carnut
-
Posts
273 -
Joined
-
Last visited
Content Type
Profiles
Forums
Events
Gallery
Everything posted by carnut
-
 I have one of these pickups and I was thinking of getting rid of it but after seeing what you are doing I will have to keep it and put this on my to build list. nice work.
 -
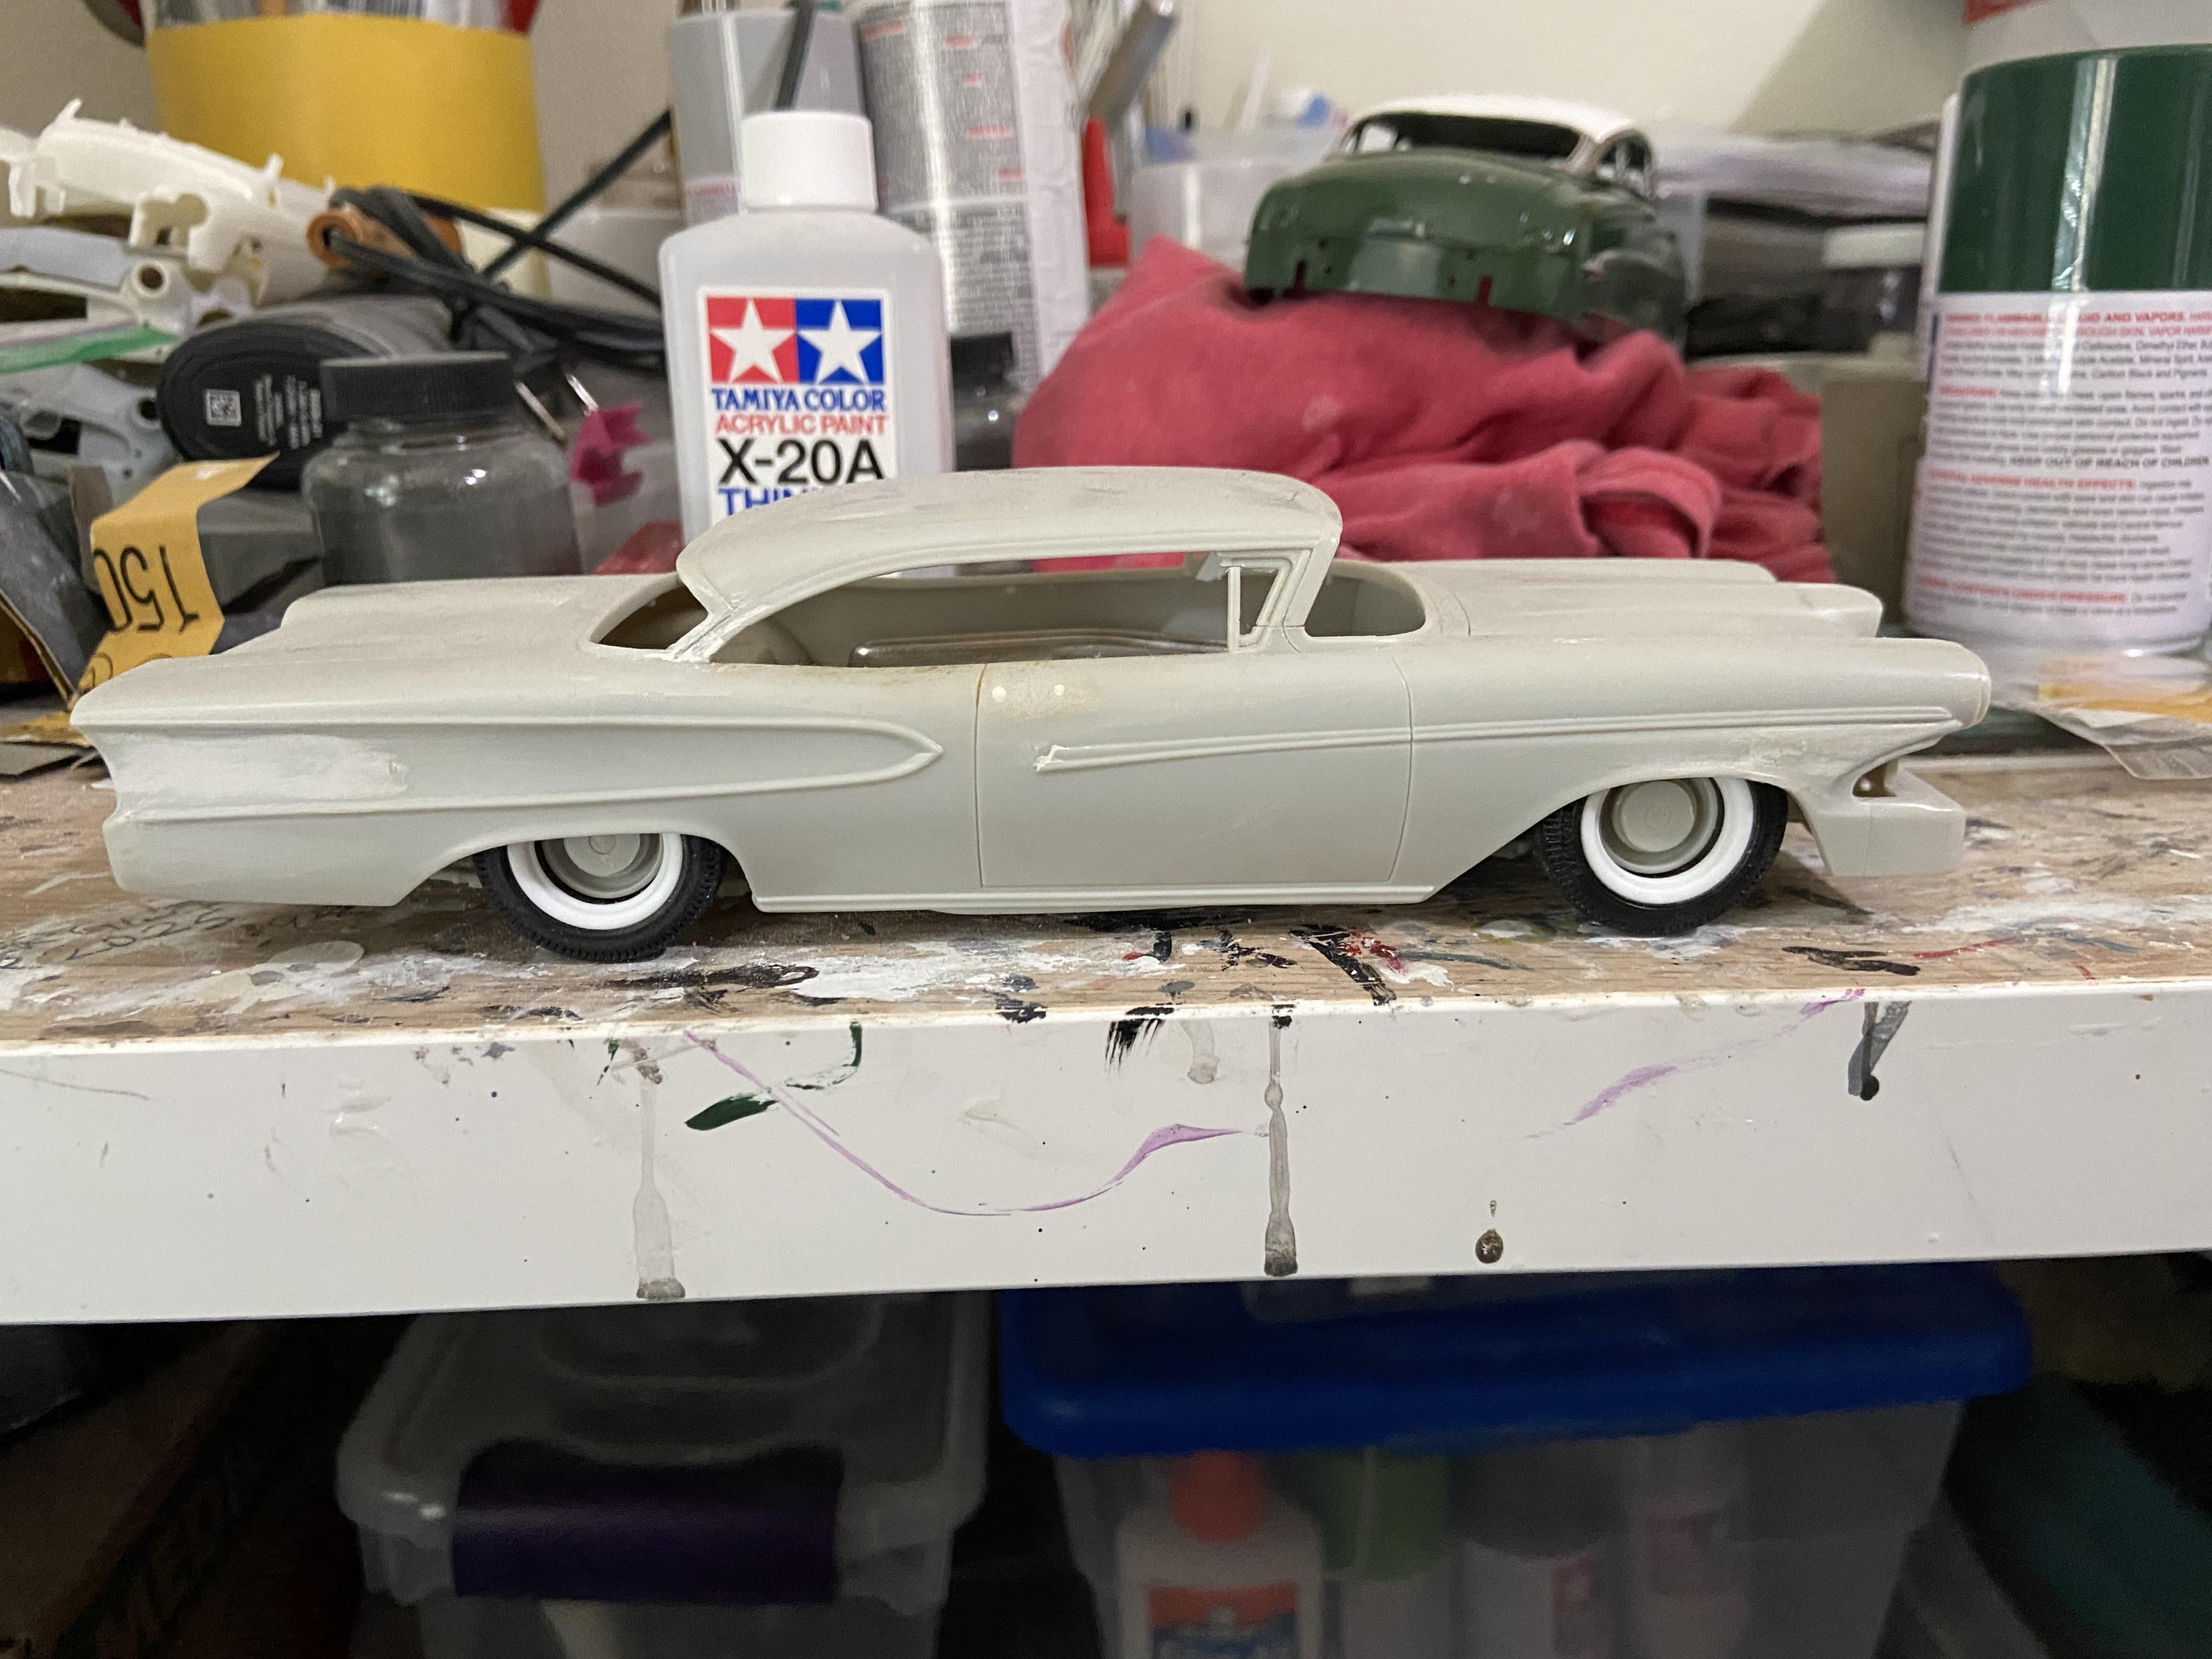
I am really liking what you were doing on the 58 Edsel. Here’s a photo of mine that I chopped a few years ago, but the project was stalled for various reasons. Your work is making me want to dig mine back out.

-
1953 International pickup
carnut replied to mchook's topic in WIP: Model Trucks: Pickups, Vans, SUVs, Light Commercial
Outstanding work, Mark - keep at it. -
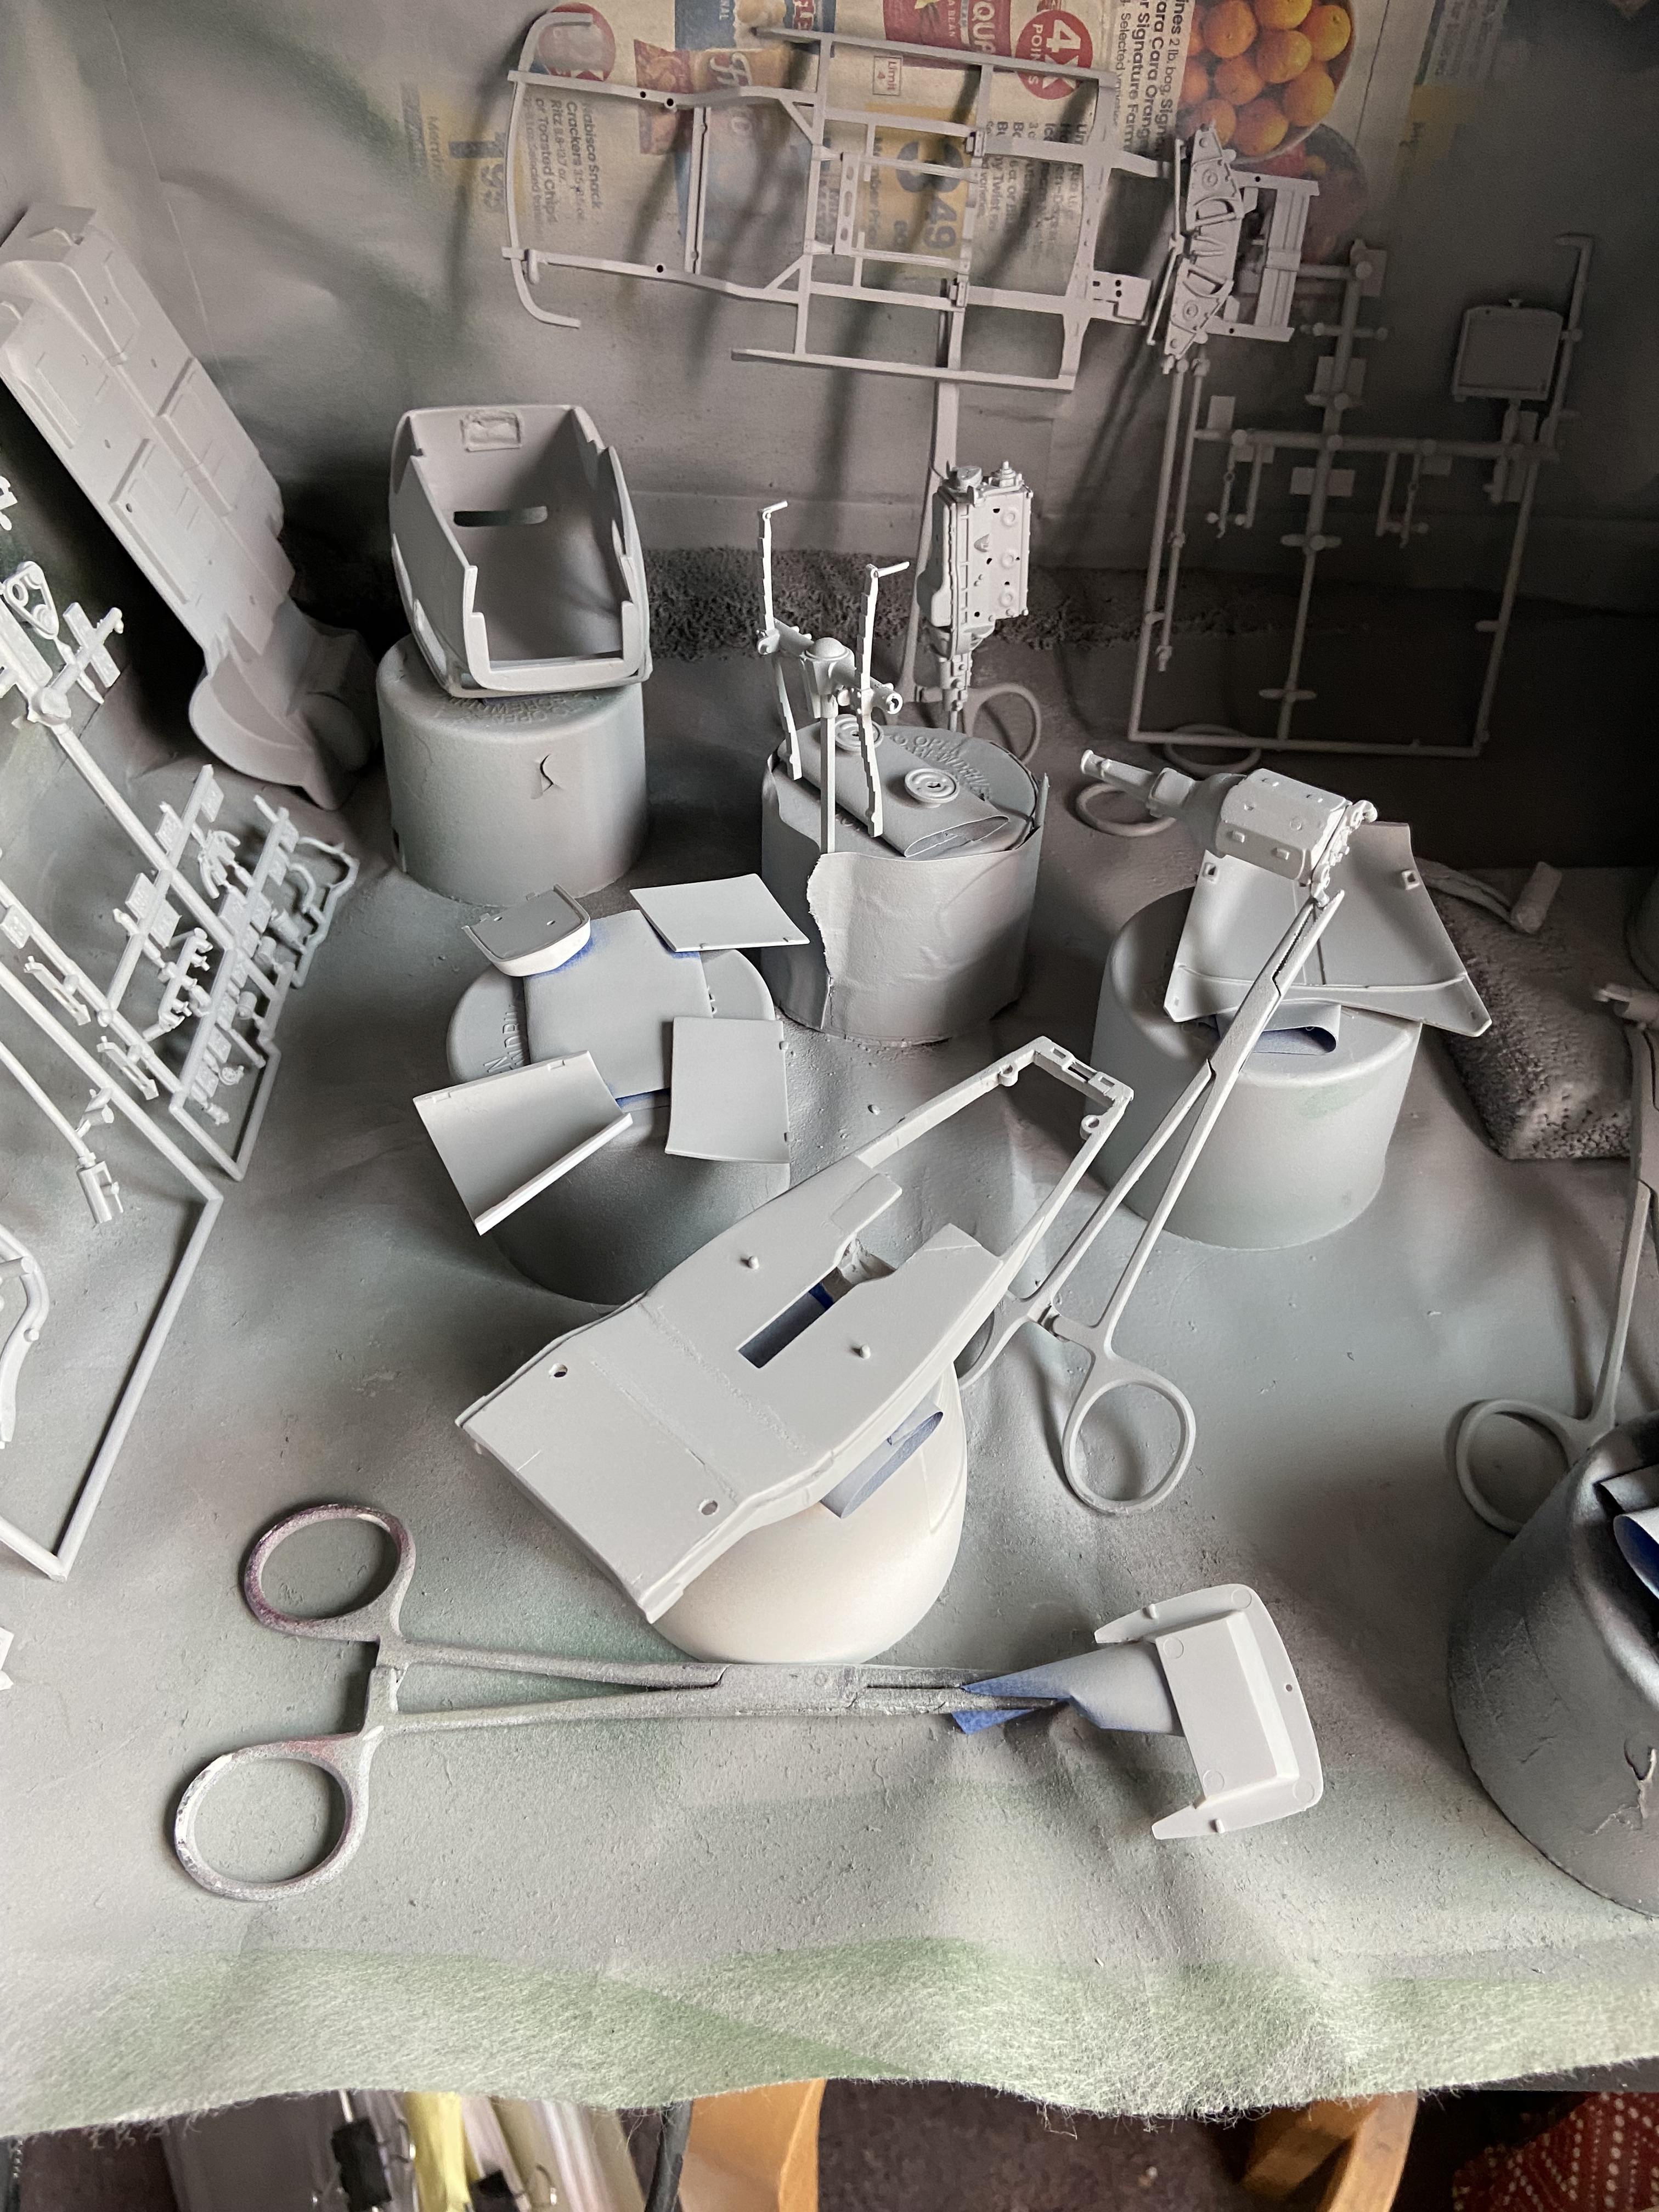
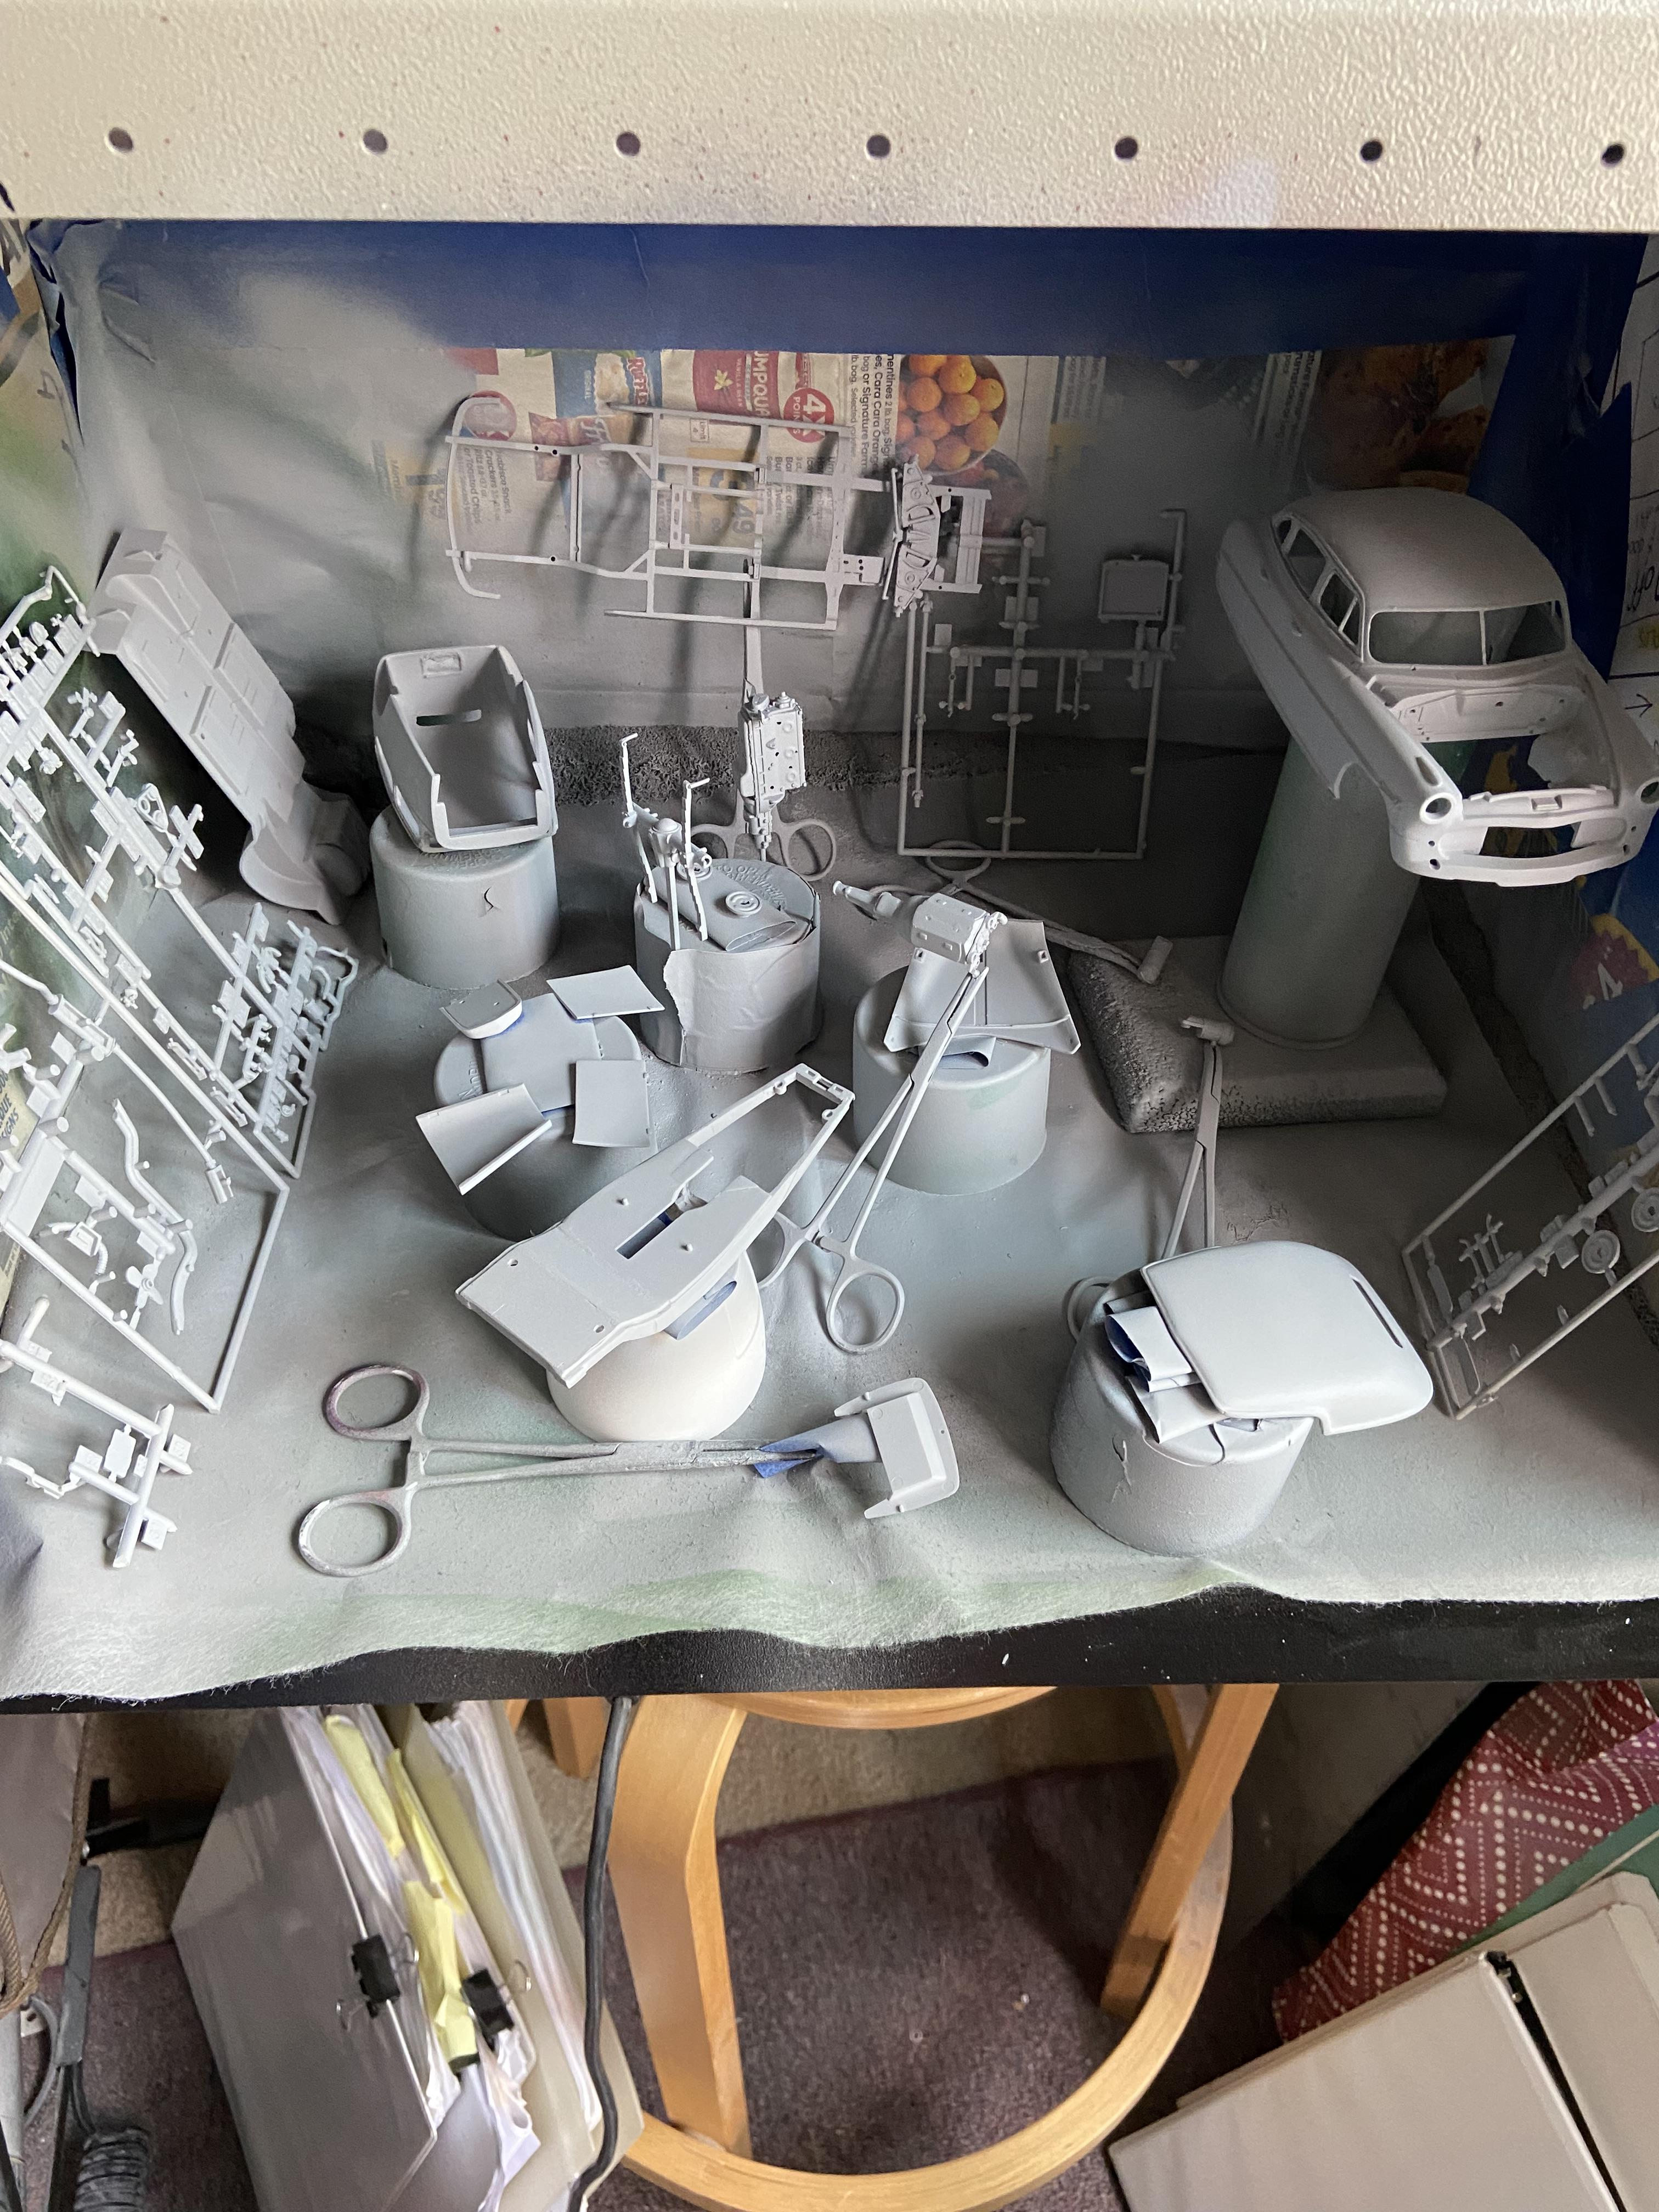
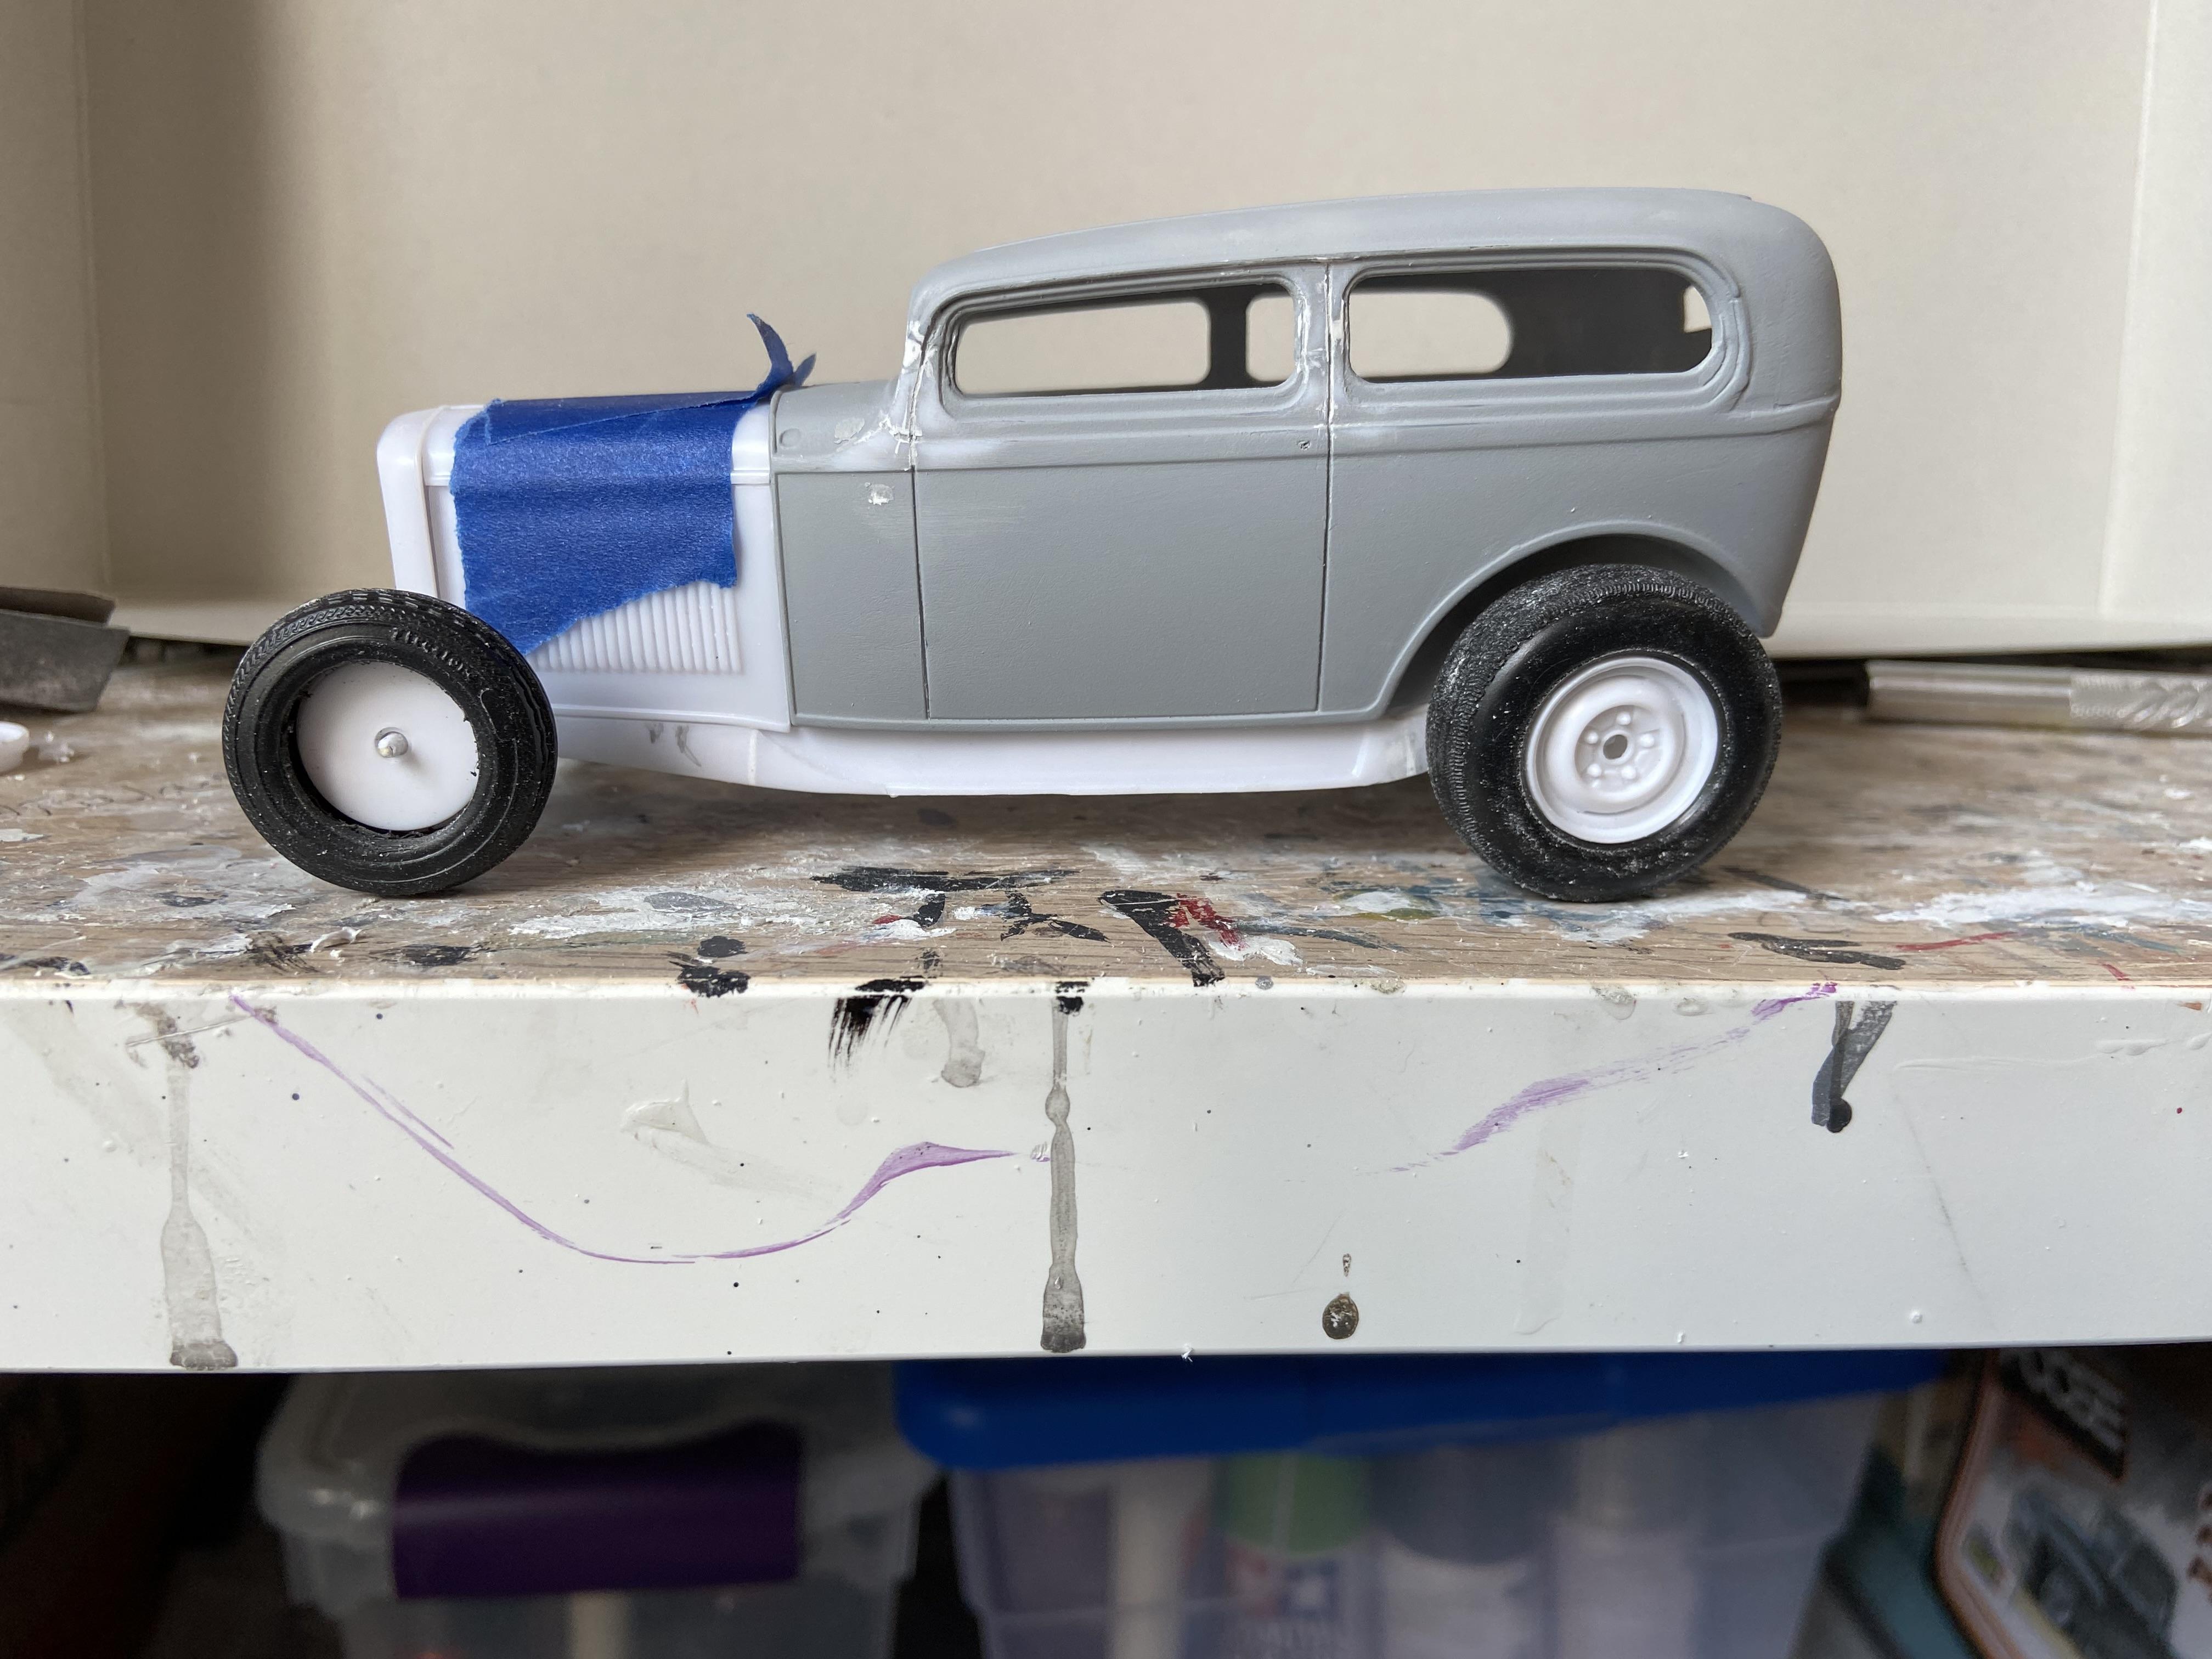
Update on my 32 FordTudor Sedan build: I finally got a day at the paint booth for more primer. More of my 32 Ford parts are in these two pictures, along with a 52 Hudson Hornet four-door sedan conversion that I’m building for a good friend. Enjoy the photos and have fun this weekend.
-
What I wish is that Round2 would improve their quality control, I have bought a few of their kits here recently, and several of them have warped frames and chassis. Fortunately, I can straighten them out Now that my griping is out of the way , Here are just a few of my suggestions to have cloned or reissued.
-
I am really liking the builds on this thread. Keep up the fine work y’all
-
I like how you have done this mod. The stock height can be a smidgeon too high. Must remember this Thanks Bill for the compliment, I have to keep reminding myself of this also all the time, continuous mocking things up to recheck certainly helps in this area. Ha ha ha ha. Here’s a bit of an update. I am slowly moving my way hopefully soon into the paint booth for one last shot of primer and then into color. Things are coming along nicely. Thanks for looking and keep smiling.
-
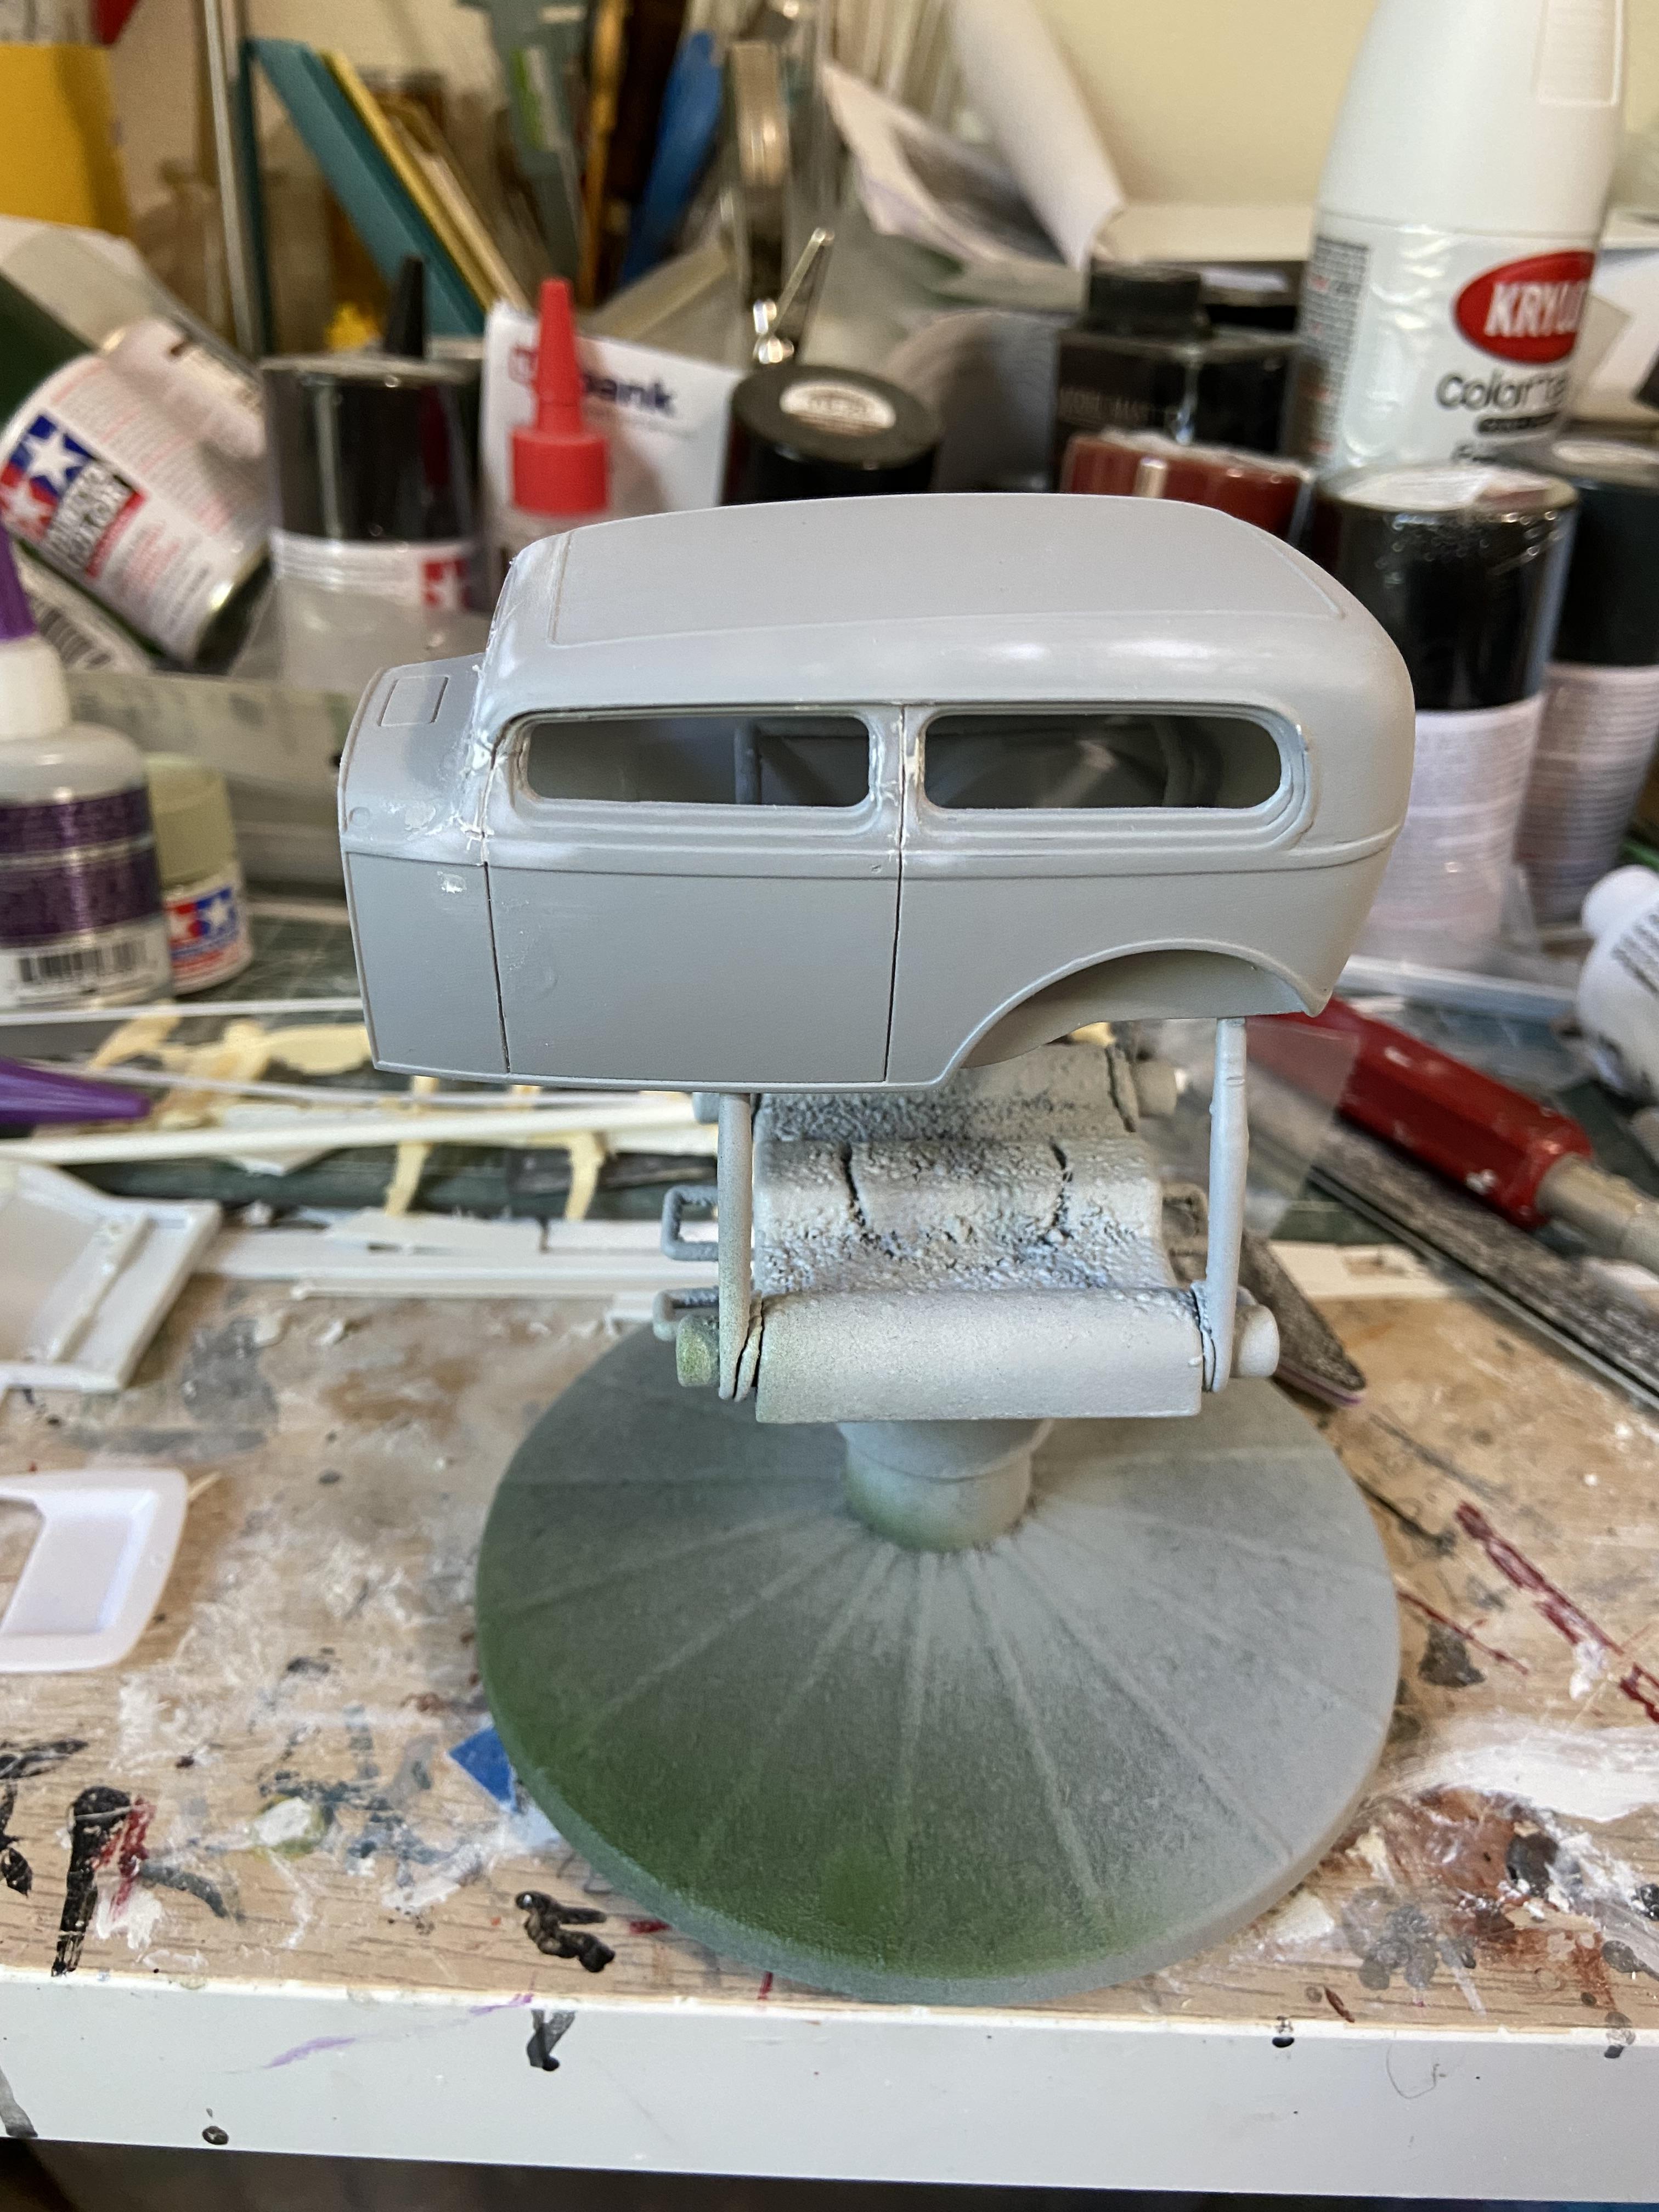
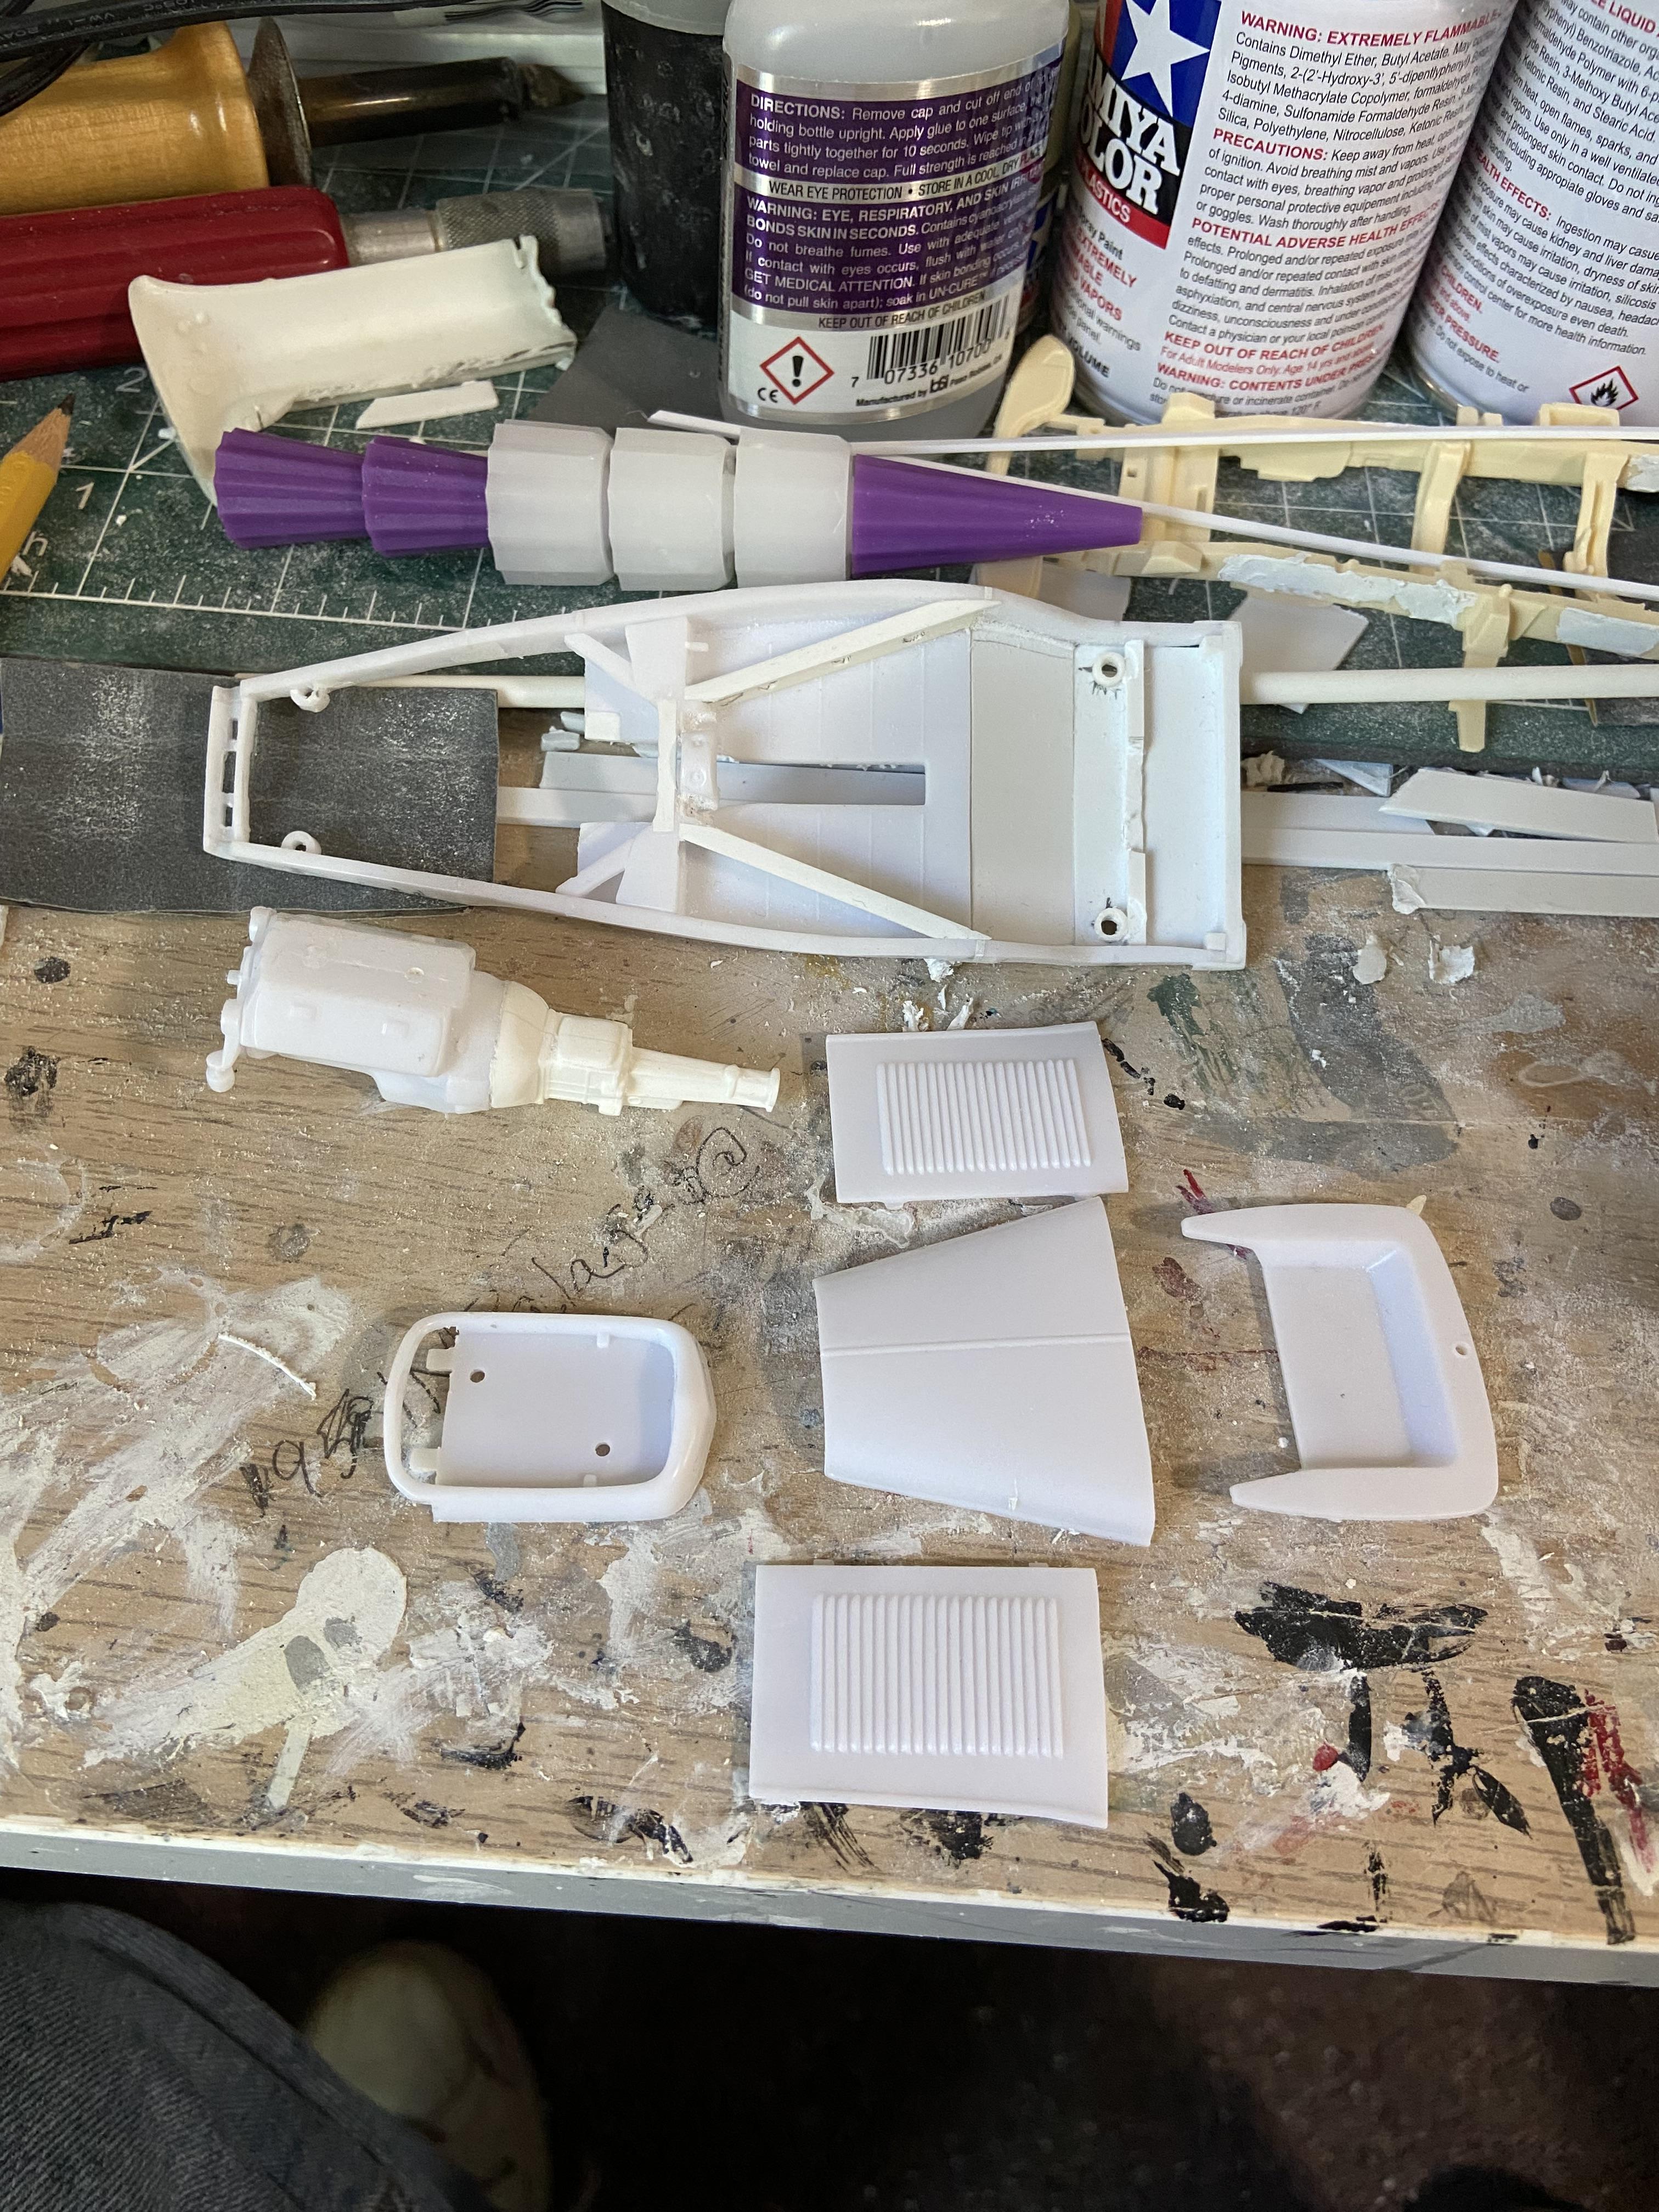
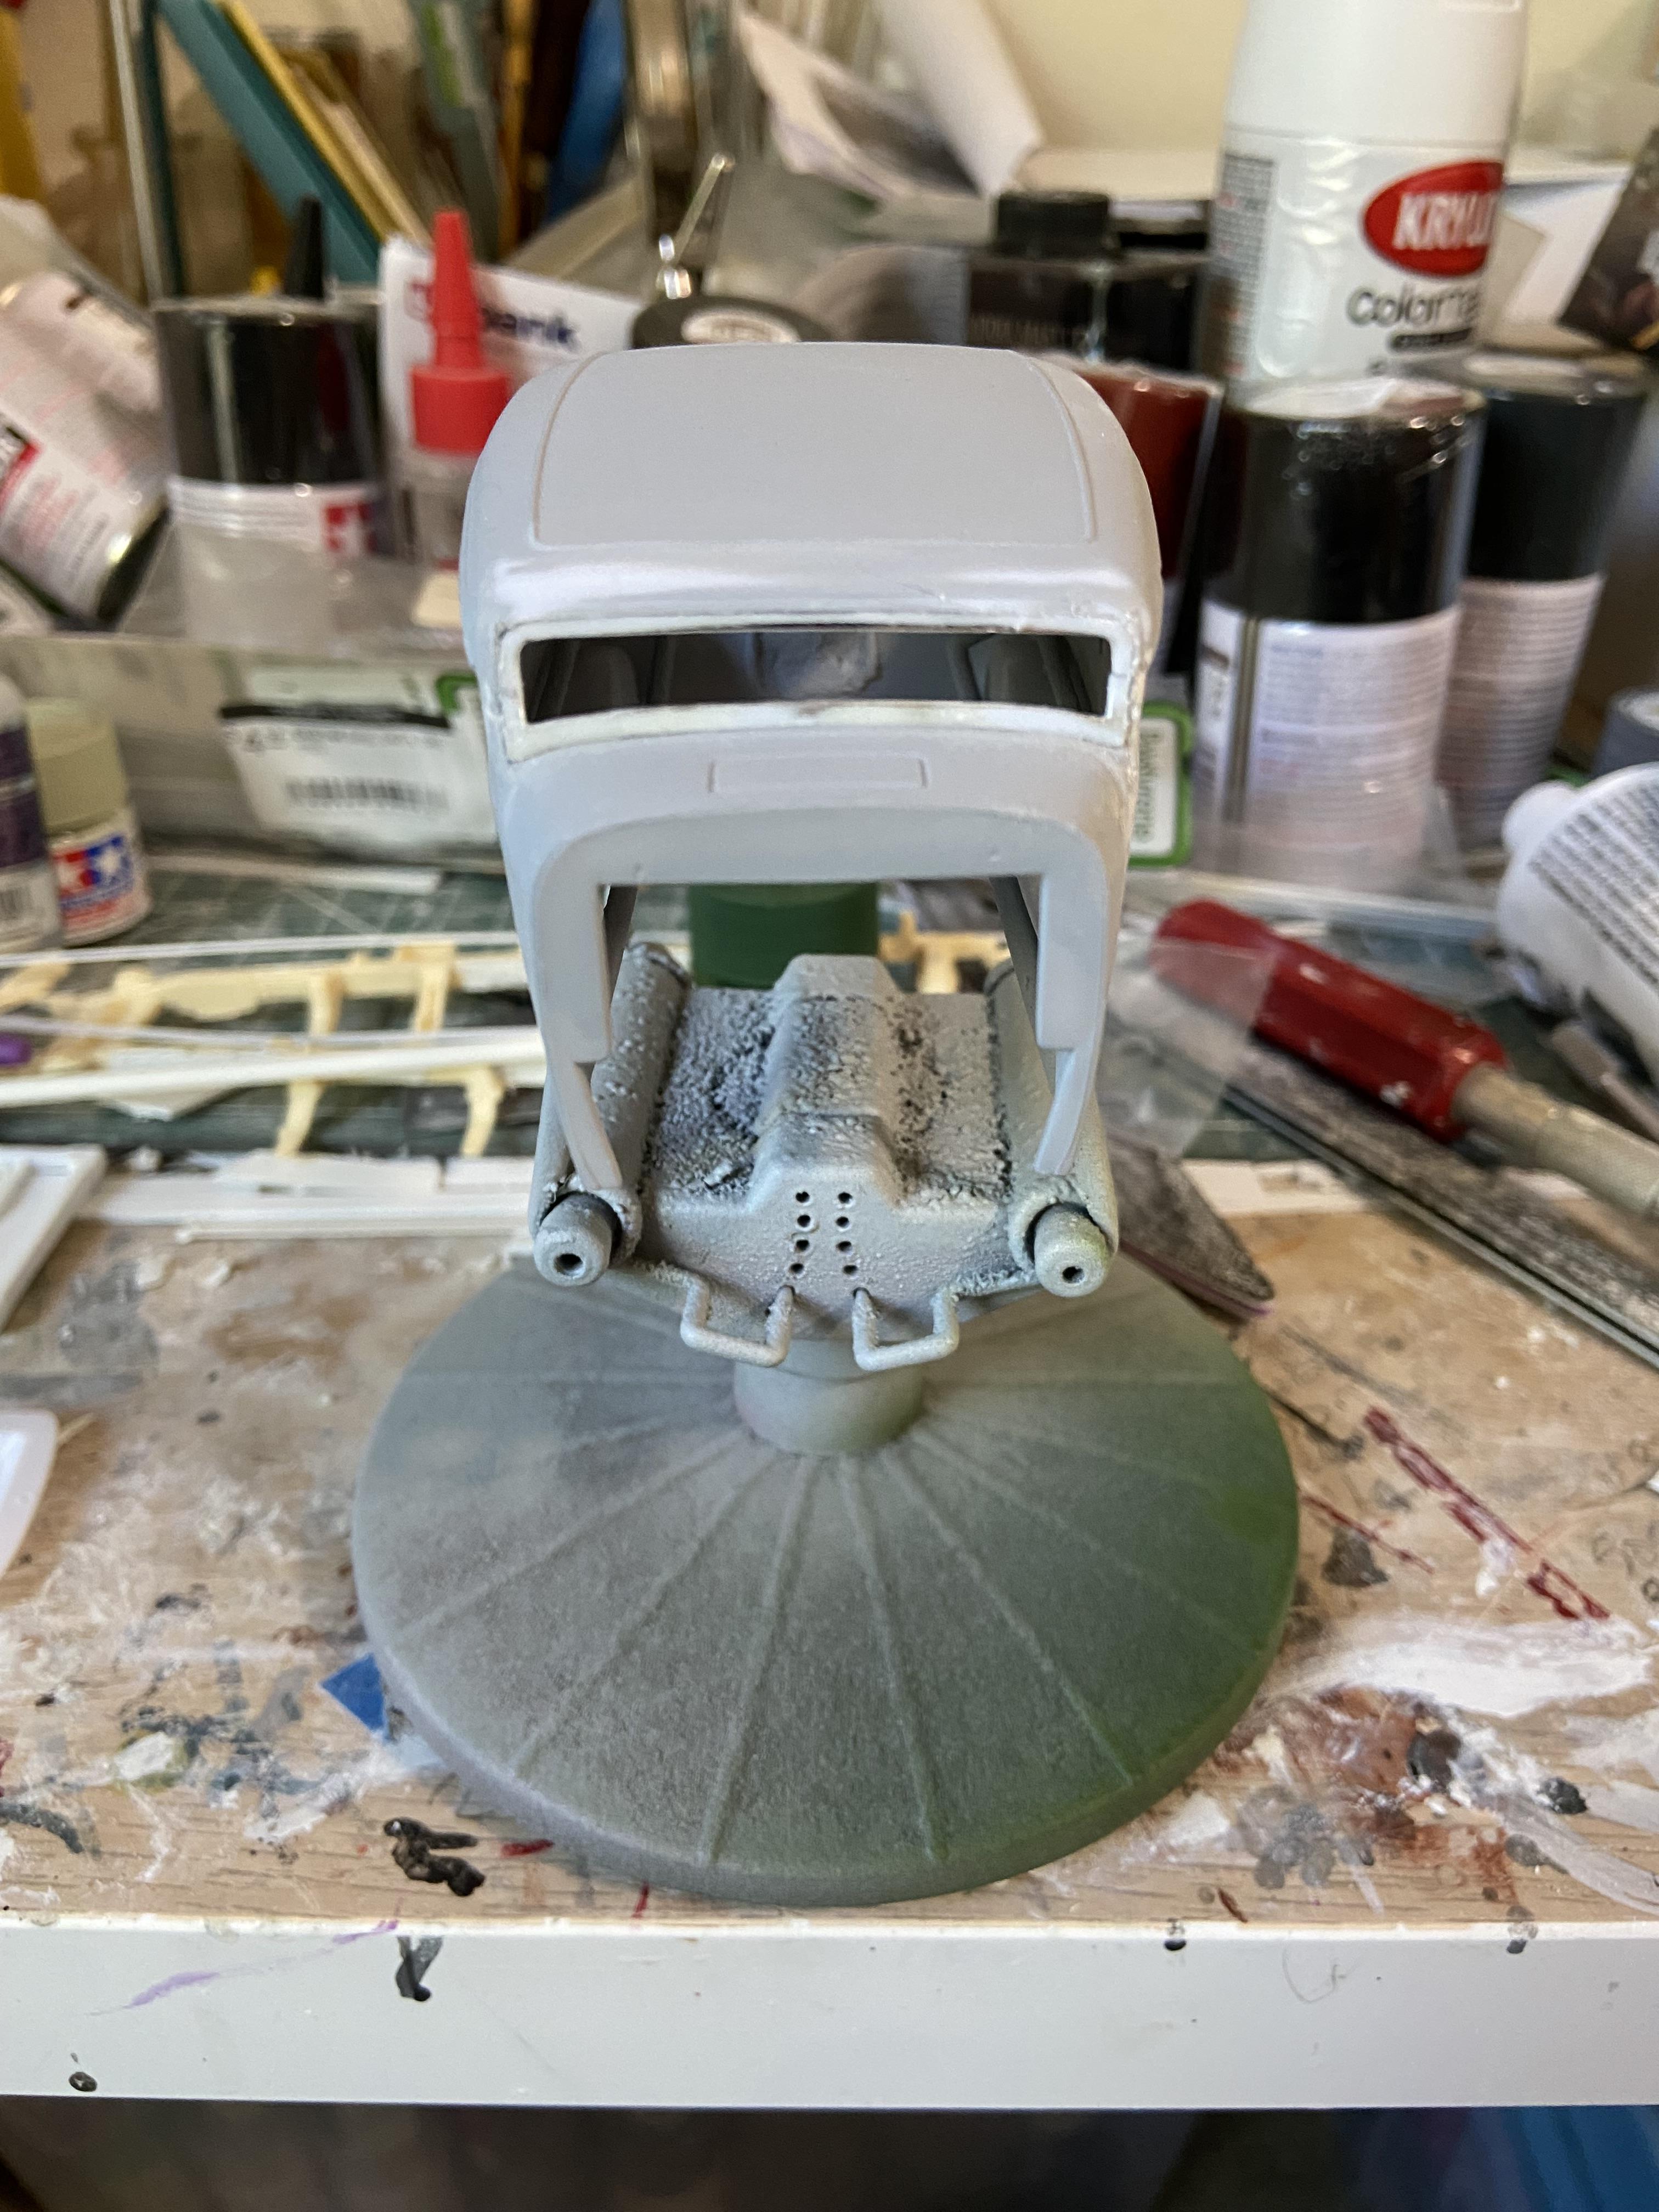
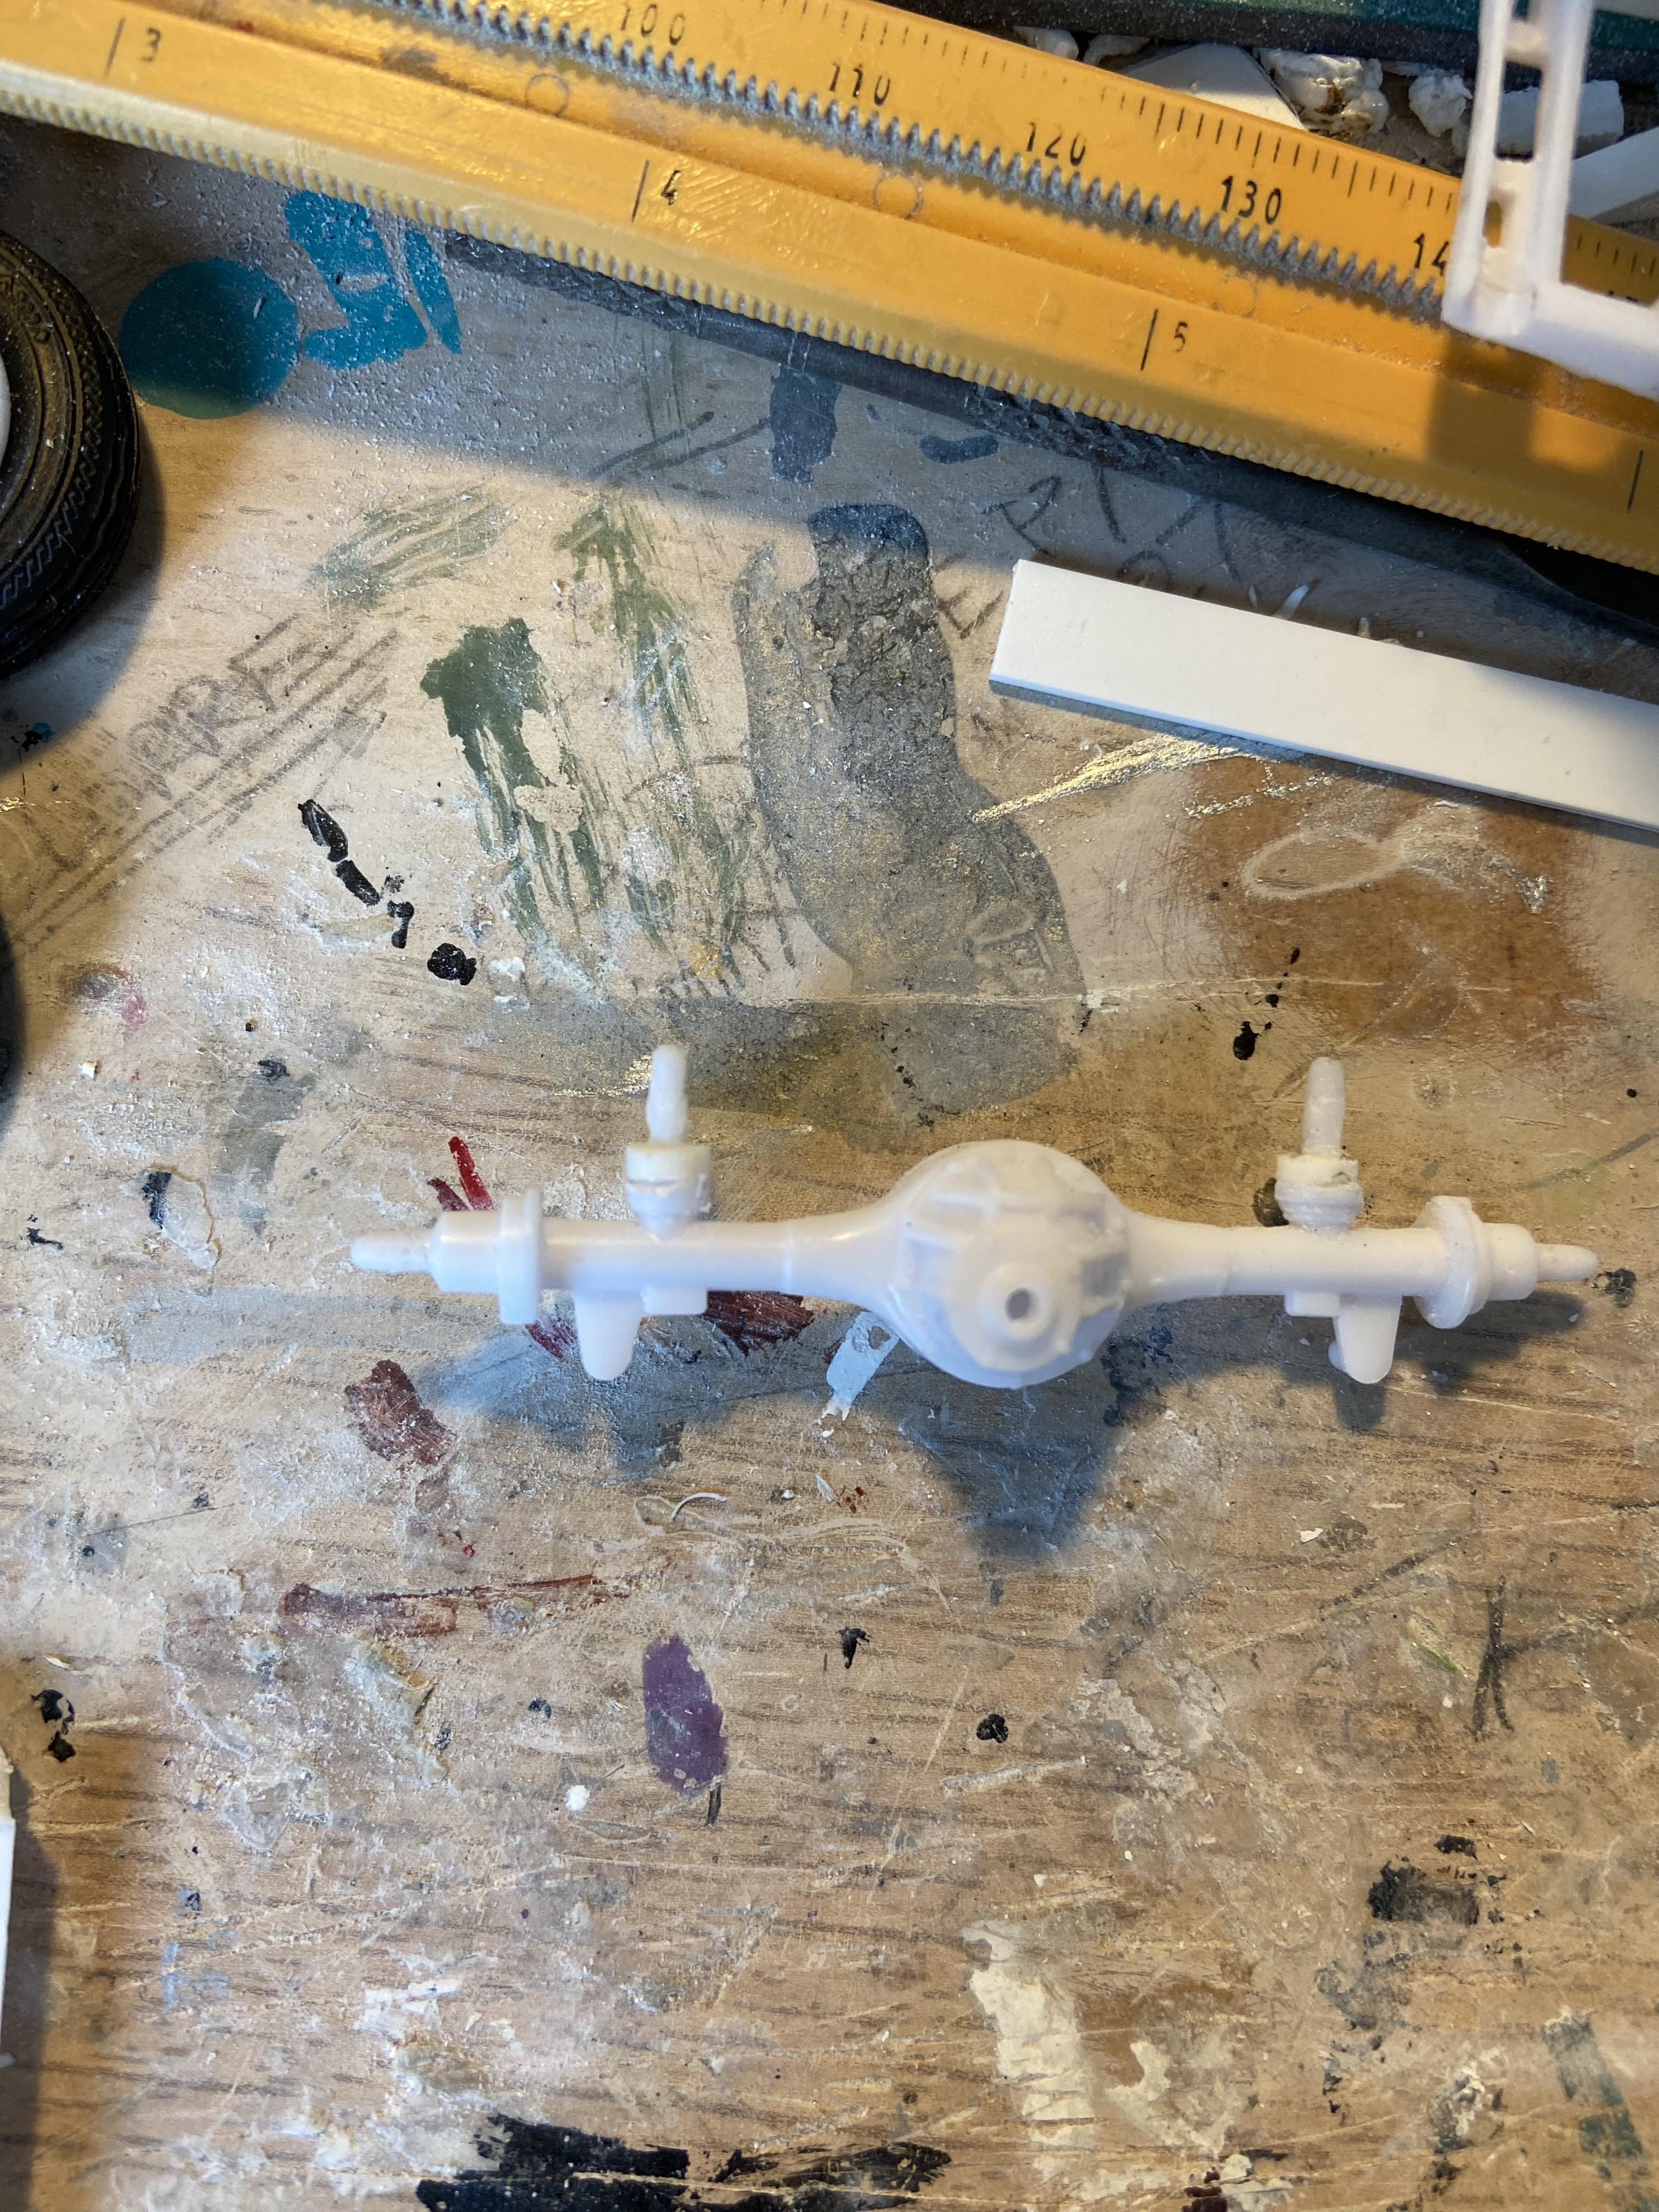
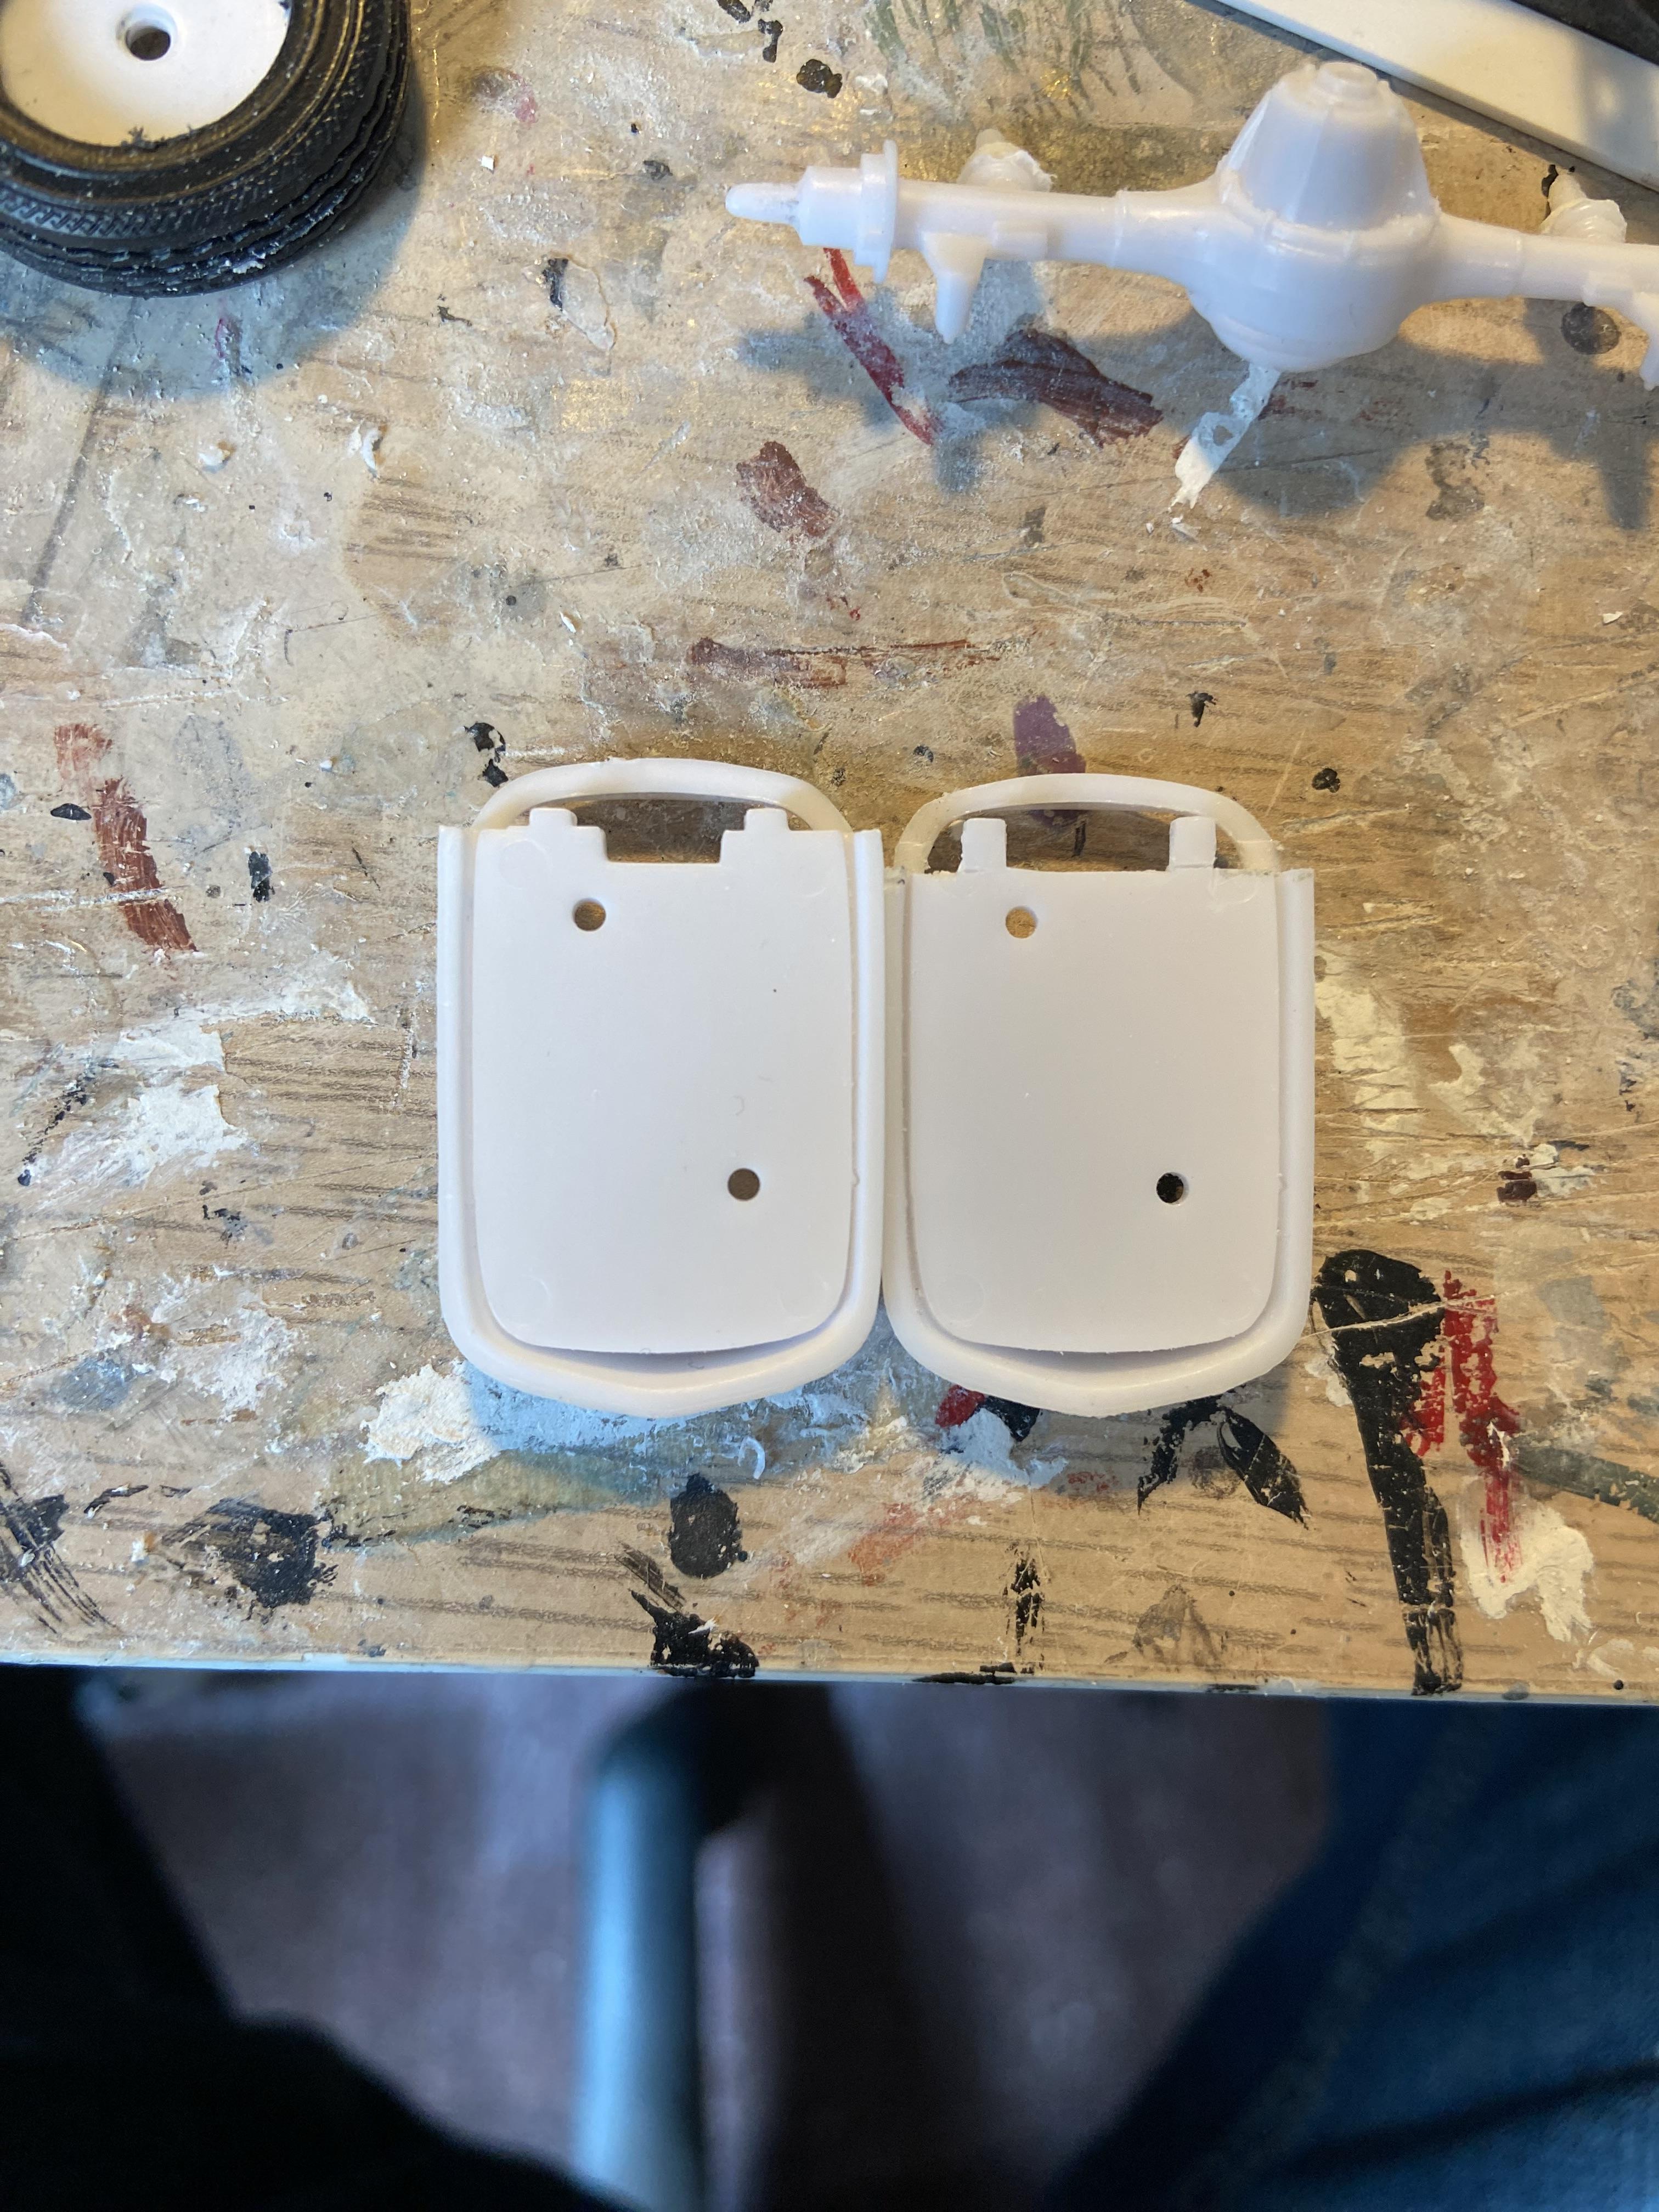
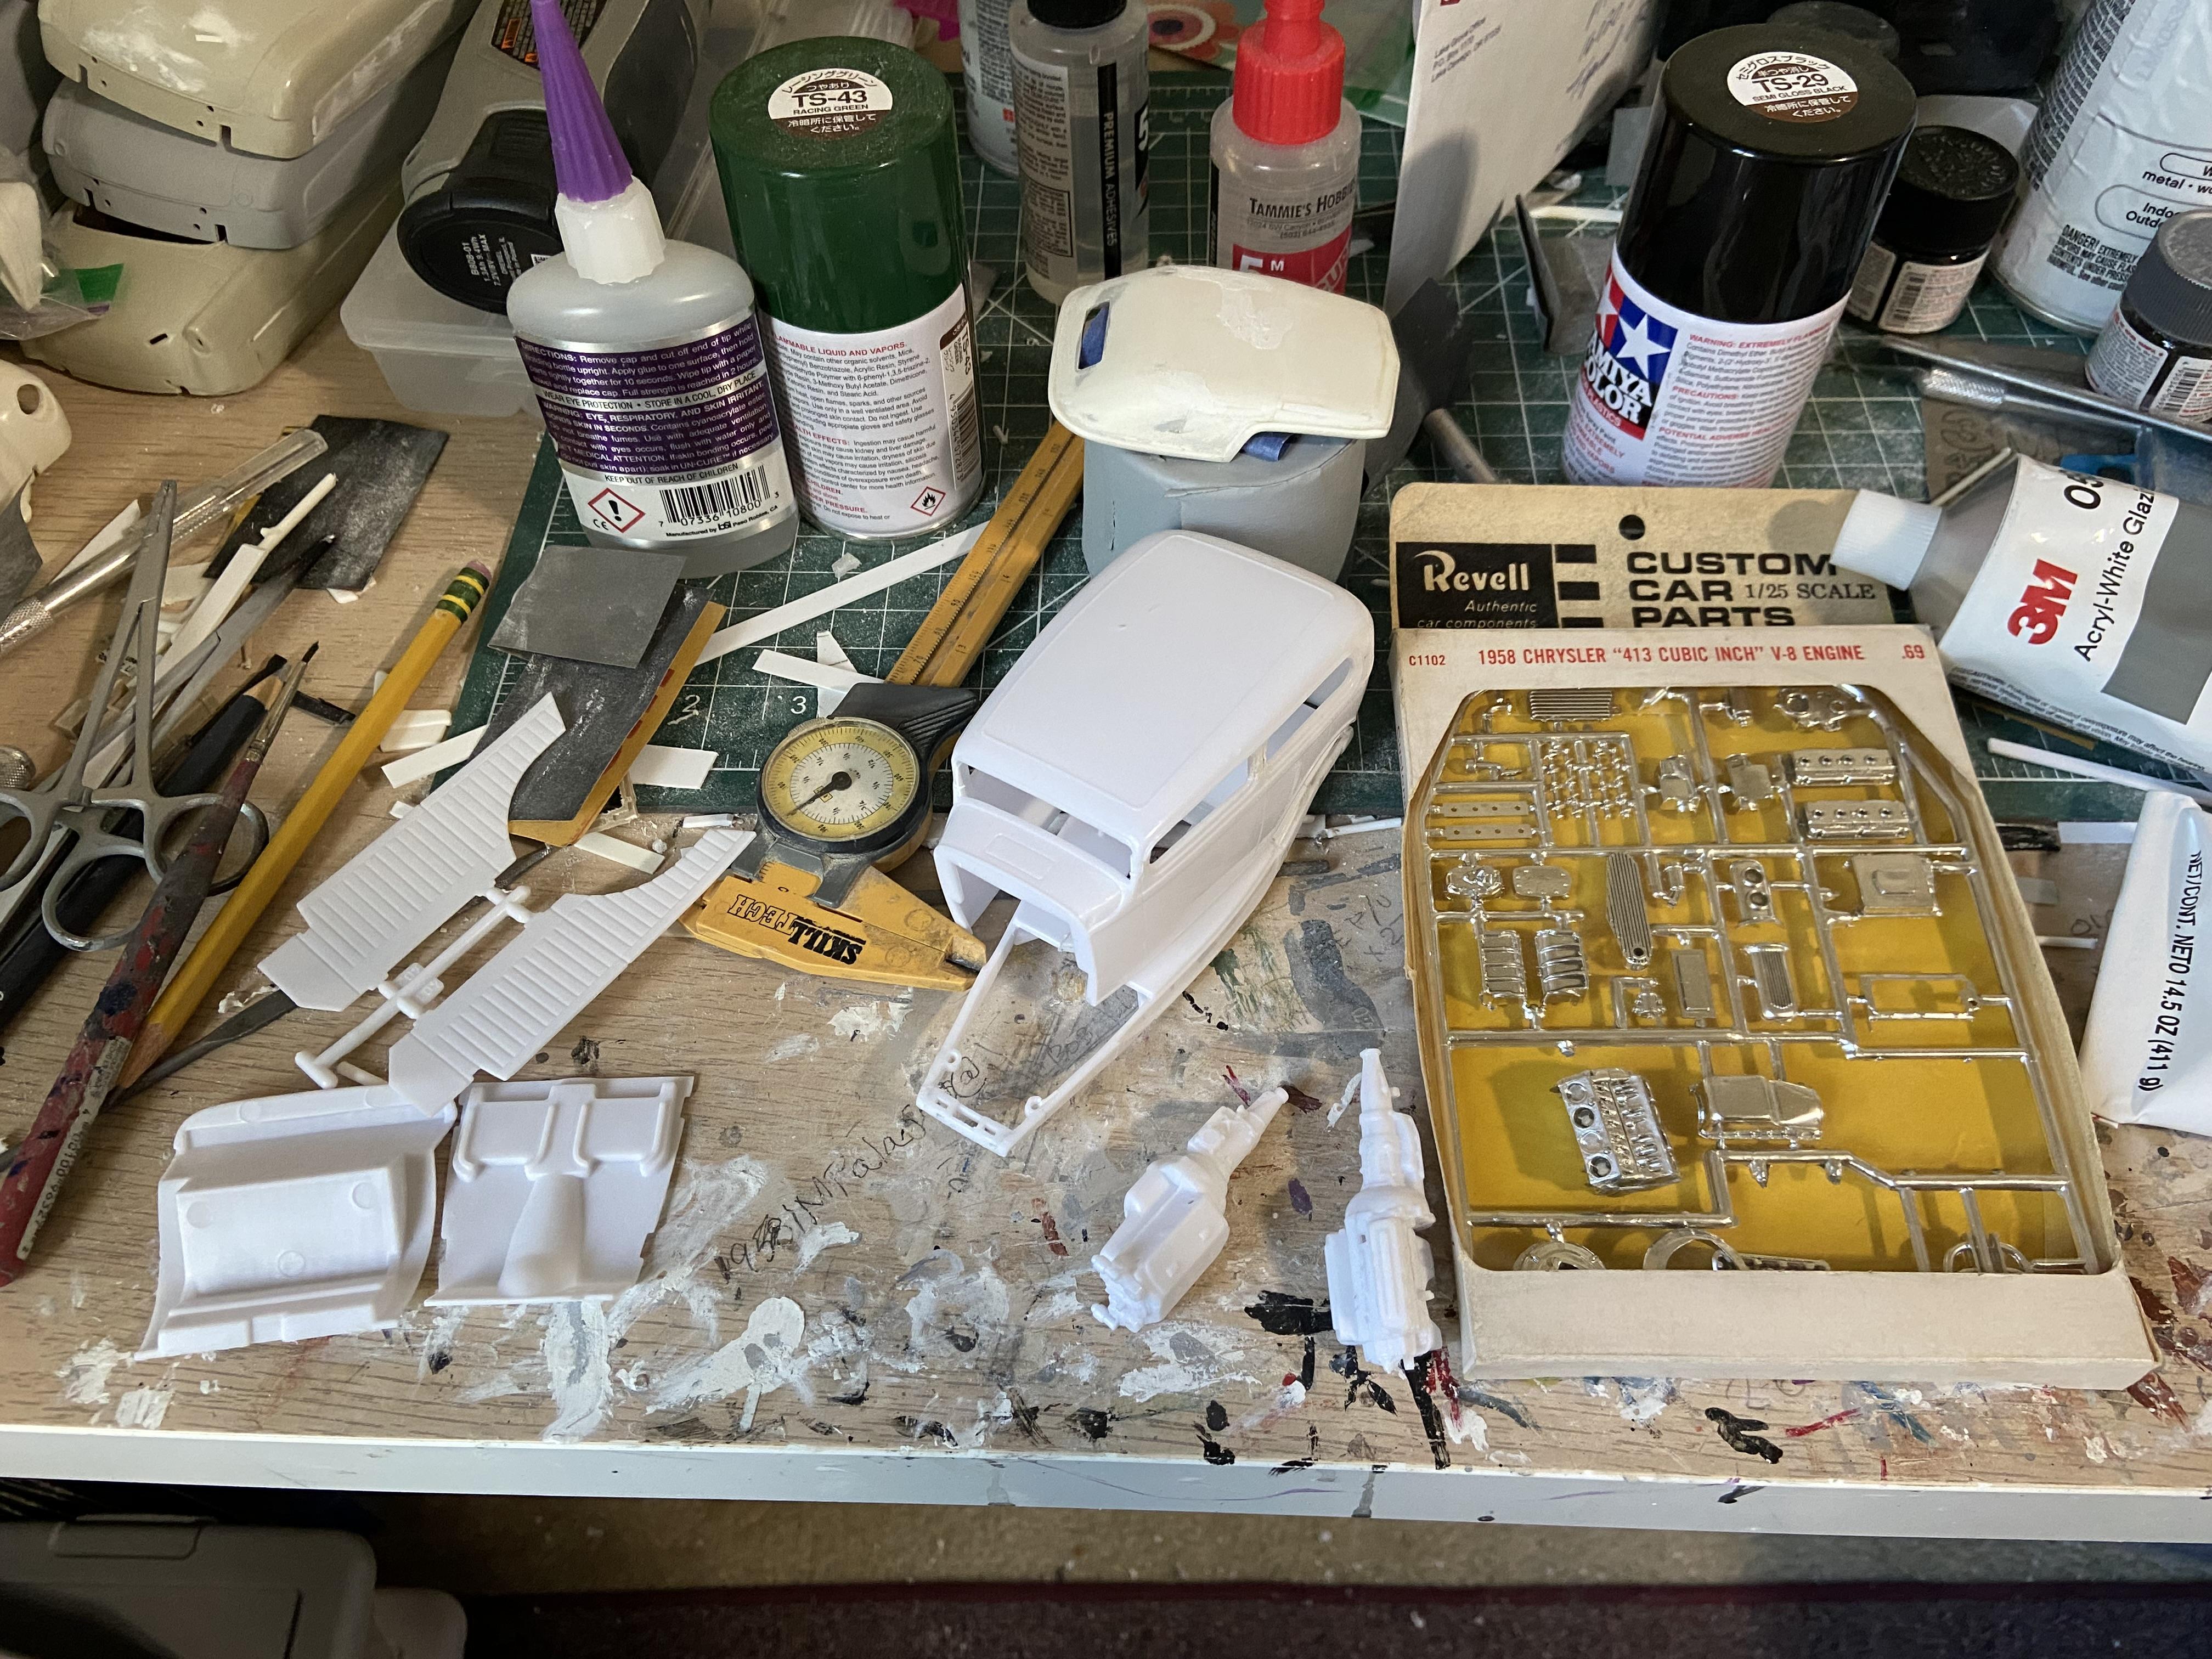
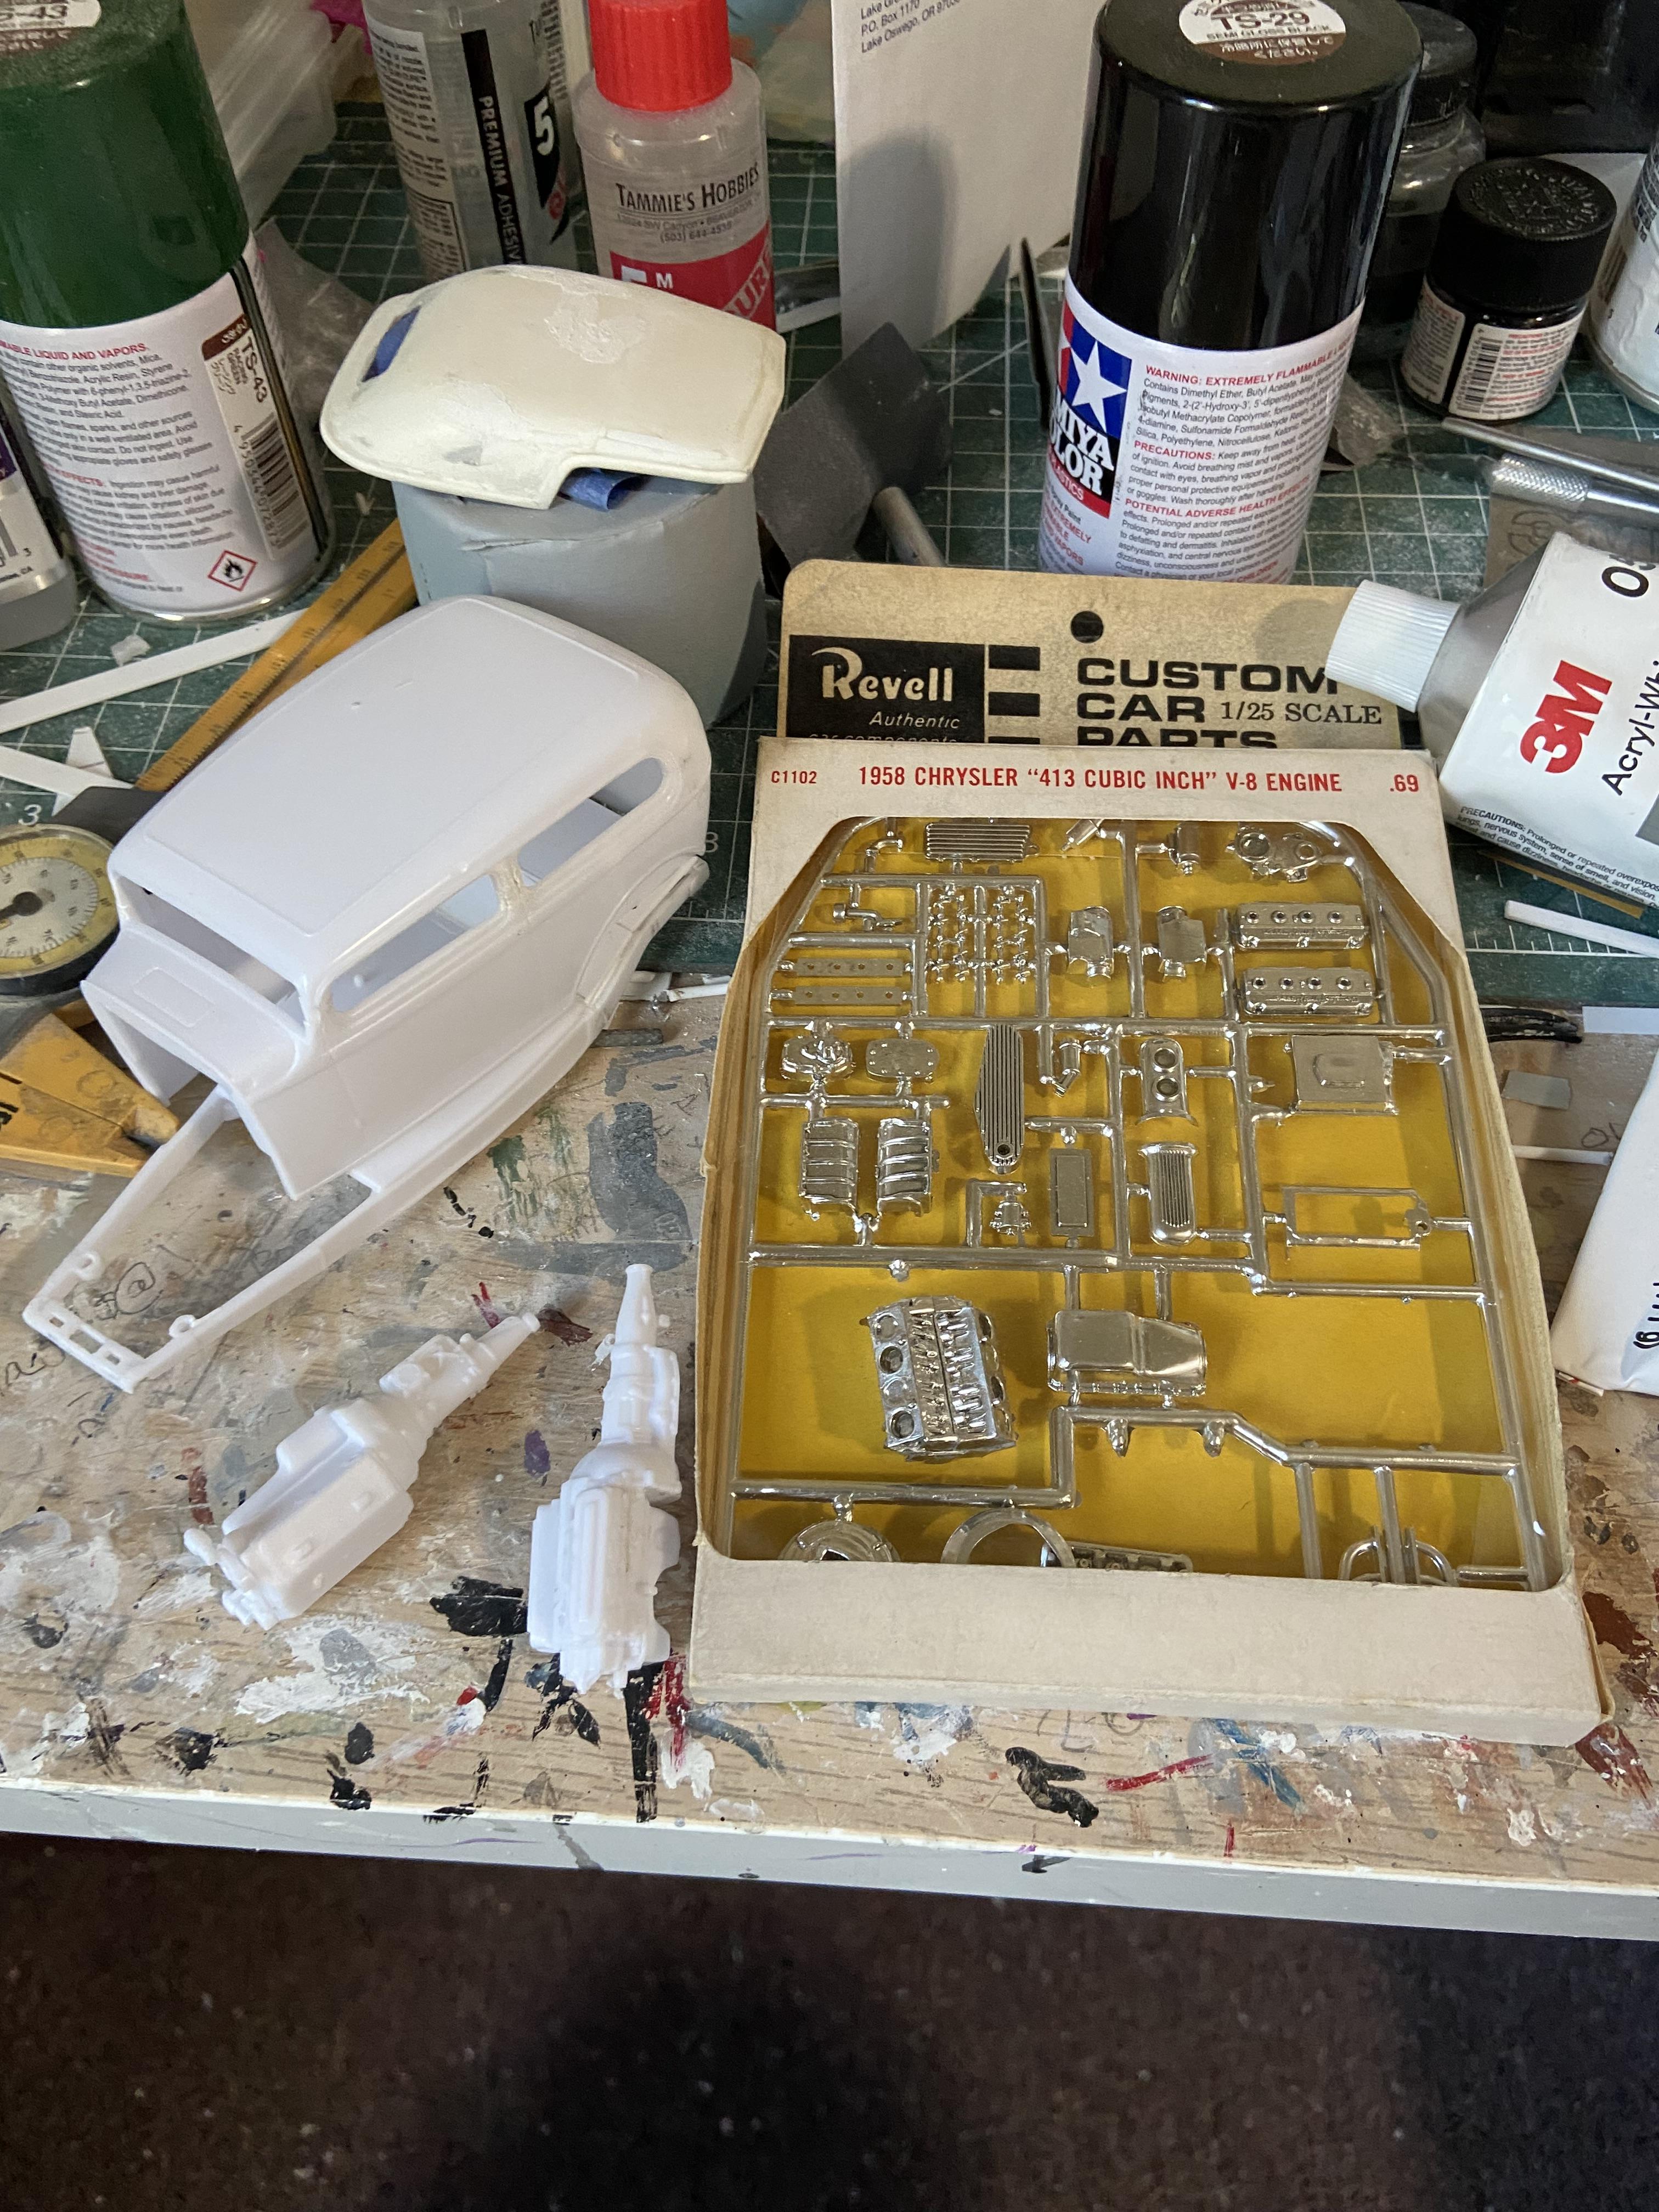
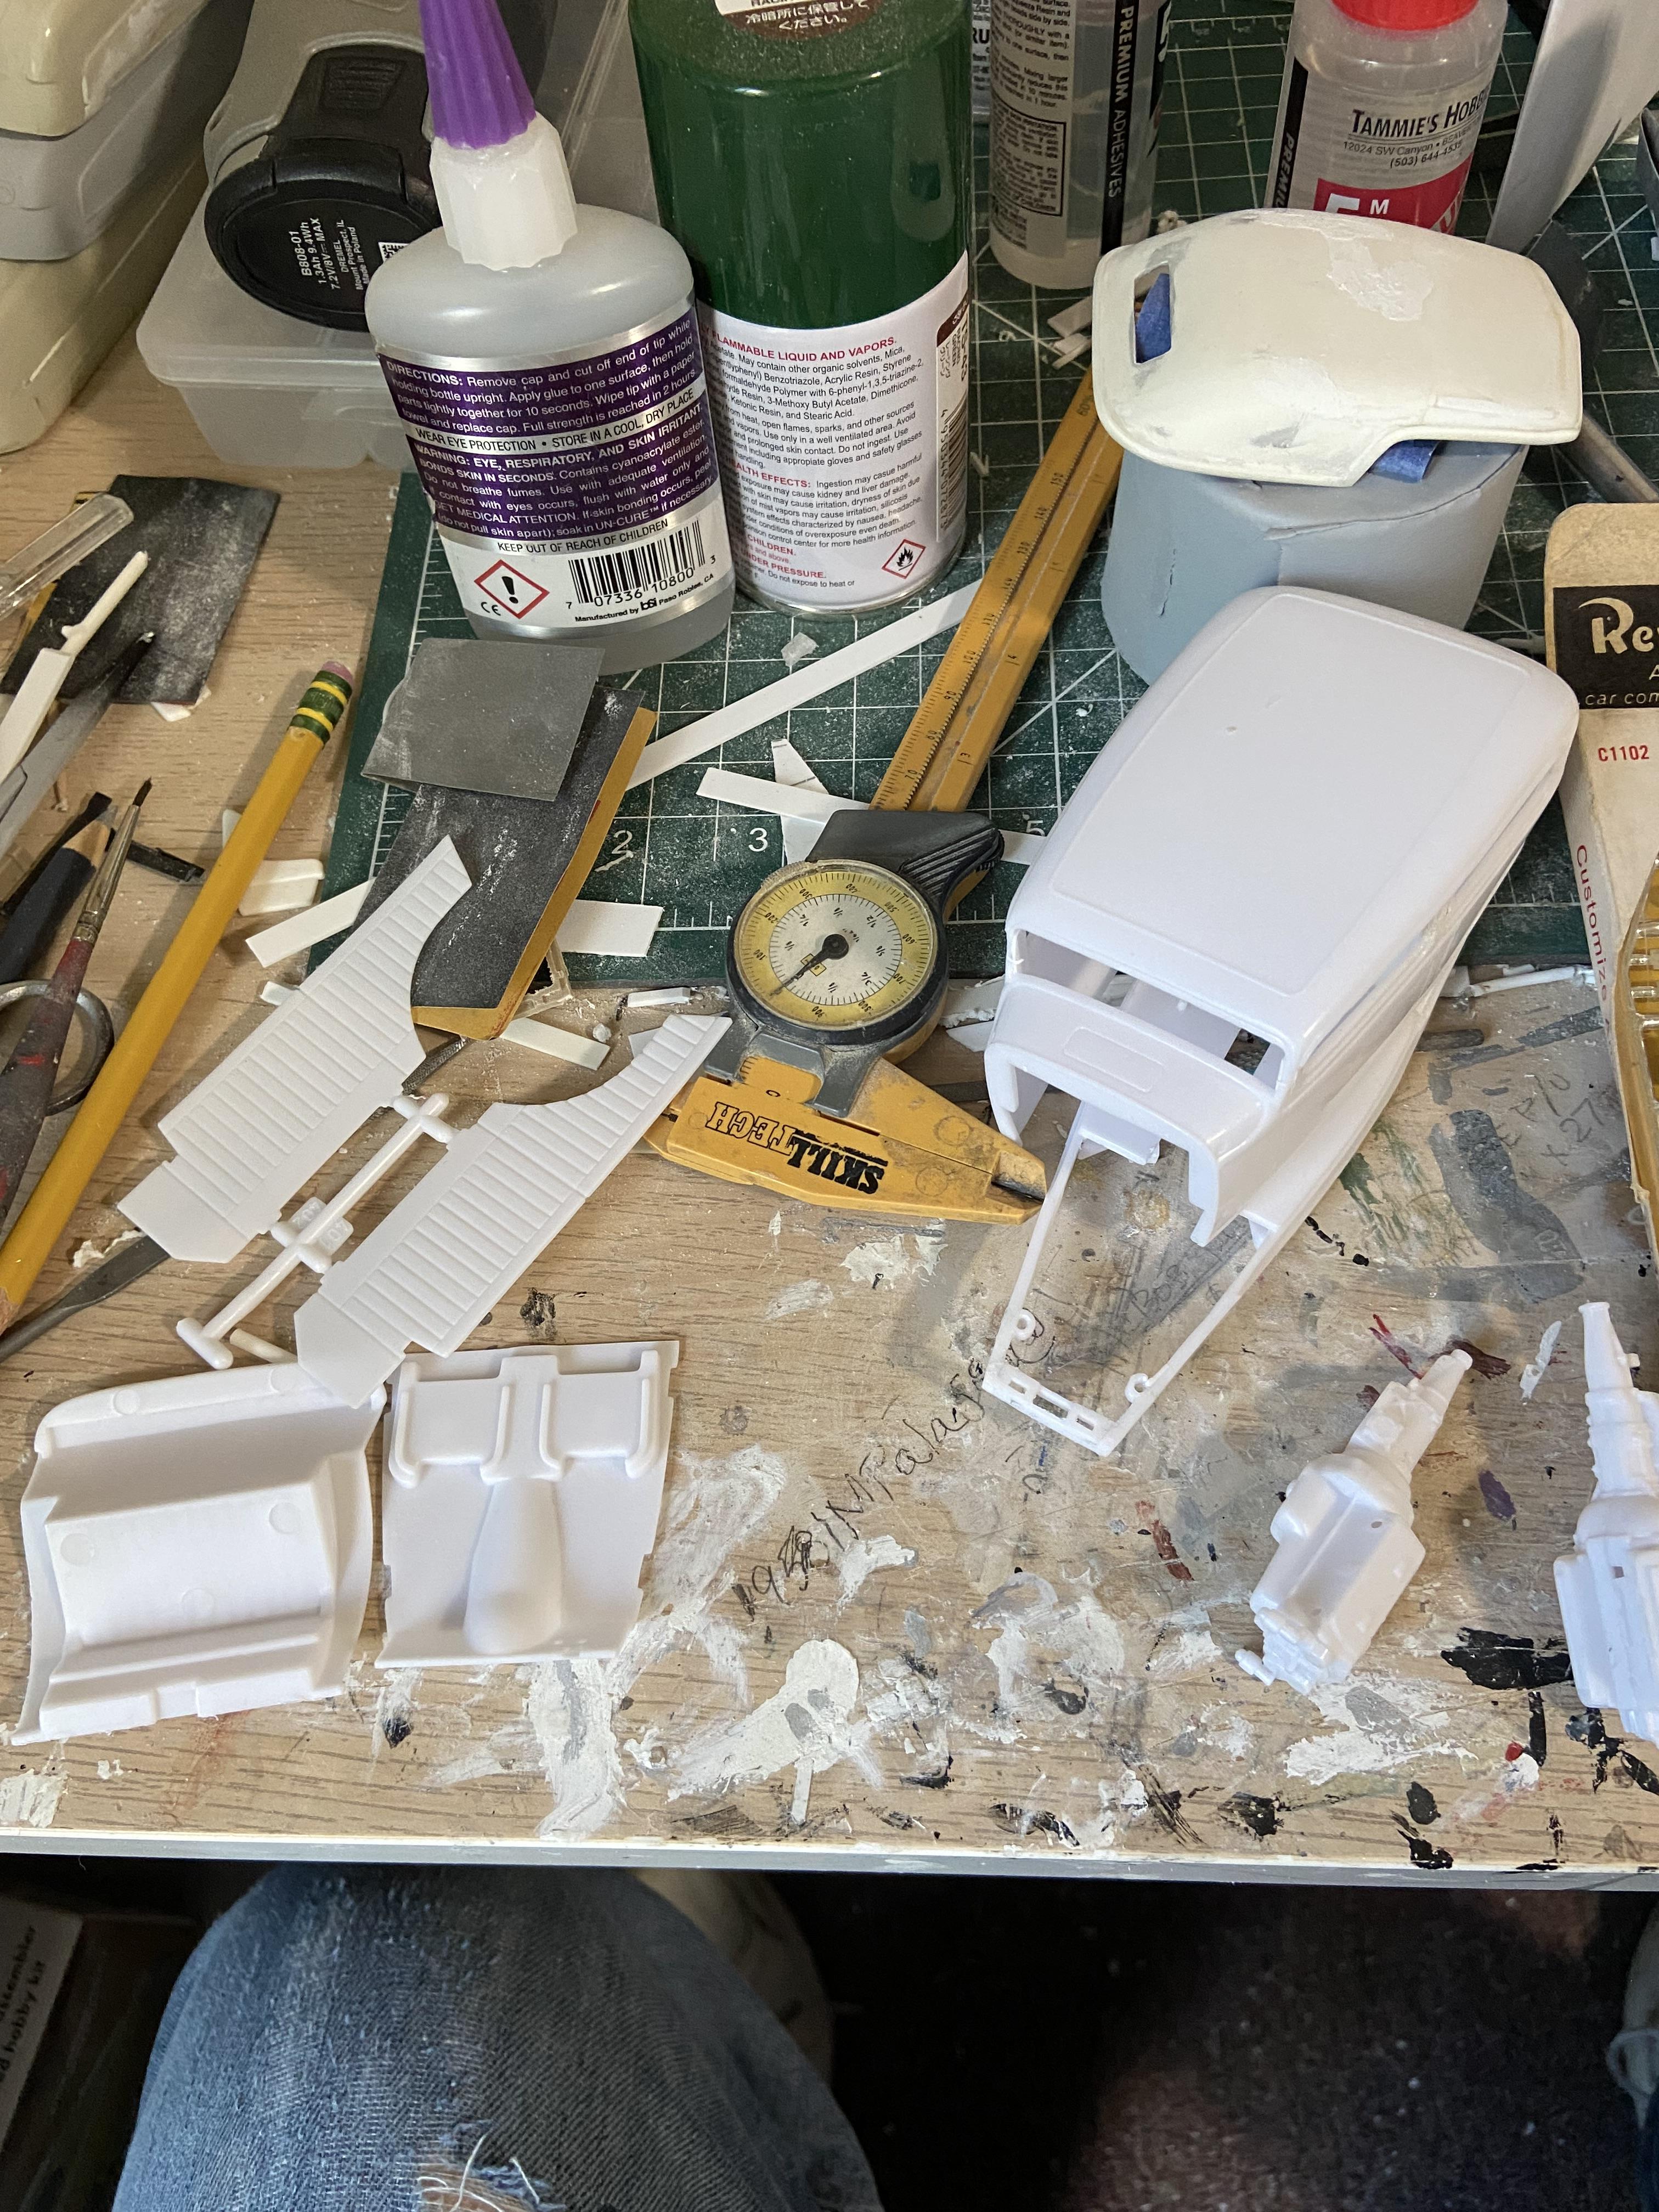
Greetings all, here’s my update on my 32 Tudor: I did a mock up of everything this morning as you can see from the first photo and after all the work I did on the frame, I still had the rear end sitting too high. So I got it adjusted down better in the second photo. The third photo shows what I did to the rear end to get it to sit down more, I am using the kit 9 inch Ford rear end. The last photo shows the modifications I had to make to the grill shell. The radiator shell on the left is the stock one. The modified radiator shell is on the right. it looks like I am now just about ready to start priming and painting. Keep smiling and thanks for looking.
-
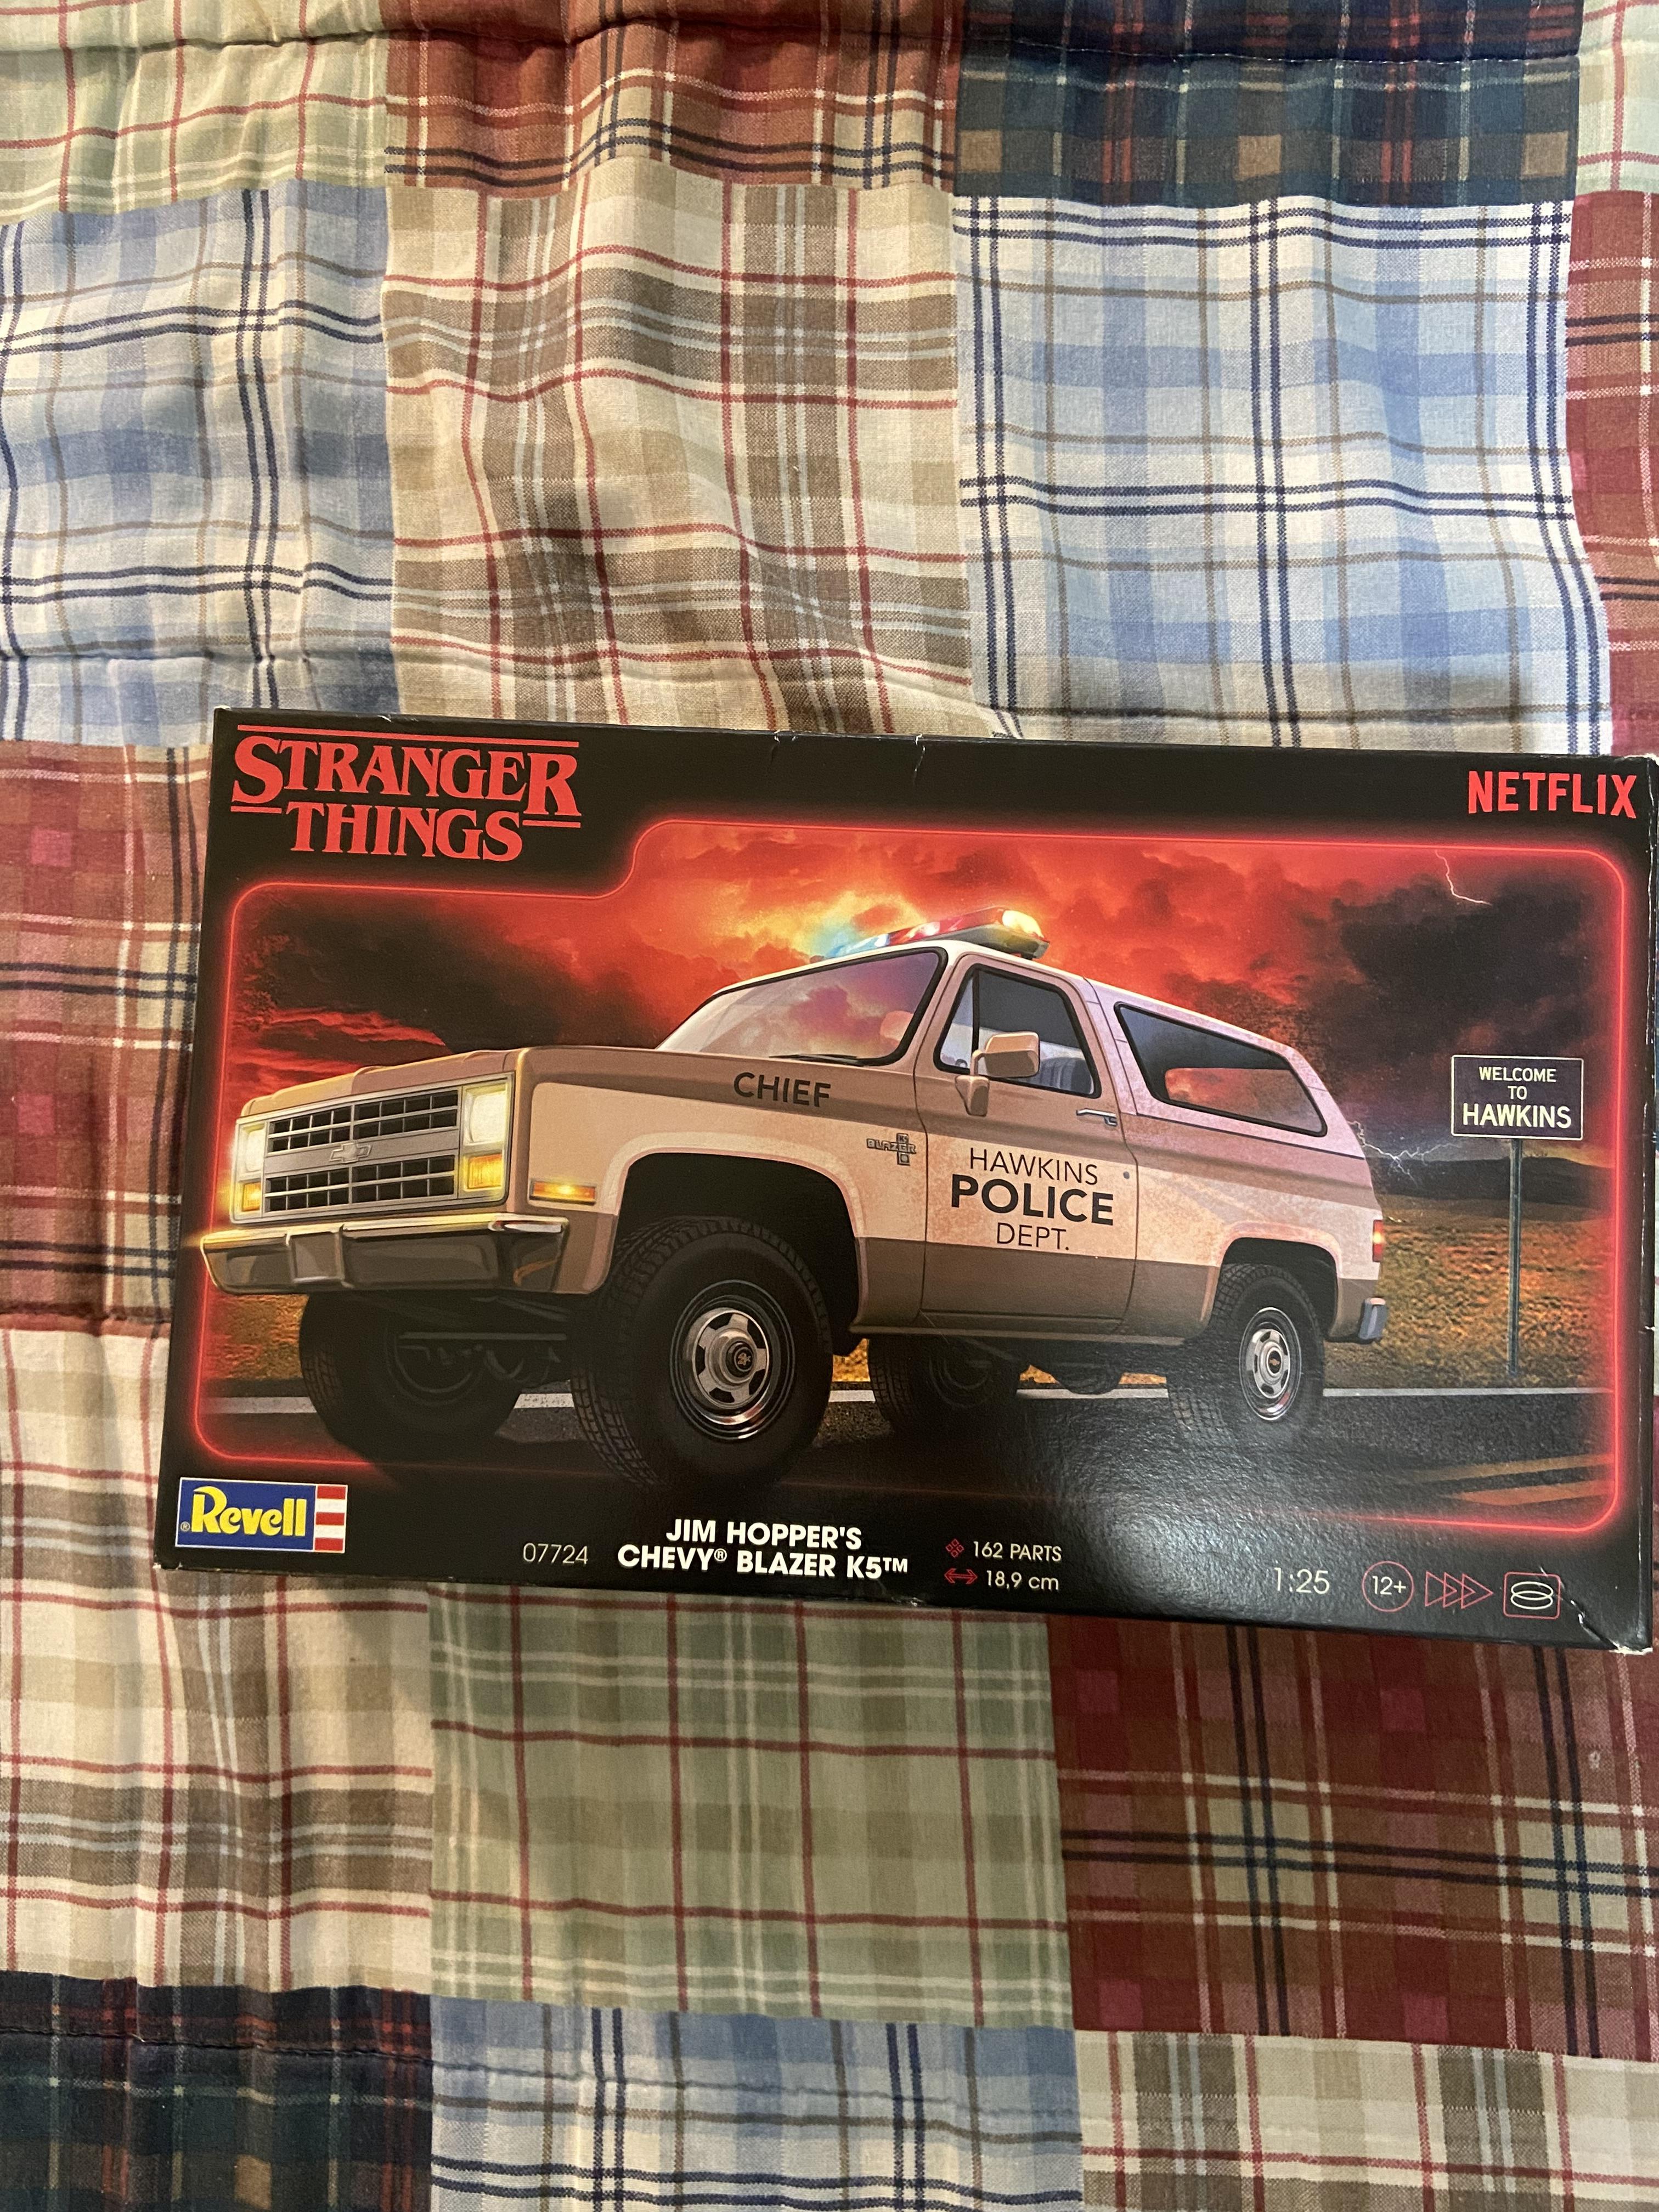
Round 2 July 2025 Product Spotlight
carnut replied to Tim W. SoCal's topic in Car Kit News & Reviews
It might be a good kit to pick up for parts on the 40% off, but otherwise - my money is safe. -
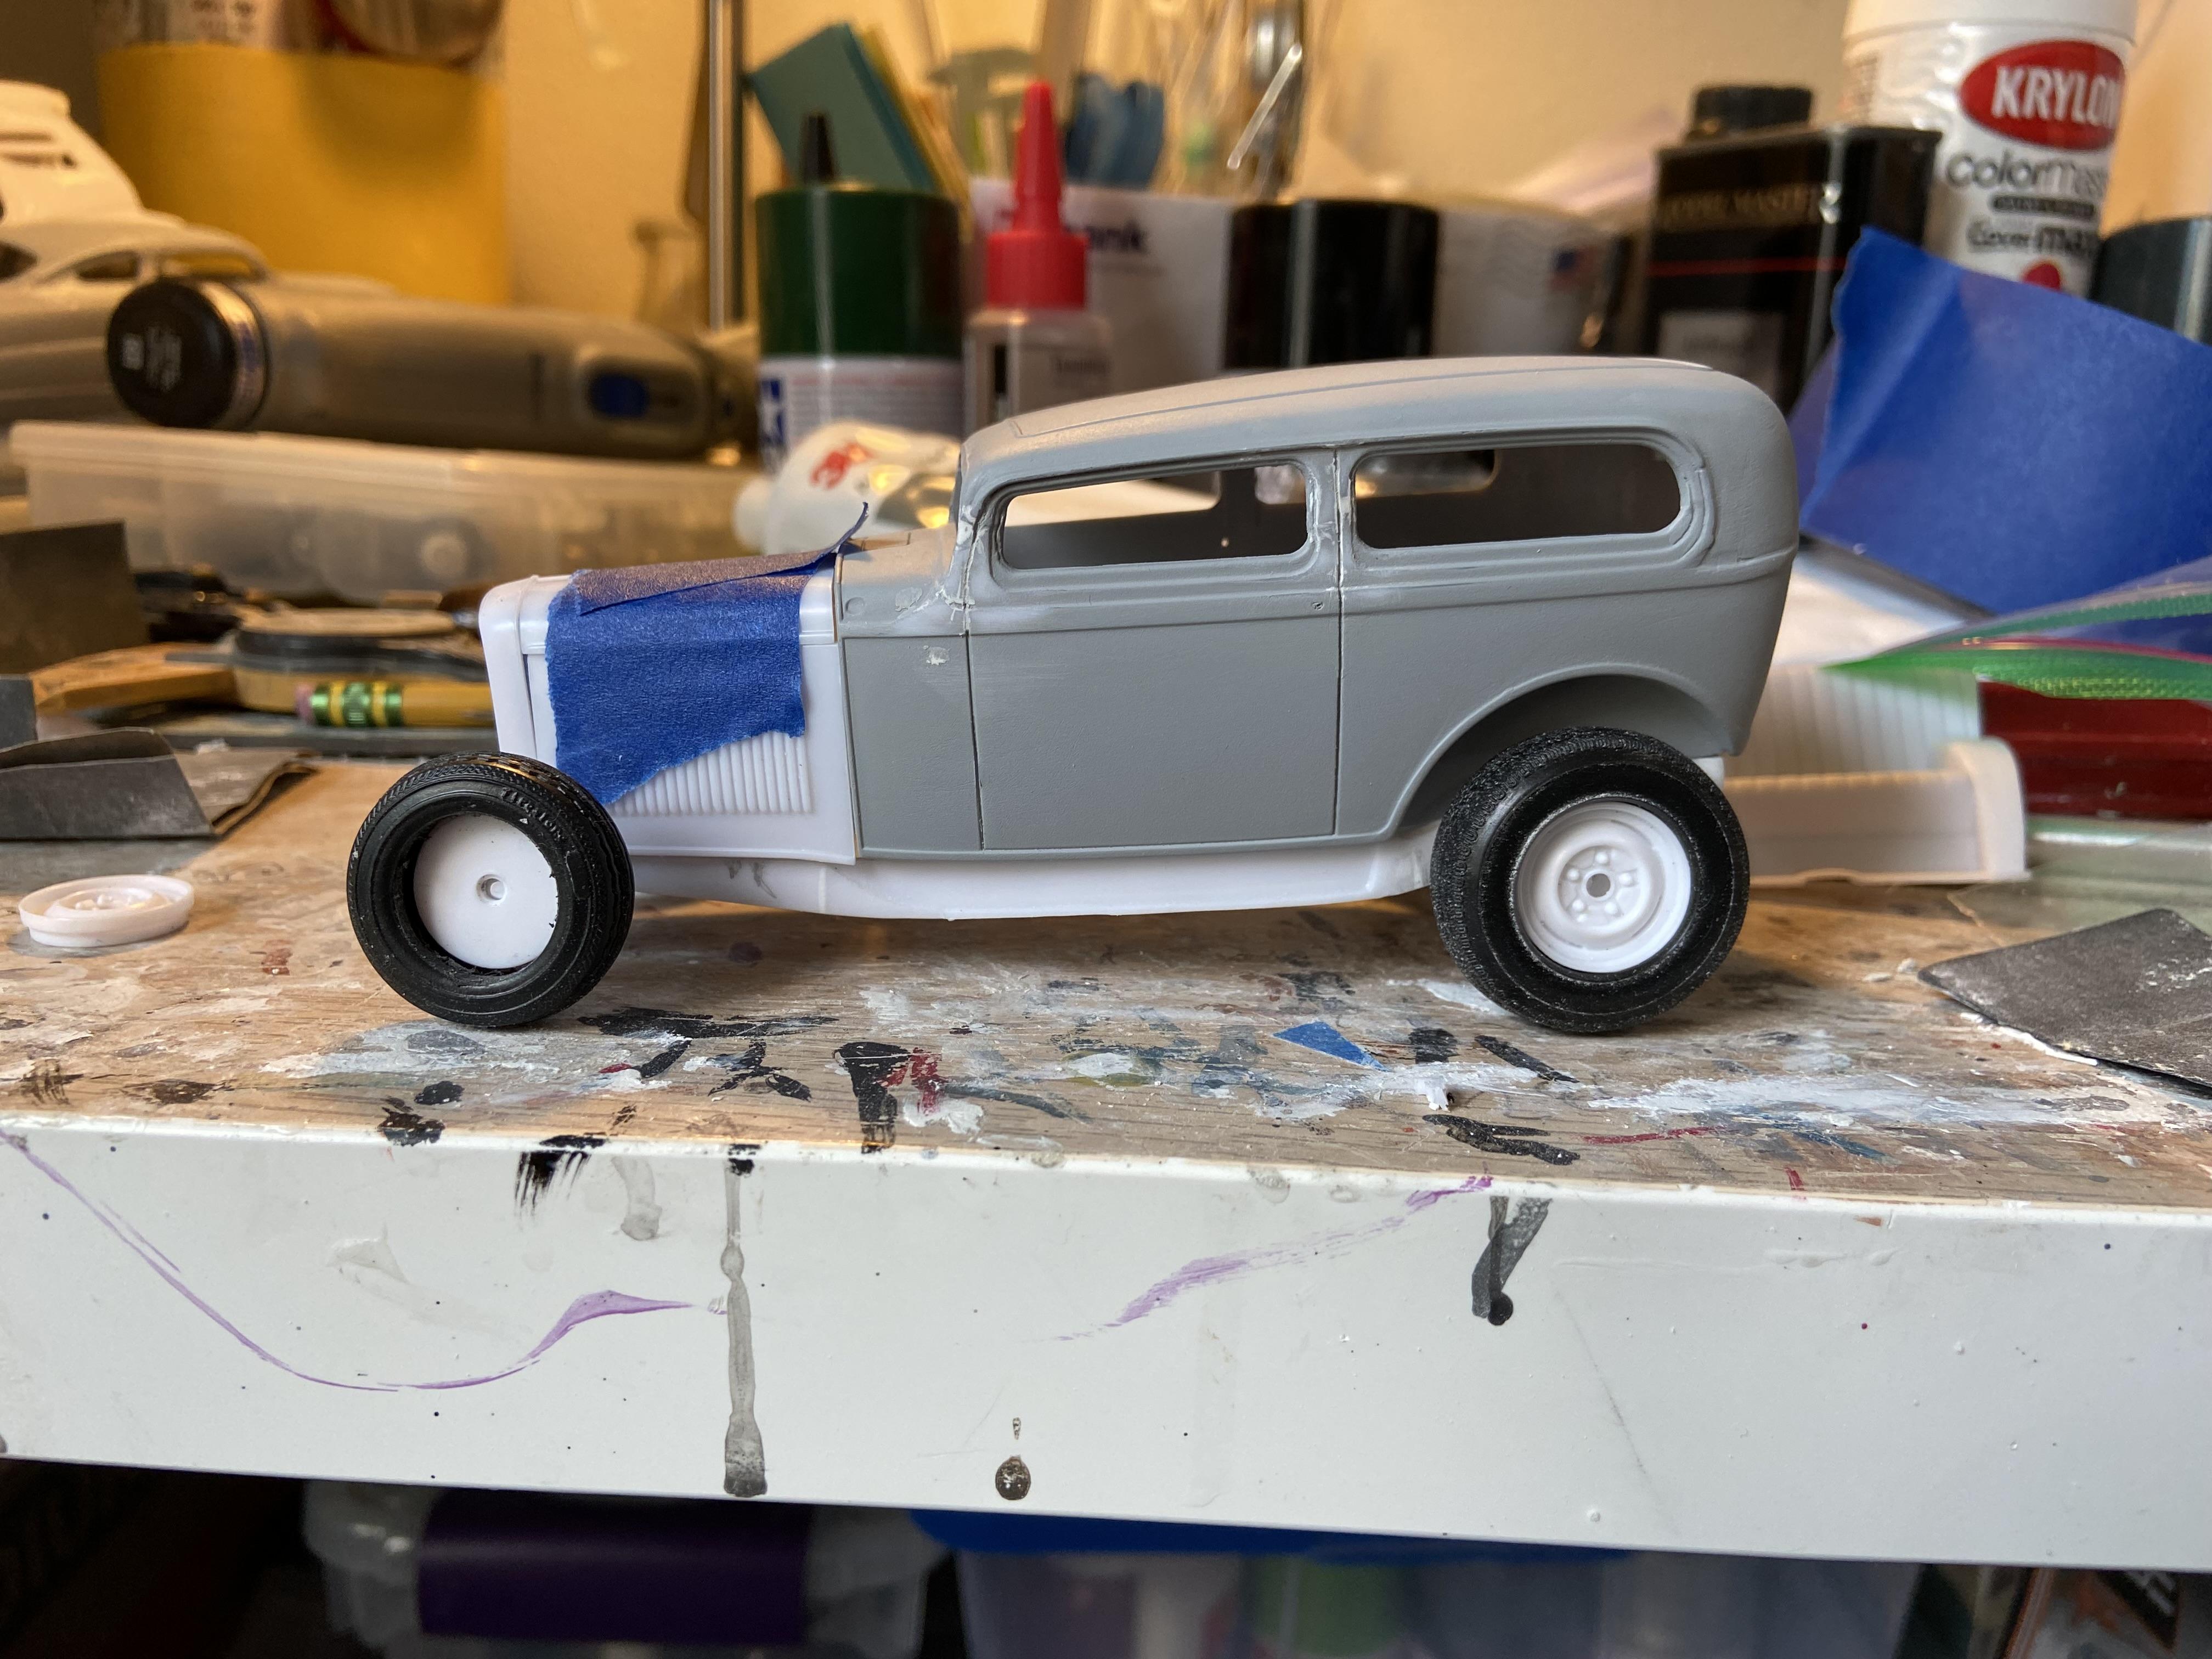
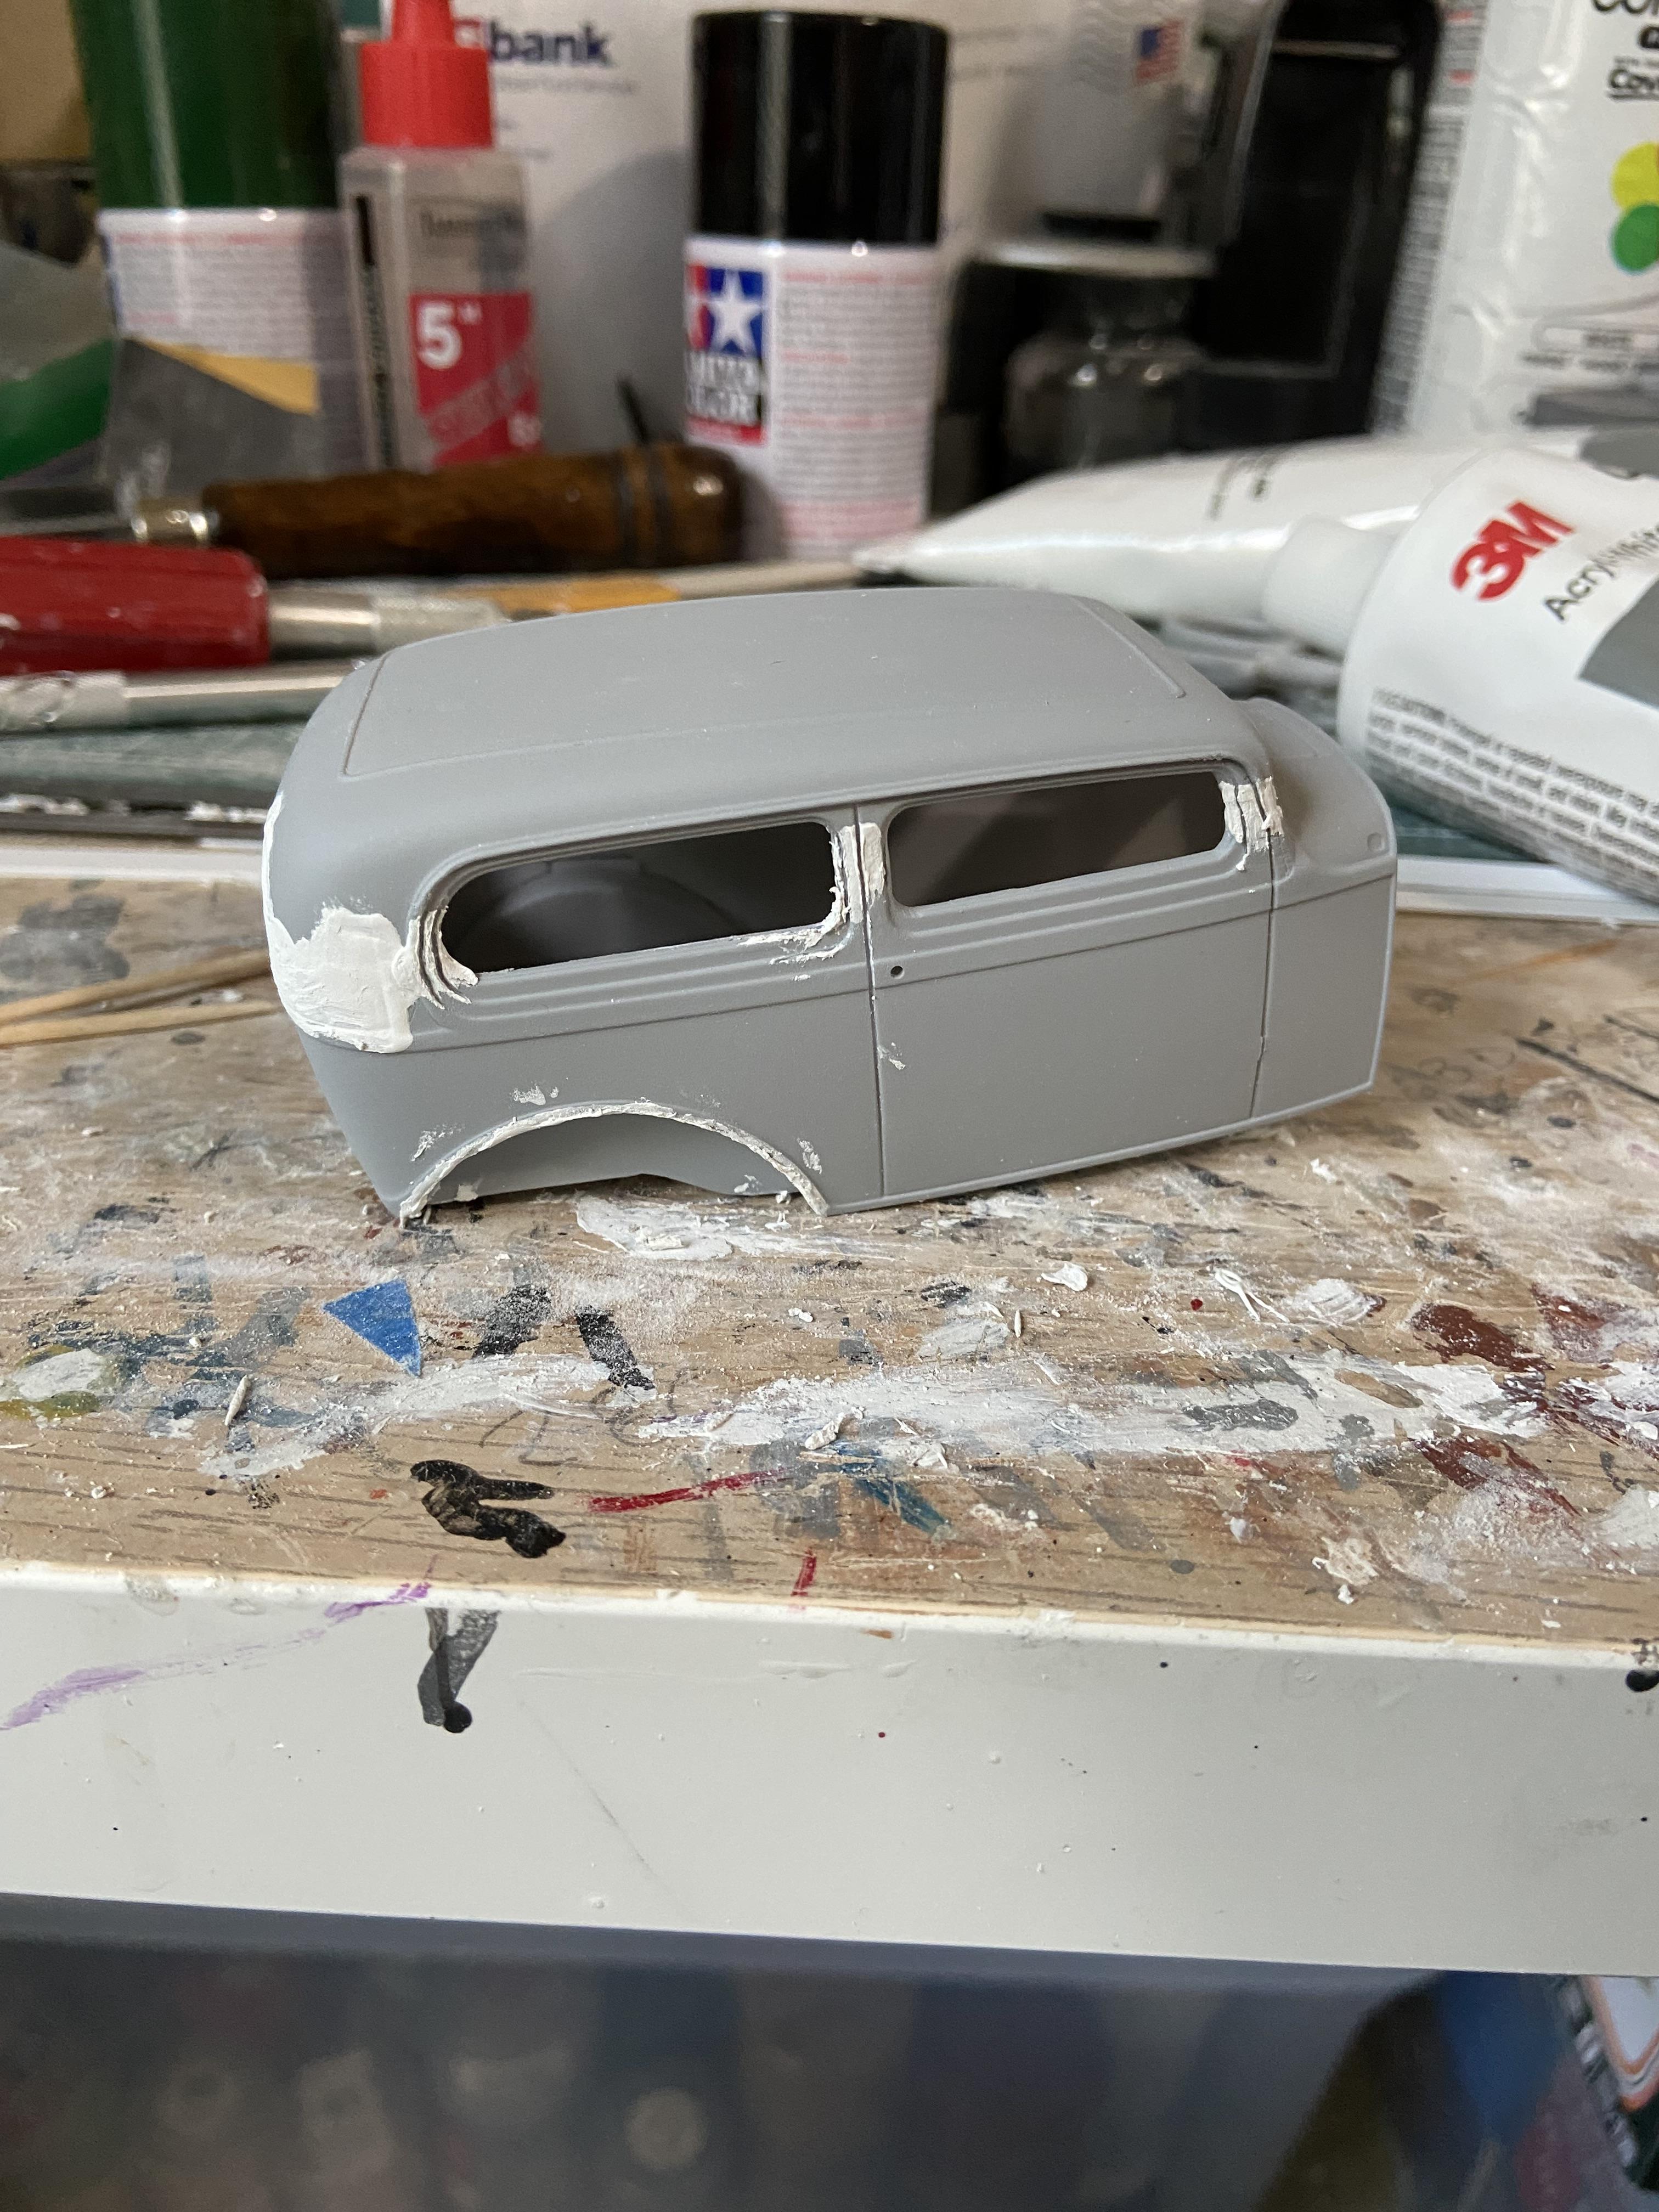
Well things are moving along nicely now and I realized that it is time for me to finish up the bodywork on the 32 Tudor. I took a queue from Kit Karson and added a last minute change to make it my own. Now it’s time to break out the 3M glazing putty and cleanup the bodywork and such. Thanks for looking, cheers
-
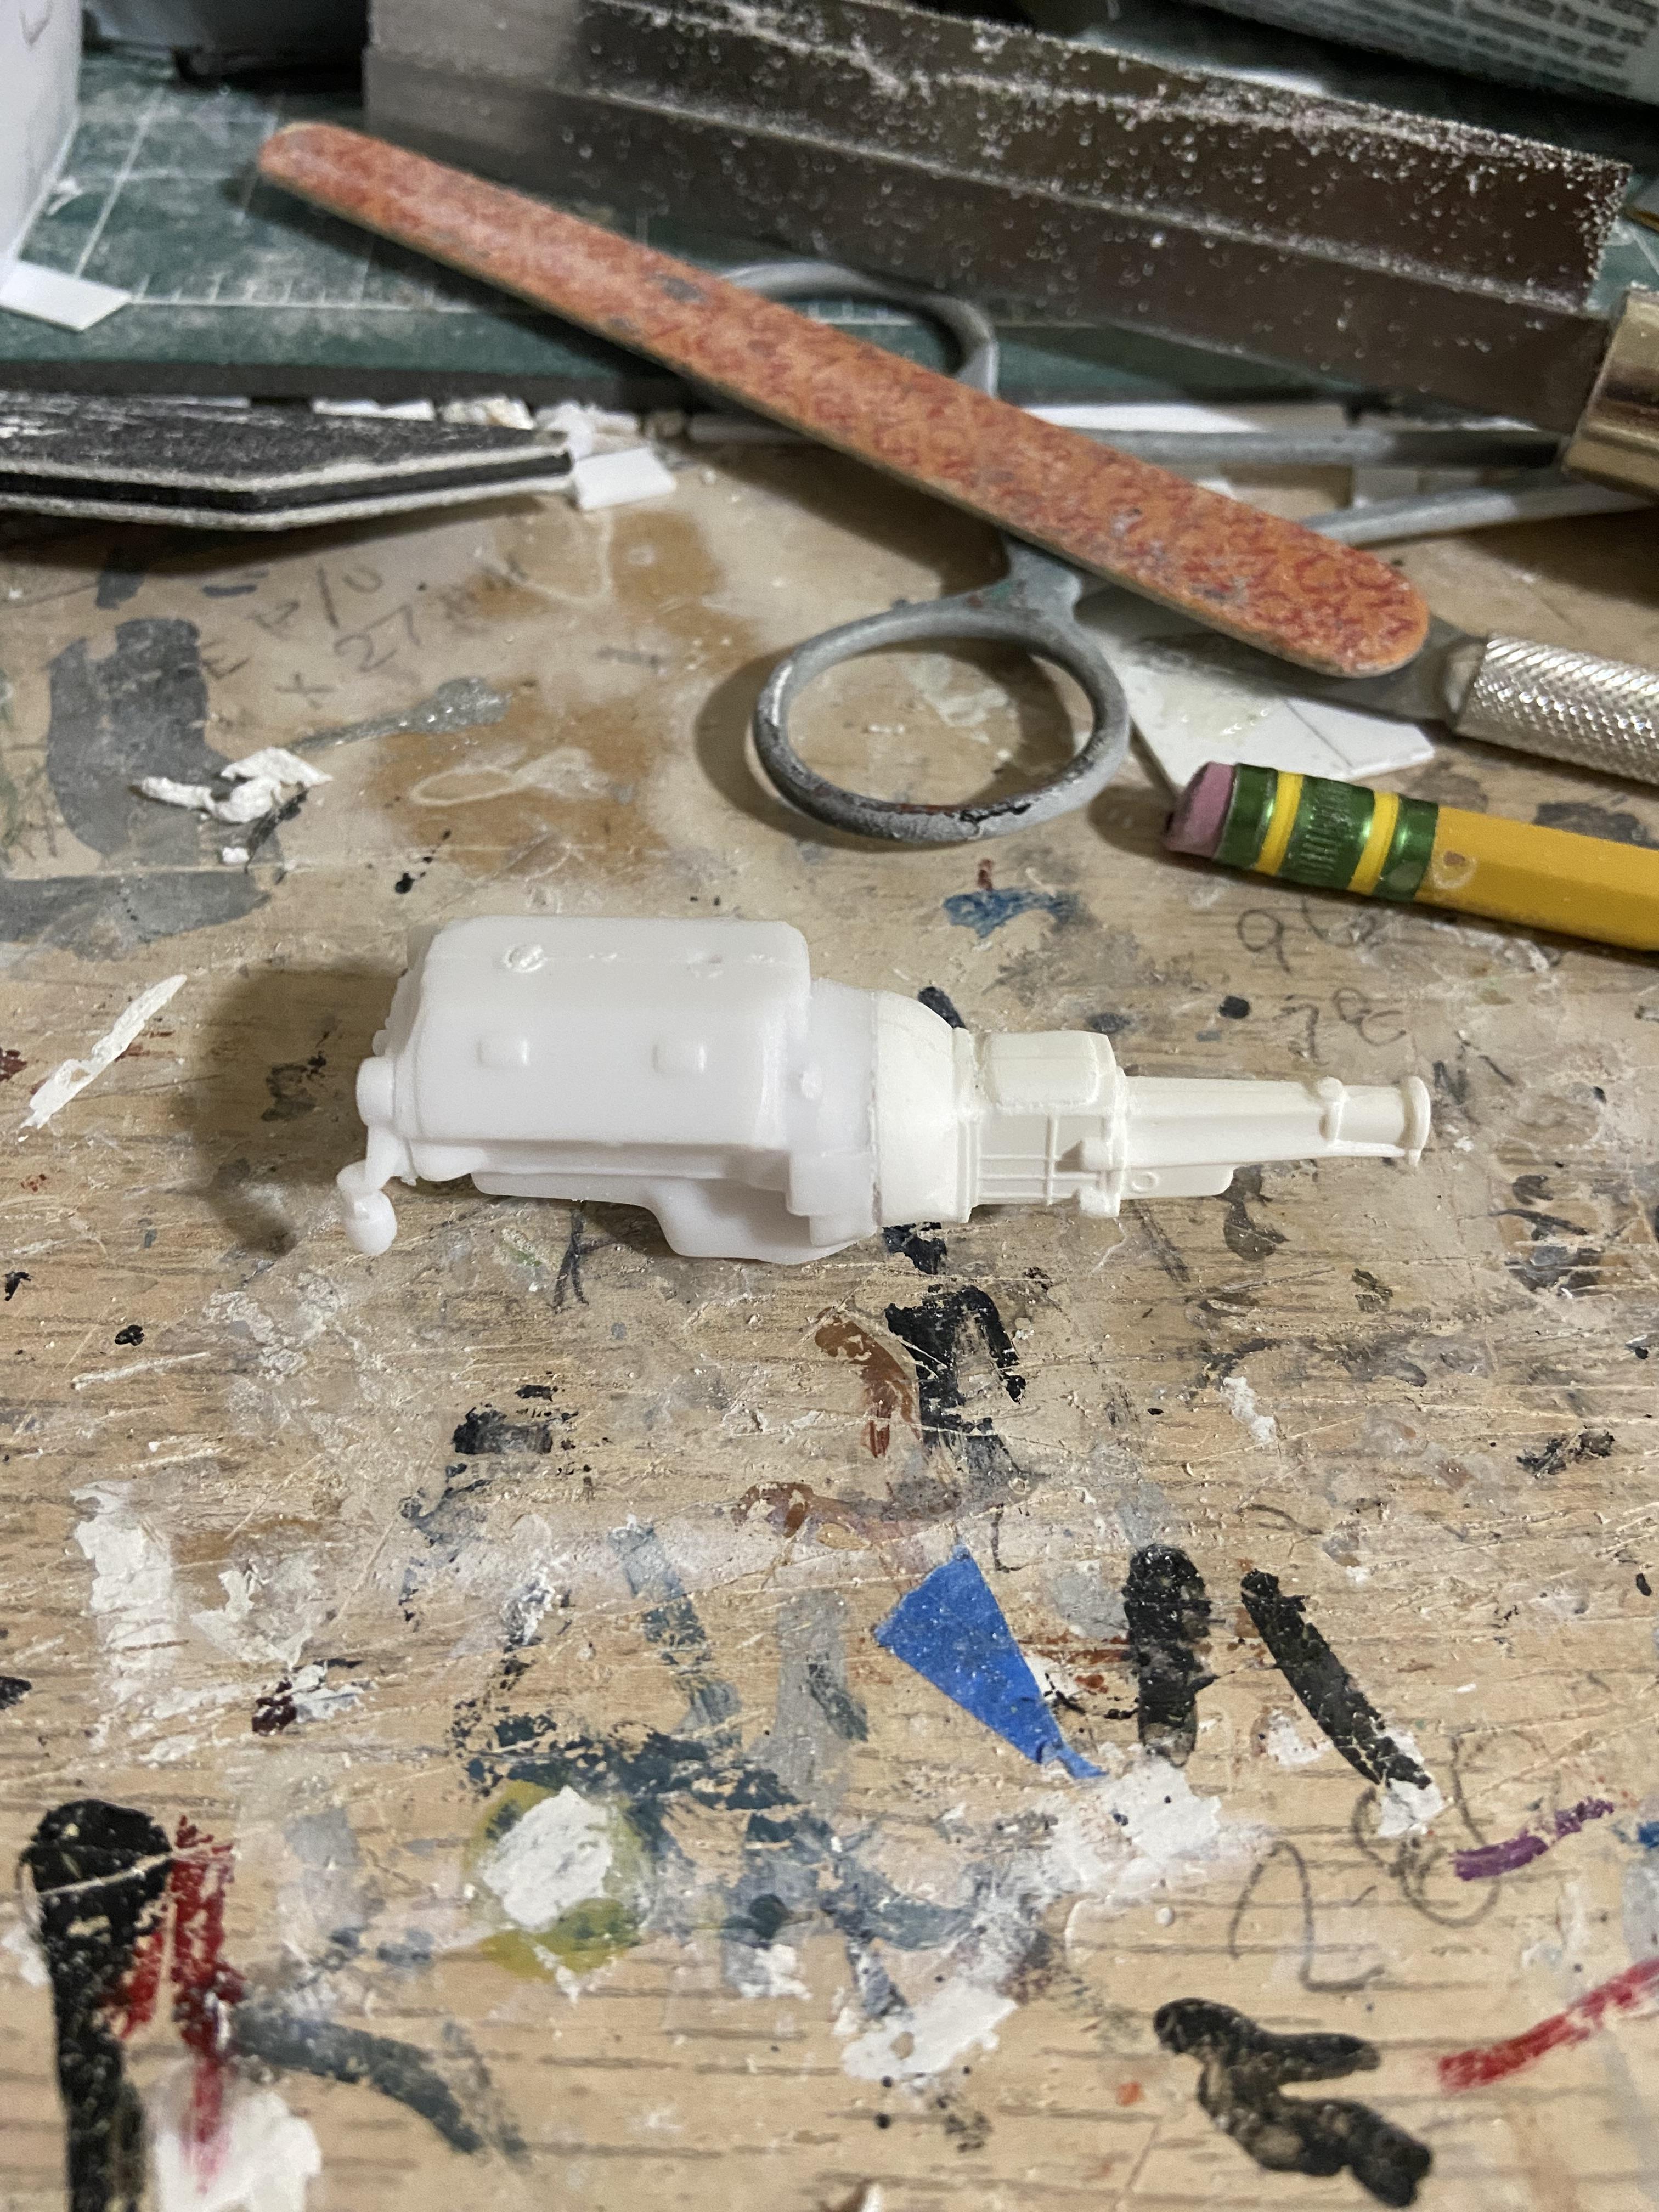
The trans connected to the HEMI is a 39 Ford transmission. These are supposed to be short and stubby, they were very popular to use in early days of hot rodding because of their short stubbiness. They were a three speed trans. And that’s what was used on the Barris Ala Kart.
-
I totally forgot about this. I believe it’s a 392 hemi but I could be wrong. The plus side is it’s a manual trans and that’s cool. The frame and everything is set up to run the flathead so I decided I’m going to go with that. However, tonight I was scrounging through my parts box and I found an old NASCAR engine block with a molded in manual trans so I cut that off and cut off the automatic from the flathead and I glued on the manual trans from the NASCAR engine. Pretty cool, huh?
-
-
I hope I didn’t turn anyone off by me being this critical. I usually try to just have fun and enjoy the building, but I do wish sometimes the manufacturers would try to get things a little straight.
-
I just did some measuring between the centers of the wheel openings and everything that I can see points to this being 1/24 scale. I did a search on the Internet web, and I found out that the wheelbase is 106.5 inches. Then I used the math formula.: 106.5 divided by 24= 4.4375 or 4 7/16” it measures up. For 1/25 scale you simply just use the mathematical formula following: 106.5 divided by 25 = 4.26 I am fine with this being at 1/24 scale. Everything now makes sense to me. I still cannot wait to see what everyone’s gonna do with this. For me it’s time to start scrounging for parts.. keep smiling
-
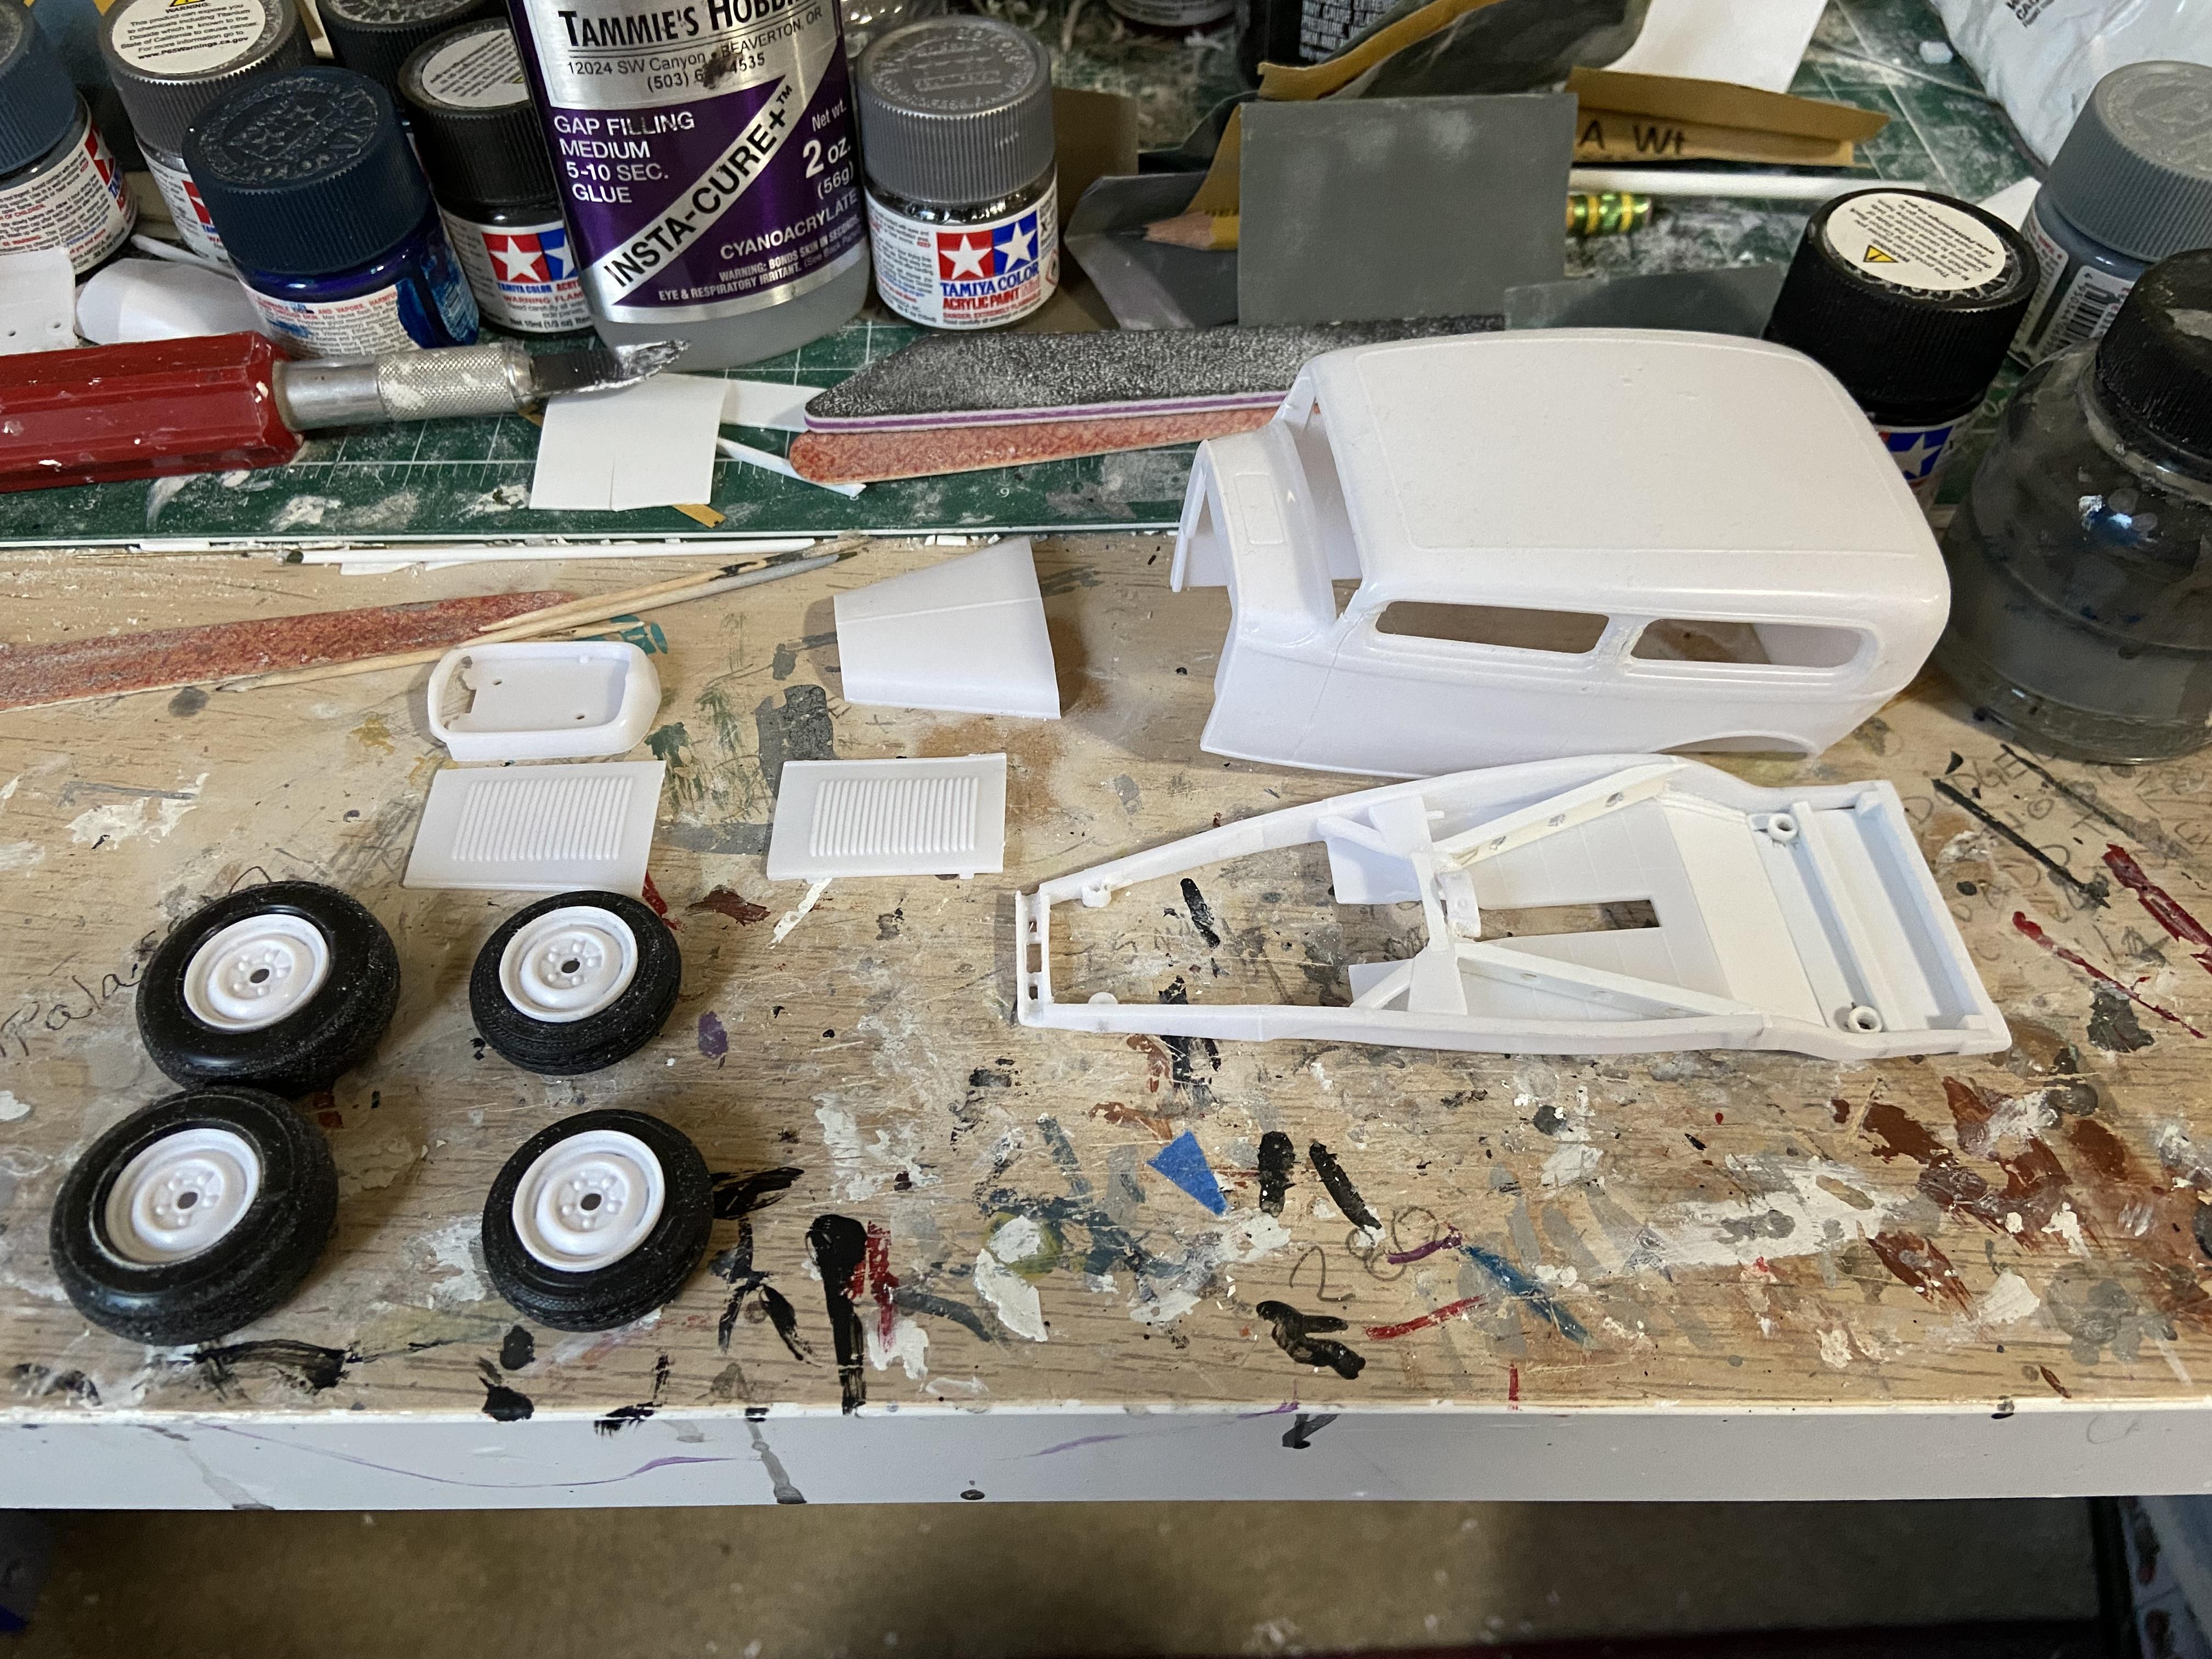
After a bit of a hiatus due to other projects, I am back onto my 32 Ford rolling bones Tudor. It has been too long. i am considering engine options: I have everything set up to use the kit’s 32 flathead. The only problem is is that it has a C4 automatic. I also managed to find a 327 Chevrolet. It’s nicely detailed, but it too has an automatic. My last choice is the old Revell custom parts pack 58 Chrysler hemi. Does anyone know where I can find a 241, 271 or 330 HEMI hopefully with a manual transmission ? Maybe the hemi out of the AMT 29 model a ? I am also trying to still work out where to put my gas filler door or cap. Because I removed the stock located gas tank. anyway, enjoy the photos. Your comments are welcome. Keep smiling.😊
-
I just picked up mine yesterday on a lunch break from work. I picked mine up at my local hobby shop, sure I paid a little bit more than online, but I’m supporting my local hobby shop. I have opened the box up, and I pulled everything out to inspect everything. For once it’s not a short pour nor is anything warped. I know the box says 1/25 scale, but I am wondering at the size of this, this looks more like 1/24 scale than 1/25, at least to me it does. I’m sure this has been discussed but this is just my observation. The size comparison looks more like the Monogram-Revell Chevy / GMC 4x4 pick ups that they just released. any thoughts?
-
My apologies for sidetracking your thread Kit. Here is my version of building a 30 Model A roadster out of the Revell 30 Ford. What I did was I simply did not glue the roof section on the body and I filled the two small little tab slots. I do know that it’s probably not accurate. I’ve been told by one or two “experts” that the doors are too short, but I don’t care. I decided to build this as a period late 40s to early 50s hot rod. I especially like the Hallock Windshield.
-
Kit, I am glad that you are going to be able to use the bodies from Dave Fletcher. He was a very inspiring builder and he knew his subject well. We both also talked about the 29 Model A 5 window conversion and the Revell Model A’s. The metallic gray 29 that I see in your photos. Dave actually had paint on that at one time, but then he stripped the paint off. I don’t know why but it was for some reason. We both talked about building an accurate 29 on a 32 Deuce frame. I sure muss him. I know that you will do an excellent job and I can see in your building style the same meticulous attention to detail, but also the fun factor of building as well. This build of yours is inspiring me to dig out my Revell 29 on a 32 frame rails A roadster powered by a hot rodded Chevrolet inline 6.
-
Thanks, Tim for the nudge. I’ve been kind of sidetracked on a couple of other projects, including putting together my clubs newsletter for our Model Car Fest coming this March in the Portland Oregon area. Here’s what I’ve got so far. This is my second attempt: the roof is chopped. The frame is modified. The suspension is all ready to go. I’m stuck on putting a good vintage engine (either a Y-Block or a kit bashed early HEMI). The gas has been relocated but where do I put the filler cap. I hope to circle back onto this very soon. It’s taking on a rolling bones style build somewhat.
-
I am glad to hear this and the possibility of the other 46-48 Chevrolets coming out. I also agree I would sure love to see a 41 coupe and a convertible come out this. i also hope that they will use the original art work done by Jairus Watson. His art work is top notch. I have got two customs going from the aerosedans. By the way, hopefully the magazine will republish Jairus Watson’s old article on how to lower the stock suspension - for those of us who like to do period customs. Can we say high school confidential?
-
Sorry it’s been so long for me to get back to this post. I’m hoping to clear up some of my other obligations that I’m building and circle back to this. I’ve enjoyed piecing this together and the comments I’ve been receiving about it. Keep smiling everyone.😊
-
That’s one of the main reasons why I’m having to relocate my gas filler-cap too. After my modification of the rear frame rails, kicking them up, It eliminates the gas tank stock location, the most common place to put It is underneath or behind the rear seat. So I’m exploring a couple of different options. Like maybe behind the license plate make the plate a flip down sort of thing I don’t know. Keep going on your 32. I’m really liking your details that you’re getting into and your fabrication. It’s very inspiring, keep at it and finish it up. Please.
-
Chopped 40 Ford Sedan Delivery Traditional Custom
carnut replied to Ferbz's topic in WIP: Model Cars
I’ve done a couple of these chopped, and it is not an easy thing to do. You have absolutely nailed it. It makes me wanna dig out one of my old chopped 40 Ford sedan delivery projects too. Excellent work and keep it going. -
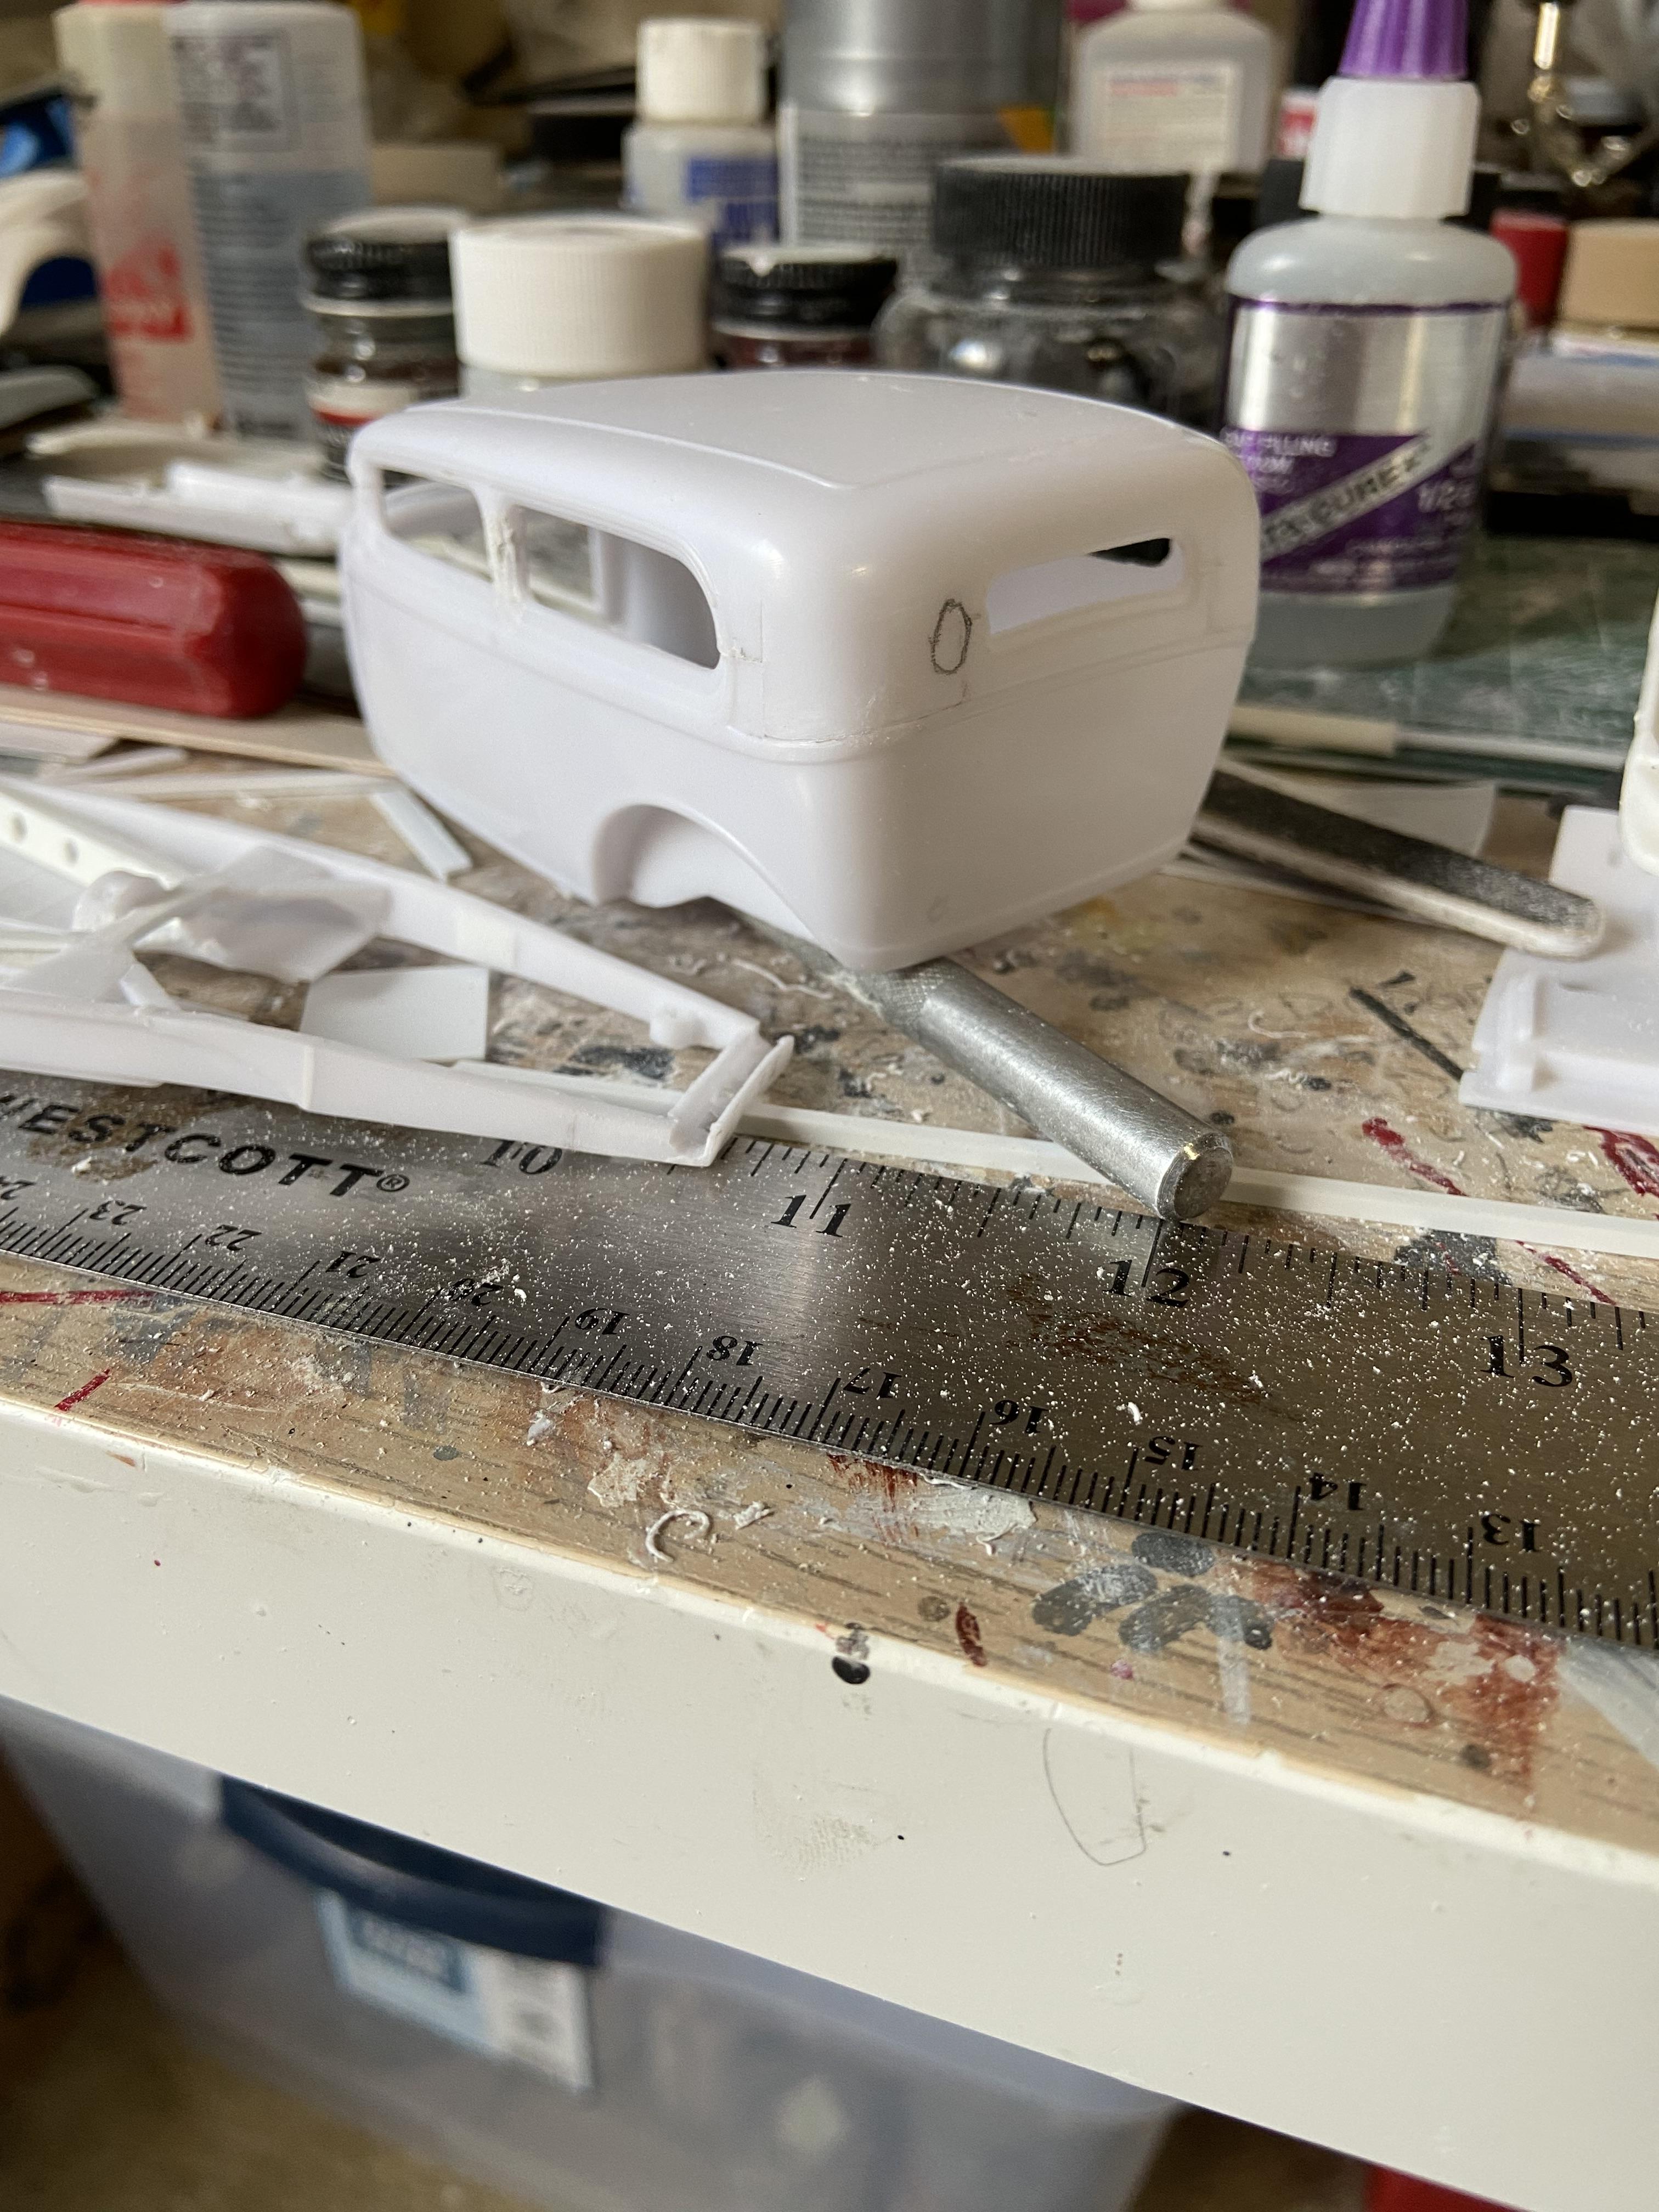
I did a bit of tidying up a few loose ends on the frame-chassis as well as some more cleanup work on the body. I could use a little bit of help here, I am trying to find a good location for the gas filler door and I’ve got an area penciled in where I think I could put it but I’m not really liking the location. Do any of you guys out there have any good ideas for this? Because the intention here is is that the gas tank is either gonna be behind or underneath the rear seat. I would appreciate any comments and help especially in this area. Thanks for looking..