Cosmo_Song
-
Posts
50 -
Joined
-
Last visited
Content Type
Profiles
Forums
Events
Gallery
Everything posted by Cosmo_Song
-
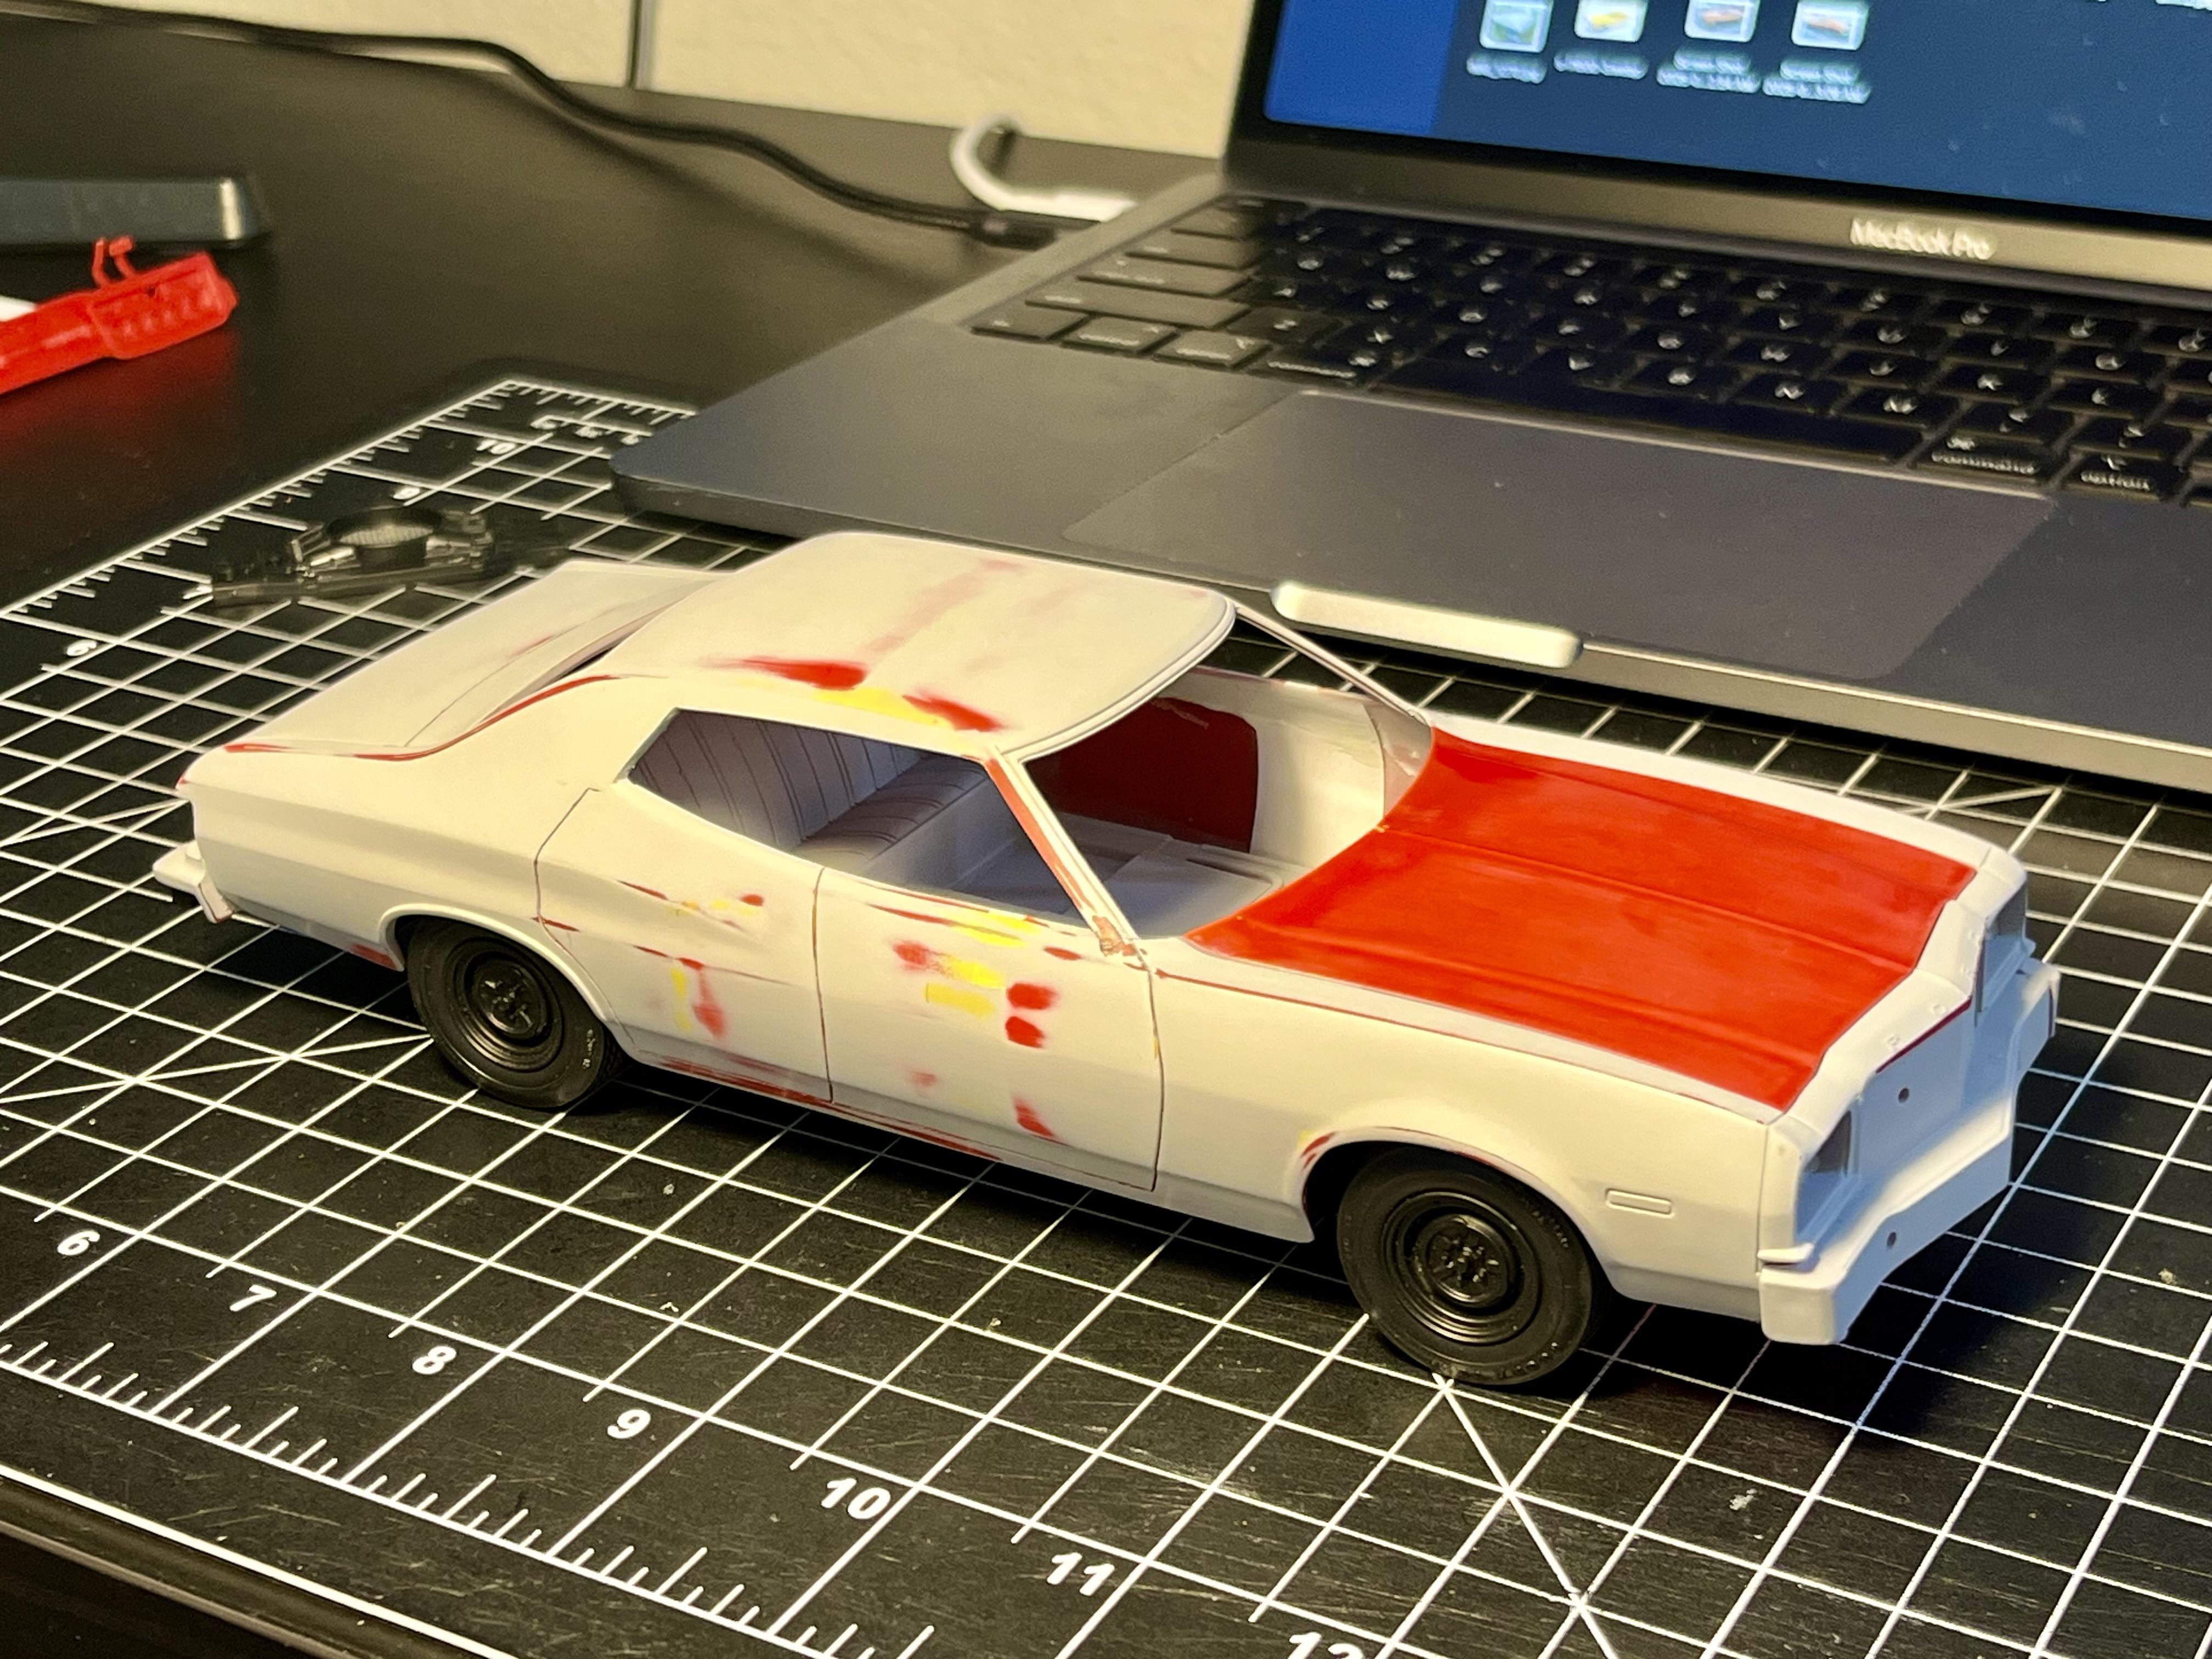
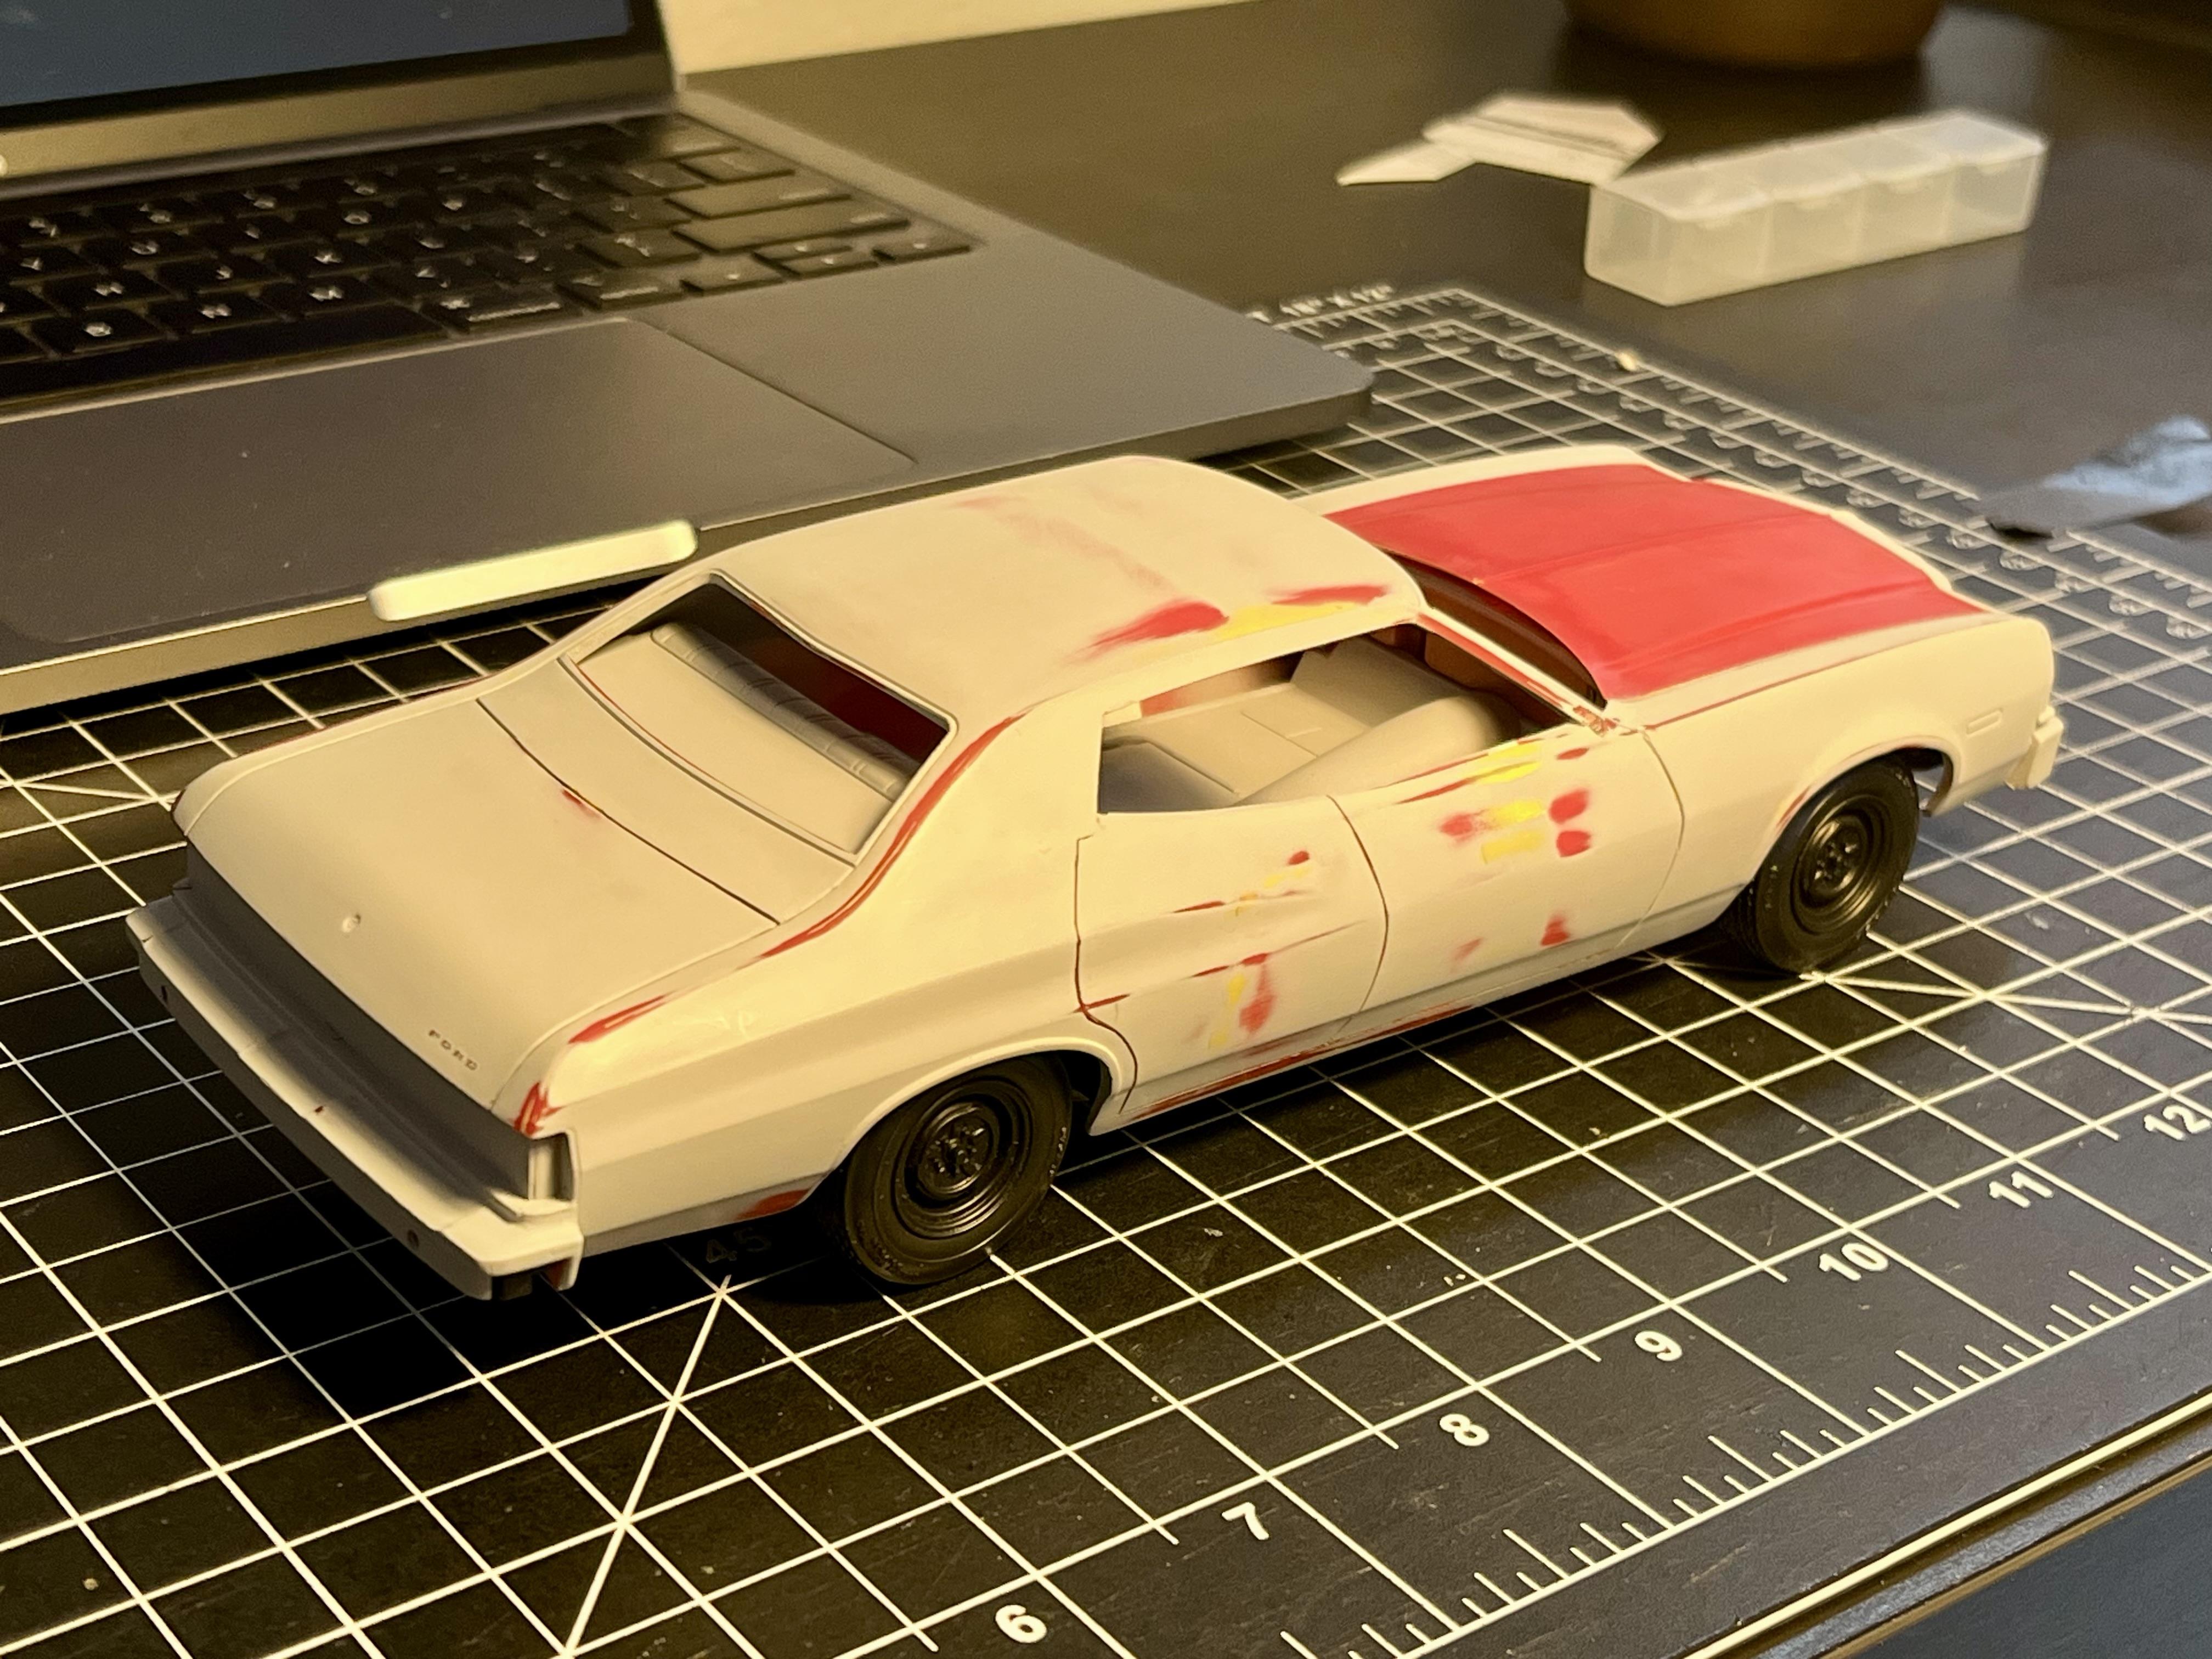
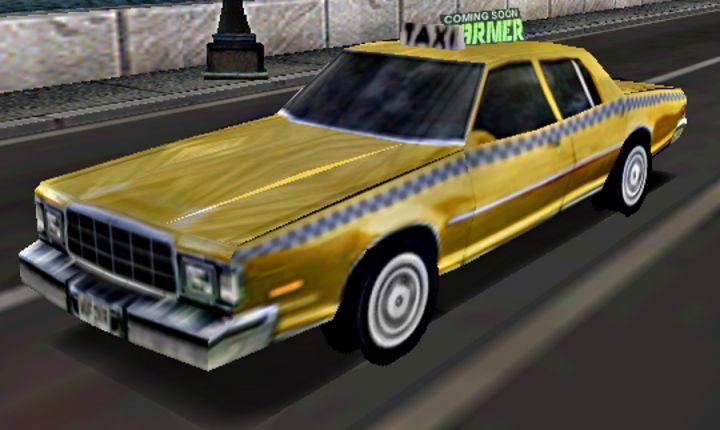
Trying to recreate a 1/25 version of the taxi in Driver: You Are the Wheelman. Started with Revell’s ‘76 Torino and extended the body, interior and chassis by 8mm to fit the wheelbase of the sedan version of Ford Torino.

-

1974 Chevy Malibu (Nascar converted to Stock)
Cosmo_Song replied to Cosmo_Song's topic in Model Cars
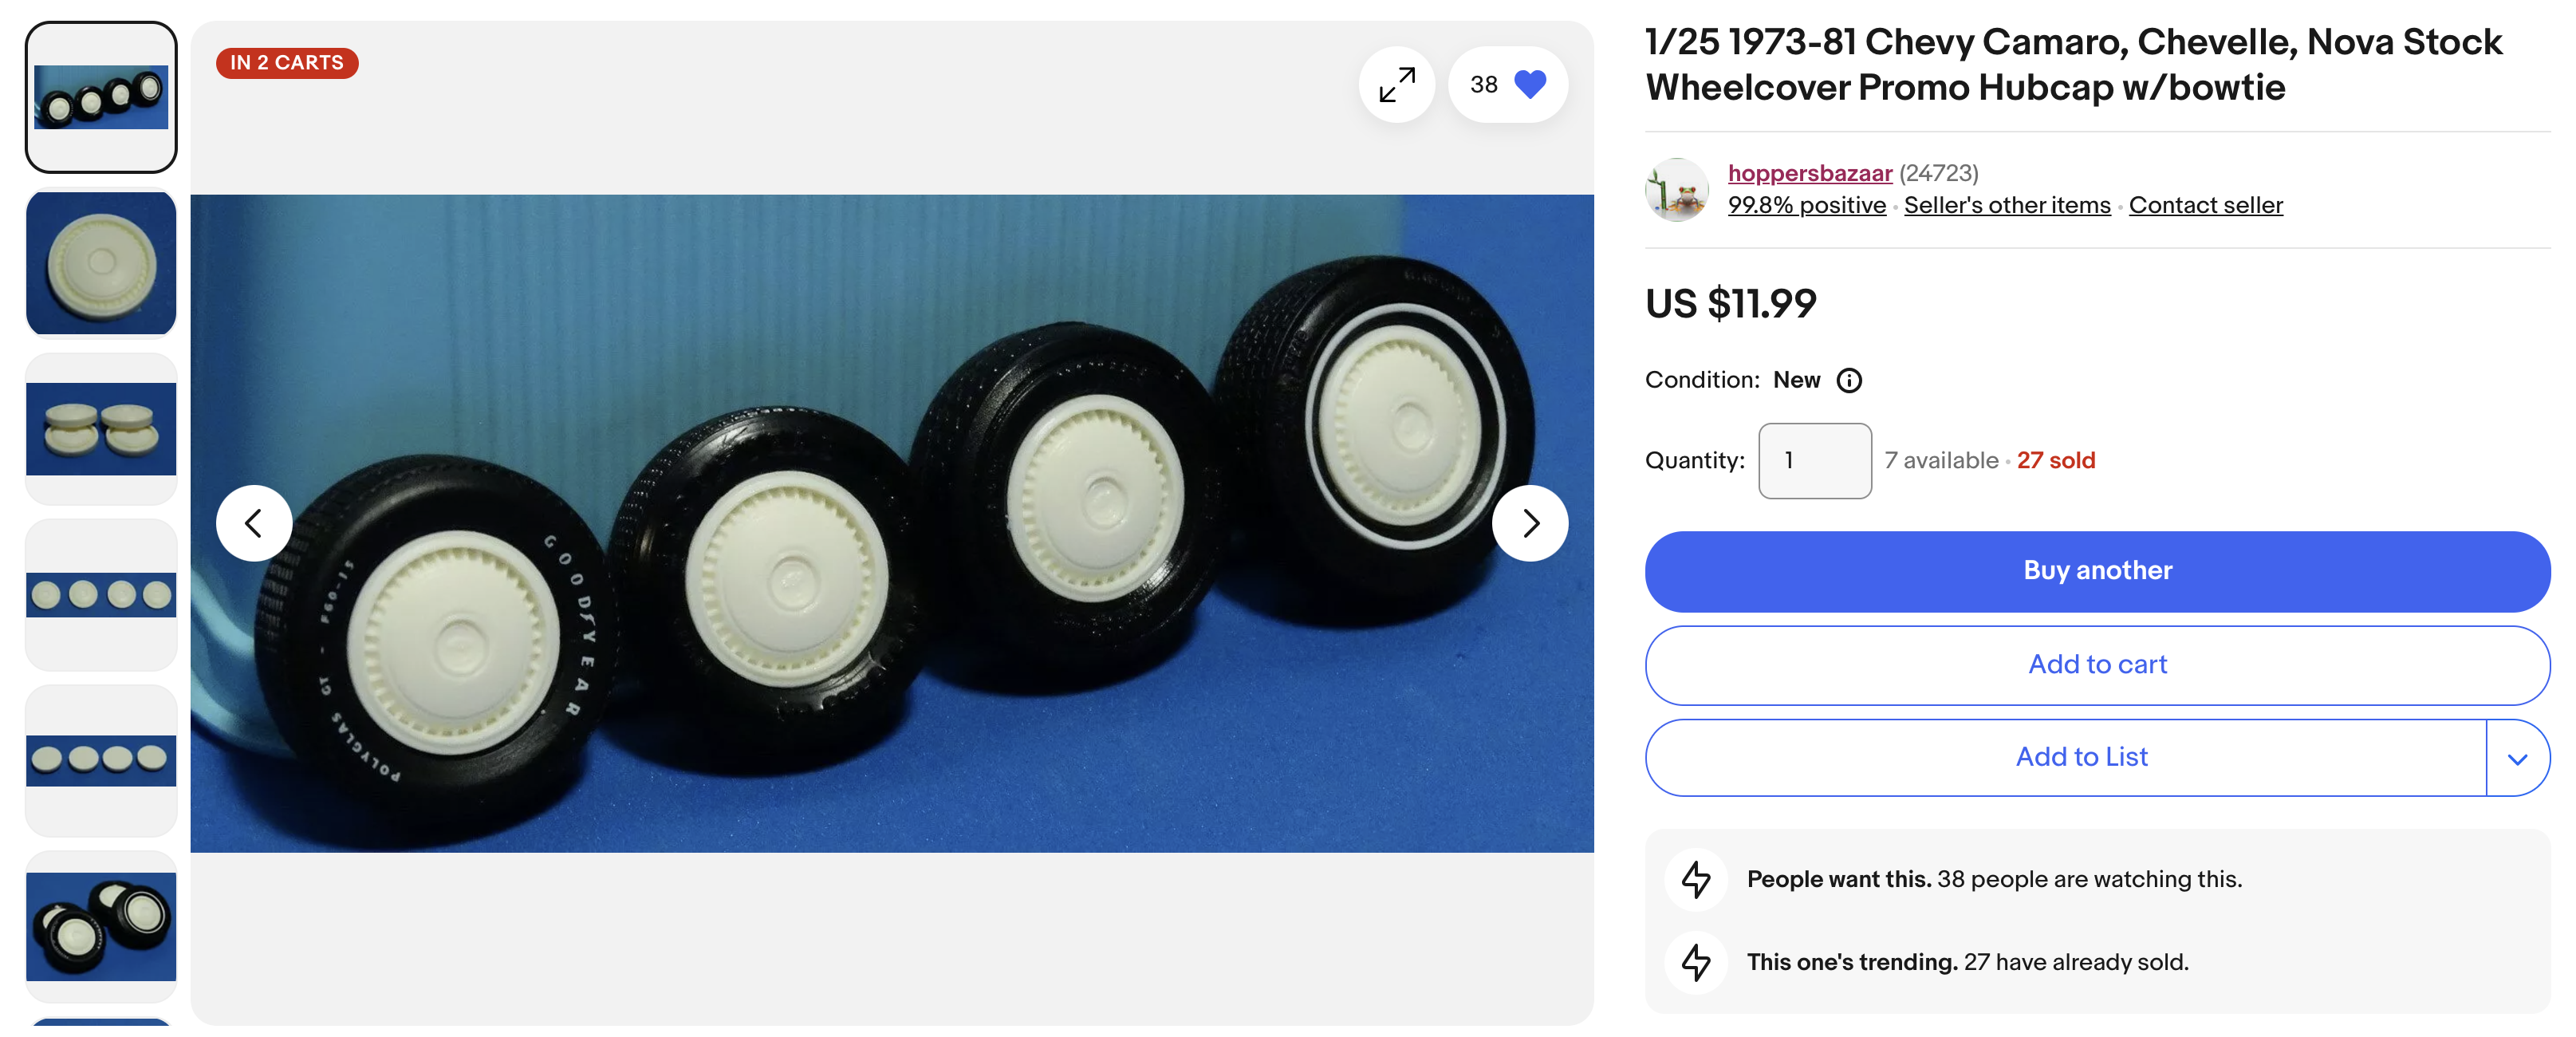
Thank you! Would be cool to get a Mercury from too many projects 3D printed bodies Thank you! Thank you! Thank you! Thank you! Thank you! Glad it matches your memories Thank you! Thank you! Thank you! Thank you! Thank you! Thank you! Thank you! Thank you! Thank you! Thank you! Thank you! I used testor's root beer, very simple rattle can Thank you! Thank you! Glad it reminded you of a real one very similar Thank you! Thank you! Thank you! Maybe when I figure out how to cast one haha Thank you! Thank you! Thank you! Thank you! I found this set from ebay seller - hoppersbazaar The quality is superb!
-
1974 Chevy Malibu (Stock converted from AMT Lennie Pond Nascar)
Cosmo_Song replied to Cosmo_Song's topic in WIP: Model Cars
Finished as Nov.17th Many thanks to DoctorLarry's interior donor parts! -
1974 Chevy Malibu (Nascar converted to Stock)
Cosmo_Song replied to Cosmo_Song's topic in Model Cars
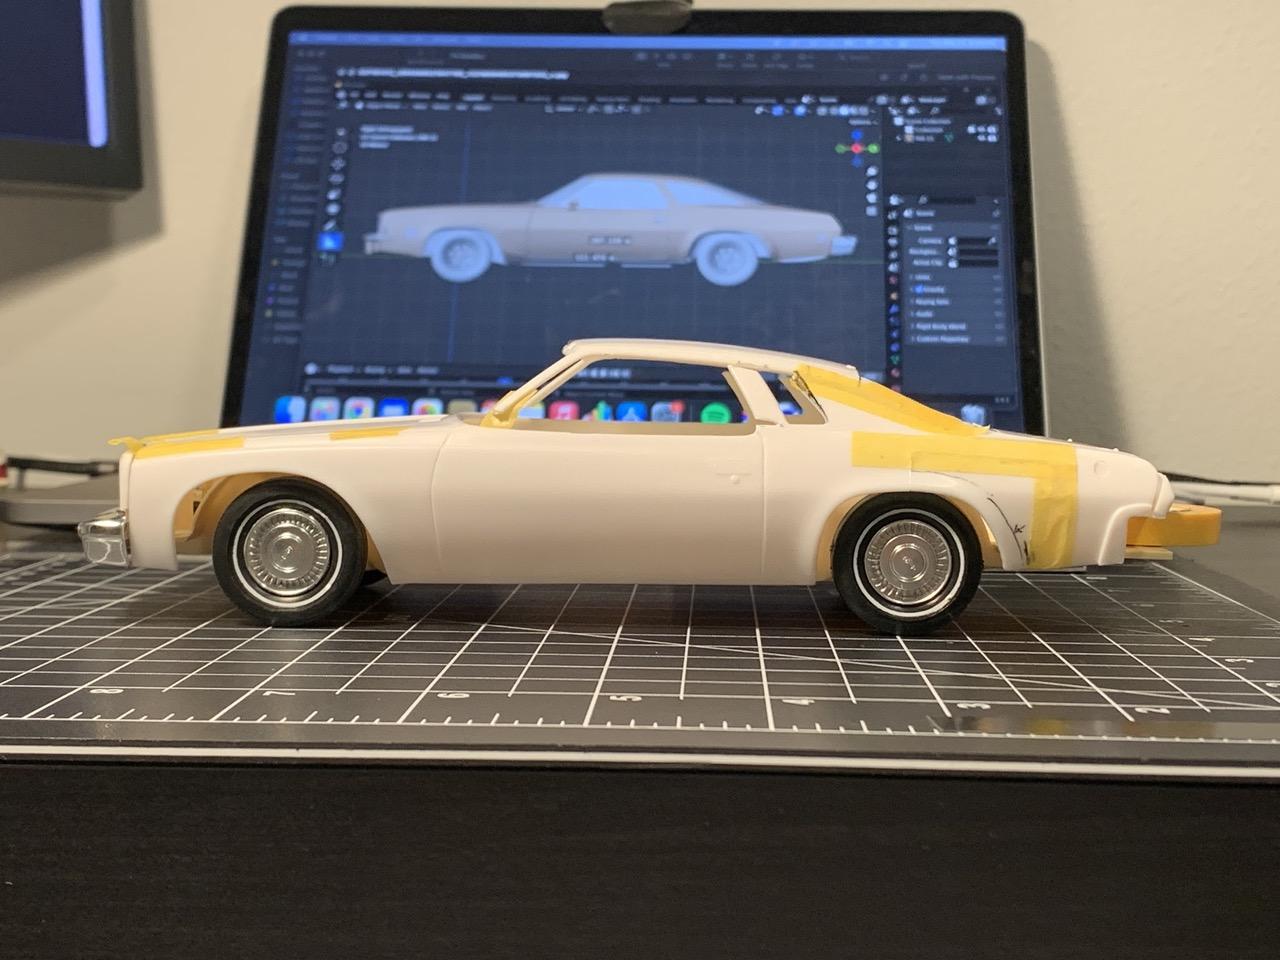
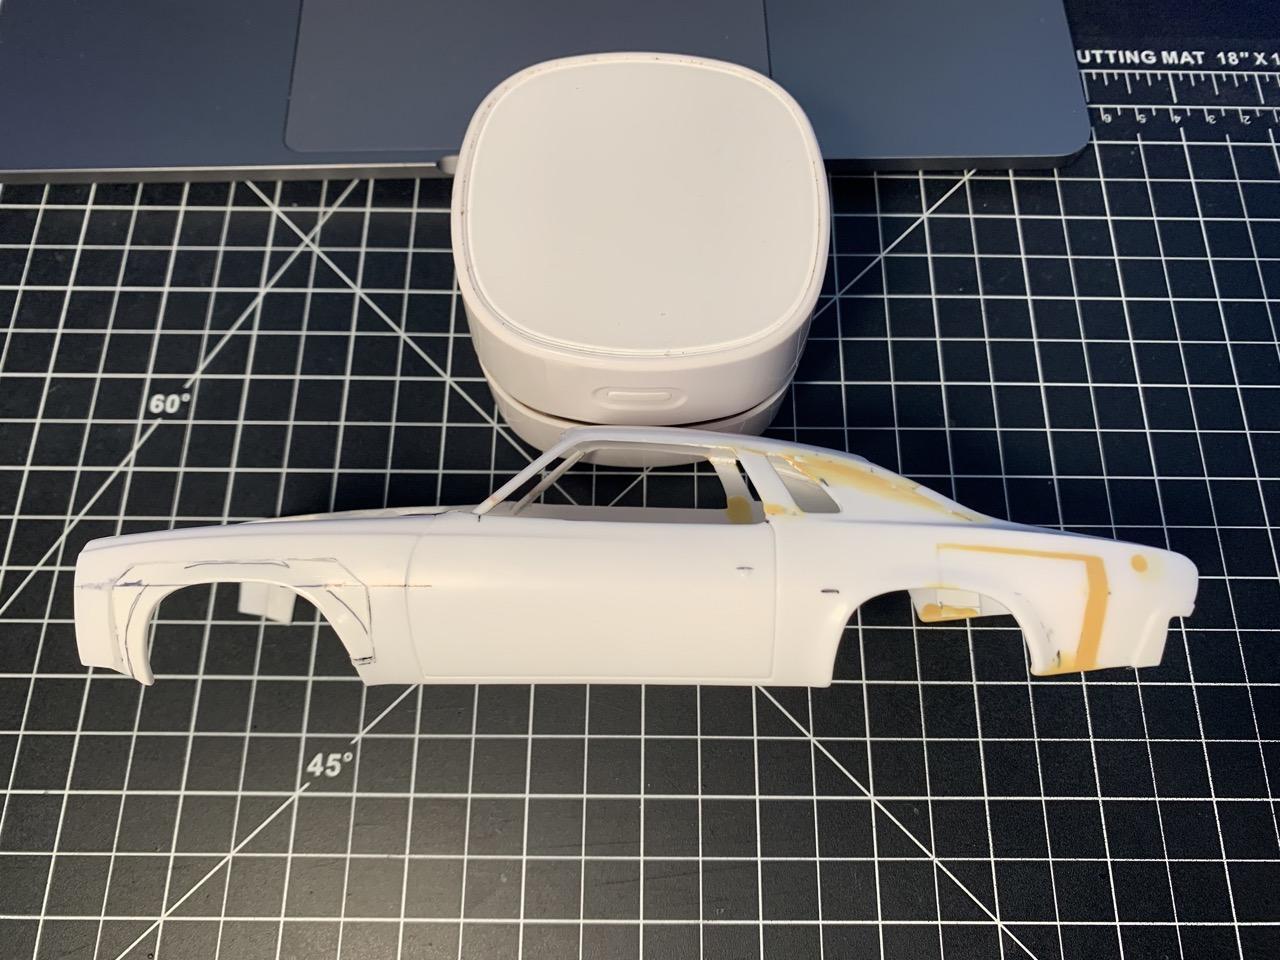
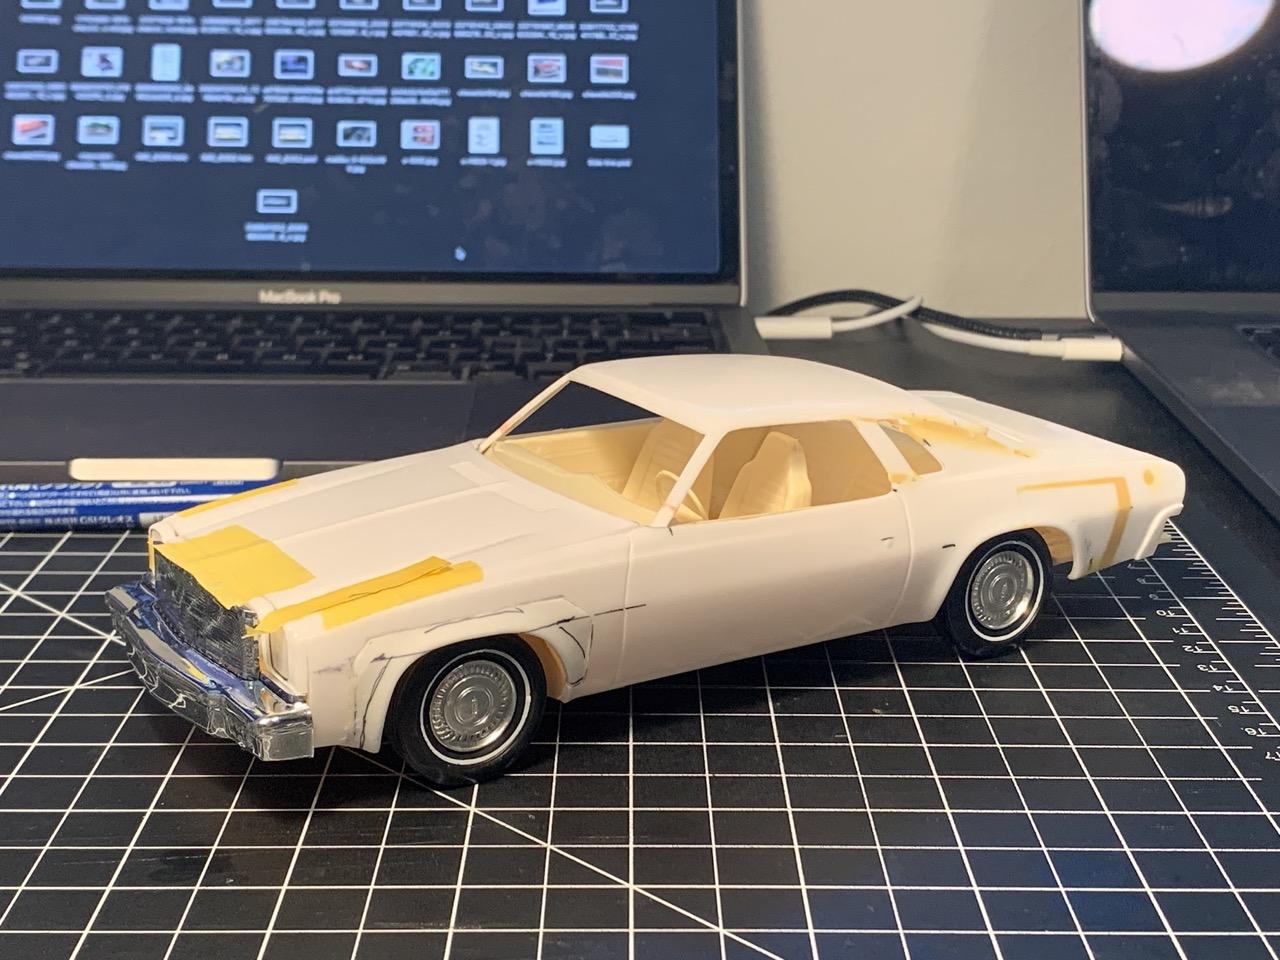
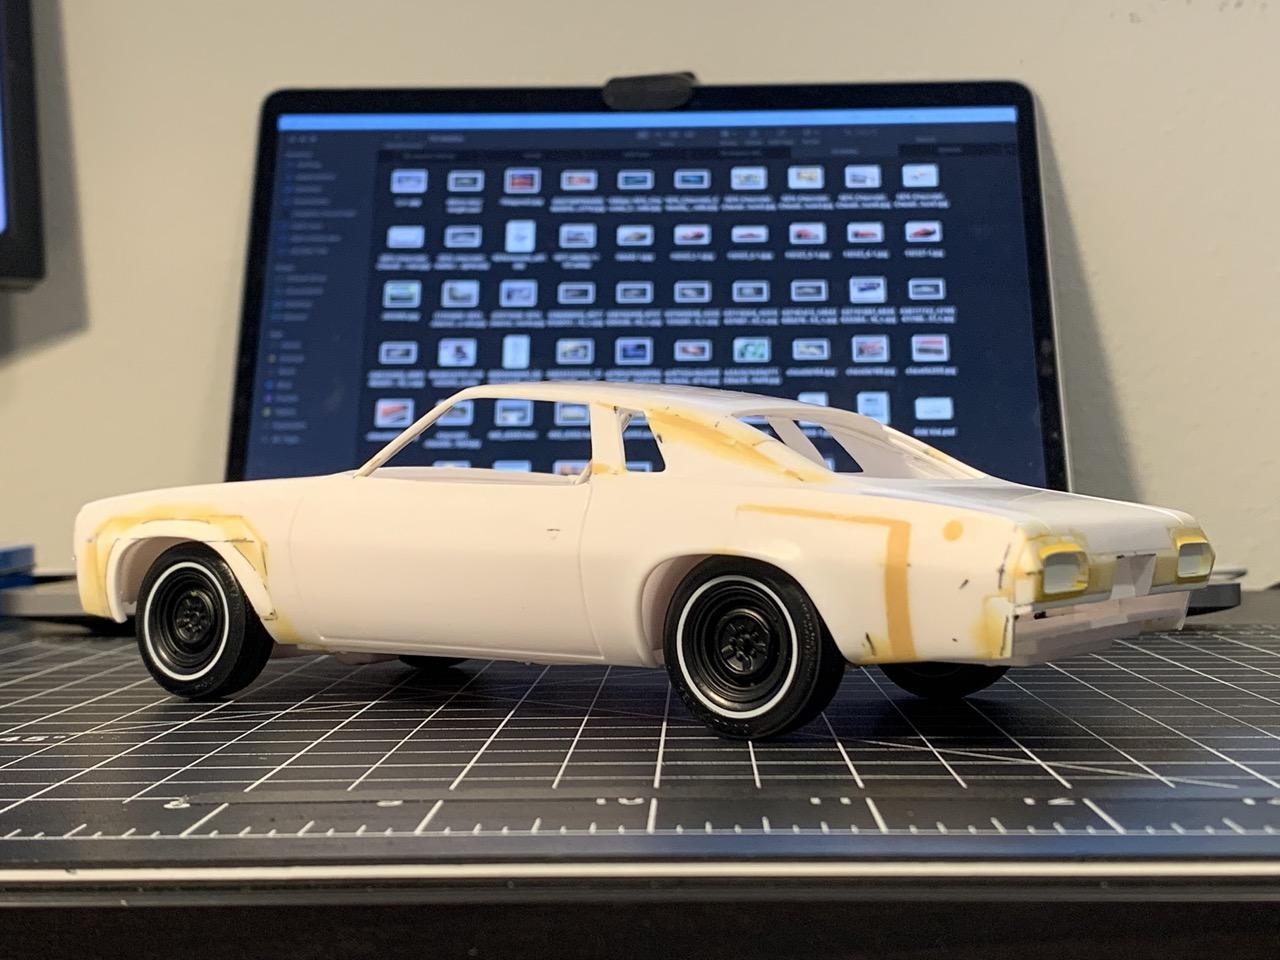
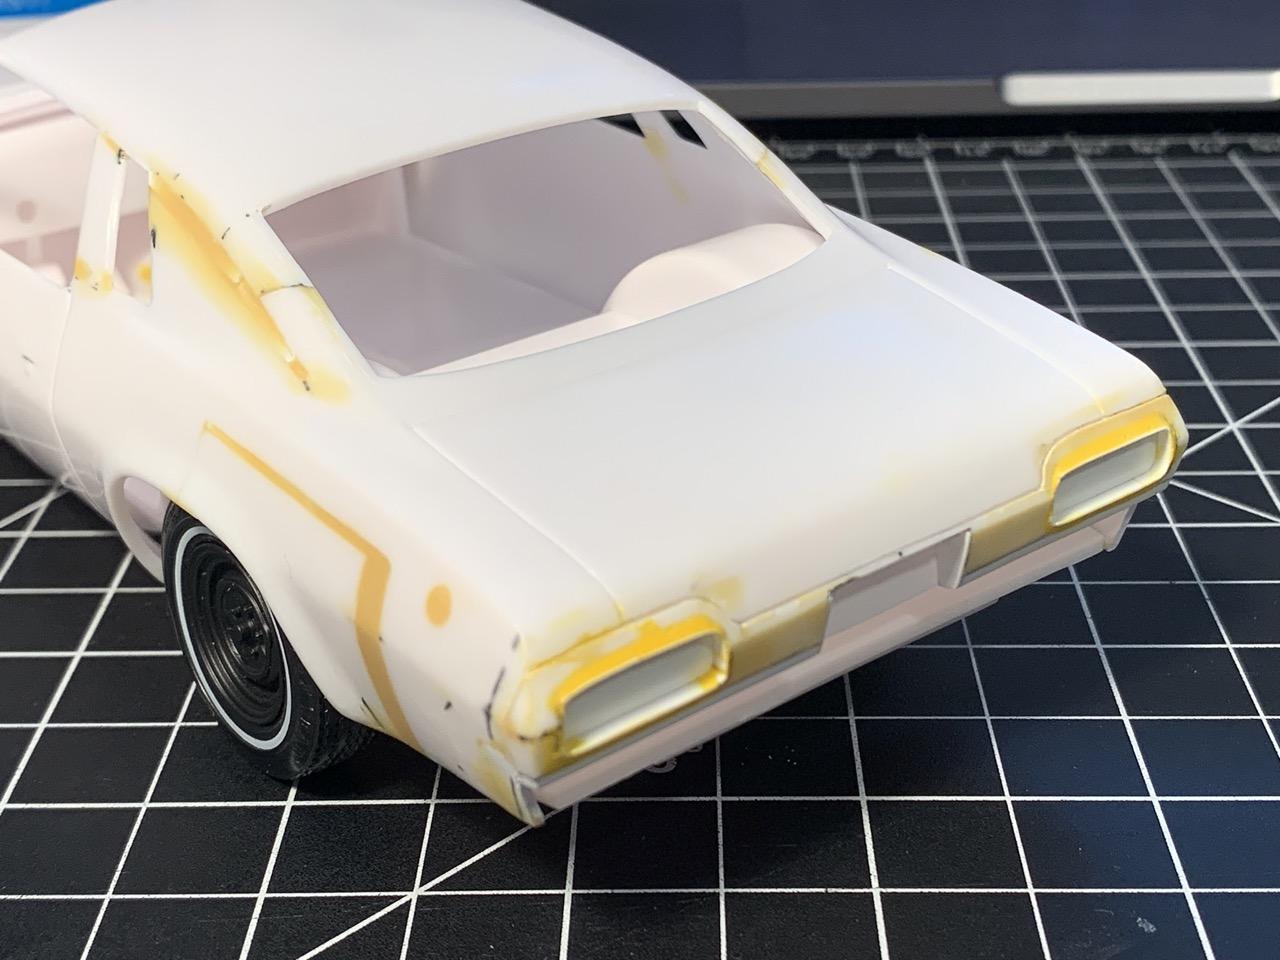
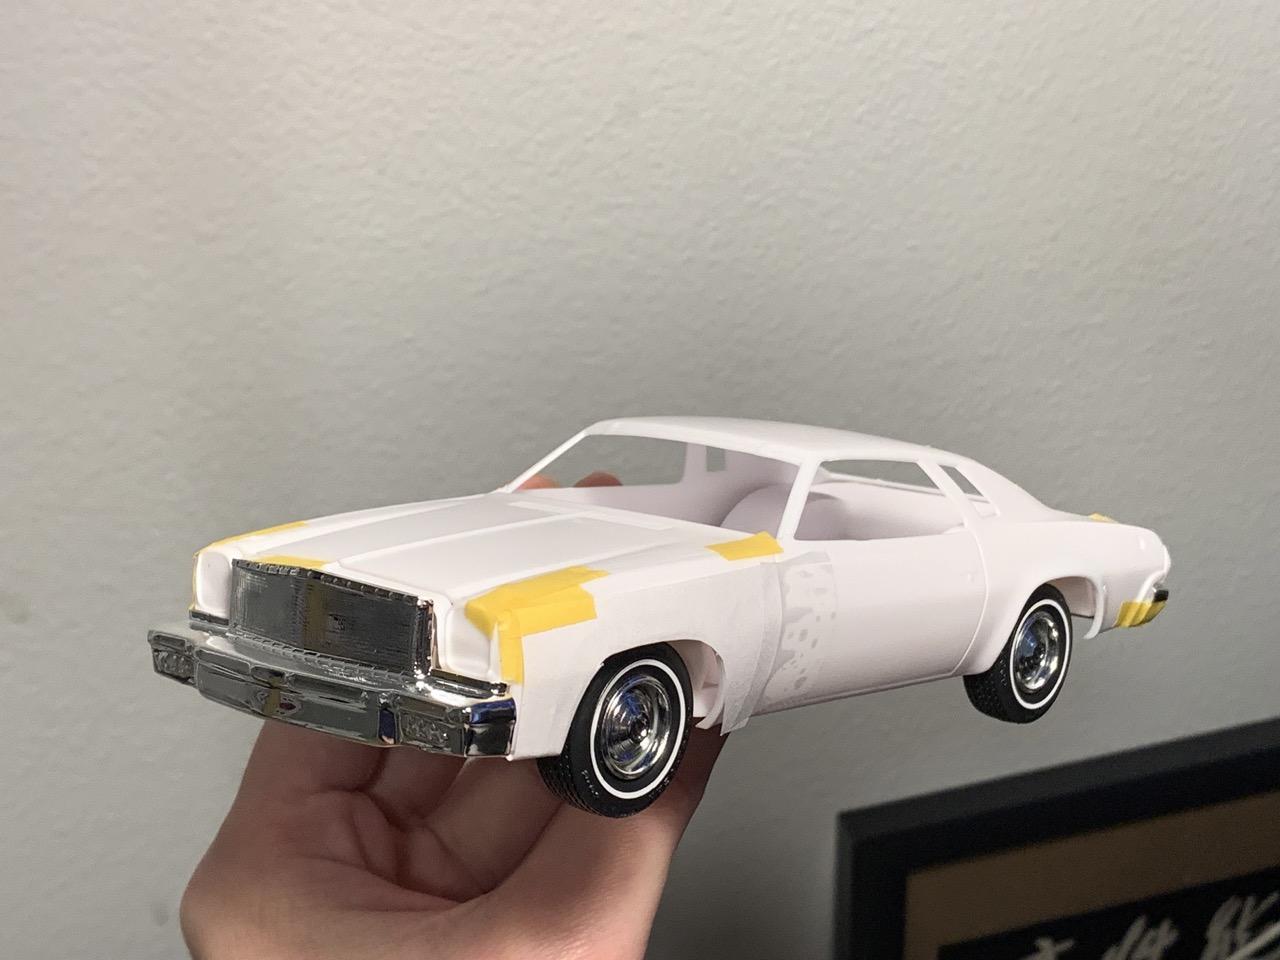
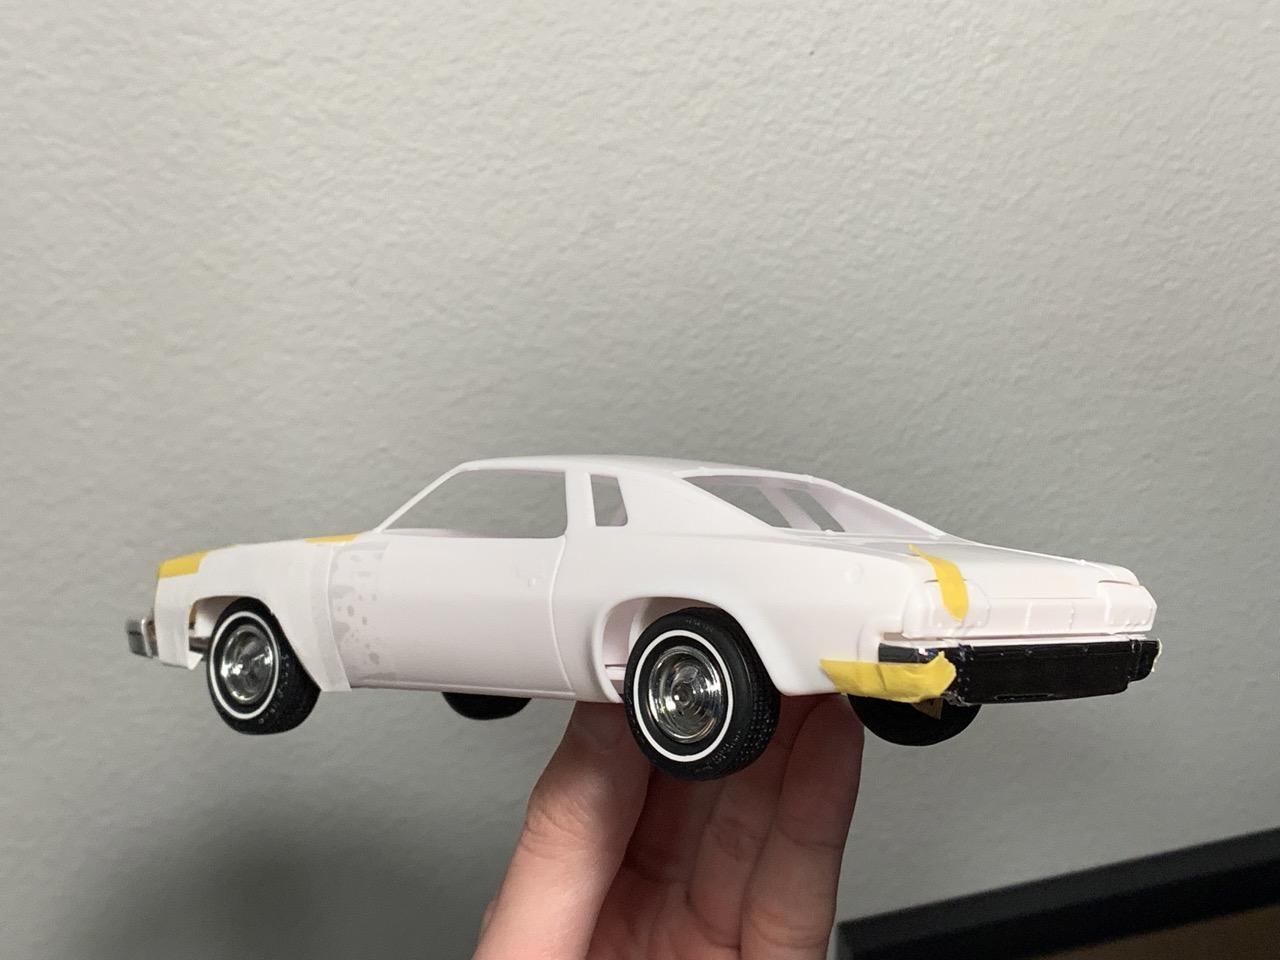
Main modifications: Increased roof height and moved backward, increased length of A pillar Shortened rear wheel opening, copied shape as a resin piece and glued to replace front wheel opening Scratch-build front grille and taillights area Resin copied headlights from Johan Cutlass Clear orange and red acrylic sheet to mimic side signals with foil underneath Door handle copied from '76 Caprice with foil and super glue on the back More bodywork process can be seen here Starting point: AMT Lennie Pond Nascar
-
A mainstream 70s Malibu converted from AMT Lennie Pond Nascar
- 34 replies
-
- 18
-

-
Amazing build! Where did you get those hubcaps?
-
GMC Kodiak now available
Cosmo_Song replied to cargostar's topic in Truck Aftermarket / Resin / 3D Printed
Hi, I'm interested in this kit. The forum showed "cargostar cannot receive messages." Could you send me a message? Thanks -
Amazing work and details! Where did you source the side mirrors? Were they 3D printed?
-
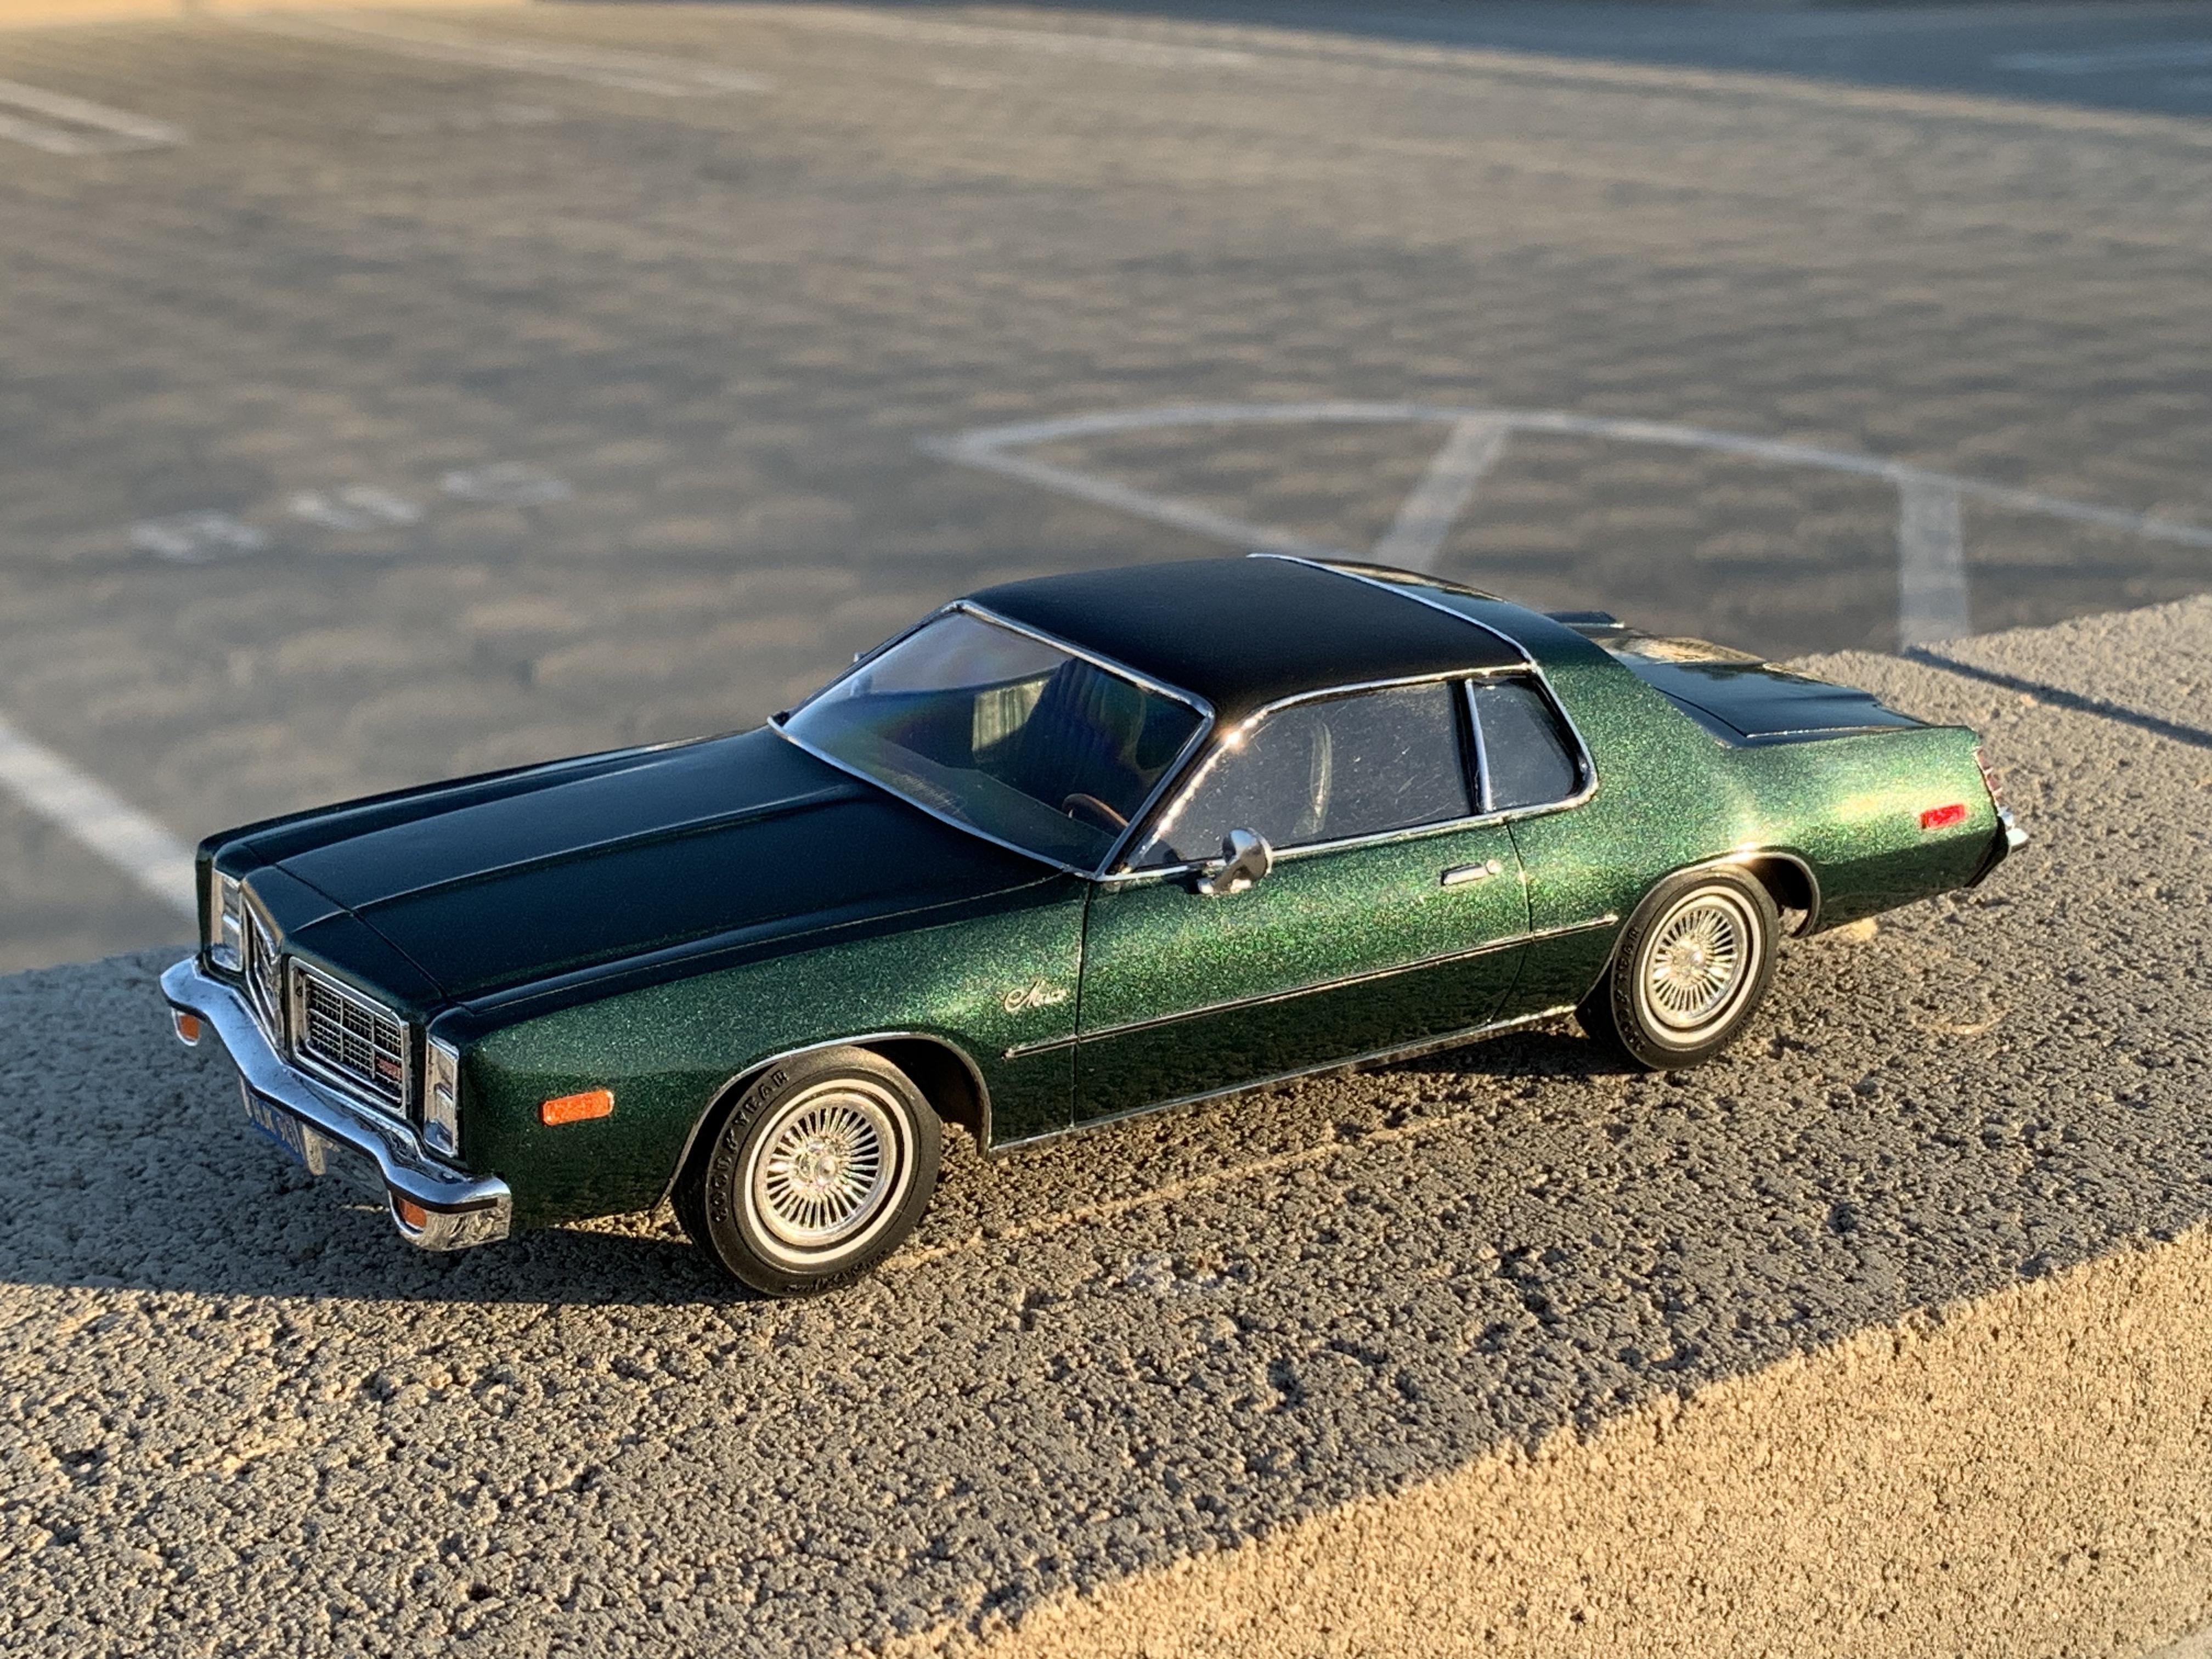
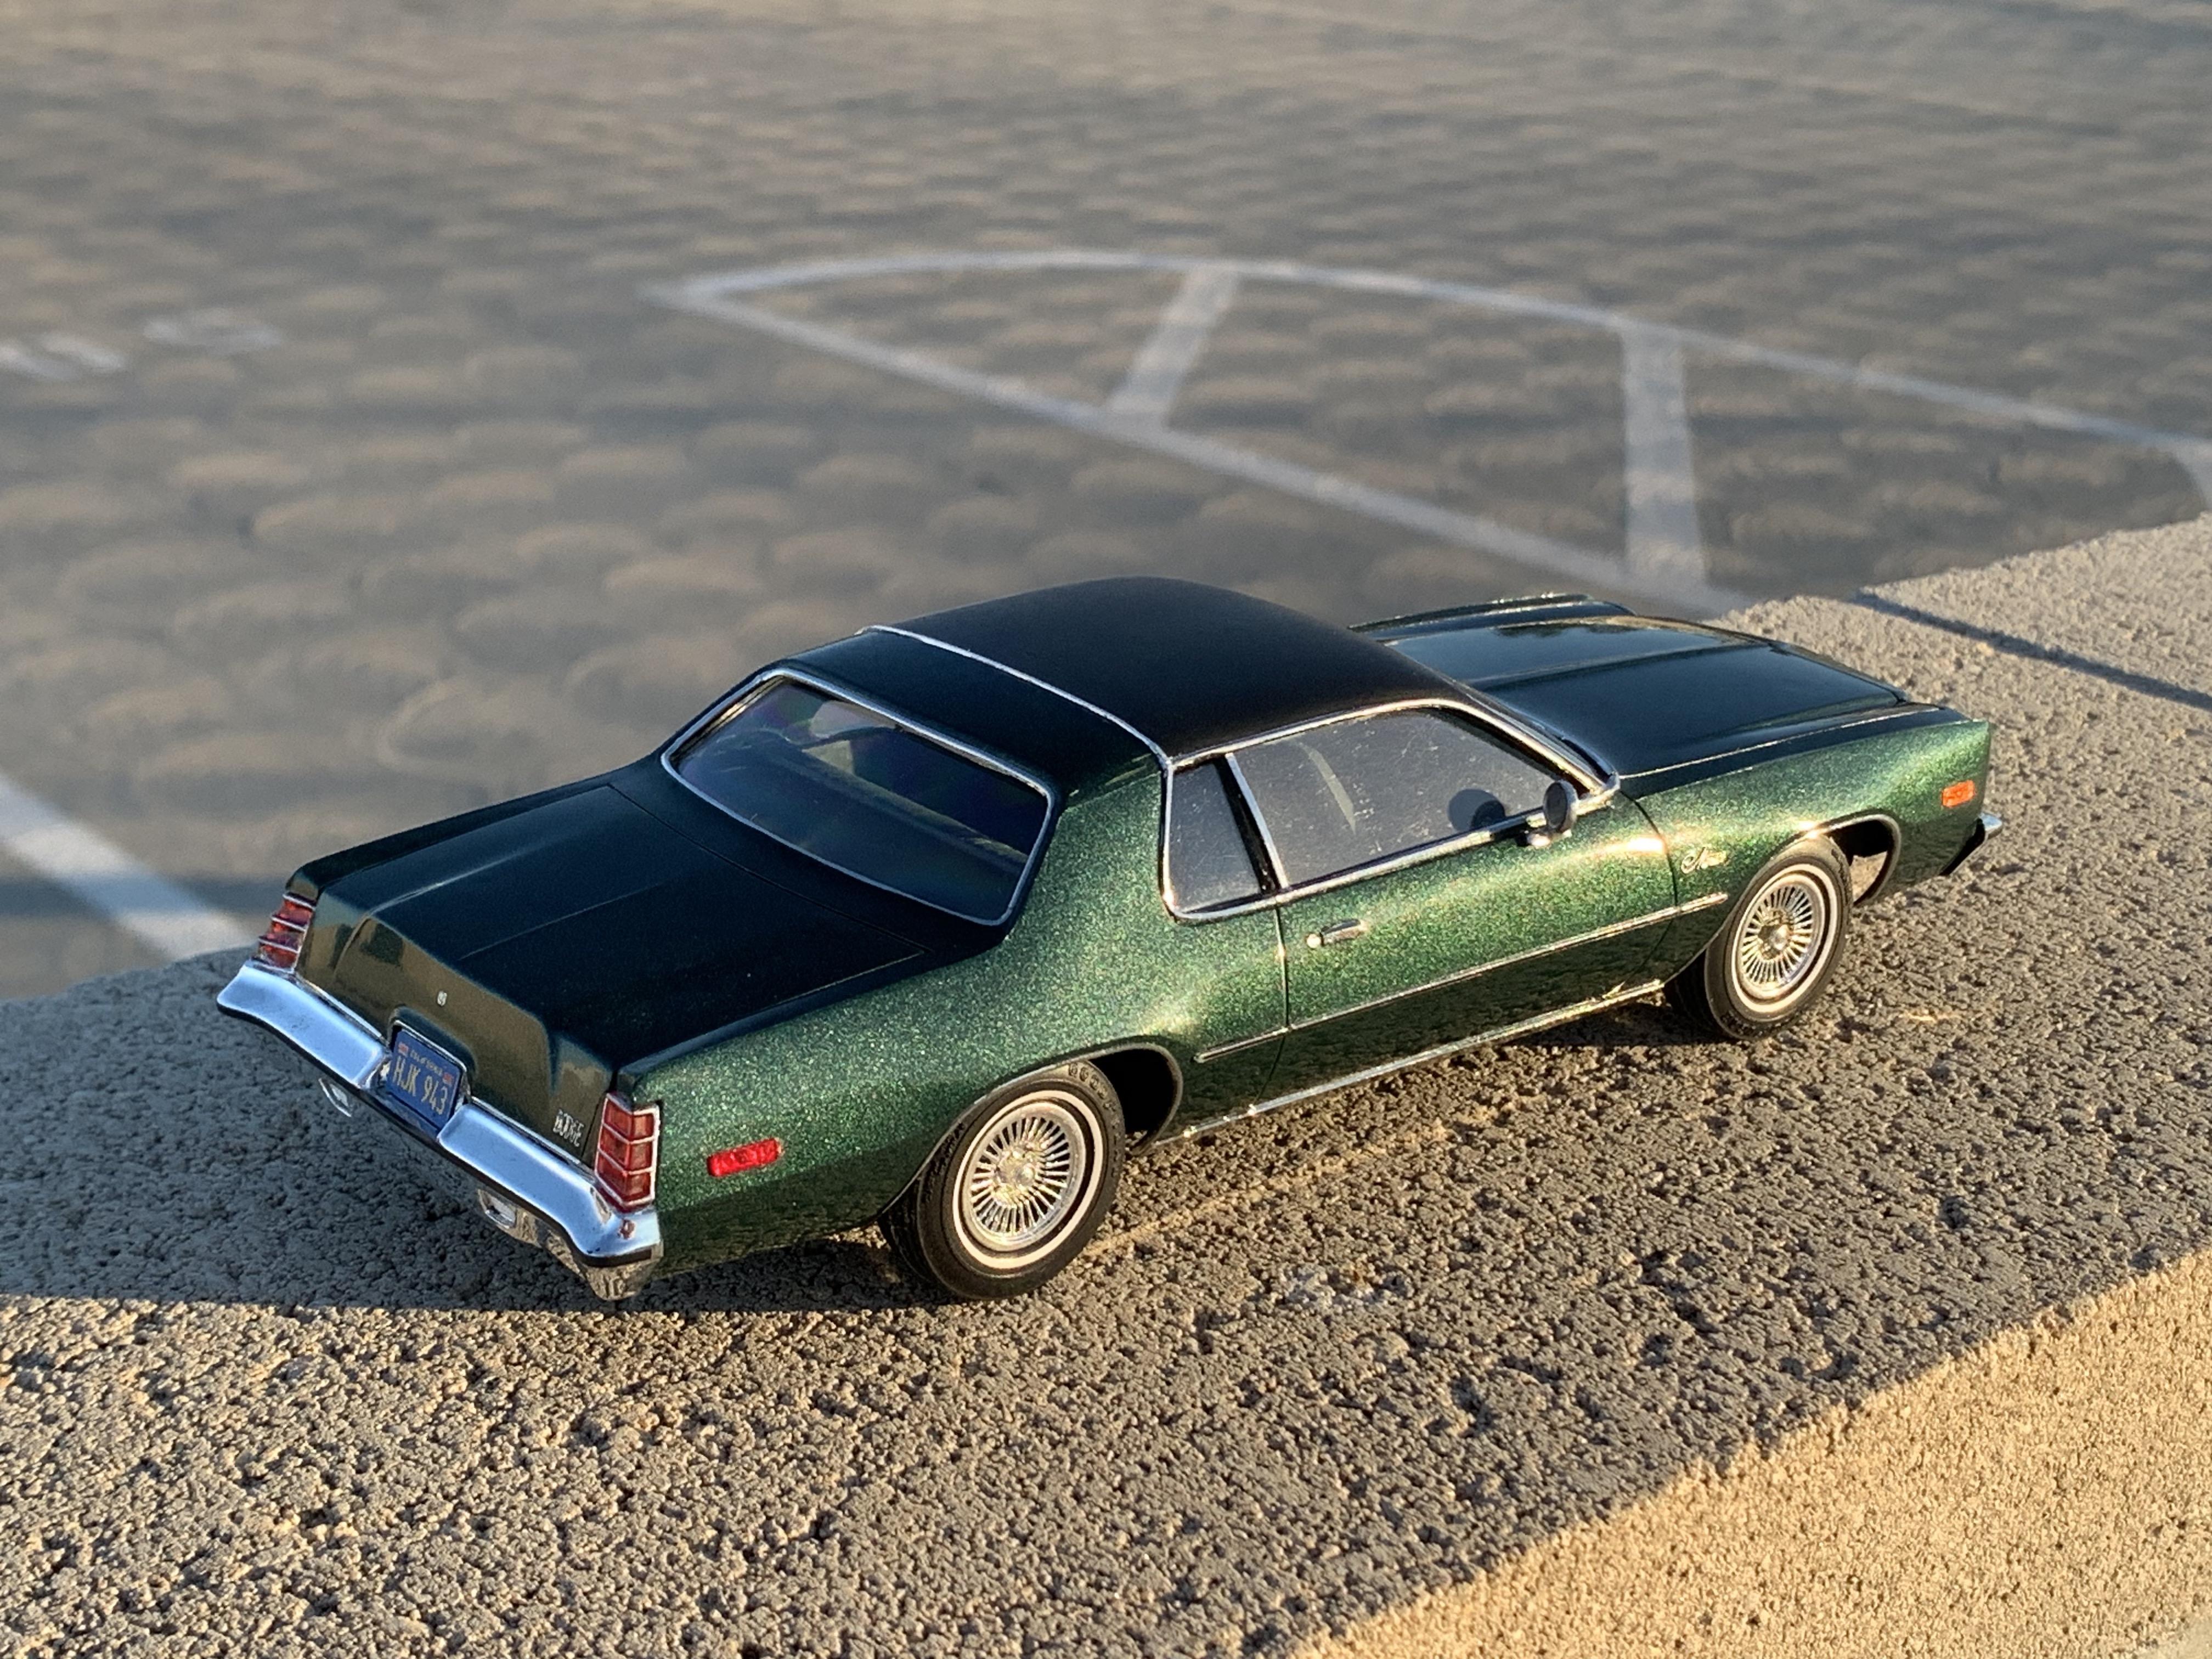
Thank you! It was really some small areas of change but I think it's essential to make it look closer to an actual vehicle from the 70s. The bumper rubber was simply a vinyl tape strip, and I foiled a styrene strip and added a super think vinyl tape stripe to mimic the side trim.
-
Thank you! Yes I really like these promo cars from the 70s but side mirrors were not common to be included until kits from the 80s. I'm so glad I was able to cast the mirrors from Greenlight's 1/24 Monaco cop car.
-
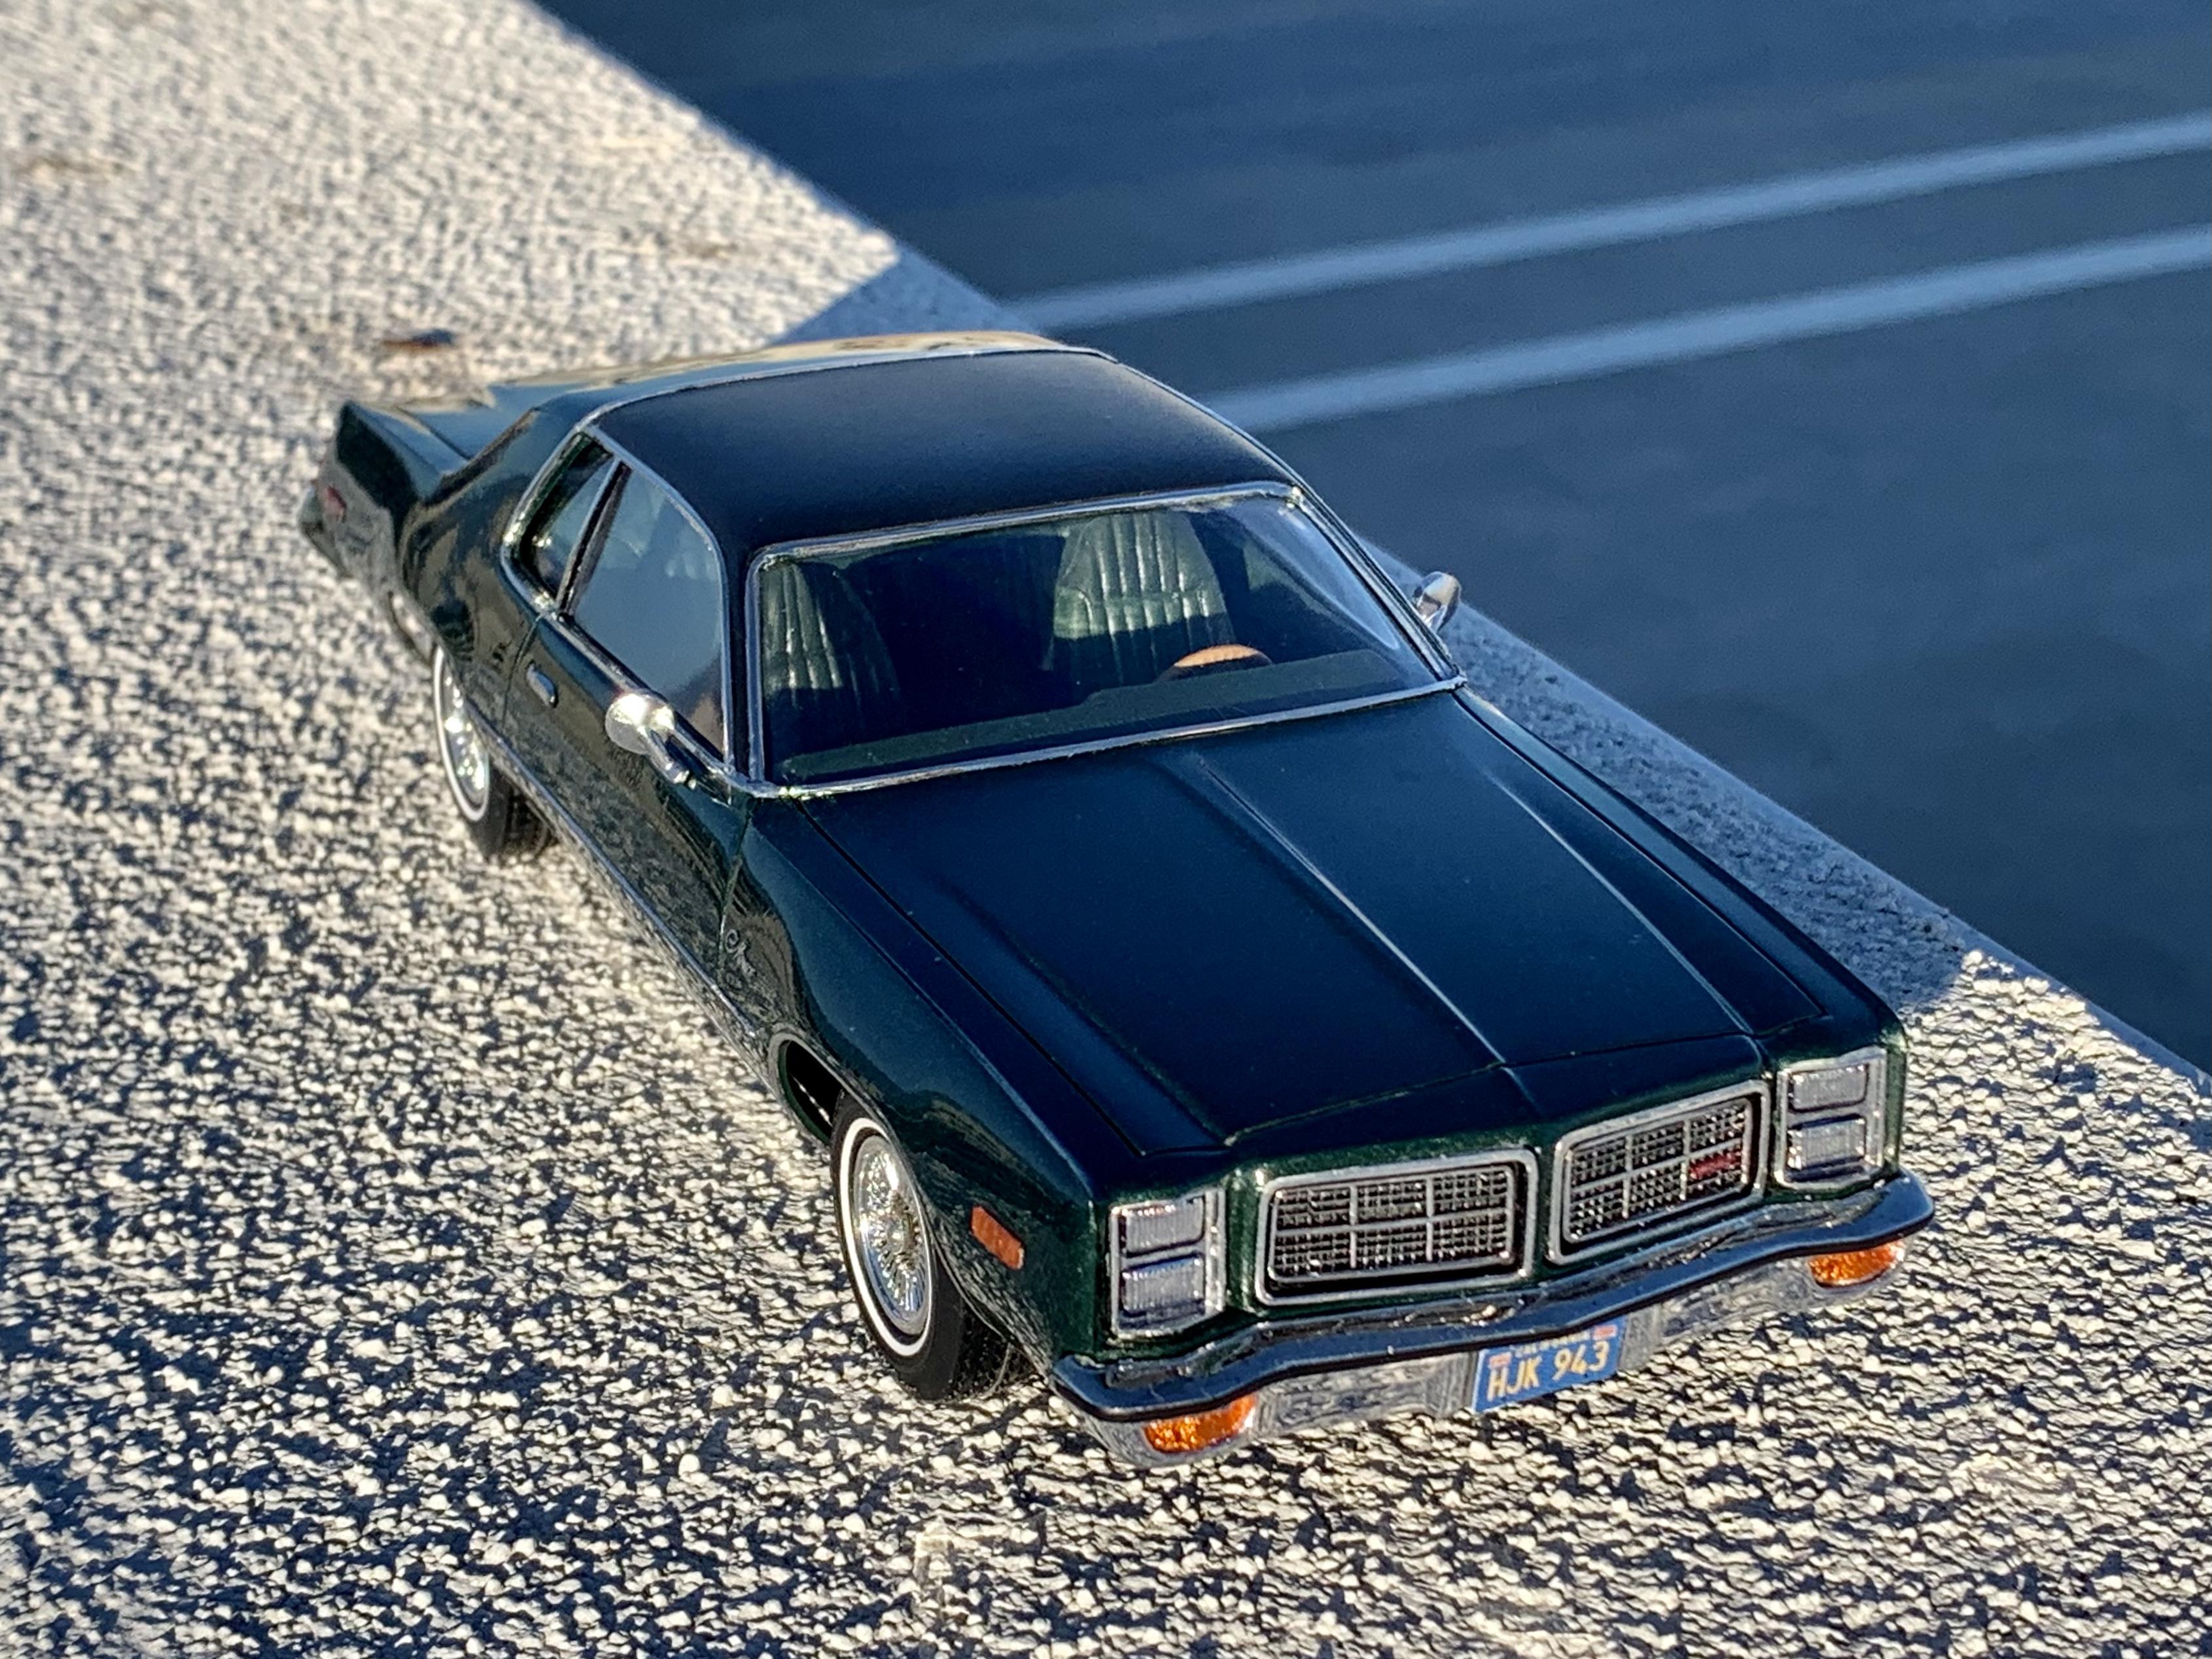
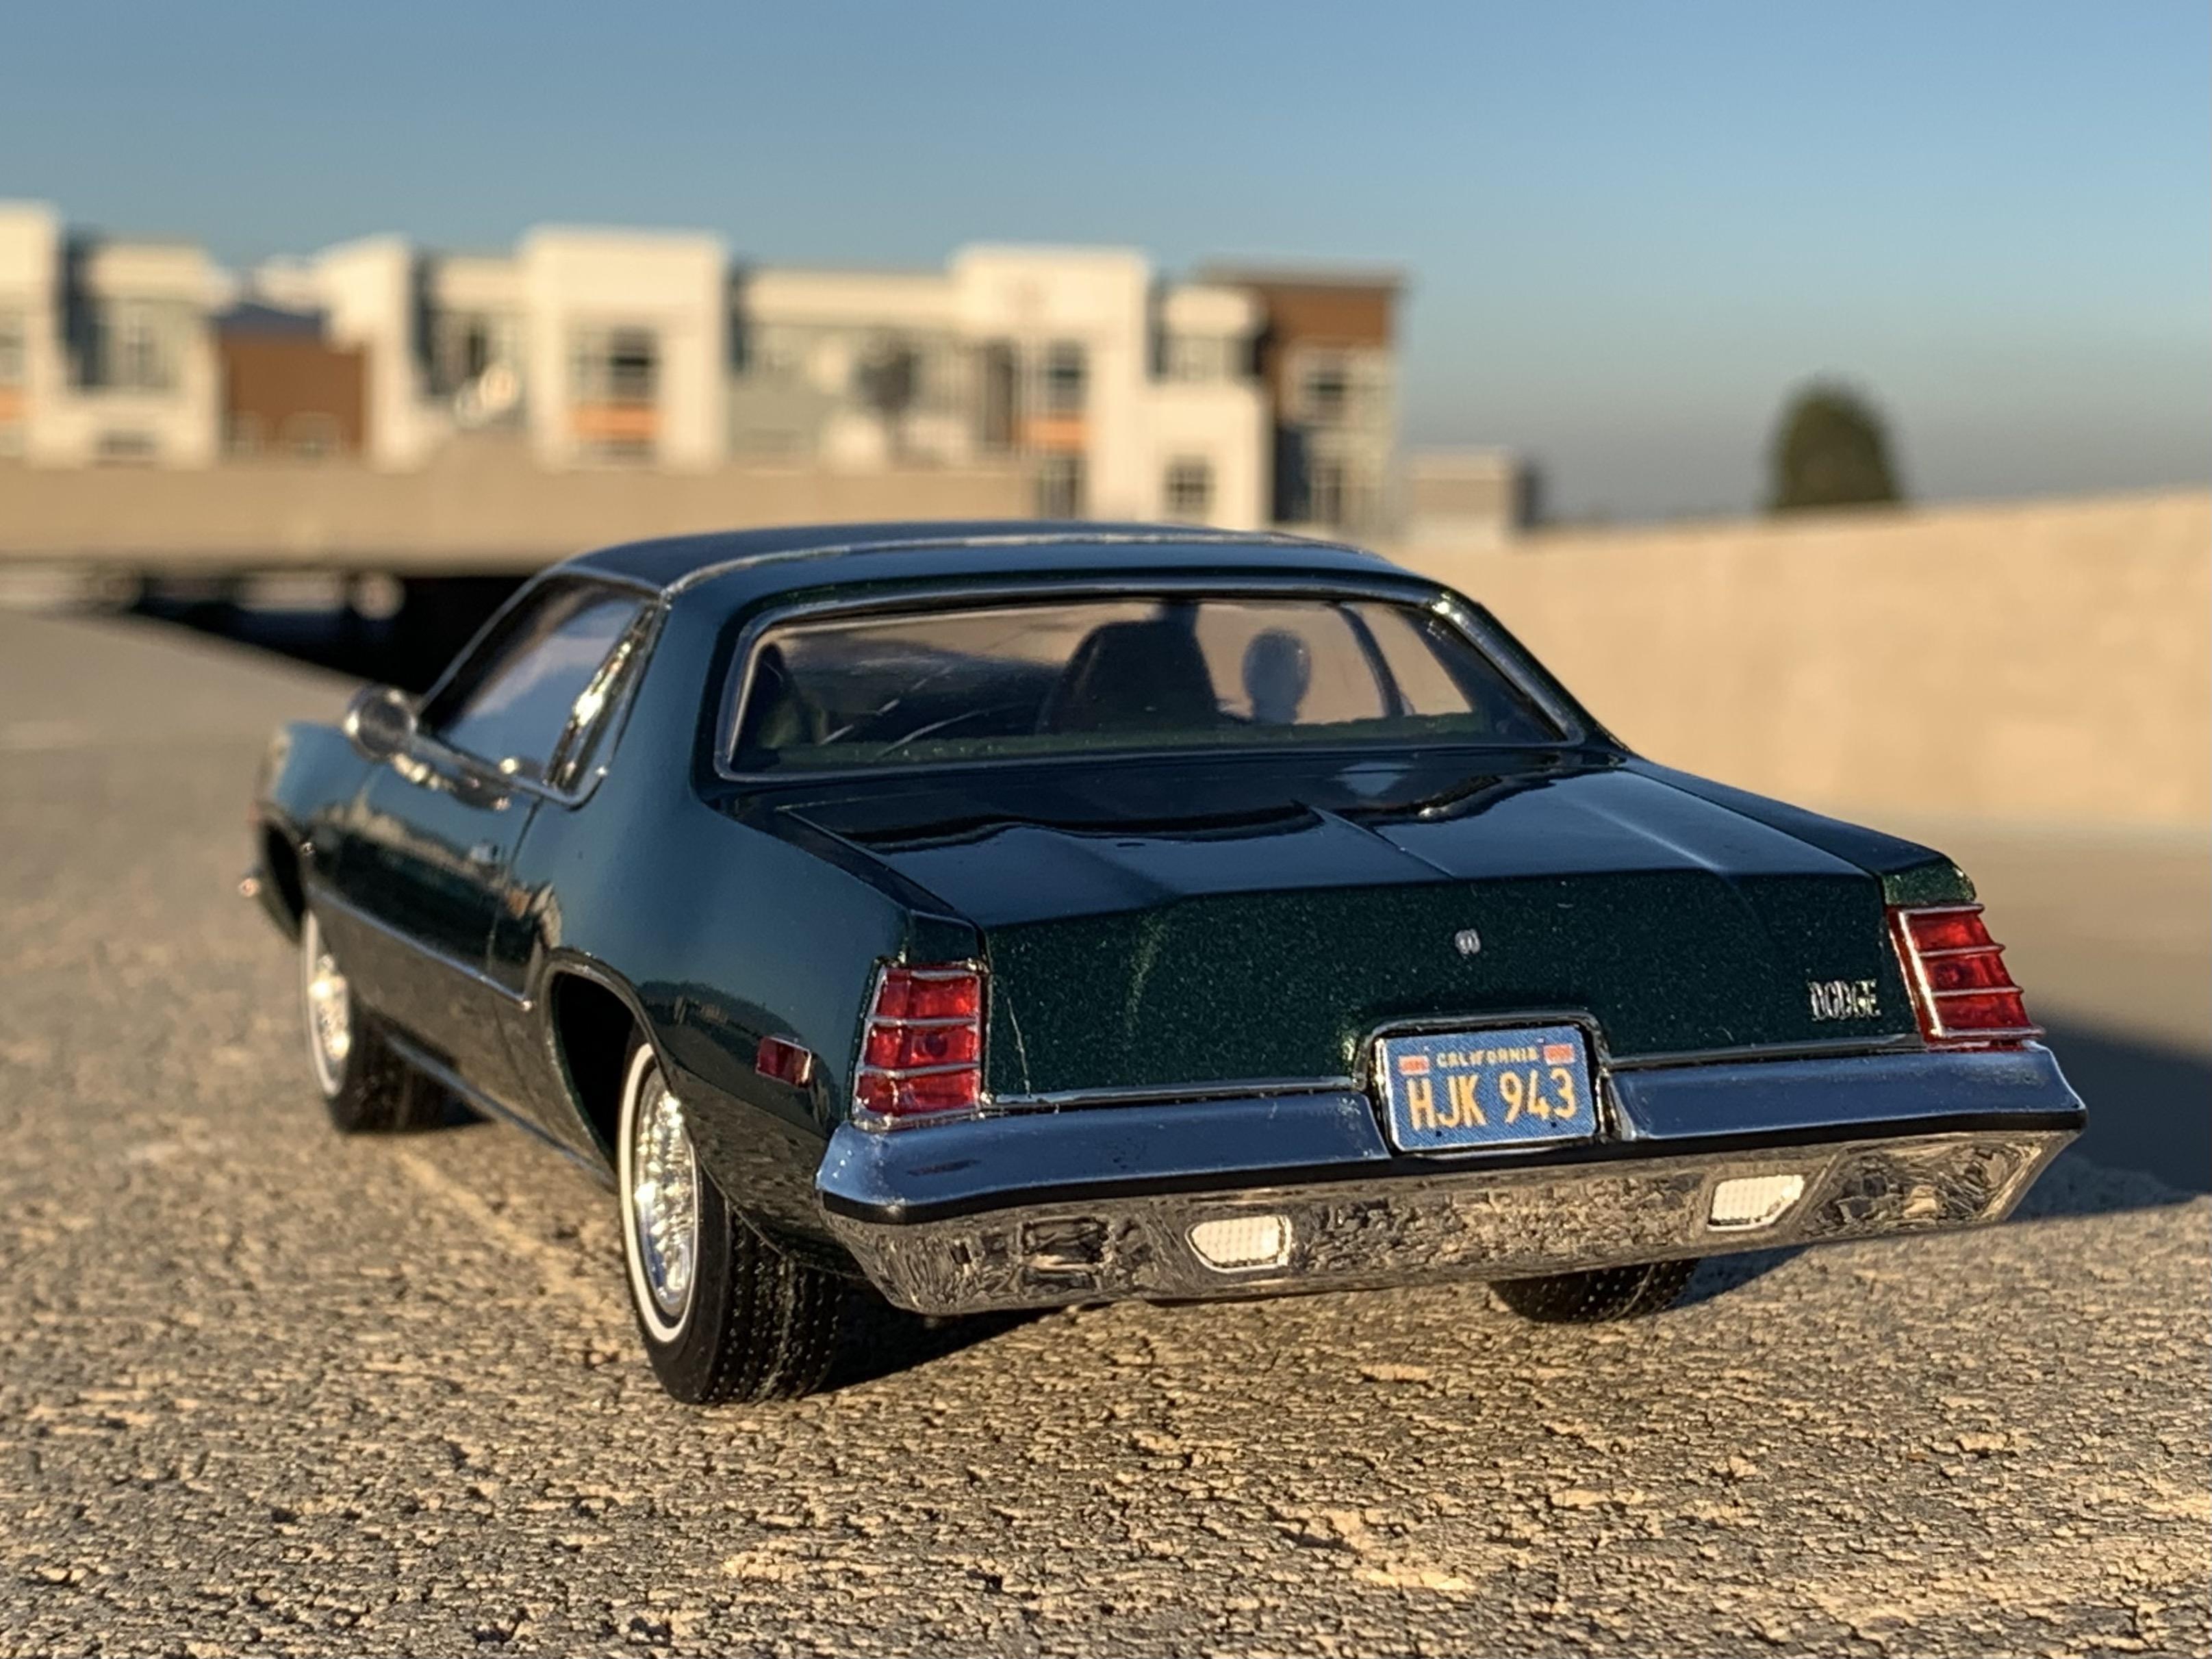
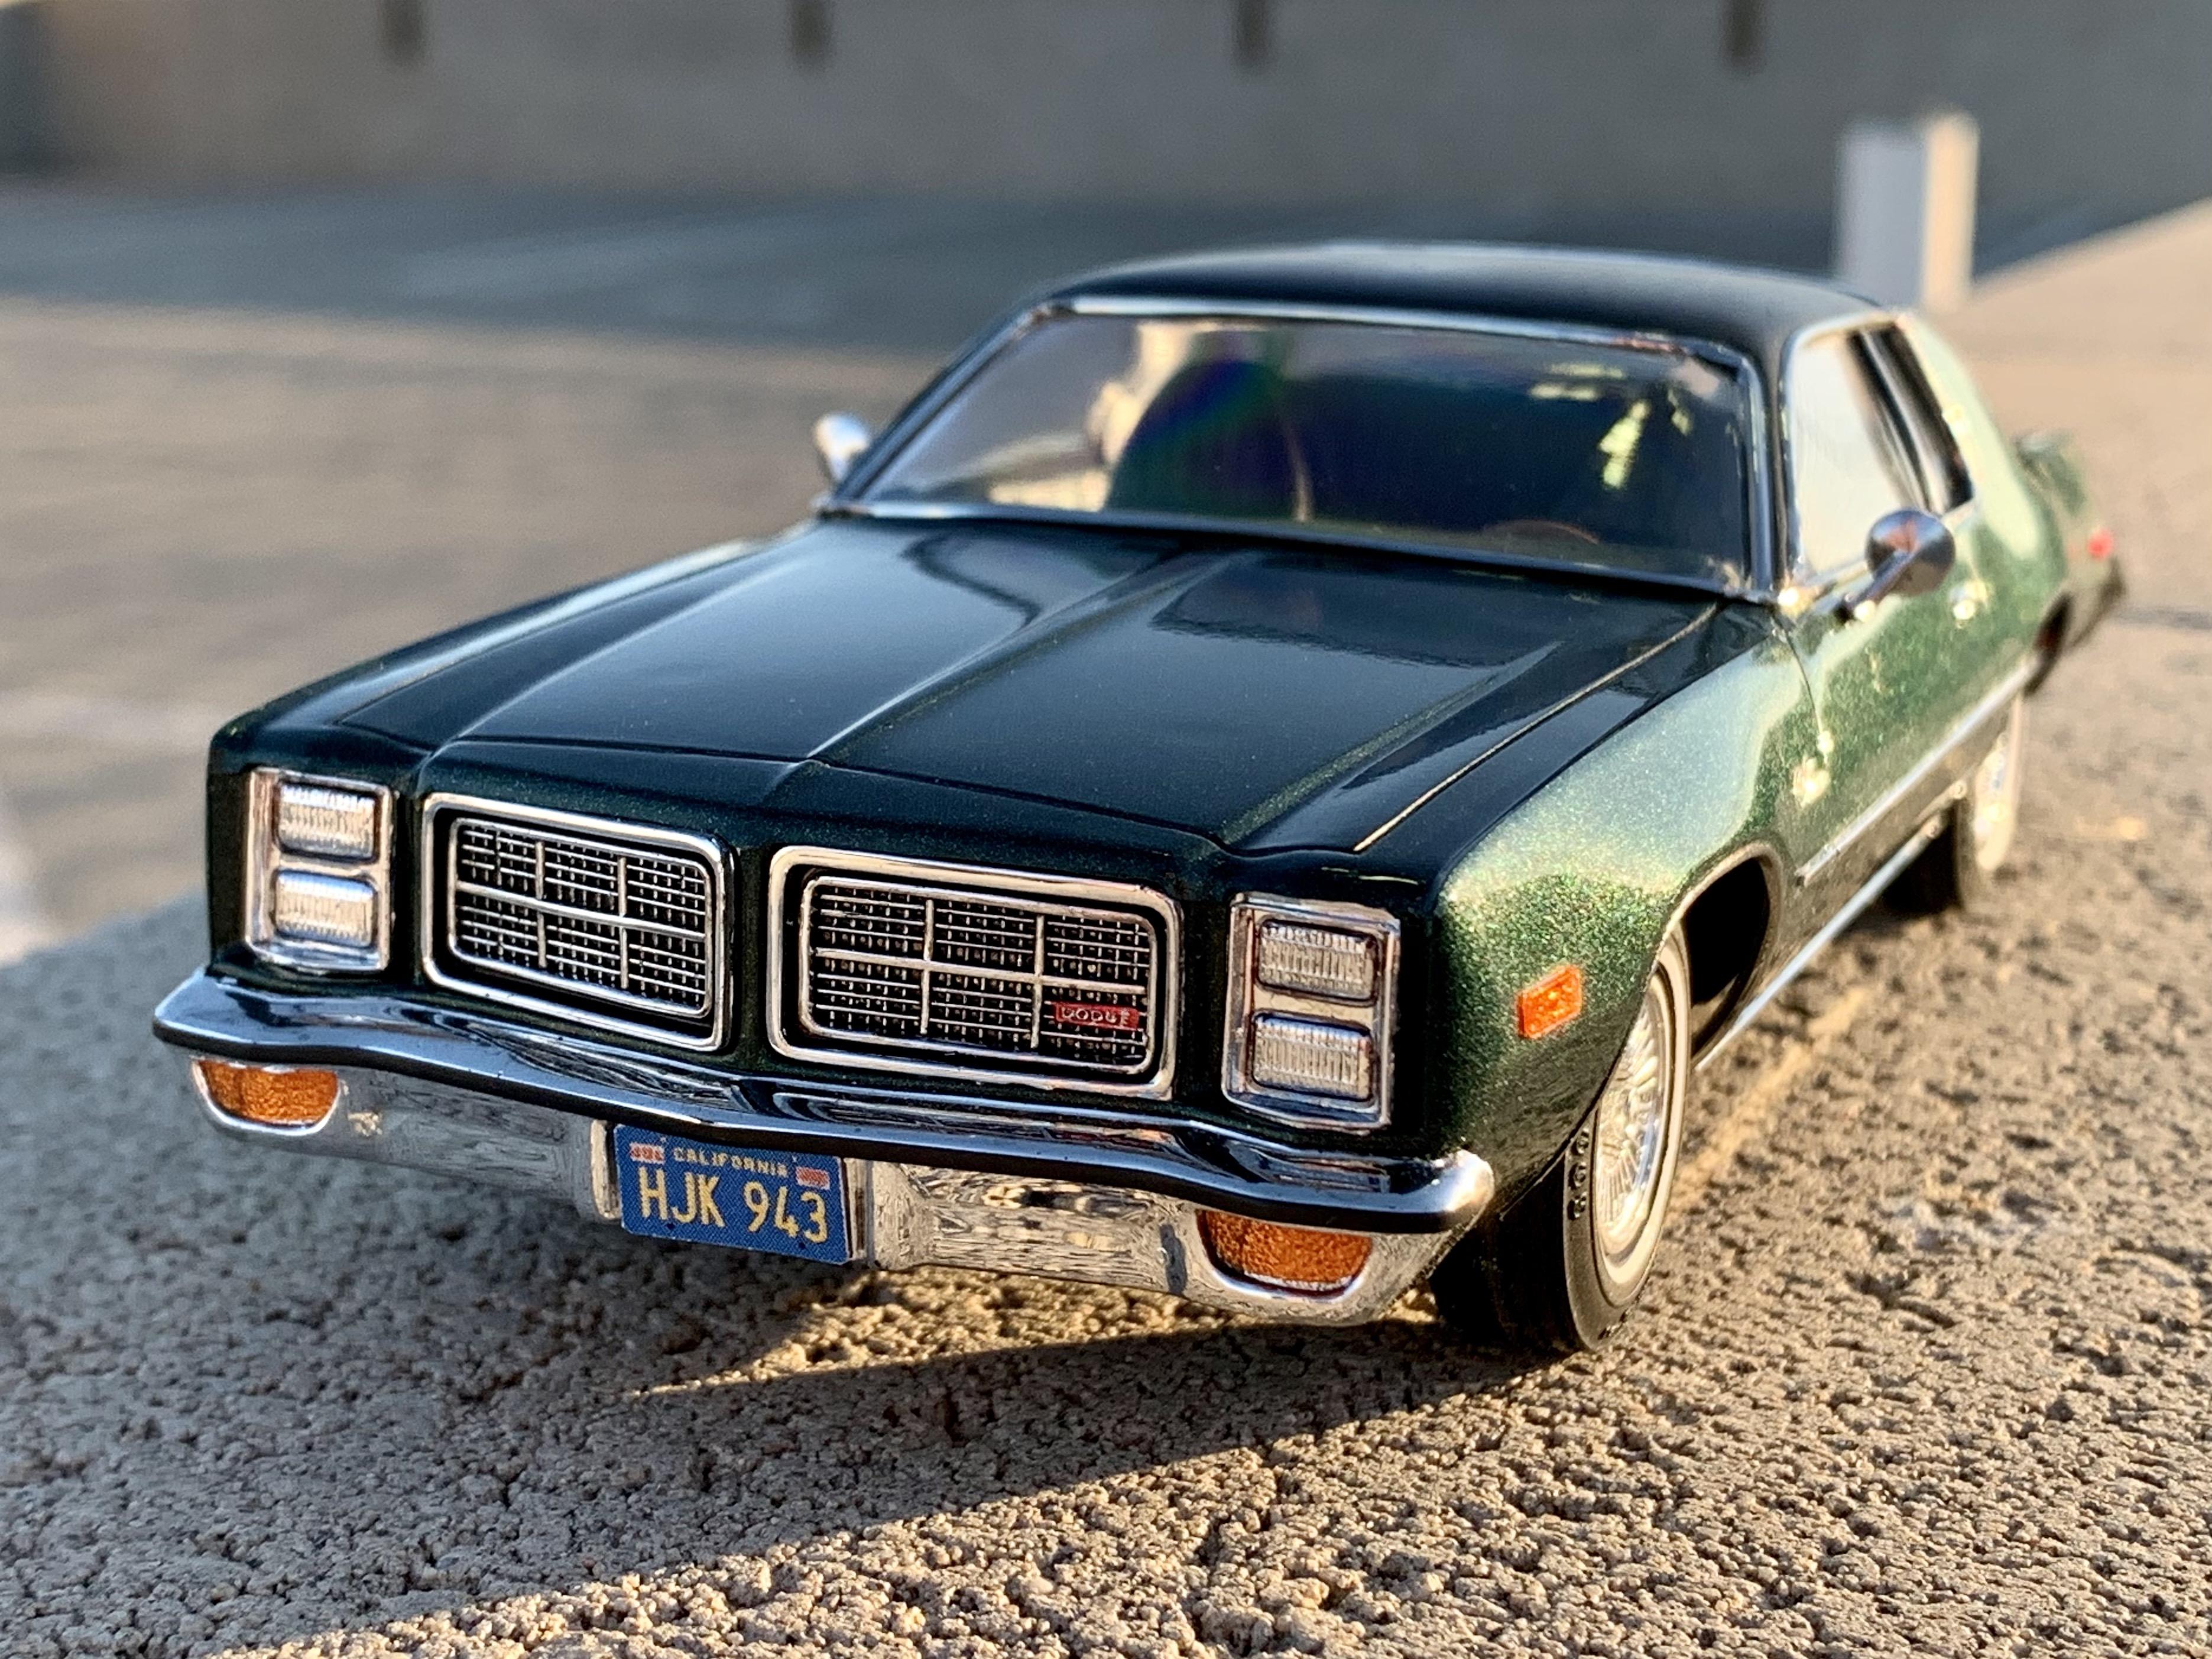
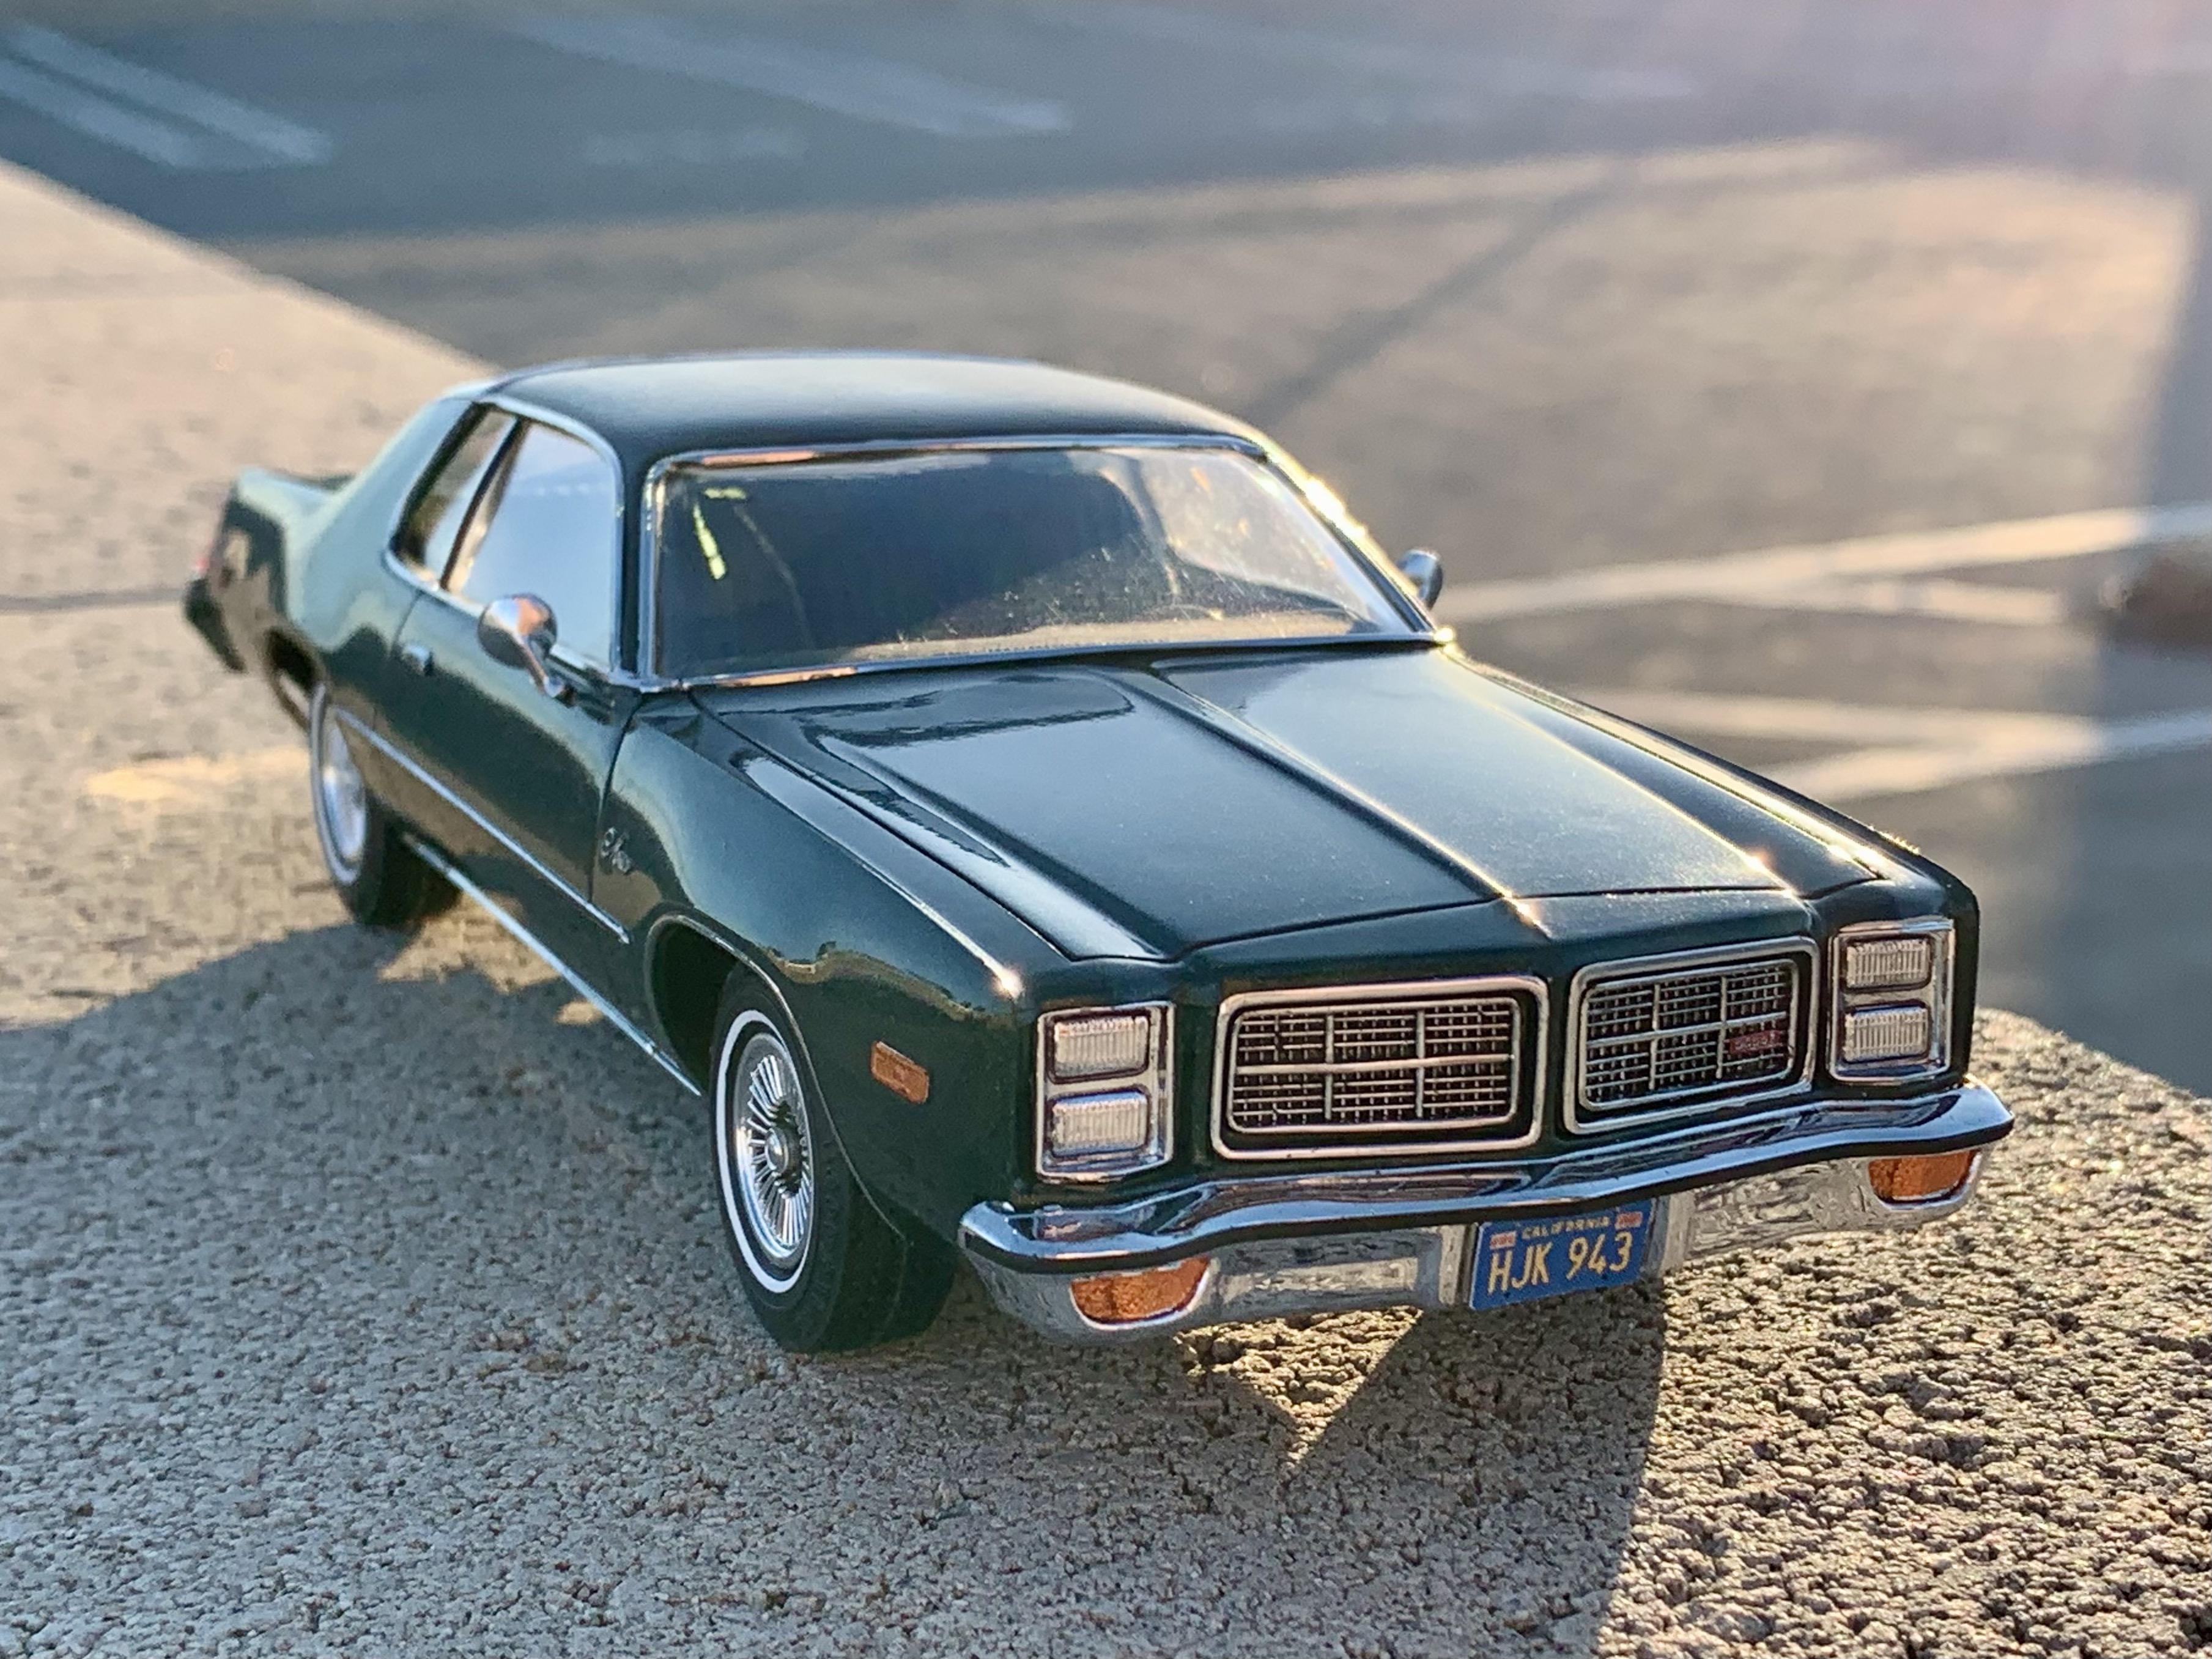
Started with a MPC promo from eBay, I added the vinyl top, side trim, transparent signal lights with acrylic sheet and some chrome details. Also casted the side mirrors from a 1/24 Greenlight Monaco cop car diecast. ------------------------------------------------------------------------------------------------
- 26 replies
-
- 15
-
-
Super cool build! Glad to see we are doing very different approach to a Gen3 Chevelle haha! Mine would be a mainstream grandma car
-
1974 Chevy Malibu (Stock converted from AMT Lennie Pond Nascar)
Cosmo_Song replied to Cosmo_Song's topic in WIP: Model Cars
Thank you! I'm planning to do a mainstream Lumina Classic
-
1974 Chevy Malibu (Stock converted from AMT Lennie Pond Nascar)
Cosmo_Song replied to Cosmo_Song's topic in WIP: Model Cars
In the meantime I'm looking for an interior that I can use, any suggestion for the bench seat and dashboard options?
-
1974 Chevy Malibu (Stock converted from AMT Lennie Pond Nascar)
Cosmo_Song replied to Cosmo_Song's topic in WIP: Model Cars
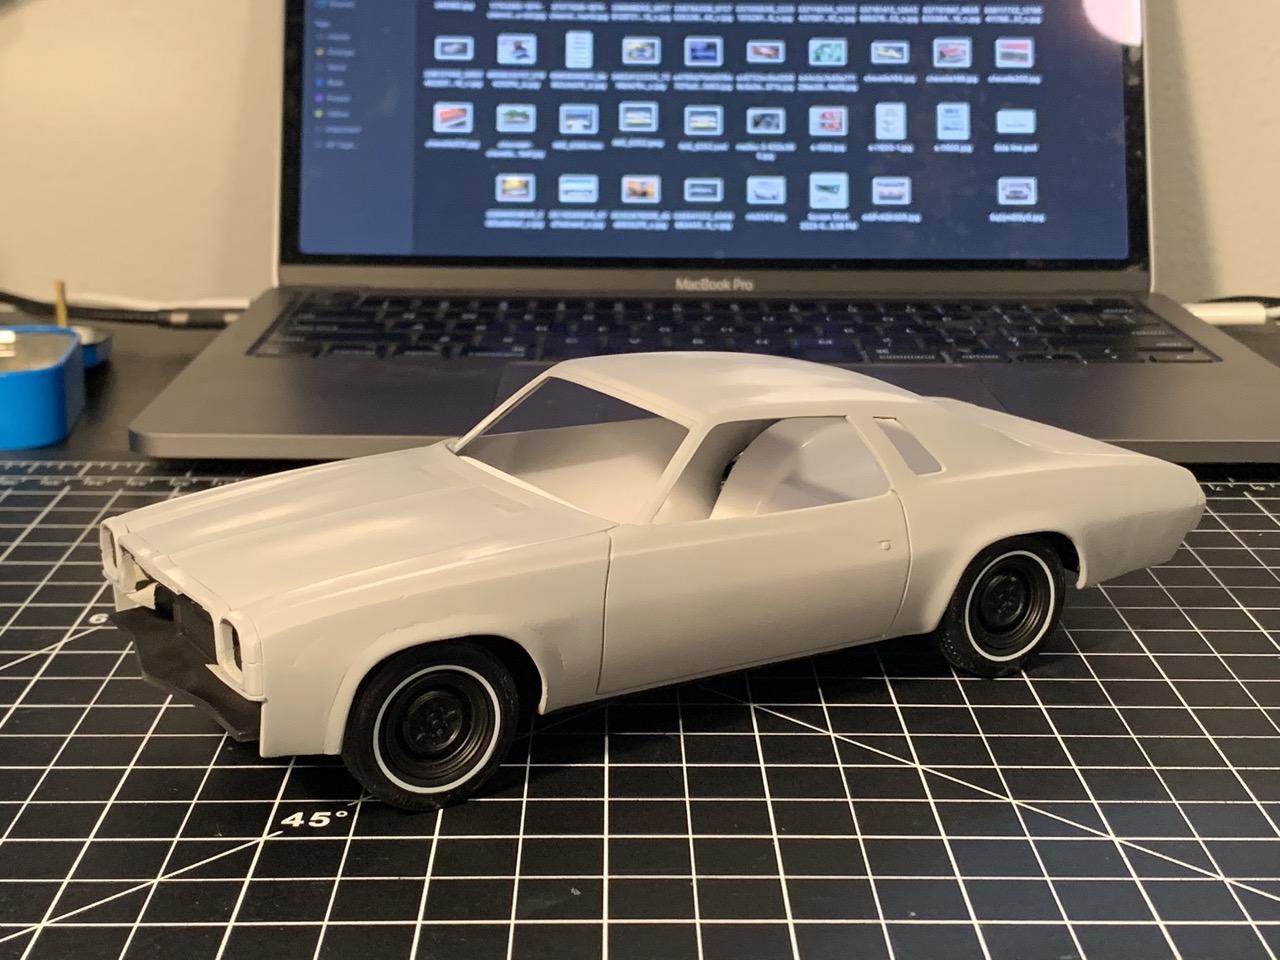
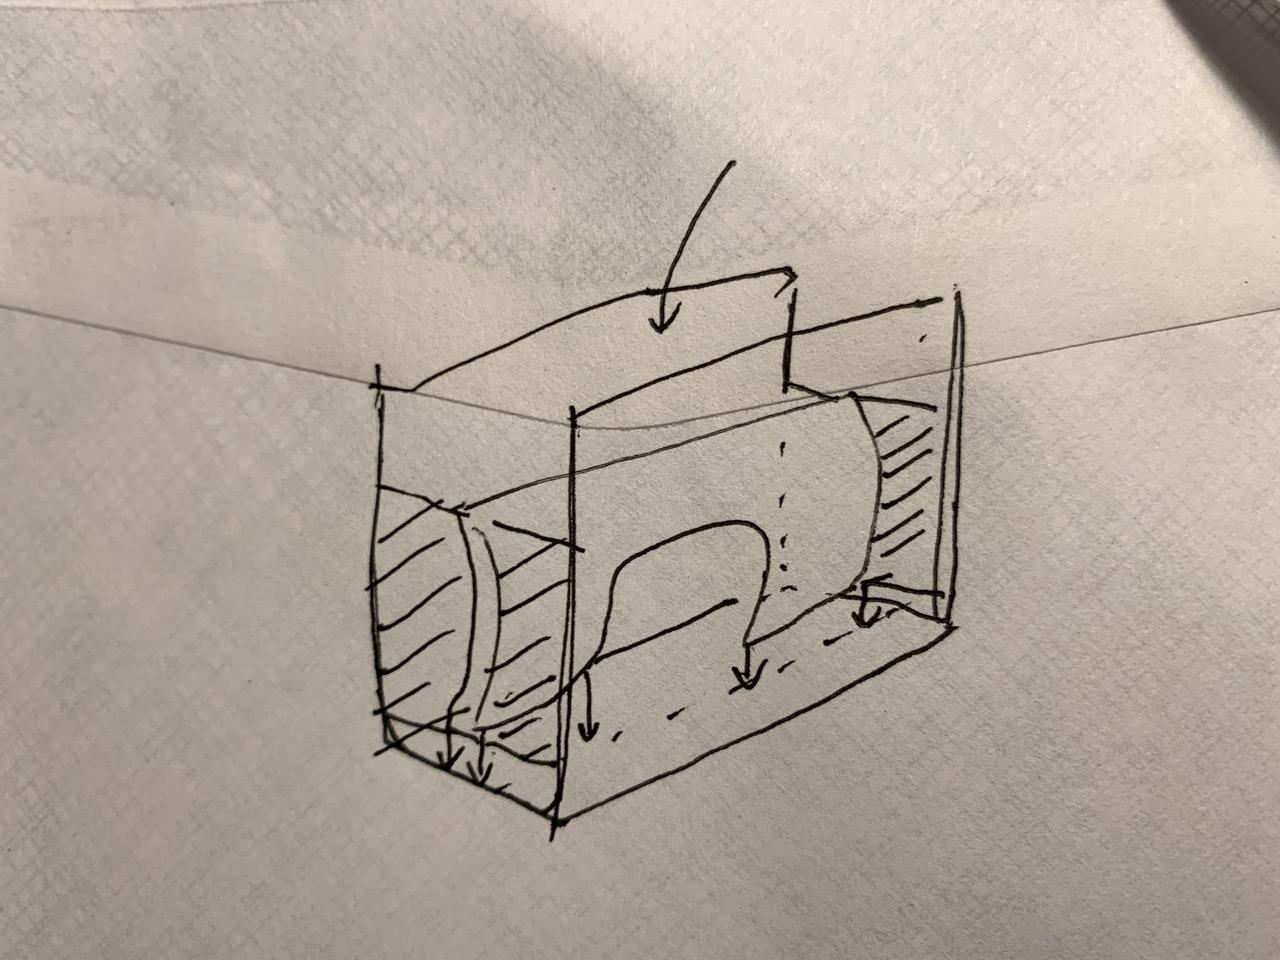
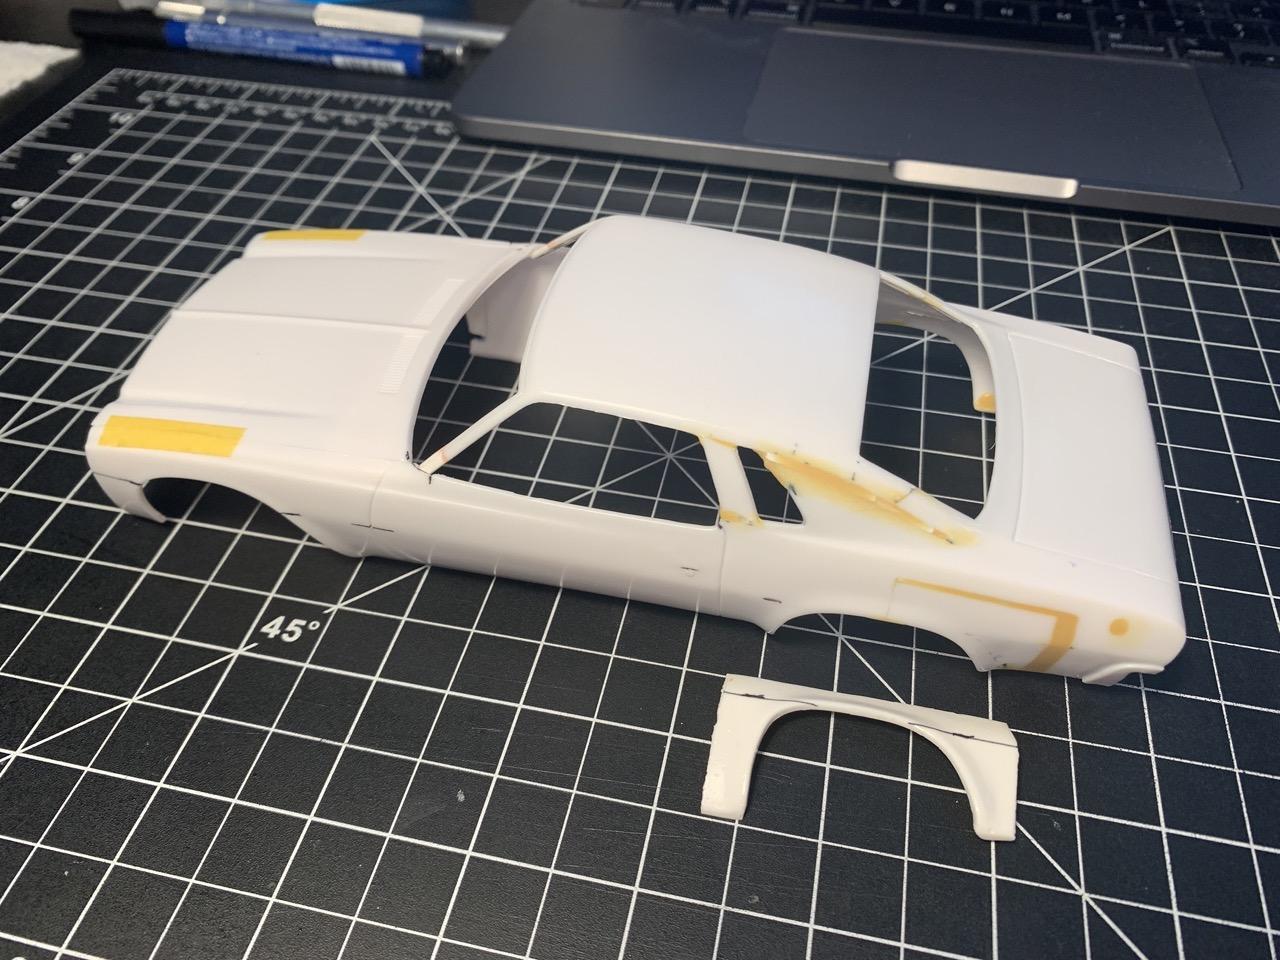
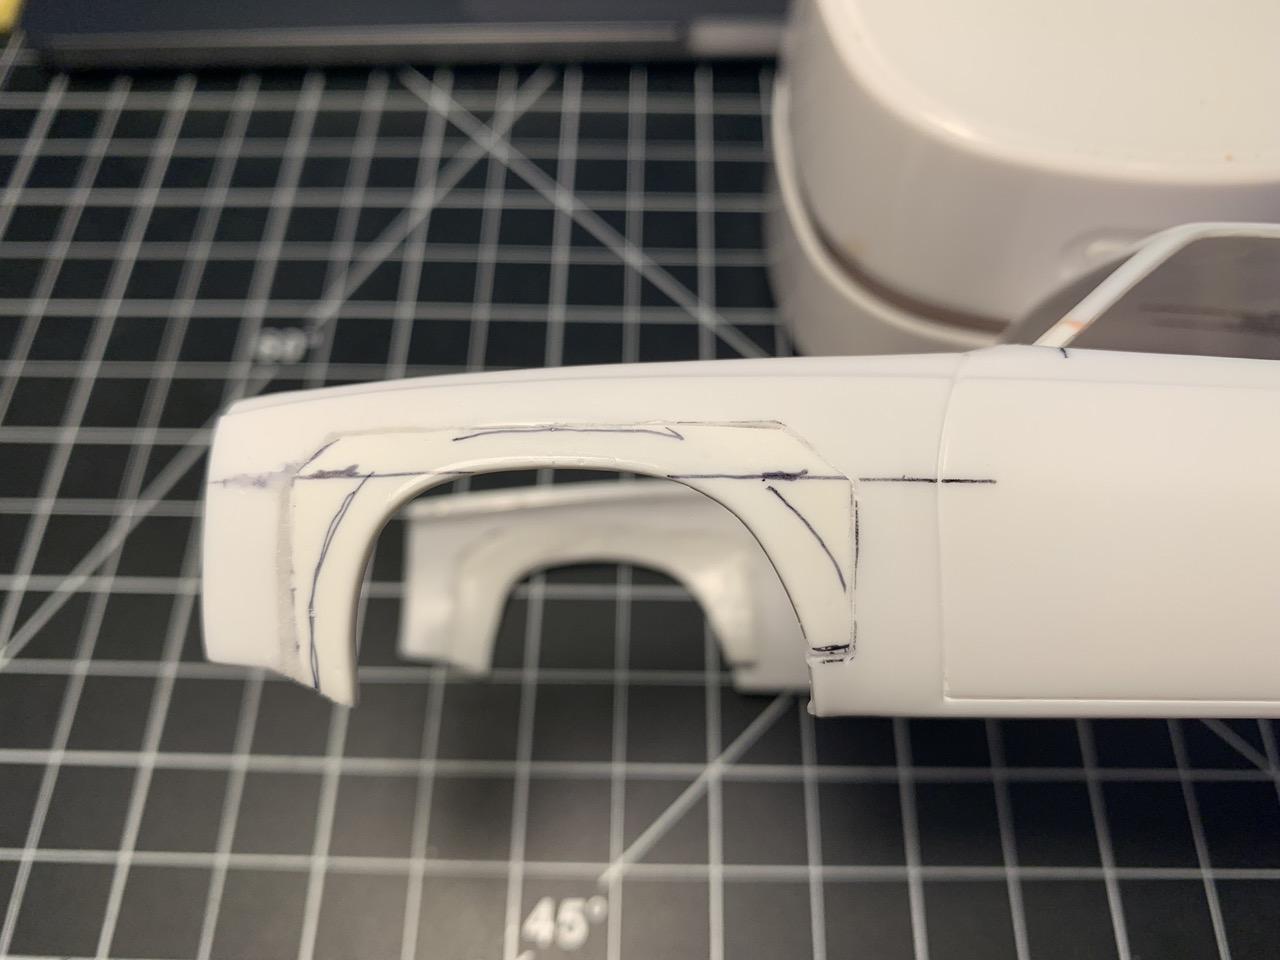
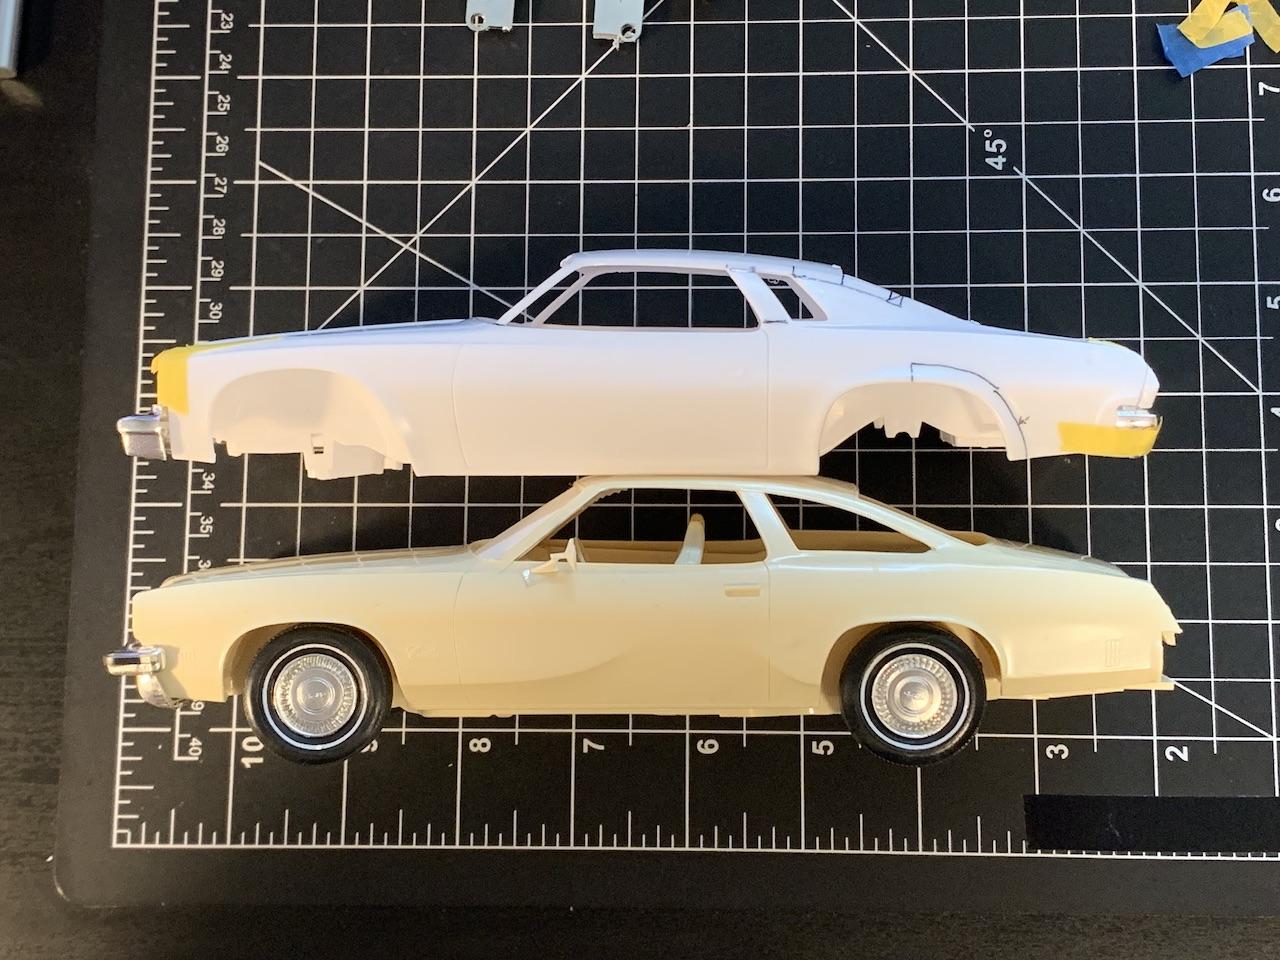
The rear wheel opening was also a little too long comparing to my reference photos, so I started with cutting from the middle of the rear wheel opening and moved it forward about 2mm. In the meantime I cut the A pillar from the bottom and made cut on the B pillar to adjust the roof angles, I moved the entire roof backward for 2mm and extended the A pillars. I could technically cut the fenders from another AMT Malibu body but I decided to try something different for replicating the body panels without damaging an existing body. I built a box with cardboard to cover the inside and outside of the rear panel area that I wanted to replicate, and sealed the curvy gaps with silly putty. Once the silicone mold was cured I poured resin into it and it came out quite good and maintained the same body panel thickness from the parent part. I will use the resin duplicate parts to implant into the front fender area. I marked the fenders on the line when the surface would bend to align with the main body and installed the duplicated resin parts with super glue + baking soda. Then I started to use Tamiya epoxy putty to merge the gaps and start forming the shapes all around the main body. The original tail panel was too short, I added 1mm styrene sheet on the bottom and scratch built the taillight and license plate opening areas. I used the Gray Mr. Hobby Mr Surfacer 1200 to check the body curvature consistency and now all the flaws became very noticeable. I'll continue work on smoothing out the main body.
-
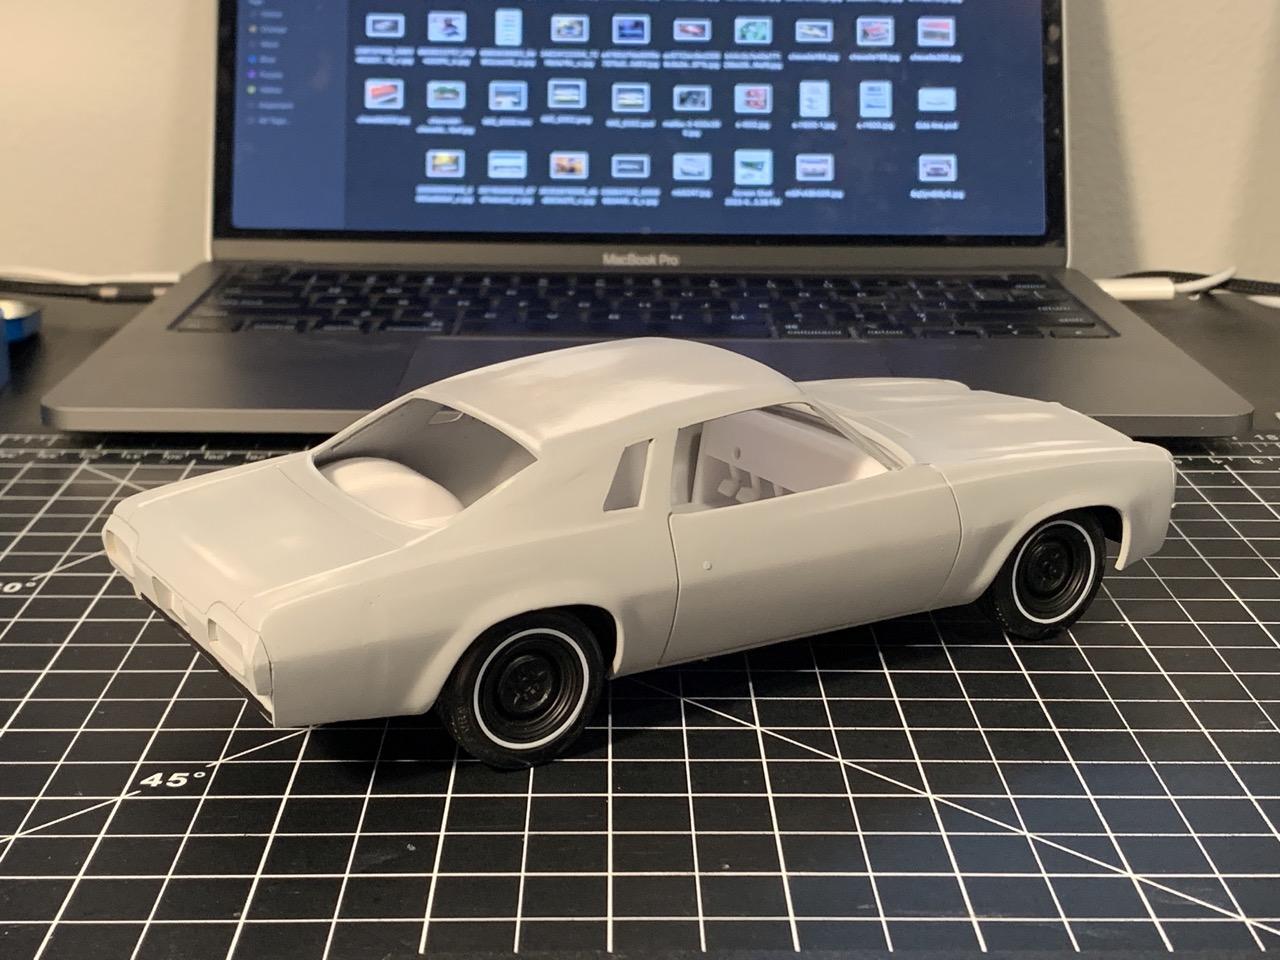
I was excited to get this '74 Malibu from AMT since there hasn't been many mid 70s midsize GM colonnade cars from major model makers (except for the Johan Cutlass decades ago). I'm a big fan of Malaise era cars so I figured I could get this Nascar car and convert it into a mainstream factory stock '74 Malibu. I thought it looked quite okay if I modify the front fender and wheel opening a bit. Until I took a closer look at the side profile and compared it to a Johan Cutlass that I have, big difference on the pillars and greenhouse proportions. It looks like the AMT Malibu had a chopped top. I realized there's much more need to be done to fix the proportions before I can work on the front fenders.
-
Awesome progress of the sedan conversion! Cant`t wait for the following results. Good job sir.
-
1976 Chevy Caprice 4-door Hardtop Sport Sedan conversion
Cosmo_Song replied to Cosmo_Song's topic in Model Cars
Thanks Dwayne! I used aluminum foil to duplicate the fender and hood and then I damaged them. I used epoxy on the backside to secure the foil afterwards and glue them on to the styrene body with super glue. You can see my whole process in here: Good luck with your builds too. -
Fantastic work! Please check out my 4DR build too:
-
Thank you Michael, I got the flat hood from here: http://www.reliableresin.com/index.php?main_page=product_info&cPath=4&products_id=77 Can you show me where can I buy the mopar volcano wheel that you 3D printed?
-
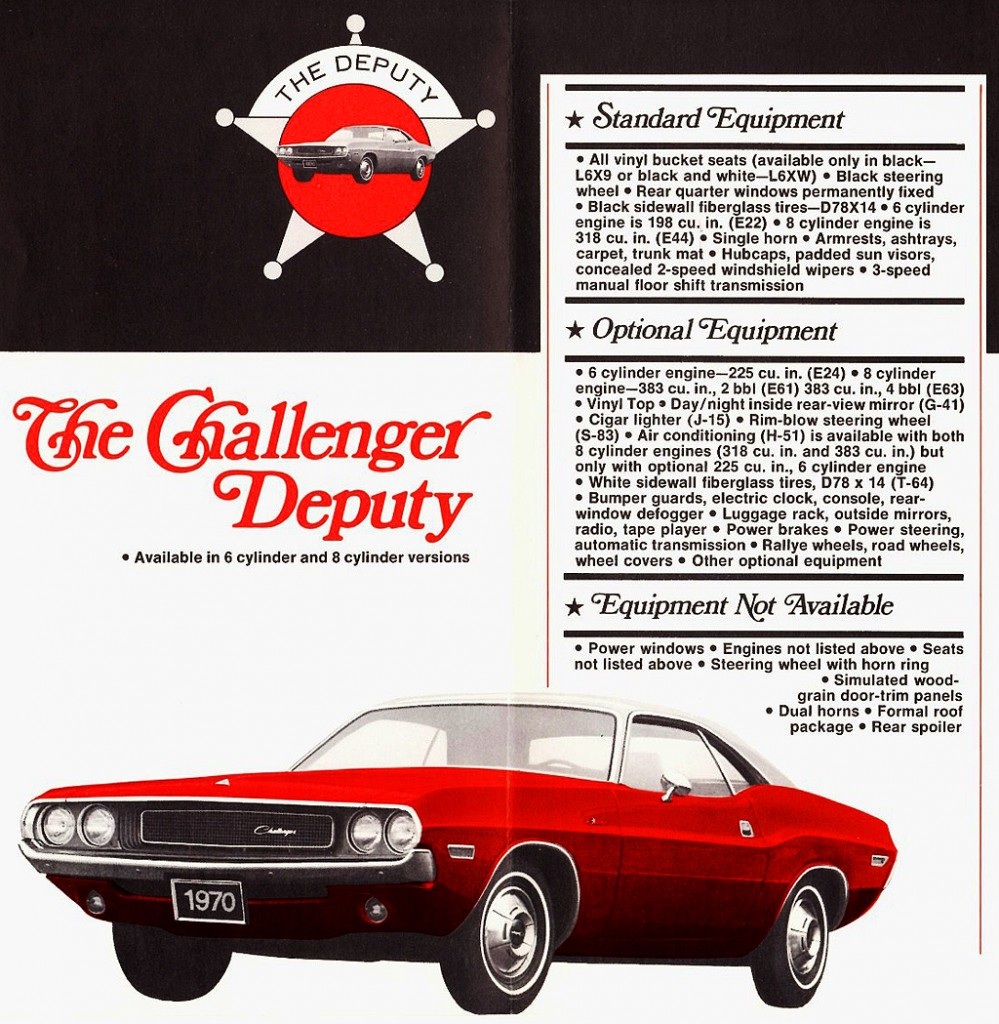
Hi Michael, super impressive work! I`m building a base model `70 Challenger would like to use your mopar volcano hubcaps, could you post a link of that your casting hubcap item on ebay?
-
This is going to be masterpiece, I admire your dedication Robert!
-
I used pencil to draw the outline on the primer body first, ant then I just used X-acto knife to slightly do some strokes along the pencil line (free hand). After a couple of strokes for the depth I pushed harder to achieve the desired depth for the door lines. I think it just takes some patience and a fresh blade
-
Thank you Charlie. Haha I`ll put it in my calendar, next one should be an accurate "glasshouse" style 4-door sedan with the correct Caprice full trim.
-
Thank you very much! Good luck with your own build too. One modifucation I did to this model was to reshape the C-pillar. The original shape was missing a triangle area so I had to use styrene to fix it.