

ibj40
-
Posts
352 -
Joined
-
Last visited
Content Type
Profiles
Forums
Events
Gallery
Everything posted by ibj40
-
Looking forward to the final product on these, and hopefully the acquisition of a set or two. Thanks for the comments on my builds, Obi-wan, us mere mortal Jedi need such encouragement. Stay Safe!
-
Thanks, but credit for the interior goes to SunStar. So, worked on the engine compartment last night. Here's the parts that I am migrating from the Sunstar to the Welly, along with the Welly inner fender surround. SunStar did a nice job, creating these roll cage extensions that come into the backside of the shock towers. Here are the two sides of the engine compartment, driver's right and driver's left in that order. You can see here that the Welly has the brake master cylinder molded into the plastic, which I will remove. Here are most of the pieces in place, there are a couple of hoses that I have to decide where to locate. One looks like either fuel or oil, the other looks like a radiator overflow, but I'll need a catch tank. The Welly included an export brace from the firewall forward to the shock towers, and my experience shows that you can never have too much bracing for the engine compartment, so I will incorporate it, as well.
-
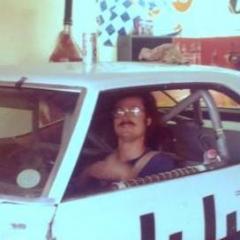
Don't look too closely, looks like a three-year old put them on.
-
Anyway, had some time on my hands last night, and got to looking at what was causing a conflict that didn't allow the body to sit down flush, once I had the inner fenders and cage installed. If you refer to the two engine compartments above, I chose to use the Welly, so that it would remain attached to the body, and had already cut away the back of the firewall where that interfered with the bellhousing of the Sunstar engine. Would be hidden anyway, but I will fill the gap with something. Even then, and with some of the bottom of the inner fender panels already ground away, but fearing the loss of too much detail, stopping; the engine wouldn't slip easily up into the engine compartment. Again, if you refer to the pictures above, notice that the Welly engine compartment is located by four screws. My assessment indicated that the rear of the engine compartment needed to flare out some, so I removed the plastic rings at the rear. But also notice the ridge at the hood/fender meeting point. That, added to a similar ridge molded into the engine compartment, kept the pieces from spreading, so that had to be ground away, as well. Now, as I slip the body (with engine compartment attached only at the front), the rear will spread ever so slightly to let the valve covers push through. But upon dry assembly, the body and chassis still would not mate up and close. So, and I can't believe I really built these things back in the day, I looked for more interference, and there it was, textbook! The A-pillar of the cage wouldn't clear the dashboard (again, Sunstar cage/Welly dash). So, another date with Dr. Dremel and a diamond cutting tip (I like to use this one, as opposed to the other cutting tips, as the cutting area is about half inch, versus the similar diameter all-purpose tip, which is about a quarter inch). I'm going to use the flash on these next pictures, to try to capture some detail. I scavenged all the detail parts from the Sunstar (fuel pressure regulator, remote oil filter, brake master cylinder) and will mount them inside the bare Welly engine compartment next. Additionally, need to mount the steering wheel and column, as well as locate the front spoiler.
-
I liked the Cougar idea, as well. As I mentioned above, the real trick will be to find an over-the-counter set of decals that will work. The bane to one of these body transfers is that no two diecast manufacturers do the same thing the same way. Here we are dealing with a Welly body onto a SunStar chassis. In one of these modifications, the real issue is primarily under the dashboard and at the firewall (of course, the two most difficult areas to see and access). Usually, I try to keep the dashboard of the donor body, but that doesn't always have the right details. Here are the two, side by side, Sunstar on the left, Welly on the right. One of the real issues is how the steering columns connect to the suspension. Most manufacturers use a stick-type steering column, but the end treatment is the key, and whether a donor will fit into another. For engine compartment finish, we need the inner fender detail (which frequently includes the radiator support, brake master cylinder and other simple details that help make the model look finished. Here are the two, again, side by side, this time the Welly is on the left, Sunstar on the right. I'll try paint what I can (already put a dab of red paint on the tops of the Welly shocks. Note that the battery is up front, whereas in a racer it would be in the trunk (non-opening on either of these models, unfortunately). Also, the Sunstar has some oil system components and a few other features. I will try to transfer as many as I can, assuming I use the Welly unit versus the Sunstar. Again, a lot of this has to do with how well the other components match up. Here is an initial dry-fit of the Welly body onto the Sunstar chassis (no dashboard, no engine compartment/inner fenders). Stance isn't bad (and this sometimes can be corrected with the removal of superfluous plastic on the chassis). Here's a couple more initial shots of the engine compartment and interior. Will try to do a little more test fitting tonight.
-
Say you were a died-in-the-wool Mercury fan and got the local Mercury dealer in your pocket; and you had been campaigning a '67 Cougar, maybe even a hand-me-down factory racer. But the bodywork was getting a little dated, and the dealer just wasn't going to be as generous next season, since your car was four years old, getting a little ragged, and looked nothing like what the factory had just put on his showroom floor. So, for this build, here are the donors. r And this one is going to be just like the '71 Mustang I just did. No repainting, but the search for a decal sheet is probably going to be a lot more difficult. Stay Tuned!
-
Here's a link to the album where I stored the in progress shots. Fantasy Demon Not real pleased with the decals, but I'm calling it done. Not going to put the front spoiler on it, way too much work, and I'd like to use the spoiler on a future custom.
-
History will show that AJ Foyt showed up at the 1997 Brickyard 400, however that car was withdrawn without ever seeing the track. For 1996, Foyt tried to redeem himself from a failure to qualify in 1995, due to rain on the second day of qualifying (back when Nascar had more cars show up than they started in field). The 1996 Ford Thunderbird was sponsored by Kennametal. Here is an interview with Foyt, showing the car in the background. https://www.youtube.com/watch?v=Z-Psa8nV7vU This was a "simple" repaint and redecal. Taking an Ertl American Muscle Mark Martin Valvoline Thunderbird and stripping off that livery, I sent the body and decal set to my buddy Lee Rilea to perform his magic. Have to admit that the decal sheet was pretty primitive, but Lee pulled it off. Didn't do anything to the rolling chassis, and the Ertl versions of this era are pretty basic.
-
Well done!
-
Fantasy Dodge Demon Trans Am Racer Blending the body from this: Onto the chassis from this:
-
I really like the way this one came out. Stance is nicely aggressive. Since it is a Moffat-based build, thought I'd see that it looked like on the ACME 1/18 scale Moffat ramp truck. Clashes a little bit with the Coca-Cola livery, but we do have a Coke decal on the racer, so there is some consistency. Of course, Moffat was the only Coke-sponsored racer. Just as an aside, here's the Coke ramper with a custom Bobby Allison Nascar Grand American Mustang. And Allison didn't just race Nascar with Coke sponsorship. He also drove this BRE Datsun 510 in selected Under 2.5 Trans Am races. And just for fun, I loaded the Moffat Mustang up with the fantasy Warren Tope Mustang, and parked that rig with some period Trans Am/IMSA racers on their rampers.
-
1/18 Bburago Jaguar E-type Lightweights conversions
ibj40 replied to wardsmodelbuilder's topic in Diecast Corner
Interesting project. Glad to see someone else working in 1/18 scale diecast. -
First, I want to go on record that I hate to decal! I am a nervous wreck during the process, and it continues on through the first two or three beers after. Here's where I ended up, clearly not back on the chassis, but just glad to have it this far along.
-
As as been said here and elsewhere, in the day, Exoto set the standard for quality and detail. I have several different lines of Exoto models in my collection, and they stand head and shoulders over their contemporary competition.
-
This has me intrigued. Picked up a cheap used one on eBay. These were raced both here in the States as well as internationally, so going to do some research on converting it to a racer. Looking forward to the OP's progress as well.
-
Yes, they are. I have used his decals on a number of custom models.
-
Decal sheet in hand, want to lean toward the BRUT livery, but other options as well.
-
At one time, Exoto offered the best detailed models in the 1/18 scale market. I probably have a dozen of more of their Cobra Daytona's, GT40's, Corvette Grandsports, Porsche 934's and 935's, and Chaparrals. Then the owner got greedy, and, among other things, took deposits on models that were never produced. When you can find them in the secondary market at a reasonable price, great add to a collection, but they get pricey quickly on eBay, for example.
-
Be careful about which one's of those are resin versus diecast. I had the black version of the Artisan Chevrolet, and up close, wasn't really impressed with it, and turned around and resold it. Haven't been able to find one of the Dodge Ram's at a reasonable enough price to pull the trigger, knowing that I may take it apart. Not familiar with the Ford from American Excellence.
-
There are crew cabs. And there are duallys. Why can't we have one that combines both features, which essentially make it the mainstay of all forms of auto racing transportation?
-
Got a coat of Classic White paint on it yesterday, hung it on my basketball net to dry in the sun. Came out decent, for what I intended it for, although a lot of work.
-
Go big, or go home! Widened the rear track by 3/8 inch on each side, in order to fill out the wheel wells. I think this is where we're going to go.
-
Laid down a coat of primer. Now the question is, should I lengthen the rear axle to fill up the wheel wells?
-
Threw some Bondo on the fenders to smooth them up a little. If the weather's right this weekend, at least a coat of primer.
-
It's kind of like the catch phase for Frank's Red Hot Sauce.