Plastic_Passion
-
Posts
589 -
Joined
-
Last visited
Content Type
Profiles
Forums
Events
Gallery
Everything posted by Plastic_Passion
-
Where did you get your embossing powder? I've been looking for something easier than what I'm doing. I've thought about getting flocking but haven't done it yet. I usually use colored card stock thru a cheese grater and a screen to sift it out. Then paint what ever the color is I'm using, let it dry then white glue and sift the sifted paper onto my interior tub or seats. I've had really good results doing it that way and it's cheap but very time intensive. This all looks very good so far keep up the good work! And I agree it's a much better kit than the uptown kit.
-
Just found this same vette basically the same color on Google done by a guy with the username cartpix... I made my color and the other car is painted Boyd pearl orange. Crazy how close the colors are. His car looks very nice.
-
nice! Well at least your rs didn't have the 3.1 they put in them. My mother has two 84's one is a regular camaro with the three holes in the nose and the other is a z28. The base model car has t tops and had a 5 speed with a 305 and the z have the 700r4 with a 350. It needs quite a bit of work and I keep trying to buy it from her but to no avail so far. Love my ram but miss my f body.
-
'84 Oldsmobile Cutlass LSX442(Updated 1-24-'16)
Plastic_Passion replied to echoxrayniner's topic in WIP: Model Cars
Brush on white glue or modge podge and sift the card stock over the glue. -
'84 Oldsmobile Cutlass LSX442(Updated 1-24-'16)
Plastic_Passion replied to echoxrayniner's topic in WIP: Model Cars
I do my flocking with card stock and a cheese grater then I use a screen to sift it out. It's a little work to do but it comes out ok -
Thank you! I wish I had painted the centers of the rims like the actual irocs were but don't hate it this way. This is my favorite generation of f body as well. I had an 84 berlinetta, an 85 firebird, and an 87 formula as 1:1 cars. I have a 92 formula model I'll be building pretty soon. I'm going to pick up a firebird on ebay and see if I can replicate my 87. Did your rs have the tuned port in it?
-
Thanks guys!
-
'84 Oldsmobile Cutlass LSX442(Updated 1-24-'16)
Plastic_Passion replied to echoxrayniner's topic in WIP: Model Cars
This is awesome -
thank you! IIt's definitely grown on me
-
Thanks!
-
Thank you guys!
-
i actually starstarted doing that with a small hand file. It's slow going but does look good!
-
Hawk I know this is an older thread but God you do AMAZING work. I had this kit years ago but it ended up melting in the back window of my firebird. Apparently I didn't appreciate things in my younger days the way I do now. Great job on this kit! Please keep blessing us with your works of wonder!
-
Anyone who wants to see any more work on the vette I have the photobucket page going. Here's the link. Ok so photobucket or I sucks.... not sure which one yet... I'll figure it out I hope. http://s1174.photobucket.com/user/j_poges/slideshow/68 corvette Figured it out.
-
Anyone who wants to see any more work on the vette I have the photobucket page going. Here's the link. <iframe width="480" height="360" src="http://s1174.photobucket.com/user/j_poges/embed/slideshow/68 corvette"></iframe> <iframe width="480" height="360" src="http://s1174.photobucket.com/user/j_poges/embed/68 corvette/story"></iframe>
-
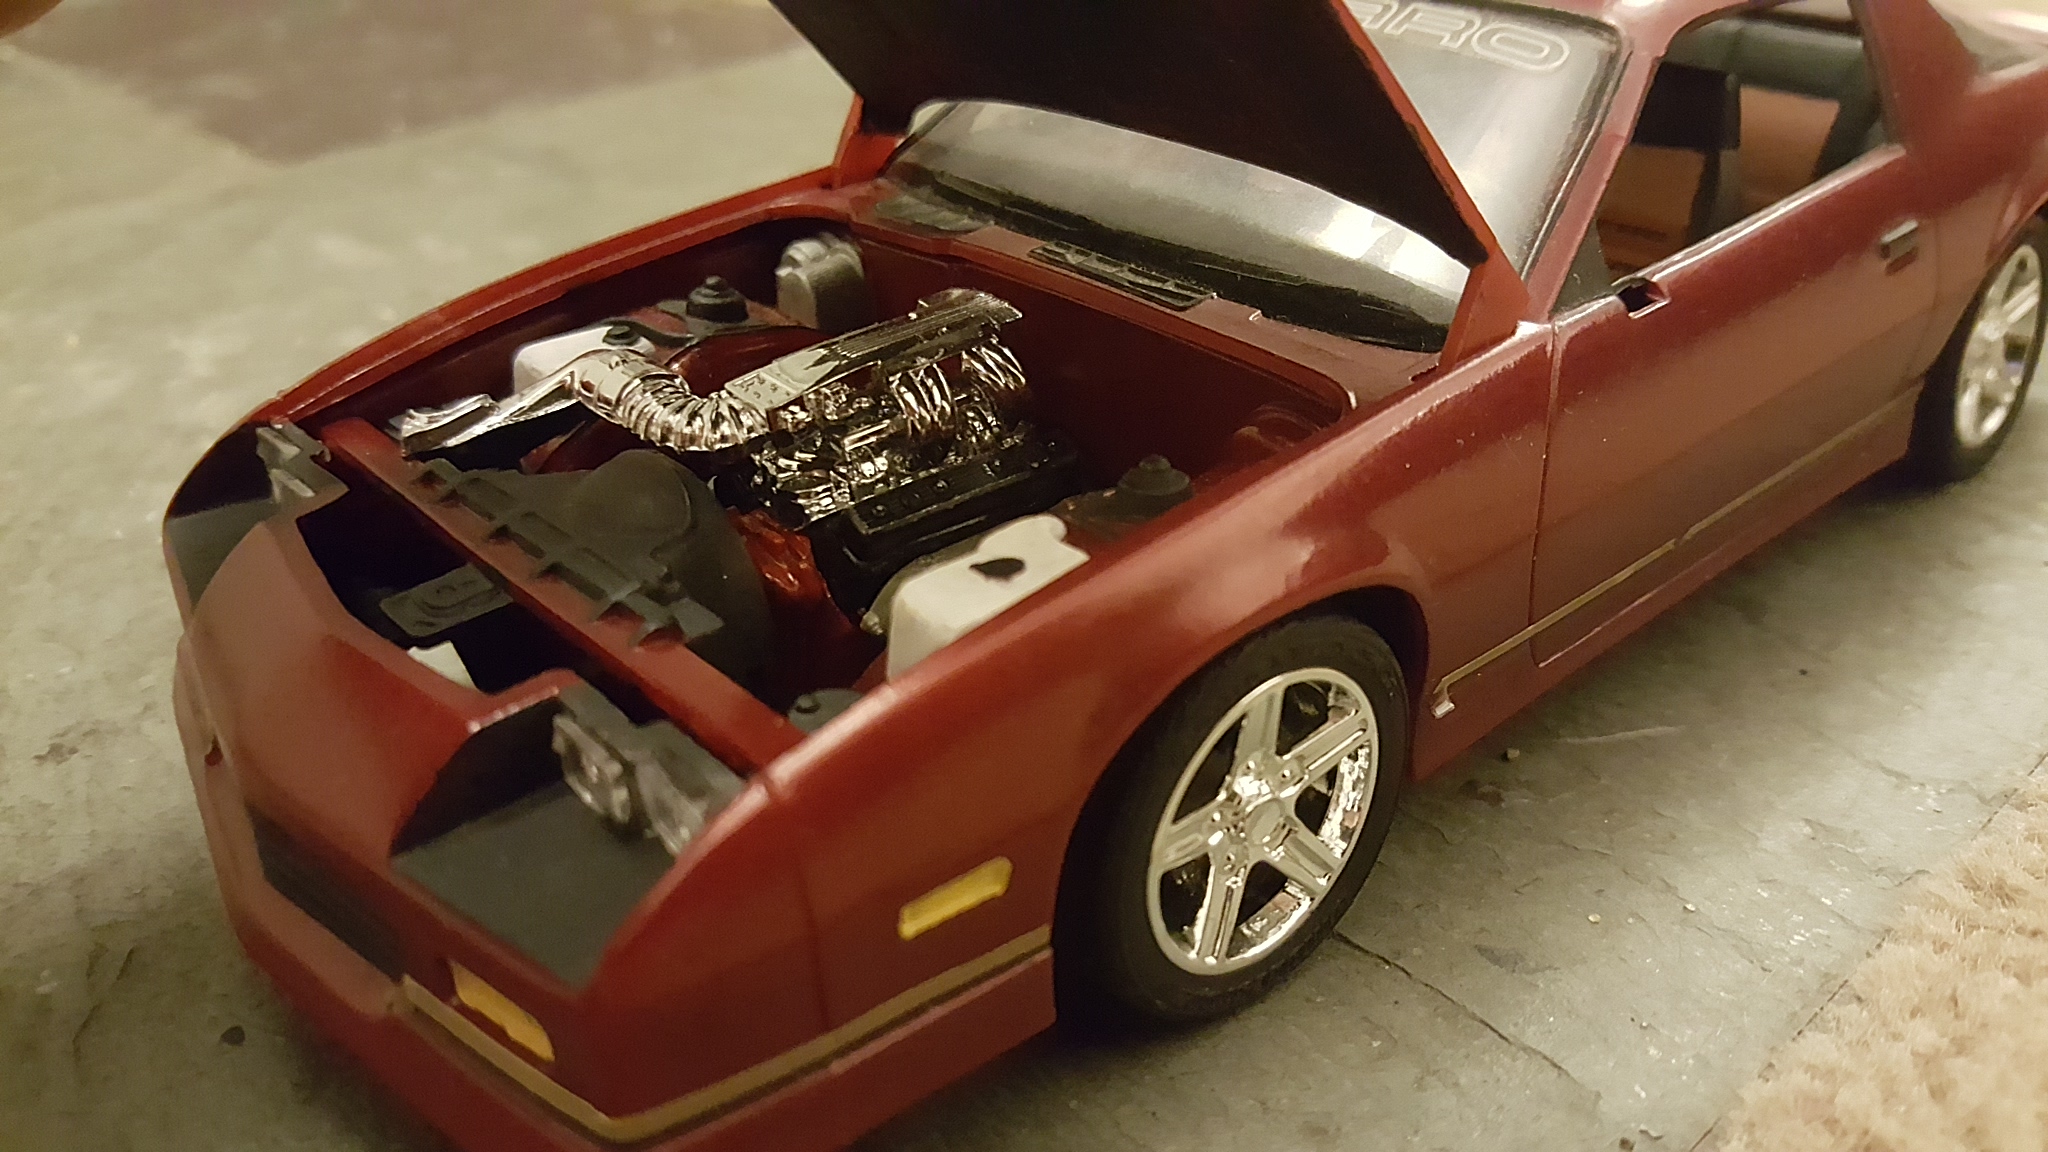
This is the monogram motorworks 85 Z/28. Anyone who knows this kit, knows the kit came with a 305ci Cross fire injection engine. The motor is a two piece design. The lower half was molded to the chasis. The upper half was pushed into the lower, and the intake pushed into the upper. The driveshaft, panhard rod(torque arm), and rear axle were all one piece as well. I cut the motor out of the chasis and the driveshaft and torque arm off the axle. I replaced the 305 with a 350 from another camaro. Took the valve covers out of my parts box. And bought a tuned port injection on ebay. The driveshaft is out of the parts box as well as the torque arm which is more of a tubular performance look than the standard arm. The wheels are pegasus 19" iroks and I put the disc brakes on it again from the parts box. Wish I still had the mirrors. Paint is actual chevy color. Cut down and painted springs up front. Hope you like it!

-
Excited to see how this turns out!
-
Ok so I've signed up for photobucket and will be posting updates to the vette on that page and will post a link when I get it up and going. I will post it in the glass section and on pbucket when finished also. If your interested, please stay tuned and check it out. Thanks again for the tips and comments!
-
Ok cool so I've seen some people doing that. Now do you personally just some herd and then a link to your bucket page?
-
thanks!
-
Trim painting clean up
Plastic_Passion replied to Plastic_Passion's topic in Model Building Questions and Answers
that is a great idea! -
Trim painting clean up
Plastic_Passion replied to Plastic_Passion's topic in Model Building Questions and Answers
I don't know why that posted like that... thank you both for the tips! -
Trim painting clean up
Plastic_Passion replied to Plastic_Passion's topic in Model Building Questions and Answers
Thank you guys. That makes sense about the windows and other miscellaneous trim. I'll have to try that. -
Trim painting clean up
Plastic_Passion replied to Plastic_Passion's topic in Model Building Questions and Answers
Thanks for the tip! I usually do my raised lettering and such with the flat end of my brushes. I dab the end of the brush in the cap and rub it on some newspaper. It'll leave wet paint on the end of the brush and I don't have to worry about having too much. The only down side is if you don't have the brush flat on the lettering there's risk of getting paint where its not supposed to be. -
Snake, your vette came out really nice. Hard to believe that's just polished and not painted. Your trim detail is great also. I've been wanting to experiment with foil and had read about using the kitchen foil with spray adhesive. I just haven't been daring enough. This definitely holds it own against the Franklin vette. I actually like it more than that 68. Very nice build! By the way thanks for the pointers on the trim clean up!