ShakyCraftsman
-
Posts
797 -
Joined
-
Last visited
3 Followers

Recent Profile Visitors


ShakyCraftsman's Achievements
MCM Ohana (6/6)
-

KW925 Something
ShakyCraftsman replied to Gary Chastain's topic in WIP: Model Trucks: Big Rigs and Heavy Equipment
They look great Gary! -
Thanks Lee
-
KW925 Something
ShakyCraftsman replied to Gary Chastain's topic in WIP: Model Trucks: Big Rigs and Heavy Equipment
Hey Gary I almost forgot. Don't forget the shift linkage between the main box & the brownie. Ron G -
KW925 Something
ShakyCraftsman replied to Gary Chastain's topic in WIP: Model Trucks: Big Rigs and Heavy Equipment
Here to help Buddy. -
KW925 Something
ShakyCraftsman replied to Gary Chastain's topic in WIP: Model Trucks: Big Rigs and Heavy Equipment
Hey Gary The set-up in the AMT Kenworth W925 is a twin stick. It is a 5 spd. Main box and a 4 spd. brownie (auxiliary),so you pretty much would have to use the second one too. This is the setup I'm using on my build for Jeff. Ron G -
KW925 Something
ShakyCraftsman replied to Gary Chastain's topic in WIP: Model Trucks: Big Rigs and Heavy Equipment
Your welcome -
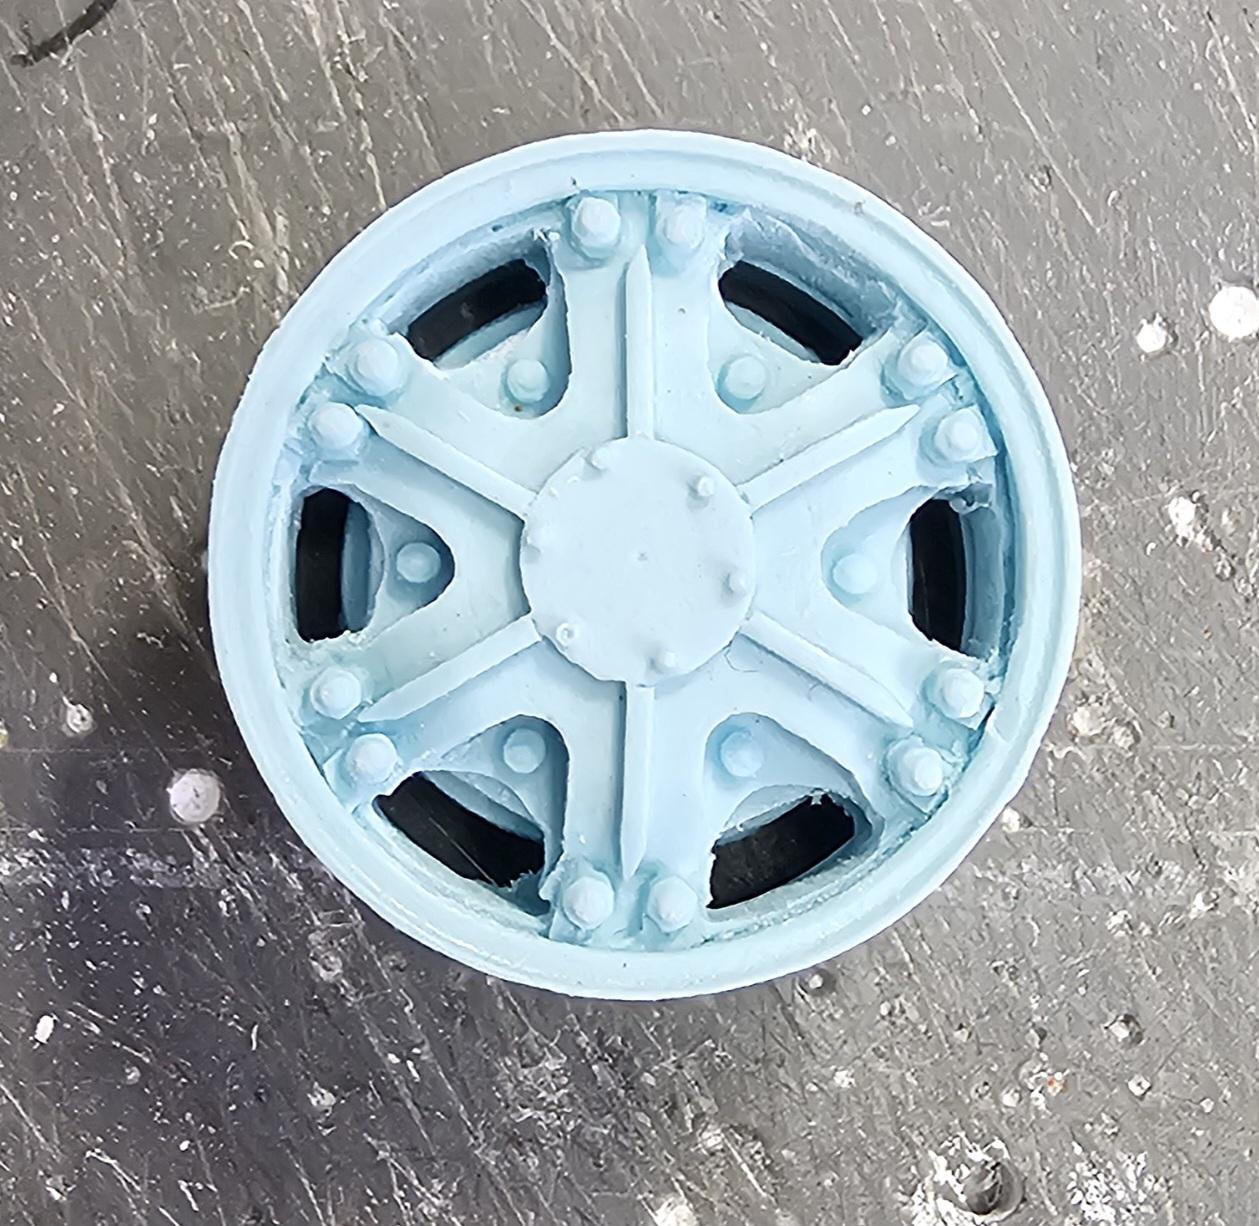
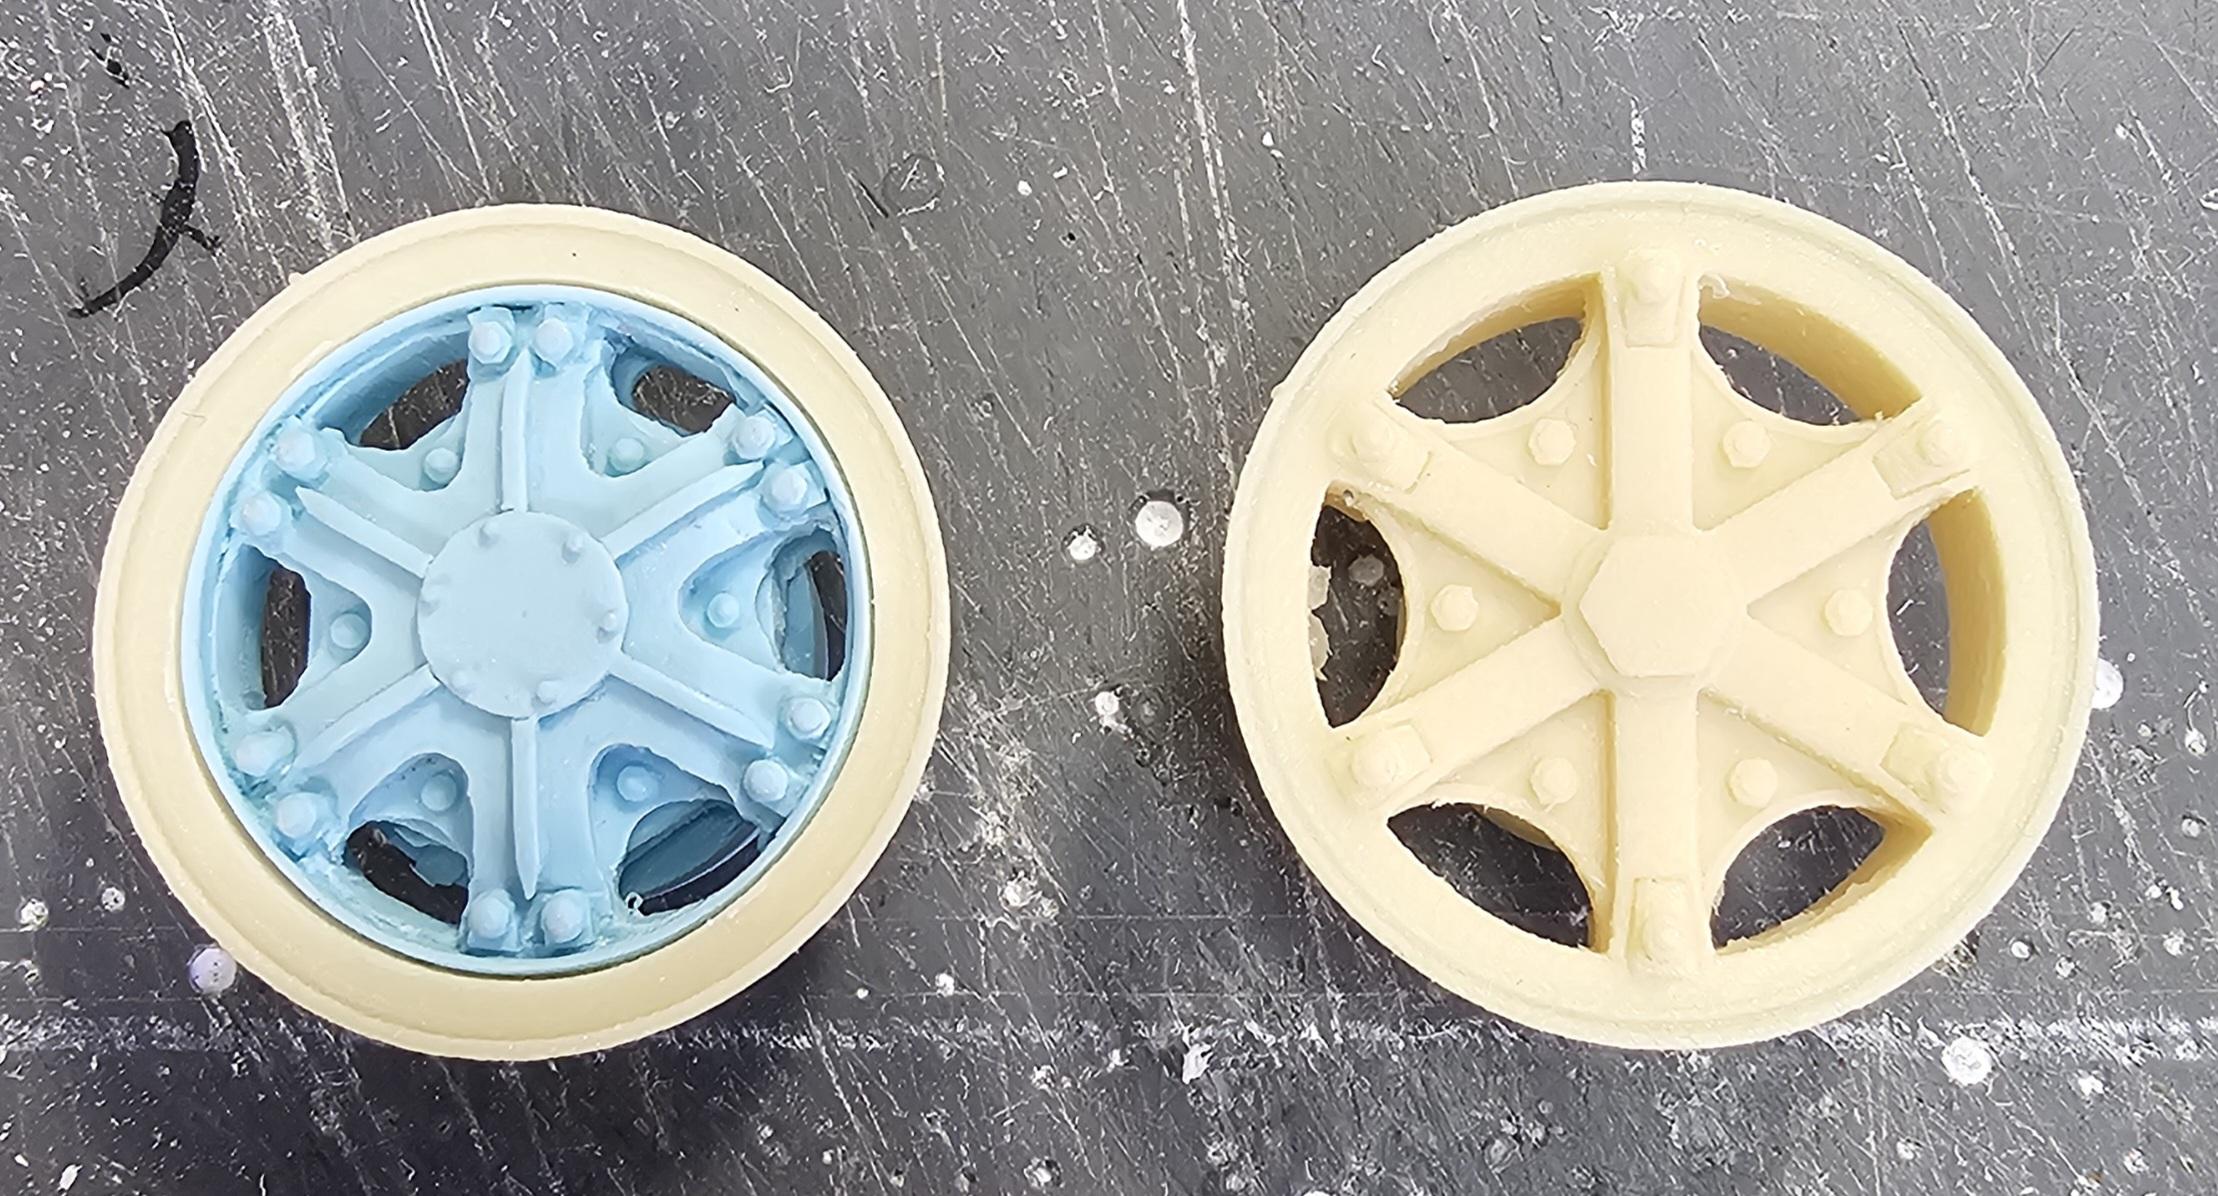
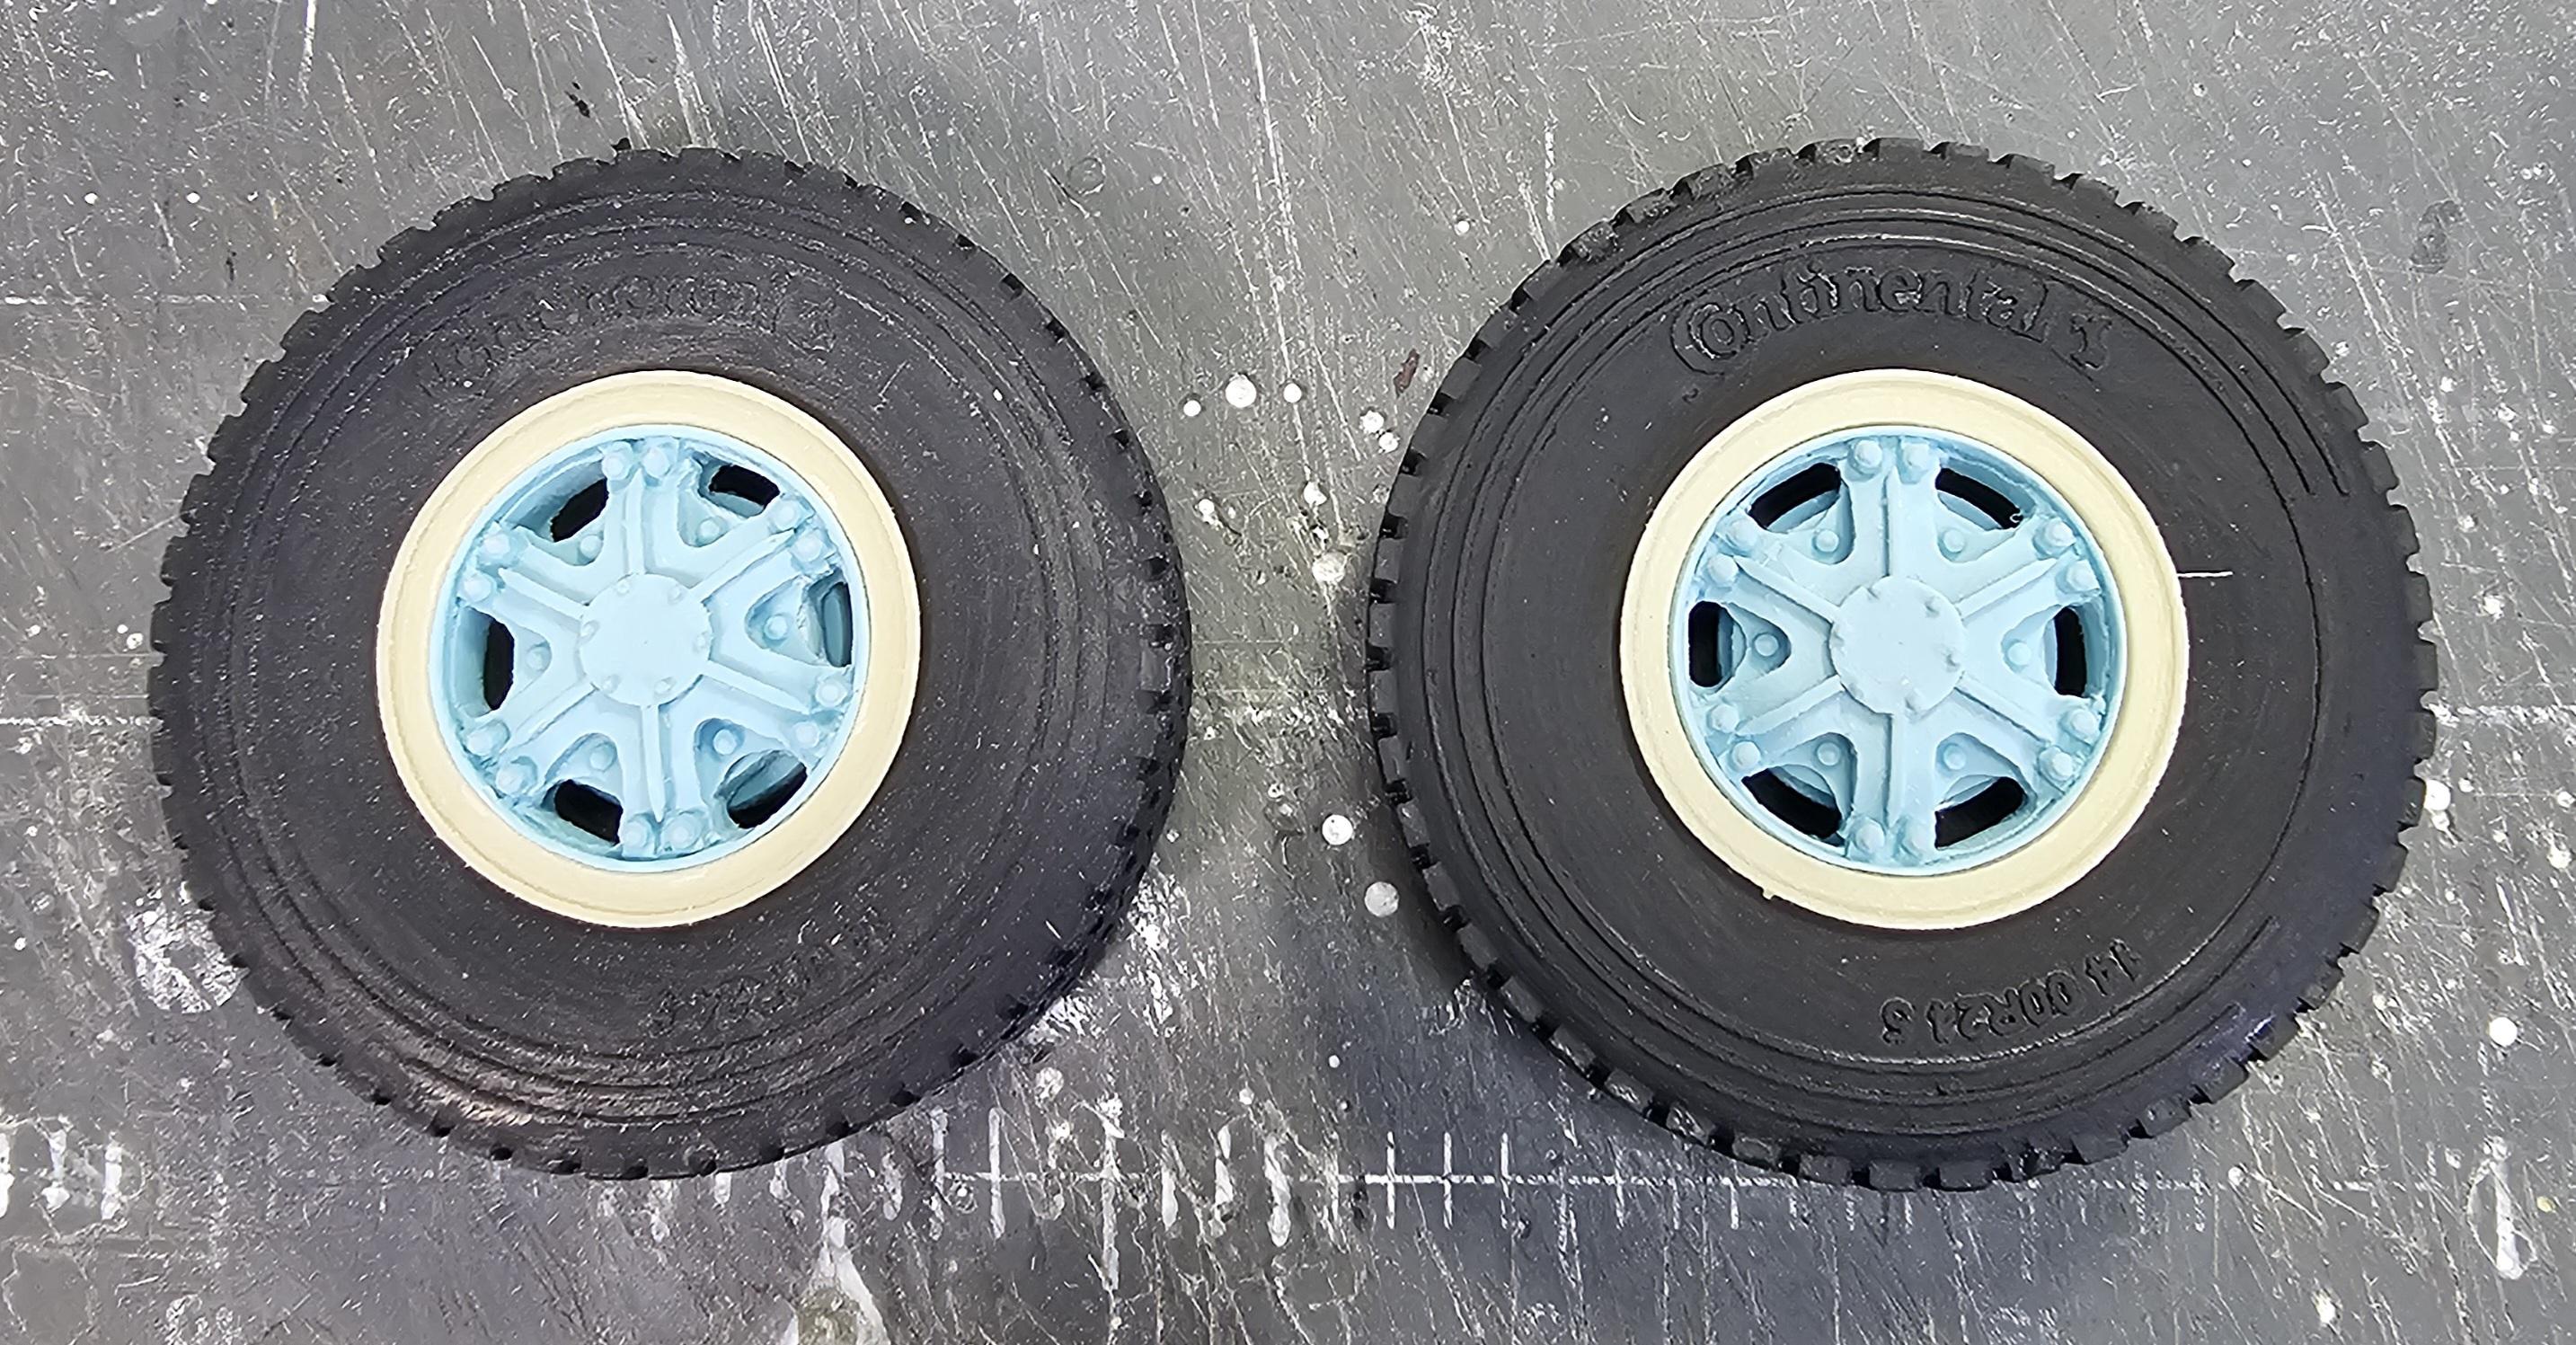
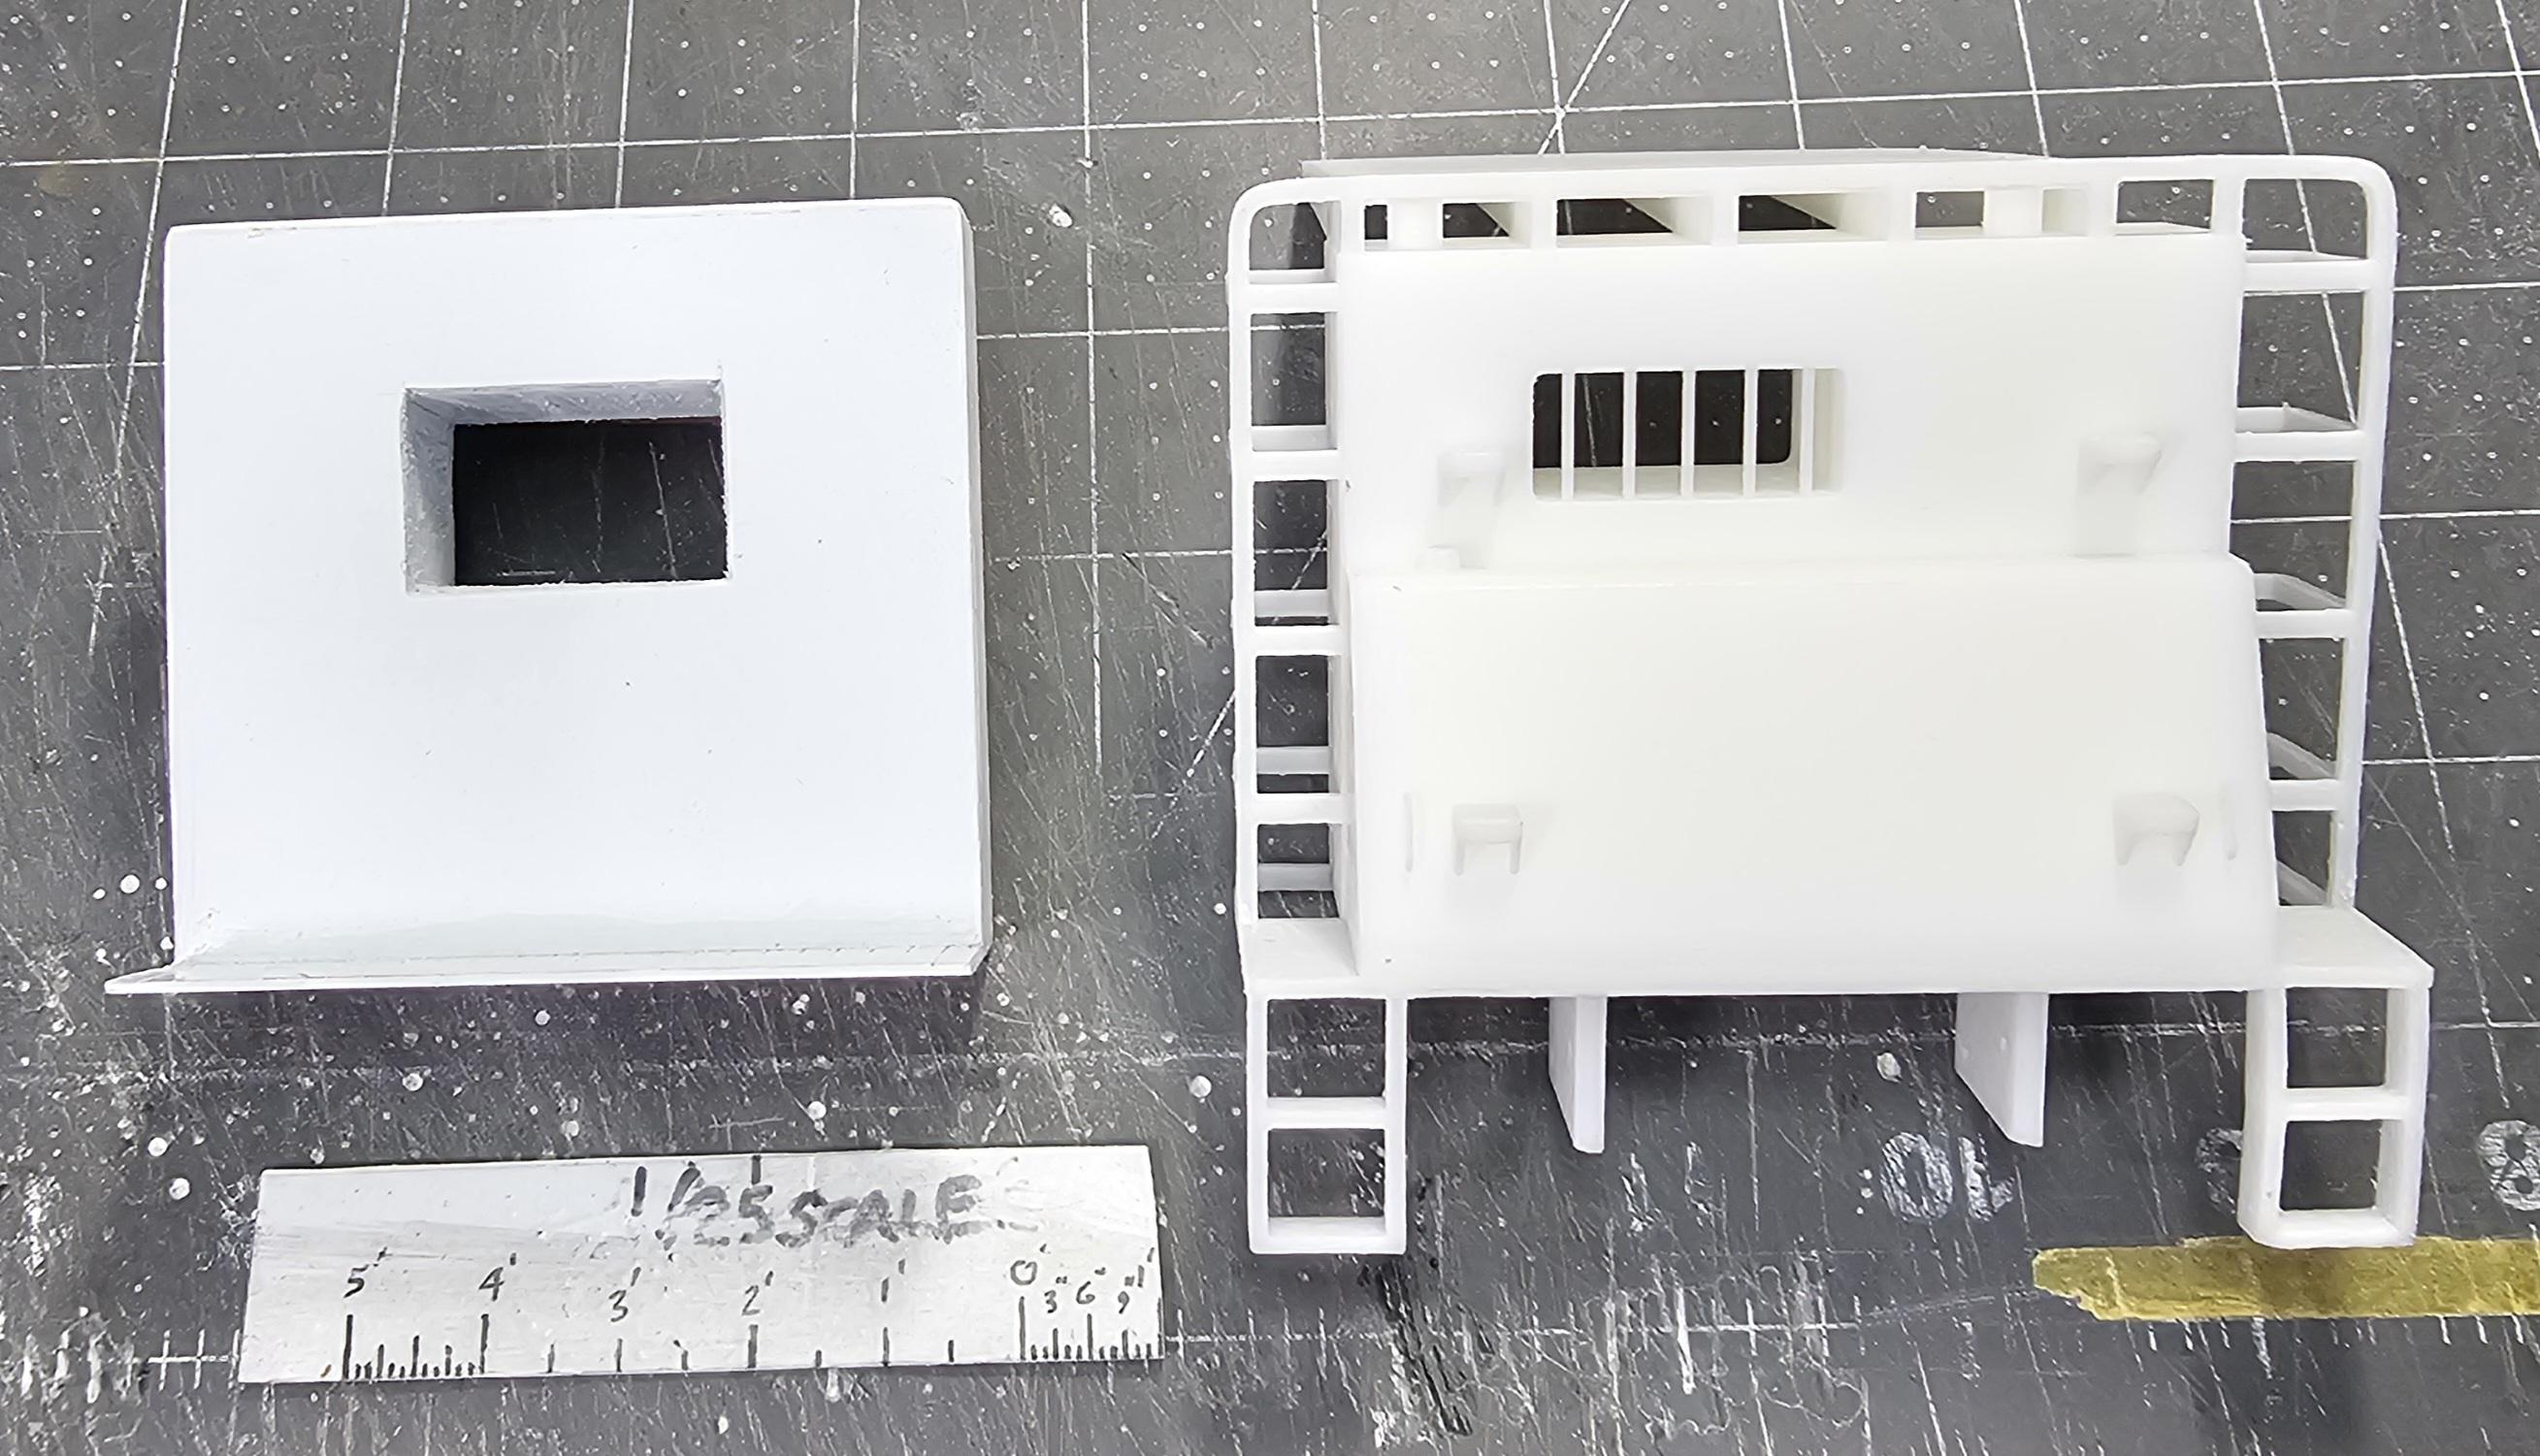
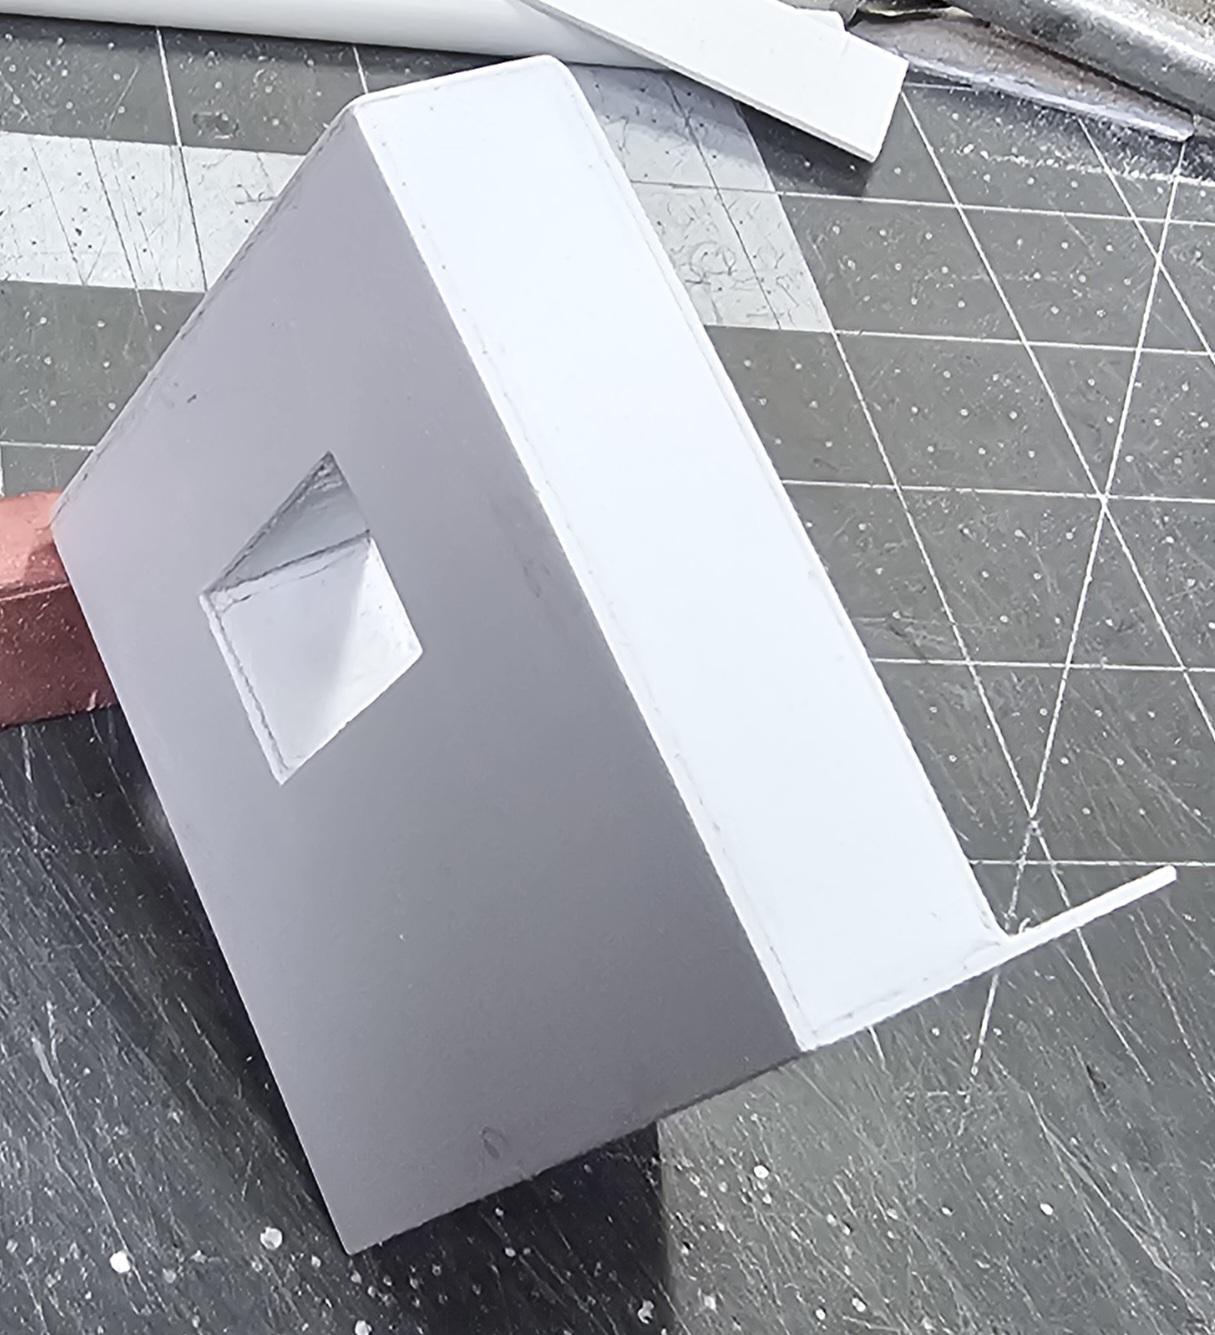
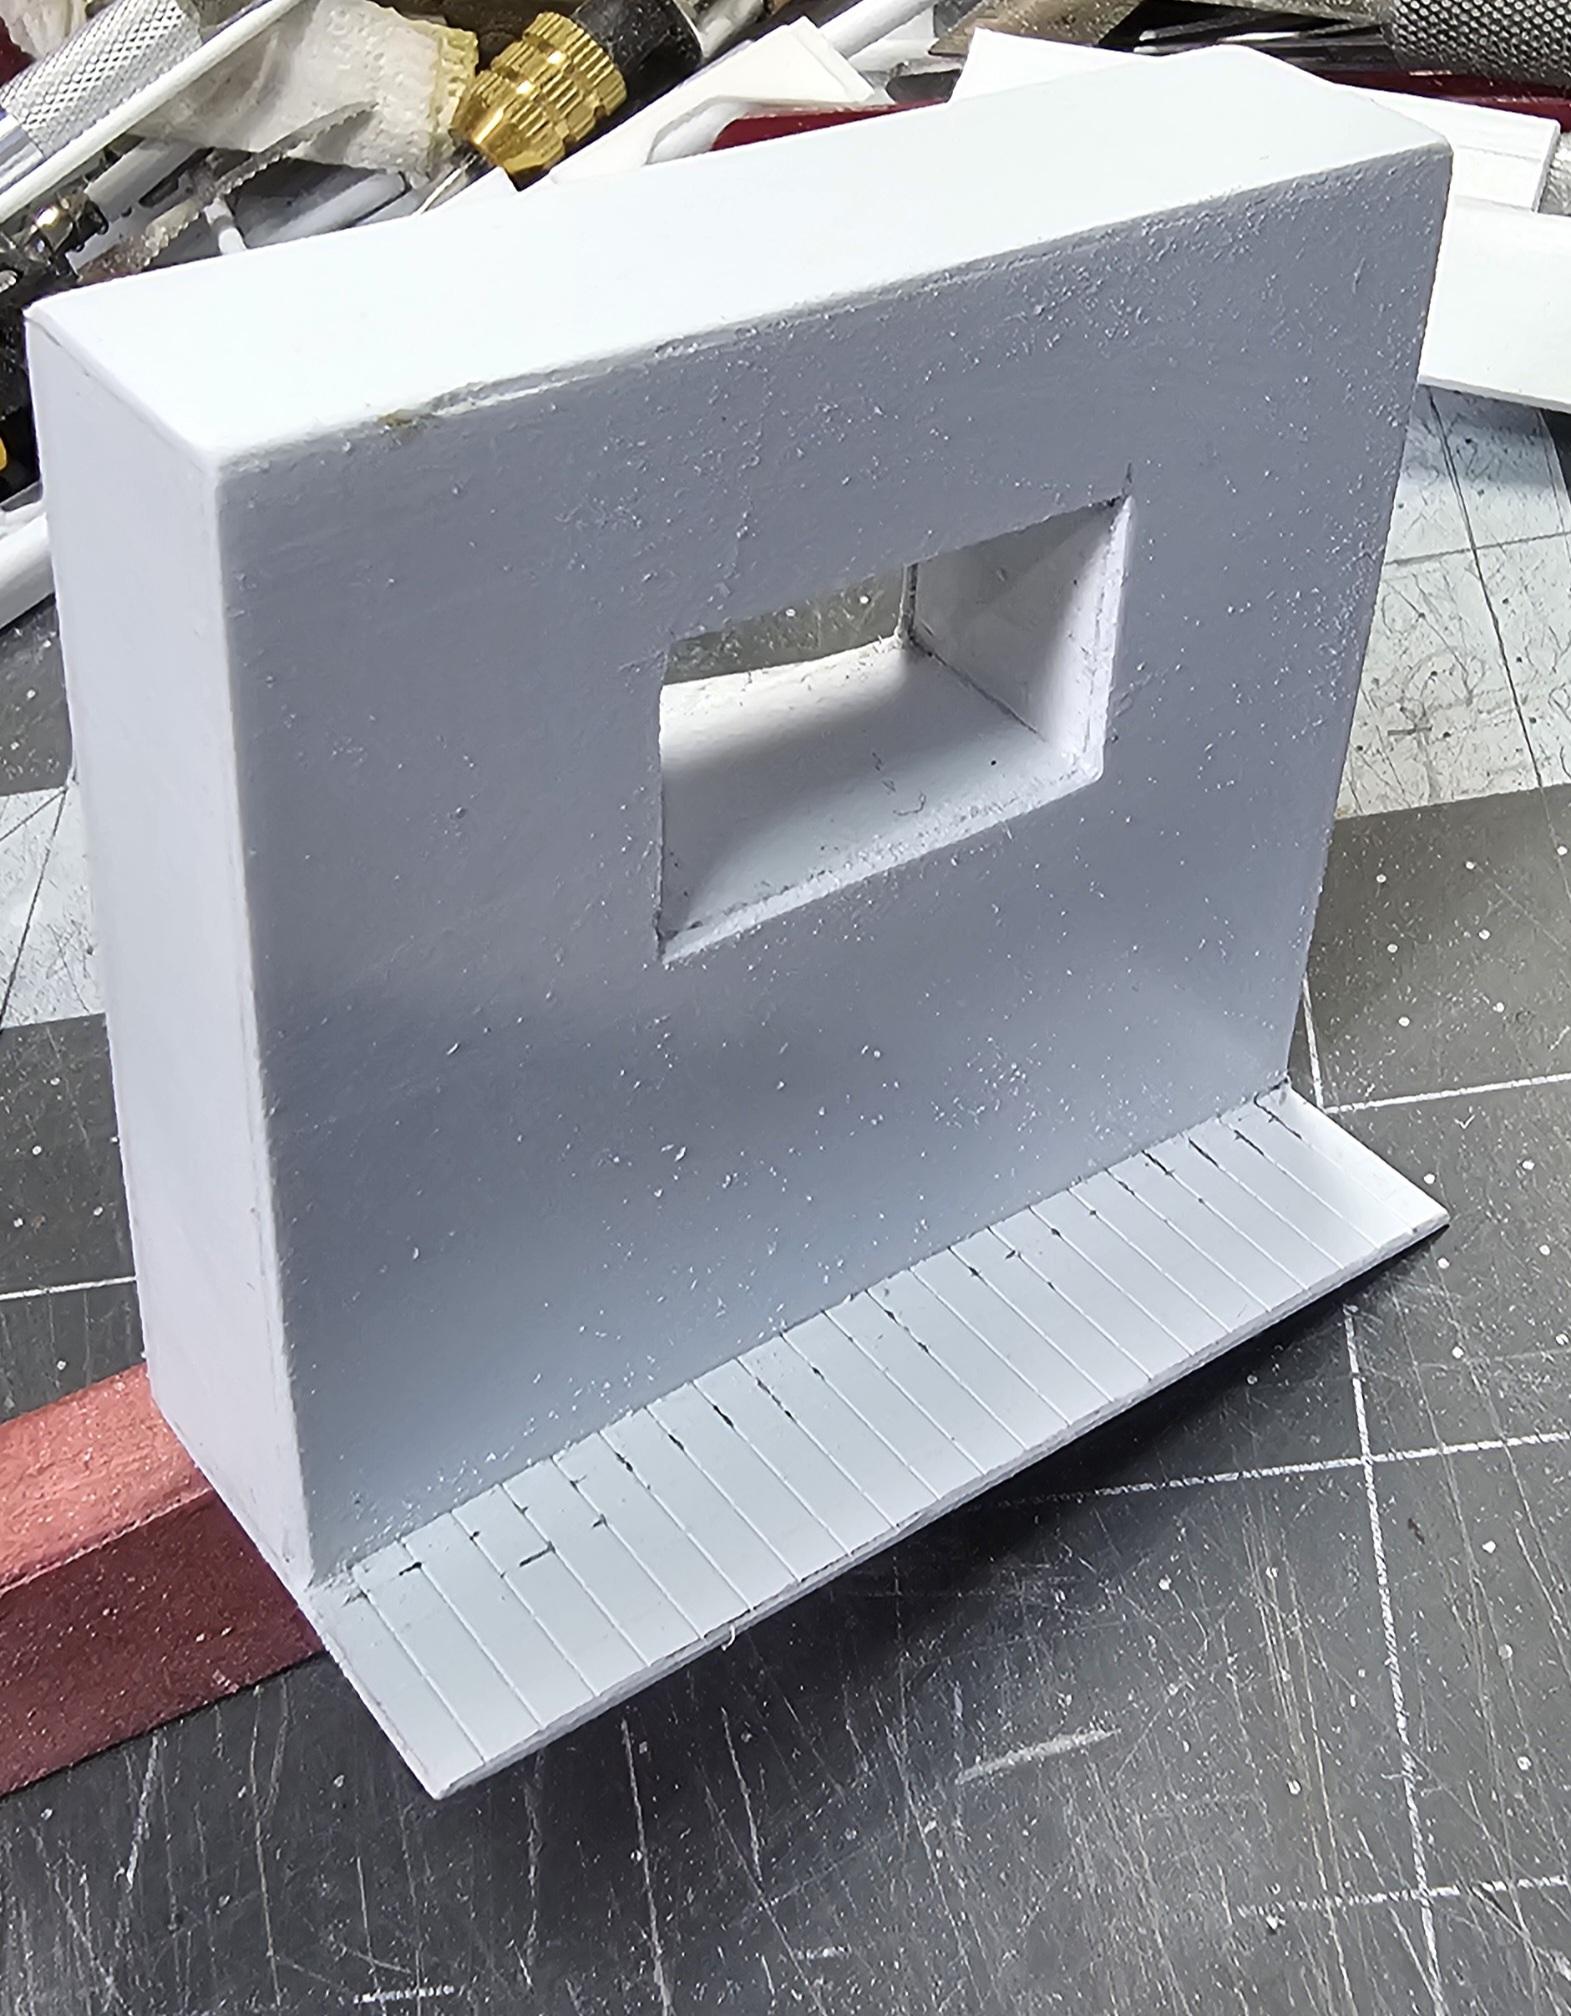
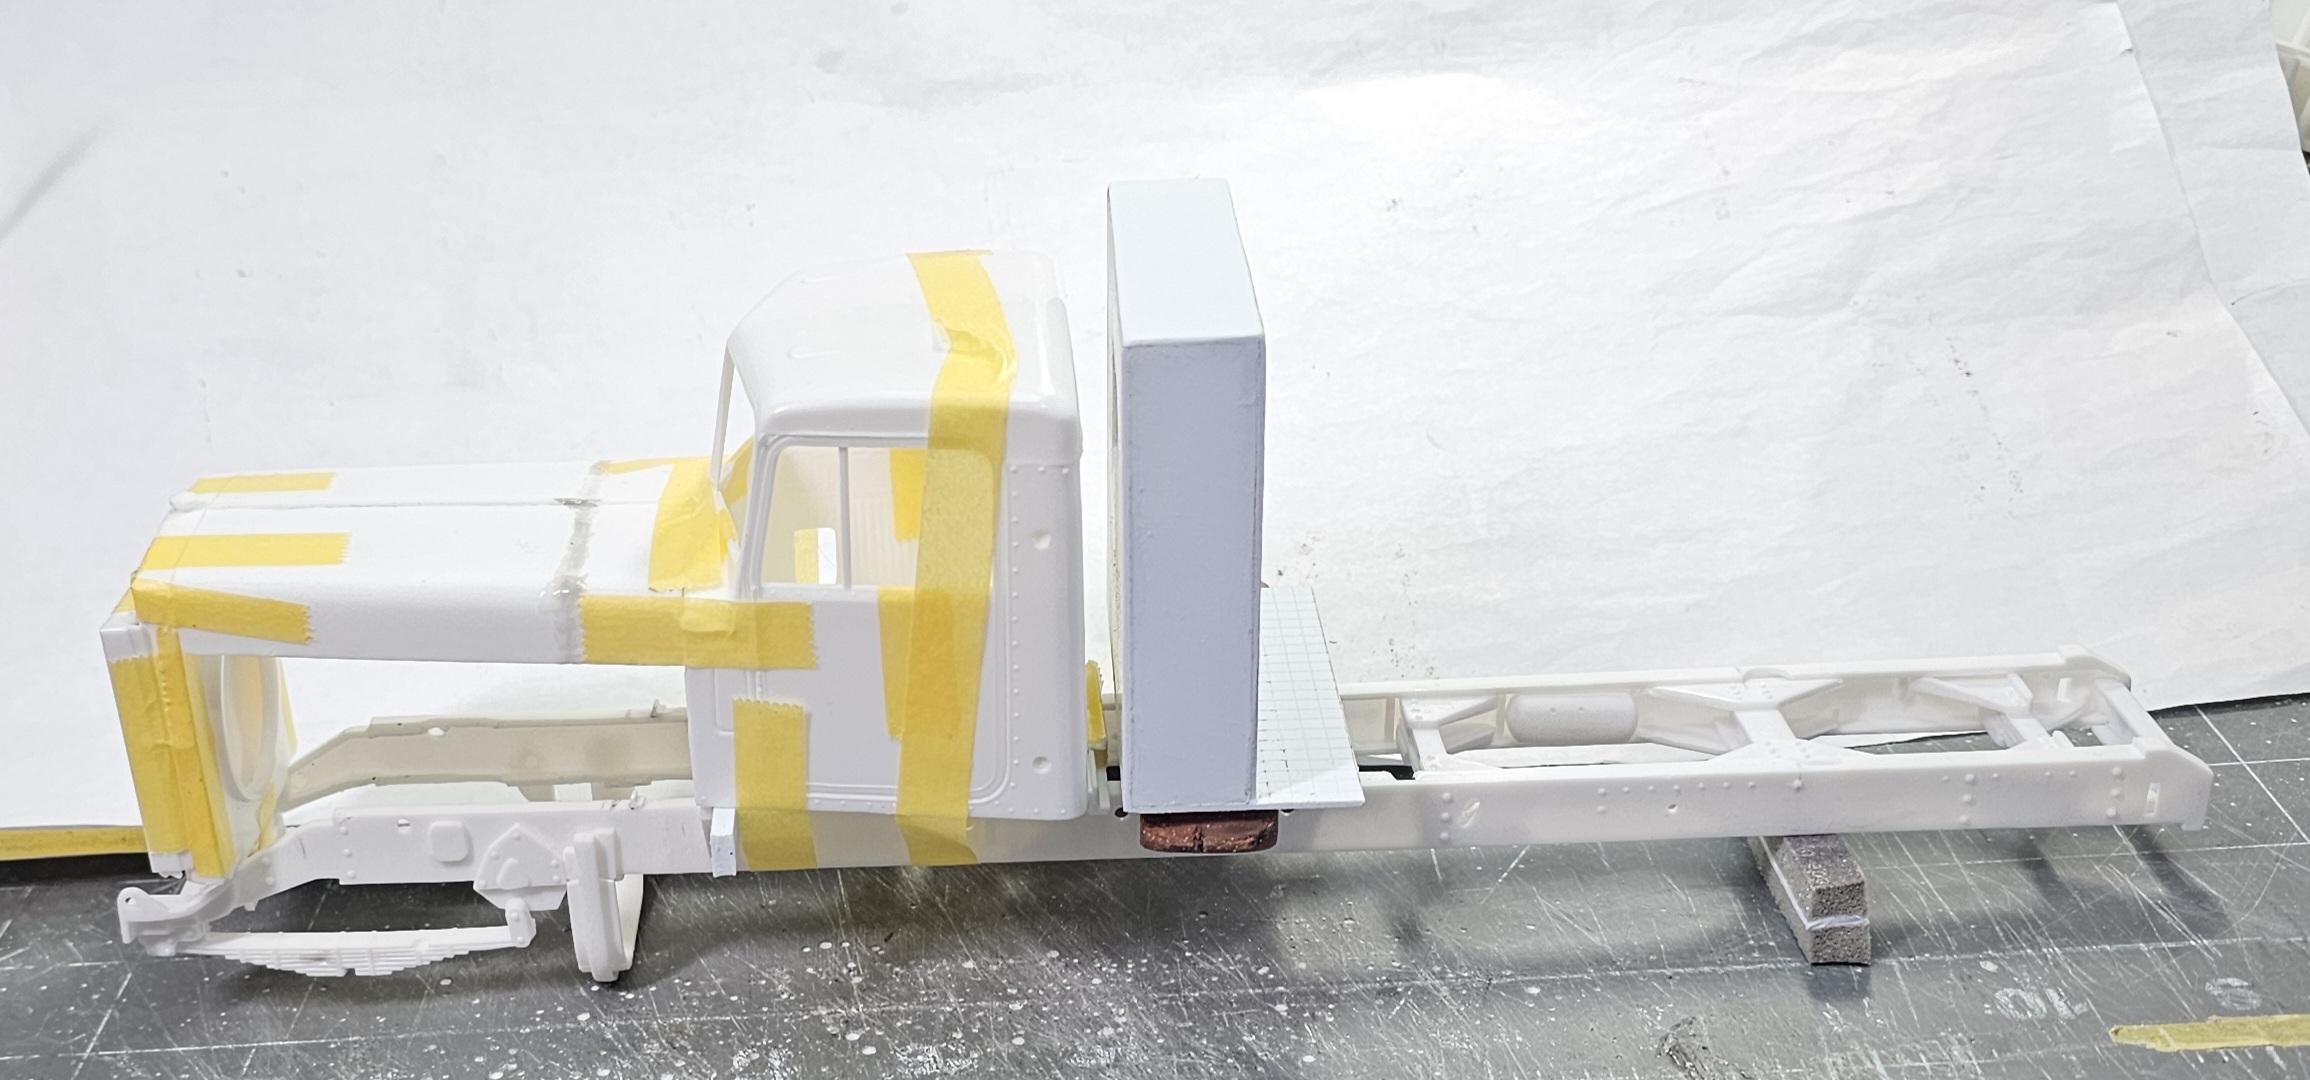
Hey all Did some more work on this build today. I modified the KFS 6 spoke front wheels to make them into twin bolt spoke mounts. I also got a start on the water tank/ headache rack. This view shows the Auslowe heavey Mack two bolt wheel I used for the conversion. The wheel on the right is the stock KFS 24.5 wheel. The one on the left is my modified version. This view shows them in the KFS 14:00 Continental tires. Tires are painted with Tamiya rubber black. This view shows the Global Hayes HDX headache rack tank on the right. I was going to use this but it is solid resin and is very heavy, plus it's offset for the Hayes. The one on the left is my scratch built one from sheet stock. Rear veiws. This view shows them from the front side. This view shows the window opening. Same thing from the other side. I still have to build the rear lower tank, steps upper cab protector and add details. This view shows it temporarily sitting on the truck. This view shows the window opening and the rear window in the cab. Well that's it for now be back with more soon. Ron G

-
Kenworth C500
ShakyCraftsman replied to Gary Chastain's topic in WIP: Model Trucks: Big Rigs and Heavy Equipment
Hey Gary There probably lost to the carpet monster...😆 🤣 😂 Ron G -
Kenworth C500
ShakyCraftsman replied to Gary Chastain's topic in WIP: Model Trucks: Big Rigs and Heavy Equipment
Hey Gary They are pretty fiddly. I have 7 of those axle kits. They are the best ones for detail. Ron G -
Kenworth C500
ShakyCraftsman replied to Gary Chastain's topic in WIP: Model Trucks: Big Rigs and Heavy Equipment
😁👍🏻👍🏻👍🏻👍🏻 Ron G -
Kenworth C500
ShakyCraftsman replied to Gary Chastain's topic in WIP: Model Trucks: Big Rigs and Heavy Equipment
You know Gary sometimes they divide the fuel tank into two separate tanks for the def, but it is still one tank, but with to fill caps. Ron G -
Kenworth C500
ShakyCraftsman replied to Gary Chastain's topic in WIP: Model Trucks: Big Rigs and Heavy Equipment
Hey Gary Paul has some. Medium at $7.00 & small at $7.00. Ron G -
Kenworth C500
ShakyCraftsman replied to Gary Chastain's topic in WIP: Model Trucks: Big Rigs and Heavy Equipment
Hey Gary If you look close the hubs on those wheels already have the lug nuts. Ron G -
Your very welcome my friend. Ron G
-
Another fine build Gary. Ron G