

Mixalz
-
Posts
223 -
Joined
-
Last visited
Content Type
Profiles
Forums
Events
Gallery
Everything posted by Mixalz
-
Love it. Just ordered this one for myself too. Spectacular body work on yours
-
Thanks Ian. Yeah its a scary process trying to get a perfect shell. The S15 I'm building has had 6 coats of primer (with sanding in between) in an attempt to get a good finish. Aoshima plastic is definitely worse than Tamiya's. Keep building peeps!
-
Thanks for the input. I'll have to trial that method one day. Been getting awesome results with paint method so far but always open to new techniques.
-
Hi everyone, Not sure if this has come up before but today I came across a new problem. My paint used to adhere the flocking dried too fast and so the flocking wasn't thick enough and the sheen of the plastic below was visible. Turns out you can touch up flocking if using enamel paint as the adhesive and it actually looks even better than normal, especially if you want a thicker film of the flocking agent. Not sure how it would work if the initial layer has fully cured though. The nice thing is that the initial layer of flocking absorbs the new paint and prevents runs! This is probably something you experienced modelers know but for me it was a nice surprise to learn. Michael
-
Tamiya Porsche Carrera GT (updated January 14th)
Mixalz replied to rbarlow1's topic in WIP: Model Cars
Oh man I was sooo tempted to buy the 1:12 but you can buy so many 1:24 for that price!!! Maybe if I get a pay rise -
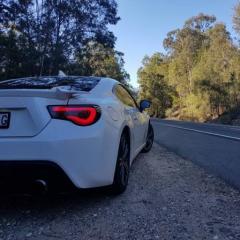
C3 Stingray
Mixalz replied to Mixalz's topic in 1:1 Reference Photos: Auto Shows, Personal vehicles (Cars and Trucks)
I never really thought of using other sales sites like Ebay. Thanks. I did check car sales (aussie site) but that's it. Good idea. -
C3 Stingray
Mixalz replied to Mixalz's topic in 1:1 Reference Photos: Auto Shows, Personal vehicles (Cars and Trucks)
I decided to pass on placing the wire (I may have forgotten to do it lol......) -
Hi everyone. I decided to try straining without success. I did return the paint but they said they wouldn't open a new white pigment so I went elsewhere to get my mix. The second shop gave me beautiful quality but although the colour isn't quite perfect. However Im content with this colour. Not quite factory but not bad by any means. Cheers
-
Hi everyone, Today I went to the local auto store and got some auto paint mixed up. Problem is that there are white specks of unmixed paint that are only visible once you start spraying. I know they aren't coming from my airbrush and if you press on them they do squish and leave a white streak (i.e. they are definielty from the paint having unmixed specks). I have tried shaking for 5mins and suing a drill to mix without success. My question is should I try straining this or ask them to mix a new batch preferably with a new tin of their white pigment? Cheers
-
Nice work sor far. Are the wires/ tubes custom or included in a kit?
-
Display Cabinet FINISHED!
Mixalz replied to Mixalz's topic in General Automotive Talk (Trucks and Cars)
Well I just finished transpodting the rest. Look good in their new home. Gonna be a few years before I even come close to filling it up!!! JDM & supercars. My favourites -
Display Cabinet FINISHED!
Mixalz replied to Mixalz's topic in General Automotive Talk (Trucks and Cars)
Bookshelf - $90 Doors - $140 ($70 each) Glass shelves - $72 ($12 each) LED strip - $45 Aluminium extrusions - $60 (3 @ $20 each) Closed cell foam - $20 All prices in AUD. So a decent cost associated but I got the exact design I wanted with minimal work. Only difference I would have liked to see, is if the backboard was solid timber/veneer rather than the carboard slide-in panel. The lack of a back panel is what makes it too front heavy. EDIT - Cable/connectors/silcone etc were my garage consumables -
Display Cabinet FINISHED!
Mixalz replied to Mixalz's topic in General Automotive Talk (Trucks and Cars)
Thanks for looking and the kind comments. Ive always loved seeing other's cabinets and the recent "post your collection" thread really inspired me. -
Merry Xmas everyone! With me only working half days over the New Year period, I had some time to complete a long awaited project. I bought a whole bunch of stuff from Ikea: - Billy bookshelf - Morliden doors - Extra glass shelves I also bought some LED strip lights and aluminium extrusions with covers from my local electrical wholesaler. To top it off I got some closed cell foam from Bunnings. I assembled the bookshelf as per the instructions and then cut to size the LEDs and extrusions. I attached these to the shelves using some simple clips that came with the extrusions. The wiring was simple enough (just soldering +/- to some dual core wire) and the joints were protected with a dab of silicone (not shown in photos). Each shelf then had a length of cable that was run to the bottom of the bookshelf. I paired of each adjacent shelf and ran them all to a connector (no idea what its actually called). After this I just cleaned up the bottom as lets face it most of us are perfectionists here. Finally I ran the weather stripping foam along the borders (after this I realised I should have used a narrower foam as even though the foam compresses, the door sliding past it is causing it to lift). The lifting isn't an issue yet as its still "dustproof" but I may change it to a narrower foam in the future. Finally I mounted the case to the wall as its front heavy from the doors. A bit of Windex and BAM it is complete. The rest of my models will be moved in when I finish moving house. Enjoy the pics
-
Tamiya Porsche Carrera GT (updated January 14th)
Mixalz replied to rbarlow1's topic in WIP: Model Cars
Out of curiosity what did you paint the shocks with? I ended up repainting mine due to chipping during assembly. So I preassembled what was possible. -
Tamiya Porsche Carrera GT (updated January 14th)
Mixalz replied to rbarlow1's topic in WIP: Model Cars
Awesome work so far. Its a really fun kit! -
C3 Stingray
Mixalz replied to Mixalz's topic in 1:1 Reference Photos: Auto Shows, Personal vehicles (Cars and Trucks)
Ah ha found it -
C3 Stingray
Mixalz replied to Mixalz's topic in 1:1 Reference Photos: Auto Shows, Personal vehicles (Cars and Trucks)
I was mainly looking for the point at which it exits the firewall. This is the best I can find unfortunately -
C3 Stingray
Mixalz replied to Mixalz's topic in 1:1 Reference Photos: Auto Shows, Personal vehicles (Cars and Trucks)
Awesome that is gonna help heaps. Do you have a photo of the path the throttle cable follows from the carby? I'm contemplating including one Thanks -
Hello everyone, I am in the process of building a C3 Stingray and am hoping to find some photos showing all the fuel line, oil hose, water hoses etc. I can't find a collection of photos from all angles on google. Anyone able to help? Cheers, Michael
-
WOW. Yours is stunning. I'll have to get the camera out tonight.
-
Thanks for looking and the comments! It really isn't visible in the photos but a few issues: 1. During my clear painting I got a speck of dust on the surface. Normally I would either: A) leave it and polish it later or, B) pick it out with fine tipped tweezers if its protruding into the air. This time it looked like it was protruding so I went to grab it and it wouldn't lift out. So I tried again and again each time grabbing closer to the paint until I inevitably touched the surface and creased the paint. It polished out about 70% so there is still some texture which I'm annoyed with. 2. Putting the model down inside a cardboard box. This is how I store models during construction to avoid dust. Picking it up and putting it down resulted in the pain on the side skirts rubbing off down to primer! Lesson here is use paper towel or similar for cushioning. 3. Polishing through sharp edges. Had to re color coat the model during the polishing stage (prior to clear) due to primer being exposed on the edges. Any suggestions here? 4. Snapped off a mirror. Lesson learnt drill holes and use a pin/rod 5. Gluing in mirrors (the "glass"). What glue do people use. Because you have to basically drop the mirror insert in, the problem I get is glue seeping up on to the "mirror" surface. Again not in the photo but its there on the model That is about it. Not major problems but I'm slowing aiming for perfection.
-
Just wrapped up another project. Standard OOB build. Only real difference was painted the stock rims black. Before: After (Tamiya anti static dusting brush): I'm really happy with my undercarriages and interiors at this point. Need to work on not ruining my exteriors/shells during assembly. Learning every step of the way. Thanks for looking, Michael
-
Interesting technique for fabrication. Could you provide a link to some photos? Never seen anyone fab their own body kits
-
Now thats the kind of reference photos I like. Fantasy Junction bookmarked