

Mixalz
-
Posts
223 -
Joined
-
Last visited
Content Type
Profiles
Forums
Events
Gallery
Everything posted by Mixalz
-
Mercedes-AMG GT3
Mixalz replied to harti20's topic in WIP: Other Racing: Road Racing, Land Speed Racers
Will be following this one. Got mine in the box still! -
Hi everyone, Its been a very long time since I was on here. Bought and renovated a house. Finally have a dedicated work space and built a bench and cupboard too. With Covid19 hanging around I have some free time. Here is my start on a great kit. Painted Mr Color Super Silver (C159) and then Mr Clear Color GX Clear Orange (Gx106) and then Mr Color Super Clear (Gx100). Sanded up to 3000grit then polished with Tamiya polishes and then Meguiars Carnauba Wax. Happy with finish Cheers, Michael
-
Nice work. Love the engine and wiring
-
Very nice so far. Are the seats painted silver or with foil?
-
Look forward to this one
-
Amazing work so far. Very clean. Love the colour
-
Thanks! Next up is the engine. Nothing too flash. Did wire up a distributor as I one sitting around to trial. Thanks for looking. Polishing the body as I post
-
Stunning work
-
Hi there, Just had a bit of a break from the hobby. Here is the latest model. Almost done already so there are not many photos of the progress. Painted to match my brother's one which he crashed (although his was targa top). Using some PE parts and wiring for distributor. Cheers!
-
Hey there. Sorry I have been off the forum and the bench for some months due to work. The paint was Tamiya Italian Red TS-8 and their clear TS-13. As for the dash it was it was what was recommended in the instructions. Hope that helps, MIchael
-
Thanks for all the kind comments. Looks good on the shelf
-
One day I'll have the patience to correctly photo my models. Sorry about the colour variation! Thanks for looking!
-
Finally wrapped up this project. Started off going for perfection but ran into multiple bumps along the way. I couldn't redo the engine plumbing as the CA glue was too tight and I didn't want to break/repaint. I also stuffed the badges from Hobby Design and have now realised I should have coated these in chrome for a better finish and glued these using clear acrylic. The biggest drama actually came straight after polishing. So I had clear coated the car and then left it in the food dehydrator over night. Polished the clear coat and then decided that moving this model along with some others would be best (I was moving houses and so moving a few models each trip over). That's where the problem occurred. I had wrapped the body in a towel to protect it and found out when I unwrapped it that the towel had left indentations of its texture in the clear! I had to repolish the body... I couldnt repaint as the badges were on there too... So I repolished as best I could without burning through the clear. So under careful scrutiny you can still discern scratches and the towels marks. All in all, it was a top quality model. Left the base of it as the clear panel to show off the space frame.
-
Thanks everyone. I find Alclads polished aluminium seems to give a nice finish for wheels The kit is being built with bits and pieces from hobby design PE kit. The wheel centres are about 6 pieces of photoetch painstakingly assembled with epoxy for added flexibility. These took a couple of tries to perfect. Luckily acetone and an ultrasonic will clean most things off PE parts. I did manage to stuff up the rear AND side badges with these PE parts unfortunately. Thought I could get away with CA glue but slipped and damaged the badges and paint as well. Lesson learnt stick with acrylic clear and the just clear coat the whole car together.
-
The red on the dash plate was probably too thin but I ran out of paint and was too scared to try and remix the paint colour and touch it up.
-
Last update for this thread. Car is basically completed and just needs number plates now. Didn't end up changing any hoses as the glue really did its job well. Engine Wheels Dash. This really held up the project. Trying to balance the paints used to avoid them eating to each other was brutal. Used Alclad for chrome and lacquer paints for the body and red with Vallejo to touch up the switches. Took three trials to achieve the result here. The order I finally settled on involved using a layer of Alclad Aqua Gloss between each coat of paint to: 1 - seal the previous coat and prevent burn through 2 - prevent masking tape damaging the lower layer 3 - seal the decals (one of which still peeled off and was attached to the masking tape! I was so lucky that I was able to carefully pull it off thanks to the layer of gloss over it giving it strength) Interior assembled
-
Very clean. Cool stuff
-
Wow. Awesome work
-
Thanks. Its still came out fairly cool. I just realised the paint work doesn't show in the photos at all. The below close up does show some of the metallic effect from the clear silver. Looks much better in person.
-
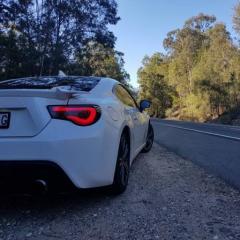
Good evening everyone. Finally completed this model. Started a new job so I have far less than time now. Stock OOB build. Just bought some metal transfers to make the badges look better. Paint: White Primer, Mr Color White (C1), Mr Color GX Clear Silver (GX110), Mr Color Super Clear Overall I'm fairly happy with this one. Looking back some nicer rims and dropping it may have been the way to go but that can be the next one. WIP Thread: Criticism welcomed always looking to improve.
-
one day ill do it, so busy right now
-
You said it perfectly. I couldn't believe it when they rolled next to each other. I mean both are 0.5mm and look completely identical tapers under magnification! Yet iwata still have different part number for them. So annoyed lol. I/ They should have scored the back end of the neddles different to avoid confusion. Then again I don't see this being a problem if you are more careful than I am.
-
Hi everyone, I was cleaning my airbrushes today and mixed up my airbrush needles. I mixed up IWATA 6171 (HP-CS) and 7171 (HP-CR) Both are 0.5 mm needles. Both appear to have the same tip size and tapers. I can't tell the difference. Are they the same....? Iwata does have different codes for them though. I'm really stuck figuring this out Michael
-
Hi everyone, I'm building a Lambo Diablo GTR and was wondering if anyone knows about the carbon fiber. Specifically: 1 - Is the entire rear wing carbon fiber or is is just the two side fins. In the picture I've found I can see the pattern on the fins but not the main horizontal piece 2 - The front and side lips; are they exposed carbon fiber or painted grey? 3 - The rear light assembly appears to be painted grey rather than carbon fibre. Can anyone confirm this? Cheers
-
Hi everyone. Is there a website anyone is aware of for listing car model stuff? www.eModelCars.com has apparently gone down. Looking for an Aussie site if possible. Otherwise Ebay/Gumtree will be the go to. Listing a few things I bought incorrectly