

Mixalz
-
Posts
223 -
Joined
-
Last visited
Content Type
Profiles
Forums
Events
Gallery
Everything posted by Mixalz
-
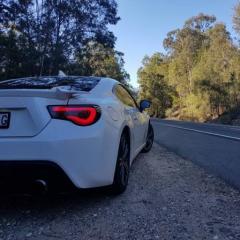
Hello everyone. I originally wasn't going to post this build but since I haven't found too many examples of it I will. In case someone tries to tackle it at least they can learn from my mistakes (there are plenty!) So the build consists of the kit and Hobby Design's PE set. First I want to say I was extremely disappointed with the kit. The rivet holes are clearly shown on the box but were not present on the model. Nor were the grooves where the flares attached to the body. http://www.jdm-shop.de/images/product_images/info_images/s30.jpg Secondly the undercarriage is clearly from a battery powered toy and very unrealistic. In fact there are panels that snap together for the battery slots! Thirldy the color shown on the box is not in the instructions. In fact that colour isn't even made by the manufacturer. The closest color they recommend is way off. This was annoying for me as I saw the box and liked THAT model, rivets and colour. So take home lesson ALWAYS find the instructions of the kit before buying! Aside from this the shell is really nicely made. The next problem I had was with the PE parts. The emblems are beautiful. The window trims were OK for the sides and rear (a touch short in some areas but enough that I could accept it). The problem with the window trims came after I had glued all the sides and rear. I found out the windshield piece was simply too small. Now I couldn't not use the one peice... This resulted in damage during placement and glue spreading whilst I tried to find a compromise position (i couldn't easily test fit due to the curvature). This annoyed me beyond belief as had I known the windshield piece was too small I simply would have used BMF as the trims were nice and deeply scribed in the model already! So if you pick up this PE kit I would advise against the trims. Onto the work itself. I had to do some majorish body work. This involved cleaning up some panel lines, deepening the front lip with a chisel, and measuring and drilling all those rivet holes. Once that was done the body was primed in grey (no photos) The shell was painted 214 Brown. This is a metallic brown I had mixed from the local auto paint store. The flake size was PERFECT. That being said the colour took 6 coats to cover my grey primer (this would become a problem later). So I painted the shell and then realised I forgot to remove the rear quarter panel emblems which were cast into the shell (I wanted to use the PE parts). So I cut them off. Now I didn't want to do another 6 coats (i was only painting the quarter panel) for fear of losing my window trim detail. So I decide to use Mr Mahogany Surfacer which is a dark brown primer, thinking it would give a good base (perhaps a bit dark but it SHOULD BE FINE I told myself). Well it wasn't fine. The quarter panel came out darker. Initially I thought it was barely perceivable (and it was!). So I decided to continue because honestly who would notice it if I barely could... However after painting the flares the colour differential is now noticeable (the joys of the human eye). Now I really couldn't be bother stripping it as there was quite a bit of body work that I wasn't sure I'd be able to redo without loss of definition. So another valuable lesson learnt. Trust your gut and also annotate instructions if using aftermarket parts!!! See the darkness Close up of rivets Vertical discrepancy of the PE. Really annoying! Bonus front end shot PS I'm not a fan of the colour I used for the flares. Its Mr Color Steel. Thats what the instruction recommended however in hindsight I should have mixed in some flat black to the paint. So annoyed at the lying box art lol.
-
I was tempted to assemble and glue as you mentioned. However im not super confident in the strength of the epoxy is such small surface area. The bolts passing through allow me to use of a "blobl" of epoxy on the other side of the lid to secure it. I ended up using a shapened toothpick with some thick paint to mark and then drilled the holes 0.5mm to allow some tolerance for error. Now it fits lines up
-
Thanks! I'm really loving the Mr Color paints. They are so durable, it makes detailing with acrylics a breeze. No matter how bad the mistake you can rub it out with a cotton bud and water! Sorry perhaps you meant someone else? I don't think calipers have come up in my threads, however, no I don't own one yet. Body is primed and needs some attention. Had problems flowing gap sealer which I didn't resolve before it set. Its gonna be detrimental to the final finish as sanding the areas in almost impossible but for a first try I'm happy.
-
I'm aware of this . The problem is that there is no clip for the front of the model. The shell has to be glued down! Now I cant access the print! So sad lol Thanks for the comments all
-
Made some more progress recently. Interior is now complete Side note on an error: the seat belts mounting points should be situated more towards the midline near the head rest. I knew this beforehand but I cut the fabric length too short. By time I trimmed it a few times to thread it through the parts the final length was too short so I made this compromise instead of cutting it off and potentially ruining the tub/ PE parts. Lesson here leave enough for extra then double that amount!!!
-
Hi all, Just finished this model. Not my best work by far but good practice. A few problems. I must have touched the windshield before gluing the shell and now have a great big print there.... I also really struggled with the black paint. Took a lot of polishing to get a mediocre result. Aside from that really enjoyed the kit. Will have to do another to do it justice!
-
Thanks! I know they aren't cheap and hadn't even contemplated using the temporary materials for this. Good idea! I have used restorative composites in the past but was limited by the light penetration. It didn't dawn on me to use a self cure resin for this. Its so obvious now (I should quit my job lol).
-
Nice work so far. Love the use of dental products; makes this hobby much easier! May I ask what exactly what resin it was? I've contemplated that but wasn't sure if I could get it to flow far enough into a mold. I may have to order some in. Cheers, Michael
-
Thanks! I really gave this one my best effort so far and am happy with the result. TOP QUALITY kit by Tamiya. Basically perfect fitment (just needed opening panels/holes to accommodate paint layers). This will be the last post in this thread. The model is now fully assembled bar the number plate. I have an idea I will be trying soon. This last photo shows the method I used to attach the seatbelts. I cut a recess into the panel using a dental bur (flat fissure if anyone is interested; it allowed a perfect slot to be cut). Next up "Under Glass" - maybe this weekend Thanks for following this thread and commenting! Michael EDIT: Under glass thread: http://www.modelcarsmag.com/forums/topic/126121-porsche-carrera-gt-tamiya-124/
-
Ugh just noticed the extra epoxy on the base of the LHS shock. Will trim it off with knife now.
-
Massive gluing session last night and tonight. Above are the shock components. Initially these were painted: 1. Alclad Gloss Black 2. Alclad Chrome 3. Alclad Hot Metal Red This resulted in non-fitment as the paint was too thick (even with mist coats). Consequently the parts were stripped and redone in: 1. Mr Metal Primer R 2. Alclad Hot Metal Red The advantage of this was that the primer is clear and so the aluminium's natural color showed through and gave the Alcald a good base color. It also allowed the use of (what I think) is an etching primer thus giving the paint so strength and good adhesion. Two parts were preglued (the rest couldn't be preglued). The assembled shocks: The shocks were fitted to photo etch bases on either end by use of 0.3mm piano wire and careful epoxy. These were then attached to the body as follows: When attaching the brakes I had to expand the holes with a file slightly. Additionally I had to file the front brake attachments opposite the rotors due the increased bulkiness of the PE rotors. . More to come once some epoxy sets. Michael
-
Thanks for the comments! Haven't had the time to pull out the airbrush so this one is still in progress. The colour is the recommended colour in Tamiya's instructions: Ascot brown: 2(XF-3) : 1(XF-7) : 1(XF-64) It came out really well except I should have cleared it as the acrylic are fragile and don't like being handled (especially these light tones). Update to come, Michael
-
 Imgur has been good to me. Its free. Has been free forever. Not a perfect layout but still easy to use.
 -
Seat belts were painted and dried last night. I now really love Mr Metal Primer R. Works a treat for PE parts that need to flex on fitting. For this model I wanted a street legal version so went with Hobby Design seat belts. Very easy to work with these. Holes were drilled for a bolt to hold the seat belt base. These were epoxied down. The seat was then threaded along the belt to its final position (now hiding the bolt....DOH; waste of parts!) The buckles didn't leave ANY room to manoeuvre the dash on placement but I got there after accidentally breaking the buckles off a couple of times. Getting really close now. I screwed up the RB Motion shocks. They are precision milled. I painted them prior to assembly and then realised even my super thin coats of paint were too thick to allow assembly. I had to pull them apart (damaging one in the process) and they are now reprimed and ready for paint. Now literally just need shocks and number plates to allow completion. Michael
-
Sexy car to say the least. Love the decal work. I haven't had any experience with Vallejo varnishes but having used Tamiya T-13, Alclads Klear Kote/s and Gunze Mr Super Clear I can say the paint chosen will have a massive impact. I've found decanted Mr Super Clear to be the most user friendly. Sorry I can't help about the Vallejo!
-
This hobby is one of the main reasons why I became a dentist Hobby and career have definitely helped each other. Thanks! Final update before I post in completed section. Just finished the interior. Seat belts took two tries. - Attempt 1: Alclad primer only. Paint was too fragile and chipper off from tweezers. - Attempt 2: Mr Metal Primer R then Alclad primer: Awesome stuff! The Mr Metal Primer R must have some sort of etchant in there. The emulsion hardens to a shell that is VERY durable and still flexible. Highly recommend! Well the shell is almost complete. Just contemplating how to use the photoetch number plates: - Do I try hand painting the lettering? - Do I paint it in lacquer black, then acrylic white and wipe off the lettering with a q-tip? - Do I just paint it one color and use a knife to scrap off the letters like I did for the seal belts here? Any suggestions appreciated!!! Michael
-
Minor update. Chasis ready to go. Blacks painted with Gunze lacquers, silver hand painted with vallejo, exhaust and brakes Alclad, Tamiya weathering kit and Gunze smoke used to give depth. First time I've done a model with functional suspension. I really like that! Cheers, Michael
-
Awesome start. What brand PE hose clamps are those? Michael
-
Love it. Awesome work
-
Thanks gotta represent! Cheers Ben. Trying hard to match the standards of this forum! I just looked at the one you've posted. Really nice work too. I was going to paint the centre piece of the engine but thought I'd probably stuff it up. I should have copied yours and used CF! Nice work. Its coming together rapidly now. Spent some more time last night: Body basically ready: My paranoia on screwing these up = using a ruler to place it centre. Only after taking the photo did i notice the dust particle on the INSIDE of the lens. I want to cry. Still really happy though! Michael
-
Cheers people. Another update as I just realised I haven't been taking photos or updating this thread as much as I thought. Nearing completion on this one. As of now its mainly polishing and assembly of shocks holding up the project. Start with engine: The carbon fibre was very tricky. Highly recommend a heat gun for application. Had to redo a few pieces and decided to accept the bubbles on others. Any thoughts on popping these with a knife? (I was scared to do this in case of tearing or marking plastic). Other than that I am really pleased with the wiring and the Alclad effects. Roof and bonnet: I used Hobby Design carbon on the roof. Not a fan especially when side by side with the Scale Production CF. Didn't notice I used the wrong stuff until the photo though. Silly mistake on the rims. Got a heatgun. Was over zealous and melted the paint slightly so its wrinkled now. Oh well live and learn. Rims were painted with mixture of Alcald aluminium and magnesium. Dash completed (minus gear knob) Can't wait to assemble! Michael
-
Thanks for the comments. Finishing touches to be done over next day/days. Excited! Lens is Tamron 90mm F/2.8 Macro Having only used 2 macro lenses in my life I am thoroughly impressed with the quality considering the price. Great for pets too if you have a fast hand.
-
Thanks, really happy with it. First paint job was better (less dust to polish out) but this still came out really well. Paints: Tamiya TS17 Gloss Aluminium; Gunze Mr Super Clear UV cut. Highly recommend the Mr Super Clear. Stuff sprays beautifully and with a decent wet coat it levels fantastically. No texture to sand. Just polish really.
-
Very impressive so far. LOVE the color. May I ask what brand paints they were?
-
Thanks for the comments so far! Update time. Finally came up with a manageable solution to my suspension dilemma (not wanting to use stock and also not liking the Scale Motorsport parts). The final product will be a combination of RB Motion shocks and some of the Scale Motorsport PE parts along with hobby design bolts. LHS to RHS: Stock, Scale Motorsport PE attached, Holes drilled and bolts inserted This shows the current product. On the side where the shocks will insert I had to cut off a segment of the stock part (not visible) between the two PE pieces to allow room for the shock to attach. The bolt on this side was cut so that only the head remained. This was glued on and a rod will be inserted from the other end to secure the shock to the joint (the bolt was too thin and too short to actually be used for this purpose). Photos to compliment this explanation once its painted and assembled.