.jpg.35153e8fc429f51f70e6945dcbab72bd.jpg)
rastta
-
Posts
200 -
Joined
-
Last visited
Content Type
Profiles
Forums
Events
Gallery
Everything posted by rastta
-
.thumb.jpg.f6247e8c05423eb52966ca1019847e11.jpg) Thanks for the positive comments. As for the trim - I ordered several sets. I have a truck I want to do as well and I'm gonna probably buy the sedan delivery. You can get it here if you ever want more. Galaxie Accessories
Thanks for the positive comments. As for the trim - I ordered several sets. I have a truck I want to do as well and I'm gonna probably buy the sedan delivery. You can get it here if you ever want more. Galaxie Accessories -
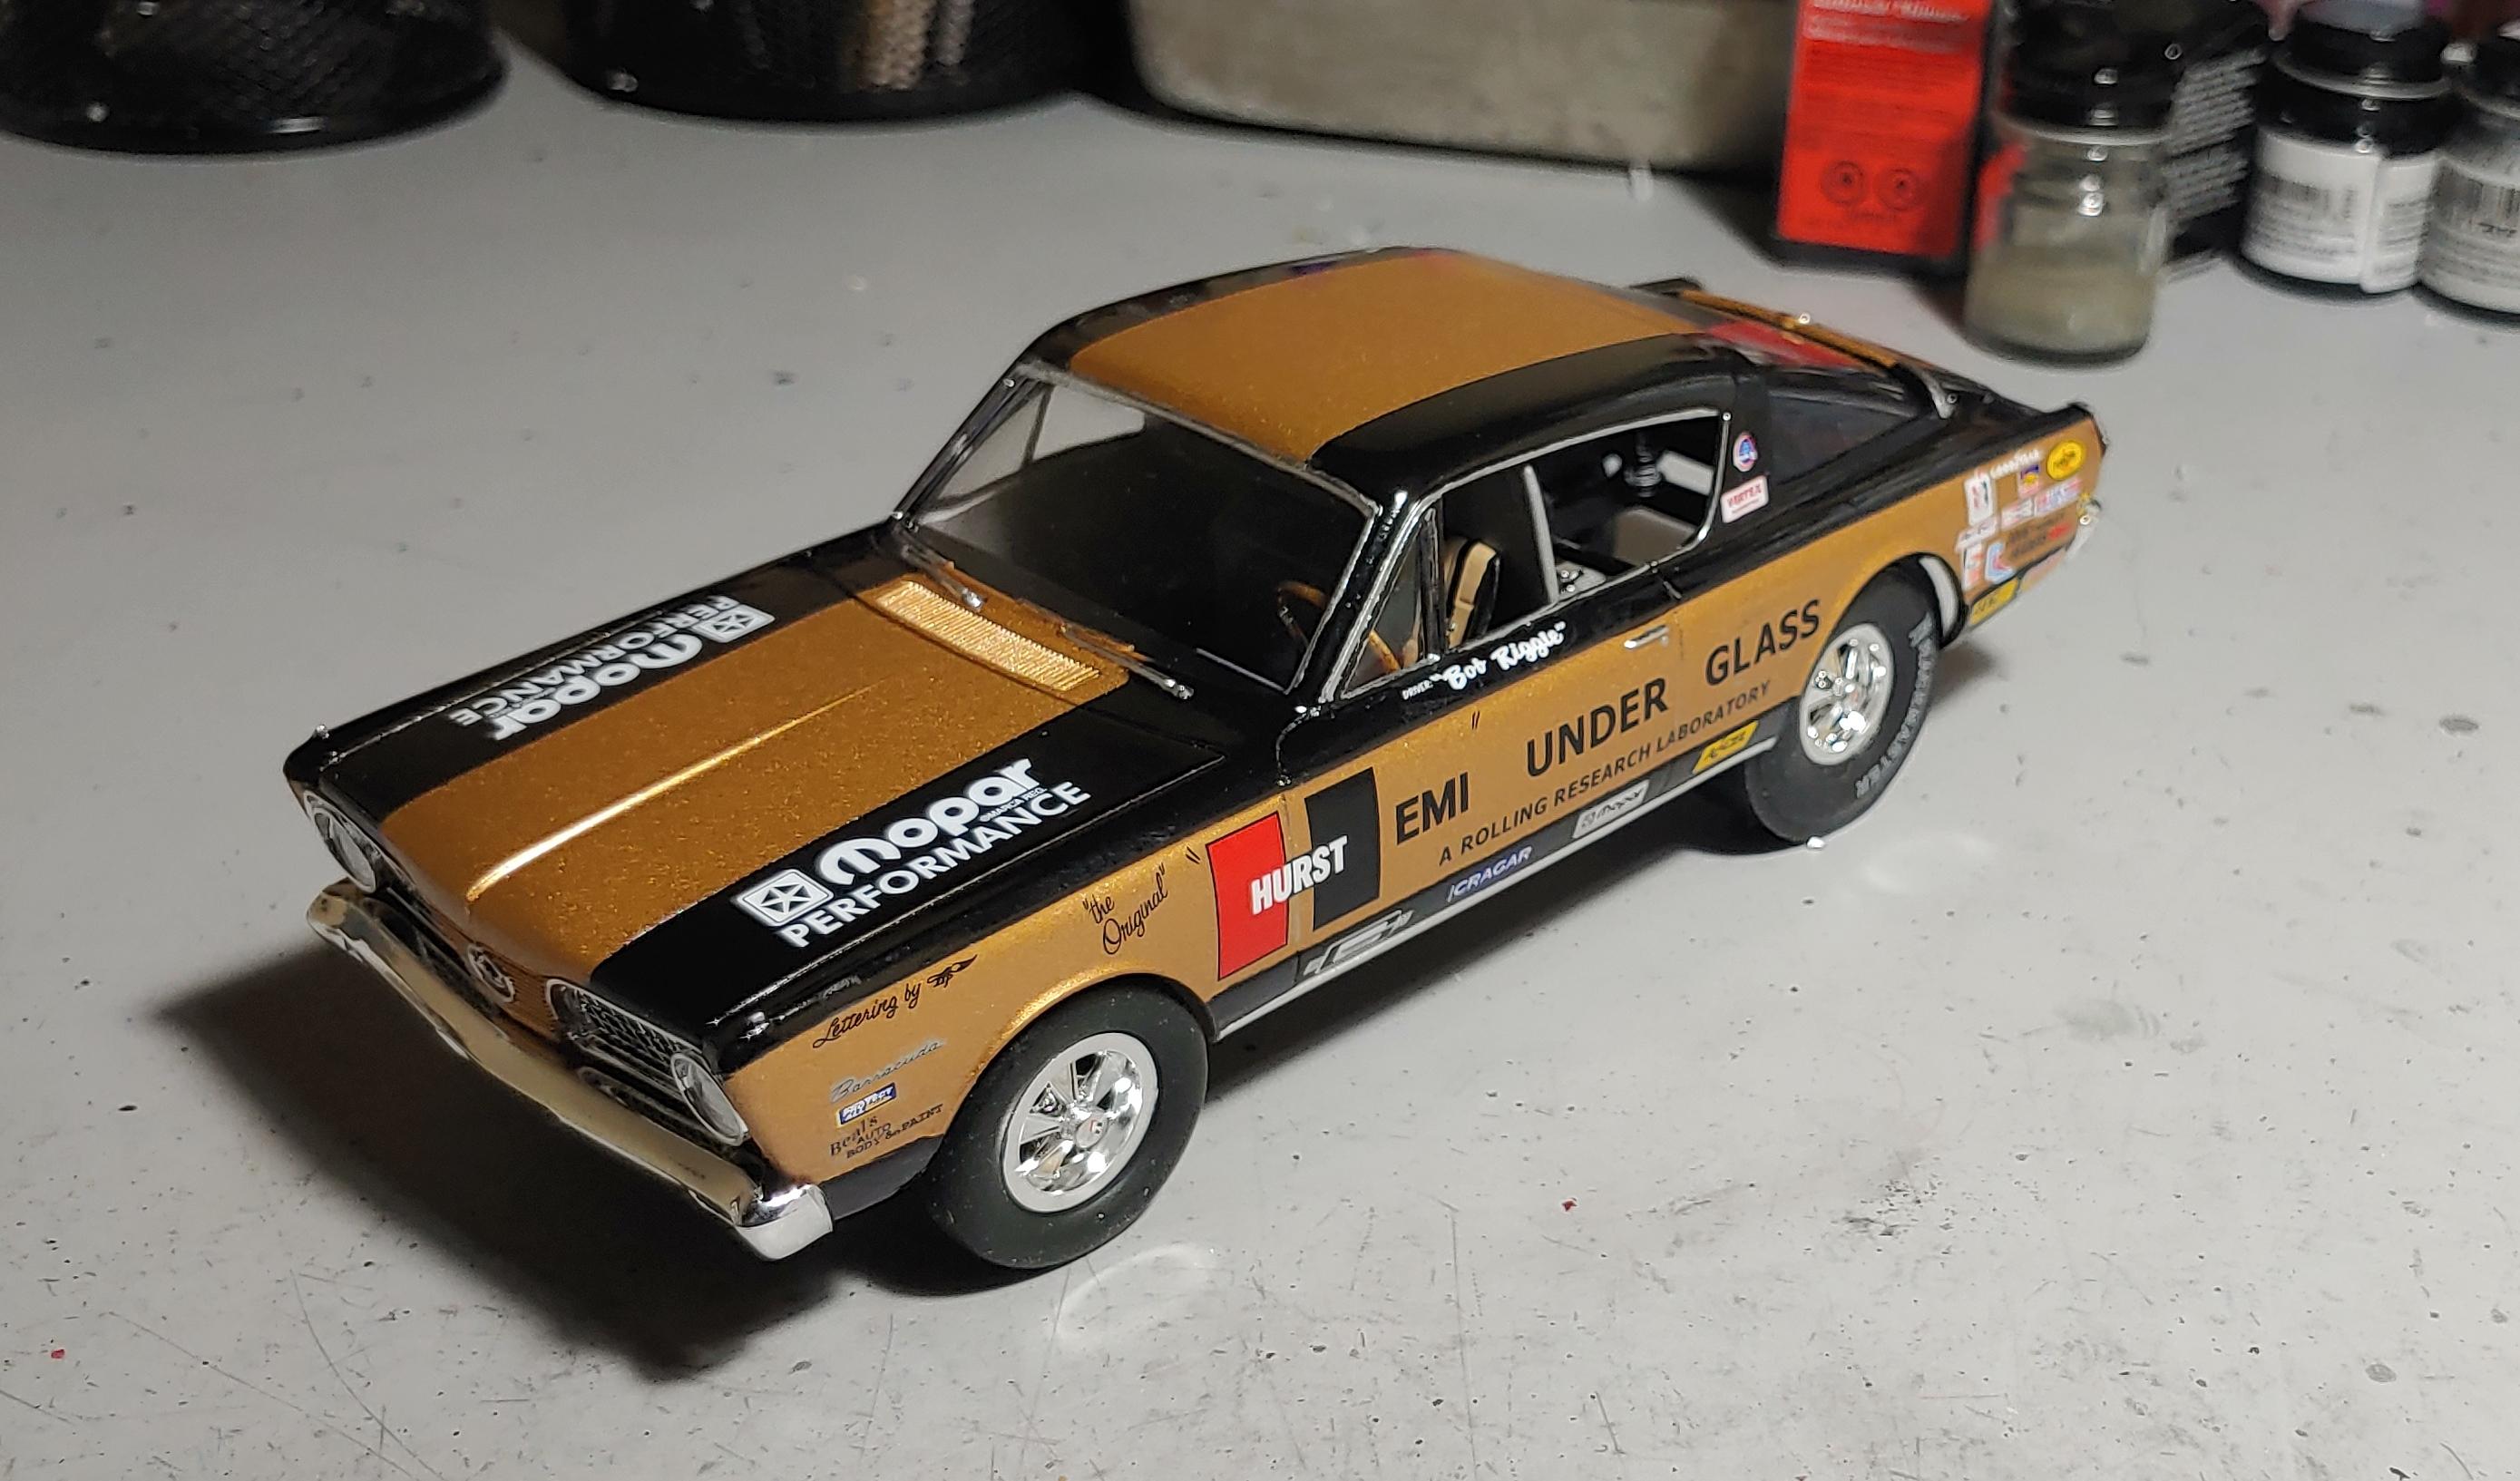
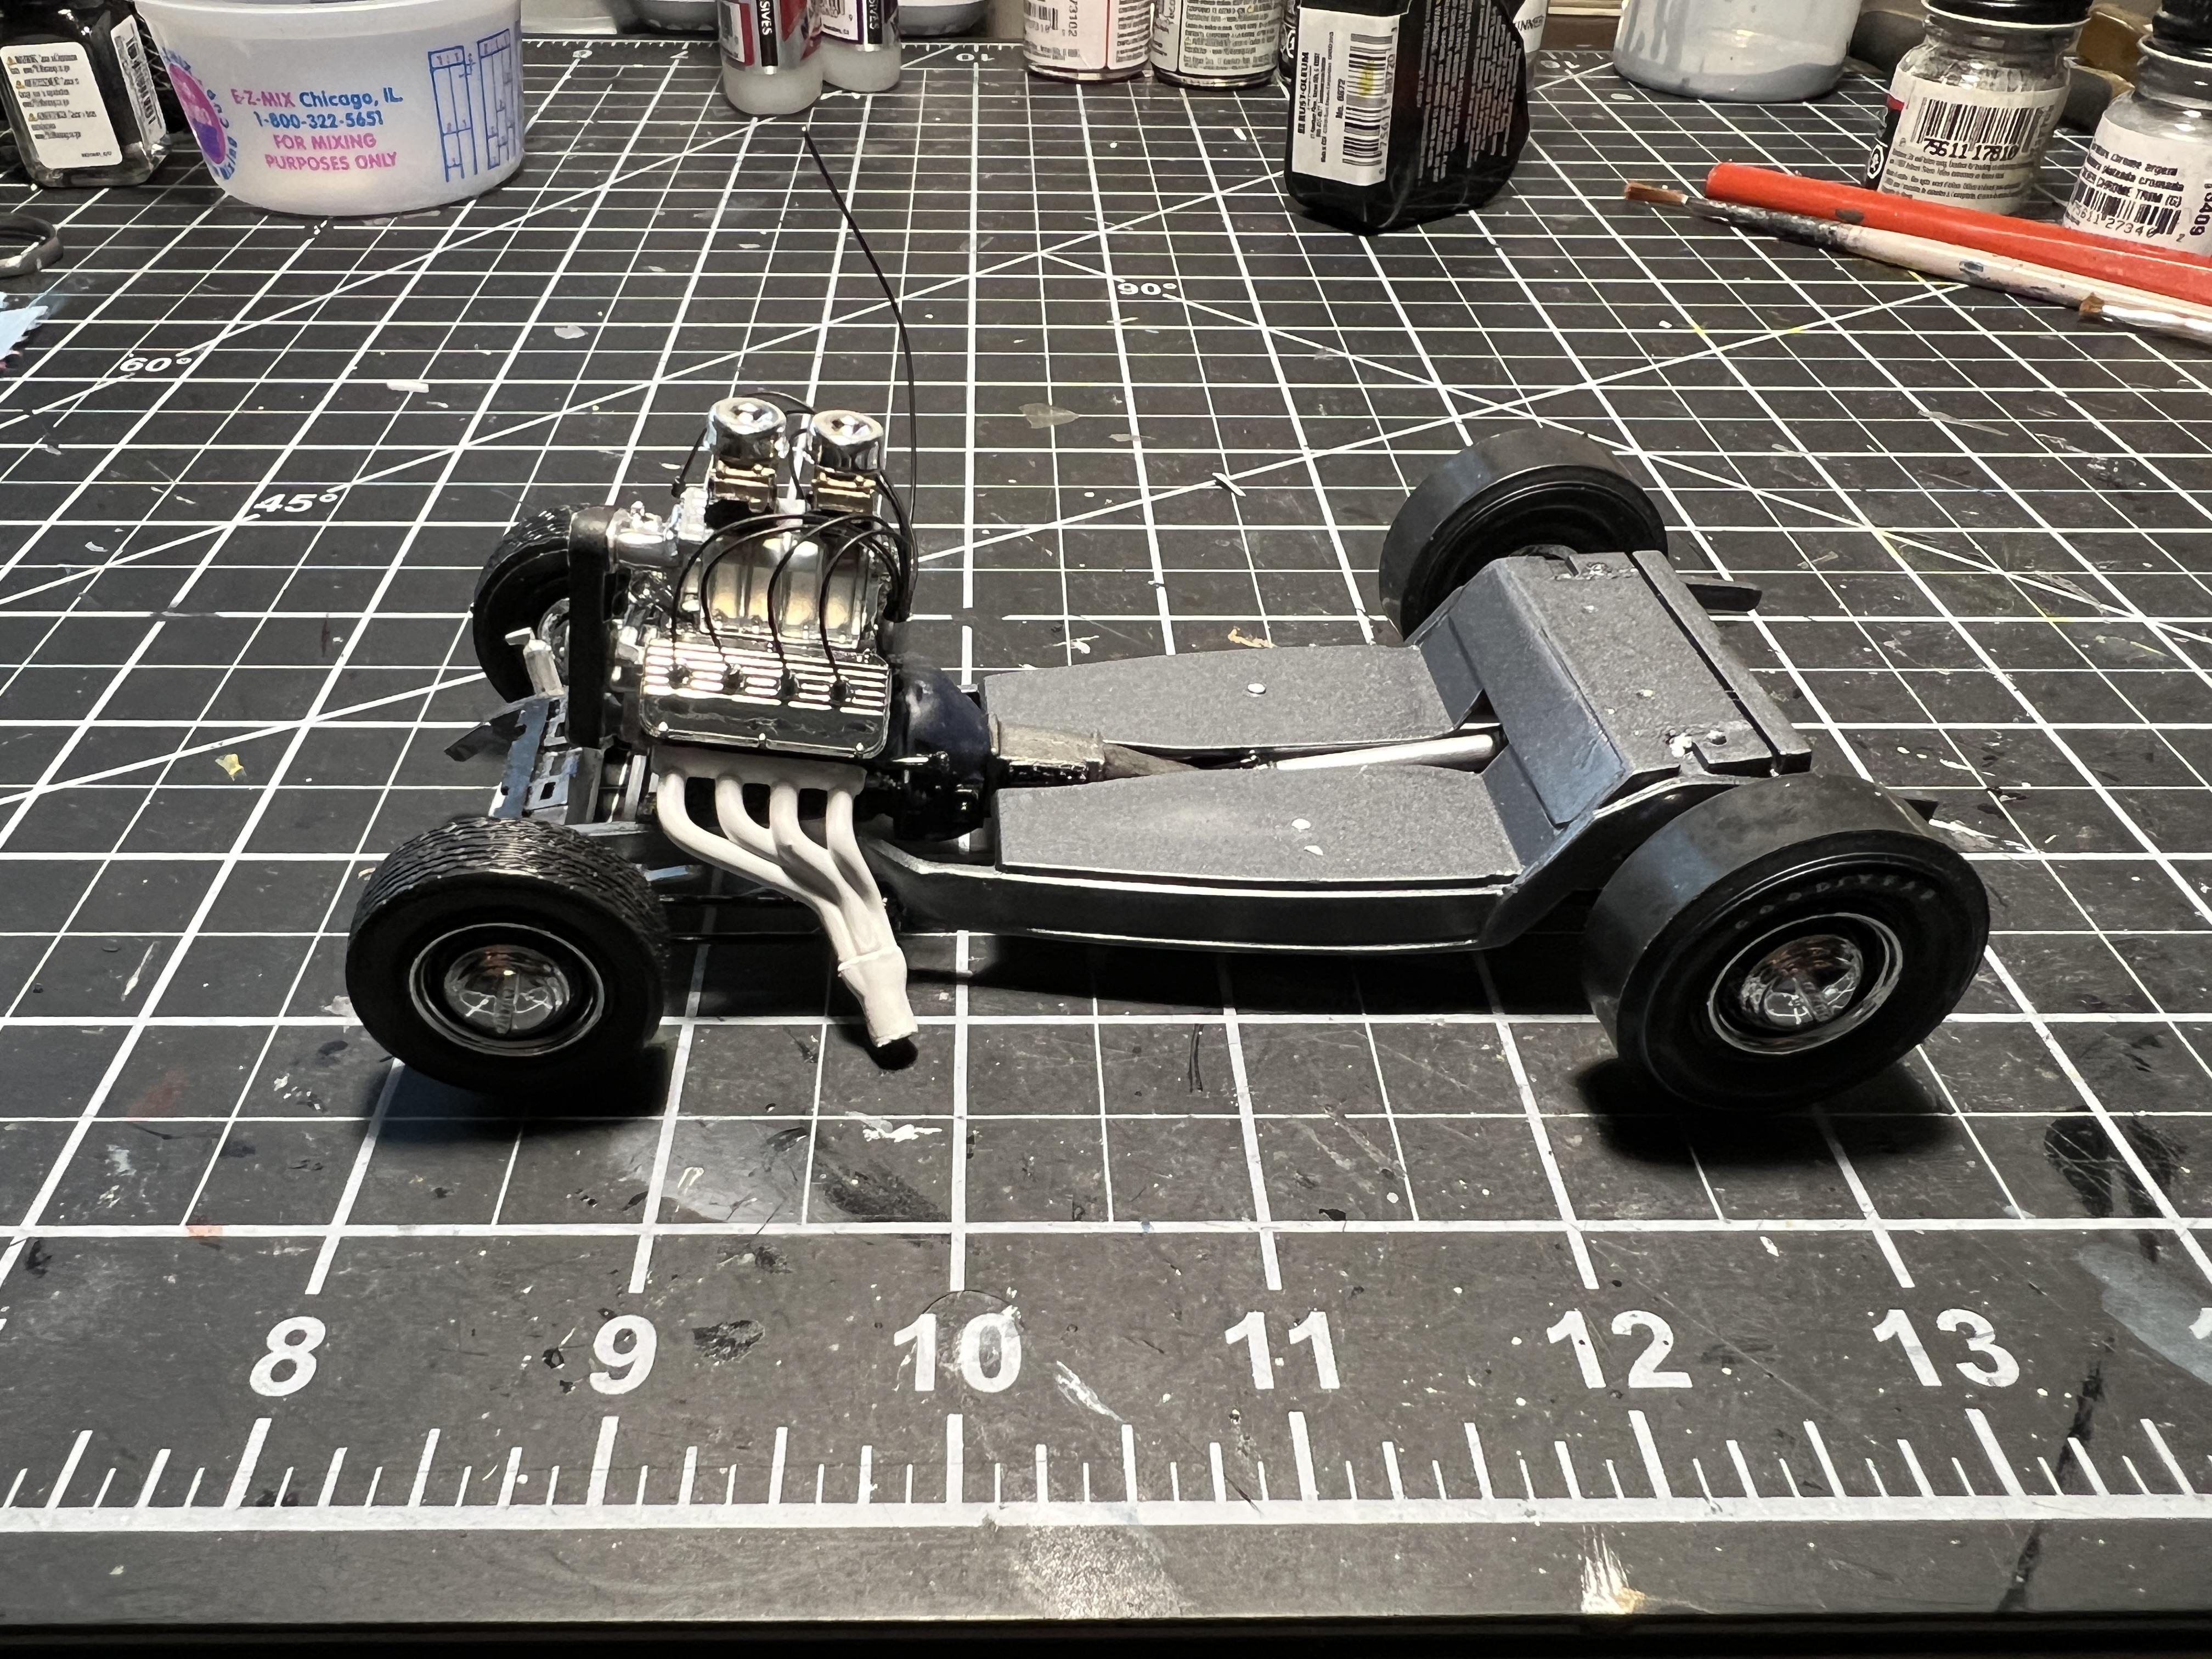
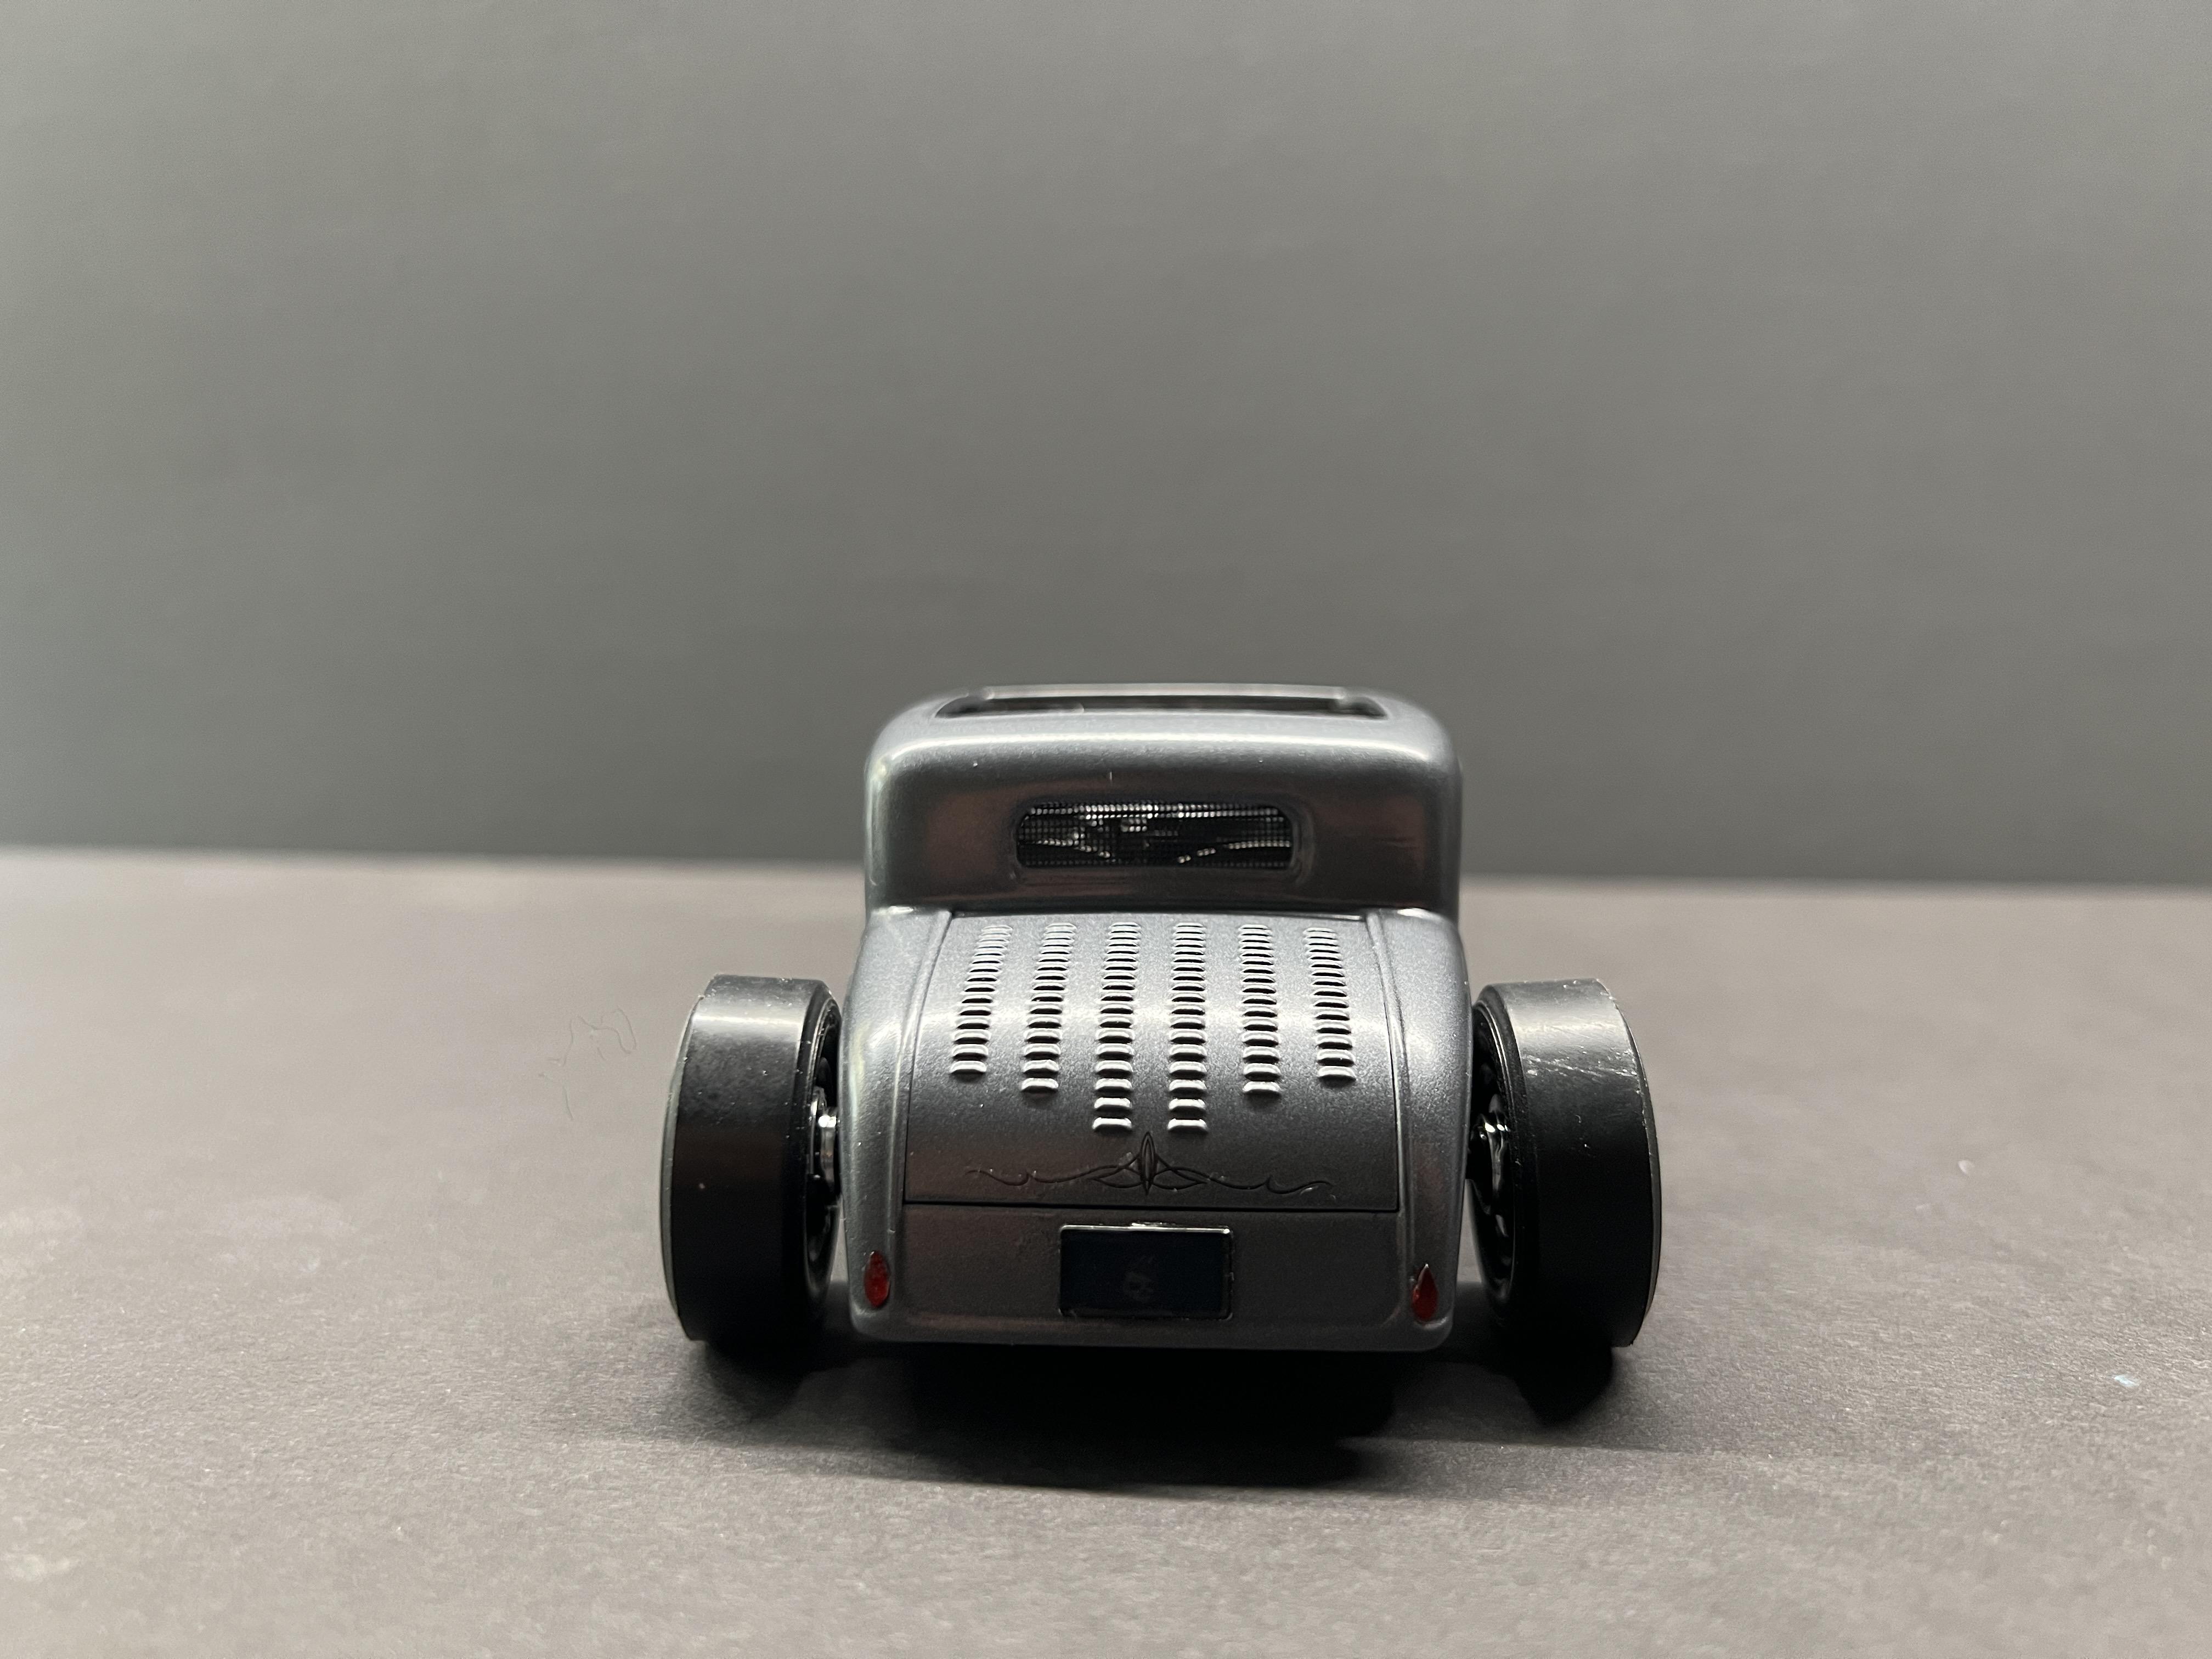
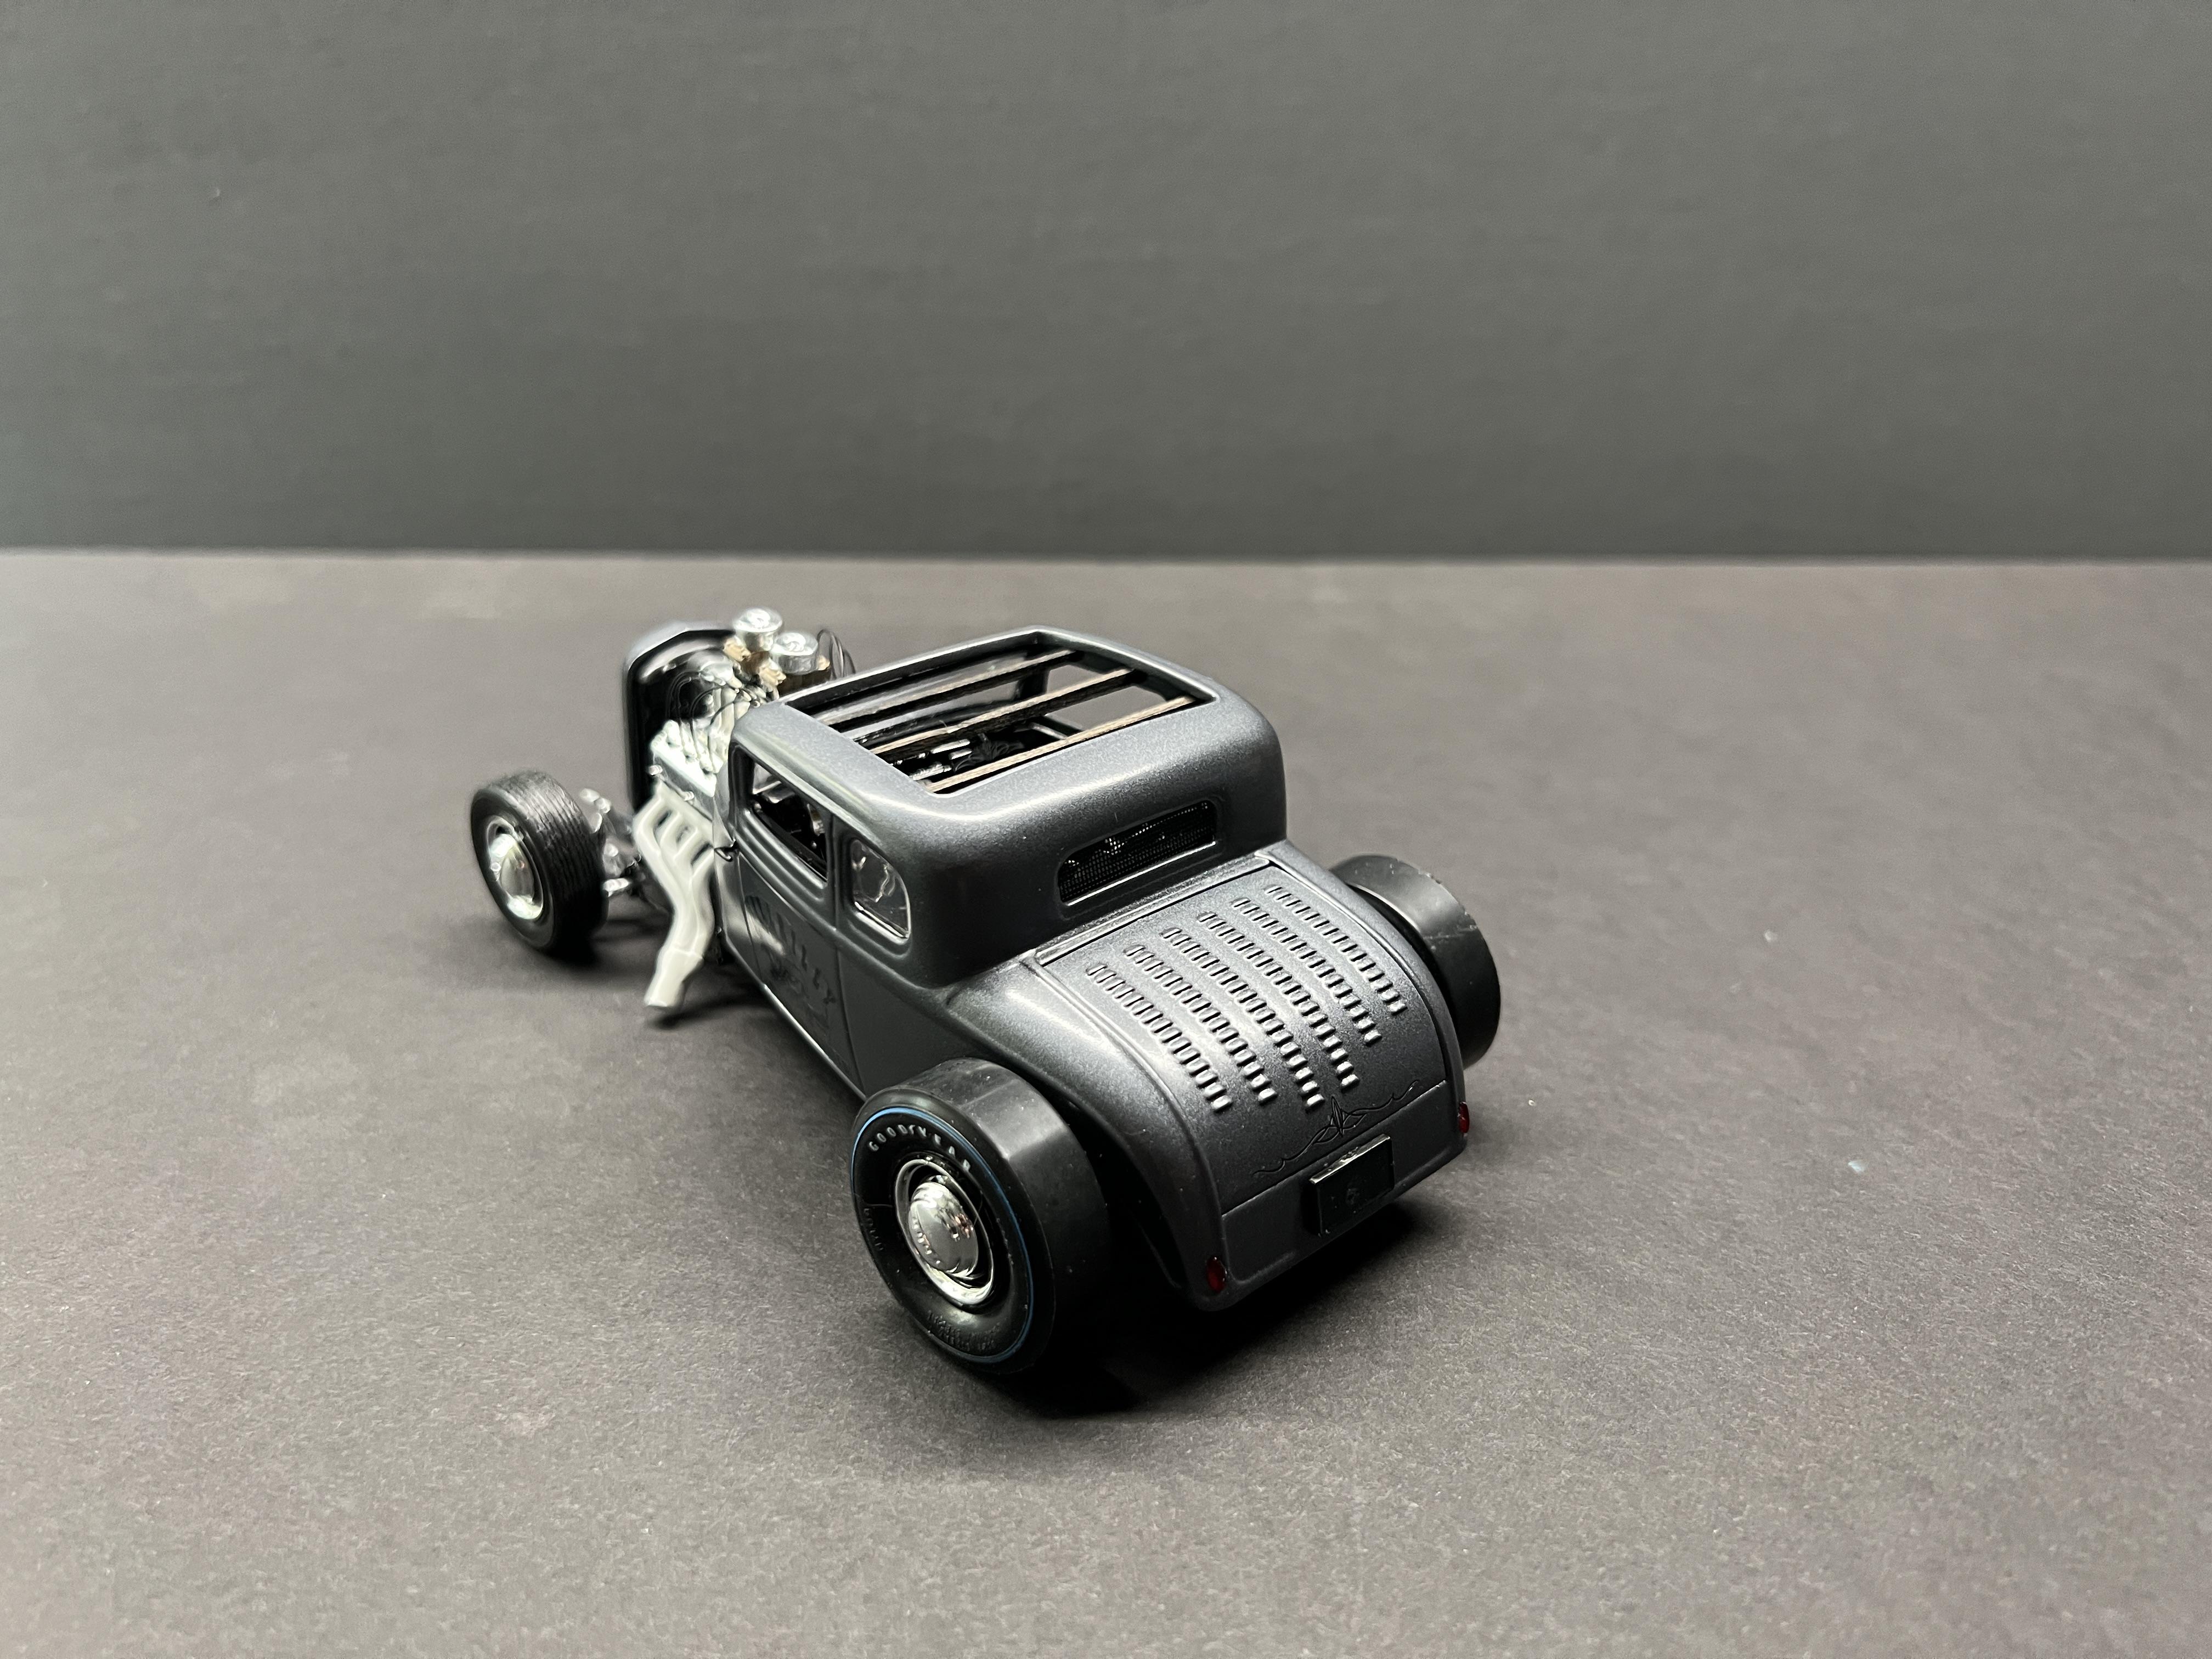
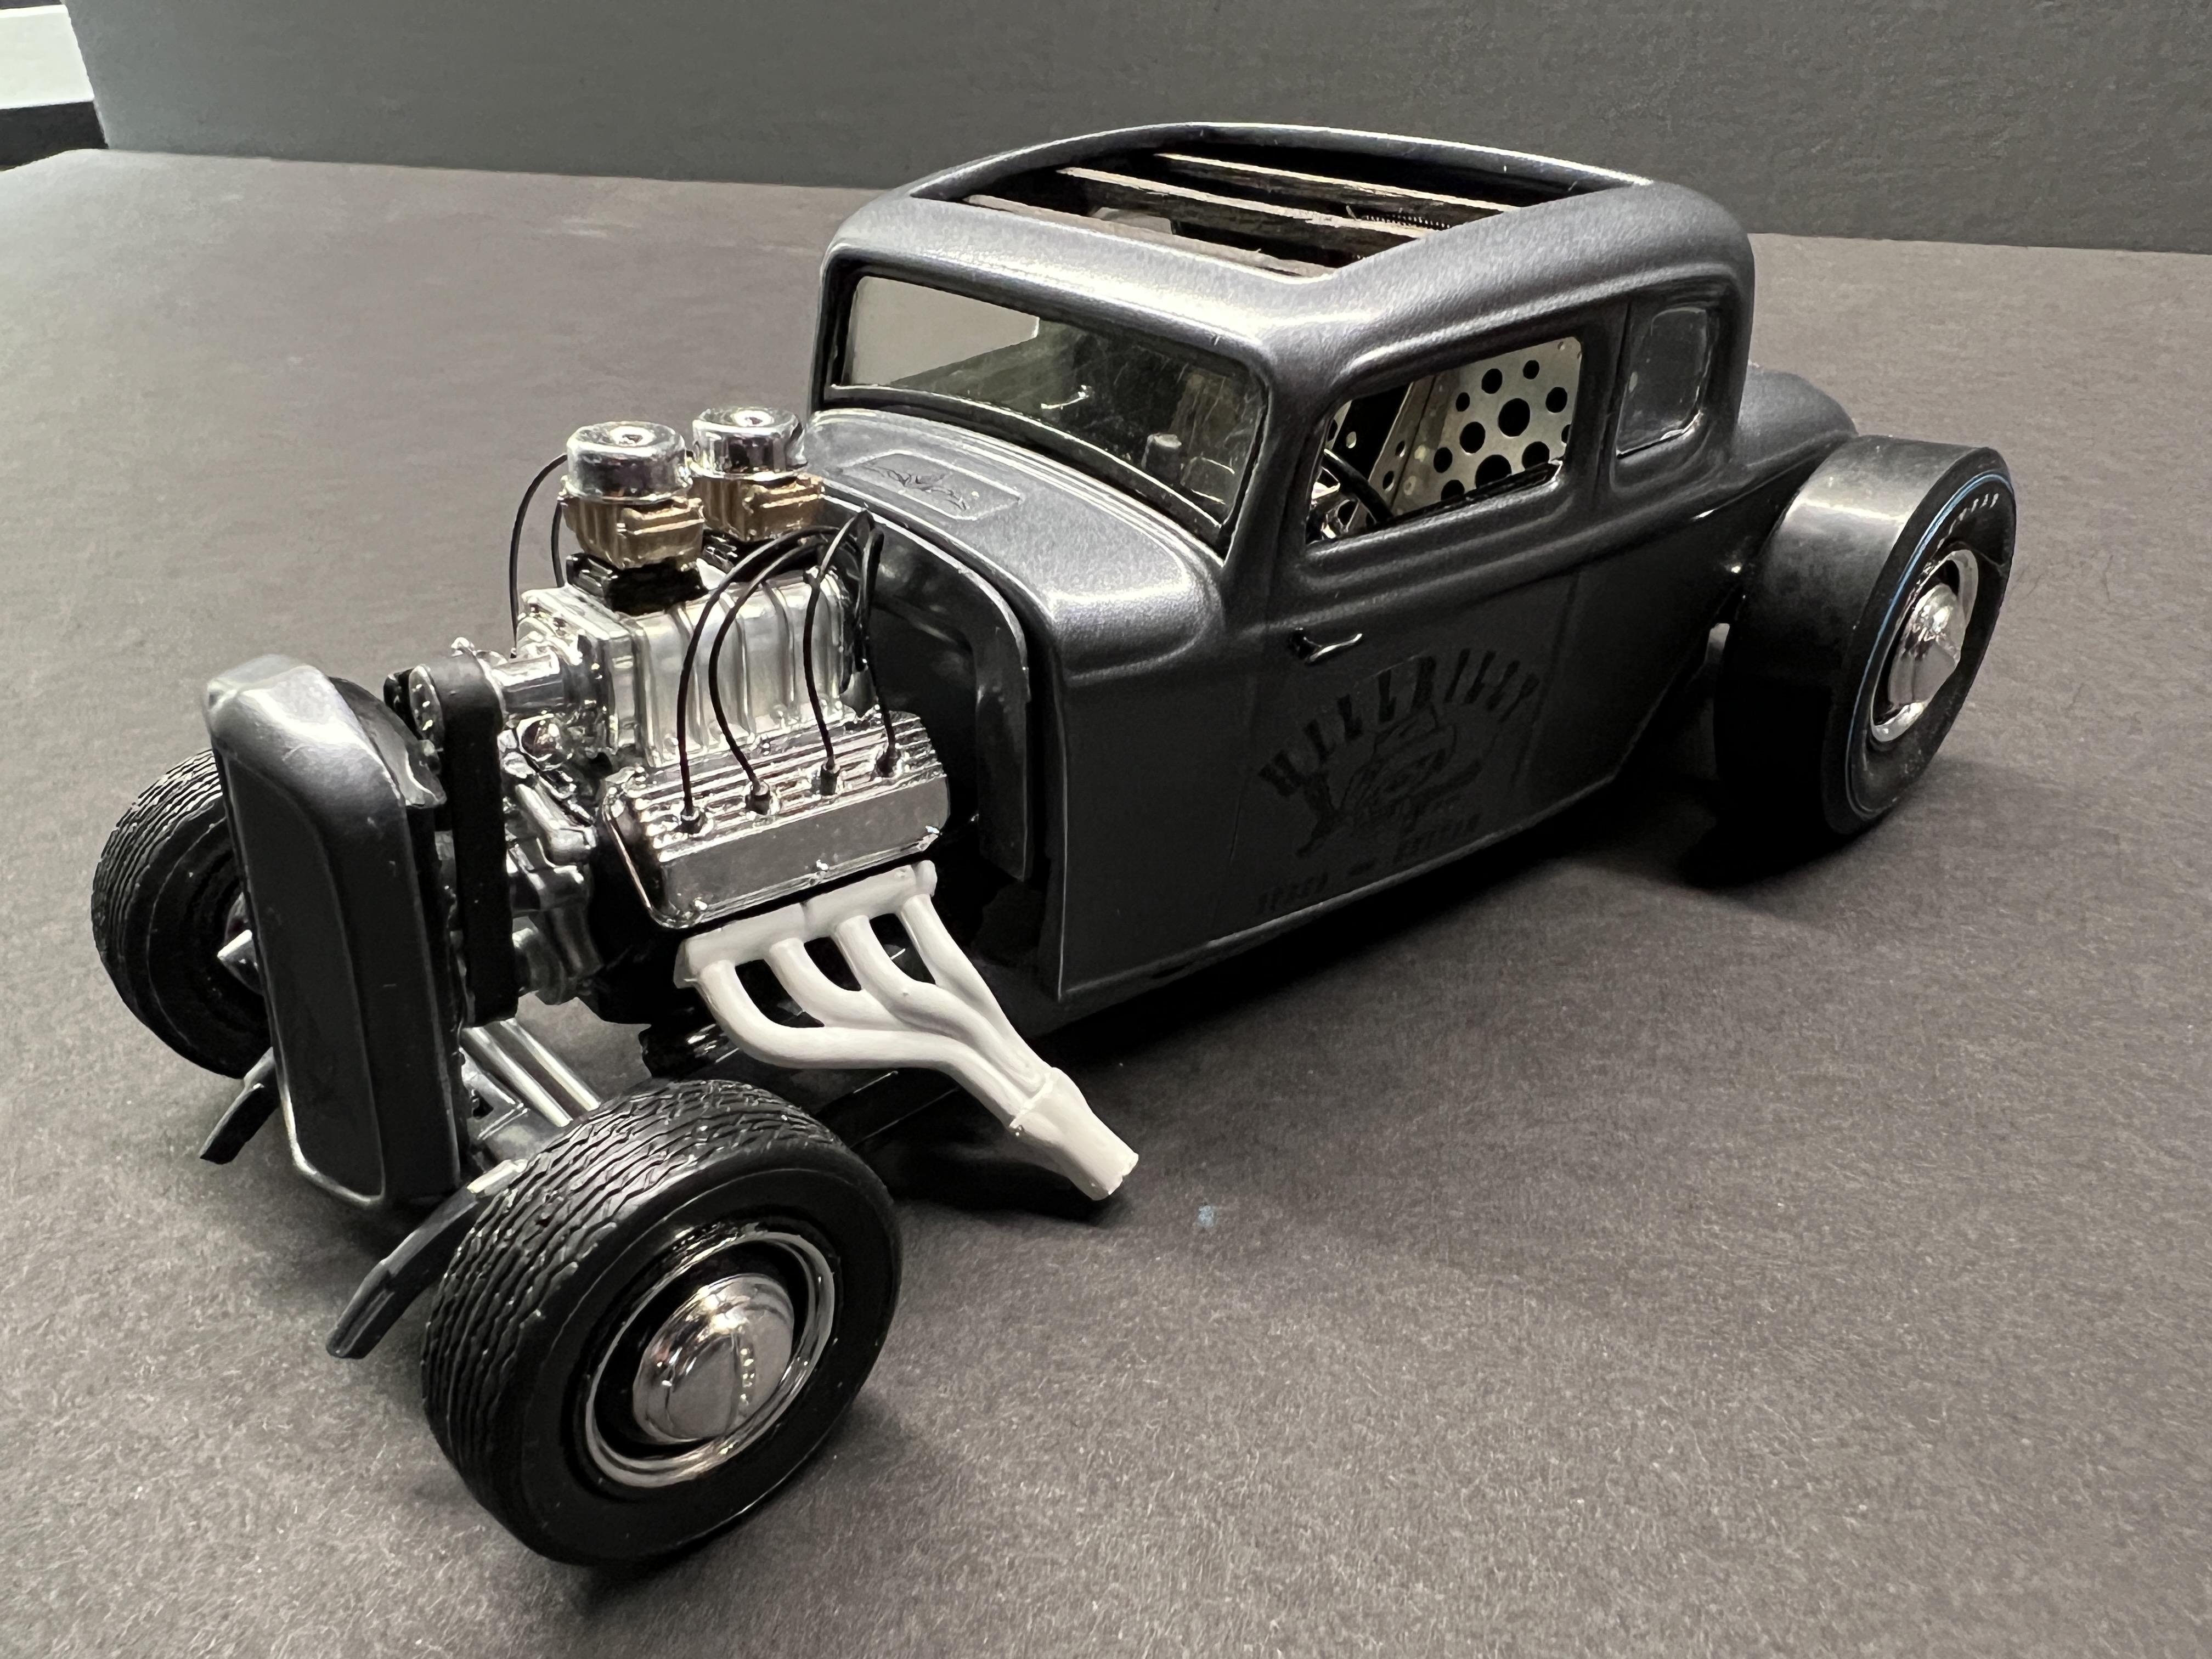
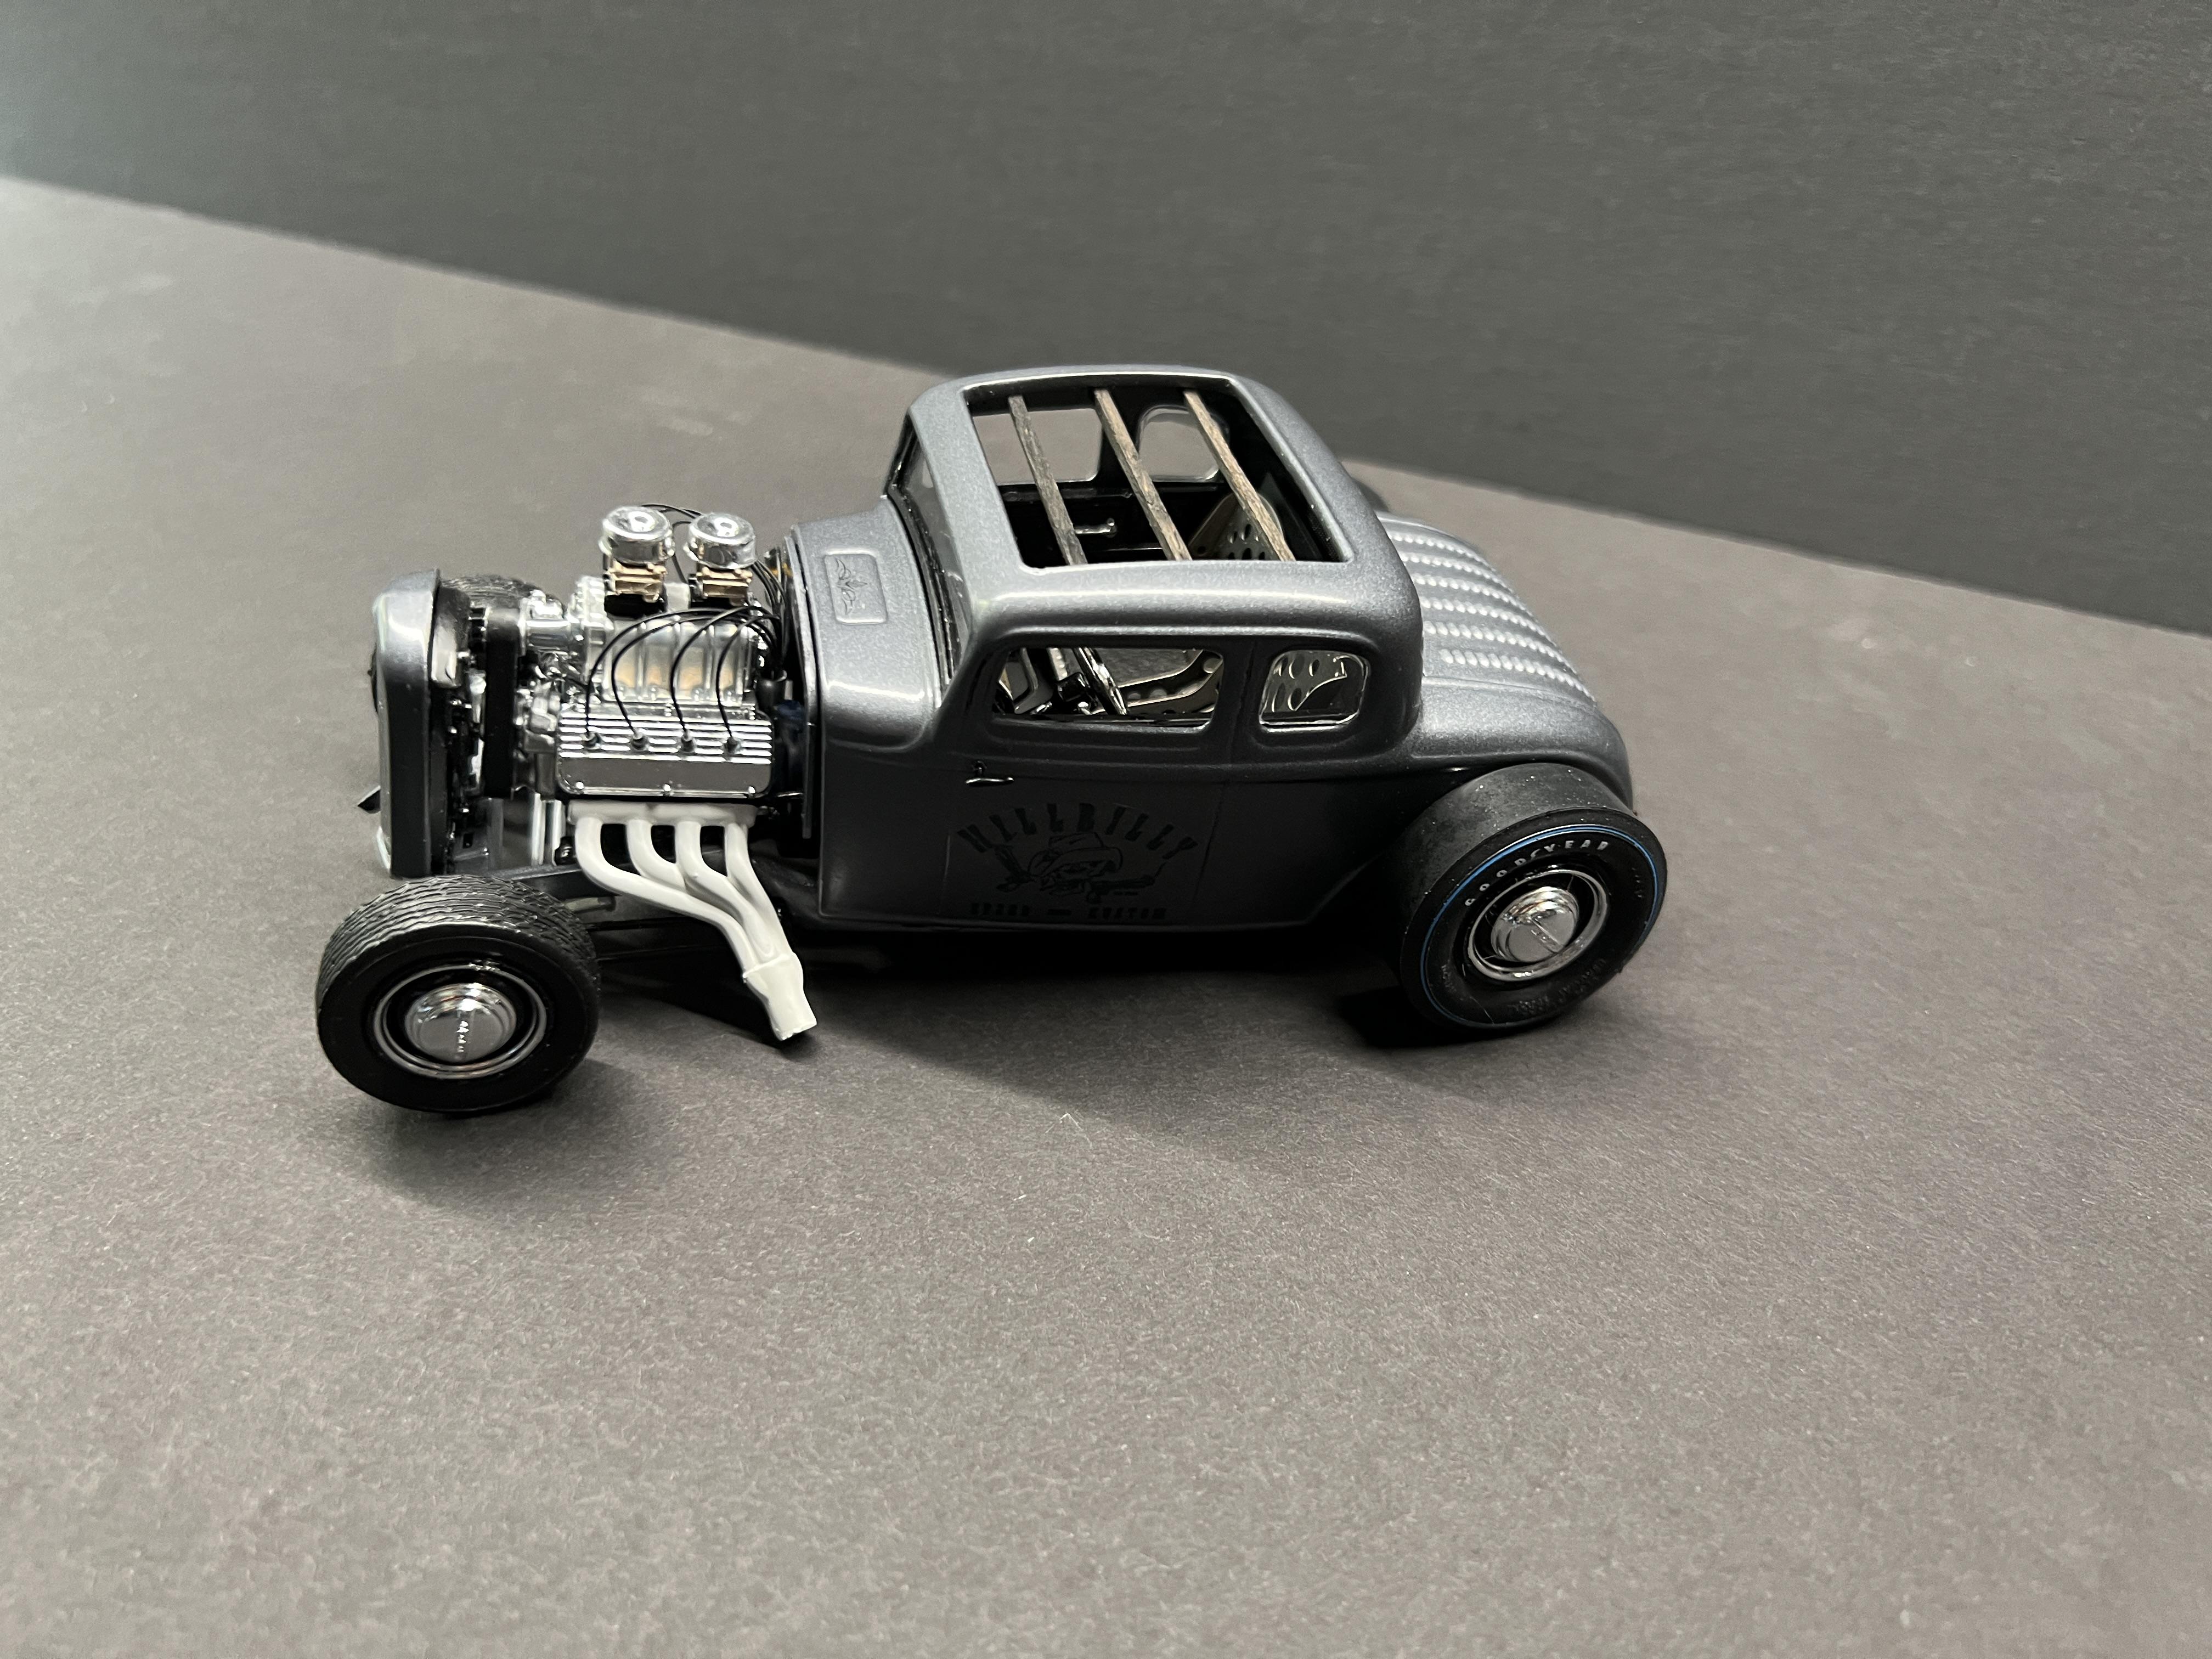
Build for my car club pres. He wanted it hot rod/rat style. The graphic on the side is from his GMC truck. Lots of work went into this but after doing it there are quite a few things I'd do differently from the start.

-
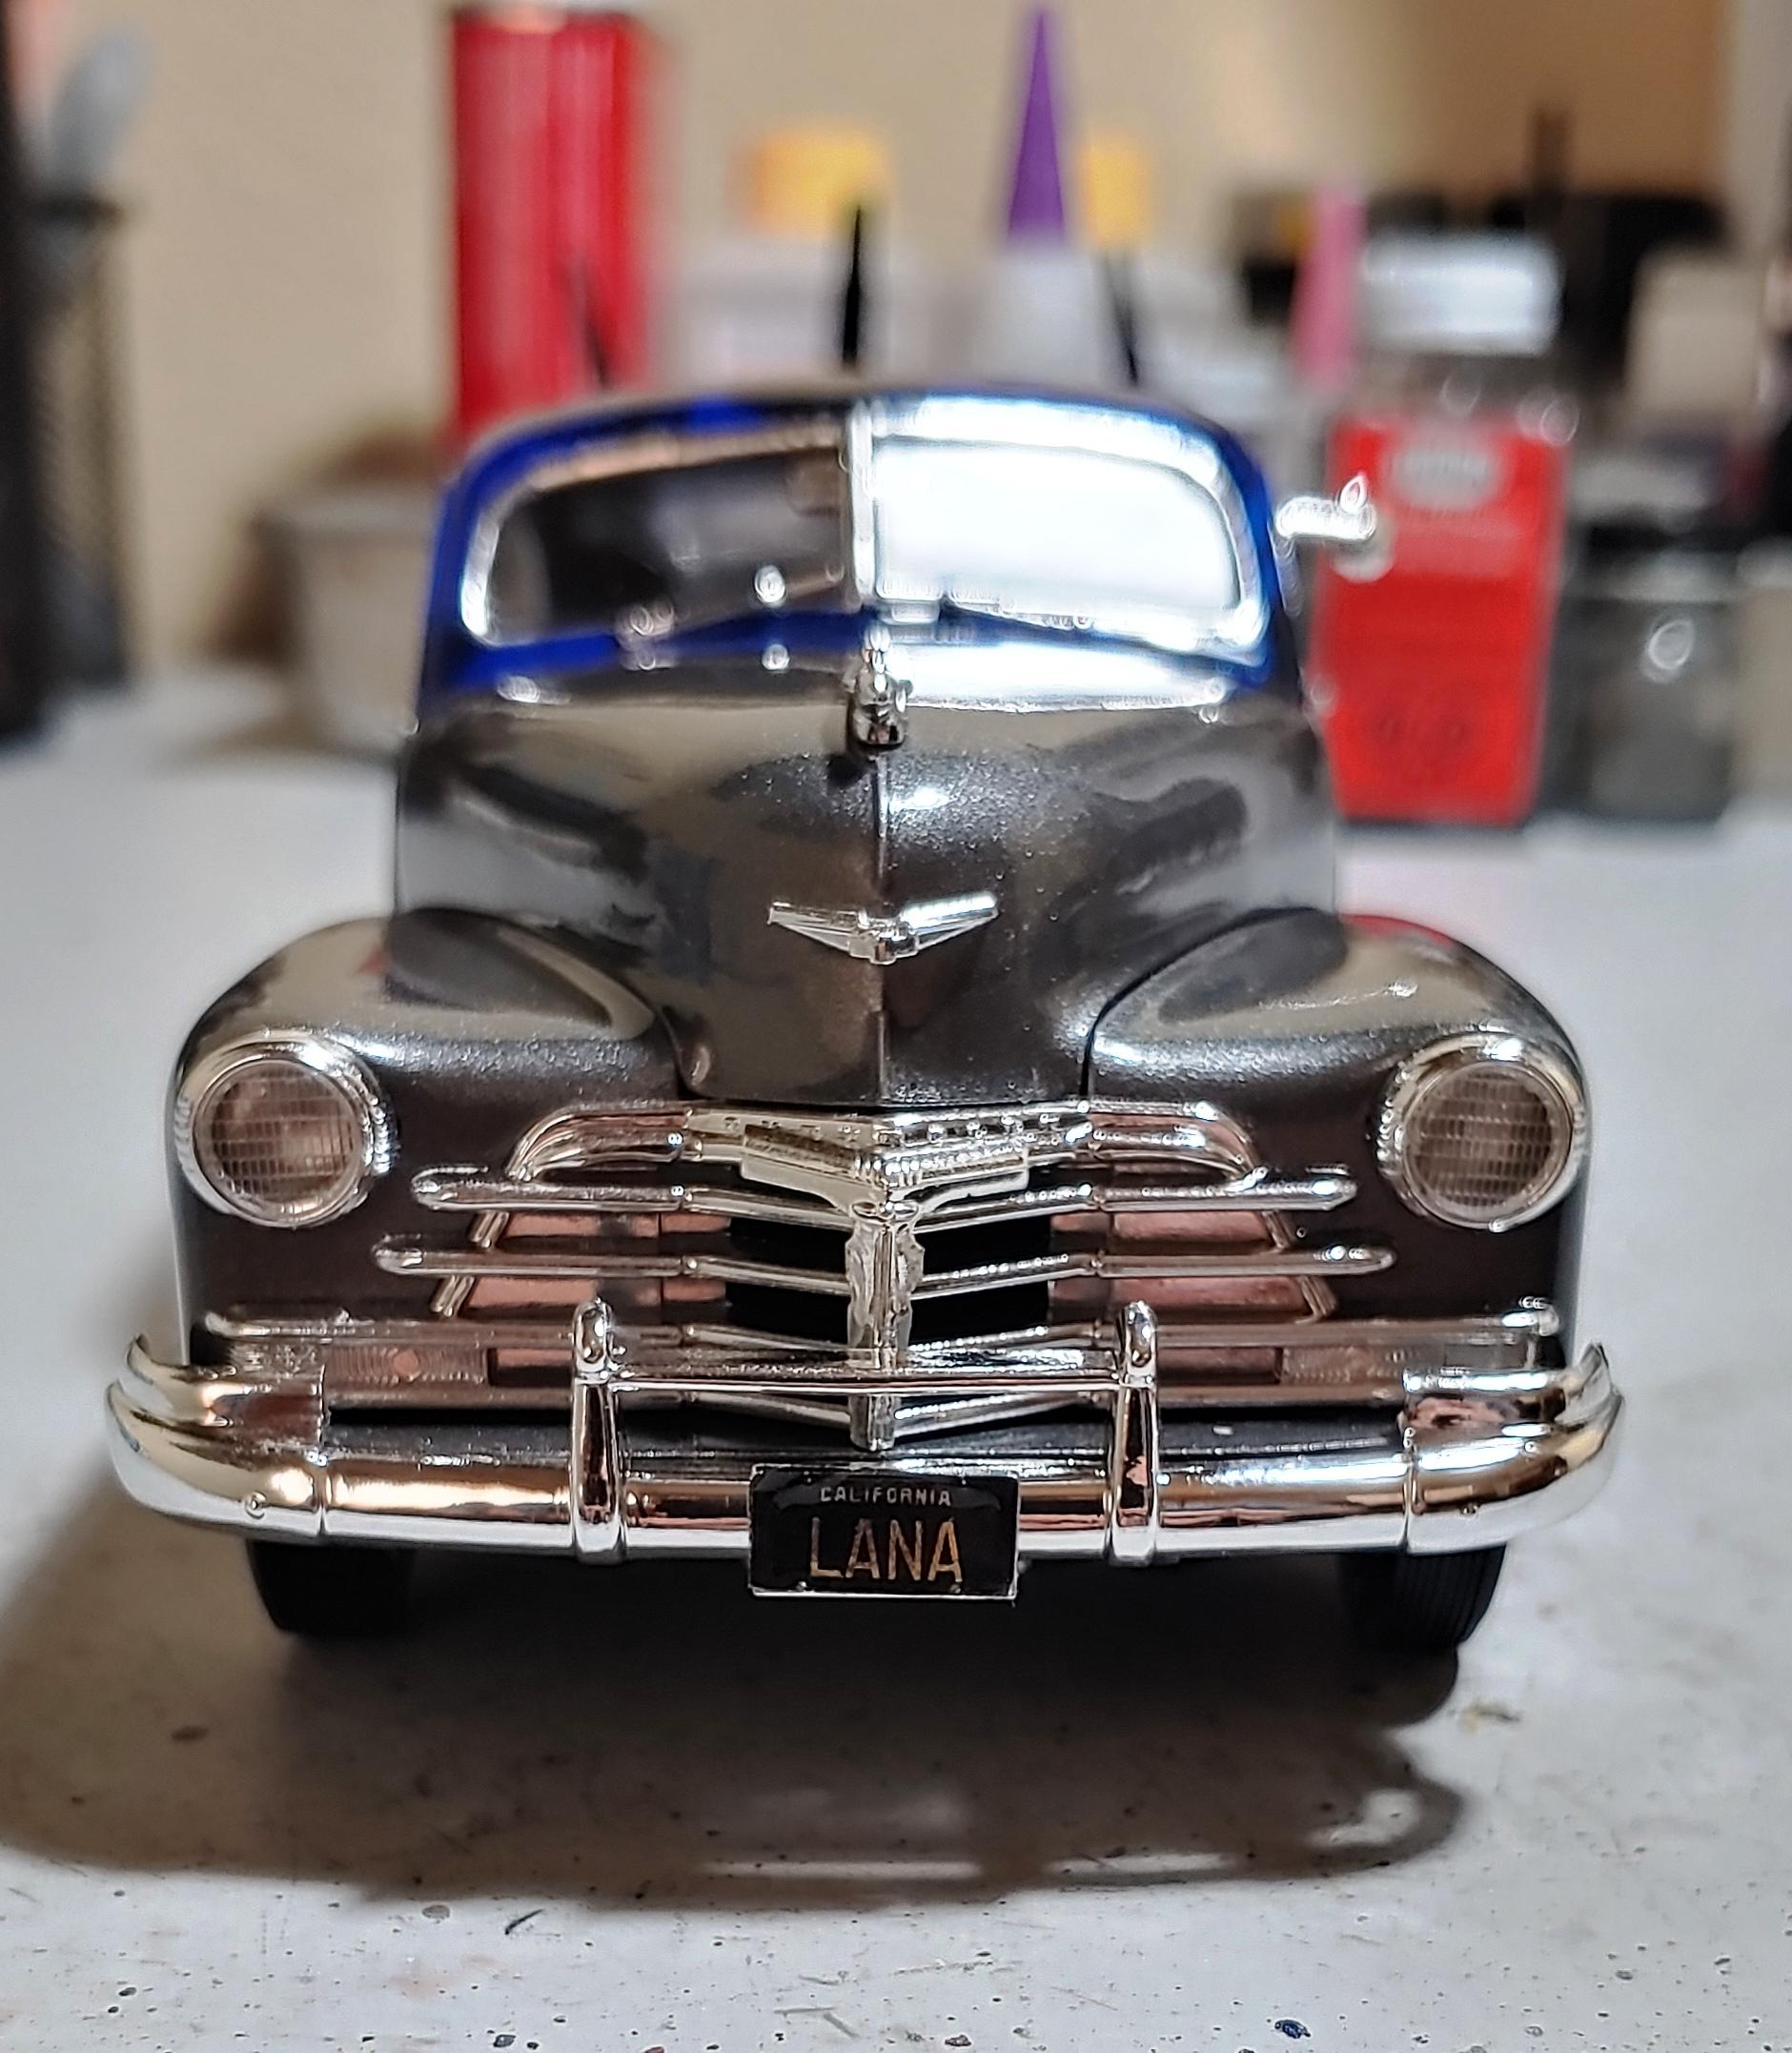
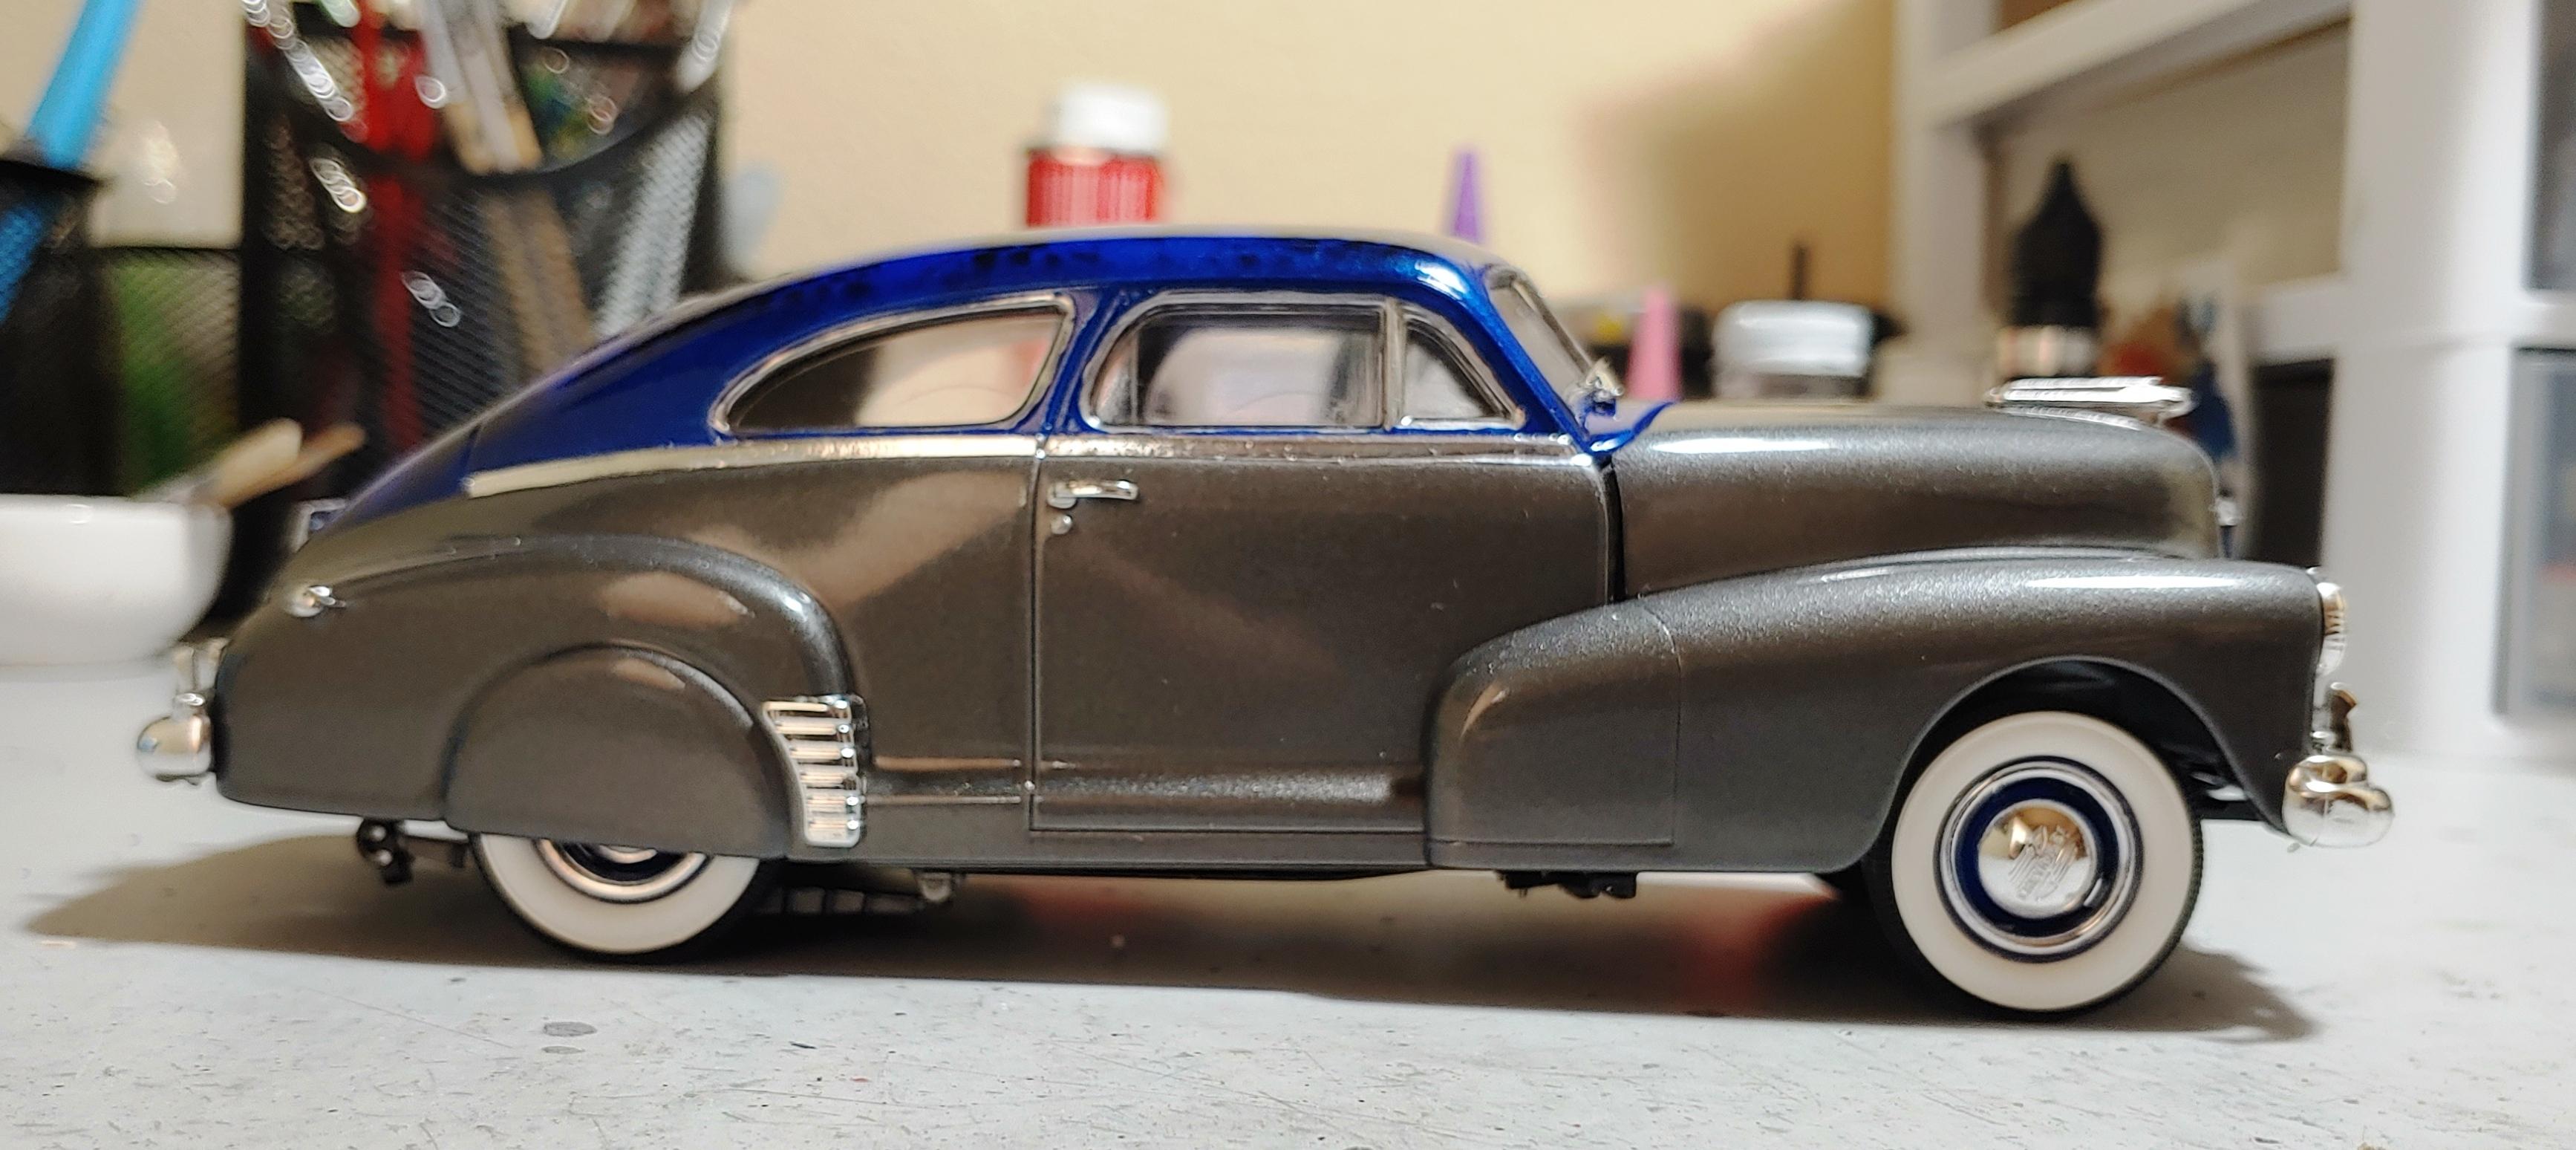
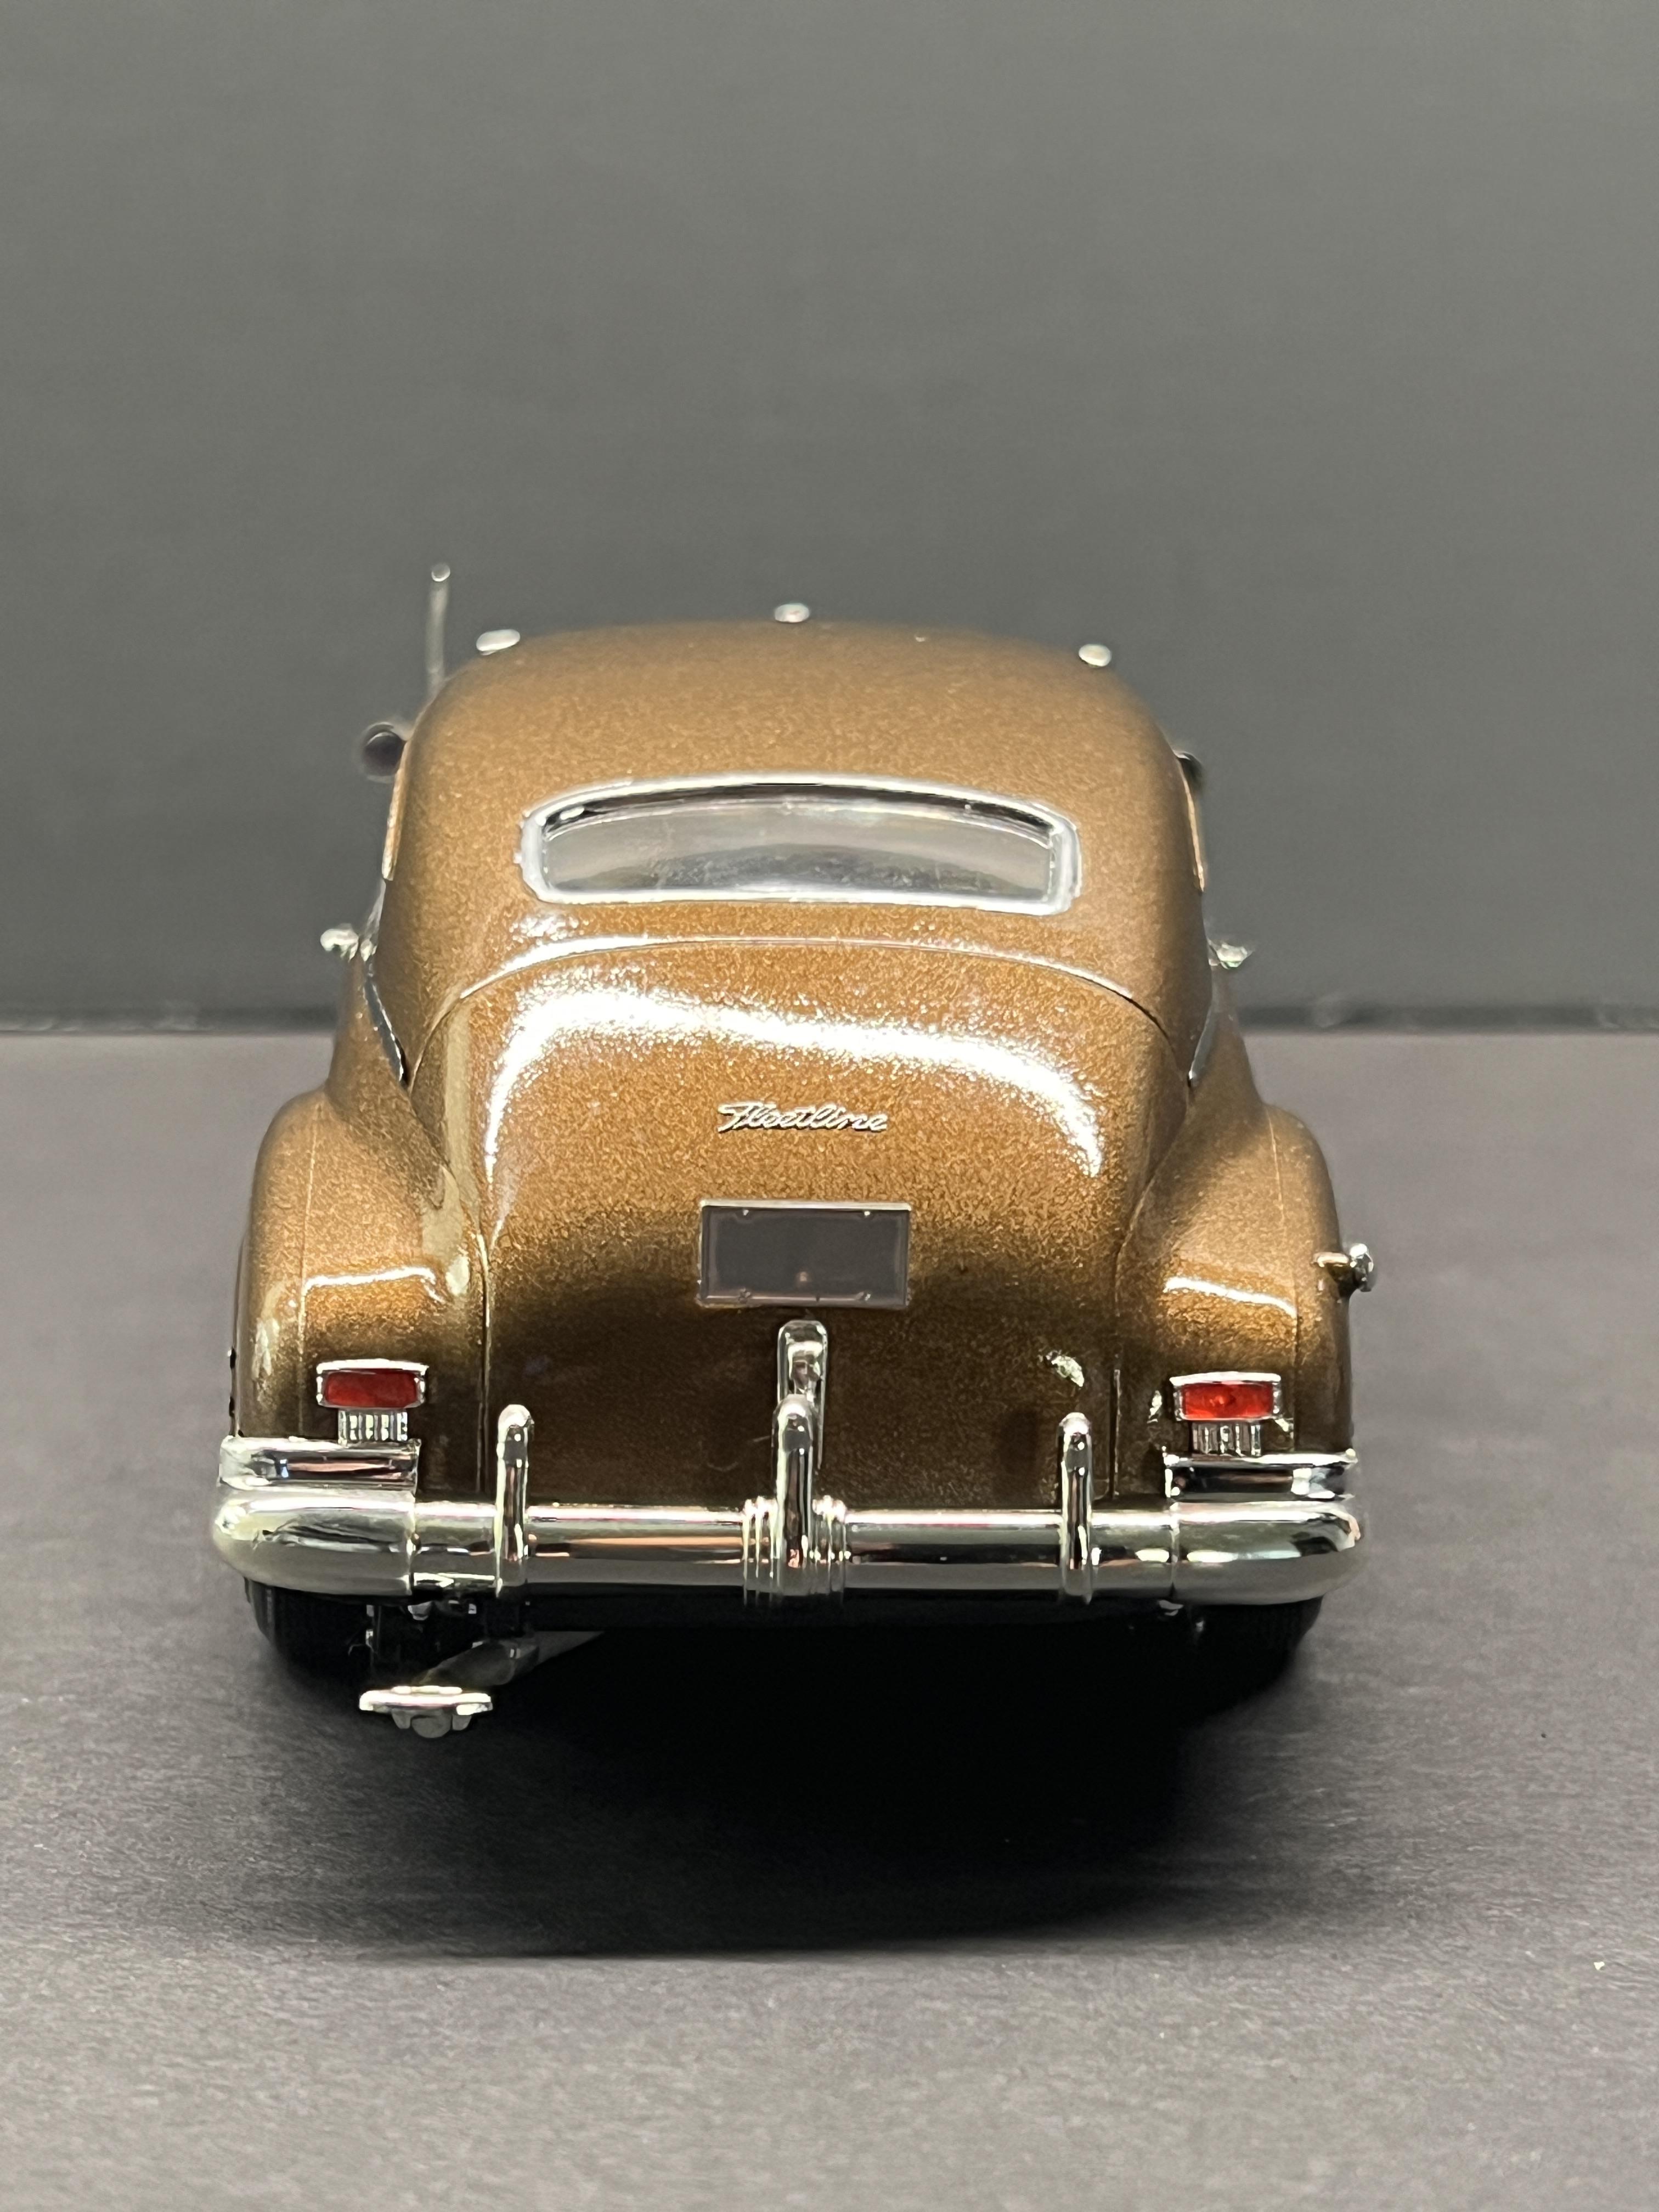
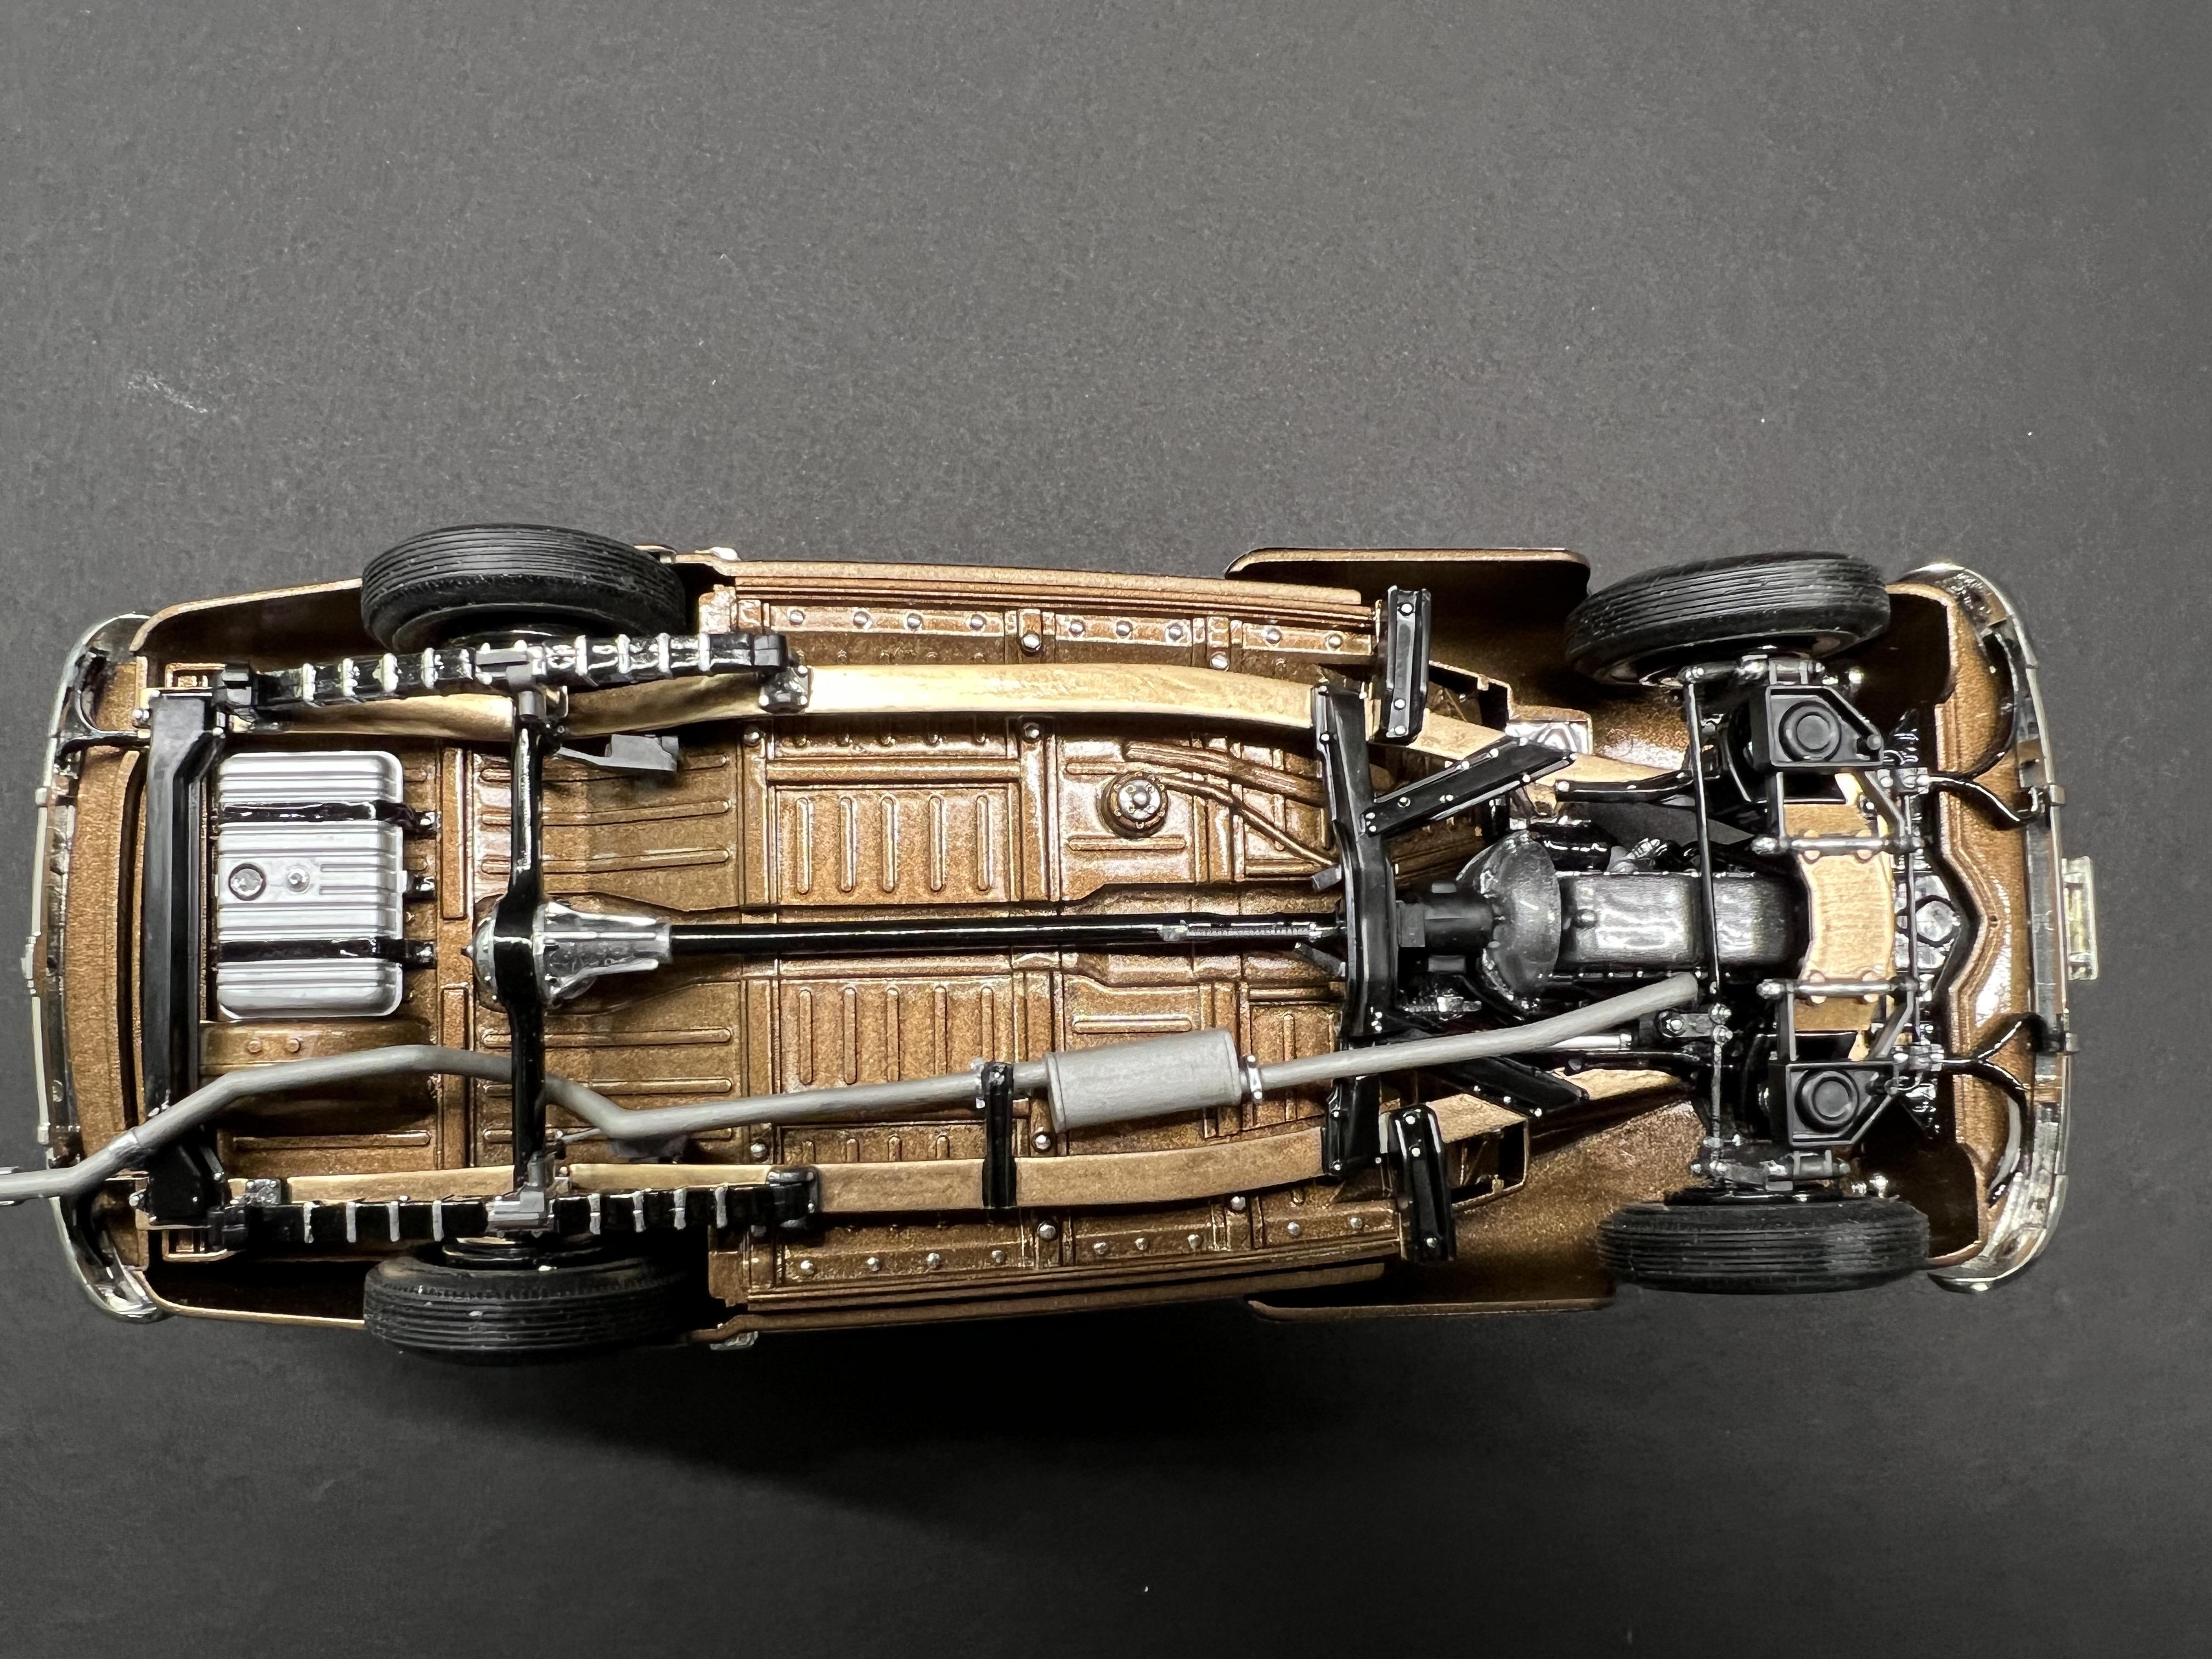
This is the Galaxie kit for the 1948 Aerosedan. I built this one as a 1946 based upon the grille. I built the 1947 Fleetmaster Aerosedan version back in 2020. Both are tributes to my two pups who passed during their builds. The first was Lana and the second was Charlie. I haven't printed the license plate out yet which will say Charlie, as my previous one did for Lana. On to the build. This is pretty much stock except for the artillery wheels and front lamps. I ordered additional chrome trim to put on the fender skirts. It's done in Testors Extreme Lacquer Bronze with wet look clear. Interior wood courtesy of Gopher racing truck bed decals. Happy with it overall. Last picture is both of them together.
-
Ummm WOW!
-
Grill design requests
rastta replied to Texas_3D_Customs's topic in Car Aftermarket / Resin / 3D Printed
Thanks for the link! Hadn't seen it before! -
Grill design requests
rastta replied to Texas_3D_Customs's topic in Car Aftermarket / Resin / 3D Printed
I would really like the 60-66 GMC grill so that I can make a GMC out of the 60 Chevy Fleetside kit. The dash would be great too ? Don't need the tailgate.
-
So nice!
-
What a beauty!
-
1950 3100 Lowrider
rastta replied to rastta's topic in Model Trucks: Pickups, Vans, SUVs, Light Commercial
Thanks for all the kind words! Certainly one of my favorite builds! -
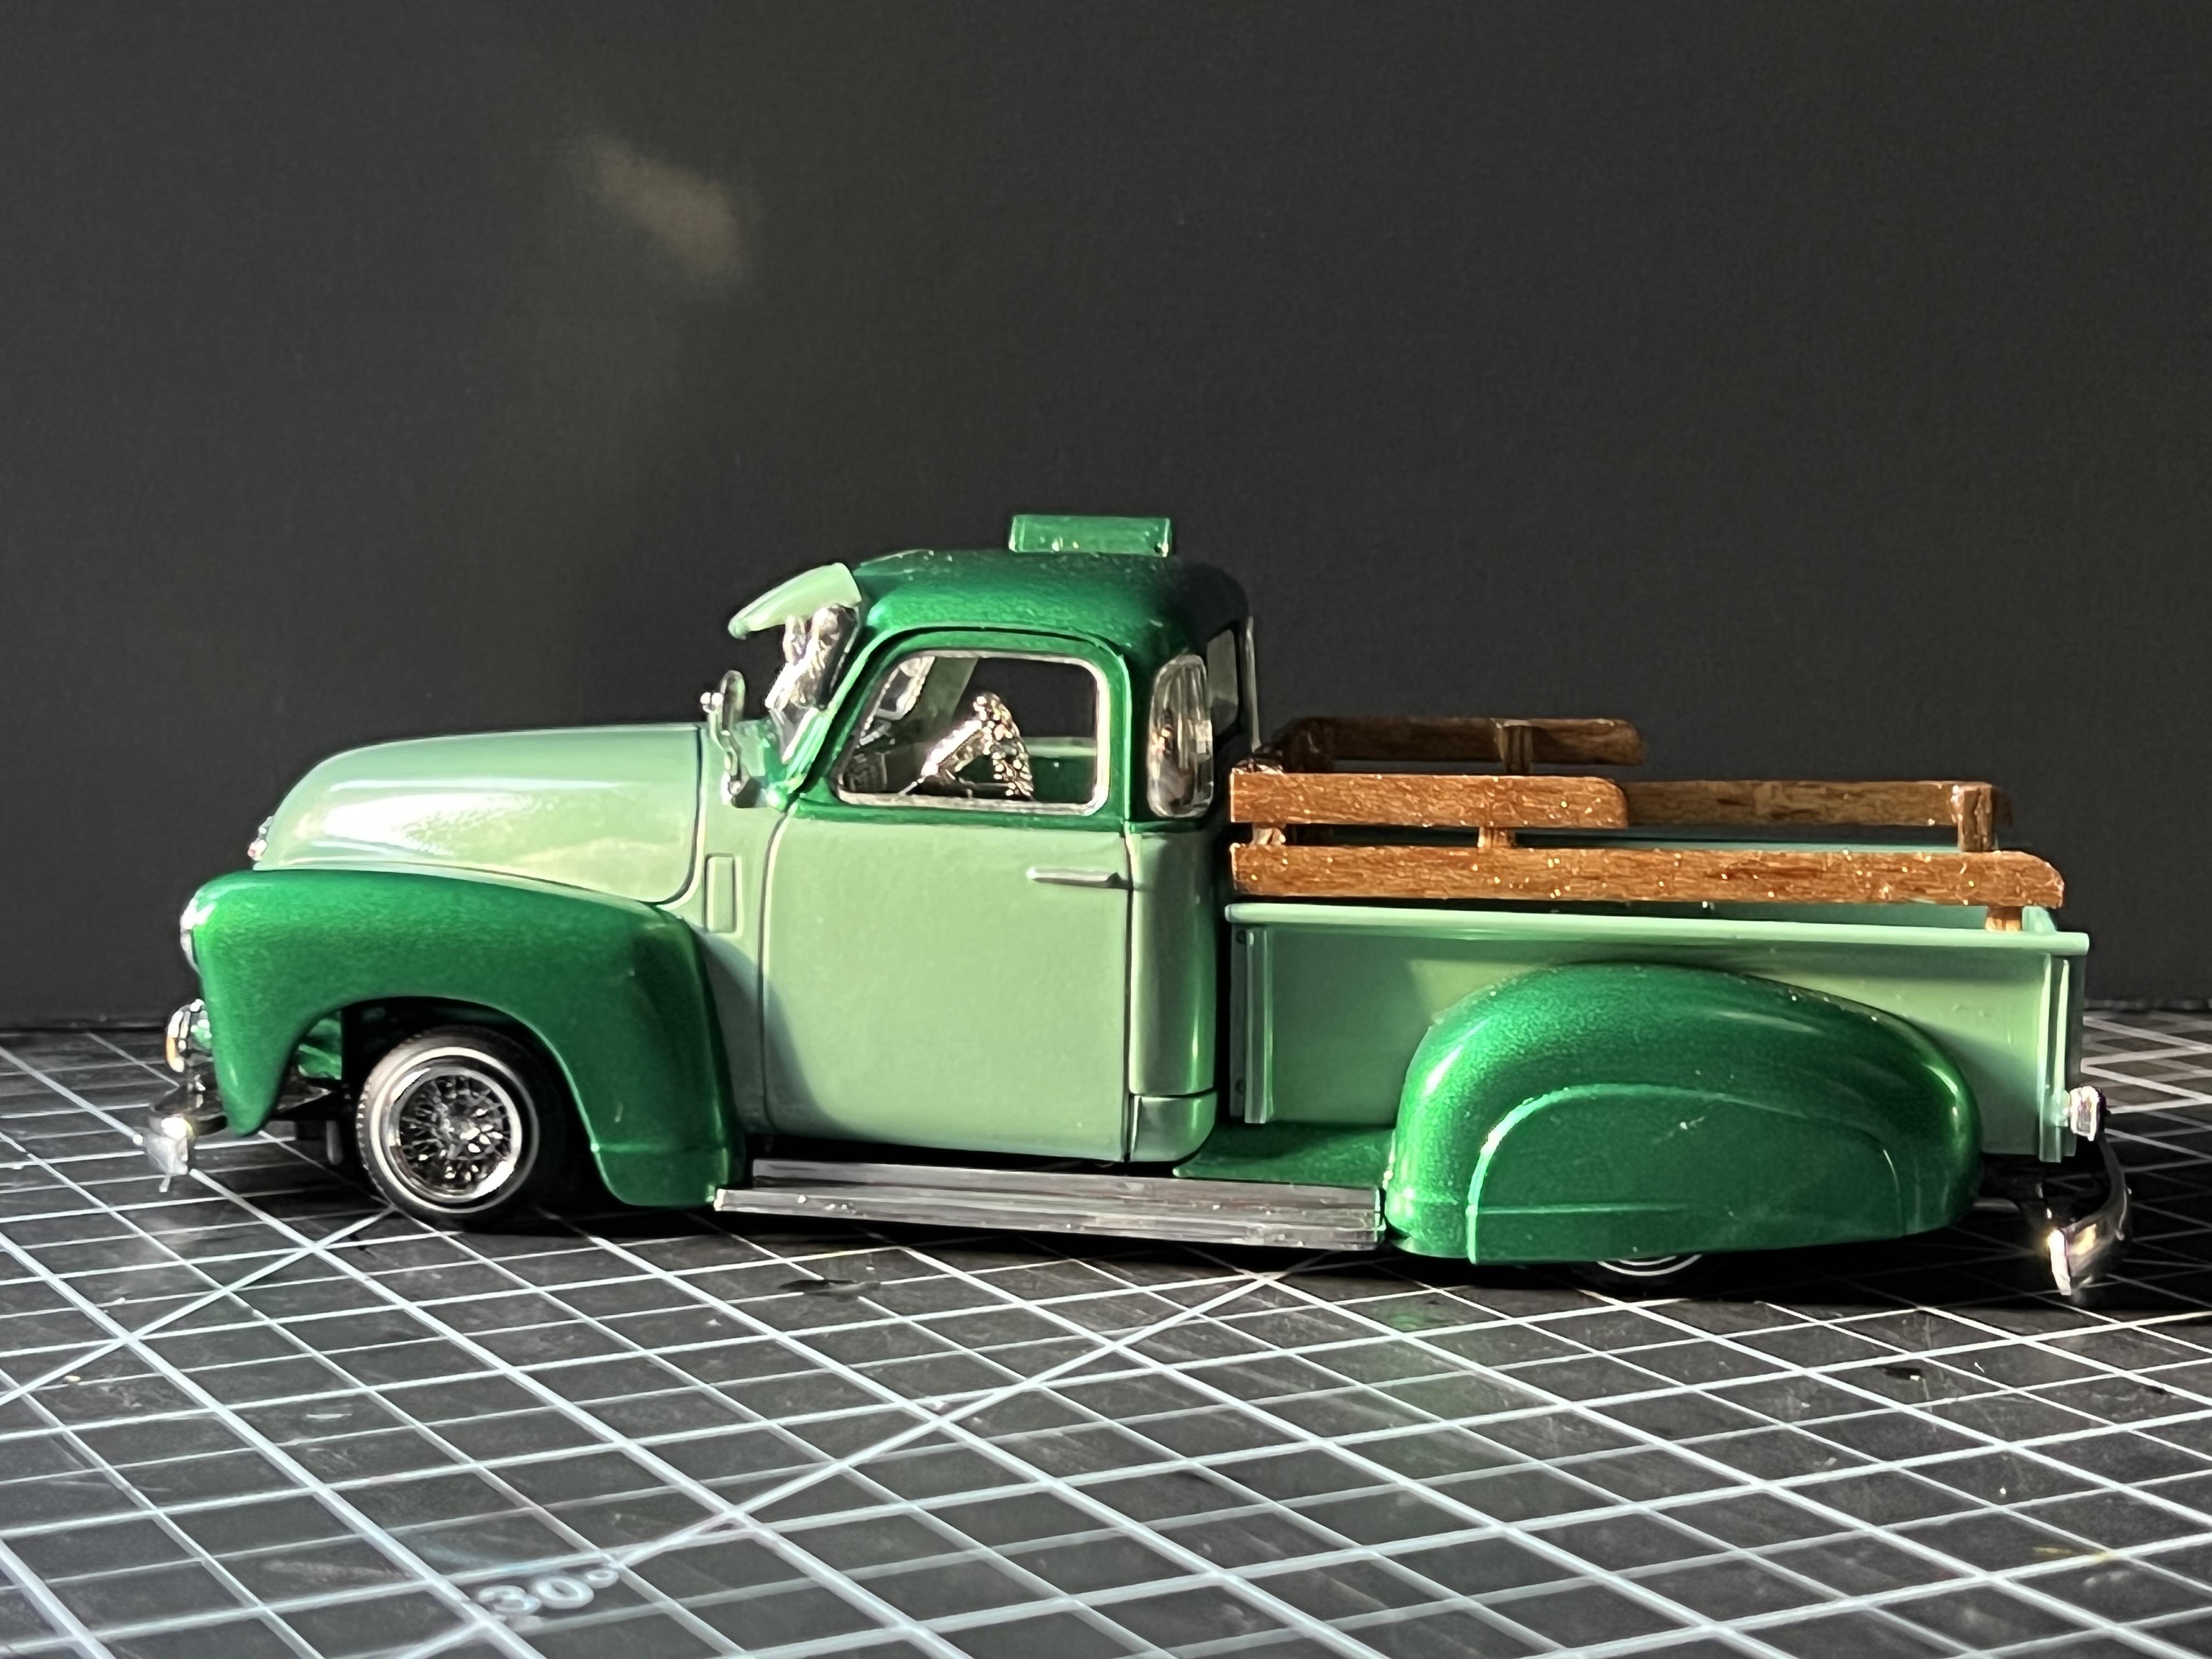
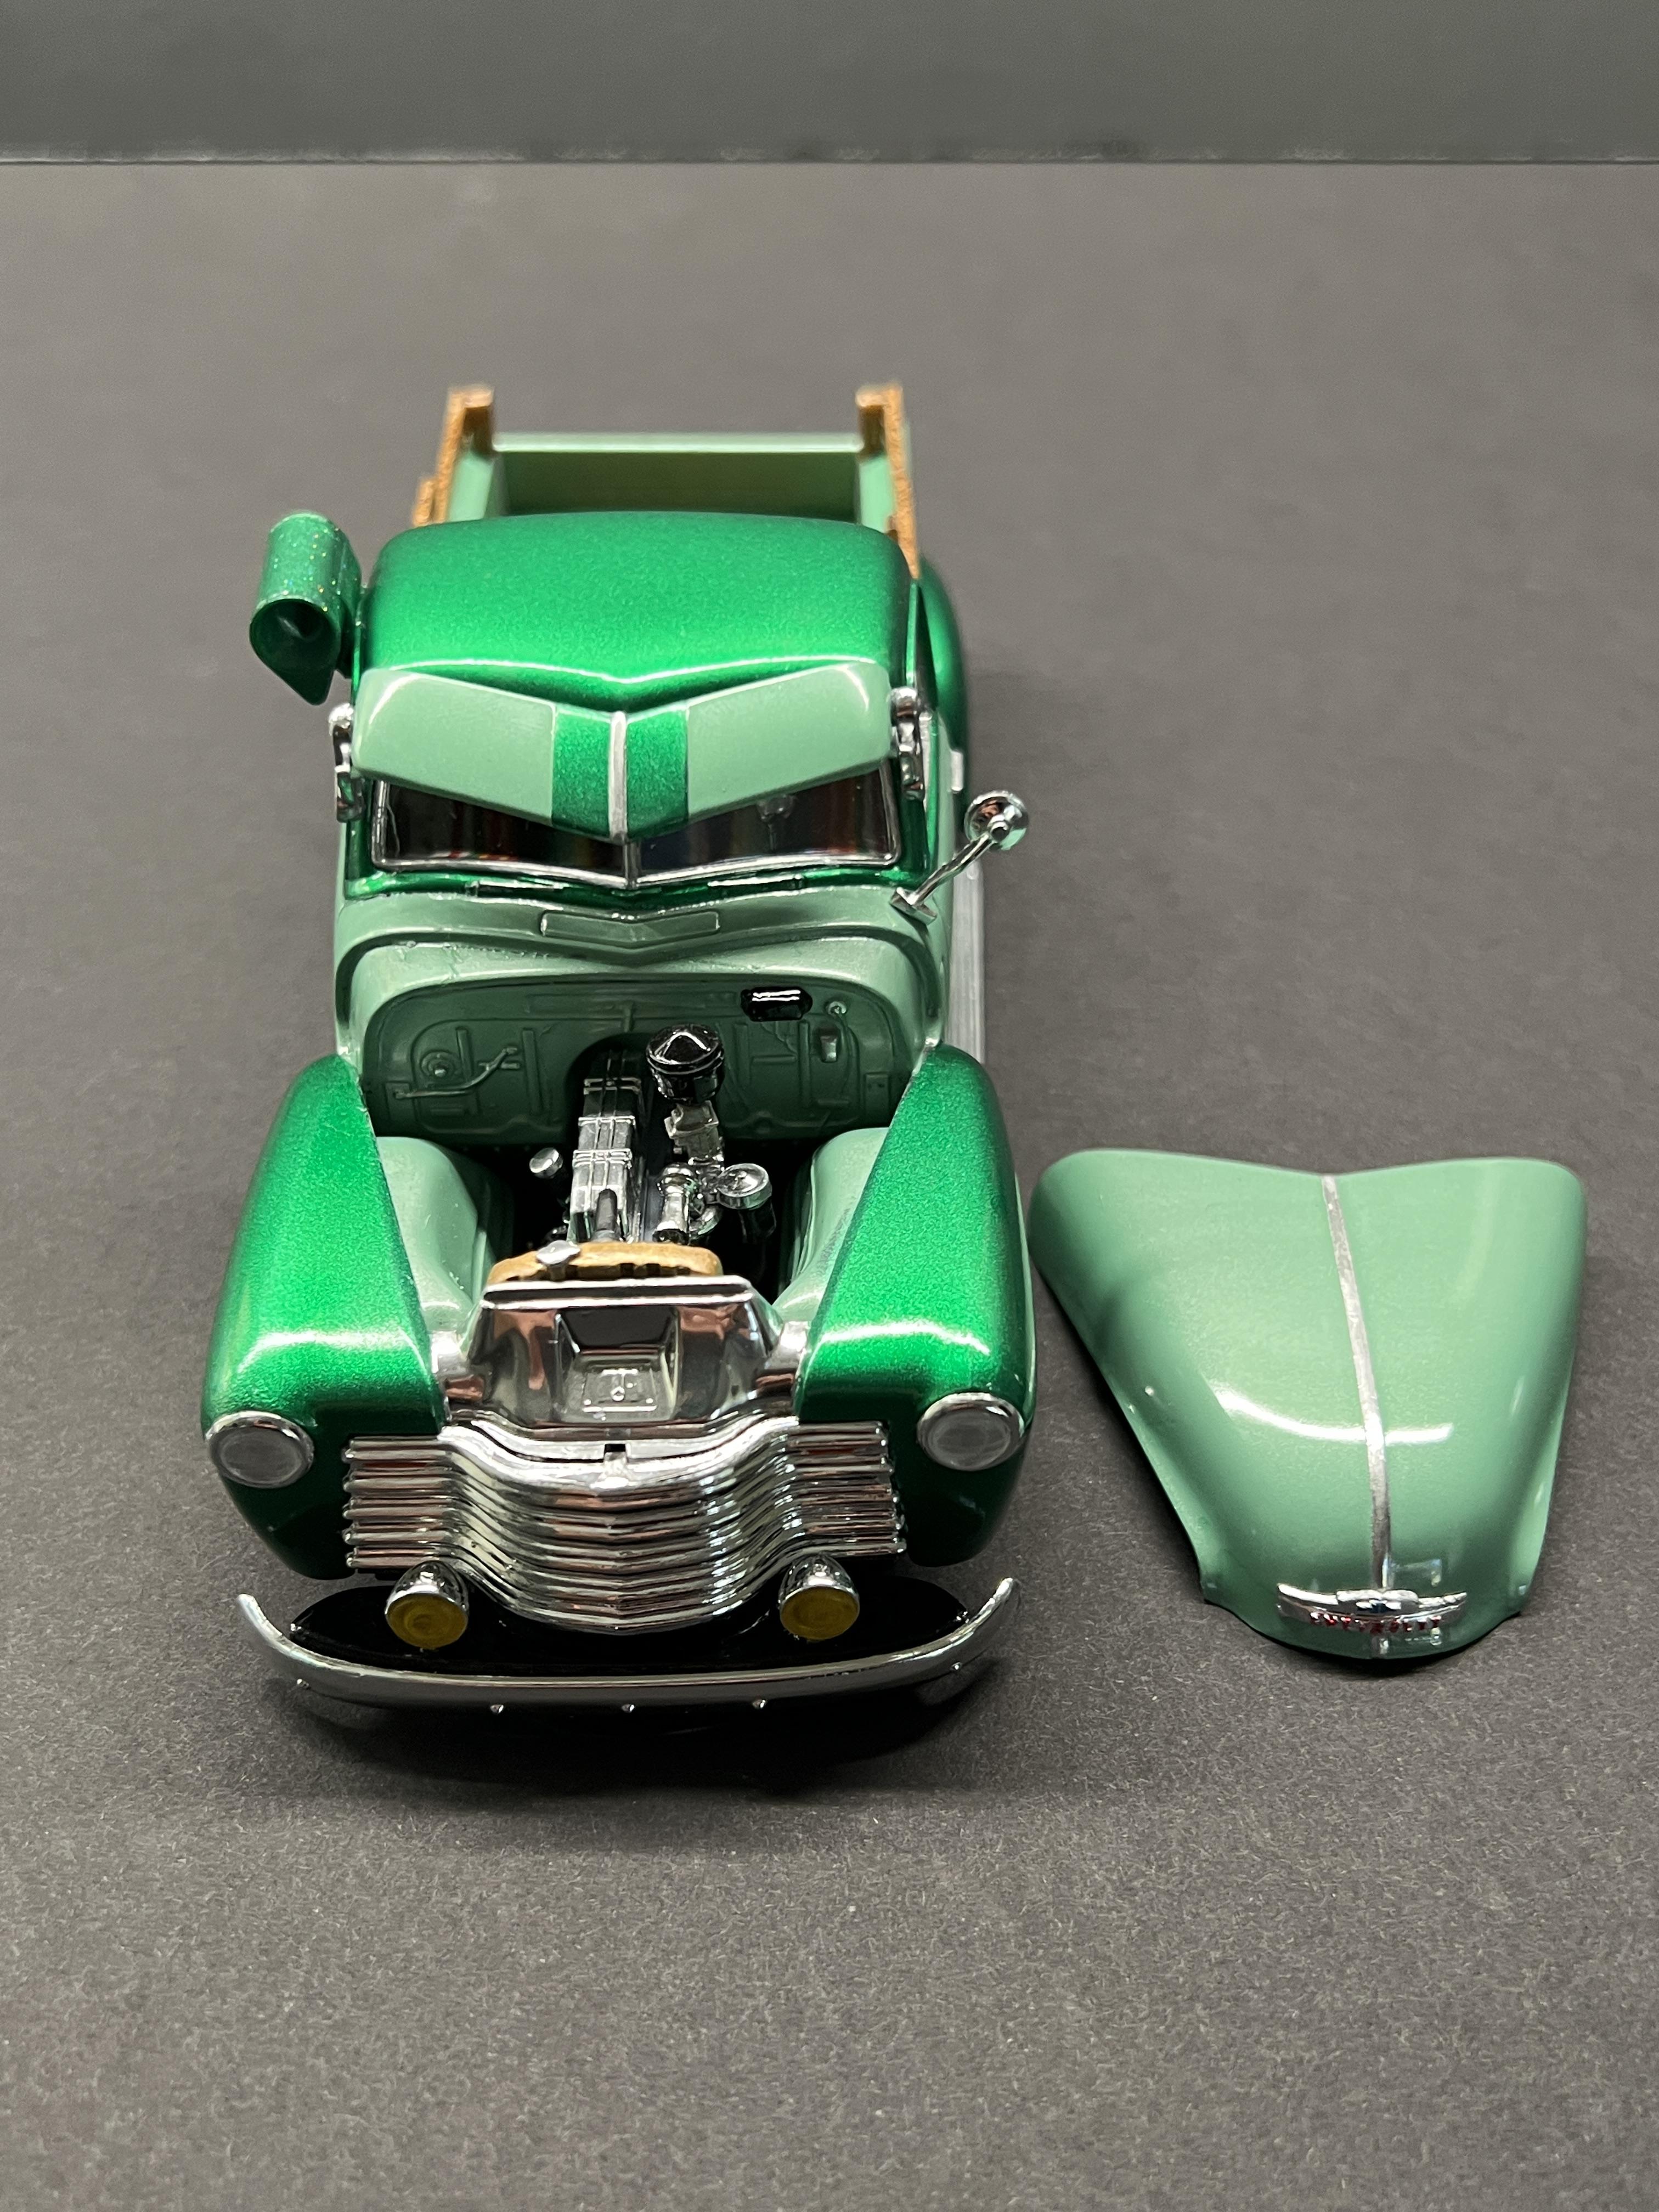
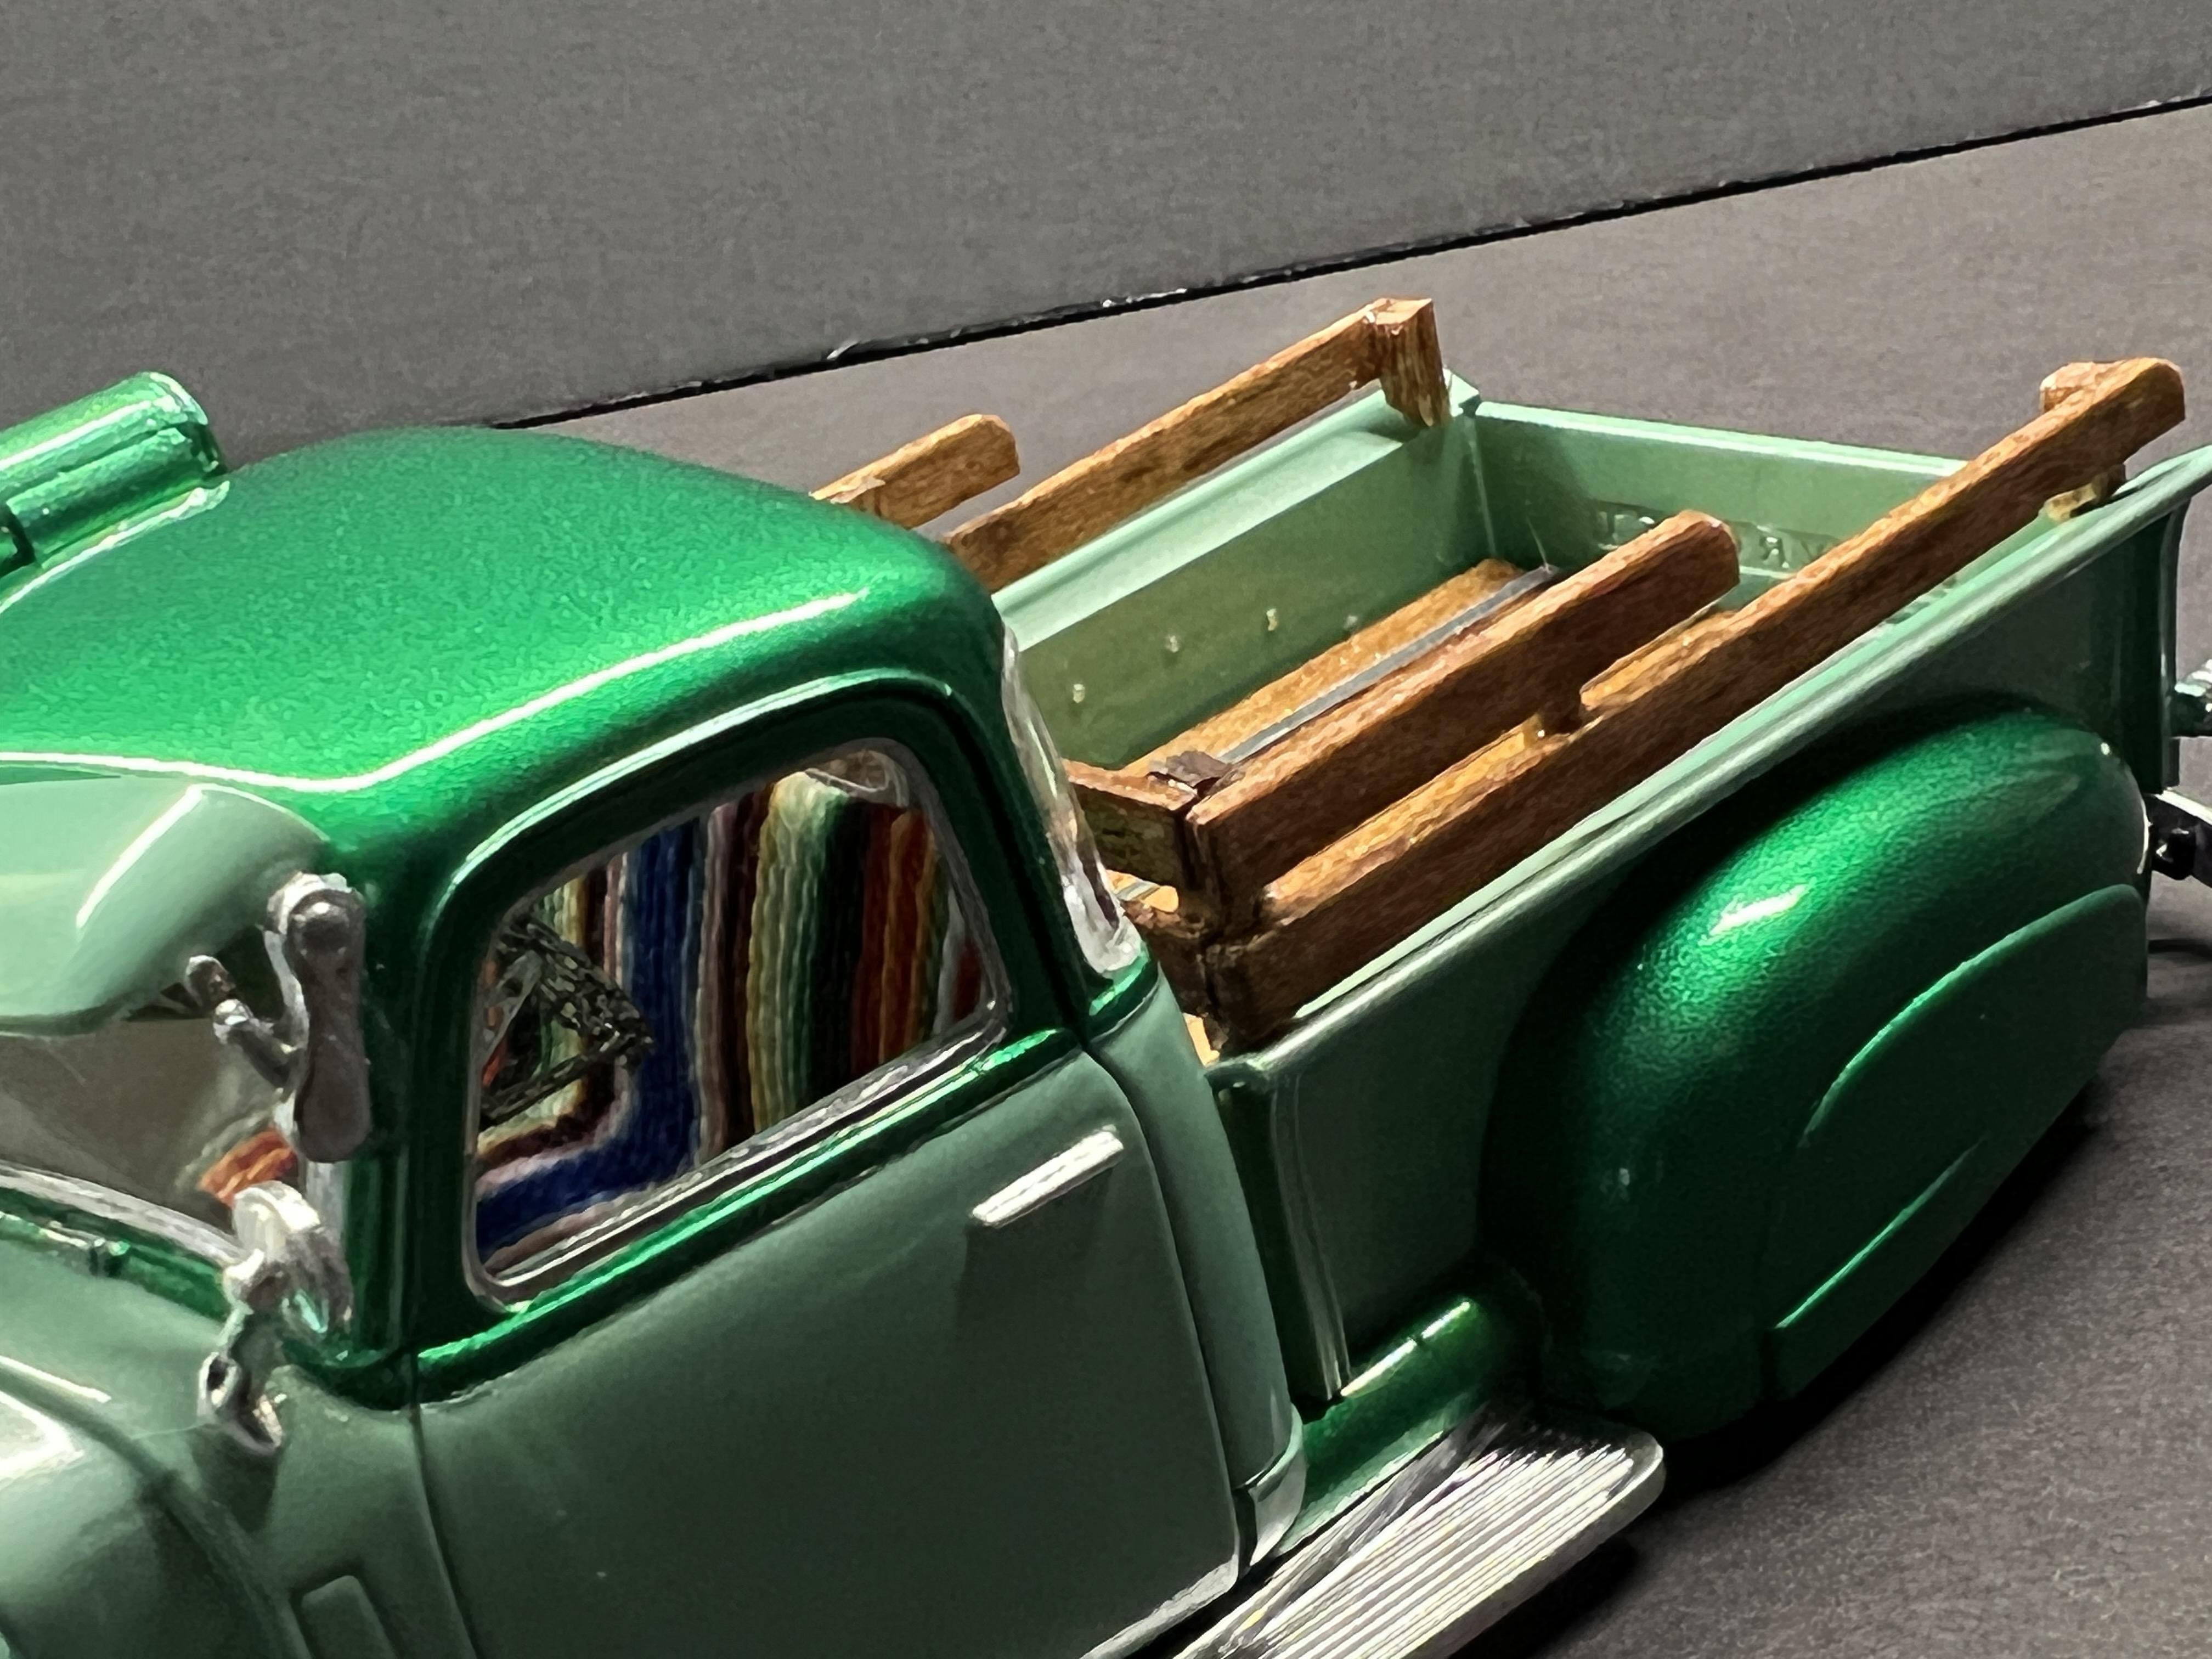
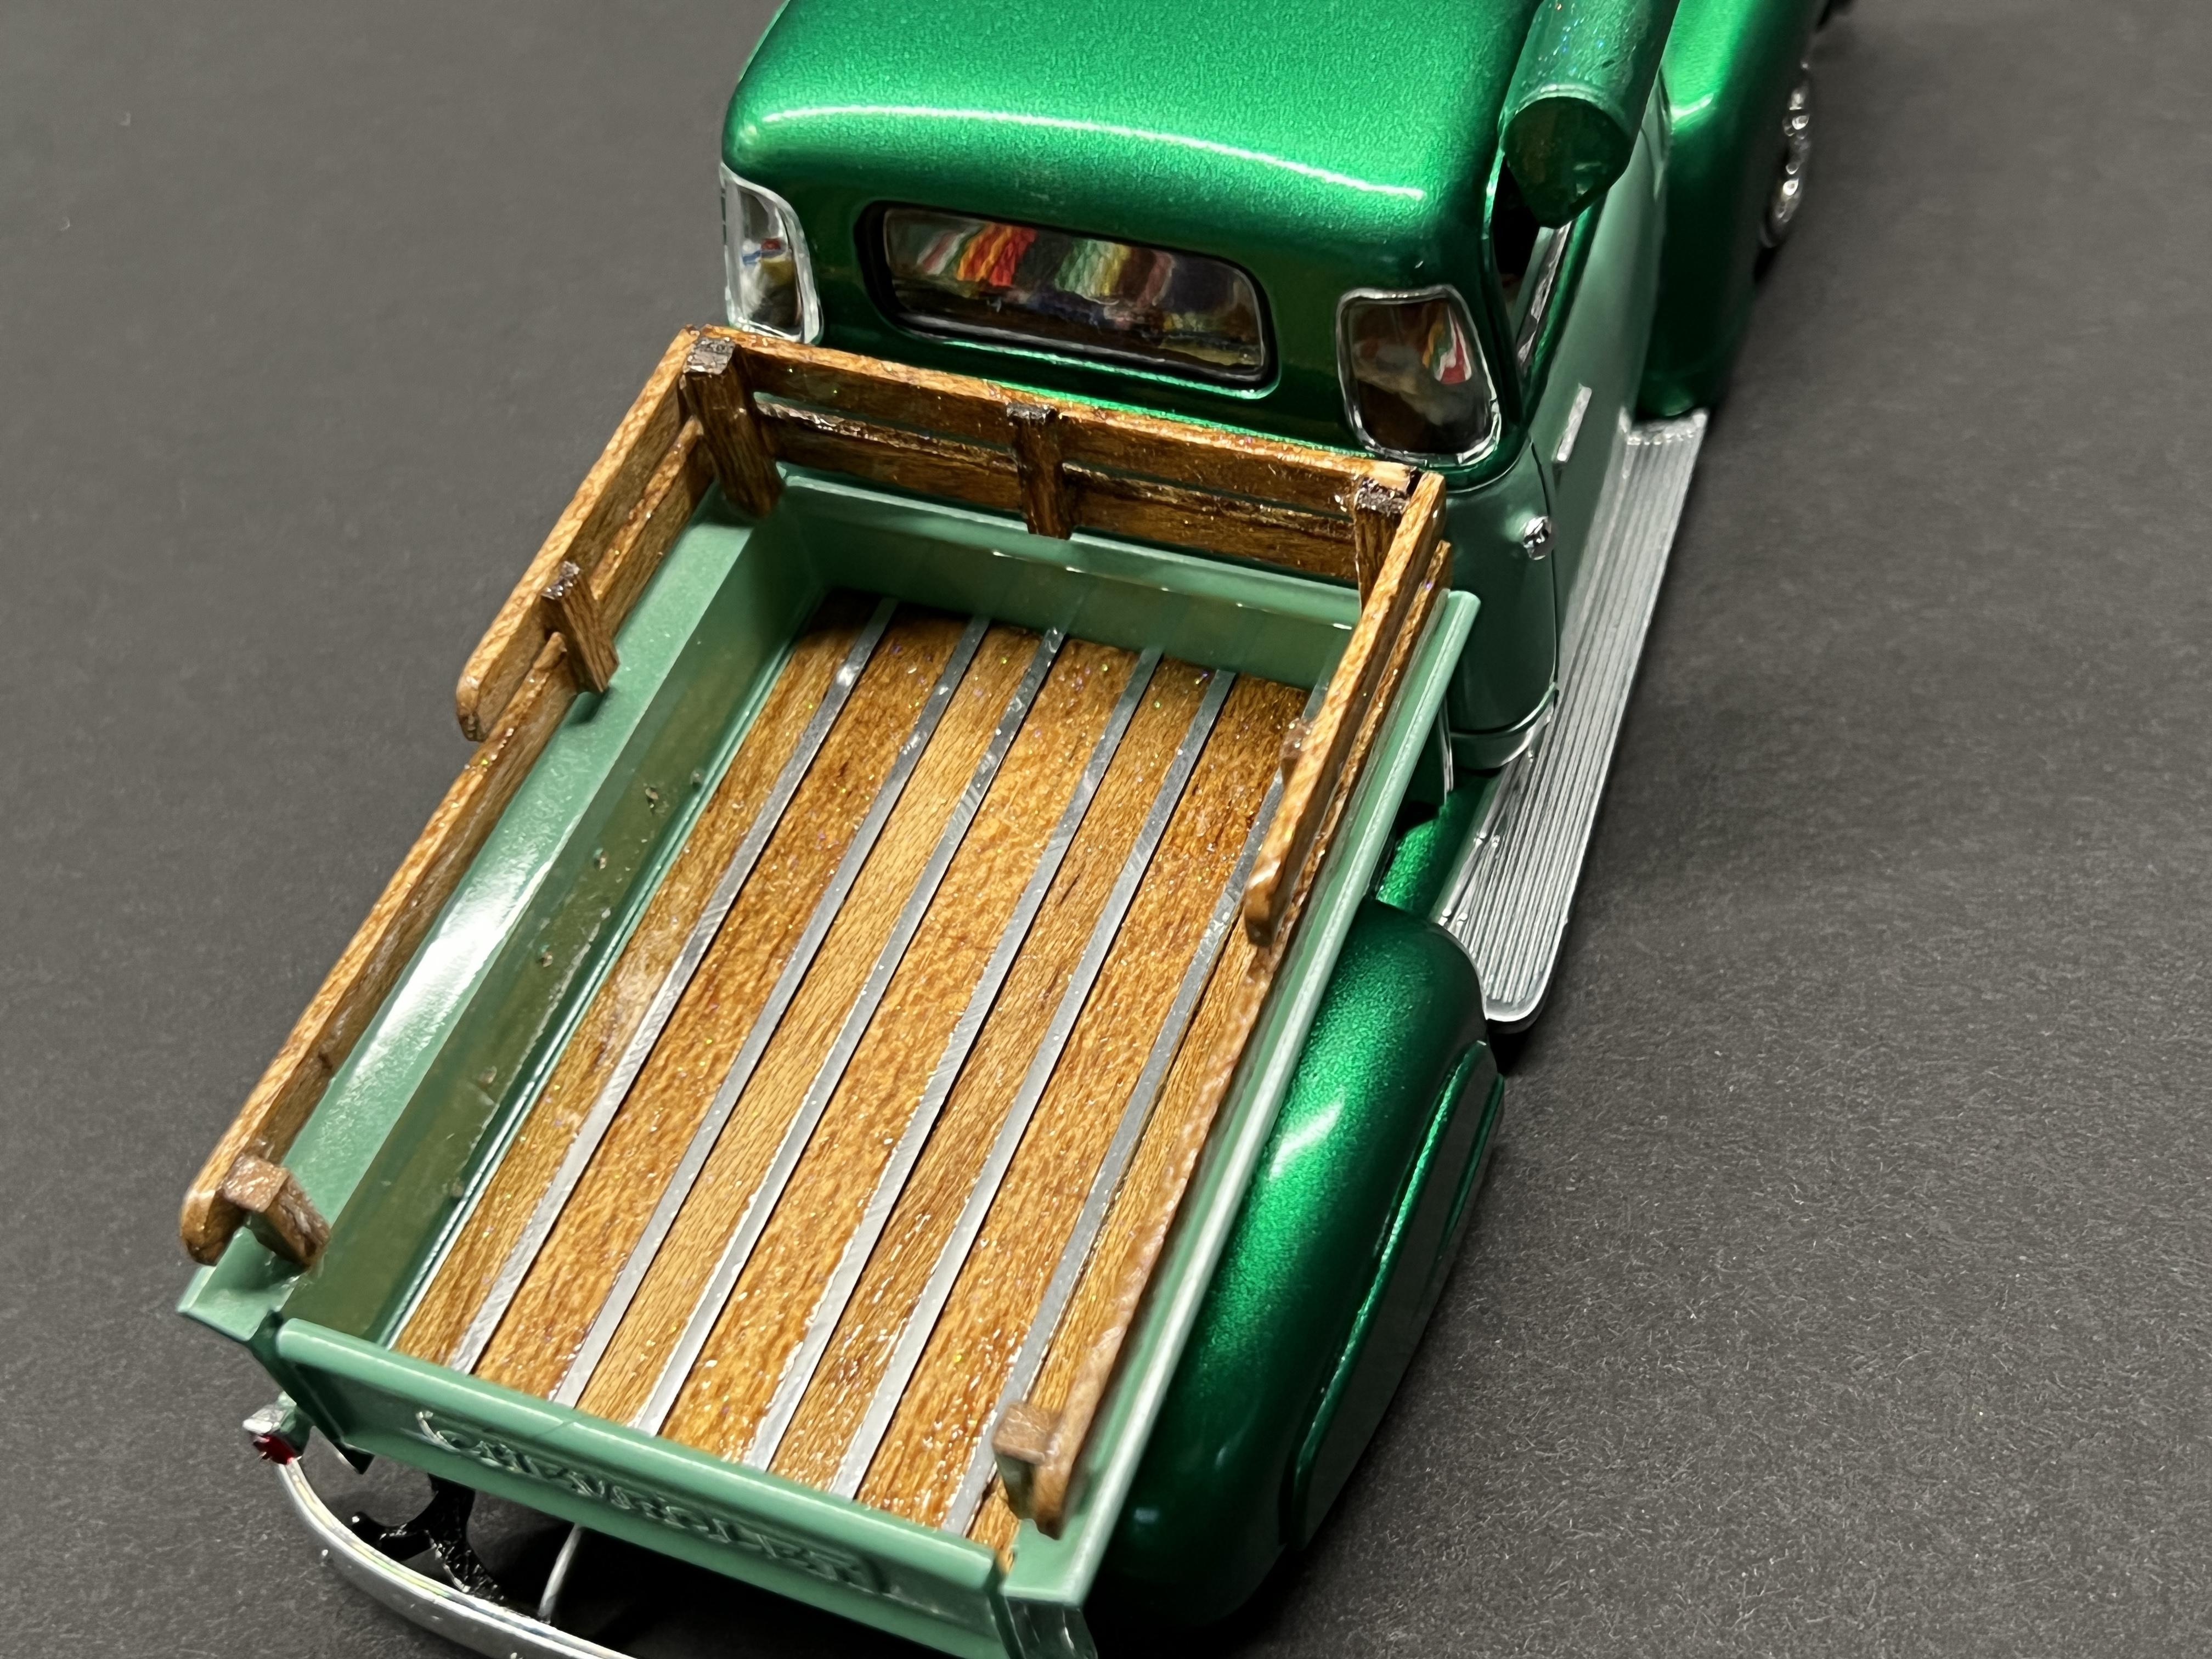
Built this from the AMT 3100 kit. Always loved these in lowrider style so I figured I'd give it a shot. Thanks to lowridermodelcarparts.com for the wheels and tires, fender skirts, chain steering wheel and swamp cooler. Wouldn't be the same without them. Wood bed and rails are balsa wood, and unfortunately, you can't see the multicolor metallic metalflake clear I used on them in pics. Made the front fogs from some old light housings I had and cutting off the flasher tops from the kit to use as lenses. Mexican serape blanket is made from embroidery string. Copious amounts of Molotow Liquid Chrome were used. Tamiya lacquer paint was used on the body. It's only my second time using it, and its a bit tricky to get even. All in all happy with the results. Chassis and Mexican Blanket Interior detail
-
Recreation of our 64 C10 "True Blue"
rastta replied to rastta's topic in Model Trucks: Pickups, Vans, SUVs, Light Commercial
Thanks again everyone. The model will make it's debut this weekend at a local car show called Midnight Mass sitting on the dash of True Blue. -
Recreation of our 64 C10 "True Blue"
rastta replied to rastta's topic in Model Trucks: Pickups, Vans, SUVs, Light Commercial
Thanks for the kind words everyone. -
Recreation of our 64 C10 "True Blue"
rastta replied to rastta's topic in Model Trucks: Pickups, Vans, SUVs, Light Commercial
Thanks. I fully understand what you mean. Unfortunately the guy who built it is in hospice due to cancer. He had turned down higher offers from folks who wanted to change this and that. He spent 15 years building it along with a shop call Mackey's Hot Rod Shop in SoCal. We told the guy who was helping him sell it that while there are probably some things well change here and there (added a BT stereo hidden in the console, and the boltless strips in the bed to match the shaved bumpers) we ain't going to change a good thing. He took our offer. As a condition of the sale - we wanted his name added to the glove box by the pinstriper who did the other work. We take it all over to shows and can't take credit - it's all his. -
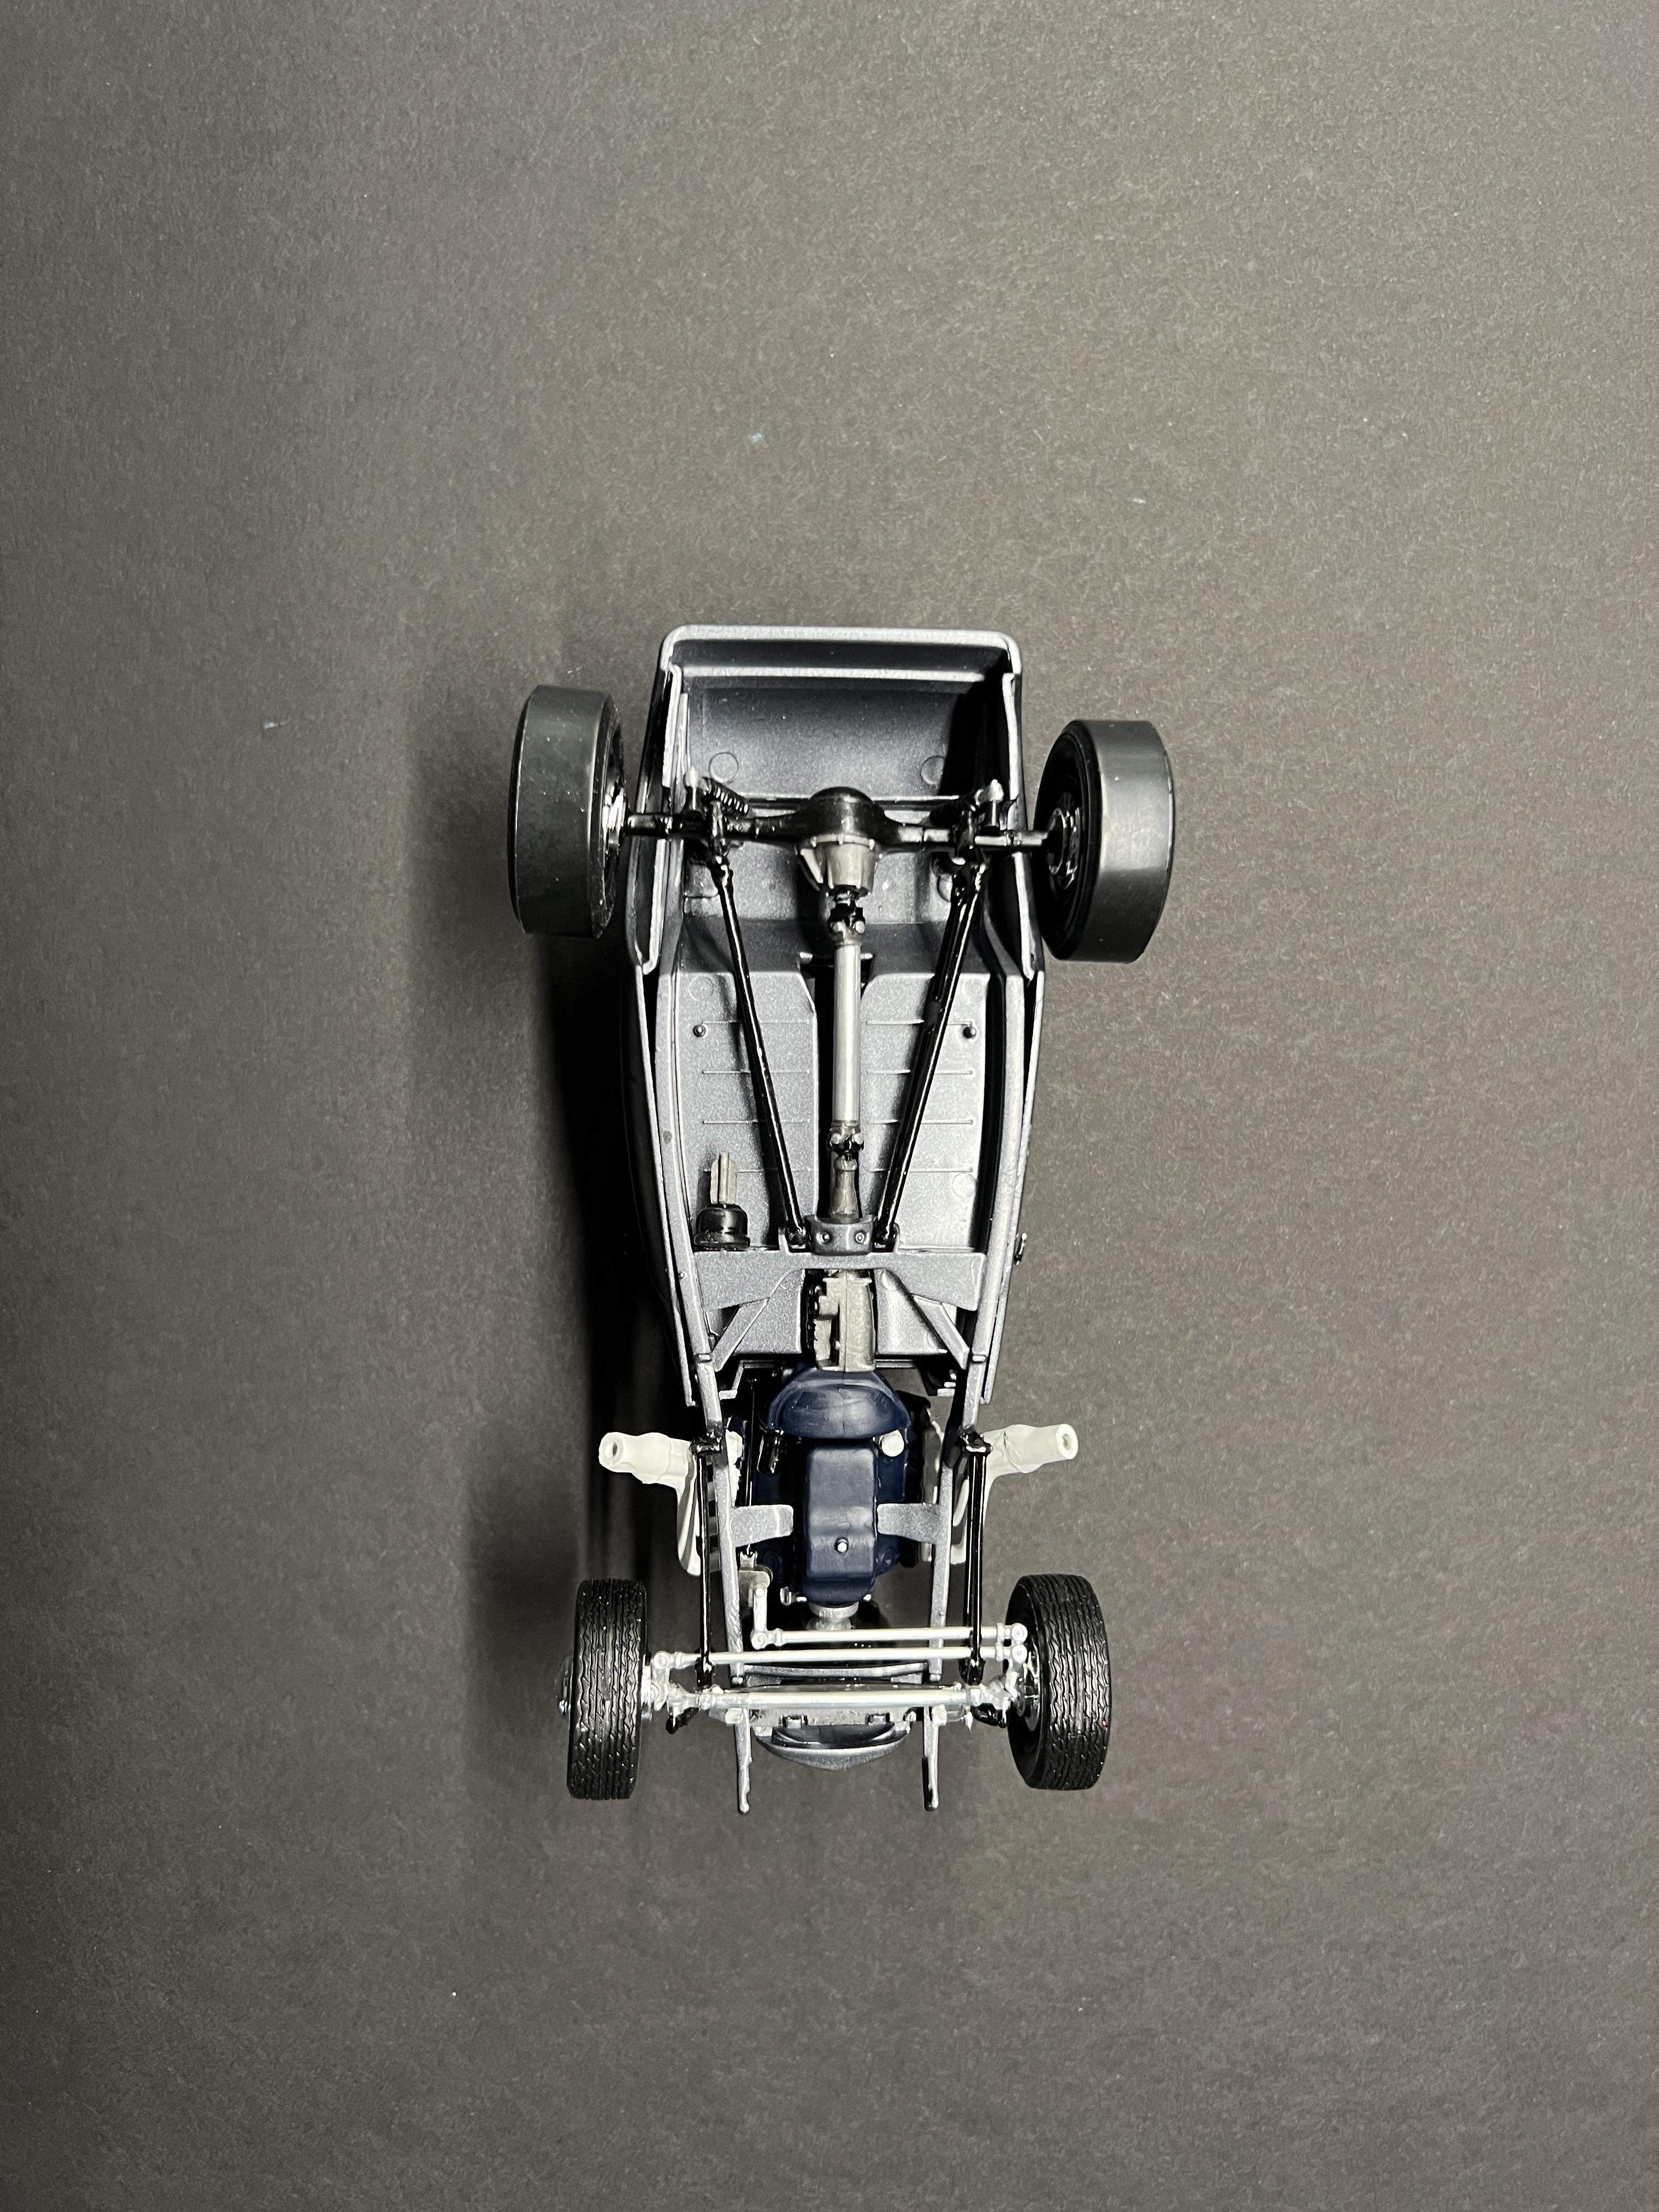
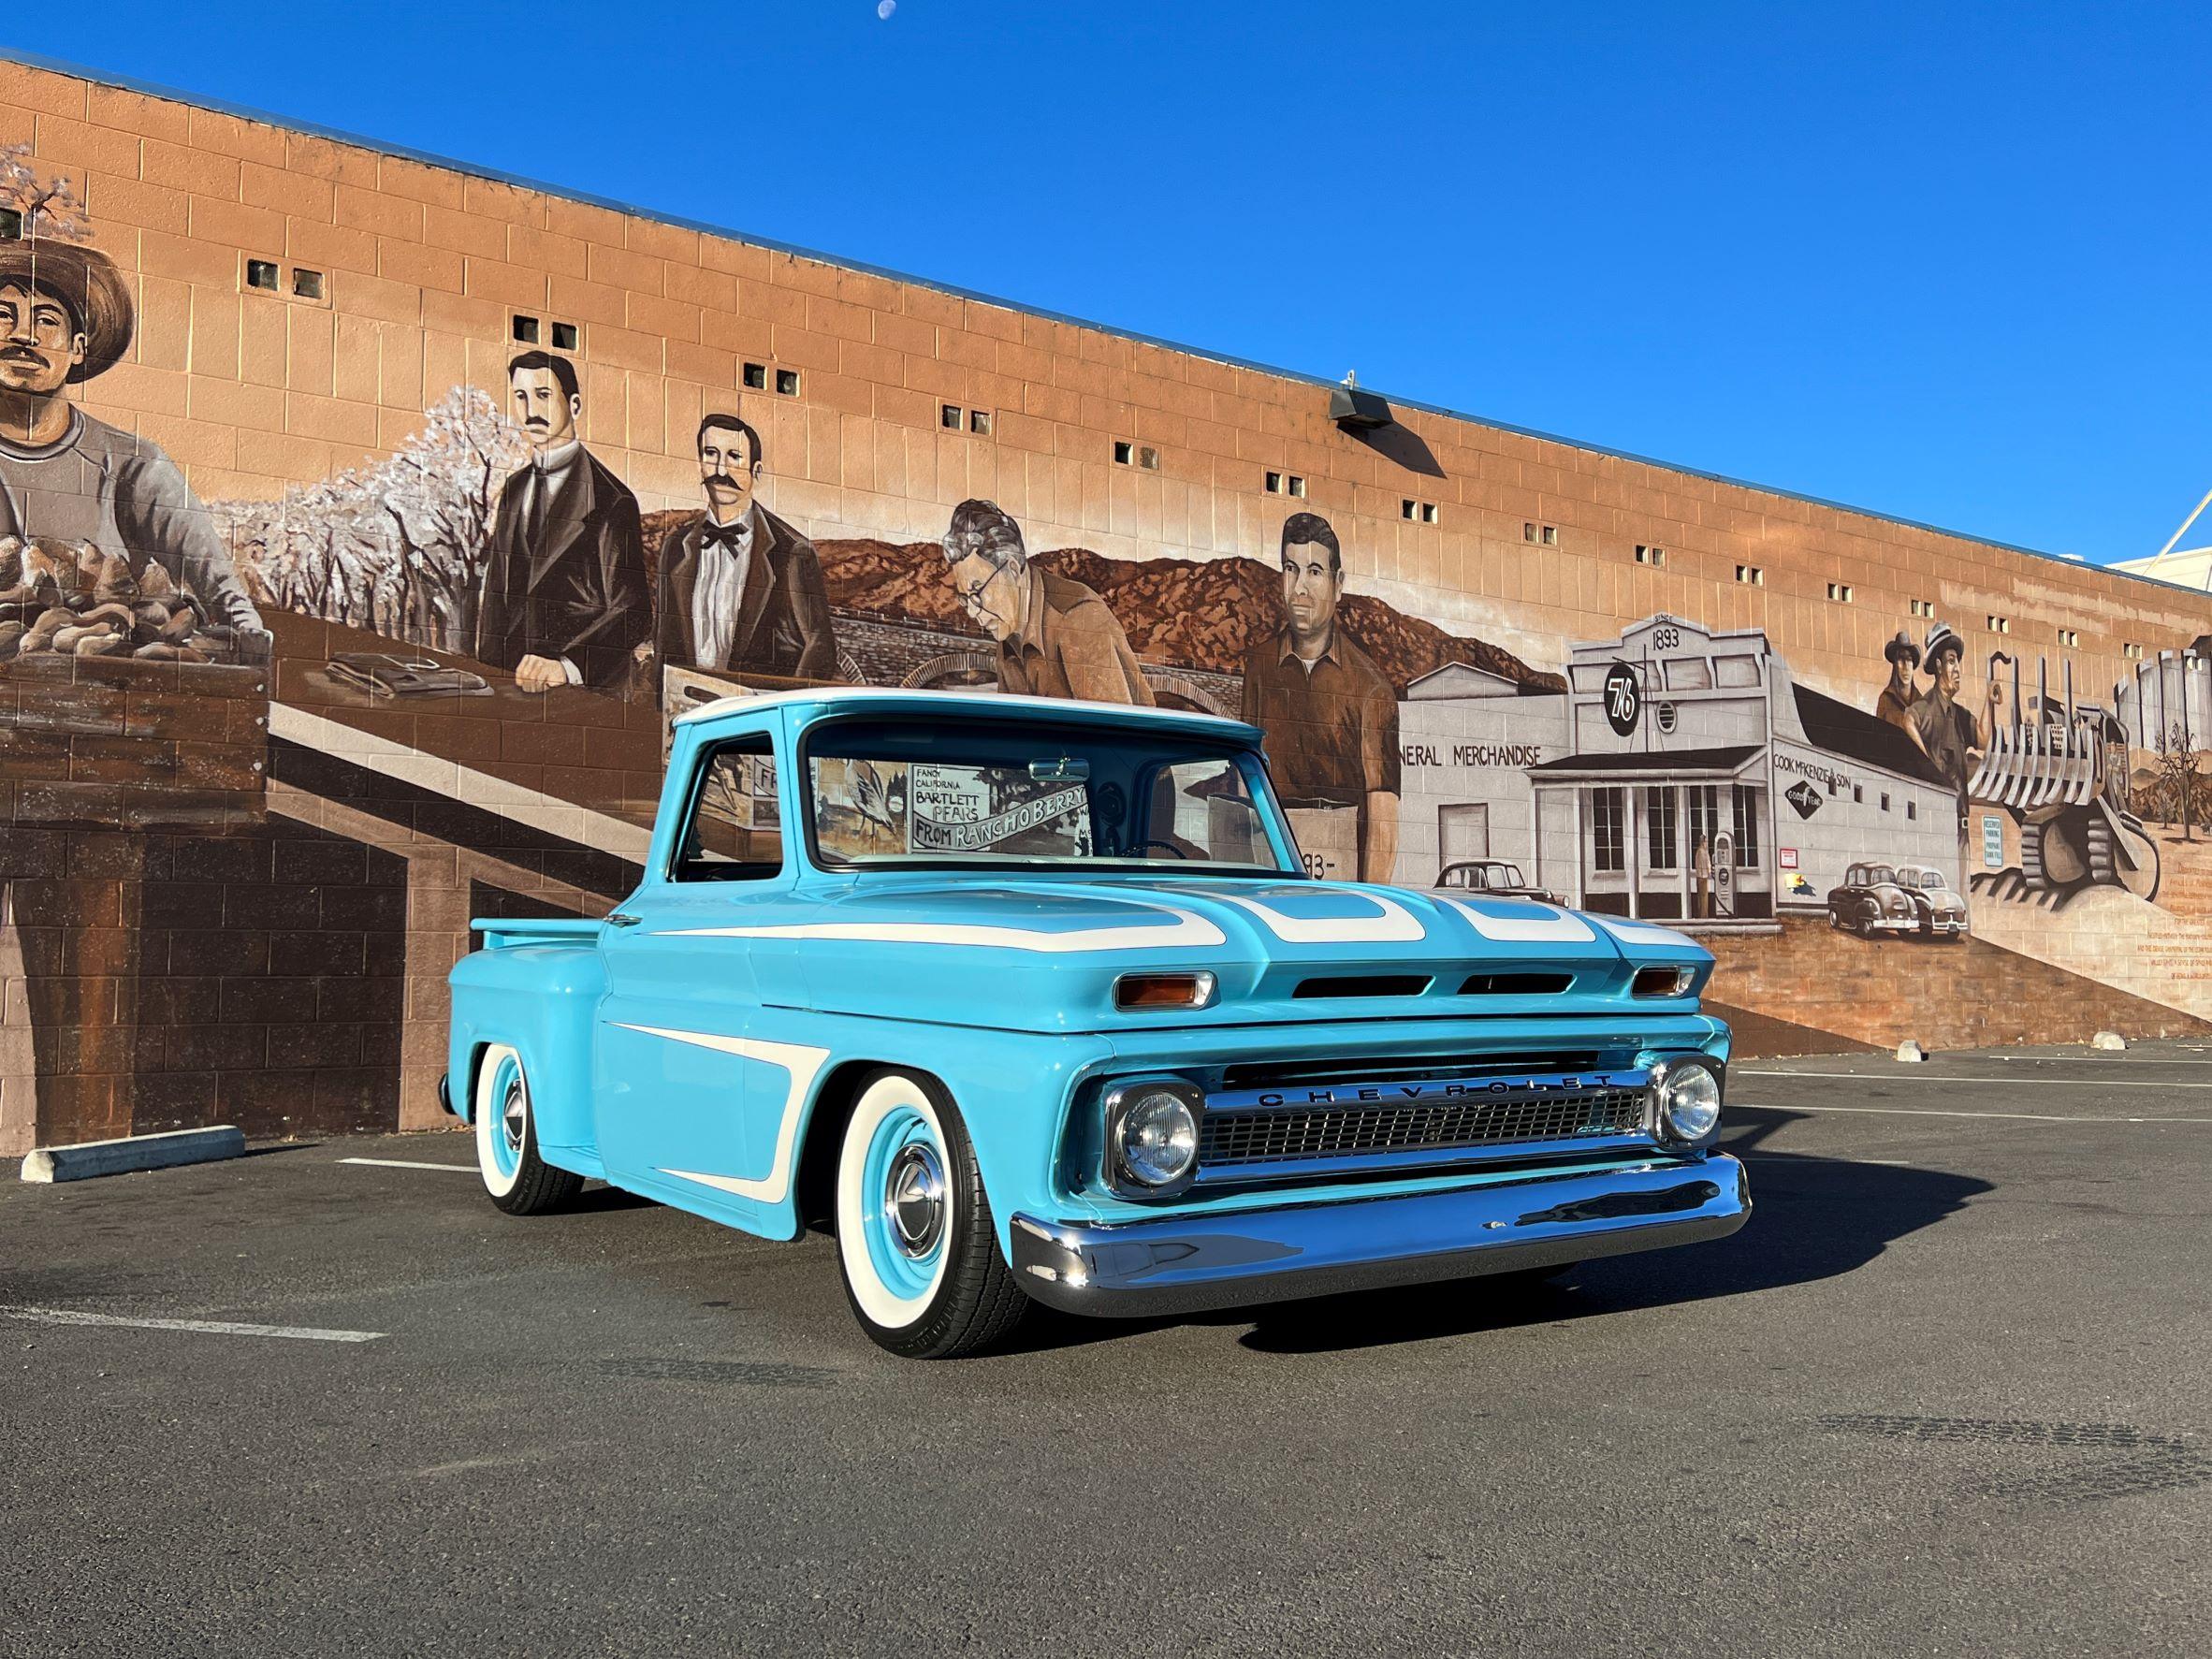
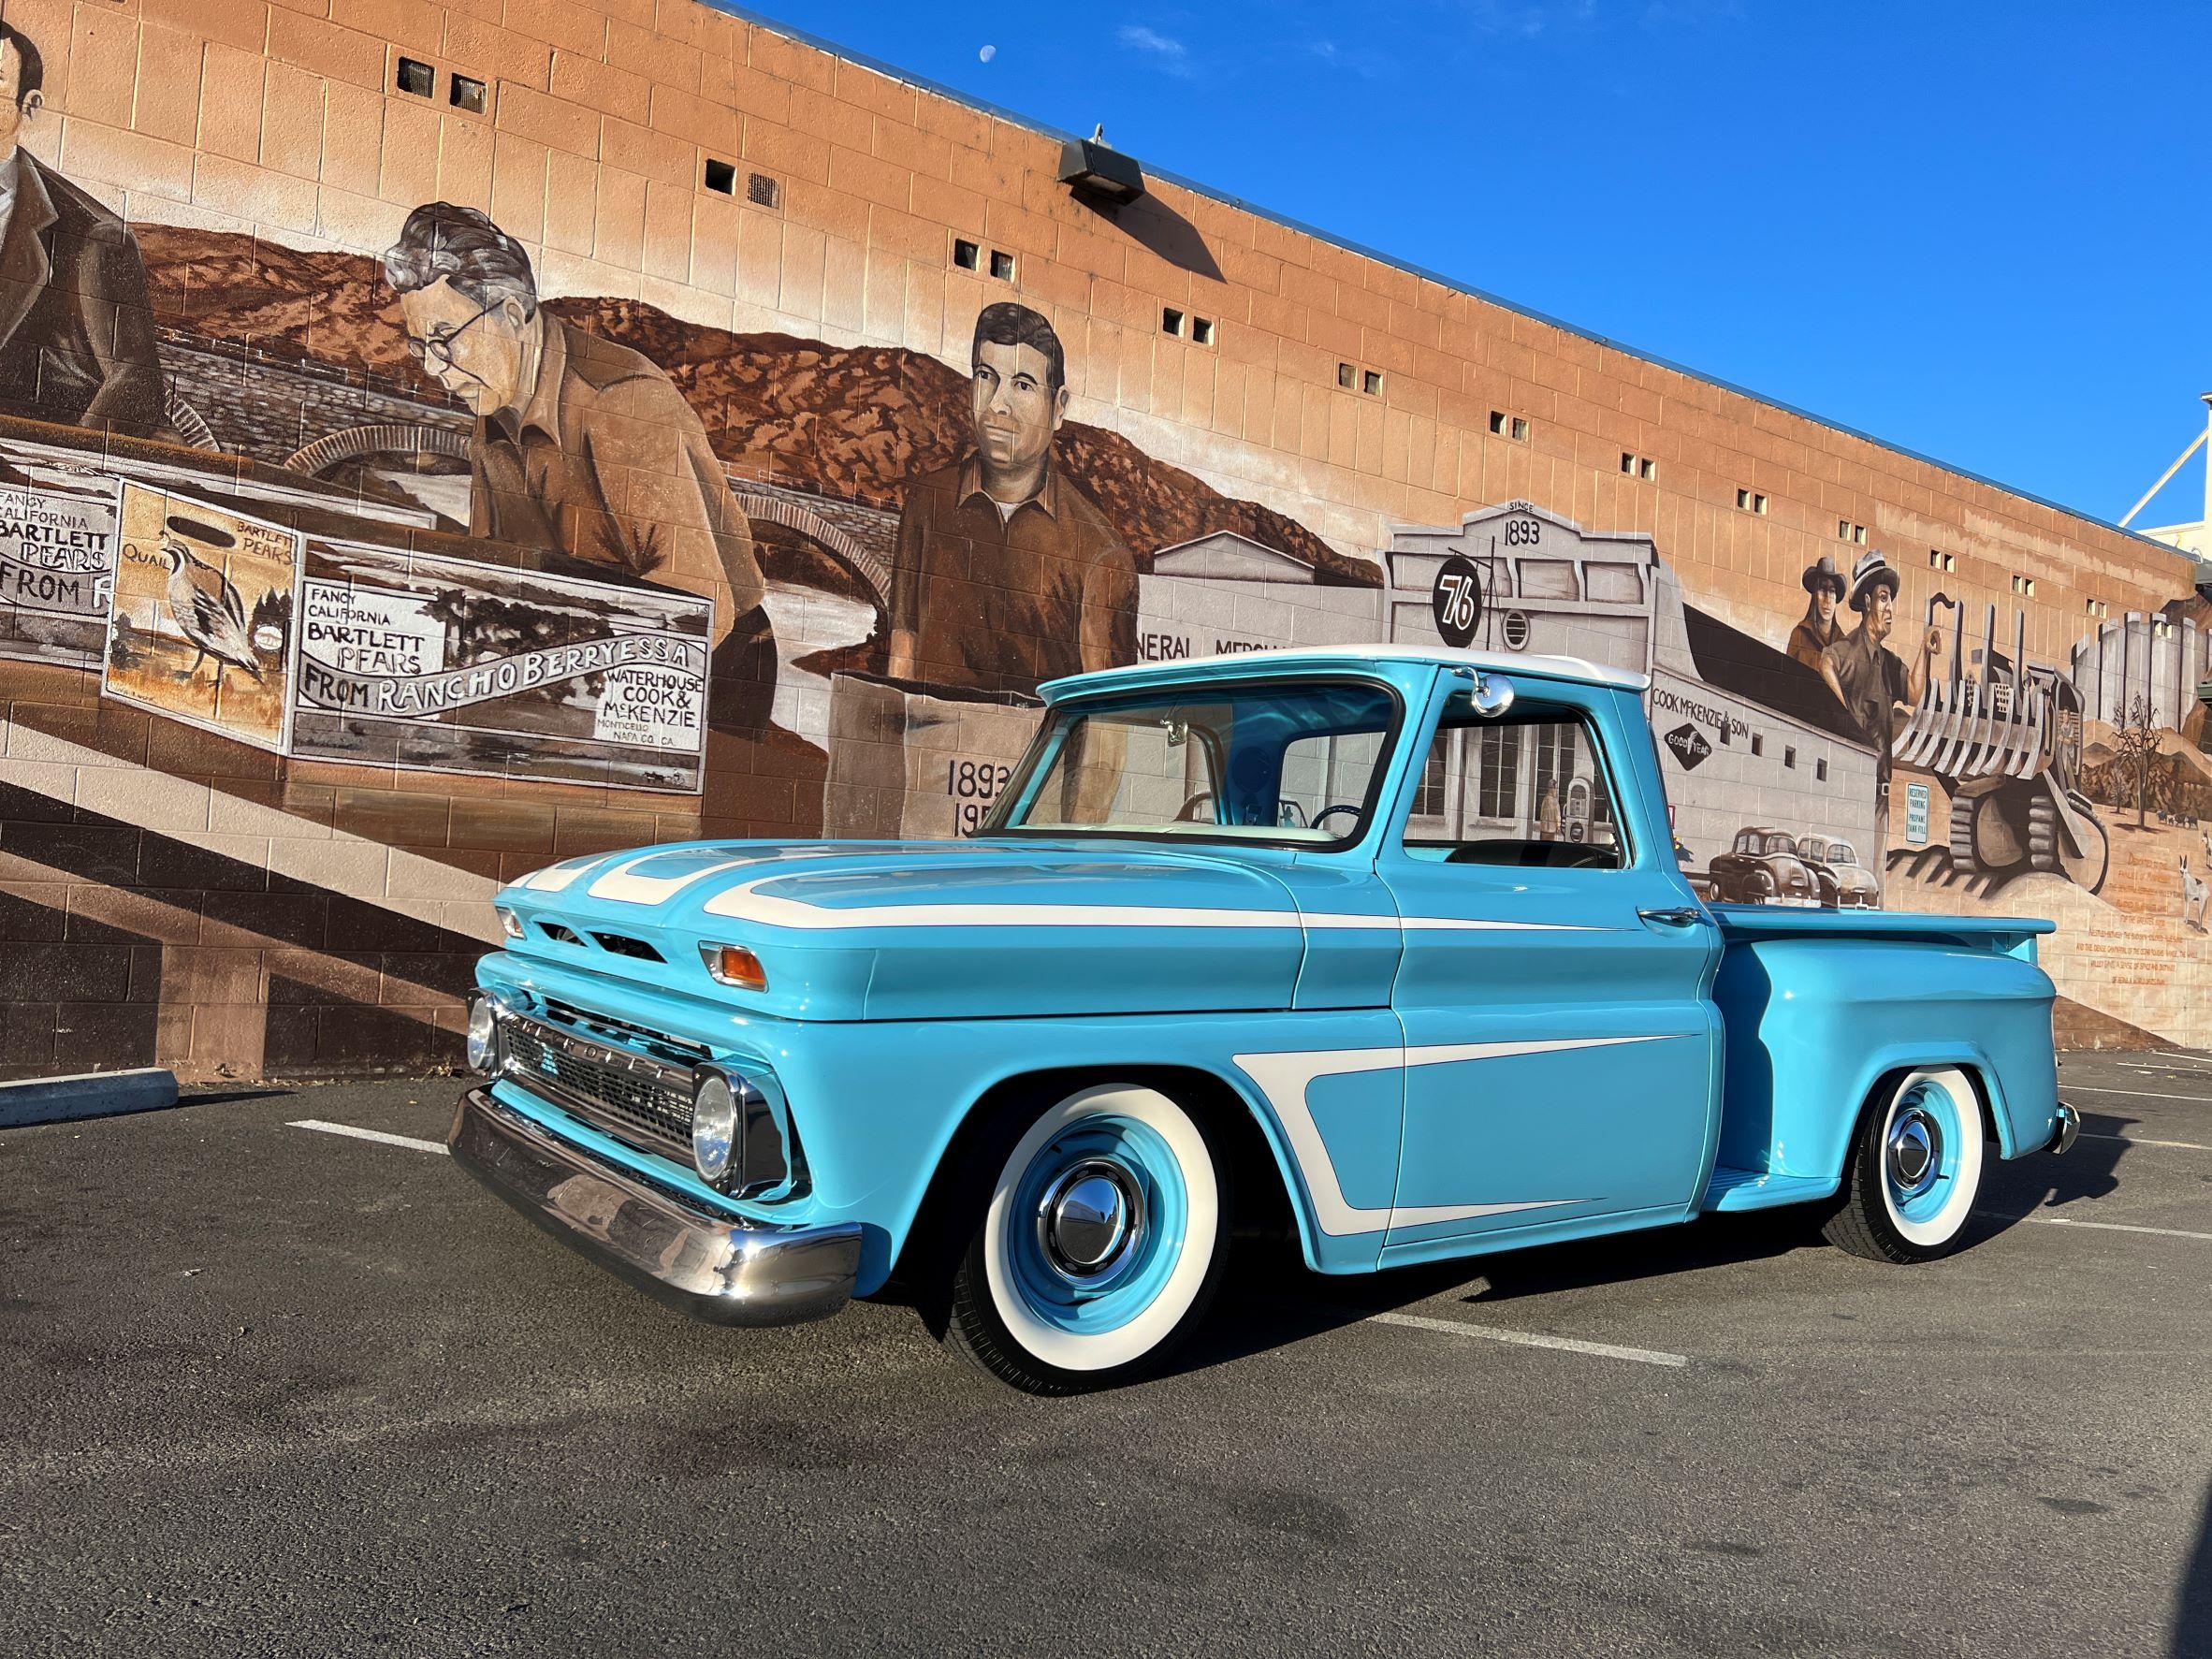
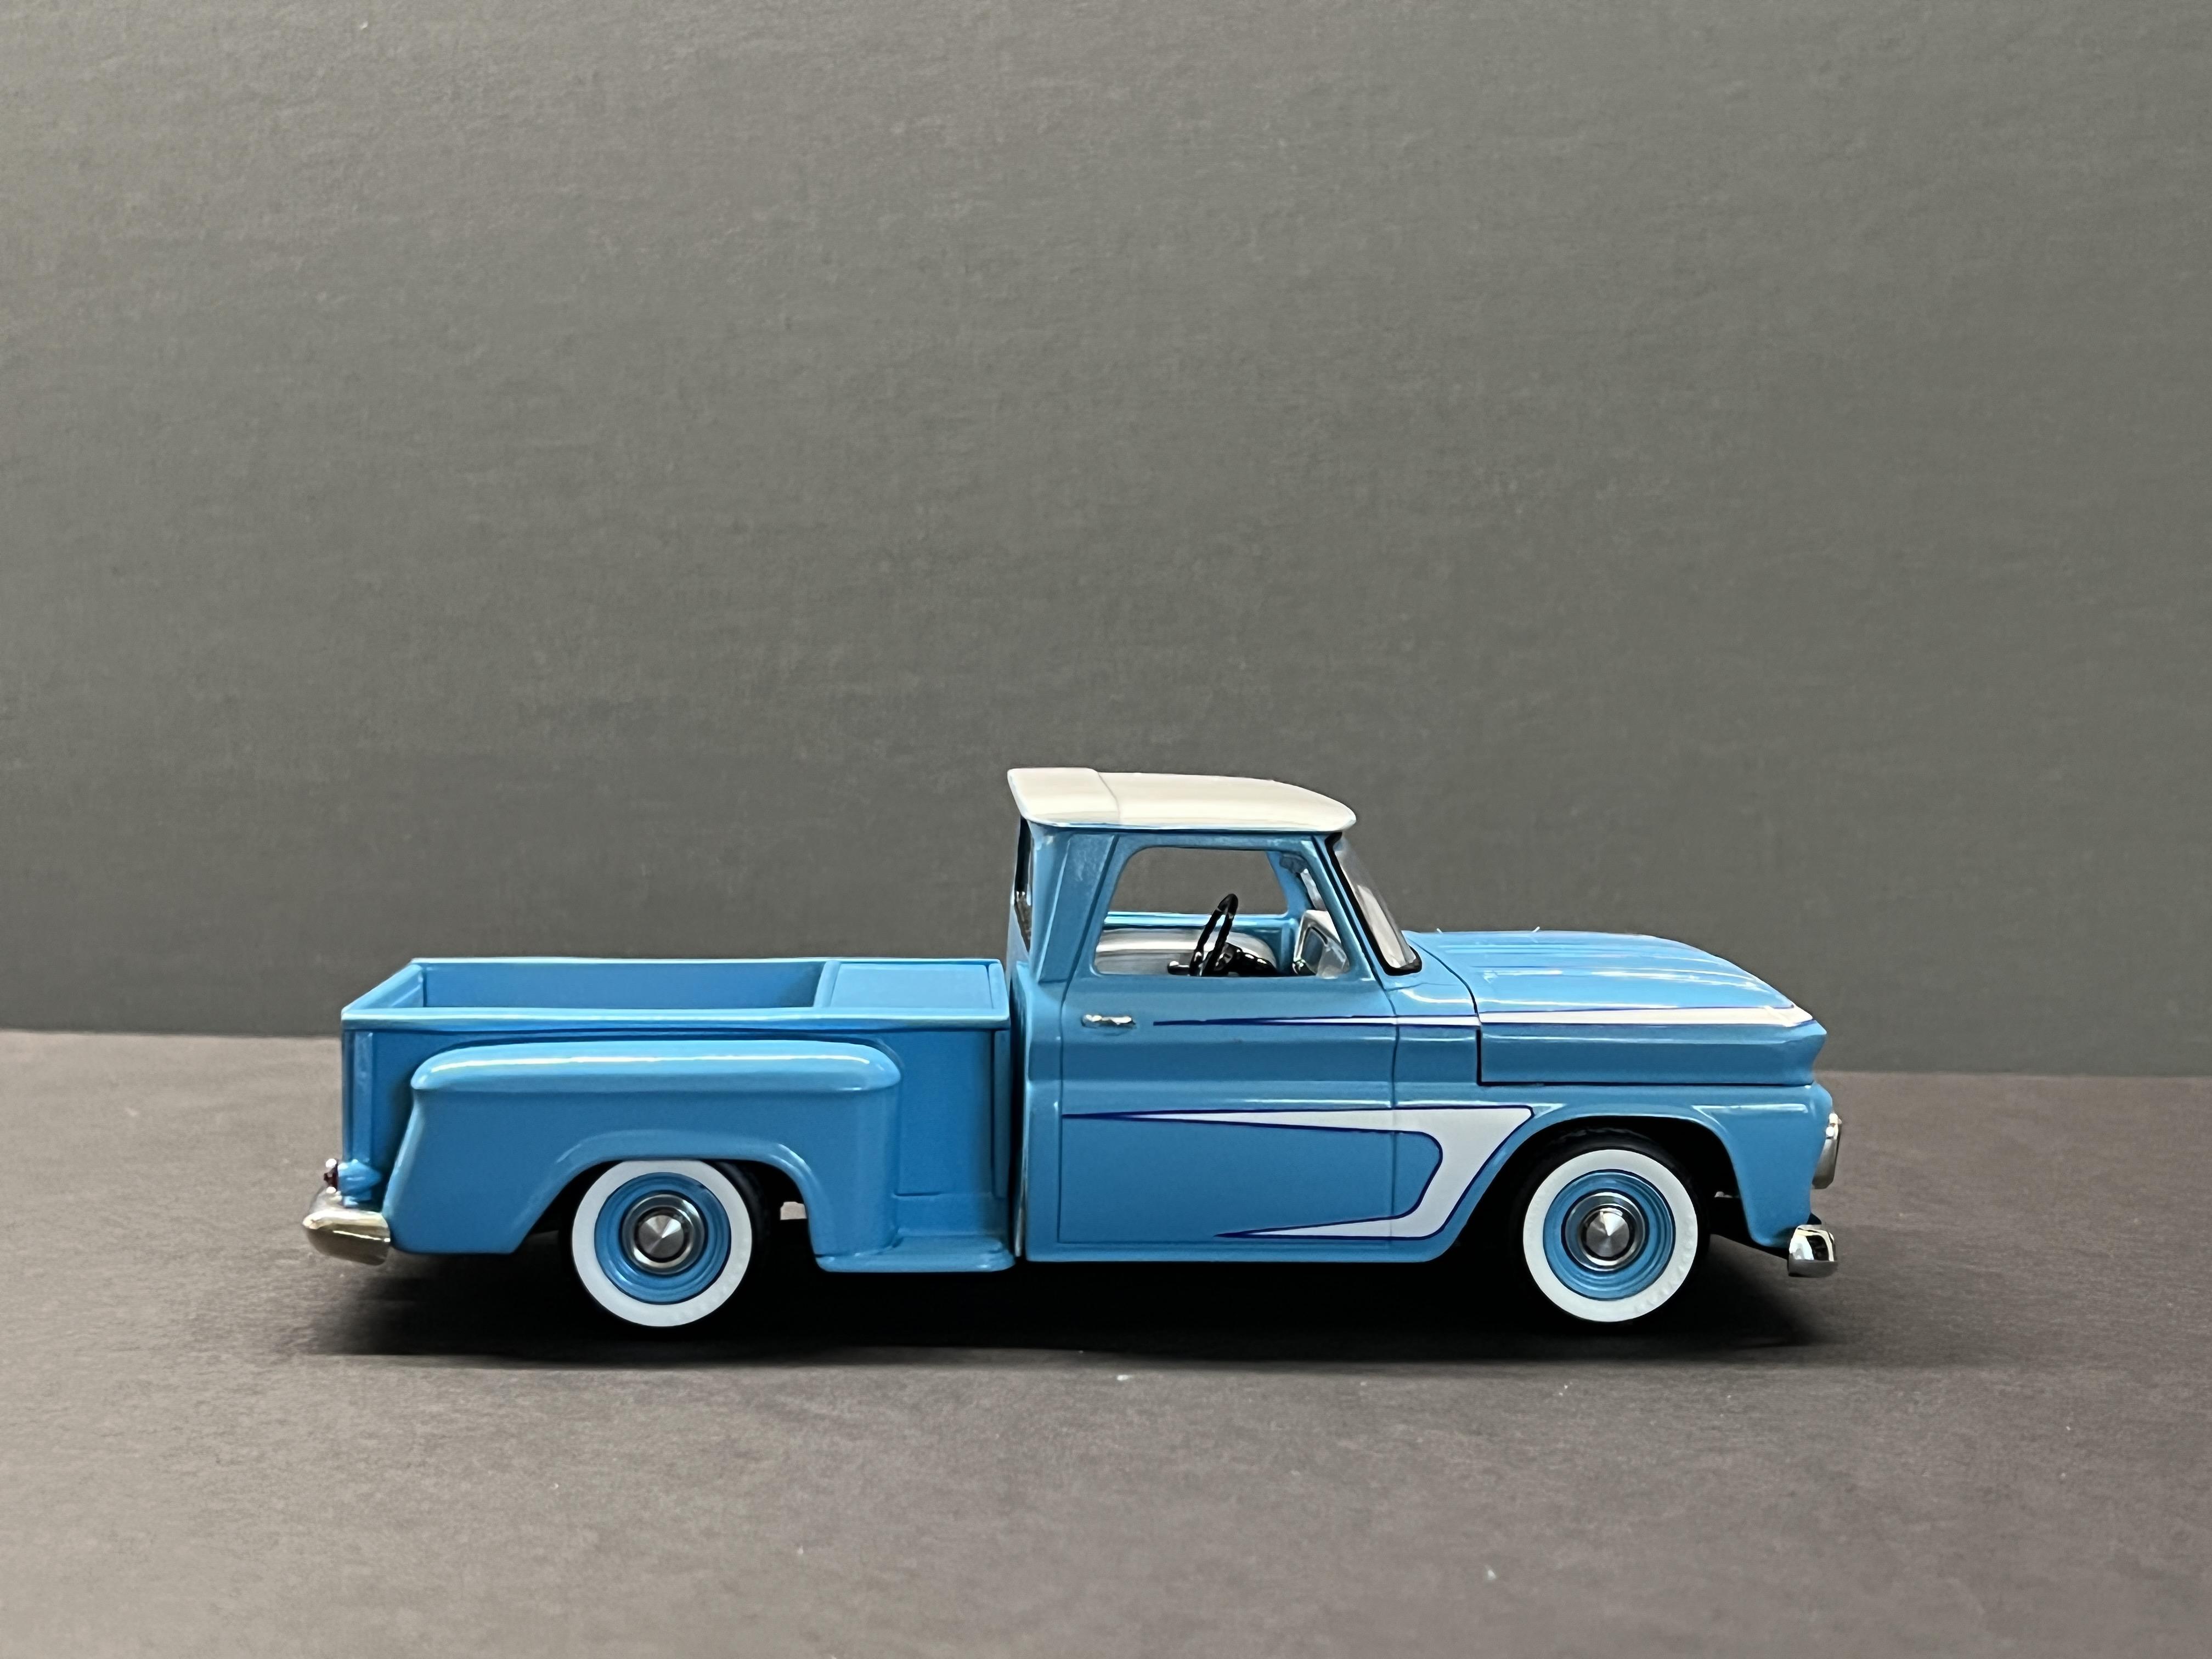
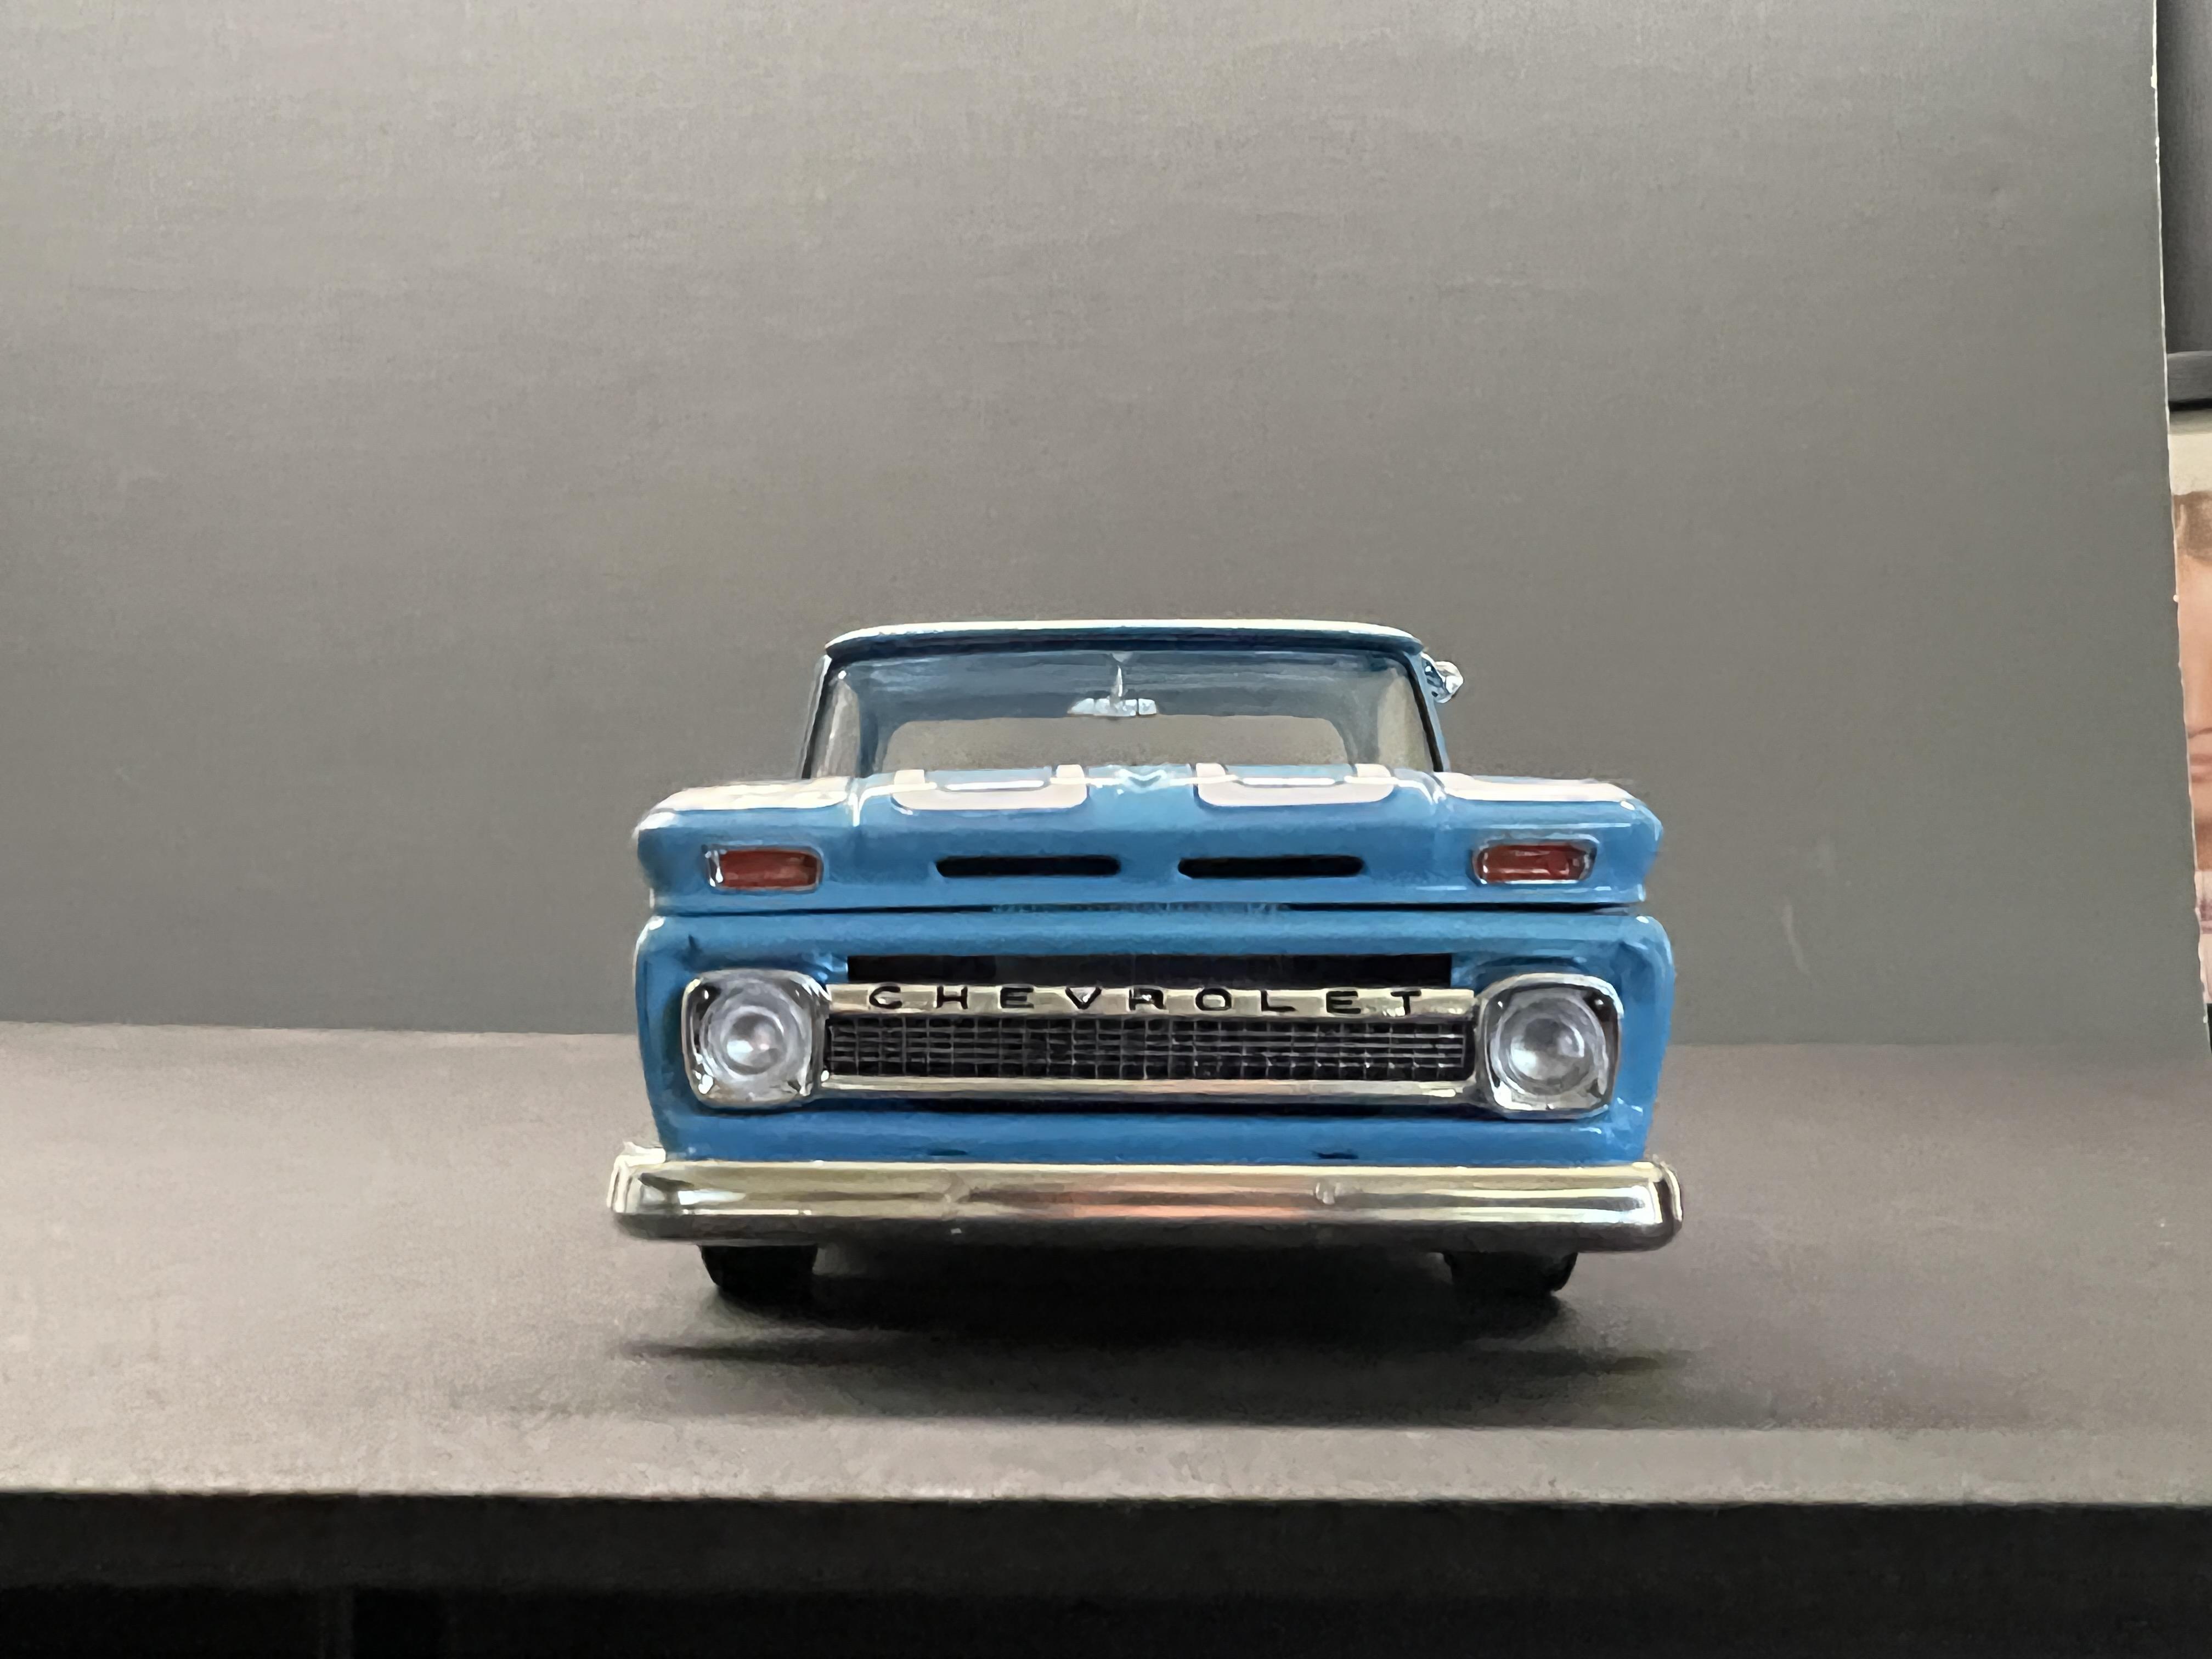
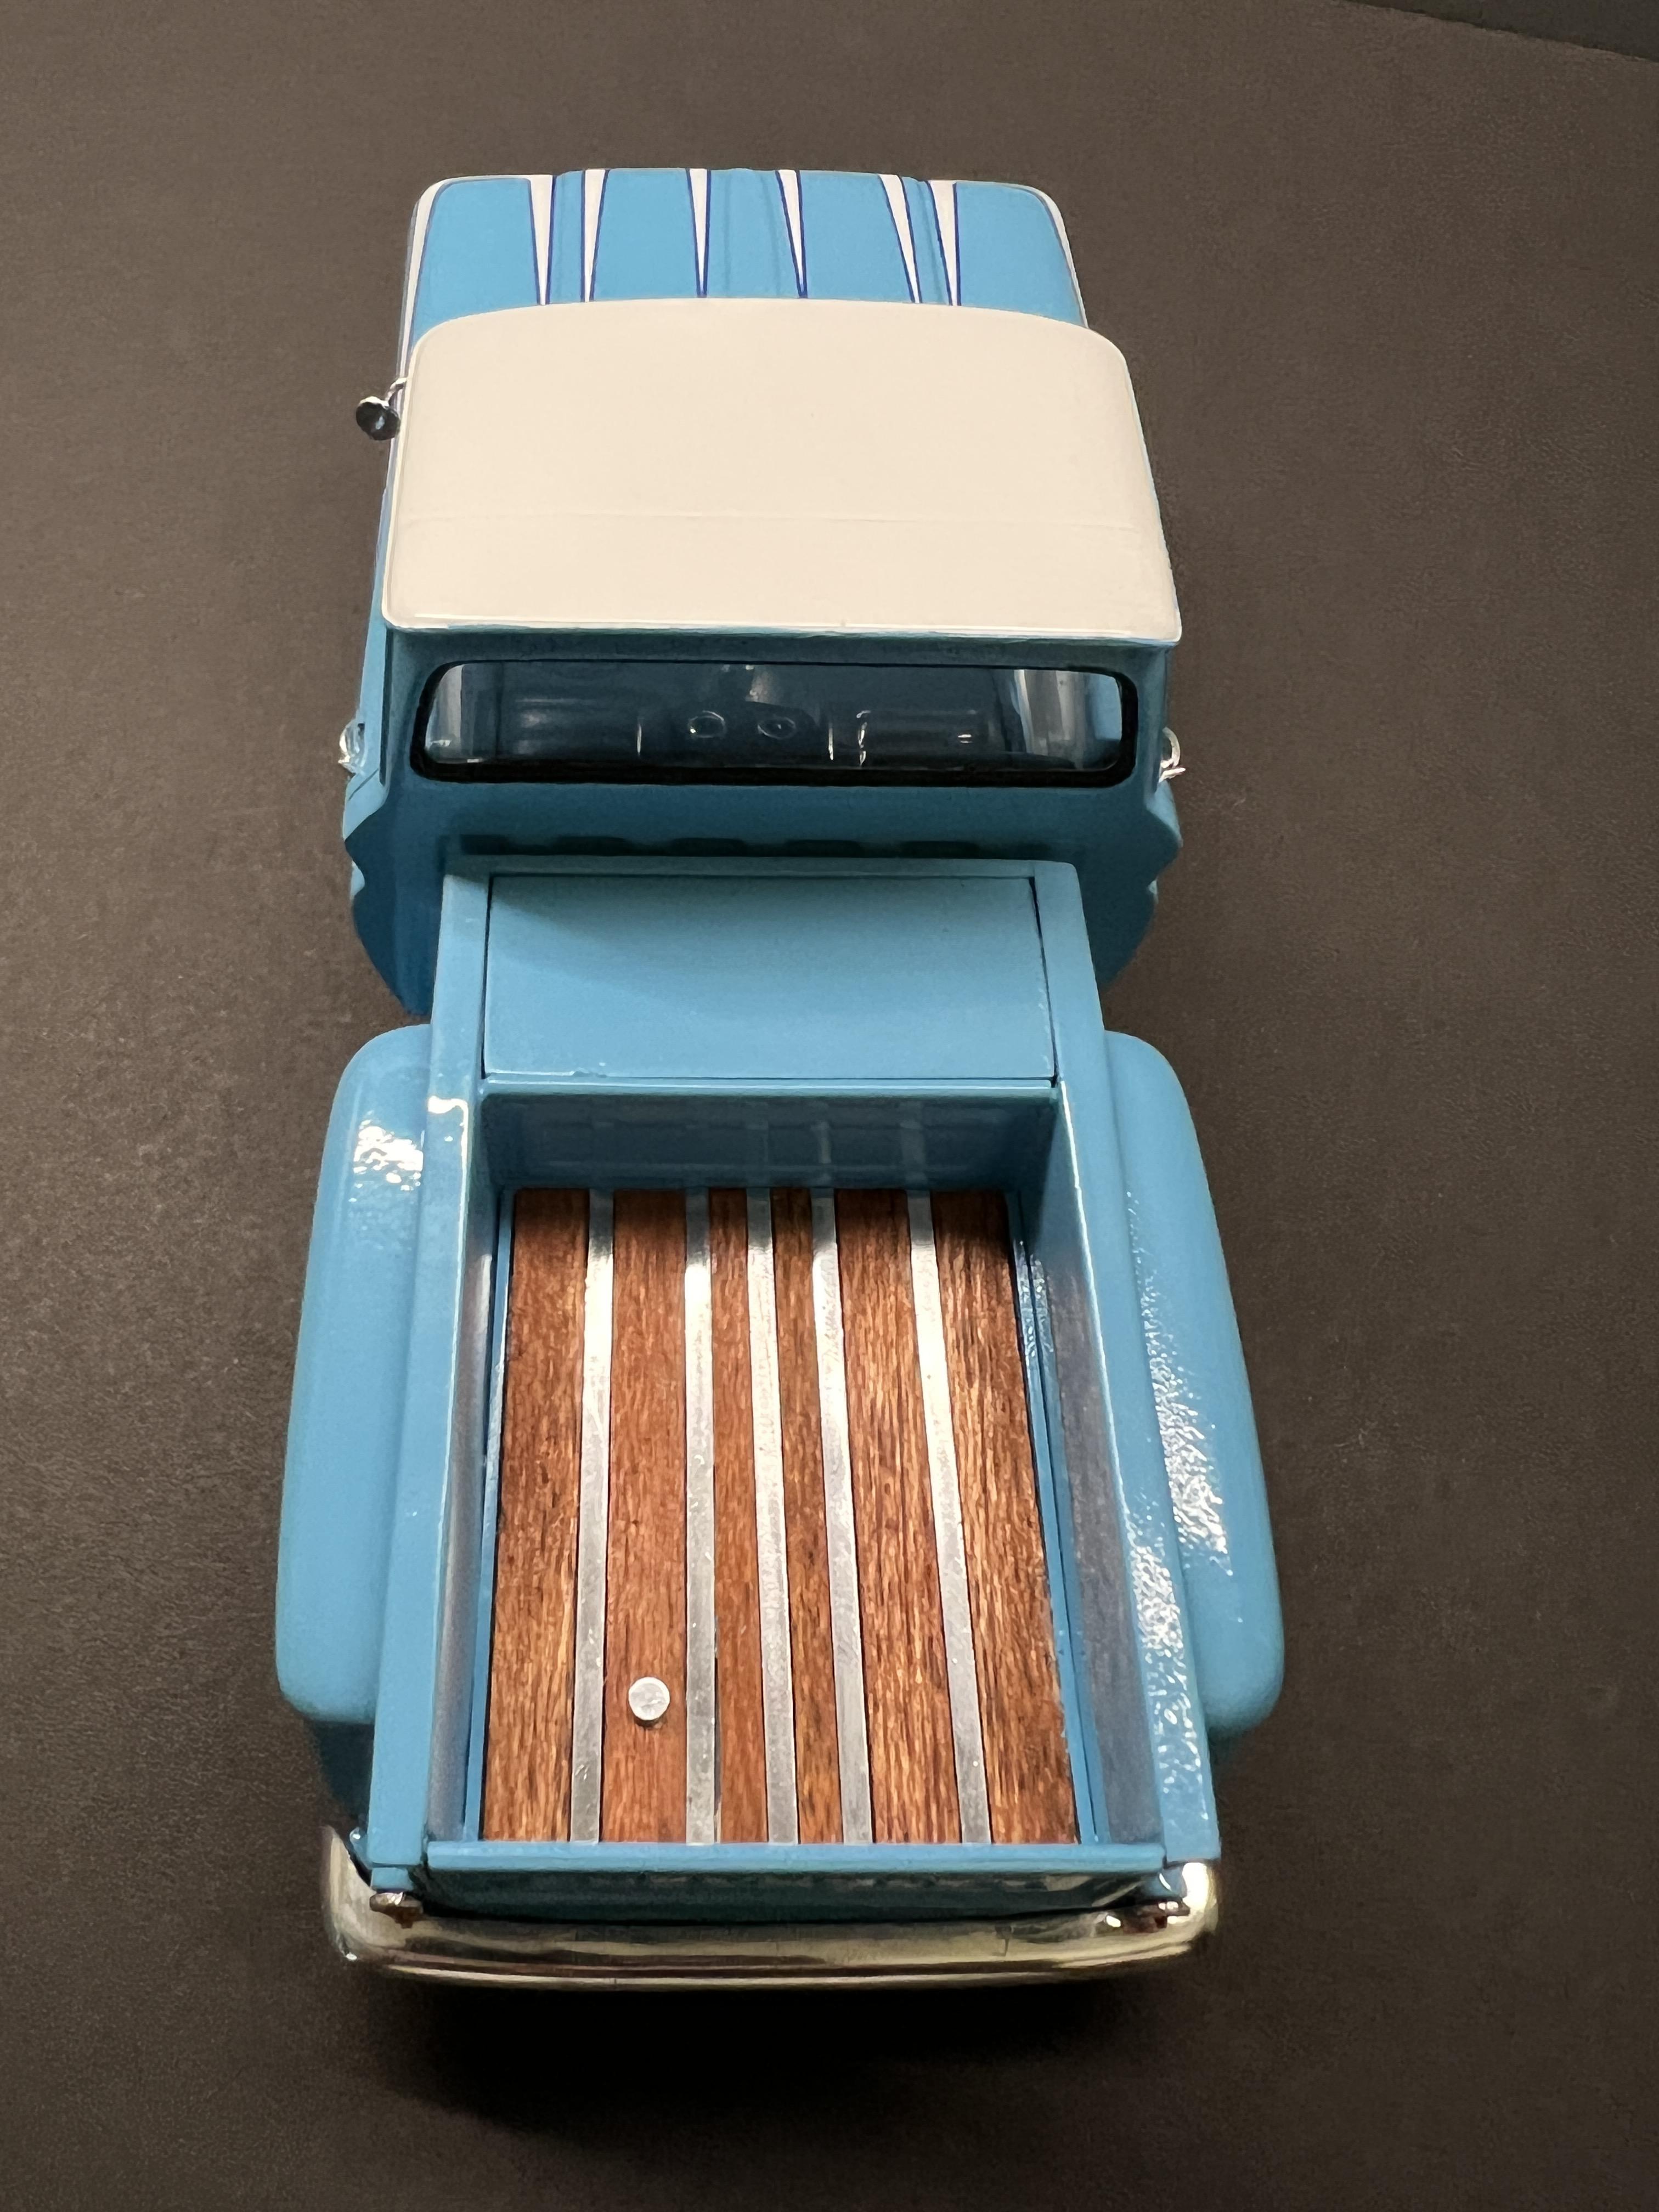
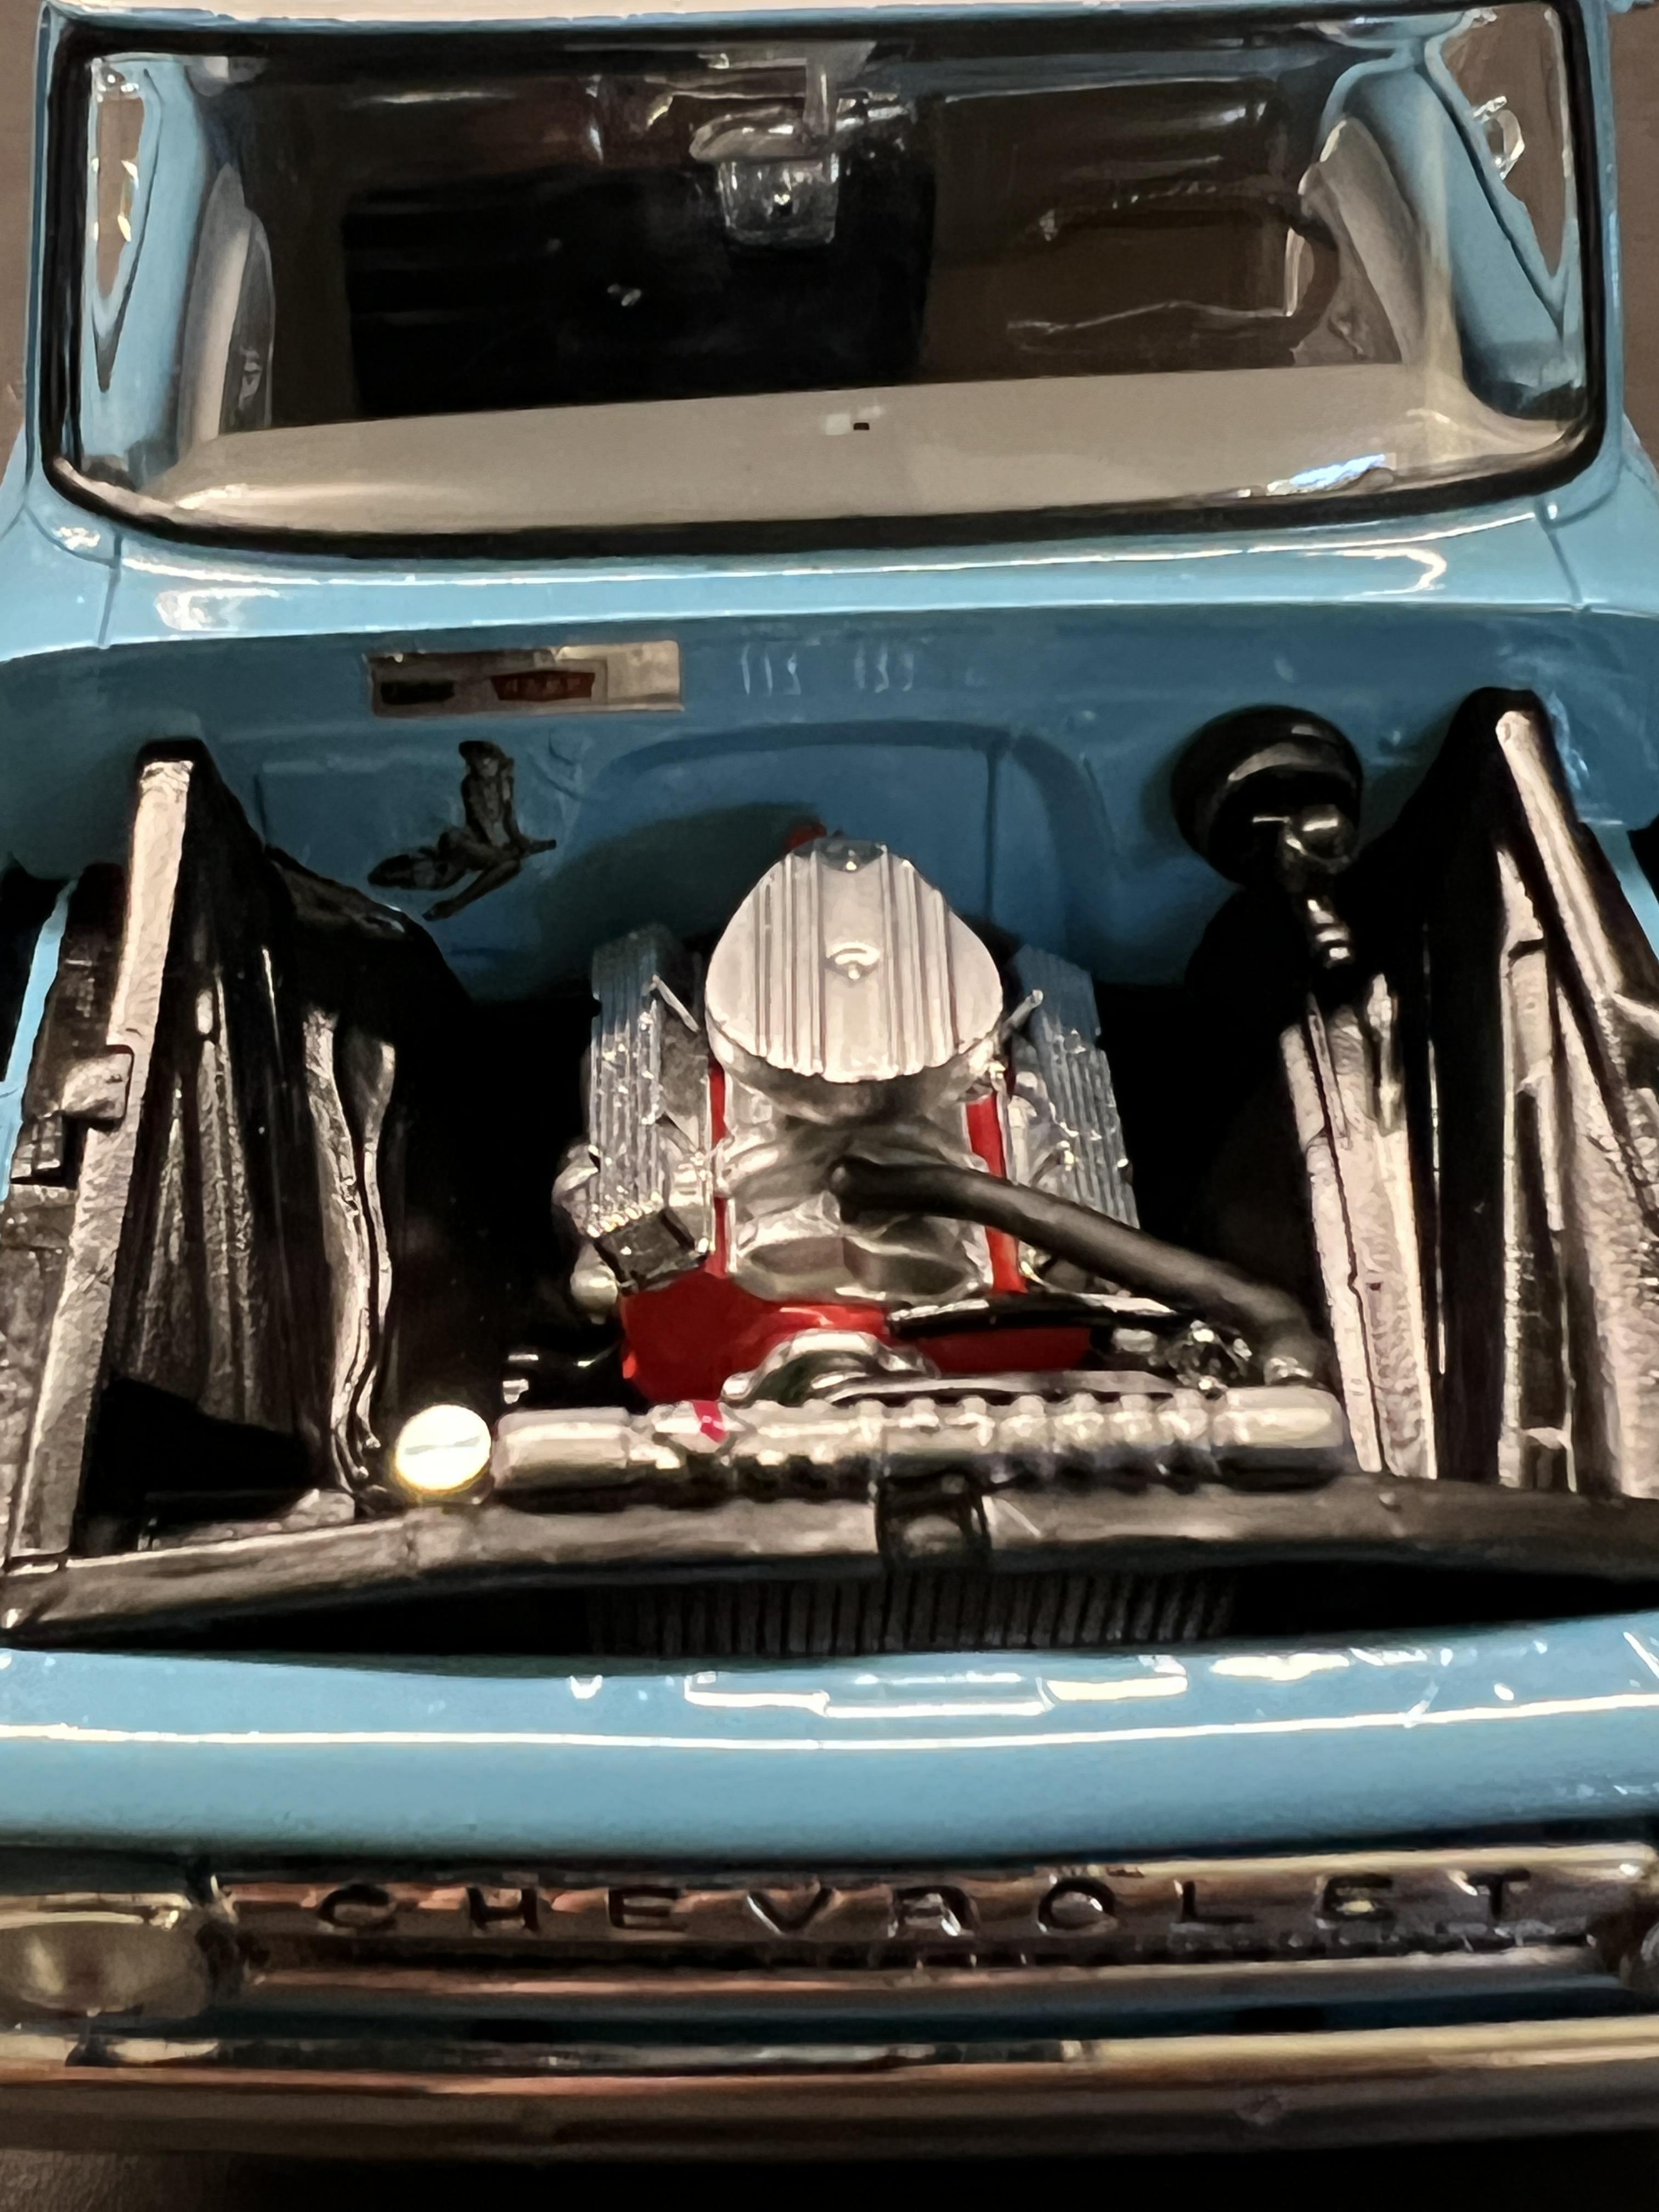
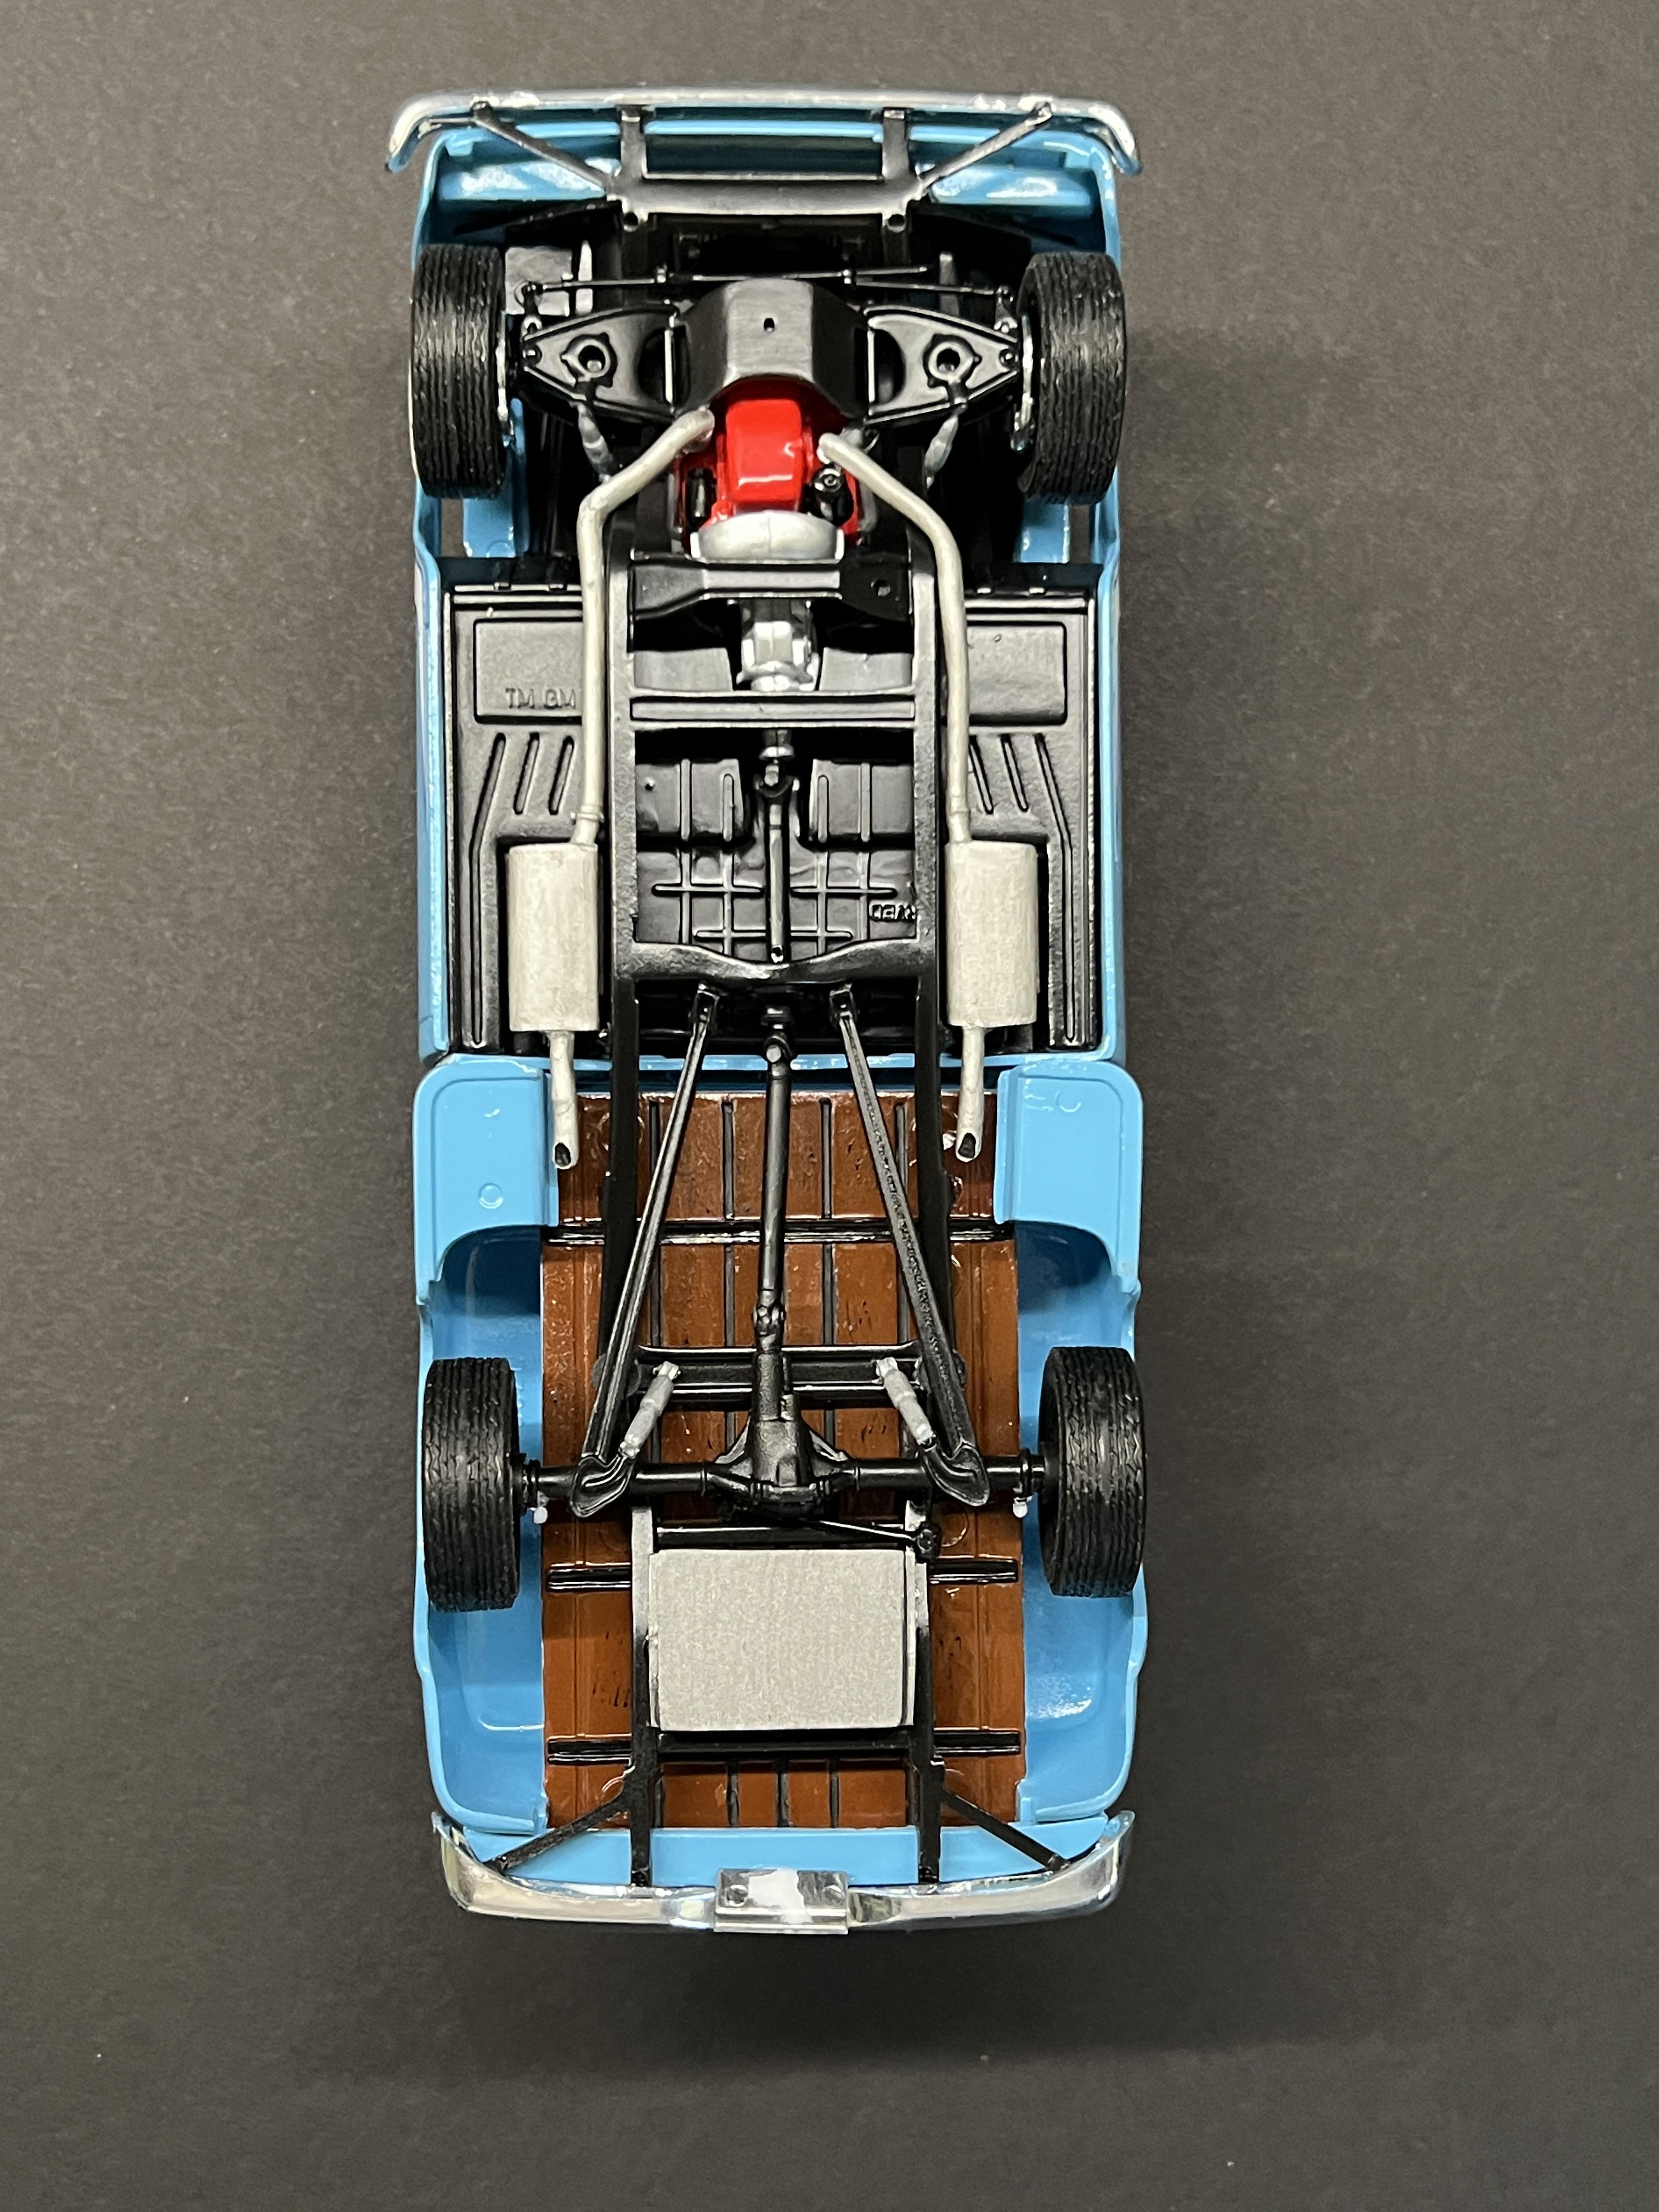
We were fortunate to pick up this 1964 C10 custom named "True Blue" by the original owner in January of this year. It has a lot of small custom touches which as with all good customs - aren't really visible at first. So, when attempting to build a model of it - these proved to be some of the greatest challenges. I'll start with a few pictures of the truck - then follow them with pictures of the model. This started life as the 65 C10 Stepside Kit by Revell. All of the custom touches were handmade by me and I also want to thank members “Khils” and “Sam I am” for providing some custom parts I needed such as a 59 Impala steering wheel, Impala rear speaker grill, 65 Chevelle bucket seats and an extra tailgate. While I was able to recreate the original in many ways - there were several things which were limitations due to the model. First was getting lowered enough in the front. In order to match the original, the from A-arms would have been touching the ground on the model. The other major item was the rear suspension. Our truck has had a 1978 rear leaf spring suspension adapted to the original rare leaf spring frame. I opted to just use the coil/trailing arm suspension from the model. Other than that, it's pretty damn close to the original. I painted it Testors Light Blue enamel with an airbrush which was lightened to match the truck. The first two coats came out flawless - then I got a bunch of dust in the final coat. No idea how. The scallops were hand drawn on tape on the model, scanned and then recreated in Adobe Illustrator and printed on white vinyl. The wheels consist of "Dog Dish Hubcaps Generic #2" by Parts by Parks with decals added to match the 56 BelAir dog dishes on the original. The wide whites are from Modelhaus and have the same width white walls as the original. You'll notice no vent wings or vents or wipers - those were shaved on the original and a smooth cowel was installed as well. One of the unique features of our truck is the rear "trunk" that was added by the original owner. I recreated it with the extra tailgate and making the top. The wood bed is balsa with chromed strips. The models opens as well but I need to make a prop to keep it open. The exhaust mimics the original and was made from a 65 GTO exhaust I had. The rear gas tank was handmade as well. The interior was the biggest challenge. I wound up making the console from the ends of the bench seat. Cupholders were chrome flash that were inset in it. Shifter was made from an old antenna and some scrap. The dash was shaved and the decals added just like the original. Same with the armrests. All the decals on the model were created from photographs of the original paint/pinstriping, stickers or emblems and cleaned and scaled in Adobe Photoshop and then printed on decal paper. This includes the decals on the dash, rear panel, hubcaps and engine compartment. The gas cap and cap on the overflow tube in the engine compartment were billet aluminum radiator caps by Detail Master. Definitely the most ambitious model I've done, and I'm pretty happy with the results.
-
Thanks again for the kudos. Very much appreciated.
-
Thanks for all the kind words. Hoping you all have a great New Year!
-
Thanks! It's definitely one of my favorites. As for the guitars - it was something I would have never dreamed I would have been doing, but I love building stuff so I figured I'd give it a shot.
-
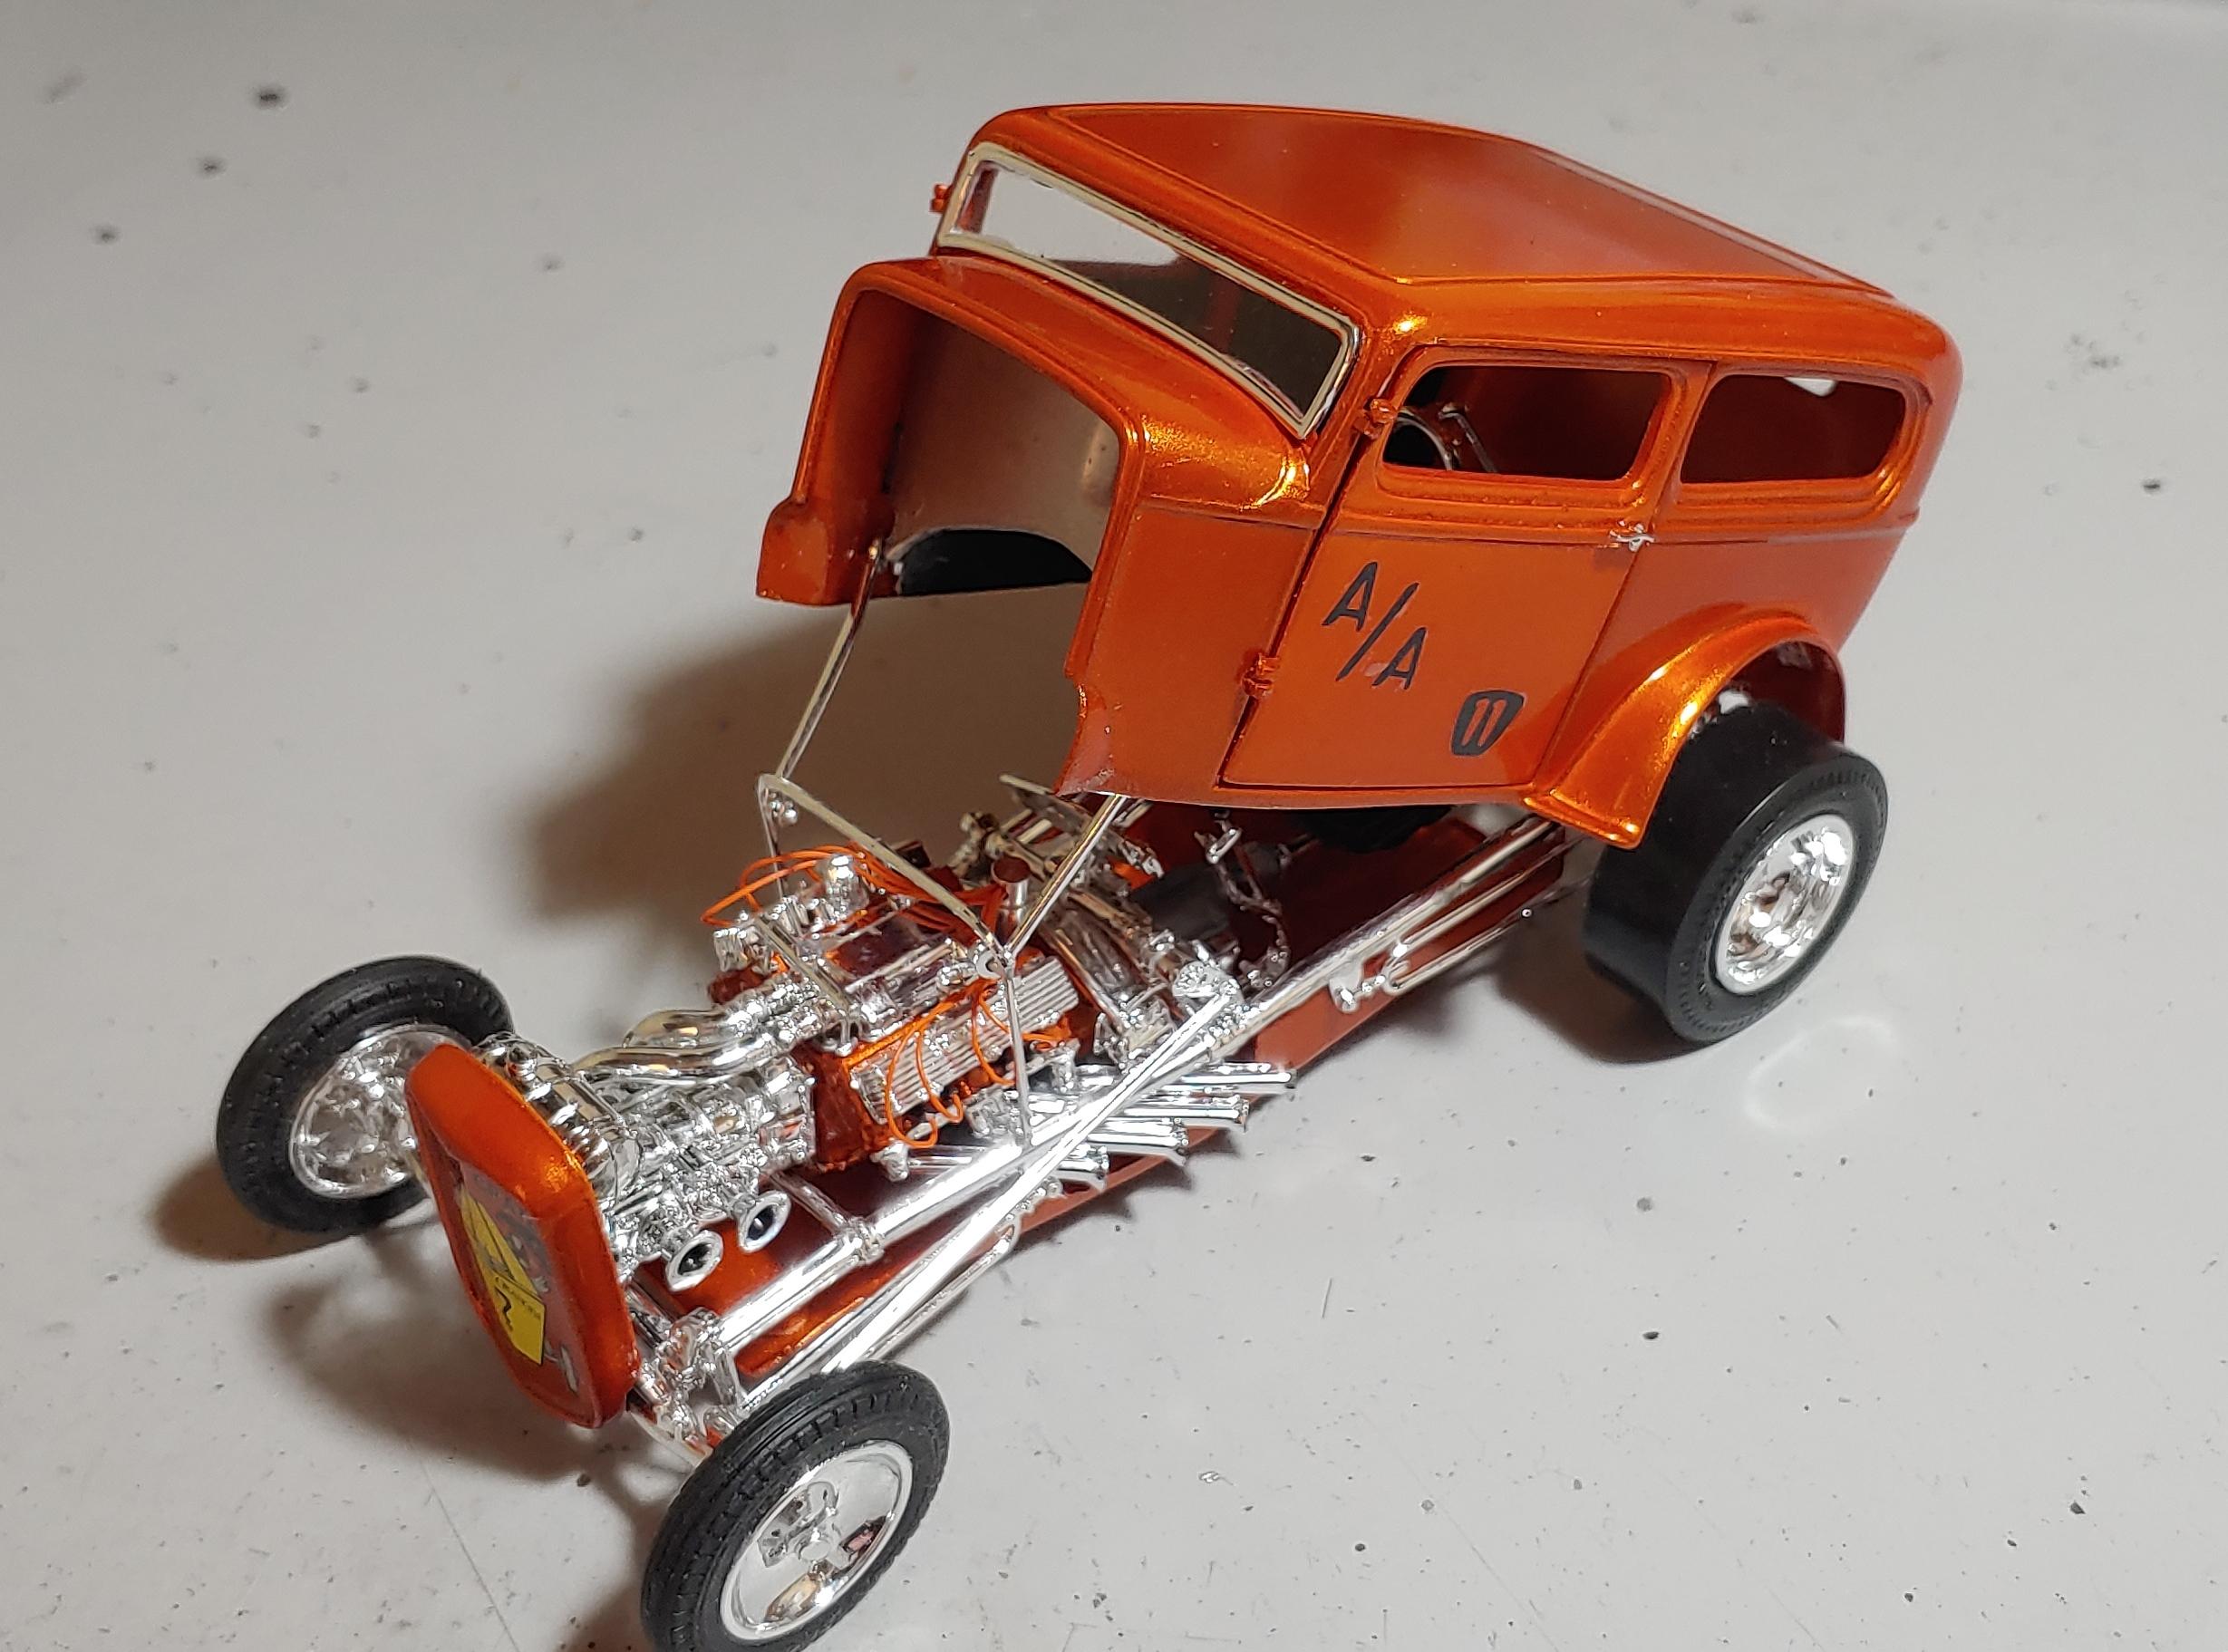
Thanks! However, considering what PITA build the Orange Crate was I think I'll keep it ?
-
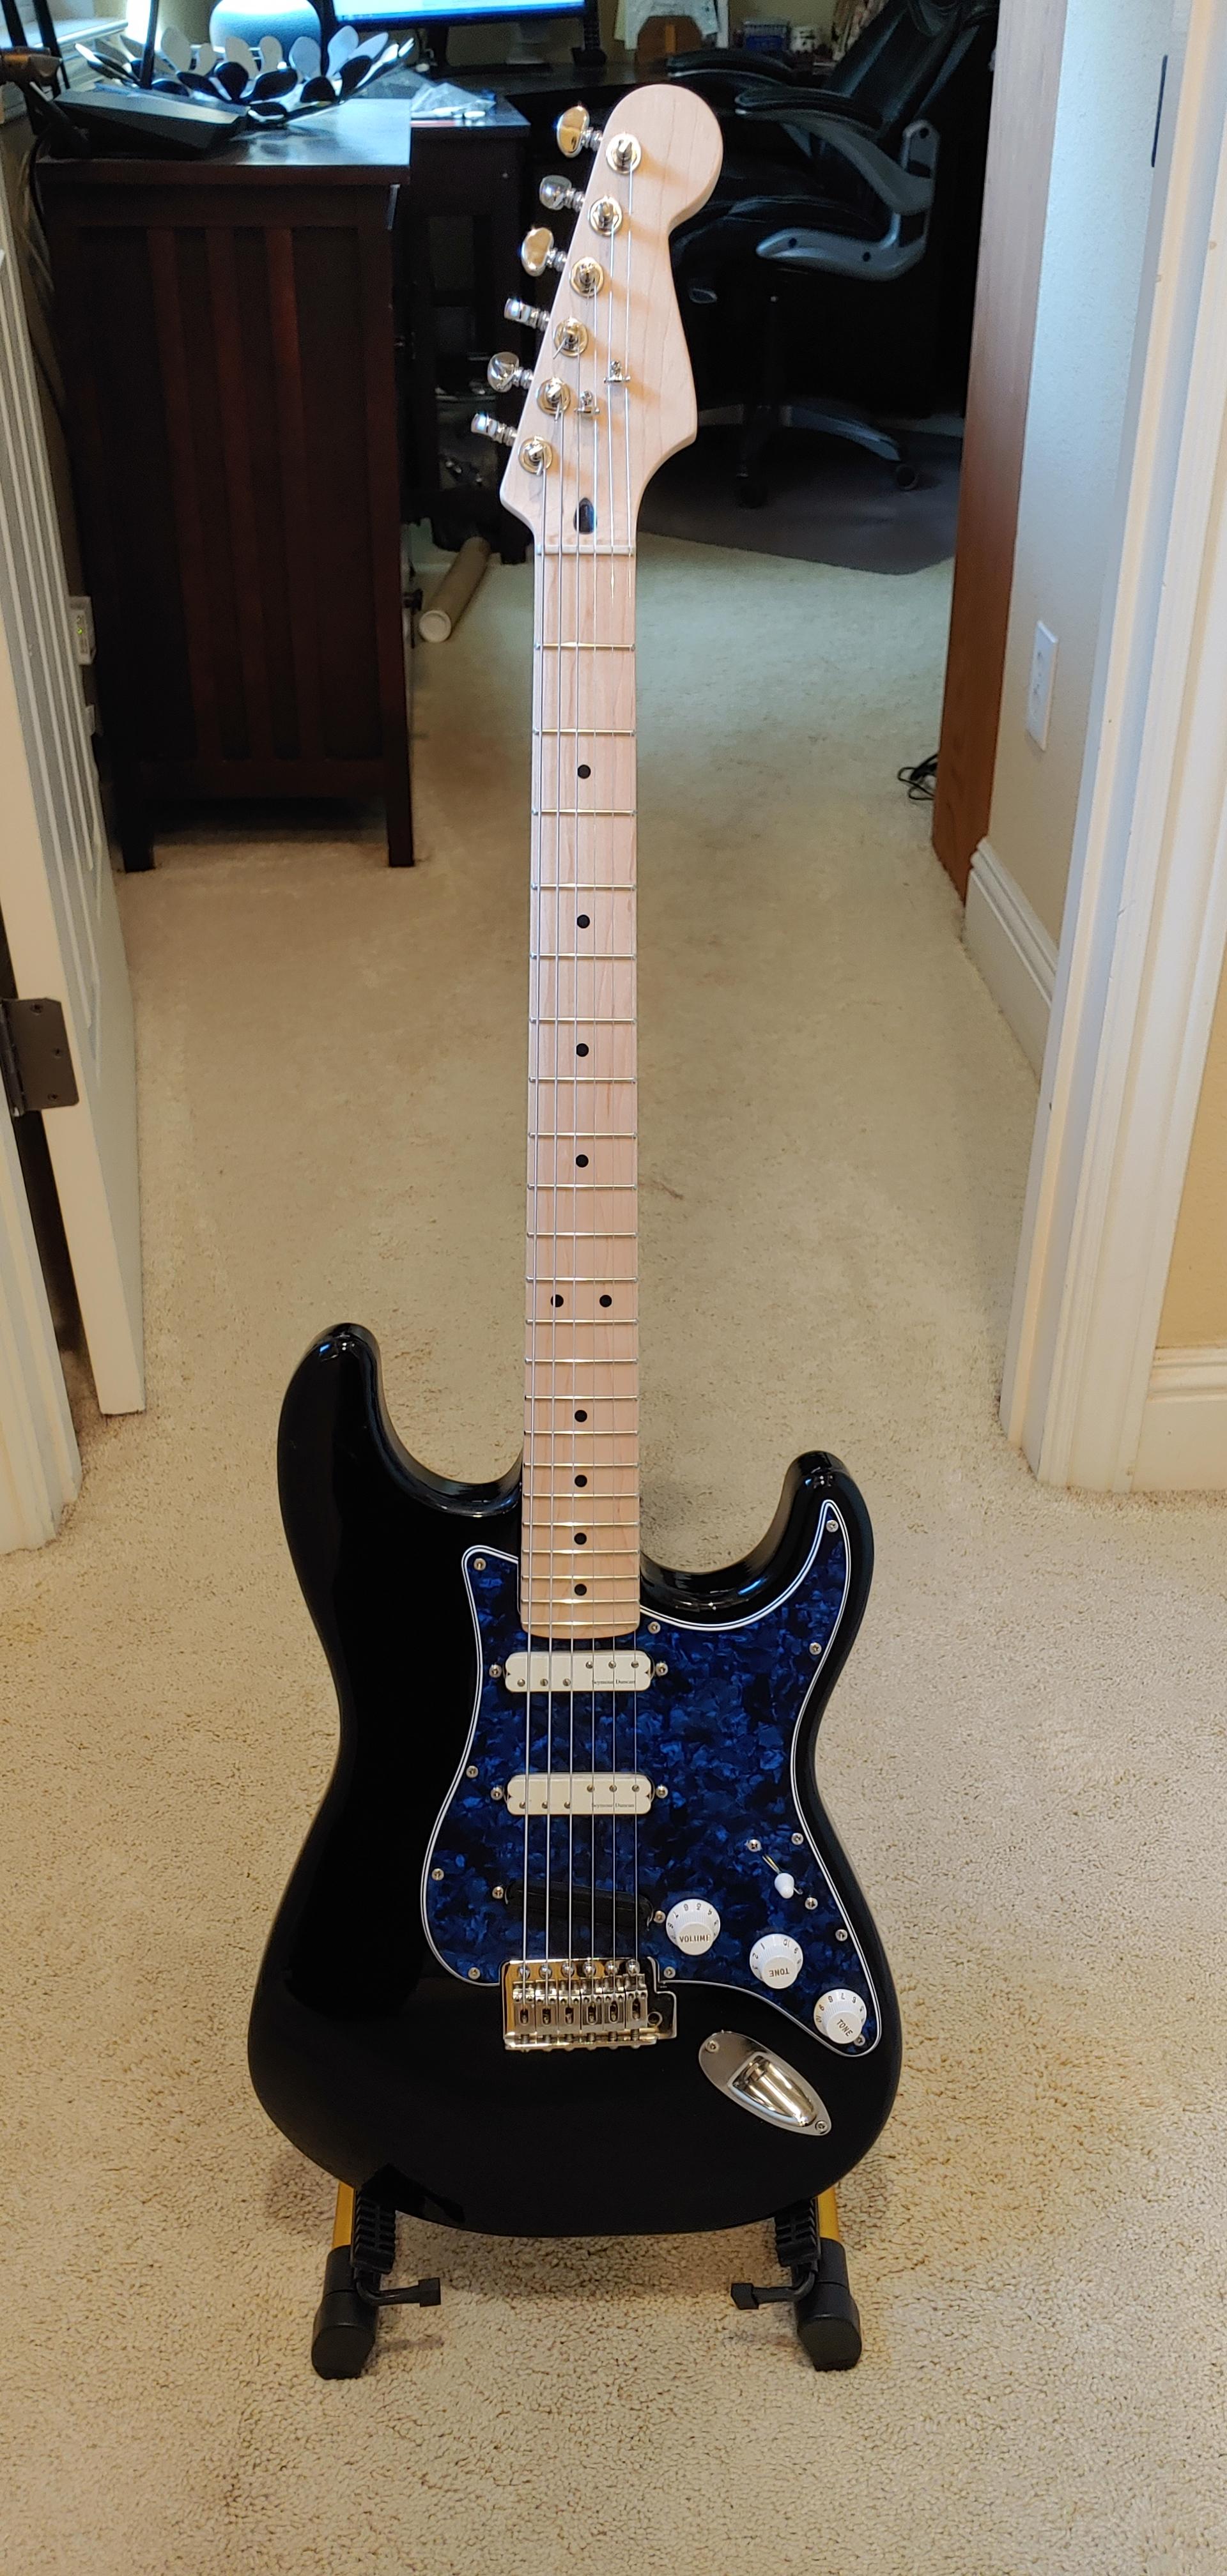
Finished my last build of 2020 in June. Then decided to try my hand at building guitars, as I had inherited a storage locker full of stuff. Never had even really played one but I figured if I can build a model car I can build a guitar. Here's my eight. And a couple of my guitars ?
-
Excellent pair!
-
Thanks for all the kind words. Really enjoyed this build.
-
It was a bit odd that the front stayed so high. You did about as much as you could to change it - It seemed a bit complex so I didn't want to mess with it and screw it up ? I do like that style though with the front up a bit higher than the rear. Something about the lines on these cars that works with that.
-
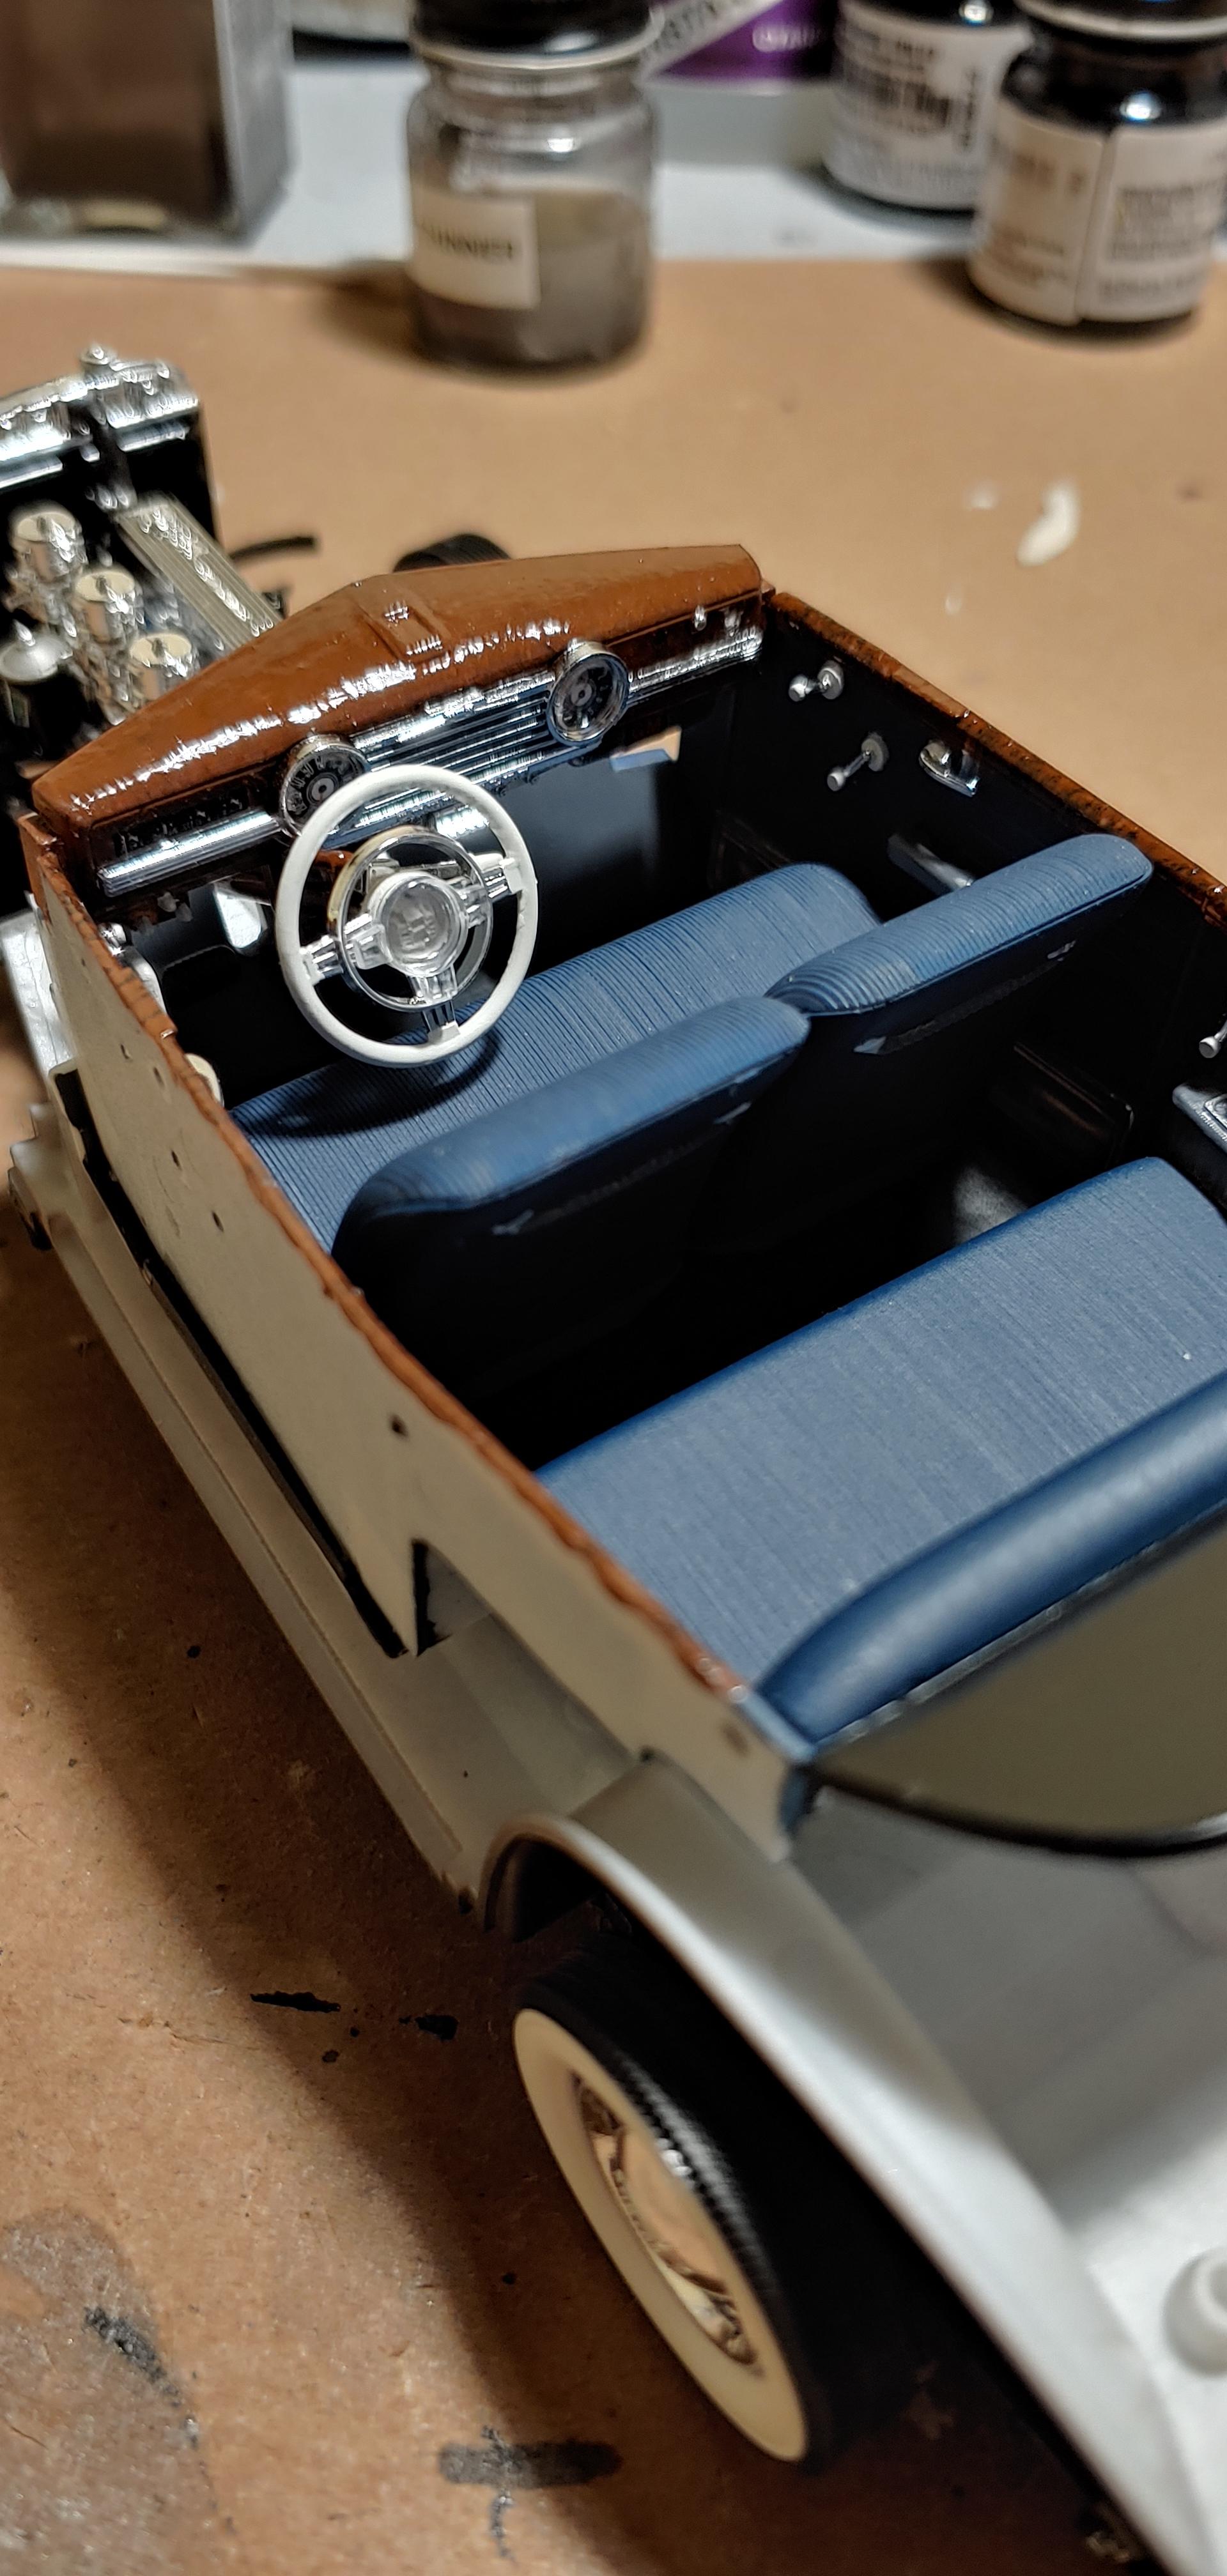
I did just the kits designed lowered front and rear. If I remember correctly - you just flip the spindle and swap sides or something like that. Rear was just adding block to the springs that they provided to drop the axle. The hood ornament and badge were provided and the badge was the 1947 option, the strip below the window is foil. I also opted to add the 1948 grill shield because I liked the look. The only other trim I didn't use was the hood side badges, just liked the clean look a bit better. I'm still thinking about the "windshield shade" which is chrome and doesn't look that good to me in that finish. Losing her was tough - but just like this car - she was sleek and sexy, but a bit wide and low. ?
-
Beautiful!
-
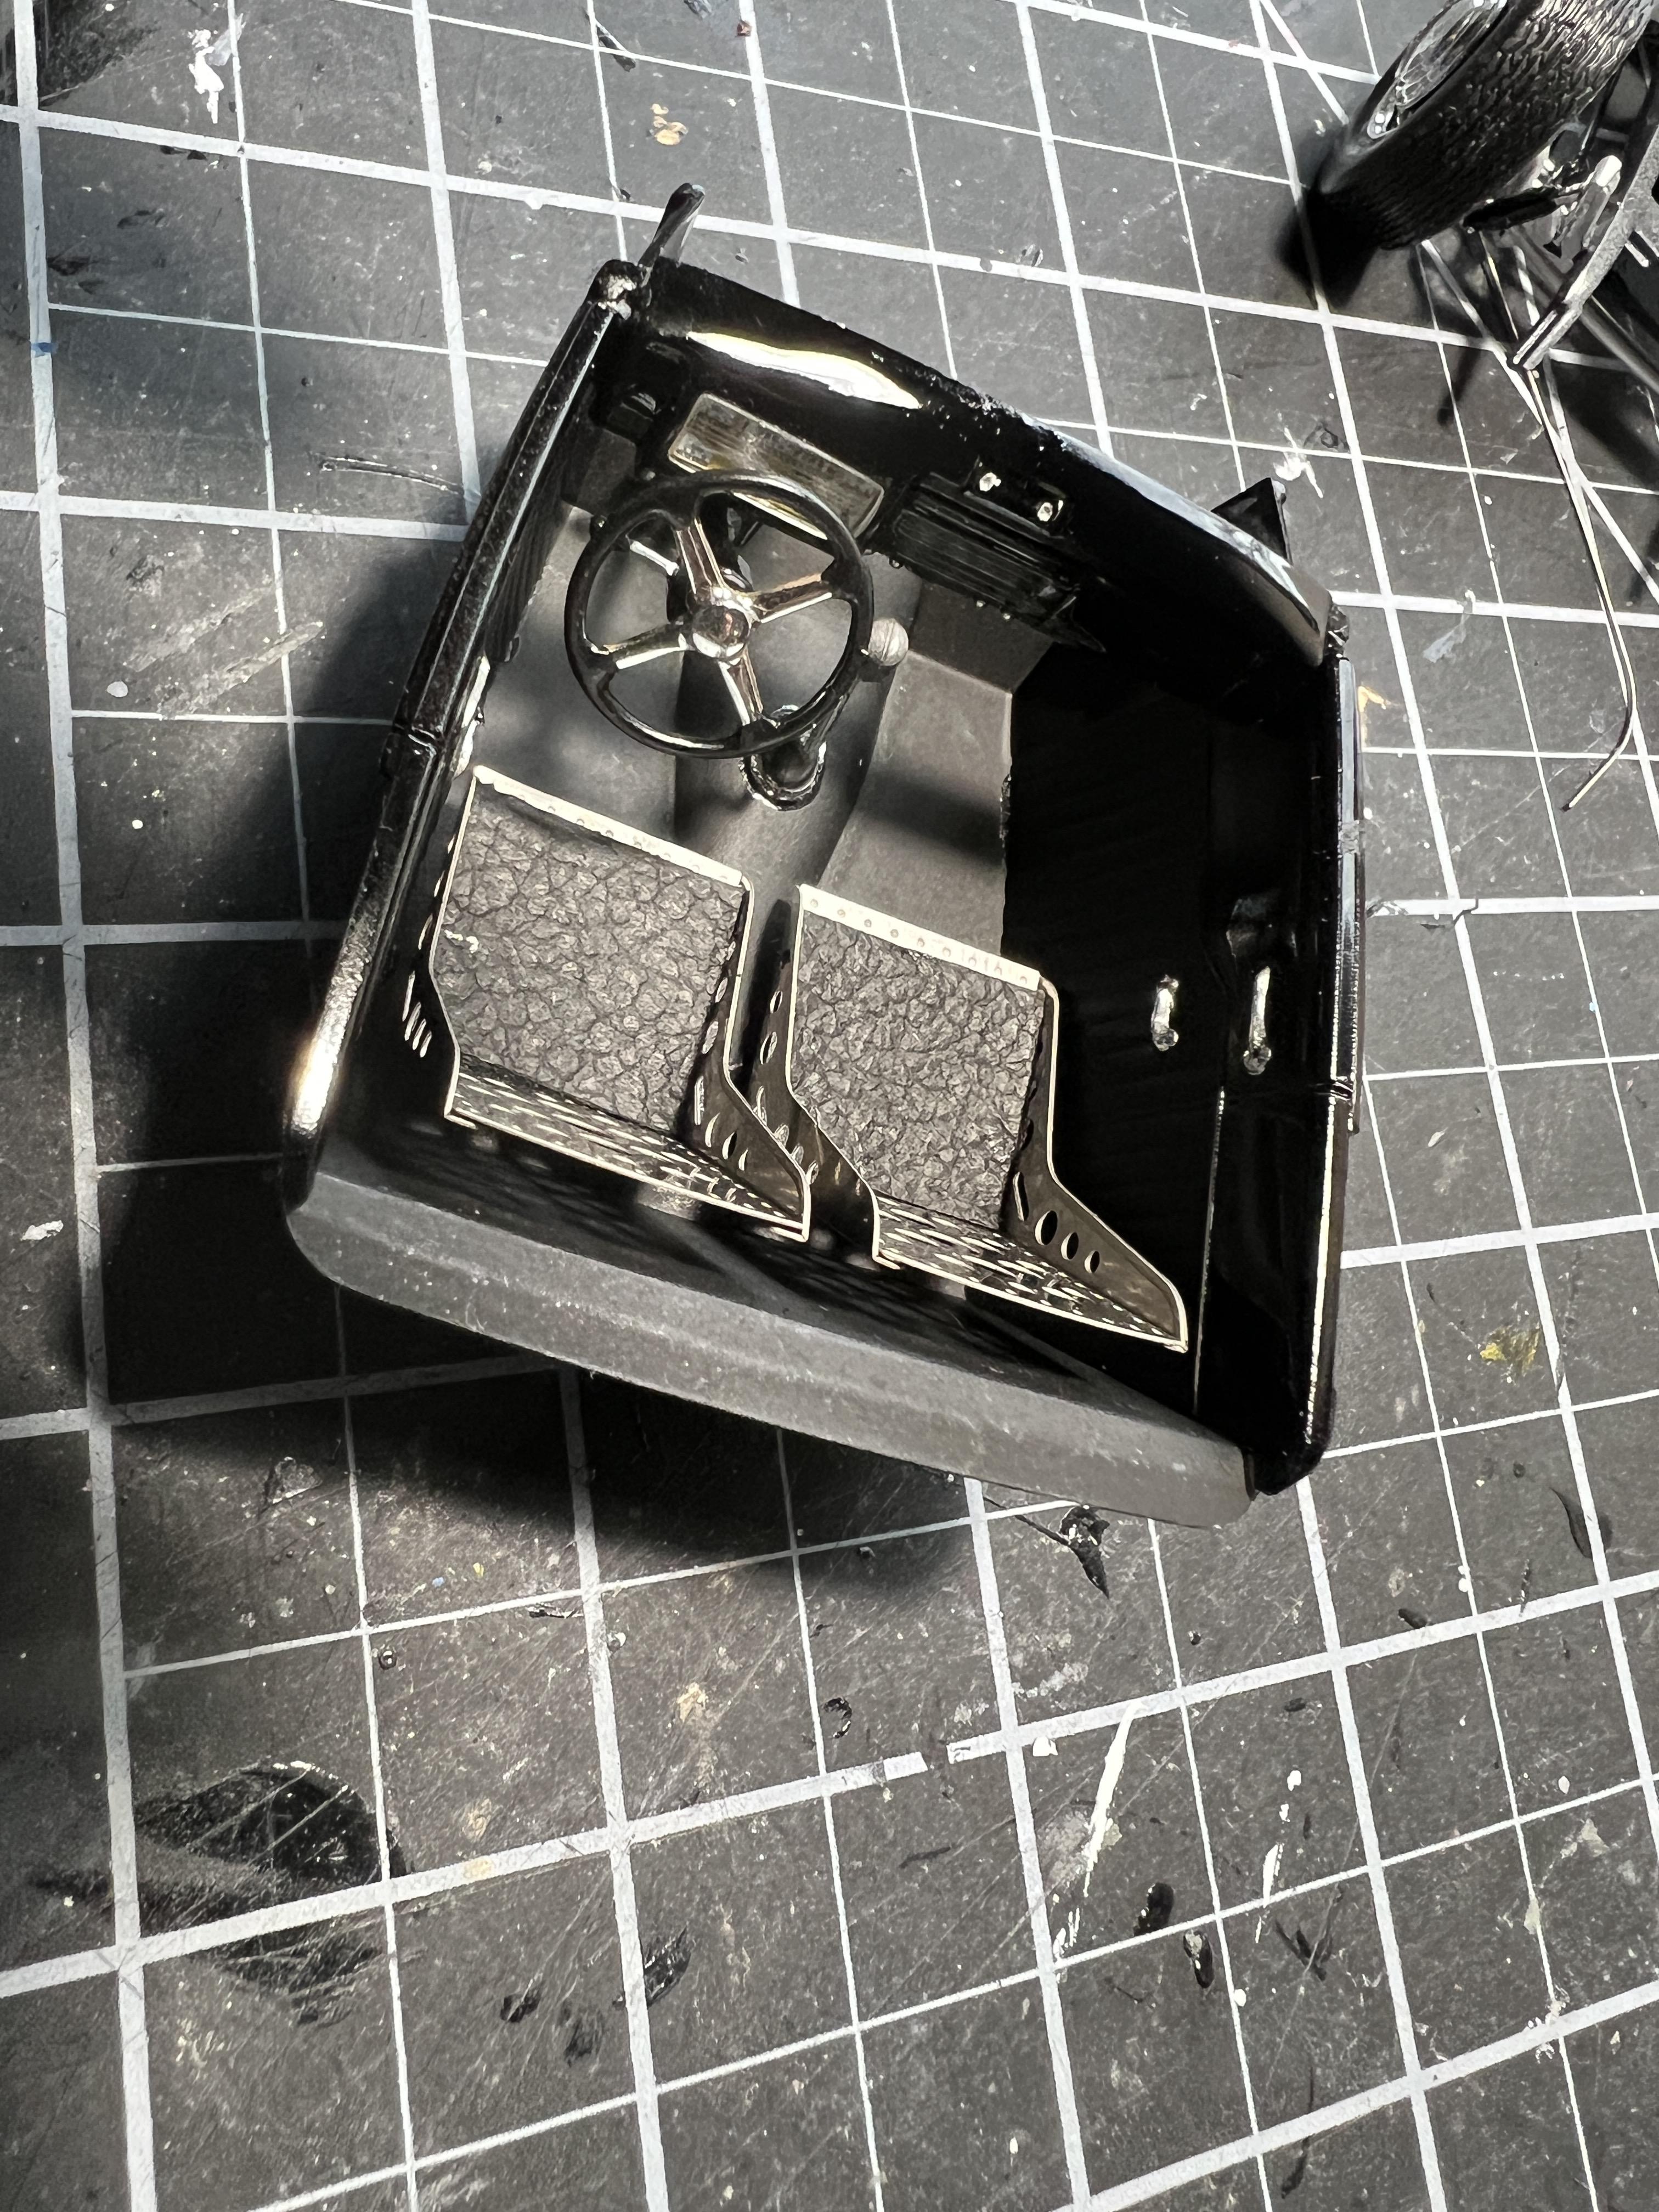
Just finished this up this week. Yesterday we had to say goodbye to our pup Lana of 12 years to cancer. Since I knew it was inevitable - this became a tribute build, and I named the car after her. What better way than by creating personalized License plates for her. So back to the car. This was a great model kit - very nicely done with outstanding detail and good fit. Almost no flash anywhere - and they attached the chrome to the tree in a way that didn't affect it hardly at all when you removed it. I sure wish they made more different models. It's painted in Testors Extreme Lacquers, Star Spangled Blue and Graphite Dust, with Testors Black Lacquer and then a couple coats of the Extreme Wet Look clear. I tried my hand at "lacing" after seeing a car at a show which had done it. Bought some dollhouse curtains online which wound up working out ok. I do wish the pattern was a bit smaller and I was a bit less heavy handed with the rattle can, but I'm happy overall with how it came out. Not my best chrome trim job. I also noticed after taking pics the hood had shifted a bit - it fits much better than it looks - although I hadn't installed the hood hinges yet. The kit offers multiple build options but I built it lowrider style - dropped. Also tried my hand at "burlwood" painting - like the originals were done. Top of the dash came out so so - but tops of the doors came out ok. Overall I'm happy with the results - and hopefully can improve upon them next time.


.JPG.6d400cee8eba7d5d1a96fec0d7d9dc28.JPG)
.JPG.a554bcd70253785b5556fe8bcd82cbde.JPG)
.JPG.2c8e6f0b287ca4ad05cd0d03f034760f.JPG)
.JPG.a4b6fcde63d25bd62ba6319f147cc1ed.JPG)
.JPG.5493c2df7f582e2176f58c296e40fb5a.JPG)
.JPG.a0f3fdba3775f303d2d6a9334756400e.JPG)


.jpg.ab25e947fe3788aef90db2eb4ad4a1e7.jpg)


.jpg.7cb3124bde11ccf501a741a46a4763d9.jpg)