

MarcelT4
-
Posts
166 -
Joined
-
Last visited
Content Type
Profiles
Forums
Events
Gallery
Everything posted by MarcelT4
-
Hoonitruck Ford F150
MarcelT4 replied to MarcelT4's topic in WIP: Model Trucks: Pickups, Vans, SUVs, Light Commercial
No, these 2 cars are the best. I like them very much. The Audi would still appeal to me, but I haven't found a model of it yet. -
Hoonitruck Ford F150
MarcelT4 replied to MarcelT4's topic in WIP: Model Trucks: Pickups, Vans, SUVs, Light Commercial
Thank you very much. I'm glad I was able to help you build your short bed. Feel free to leave the picture here. -
Hoonitruck Ford F150
MarcelT4 replied to MarcelT4's topic in WIP: Model Trucks: Pickups, Vans, SUVs, Light Commercial
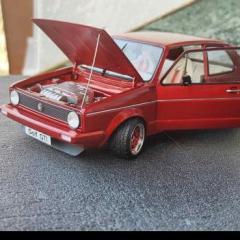
The display case arrived today. There's now room for both vehicles and the master. I think it fits really well on the shelf.
- 67 replies
-
- 2
-

-
- hoonigan
- hoonitruck
- (and 2 more)
-
Hoonitruck Ford F150
MarcelT4 replied to MarcelT4's topic in WIP: Model Trucks: Pickups, Vans, SUVs, Light Commercial
Yes, the trailer hitch is actually fitted to this car. This was specifically requested by Ken Block. -
Hoonitruck Ford F150
MarcelT4 replied to MarcelT4's topic in WIP: Model Trucks: Pickups, Vans, SUVs, Light Commercial
Hello, the time has come. The Hoonitruck is finished after 3 months of construction. Here are the pictures. Now I need a new project. Unfortunately I have no idea what else I could do.
-
Hoonitruck Ford F150
MarcelT4 replied to MarcelT4's topic in WIP: Model Trucks: Pickups, Vans, SUVs, Light Commercial
Hi, I use both. White and clear. The paint pattern is printed on clear decal paper in lighter gray. The sponsors are printed on white decal paper with a black border.- 67 replies
-
- 1
-

-
- hoonigan
- hoonitruck
- (and 2 more)
-
Hoonitruck Ford F150
MarcelT4 replied to MarcelT4's topic in WIP: Model Trucks: Pickups, Vans, SUVs, Light Commercial
First of all, many thanks to you all. I make the decals with Corel Draw. I search the web for good images and then have them converted into detailed logos. Then they are post-processed and printed on decal paper. I use a laser printer for this. However, some people say that they should be better with an inkjet printer. -
Hoonitruck Ford F150
MarcelT4 replied to MarcelT4's topic in WIP: Model Trucks: Pickups, Vans, SUVs, Light Commercial
I had forgotten that the front blinker, headlight and rear light lenses are castings from the original kit. But all the lenses are molded on, so there were no clear parts. I simply ran clear UV resin from my printer over them and hardened them. Carefully removed and then painted with Tamiya clear paints. -
Hoonitruck Ford F150
MarcelT4 replied to MarcelT4's topic in WIP: Model Trucks: Pickups, Vans, SUVs, Light Commercial
Hello everyone, The parts are slowly coming together. I think it already looks pretty good.
-
Hoonitruck Ford F150
MarcelT4 replied to MarcelT4's topic in WIP: Model Trucks: Pickups, Vans, SUVs, Light Commercial
Here's the current status today. I glued the headlights into the grille. Then put the rear together and made a trial fit. The rear section and the spoiler are only loosely attached.
- 67 replies
-
- 2
-
-
- hoonigan
- hoonitruck
- (and 2 more)
-
Hoonitruck Ford F150
MarcelT4 replied to MarcelT4's topic in WIP: Model Trucks: Pickups, Vans, SUVs, Light Commercial
Hello everyone, I have changed the engine again, this one is now completely new and 3D printed. The other engine from the Ford GT was simply too big. This kit is 1:24 and the Hoonitruck is 1:25. The rear window is also included. I have now installed the tank filler neck. And the wheels are also ready.
- 67 replies
-
- 2
-
-
- hoonigan
- hoonitruck
- (and 2 more)
-
Hoonitruck Ford F150
MarcelT4 replied to MarcelT4's topic in WIP: Model Trucks: Pickups, Vans, SUVs, Light Commercial
Today was the partial wedding. The body with the interior was put on the chassis. The engine was put in. Nothing is glued yet. Let's start with the hood. And now a question: As already mentioned, the 2 struts from the rear frame then go through the rear window to the cage. How can I measure this correctly so that these holes in the windshield are positioned correctly afterwards? They have to be slotted holes, as the struts go through at an angle. I'm looking forward to your solutions, because sometimes you think it's far too complicated, even though it's easy to solve. Here is another picture. The struts are not yet glued to the cage, as the windshield has to go between them first.
-
Hoonitruck Ford F150
MarcelT4 replied to MarcelT4's topic in WIP: Model Trucks: Pickups, Vans, SUVs, Light Commercial
Hello everyone. Today I continued with the little things. First I made the rear parts from the inside with AK True Metal Aluminum. Then I added the lettering to the spoiler. The windows also got decals. The rear window was cut from a new piece of packaging. This is screwed on from the outside and later gets the holes where the rear struts go through to the cage. This was also tried out. The clear piece of the tank filler neck got its clamps. And here I have highlighted the screws. Finally, I made the brakes. The small red part is the fuel filler cap. This also gets a decal. Well, it was just a few little things, but they do hold up.
- 67 replies
-
- 2
-
-
- hoonigan
- hoonitruck
- (and 2 more)
-
Hoonitruck Ford F150
MarcelT4 replied to MarcelT4's topic in WIP: Model Trucks: Pickups, Vans, SUVs, Light Commercial
I didn't really like the spoiler, so I redid it. This time I used True Metal from AK. A comparison with the first spoiler. I also reworked the tank filler neck, as it has a transparent piece. This was made from a piece of cast iron, which was drilled through and hollowed out with a milling cutter. Small things also made here.
- 67 replies
-
- 1
-
-
- hoonigan
- hoonitruck
- (and 2 more)
-
Hoonitruck Ford F150
MarcelT4 replied to MarcelT4's topic in WIP: Model Trucks: Pickups, Vans, SUVs, Light Commercial
Next.... Spoiler with BMF Aluminium.
- 67 replies
-
- 1
-
-
- hoonigan
- hoonitruck
- (and 2 more)
-
Hoonitruck Ford F150
MarcelT4 replied to MarcelT4's topic in WIP: Model Trucks: Pickups, Vans, SUVs, Light Commercial
The sponsors were next. All decals were created and printed by myself.
- 67 replies
-
- 1
-
-
- hoonigan
- hoonitruck
- (and 2 more)
-
Hoonitruck Ford F150
MarcelT4 replied to MarcelT4's topic in WIP: Model Trucks: Pickups, Vans, SUVs, Light Commercial
Hello everyone I have started to give the truck its "war paint". Something has also been done here. The A-board is ready. Unfortunately not much, but this work keeps me busy. Today was over in no time.
- 67 replies
-
- 2
-
-
- hoonigan
- hoonitruck
- (and 2 more)
-
Hoonitruck Ford F150
MarcelT4 replied to MarcelT4's topic in WIP: Model Trucks: Pickups, Vans, SUVs, Light Commercial
Let's continue with some color. The engine... ...and the turbos. (completely painted with a brush) The interior tub also got some paint. A few more parts.... .... and of course the little house. That's it for now.
-
Hoonitruck Ford F150
MarcelT4 replied to MarcelT4's topic in WIP: Model Trucks: Pickups, Vans, SUVs, Light Commercial
First of all, a happy new year to everyone. I had some time and attached the various small parts and cables to the frame. I hope you can see what I mean.
- 67 replies
-
- 2
-
-
- hoonigan
- hoonitruck
- (and 2 more)
-
Hoonitruck Ford F150
MarcelT4 replied to MarcelT4's topic in WIP: Model Trucks: Pickups, Vans, SUVs, Light Commercial
Hello, today I tried something with paint. Then I had to do a trial fit to find the right position for the rear extensions. I think it looks good. Don't you?
- 67 replies
-
- 3
-
-
- hoonigan
- hoonitruck
- (and 2 more)
-
Hoonitruck Ford F150
MarcelT4 replied to MarcelT4's topic in WIP: Model Trucks: Pickups, Vans, SUVs, Light Commercial
Hello everyone. We've made a little progress. The first widenings are now in place. Then I had something printed again. And put the first color on the model. @streetmachine11 I am considering whether and how I could make these files available. A little more patience. I would also be interested in your body.
- 67 replies
-
- 1
-
-
- hoonigan
- hoonitruck
- (and 2 more)
-
Hoonitruck Ford F150
MarcelT4 replied to MarcelT4's topic in WIP: Model Trucks: Pickups, Vans, SUVs, Light Commercial
After a long time, I have something for you again. First the interior. Here are some parts that were created and printed. In the sorting box. The partition wall was also redone, as the original one didn't go all the way down and the side screw connections still had to be fitted. So far from me, now I'm looking forward to your comments
- 67 replies
-
- 3
-
-
- hoonigan
- hoonitruck
- (and 2 more)
-
Hoonitruck Ford F150
MarcelT4 replied to MarcelT4's topic in WIP: Model Trucks: Pickups, Vans, SUVs, Light Commercial
Thank you very much. I had no intention of selling these files. It is very hard work to create them and has already taken 2 months. There is no body, no engine and also other parts that can be taken from the kit are not included as 3D files. My models are all supposed to be unique, but I think they will remain so anyway. Maybe I will reconsider and offer them for sale on a platform (cgtrader, 3dexport etc.). -
Hoonitruck Ford F150
MarcelT4 replied to MarcelT4's topic in WIP: Model Trucks: Pickups, Vans, SUVs, Light Commercial
Small update. Since pretty much everything is visible at the rear, I've started to create various things. I'm not quite sure what these small containers are supposed to be, but it's easy to see. Close-up of the rear radiator. Another tank and of course the tank filler neck with the corresponding cap.
-
Hoonitruck Ford F150
MarcelT4 replied to MarcelT4's topic in WIP: Model Trucks: Pickups, Vans, SUVs, Light Commercial
Hello everyone, I have taken out the interior again. The gearshift and handbrake have been added. The part is quite delicate. Here with the A-board from a different perspective. It will continue soon, but it takes a little longer to create these small parts.
- 67 replies
-
- 1
-
-
- hoonigan
- hoonitruck
- (and 2 more)