mitchy
-
Posts
147 -
Joined
-
Last visited
Content Type
Profiles
Forums
Events
Gallery
Everything posted by mitchy
-
 I just need to add a rear view mirror and fix the paint on the sills, and maybe add some seatbelts. The driver is included, but I don’t think I shall use it.
-
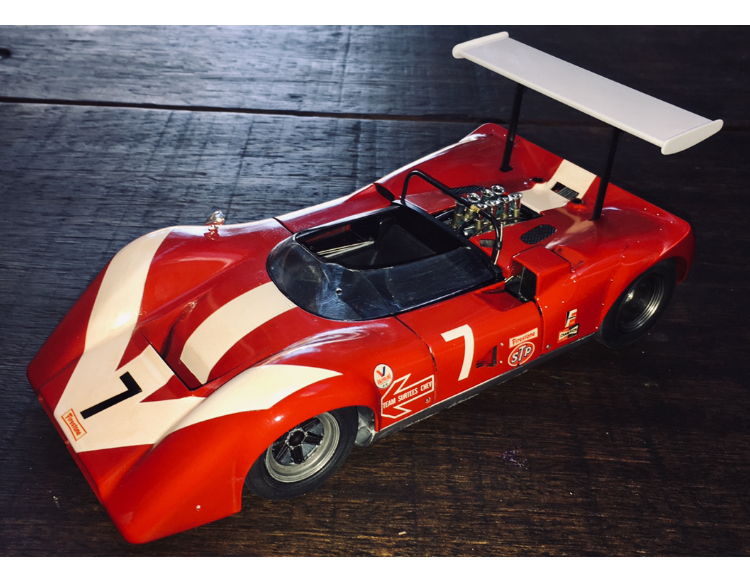
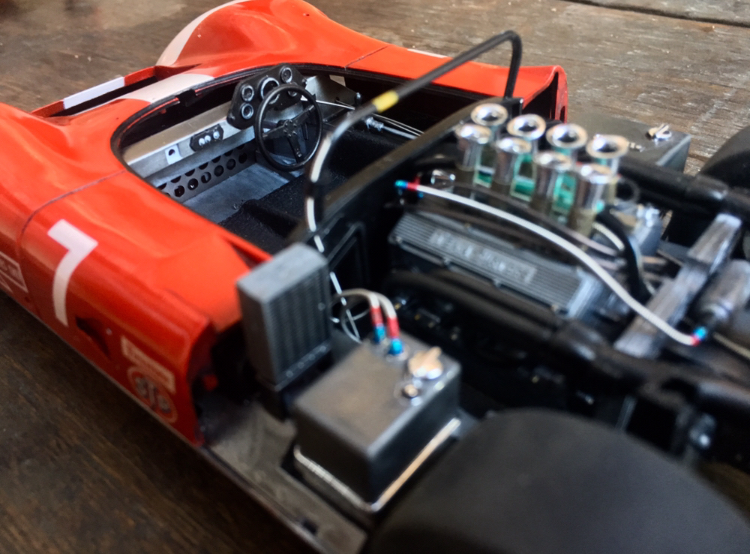
Tamiya model #10004 At last, though still in need of two small details, I leave this model under glass. My first of many, hopefully. Combination of afternoon daylight and direct flash.
-
Tamiya1/18 Lola T-160 TS
mitchy replied to mitchy's topic in WIP: Other Racing: Road Racing, Land Speed Racers
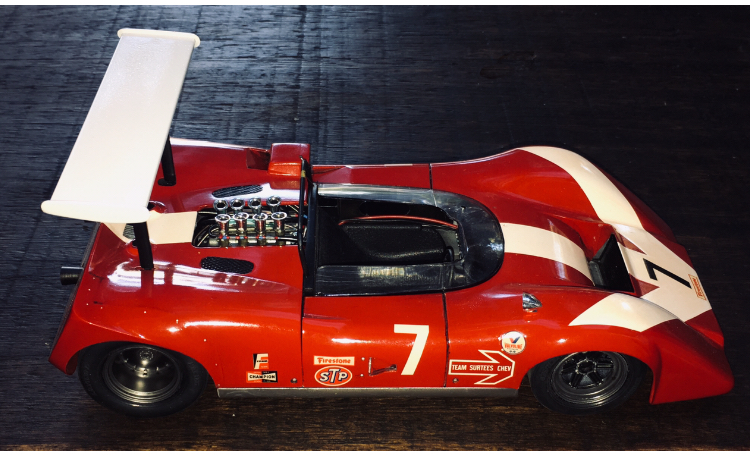
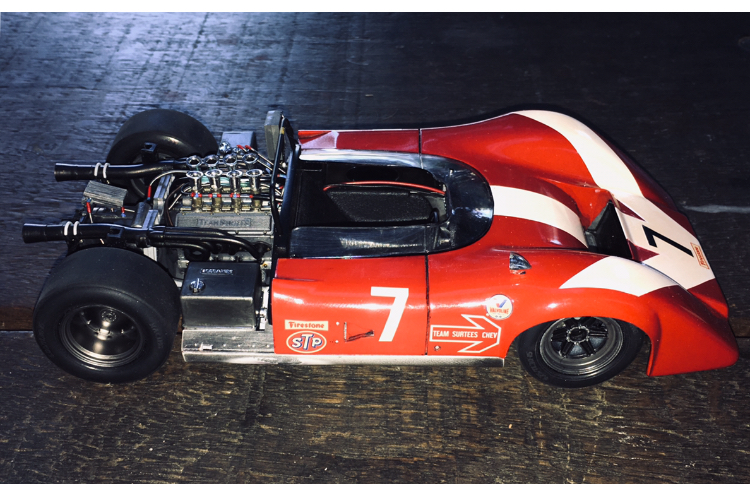
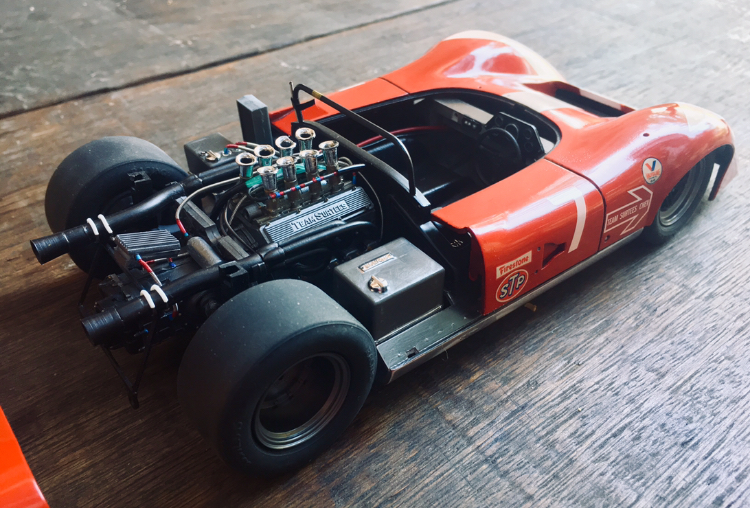
Not much to do now, I could add some more wiring details (I haven’t got around to doing the (missing) distrubutor or its cables yet), and the now-painted wing needs to go on. Then its Under Glass!
-
Sorry, I arrived late.
-
Use the mag 5 spokes, use the skirts, and jaaaack up the rear. Best of both worlds!!
-
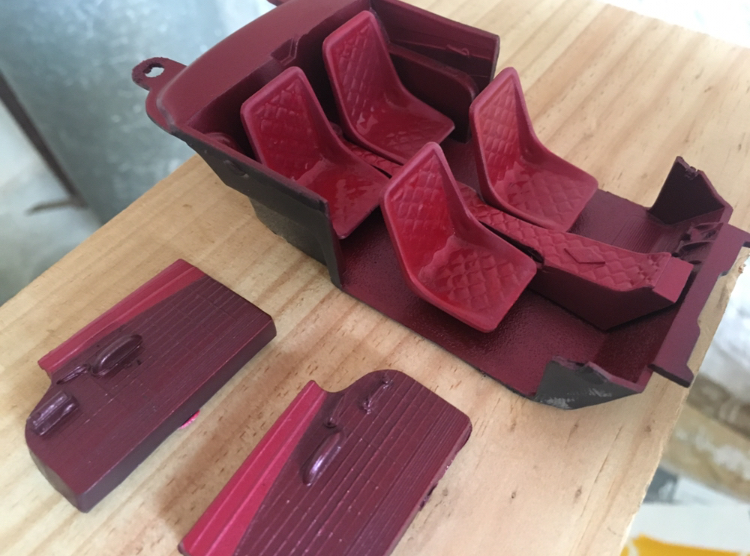
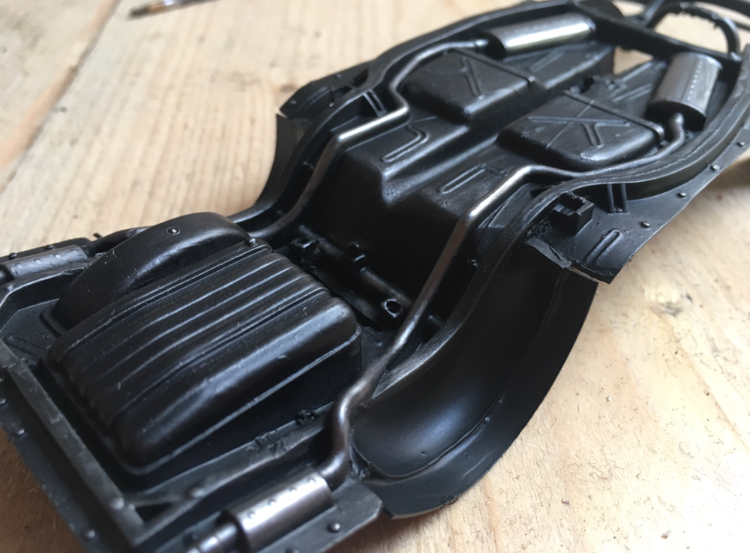
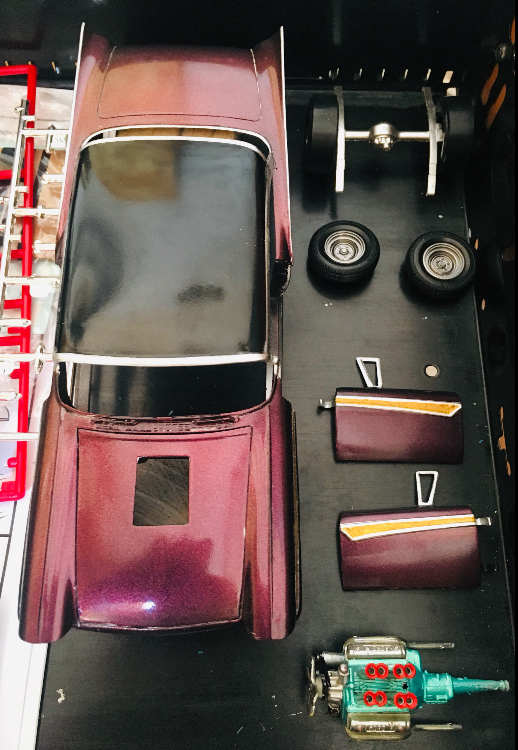
The underside remains simple black, with some C1 metalizer powder to pick out the two pipes and some other detail. The interior, however, is not subtle. Various tones of Faskolor pearl red: -it is awful, but I love it. Soon to be sporting some chrome details.
-
. Nope, I lost the cracked one whilst unmasking today!
-
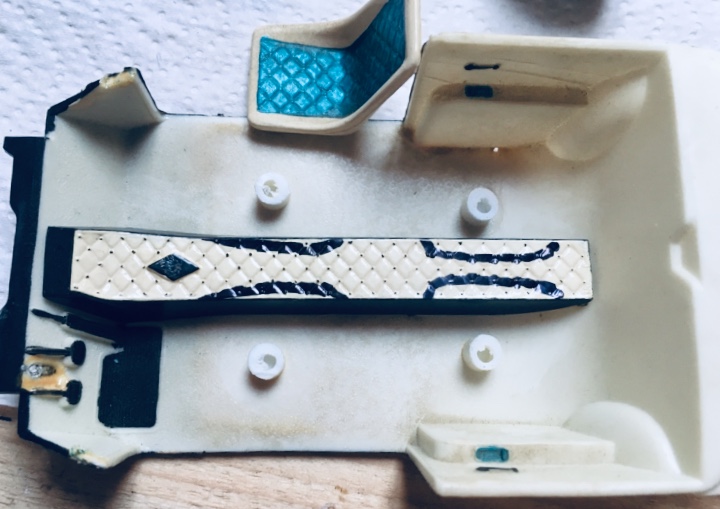
I’ll tuck those parts away now and get on with the interior!
-
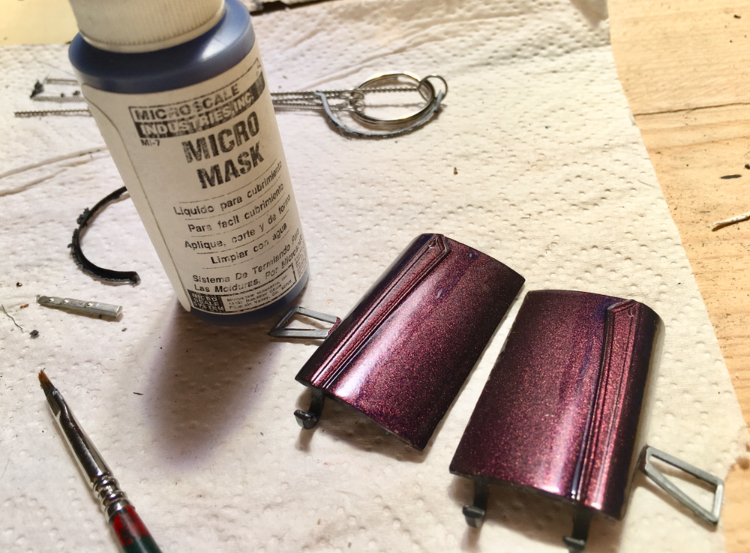
Adding some trim detail with chrome paint, masked with Micro Mask, then tape.
-
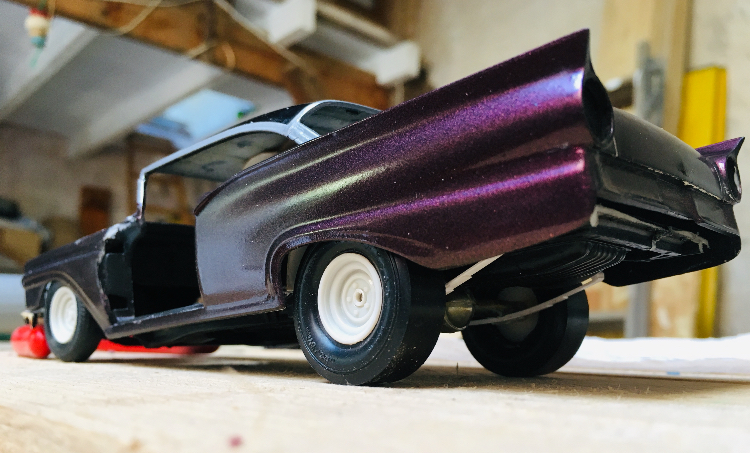
Testing for stance with the narrowed axle and new springs.
-
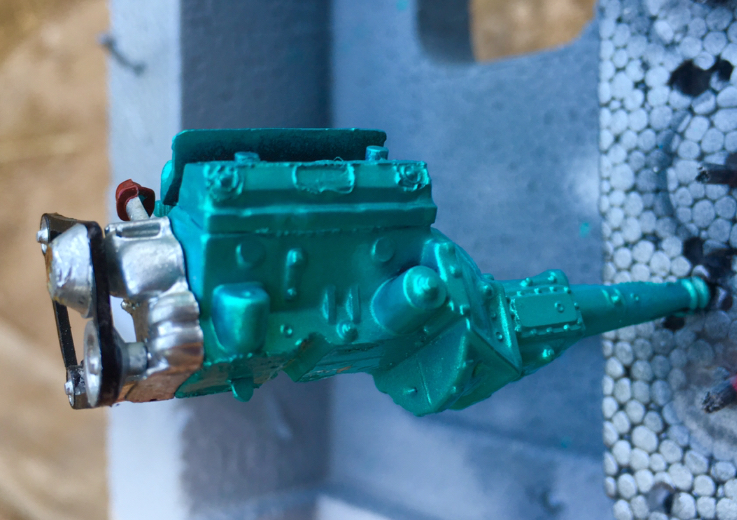
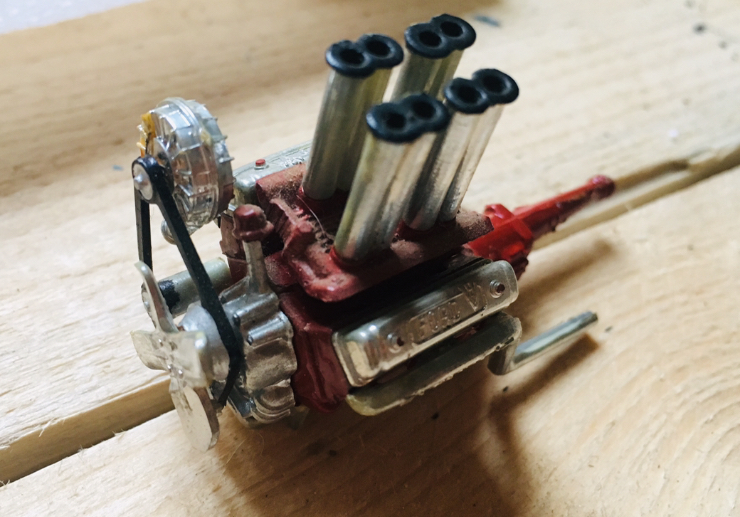
To note; The engine came with that lovely supercharger, but also with direct air stacks, so the supercharger is moot, obviously. It shall not be installed, a pity, but it does make for a tidier engine bay. As it was: And now....
-
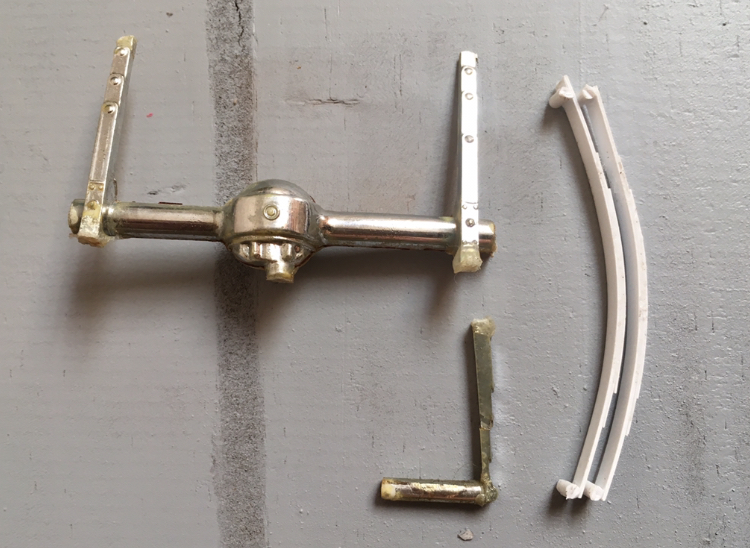
The rear springs could be repaired, but instead I quickly knocked up some replacement leaf springs with plastic card and dowel. I have given them some excessive arc whereby the car can be either lowered by straightening the springs, or raised by using longer drop-links. I am hoping for a tail-up look similar to the original glue-bomb pics, so there should be plenty of detail to go under there as it will be visible. The original model’s drop-link was that silver post wrapped in yellow electrician’s tape! As the new springs are fairly fine, they will likely flatten over time under the weight of the model, so I shall add the missing shock absorbers for support.
-
A little more progress made; wheel wells are now deeper, and profiled for the drag slicks to fit nice and snug. Still some trimming/filling to be done before paint. The exhaust pipes and chassis rails are preserved, by narrowing the whole floorpan rear of the rear axle. So its going to be a four-seater street machine with dragster details. Why not? Engine is building up, and the paintwork polished. Thankx
-
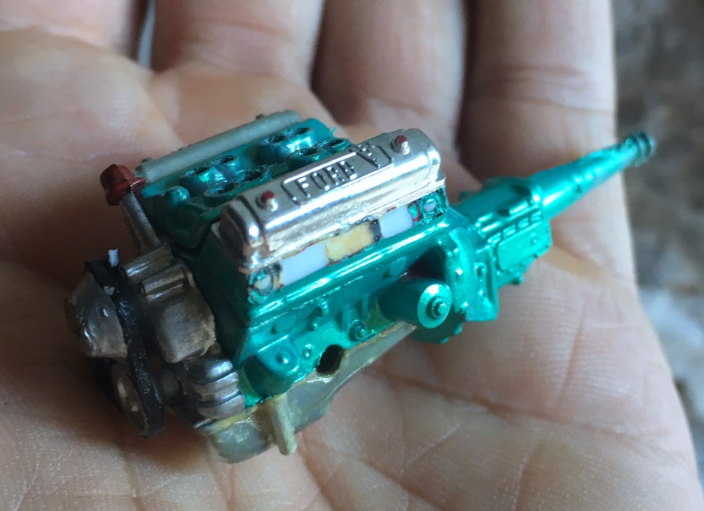
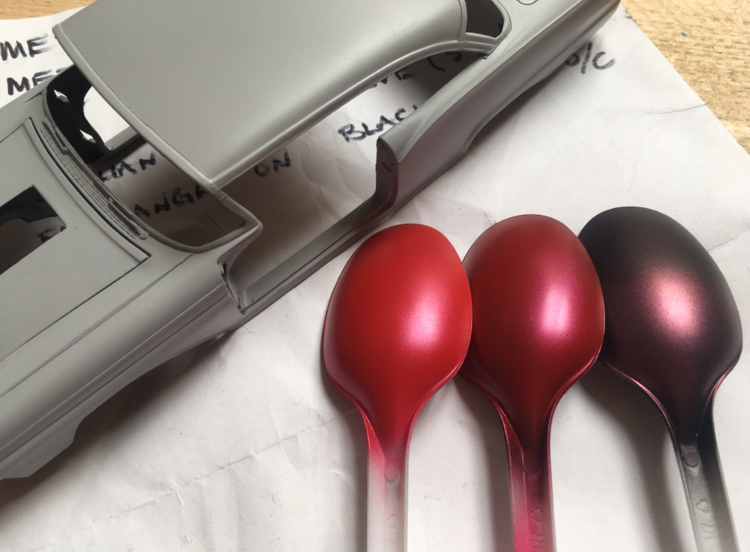
Engine gets a new scheme too, something to contrast with the deep purple. From dull red to Faskolor Faspearl Teal. It will ‘ping’ a little more now! I think the interior may receive some red treatment, perhaps using the two reds on the earlier plastic spoon test. The seat posts have been cut down and angled back to get the seats into a more natural position. This means cutting into the custom trans tunnel trim so they will fit flush. Also, the rear of the chassis needs some tweaking for the bigger tyres; wheel wells moved inwards and will require extensions to bring them back to the correct outer width. I am squeezing together the floorpan behind the rear axle to preserve the chassis rails and exhaust details, otherwise I would have had to cut them for the wheel well mod. That is just about all the modification there will be, though I still have to figure out ride heights, narrow the rear axle, and build some new leaf springs. Then its filler, glue, paint and assemble. Should be done by christmas 2029....
-
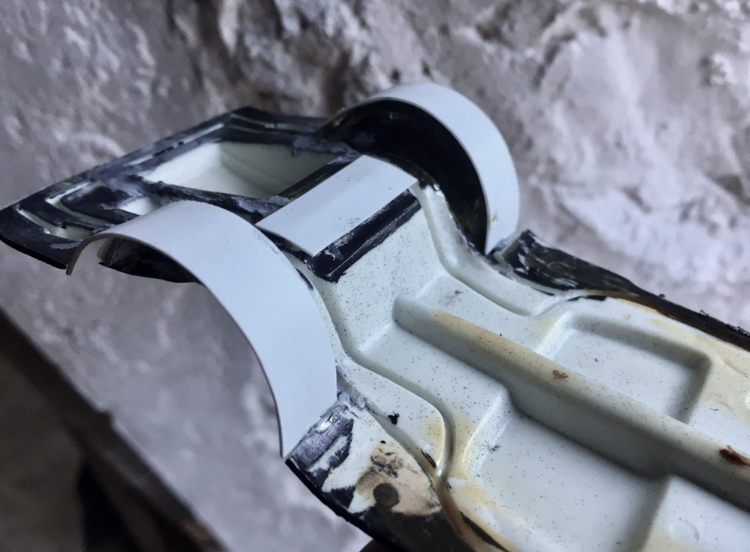
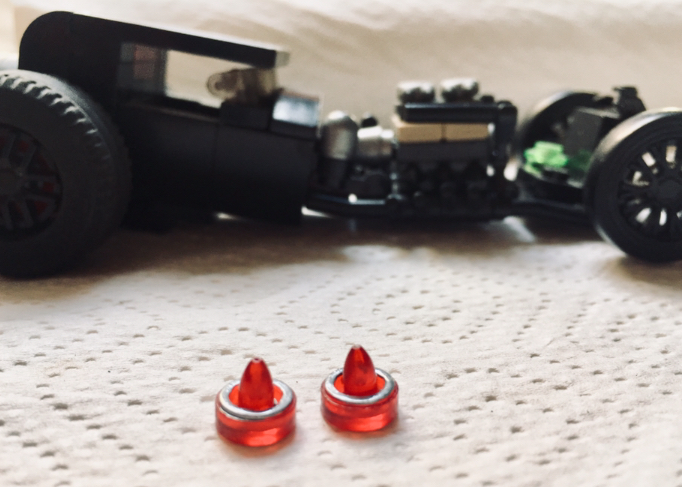
I have been known to raid the kids’ Lego pile now and then, today I found two one-stud discs which fit perfectly in the recesses, with the original Fairlane cone-shaped lamp inserts. A dab of silver paint perhaps, and that should do it! Lego and original parts: Might work....:
-
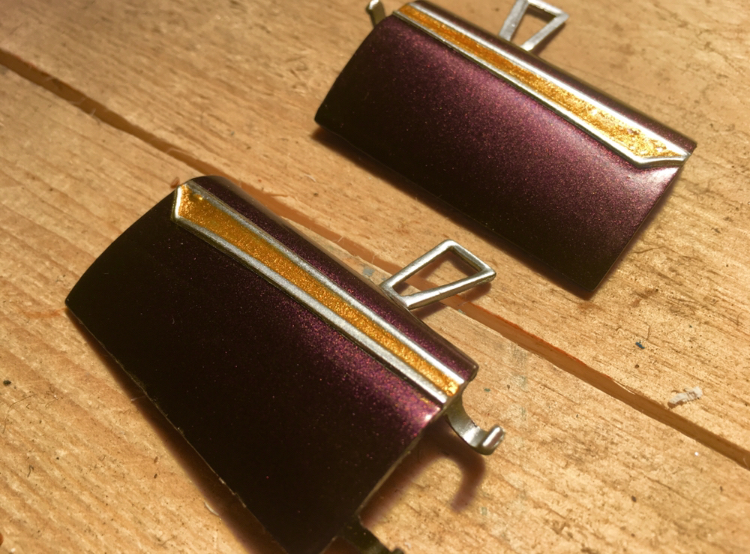
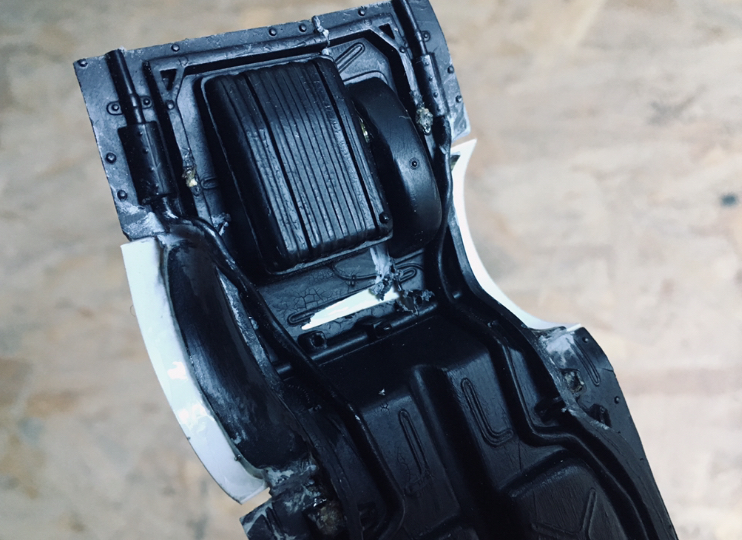
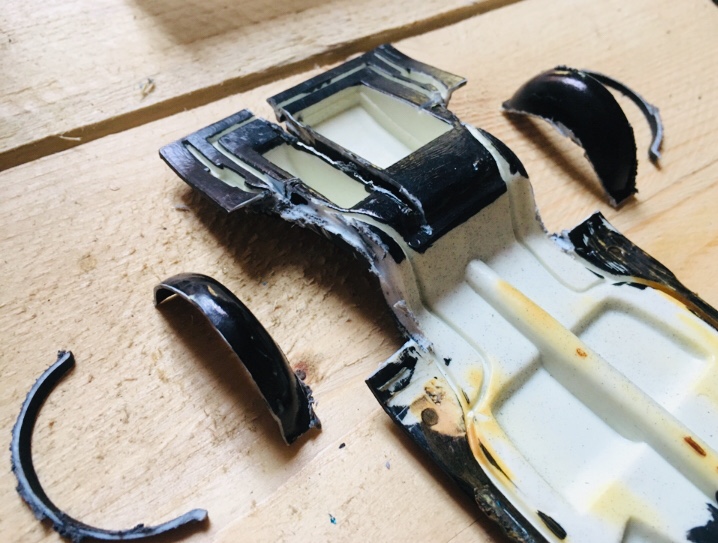
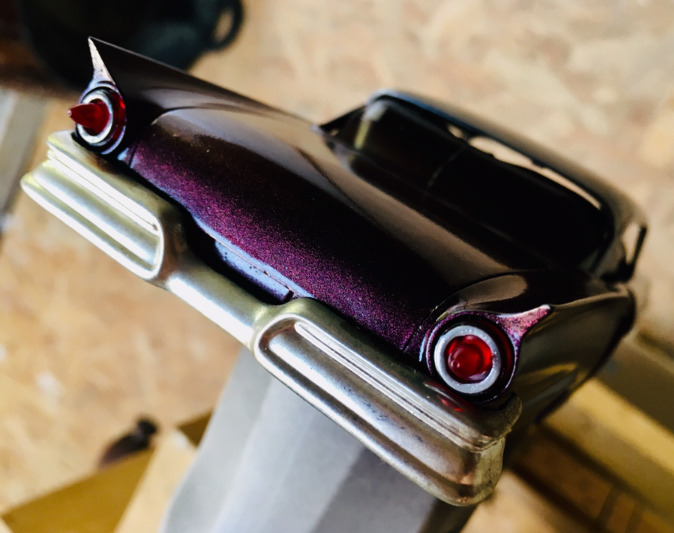
Regarding the taillights, I have decided to leave the tail fin tips, which house the tail lights, and mount the lights directly in the body as is. I quite like the cut-off effect, especially as I have now removed some of the body details (badging, door handles, etc) for a cleaner look.
-
Thanks. I’m a little wary of metallic paint on scale models, due to the size of the flakes. It rarely looks correct due to the flake texture when trying to emulate a real car’s colour. Using the factory colour ‘full-size’ metallic paint for a model would give a 24x size metal flake, equivalent to 6-12mm flakes on the full size car! On a custom job you can get away with it just about due to custom metal flake paint which has larger flakes anyway. So I risked it here.
-
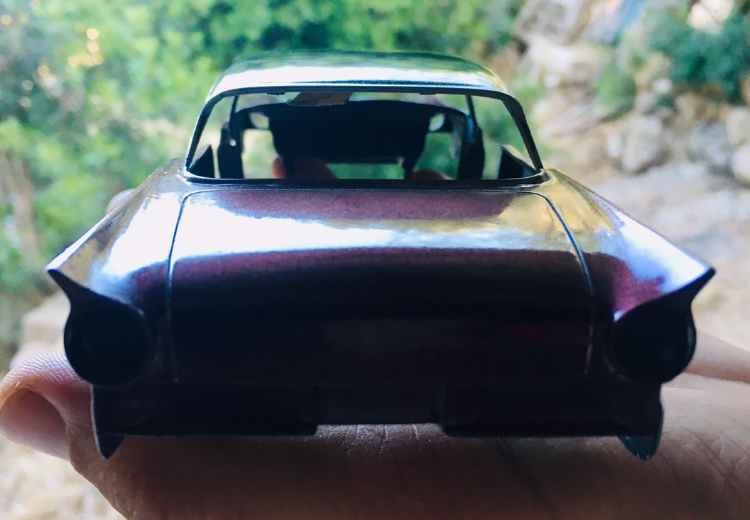
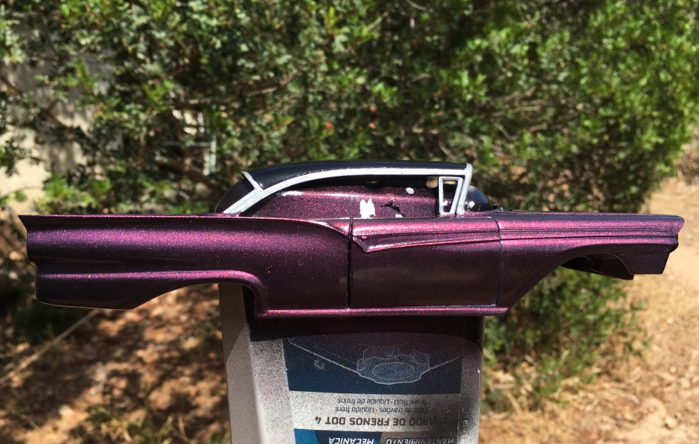
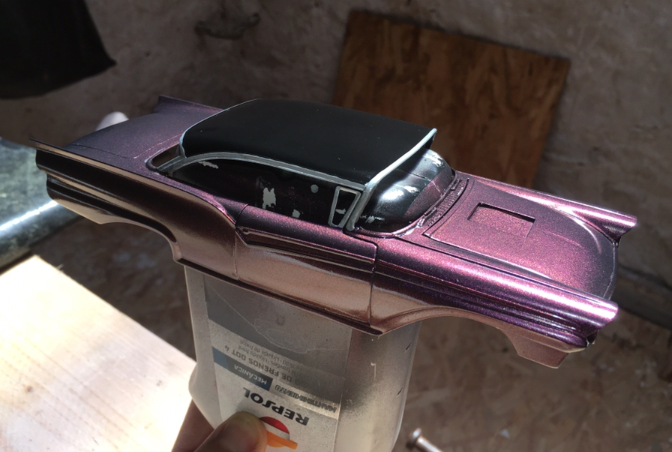
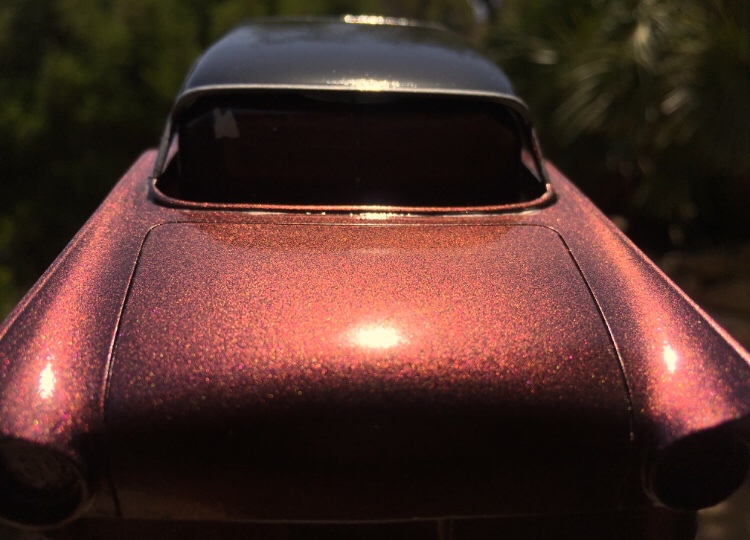
And here is the result. All black, sprayed over with Faskolor Faschange red and Vallejo Acrylic gloss clear. The roof is solid black with gloss for some contrast. I’m happy withe the resulting colour, but the finish has suffered due to not servicing my cheapo airbrush properly. The Vallejo gloss acrylic lacquer is also more difficult to apply cleanly than the Tamiya x22. It will need a light sand and rub to get that polished deep gloss. The colour is great, a little more coarse flake than I expected, but it makes a decent scale metal flake effect. These effects never seem to look as good in photos! Direct sunlight and interior daylit comparison: This paint has the ‘deep purple’ when lit from front, which changes to a warm golden hue when viewed into the sunlight:
-
Great looking Morgan- another of my British favourites.
-
Aha? ...me too!
-
One must remember that these are schemes designed in the 1930-40s. Interesting to note though, is that MG likely employed common colour theory, hence no contrasting or ‘complementary’ (opposite) colour schemes, such as the the green/red combination. At that time Green with red was a fairly well-established railway/ industrial/ commercial/ agricultural machinery colour scheme, therefore perhaps unsuitable to a contemporary sportscar.
-
An interesting project. I was once involved with the MG club in the north of England, and regular trips and meetings introduced me to the vintage MG world. There were many staunch purists, and each had his theories on factory colour schemes. So much so that a database was put together, so that the purists could finally agree to disagree. There was one argument that all colour combinations were available, whilst others argued that certain combinations were not ‘allowed’. Apparently, as it turns out, rarely or rather never, would one find a dark green TC with an originally red interior and grille. Black or beige paint with red, yes, but not green. Green/green or green/beige were the only ‘officially agreed’ body/trim colour schemes. There are obviously exceptions, as the production ran for a number of years with changes throughout, special orders and of course the US market with undoubtedly offered more options that the UK domestic. Green with red is indeed a fine choice! I would not usually comment on someone’s colour choices, but for the sake of originality I offer my 2pence’ worth. With regards to engine colour, it would appear that early TCs had grey, grey-green, or even dark green blocks. From around #5000 the blocks were painted dark red or maroon. Here is a link to some colour data::: http://www.mg-tabc.org/special-files/mg-tc-colours-v2.1.pdf I hope someone finds this of interest Thanks
-
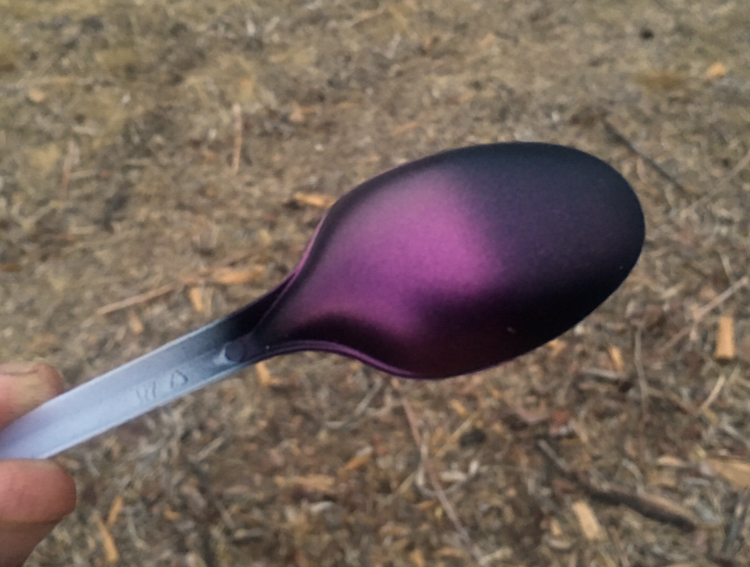
Playing with airbrush colour. L-R spoons: Faskolor Faspearl red over grey primer. Faspearl red over black Faschange red highlight over black, shown outdoors in low light too. Looks way more intense. I need to lacquer them now and make a choice.
-
Thanks I like the air inlet stacks so the hole must stay
-
Wow, I had no idea of the options available. Those rear end treatments are something. Thank you for the information, more food for thought!