mitchy
-
Posts
147 -
Joined
-
Last visited
Content Type
Profiles
Forums
Events
Gallery
Everything posted by mitchy
-
Great! Love them! -getting close to my plans for this model with old ‘Blue’ there...Are those frontal treatments (blue and green cars) custom builds or kit options? Thanks a lot.
-
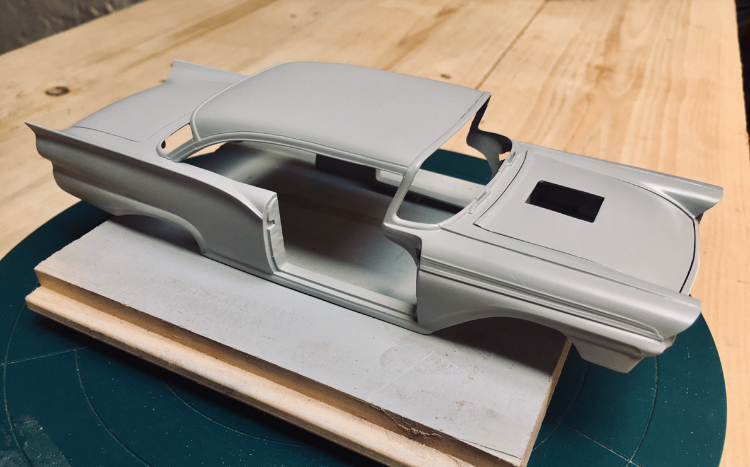
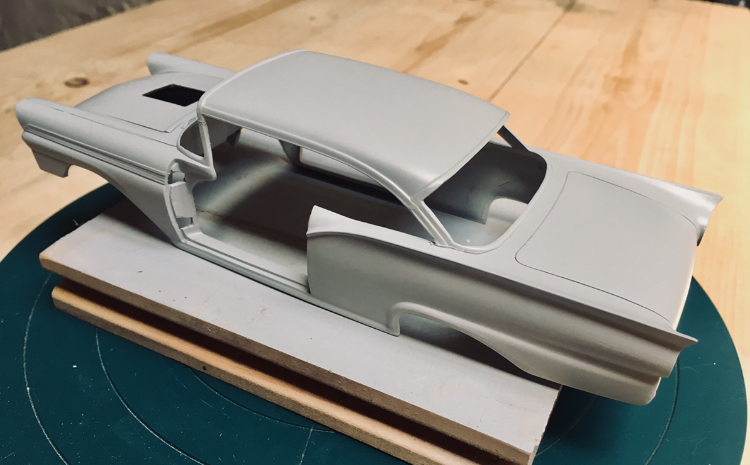
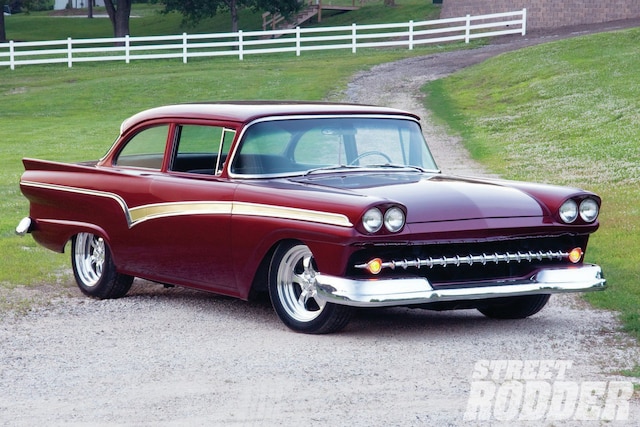
A light coat of Tamiya’s fine primer to hunt out the many minor imperfections. Time now to leave to dry, and maybe pick out some other parts for treatment. I have decided to go for this kind of thing; simple but potent. This is a 57’ 300 (not my pic) with twin headlamp mod:

-
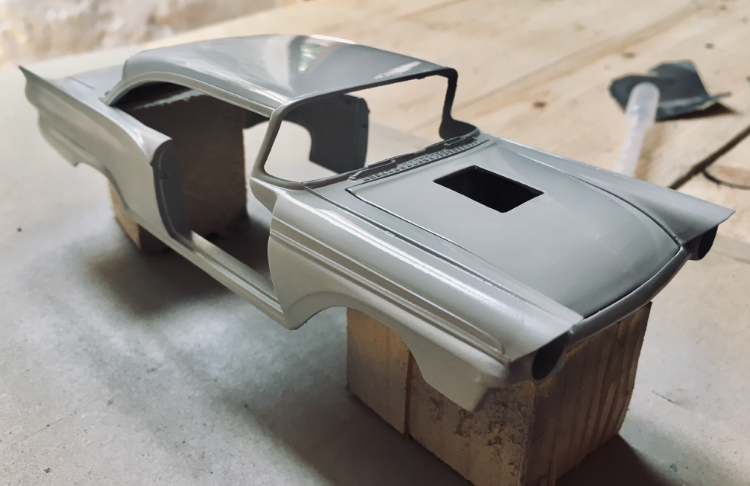
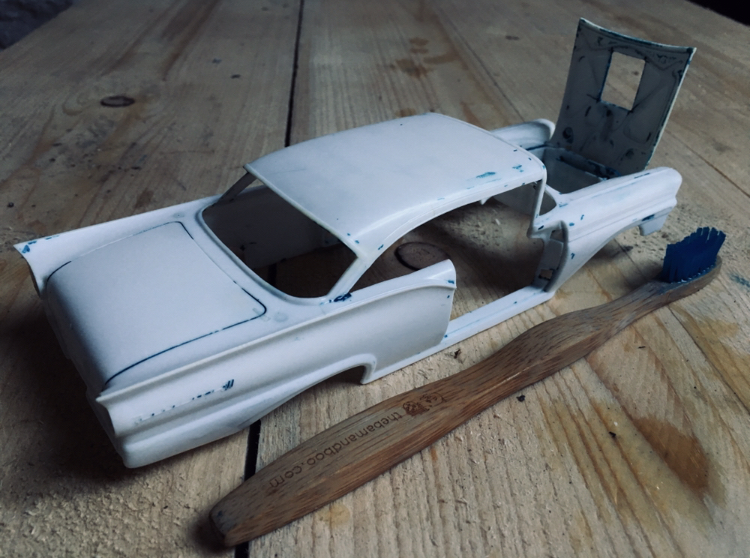
Thanks for the tips; one of the door hinges was missing/snapped and the door was ‘gunged’ shut. The other works. I may end up sanding some of the trim detail, as you said; the trunk detail especially is a tricky one to show well. As the model is a glue bomb, and with custom parts abound, I am going to concentrate on clean lines and a mono or duo-colour deep paint finish, and lose some of the fine detail to get a smoother look. There are many fine stock examples on this forum, so I’m going to play with this one. Tamiya putty in the sink holes and preliminary sanding:: Thanks for Lkn’
-
-
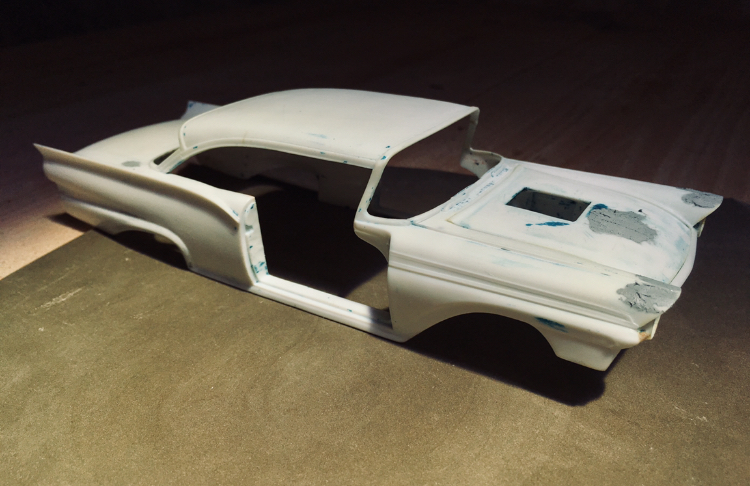
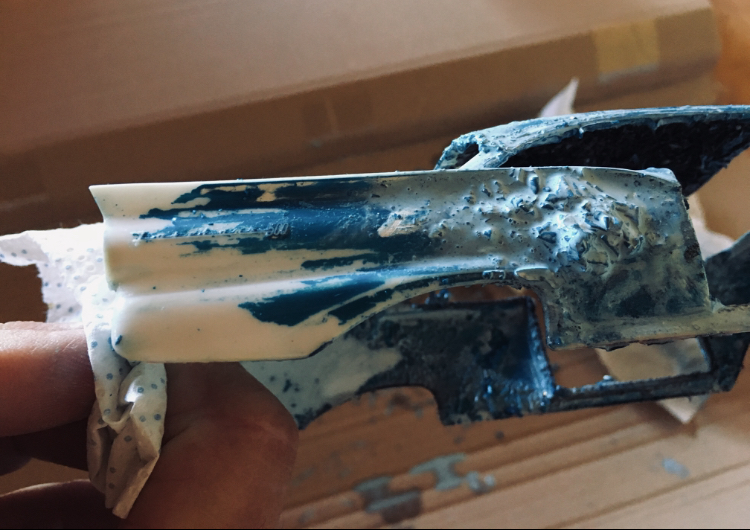
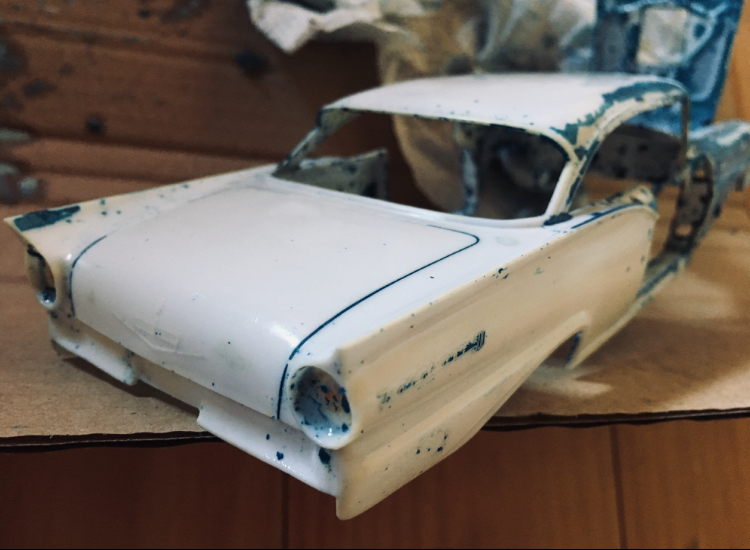
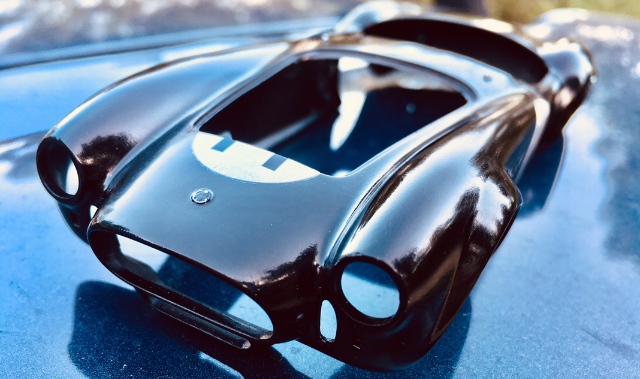
Ooohkay back at the bench again for a little while. Other projects- work and home had taken over! Finally got around to some paint removal of the shell to see what’s what- looks better than I thought. Not sanded, so the ‘Fairlane’ and ‘500’ logos remain. The body had been primed in blue metallic, then a thick layer of white (primer?), and finished with a thick layer of blue metallic. No lacquer. Not pretty. As you can see, the layers are coming off thick!! cracked A pillars, no big deal...
-
Fantastico!!!!! Beautiful beast
-
Love it. Volvo Boxy, but good!
-

Tamiya1/18 Lola T-160 TS
mitchy replied to mitchy's topic in WIP: Other Racing: Road Racing, Land Speed Racers
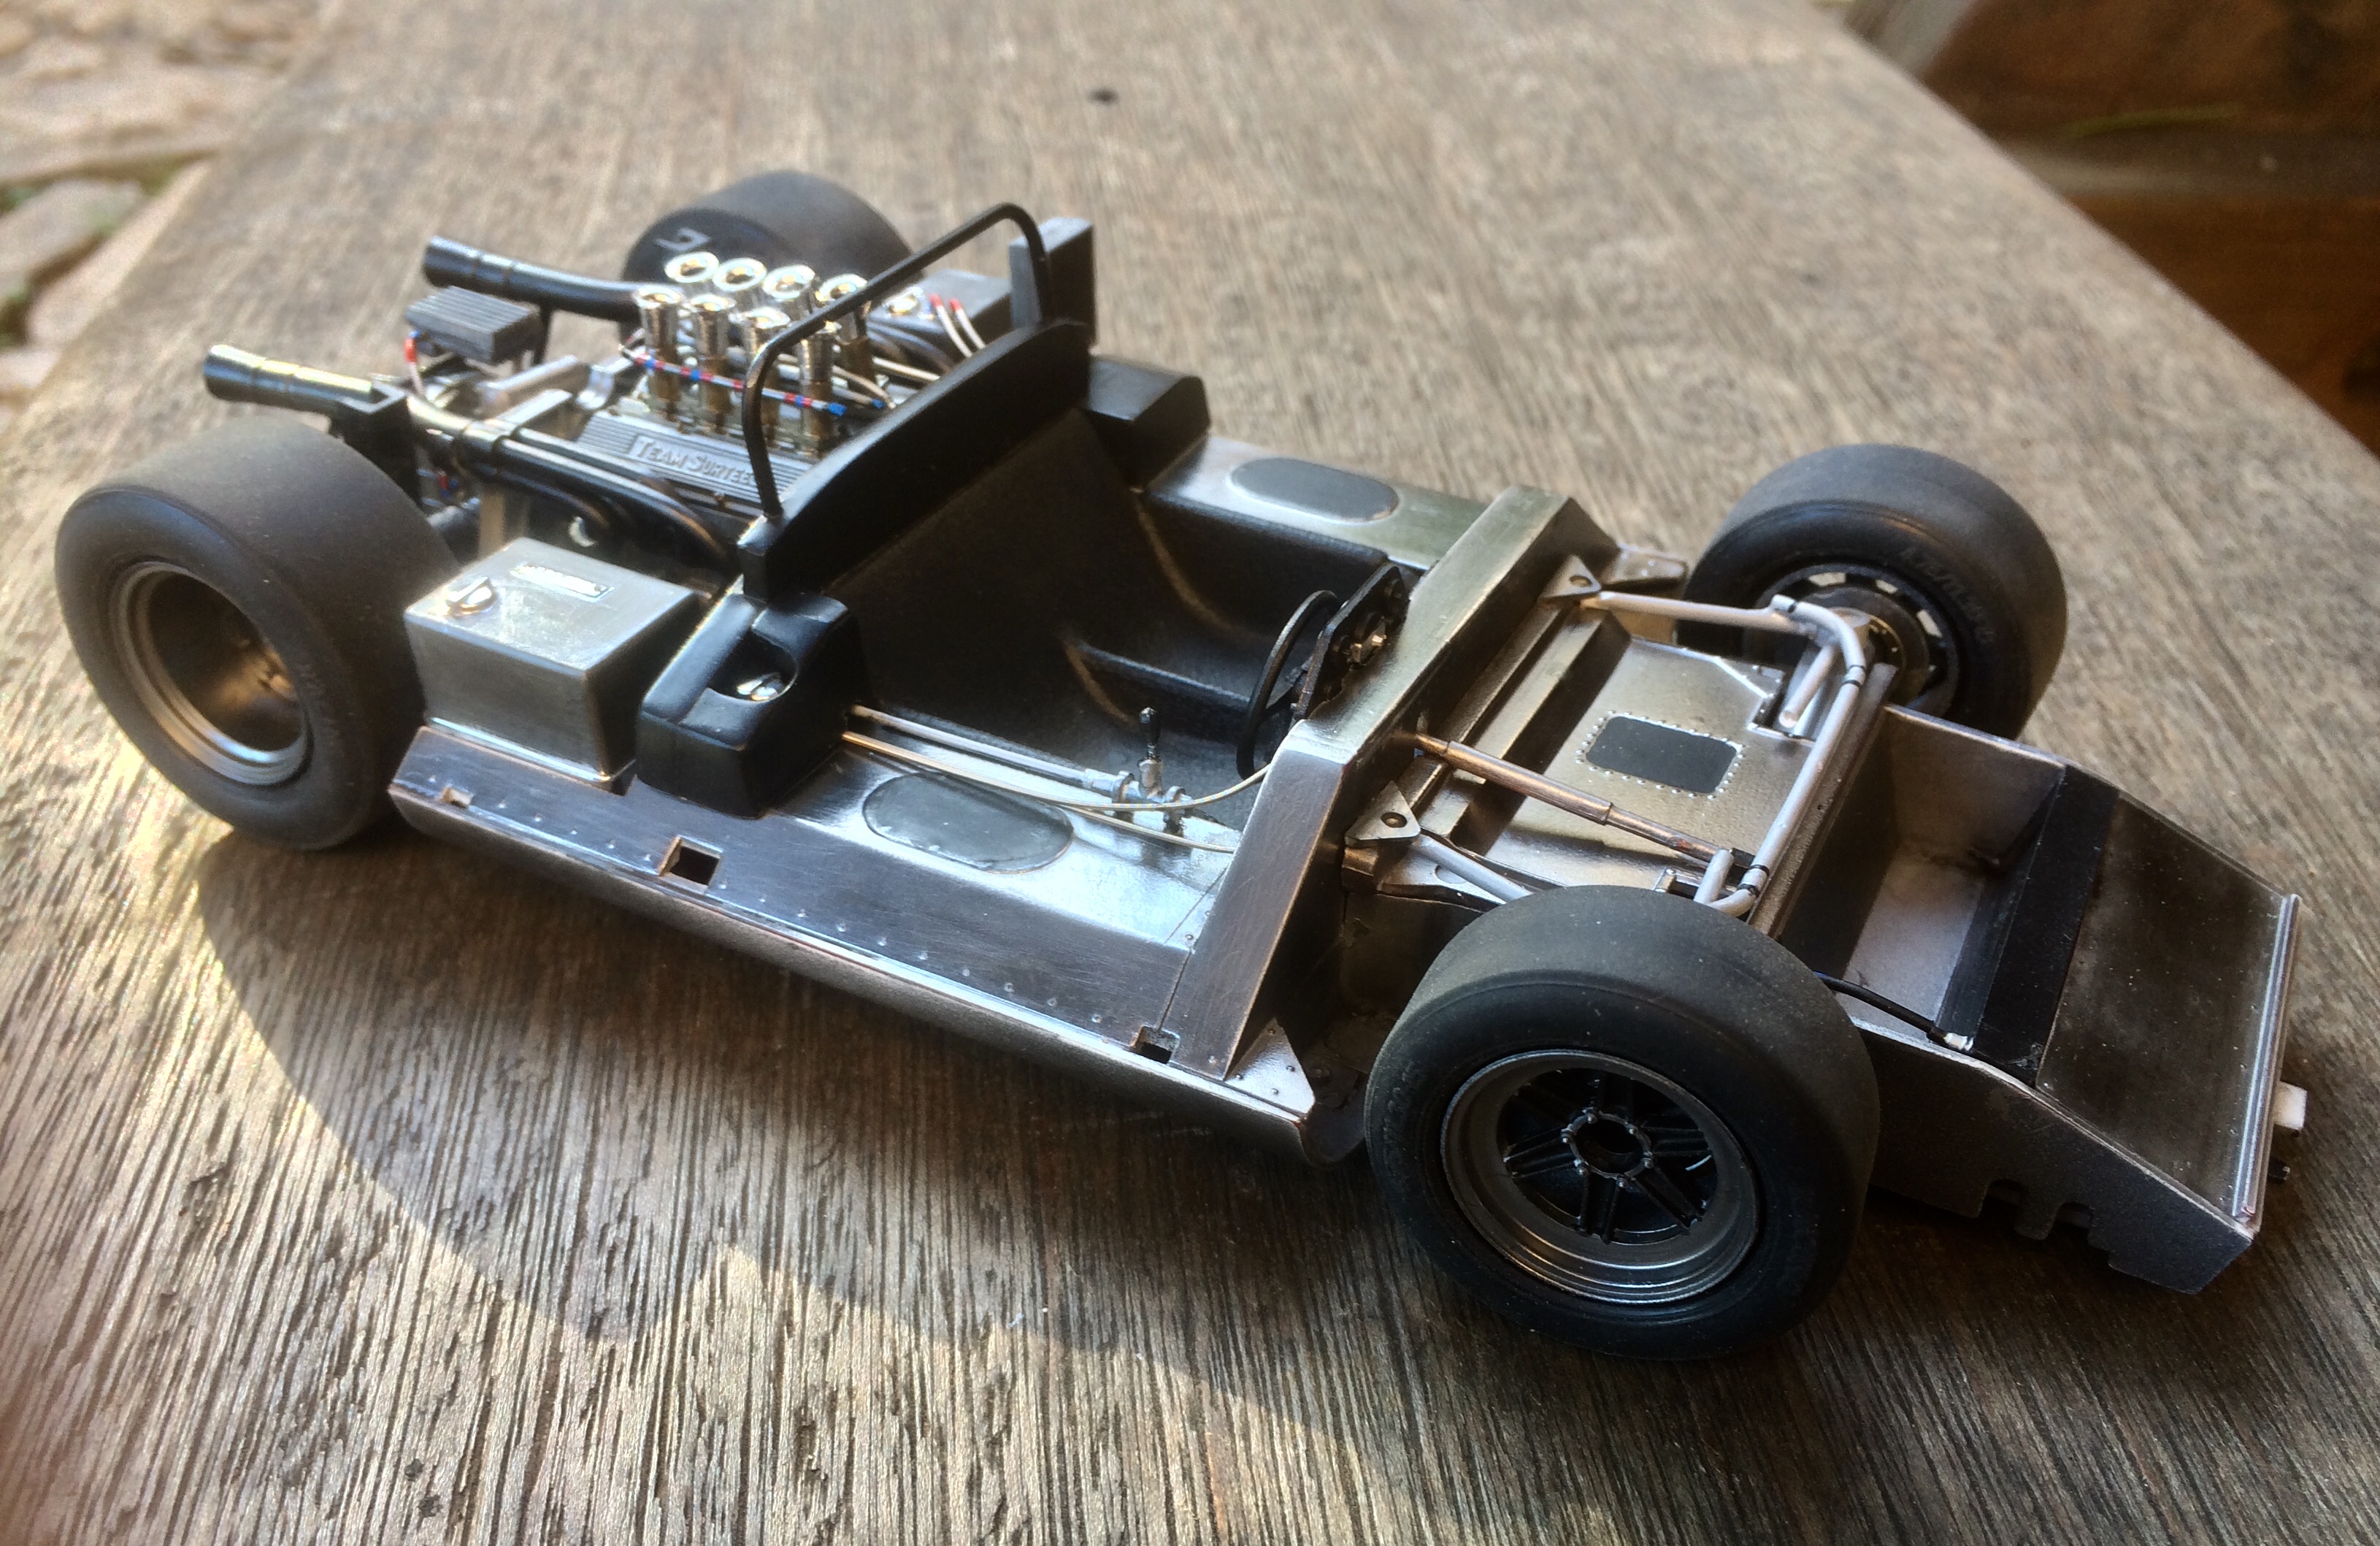
Thanks, I find these racing cars are a model within a model. The fact that you can remove all of the bodywork to see the full chassis detail makes them very special:
-
Tamiya1/18 Lola T-160 TS
mitchy replied to mitchy's topic in WIP: Other Racing: Road Racing, Land Speed Racers
Mounted on the chassis; still plenty to do...
-
Tamiya1/18 Lola T-160 TS
mitchy replied to mitchy's topic in WIP: Other Racing: Road Racing, Land Speed Racers
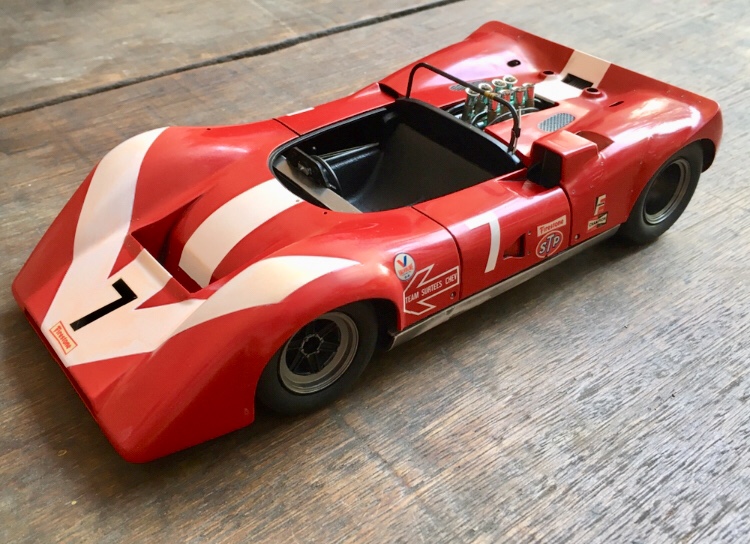
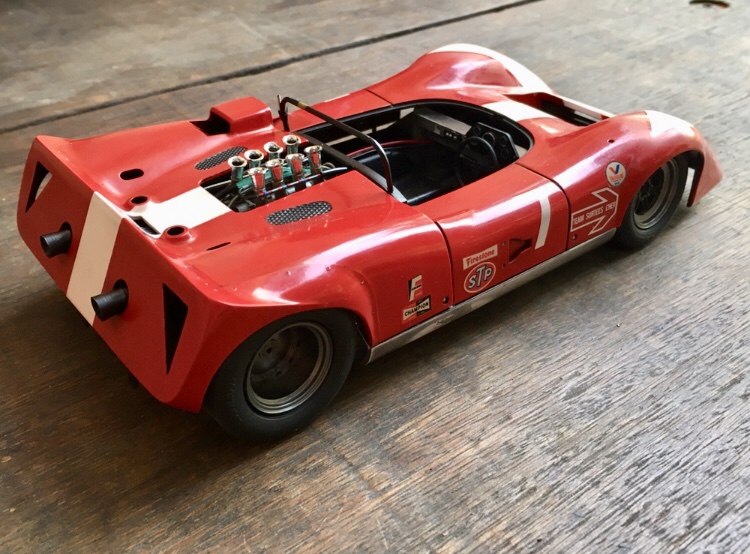
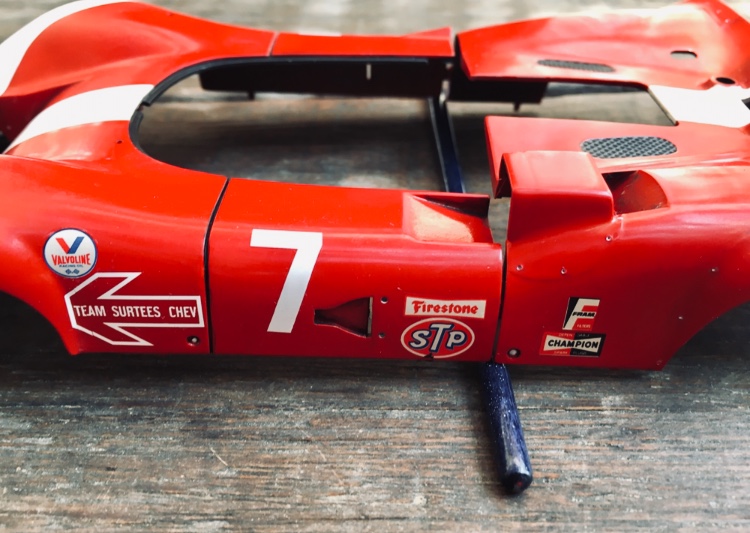
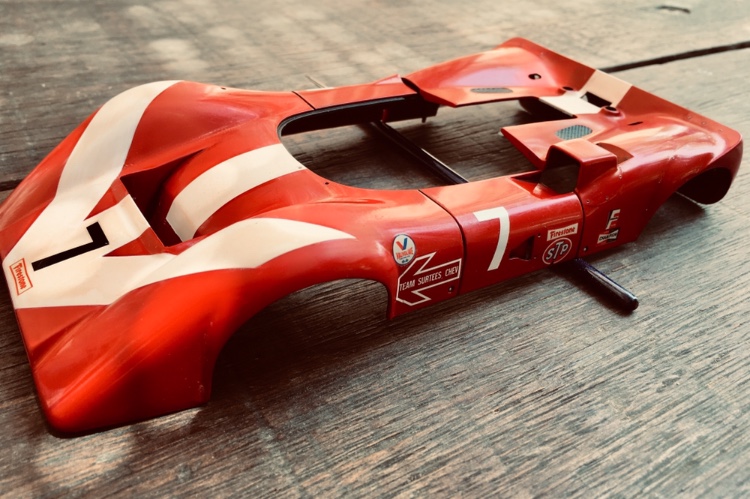
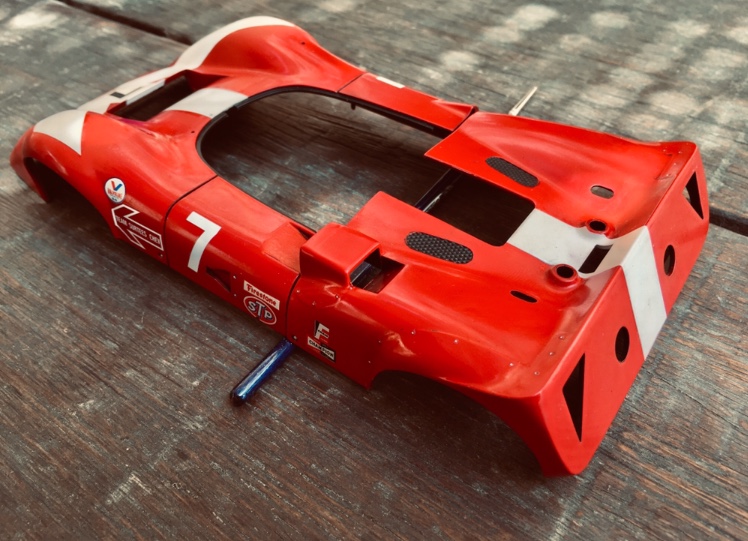
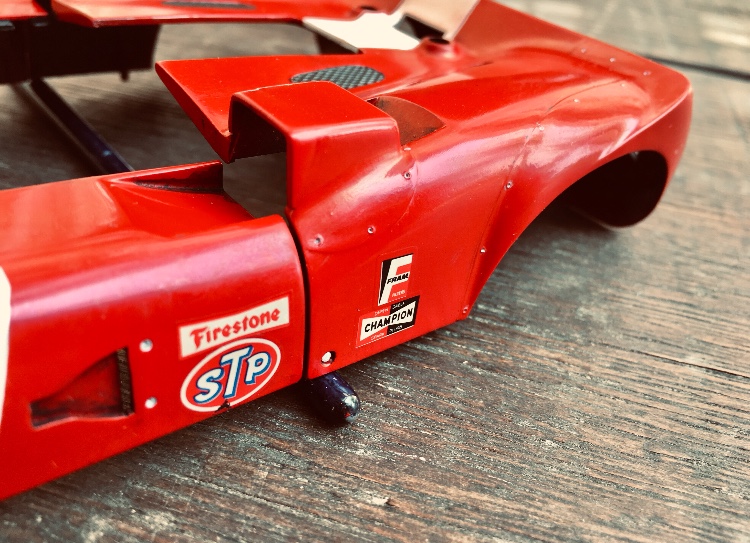
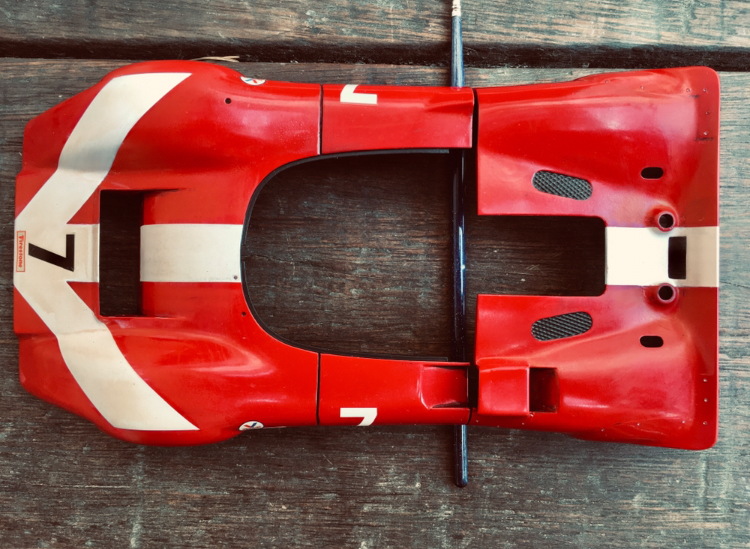
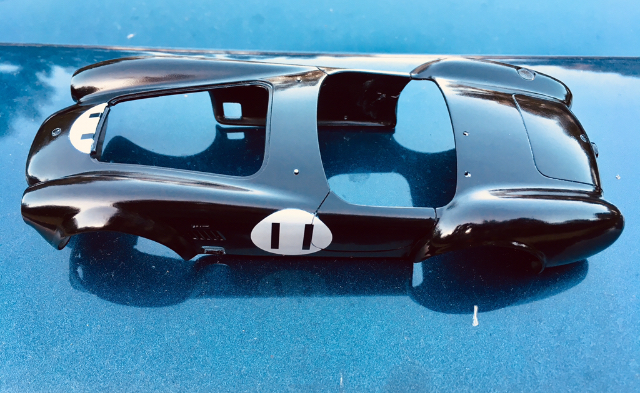
.....and I bet you thought I wasn’t coming back! I have had a busy work season, now relaxing during the summer holidays. Time to pull out the plastic again! I have spent a few hours today on the body, and about three months ago I airbrushed the white arrow design. I removed the masking last week! The rivet details, side scoops, rear arch farings and body clip holes were not on the kit molding, they are additions. The old decals were a bit scary to apply, especially the ‘TEAM SURTEES CHEV’ arrows, as they have very little paint and split like crazy, but I got them on! Some rivet detail and shading wash in the crevices really finishes it off! Tomorrow I will give it a good cleaning and eventually get some clear coat AB’d on. Thanks!
-
Thank you, gentlemen.
-
I am surprised at how the paint went down and stayed dust free, I have no booth and painted/dried in an unprotected area. Light sanding and polishing obviously helps overcome the inevitable specks. I think the most important aspect of dust-free paint is quick drying and zero human/animal movement in the paint area during paint and curing
-
Fascinating. I am a professional movie camera Grip, the guy who fixes the camera to where it needs to be fixed. Quite often to moving motor vehicles.... I can’t imagine nowadays the camera operator would willingly ‘hang out’ of such a track racer. It is a very interesting project, but now you need a realistically harnessed-in operator with a big Panavision or Arri camera for that close-up high speed racing action! Good colour choice too - camera tracking vehicles are almost always finished in matt black to prevent unwanted reflections. Great stuff, thank you
-
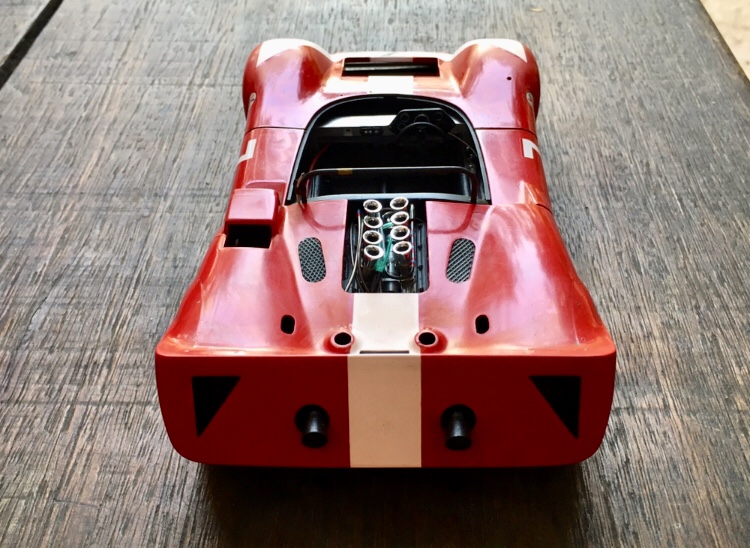
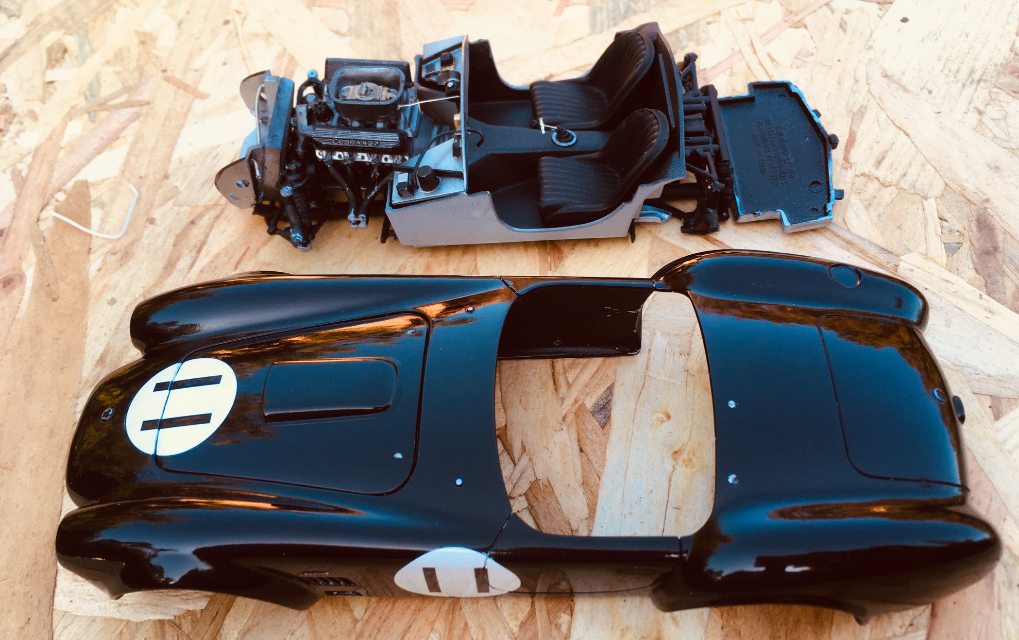
Picked up again, during my one day weekends... not too much progress, but I’m in no rush as you may have guessed. Another AB misting and wet coat of tamiya x-22 clear 50:50 with their lacquer thinners. Great results with minimal wet sanding to 12000, finished with tamiya polishing compound and Kiwi black parade gloss boot polish. Chassis, motor and interior test fitting in the background. Thanks for looking
-
Thanks. I was quite surprised when I was experimenting with the painted wood technique, using basic acrylic paints. I must admit it would be more difficult or impossible to achieve on smaller sculpted surfaces, using just one’s finger. I’m sure there must exist something to use as a finer tool for such a circumstance. A small child’s finger? ?
-
I’m itching to get on, but a month-long work project begins, so everything else stops.. But I’ll be bumping this thread again soon enough. Looking forward to seeing those other Cobra WIPs... Thanks for looking.
-
That reminds me; I have three different versions of Tamiya’s Cooper to build... Detailing that teeny weeny A series engine is inded tricky. Almost like working on a 1:32 compared to the detroit iron around here! Good job
-
Going to be a short pause, work coming up... yeah.
-
Dammit. found the missing part. Too late. The gremlin appears to be me.
-
Thanks! I should really get on with the final touches and get this under glass!
-
Been hard at it today, yesterday’s clear coat got some minimal Micro Mesh 2500 and 6000 wet sanding plus some Tamiya polishing compound, followed by a dab of black Kiwi Parade Gloss shoe polish. As an additional note I have to say that Tamiya’s X-22 gloss mixed 50/50 with their own lacquer thinners creates a really easy to AB and quick drying clear. Highly recommended. thanks for looking
-
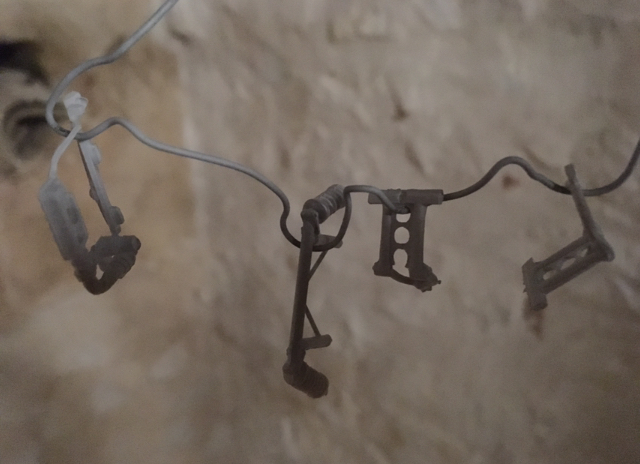
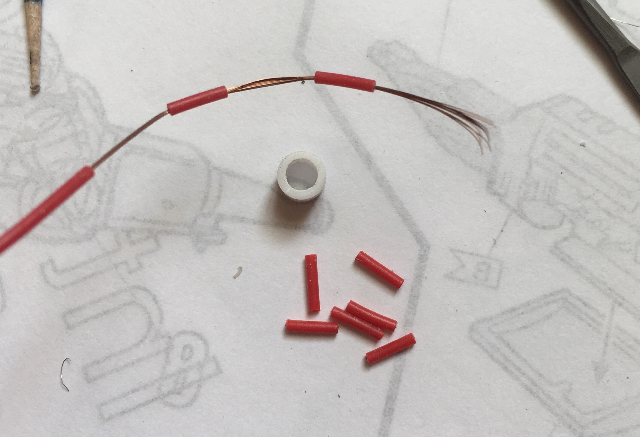
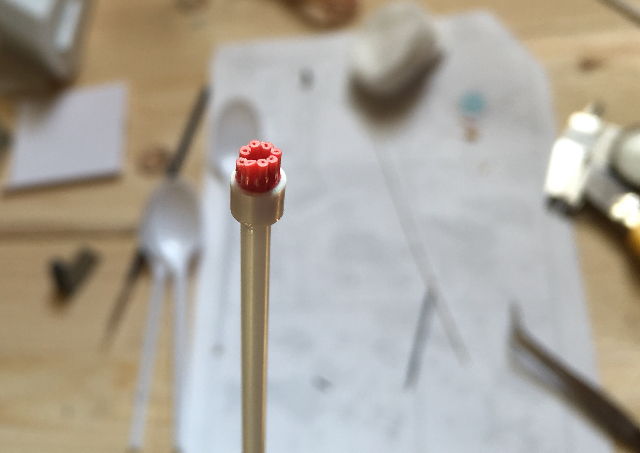
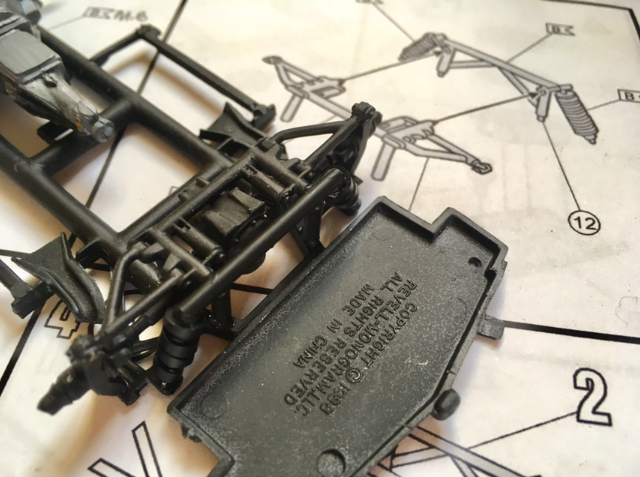
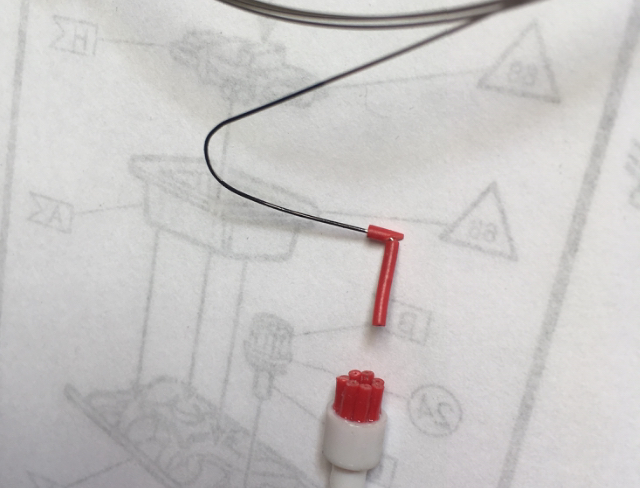
Speaking of cabling, there is no way to employ the kit dizzy. Time to experiment with styrene tube, tiny weeny wire sleeving and guitar string. The guitar string is 0.333mm diameter, giving a 1:1 cable dia of 8mm, roughly 1/4”, which is pretty much spot on. The red cable boots look a bit fat, but as long as the cables do not look like hosepipe I am happy. The other benefit of guitar string is that it can be permanently bent into position for elbows and scale ‘cable sag’. ? I have no carpet, and the piece is relatively large, but gremlins ate suspension part #12, So I had to scratch one, coil springs and all.
-
Waterslide decals-cleaning after application
mitchy replied to mitchy's topic in Model Building Questions and Answers
Hi Petesky you ard right, the paint is not gloss, but I have luckily escaped without any silvering. No decal serting solution applied, just distilled water. Indeed, a good moist wipe has left the surface ready for clear coats. Thank you all for your input -
I think it will be inevitable, some added cabling and plumbing will just set the engine bay off. ?
-
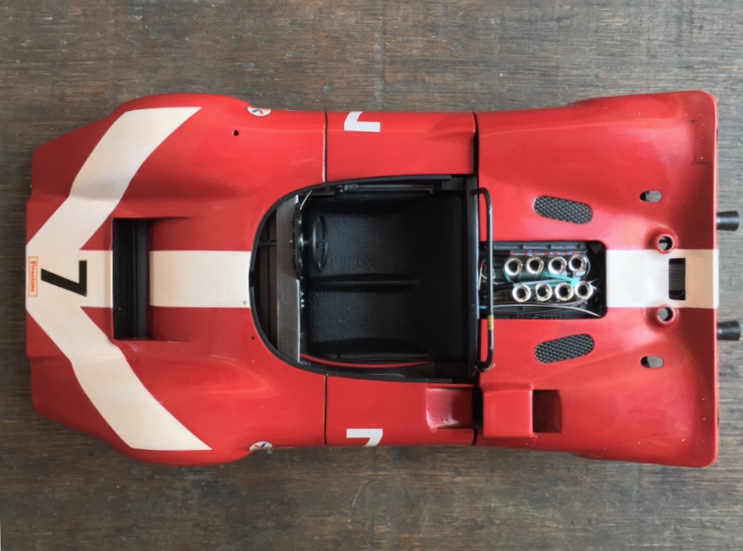
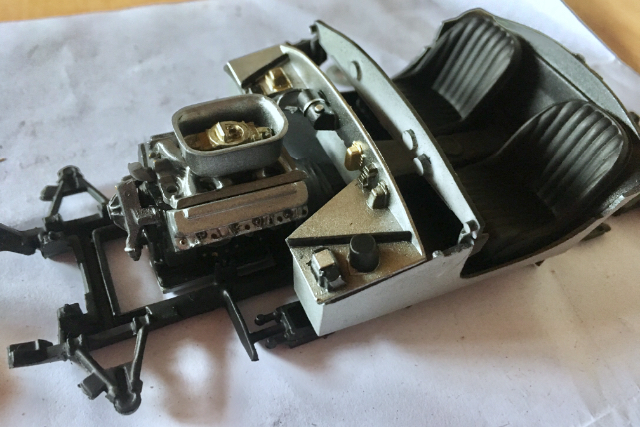
Whilst the body work builds up some clear coats, I can get on with some other parts. Test fit chassis, tub and engine: I lopped off those unrealistic concave exhaust tips and replaced them with some styrene tube: Thanks for looking.