mitchy
-
Posts
147 -
Joined
-
Last visited
Content Type
Profiles
Forums
Events
Gallery
Everything posted by mitchy
-
I’m going to give it a go on the pickup bed and sides of my just-started Ford Model T.
-
%?D cheeky
-
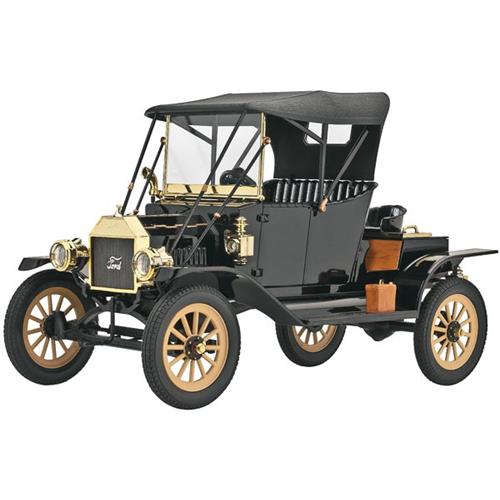
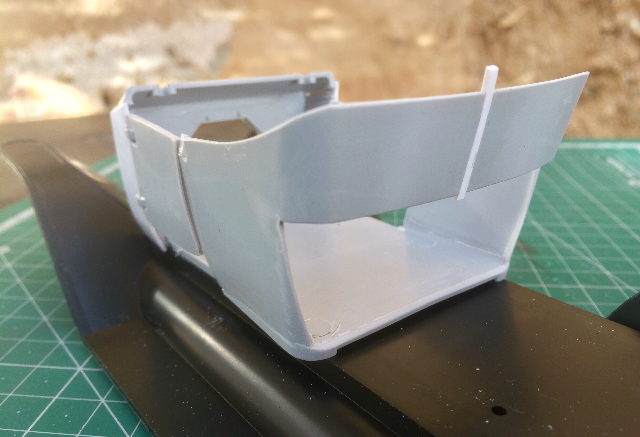
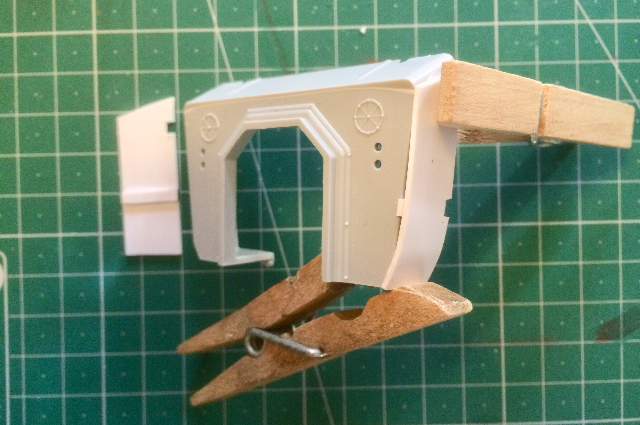
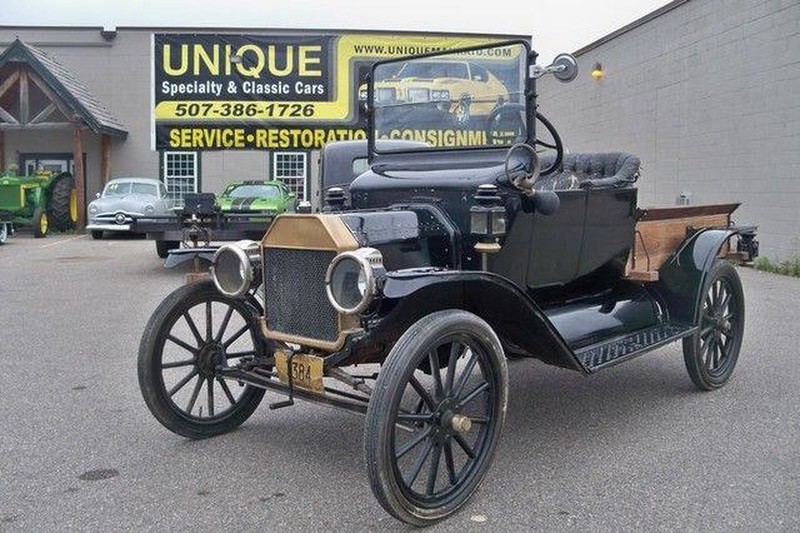
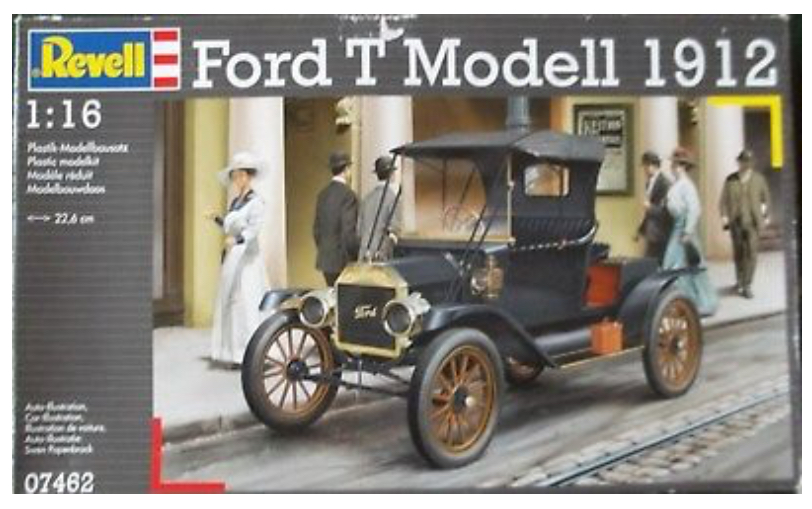
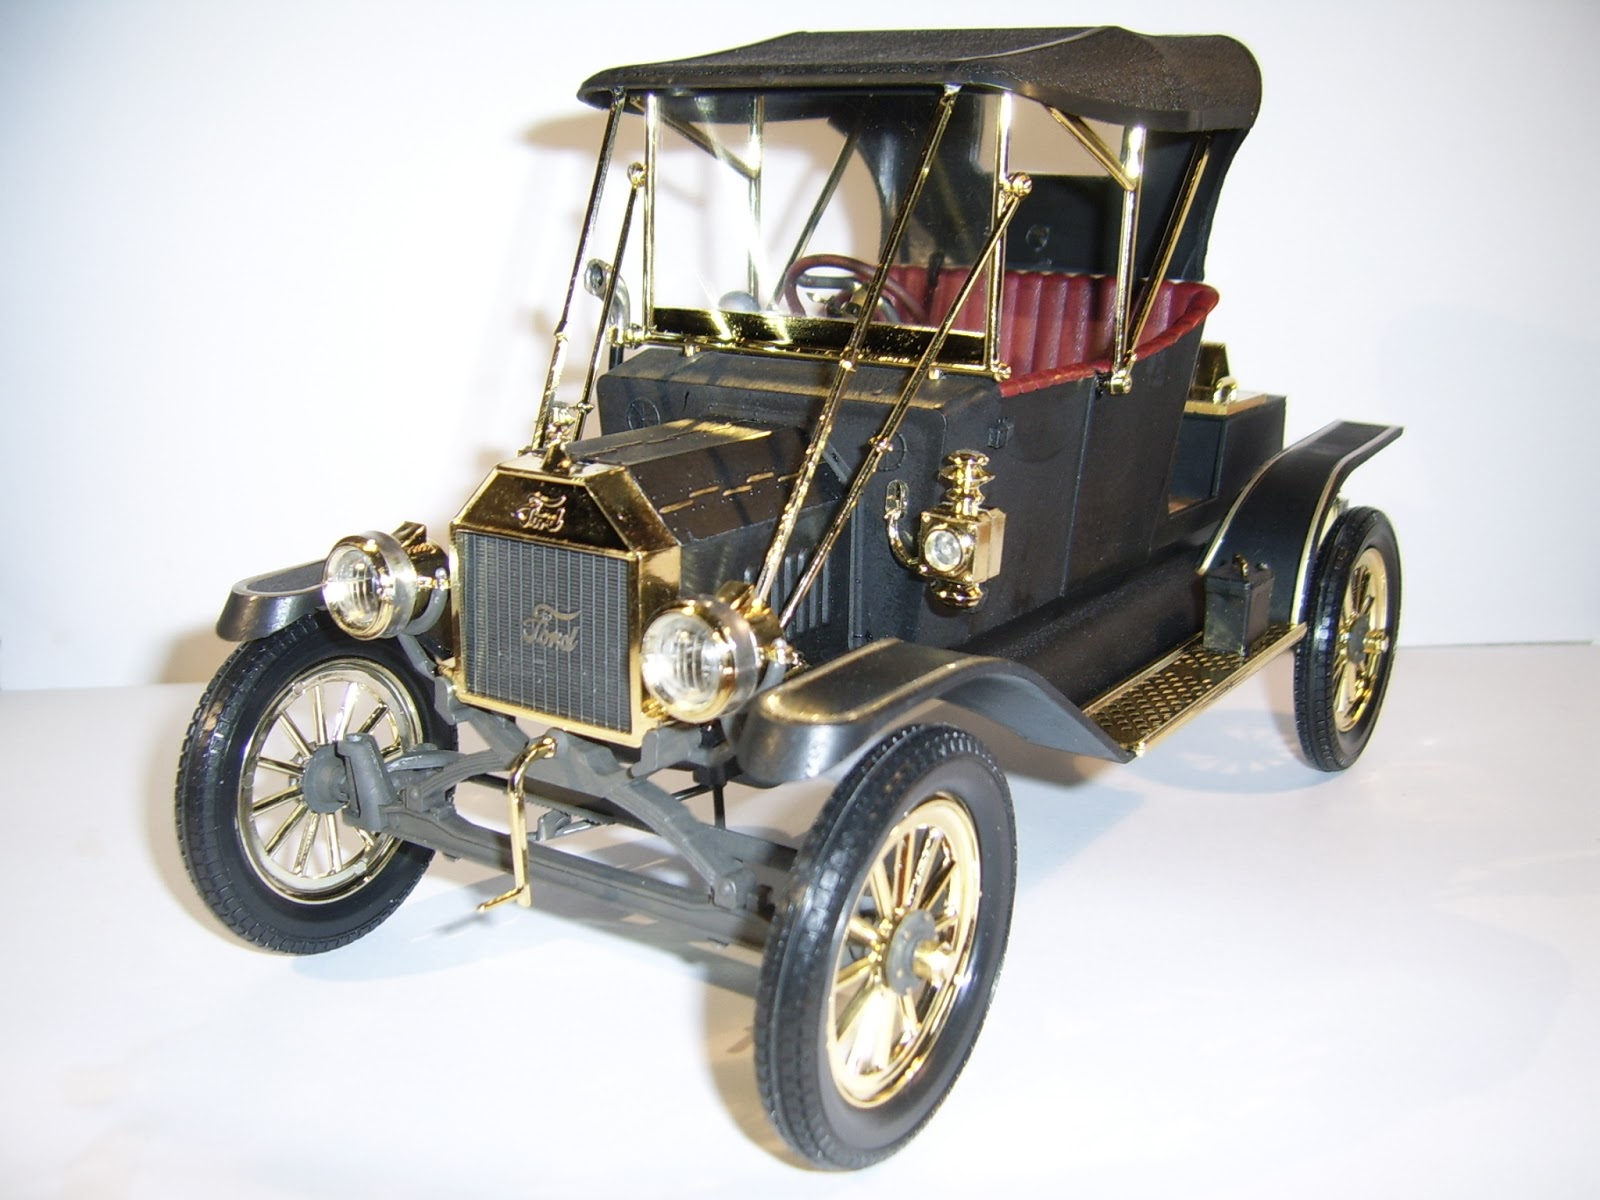
The Model T The grand daddy of modern cars. Not the obvious modellers choice on this forum, but when I saw I knew I had to have it. It soon became apparent, however, that this little big-scale car needed some tweaks to make it on to my shelf. Catalogue picture as per box and instructions: Although an attractive model (if you like this kind of thing) it is inaccurate in so many ways, so I shall strive to correct these glaring errors and build something a little more precise and aesthetically more to my liking. Something like this: Today I have been able to get it out of the box, and carve up a few major parts to give it the vintage look: The front wheel arch fenders have been raised 5mm to bring them to the correct height and angle. The body bucket has been chopped out at the back- ready for a scratch-build pickup bed, much preferable to the guilded dickie seat museum piece offered in the kit. The bucket sides and doors are undergoing some reshaping and ‘contouring’ - the kit provides flat slab-sided parts which do nothing for the looks and accuracy. The front bulkhead has also received some of the same treatment. -This is a good project to practice scratch building, as the curvature and panel fit can be a bit off, yet still appear authentic. so that is about all for the moment, and a few hours work I am already much happier. Thanks for looking

-
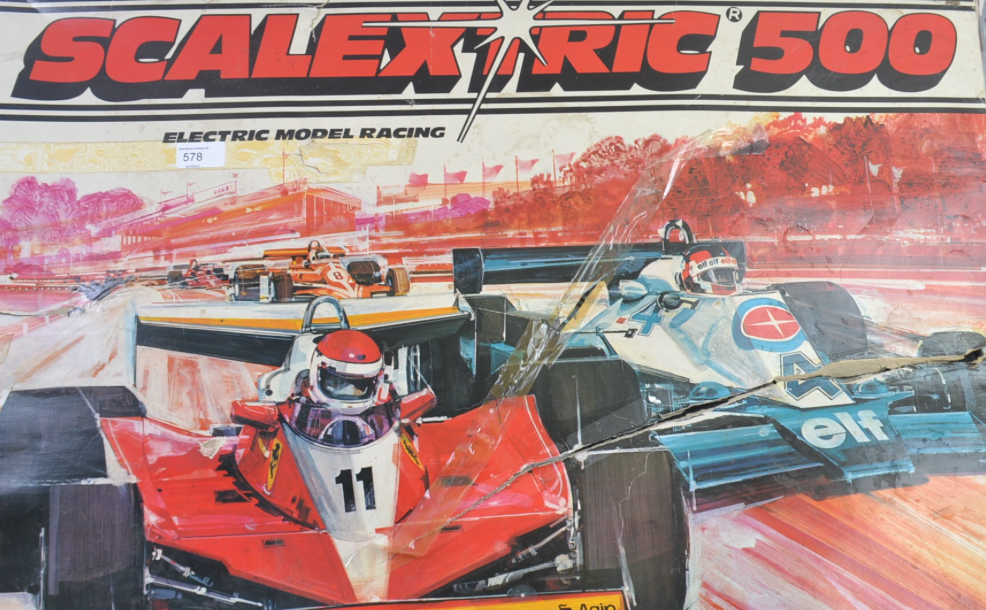
Funny, I’m thinking about the same setup, space will be at a premium and I’m certainly not planning to pack it away each time. I remember twisting and wrenching the track apart way too often (usually due to someone ordering us to tidy up our room...) soon enough it stopped going back together easily, and the metal tabs on the rails would snap off. ‘Twas a Scalextric 500...
-
Now that the kids are a bit bigger we thought it was time to indulge in a proper christmas present like I remember, so I got on the ‘bay and picked up a lightly-used Scalextric set- Continental Sports Cars. For a 25€ winning bid I am very pleased- the mediocre cars work, the track is excellent, and I have already purchased a few extra sections, plus this, by Scaleauto: Now to build a new garage...
-
Wow, thanks for that link. Everything pales into insignificance next to that! I have just used up all of my free views on that site.
-
Thanks. This was actually my first attempt at this in small scale (I learnt by doing a load of doors in an apartment a while back). I actually tried making a little grain effect tool out of an eraser, but then realised that my fingers are by far more effective and finer scale. the yellow blodge at centre is my fault, trying to pencil-in a little knot but the paint was still soft. A little dot of brown wil fix that!
-
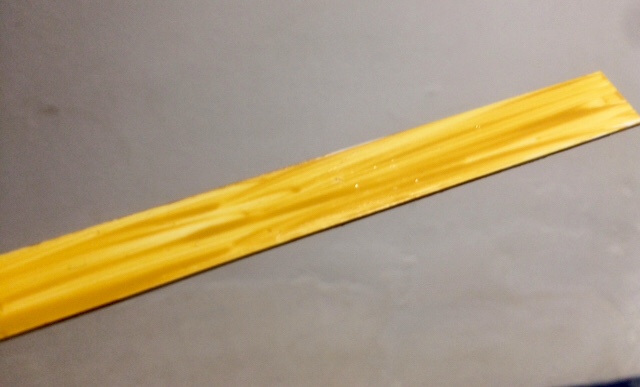
I was tinkering with my Vallejo acrylics and thought I would try something I did at 1:1 scale for a friend’s faux wood grain. On a 10mm wide strip of styrene sheet sanded with 2000 grit, I applied light coats of Yellow Ochre with a 3mm brush in the required grain direction. This base coat was left to dry briefly and the required result is fairly streaky; here the trick is to use long strokes and try to even out as much as you feel is necessary, remembering that wood is not uniform. With the base now reasonably dry, I mixed yellow ochre, red and black 4:2:1, and applied dabs of this mix randomly over the whole strip. I did not apply this like the base coat, - just random thick-ish dabs. Think leopard skin. Instantly running a clean dry fingertip along the whole length and simultaneously rolling it back and forth gives a fine random graining. You may decide to run another clean fingertip along the length if required. After a short dry I could rub the surface again with my clean dry fingers and buff it to a satin varnish/wax finish. I hope this is of use, I shall be searching for opportunities!
-
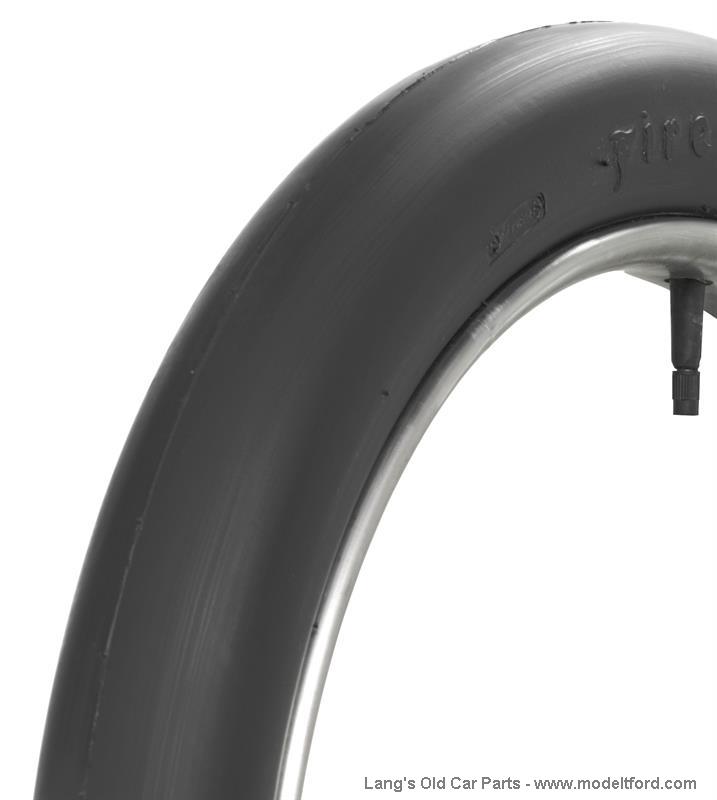
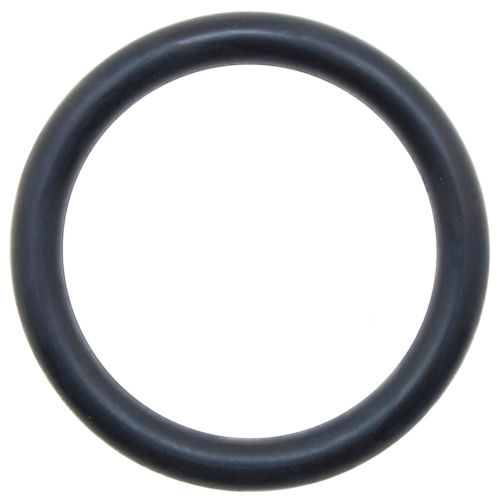
I am presently studying the engine for a completely scratch-built unit, - ‘tis a real shame this kit comes without, but I’m happy to play. Thankfully it is really simple, though all curves! I have also discovered that completely smooth tyres were (and are still) available for the T. Therefore some 38x48x5mm or 36x48x6mm o-rings will be perfect. I hope. the o-ring: the tyre:
-
Tamiya1/18 Lola T-160 TS
mitchy replied to mitchy's topic in WIP: Other Racing: Road Racing, Land Speed Racers
Ok, I’ll check rhem out. I’m loving your Lola, thanks for sharing that. -
Thats looks very engaging- remember- take it slooow. When it gets too heavy, I drop it temporarily and get on with something else (ideally not another model!!) Nothing worse than forcing something if its causing you grief! Then I will bounce back and take it on. No rush!
-
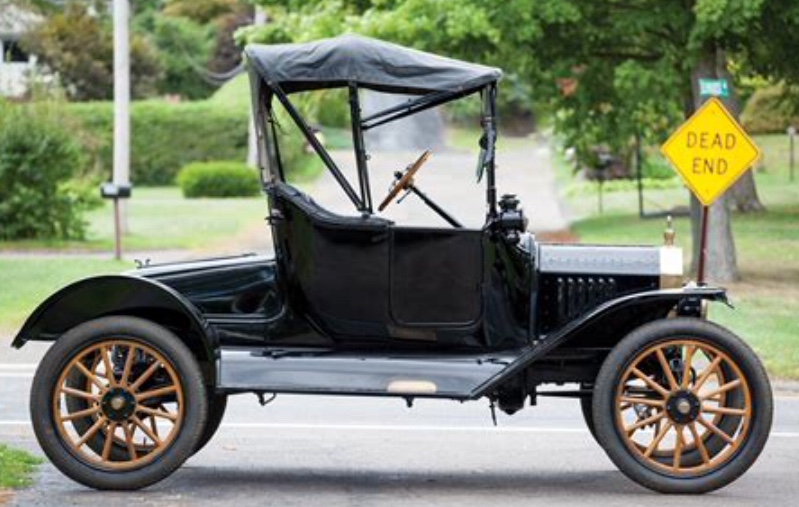
- A surprise buy whilst shopping for something completely different; funny how that happens... Having previously been a fan of 1:24 or 1:25 scale, I have discovered the joy of larger scale kits, such as the Lola T-160TS by Tamiya, which is currently on my workbench, paint curing. Therefore this cute thing caught my eye. Sold under the Revell brand, I notice that it was previously available from the Union brand amongst others. I’m a stickler for realistic details (part of the challenge of the build for me is to add or modify certain details), I like to immerse myself in 1:1 reference images... ...After some research I soon discovered that this model will need pretty much every part modified to look anything like a realistic ‘Flivver’. Although an excellent base it is. Photo of a built one, a great build courtesy “Mike’s Models” - I’m just not keen on the kit’s aesthetics: It sits way too high, the mudguards are way too low, the wheels are out of proportion, the tyres are too big, the bucket is just wrong, one piece windscreen, and no engine, — And it is right-hand-drive. — ?? Originally a Japanese mold perhaps. Or perhaps I am a maniac. I am determined to rectify these small errors, as our hobby knows no limits! There is also the fact that I do not like all that Gold bling. Yaaargh. I like funcional black, so this is the direction in which I shall be going: More posts to come... Wish me luck ??
-
Tamiya1/18 Lola T-160 TS
mitchy replied to mitchy's topic in WIP: Other Racing: Road Racing, Land Speed Racers
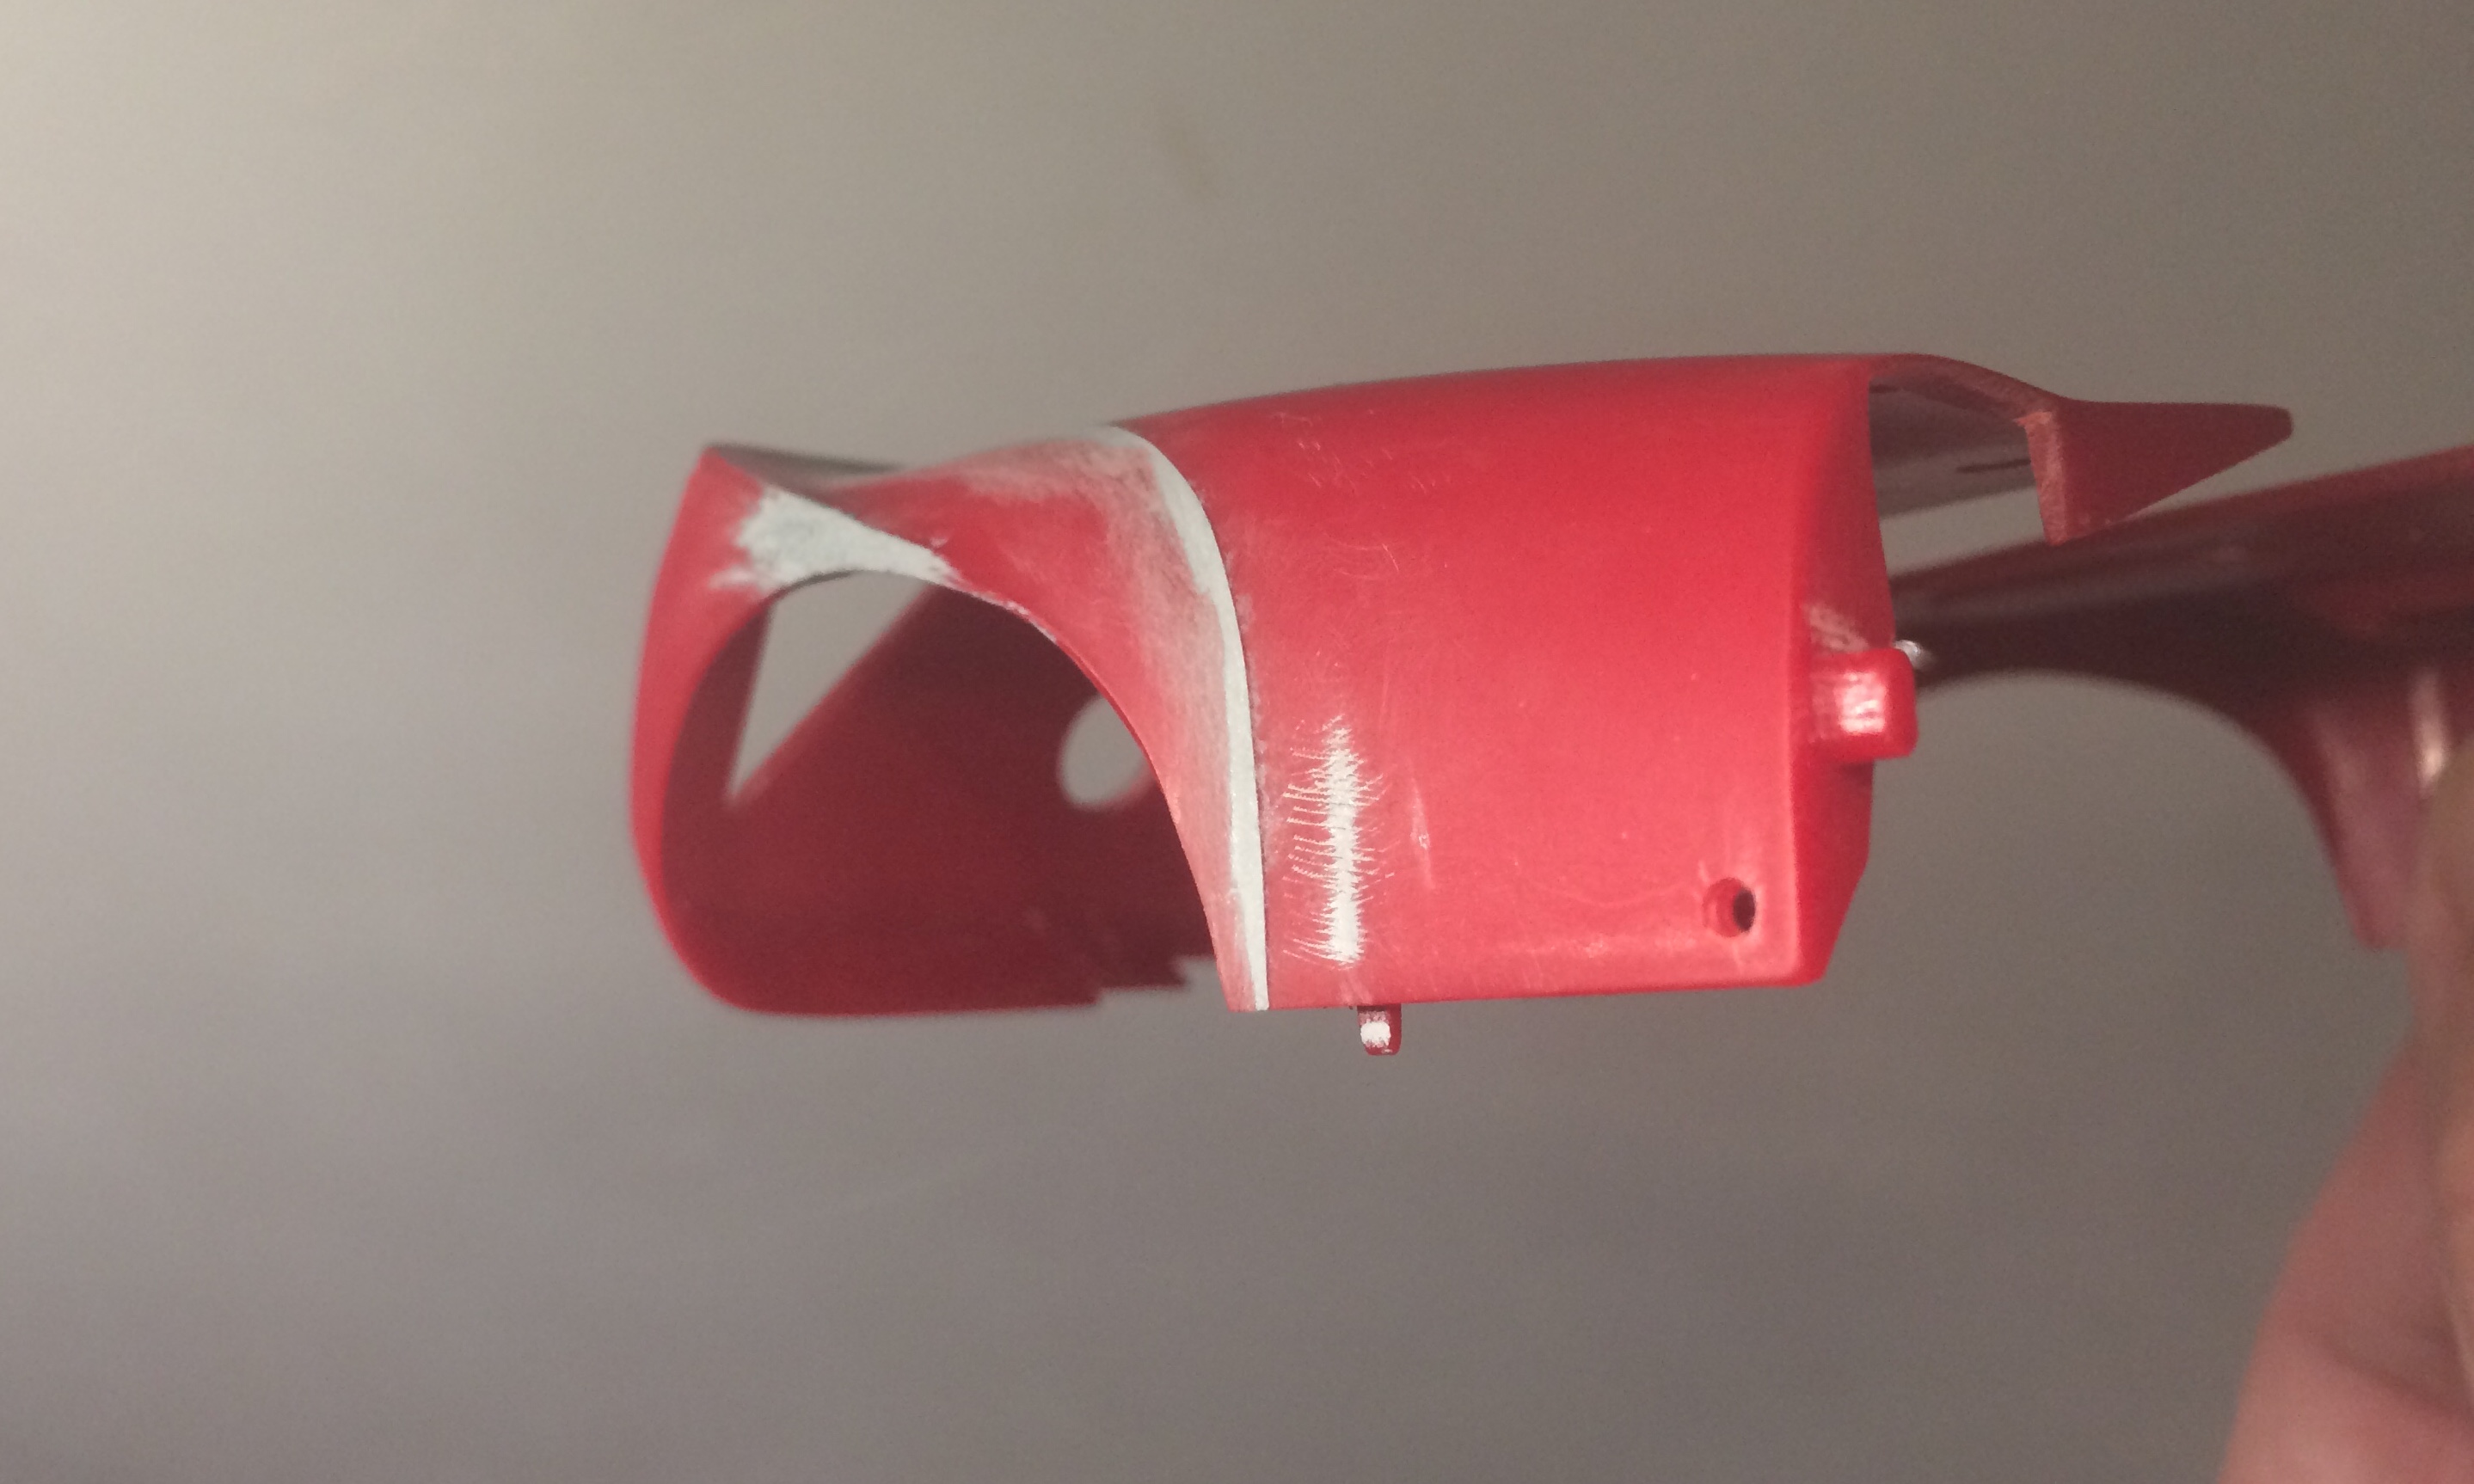
? So far no big disasters - I did however manage to snap the ever-so-fragile lower ‘blade’ beneath the front air intake... a little gob of Tamiya cement will see it right. Patience is certainly a necessary virtue, slowly finding it as I mellow into middle-age! I’ll be sure to keep posting my progress, thanks. ok ok, I couldn’t resist....
-
Tamiya1/18 Lola T-160 TS
mitchy replied to mitchy's topic in WIP: Other Racing: Road Racing, Land Speed Racers
Is it still in the box? I have one more in its box too - I’m not sure why I bought two at different times..
-
Thanks gents.
-
Tamiya1/18 Lola T-160 TS
mitchy replied to mitchy's topic in WIP: Other Racing: Road Racing, Land Speed Racers
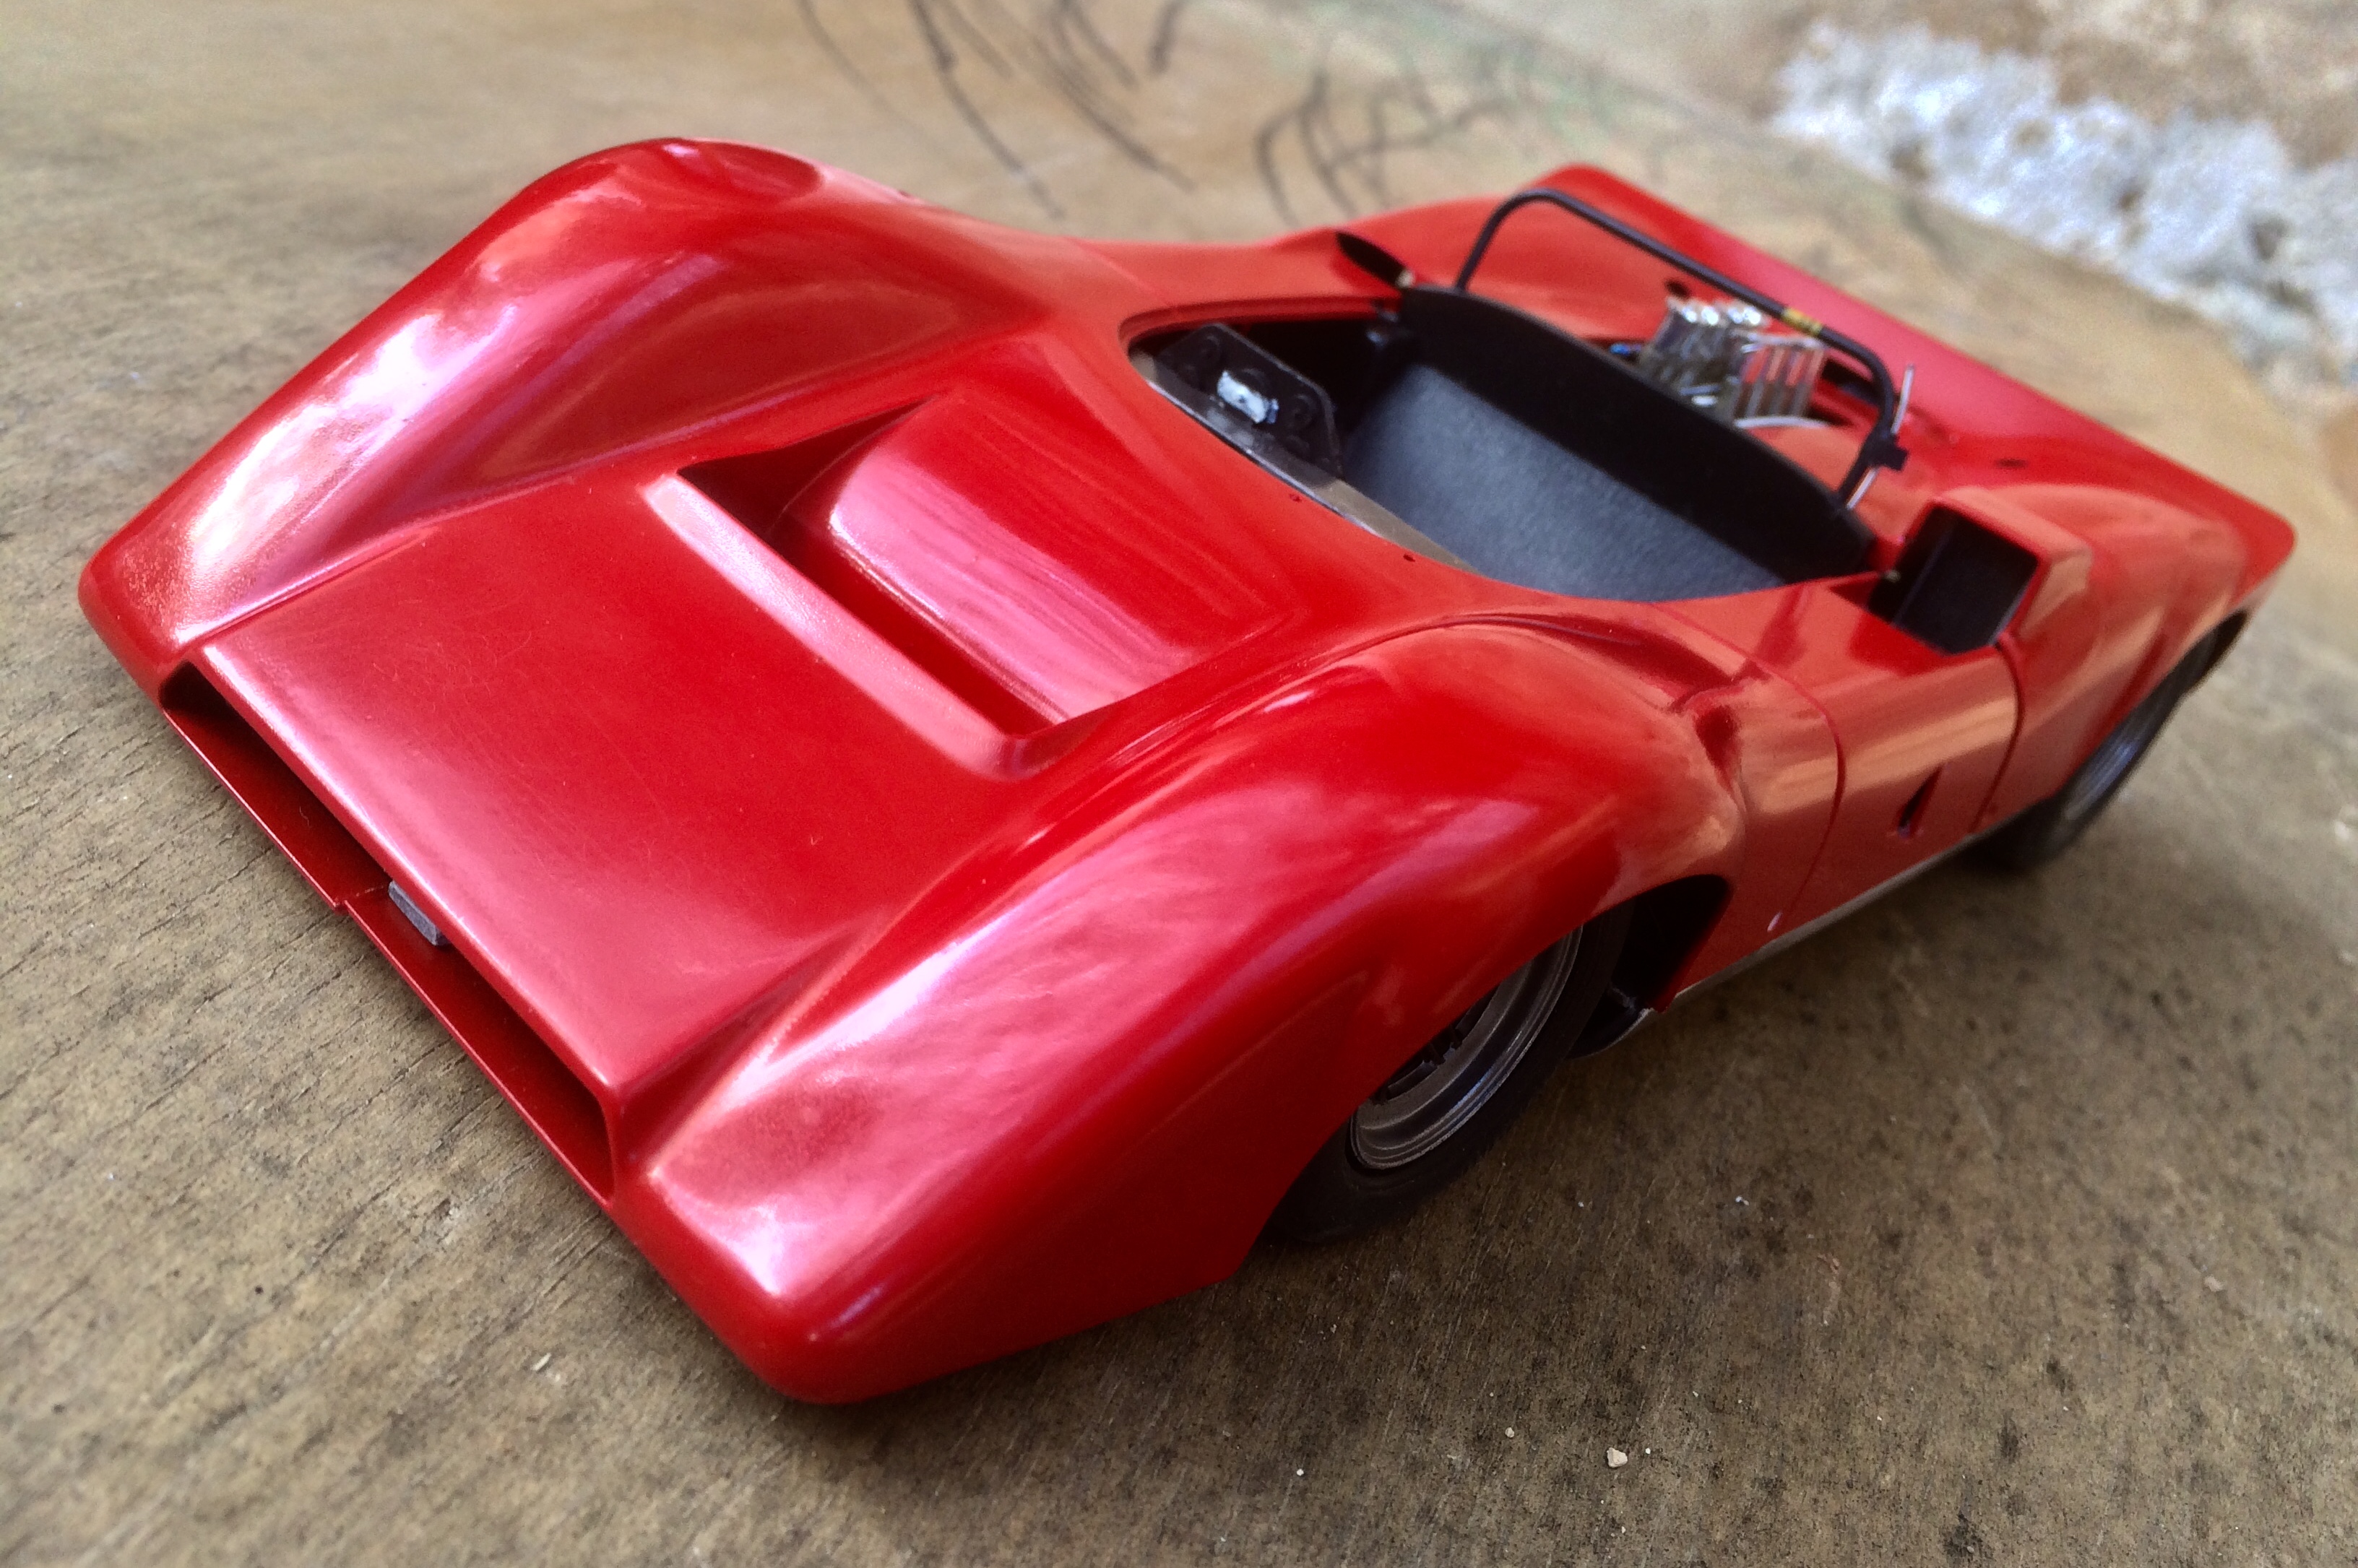
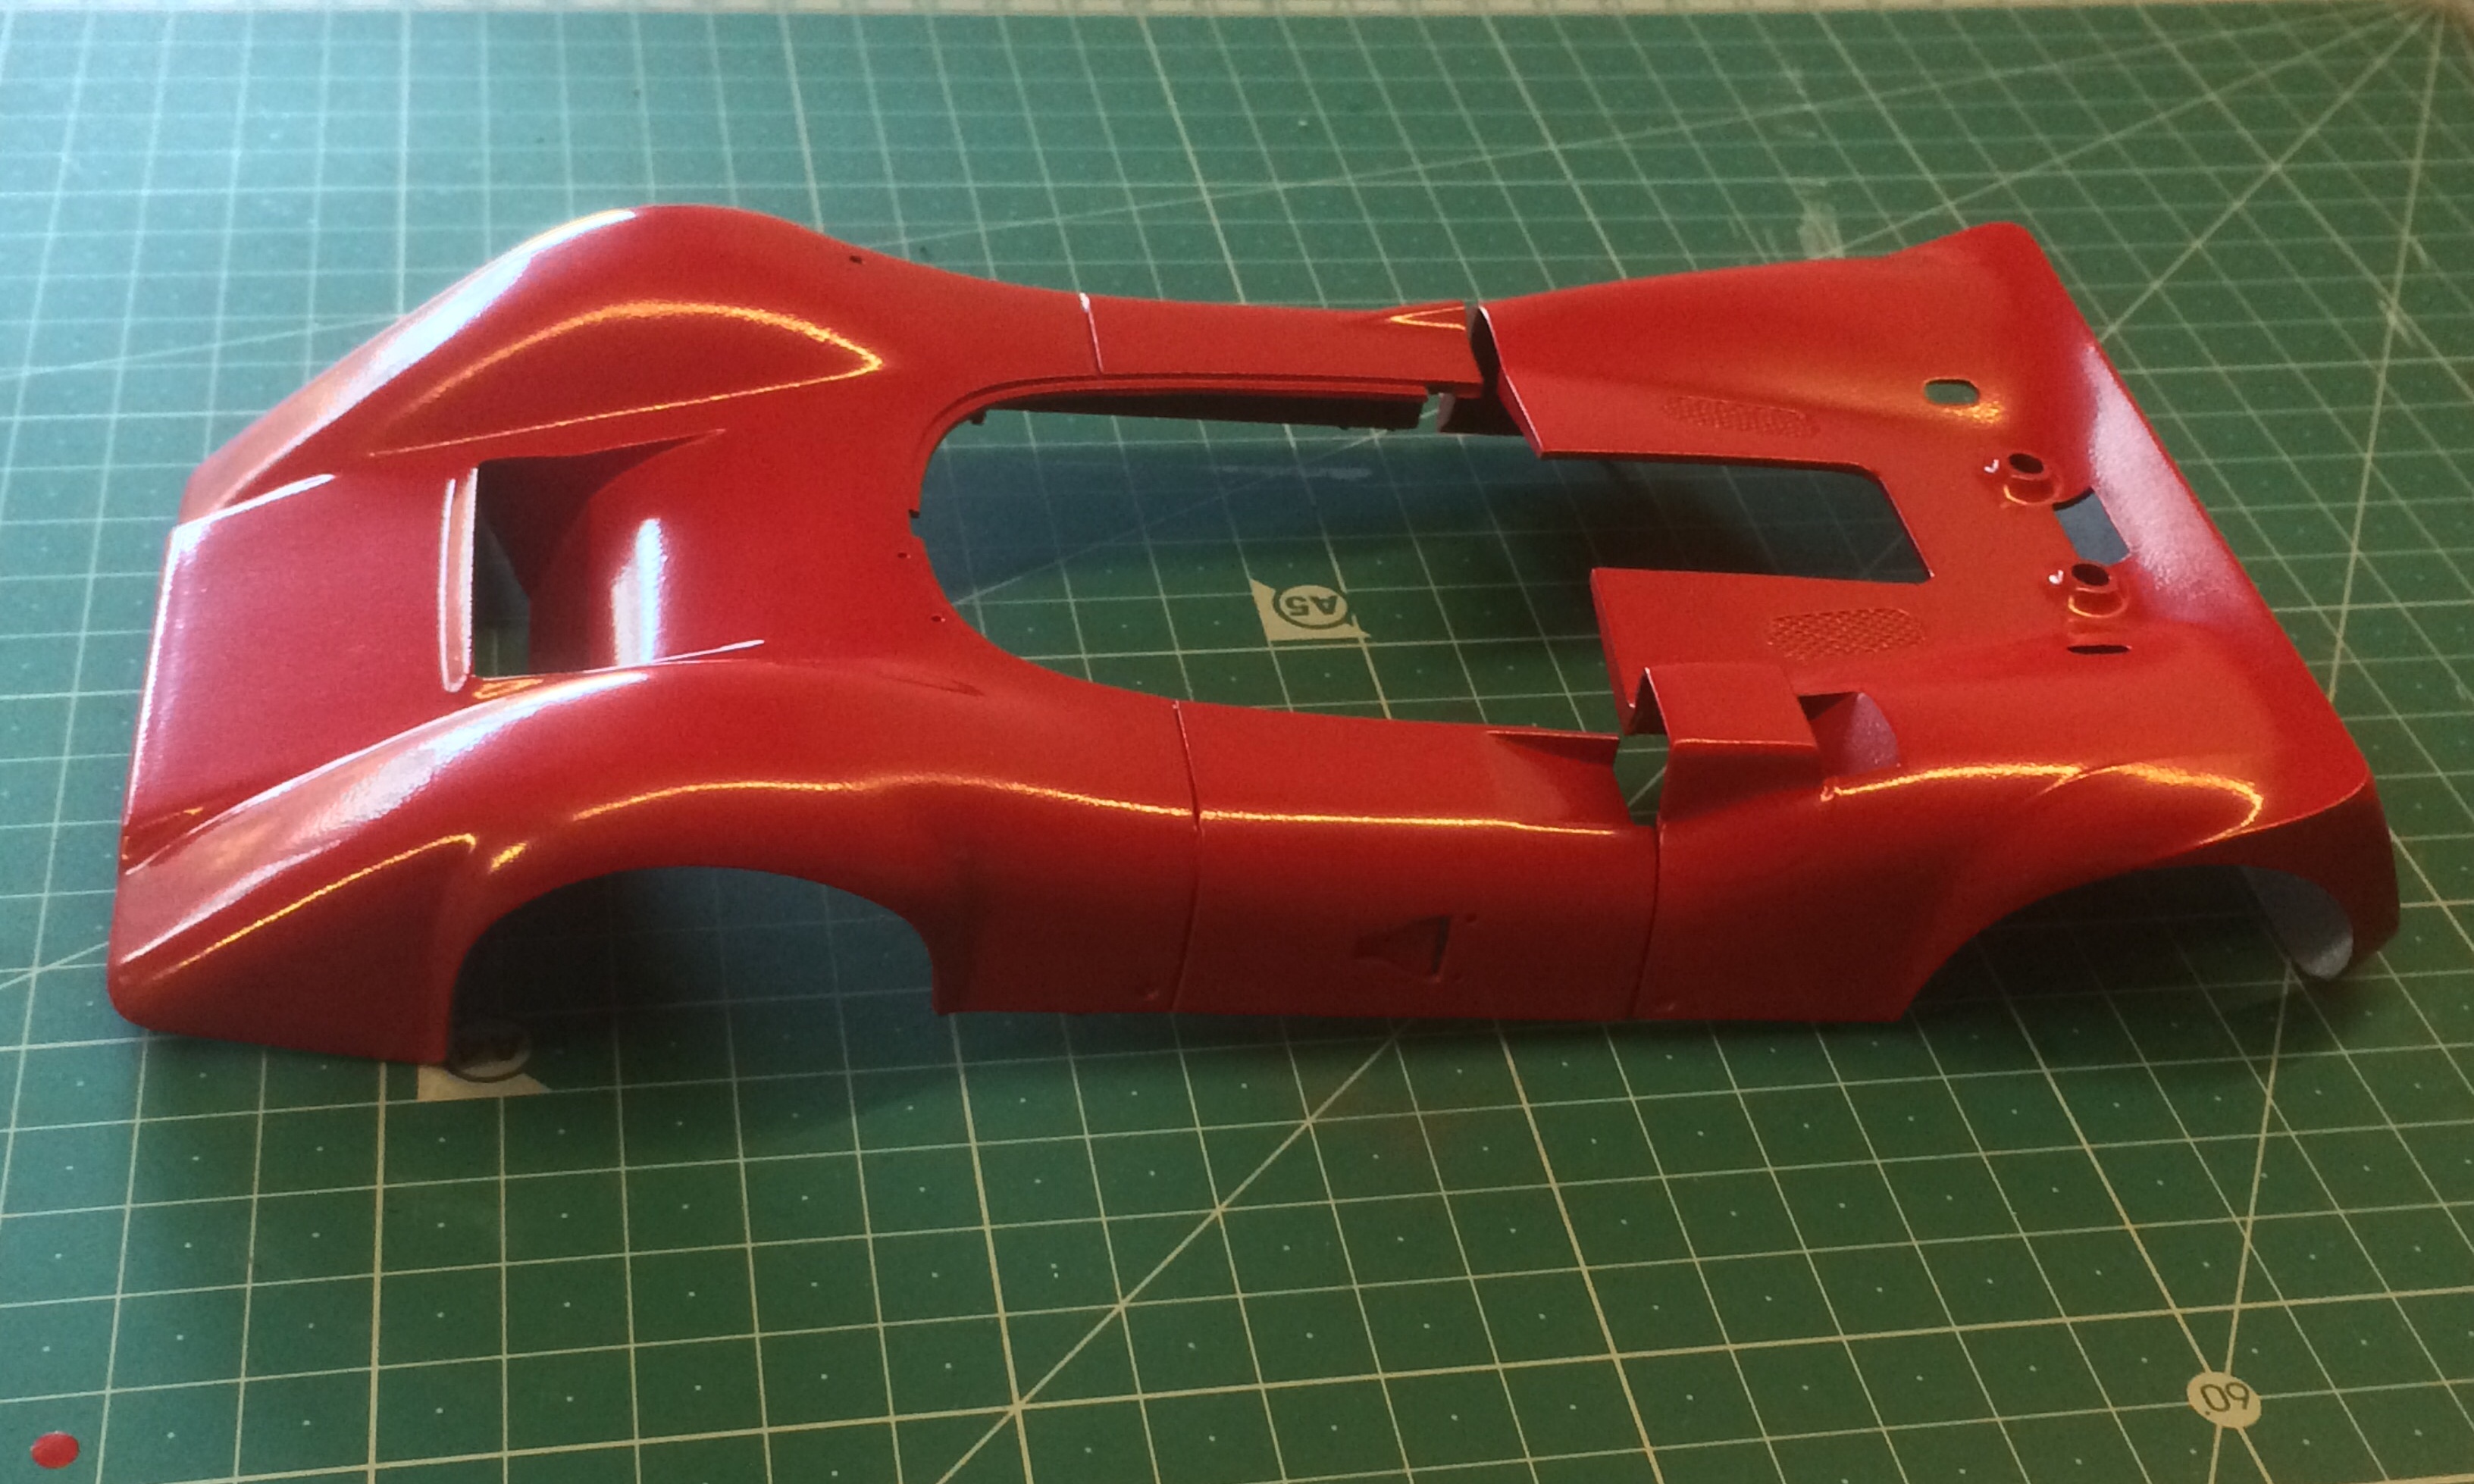
@Racersonly: Formula Ford? Wowee, if only..... that looks really superb. After my not particularly satisfying body paintjob, I sanded back a little with 2500 grit micromesh to lose the texture. Of course, and as expected, I went through to the white primer layer on the high spots in one or two areas. I took out the airbrush again and this time diluted the Vallejo down a little more with good old distilled water. Bingo!! Two more dust coats and two good wet coats, a few hours of drying (not totally dry yet, and given the weather I’m going to leave it until January to cure before touching it again) and I have a very pleasing smooth smooth smooth finish. Still learning. This will maybe take to some Tamiya fine polishing compound, or perhaps if I am really lucky just a wax. I want it shiny. But after the red has cured I shall be masking out for the white Surtees arrow design- I dont trust the 23 year old decals, plus they come in sections and I dont believe that they will line up invisibly, plus the niggly fact that they are a tad too narrow compared to the real car. originally I was going to lacquer over the whole body once the decals are applied, but now I am not so sure- can anyone suggest how to protect the smaller sponsor decals please? Anyhoo, nothing more to add, and no more to do until the new year, so perhaps I’ll get one of the other projects out of its box... Thanks for looking. A photo of the fresh paint- the paint went on sooo smooth this time- happy chappy.
-
Tamiya1/18 Lola T-160 TS
mitchy replied to mitchy's topic in WIP: Other Racing: Road Racing, Land Speed Racers
Thanks for that I remember being impatient and always always spoiling my models when I was a kid- now I have learned patience (being busy and having to find time for the build also helps), This is actually a refresher build for me- plenty of experiment, and of course the internet offers so much help. -
This is fascinating, It is quite exiting to see how 3D printing is progressing! looking forward to more posts : ‘Follow’ button hit!
-
Tamiya1/18 Lola T-160 TS
mitchy replied to mitchy's topic in WIP: Other Racing: Road Racing, Land Speed Racers
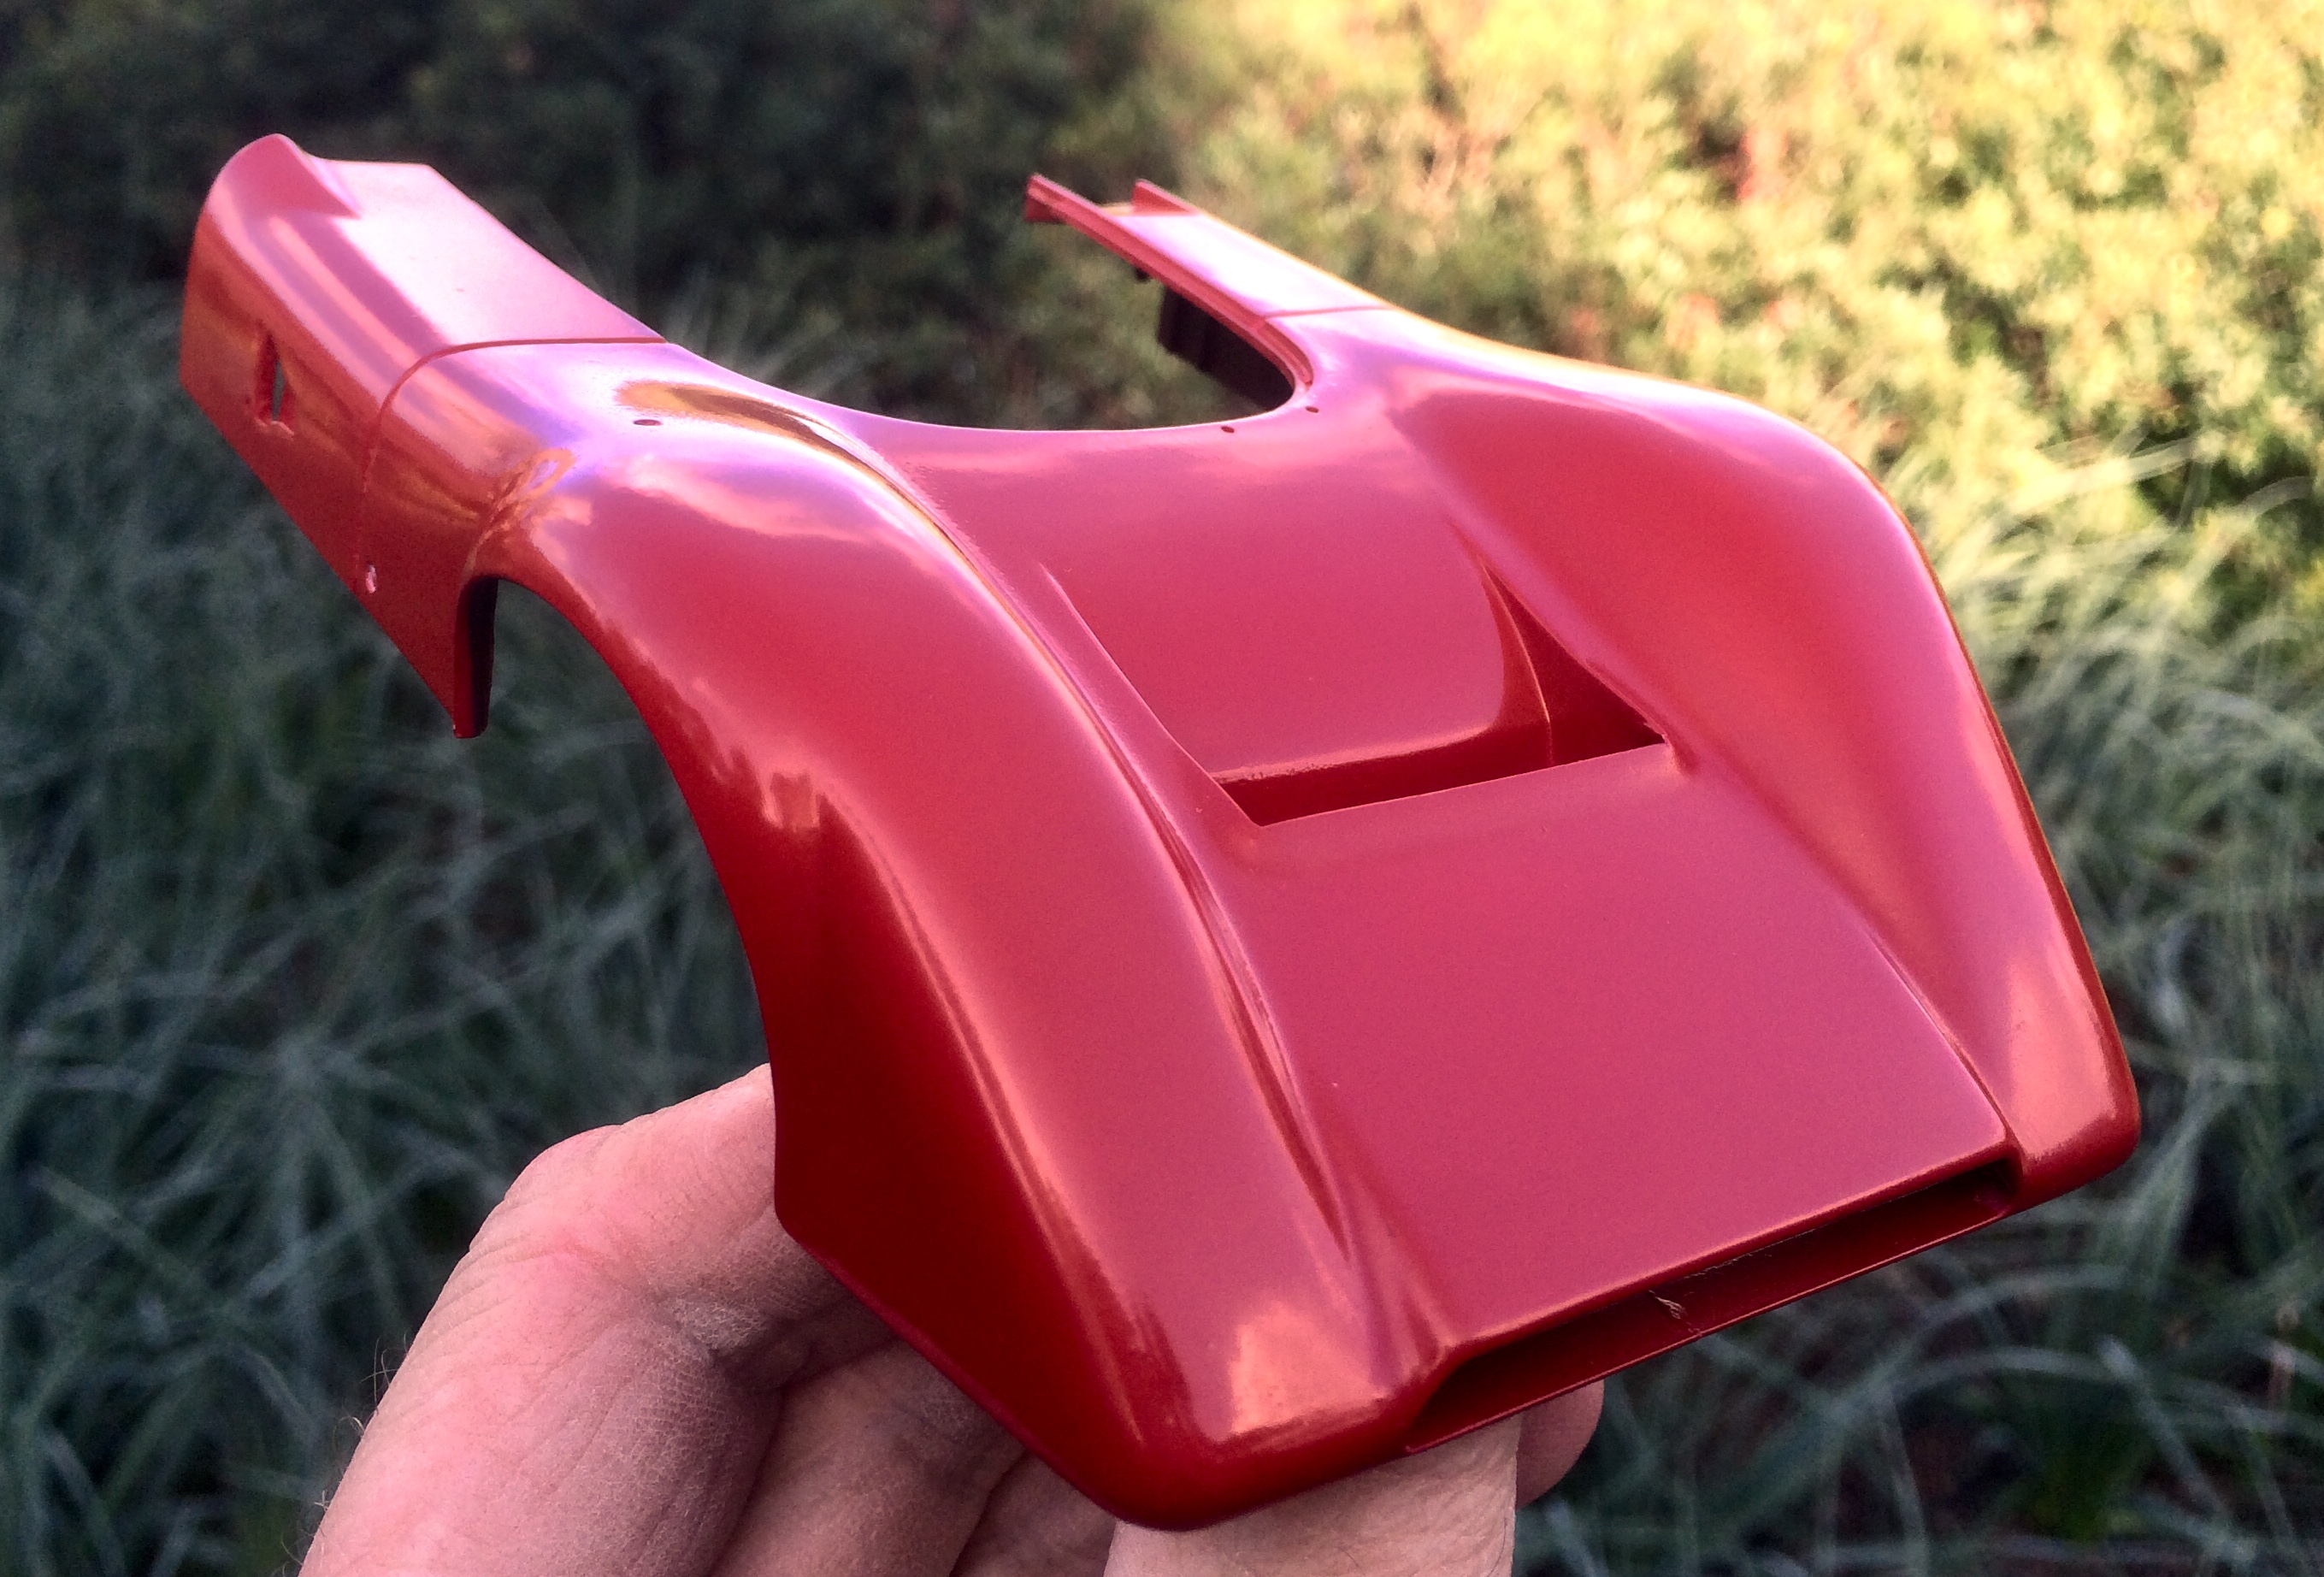
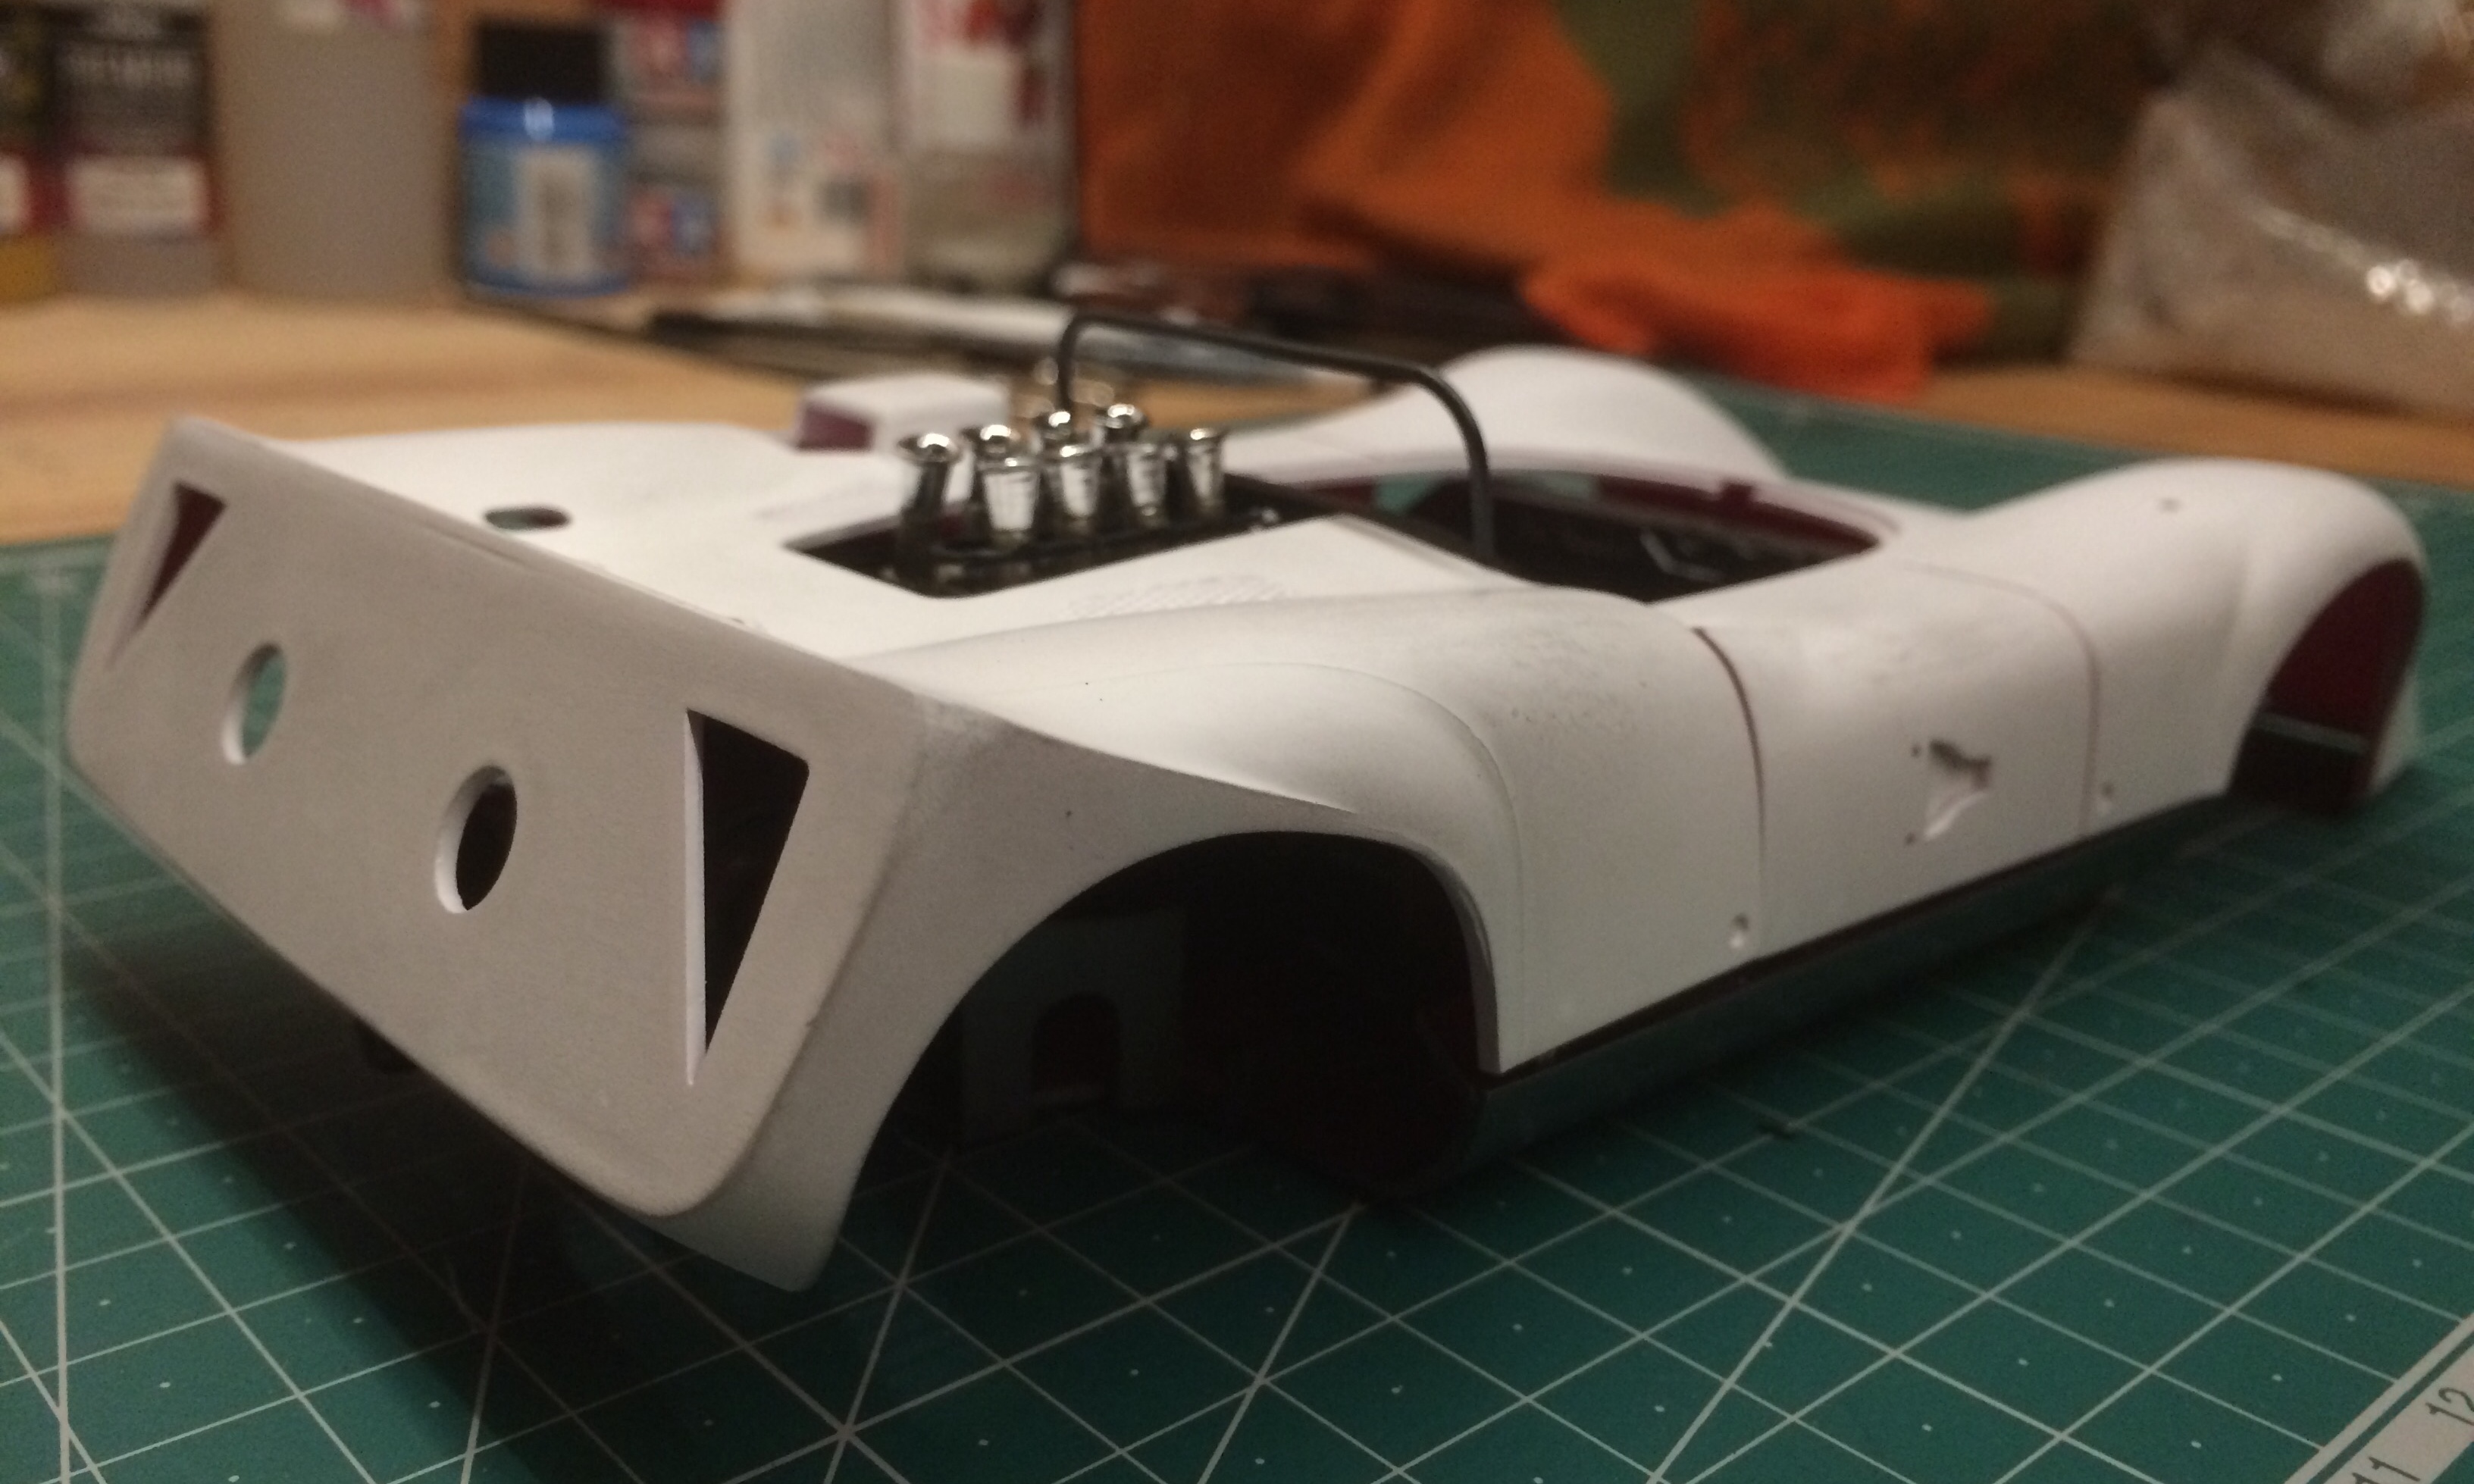
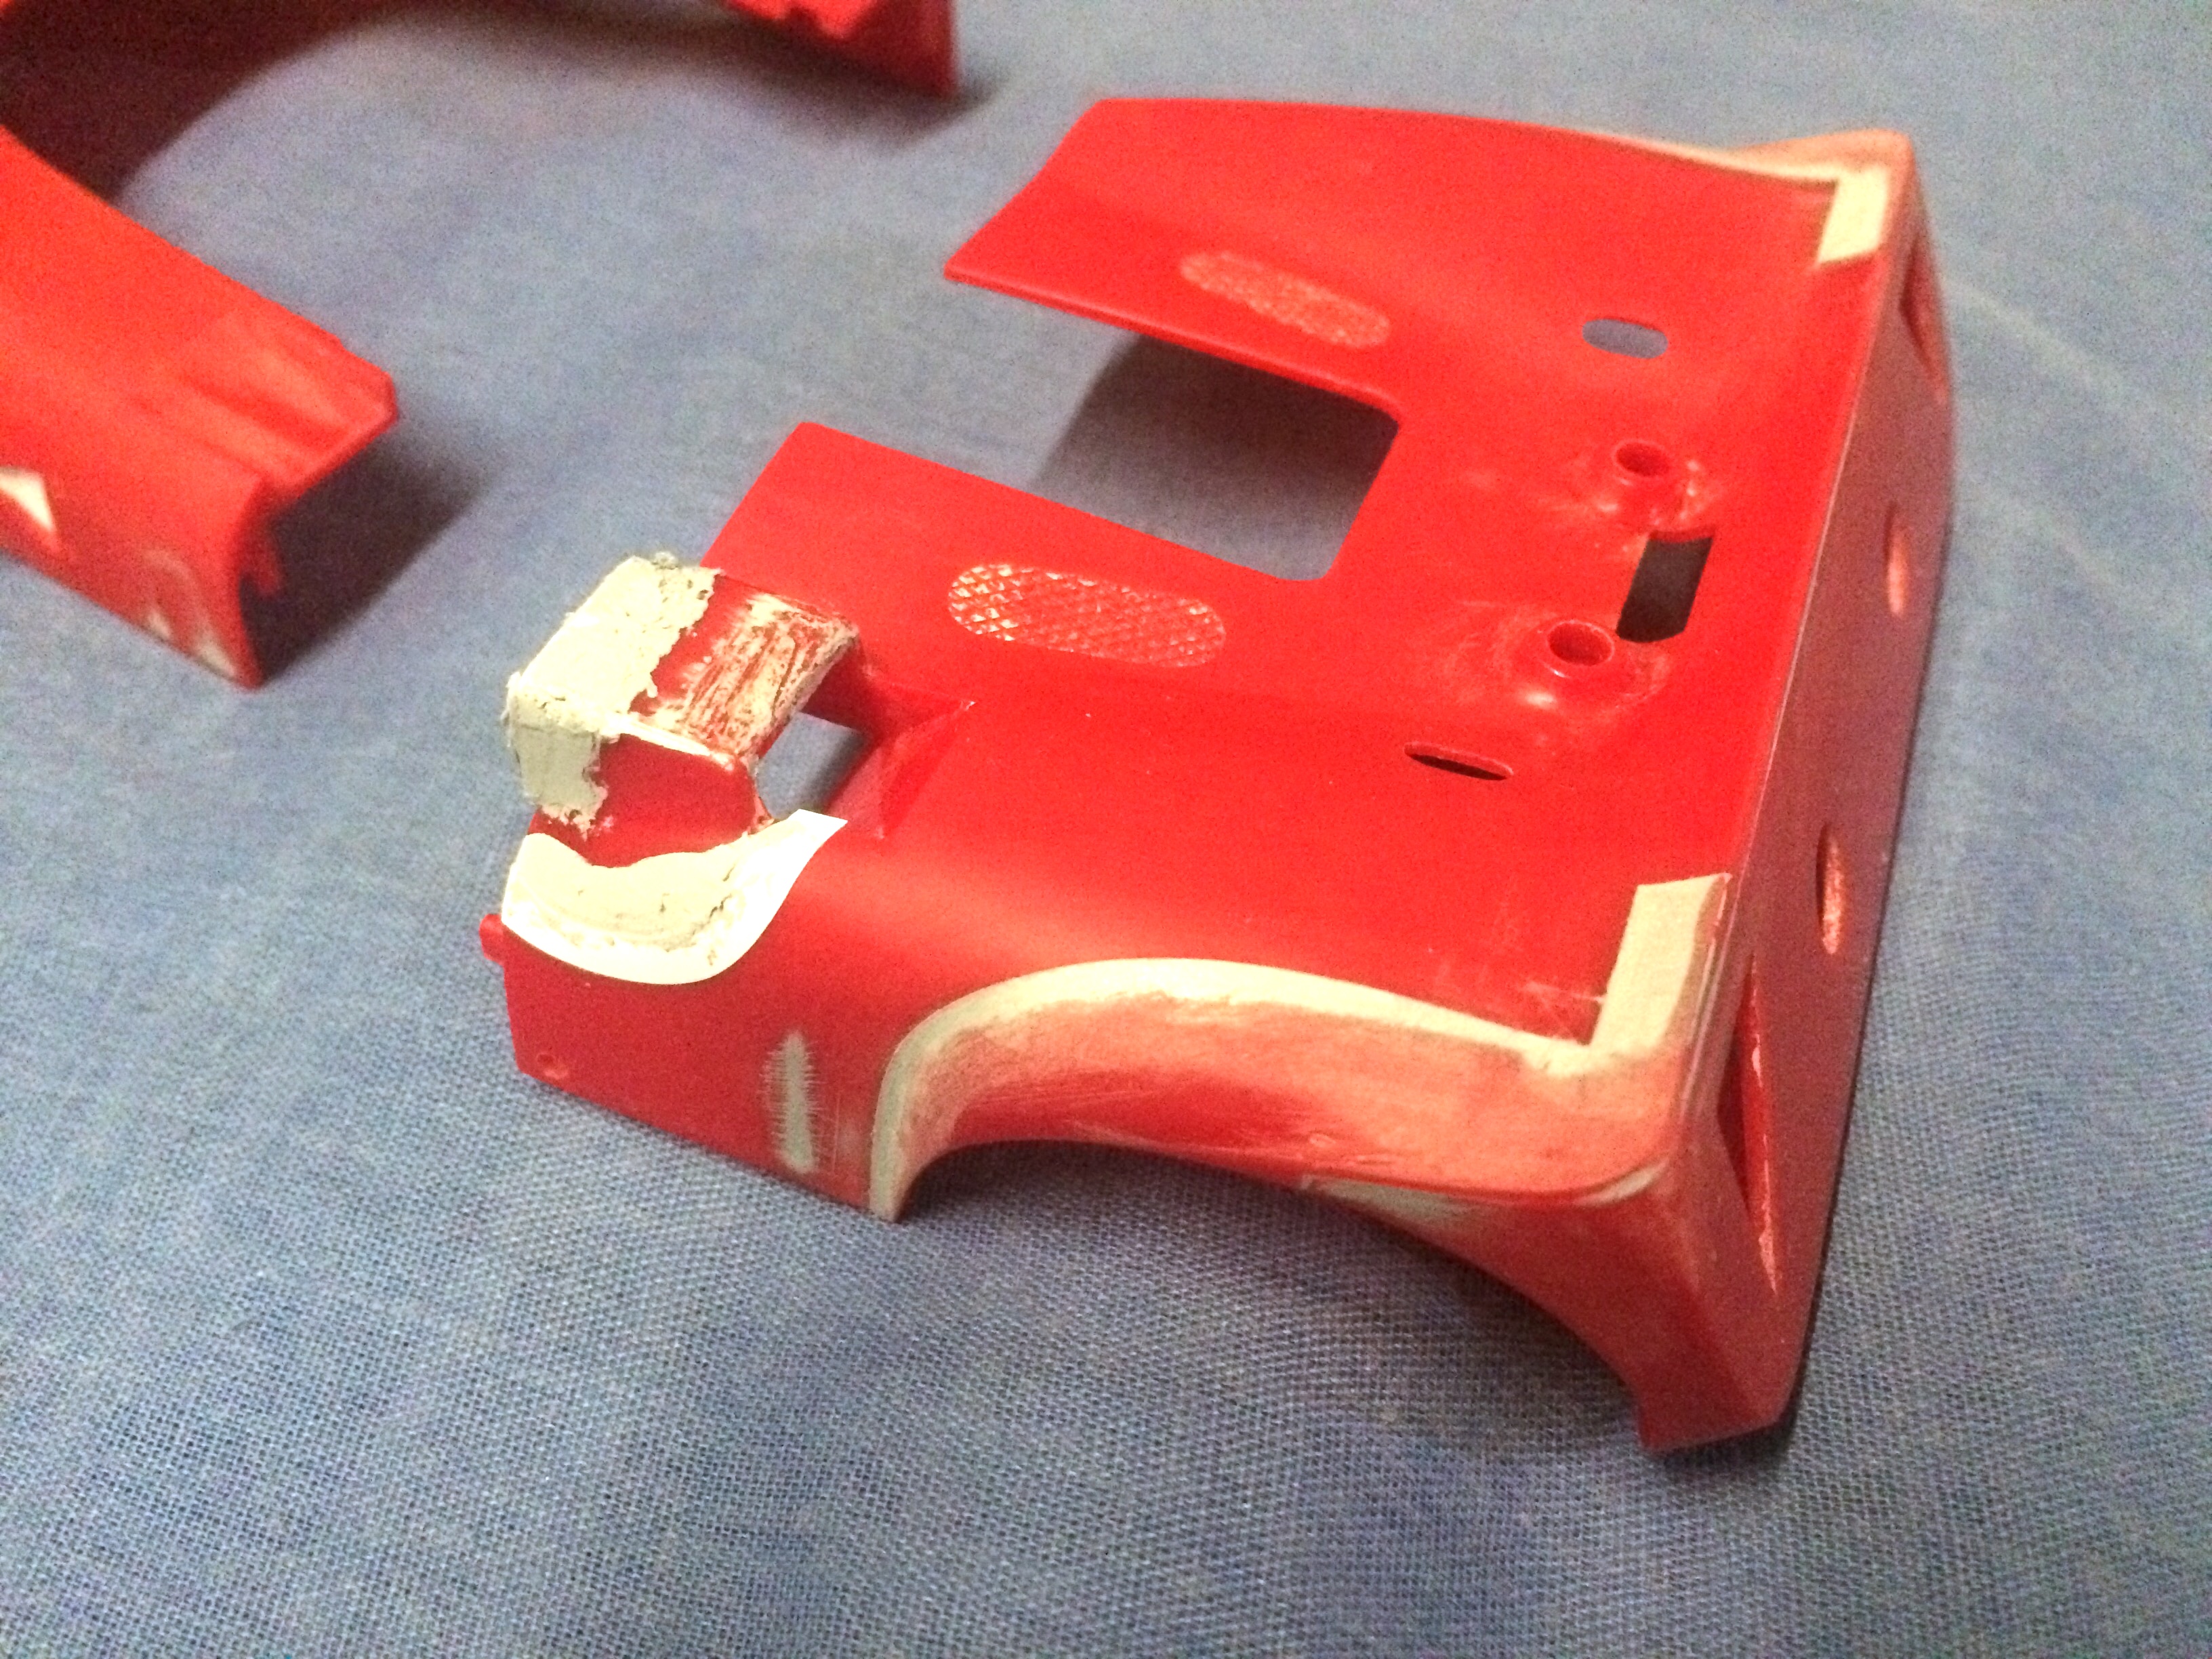
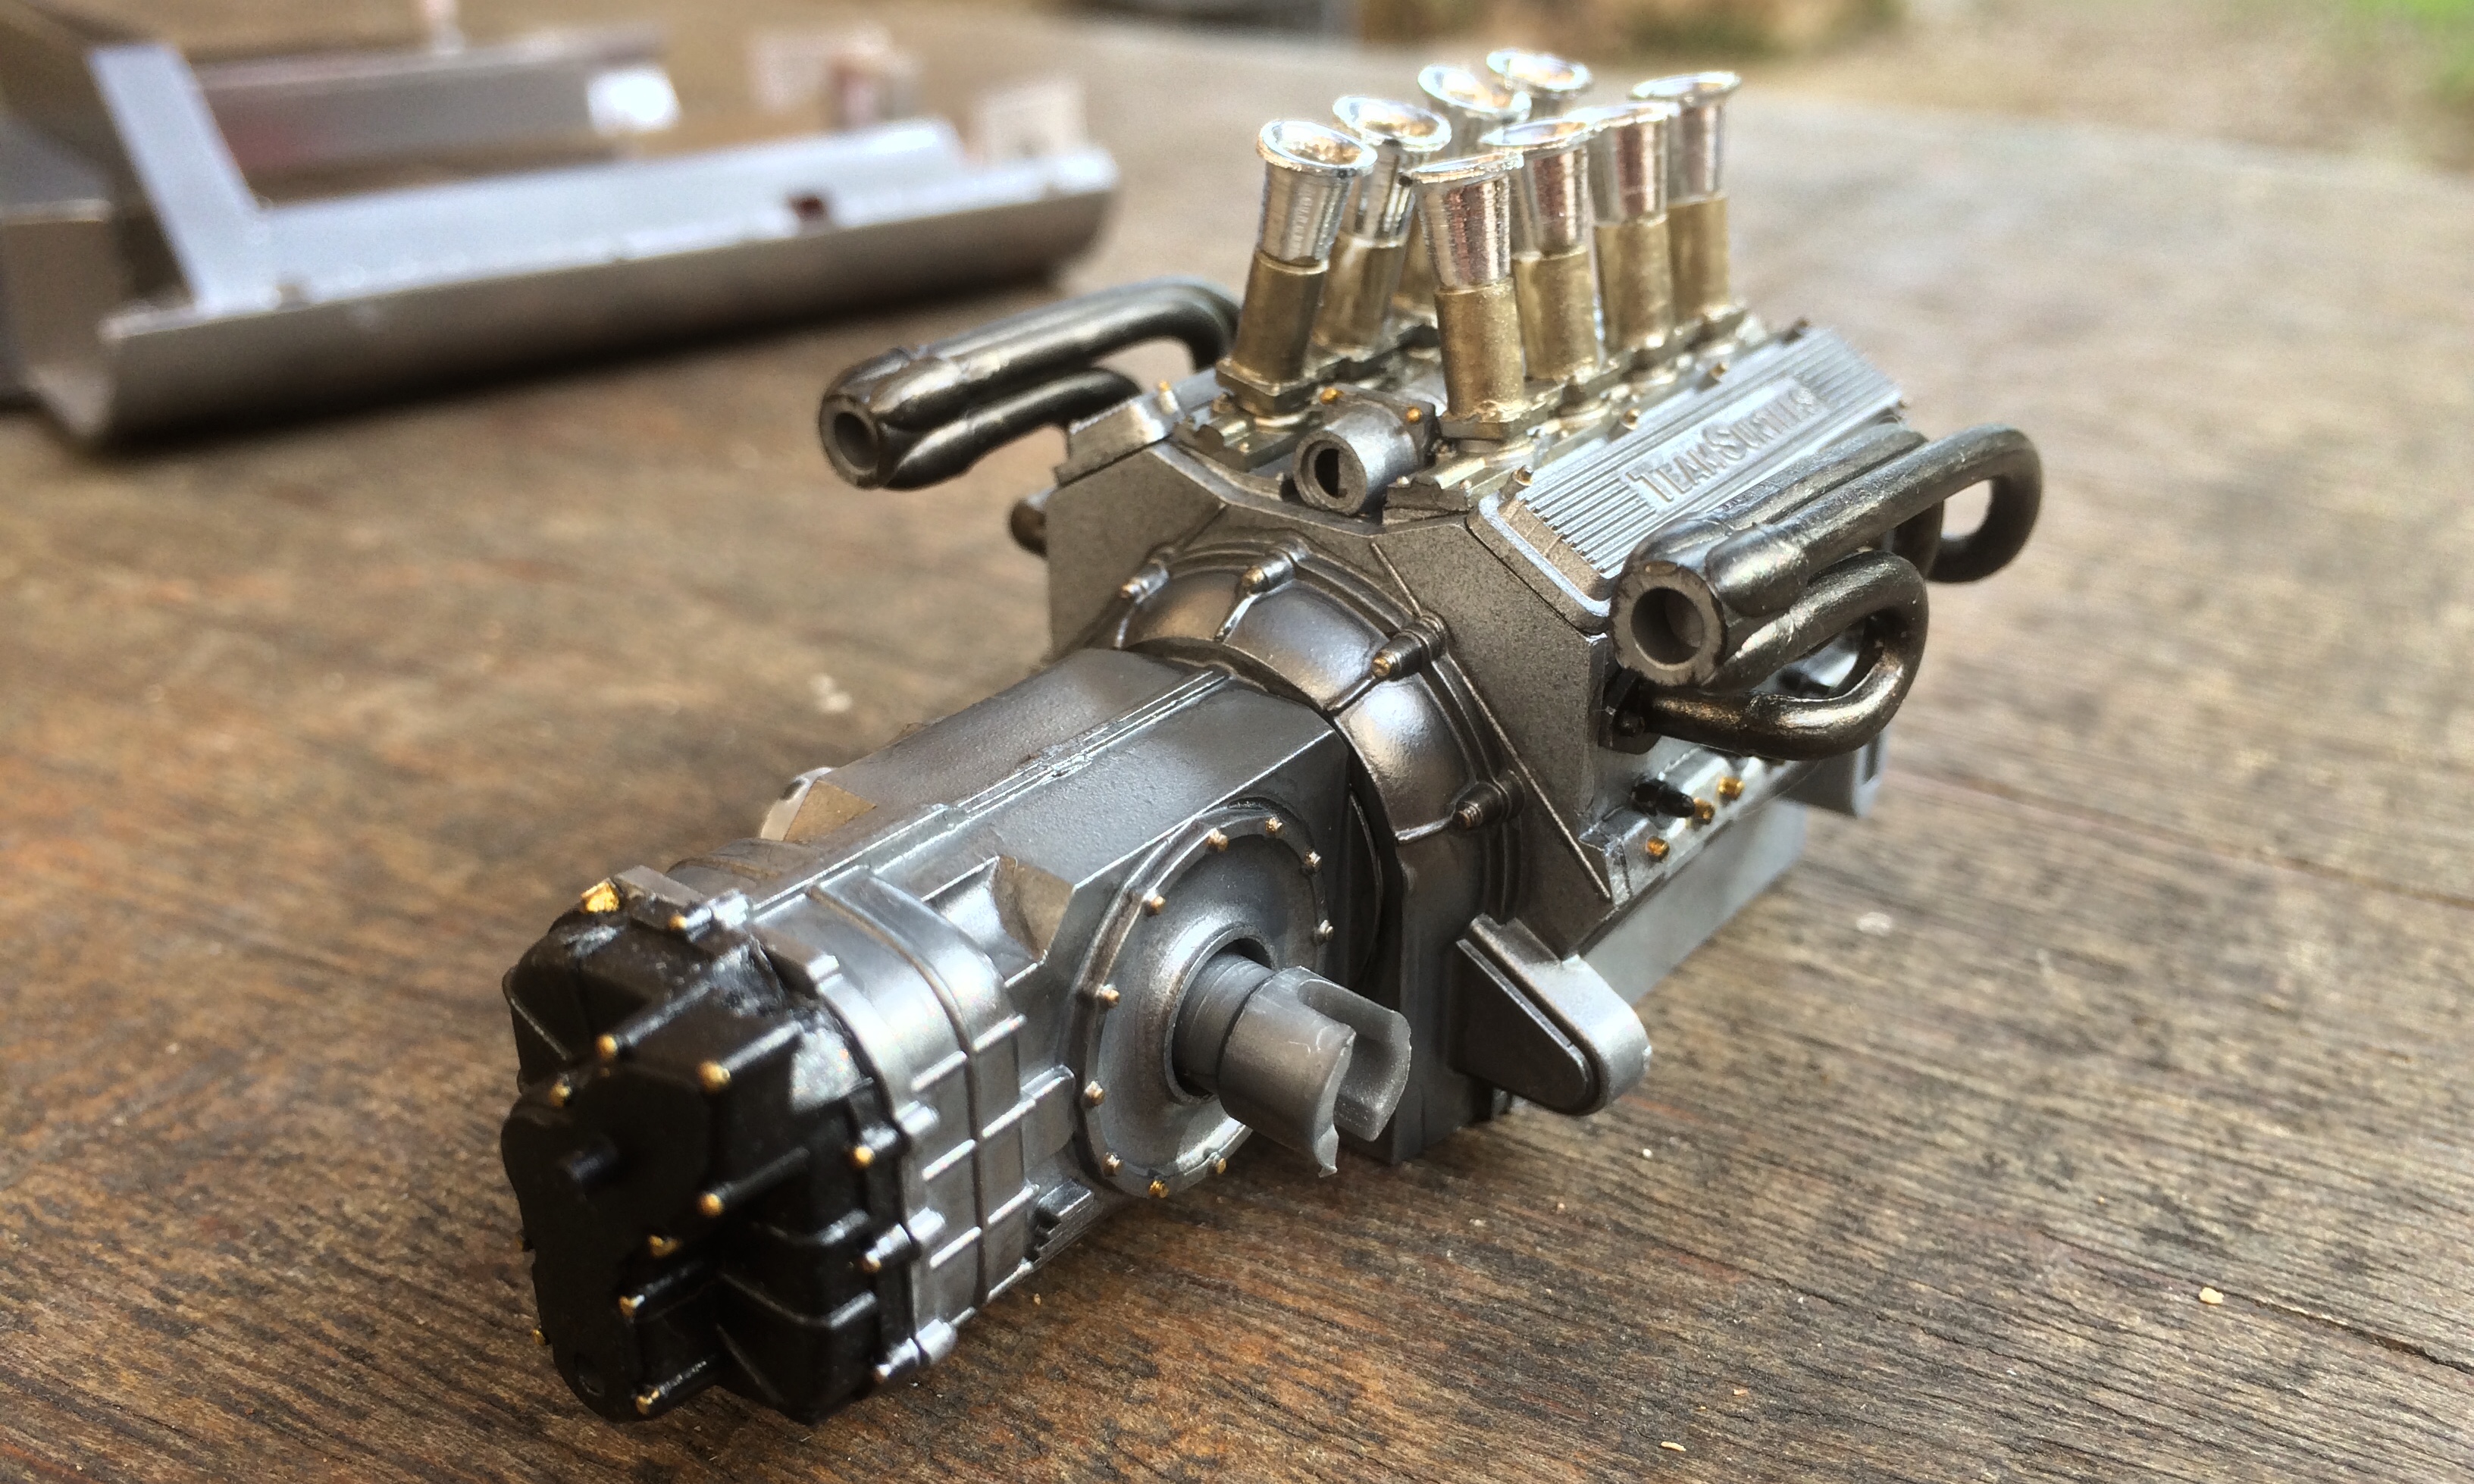
It is a curious model. Apparently motorised models were all the rage in Japan in the late 60’s and early 70’s, precursors to the radio controlled models they are also famous for. This was originally in 1970 one such model: high detail but compromised for motorised running. it has a basic funcional rear suspension so the detail suffers plenty. The front end is also designed to be steerable, but without the correct (fragile if motorised) details. the detailed motor and gearbox originally (1970 version) hid an electric motor and brass gears, the gearbox end plate moulding actually retains two noticeable holes, one supposes for two power cables perhaps? Since filled with putty.... the undercarriage also sports two doors for AA batteries. Therefore this 1995 re-release marks the year ‘1970’ on the parts trees, though the kit lacks the original’s blister packs with the mechanised parts. I also dis-repected the assembly order of the chassis to allow for filling and painting of some unwanted join lines! Added are more pictures of the build, in no particular order: -Added body detail and faults filled -Test fitting before glueing the engine to the chassis -Added engine details, paint splodges etc -Body in Vallejo Premium red.. must now polish my novice airbrush skills out of that shell... looks worse in photo than in the flesh. **edit: at second glance, and compared to the respray photo, it looks terrible!
-
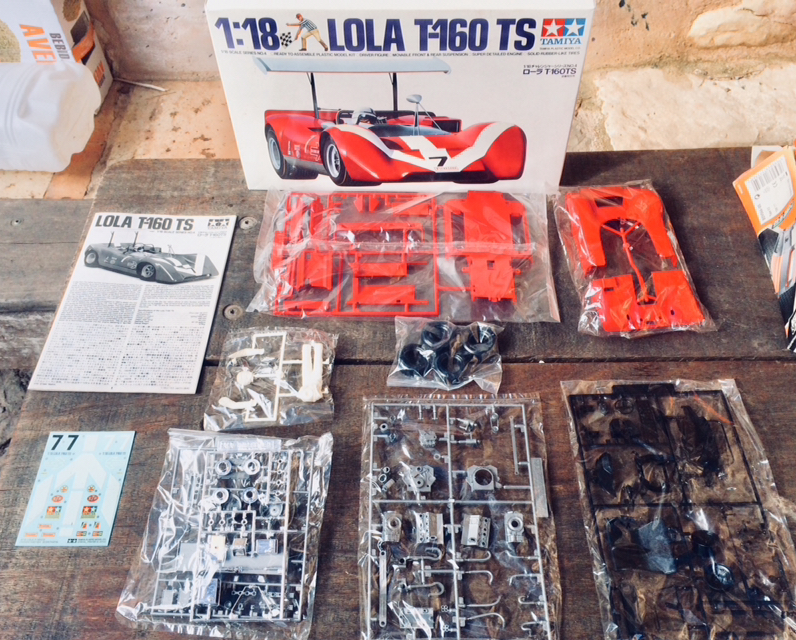
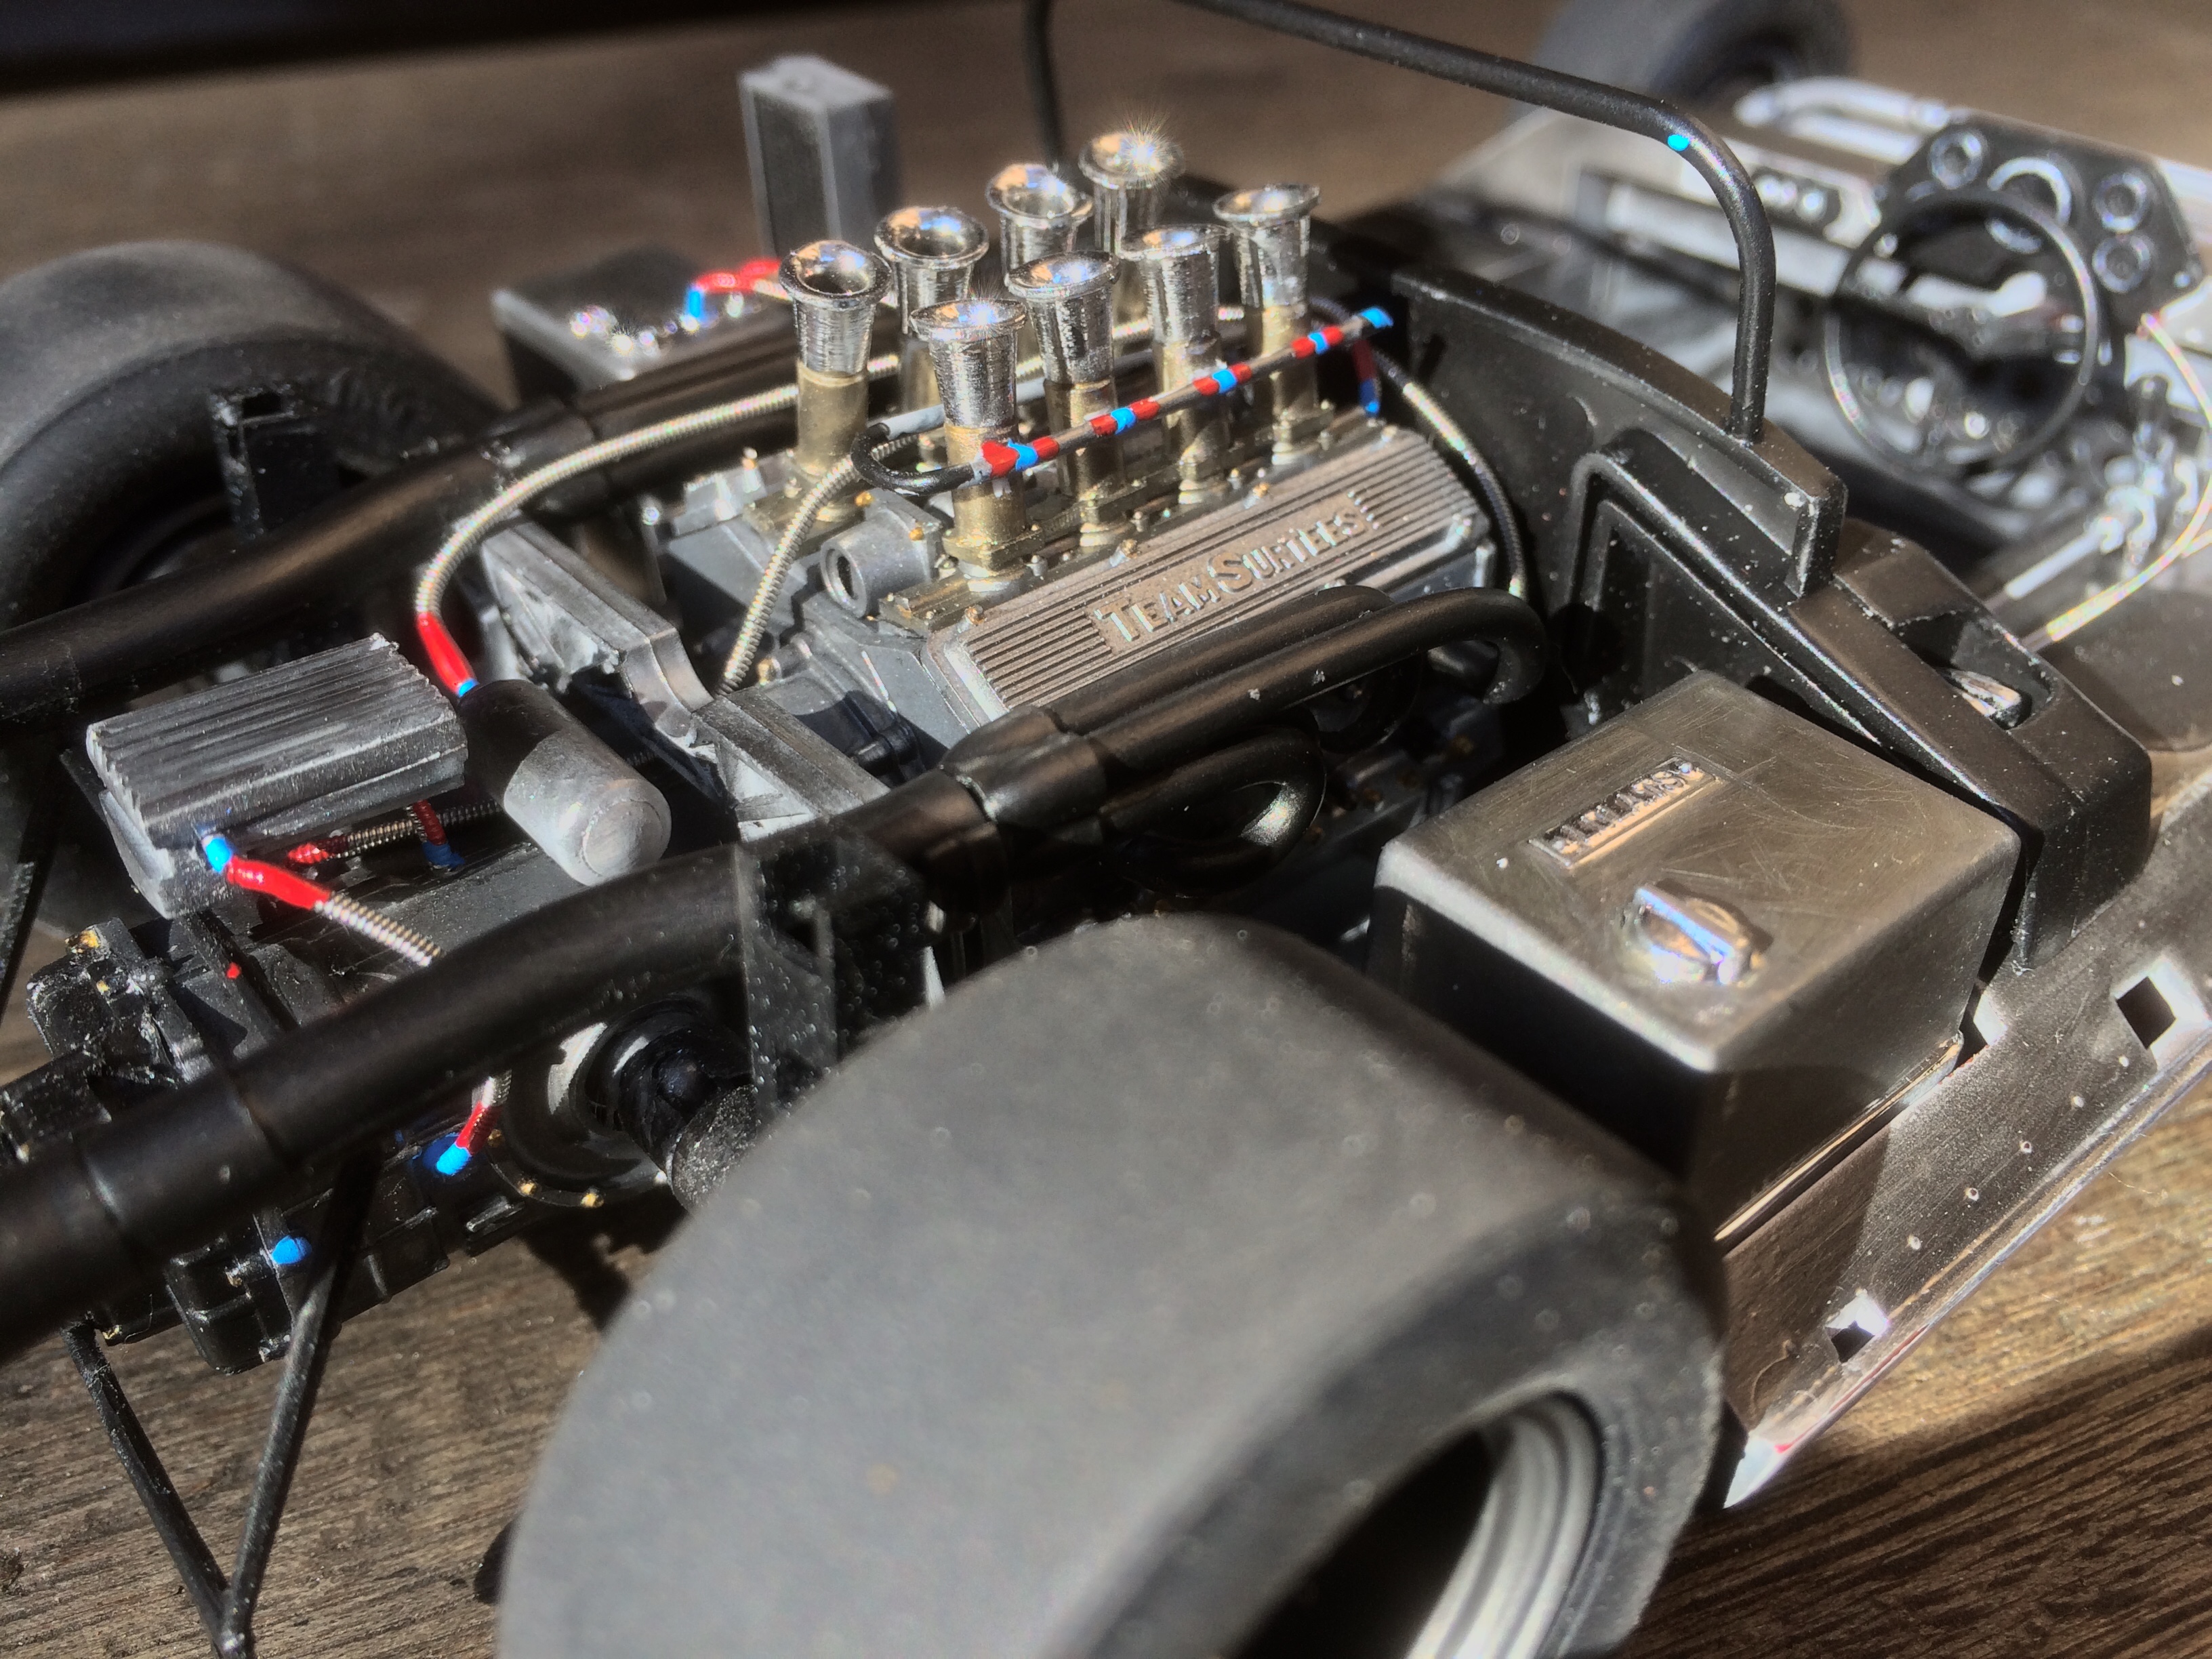
My very first car entry on the forum, my recently aquired Lola by Tamiya. This is an old kit; a 1995 re-release of a 1970 mold! This was one of Tamiya’s first plastic kits as far as I can tell- kit number 10004. This is going together fairly well, though out of the box it lacks a great many details to be truly authentic. I set about grabbing as much reference material as possible, and have thereby modified or scratch built a number of parts. I have added considerable body detail- NACA ducts, body pin holes, rear wheel arch fairings and the like. Underneath, though reasonably detailed, I have given the main chassis some metalizer finish (from C1), added some roughly accurate front suspension (other than the geometry which is off due to the models own geometry), plenty of braided hosing courtesy of some guitar strings which are not strictly scale braid, but they due look the part and adapt very well to model making. I have completely ignored Tamiya’s very basic paint references in favour of the compiled reference photos, airbrushing or brush painting where applicable. The sticky-shiny ‘Rubber-like’ tyres were 2000 grit sanded on their rolling face to texture them a little and remove the seam, and a simple rubbing of the walls with my rough index finger took away the ‘brillo’, -I prefer them to look like they have at least rolled into the paddock. The body parts are presently drying after two dust and two wet coats with Vallejo Premium red, which unfortunately will require some light colour sanding all over. I hope there is enough paint... So far I am enjoying this model, spending odd hours here and there, and my first serious effort of pure scale modelling after a few years of radio control, and perhaps 25 years since my last plastic model was built.
-
Hi All After a few years of rediscovering RC car models (which are all on the shelf as static models one day to be run..) I have returned to scale modelling, a hobby I was deeply involved with as a lad (I now have my own growing lads). My first recent scale purchase is my old favourite Tamiya 1:24 Morris Cooper S, which is presently being built in dribs and drabs, tweed grey paint curing as we speak... This is my mule, to practice detailing and paint finishes - I now have an airbrush which is a leap forward. Next up, an eBay cheapo; Tamiya 1:24 Cooper S Monte Carlo, no.177, LBL 6D, of which I must have built 5 or six as a teenager. Quite the obsession. I have just found a Tamiya 1:18 Lola 1968 T160 TS re-release (of 1995 vintage), and it looks like a chance bid on another one is going to be successful. There's nothing like repetition, eh? One of these fine Lolas will remain in its (least marked) box for the time being, meanwhile the other shall be ...slowly.... built in Team Surtees' red box art with a ton of added details and realistic finishes, much of which will be experimentation. I shall be trying some rubbing metalizer from C1 Models which looks promising for the bare aluminium chassis, some guitar strings for general hoses and some scratch built engine and suspension parts. Hopefully a few tutorials may spin off from the build. It looks like a beautiful model, with plenty of options for detailing and refining. There are some lovely and not so lovely builds on the internet, for reference. Tamiya kit number 10004, so its one of their very earliest plastic model kits, AFAIK. As it happens I was at my model supplier today, buying some polystyrene tubing and other accessories, and I accidently stumbled upon the one car I have not been able to find at a good price anywhere - Tamiya's 1:24 AUSTIN mini Cooper S! I can now make that Italian Job mini I have been planning for thirty years! But that is another story. I have been browsing some modeller sites, and I like what I see here, so here I am.