Evlwevl
-
Posts
37 -
Joined
-
Last visited
Content Type
Profiles
Forums
Events
Gallery
Everything posted by Evlwevl
-
Man I love vintage funny cars, nice work!
-
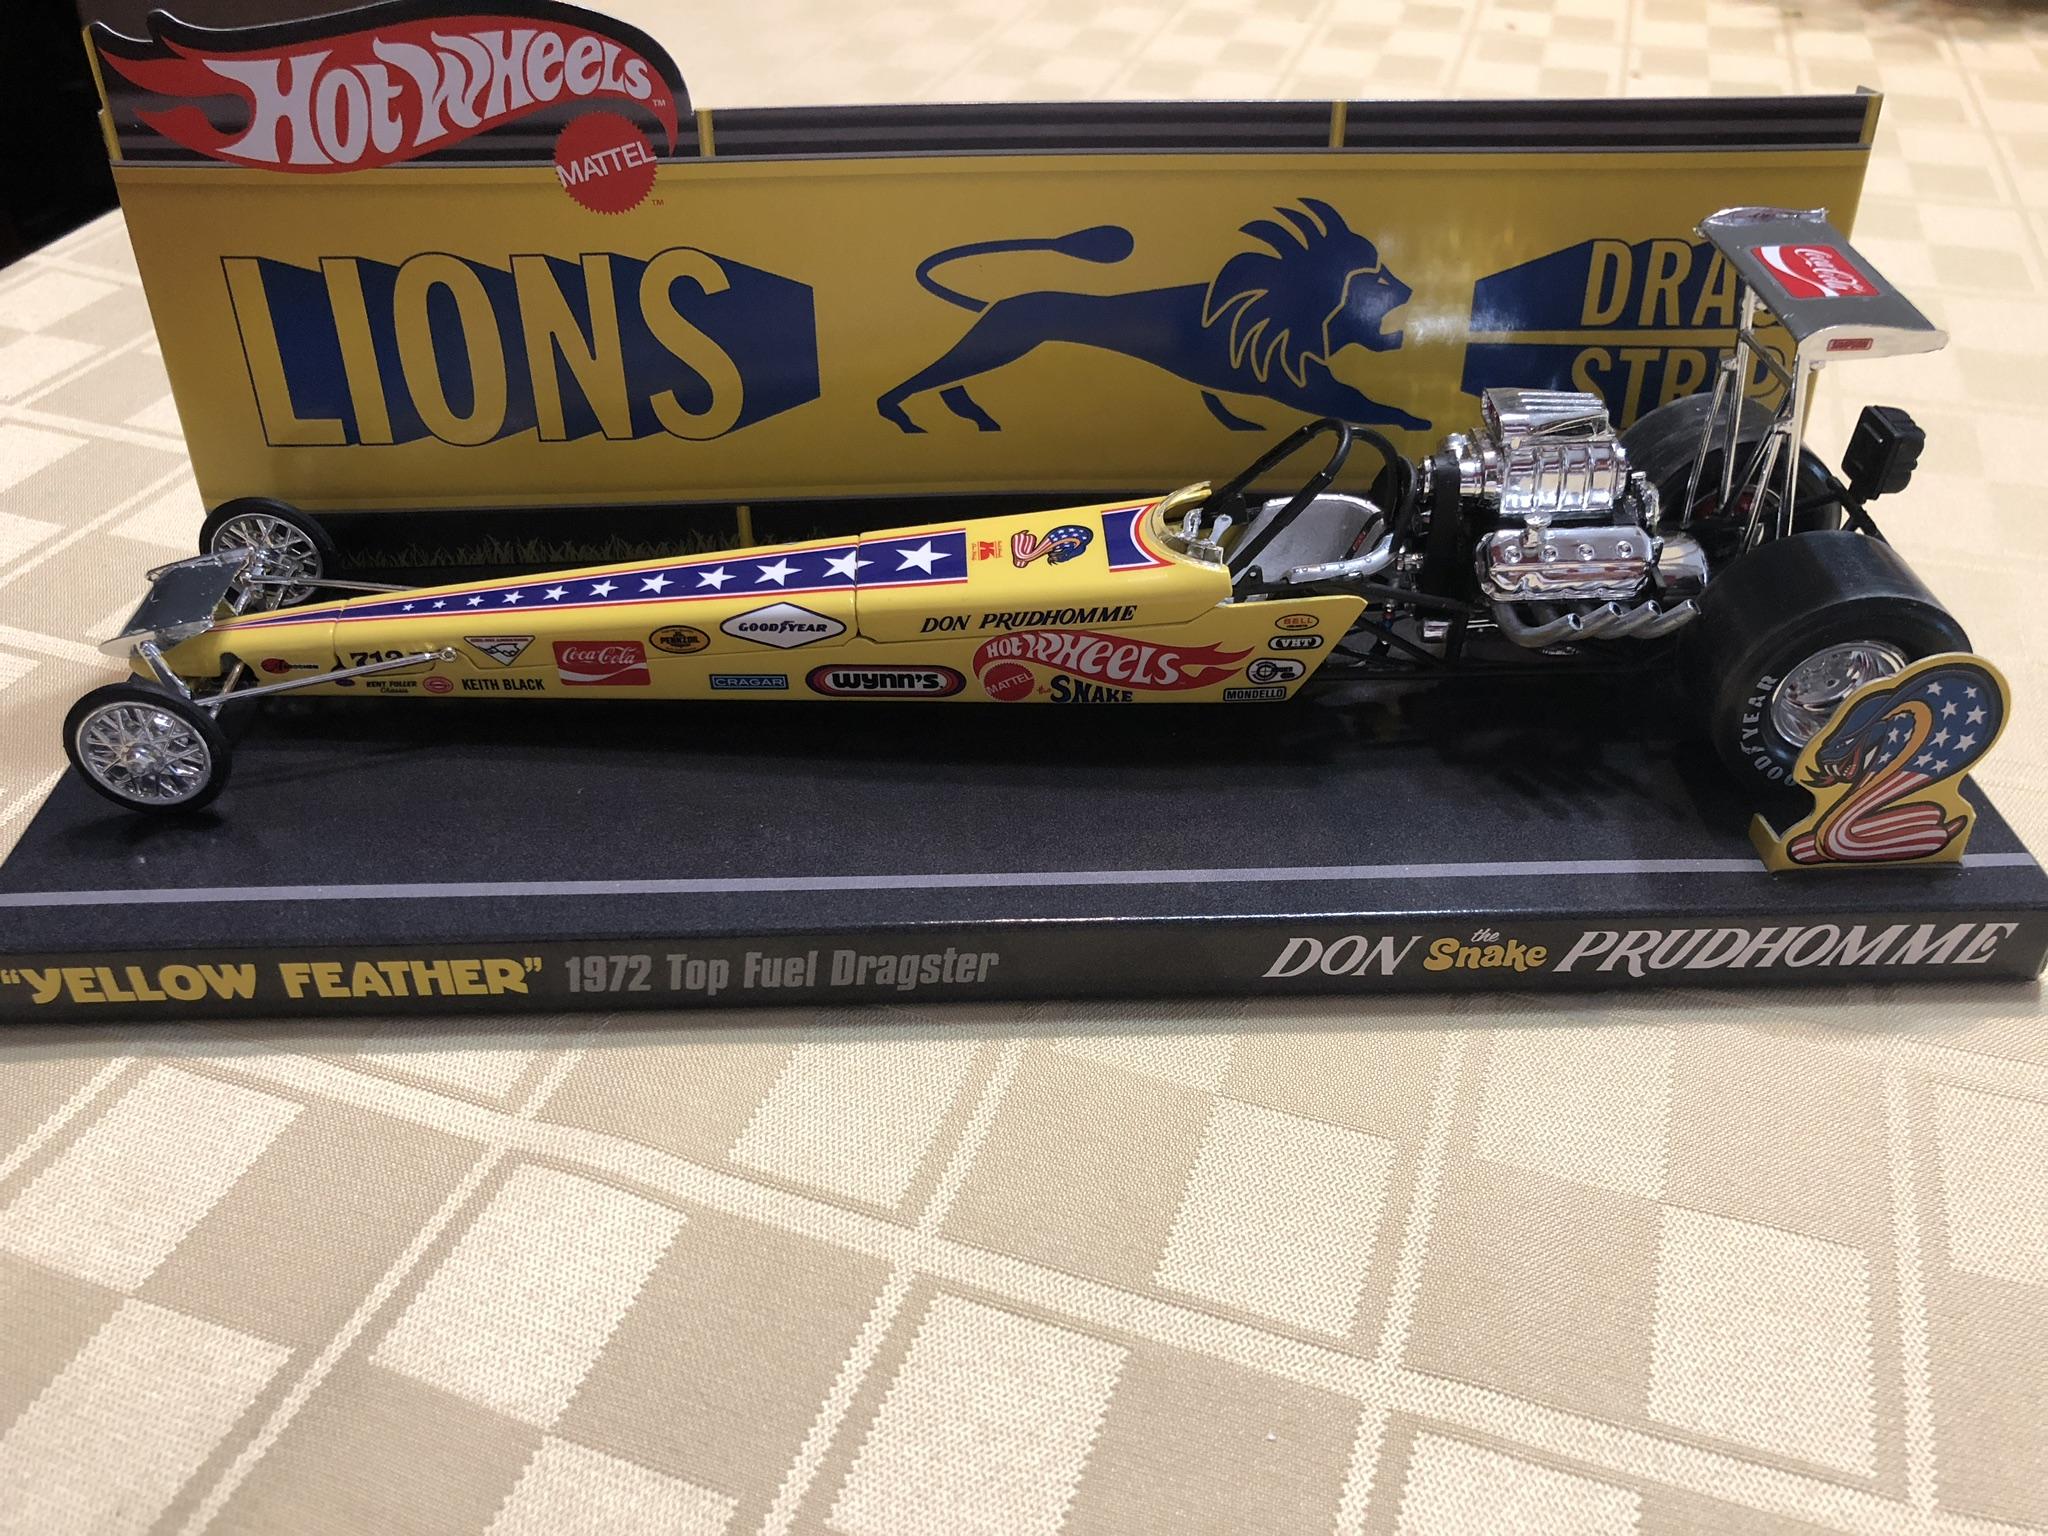
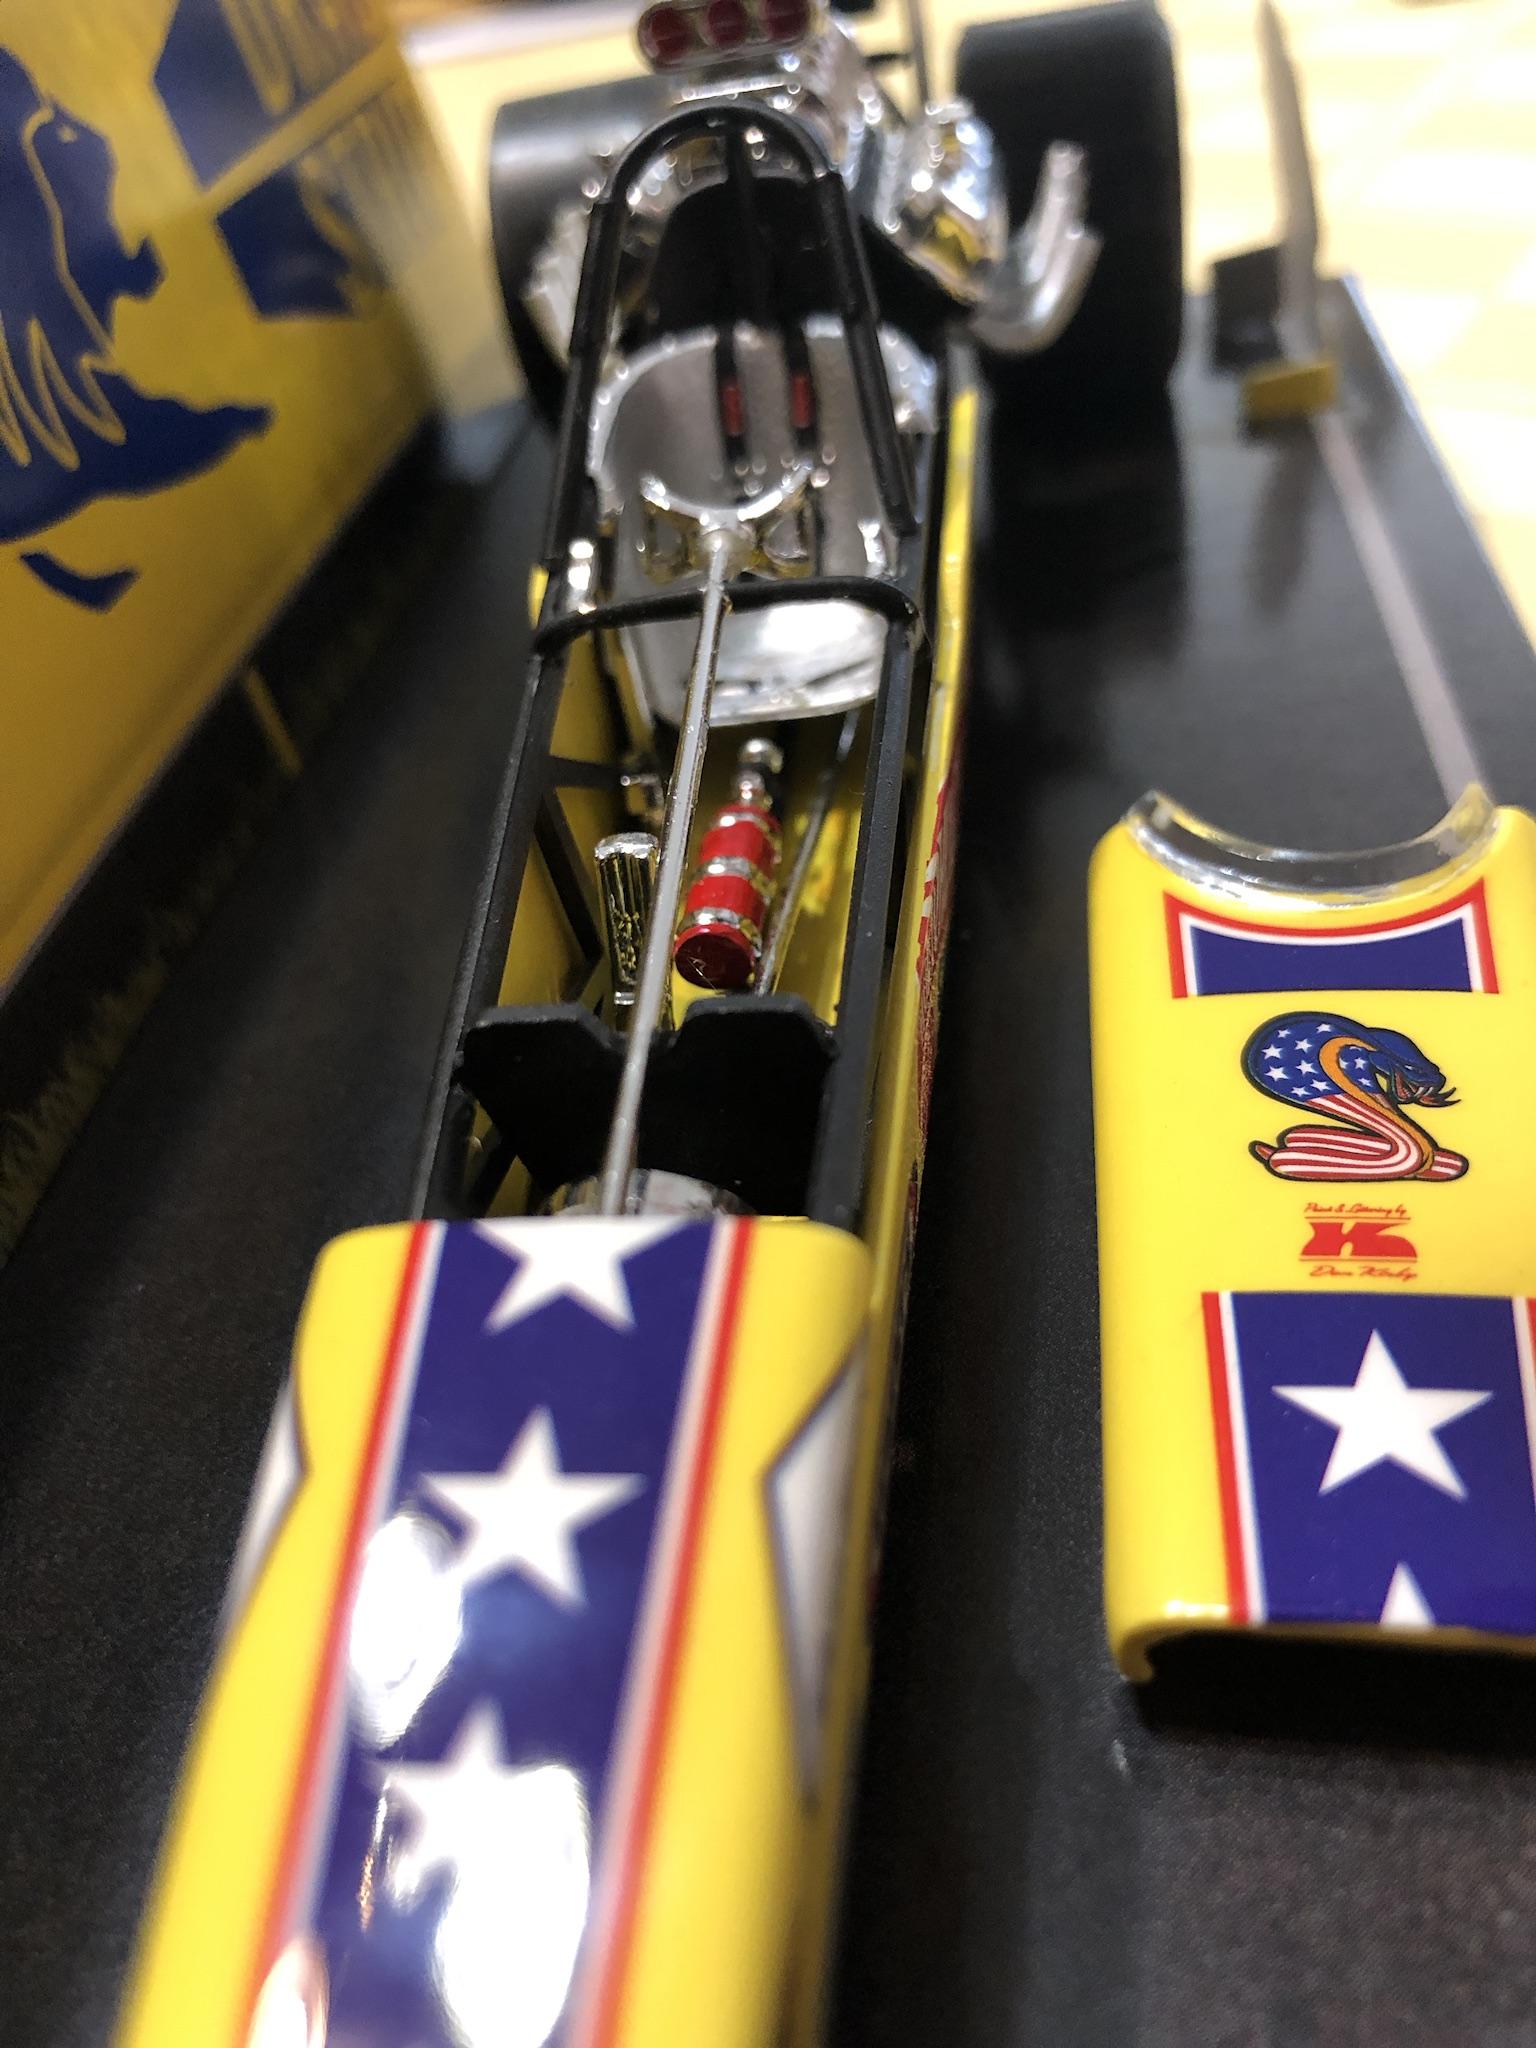
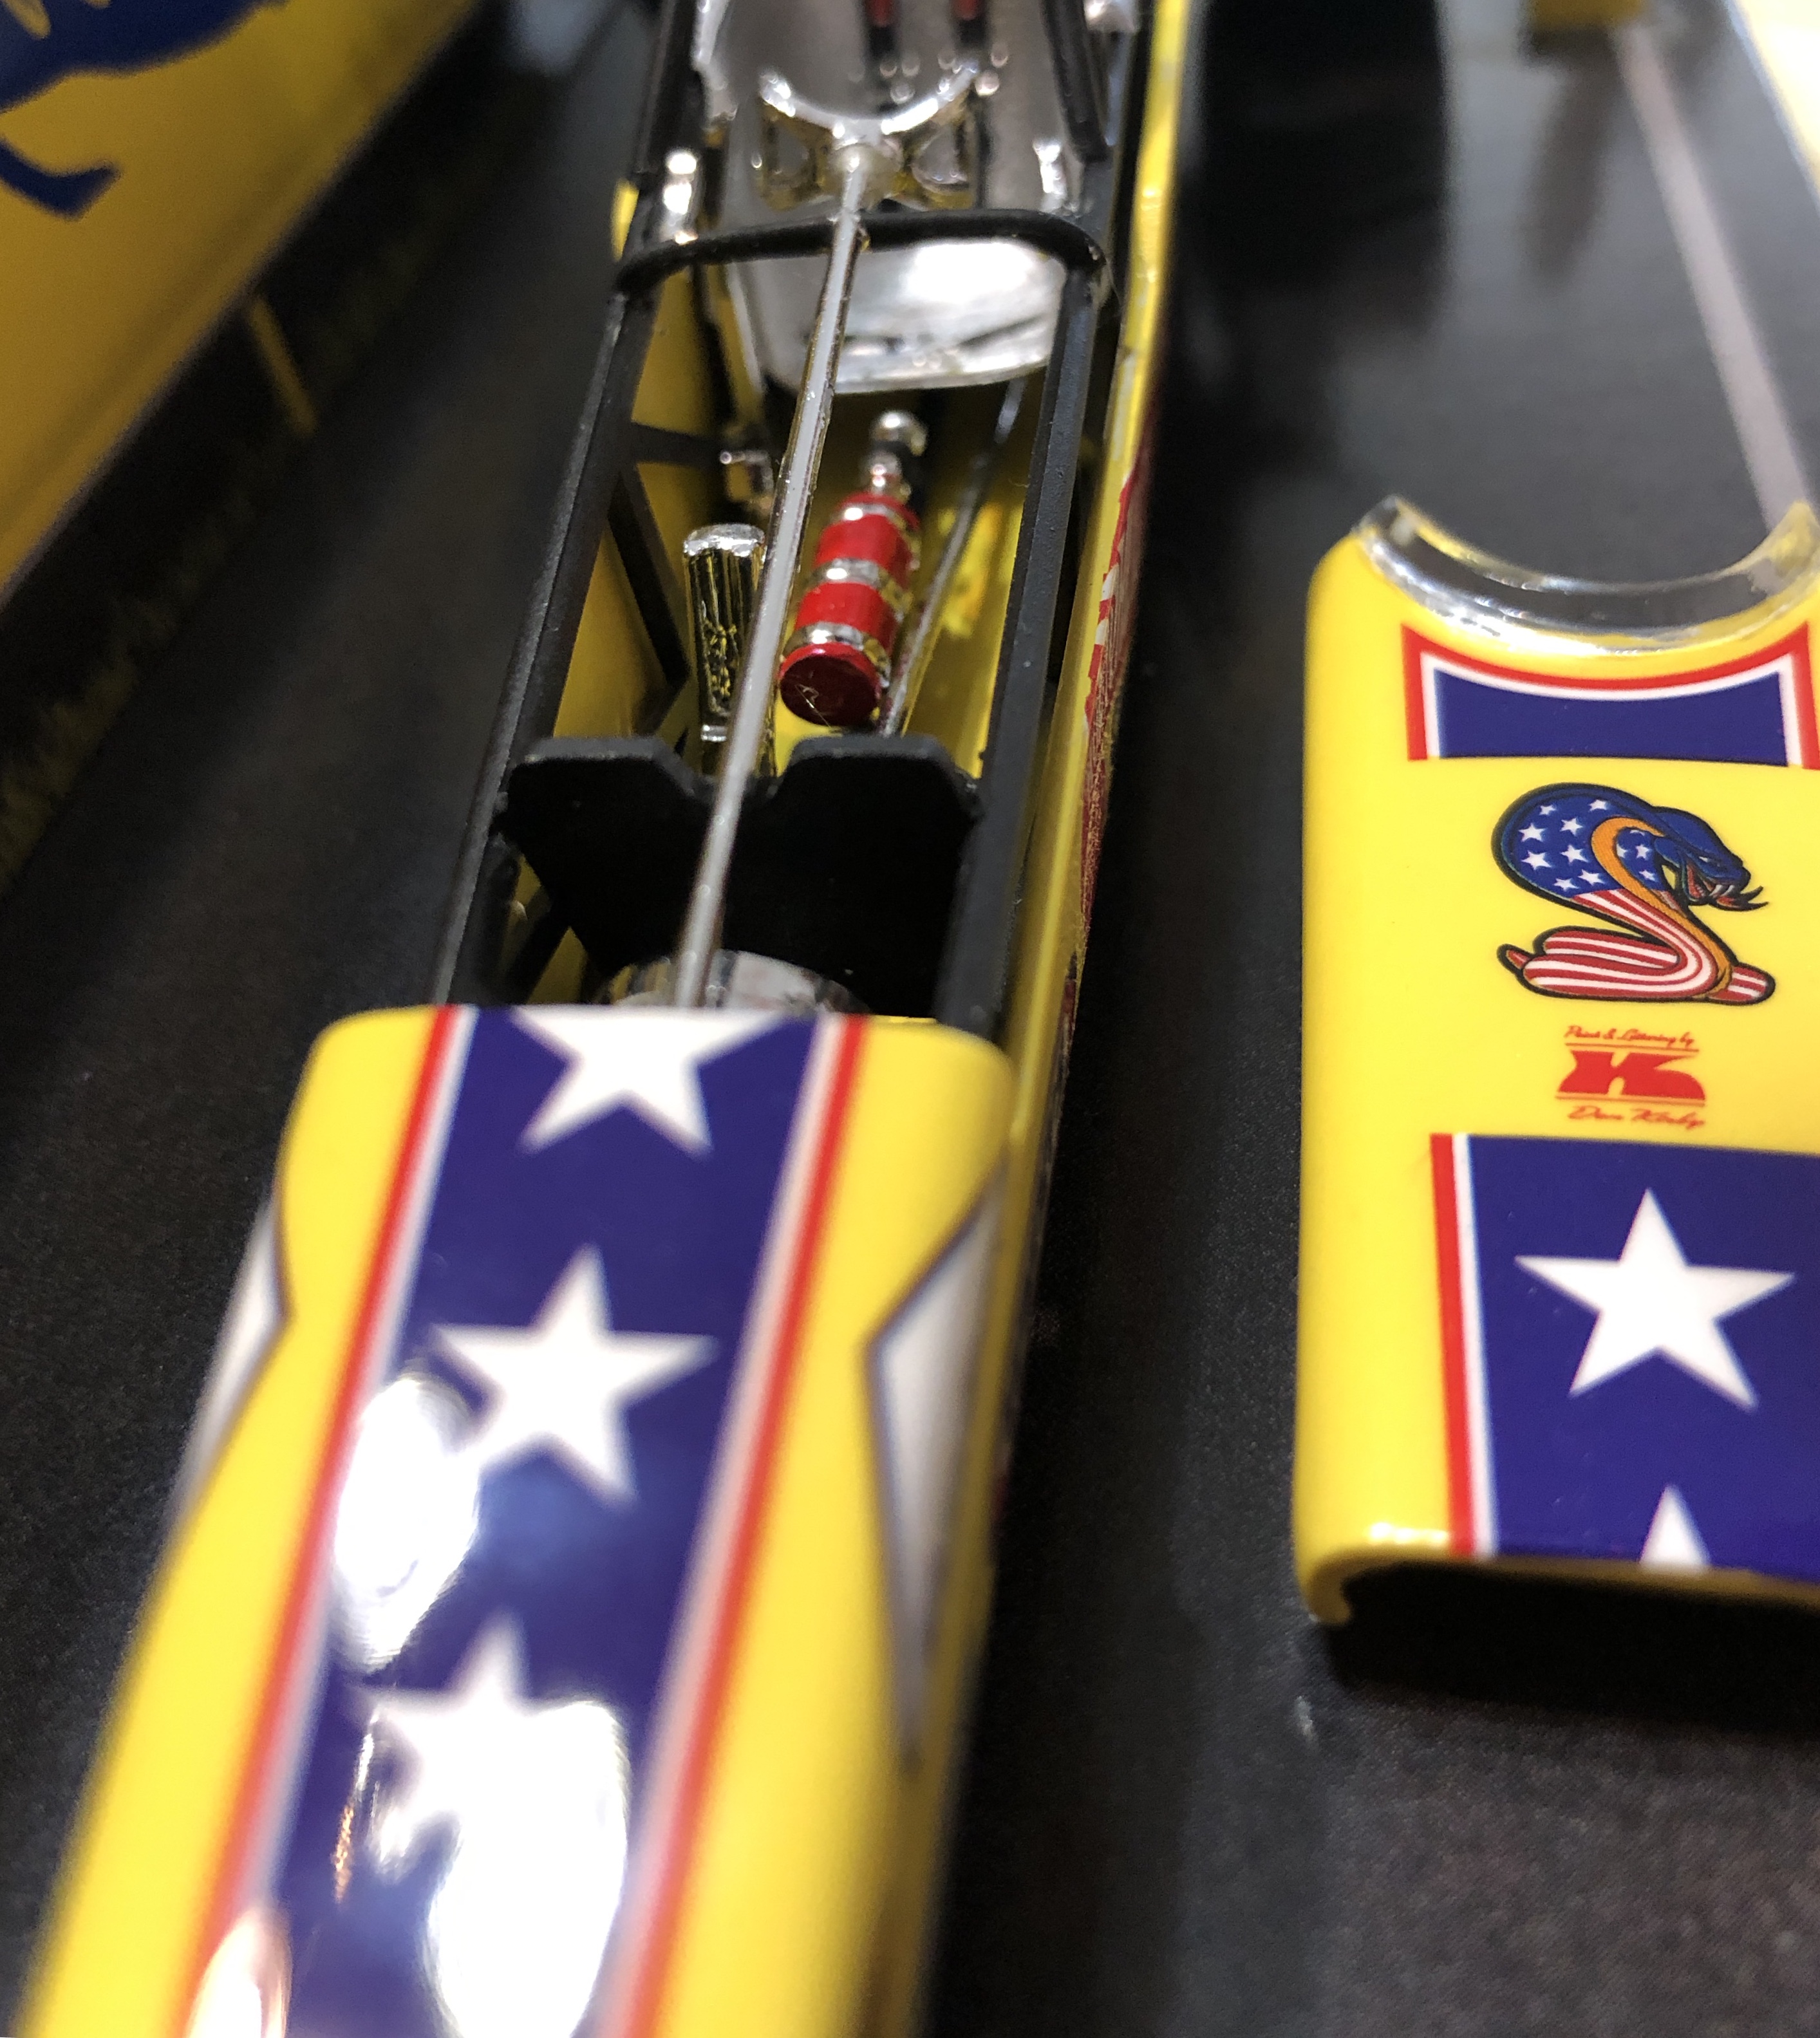
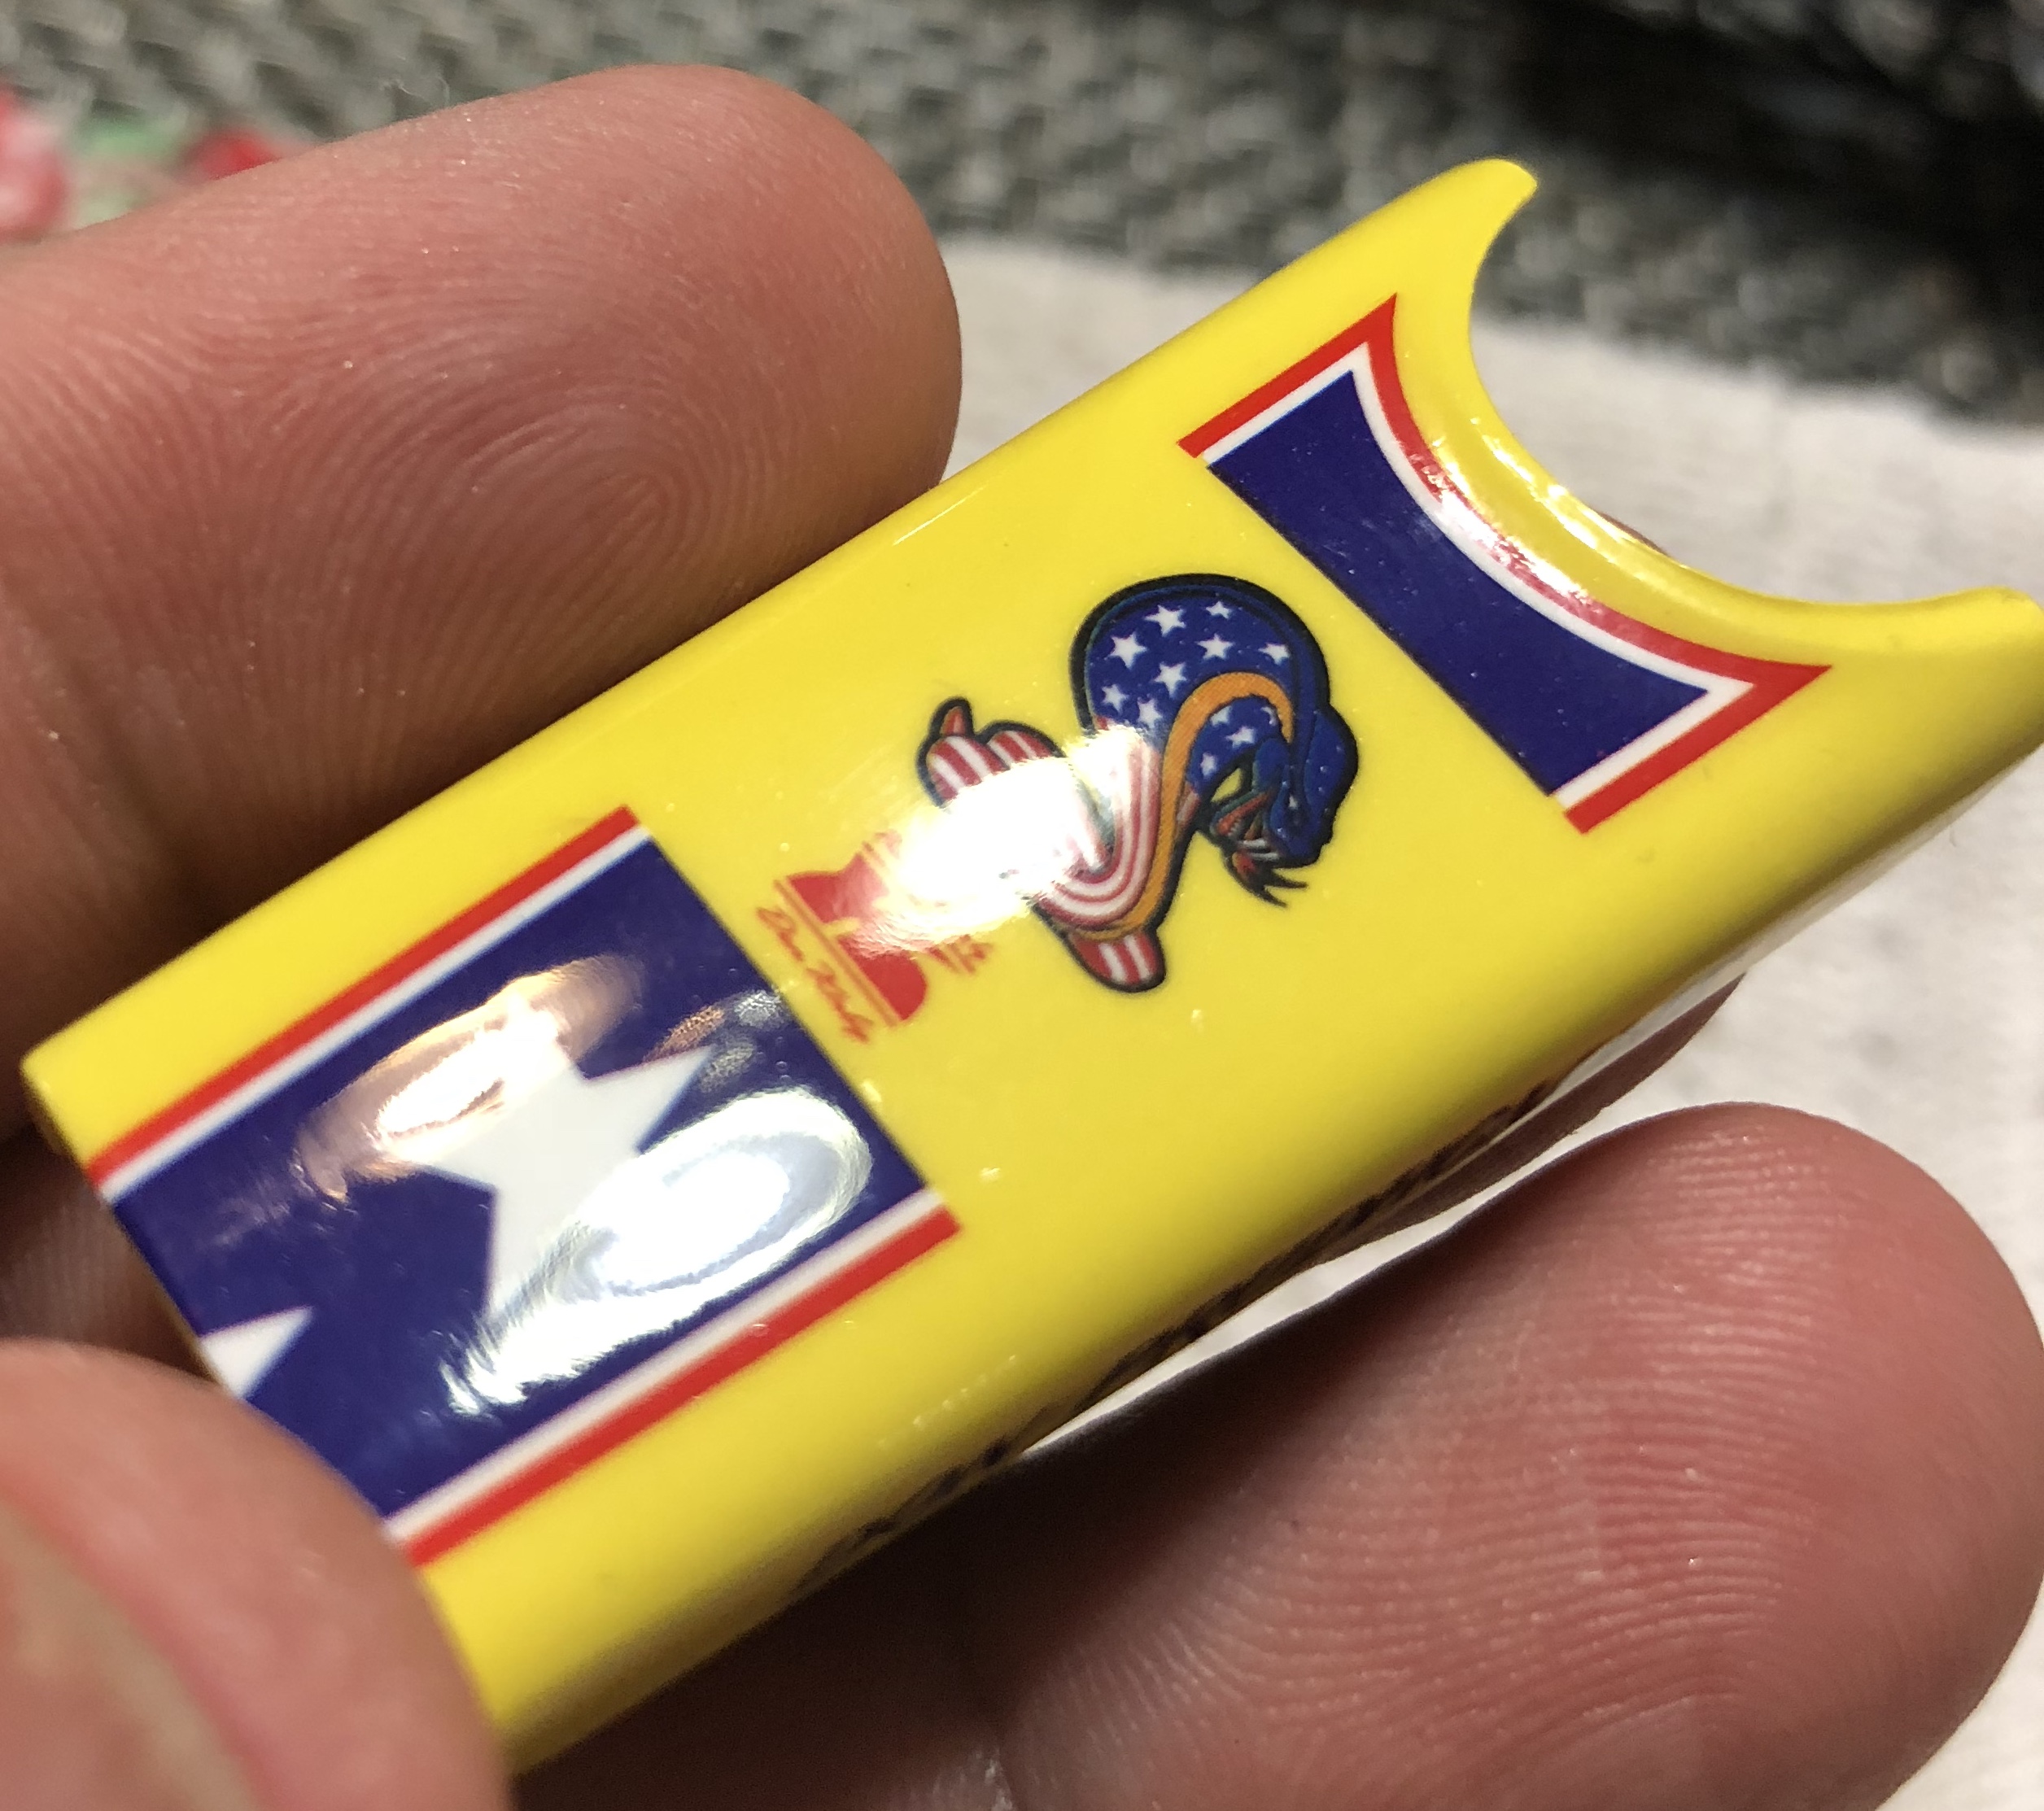
Don Prudhomme “Yellow Feather” dragster
Evlwevl replied to Evlwevl's topic in WIP: Drag Racing Models
The display cardboard cutout is included. Thankyou all -
This is my first dragster build (box stock). Painted with rattle can model Master laquer and High gloss clear, then hand polished. I will eventually build the Tom Mc Ewen version and display them together

-
I built a tank
Evlwevl replied to Chris Smith's topic in WIP: All The Rest: Motorcycles, Aviation, Military, Sci-Fi, Figures
Very nice, building tanks is much more relaxing to me than cars since I can concentrate on the build and then paint later. -
I was almost finished with my build and then to my horror after using a flash photo realized how many unpainted spots on my figures were left. I definitely need a stronger lamp and better magnification. These old eyes aren’t what they used to be .
-
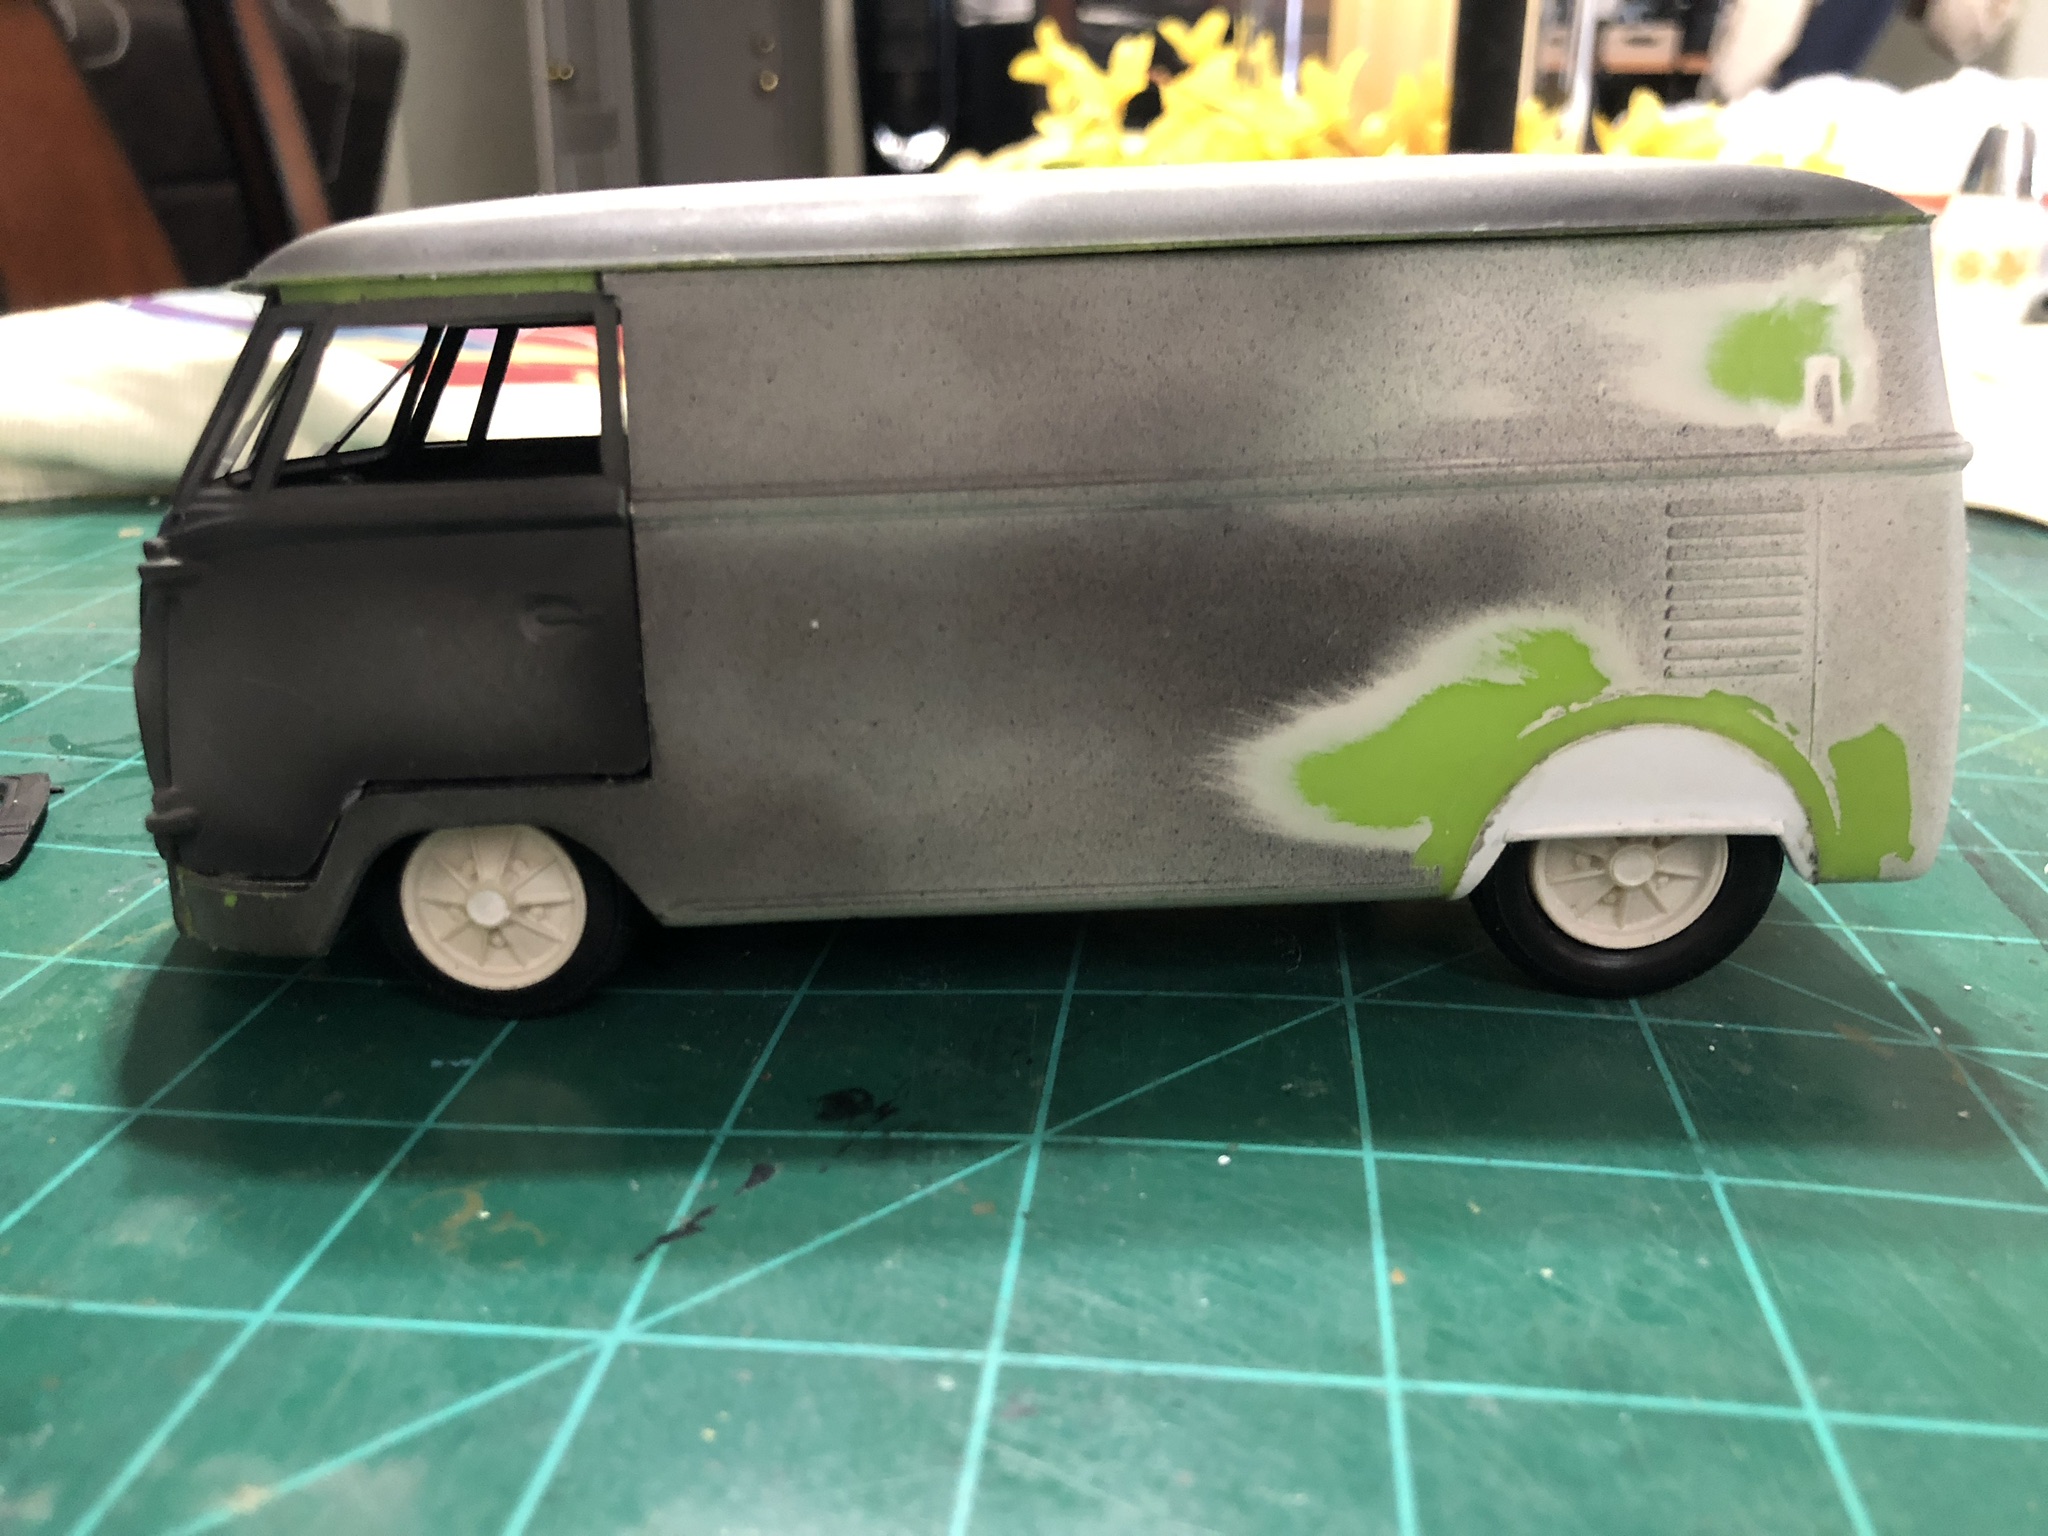
That’s cool. I really enjoy building weathered rusty old VWs. This is a project I’ve been working on between builds. What weathering method do you use? My bus will get a paint chip method once I get my stance down
-
Do you prime all pieces
Evlwevl replied to youpey's topic in General Automotive Talk (Trucks and Cars)
I didn’t used to but I prime everything now. I prime most parts right on the sprue with either black, white or grey duplicolor sandable primer. It helps my cheap Walmart acrylics hold on better. -
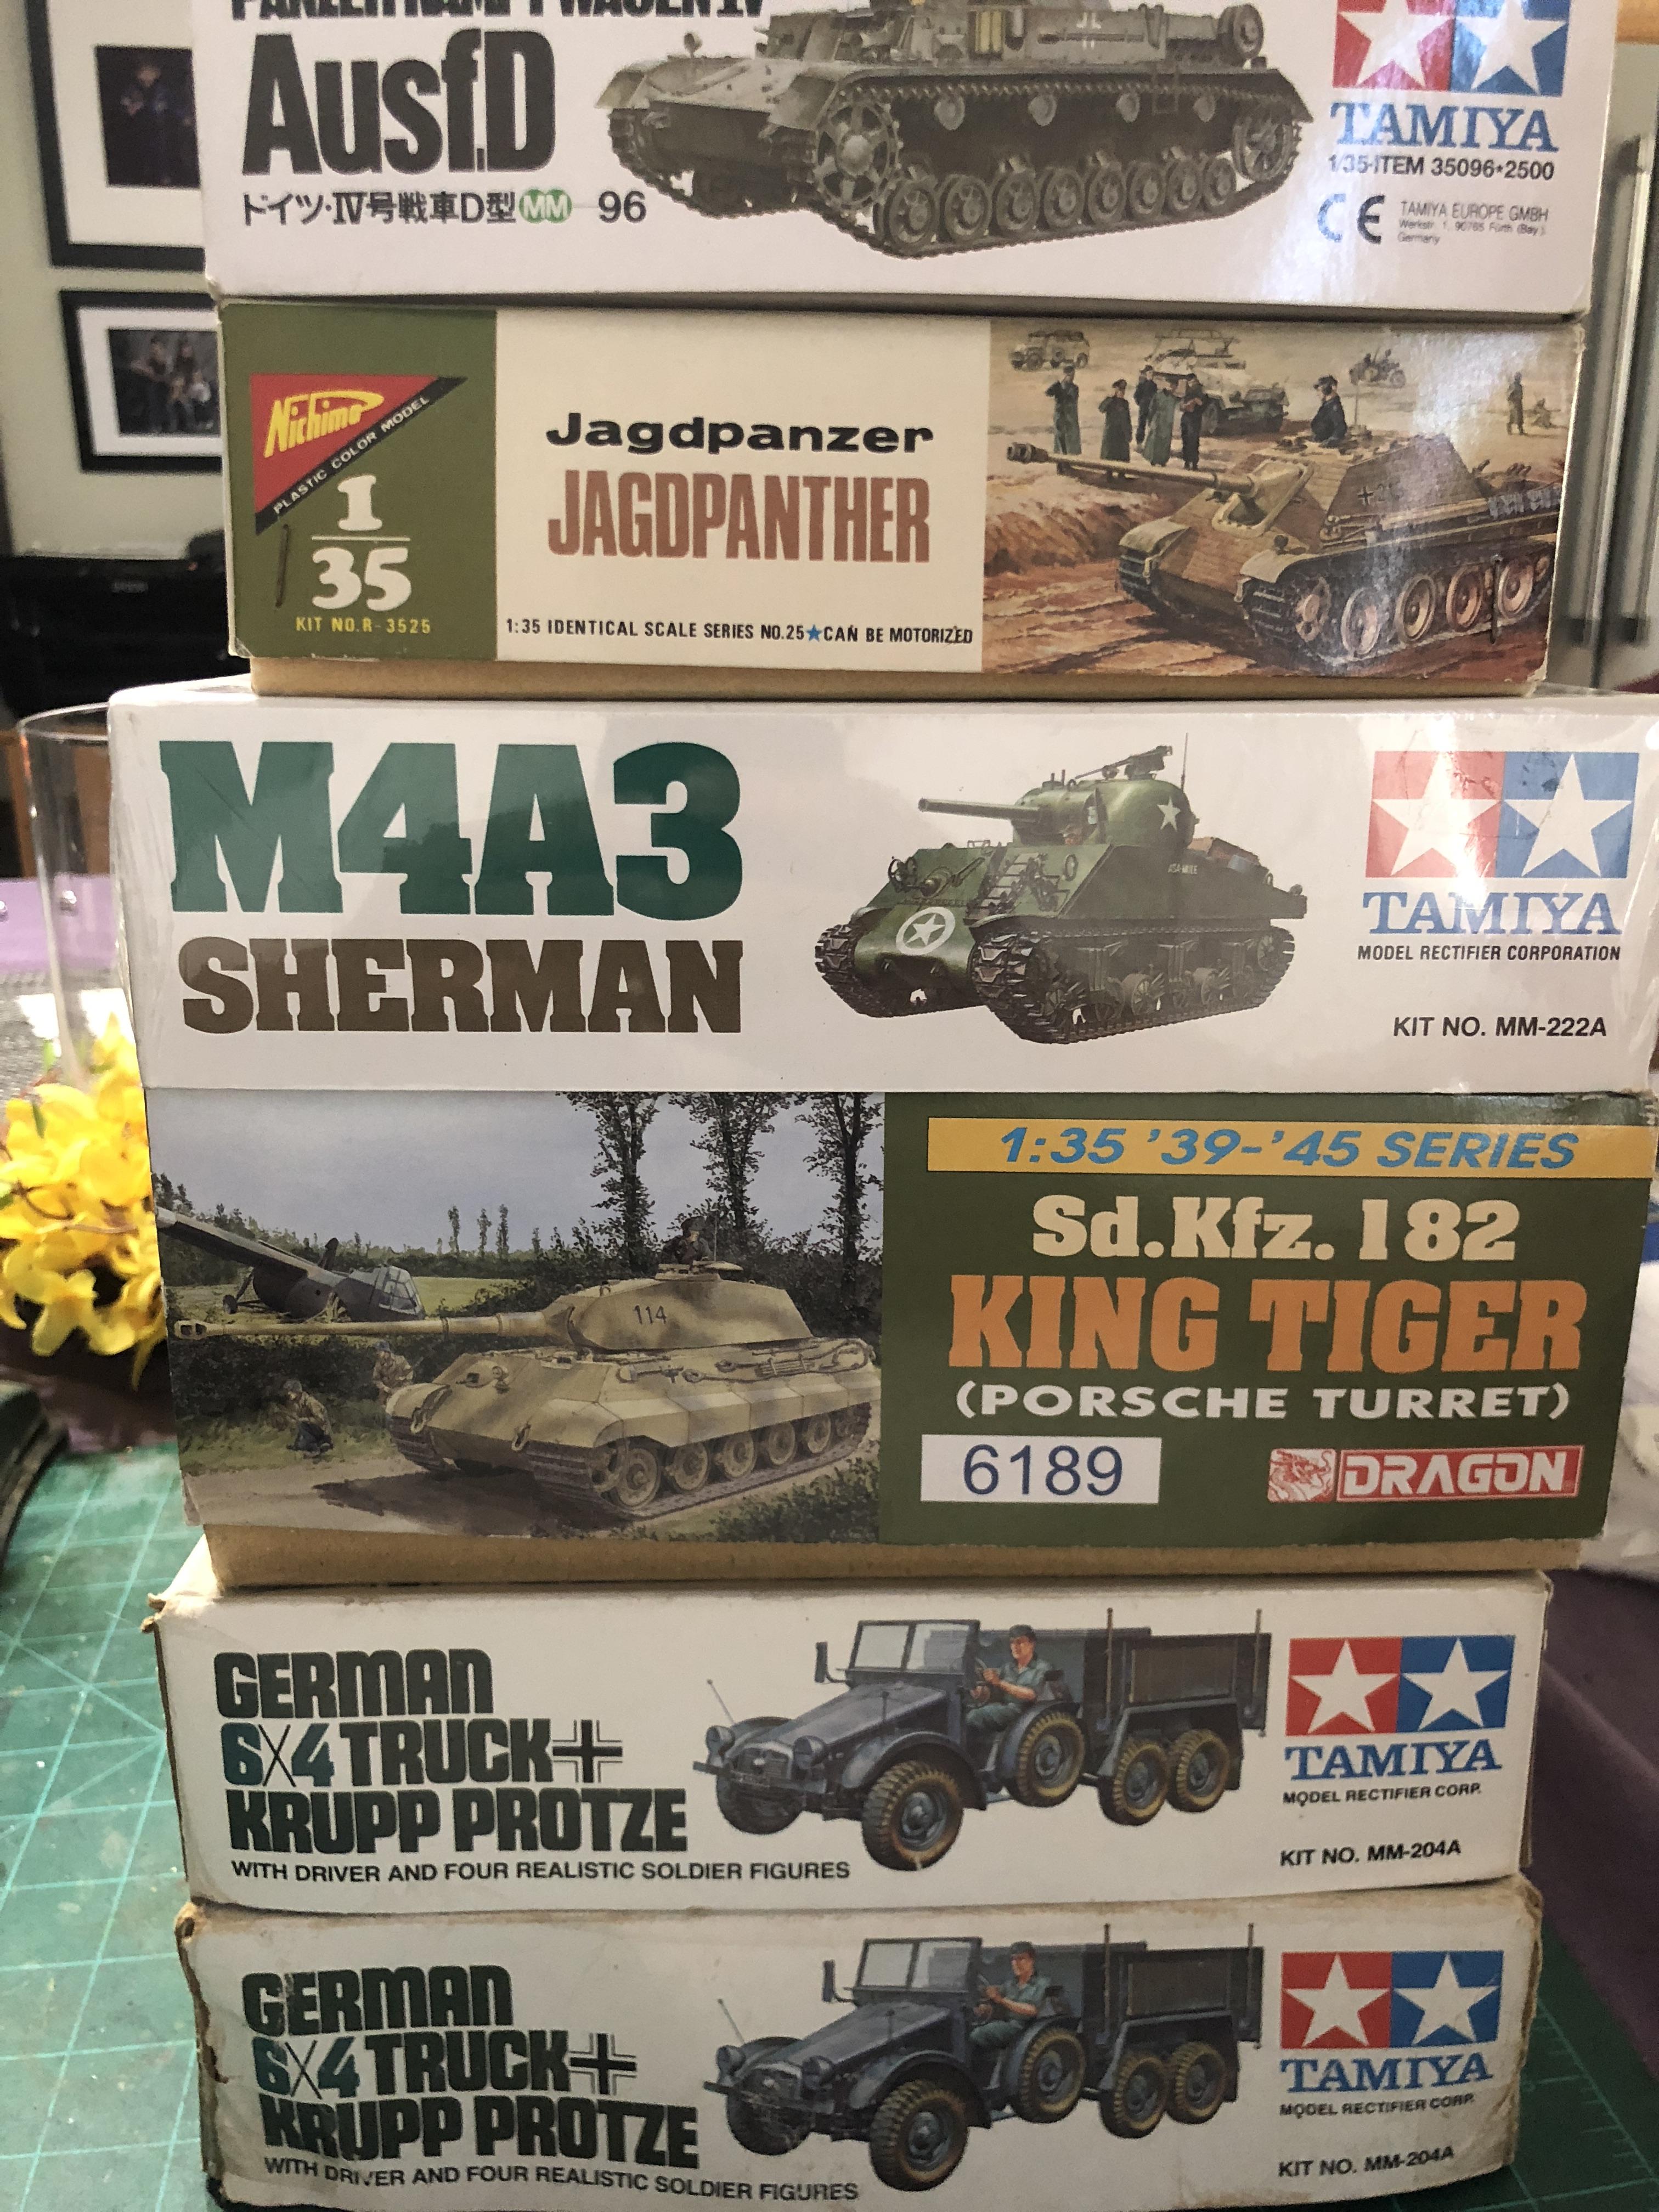
Picked up a few kits from a local club member.
-
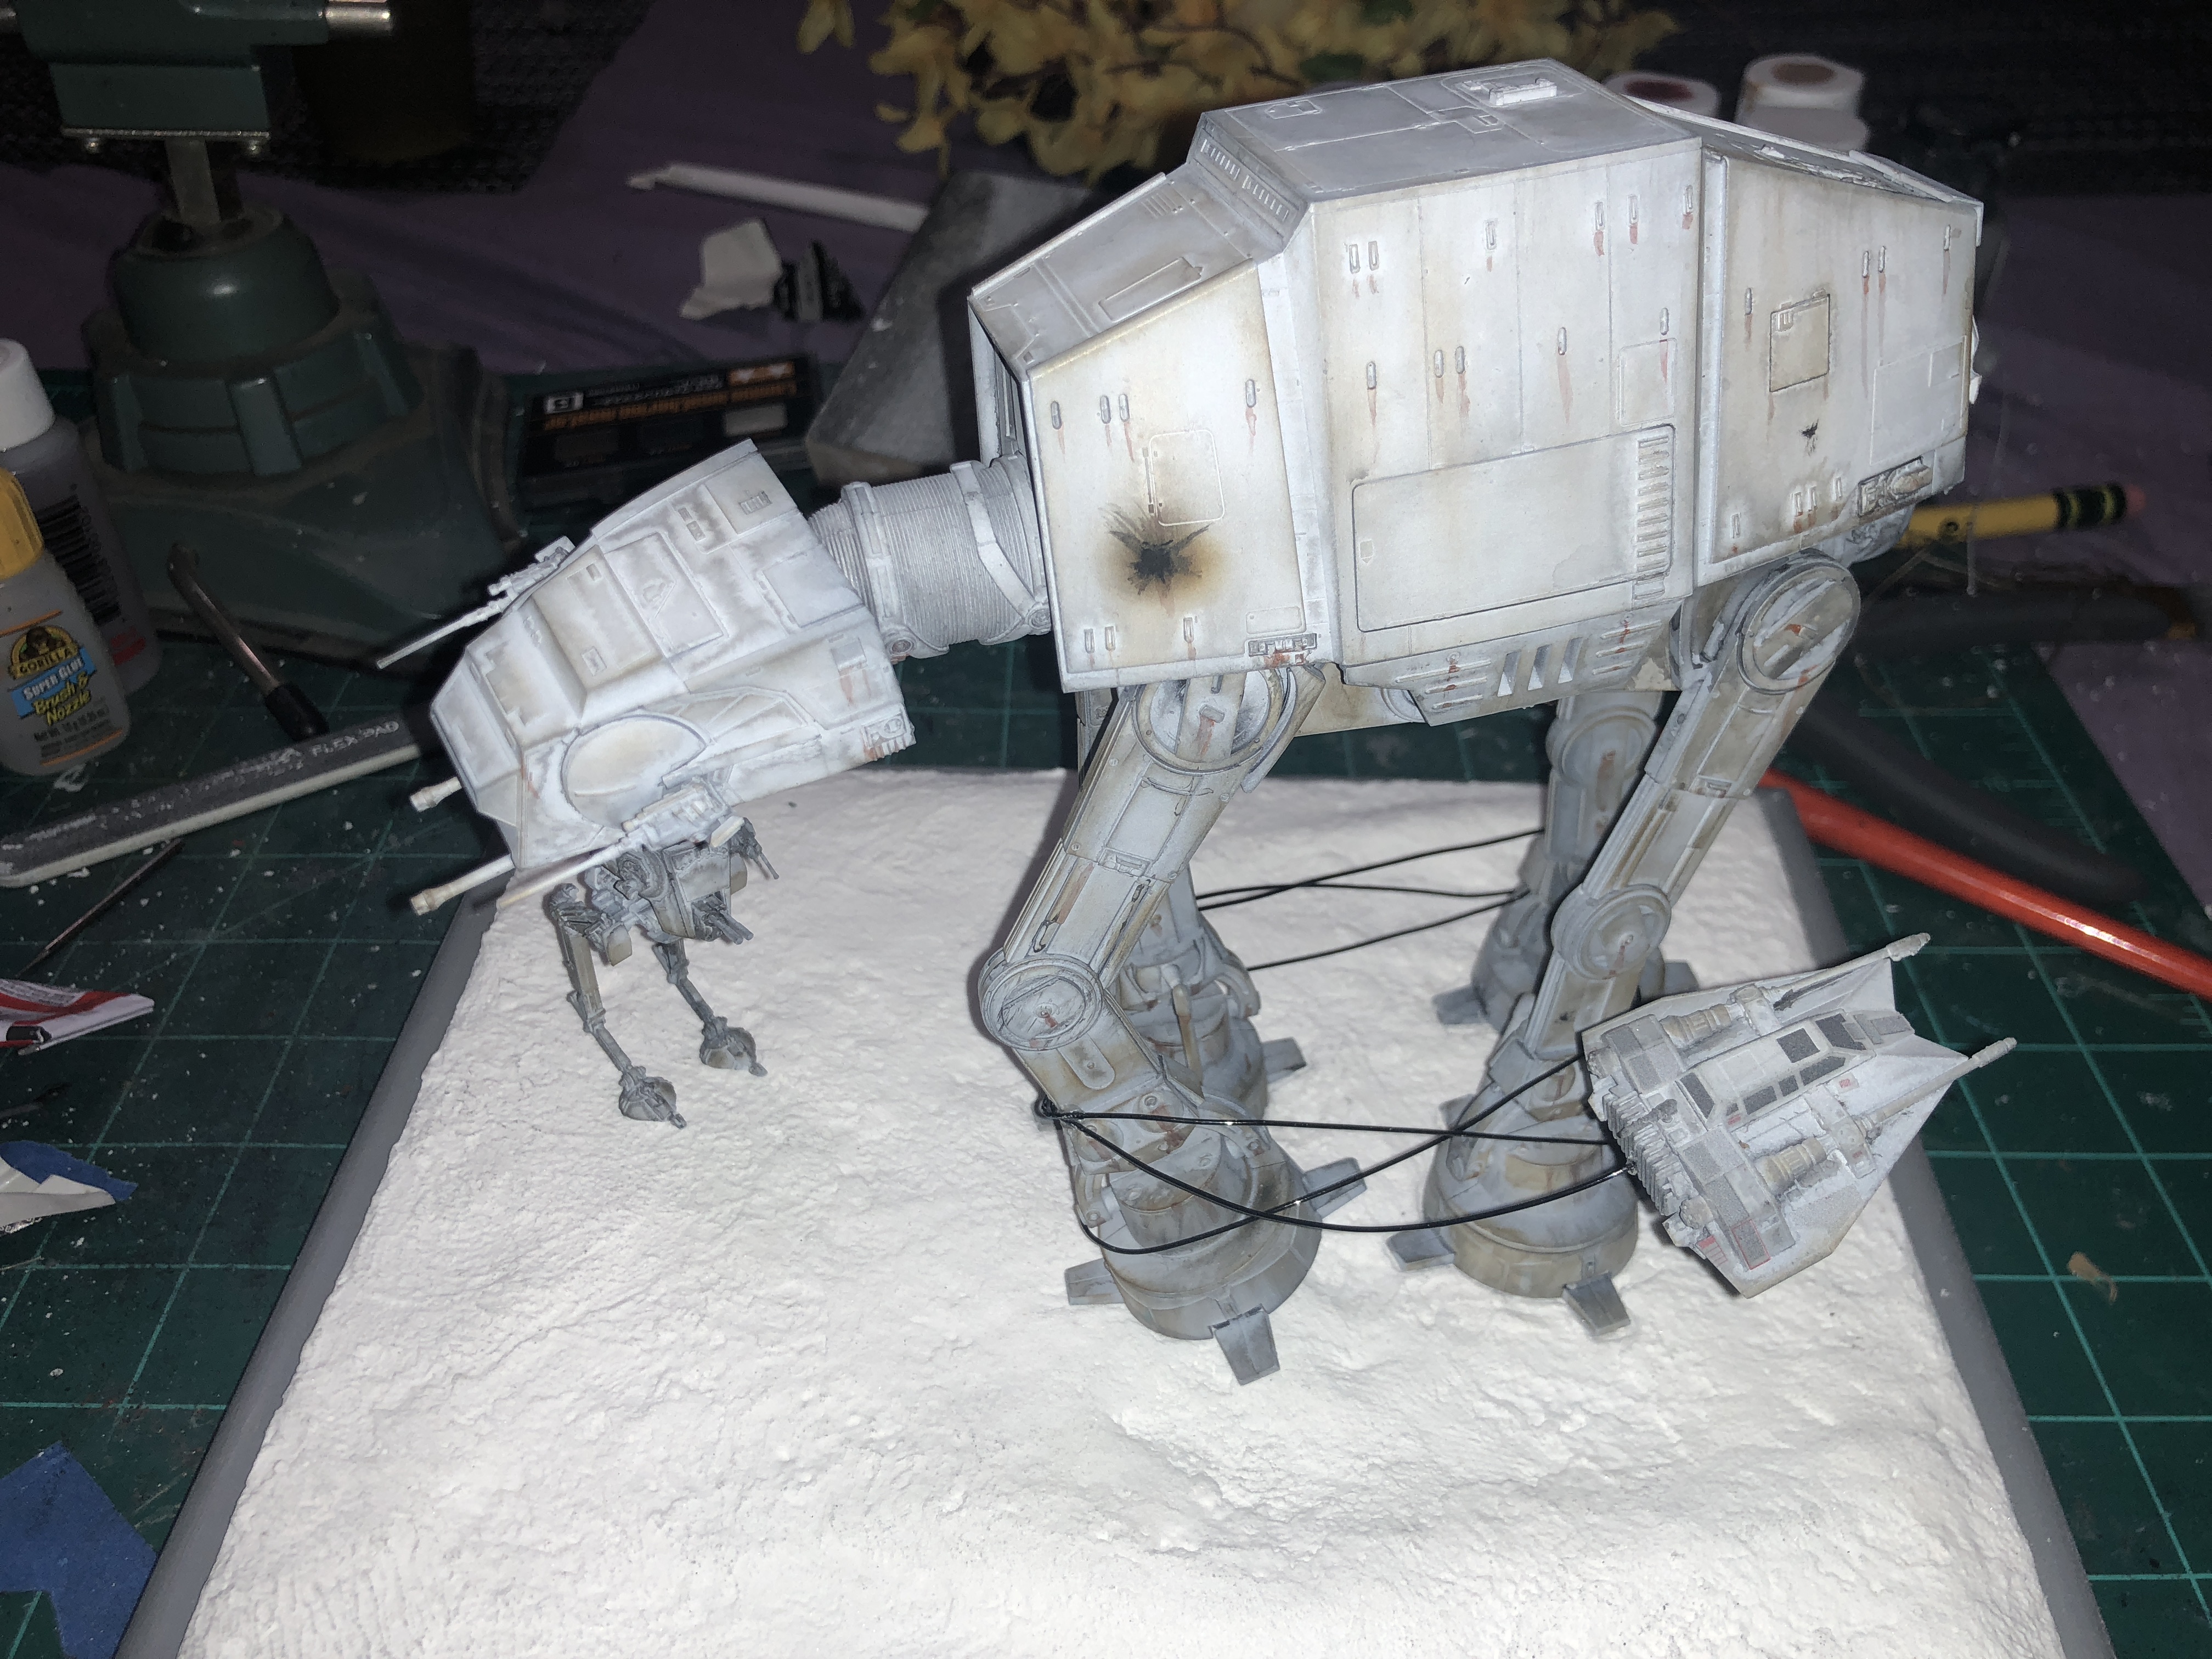
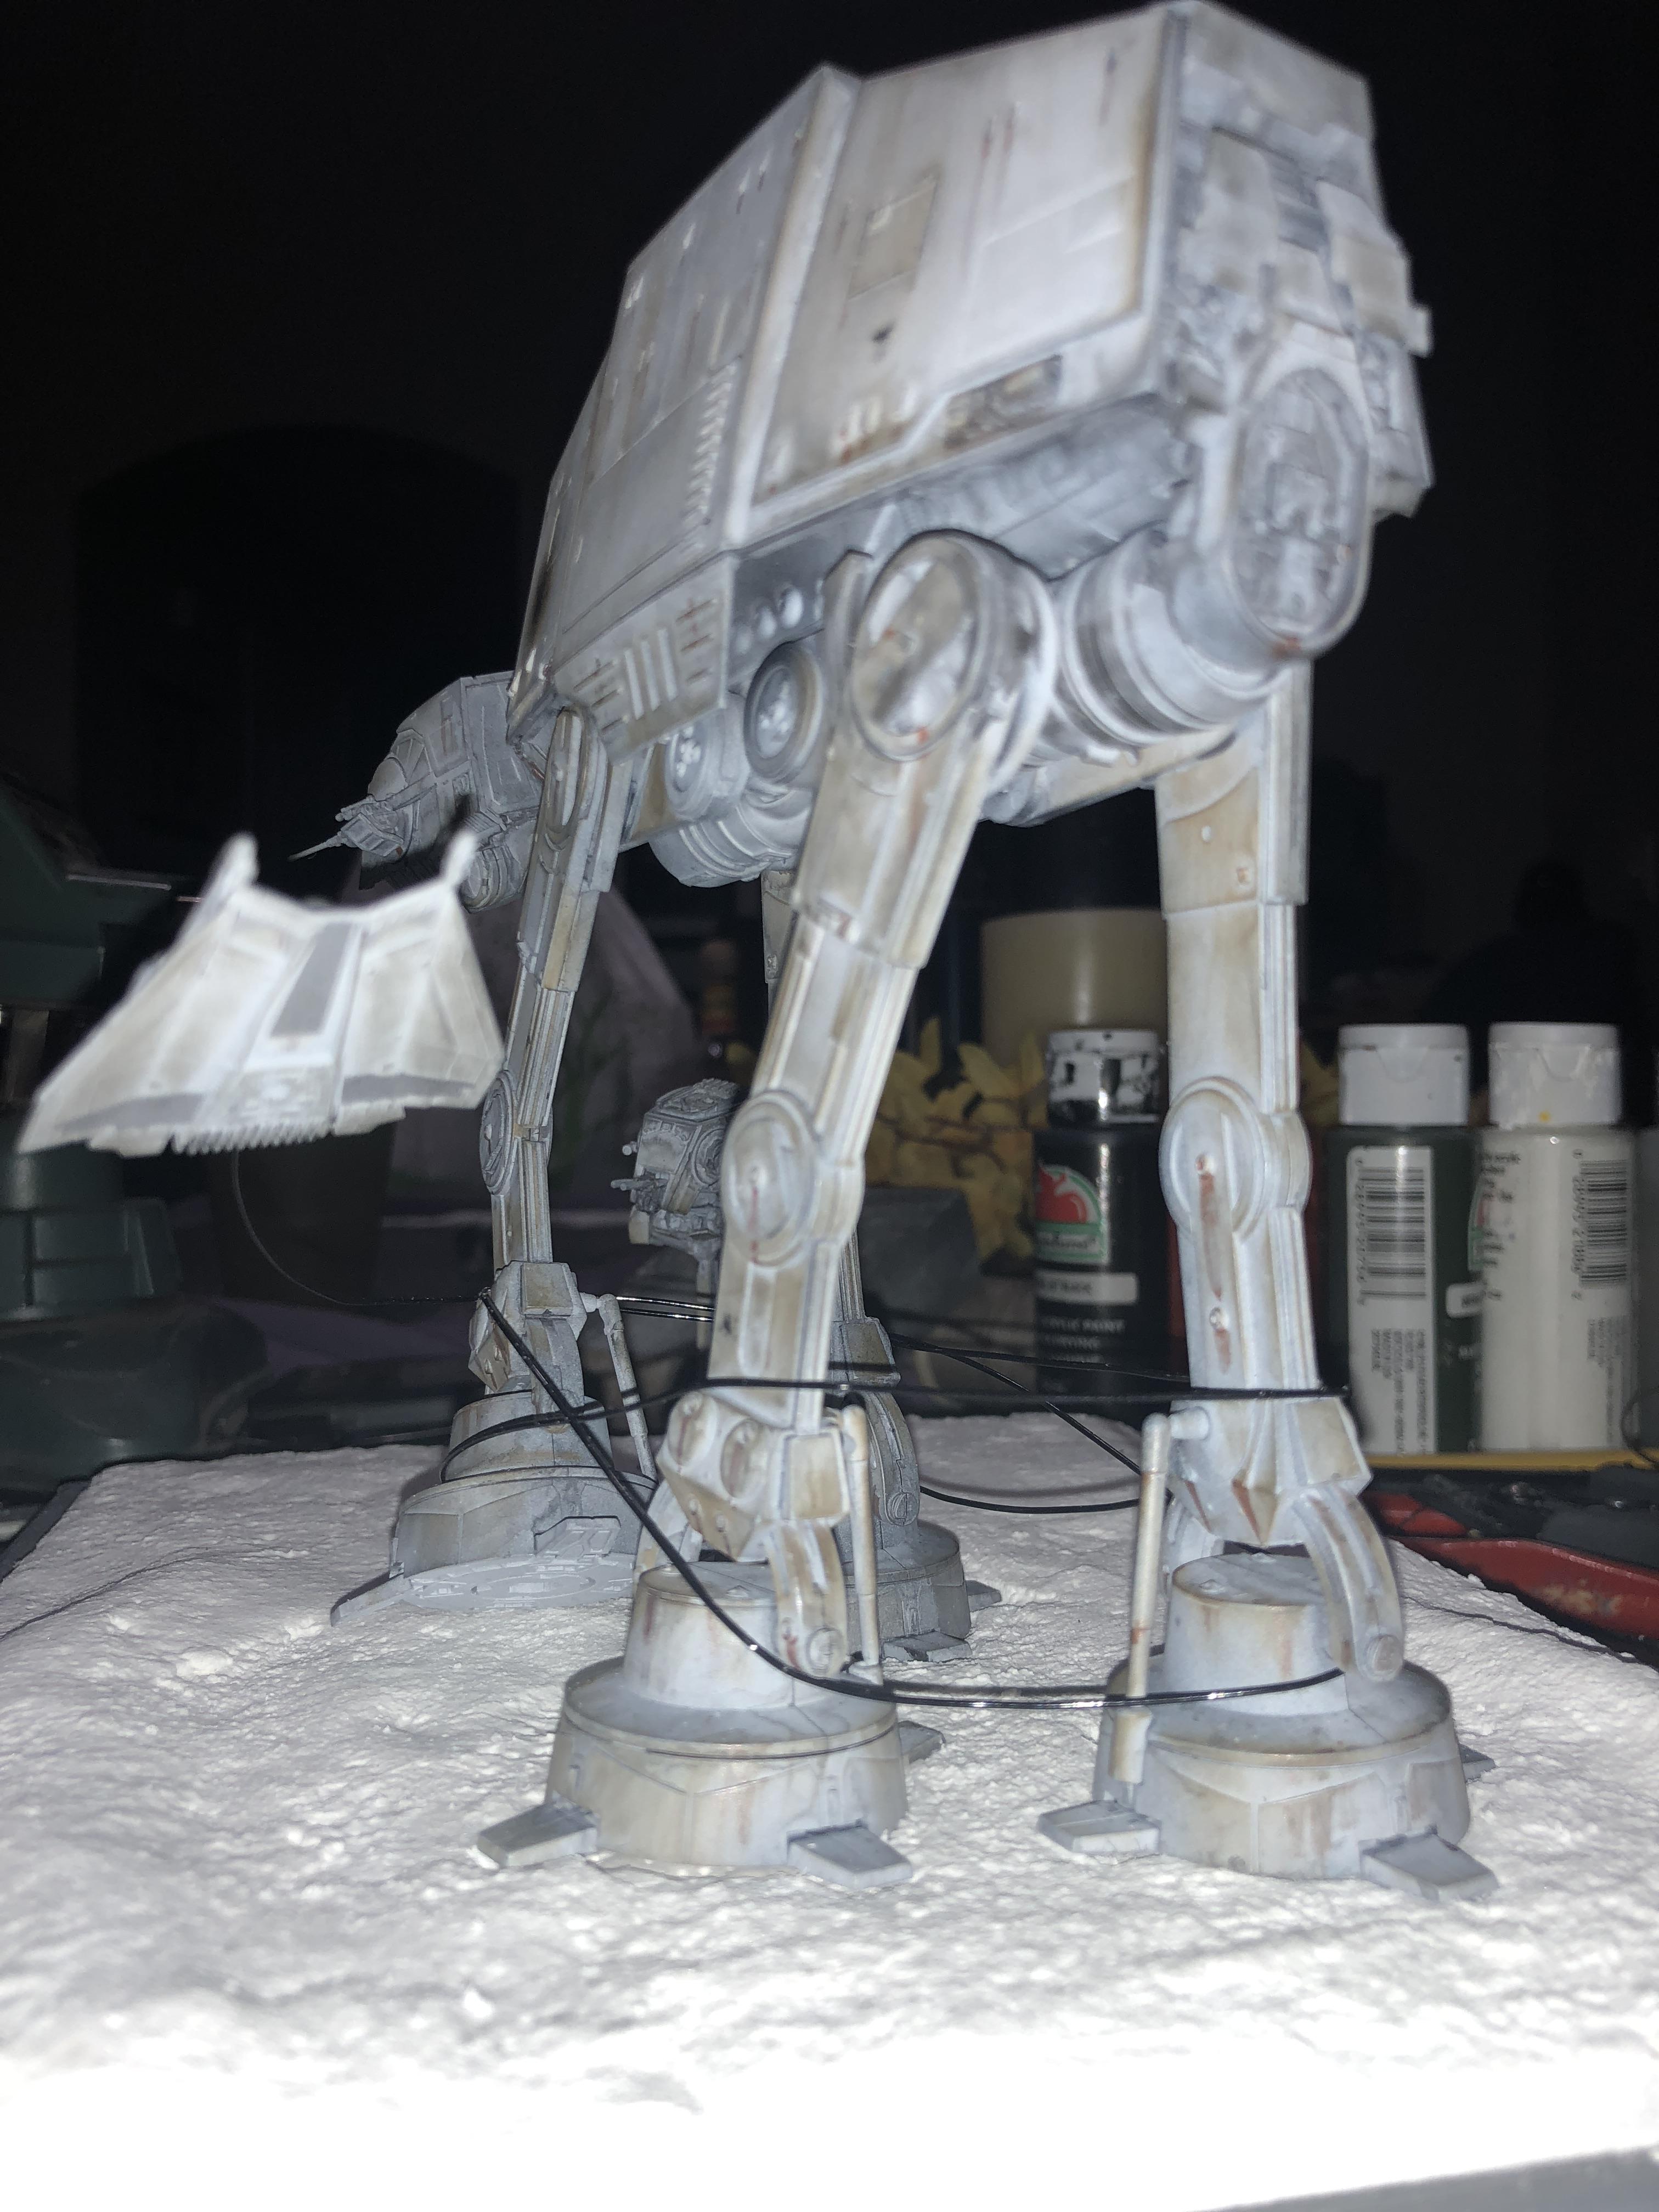
Need help suspending 1/144 snow speeder
Evlwevl replied to Evlwevl's topic in Model Building Questions and Answers
Thank you, not too bad for 50 Cent Walmart acrylic paint. I’m really liking these Tamiya weathering master kits as well. The only thing I’m finding is the applicator tears after a while Of rubbing it on a plastic model surface with any sort of protruding detail. I’m going to see if dollar tree sells make up applicators -
Need help suspending 1/144 snow speeder
Evlwevl replied to Evlwevl's topic in Model Building Questions and Answers
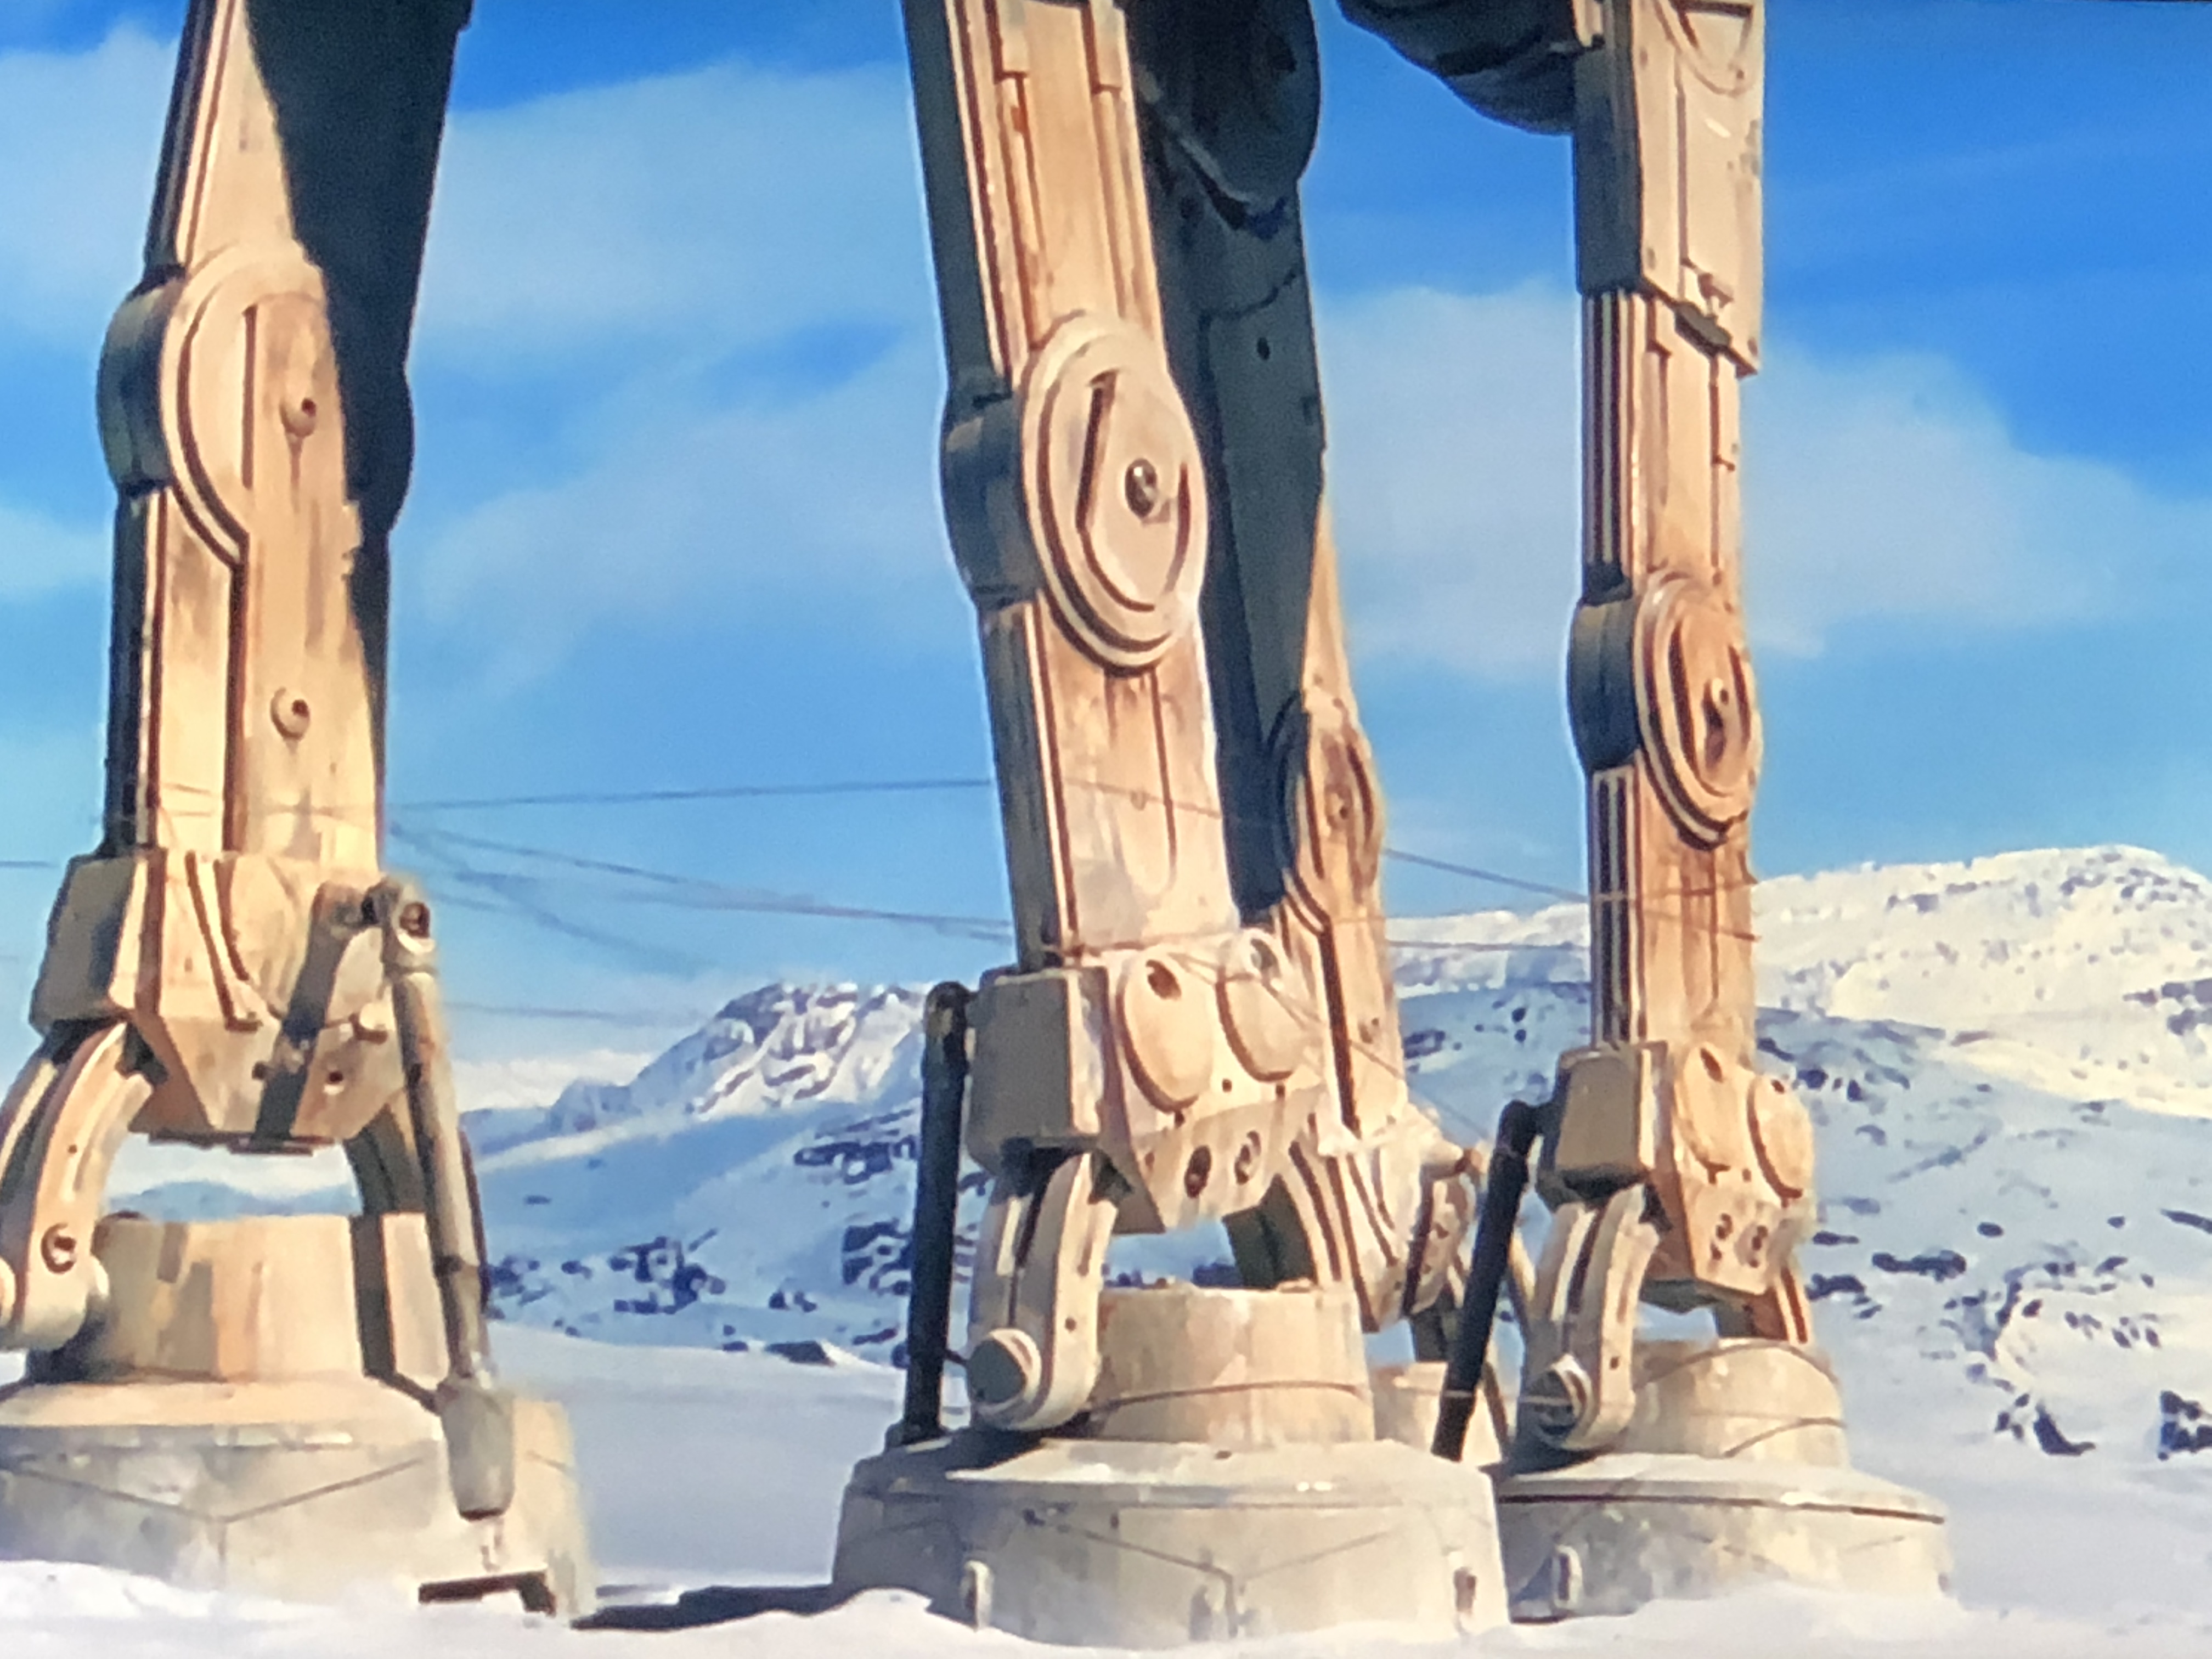
Well here it is guys. I stopped by Hobby lobby today and found some black 20 gauge bead wire. Surprisingly it’s thinner then the silver plated wire I tried from my wife’s jewelry making kit. It looks like a decent scale and was easy to bend and best of all it suspends the snow speeder perfectly. Now I just have to add a little snow to the vehicles in this puppy is done
-
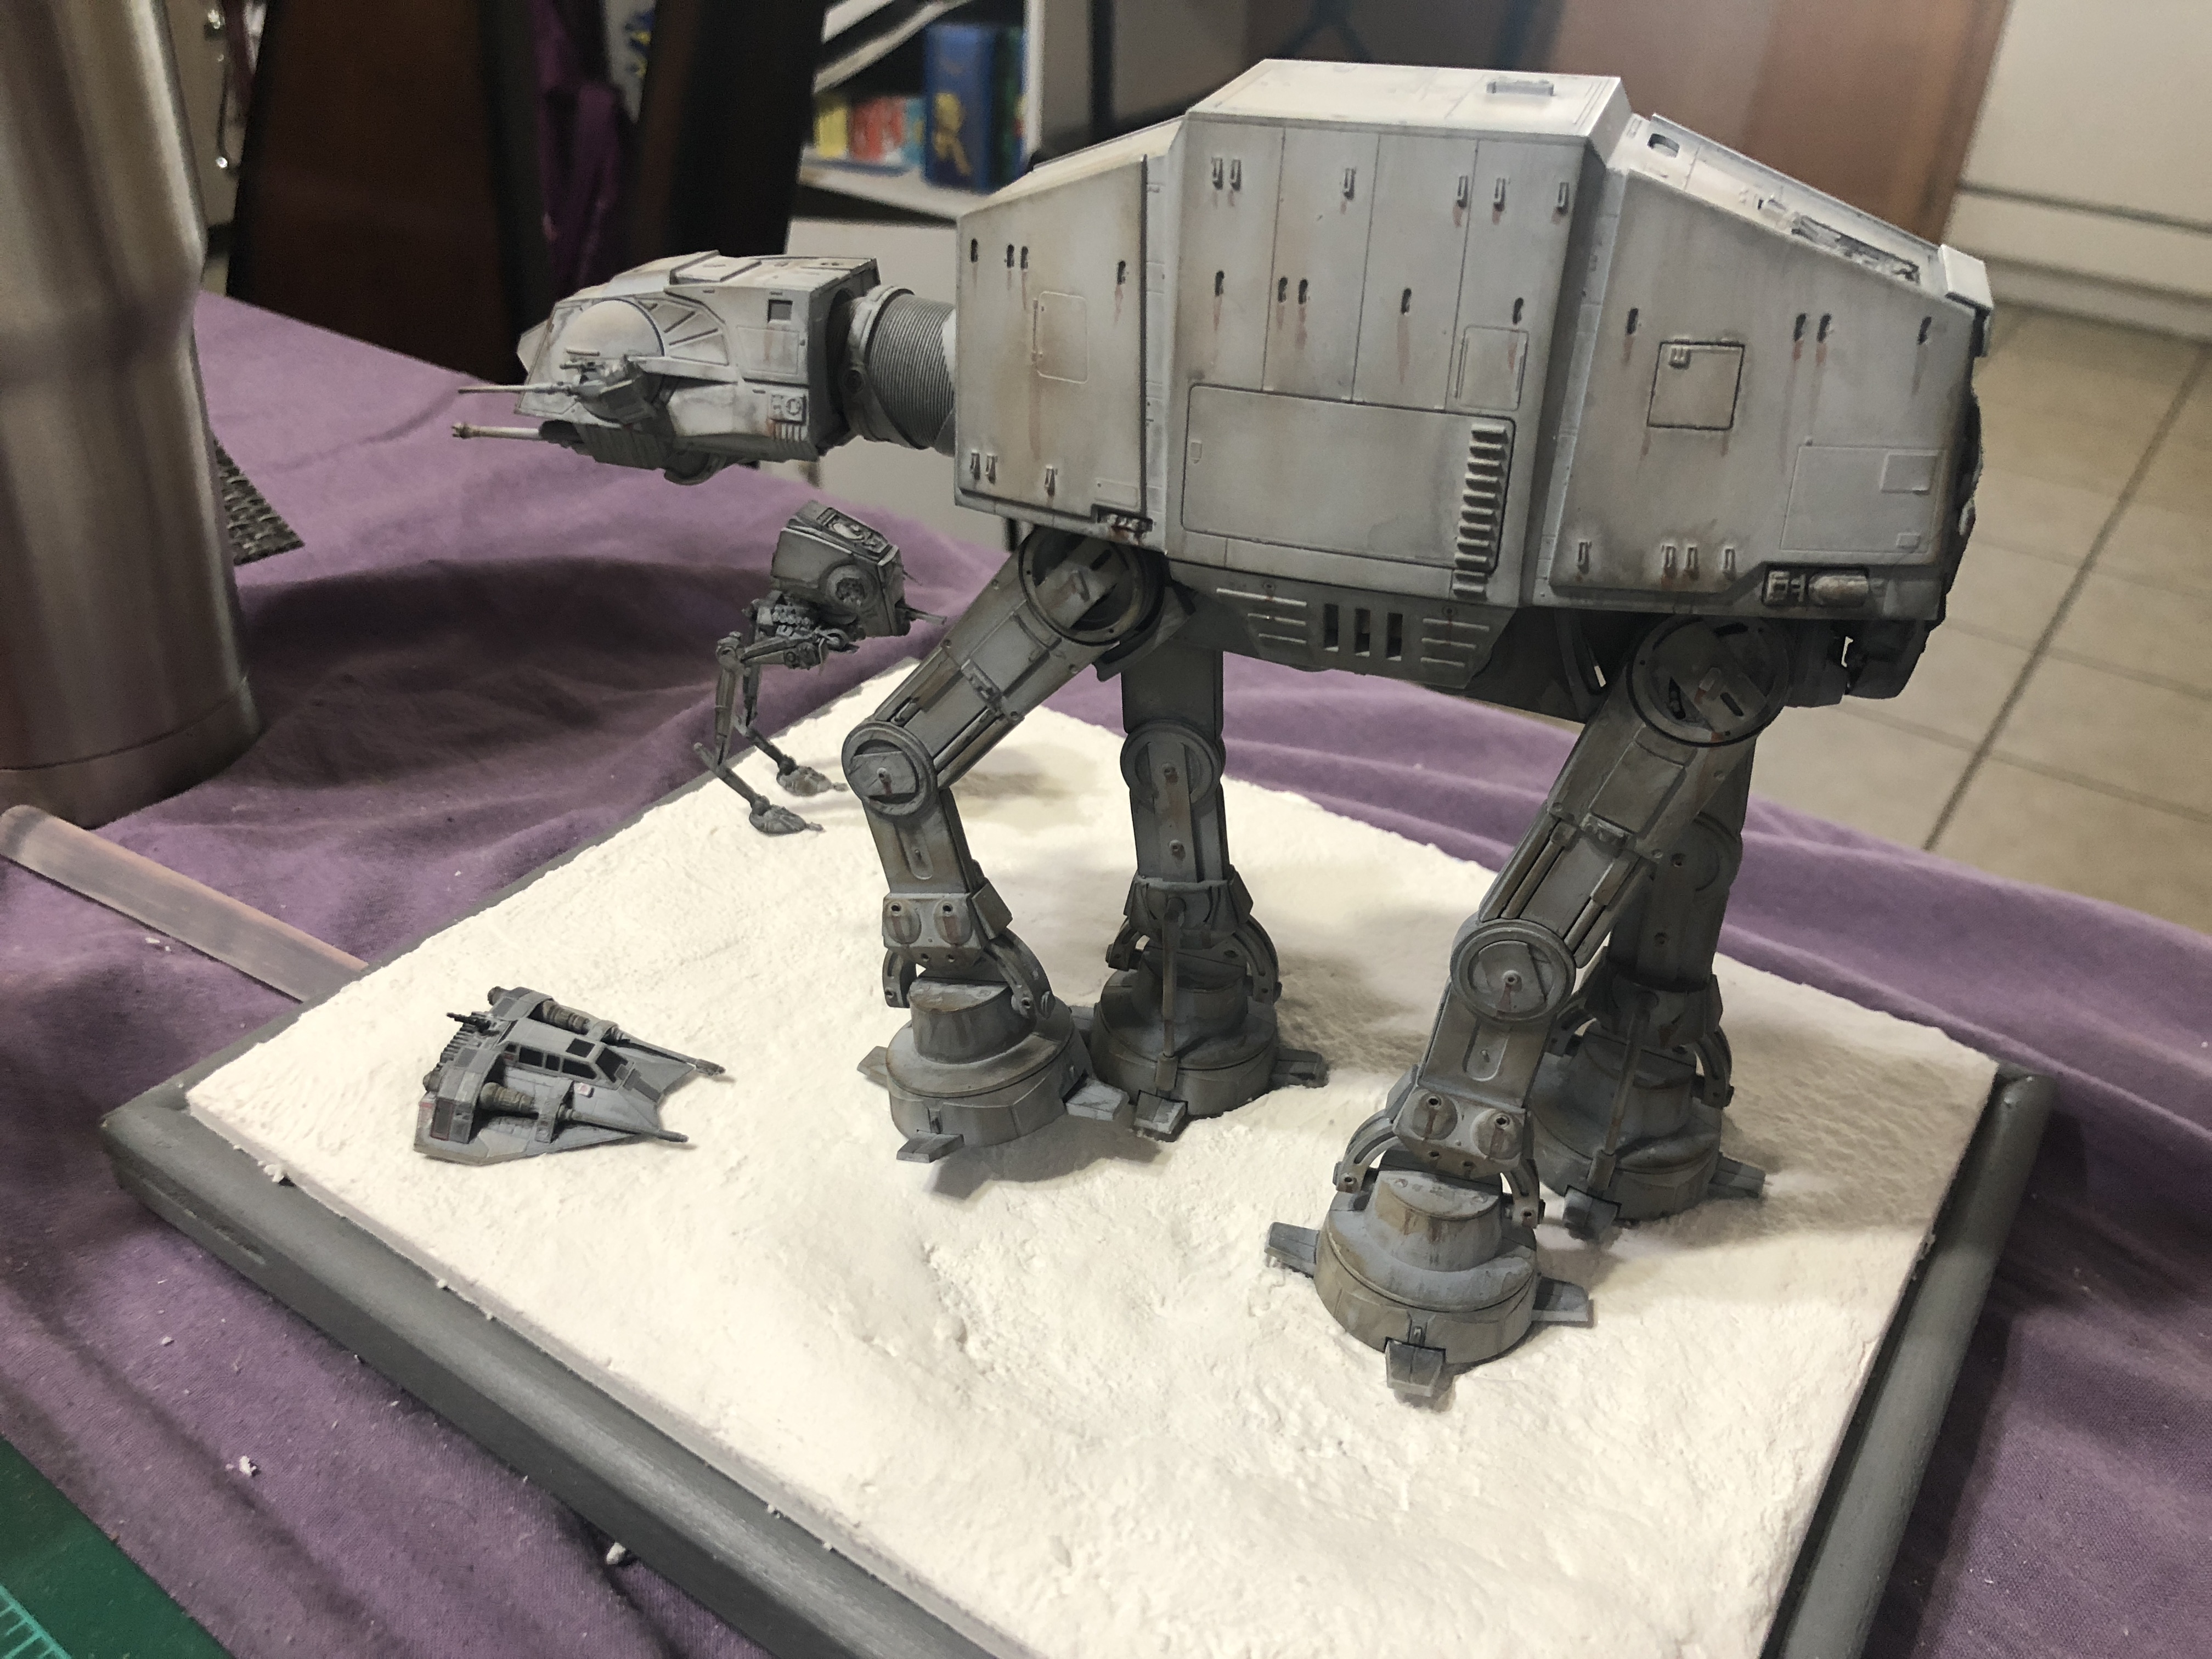
I’m just about finished with my AT-AT diorama. The last part I’m having trouble with is finding a way to replicate the cable wrapped around the legs and trying to suspend the snow speeder with the tow cable alone. I’ve seen several guys use various guaged of wire which look too heavy to be scale looking . I raided my wife’s jewelry making supplies and found that a 22 gauge wire is strong enough to hold the vehicle suspended in the air without having to use a mounting stick attached to the base however it does not look scale and is a little too thick still . I tried to use CA coated upholstery thread and that doesn’t seem to work either. I have some really thin lengths of styrene rod but they don’t have the strength to hold up the vehicle either. Does anyone have any other ideas? I’m all ears.
-
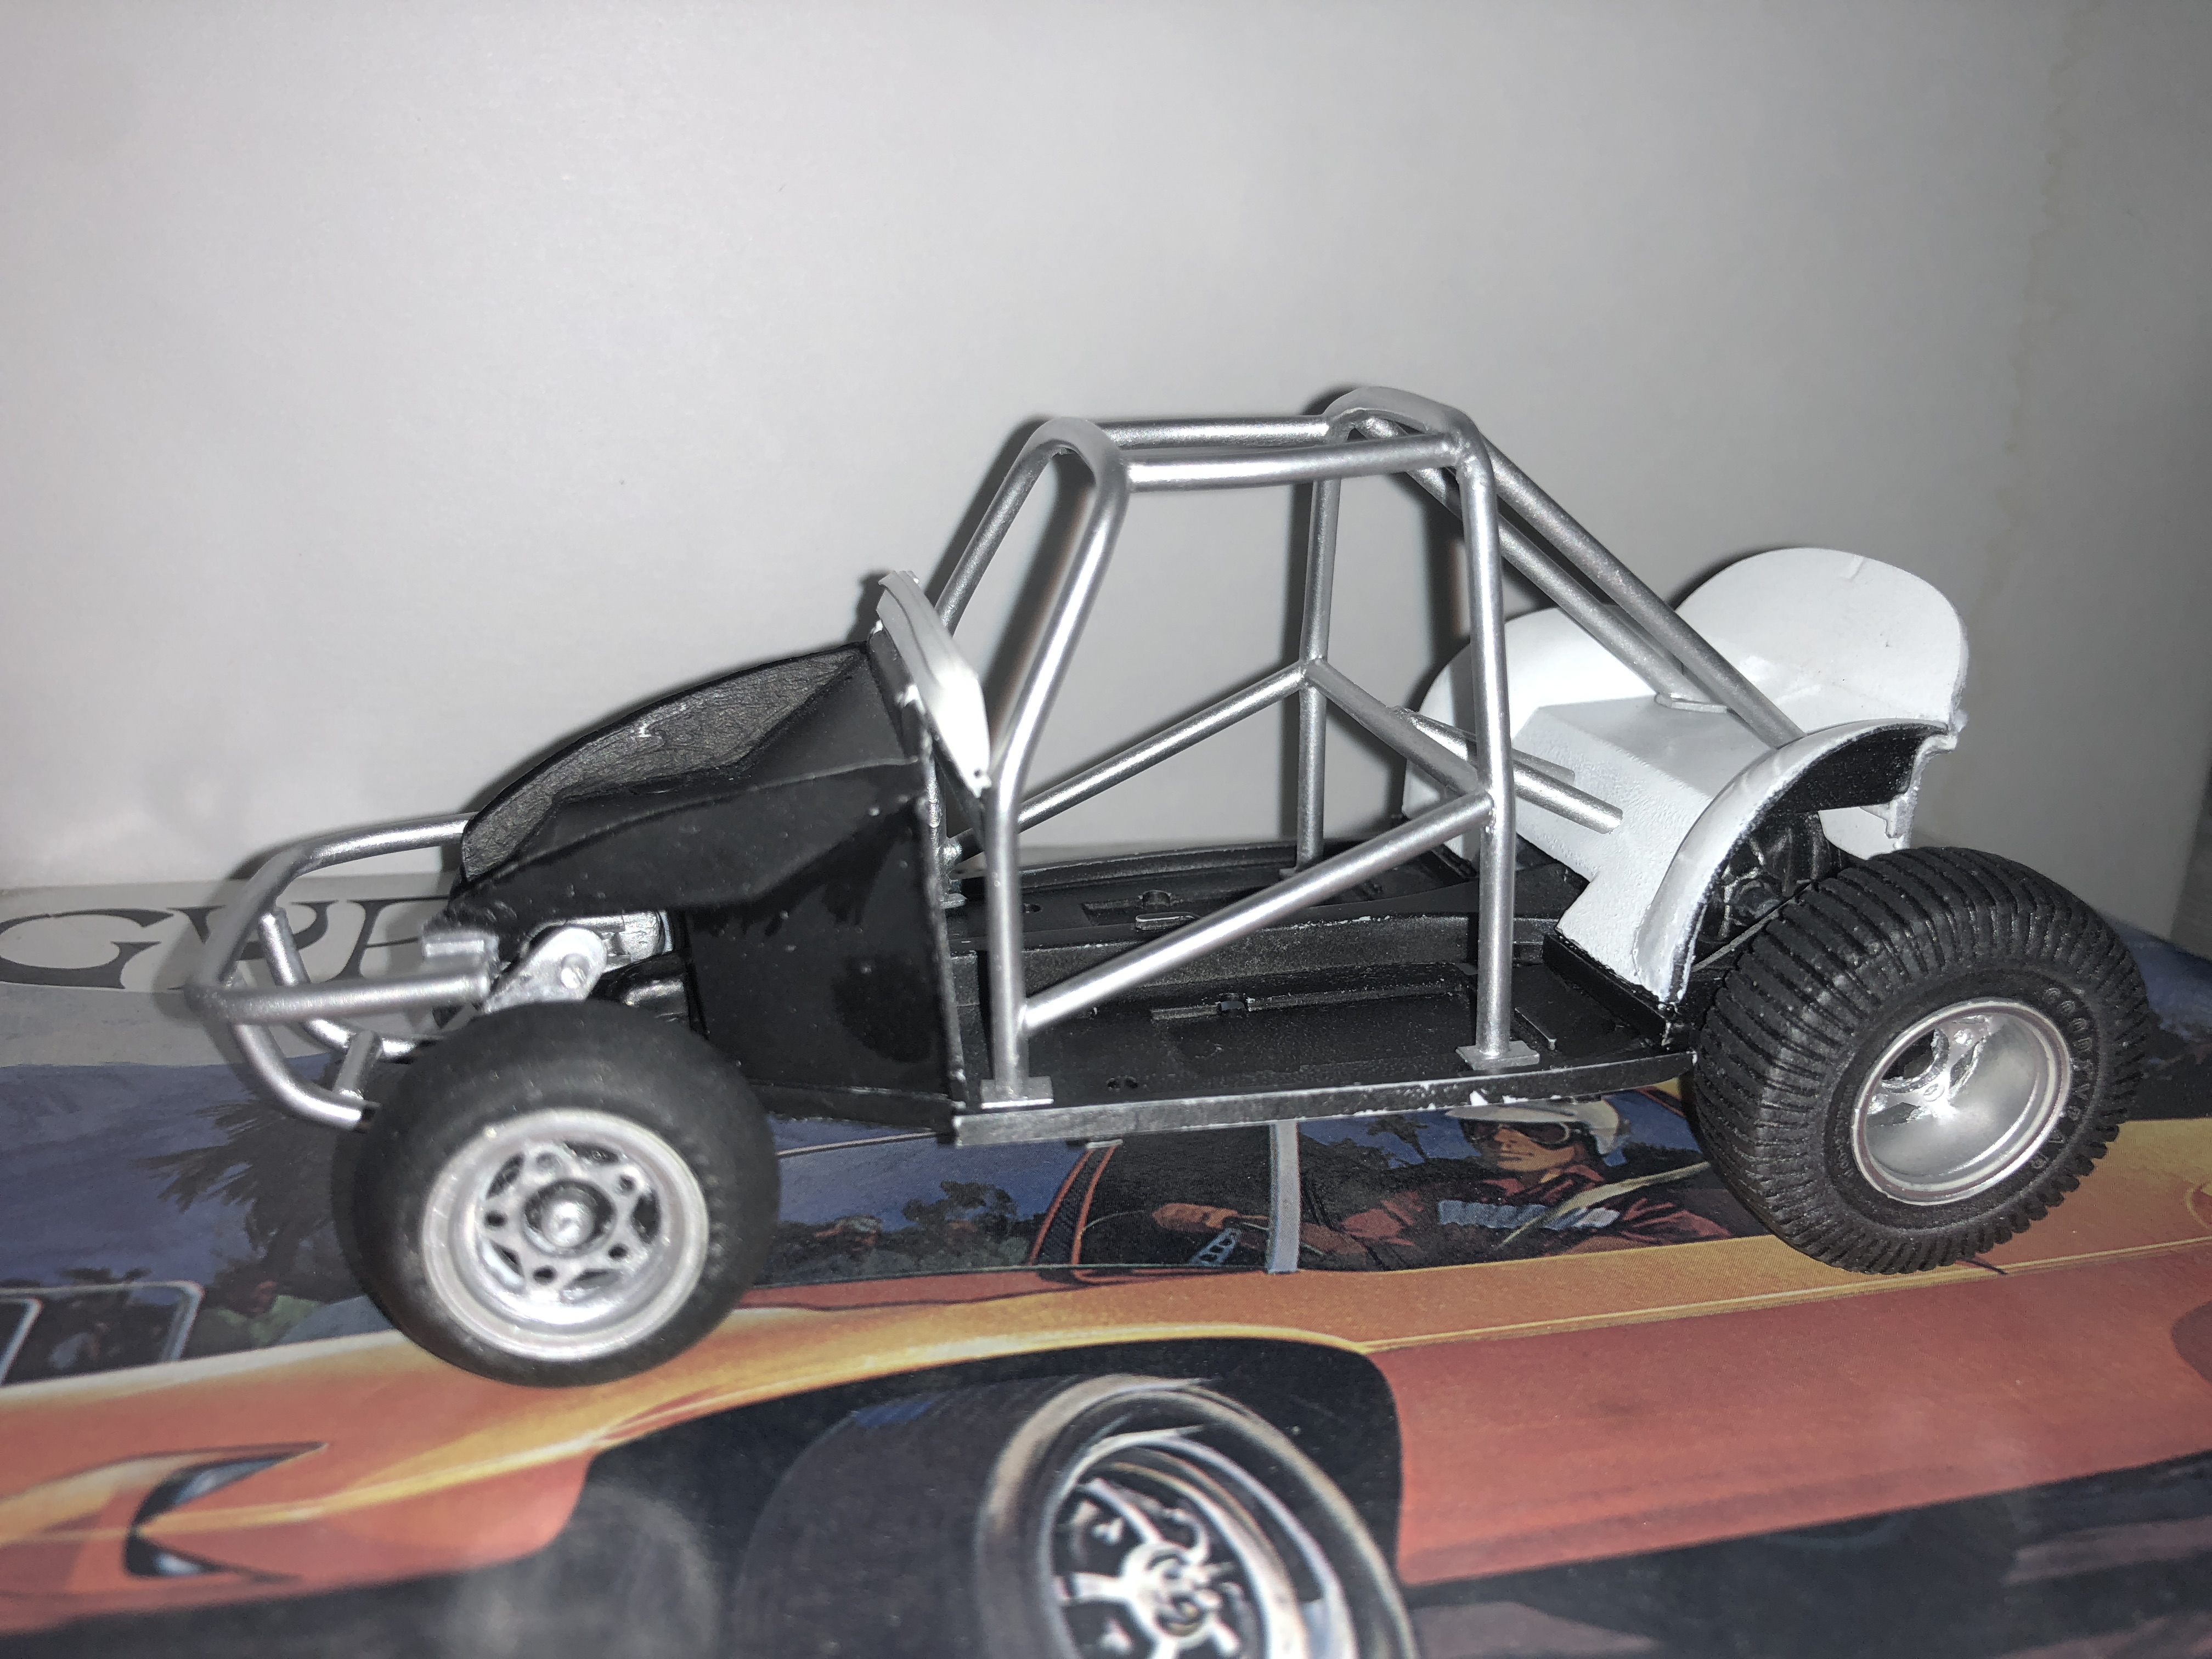
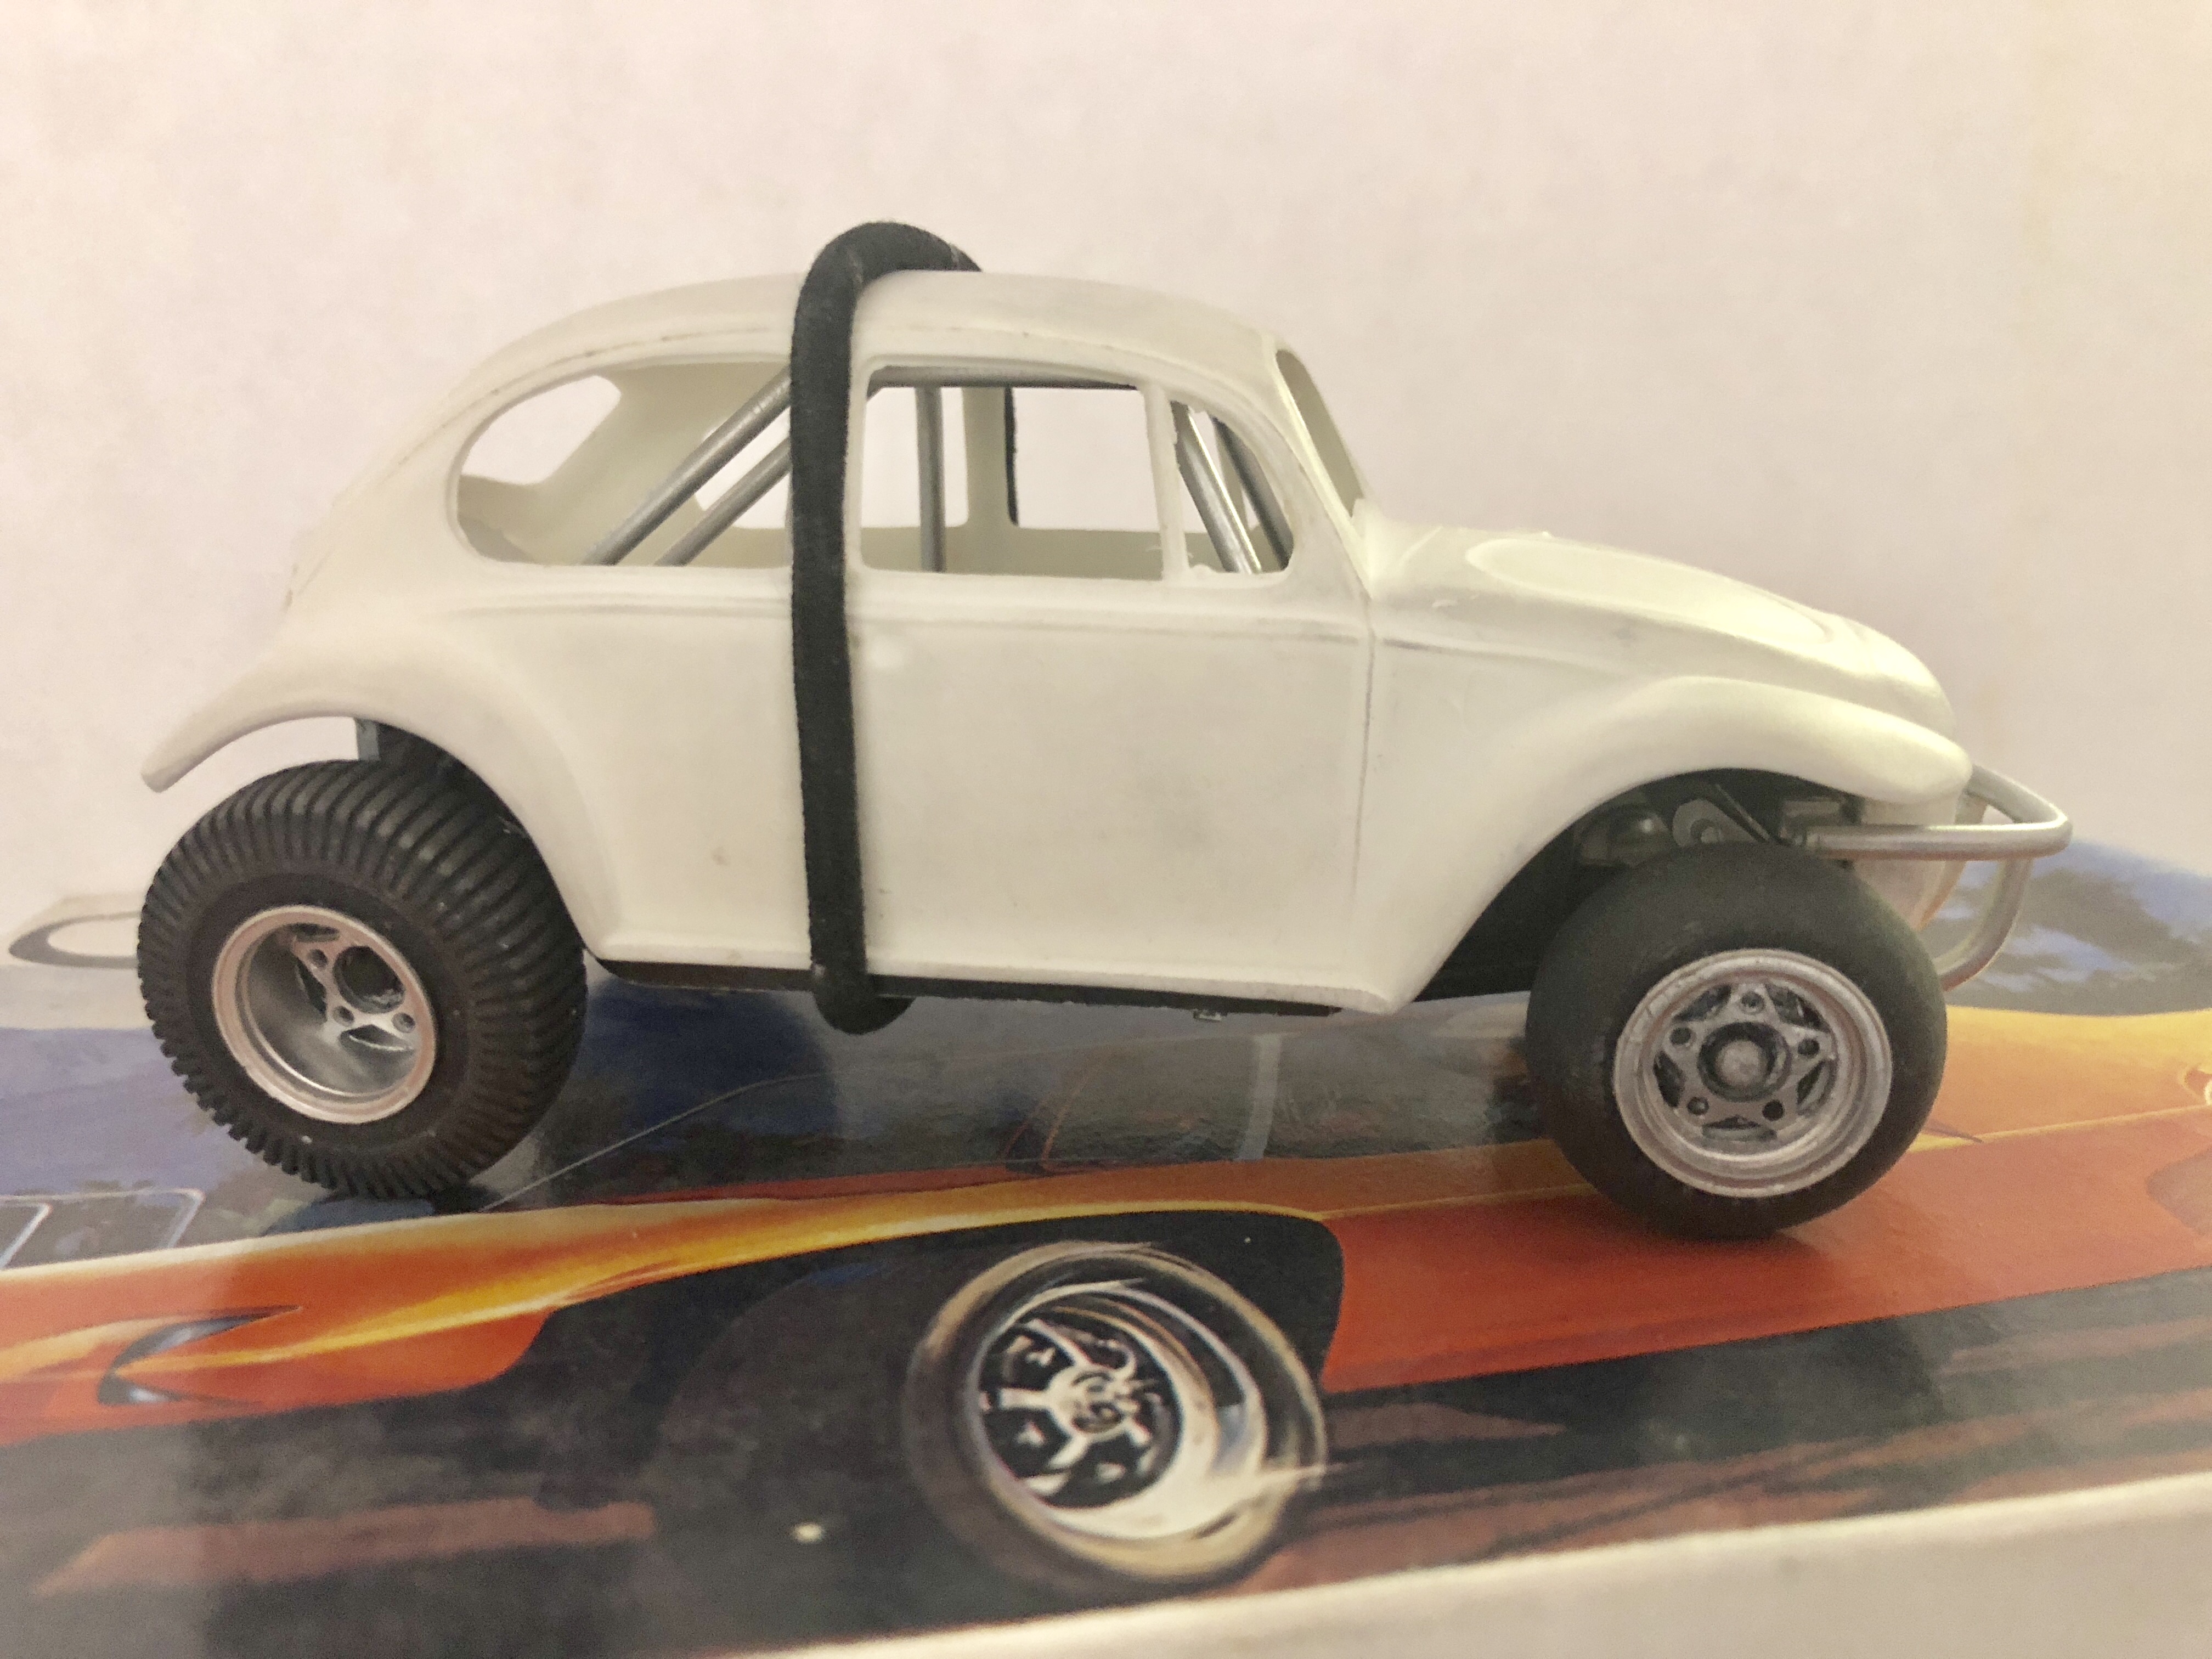
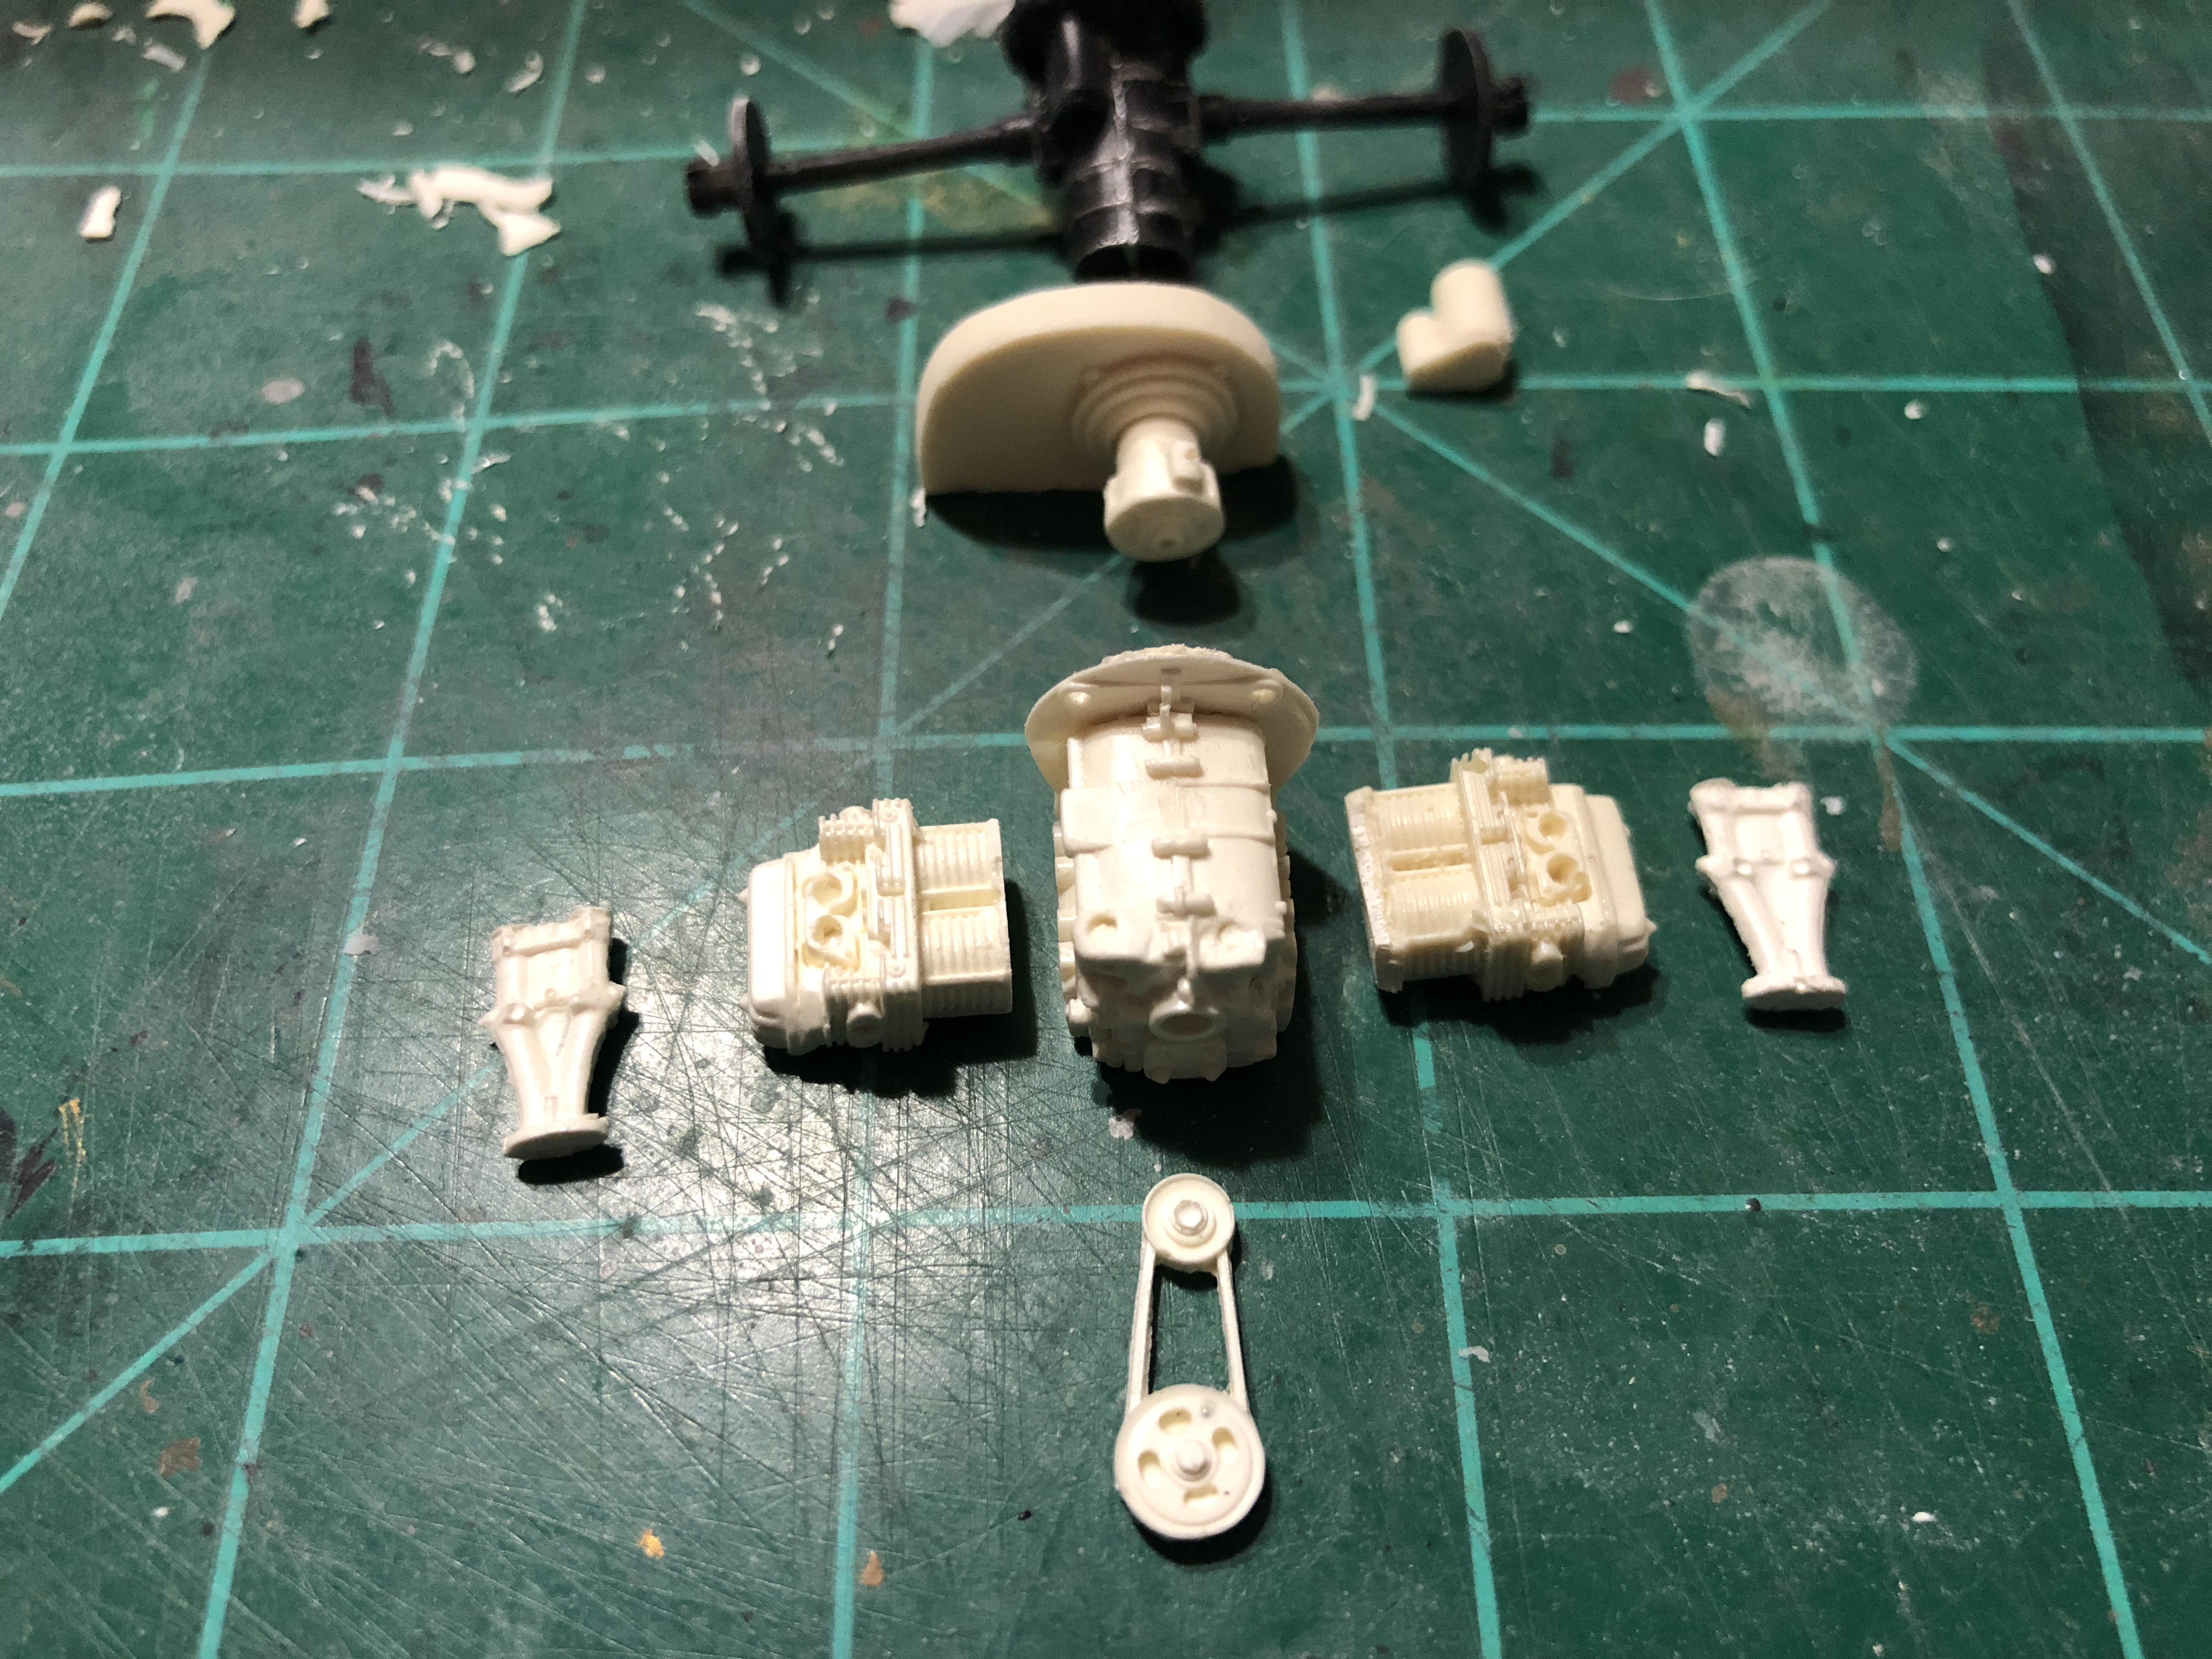
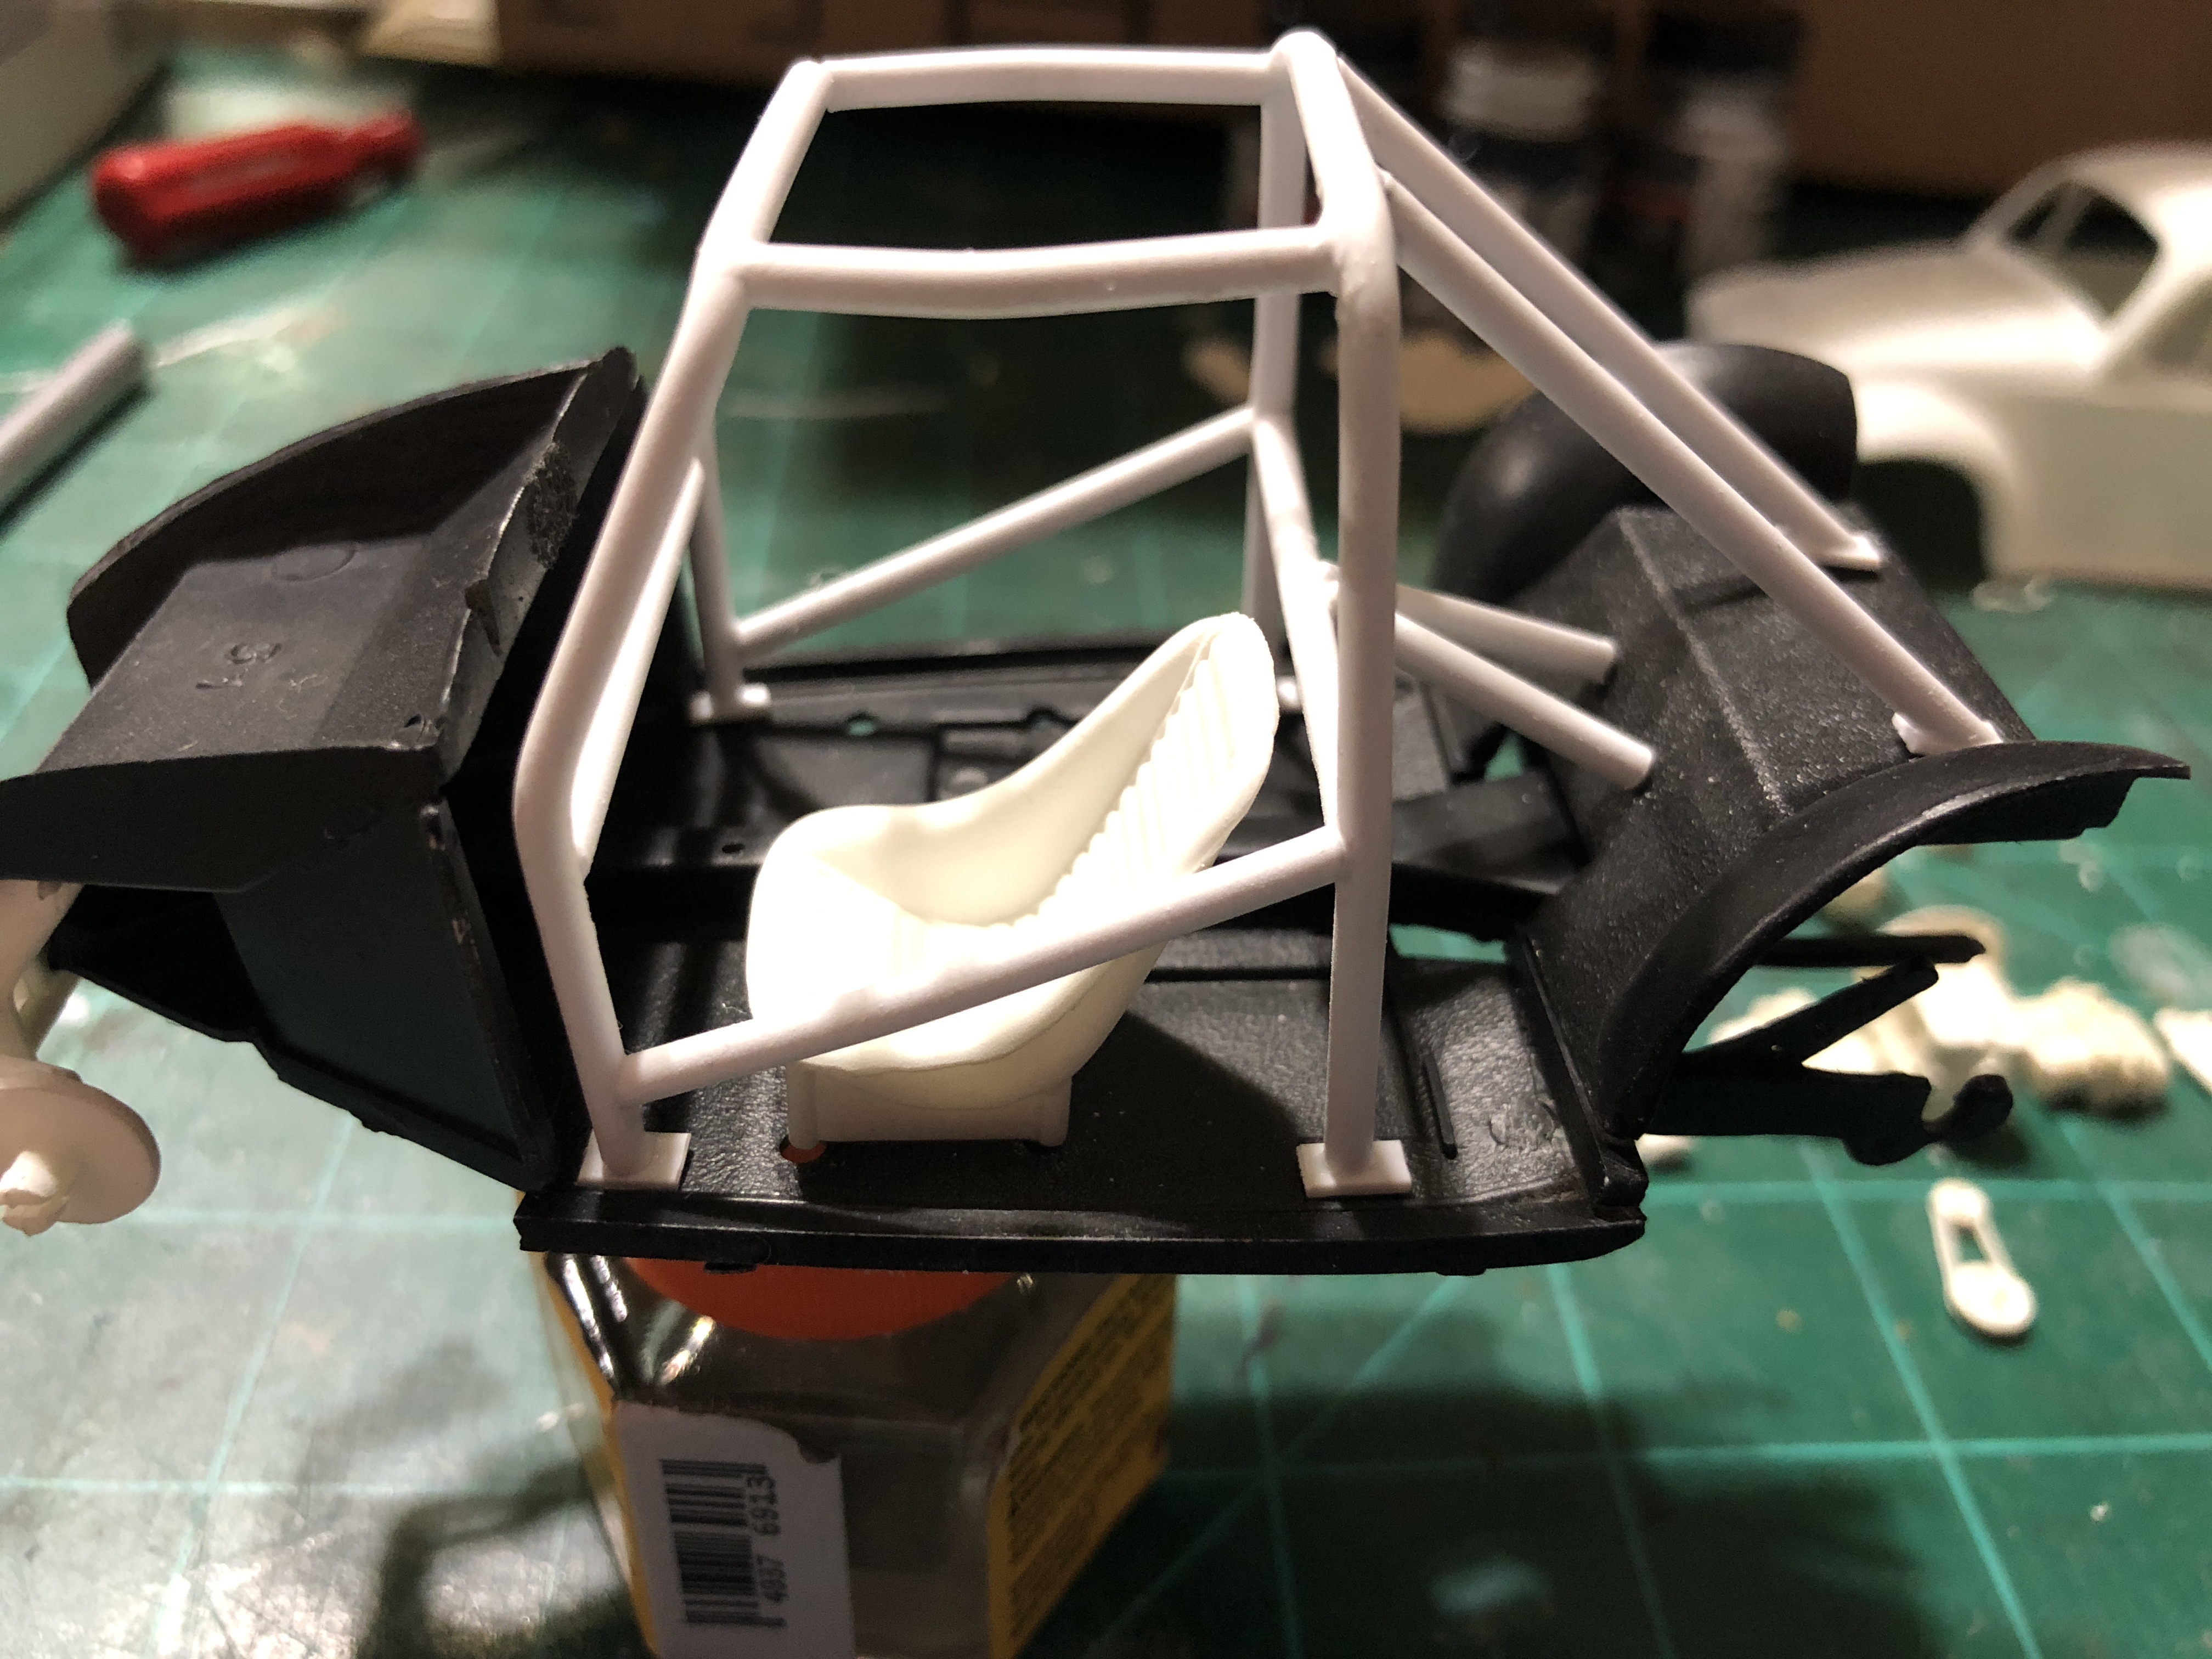
Been a slow build working a few minutes here in a few minutes there. I finally cast a set of good usable tires after running through my resin supply. I’ve added a front passenger foot rest and front bumper and built a completely new front beam and shock towers to raise the front suspension a little bit. I originally modified the kit supplied beam, raising and widening it a little bit and it was just not giving me the look and strength I was looking for. I also end up separating the transmission/engine mount away from the firewall by cutting the mount area away. I’ve never cared for the way Revell originally molded the firewall and this being in a Baja, it will be completely visible. I also originally added a small strip above the firewall to compensate for the body lift I made. After separating the mounts I was able to remove the strip and just mount it in place. Wheels, cage and bumper all painted with metallizer aluminum buff And slightly polished with a paper towel. Extra thick drums were added also to widen the rear stance as well as adding more positive camber to the back wheels to Simulate a raised rear spring plate. I’d like to eventually make some Lugnuts for the wheels and next will come the rear bumper and assembly and paint of the engine. My daughters black hair tie holds everything together while I mark up the body and pan
-
It sure does look like it
-
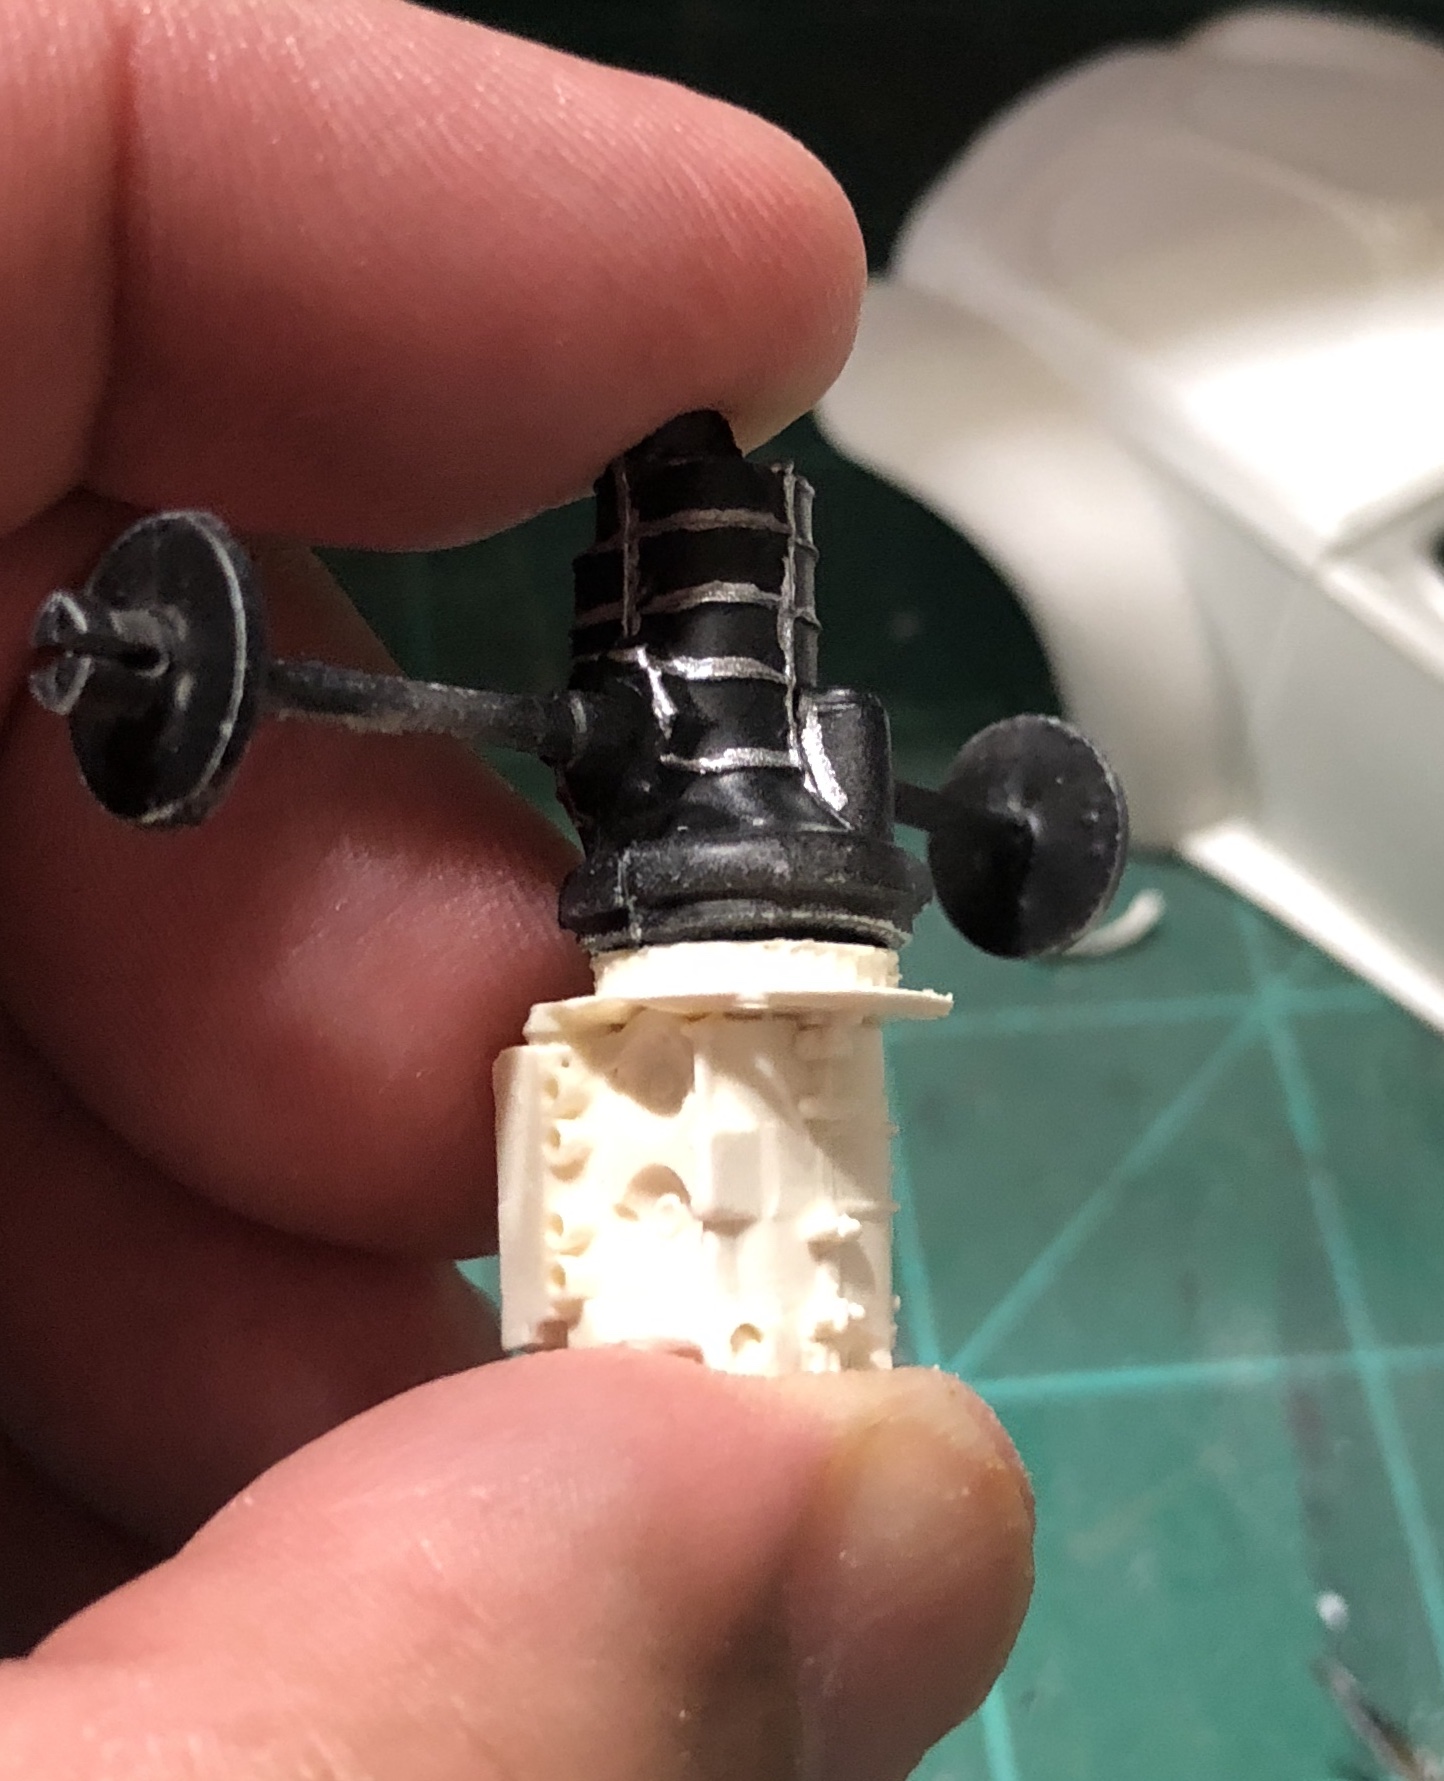
The cylinder tin provides a sealed cooling path For the air so they direct air around the cylinders and cools them with air provided from the fan. It turns out that I have a parts kit from Tamiya that uses those same cylinder tins for this engine
-
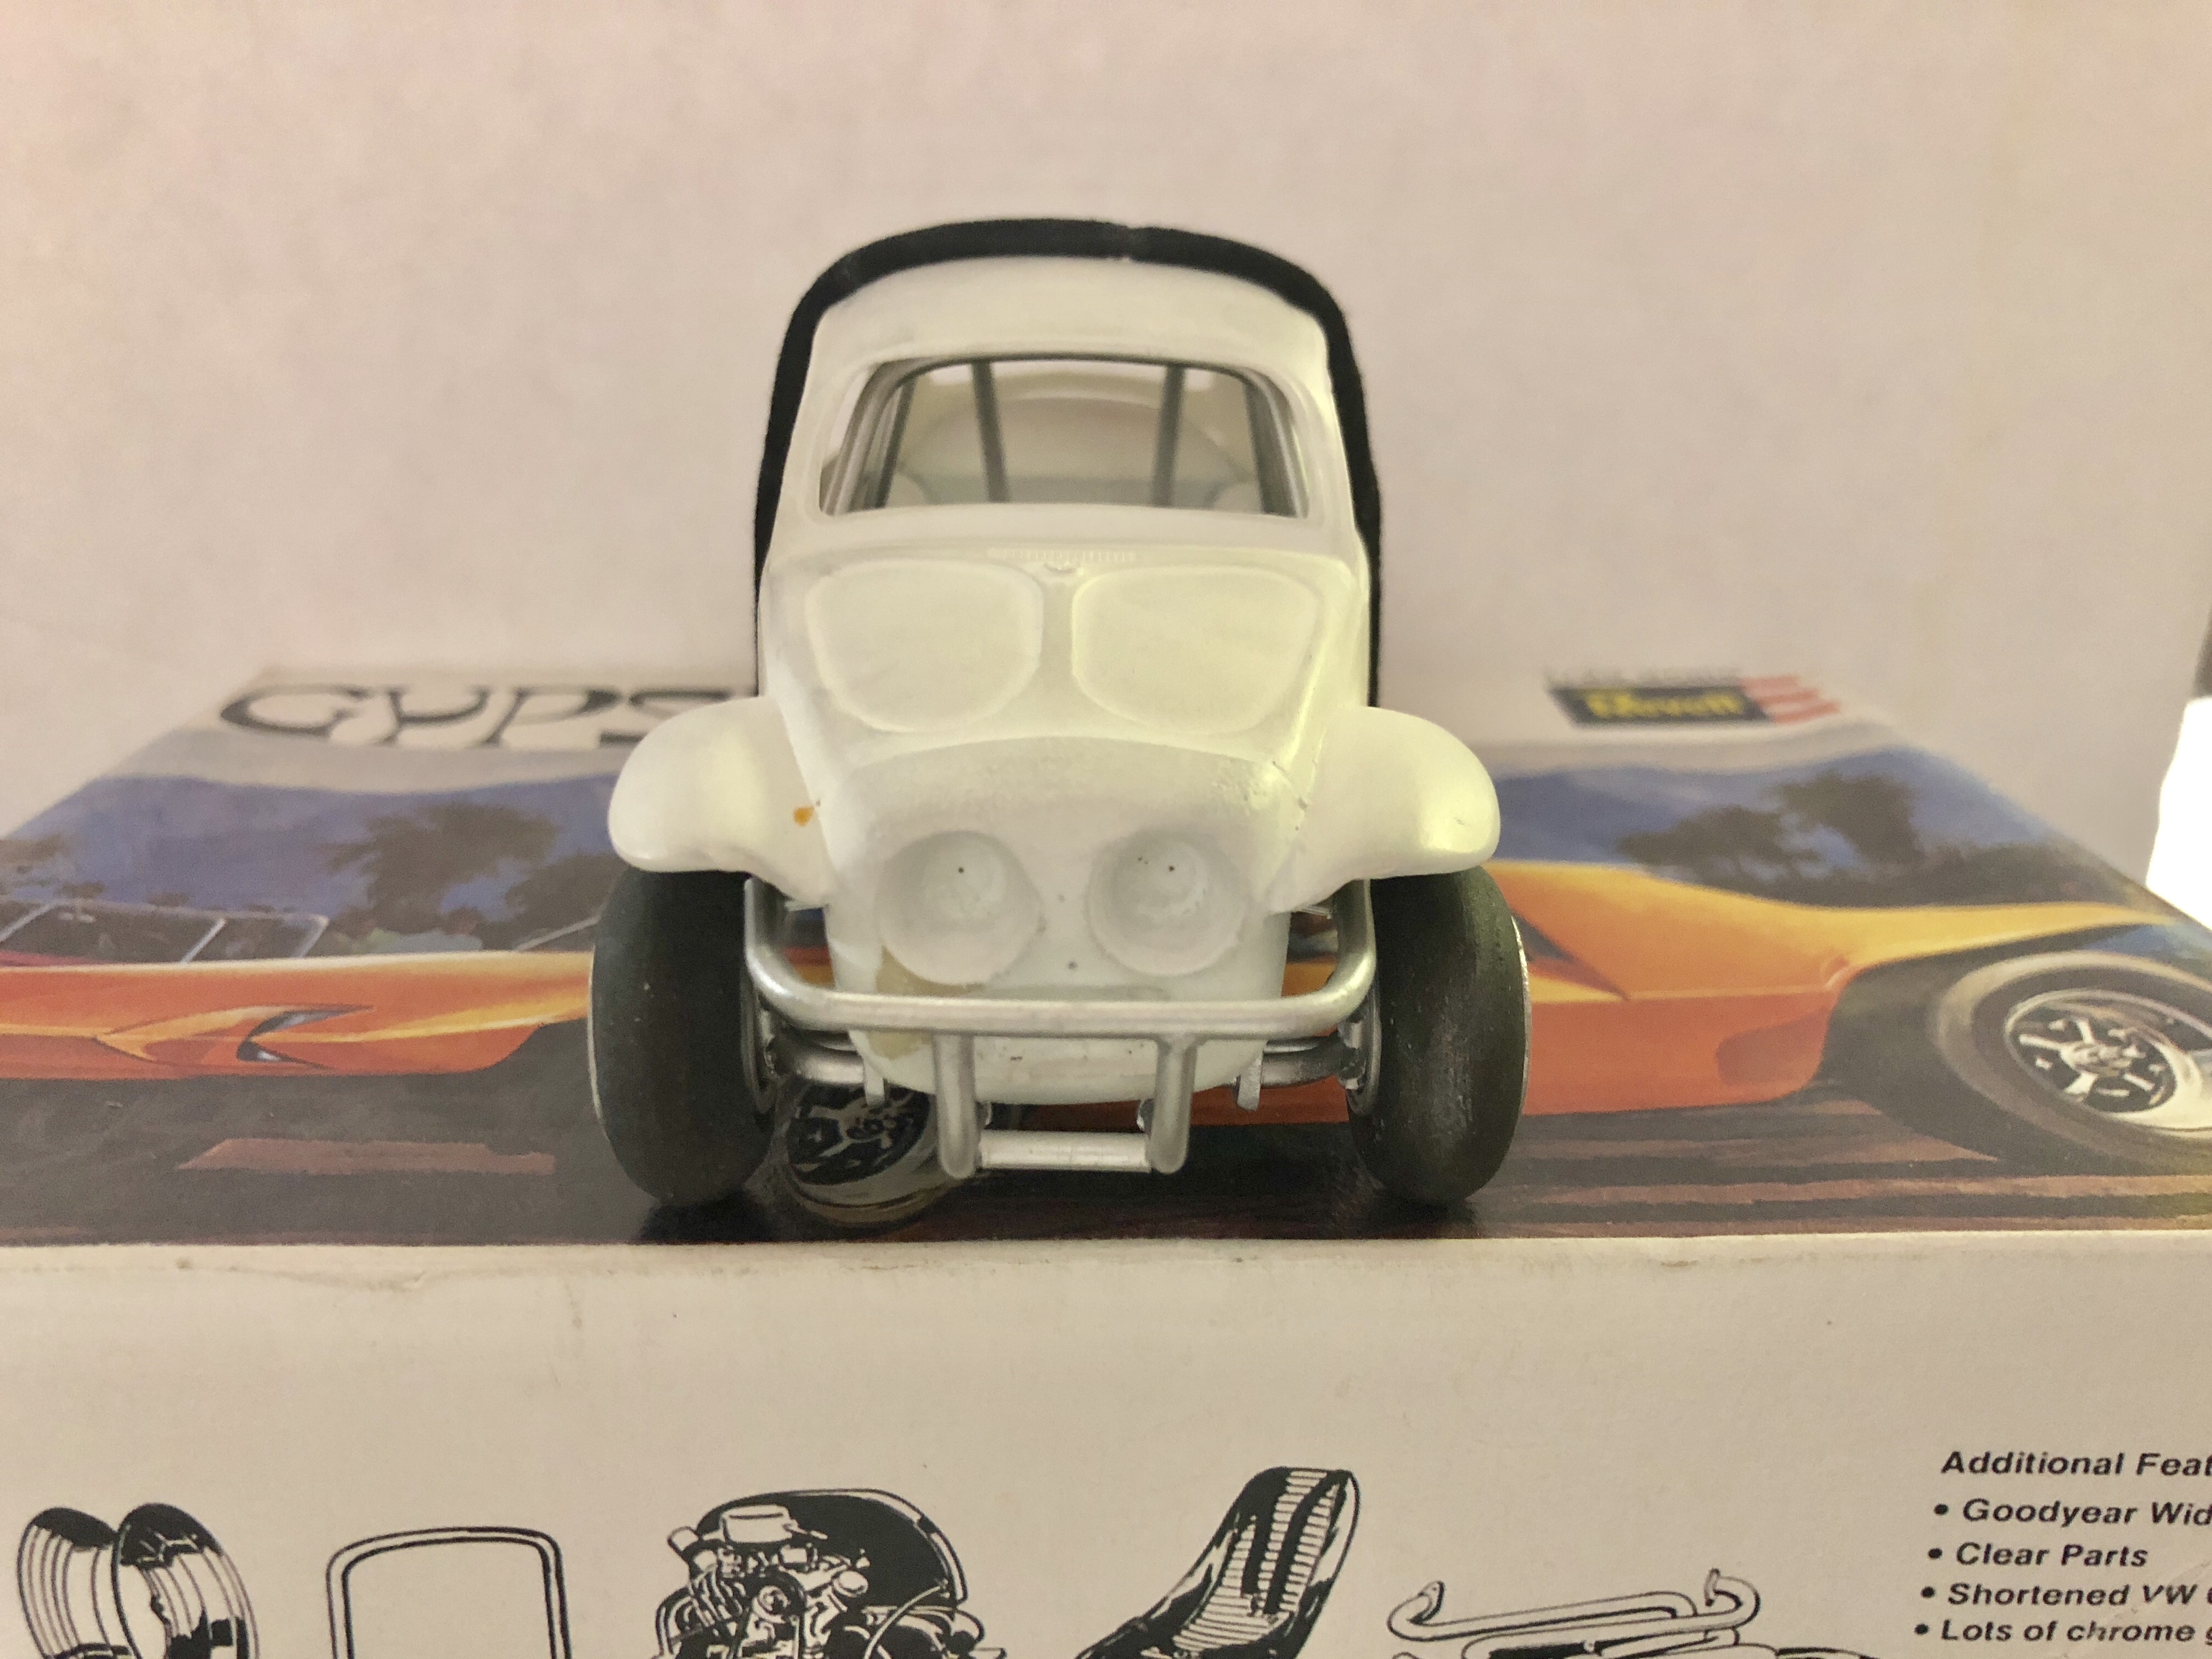
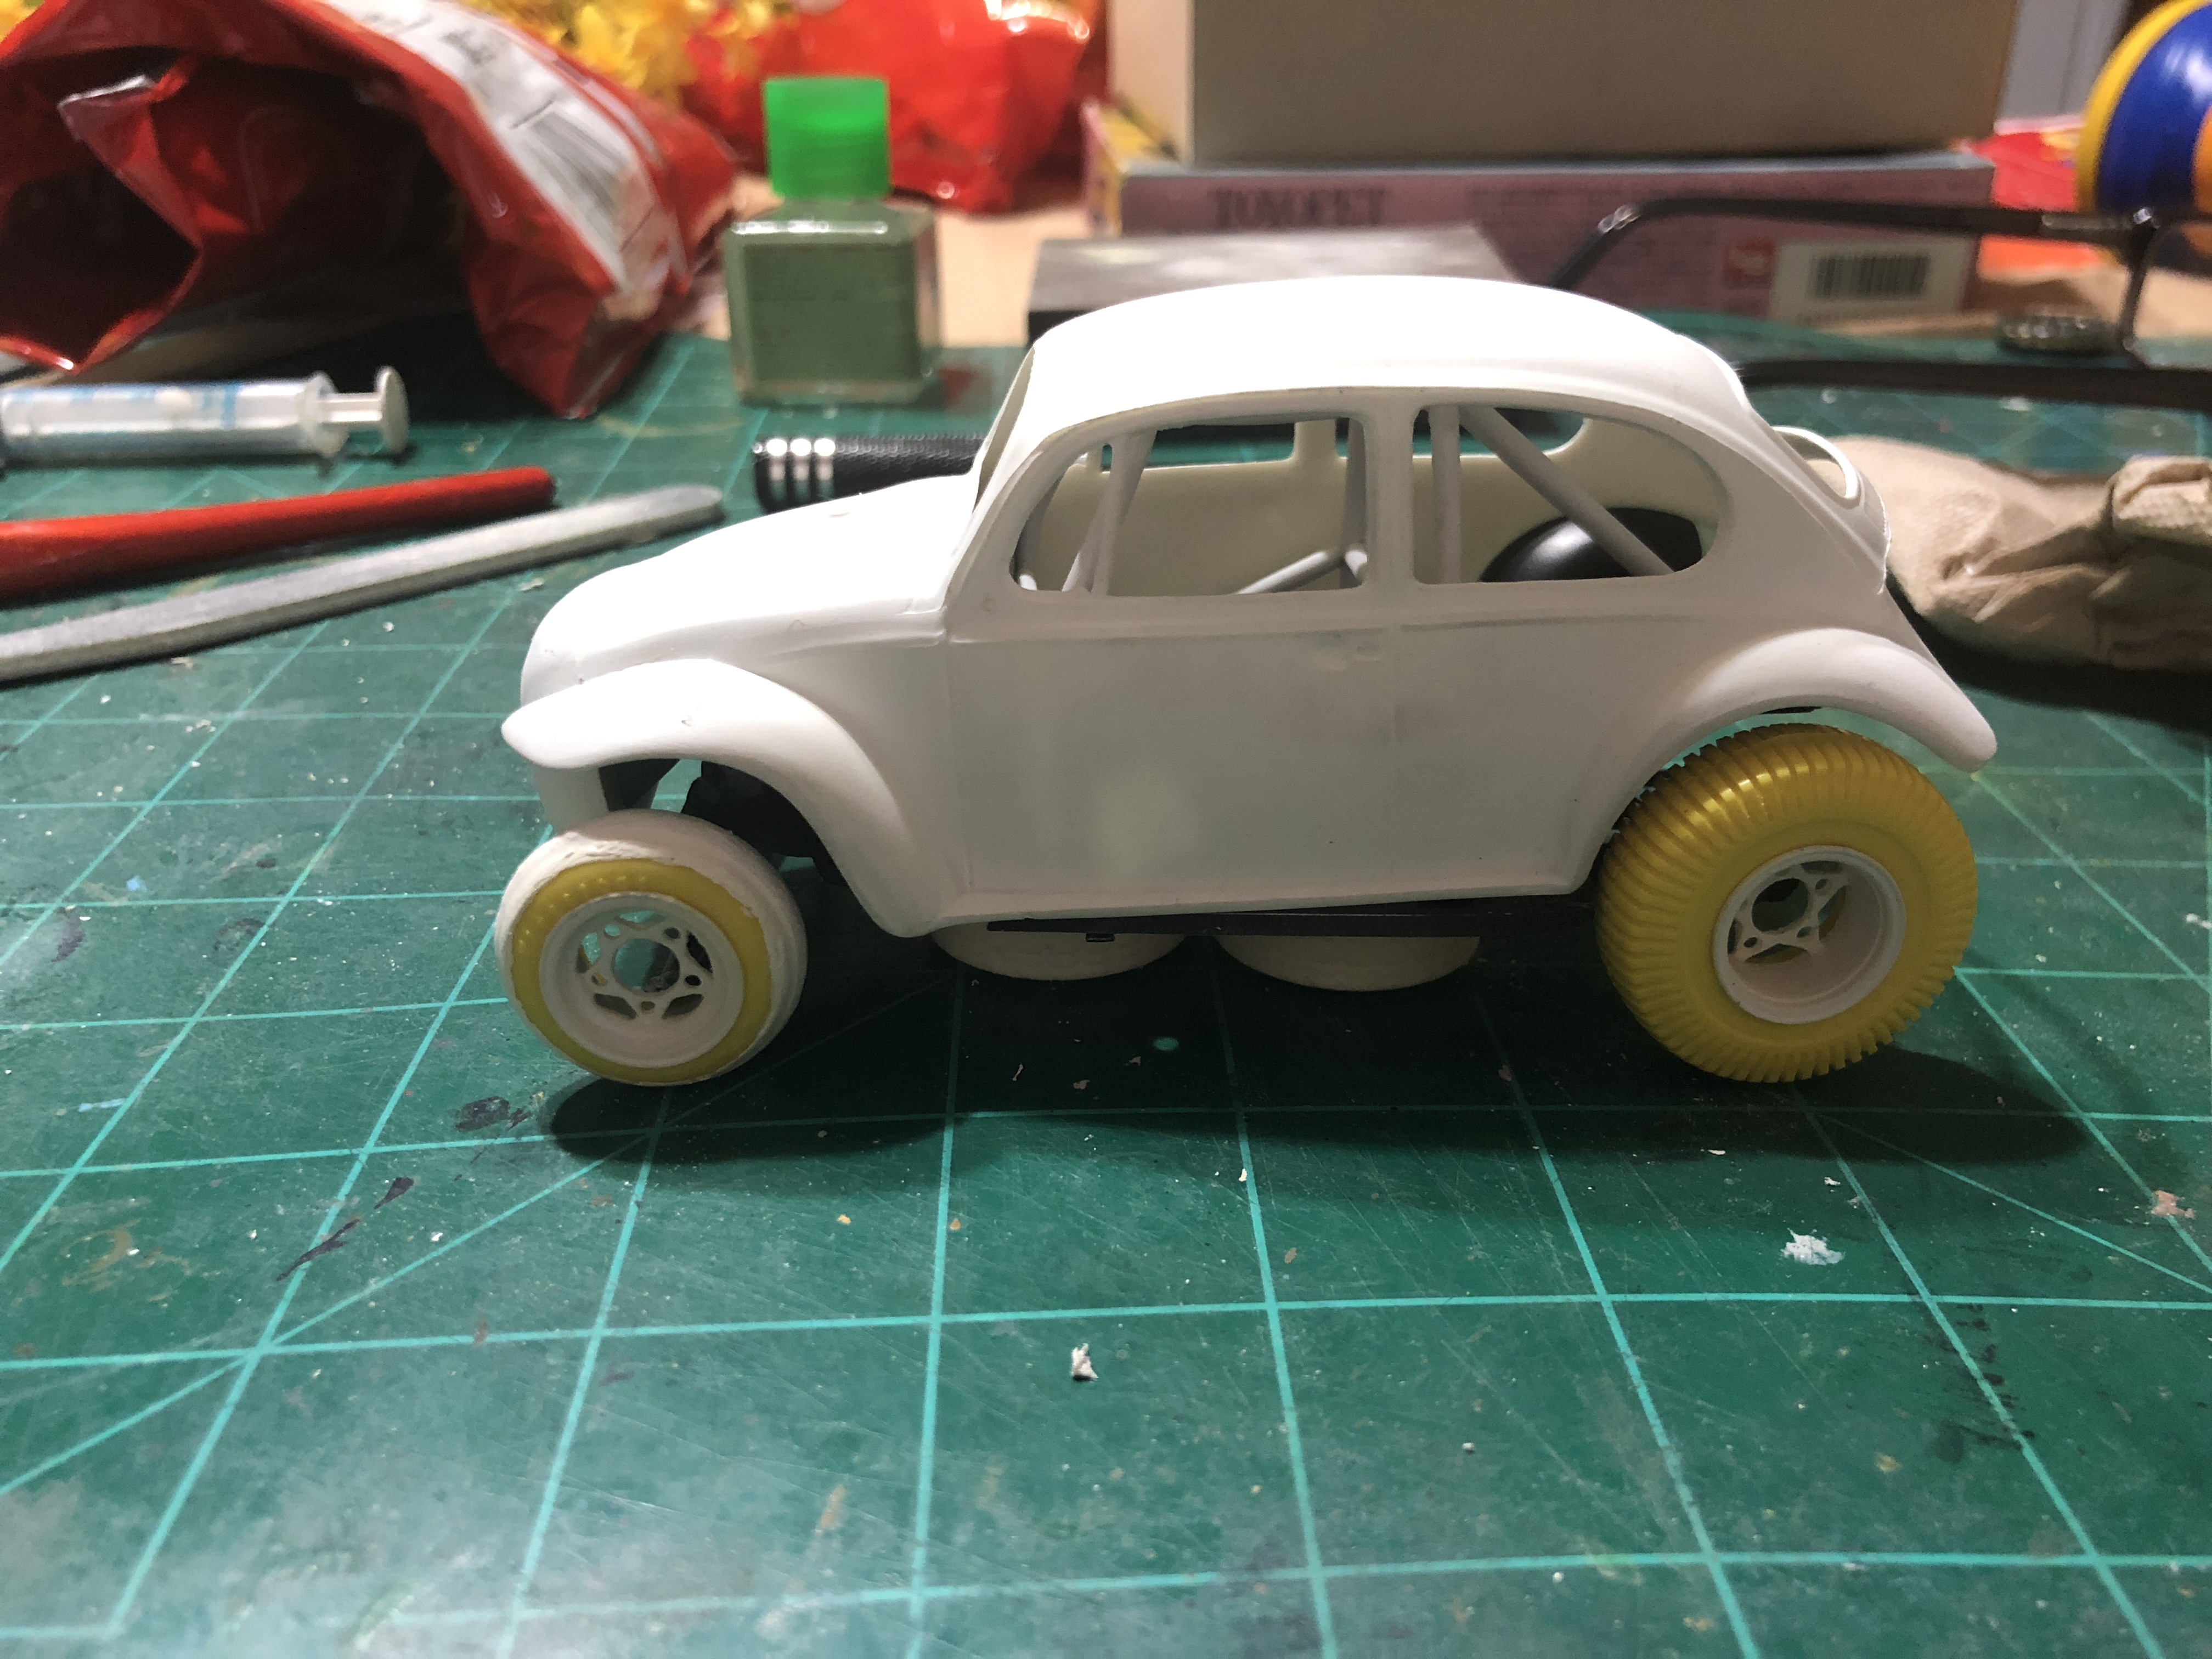
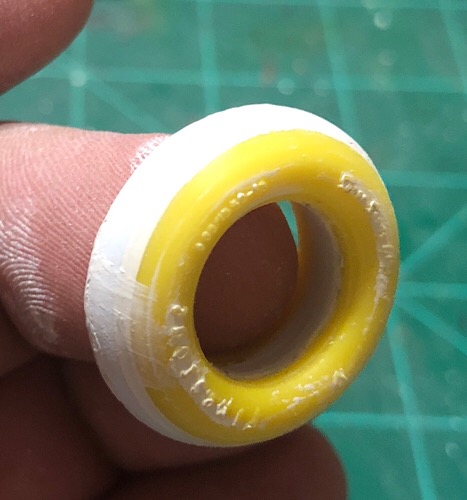
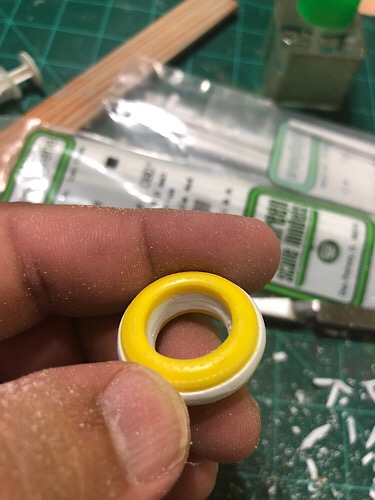
Been in a little bit of a standstill while sourcing the tires that more or less replicate The original Sand Scorcher. Front tires are from a AMT deora kit With two thick styrene sheets sandwiched between the tire halves and shaped with Tamiya putty to get the correct tire width. While waiting for the putty to cure, I just wanted to see a Mock up of the wheels and tires sitting next to the body. Once I modify the suspension, it should be ready for paint
-
Since this is an off-road car, I’m going to save the 48’s for my upcoming drag convertible bug and I’m going to run these air cleaner covered webers instead.
-
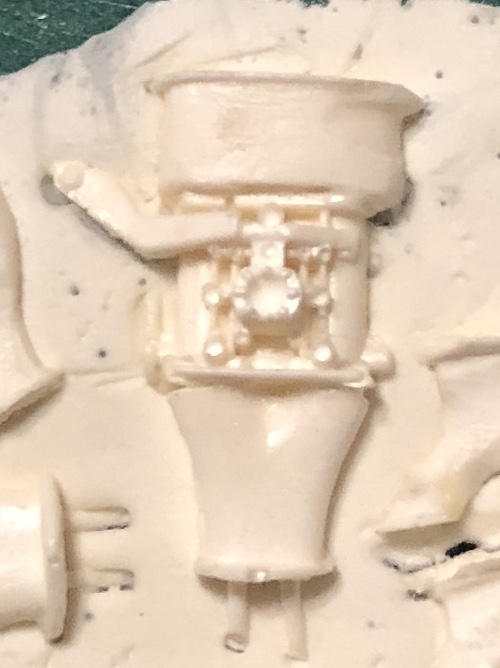
I purchased this resin cast engine and I am doing some cleanup on the parts. I like the look of the 36 horse style fan shroud and I usually modify the 1600 Revell fan shrouds to look like 36 horse shrouds anyway . Interestingly it does not have cylinder tin which leaves the cylinders exposed which might look good for a drag car but not practical for a Baja bug. It’s going to have to work. Just like in real life, the issue with trying to fit a 200mm flywheel in an early tranny case, this cast resin flywheel doesn’t fit the stock Revell bell housing.
-
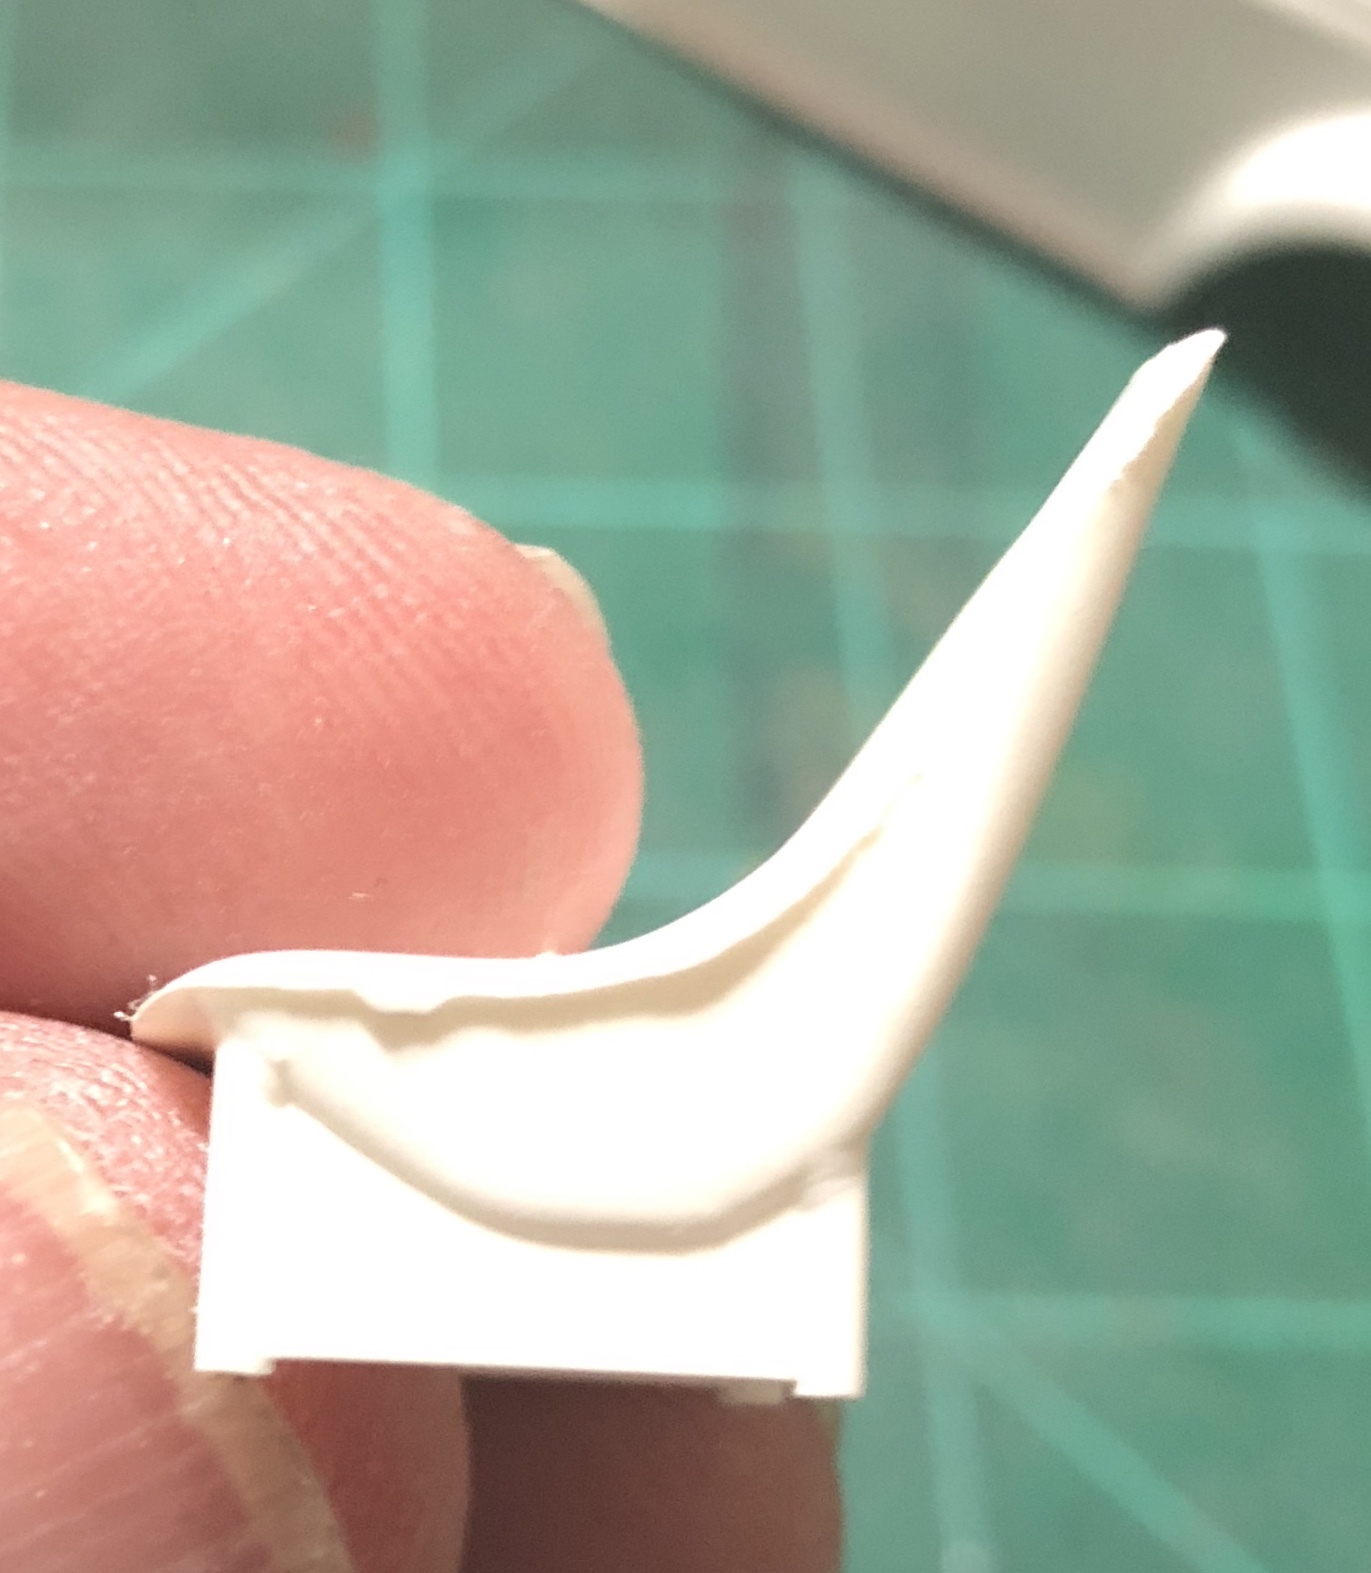
I’ve got the body in rough primer and I am added mount tabs and primed the cage. With the scale 3 inch body lift I’ve added, I will have to also lift the seats up. I’m considering cutting the center web in the seat mount and build some risers/seat mounts.
-
That is a nice collection. I also picked up that Viper GTS coupe at the last model show. I have that convertible and I’m planning on a full out drag Bug for that kit
-
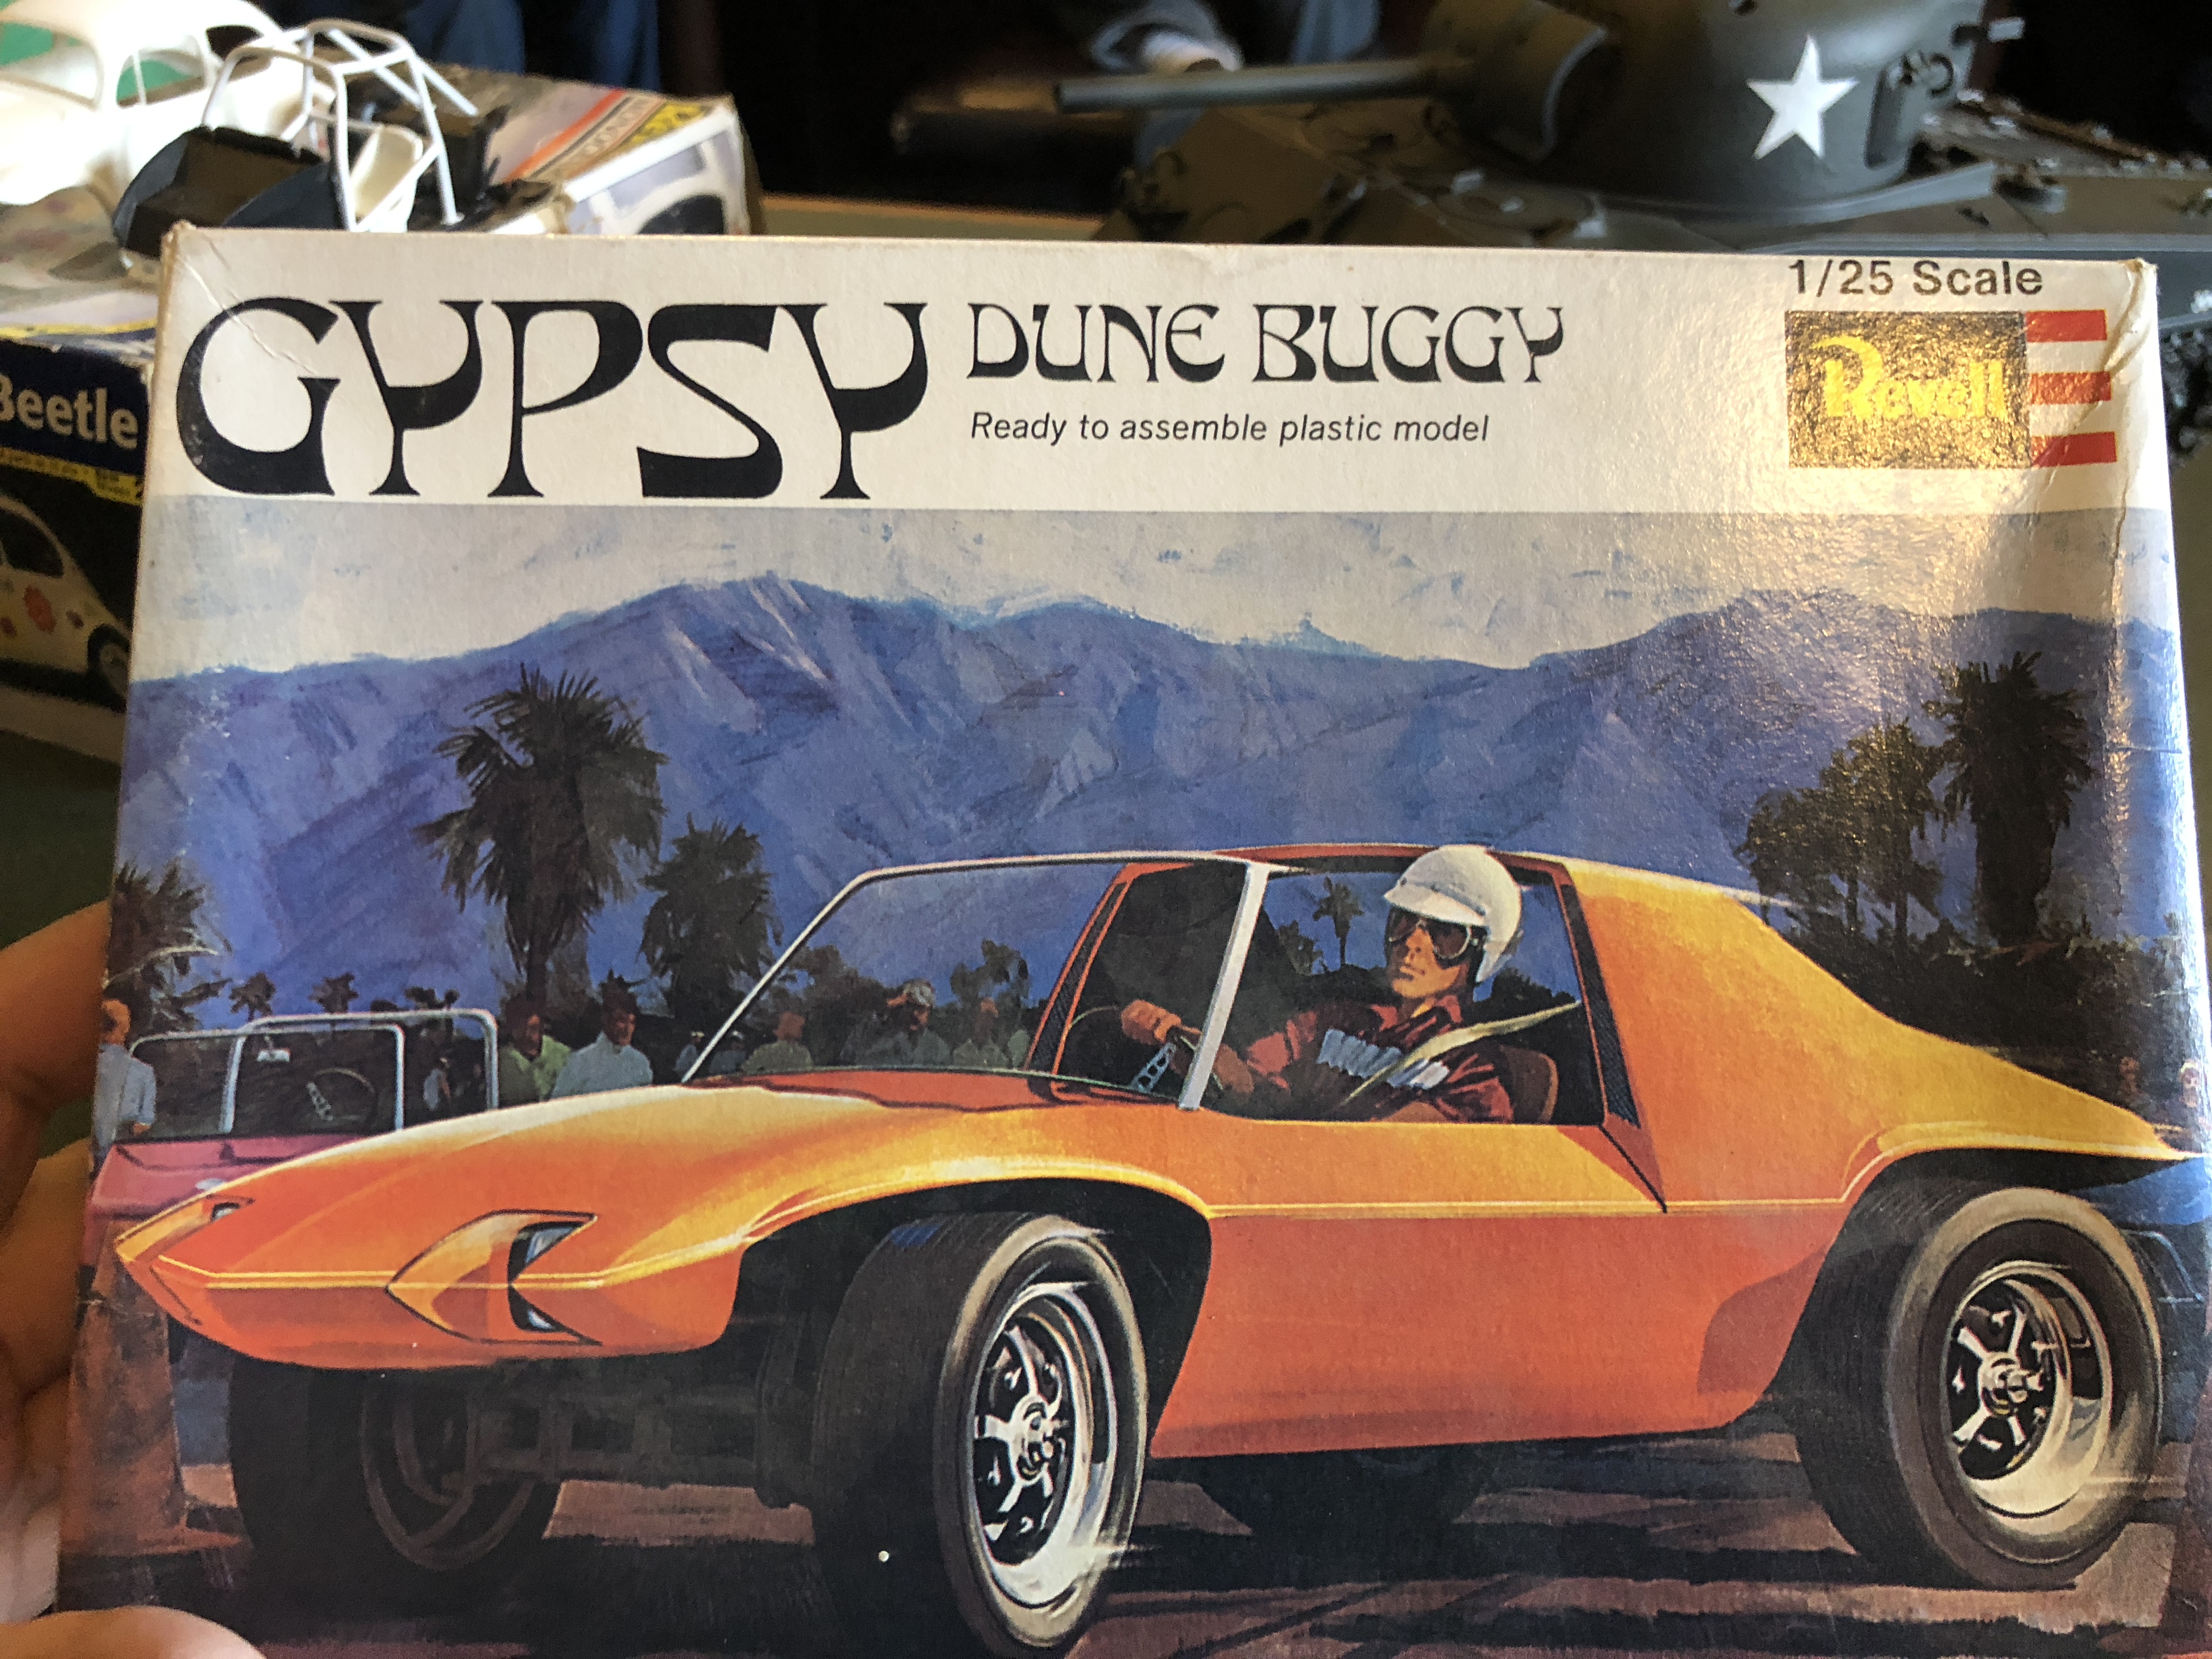
A local club member gifted me this Revell Gypsy today. Another one for my VW collection. Thank you Alan
-
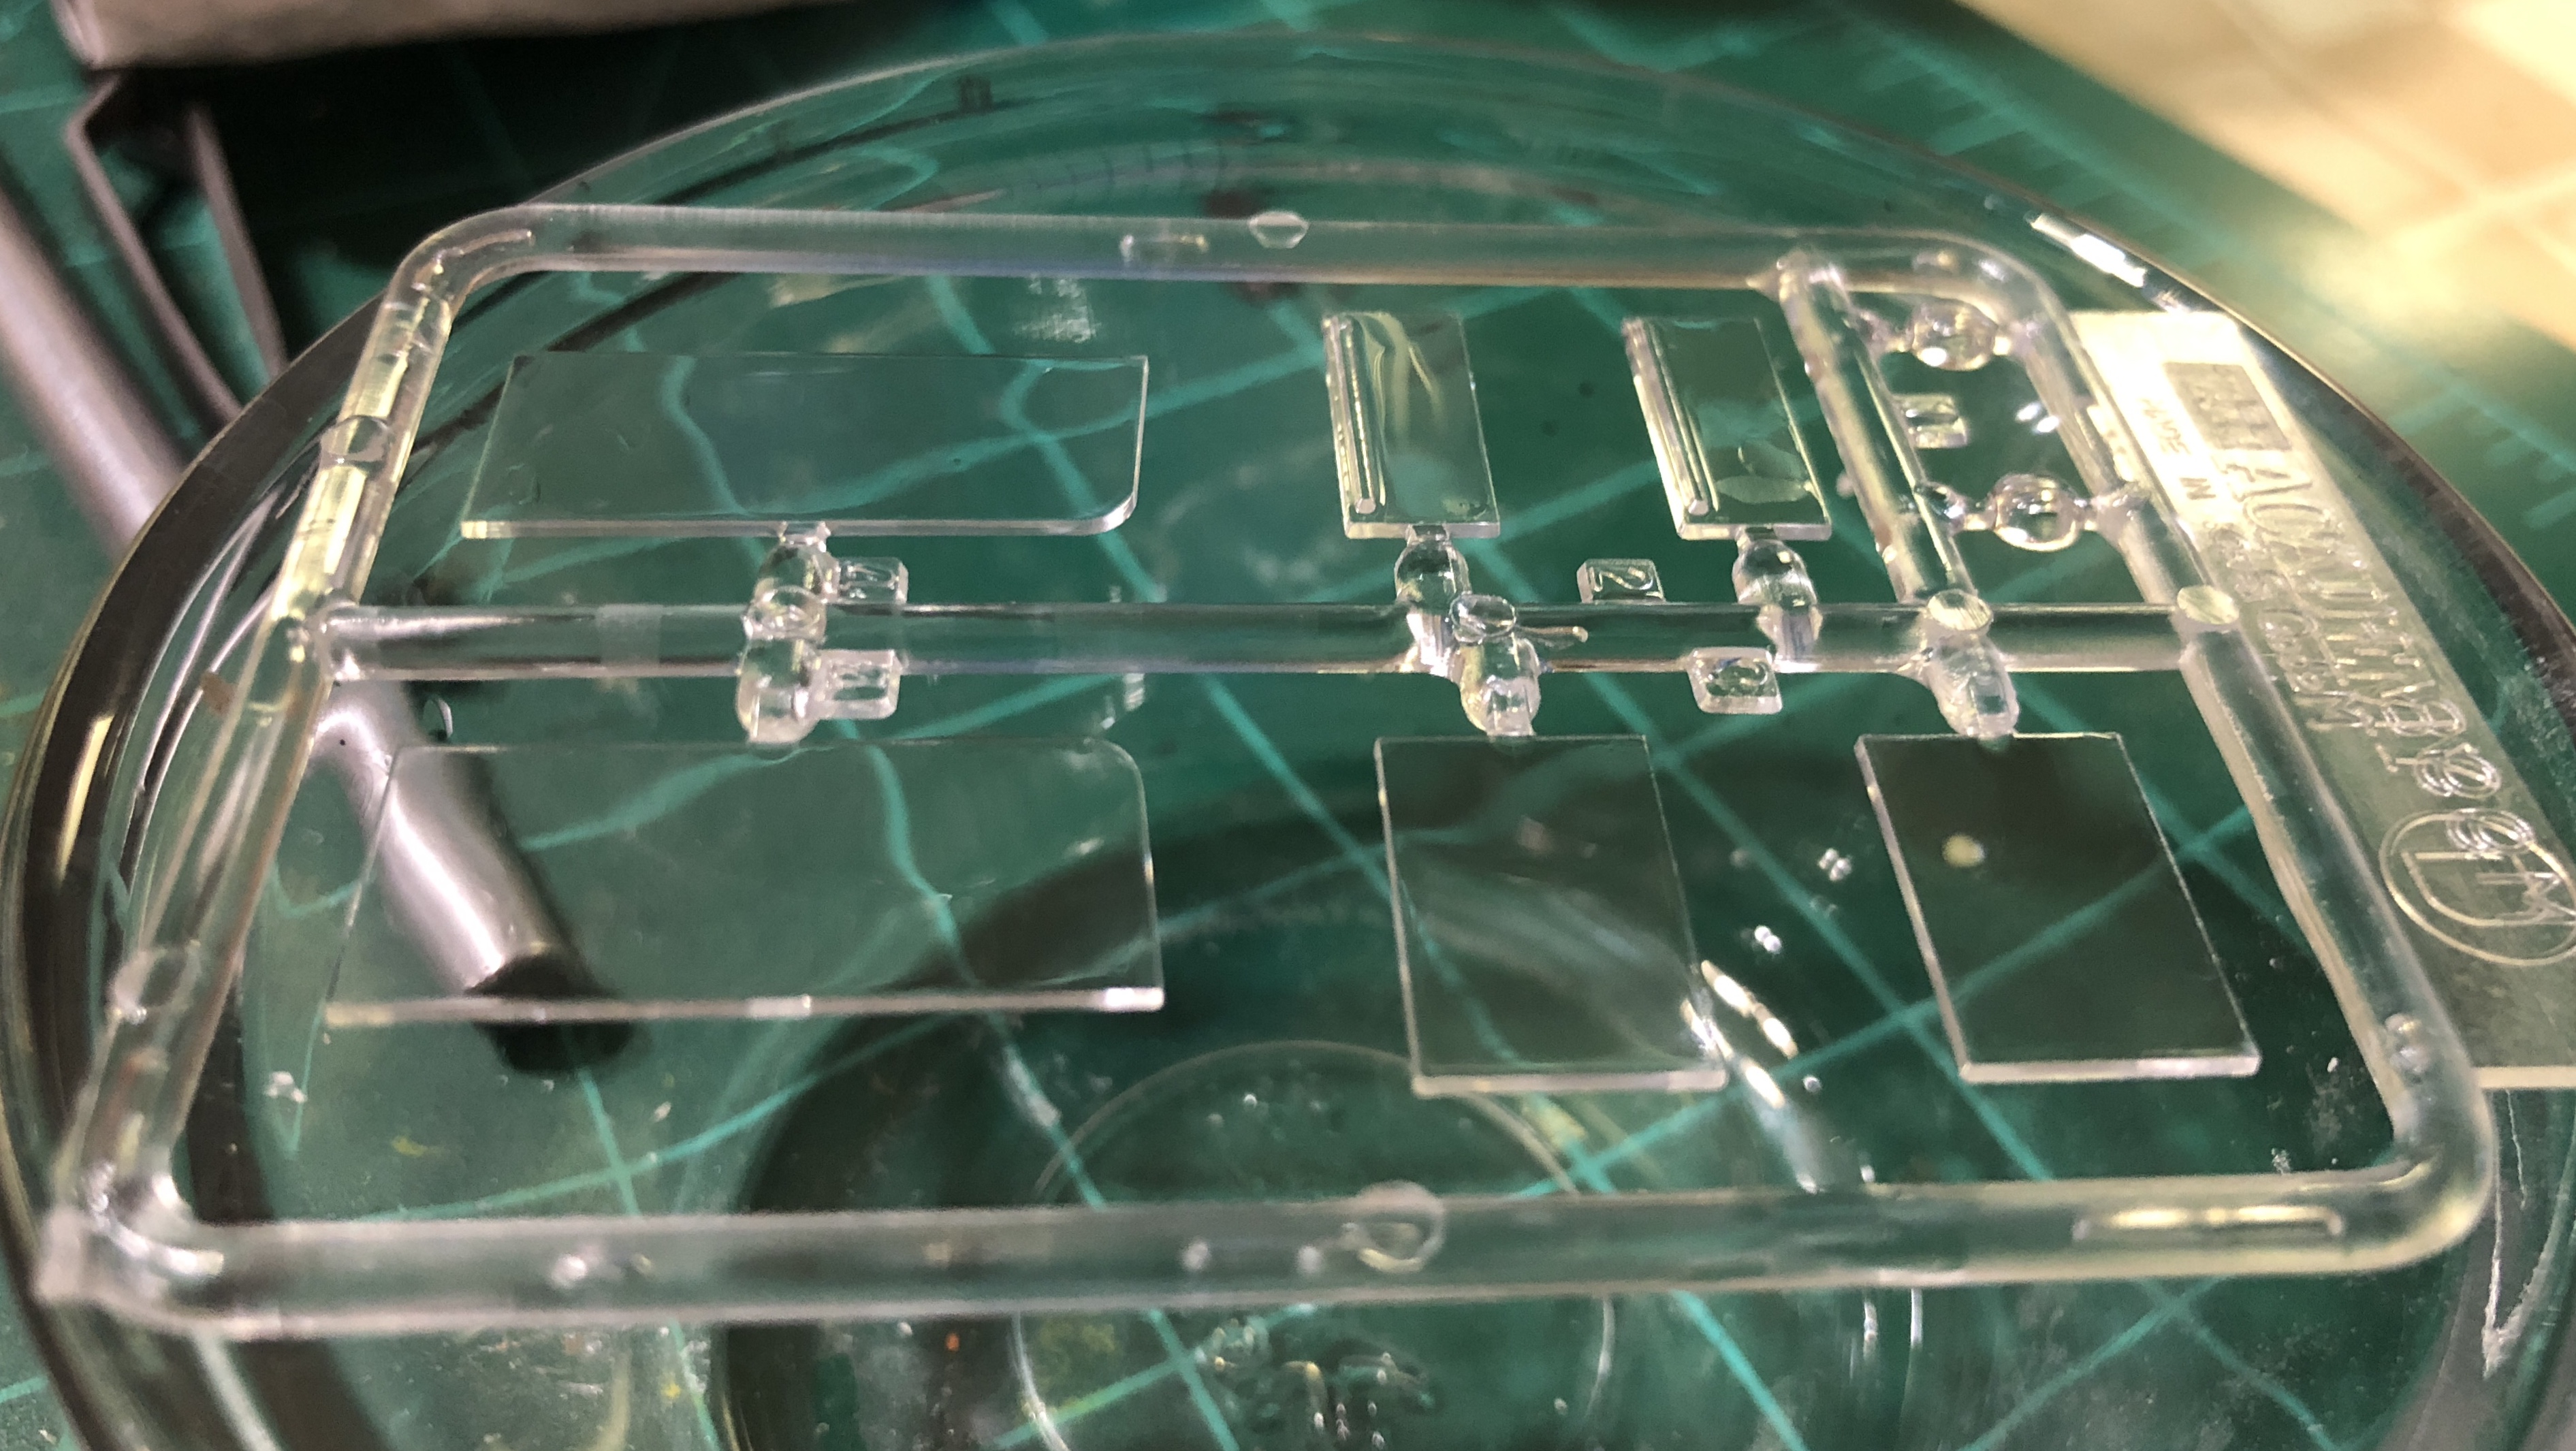
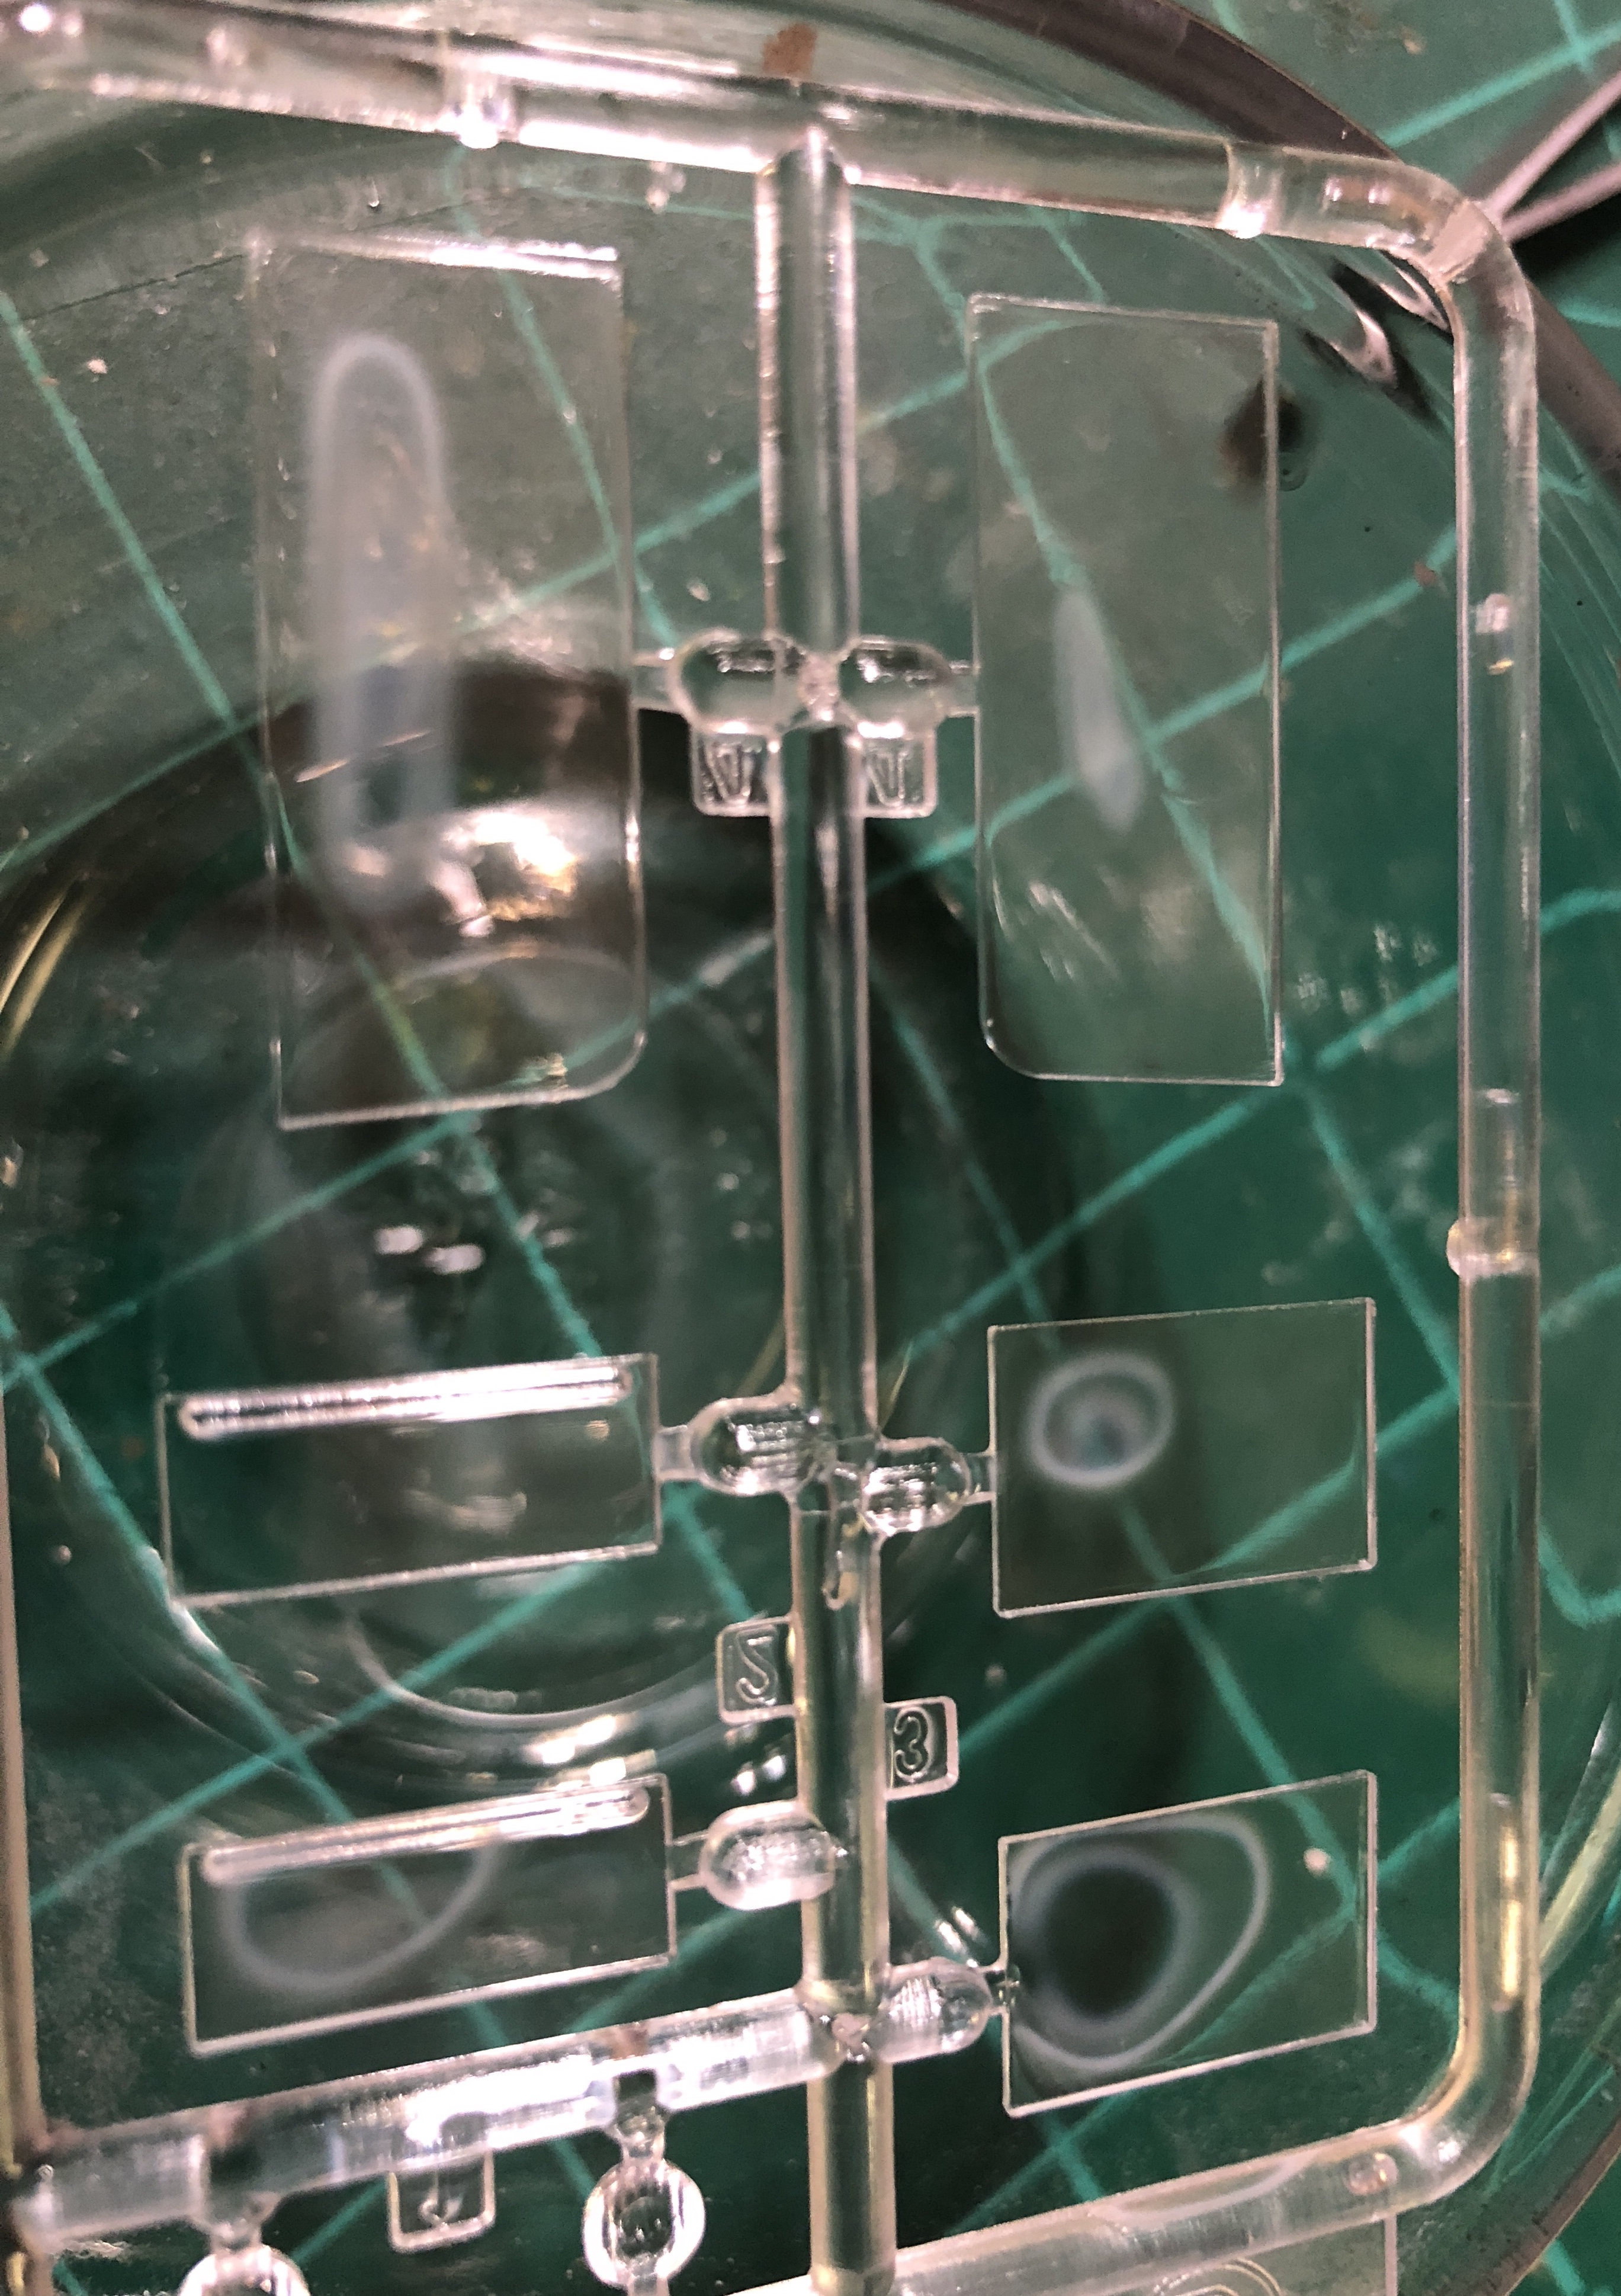
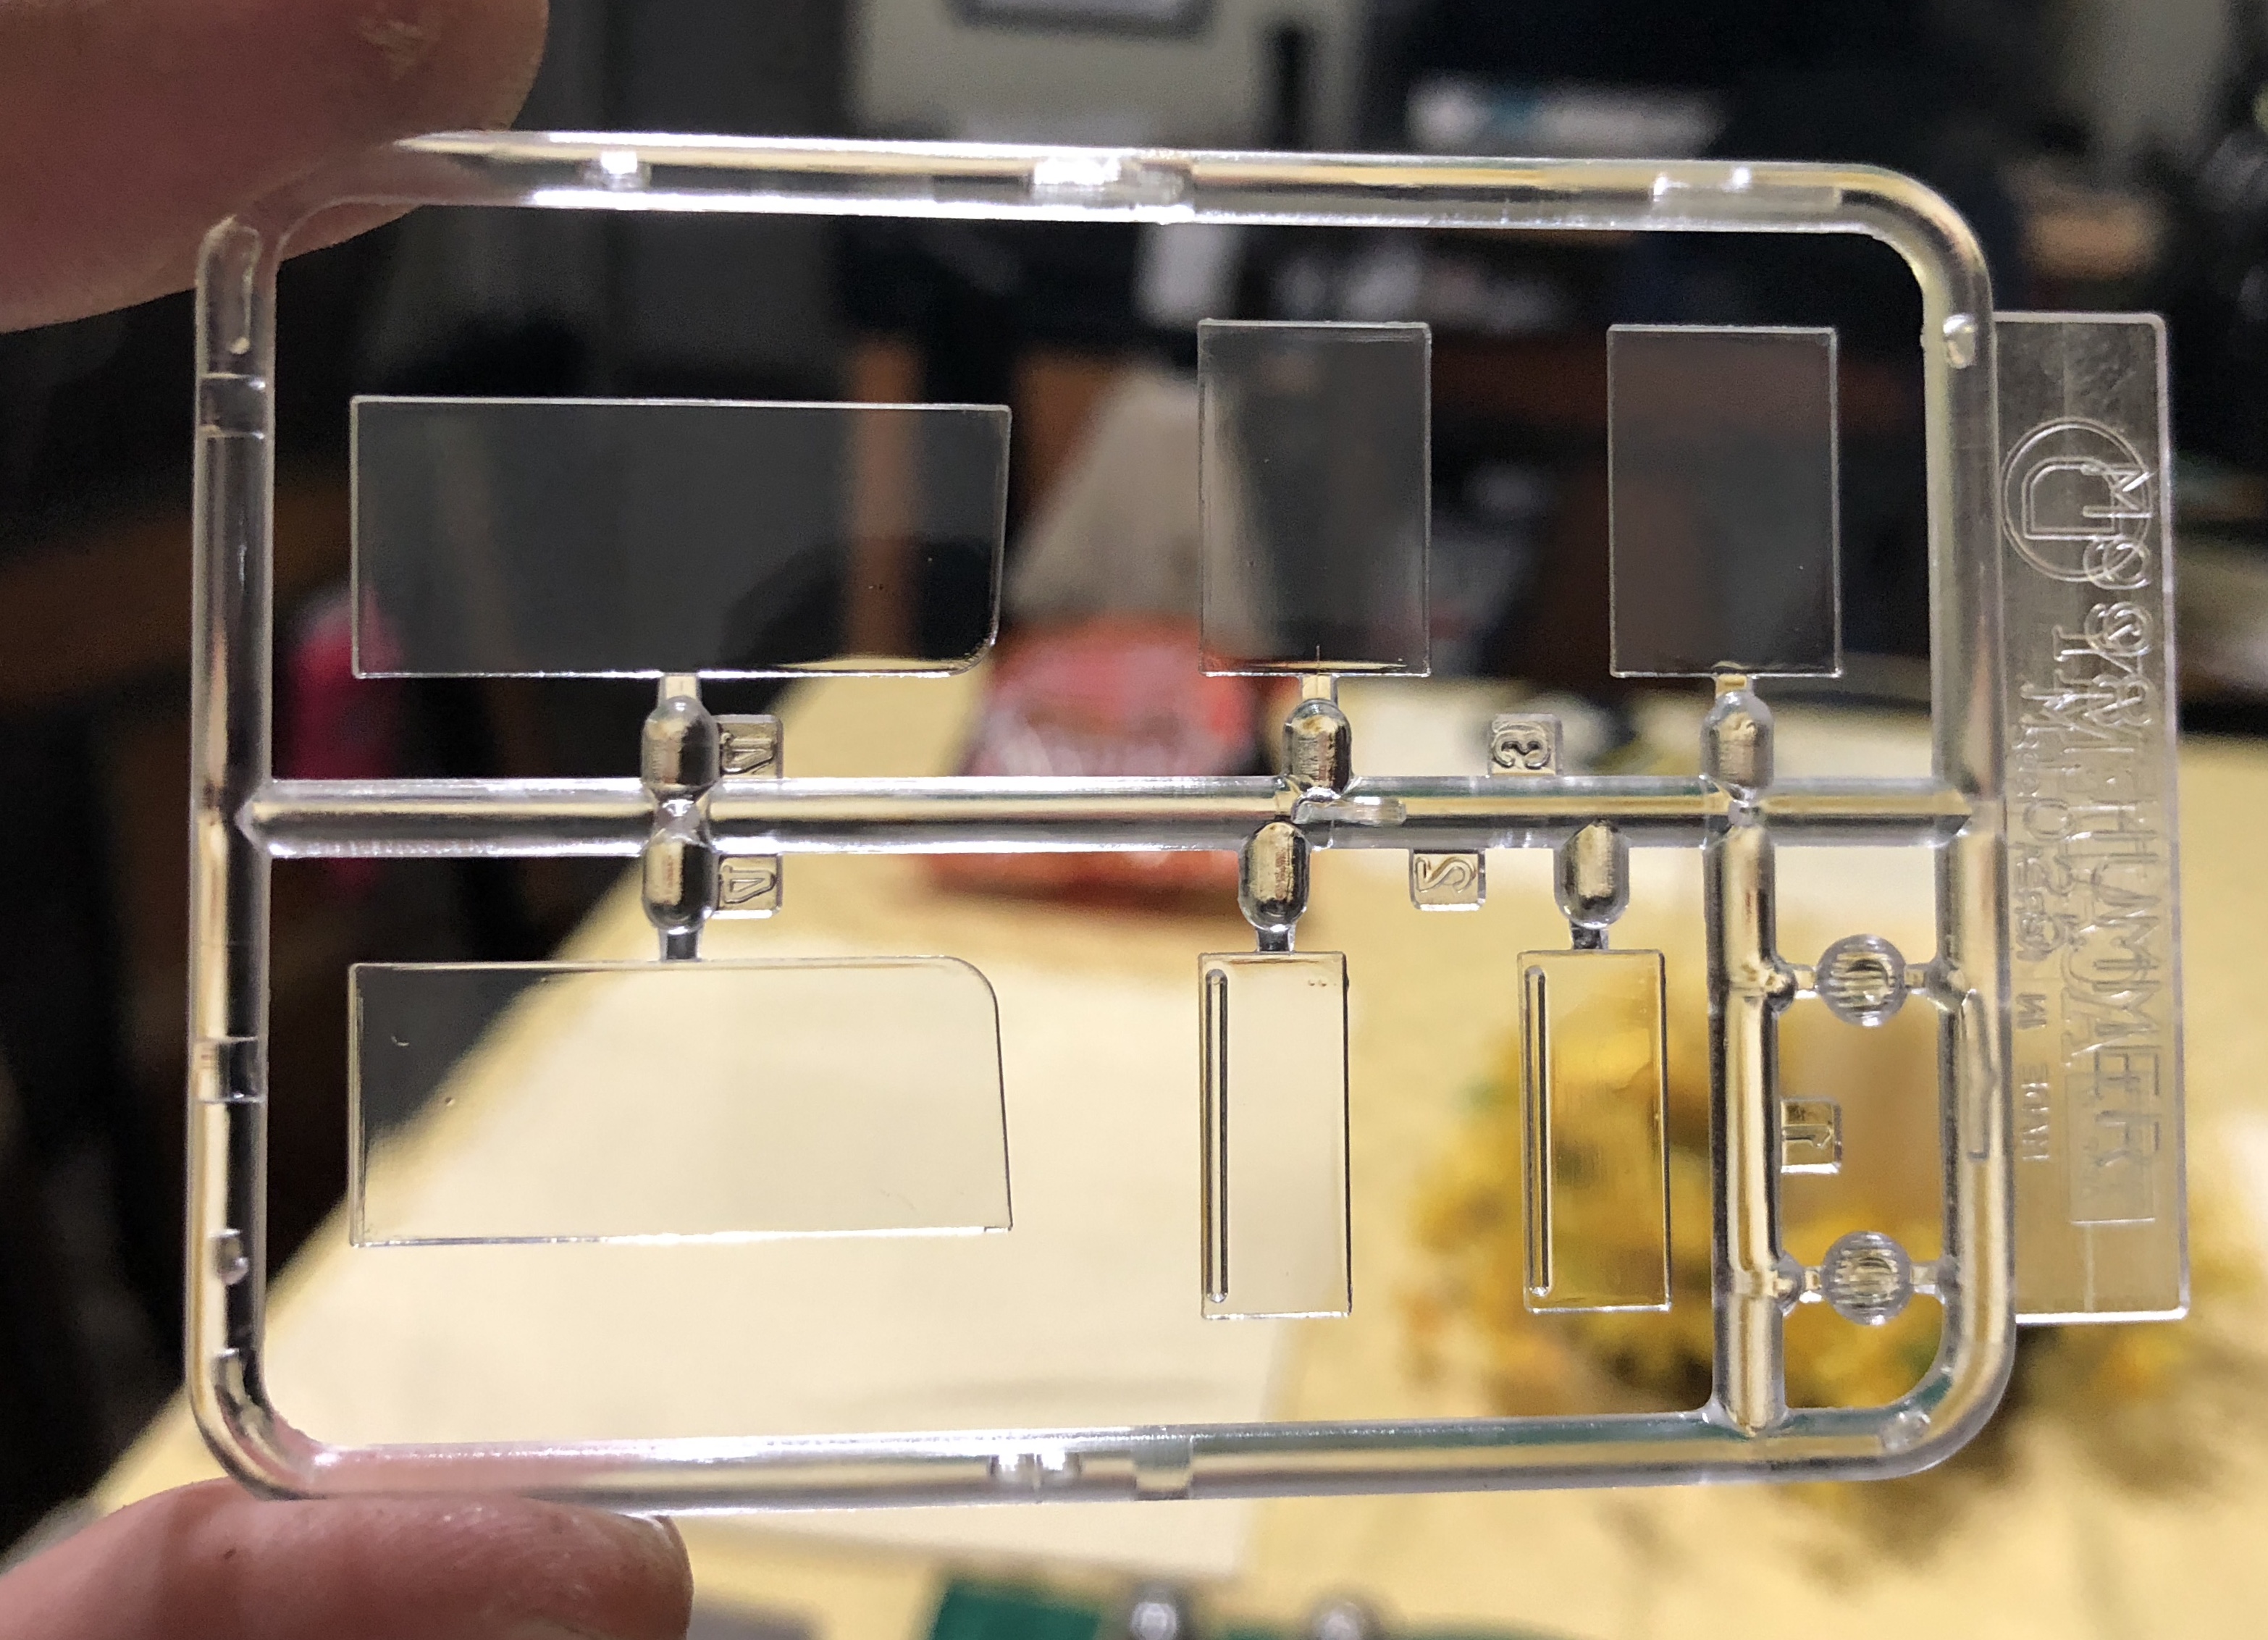
If the tree is small enough, I dip the entire tree then wick off any excess onto a paper towel at the corners of the tree while tapping it several times on the paper towel to remove any drips . I will usually continue to check for areas where pledge might be pooled up. As the pledge starts to dry you might see white hazing forming in the center of each of your window panels but that’s OK, it will dry completely crystal clear as you see in this last photo. You can see the difference in the treated area of the glass and the non-treated sprue ID portion. If you stand the tree up on something you’ll reduce the chance of getting plant or dust falling on
-
That’s the dieback I was speaking of in the first two photo examples I posted. I don’t know if I was expecting too much but having painted 1:1 cars, I have an idea what I’m looking for and I just couldn’t achieve it with pledge like I’m able to do with laquer. It appears other self are quite happy with the results and their results look pretty good
-
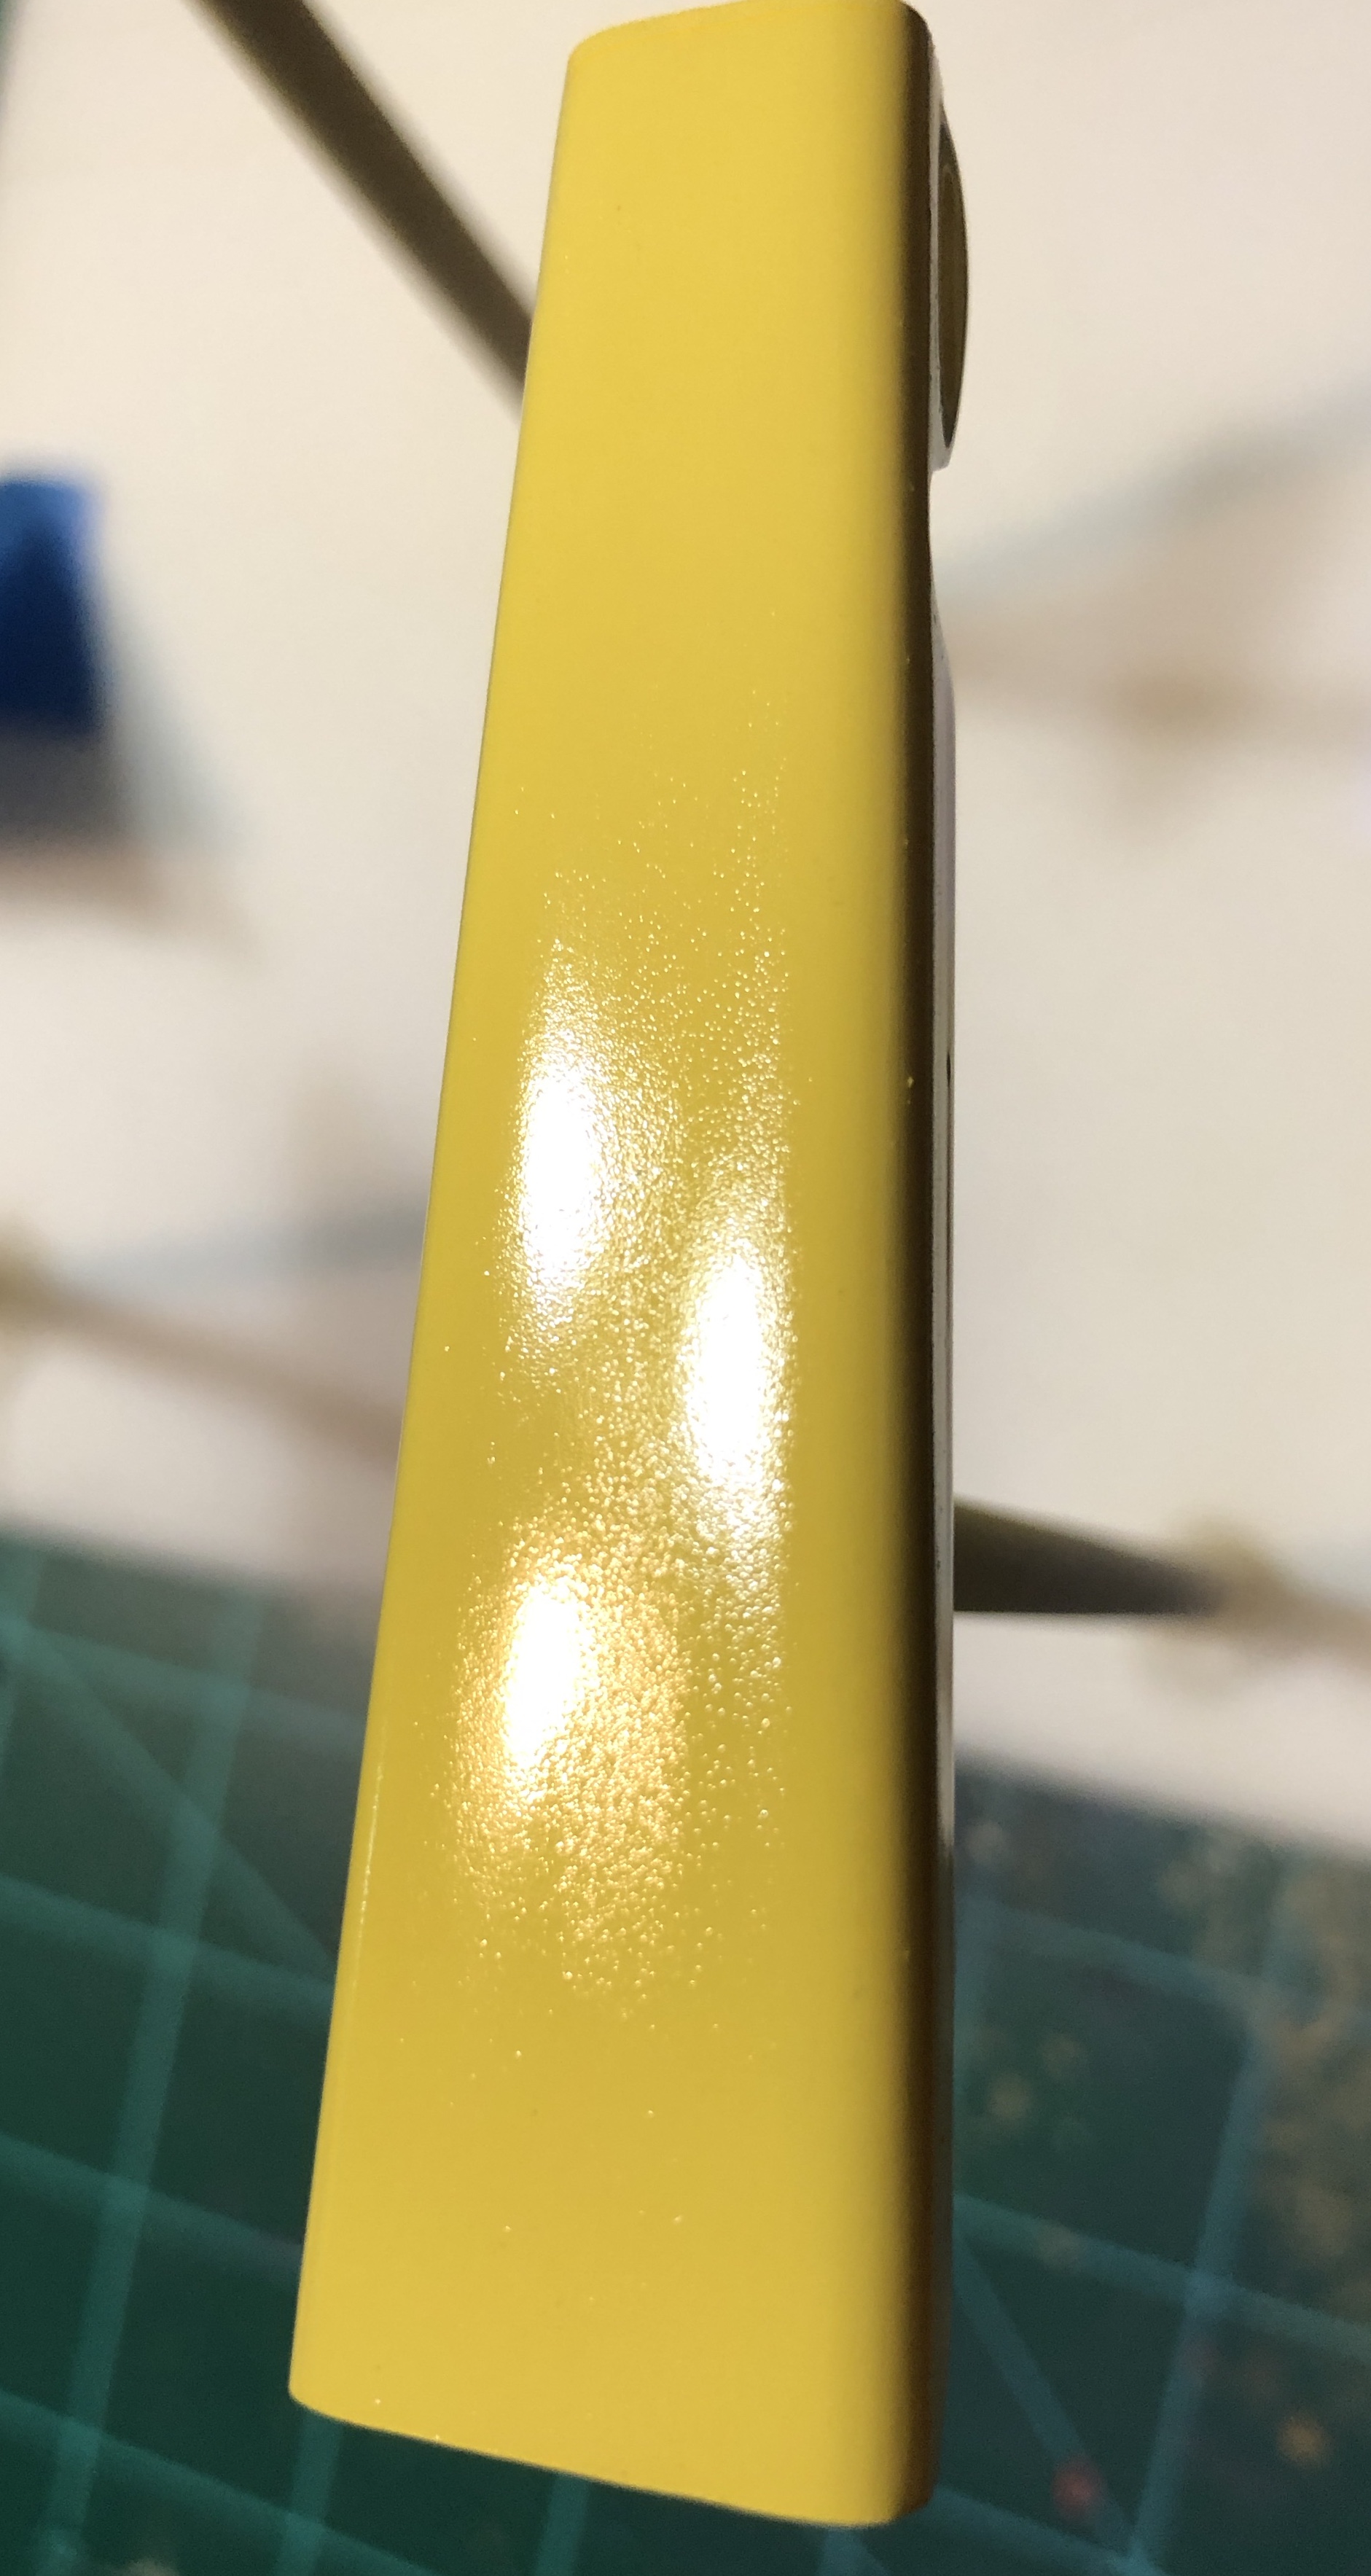
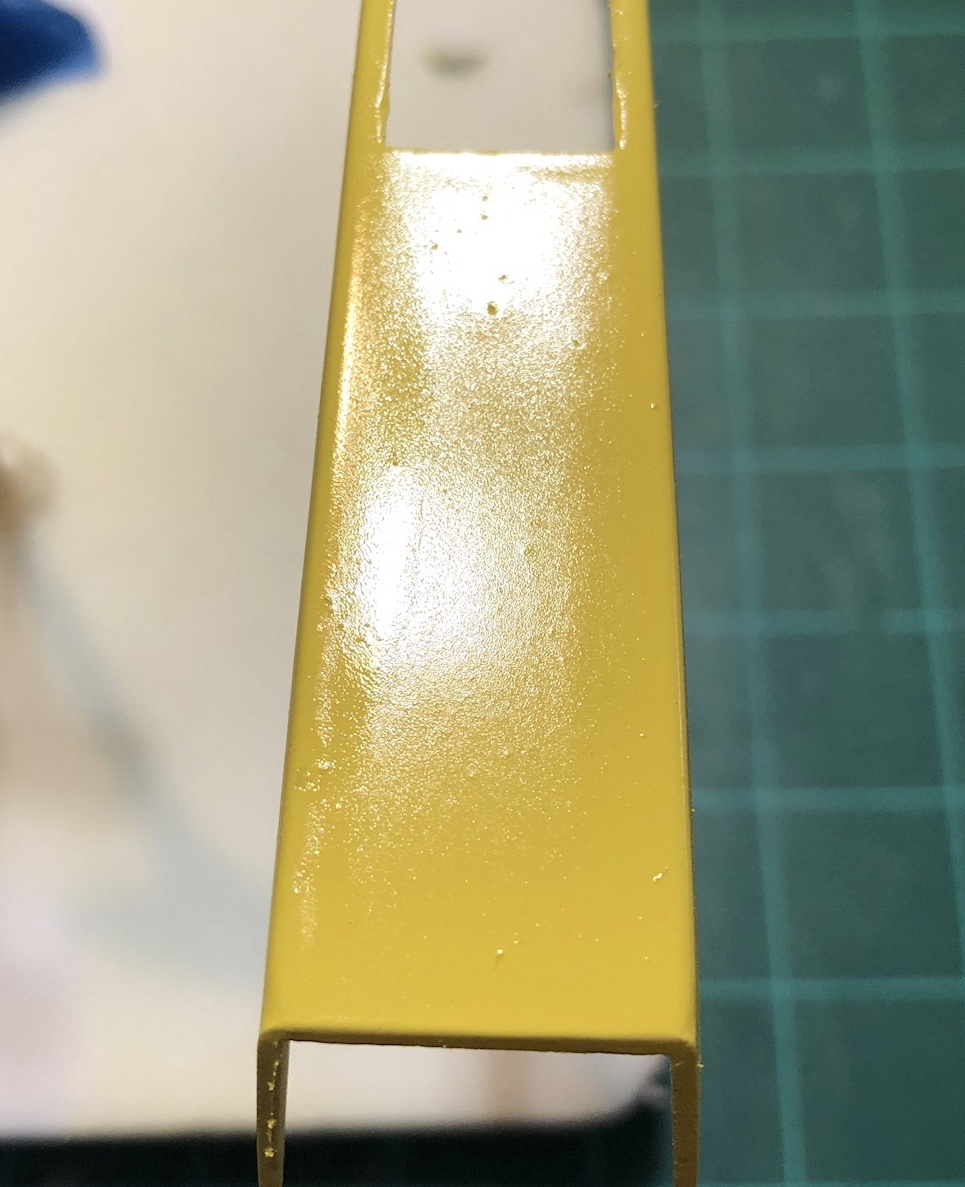
I now use pledge religiously on all of my windows, headlights or anything I want to appear as glass. I also use it to fortify cheap Walmart acrylic paint when airbrushing. I like the semi gloss finish When mixed with paint and also use it as an underbase for my decals and over the top of my decals before my matte varnish. I however have stopped using it for any finish I want polished. I was never able to achieve the kind of deep lasting finish a polished Laquer clear can provide. A few of the times, I tried using it as a top coat, it would spray on really wet but would soon die back to a slightly orange peel finish. I tried polishing several times but maybe I polished too early as I would quickly burn through so I now only use it on anything that doesn’t get polished like car interiors, under carriage, military and weathered vehicles. Top 2 photos with acrylic yellow base and pledge topcoat. Botttom 2 photos .with model master yellow laquer base and model master deep gloss clear after polishing.
-
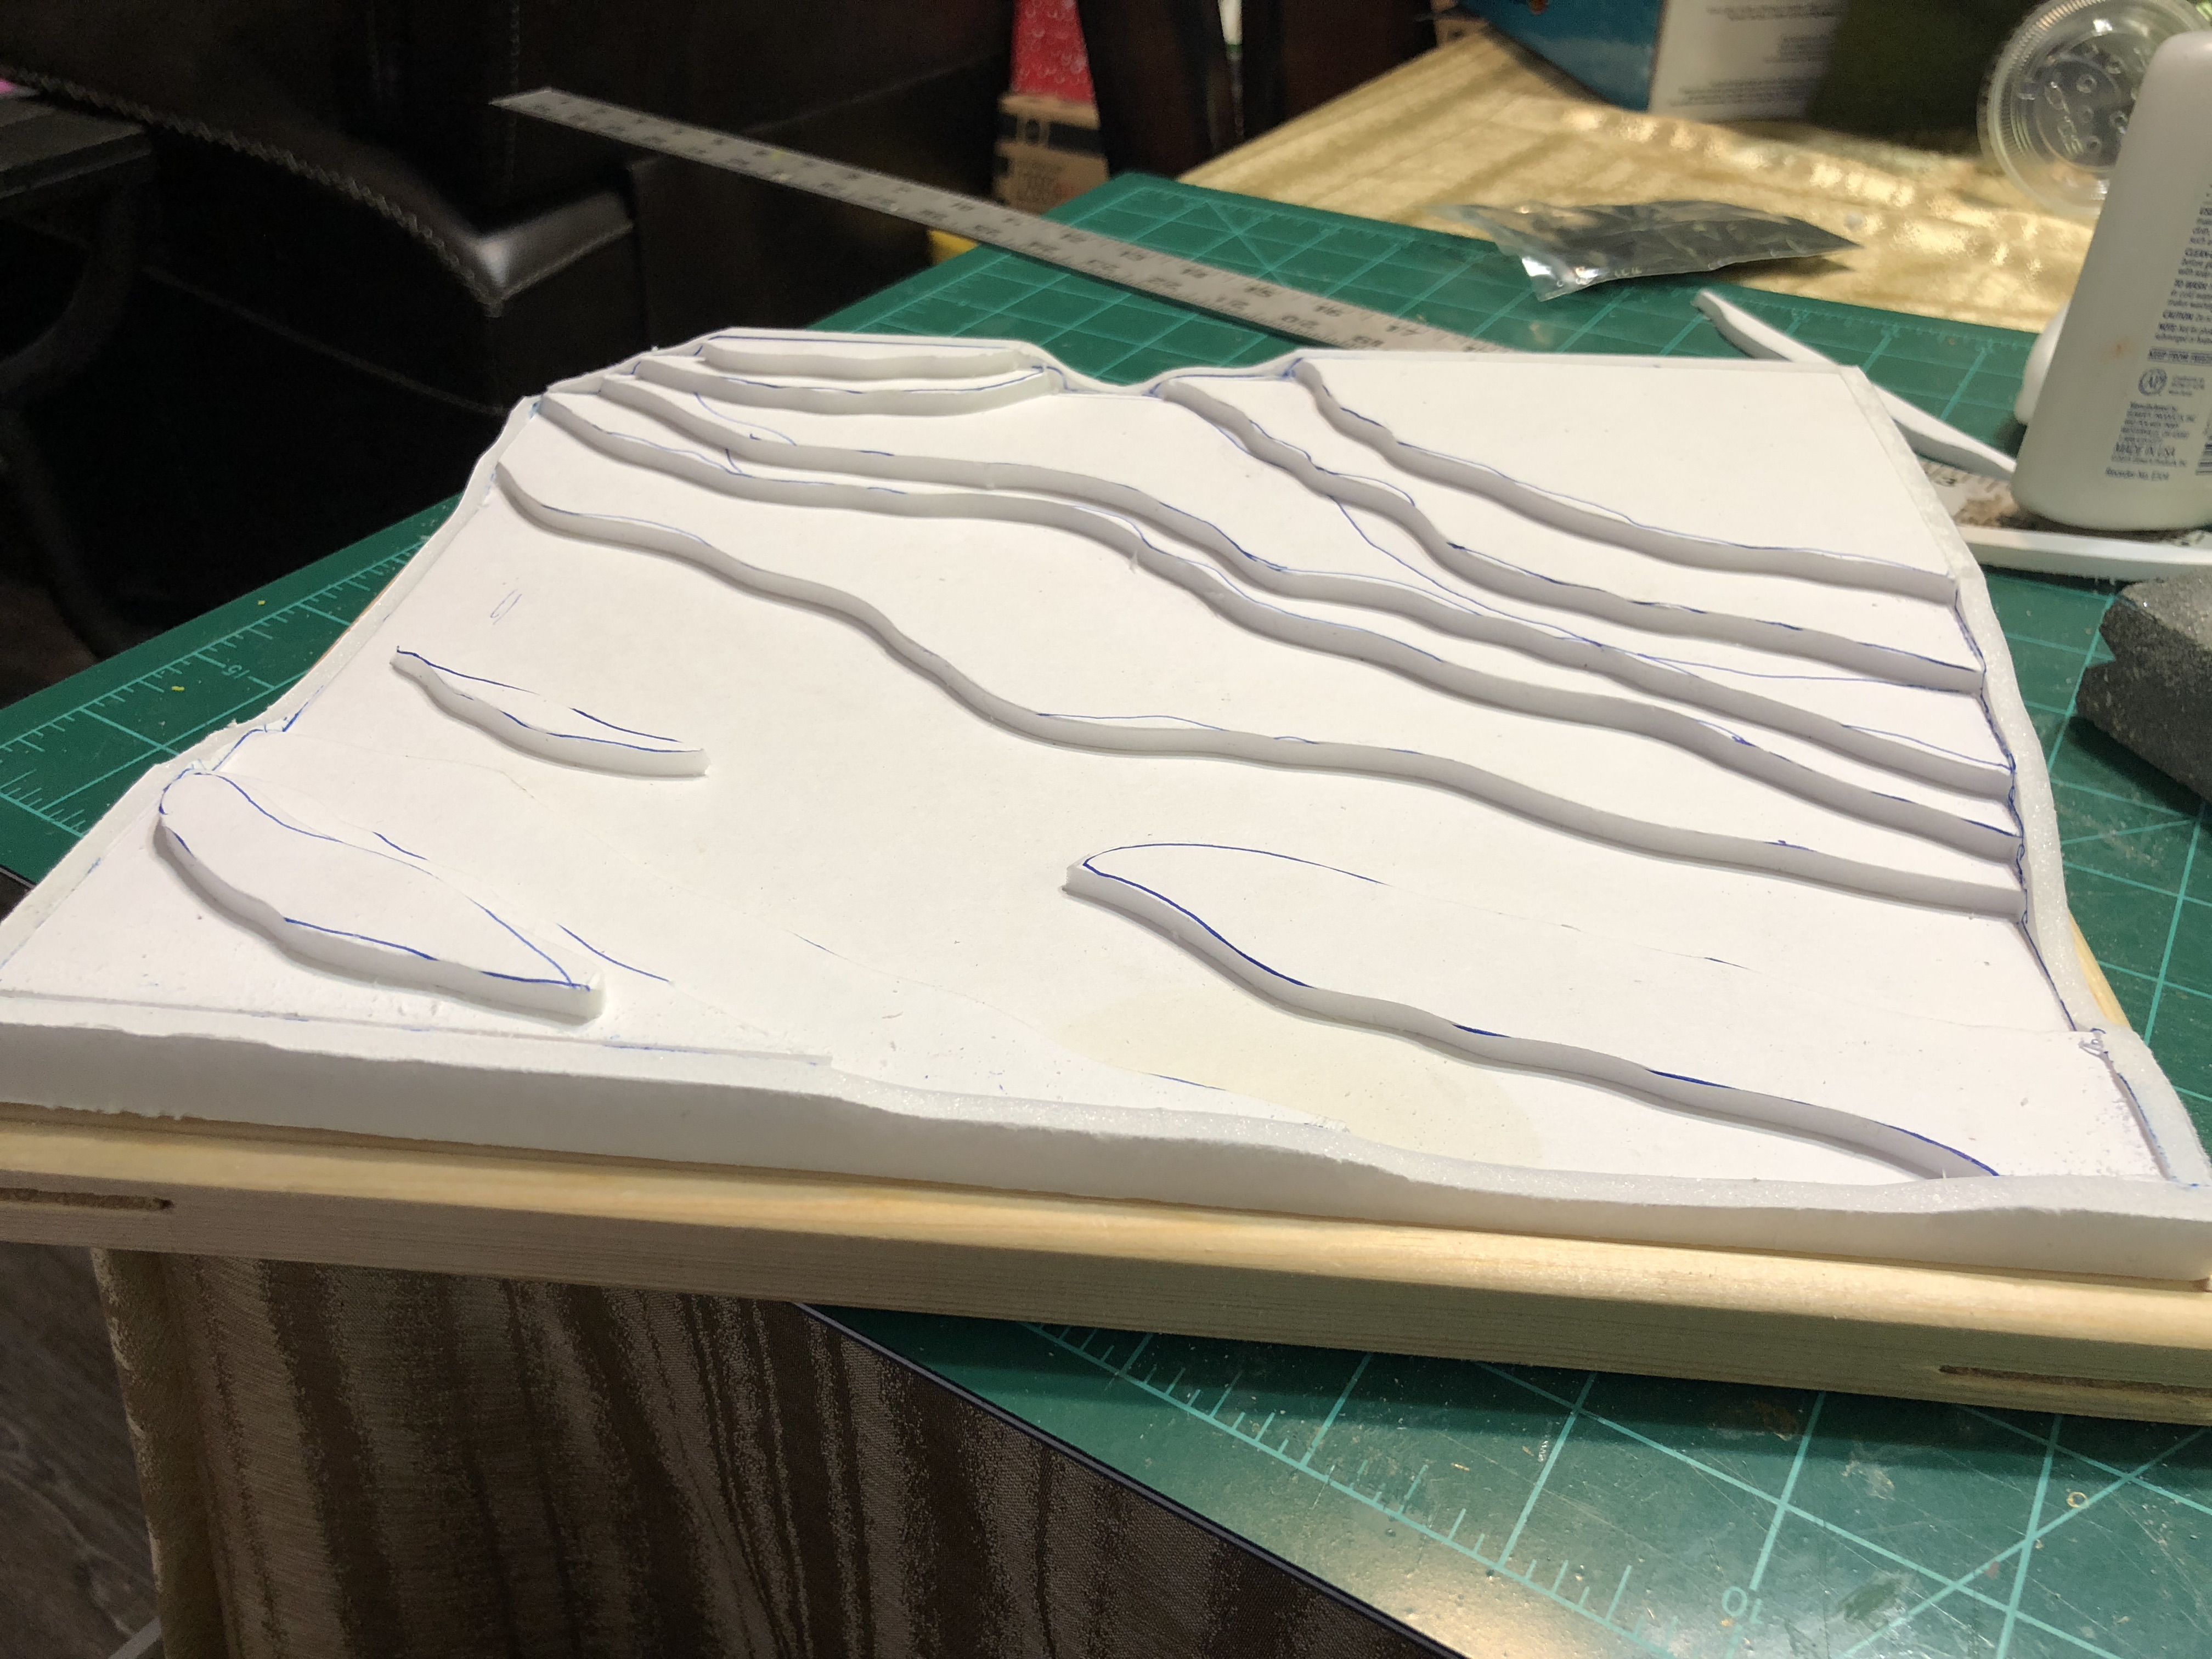
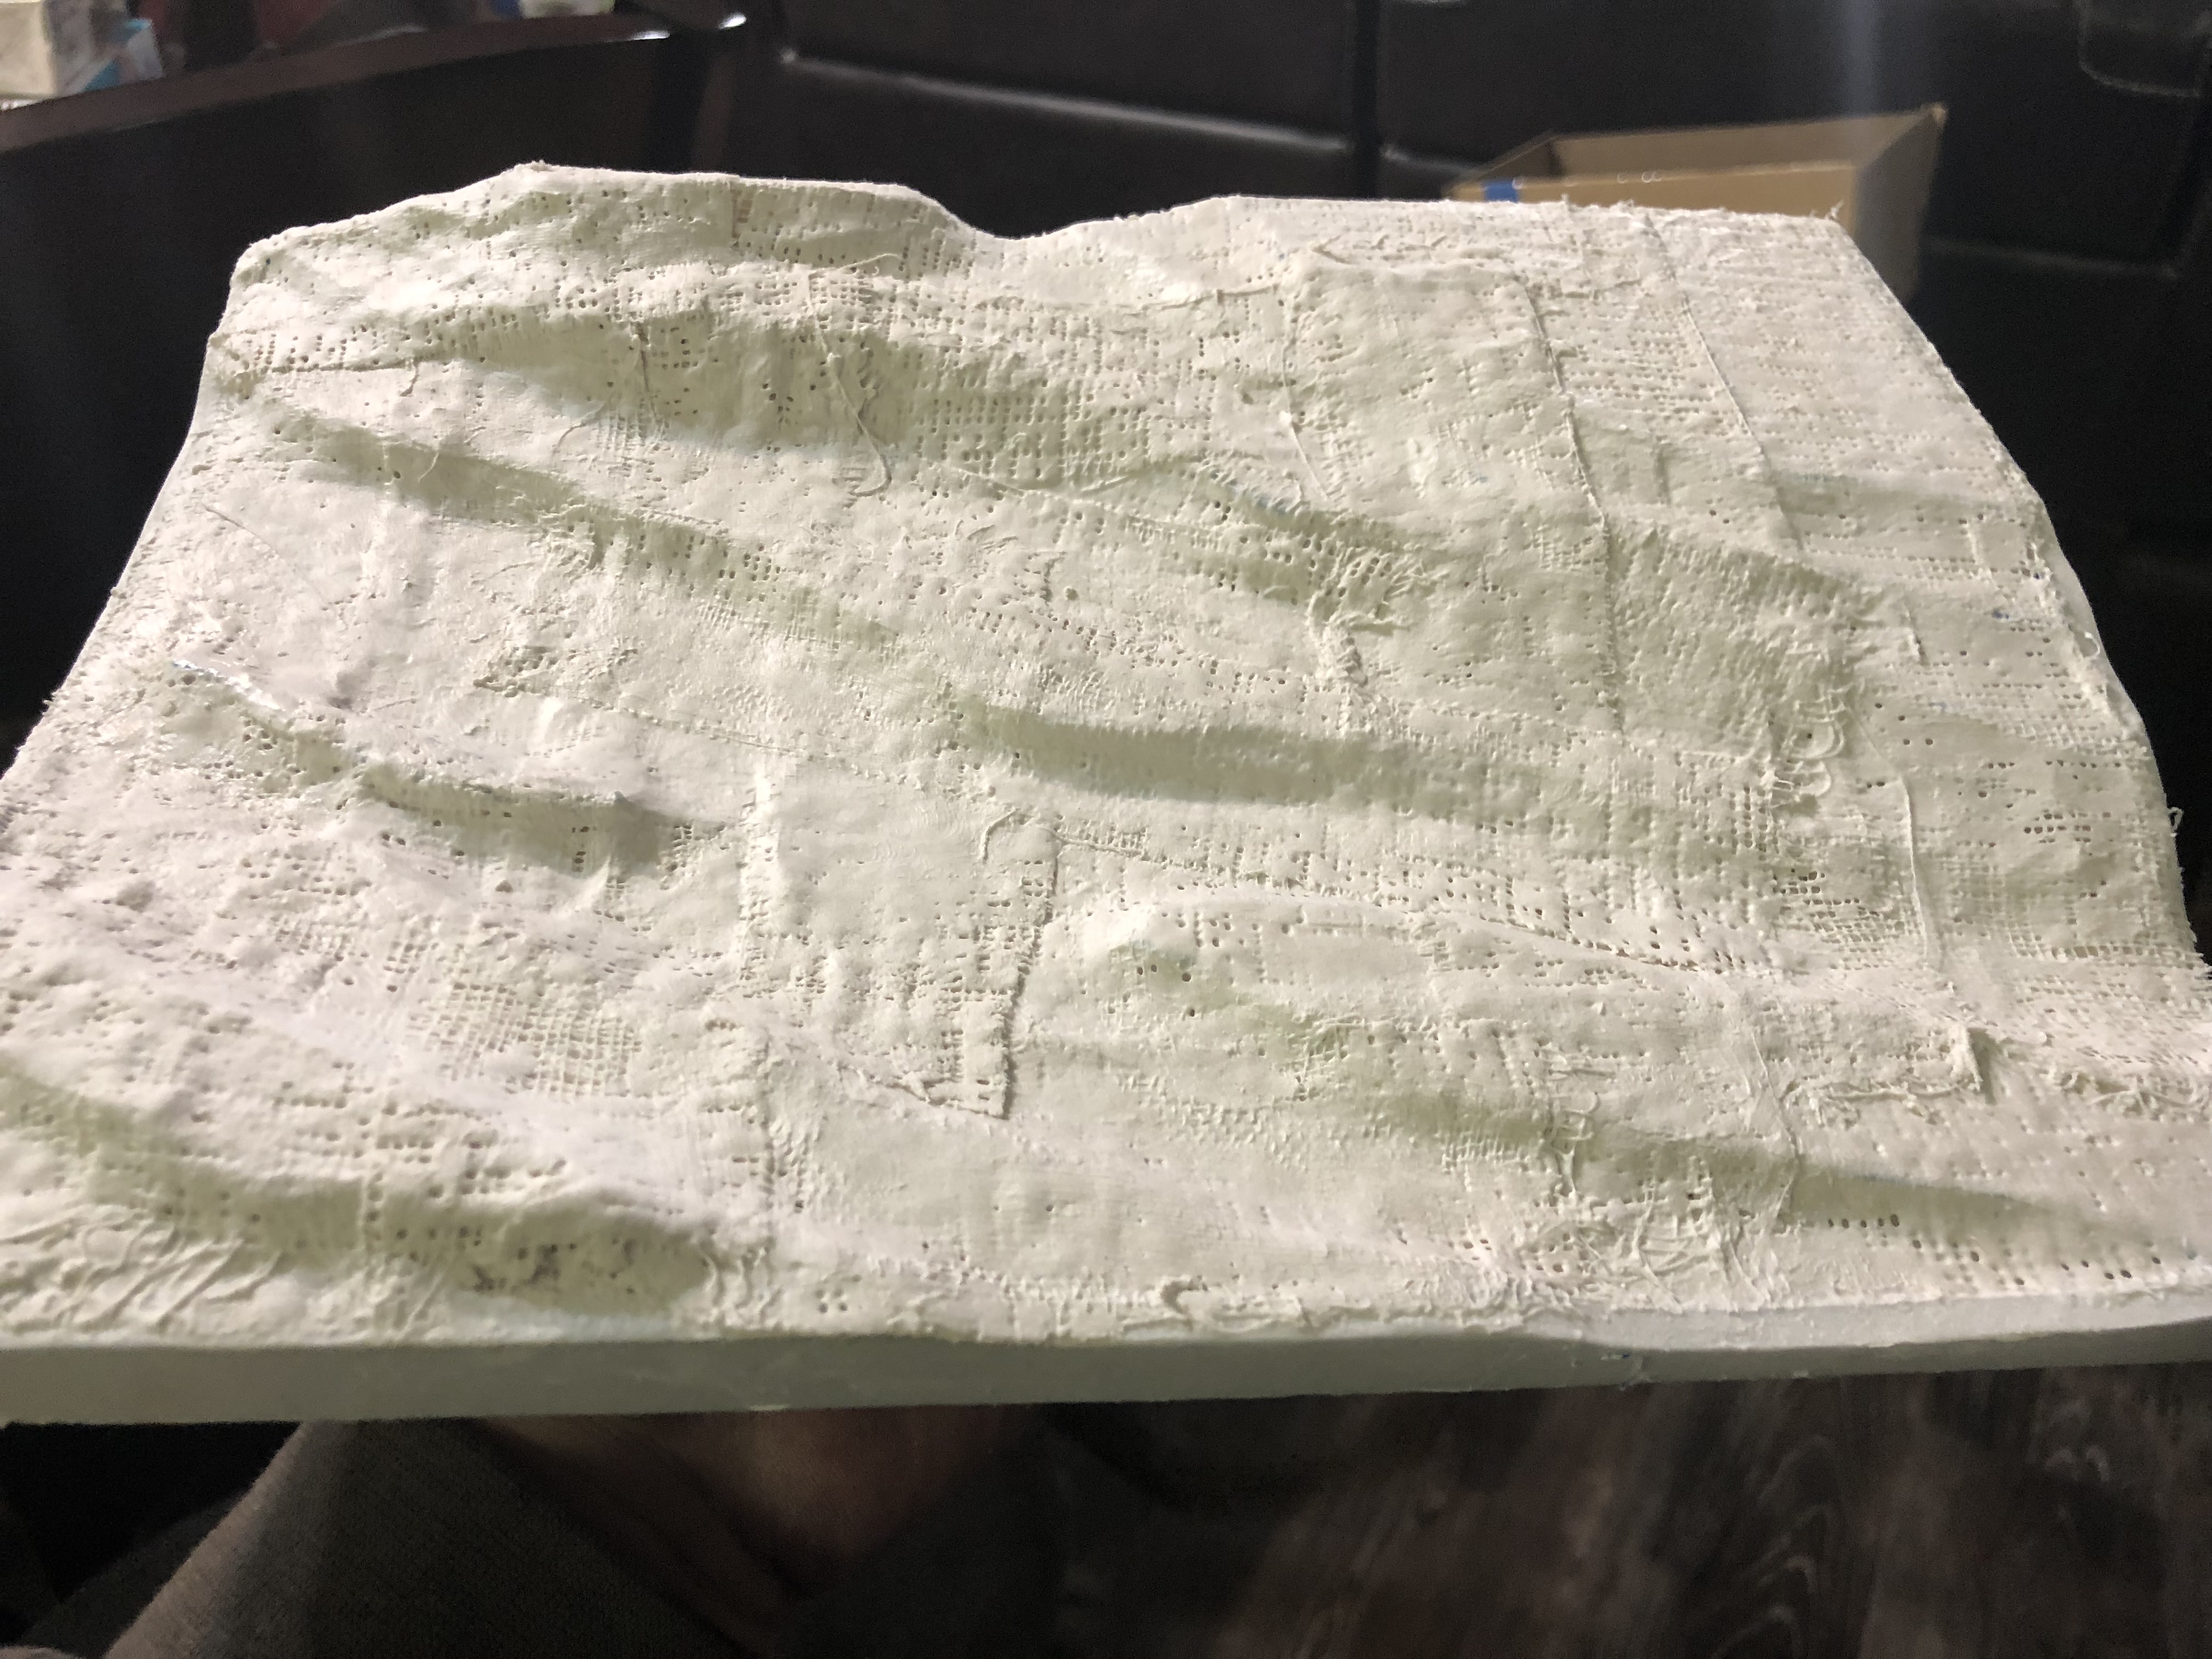
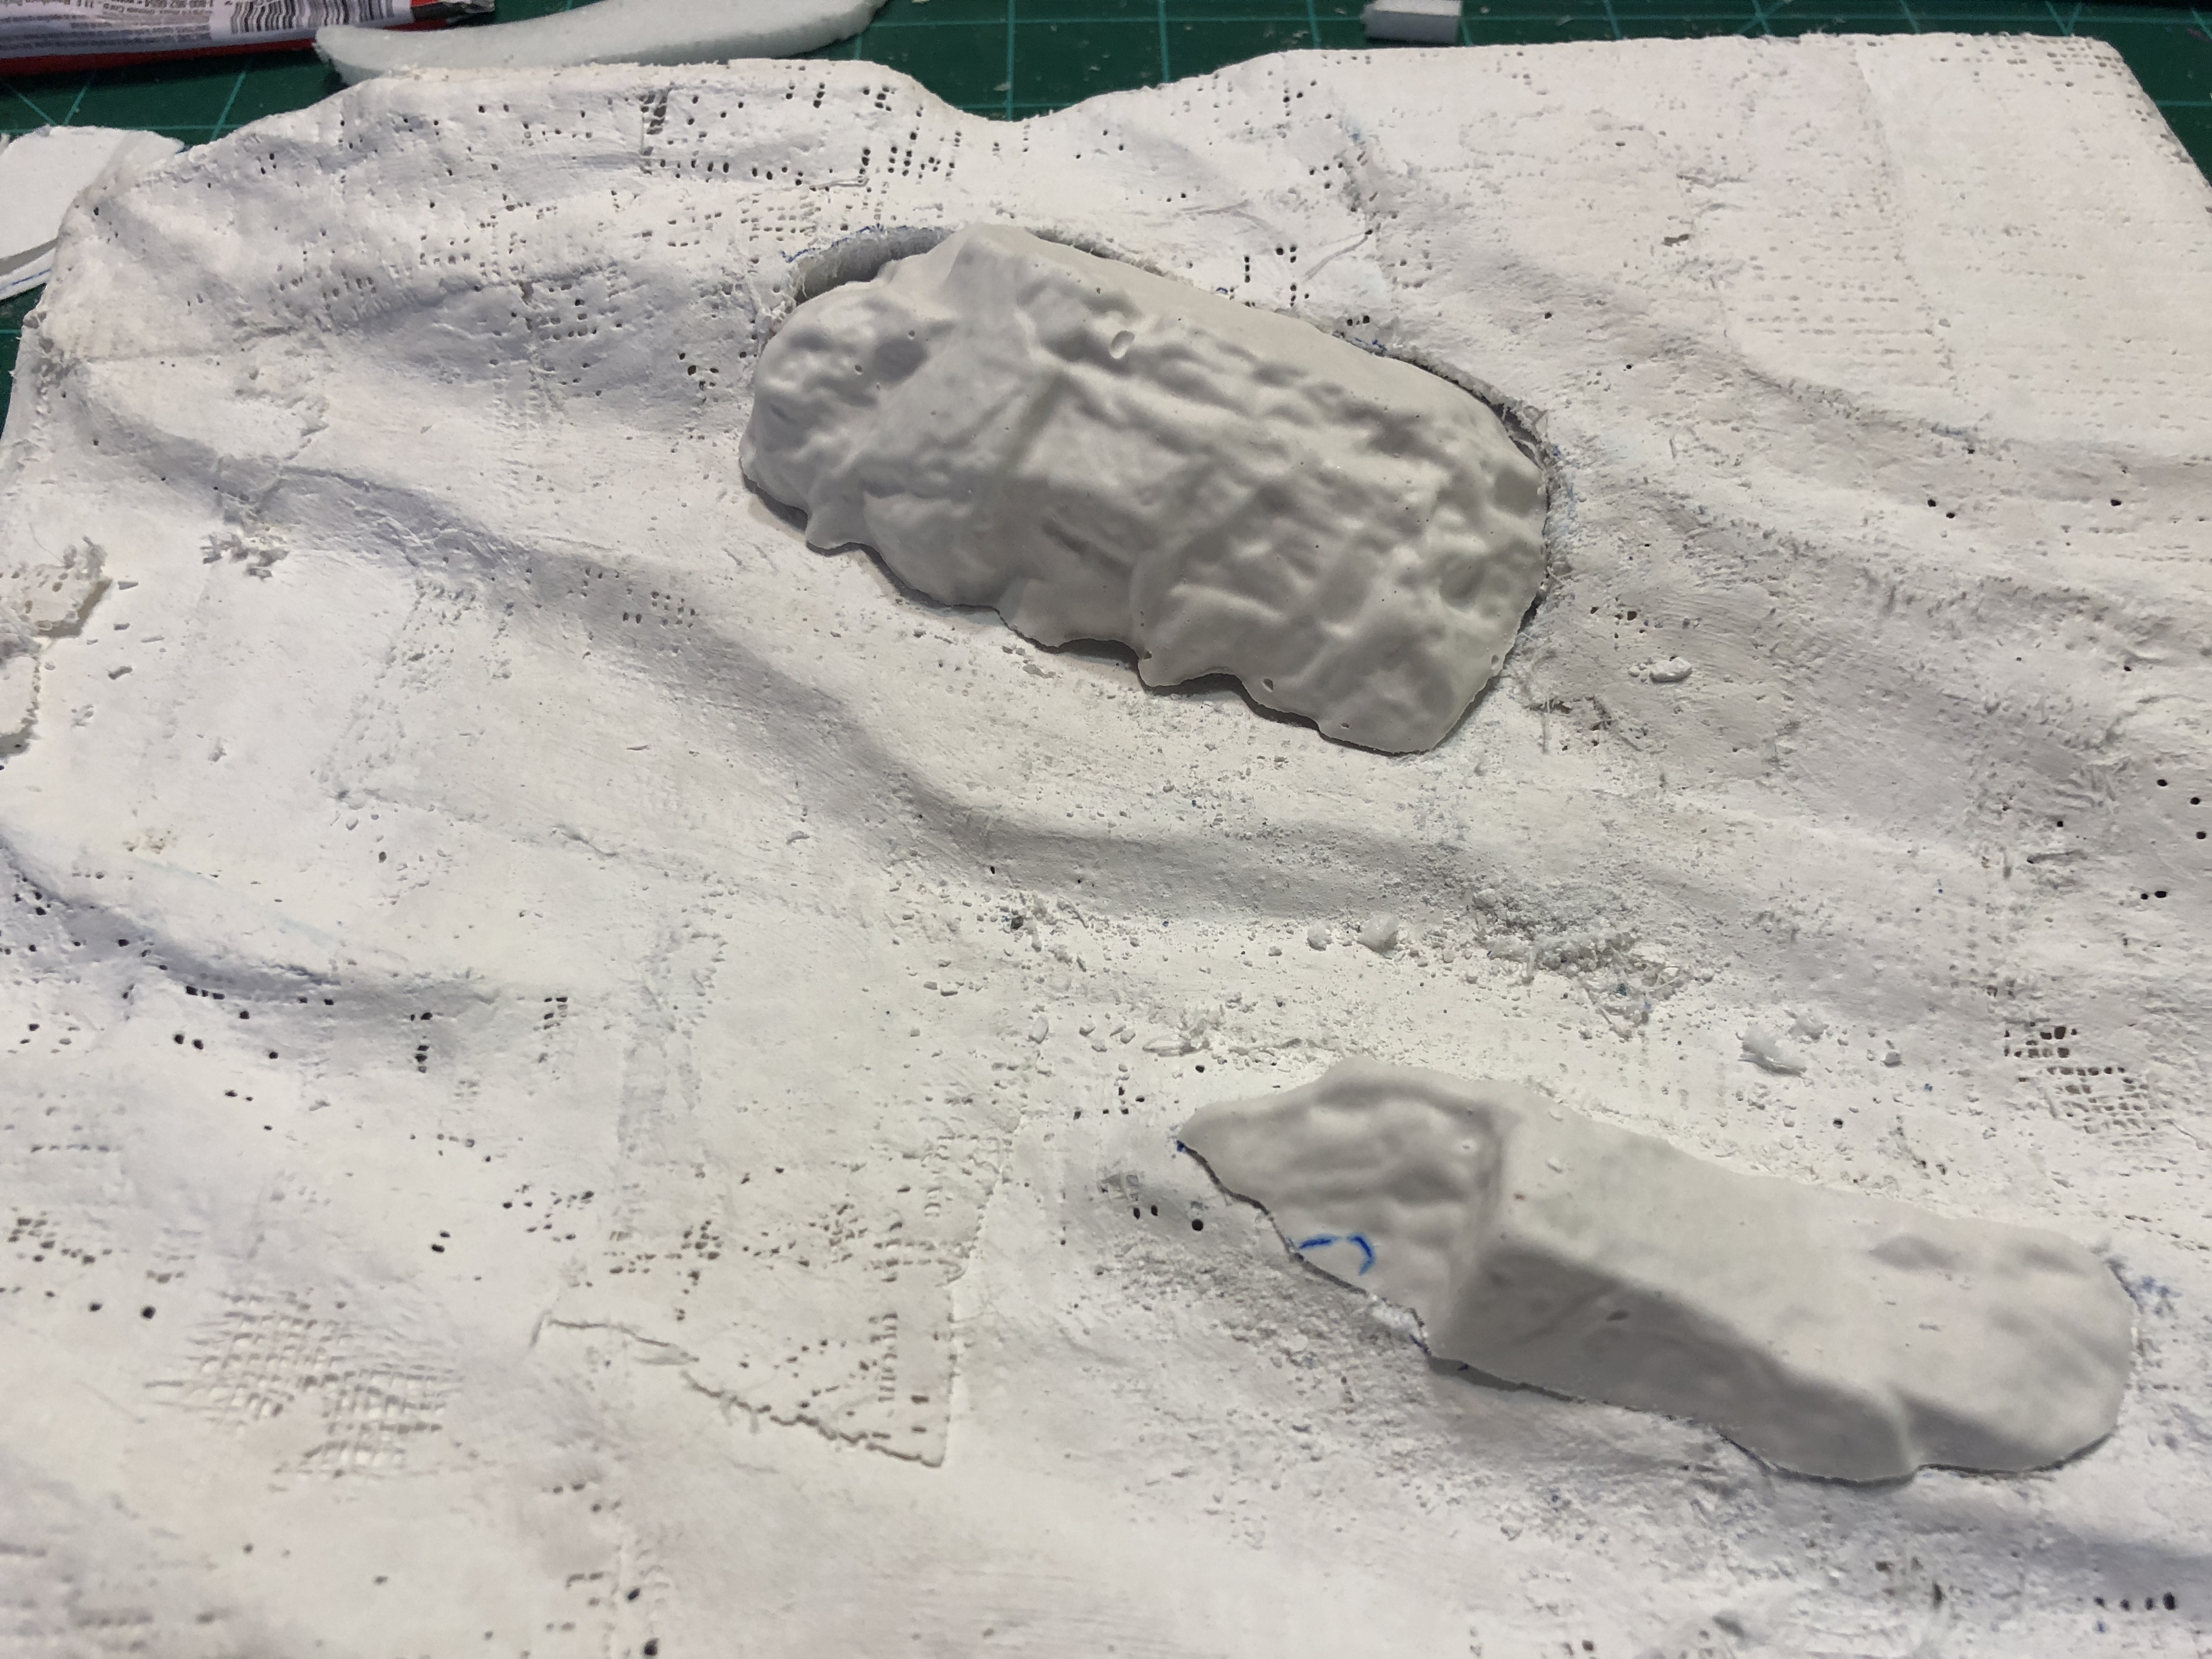
Thanks guys, It was surprisingly easy to create as I hadn’t built a scenery before since my elementary school days using cardboard and poster paint. I just purchased one of those kits and watch their videos on how to use the product and the kit provides just barely enough supplies to finish what you see there minus the trees which I’ve purchased separately. After building this I realize a lot of materials around the home can be used to add to your diorama like dirt, sand and twigs from your backyard. When I finish this, I was in disbelief that looked somewhat believable. I’m ready to create my next one . Adams foamboard from the dollar tree was used to cut my elevation and just simply glued with Elmers and then covered with sheet plaster paper. The rocks were poured into the Supplied molds and glued into place
-
I remember an unexpected phone call with Dave Deal as I was working at an aftermarket VW parts house in the late 80s. I picked up the phone to take a parts order and as I start to write his name down, it started to sound familiar to the name I had read in many magazine art, toys and models I owned. He confirmed he was “Big Deal” and we got to talking about his artwork and designs as I was a graphic art student at the time myself. I still think about that inspirational phonecall that started out as a simple parts order when I look at some of his designs in my own VW collection. I was also saddened after reading about his passing years later in on of my VW magazines.