JP Models
-
Posts
46 -
Joined
-
Last visited
Content Type
Profiles
Forums
Events
Gallery
Everything posted by JP Models
-
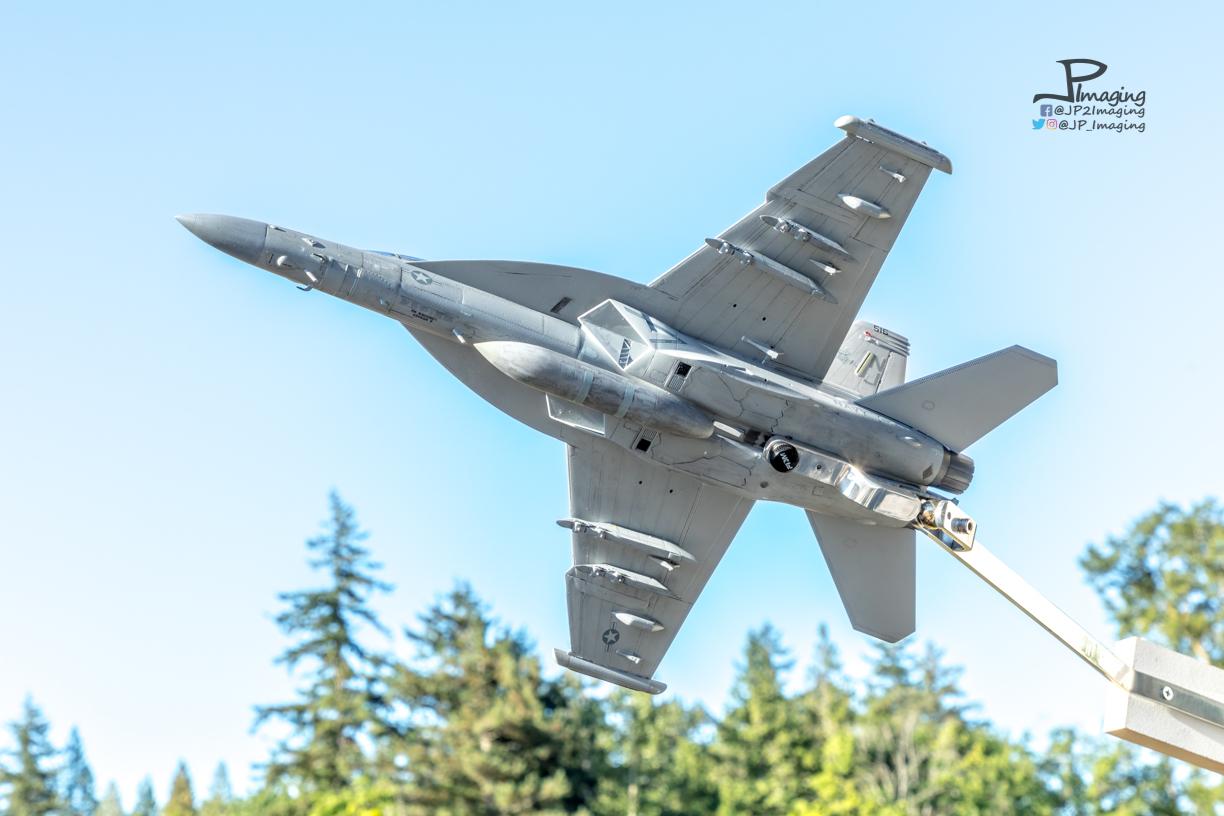
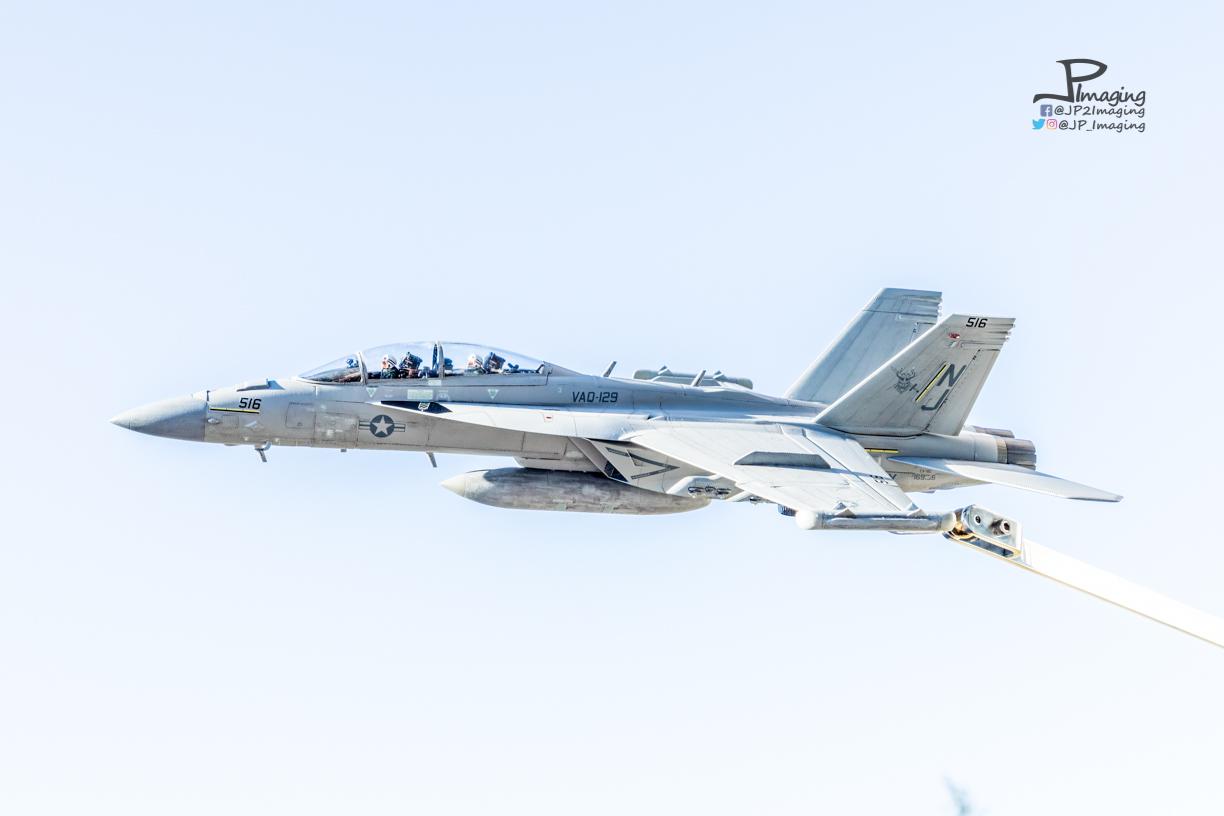
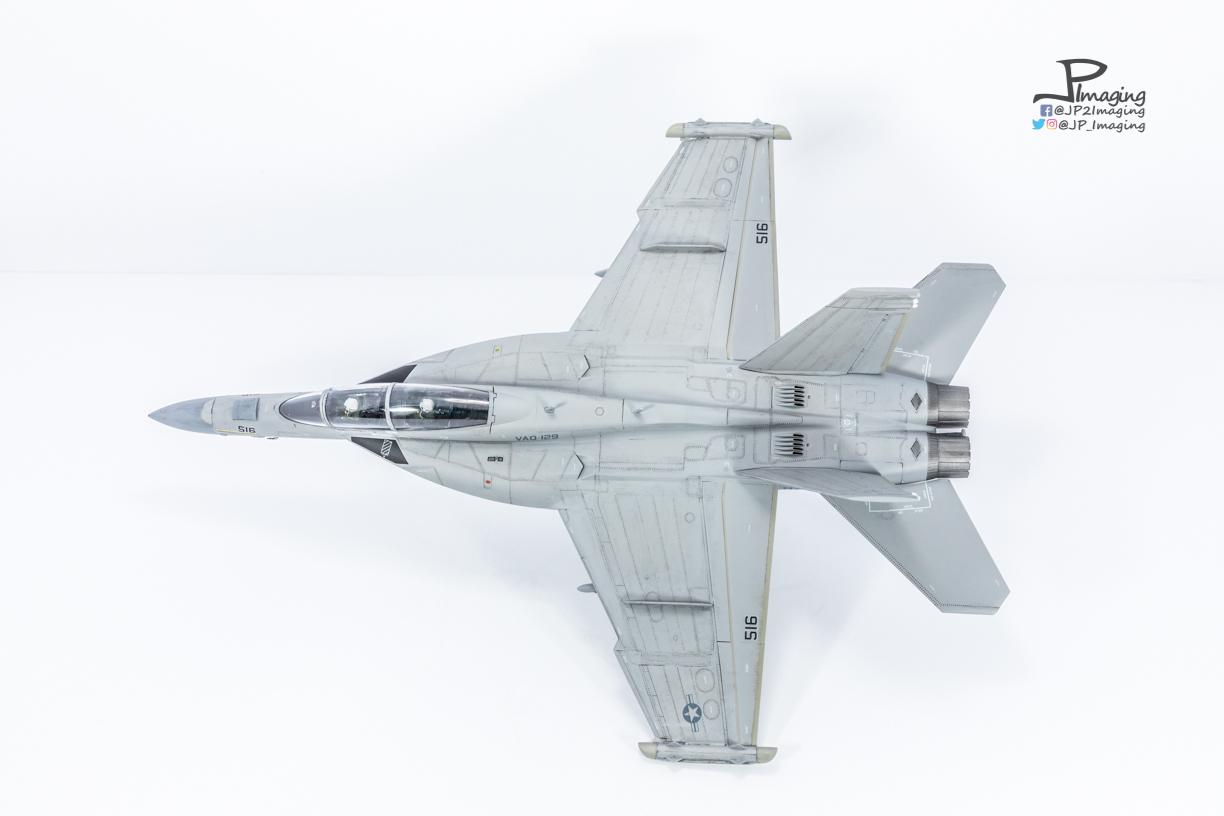
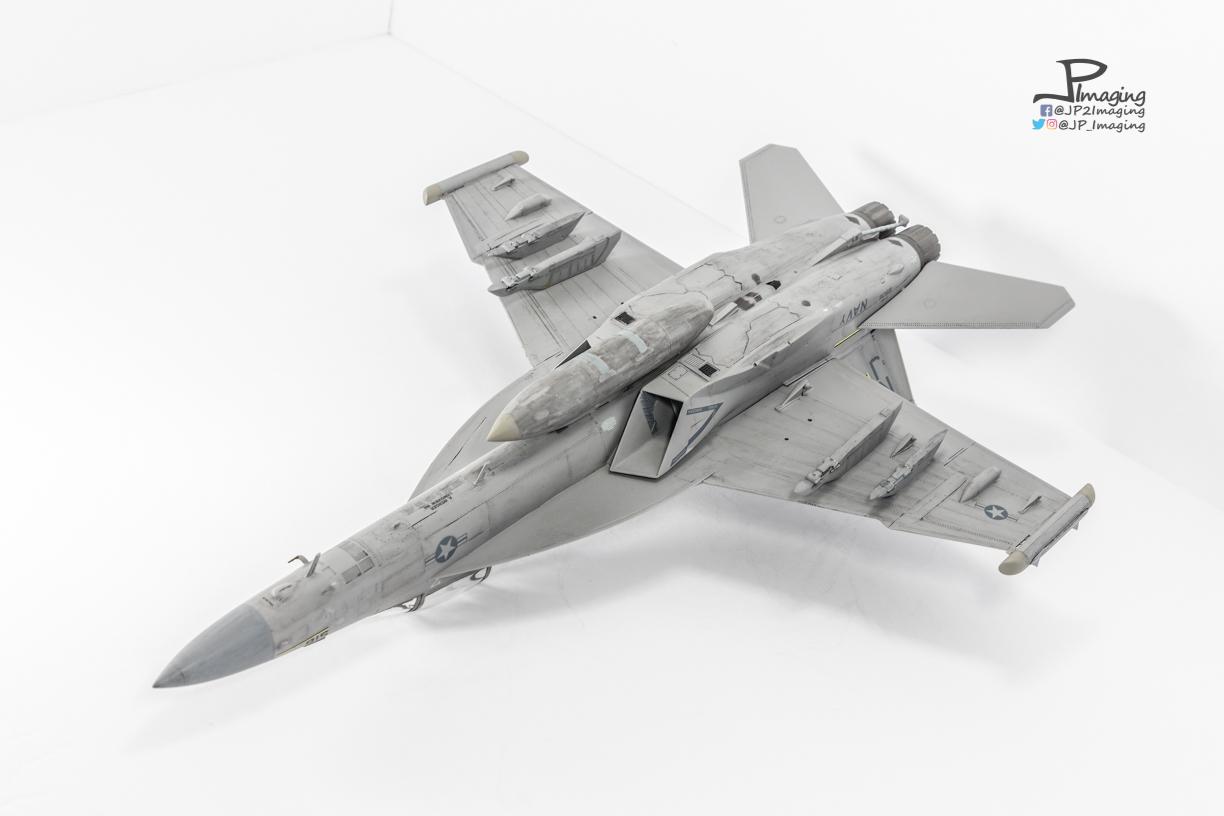
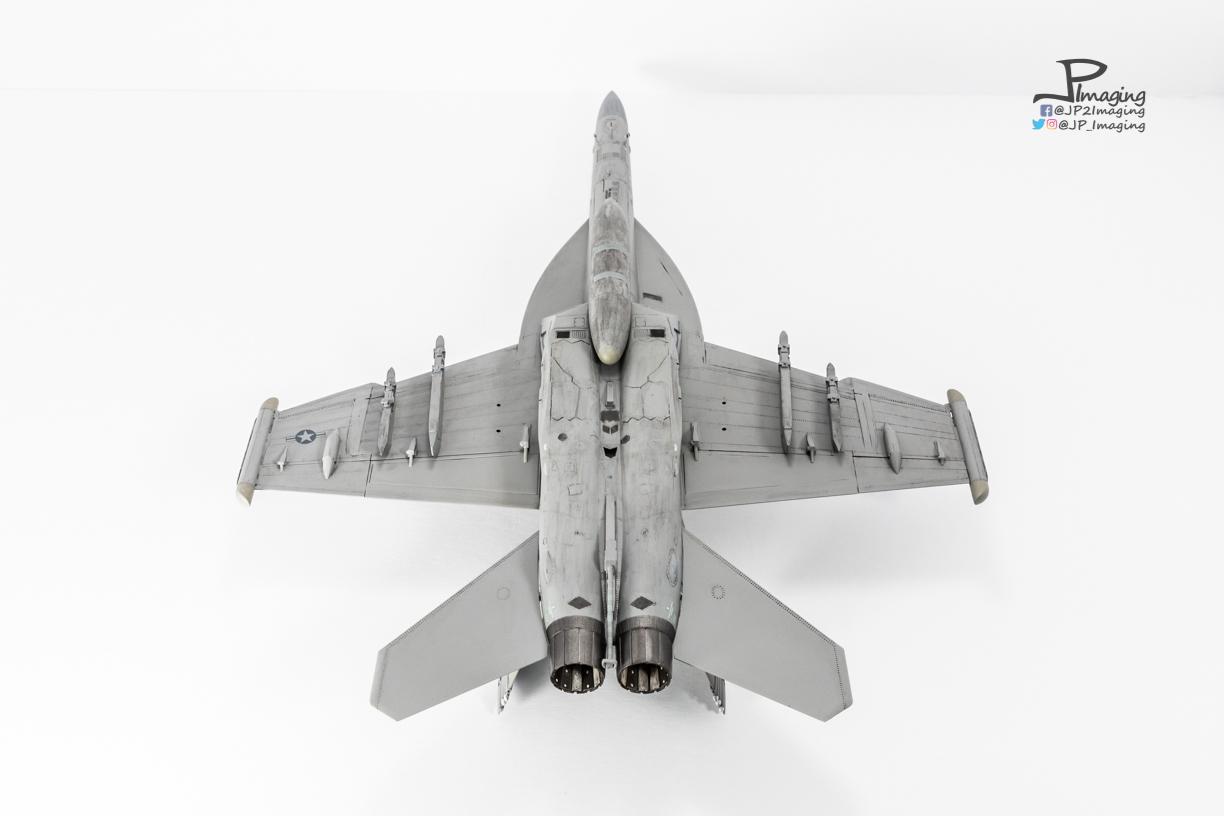
Hello! Finished up another replica aircraft, this one after the Growler Airshow Team out of Naval Air Station Whidbey Island. This particular build is meant to replicate the aircraft flown at Aviation Nation in November, 2022. Hobby Boss Kit with Eduard cockpit detail kit. Tamiya acrylic paint and Mr. Color clear. It's really unfortunate Tamiya hasn't come out with a FA-18 or EA-18 model! The Hobby Boss / Meng kits struggle with a few parts of the aircraft. Took quite a bit of sanding, putty, more sanding and some admitting defeat on this one. Wasn't until I was looking at the final pictures of the model that I noticed Hobby Boss has the wingtip pods positioned too far back on the wing tips 🤦♂️. Will probably move the pods at some point forward as they are with the real aircraft. The Growler Airshow Team puts on a great show if you get a chance to see them live! Thanks for looking. Inspiration: More inspration:

-
Majel - Thank you!! I just finished up a pair of Tamiya F-14 Tomcats that were a dream to build. The Tamiya Mustang GT4 the same. The Nunu's a bit hit and miss. Way better than the Revell C7R kit, but the body to chassis fit on the Nunu kit could be better. The factory rubber tires are horrific in the Nunu kit. I went with 3D printed tires from Indycals. Otherwise, the Nunu kit really wasn't too bad, but it doesn't quite fall together like a Tamiya kit. The Nunu brand photo etch parts on the other hand... stay away!! They are terrible. Don't fit properly (or at all), curves don't line up, and the scale is off. If going with PE parts for the Nunu, look elsewhere beyond factory Nunu for PE parts.
-
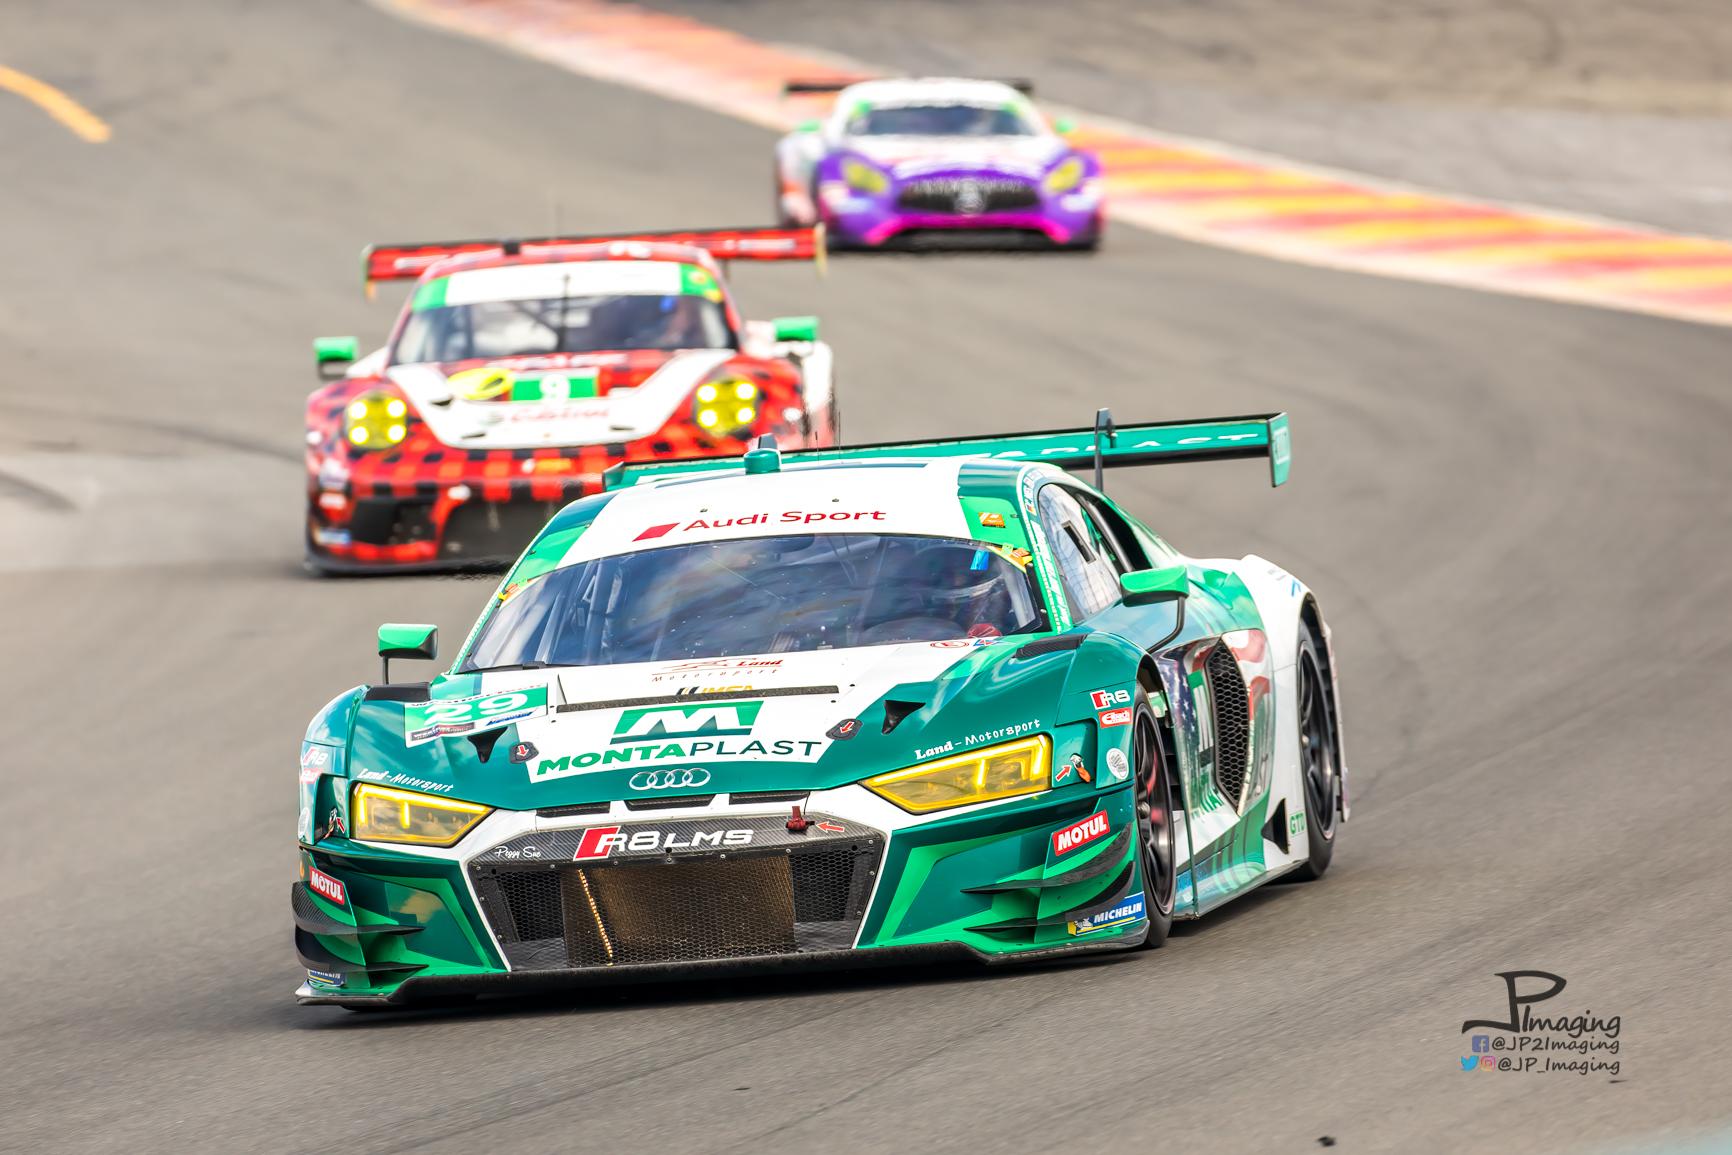
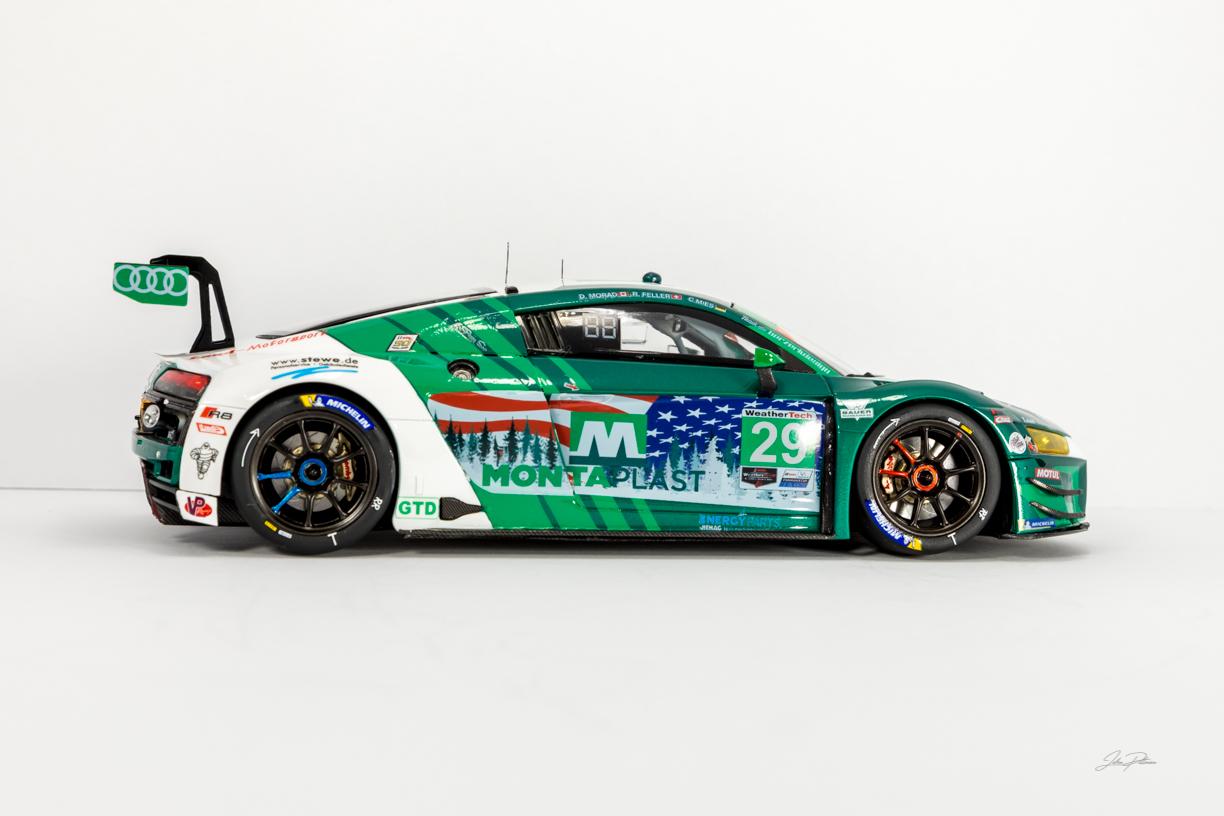
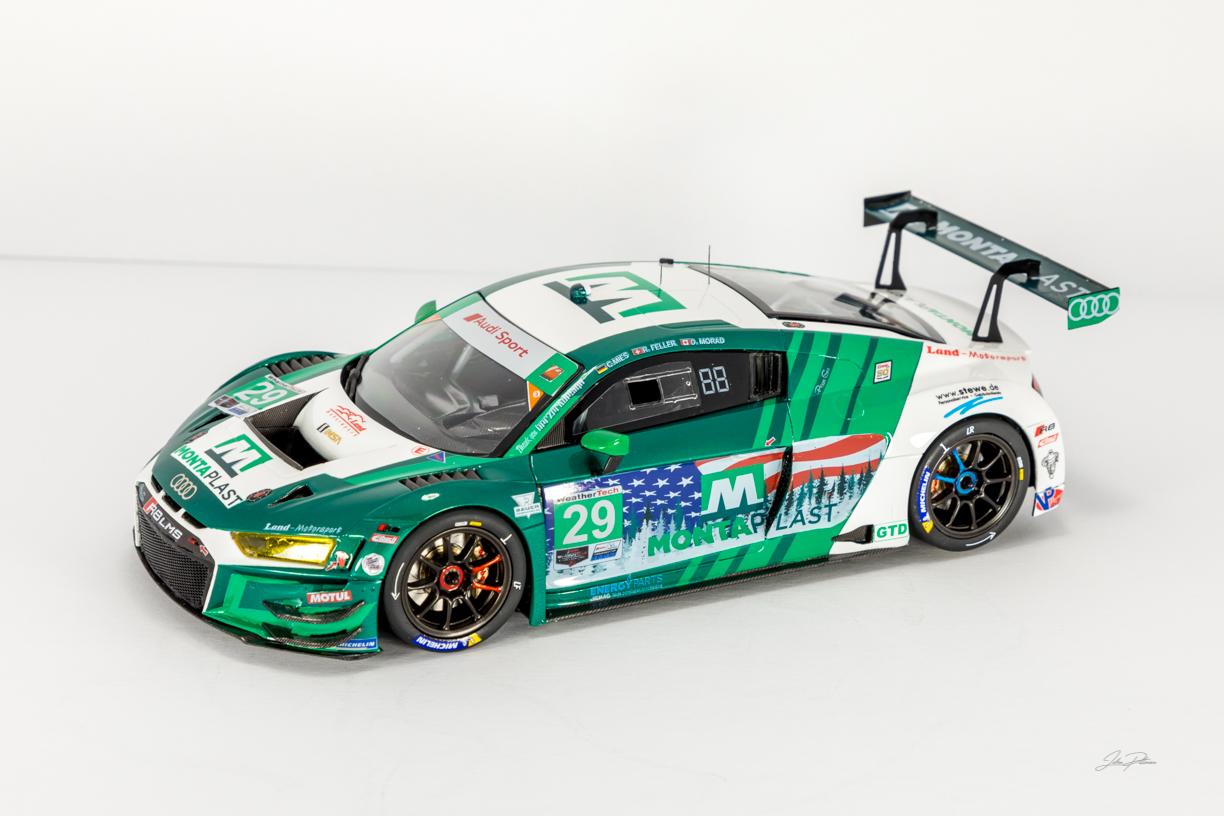
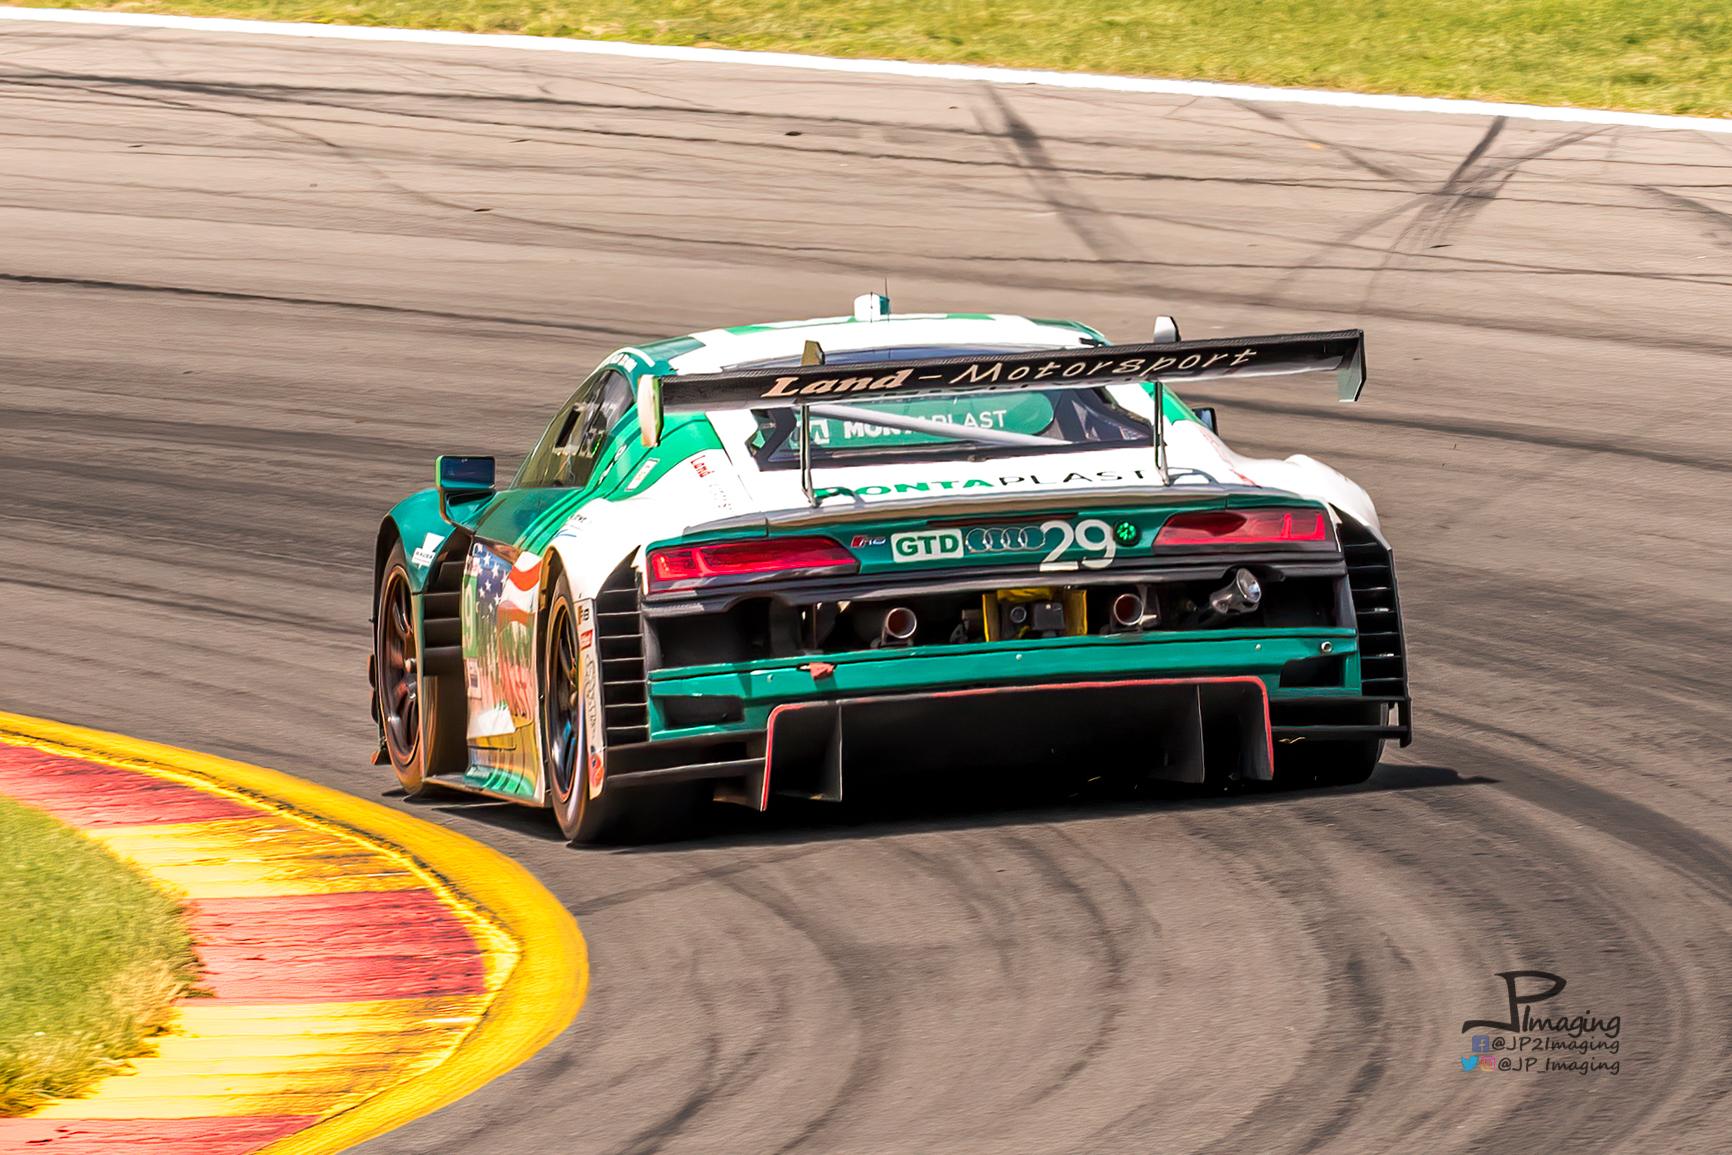
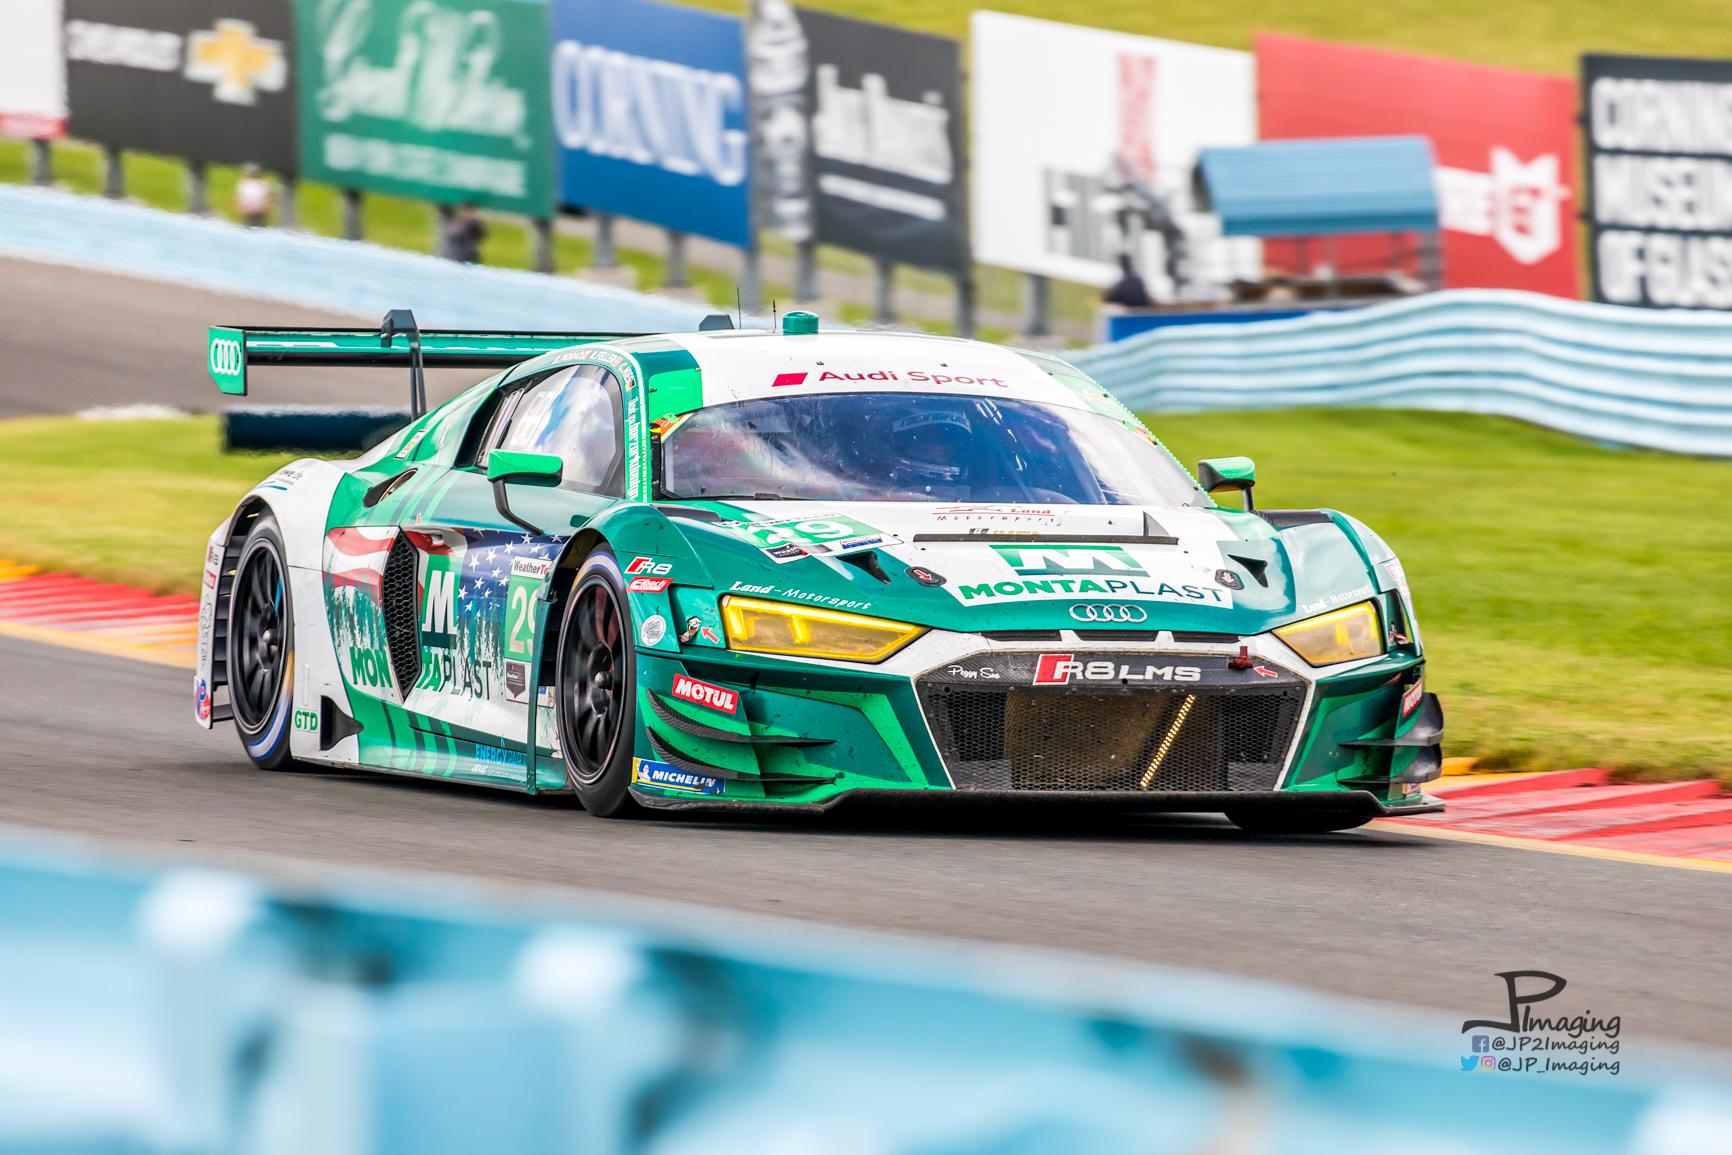
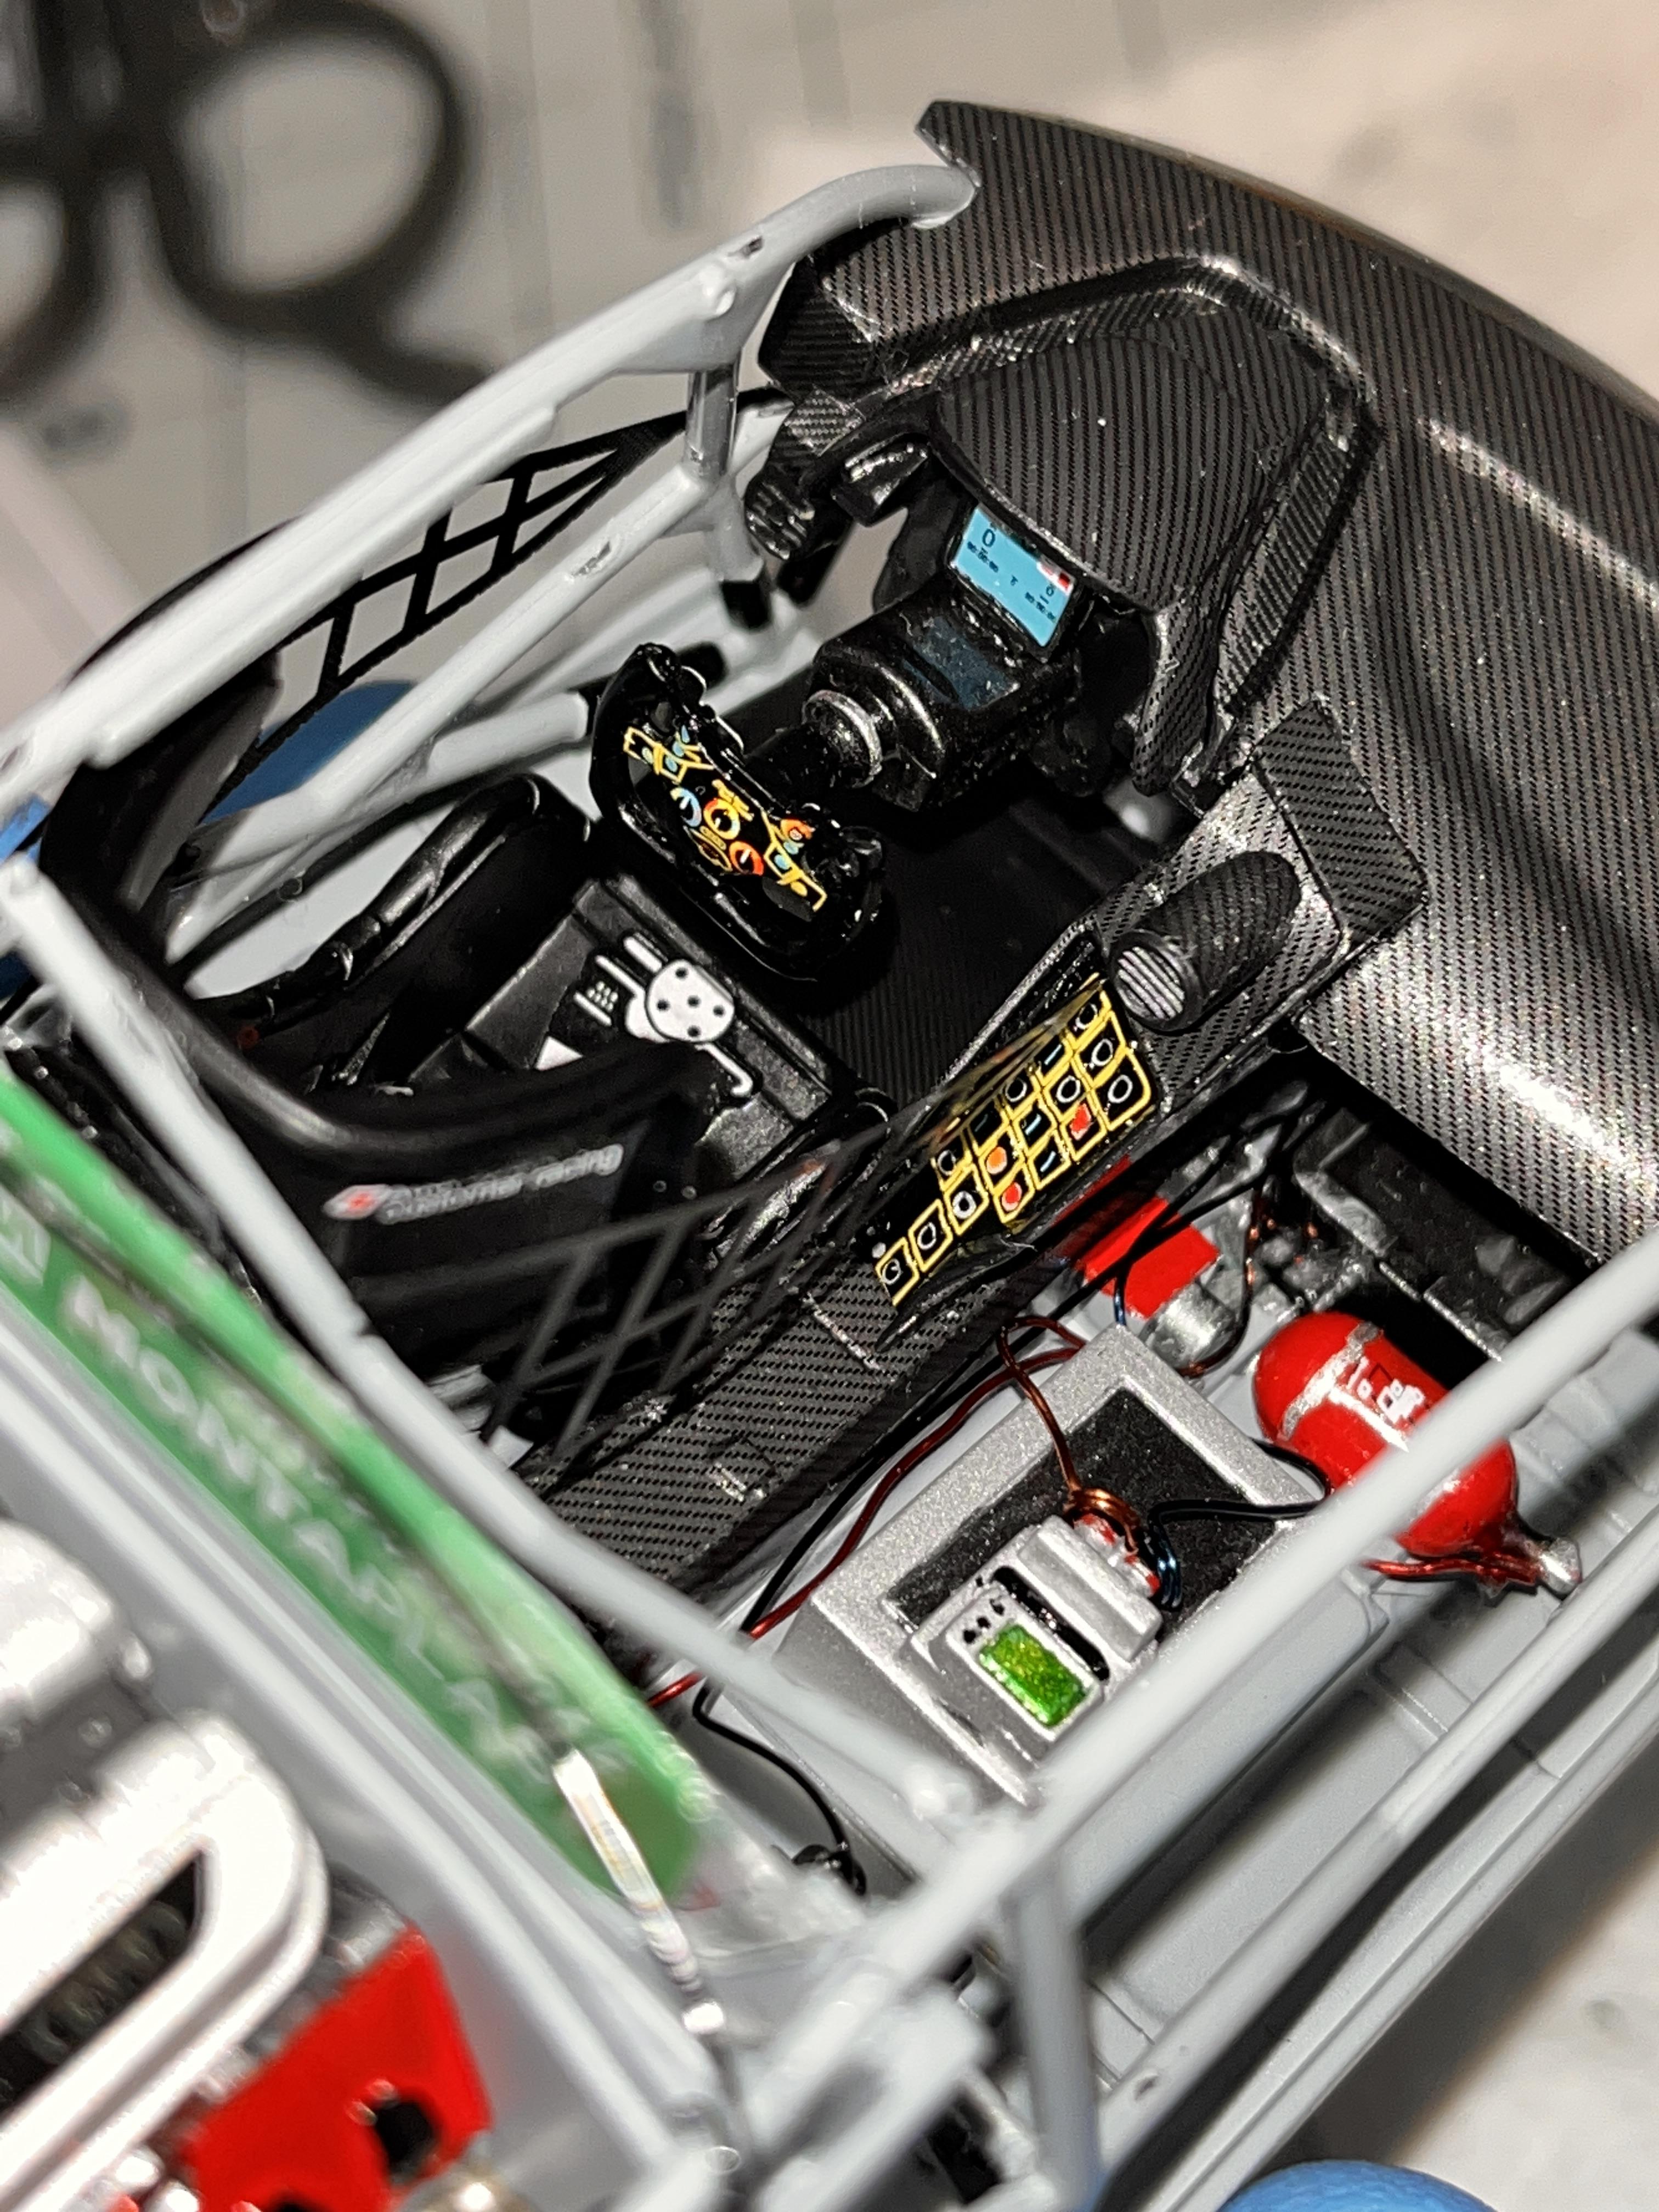
Finished! The Nunu Audi R8 LMS EVO GT3, dressed in the Land Motorsports Montaplast livery from the 2019 IMSA Sahlen's Six Hours of The Glen. I spend a lot of time pouring over my race pics to get the details and intricacies accurately replicated. Every time I looked at a new picture I seemed to find more exposed carbon fiber! A few custom parts, a few PE parts from the Nunu detail kit (DO NOT recommend), and decals from Taylor Made decals / Decal Doc. Really quite pleased with the end result, really like this Land Motorsports livery and the details this team puts on their race cars. Tried multiple green colors to get the right dark green shade, and landed on multiple coats of Splash Paints 'Isle of Man Green' for the darker shade. A few of my race pics from the 2019 WGI IMSA race interspersed as my inspiration and reference. Thanks for looking!
-
Thank you all for the comments and compliments! I really wanted to focus on the replica part with realism in a flying type display. I appreciate your comments!
-
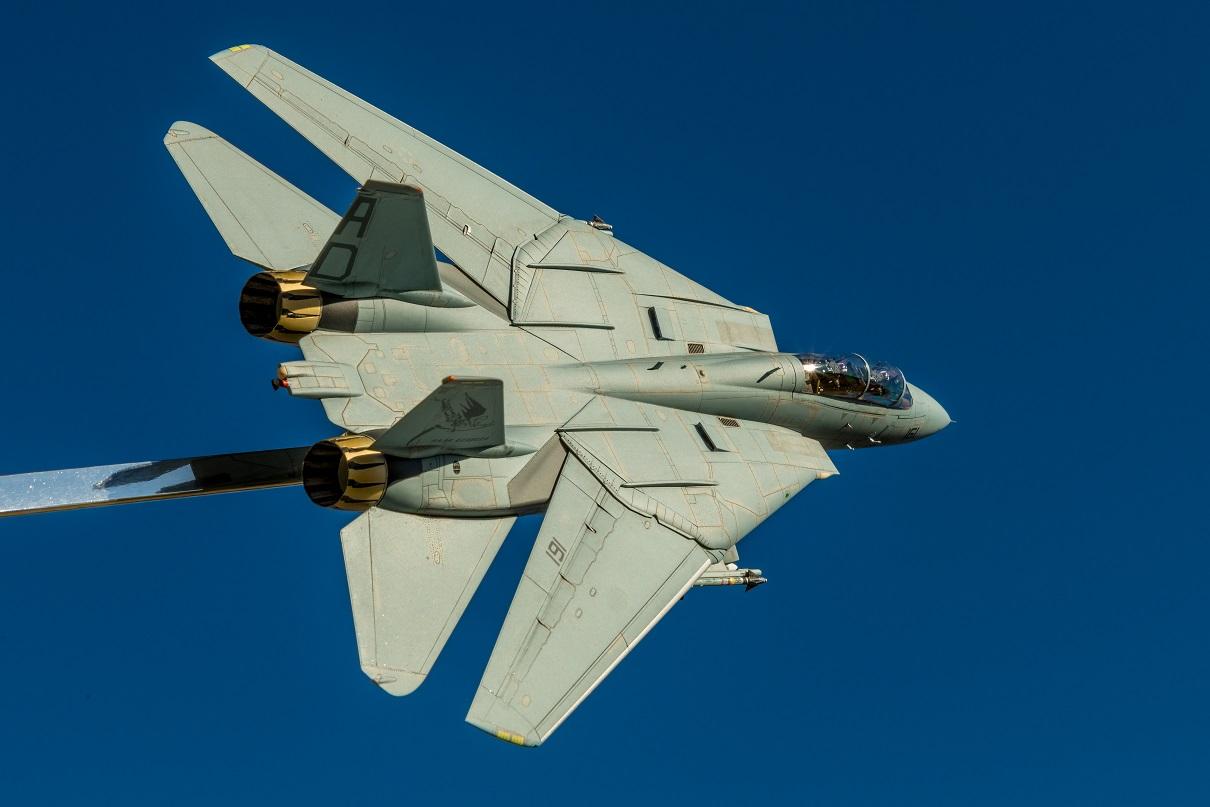
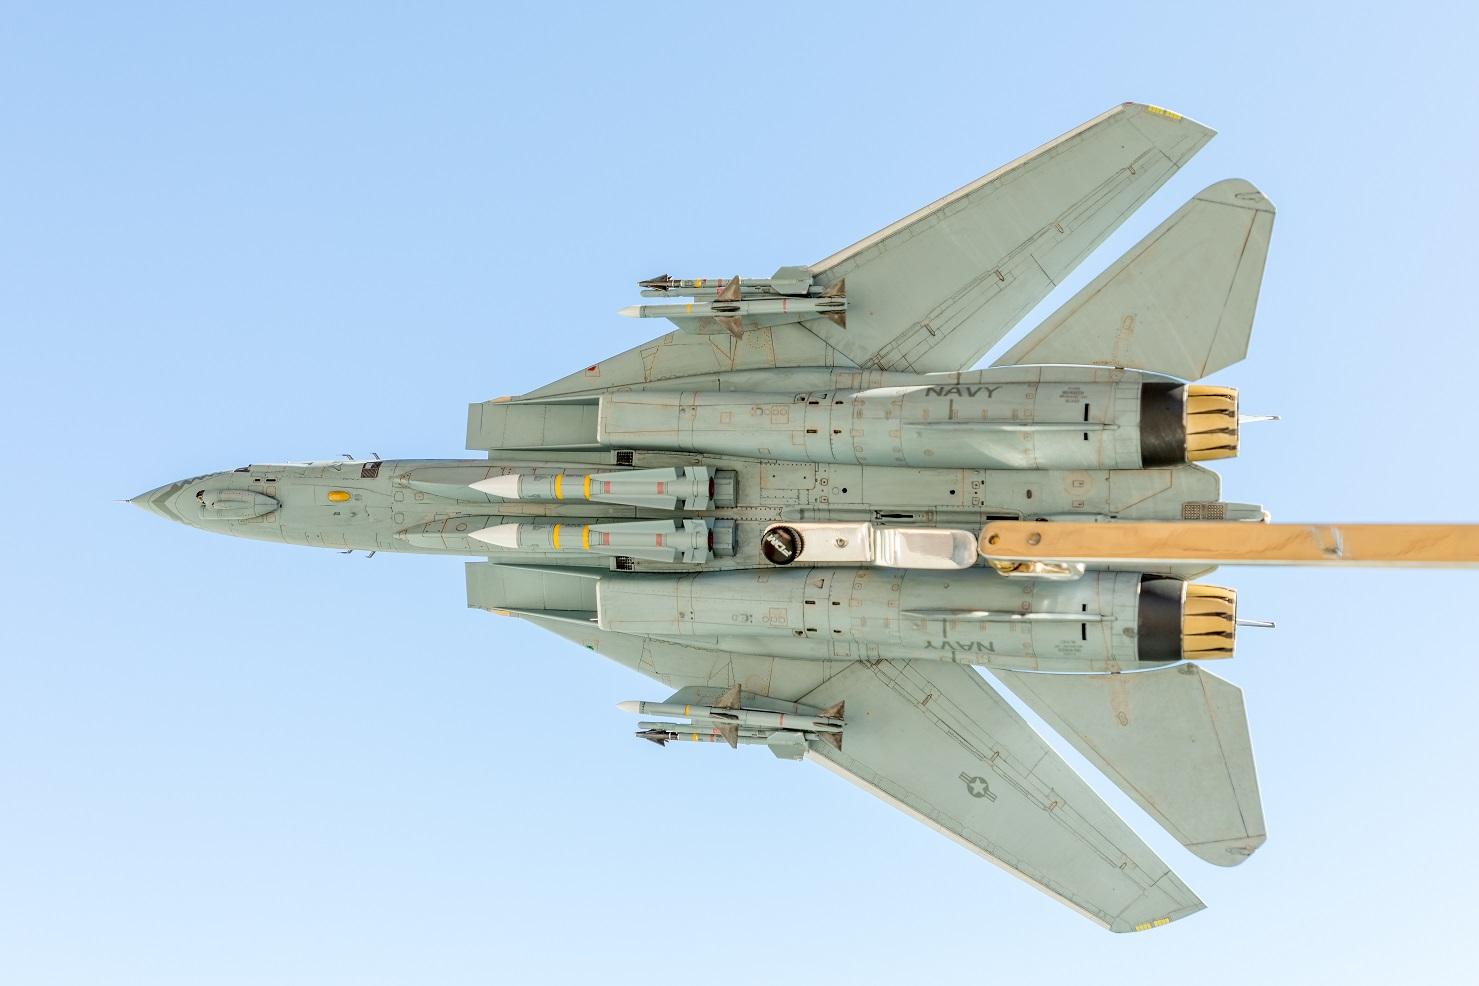
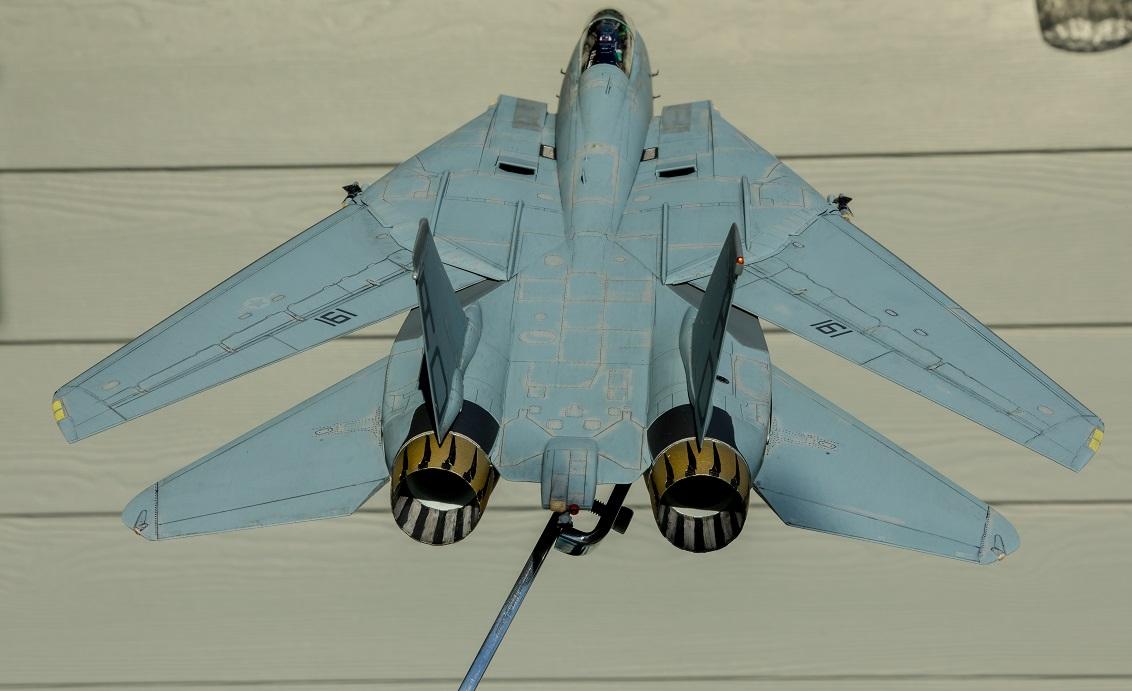
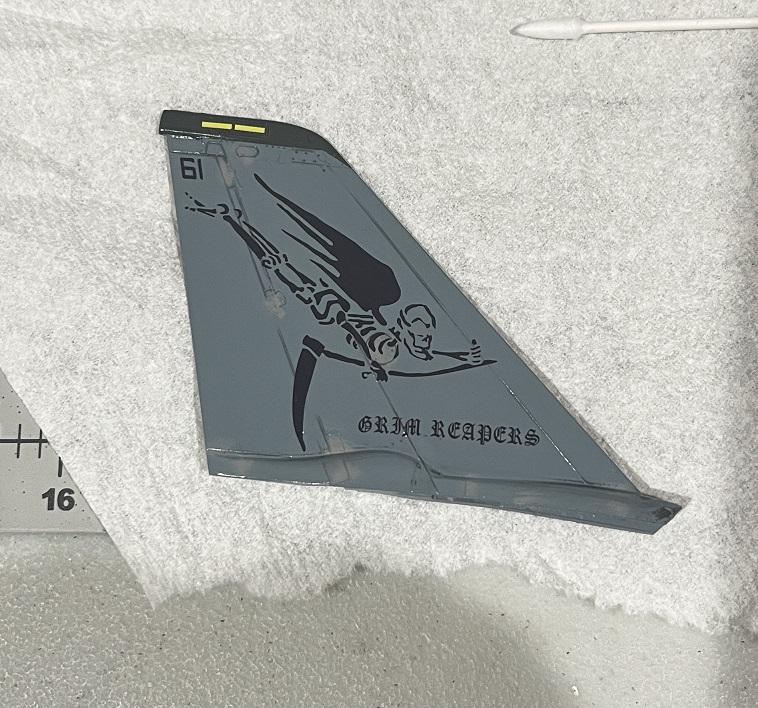
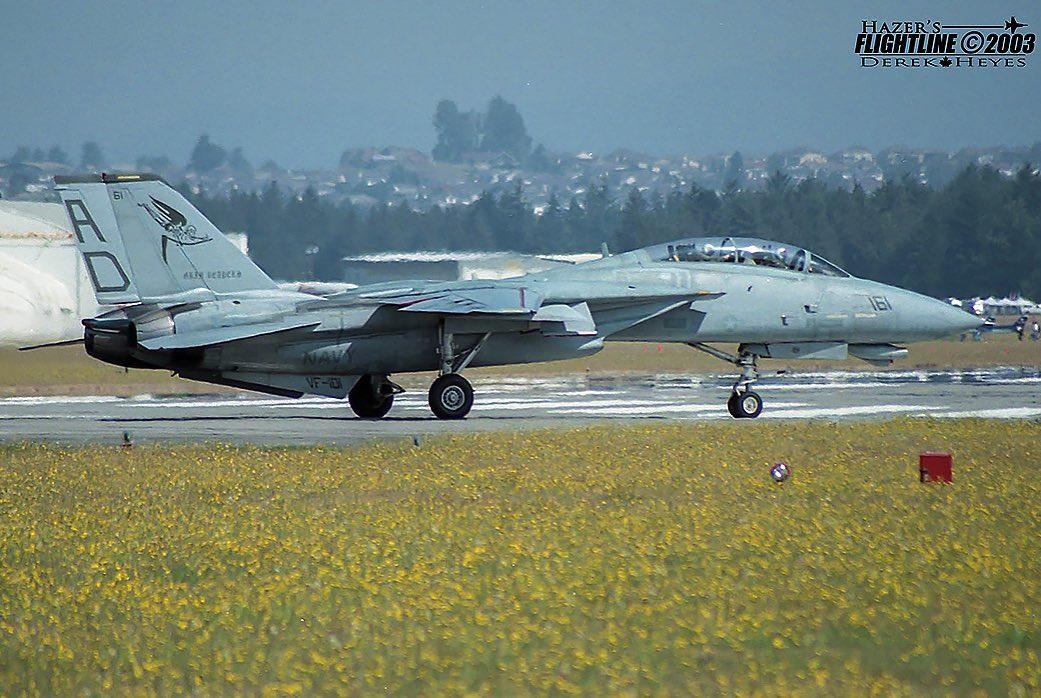
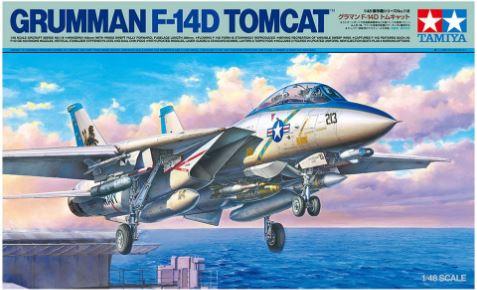
I've wanted to build this livery for quite a few years, and finally made it happen. Was fortunate to see the Tomcat Demo team back in 2003 prior to the decommissioning of the mighty and gorgeous Tomcat. Tamiya 1/48 scale F-14D Tomcat kit. Used Fightertown Decals 'Reaper Domination' decals for the VF-101 specific decals. Massive praise on the Fightertown Decals, they are phenomenal - best I've ever used. They're extremely thin and lay down over edges like they're pre-solvaset without being too fragile. Really fun to work with. Pretty much exclusive Tamiya paint and clear. Used a Factory Direct Models mount for in flight display. The Demo team of course didn't run ordinance or Phoenix missile rails, so I took a little liberty and added the air-to-air element for display. Thanks for looking, hope you enjoy:
-
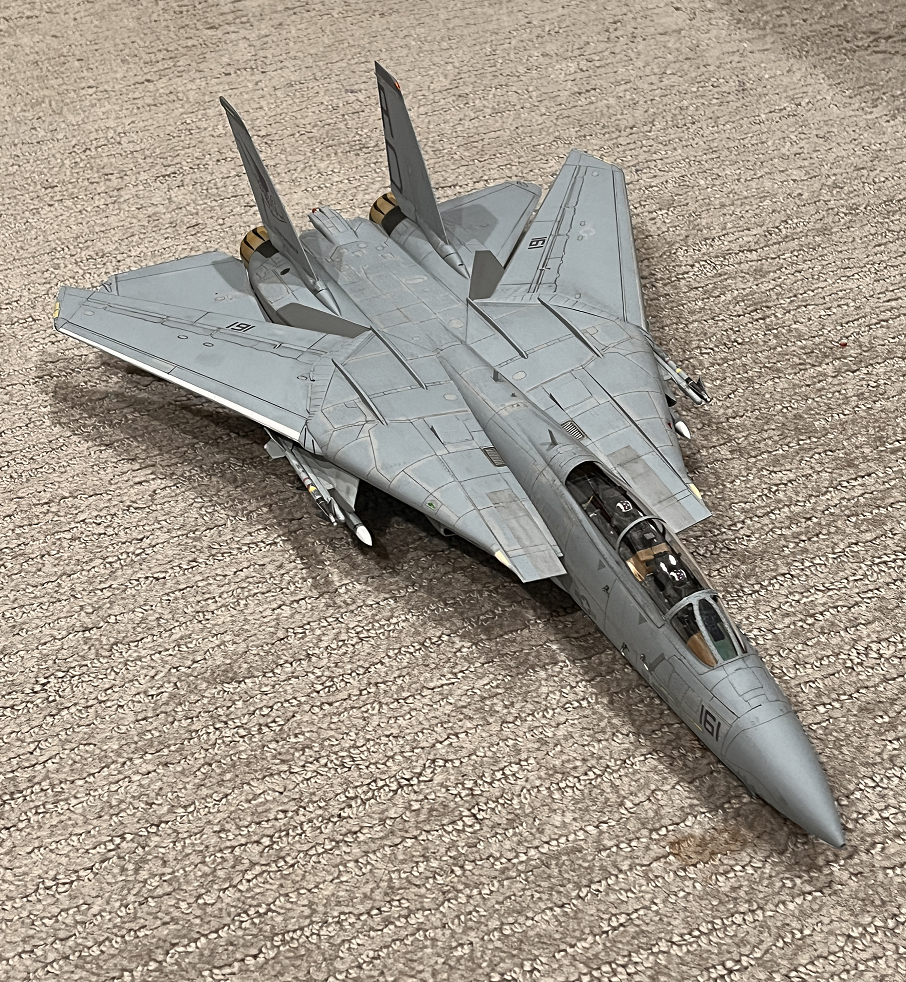
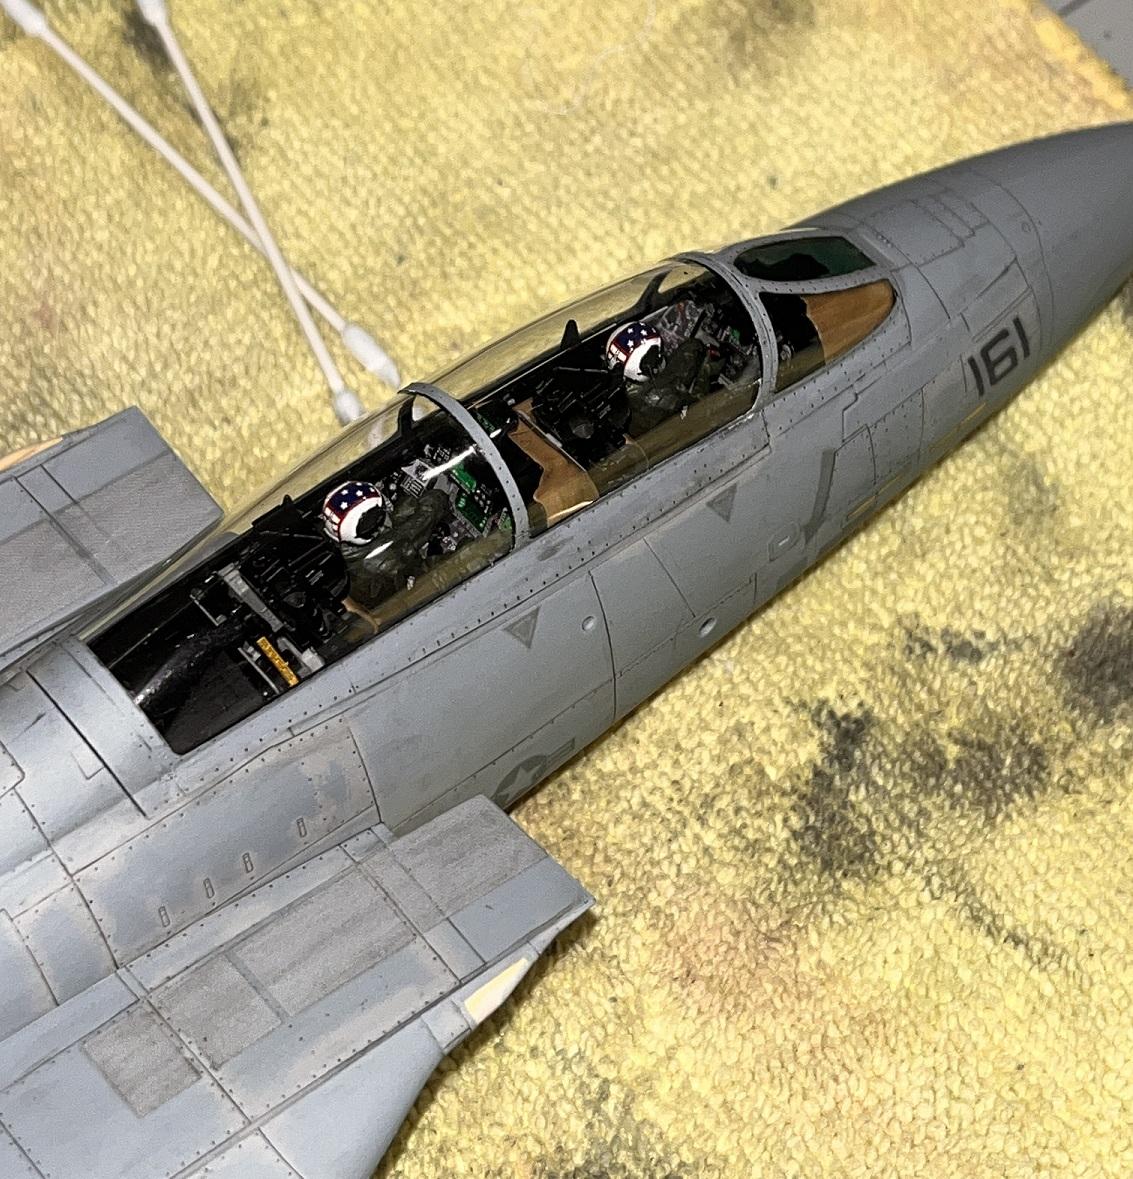
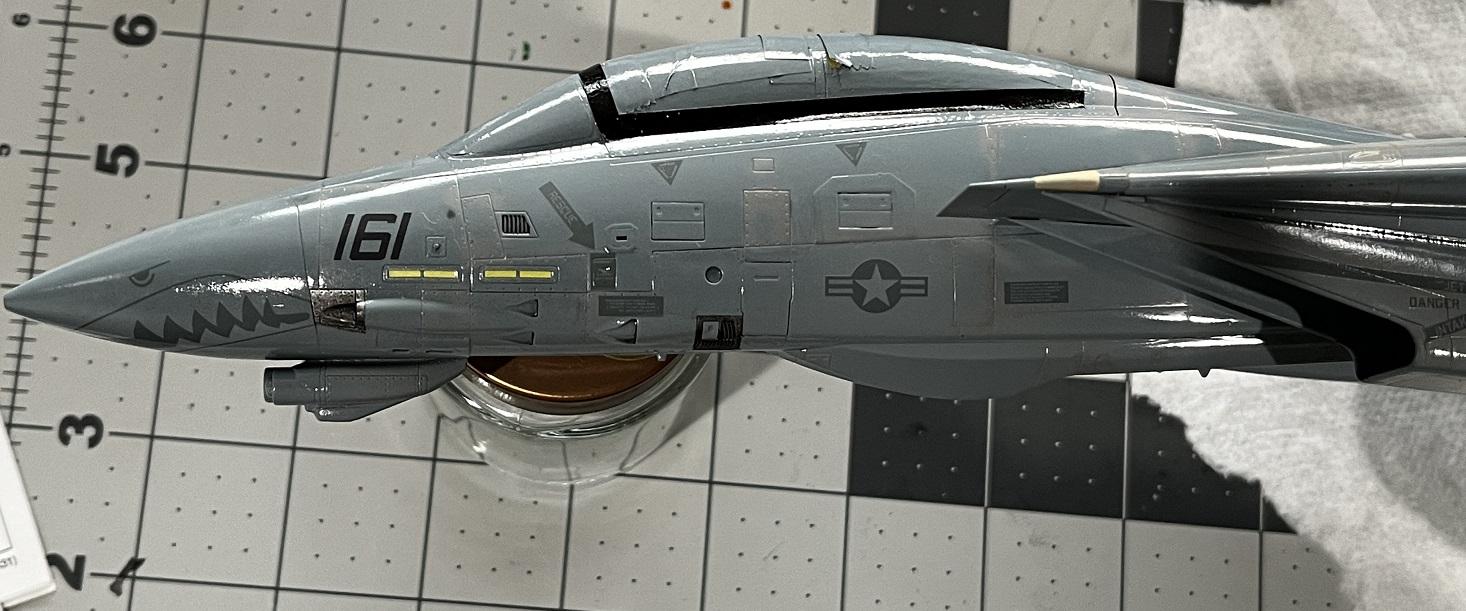
Pushed the Tomcat through the finish line. These Tamiya kits are fantastic builds. The fit and finish really make the build and customization process quite enjoyable. Model wash panel line details and weathering: Wing weathering: Missiles: Cockpit unmasked finally following matte clear: Just about assembled complete! Thanks for looking! Completed shots over in the under glass section.
-
Panel lines are coming along. Using a combination of Tamiya panel line paint and Vallejo dark gray model wash. Using the Vallejo model wash, letting it try and then using hot water and/or Tamiya X-20A acrylic thinner works pretty well.
-
Didn't do a great job of getting progress shots through the painting, pre-shading, and assembly... but the 2003 Demo Tomcat is nearing the finish line. Gloss is on over the Tamiya Light Ghost Gray bottom and Dark Ghost Gray top. Using decals almost exclusively from the 'Reaper Domination' set from Fightertown Decals. Again, these decals are phenomenal. They lay down like they have solvaset already applied without being too delicate. Very enjoyable decals to apply. Onwards to painting panel lines!
-
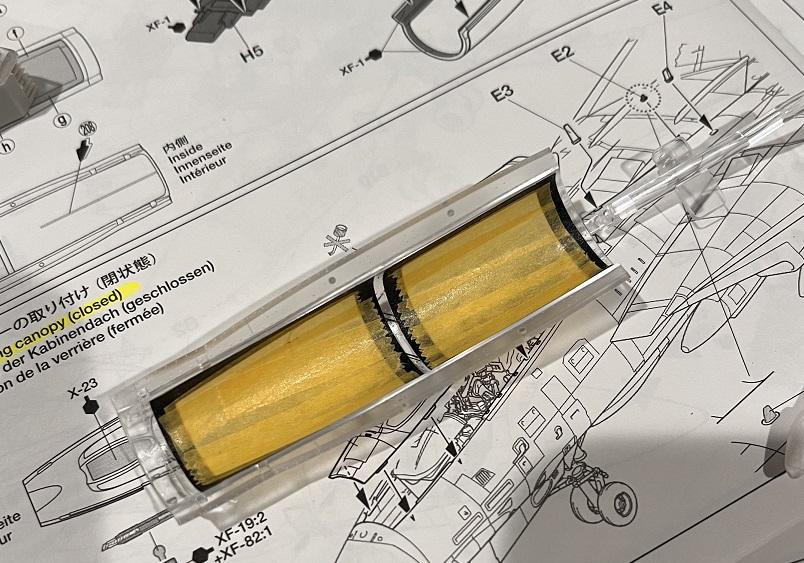
Making more progress. Airframe is together and primed. Using some cotton balls for support for the front landing gear doors. Foam would have likely been better but... it's what I had. Demo Team never ran Phoenix missile / bomb pallets, but I'll be putting on some air/air ordinance for display. My only knock on the Tamiya kit, it'd be nice if it came with internal canopy masks as well as the external! Primed using Tamiya AS-10 Ocean Gray.
-
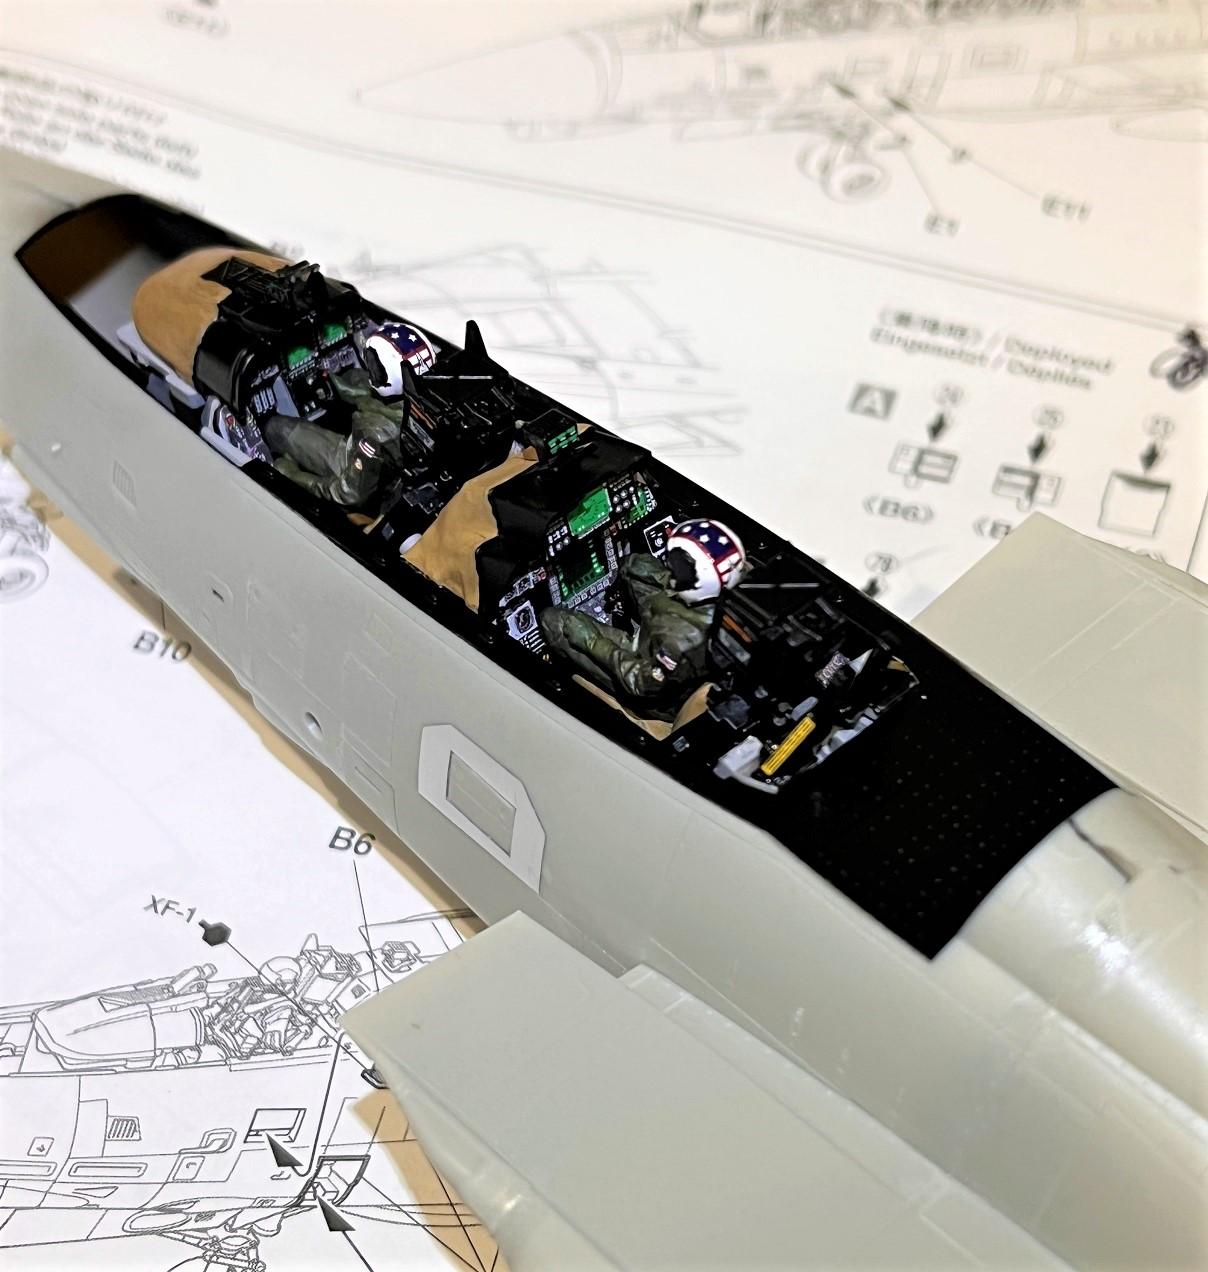
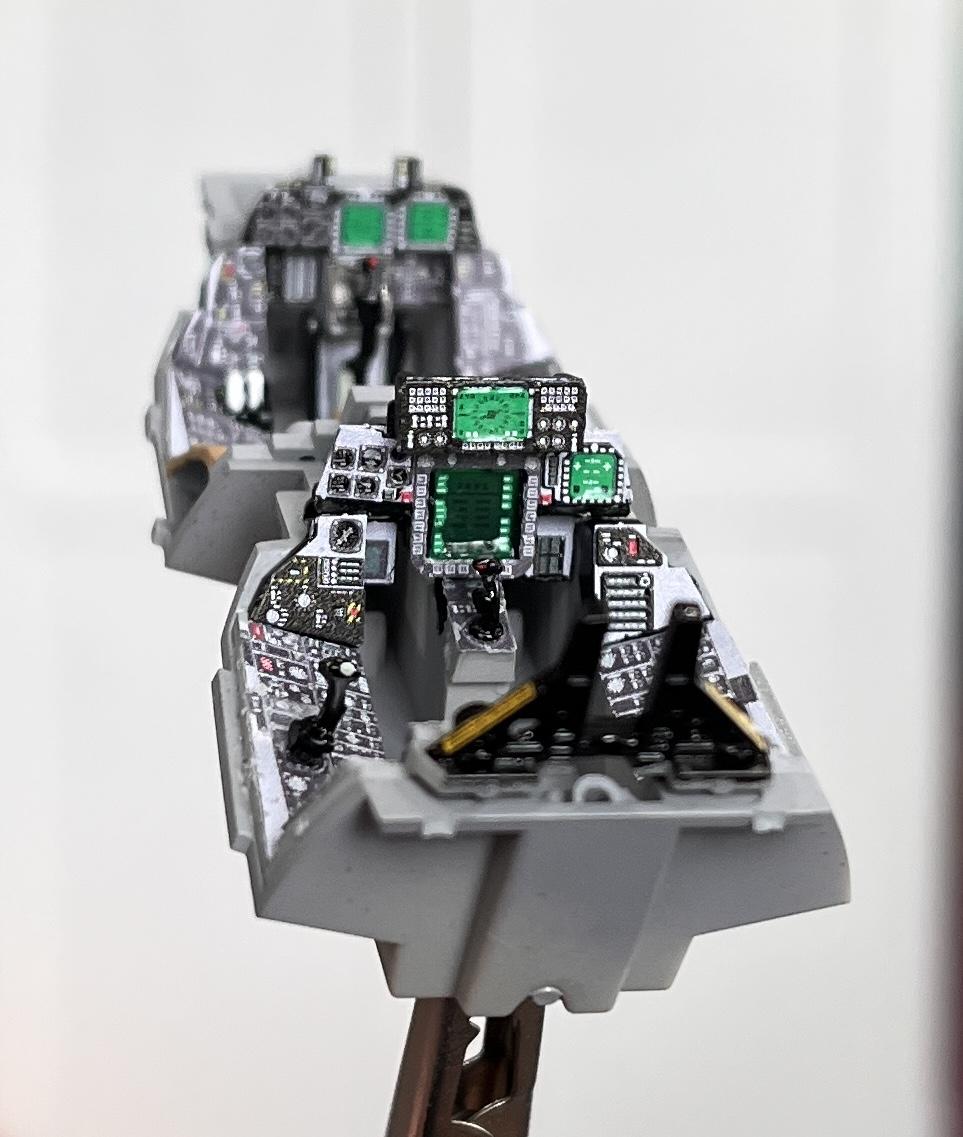
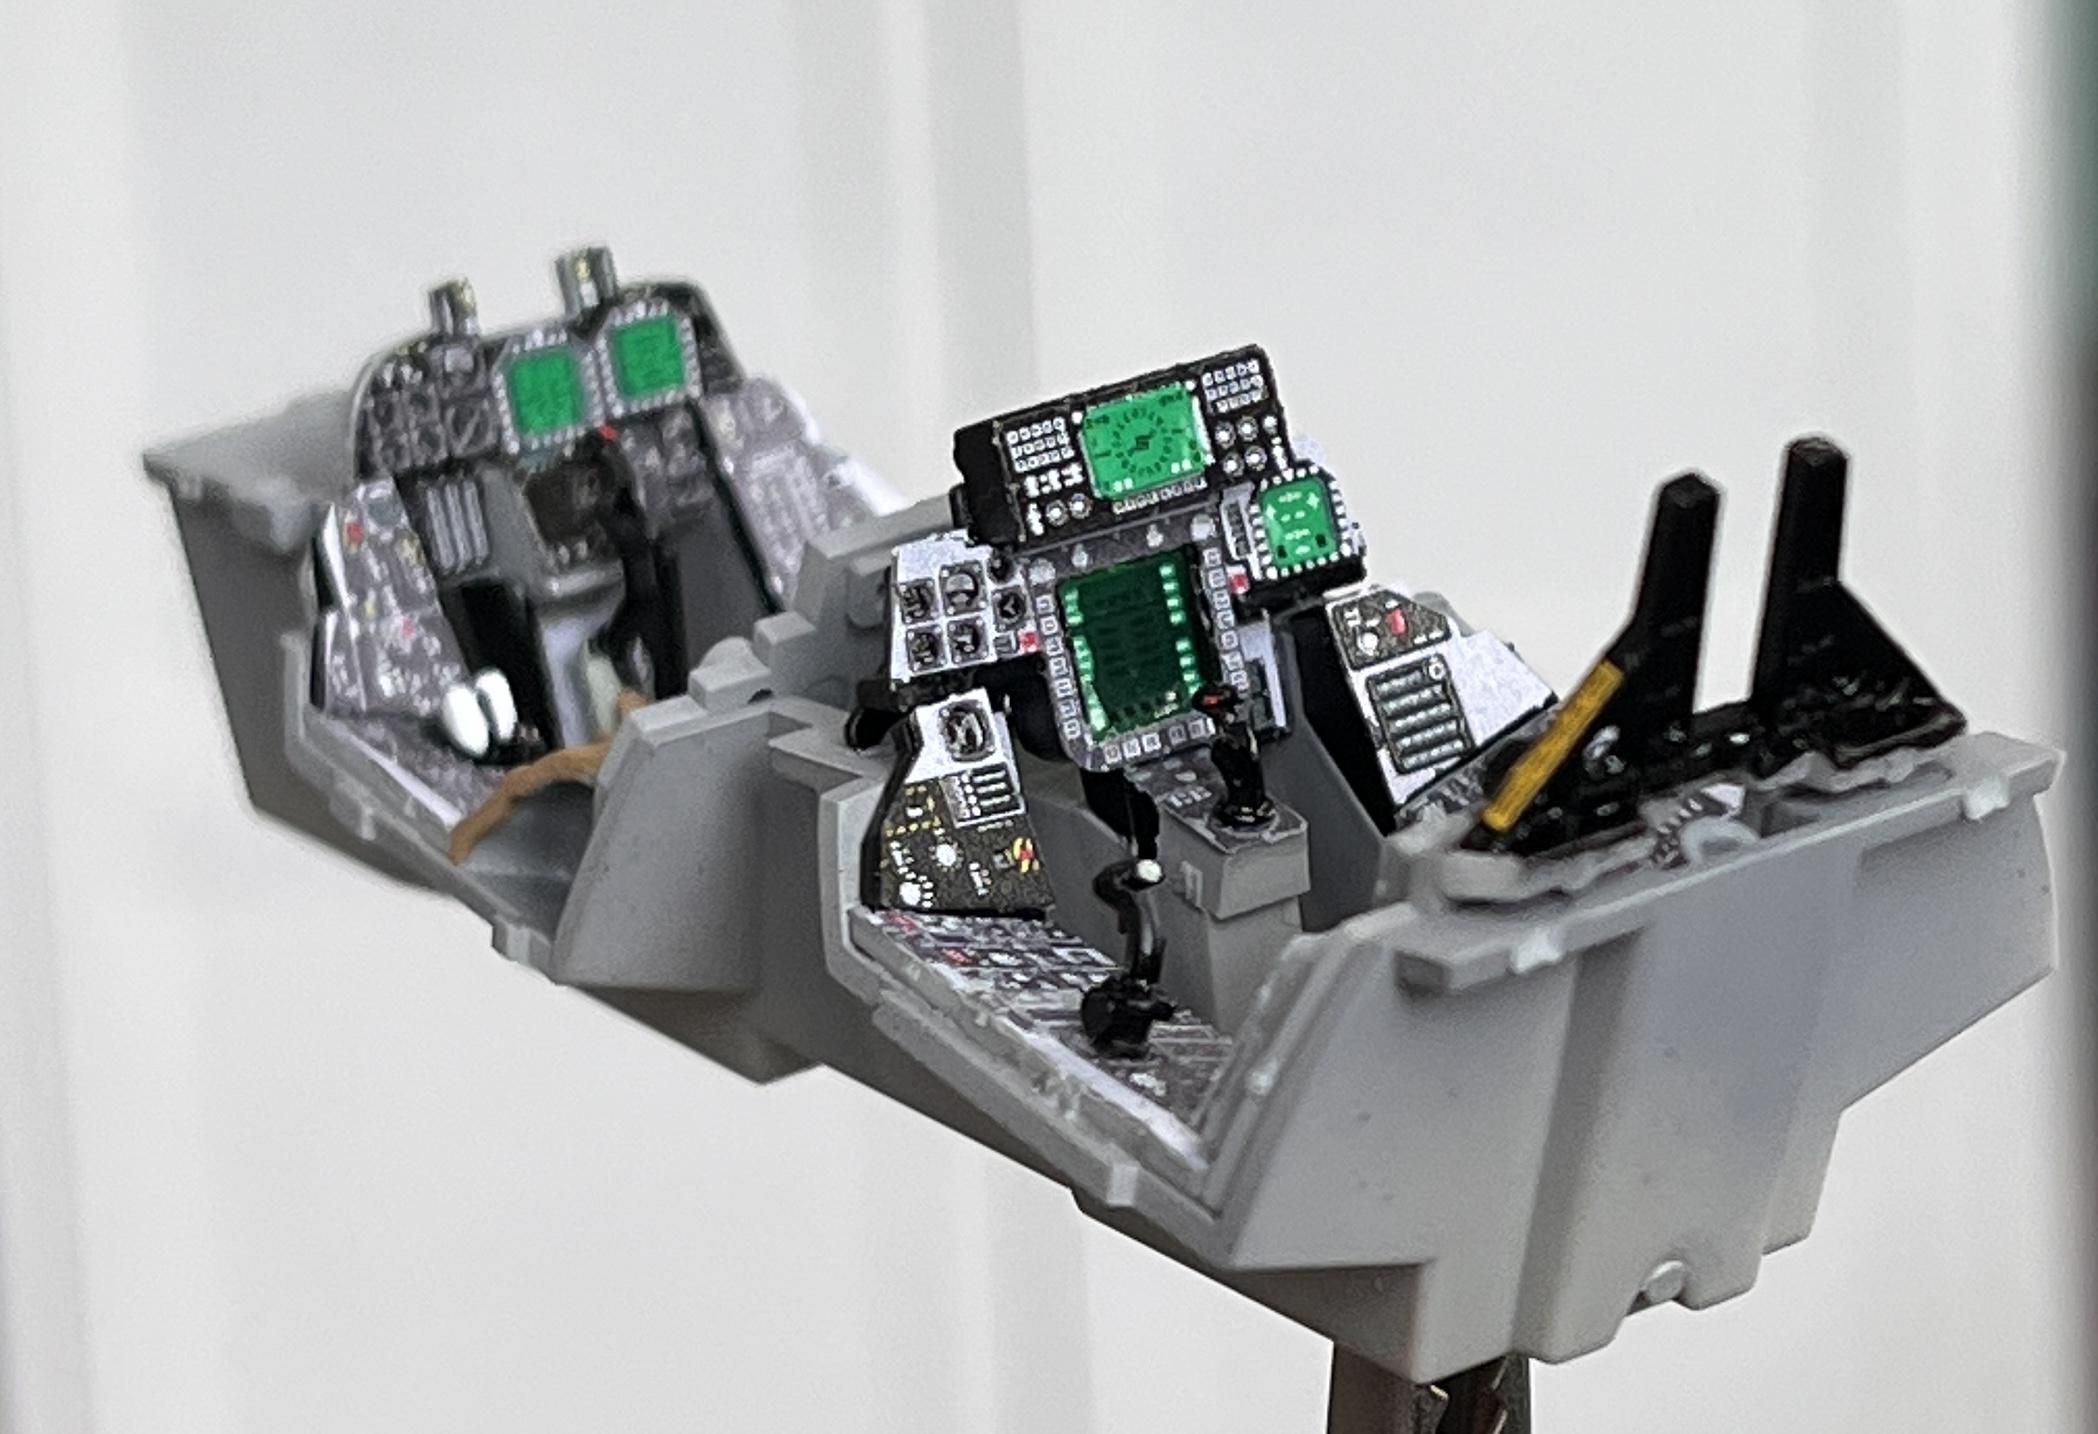
Progressing here on the Tomcat - another shot of the cockpit before assembling into the nose, and starting to put the fuselage and body together. This shot before I weathered the cockpit and sanded the stick boot (oops). Doing this build as a gear up flying replica, so needed to cut out a couple pieces to bridge the landing gear doors. A bit of cutting, sanding, fitting , and bracing, but overall okay. Kit's not designed for gear up display but it'll do! Starting on the nozzles as well. Thanks for looking!
-
I certainly miss the Tomcat as well! What a beautiful, functional, and BA fighter jet. Putting the seats and Pilot / REO together. Using Fightertown Decals for the Tomcat Demo Grim Reapers specific livery. So far really enjoying the Fightertown decal quality. They are extremely thin and lay down wonderfully.
-
Working on a Tamiya F-14D in 1/48 scale, in the livery that the Tomcat Demonstration Team ran in 2003; the one and only time I got to see a Tomcat live (and it didn't disappoint)! Here's a few reference shots on what I'm trying to replicate: Started as the box describes with the cockpit, but shaving most of the raised surfaces and replaced with eduard F-14D cockpit PE detail kit. The eduard stuff is really good. This is my 3rd aircraft model using their detail up photo etch and it's top notch.
-
Outstanding build. You nailed the paint and exhaust colors, looks fantastic.
-
Liberty Walk Lamborghini Aventador
JP Models replied to Jay's topic in Other Racing: Road Racing, Salt Flat Racers
Highest quality, level of detail, and realism. Top notch is an understatement!! -
My take on the Revell C7R kit. What a frustrating kit at times!! Didn't do a great job of taking WIP pics, chassis built more or less as it comes from the kit, with some fairly major sanding and trimming to get the body to sit down properly. Getting started. Using the Classic Racing Resins upgrade kit: Fit was pretty good, used CA Accelerator to get the glue to hold. Primer and sanding: Cut the plastic apart using a Dremel with a thin cutting disc. Not sure there's a way to get this body to sit properly with the factory plastic windows. More filler and sanding: Final assembly beginning: Used fuel filter screen to add more detail to the mesh grille opening: Used a 3D pen to and staples to make the front pitot tubes: Thanks for looking!
-
Gorgeous build!! Love the detail and uniqueness of this one. Hats off, well done!
-
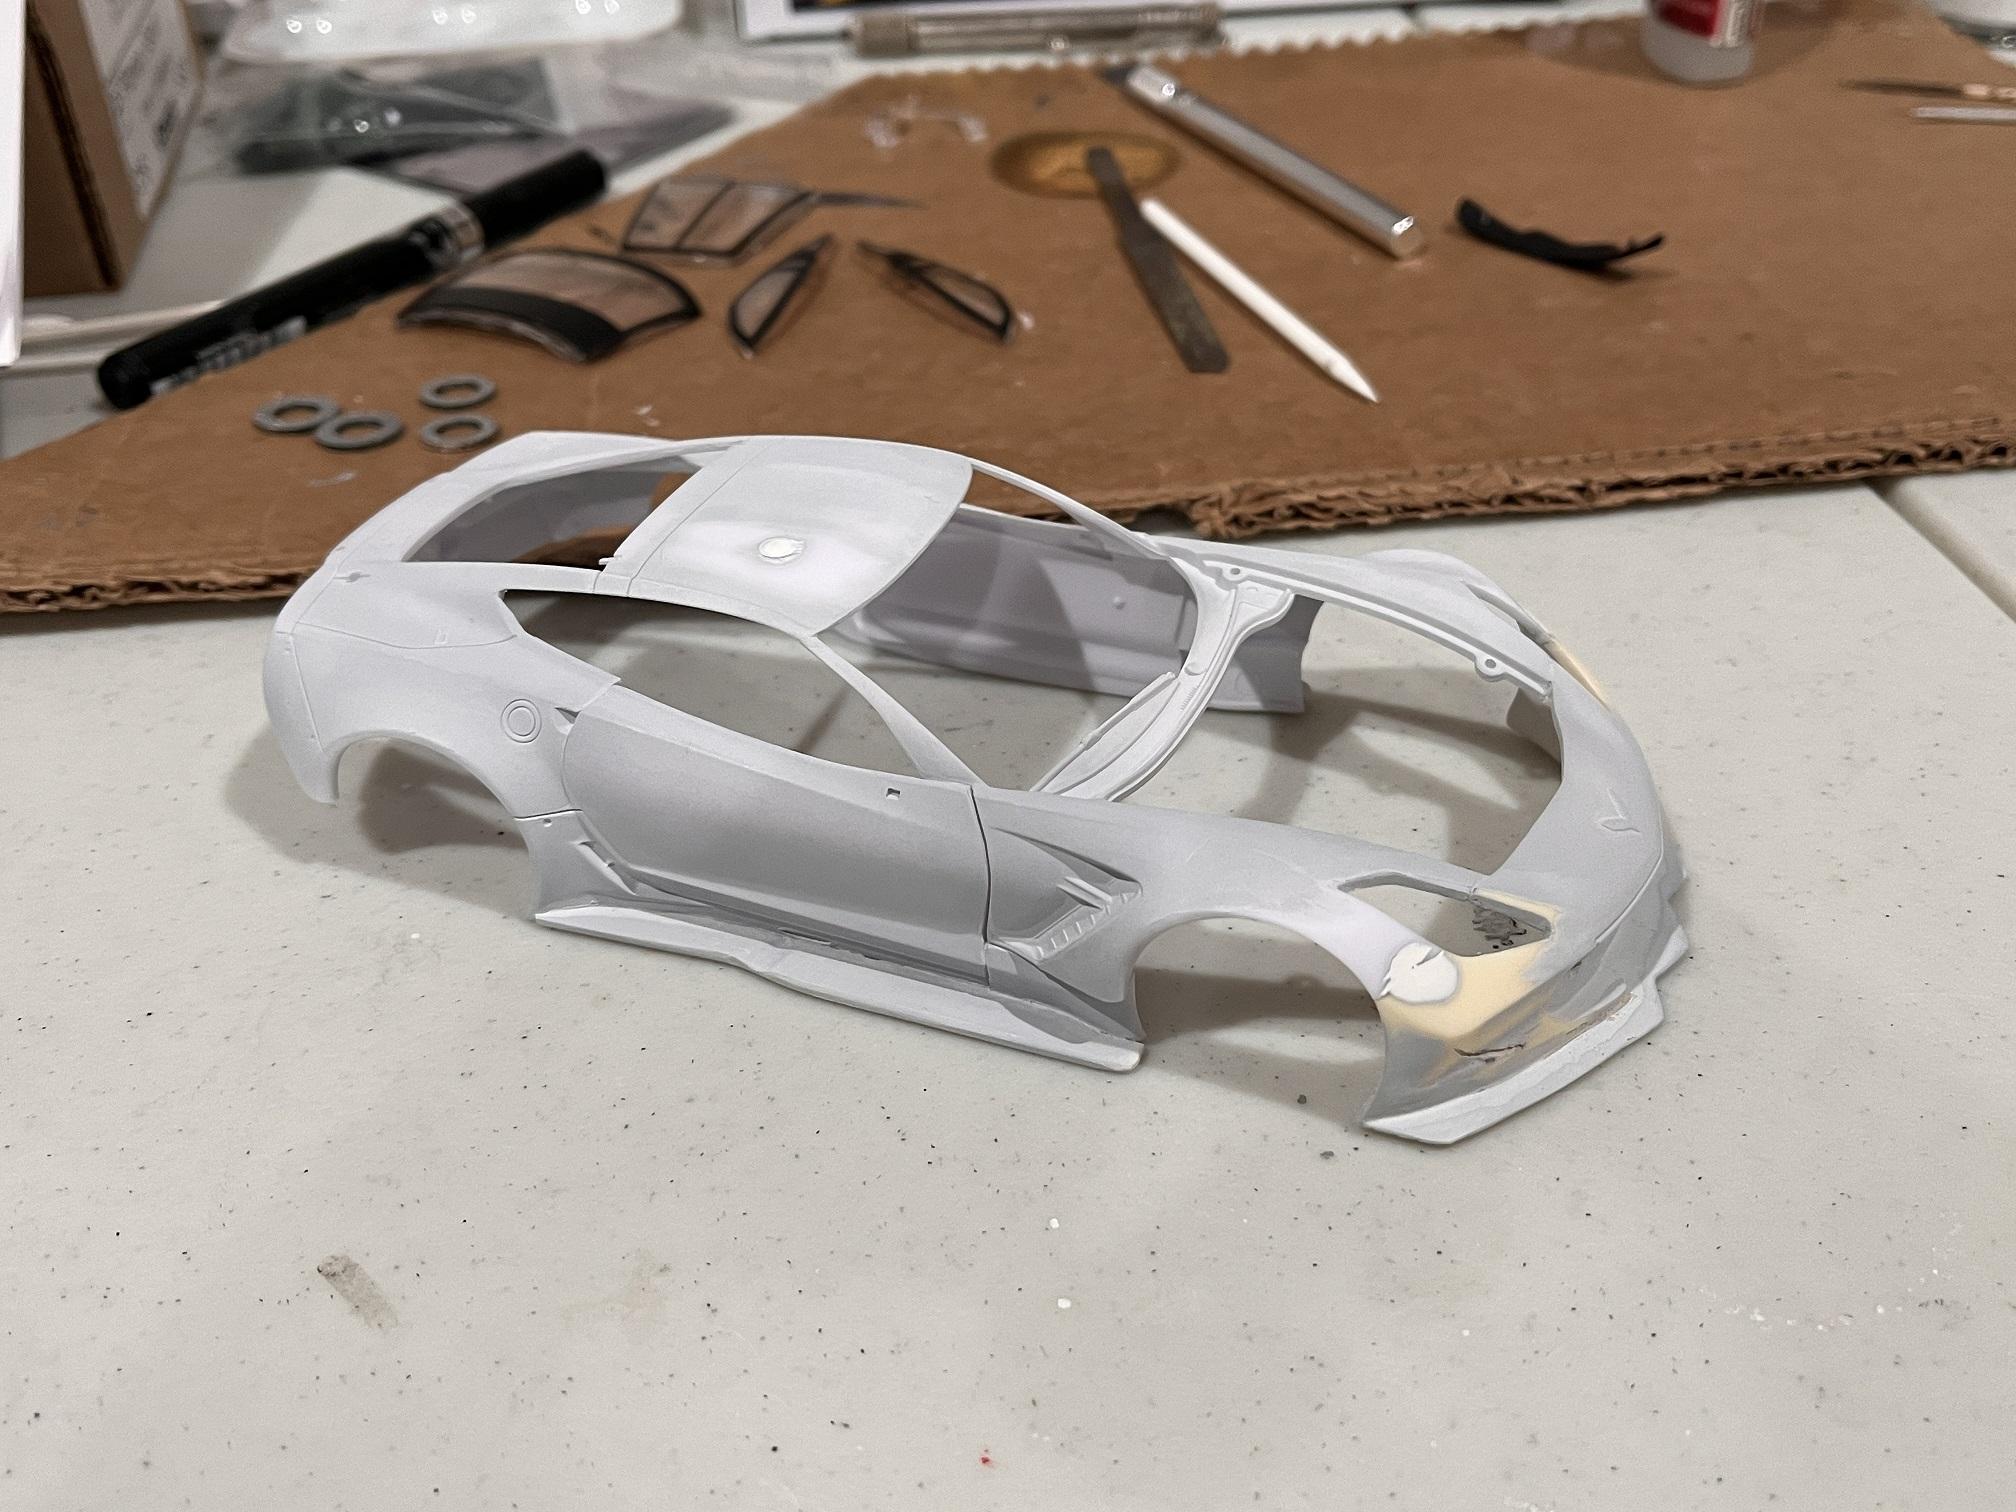
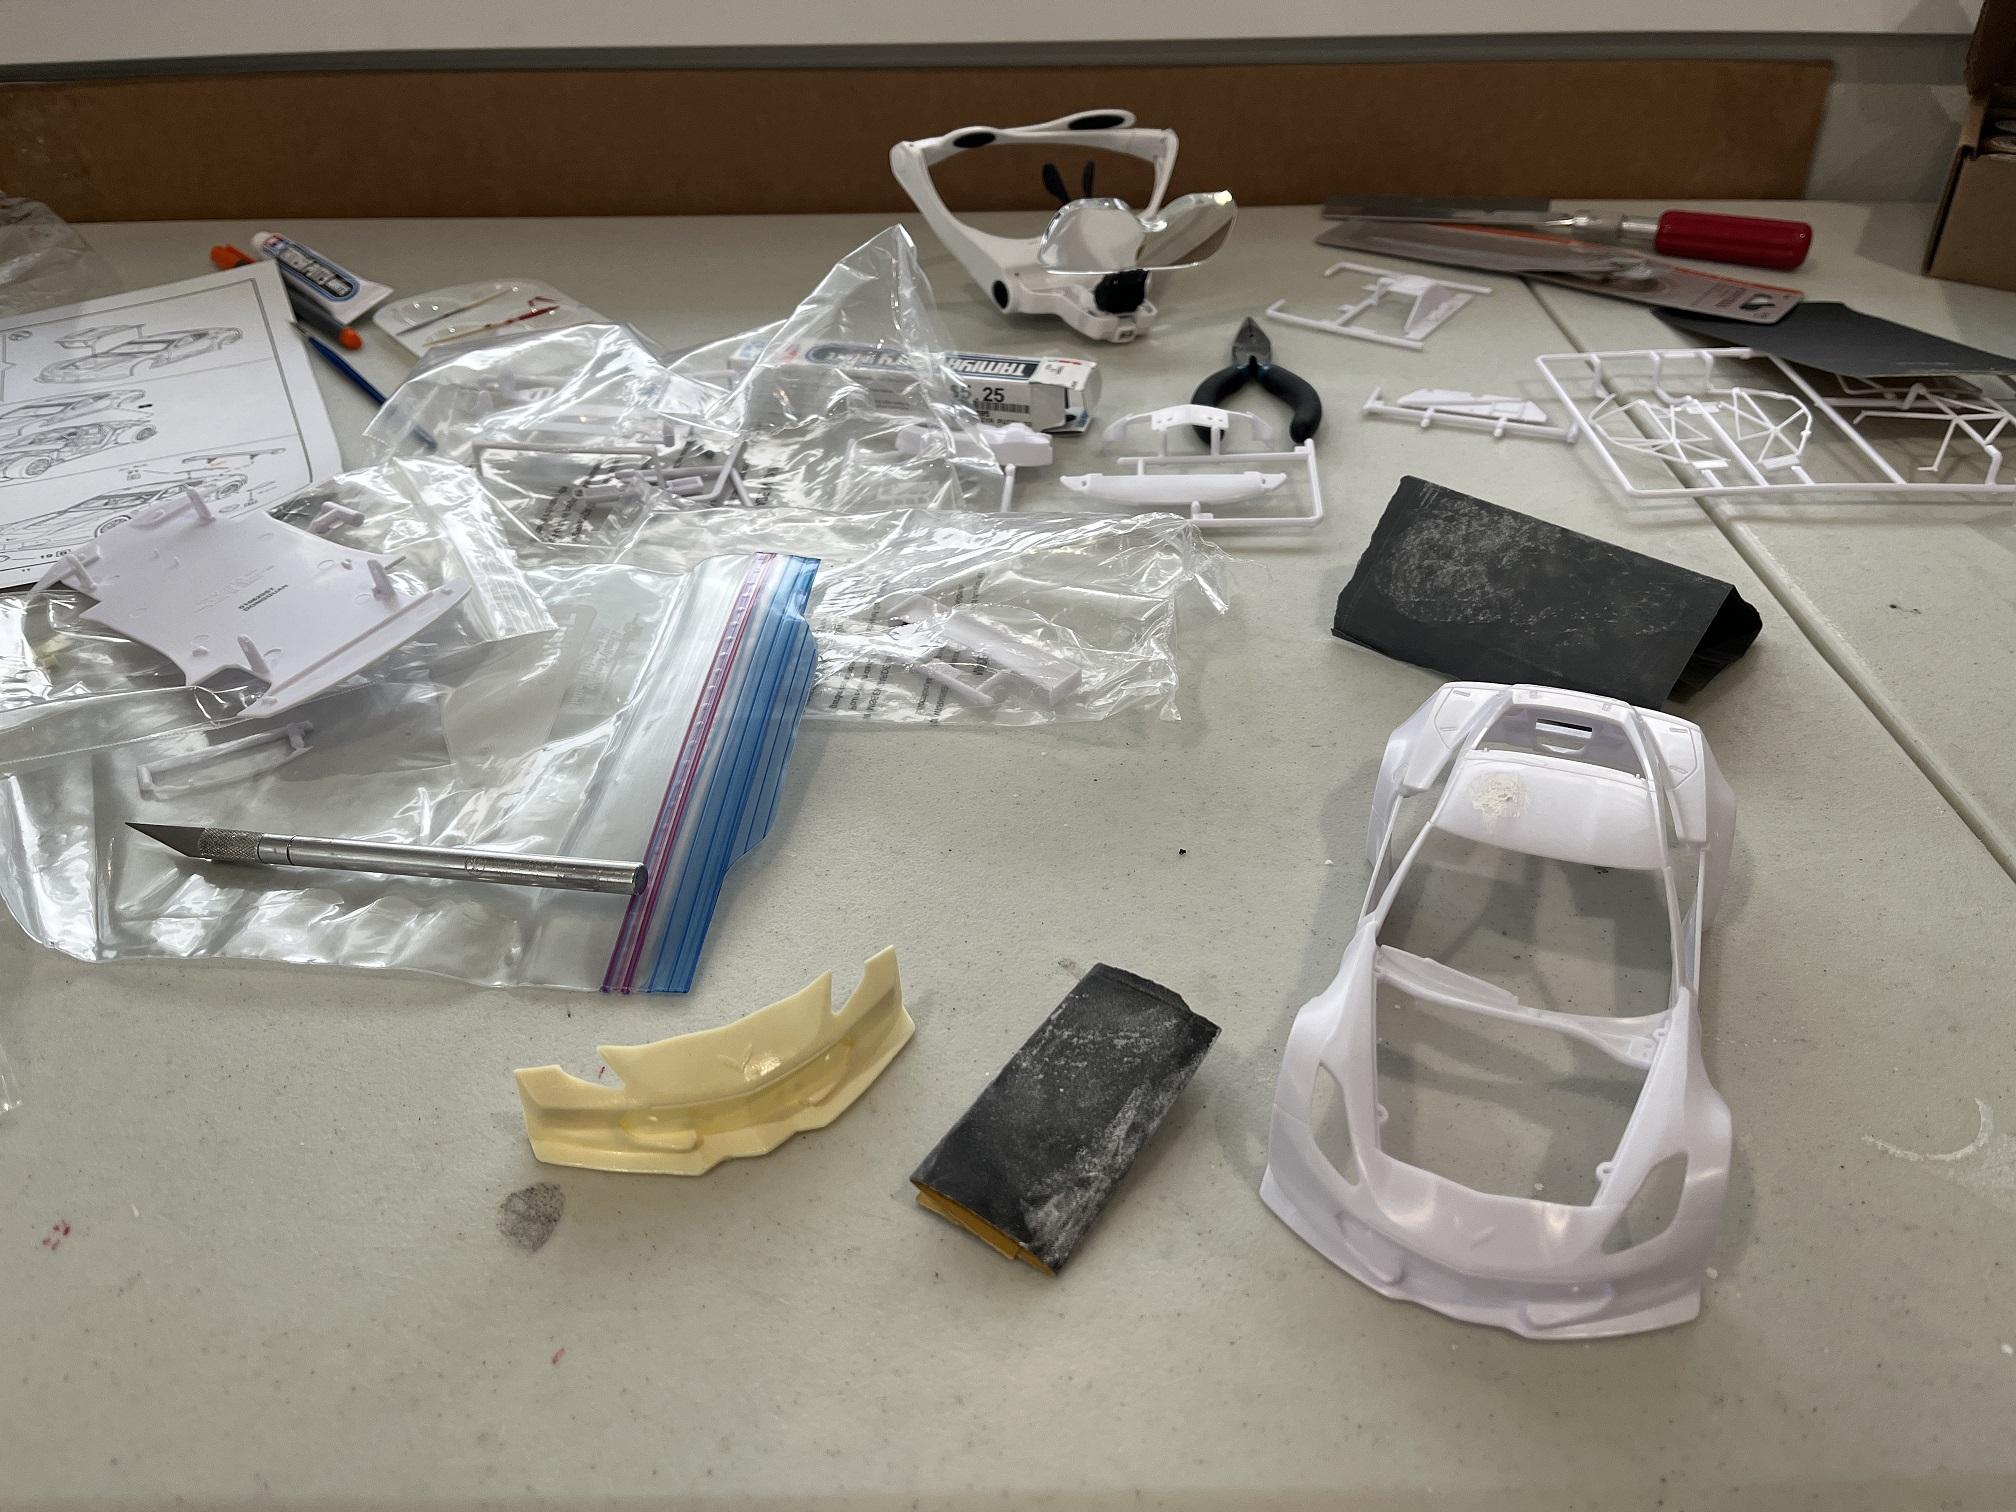
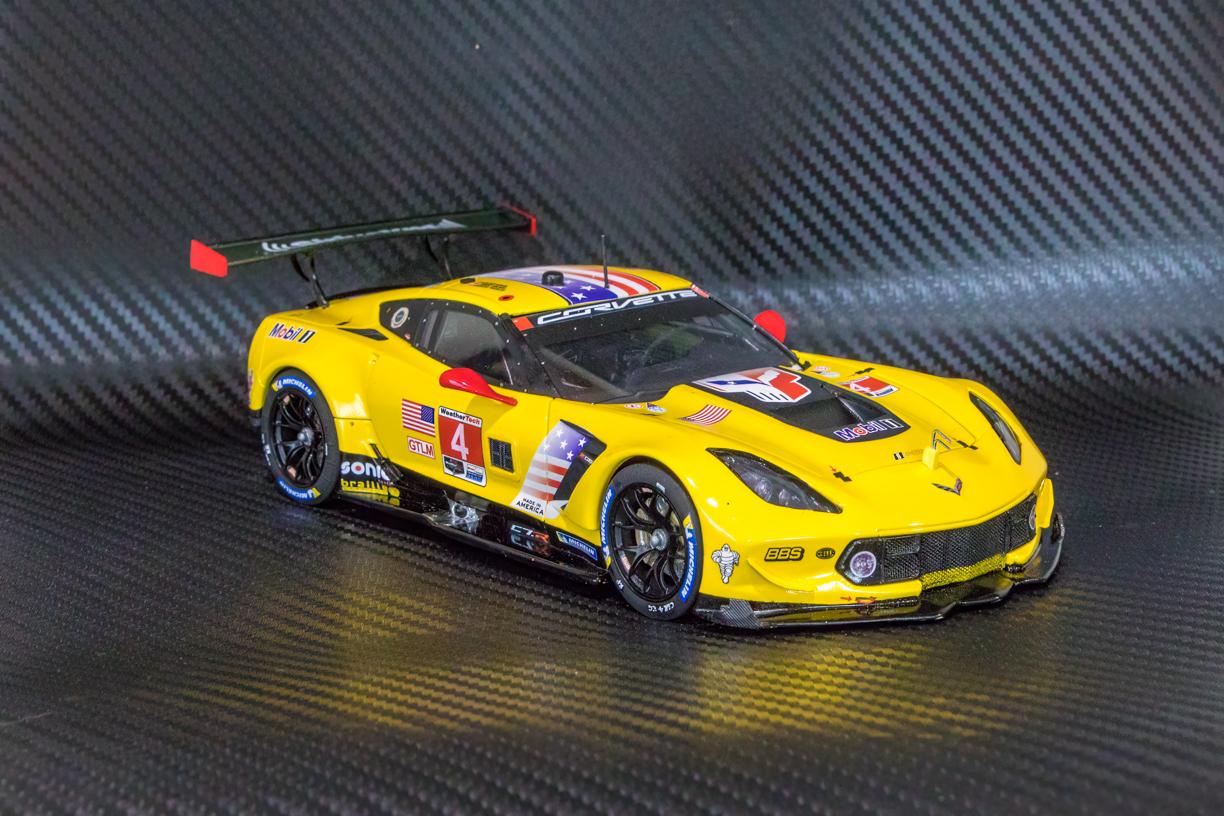
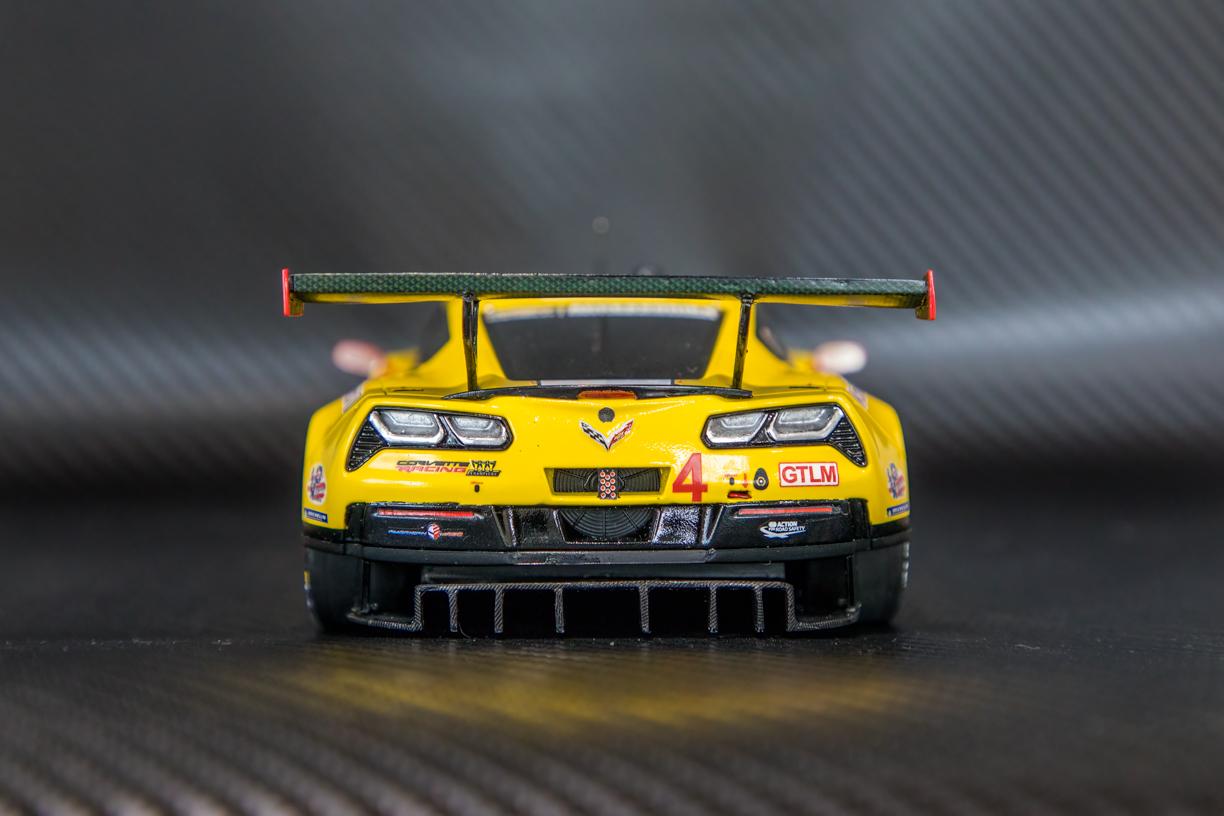
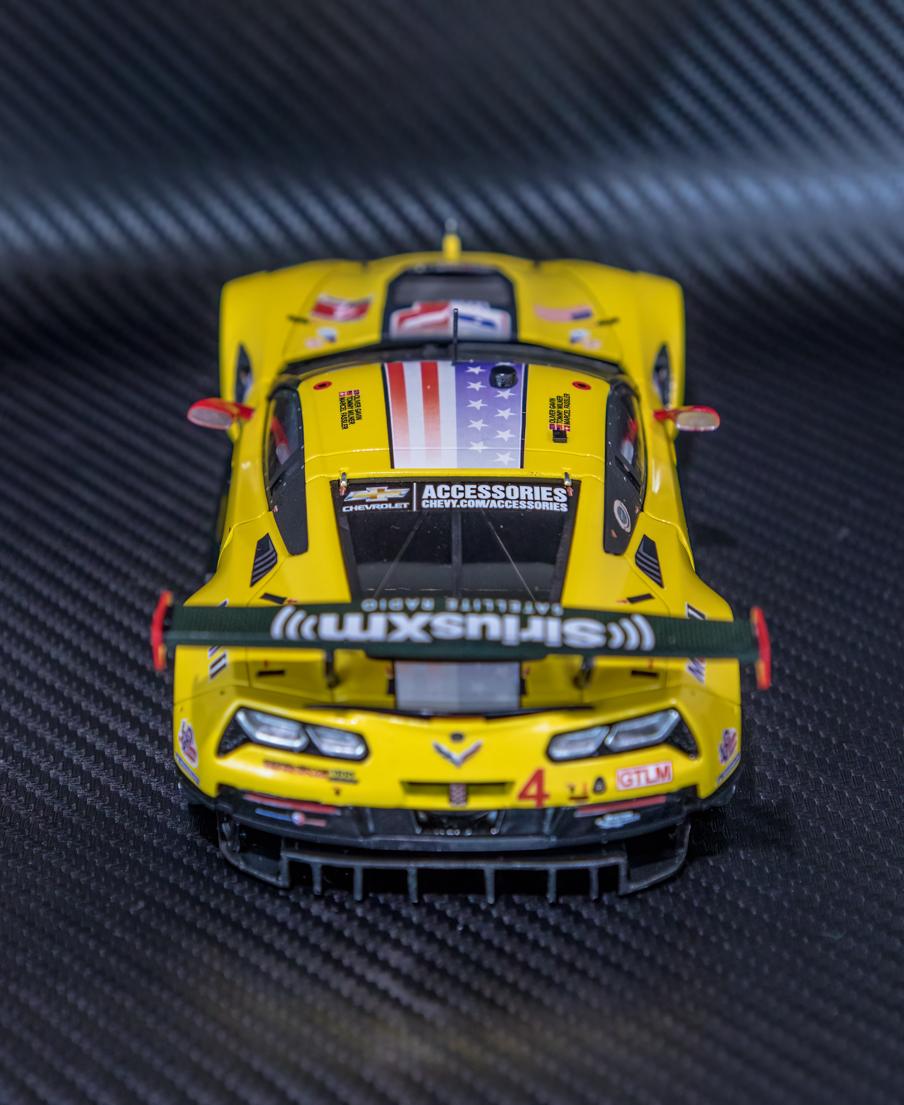
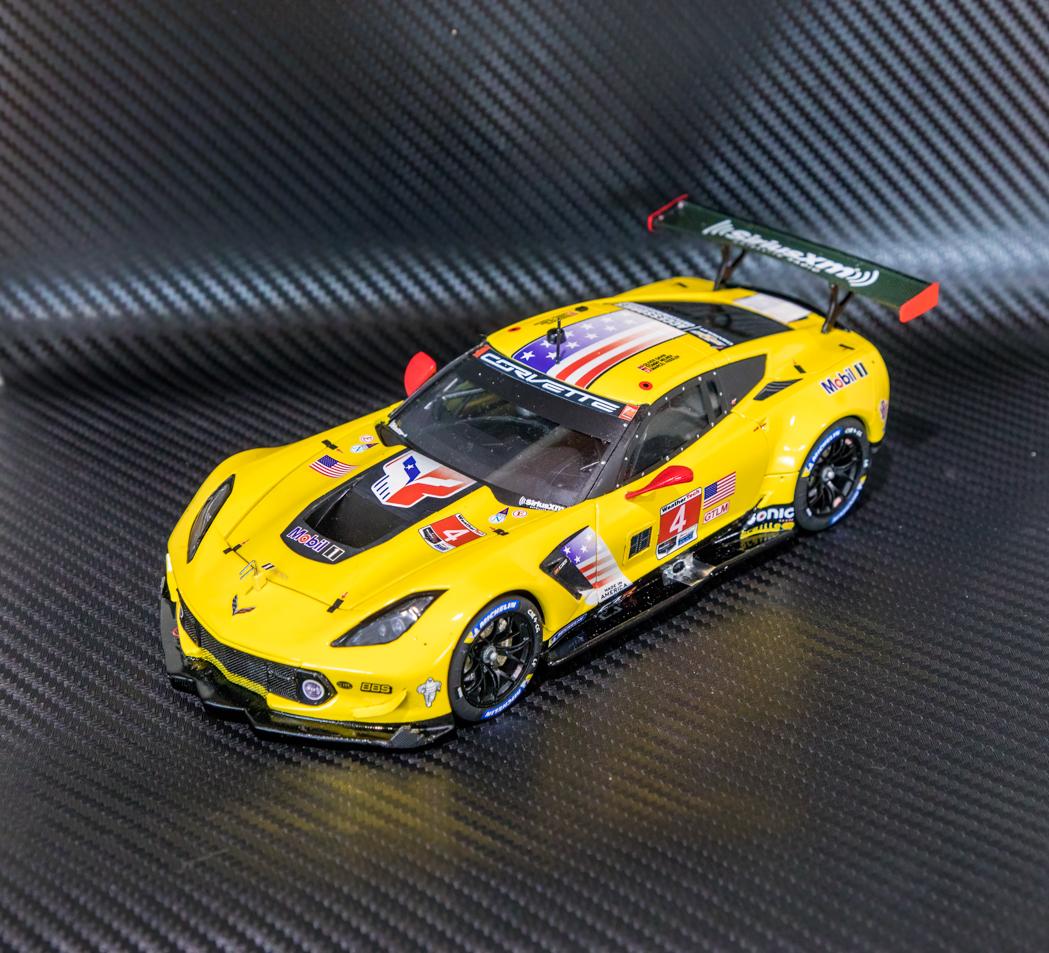
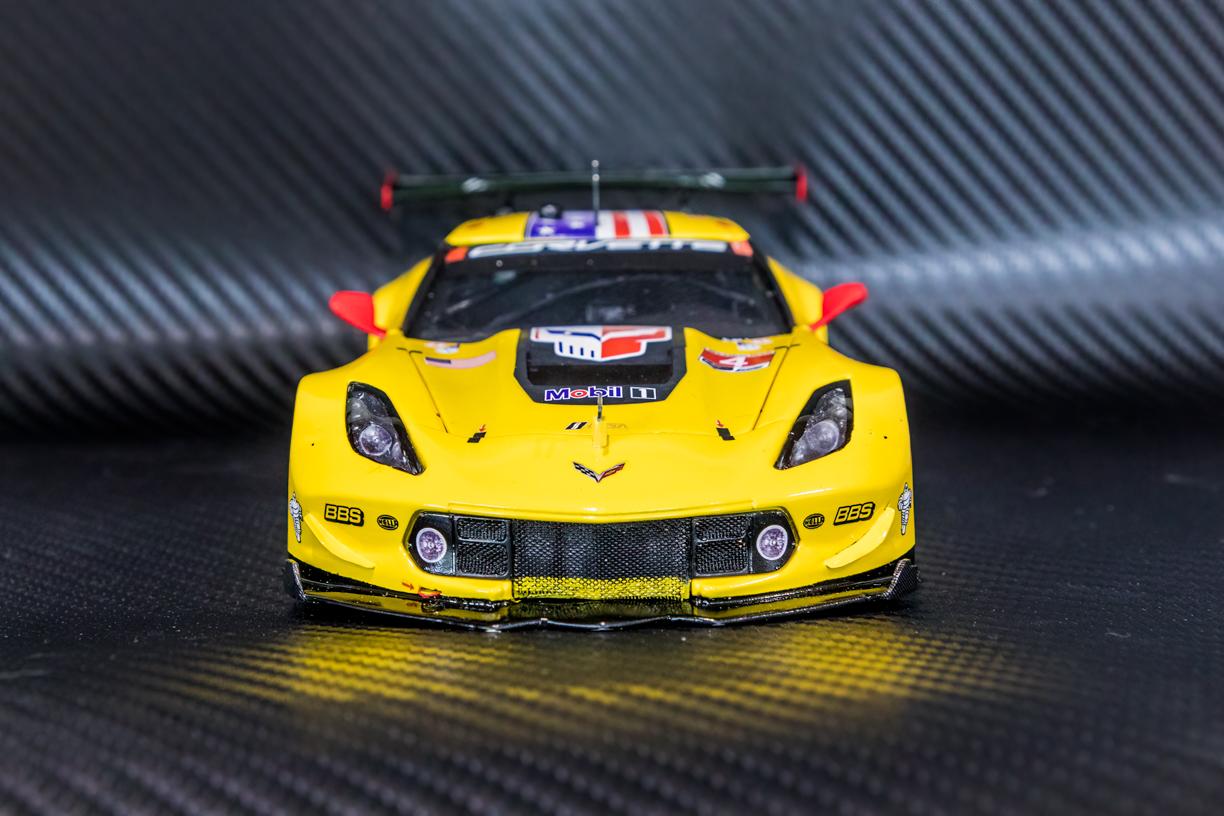
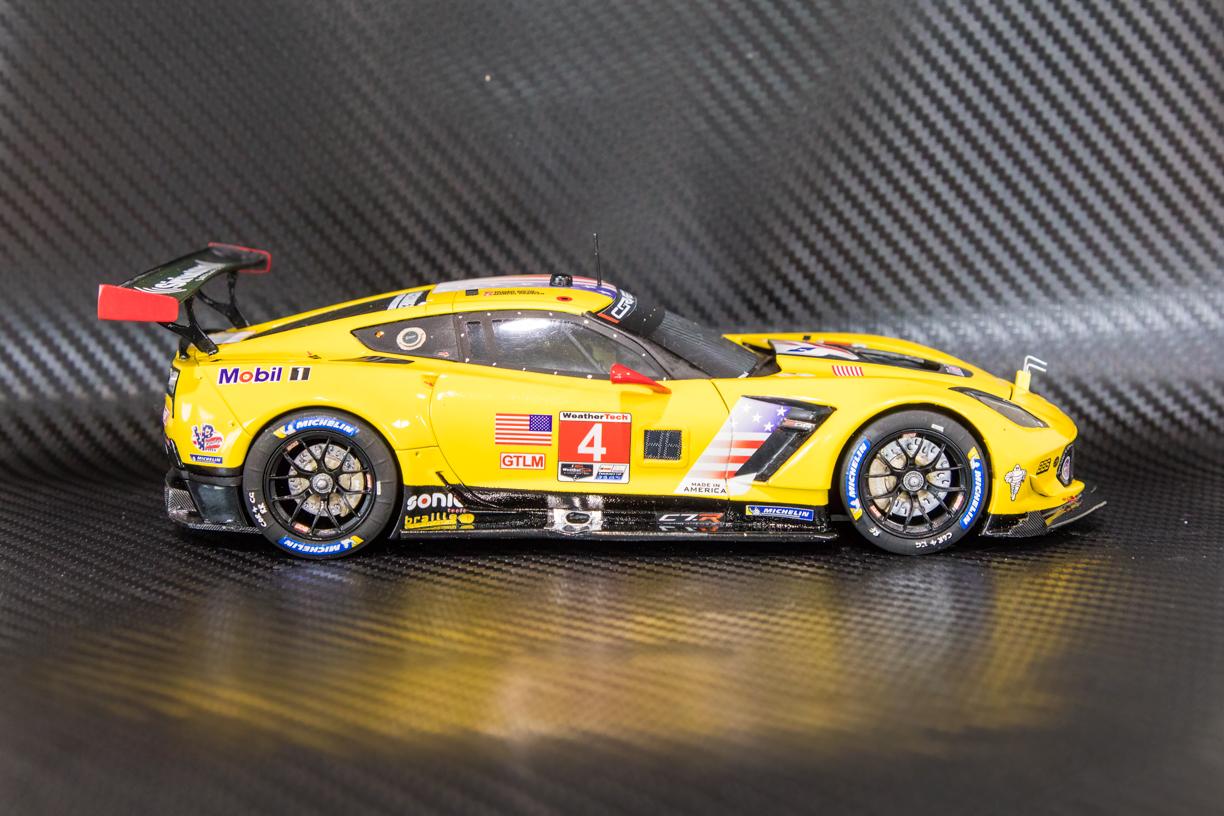
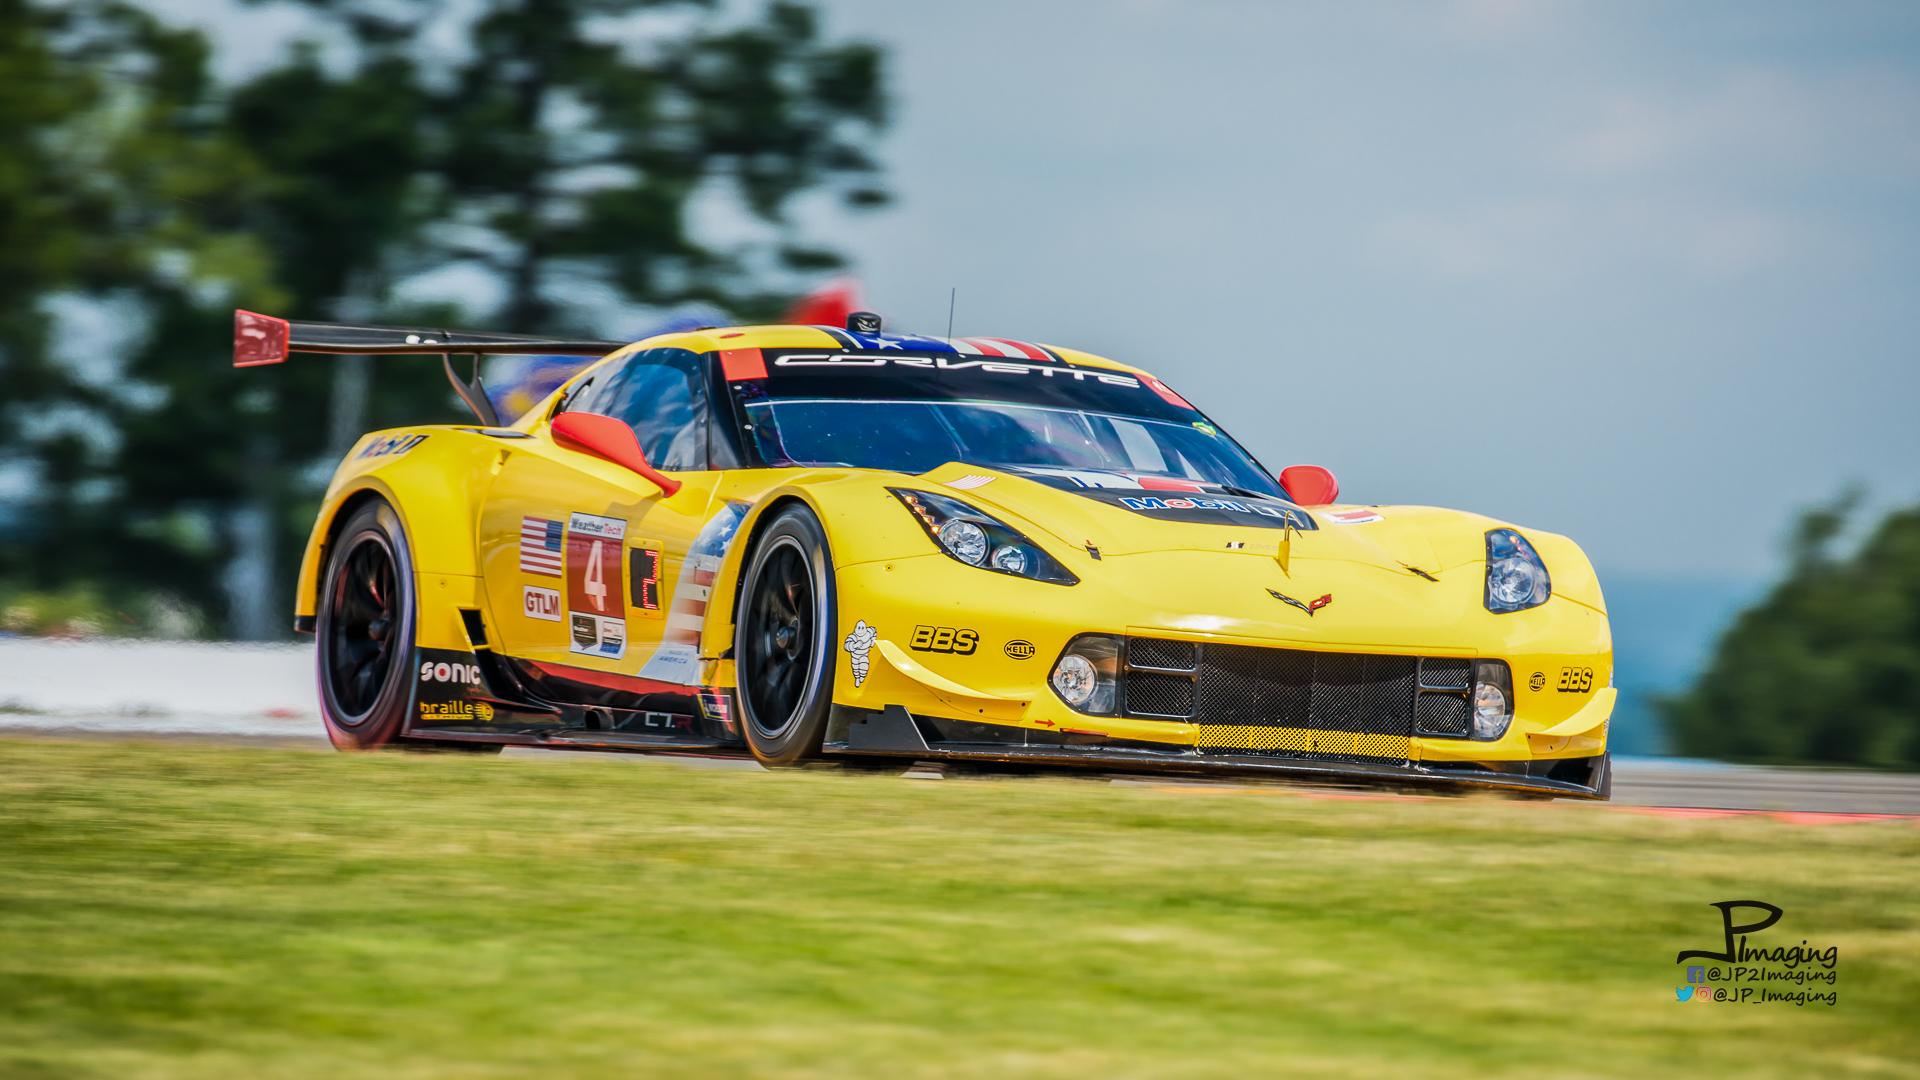
Finished up my take on the Revell Corvette C7R. This one is done to replicate the #4 C7R ran at the 2019 Sahlens Six Hours of The Glen at Watkins Glen International. Unfortanently, the #4 car didn't make it more than 4 turns on lap 1 before being turned by an RSR... The build - Started with the Revell C7R kit - arguably one of the most frustrating builds I've had in some time!! This kit is borderline terrible in fit and finish. A LOT of test fitting and sanding / cutting, followed by more of the same. Thankfully I was able to glean some tips from those of you that came before me! Used the Classic Racing Resins C7R upgrade kit that upgrades the nose, rocker panels, wing, and rear diffuser. Fit and finish of the resin parts was okay, a fair amount of sanding and profiling had them looking decent. Cutting the nose and diffuser was pretty straight forward and a decent fit. Required some body filler to get the high/low but otherwise fairly pleased with them. The clear pieces on this kit were a royal challenge... ended up cutting all windows and headlights apart and fitting individually. A Dremel with a thin cutting wheel works great for this. Gravity Colors USA paint was used and dressed with Indycals and few customs I made to directly replicate the 2019 Sahlens Six Hours livery. Wheels and brakes are KMP-Scale Modeling which I feel really dress up the car and add realism to the kit. Thanks for looking! Inspiration: IMSA 2019 Sahlens Six hours of The Glen, #4 Corvette Racing C7R.
-
Very nicely done!
-
Thanks all - fun little build. I was really impressed with the photoetch quality from Eduard detail kit.
-
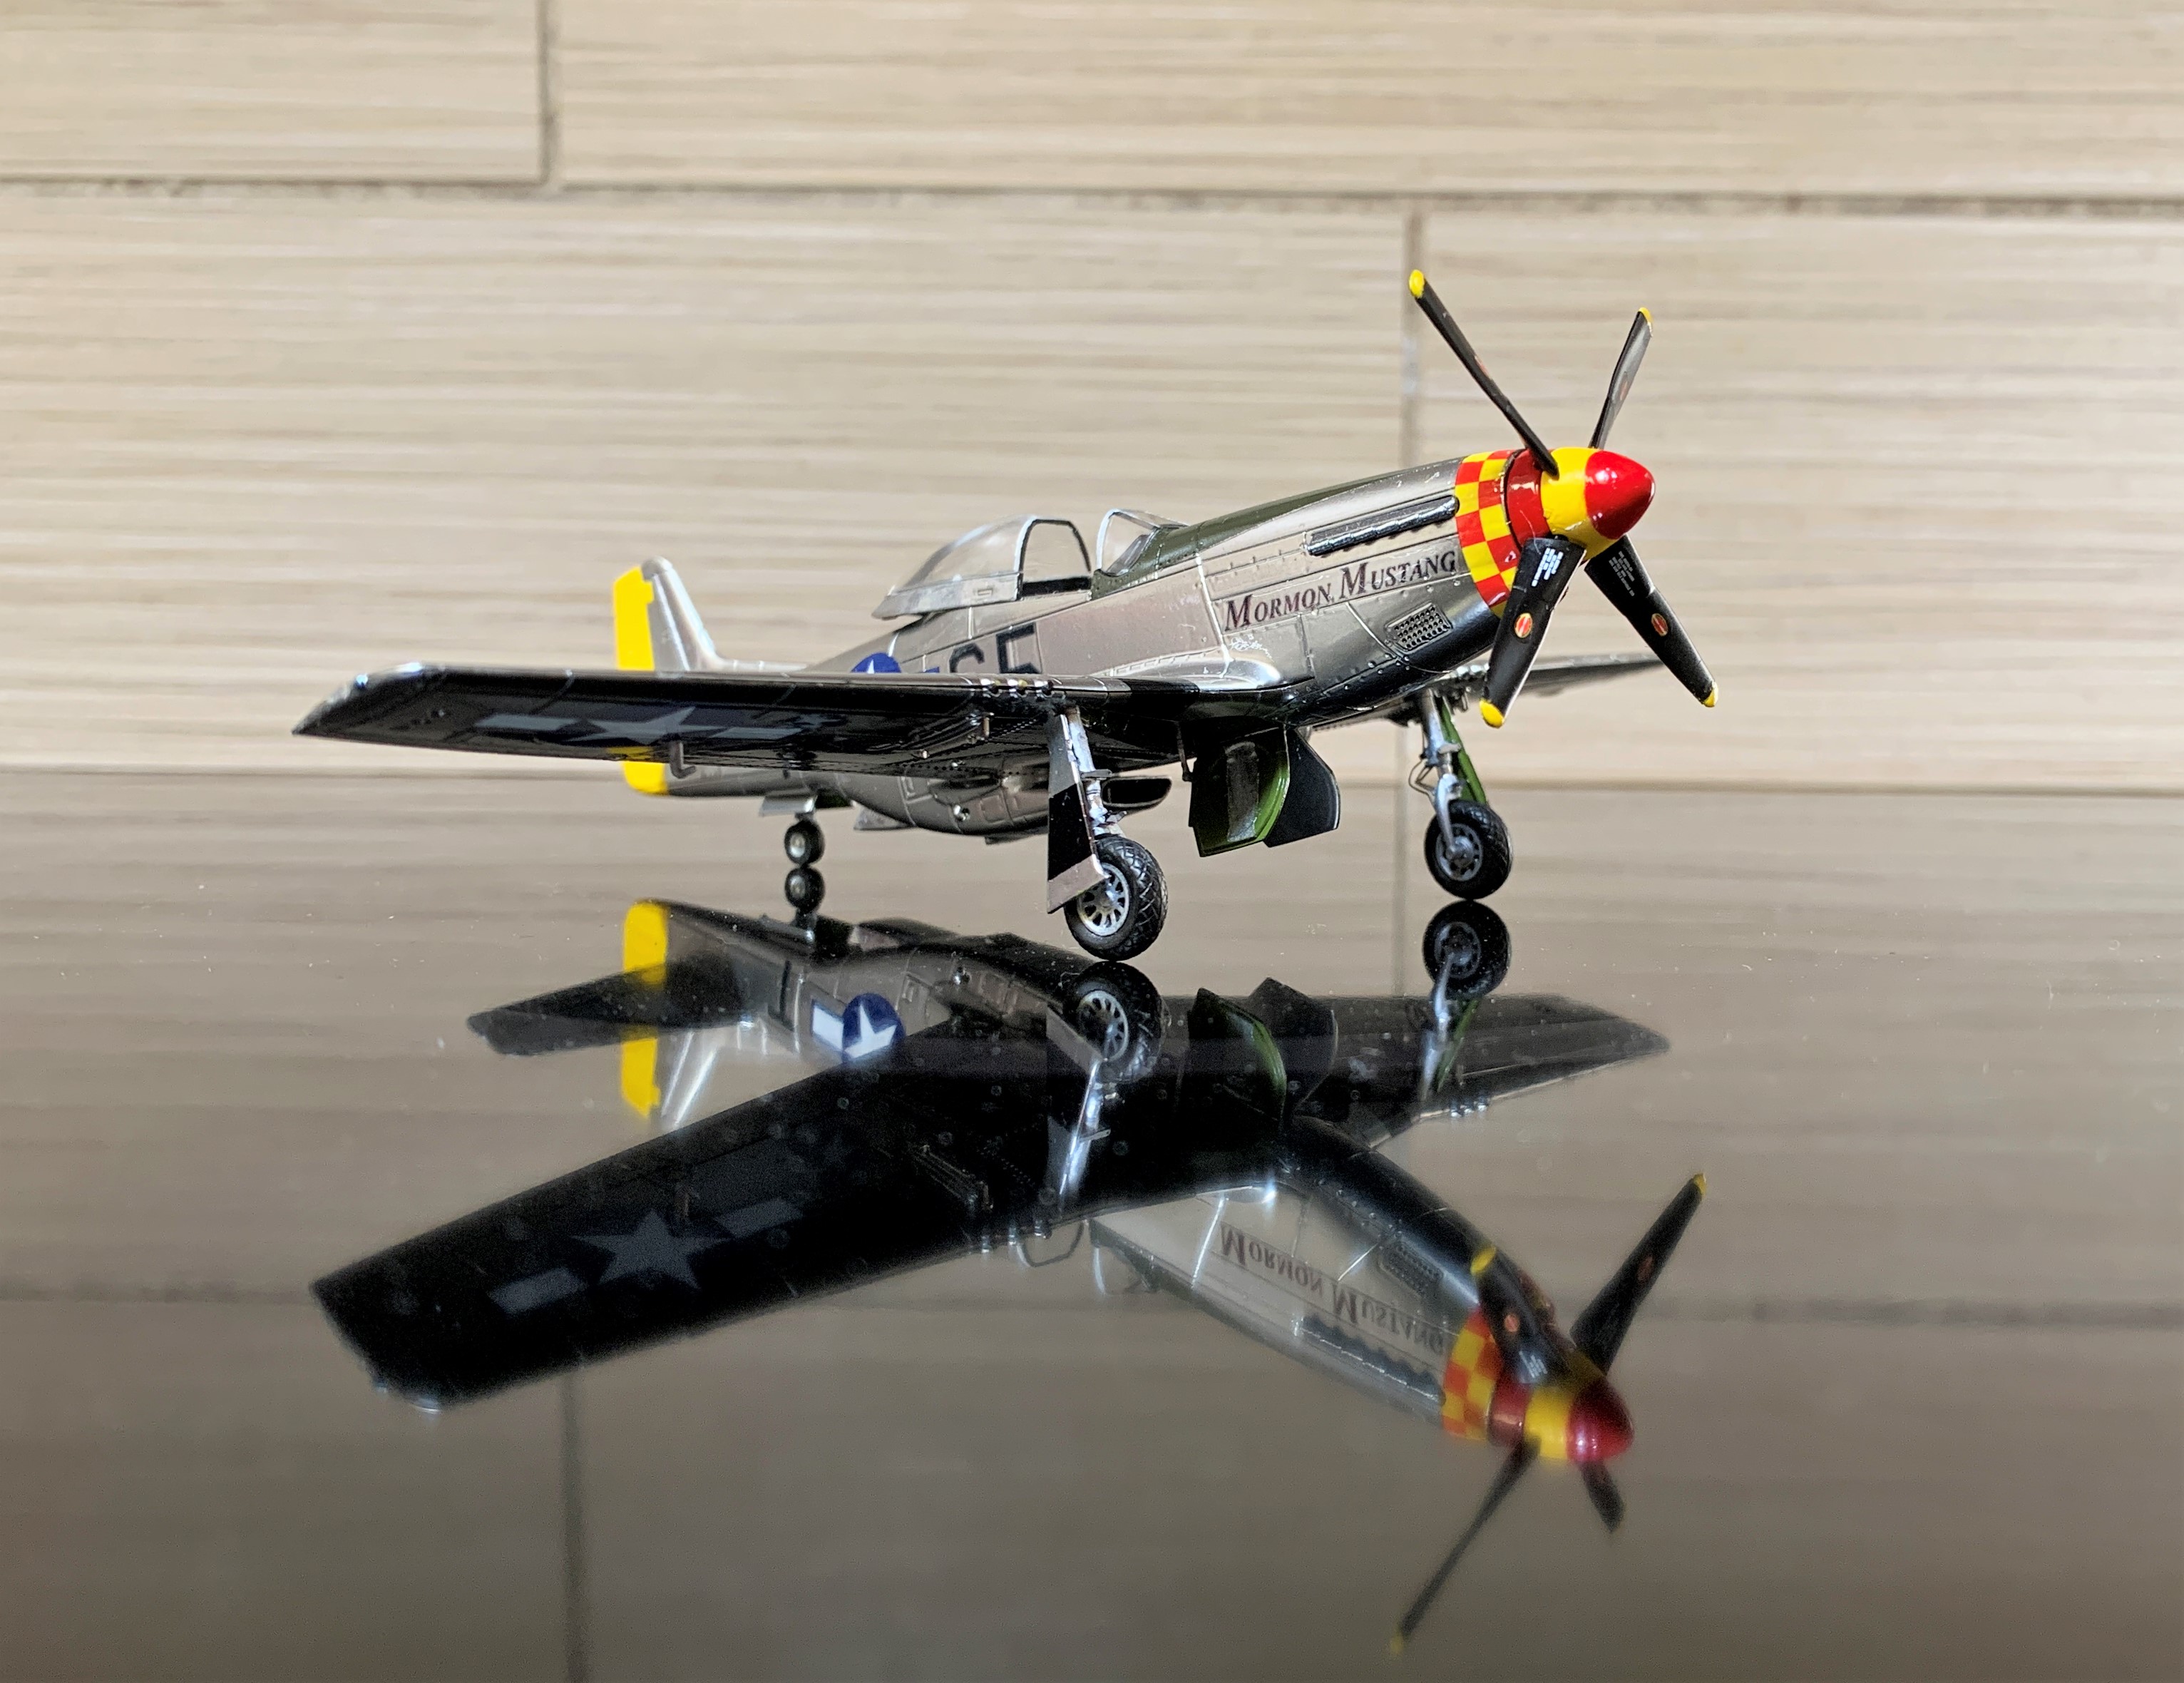
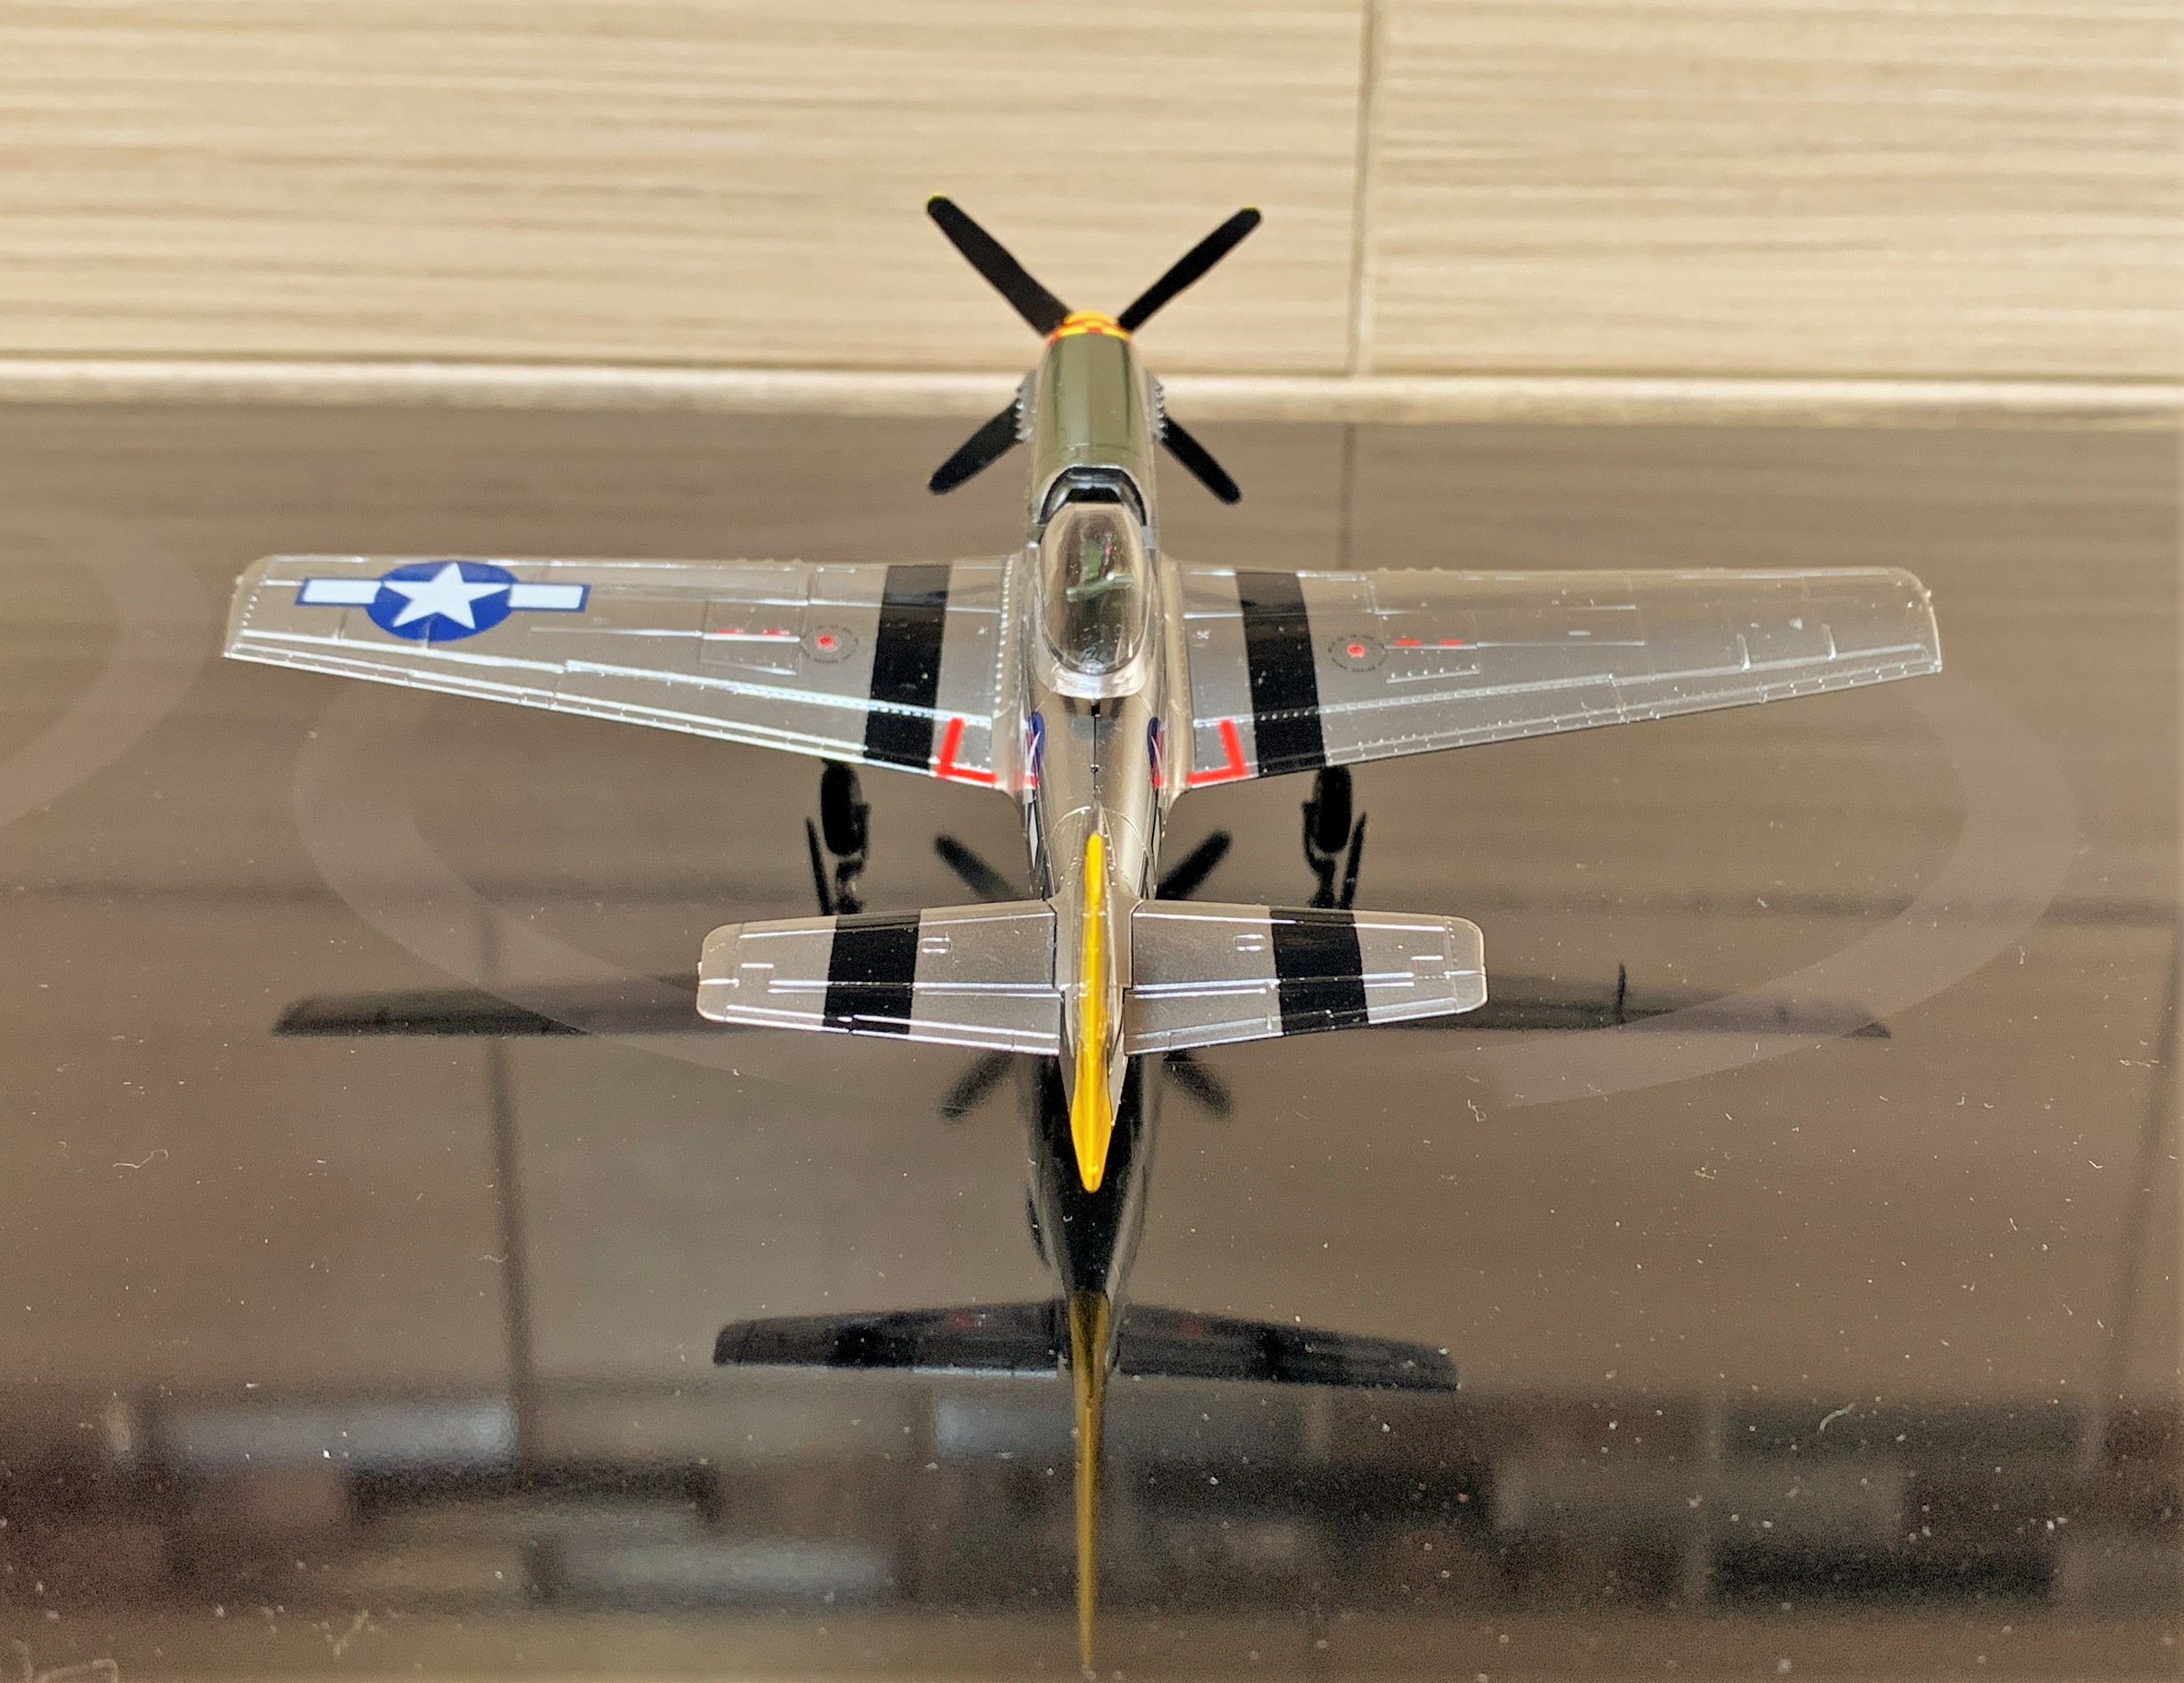
Did a tribute P51D Mustang for my pops who had the opportunity to ride in this beautiful plane. Used a few parts from the Eduard Detail up kit for the Tamiya kit. Use Gravity Colors USA paints, including their 'Chrome' top coat over a high gloss black base. .
-
Simil’R Matech Ford GT
JP Models replied to Jay's topic in Other Racing: Road Racing, Salt Flat Racers
No words to describe this! Incredible build. Love all of the attention to details, the fine Kevlar and Carbon fiber details, the foil, everything. Incredible build, very well done!! -
Nu Nu Audi GT3
JP Models replied to Silver Foxx's topic in Other Racing: Road Racing, Salt Flat Racers
Beautifully done! The engine detail looks great through the back glass. Looking forward to starting this one myself. -
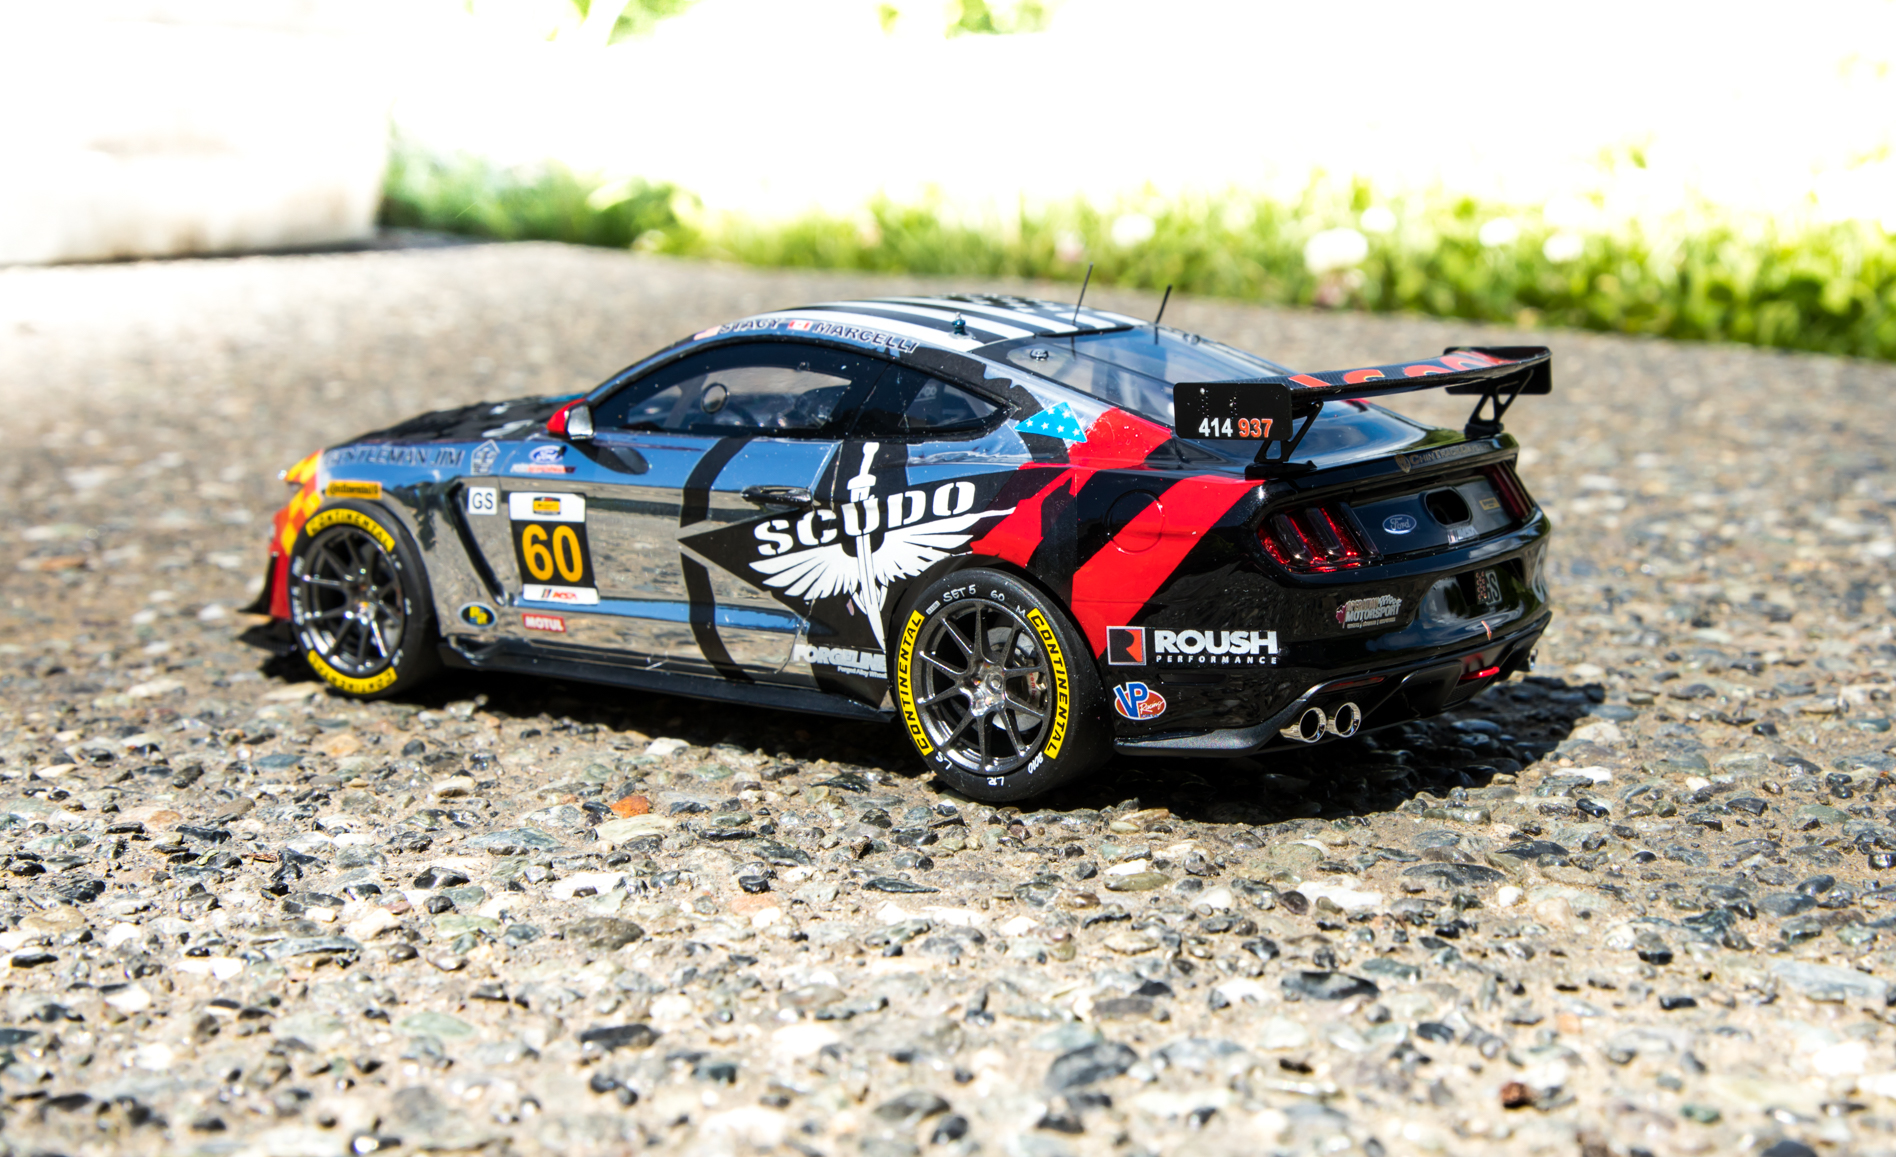
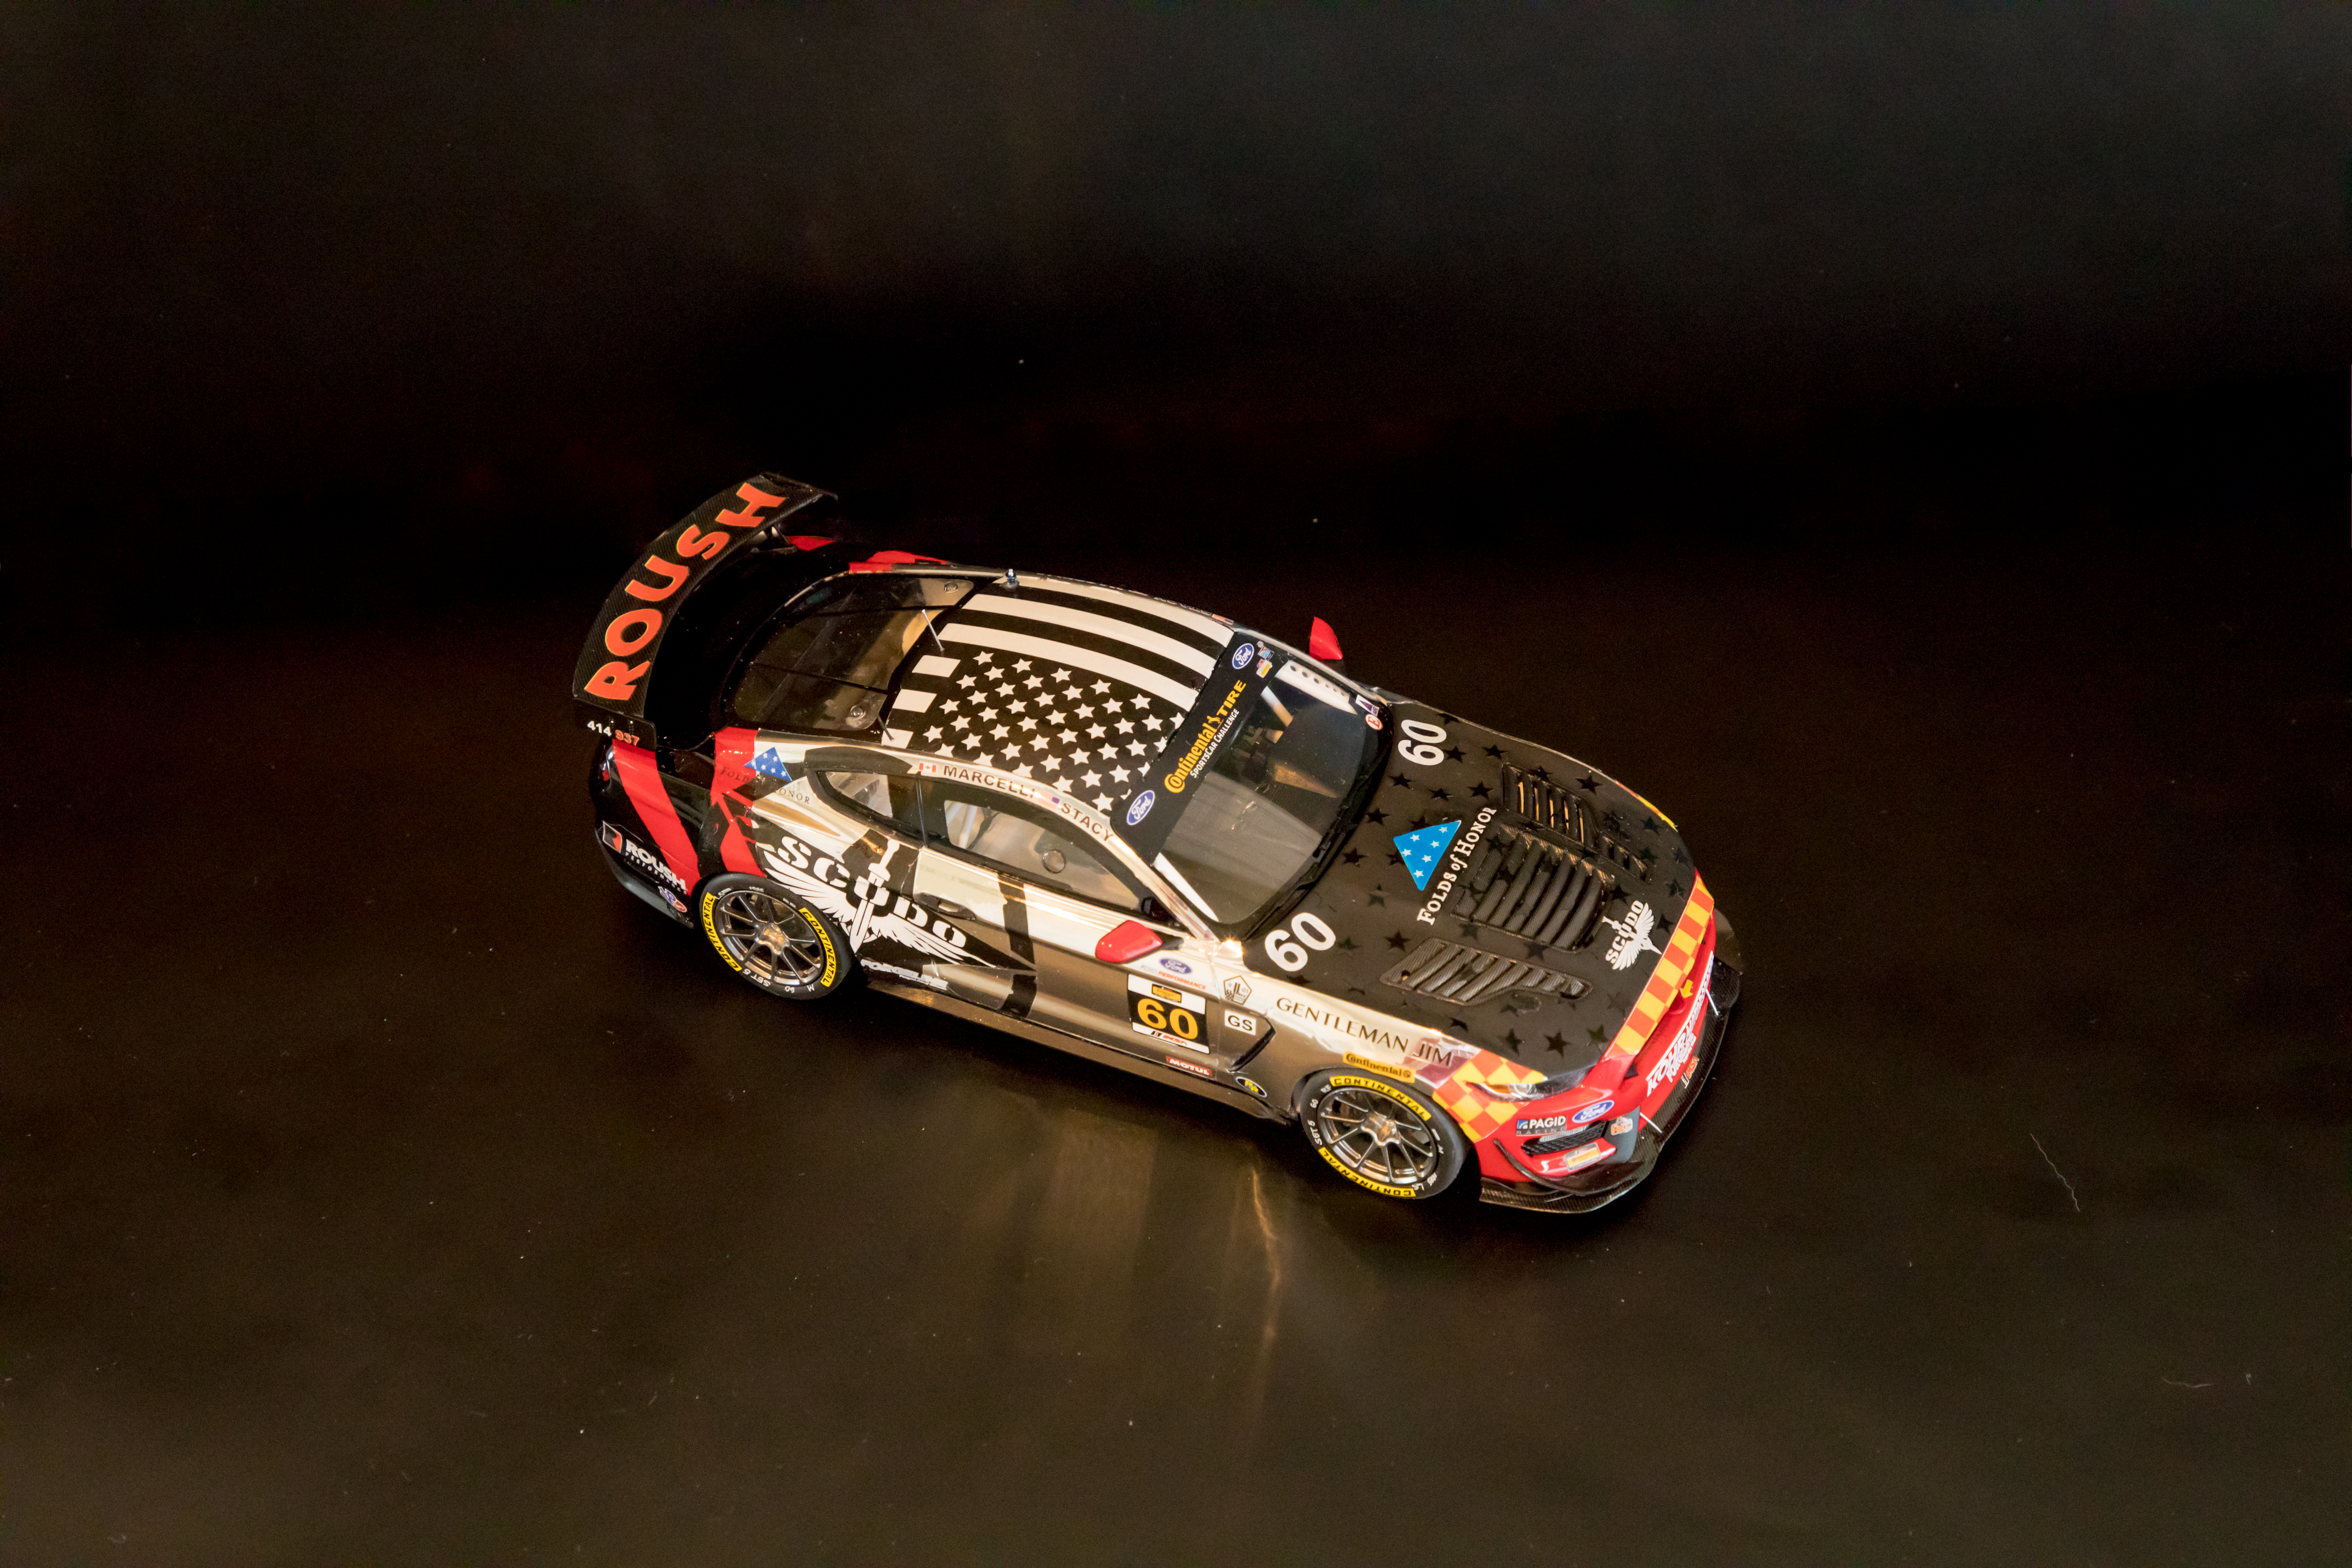
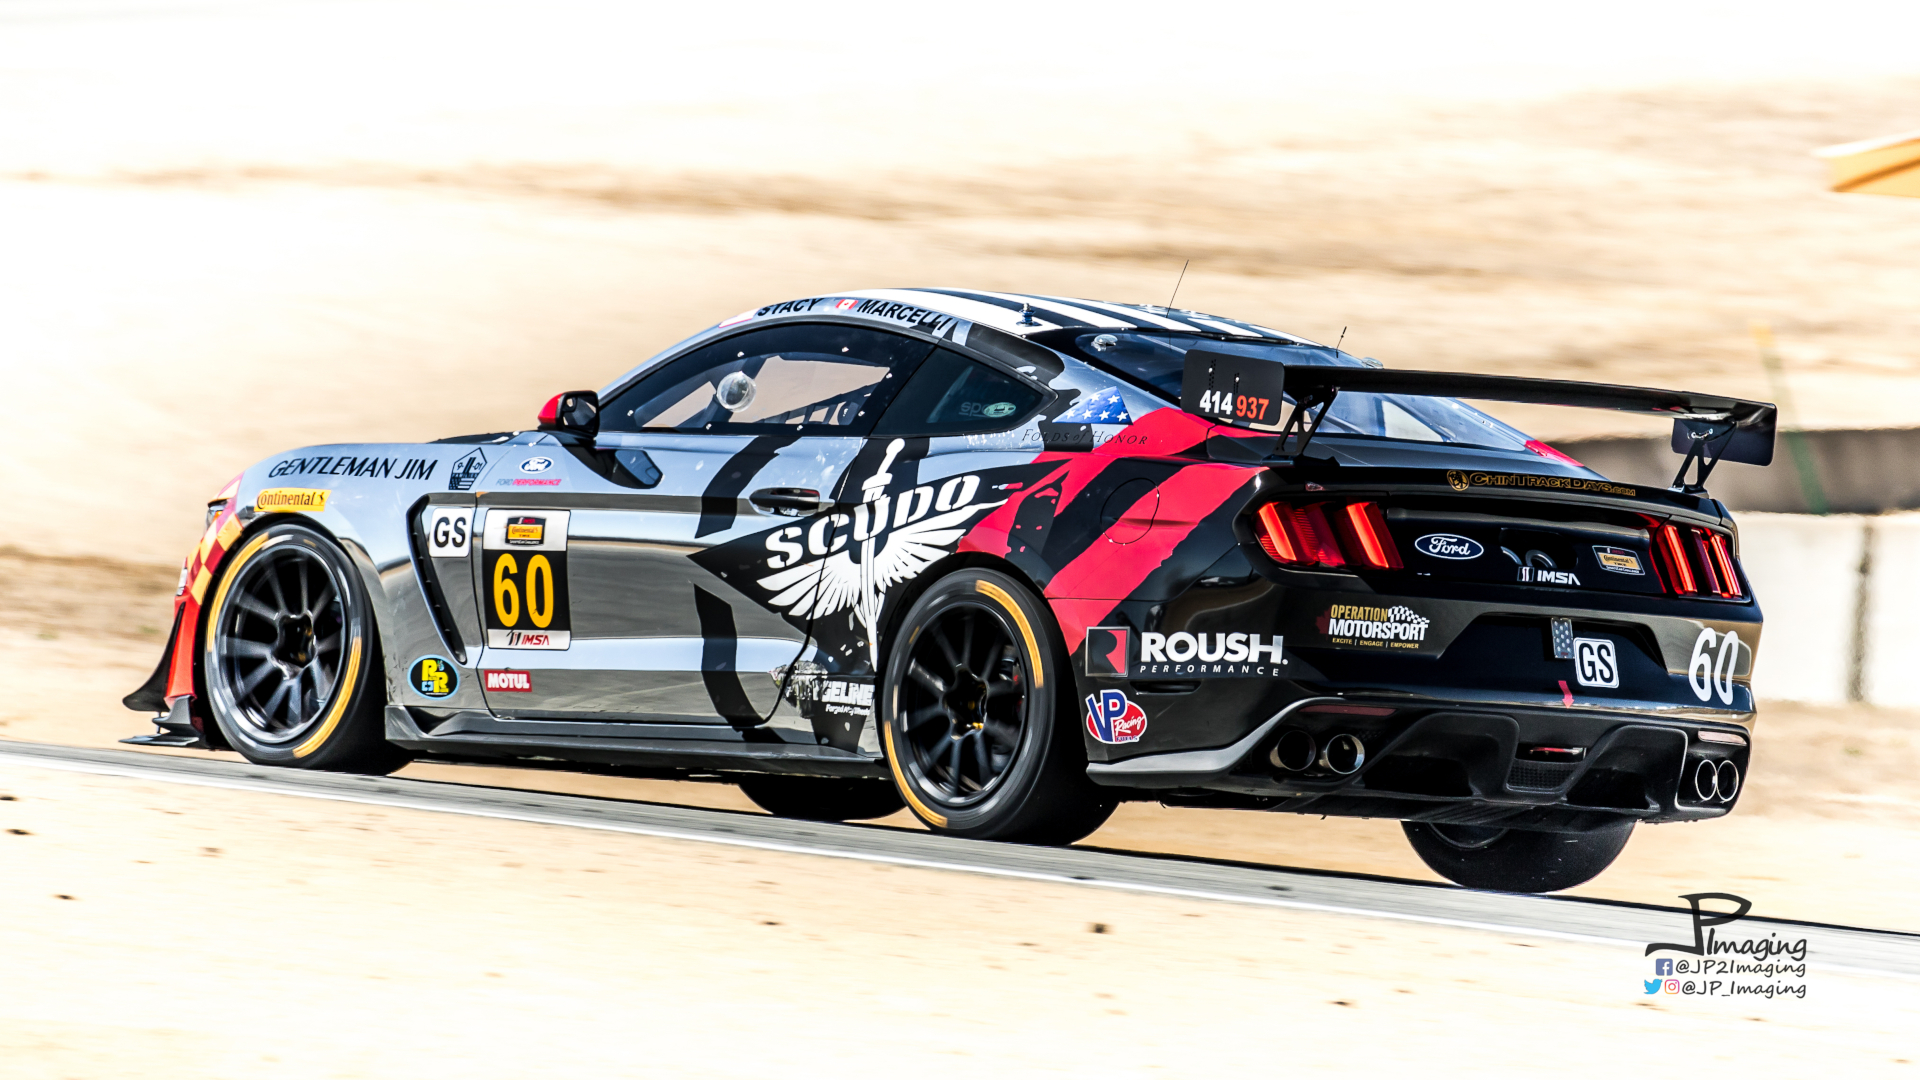
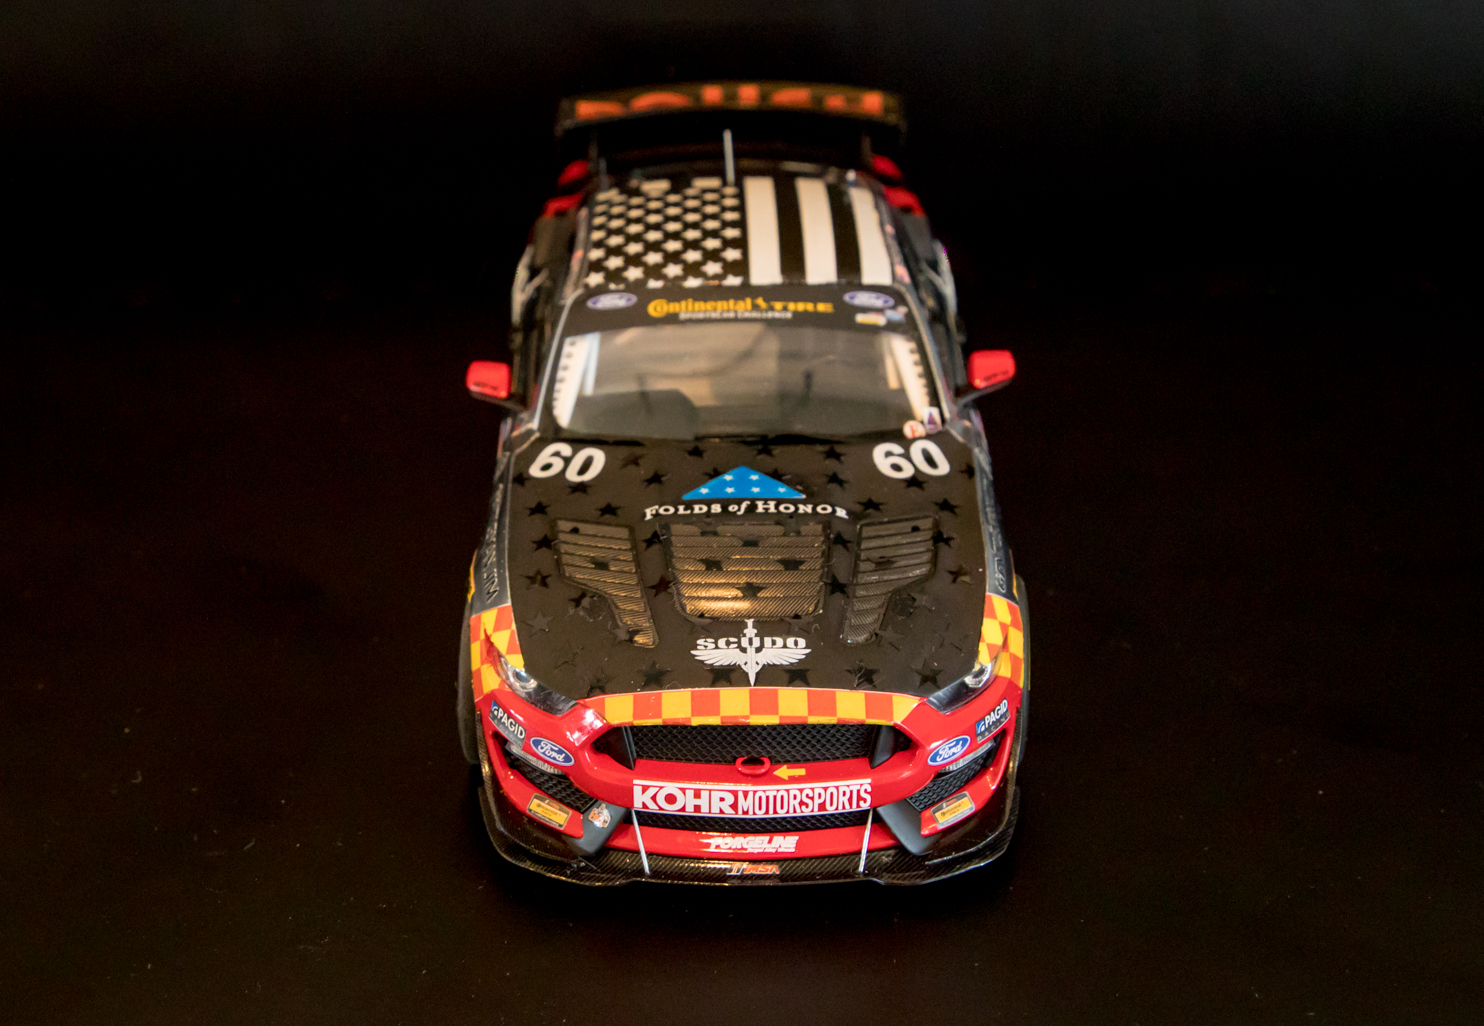
Thank you all for the kind words!! It was definitely a labor of love - and at times slight hate... I tried two different chrome paint techniques, both over a high gloss black base. Both attempts turned out silver to bright silver with some reflection but neither came close to replicating the chrome wrap of the real GT4 car. Considering the actual car is a vinyl wrap I thought I'd give that a try to get the true mirror type reflection on the model. I used this hobby vinyl to wrap the body panels: https://www.amazon.com/gp/product/B08ML9H1Y3/ref=ppx_yo_dt_b_search_asin_title?ie=UTF8&psc=1 It's about 2.5 mils thick, and stretches decently. That said, it's adhesive isn't great but does work for this application. Further - DO NOT USE HEAT on this vinyl! Using a hair dryer didn't do much, so I tried a heat gun... which resulted in the vinyl very rapidly shrinking and creating rounded ridges in the wrap. There's probably a sweet spot in there one could find at the right temp but I found it was doable without the heat. Decals went on well on top of the vinyl. I used some MicroSet and Solvaset to seat the large Scudo Star on the door to rear quarter panels. Talk about patience with that decal!! The hood louver carbon fiber decals are from a sheet of Scale Motorsports CF, with a lot of Solvaset and careful Exacto work. Thank you for the comments!
-
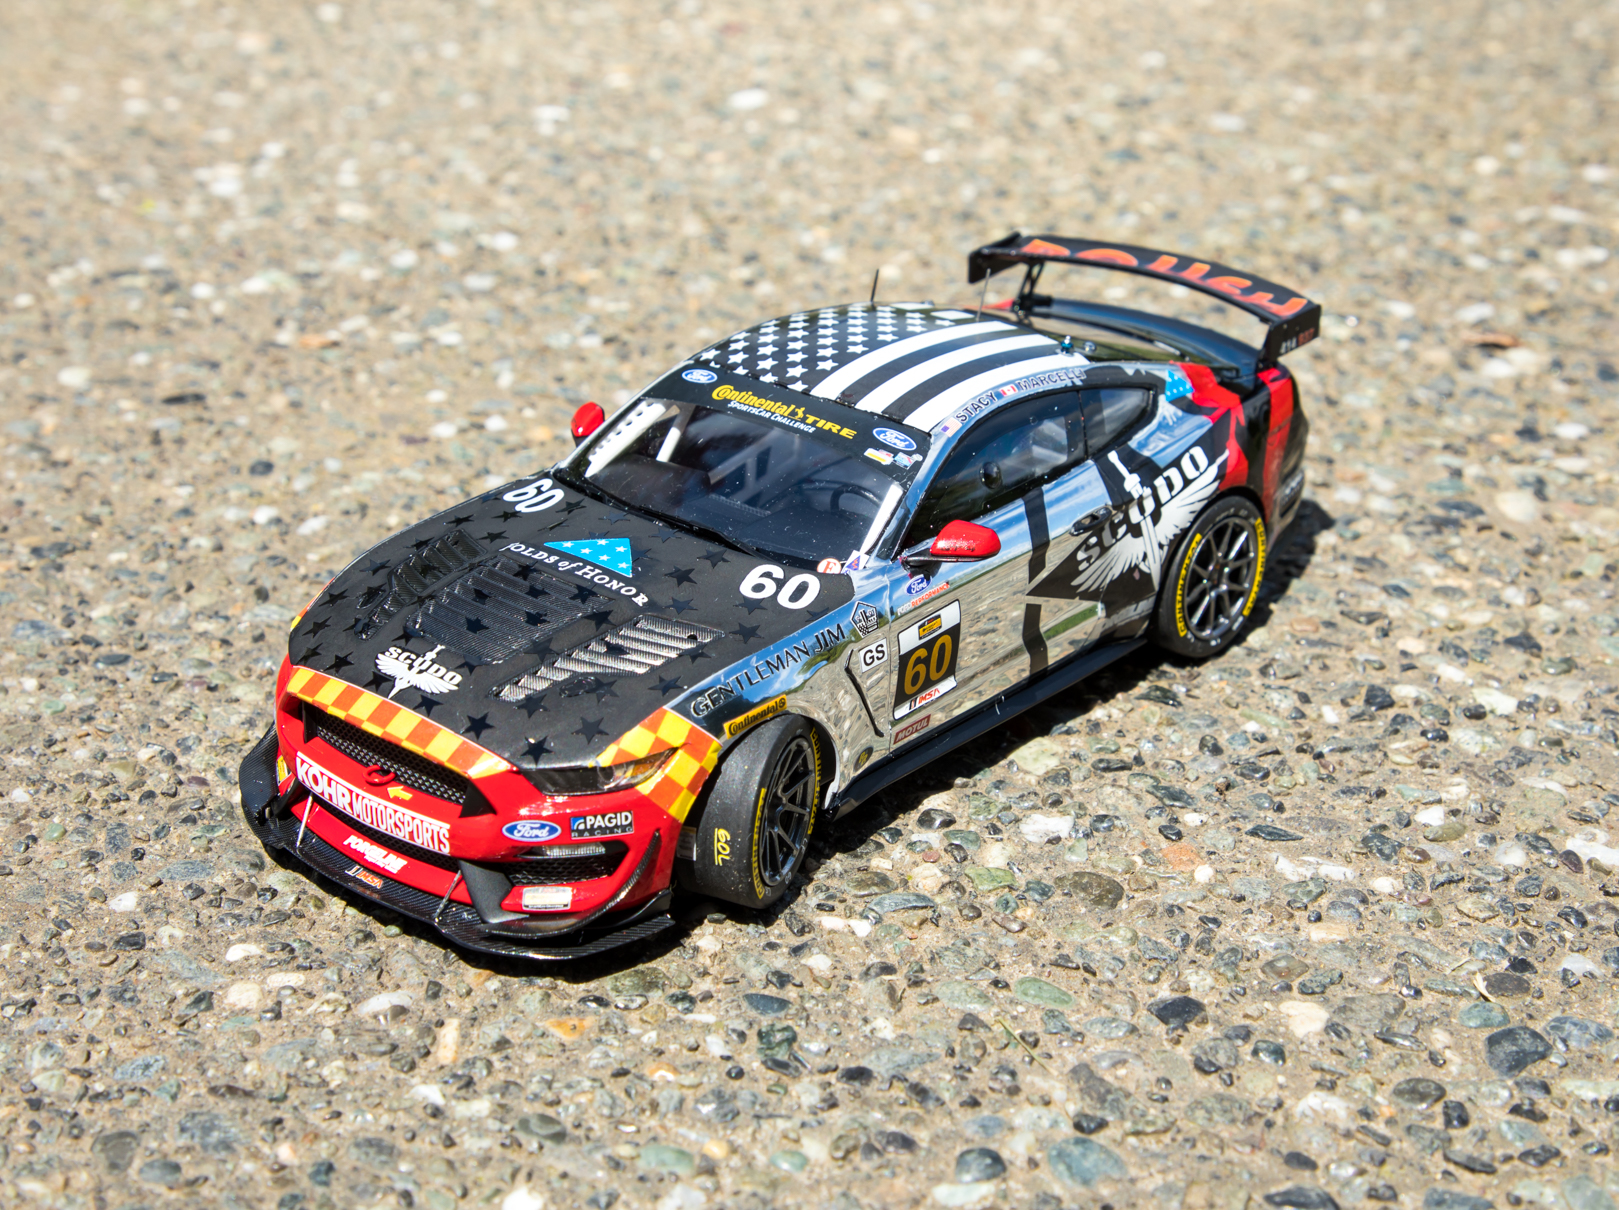
Finally calling this one complete! A lot of time in this one trying to perfect the chrome look and replicate the exact livery as it ran in the 2018 Monterey Grand Prix 120 at Weathertech Raceway Laguna Seca. Took me two bodies as my first chrome attempt with Gravity Colors Chrome failed. The look was bright silver, and the clear didn't adhere well - parts came off with my masking around the window sills. Tried again with chrome vinyl which is what you see here. Laid the vinyl out like a body wrap, cutting them into more manageable pieces along the body lines. A handful of decals are from Indycals, and most of them I designed and had printed by Highball Graphics. Carbon fiber is a combination of Studio 27's and custom Scale Motorsports. I enjoy the inspiration this place gives for future builds! Thanks for looking!
-
Deal's Wheels "The Boss" Mustang
JP Models replied to TooOld's topic in Other Racing: Road Racing, Salt Flat Racers
This is awesome! What a great transformation.