

EngineerBob
-
Posts
145 -
Joined
-
Last visited
EngineerBob's Achievements
MCM Friend (4/6)
-

Pro Touring '71 Demon With Twin Turbo 440
EngineerBob replied to Quick GMC's topic in WIP: Model Cars
Beautifully detailed engine! Did you buy the resin engine and interior bits or make them yourself? -
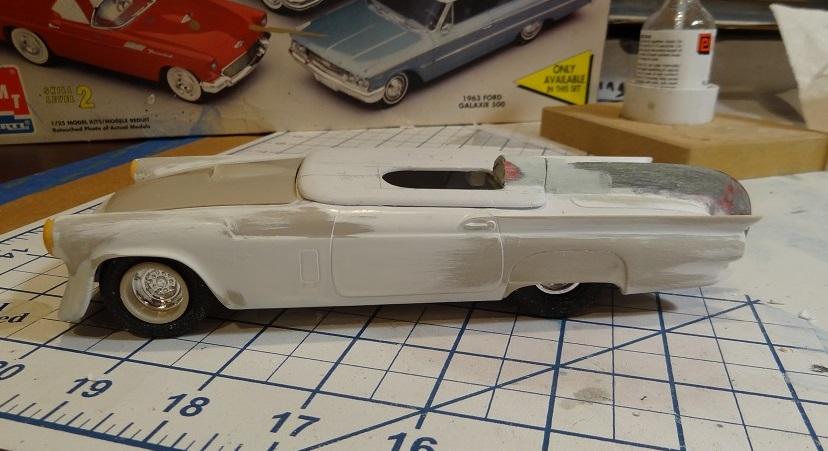
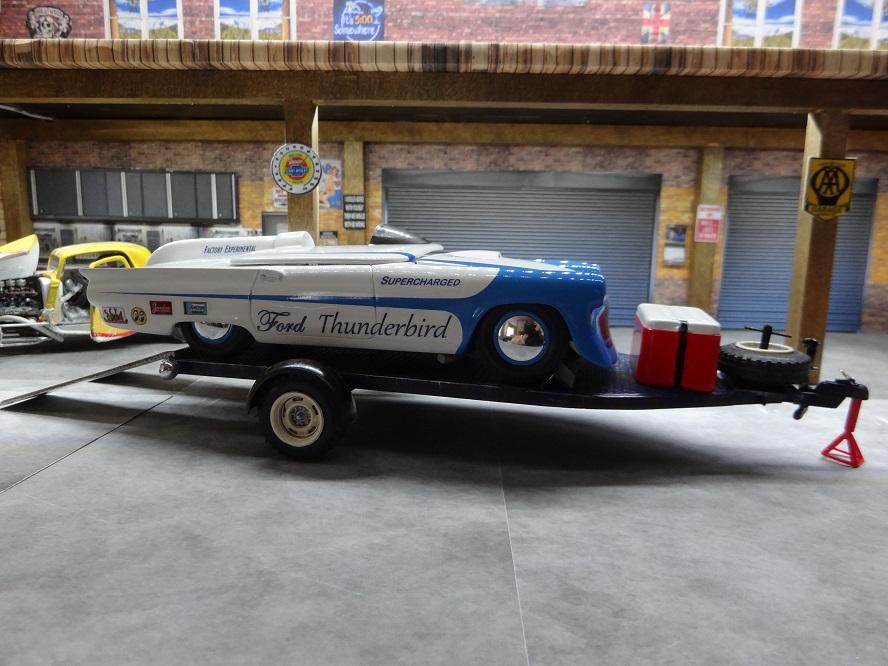
I haven't seen a Battlebird style kit. I made my headrest fairing out of a B17 model tailfin:

-
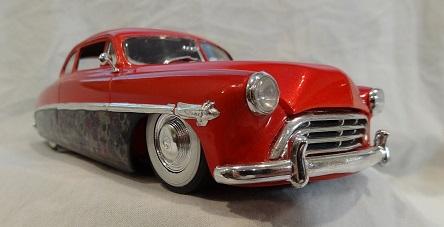
LOVE how this is coming out! These Hudson's are one of my favorite style of old-school kustom. Almost makes me want to re-do my Hudson similarly.
-
Display/Storage - How do you do it
EngineerBob replied to Donny's topic in General Automotive Talk (Trucks and Cars)
I 100% agree that you can get some bargain used display cases by checking out local for sale (or even for free) ads. Lots of out of style china cabinets are available. I use an oak lawyer's bookcase with glass doors. -
Forum Changes
EngineerBob replied to Xingu's topic in Forum News and Questions (formerly: How To Use This Board)
Just my two cents: As someone who is only "into" modeling from time to time (I haven't worked on any of my WIP models for almost a year), I appreciate the Forum just as it is. I typically only look at the "New Activity" posts to see if any topics or models are being discussed that catch my interest. I personally don't think the current amount of ads are too intrusive and wouldn't be interested in a pay option. Administrators, keep up the good work! -
What Are Some of Your Favourite Kits That You Built?
EngineerBob replied to Falcon Ranchero's topic in Model Cars
Great looking kit-bash of a cougar that should have been. Check out a real-life fastback Cougar that's currently winning at the car shows:
-
Great job capturing the look of your inspiration. That's funny, I also had my instagram account canceled with no explanation, even after contacting them. I think they don't want old people to be on there.
-
Very nicely detailed! I especially liked the fuel lines as well as the shifter.
-
I also use liquid glues such as Bondene or Tamiya. I use styrene strips on the backside to aid alignment and to reinforce the joint. Take extra care with your cuts and make the seam fit as well as possible to provide the best possible glue surface. Use small pieces of styrene to fill any gaps. I also use sprue-goo in any remaining gaps or holes.
-
I'd try spraying the dash with clear paint (w/ appropriate gloss) and placing the vents on the dash when paint is tacky.
-
There are a lot of different putties available so, if you've had trouble sanding some, try a different putty that may be easier for you to work. A good product to use on a small divot such as yours is "sprue goo", liquid plastic cement mixed with small bits of chopped up plastic sprue. Being of the same material as your model body it will sand and finish the same once dry. Make sure you use sandpaper backed by a hard material so that you don't sand a bigger deppression into the roof.
-
Perfect. So simple and effective!
-
Thanks. It was very easy (and cheap). Everything except the wood beams was printed from images found using Google Image Search. Some very basic enlarging and cropping was done with MS Photo or Paint. Pics were spray glued to foam core board.
-
Not exactly a "diorama" but I used internet images printed on standard computer paper to create a backdrop in my display case. The method works especially well for scale posters, calendars, signs, window backgrounds, etc.
-
I used 3D Louver decals by Archer Surface Details from Teds Modeling and was very happy with the results. Very simple installation and no body work required.


.JPG.060a422ad68823e5443b0bdef6517ce6.JPG)