70 Sting
-
Posts
1,369 -
Joined
-
Last visited
Content Type
Profiles
Forums
Events
Gallery
Everything posted by 70 Sting
-
@Dann Tier I’ll send you a DM.
-
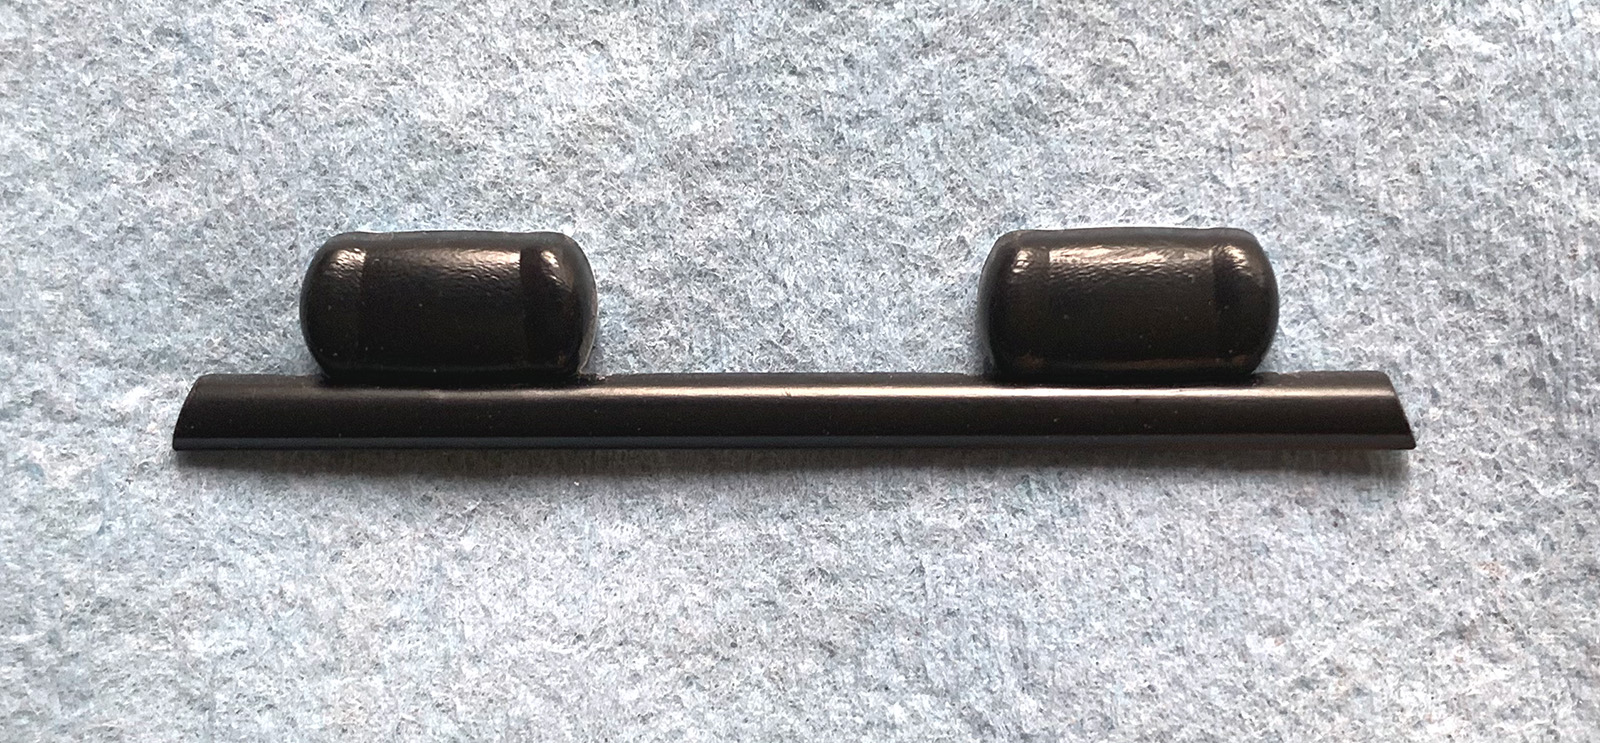
Not much today, just made the backs of the headrests which will be visible through the rear window when engine louvers are removed.

-
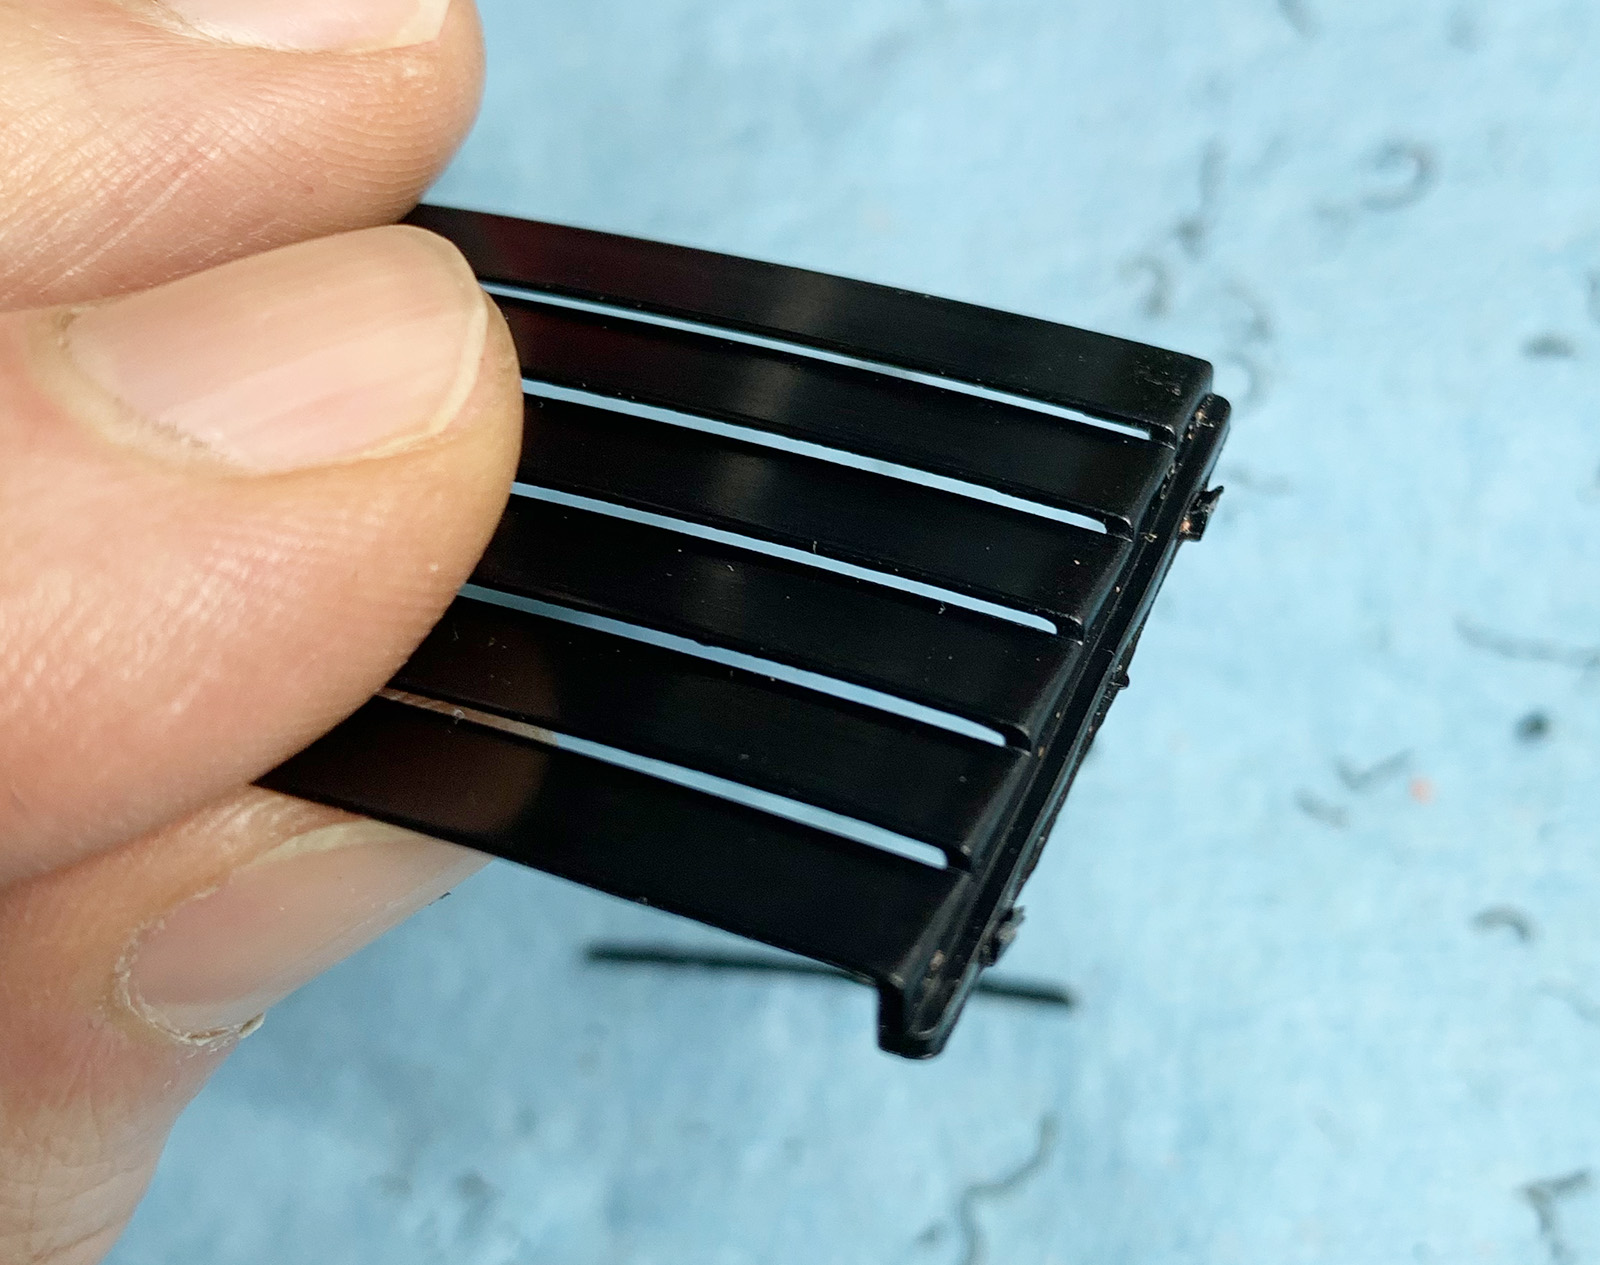
@Beans I did try playing around with some polystyrene thinking I could remake the lower 3 sections as they were the only ones affected. It looked pretty crude to say the least. There is a slight curve to the louvers which match the body contours, a small gap in between each one and they sit upon 2 stepped risers on either side. A little much for my caveman skills. On the plus side, Lightspeed Global got back to me this morning. The part is available, however due to the pandemic it will be consolidated with other orders and sent by boat in 3 to 4 months. Plenty of time for me to screw up something else. ?
-
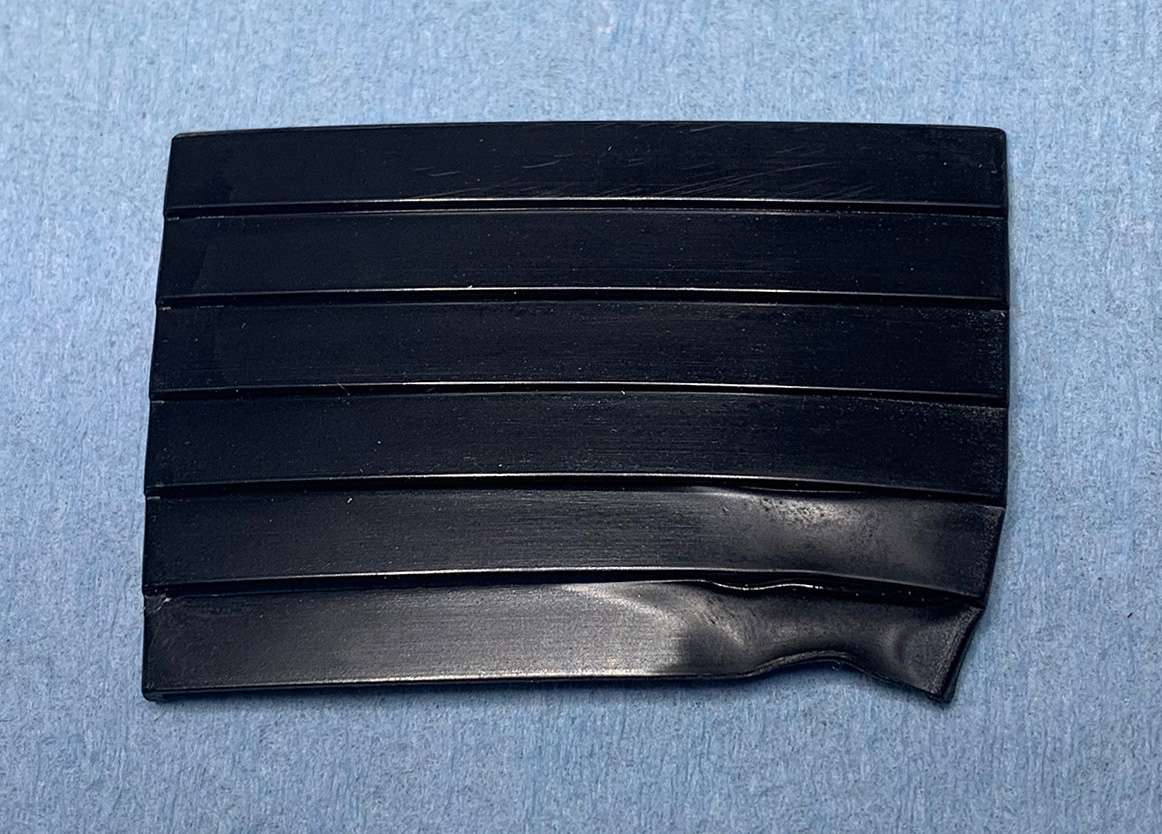
This weekend I scribed the panel lines (had to fill a few slips with Tamiya Putty) and sanded the body with 600 grit sandpaper. Used an airbrush for the first time to prime the body with decanted Tamiya Fine Surface Primer White thinned 1:1 with Tamiya Lacquer Thinner. Had to sand and respray a few times as I discovered additional areas that needed attention. It went on pretty well as far as I know - hopefully that's a good sign when it comes time to airbrush the body. ? I have a BIG problem, however. That slight warp in the rear louvers that I thought I could heat up and flatten out... I discovered that styrene melts real quick (mistake number two). I posted a request in the Wanted section on this forum. I tried contacting Hasegawa Japan using Google Translate, the American distributor Stevens International twice and the Canadian distributor Lightspeed Global who were the only ones to get back to me. They said they would contact the manufacturer to see if the part is available. Anyone have an extra set of louvers they'd be willing to sell?
-

Hasegawa Lamborghini Miura Rear Louvers
70 Sting replied to 70 Sting's topic in Car Aftermarket / Resin / 3D Printed
Thanks for the reply @peteski. I have 2 potential leads I’m working on. If neither of them pan out, I will give HLJ a try. -
Hasegawa Lamborghini Miura Rear Louvers
70 Sting replied to 70 Sting's topic in Car Aftermarket / Resin / 3D Printed
Well, that was challenging. I tried my best to work between Google Translate and the actual Japanese website. They have a parts request form and I was able to submit the request. We'll see if they get back to me. A bit of a Hail Mary but I'm keeping my fingers crossed. Thanks @Mike Chernecki edit: Also sent an email to the Canadian Distributor: Lightspeed Global Inc. -
Good afternoon, I have a parts emergency. I'm looking to replace damaged engine louvers as I don't have the skill to repair or manufacture the part on my own. I believe there are 2 versions of this kit, the red one I have (P400 SV (1971) and the detailed-up green version. I assume both are identical. Italeri also made the Miura, however I'm unsure about size and fit. I did try contacting Stevens International (https://www.stevenshobby.com) the distributor, twice, but haven't received a reply. Any help is greatly appreciated.
-
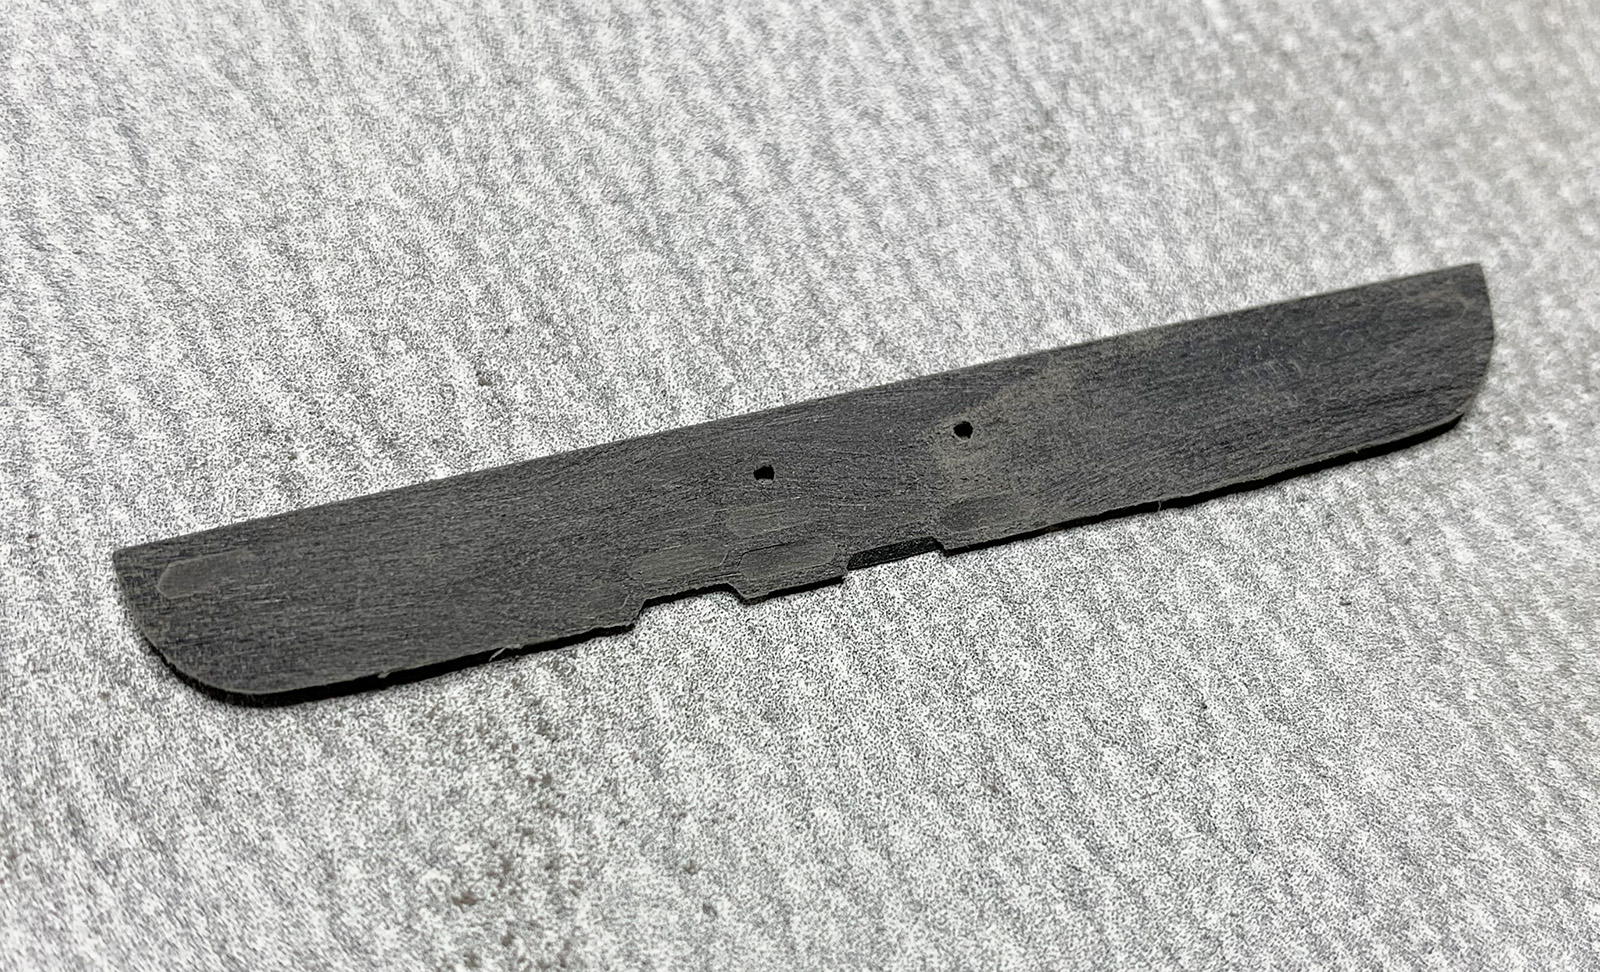
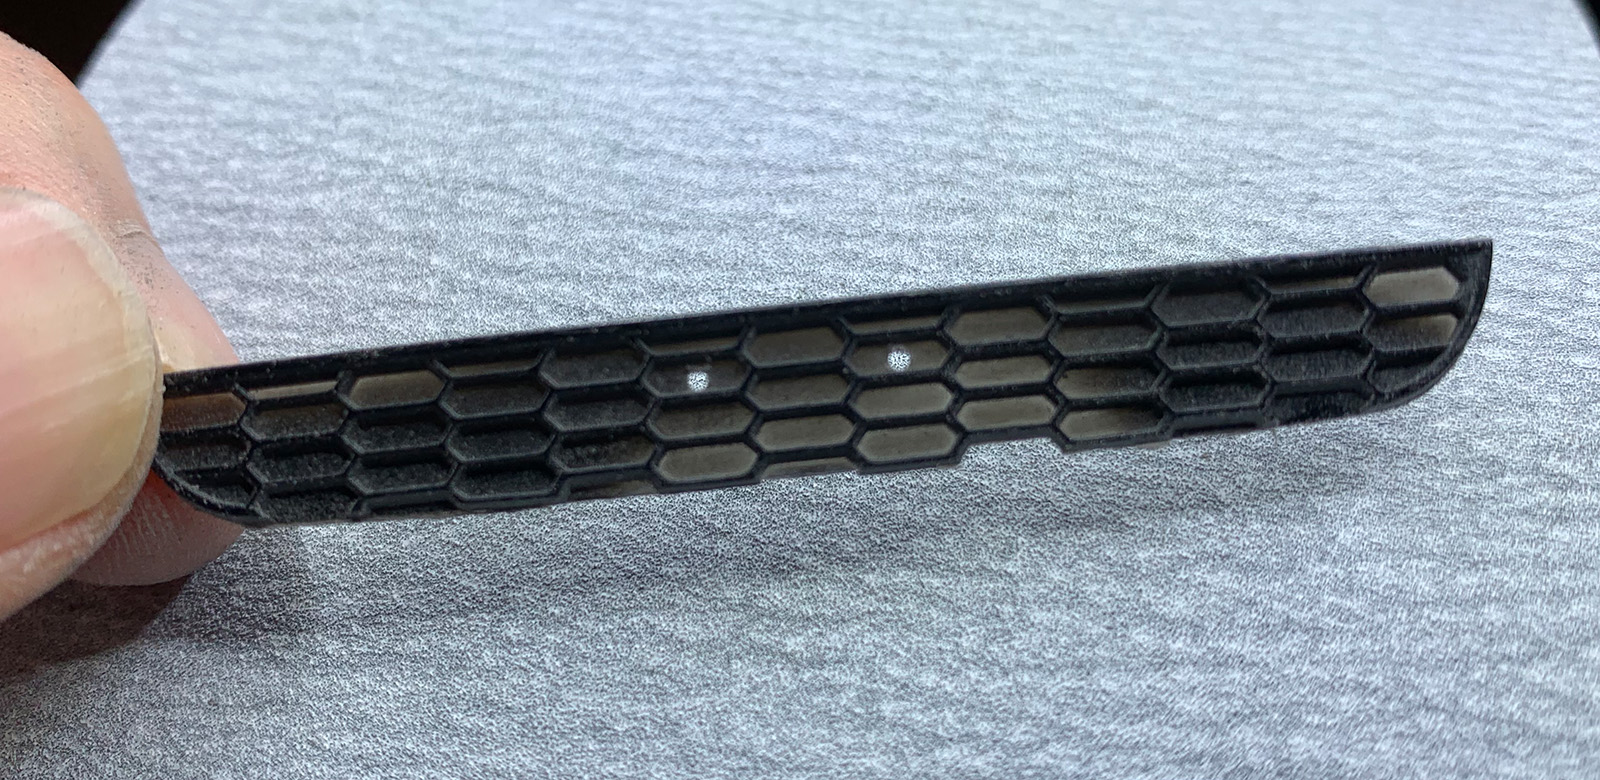
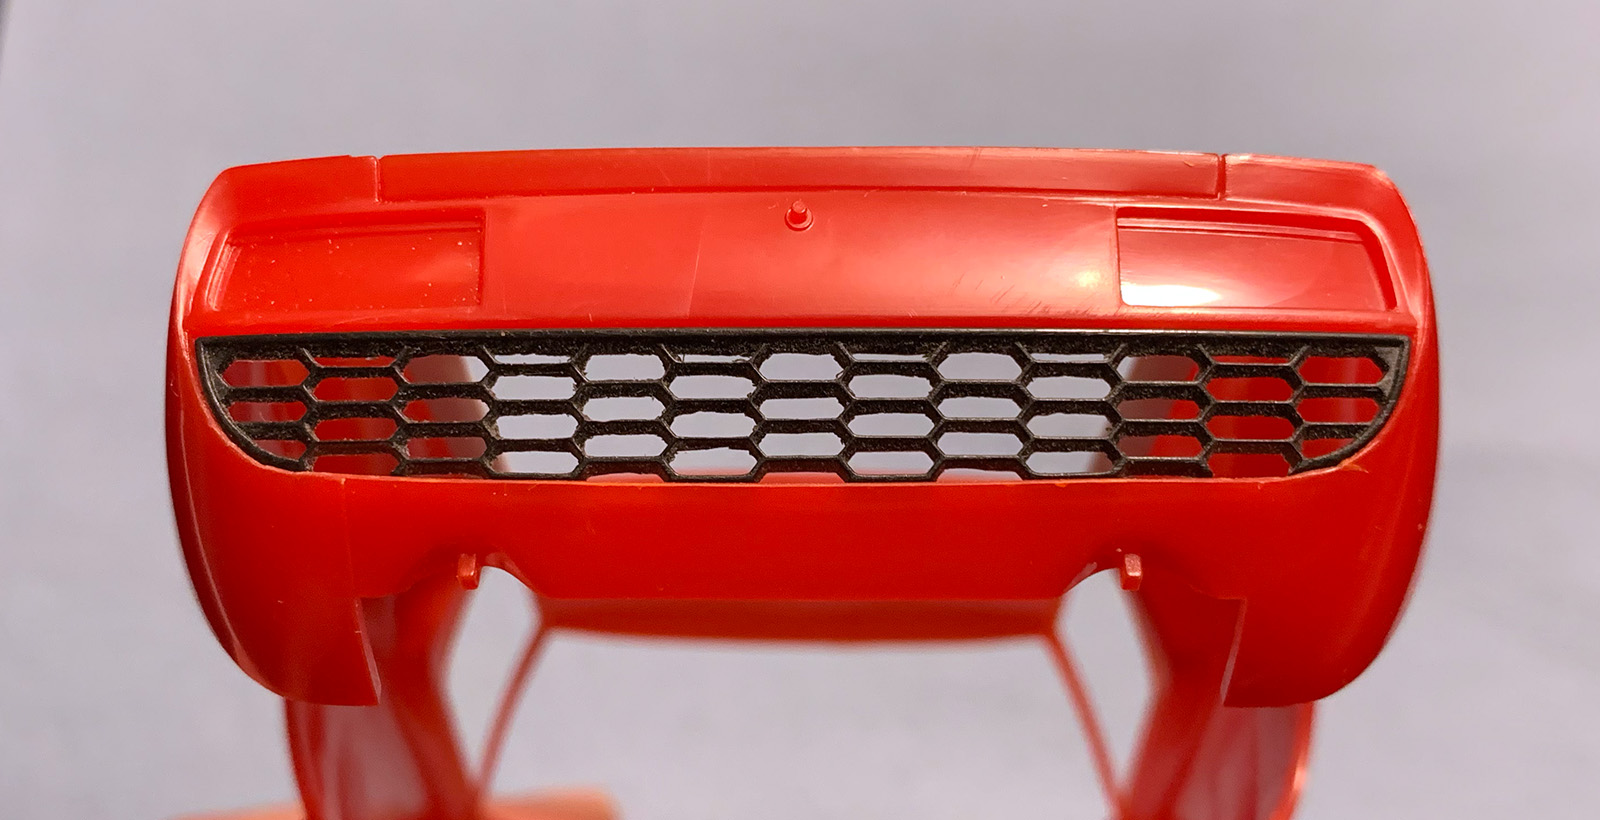
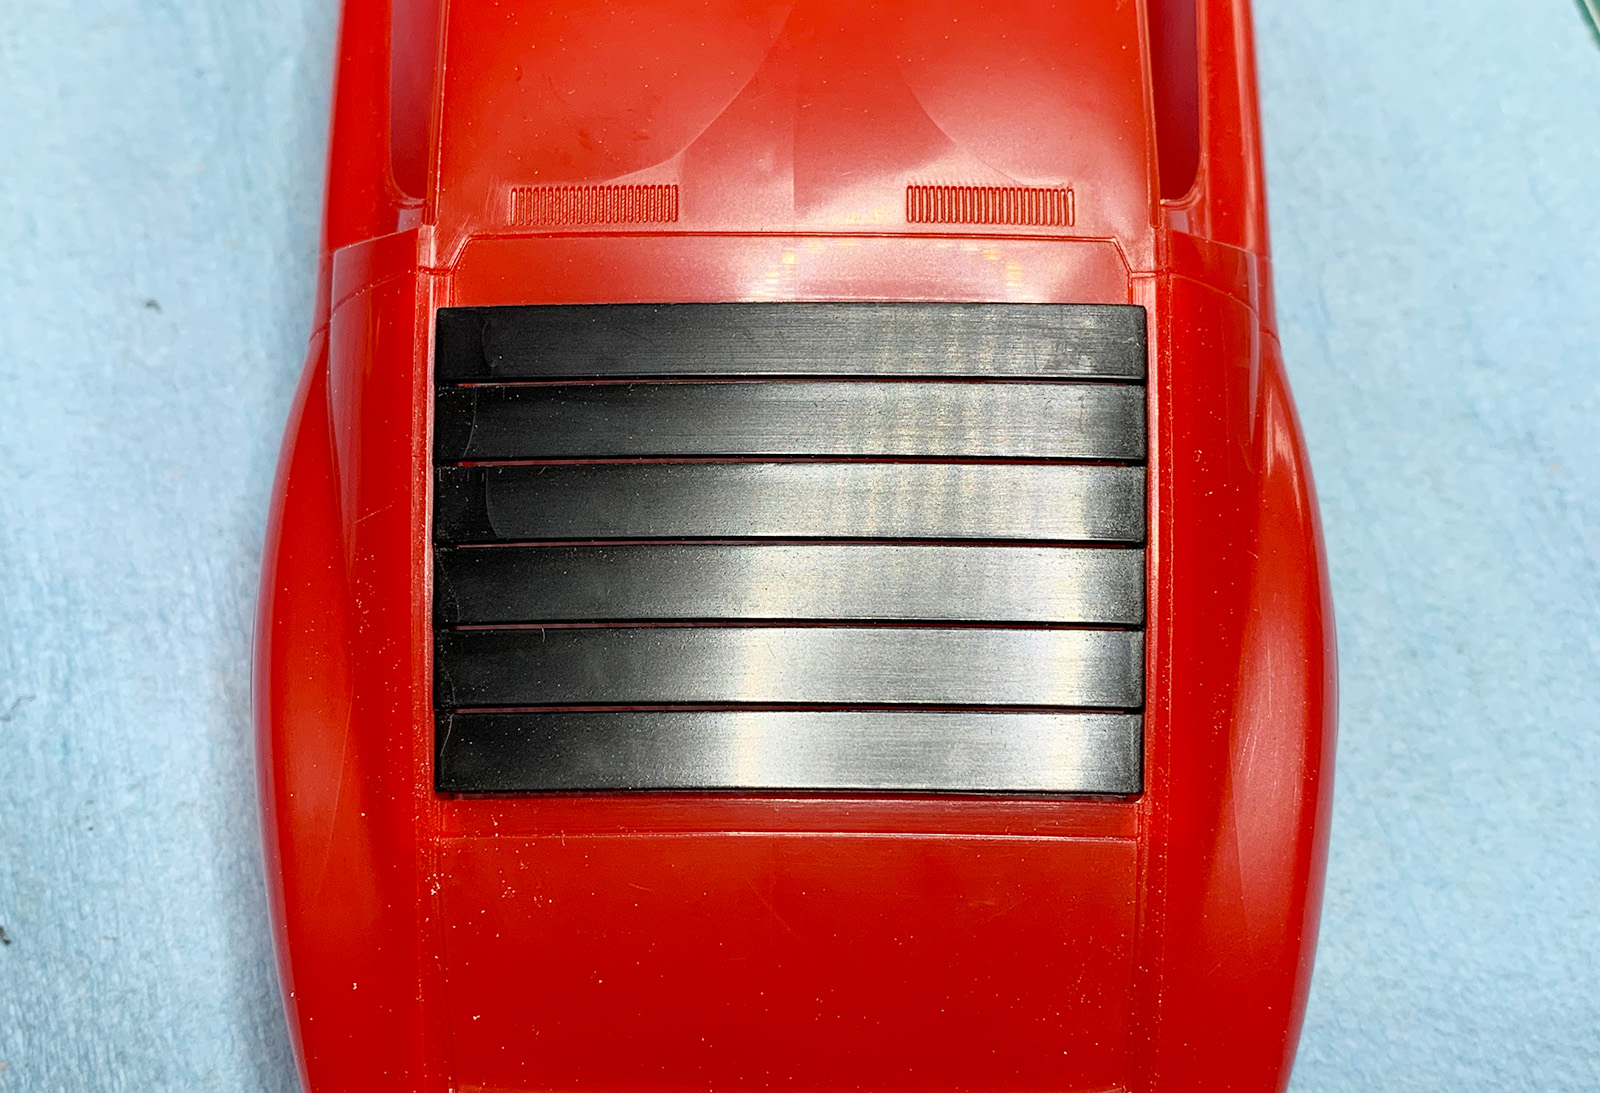
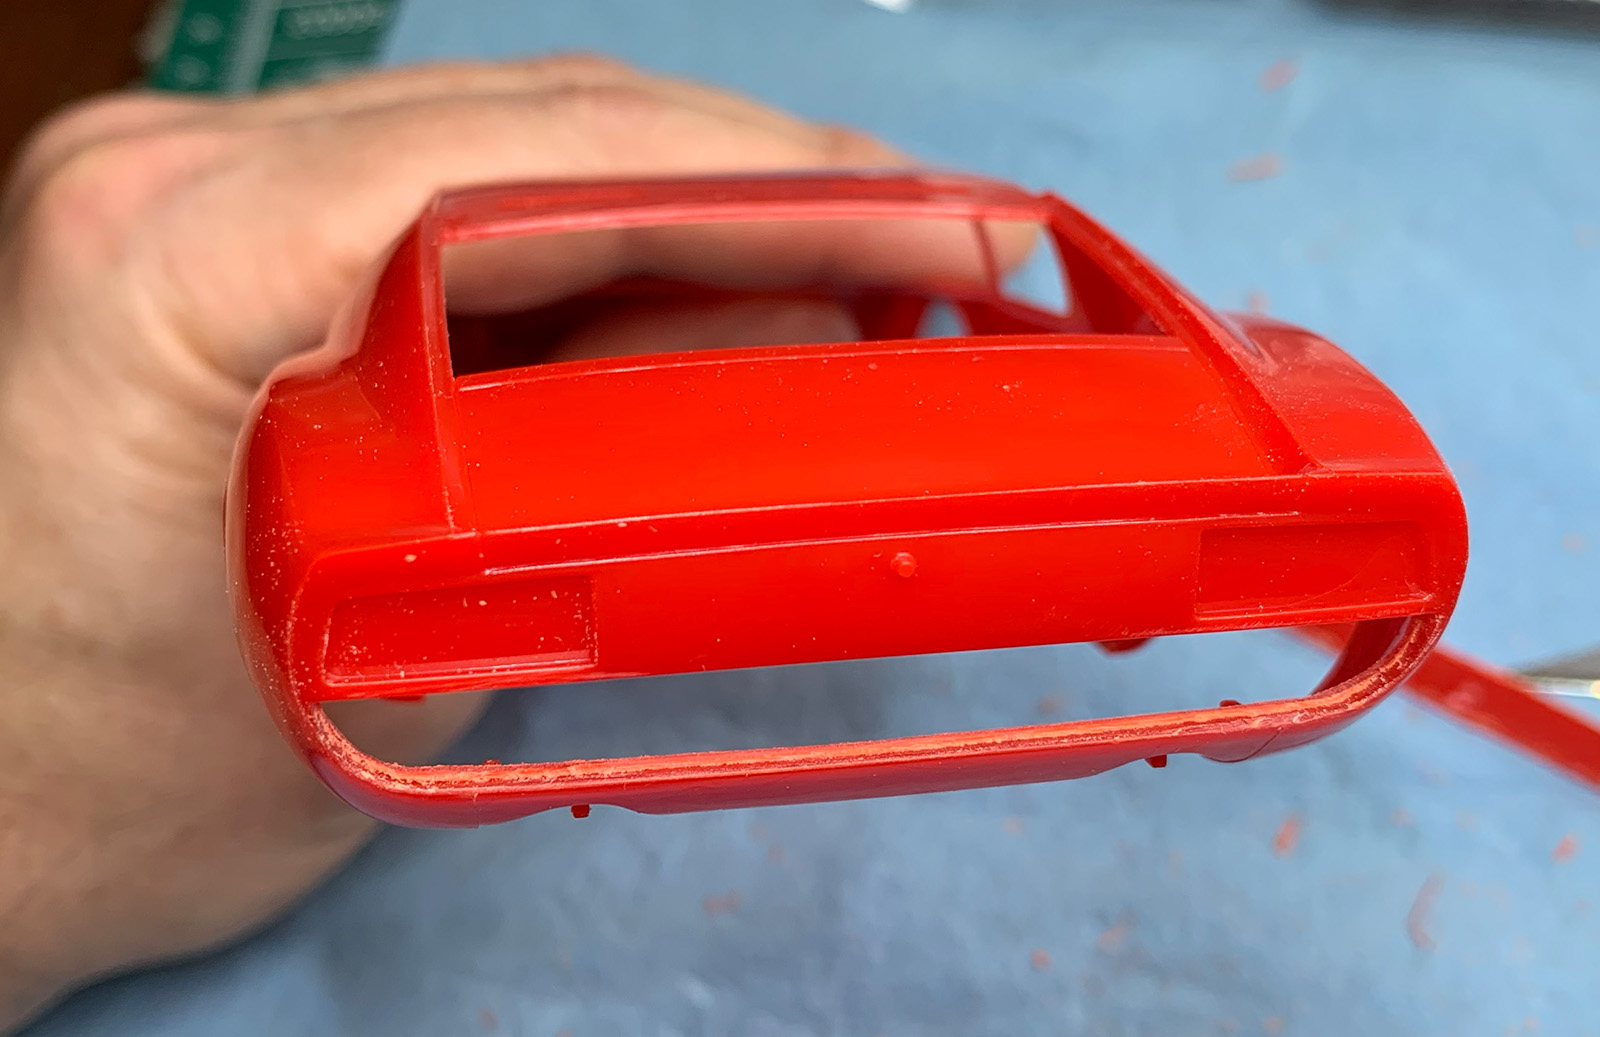
Sanded down the rear grill - opening the airflow - to make it look a little more like the actual car. Used 180 grit sandpaper then finished the holes off with the Xacto. The key was to sand the back as evenly as possible.
-
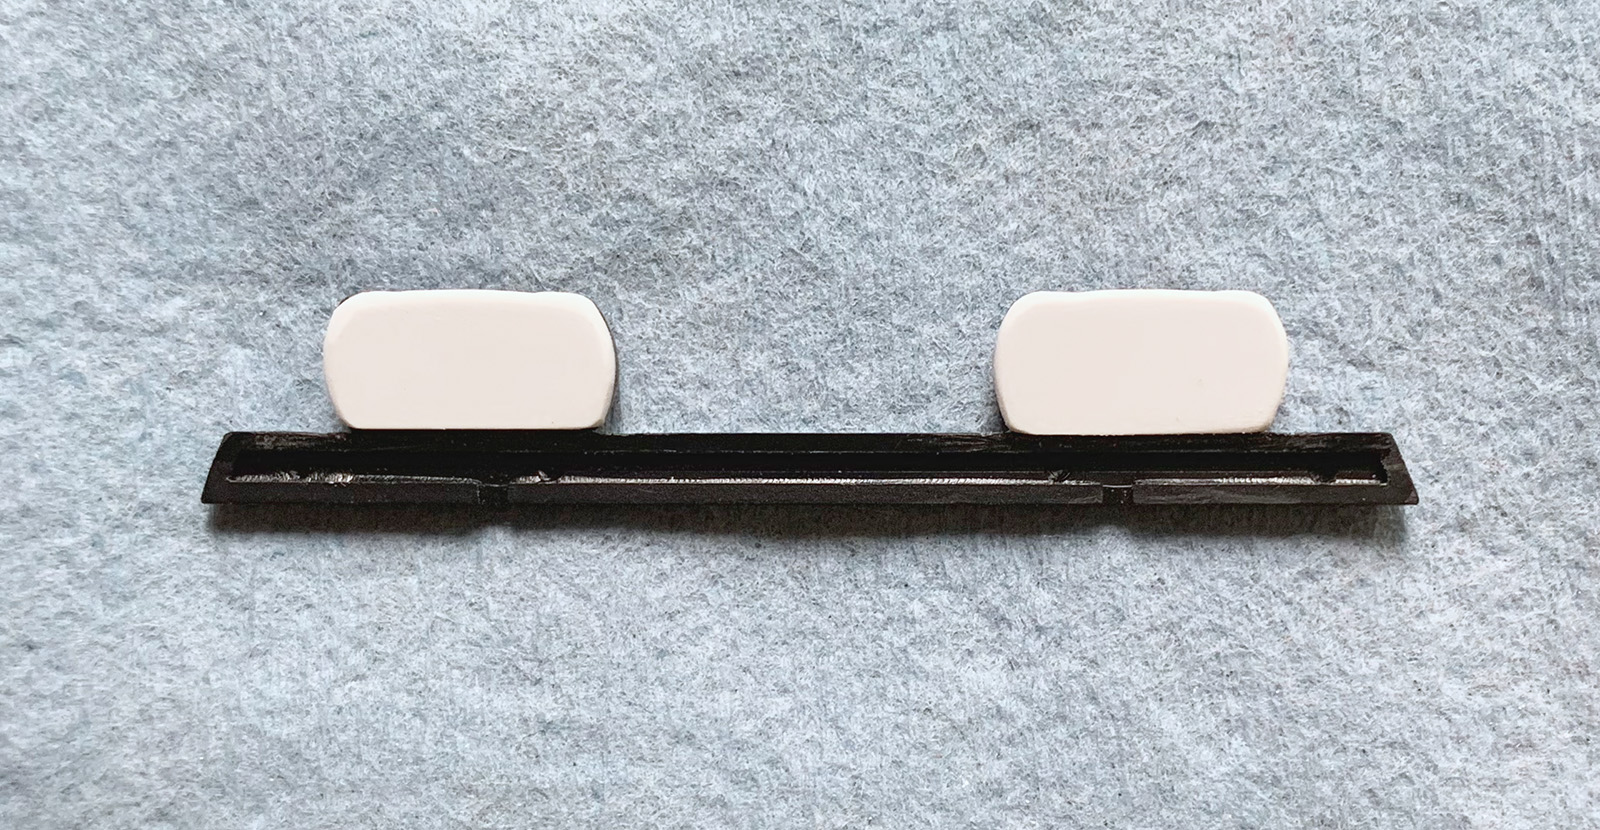
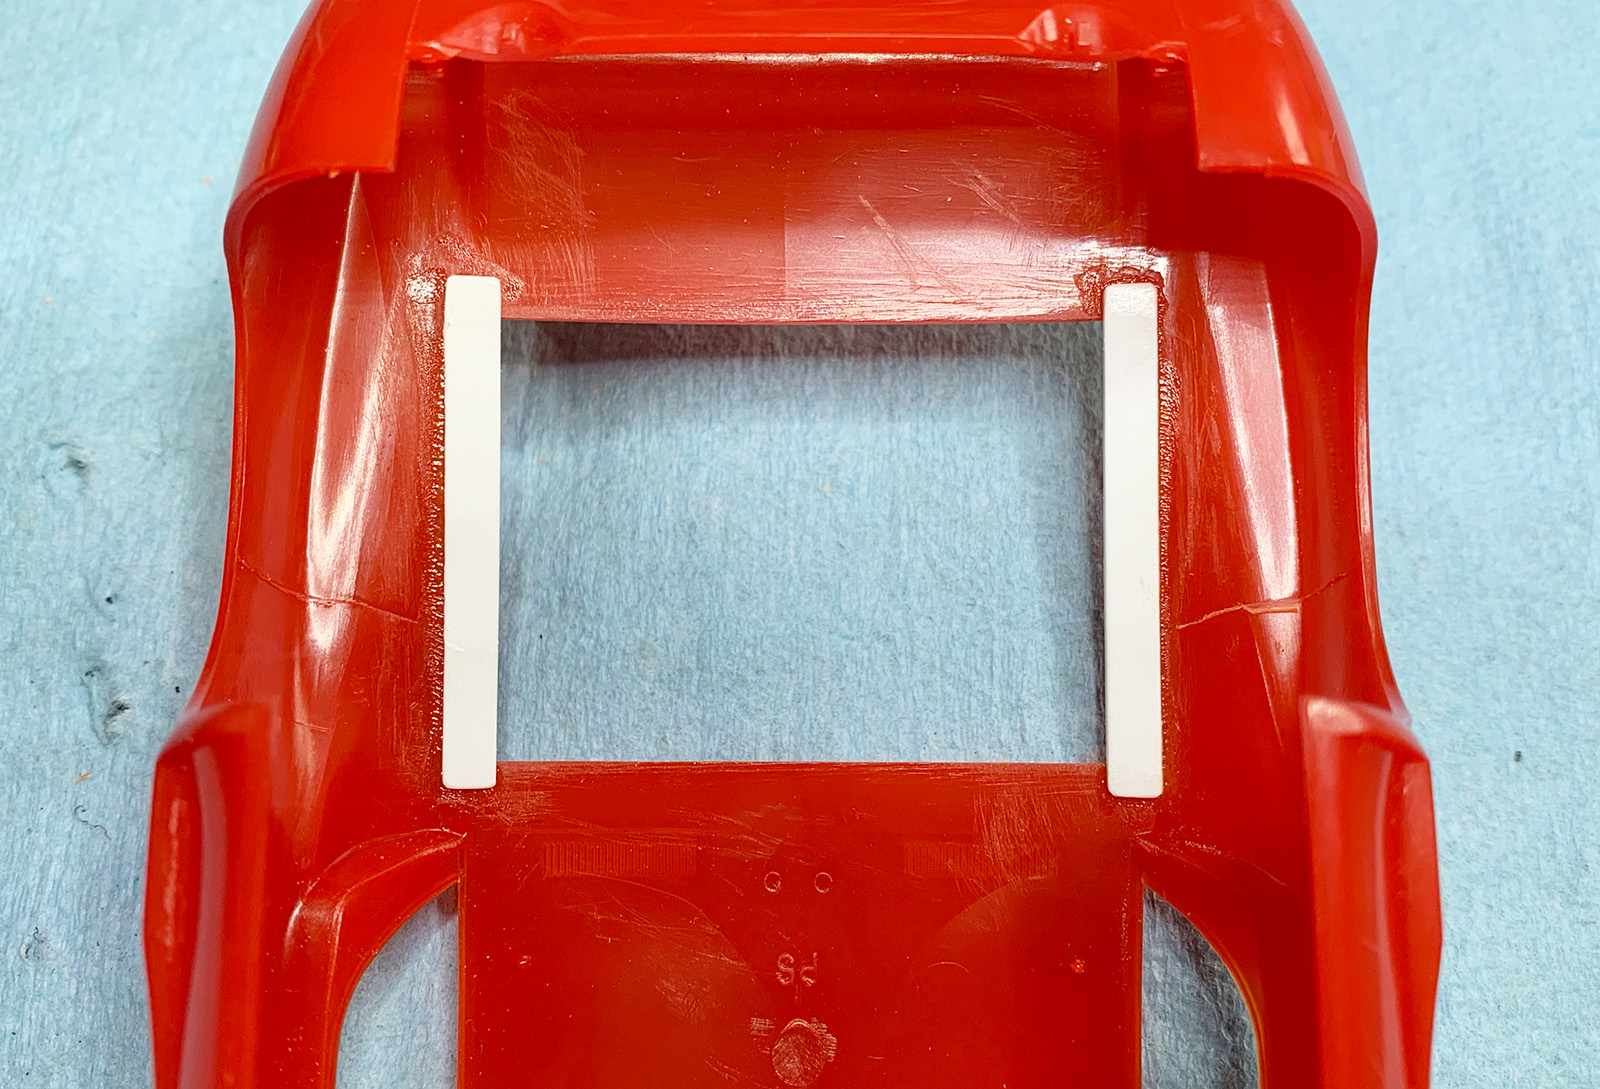
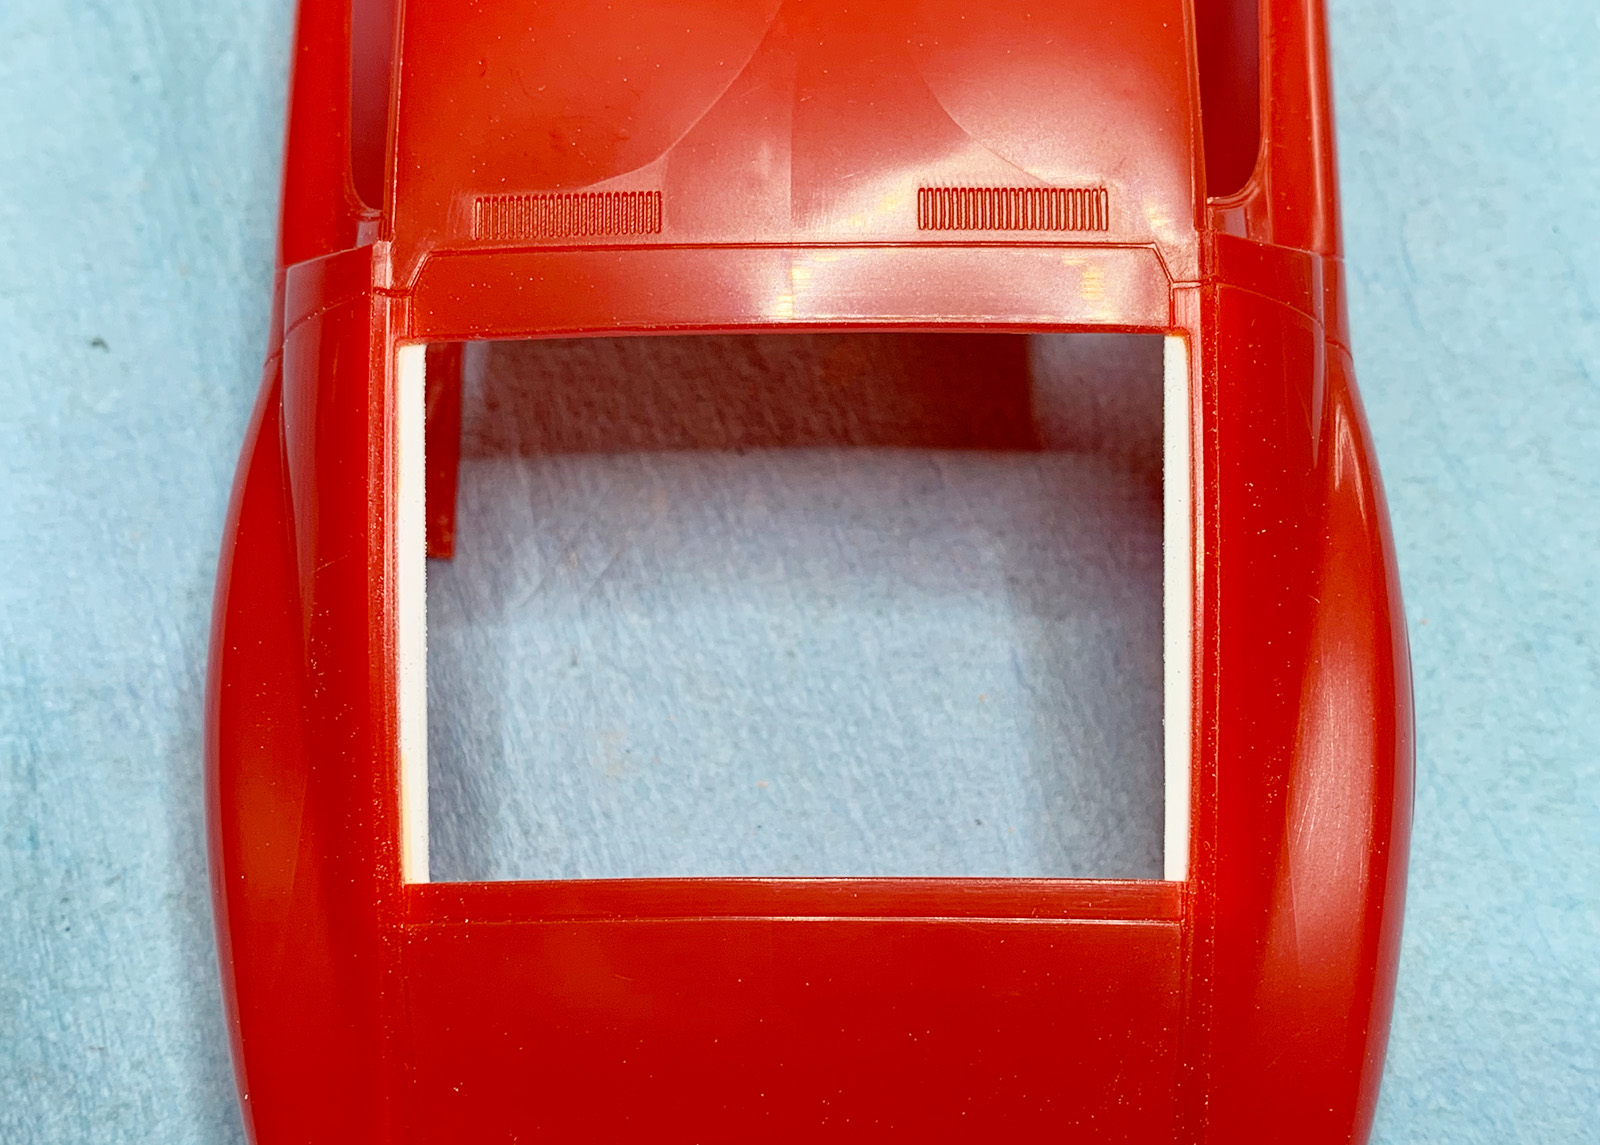
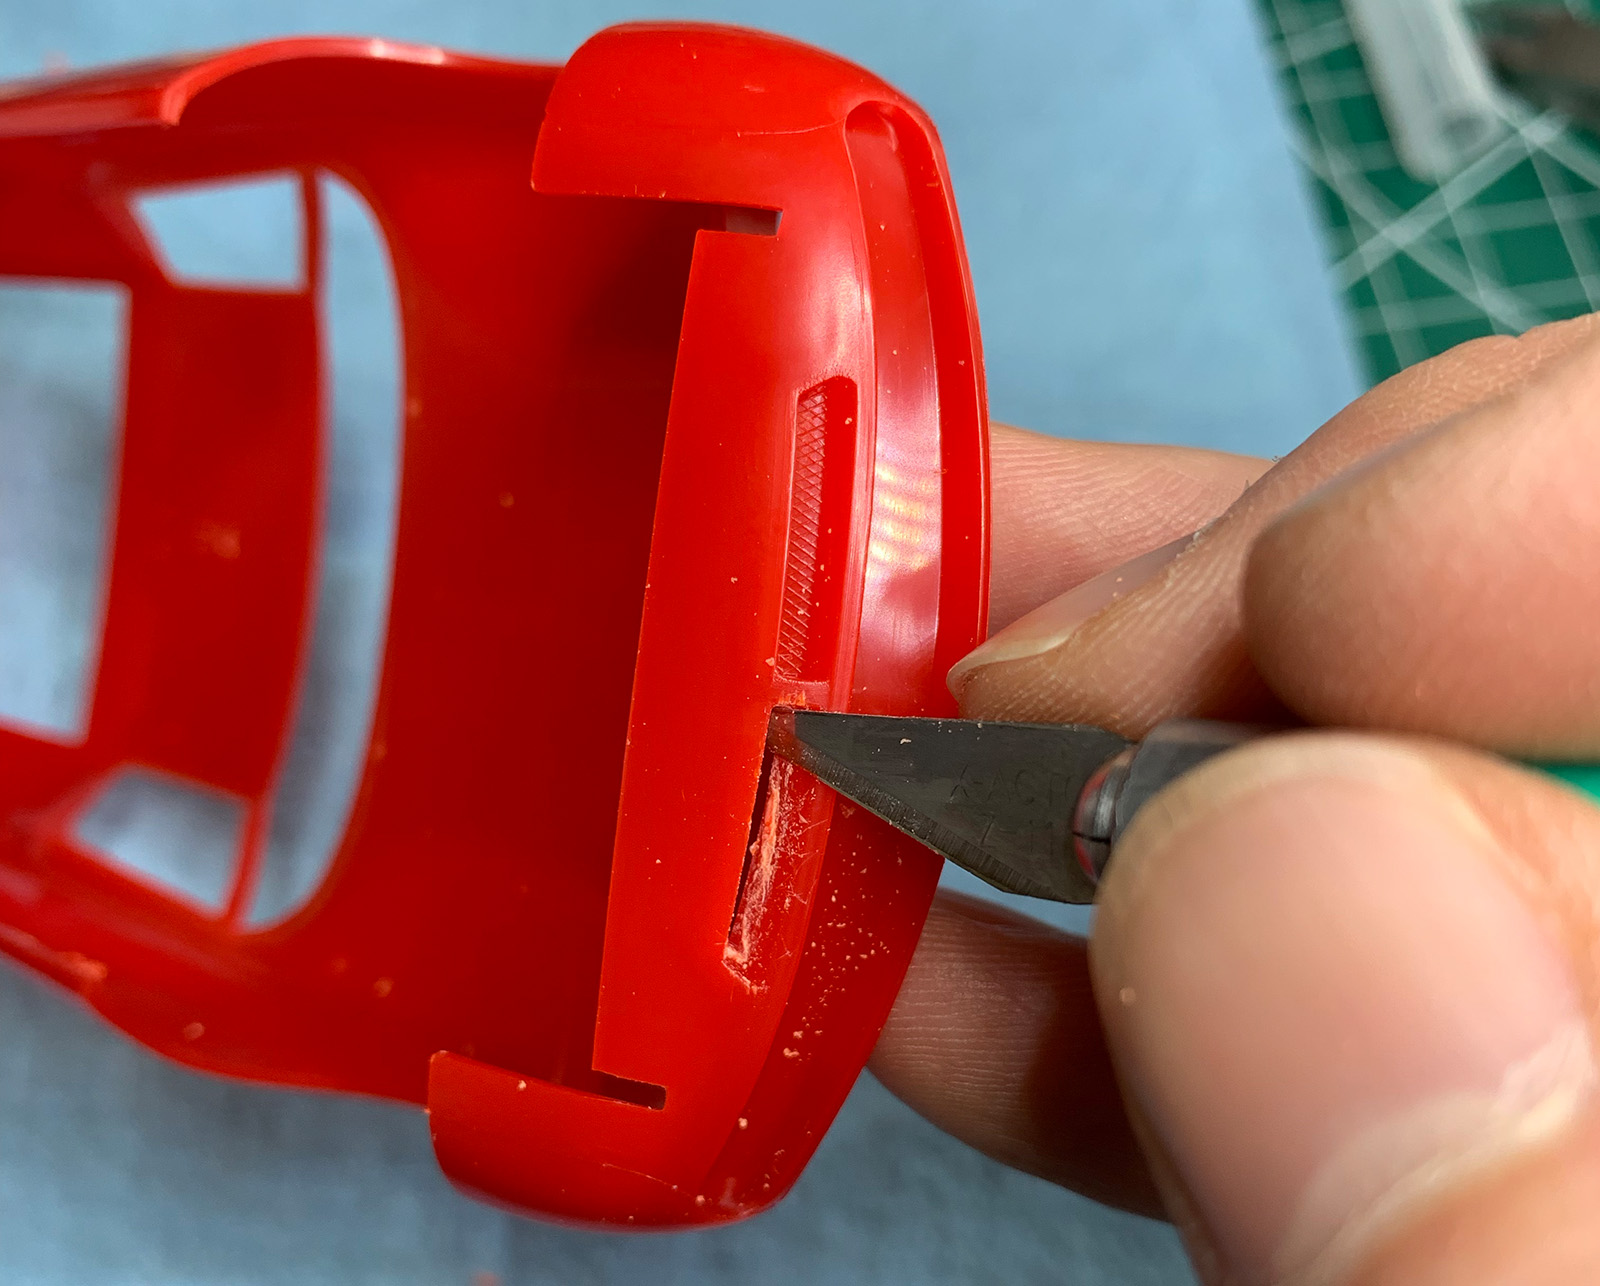
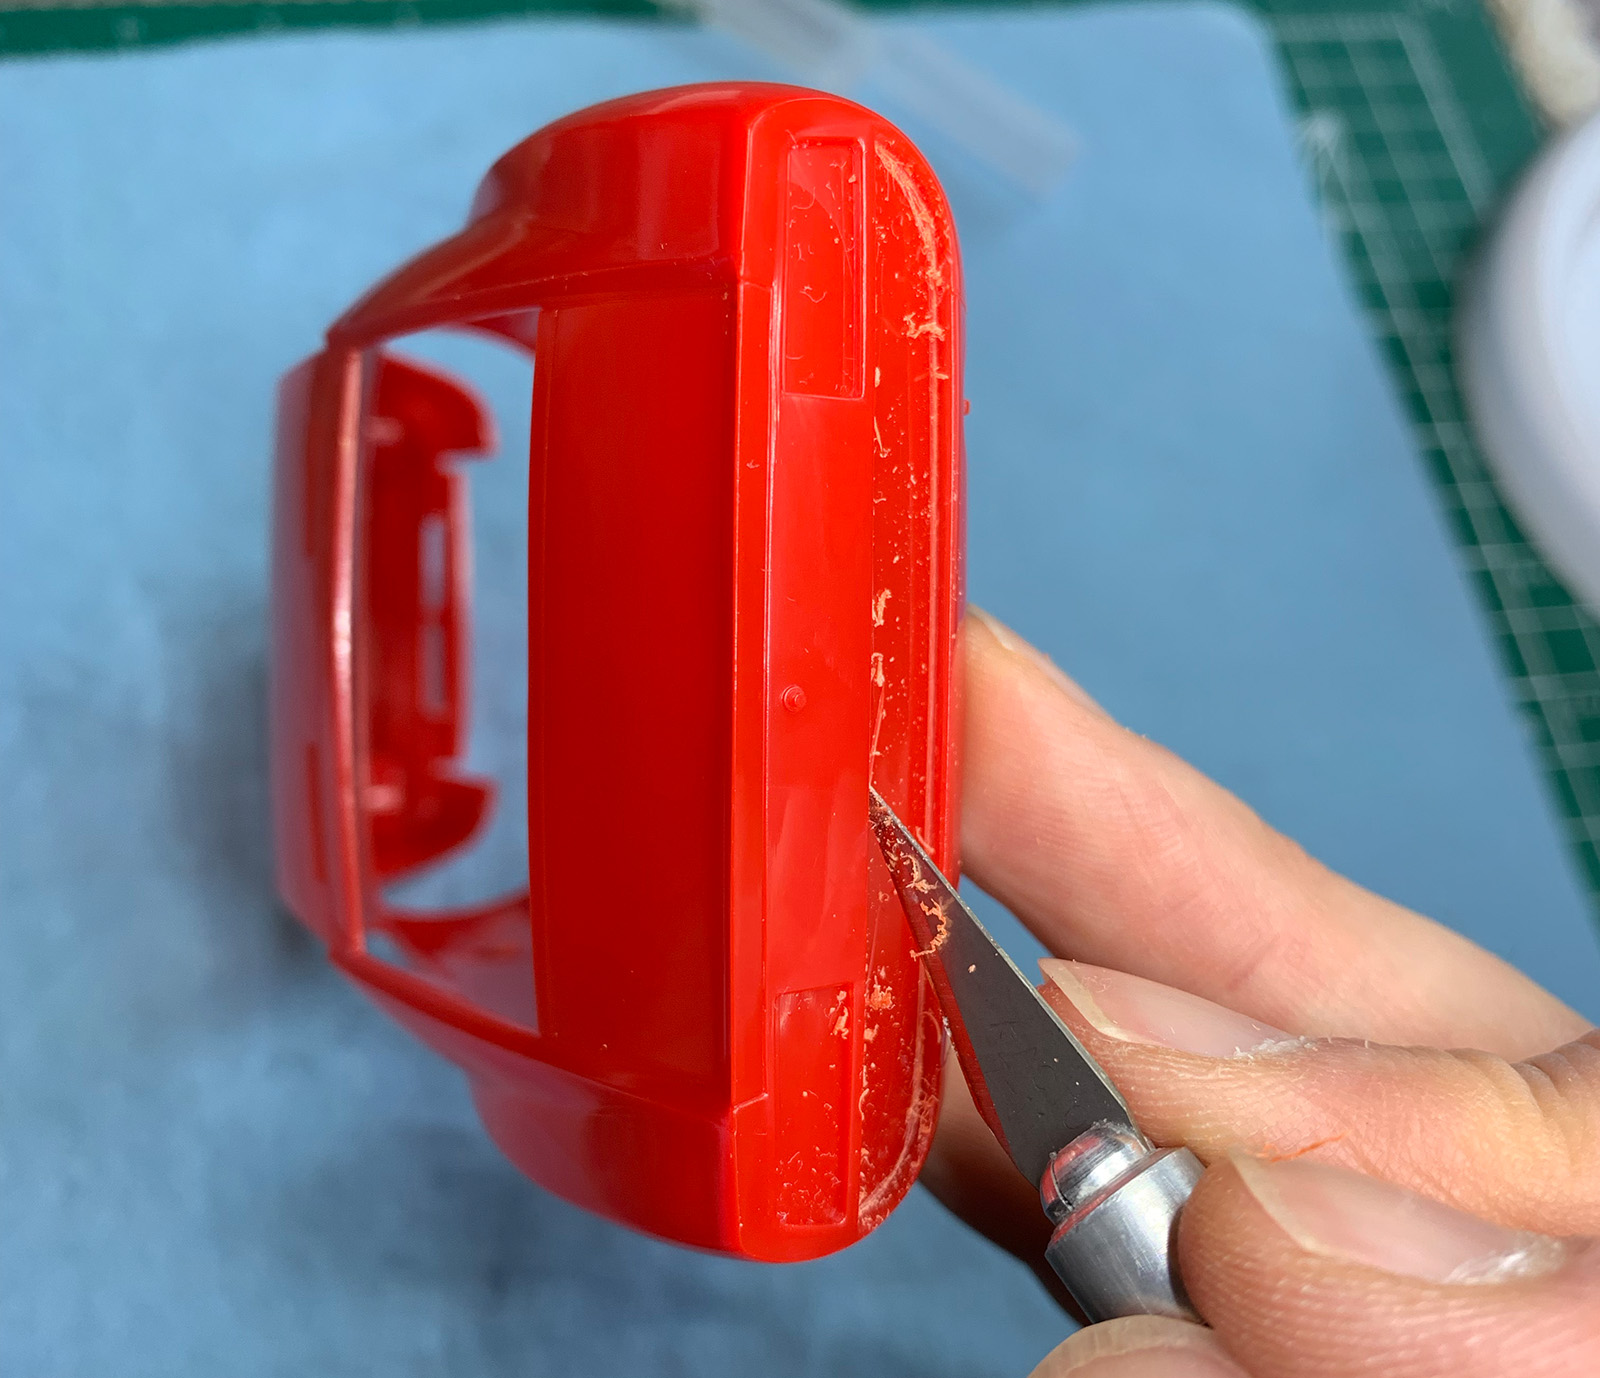
Today: On this model, the engine cover louvers are glued in from the bottom permanently hiding the engine from view. I cut the 2 ridges that make contact with the body and added new polystyrene contact points to the body itself. The pictures will explain it better than words. Original: Cutting: After: Polystyrene Bottom View: Polystyrene Top View: Engine cover is now removable. The louvers sat higher than their original position so ended up sanding the 2 bottom risers down a couple millimetres, now they're closer to the actual profile. There is a slight warp in the part so I'm thinking I can use a heat gun to soften it up so all 4 corners lay perfectly flat. I did snap one of the louvers trying to bend it by hand (mistake number one). The warp wouldn't have been an issue if the part was just glued in place.
-
Thanks for the info, @Can-Con. That's a good analogy for understanding paint science. Hmm, my intention was not to clear coat this one as it's my first run at painting a car body with an airbrush. I do have some Tamiya X-22 on hand, if the candy green turns out ok, perhaps I'll give it a try. If something goes wrong I'll just blame you. ? Green Miura, that's the detailed-up version. Looking forward to seeing that one.
-
What?! ☠️ I guess I will be from now on.
-
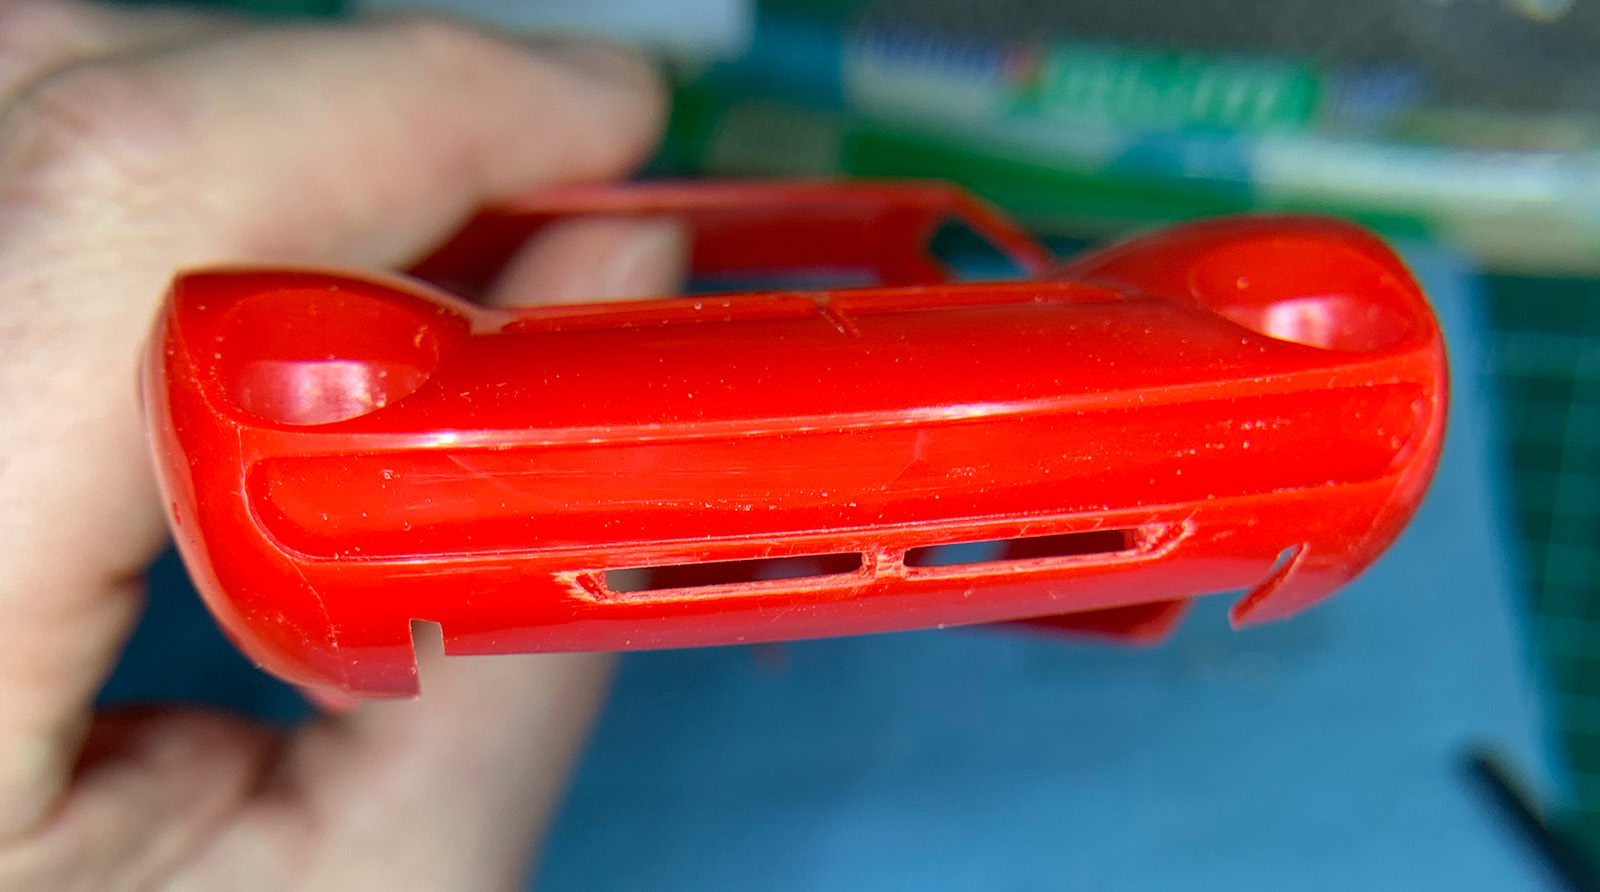
Made some progress today. After testing a few other silvers, I decided stick with AK Matte Silver and spray it over their Black Base. Stripped the chrome off a few parts with Old Dutch Bleach... wowsers that worked quick! I'm talking within 2 minutes the chrome was completely gone. I did leave them in the bath for a couple hours more and after taking them out I could feel a slimy substance on the parts - perhaps the glue? Also opened up the front and rear grill/vent locations on the body. I'm going to glue some screen to the front and grind away the back of the rear grill to expose the holes/openings. I first tried using a pin vise to drill a bunch of holes but the bit kept skipping across the surface so I ended up using an Xacto blade. I had a couple little slips but I think I can sand or fill them.
-
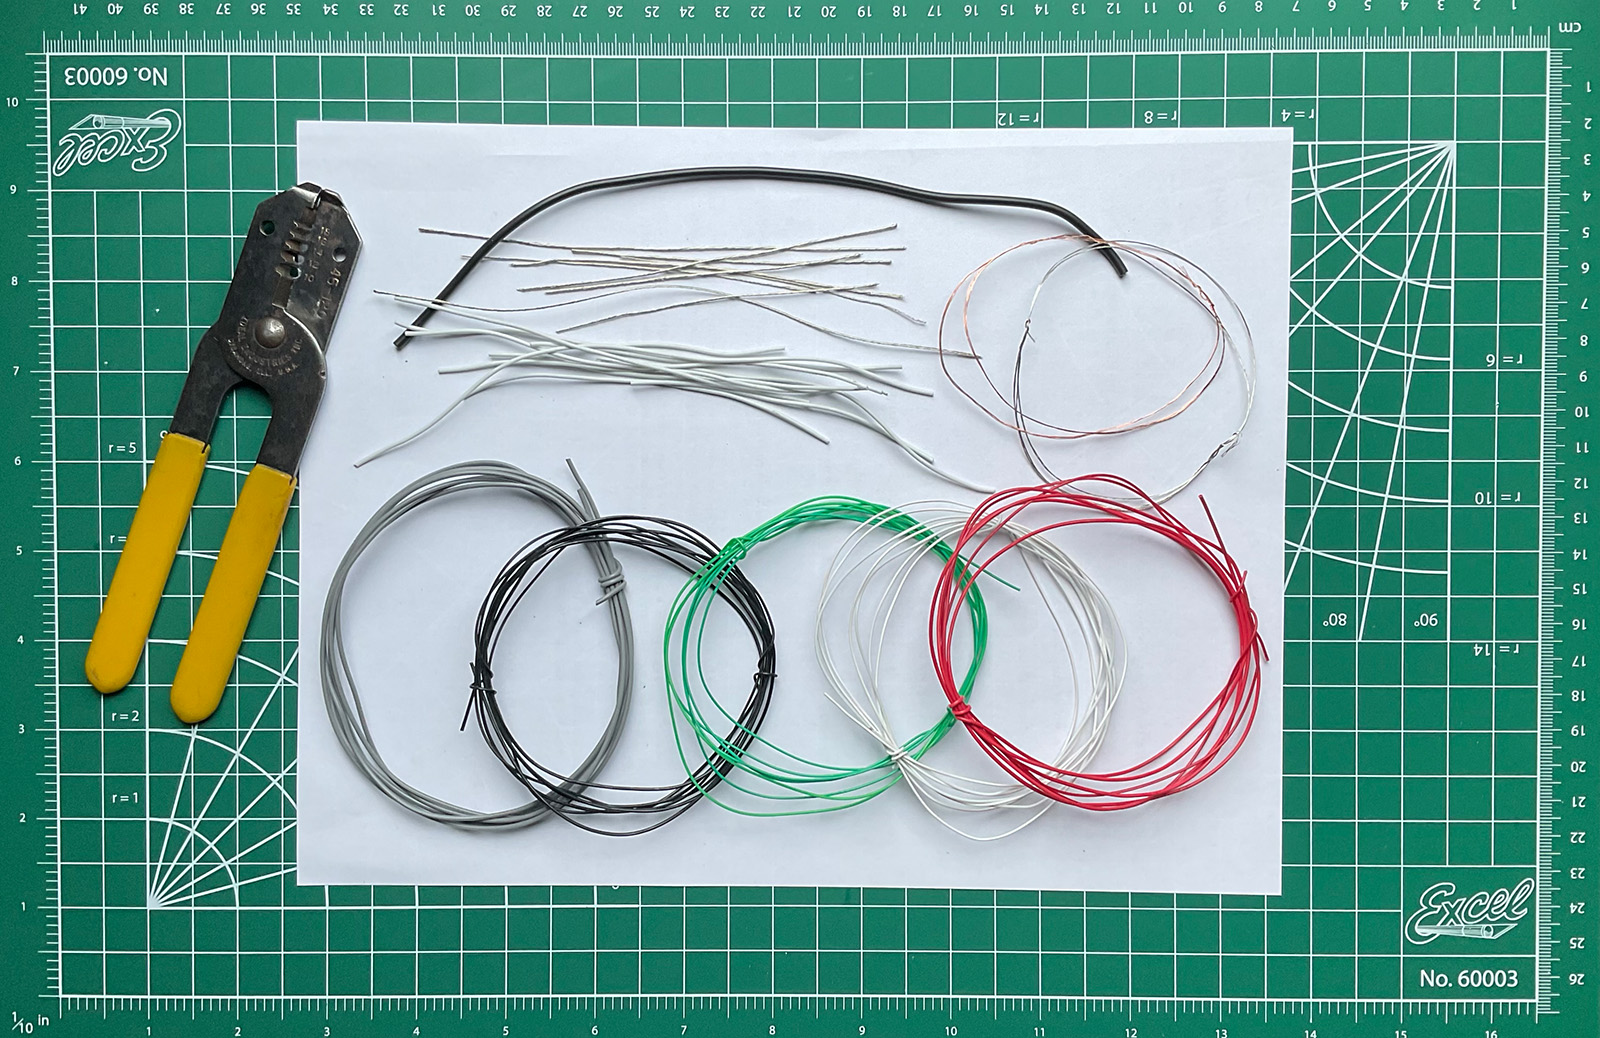
@randyc Looks great. Love that interior - great colour choice and detail. I was spraying more spoons with different AK and Tamiya silvers over different primed bases today. I pretty much suck with an airbrush at this point but I can say that AK Interactive Black Base goes on poorly. @Snake45 You could sand it down and perhaps make some louvers for the rear window. And replace the corpse in the front seat. I found a box of miscellaneous cables, wires, adapters and such and thought I could strip them for engine wires. Some are more flexible than others but I think I'll give them a try.
-
@Richard Bartrop Nothing specific with the X and XF, I just have a few more of those on hand and was wondering how they'd mix for chassis and other parts you don't see as much. I have a plan to make the engine compartment louvers removable and open up the rear grill to make it look more realistic. I'm going to try adding engine wires for the first time and maybe add a couple different colours of paint. As robertw said above, it's a nice kit and worth the effort. If it was entirely hidden, perhaps less so.
-
Interesting, I was thinking the same thing. Tamiya X-10 is a darker silver. I've had one bad experience in the past with Krylon clear spray over another brand of spray paint that had been dry for days. The X-25 came out fairly glossy on the spoon so I might not spray clear at all (certainly not TS-13 ). I recall reading somewhere, perhaps on this forum, the debate over gloss coating and whether it looks more realistic, overdone or best suited for certain cars. I guess in the end, it comes down to a matter of personal taste. I would like to try for a super glossy finish at some point... almost seems like the holy grail of finishes.
-
Out there on the prairies you probably can't even see your neighbours. ?
-
Mission Impossible - American Graffiti cop car from a wreck
70 Sting replied to Alan Barton's topic in WIP: Model Cars
Incredible amount of work. ? Can't wait to see the final product. -
@Bainford Good to know. I'll keep it as a backup if/when the need arises. I have an hour drive to get to any hobby shop in my area. @robertw I've tried panel scribing once, the results were sketchy as I found it difficult to stay within the lines. I was using the Tamiya Panel Scriber 2 but didn't like the angle you had to work at. I made a DIY scriber that I plan to try this time as well as the back of the Xacto blade. I was not aware that Japanese kits were less detailed with regards to engines. I have a plan to make the engine a little more detailed and the rear window louvers removable so I can see the engine when it's complete. I used a Tamiya TS spray on my previous model, I have to say, it goes on a heck of lot better than rattle cans from the hardware store. I'm in the process of switching from Tesors enamel to Tamiya Acrylic, though there aren't nearly as many colours (at least in gloss paint) as their TS lineup. The LP line looks very interesting but a little more toxic in use. Maybe the best compromise is TS or LP for the body and acrylic for the rest.
-
@rob1957 Thanks, Rob. I see you're a fellow Canuck I ordered the embossing powder from Amazon: https://www.amazon.ca/Ranger-EPJ-66873-Embossing-Powder-Steel/dp/B07NTRRNDY/ref=sr_1_196?dchild=1&keywords=embossing+powder&qid=1617456603&sr=8-196 The interior was airbrushed with decanted Testors Gloss Light Blue. It was supposed to be more glossy but I did not apply enough paint as I'm still a rookie when it comes to airbrushing. I thinned it with Tamiya Lacquer Thinner at a 1:1 ratio. I did not use primer. Here is the paint when I sprayed it from the can:
-
@Venom Hmm, I do have Vallejo Acrylic black primer (flat) in a spray can. Would a gloss black be better?
-
1. Good idea regarding grey primer. I've been practicing decanting and airbrushing the primer and it goes on fairly thin, so there's less chance of filling in panel lines etc. with multiple applications of paint for candy coating. 2. I have a couple extra Gloss and Flat bottles on hand, was just wondering if I could mix them for spraying chassis and undercoating on cars. I chose the Nato black for a little contrast against the semi gloss black. Might still use flat and/or gloss. Thanks @Snake45
-
Choosing the right tools and supplies made a huge difference. Not to mention the numerous hours spent watching YouTube tutorials and reading the forums. One of the best purchases I made was a magnifying desk lamp, it made things much easier.
-
Yeah, I might be tempted to try another one. There are some pretty sweet kits out there. This one was purchased from Michaels in late 2019.
-
Planning to build the Miura next, will also be attempting to airbrush a car body for the first time, should be fun. I'm going with candy green and silver side panels. Interior will be 2 tone black with silver accents and maybe embossing powder for the carpet, though I don't think it will show. I have a few questions before I start: Can I spray white primer over red plastic? I thought I read somewhere that red was hard to cover. Can you mix Tamiya Gloss Black with Tamiya Flat Black to make semi-gloss? (More out of general interest) If there's no chance that parts of an engine, trunk or interior will never be seen, do you complete them to best of your ability, casually cover them or don't bother at all? Thanks!
-
Very cool!