70 Sting
-
Posts
1,369 -
Joined
-
Last visited
Content Type
Profiles
Forums
Events
Gallery
Everything posted by 70 Sting
-
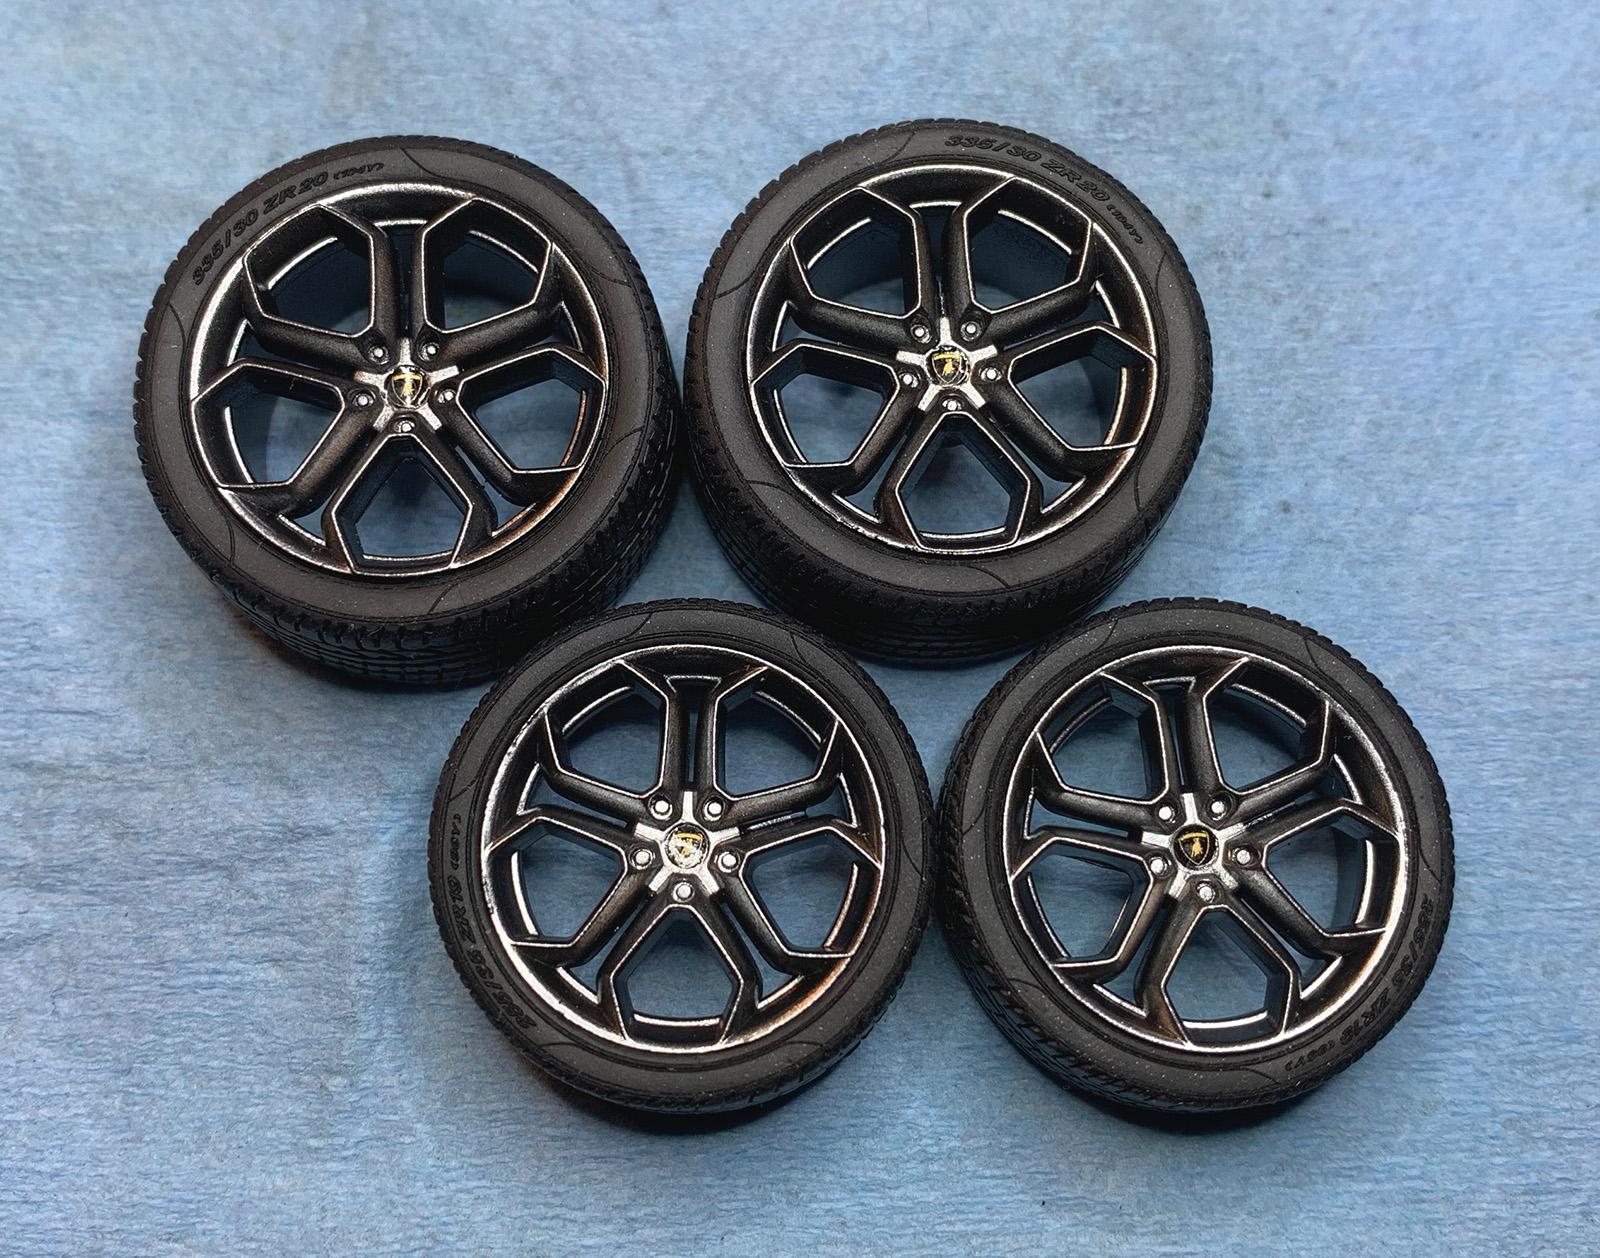
@Keavdog Nothing special was done for the wheels. Stripped the chrome, primed with grey, base coated with black and top coated with gun metal. I believe the angle of light coupled with the thinner concentrations of paint on raised ares gives them that extra detailed look.
-
@Matt Bacon You are correct, the 2 side vents could have been painted before attaching to the body. I am concerned that the individual parts won’t match if painted separately, however to your point, they are less visible. I will try thinning the paint a little more and using lower pressure. Should help when painting the next interior tub as well. Thanks for the tips!
-
@Tommy124 Just looked at your work on scalemates… I don’t think they can be built any better! Excellent work.
-
Great job - especially under the hood. Very realistic. I like the black background as well, looks like asphalt. What did you use?
-
Beautiful colour combo and expertly built!
-
Wayne’s World, party time, excelllent!
-
Groovy. Very groovy.
-
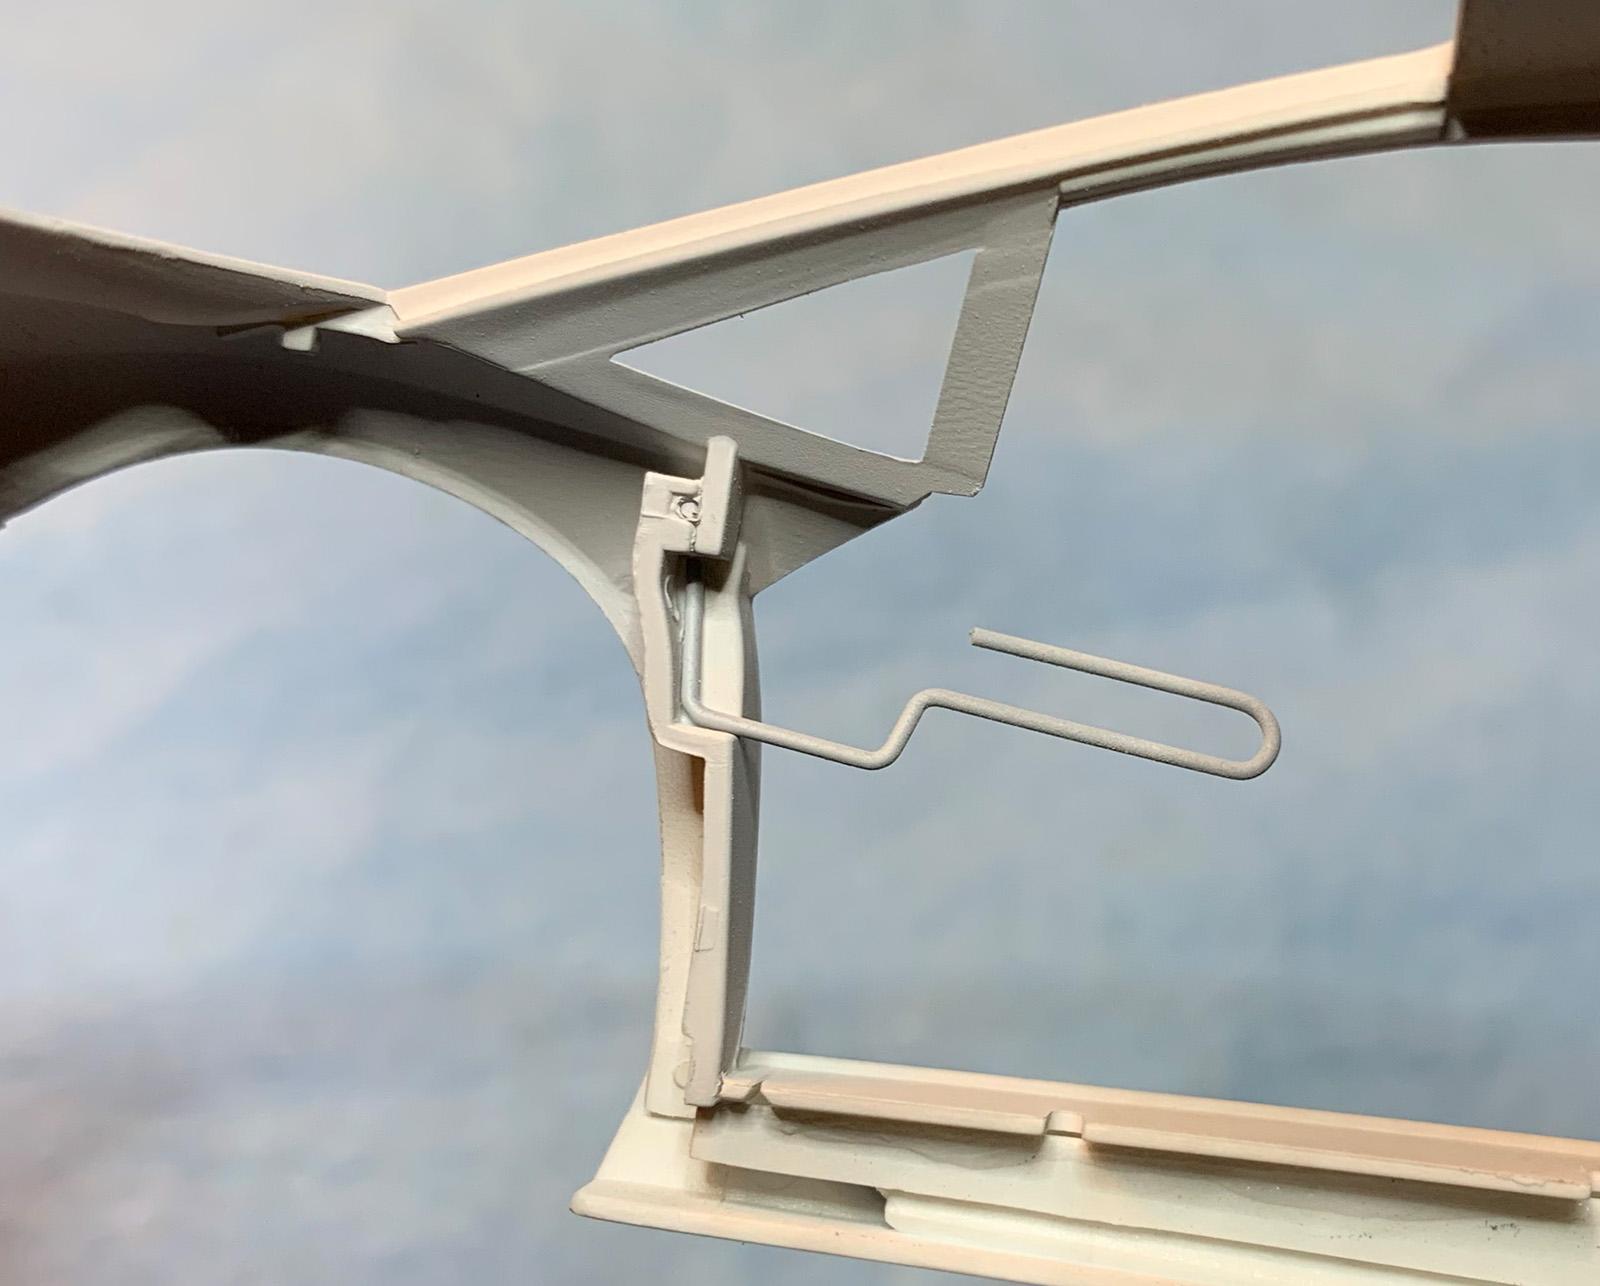
@majel I prefer your orange with black wheels combo. It’s more appropriate this type of car. Regarding Doors: I read a couple posts stating similar problems with the doors. The instructions have you attaching the wire hinge mechanisms to the doors first and then to the body, I did it the opposite way and glued those suckers very well (first photo). Sliding the doors onto the wire mechanisms was no easy task either. They slide into 2 grooves between the inner and outer door panels but require quite a bit of force to get them in (broke them apart a couple times). What I did was completely file down one groove inside each door to allow the wire mechanisms to slide in easier. In the end, the doors didn’t hold tight to the body but can be pressed a bit into place and they stay on their own. If I were to do it again I would attach a couple magnets to hold the doors tightly closed.
-
Hope I made your day.
-
She's a beauty.
-
What a beauty!
-
Simply awesome!
-
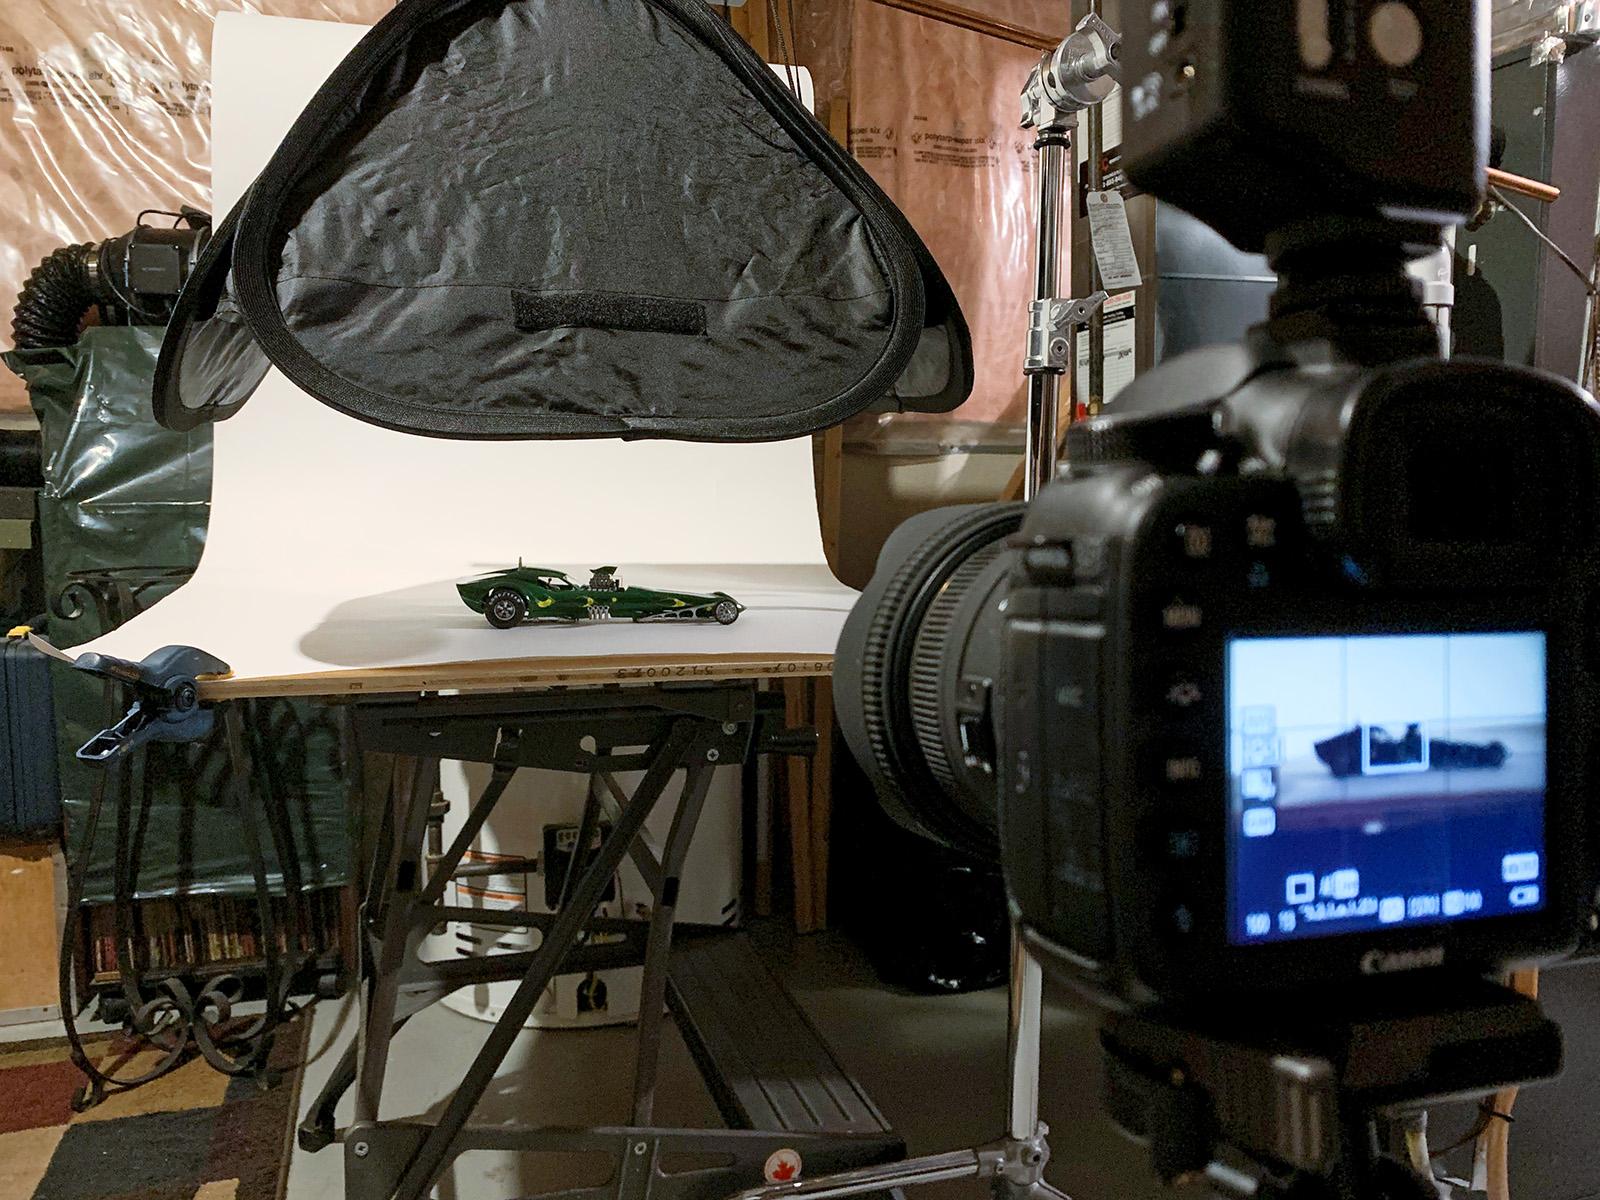
@bbowser @Venom @grodudulle77 @1959scudetto @landman Thank you very much, gentlemen.? I can't express enough how much the photography flatters the finish and hides the paint and glue gaffs. Here's a crude photo of the set: Camera: Canon 7D with a Sigma 50mm lens. I shoot around f/11 to f/13 @ 100 ISO Lighting: 18" soft box with a Canon 580 EX flash and Pocket Wizard trigger (there are alternate cheaper methods to trigger the flash) The same effect can probably be achieved with an iPhone and desk lamp suspended over a large sheet or two of wrapping tissue paper. The key is to make the light source big, soft and close to the car.

-
As Bob Ross would say, "Happy accidents."
-
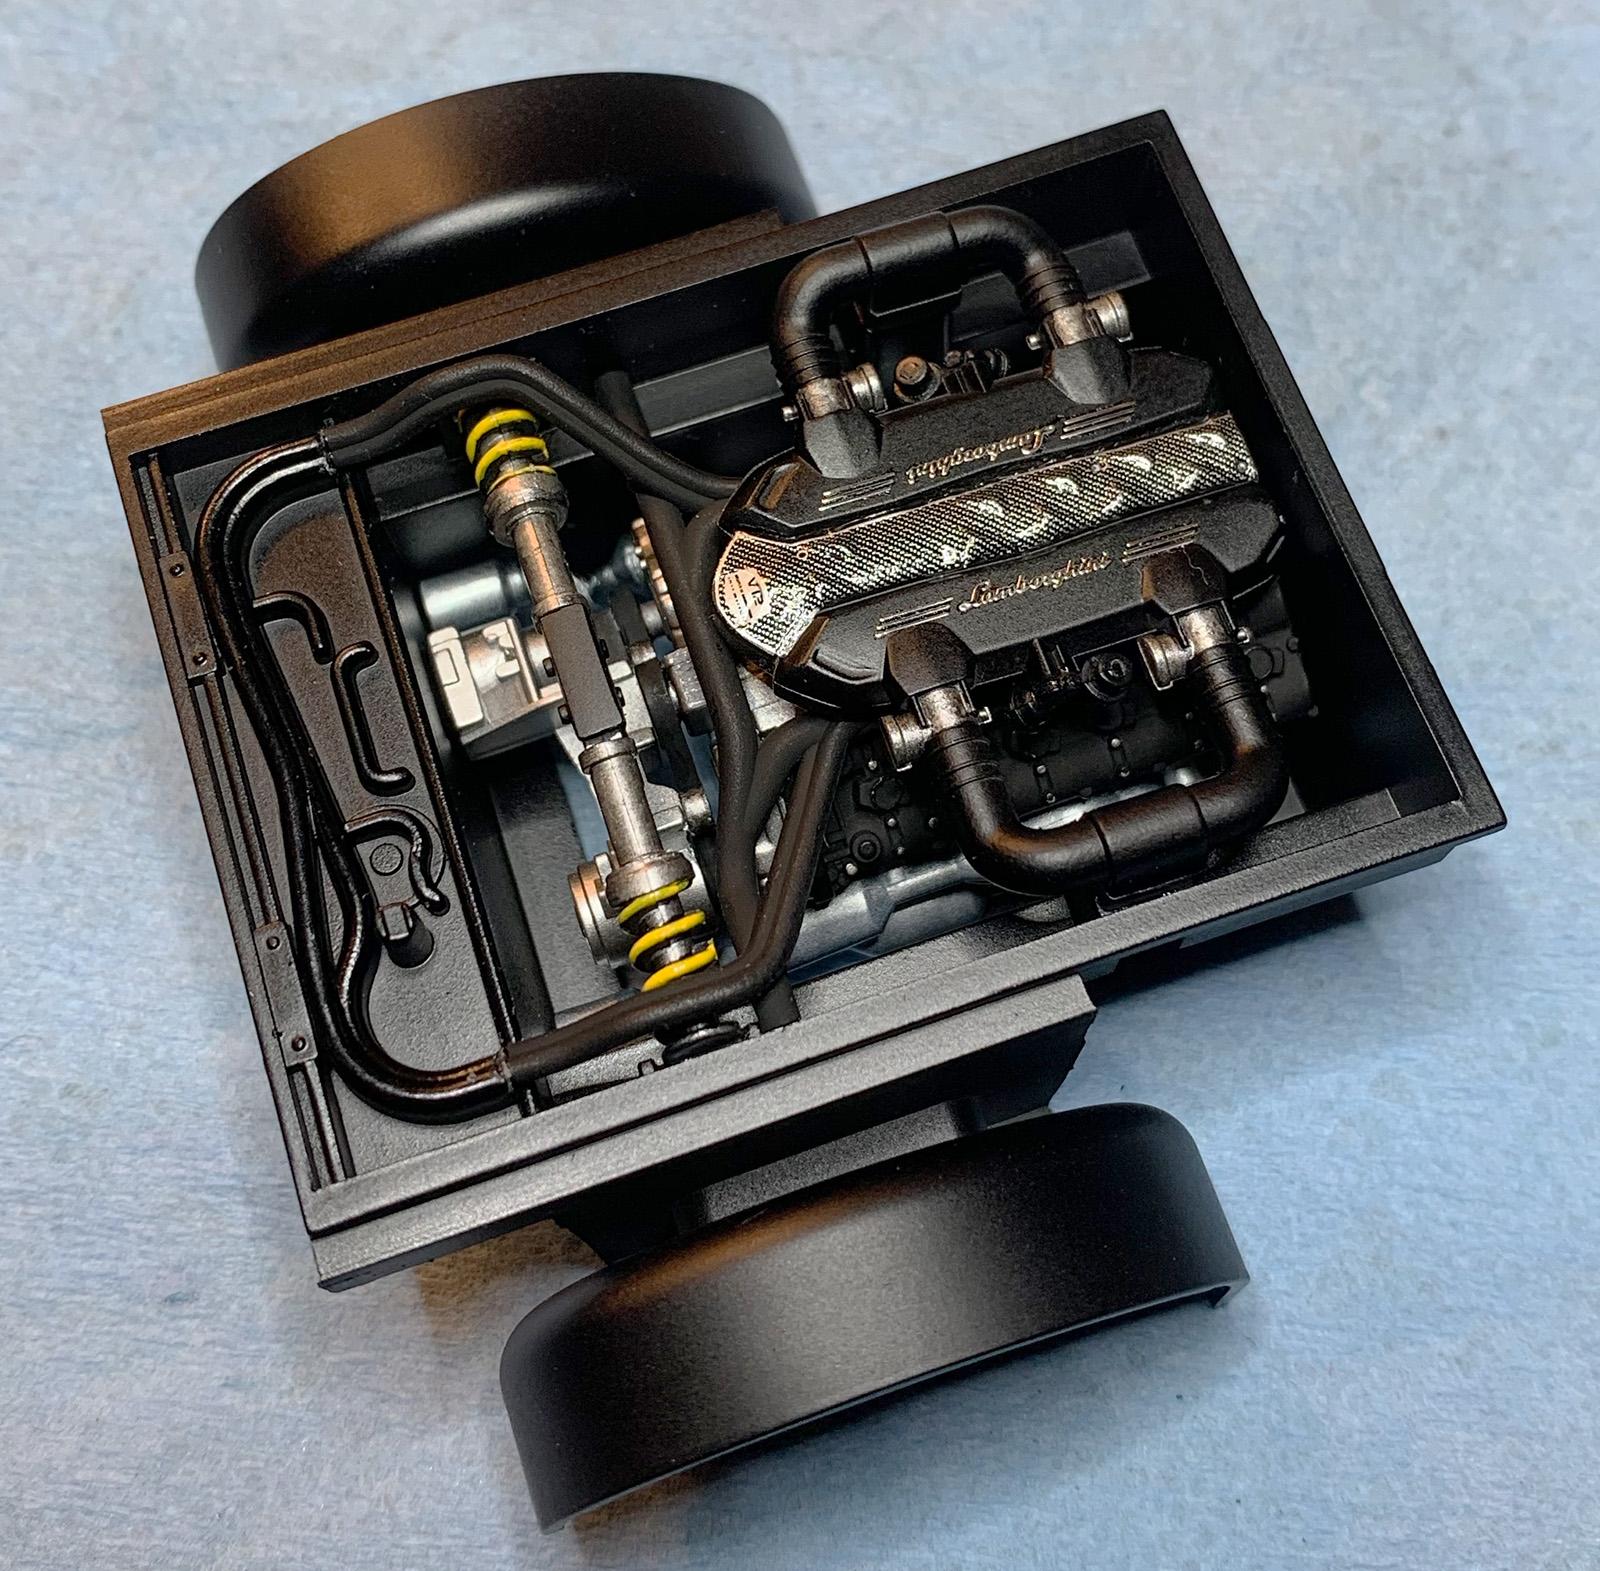
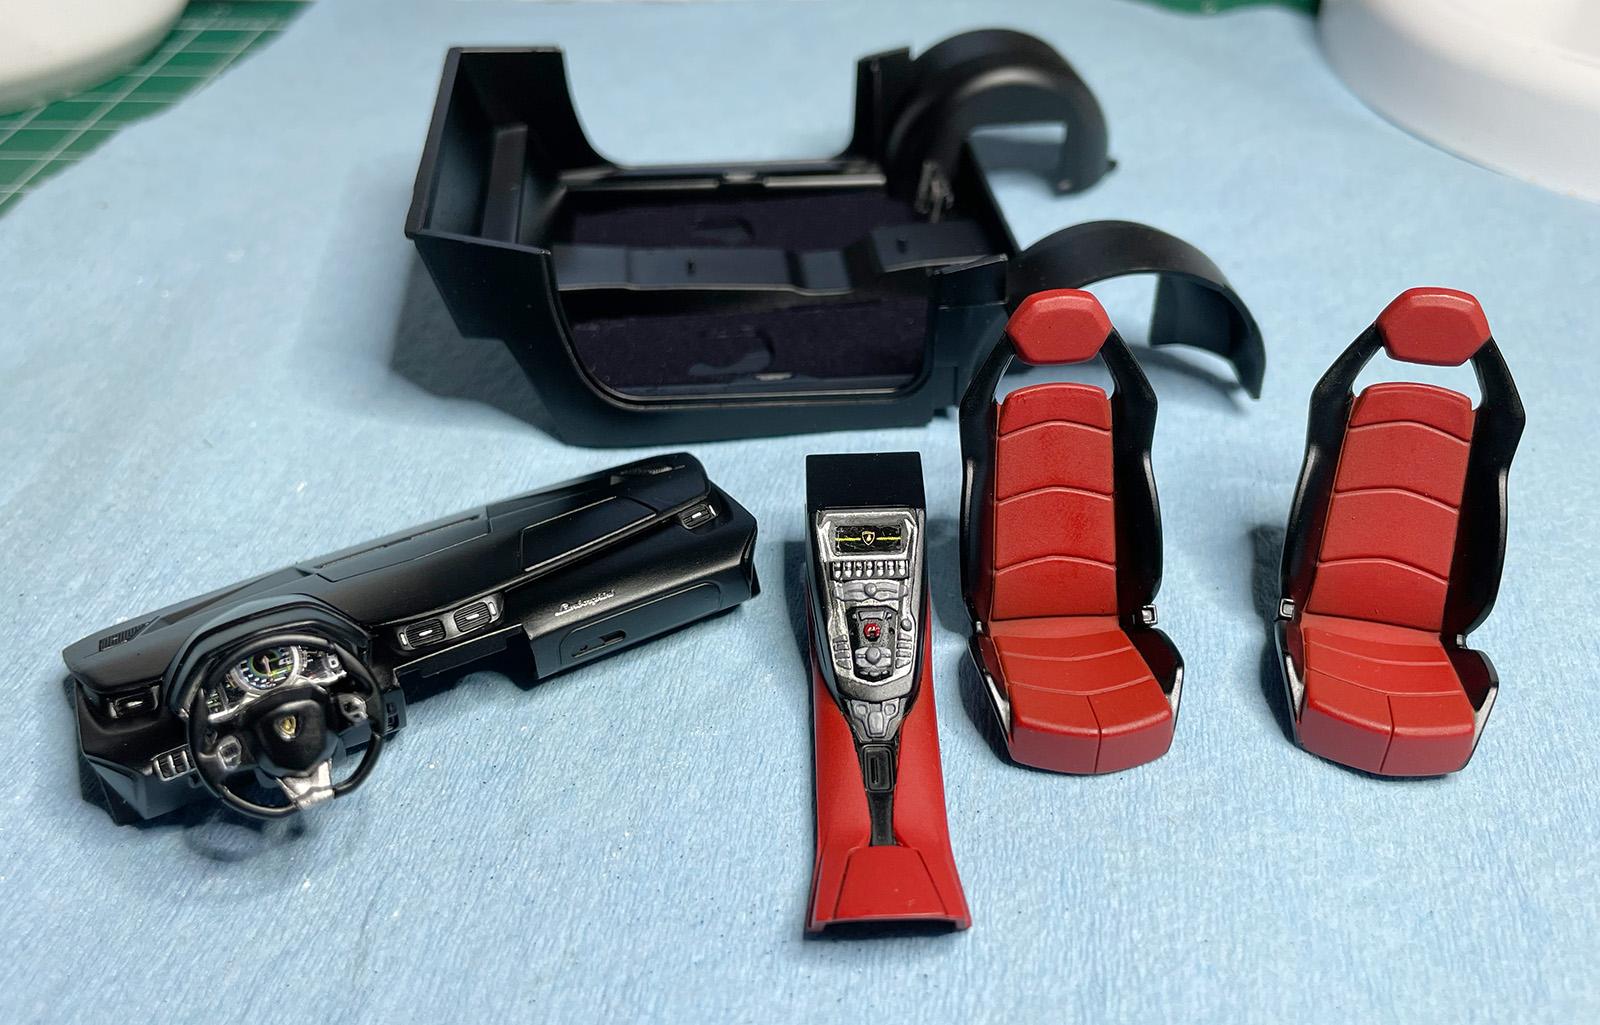
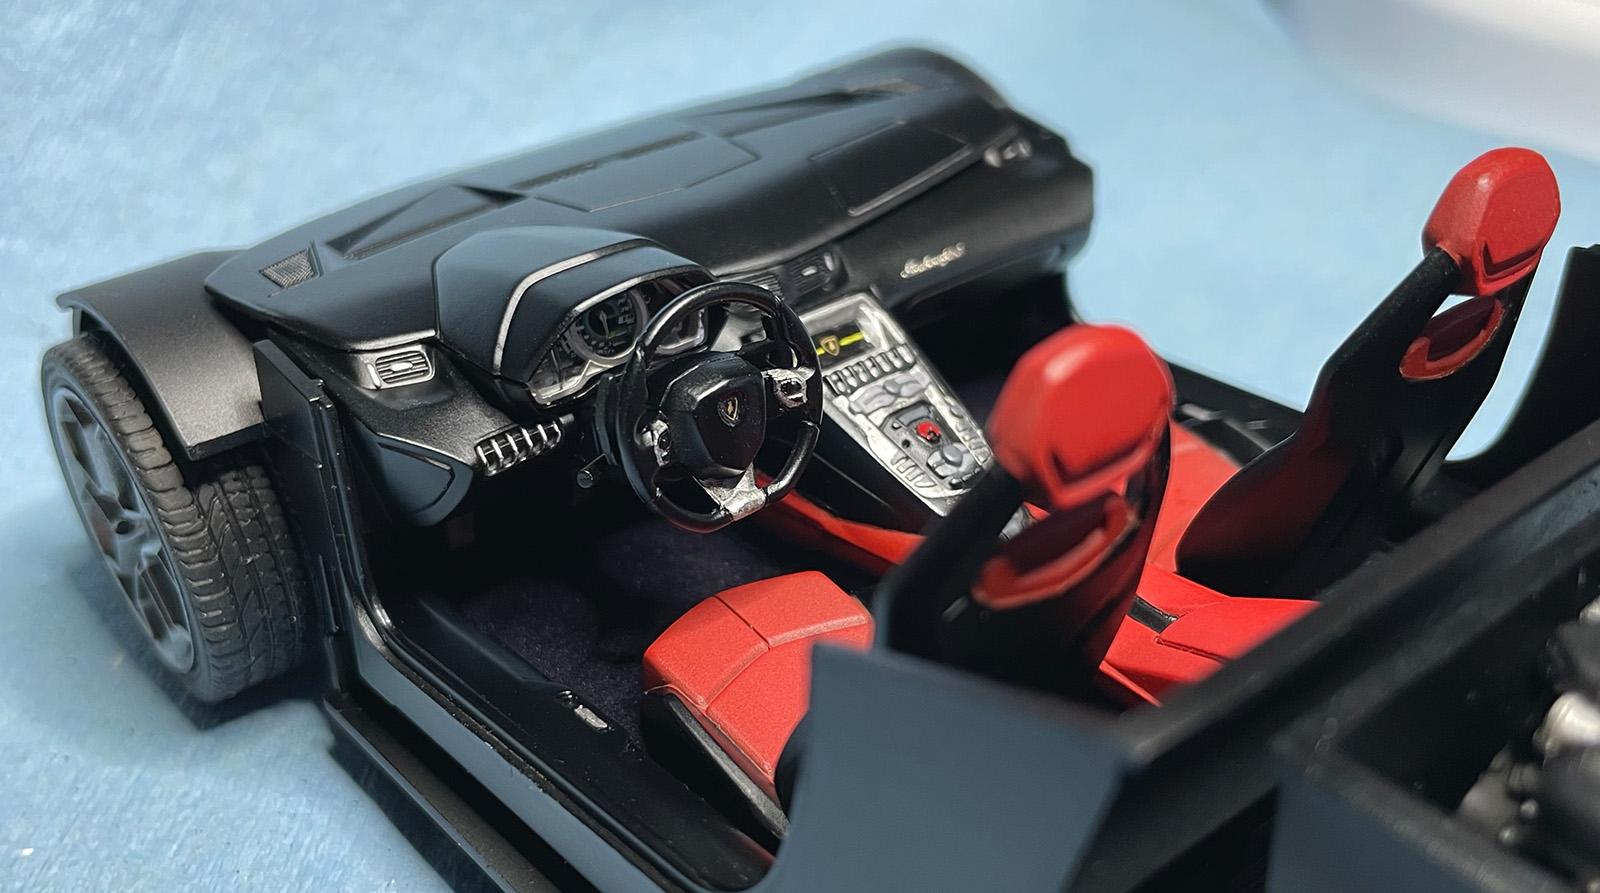
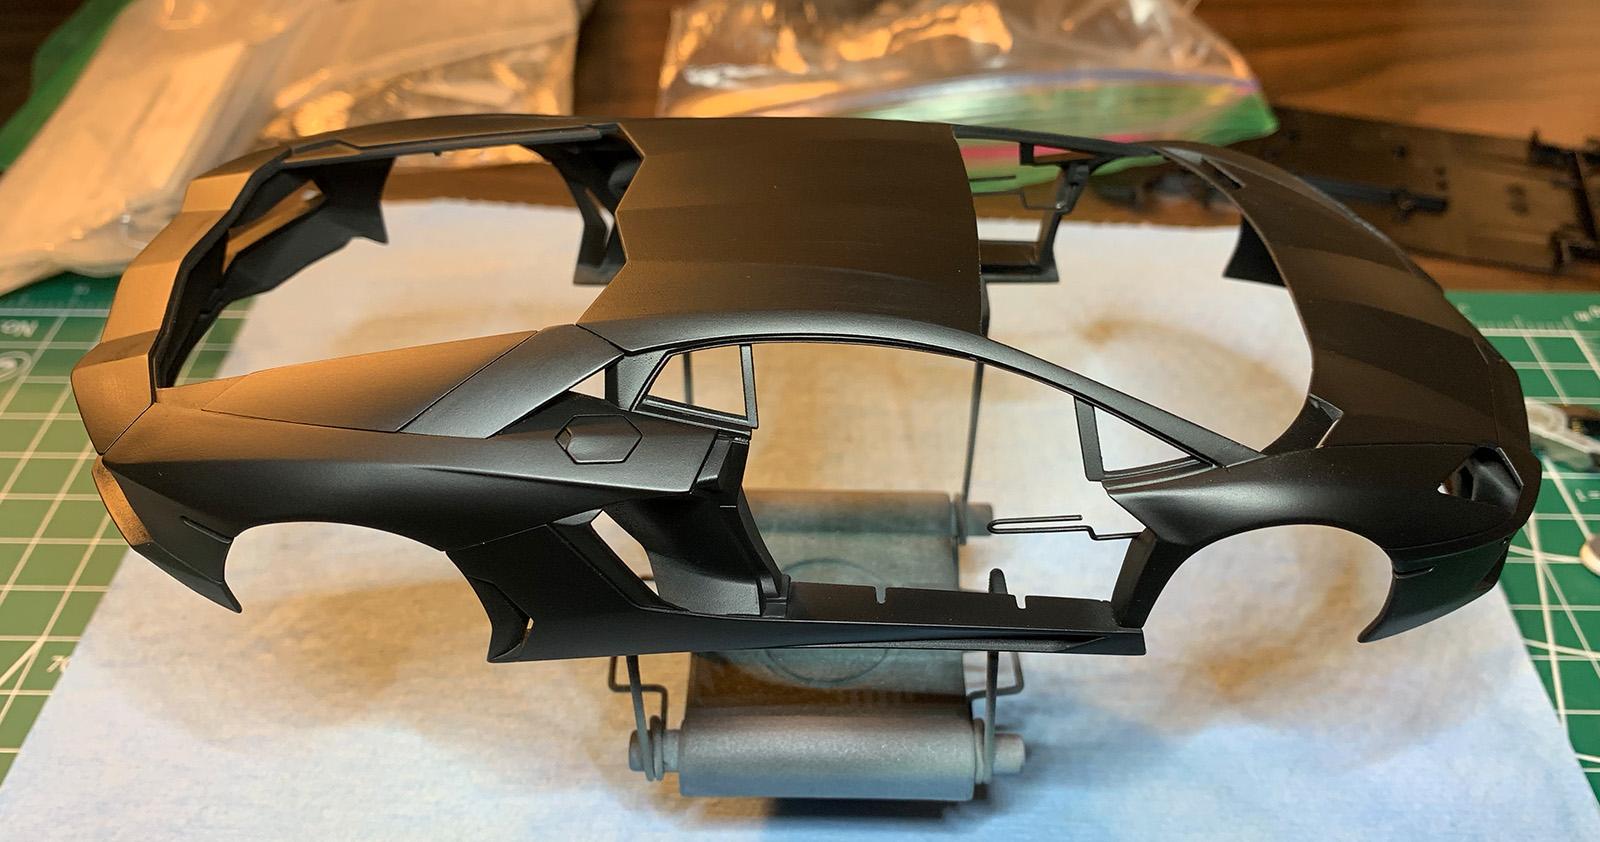
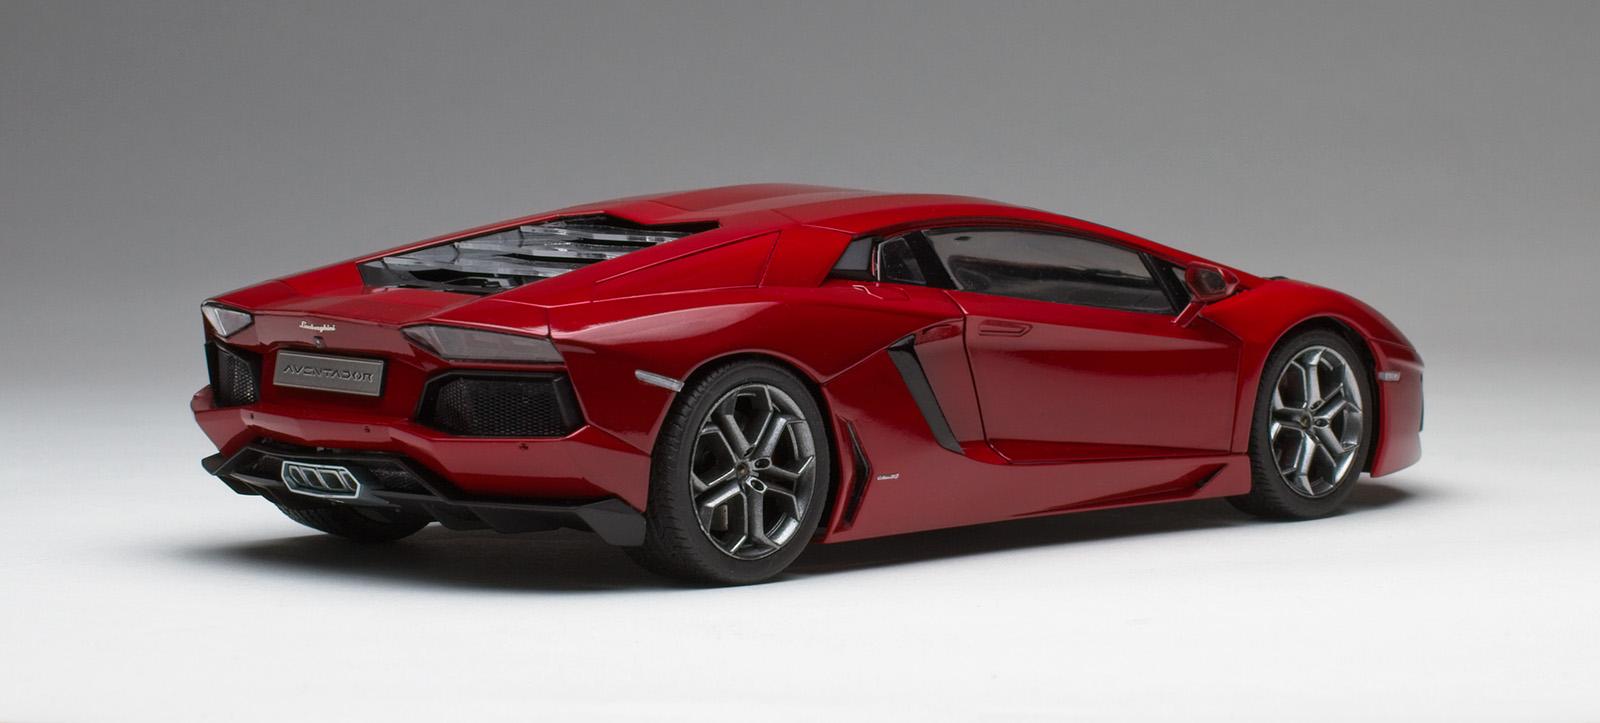
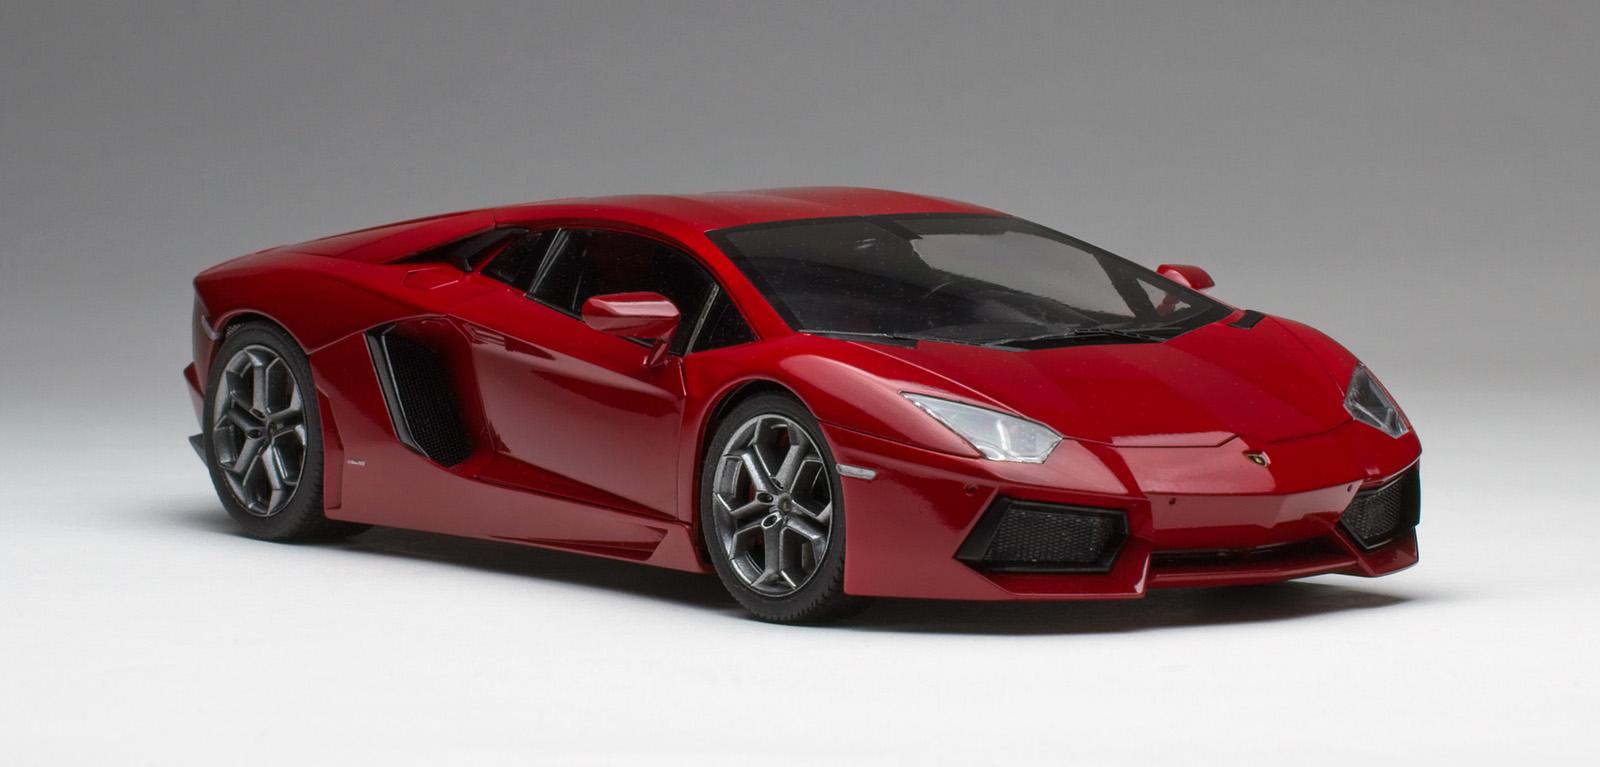
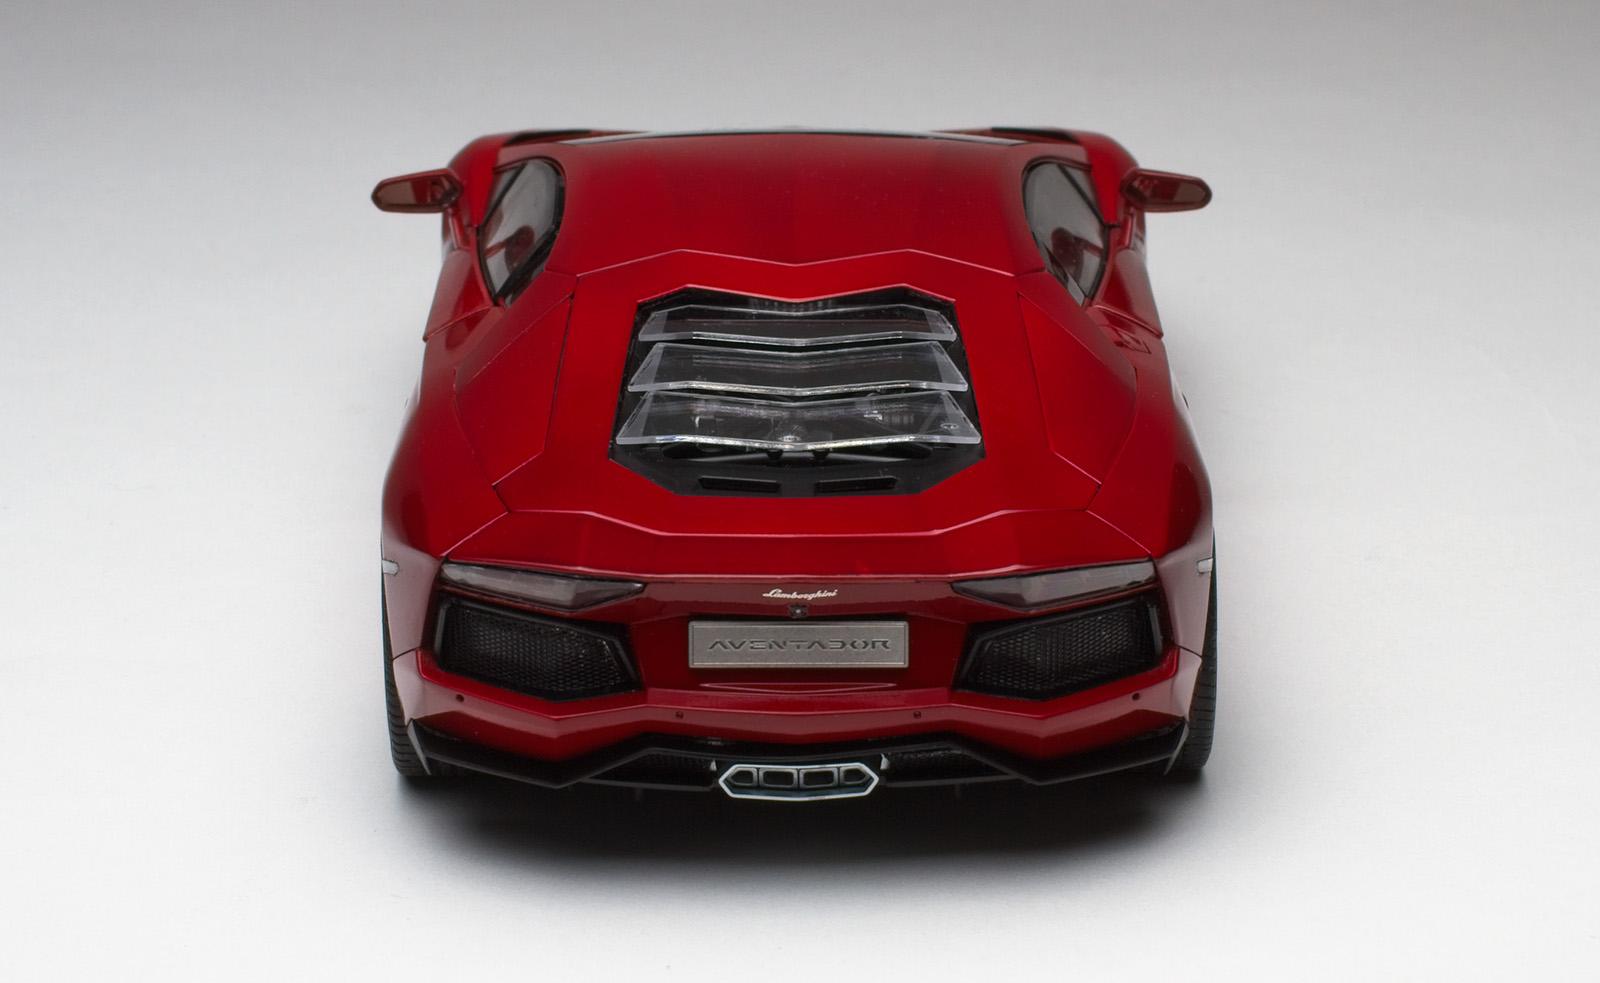
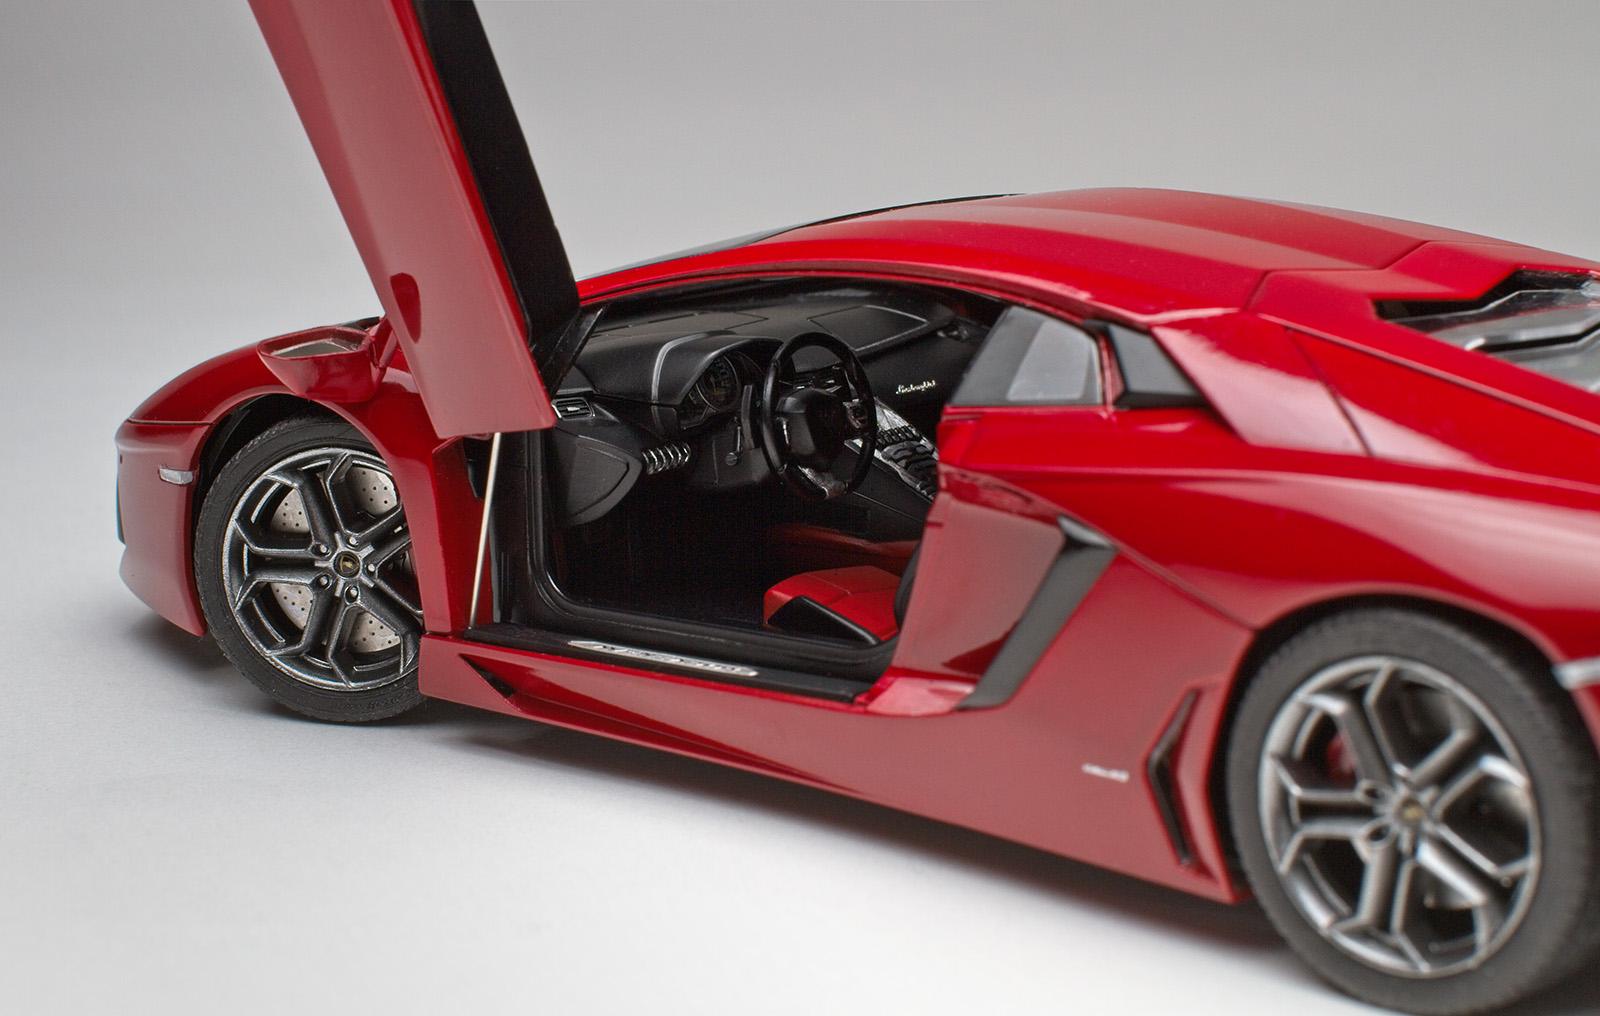
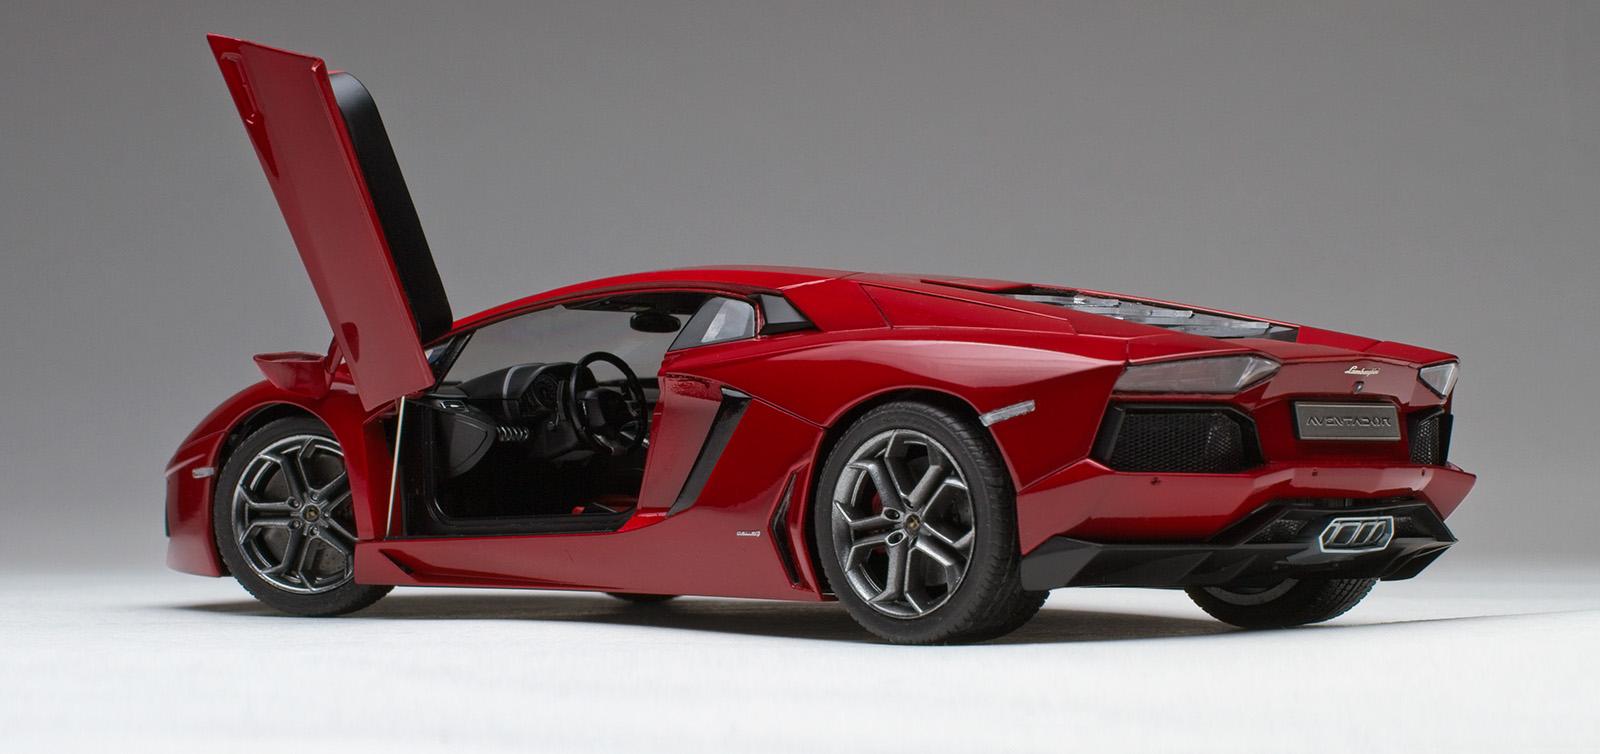
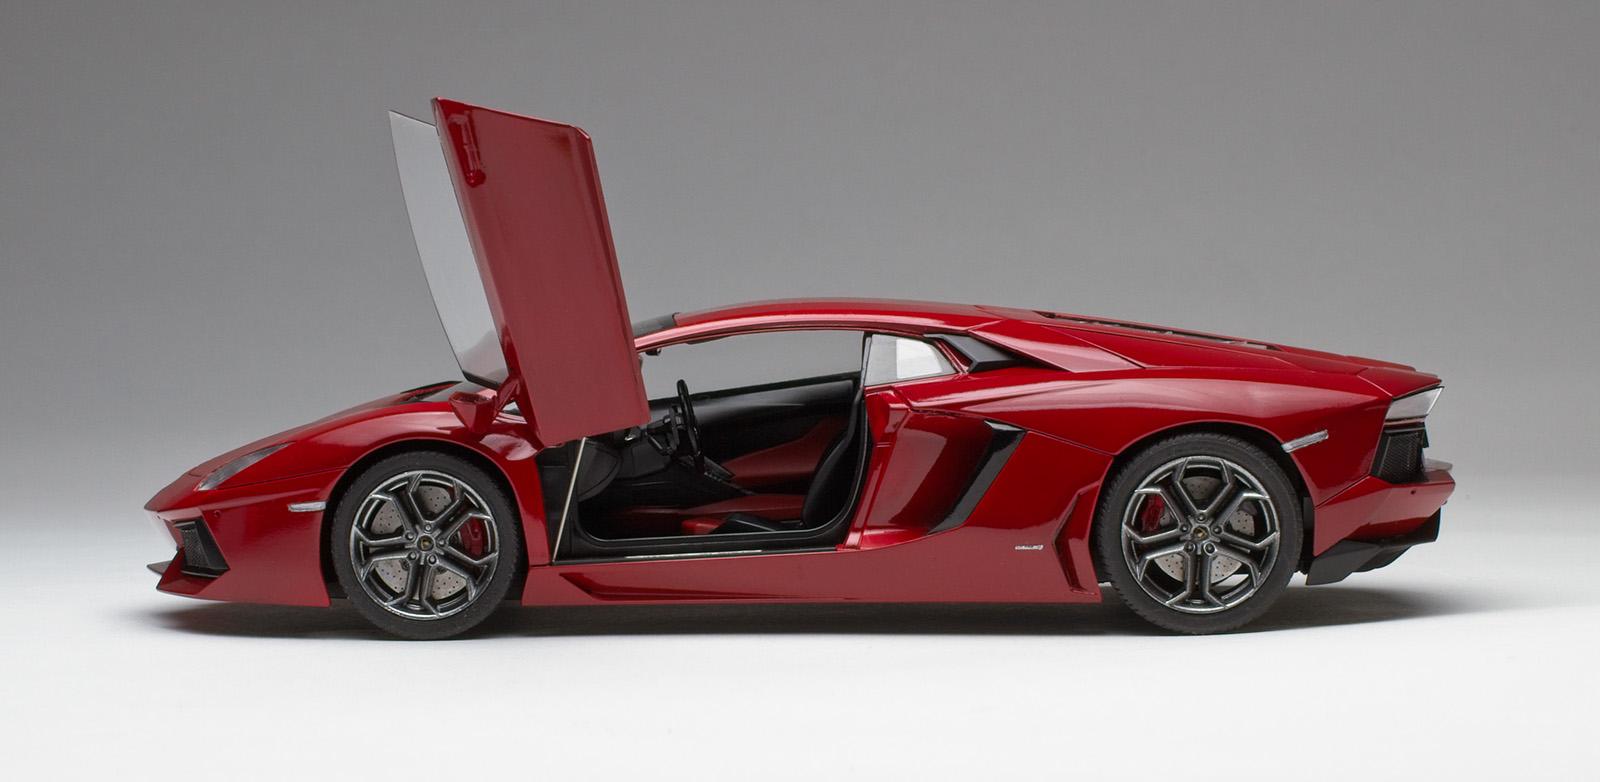
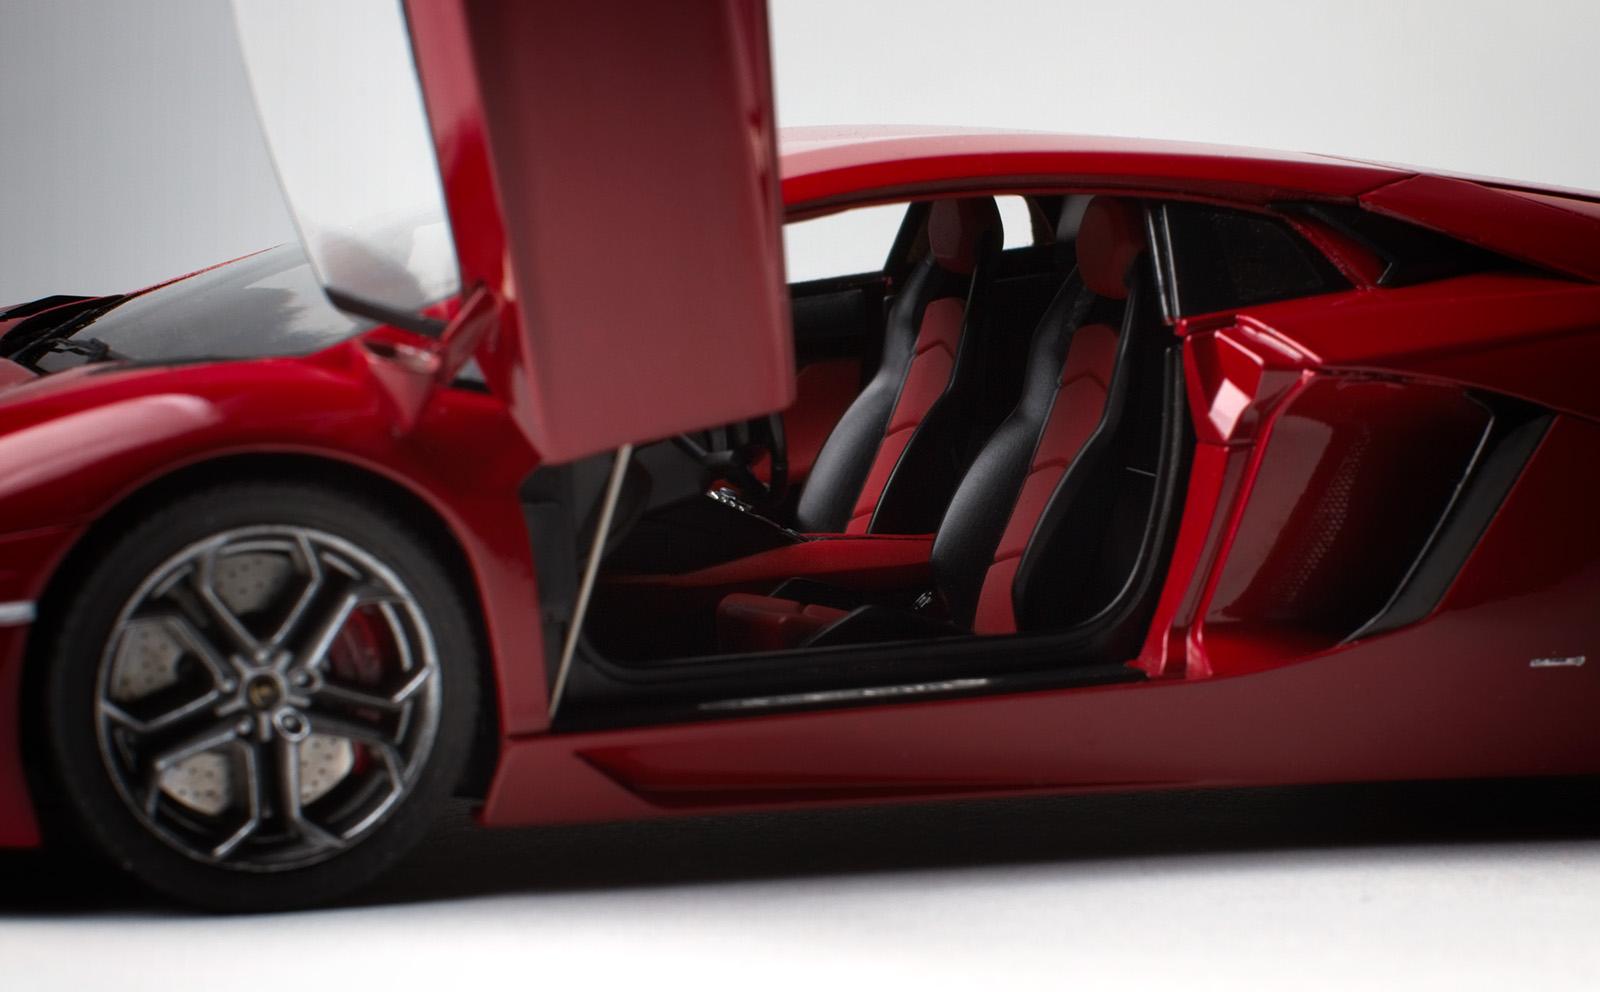
Good Evening, Aoshima's Aventador was meant to be my magnus opus build as my intention was to go all in. Well, needless to say some lessons were learned and familiar mistakes made along the way, so I'd say I'm 75% pleased with the final outcome. The body was primed with Mr. Finishing Surfacer 1500 Black, painted with Tamiya LP-21 Italian Red, then X-19 Smoke and cleared with X-22. The interior is X-18 Semi Gloss Black with XF-7 Flat Red + X-35 Semi Gloss Clear accents. Black embossing powder was used for the carpet. Wheels were chrome-stripped with LA's Totally Awesome, primed with Tamiya Fine Surfacer Grey, base coated with Tamiya X-1 Gloss Black and finished with X-10 Gun Metal. What I learned from this build: 1. Why so much paint? On a test spoon the red came out nice and dark, on the kit it was difficult to cover the black evenly so I kept applying more red. The car ended up looking more like a Ferrari so I thought I would try deepening the colour with X-19 Smoke. Again, not so easy to apply evenly, however, I decided to settle for the subtle tone differences on the car. 2. The doors ended up matching the body reasonably well, but not the engine cover. I dropped the part in LA's Totally Awesome and the acrylic paint slipped off no problem. The underlying LP red was slightly affected so I sanded it down and reapplied the red. Should have known better that it needed to be primed again first. Sanded it down again, reapplied the black primer and red once more. There were some strange, tiny bumps almost like dust or bubbles that were trapped under the paint. Stripped it down again, re-primed and painted it - this time putting the part in a dehydrator to make sure it was super dry. The result... the same bumps in the same locations. In fact, some of these bumps are all over the car body. I just accepted it and moved on. The photos with overhead lighting greatly hide the finish. 3. Getting paint into areas like the side vents was challenging. The same thing often happens when painting interior tubs. It's almost like there's a vortex and the paint either doesn't lay down with enough volume or dries before it lands. Any advice here would be appreciated. 4. First time using Photo Etch parts (ping and a prayer). These are tough little suckers to work with! I lightly sanded the back of the parts and used CA glue to hold them in place - with mixed results. The parts were meant to be glued to glass and I found that the glue was visible in some places after it dried. Any advice is welcomed here, too. 5. A couple parts in the kit were warped. Last time I tried to straighten a part (Lamborghini Miura Louvers) I melted it using a candle ?. This time I used hot tap water and it worked well. 6. The engine cover is meant to be opened, and did perfectly during test fitting, however, sliding the two horseshoe hooks into place at the end was creaky and tight process - popping the glass pieces off their supports (probably incorrect terminology here). Any advice on applying glass parts over painted black areas without the glue showing through is appreciated here. 7. The door hinges required a little patience as did the carbon fibre decal that goes over the engine cover, which was flooded with setting solution. 8. Bonehead moves: I managed to slop a little glue on the widows (my goto move) and body; left a number of fingerprints all over - gotta let that X-22 dry extra, extra long; while polishing and waxing the body I caught the cloth on the PE wiper and bent it. Overall, the parts are nicely detailed, fit very well (minus the two bent parts) and probably the most advanced kit I've built to date. Thanks for letting me waste your time.
-
Very Cool ?
-
@Rich Chernosky Wow, you went the extra mile on that one. You did a nice job on the interior paint… especially that silver line under the dash. Those colour shift paints are kinda cool. ?
-
You went the extra mile on this one. ??
-
@Rich Chernosky Thanks Rich. I received a Tamiya Mercedes-Benz 300SL from Santa this year. Looking forward to this one too. ?
-

BF Goodrich Tires for 1970 Corvette
70 Sting replied to 70 Sting's topic in Model Building Questions and Answers
@Painted Black That would be a good ‘plan B’. I could flip the tires around and use decals. What I’d really like are fatter tires… something to mimic 245s. Luka Cee recently posted a video on making tires wider. Might be something to try. -
BF Goodrich Tires for 1970 Corvette
70 Sting replied to 70 Sting's topic in Model Building Questions and Answers
@Plowboy Thanks, I'll check them out. ? -
Good evening, I hope this is the correct place to post this. I'm planning to build AMT's 1970 Corvette but would prefer to use BF Goodrich tires over the Goodyear's provided with the kit. Does anyone know of an alternative kit or aftermarket seller where I can purchase a set? Many Thanks!
-
@Nacho Z They have a better selection in their TS rattle can line, however I haven’t hit on a really good recipe for decanting/thinning/spraying it. Have you? Should probably just use it straight from the can. ? @JollySipper Photography hides some of the little flaws. I should probably add to What I Learned from this Build: If a seam that has been glued/melted with Tamiya Extra Thin Cement let’s go, re-scribing the panel line doesn’t go well as the scribing tool tends to skip along the seam. This happened after the brake fluid bath and the results can be seen along the hatch and right, rear corner panel above the wheel.
-
@Phirewriter The red is a little bright but looks nice through the windows. I saw the actual car sitting in someone’s driveway while walking the dog and thought it looked pretty cool. Did a Web search and found that Tamiya made a kit. ? Blue would look nice as well. Enjoy the build.