TruckerAL
-
Posts
408 -
Joined
-
Last visited
Content Type
Profiles
Forums
Events
Gallery
Everything posted by TruckerAL
-
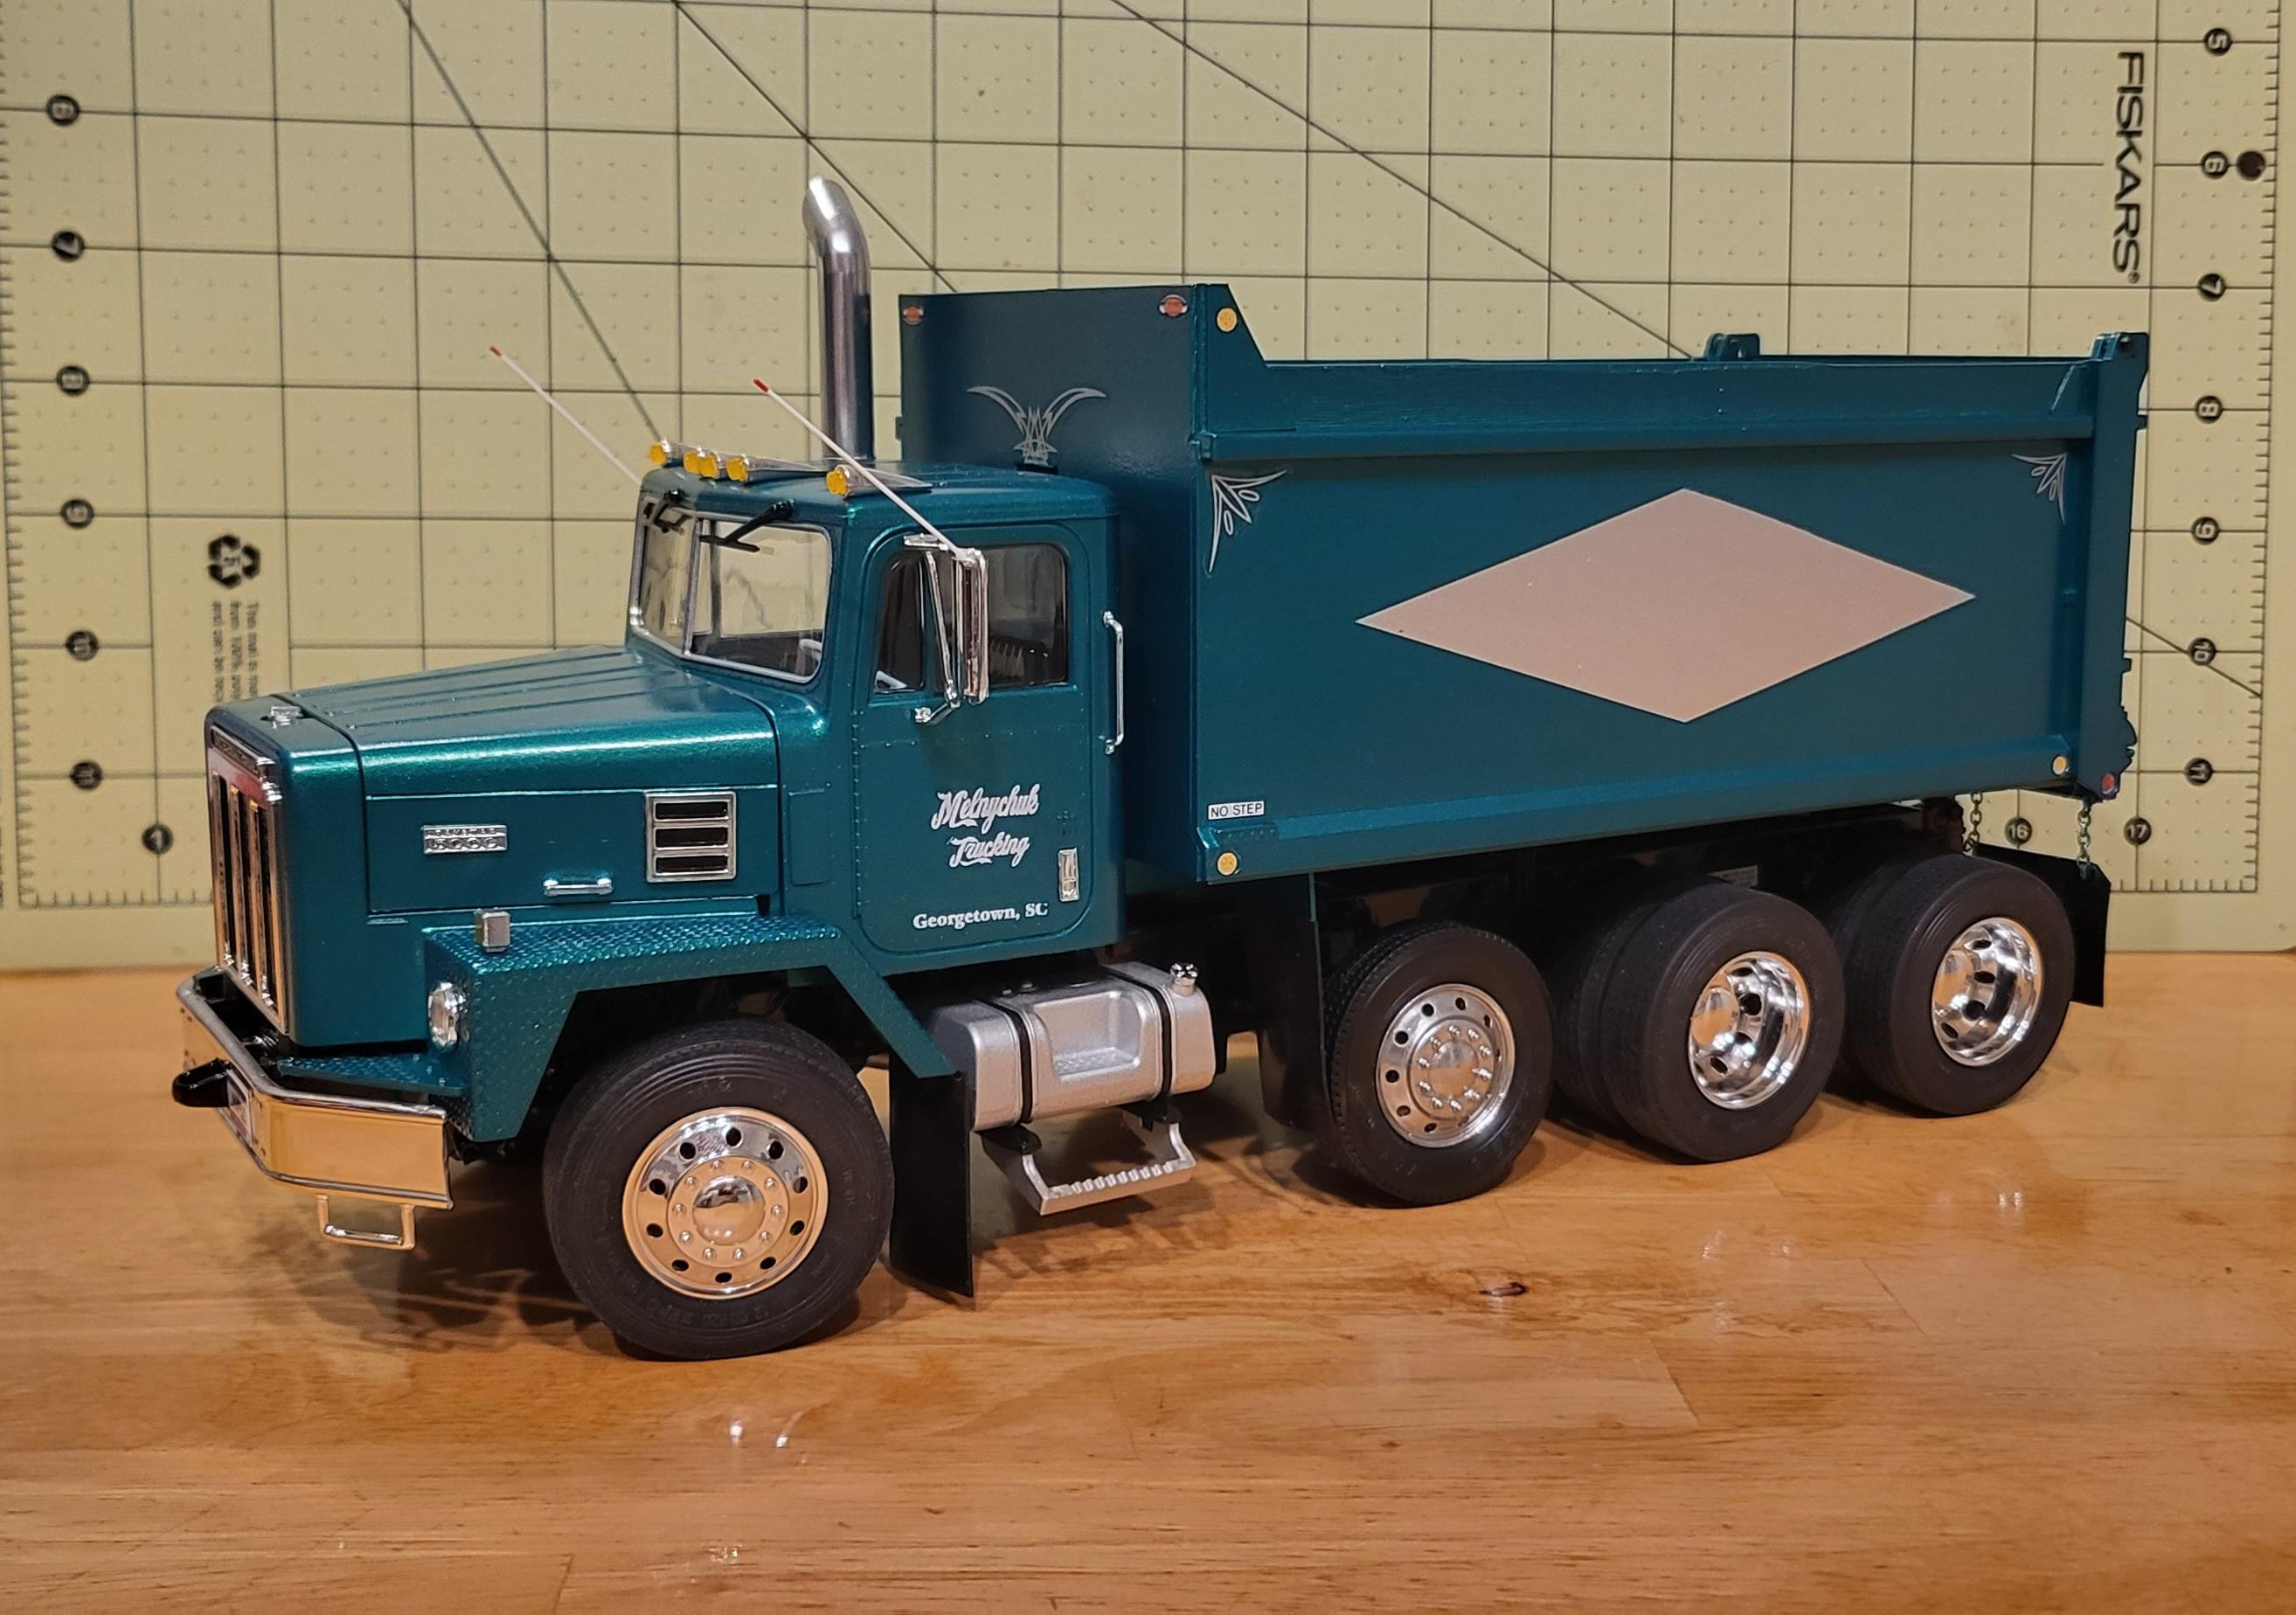
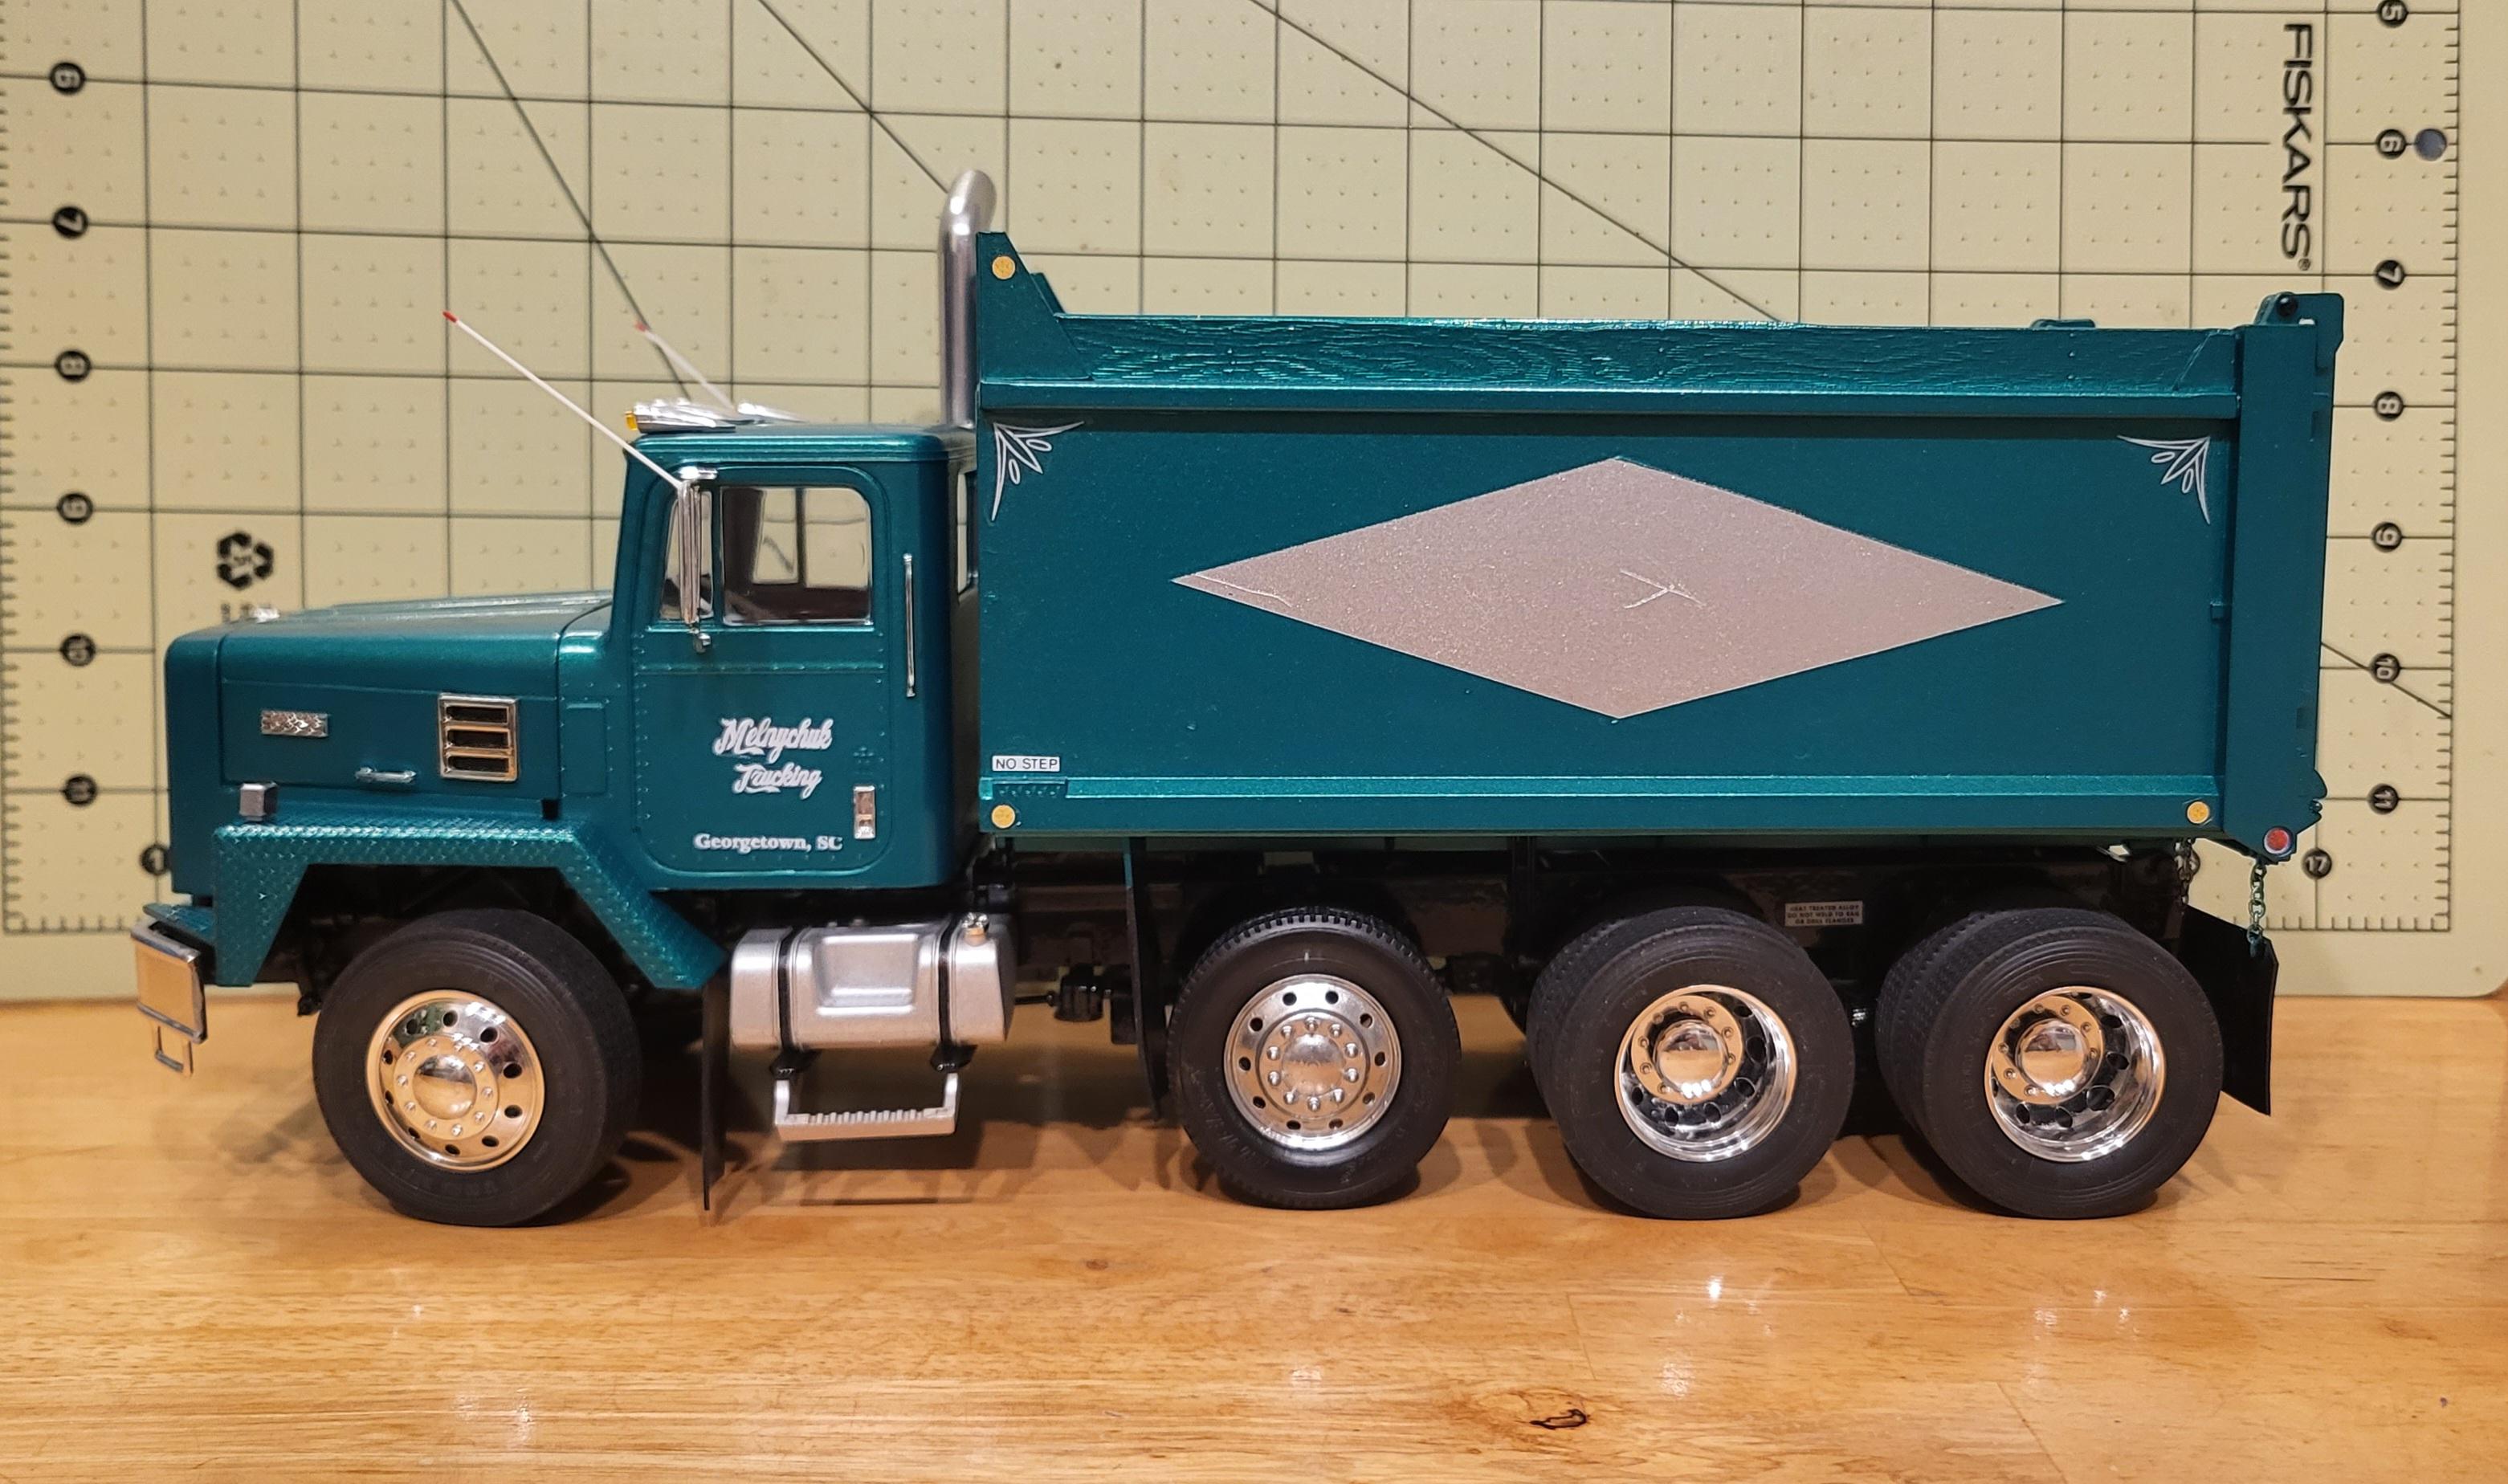
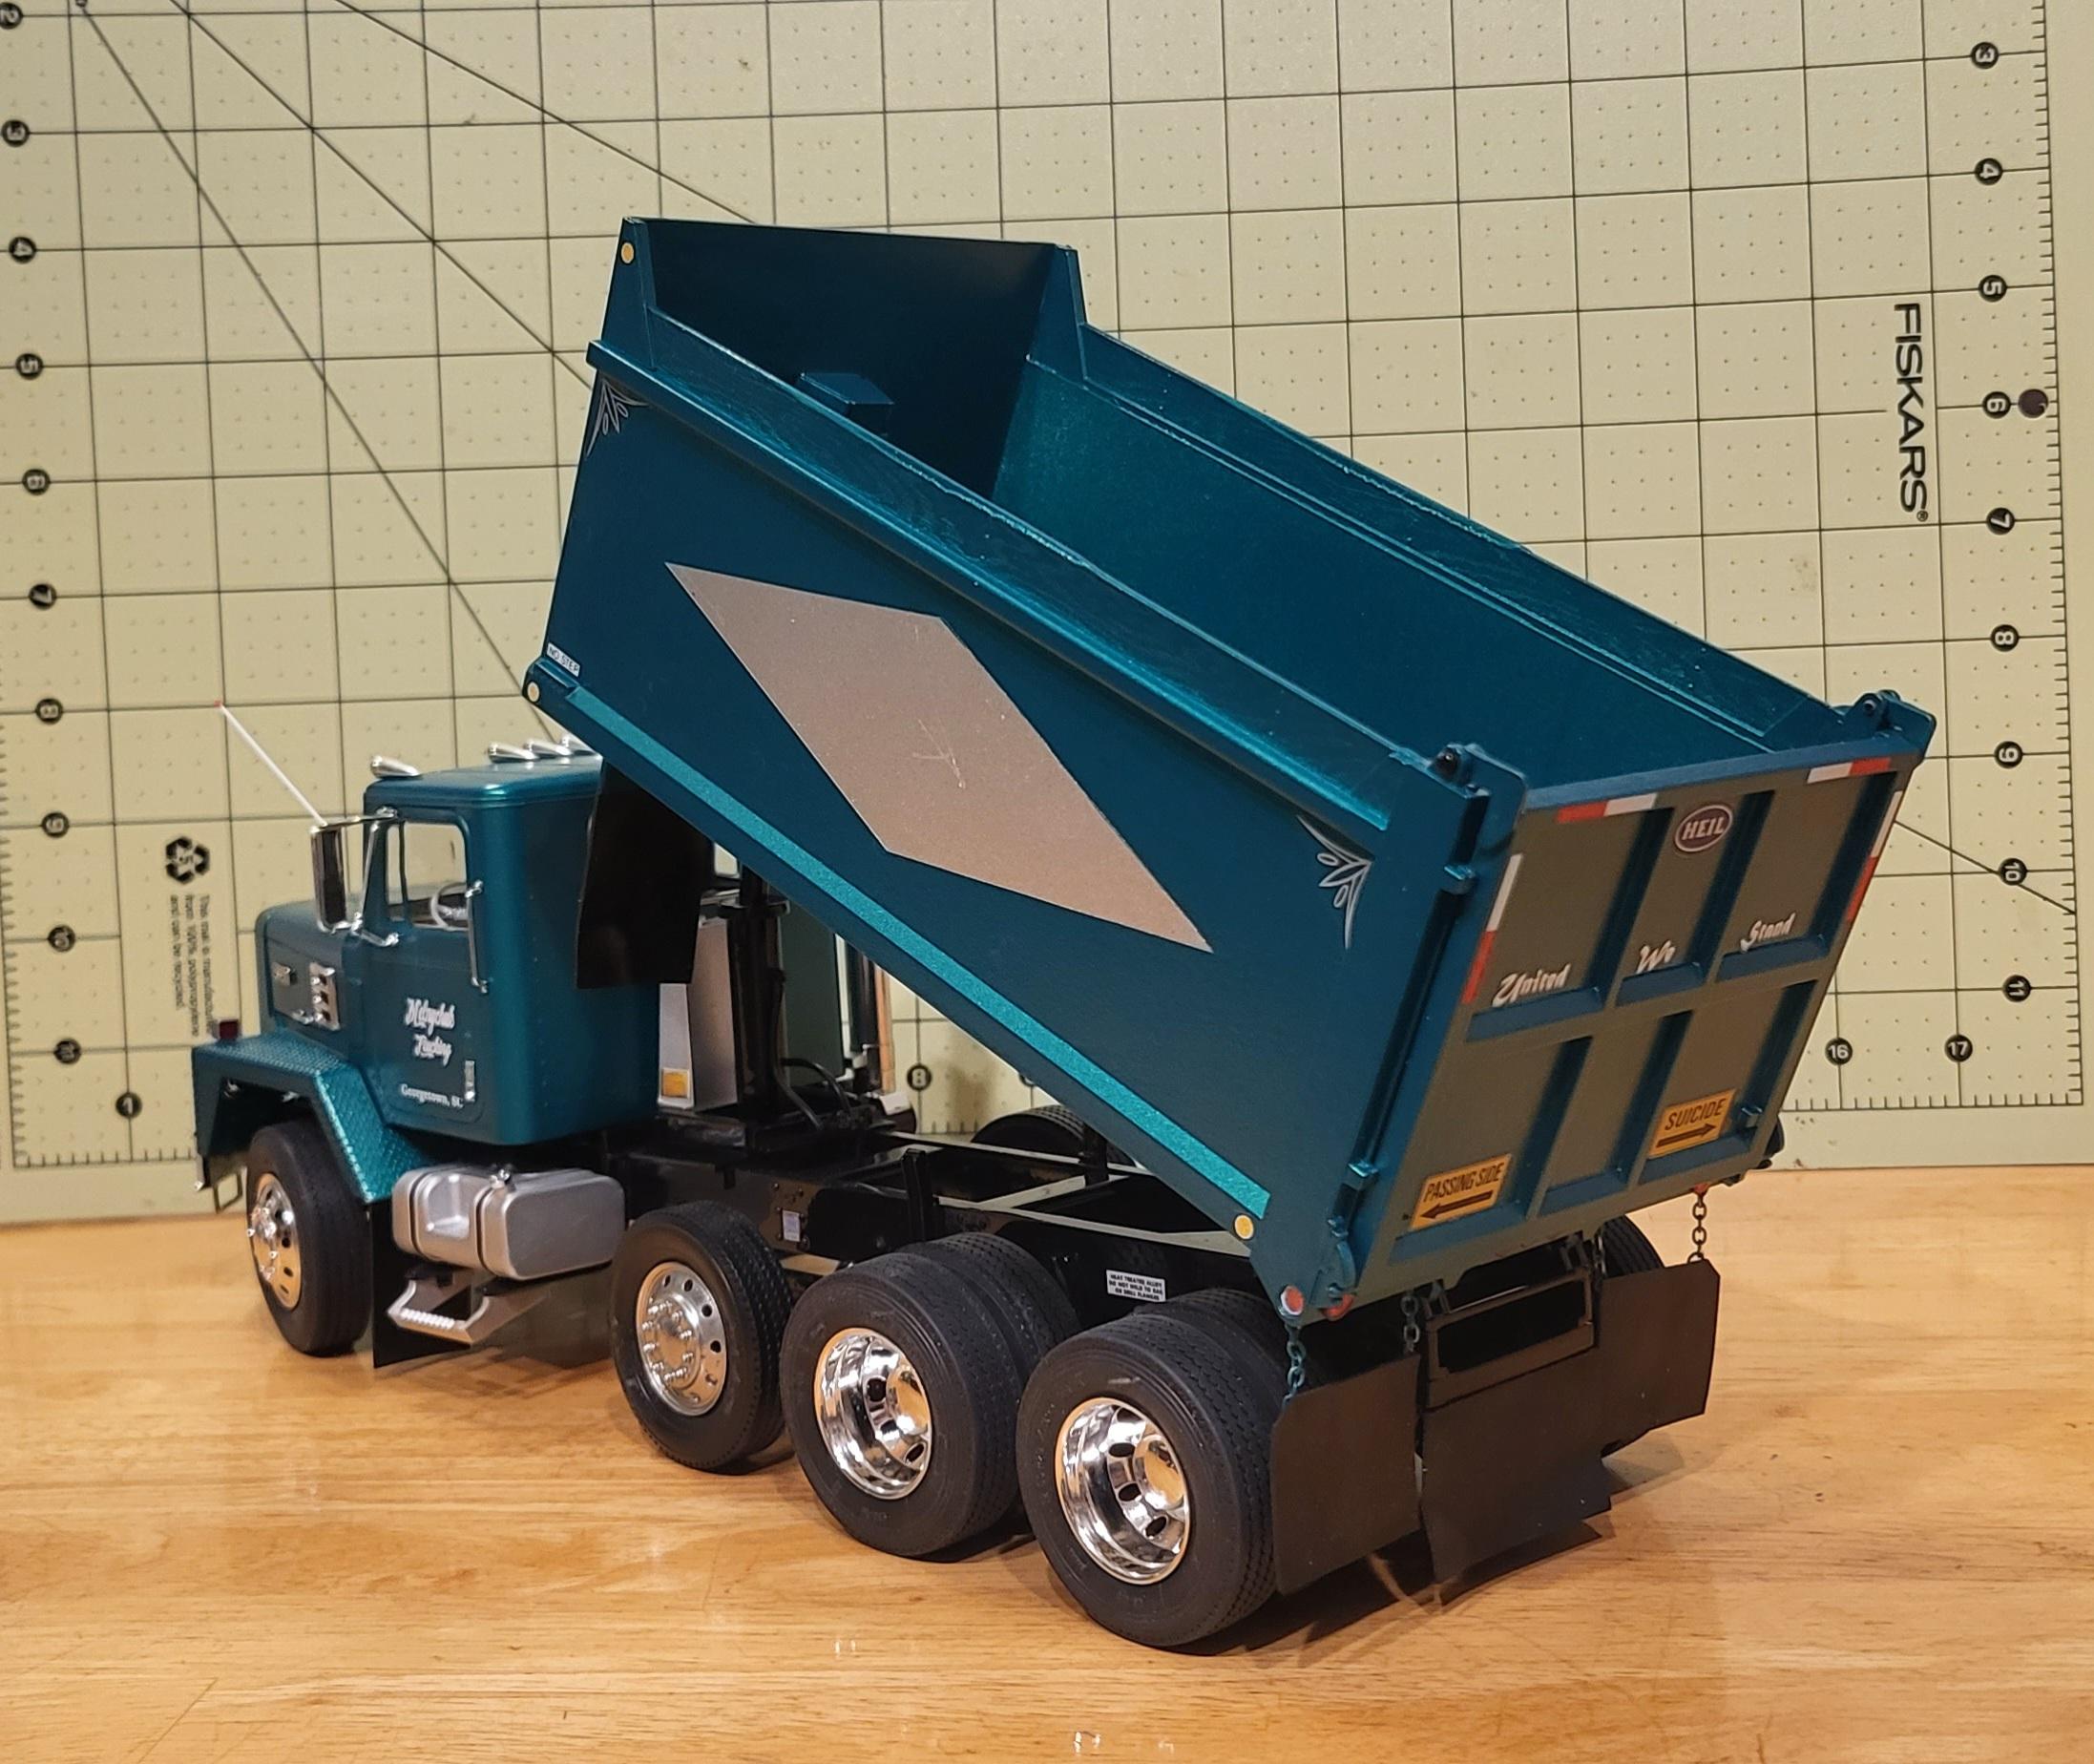
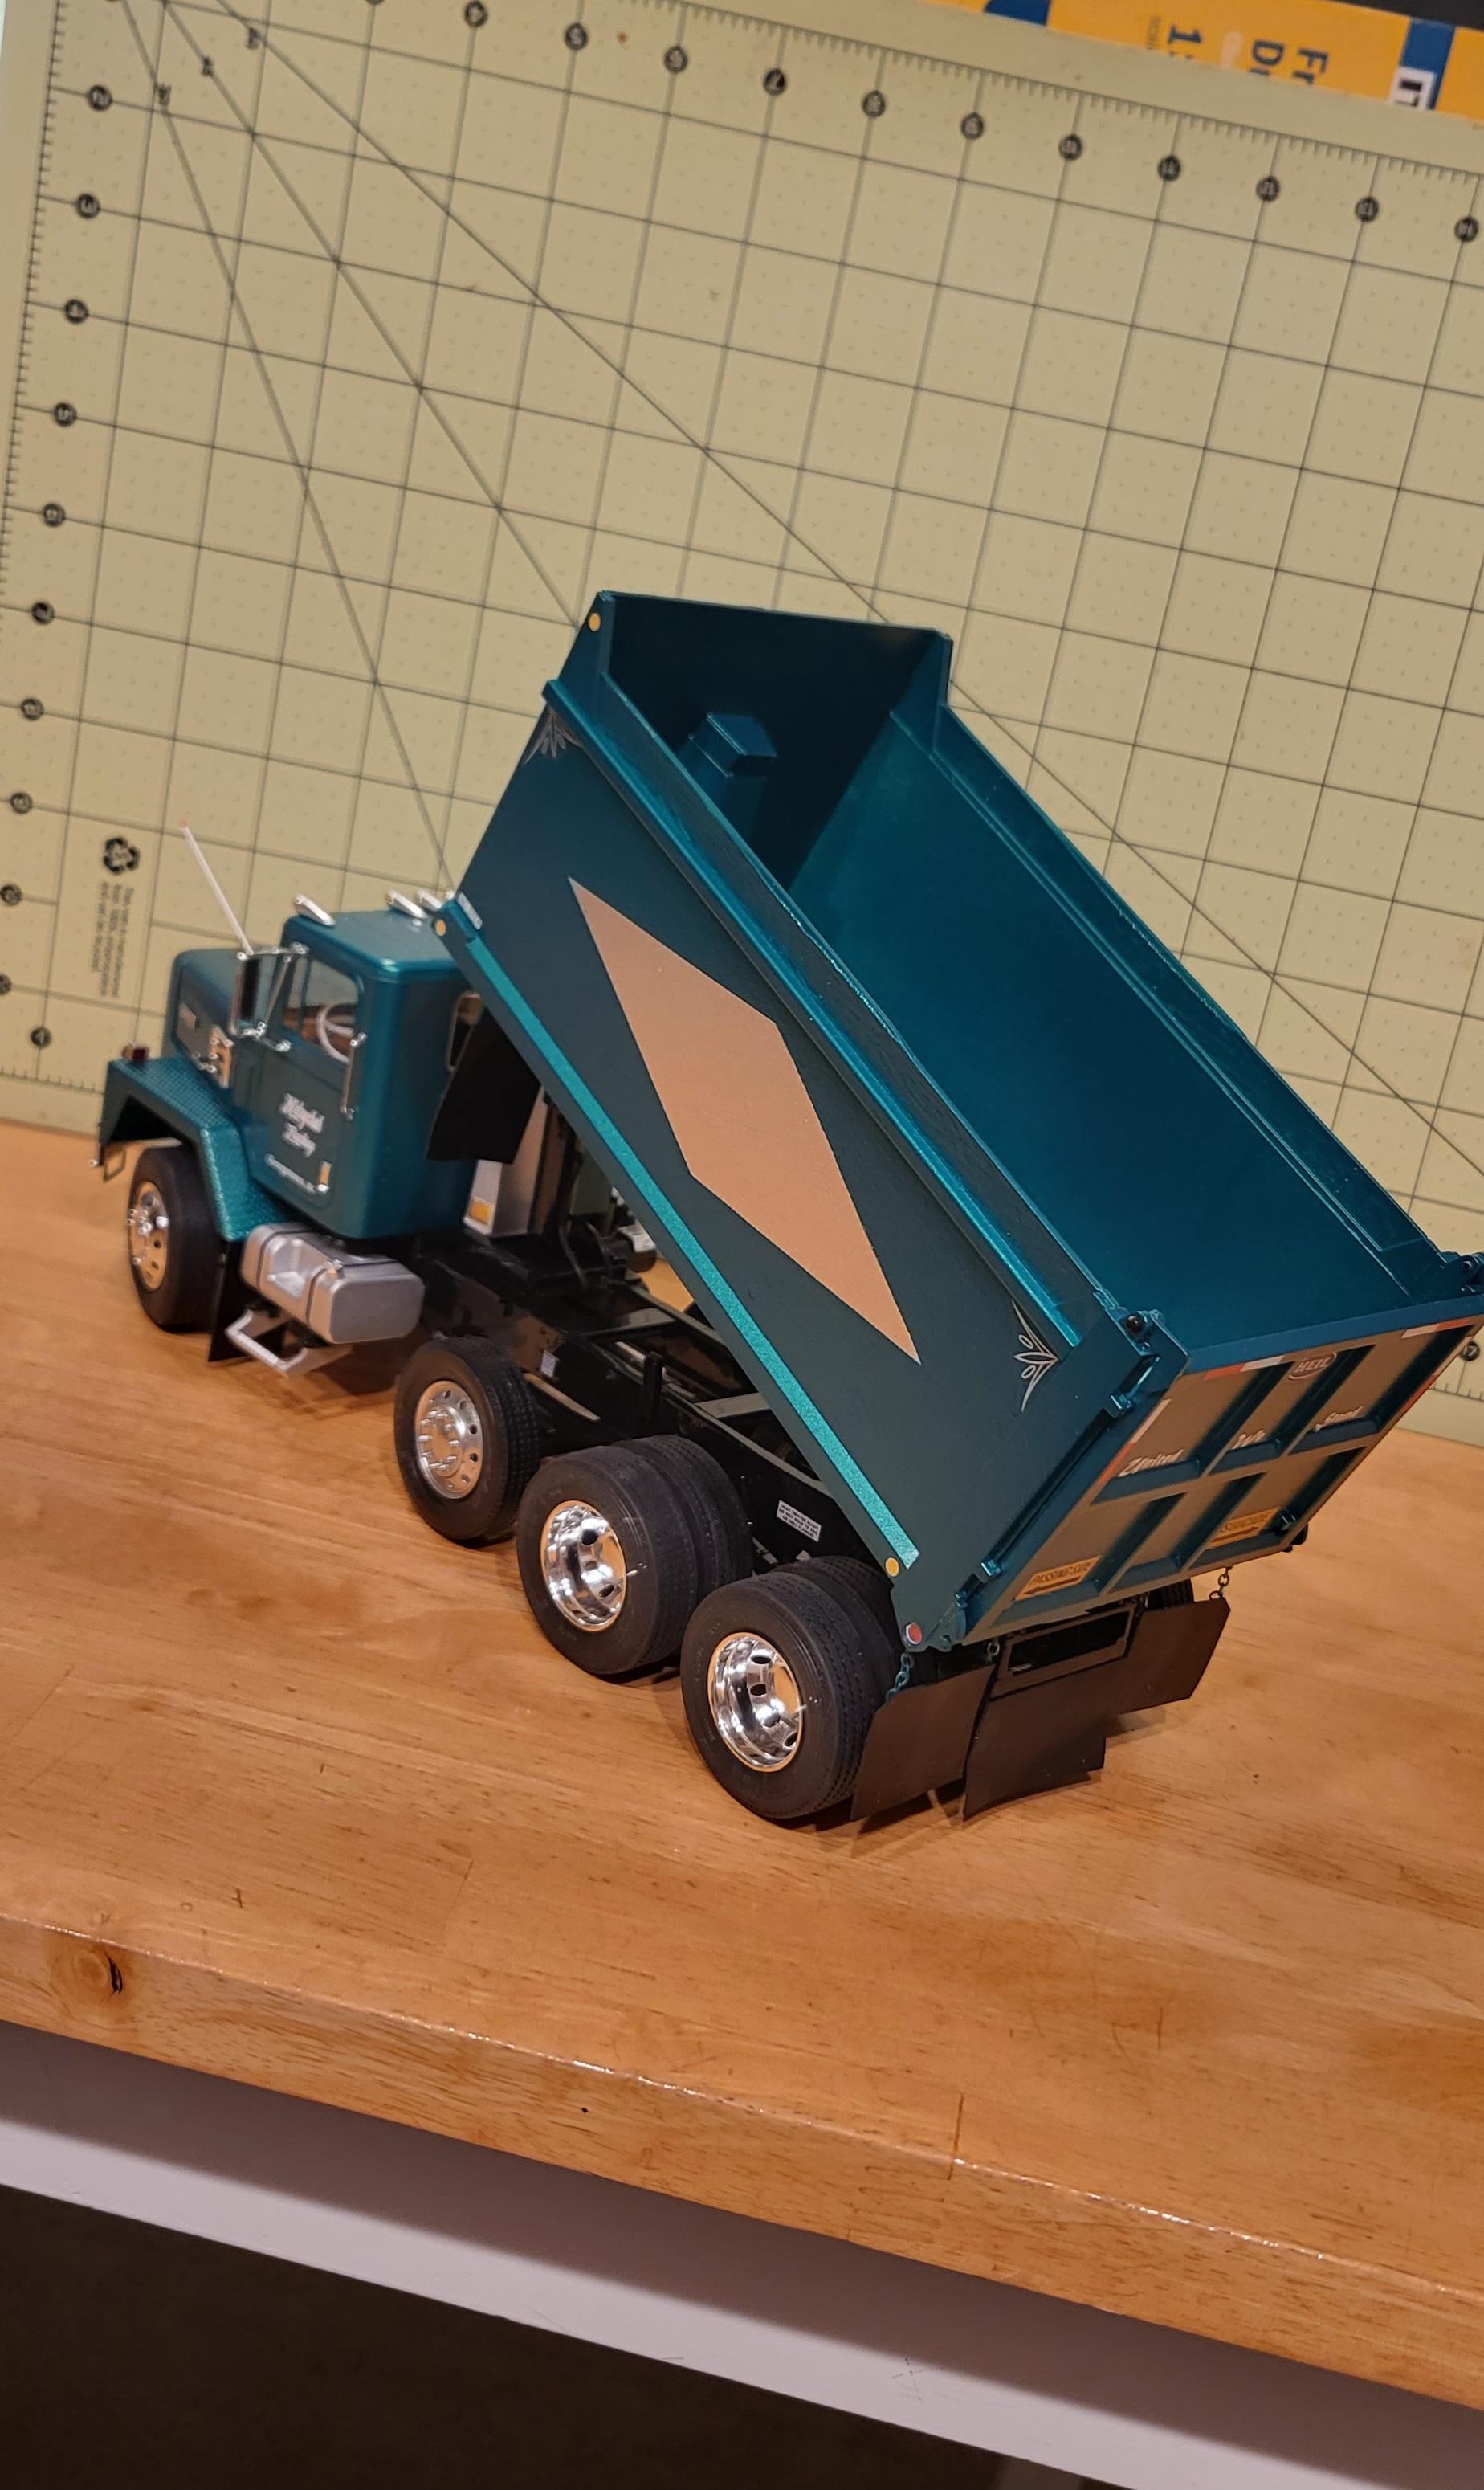
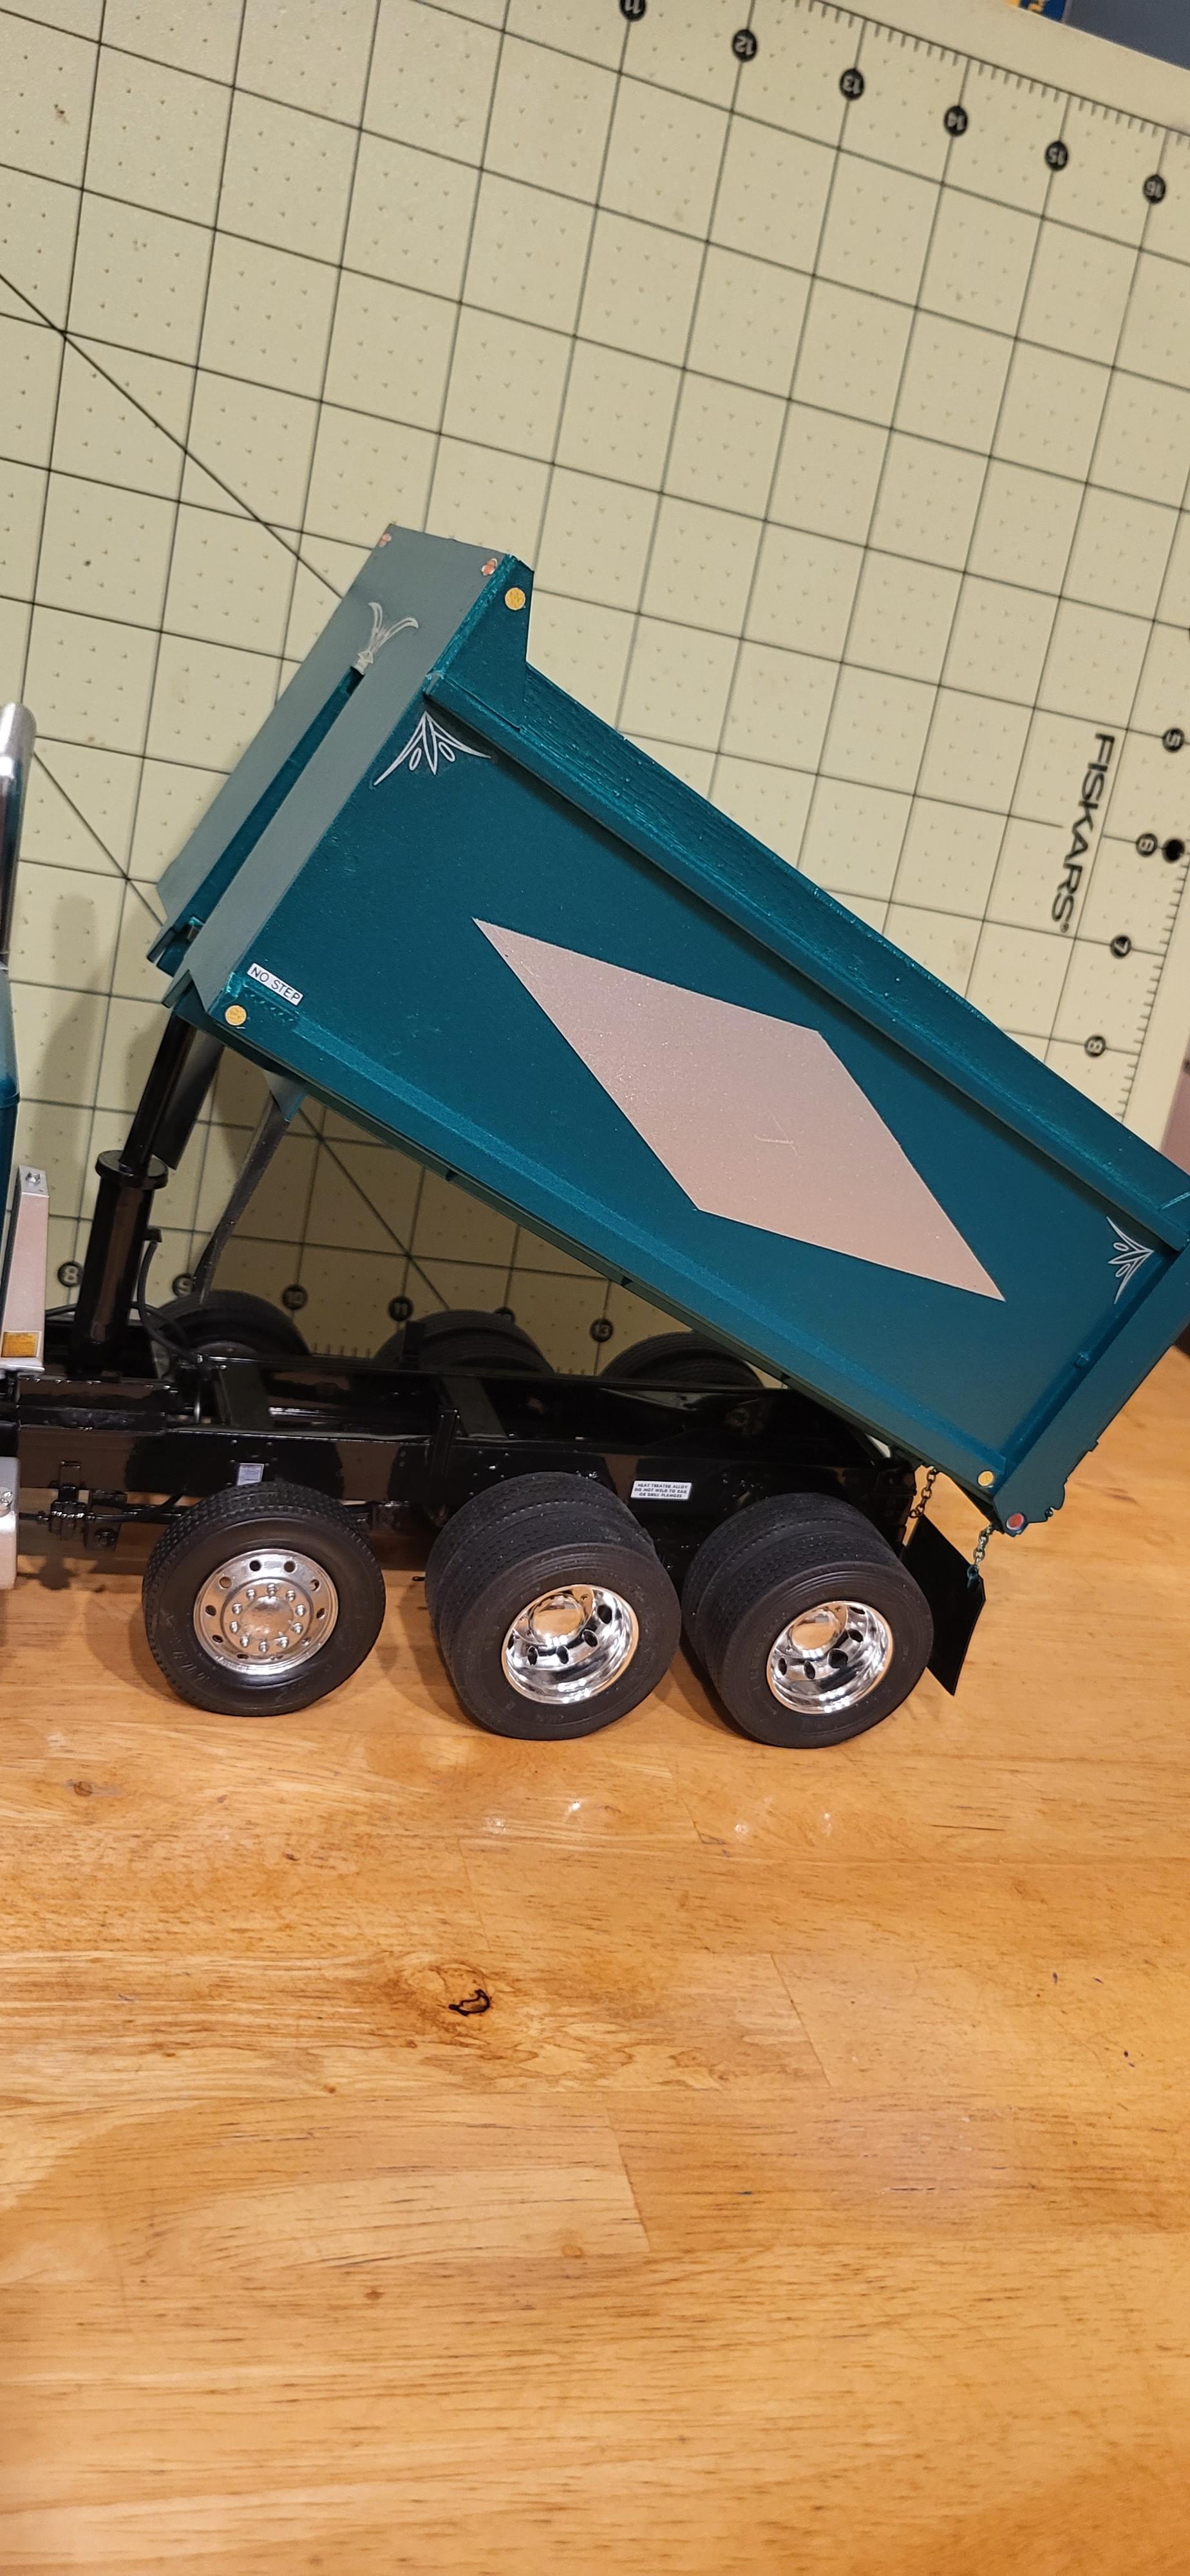
ERTL IH Paystar 5000 dumper
TruckerAL replied to TruckerAL's topic in Model Trucks: Big Rigs and Heavy Equipment
I'm truly flattered everyone, thank you for such the kind words! This is actually my first paystar dump truck I've done, and I decided I wanted it to be different than the others I've seen. I'm glad everyone likes it! ? -
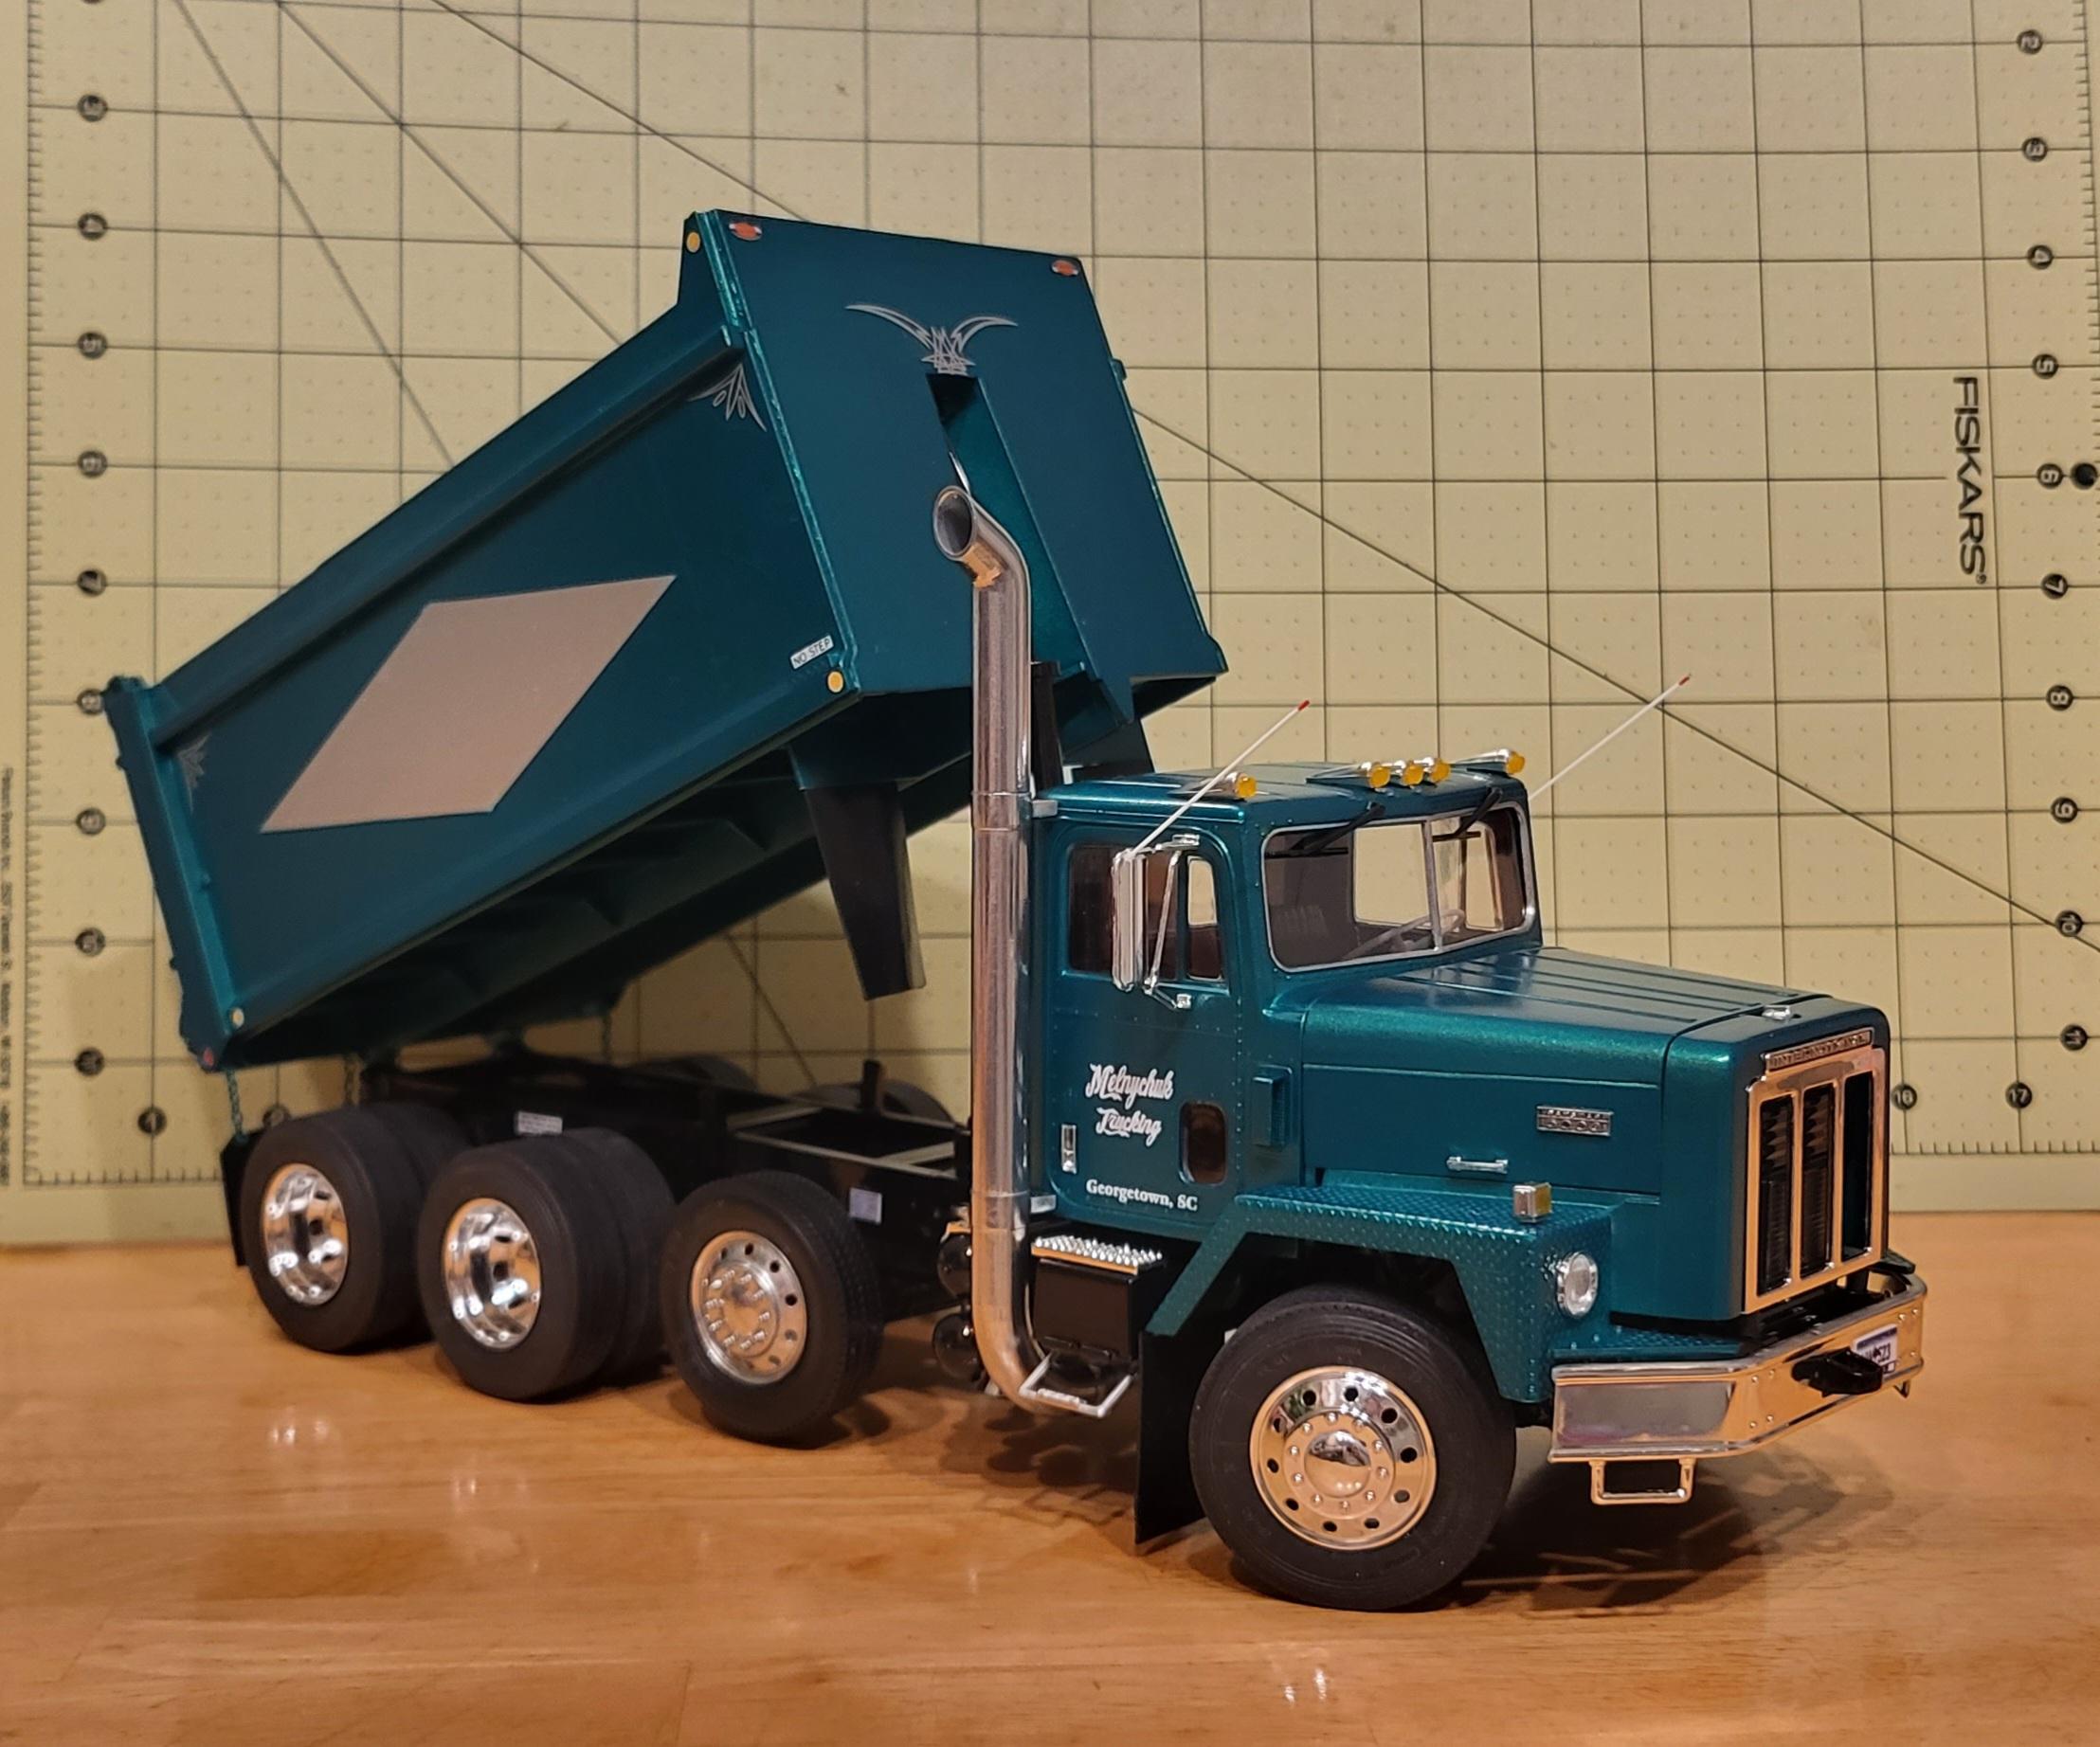
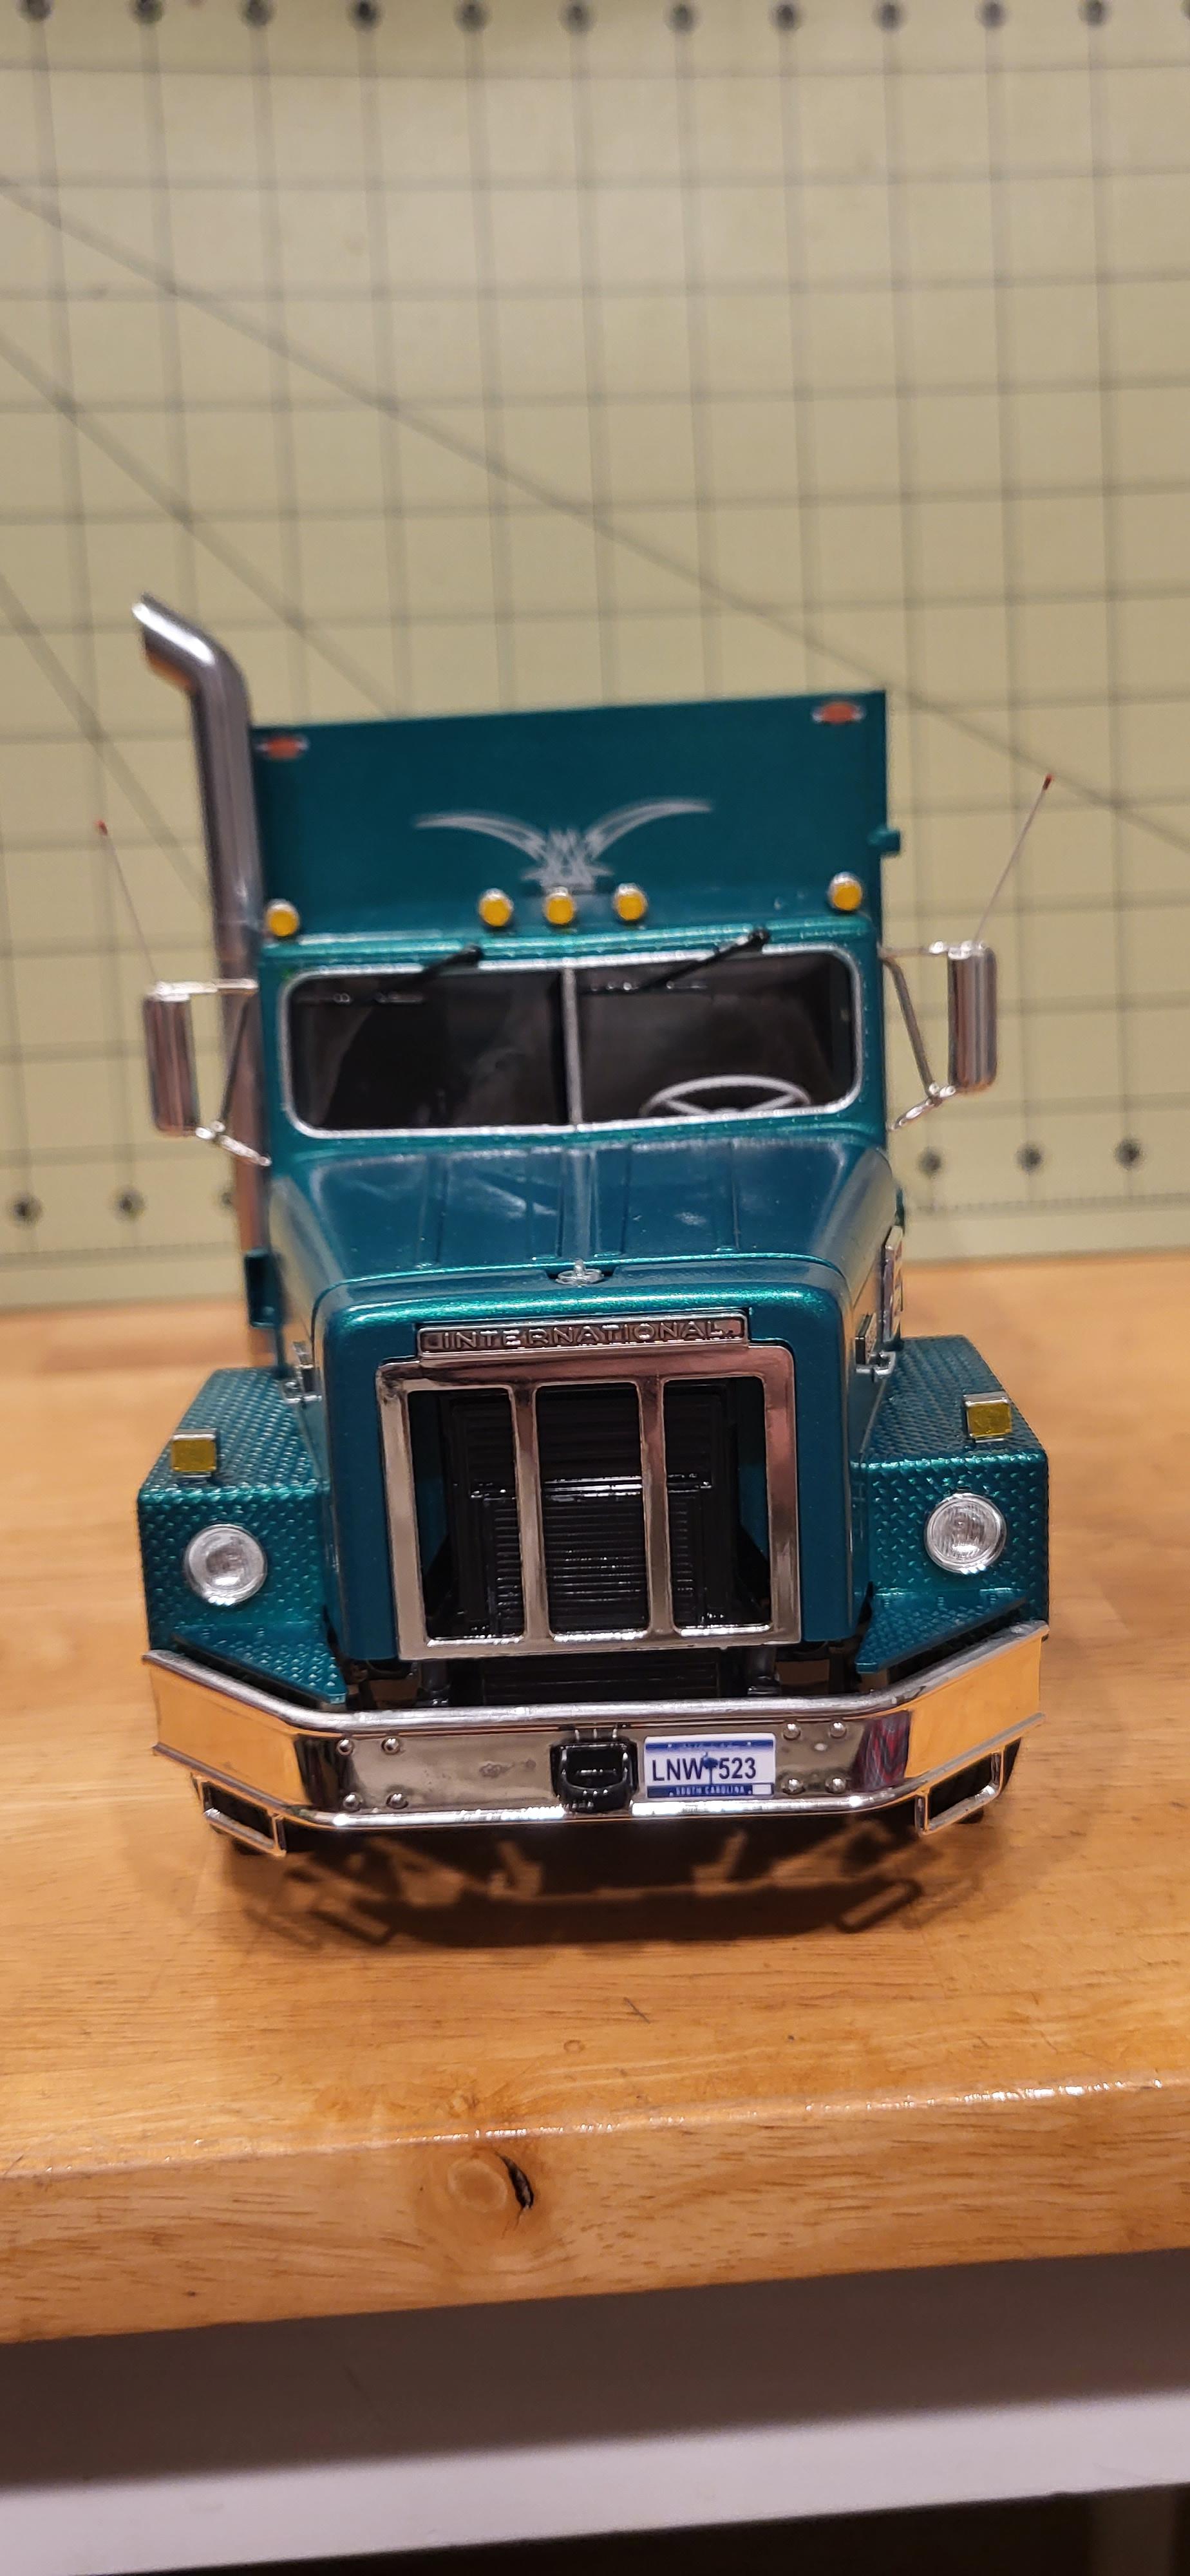
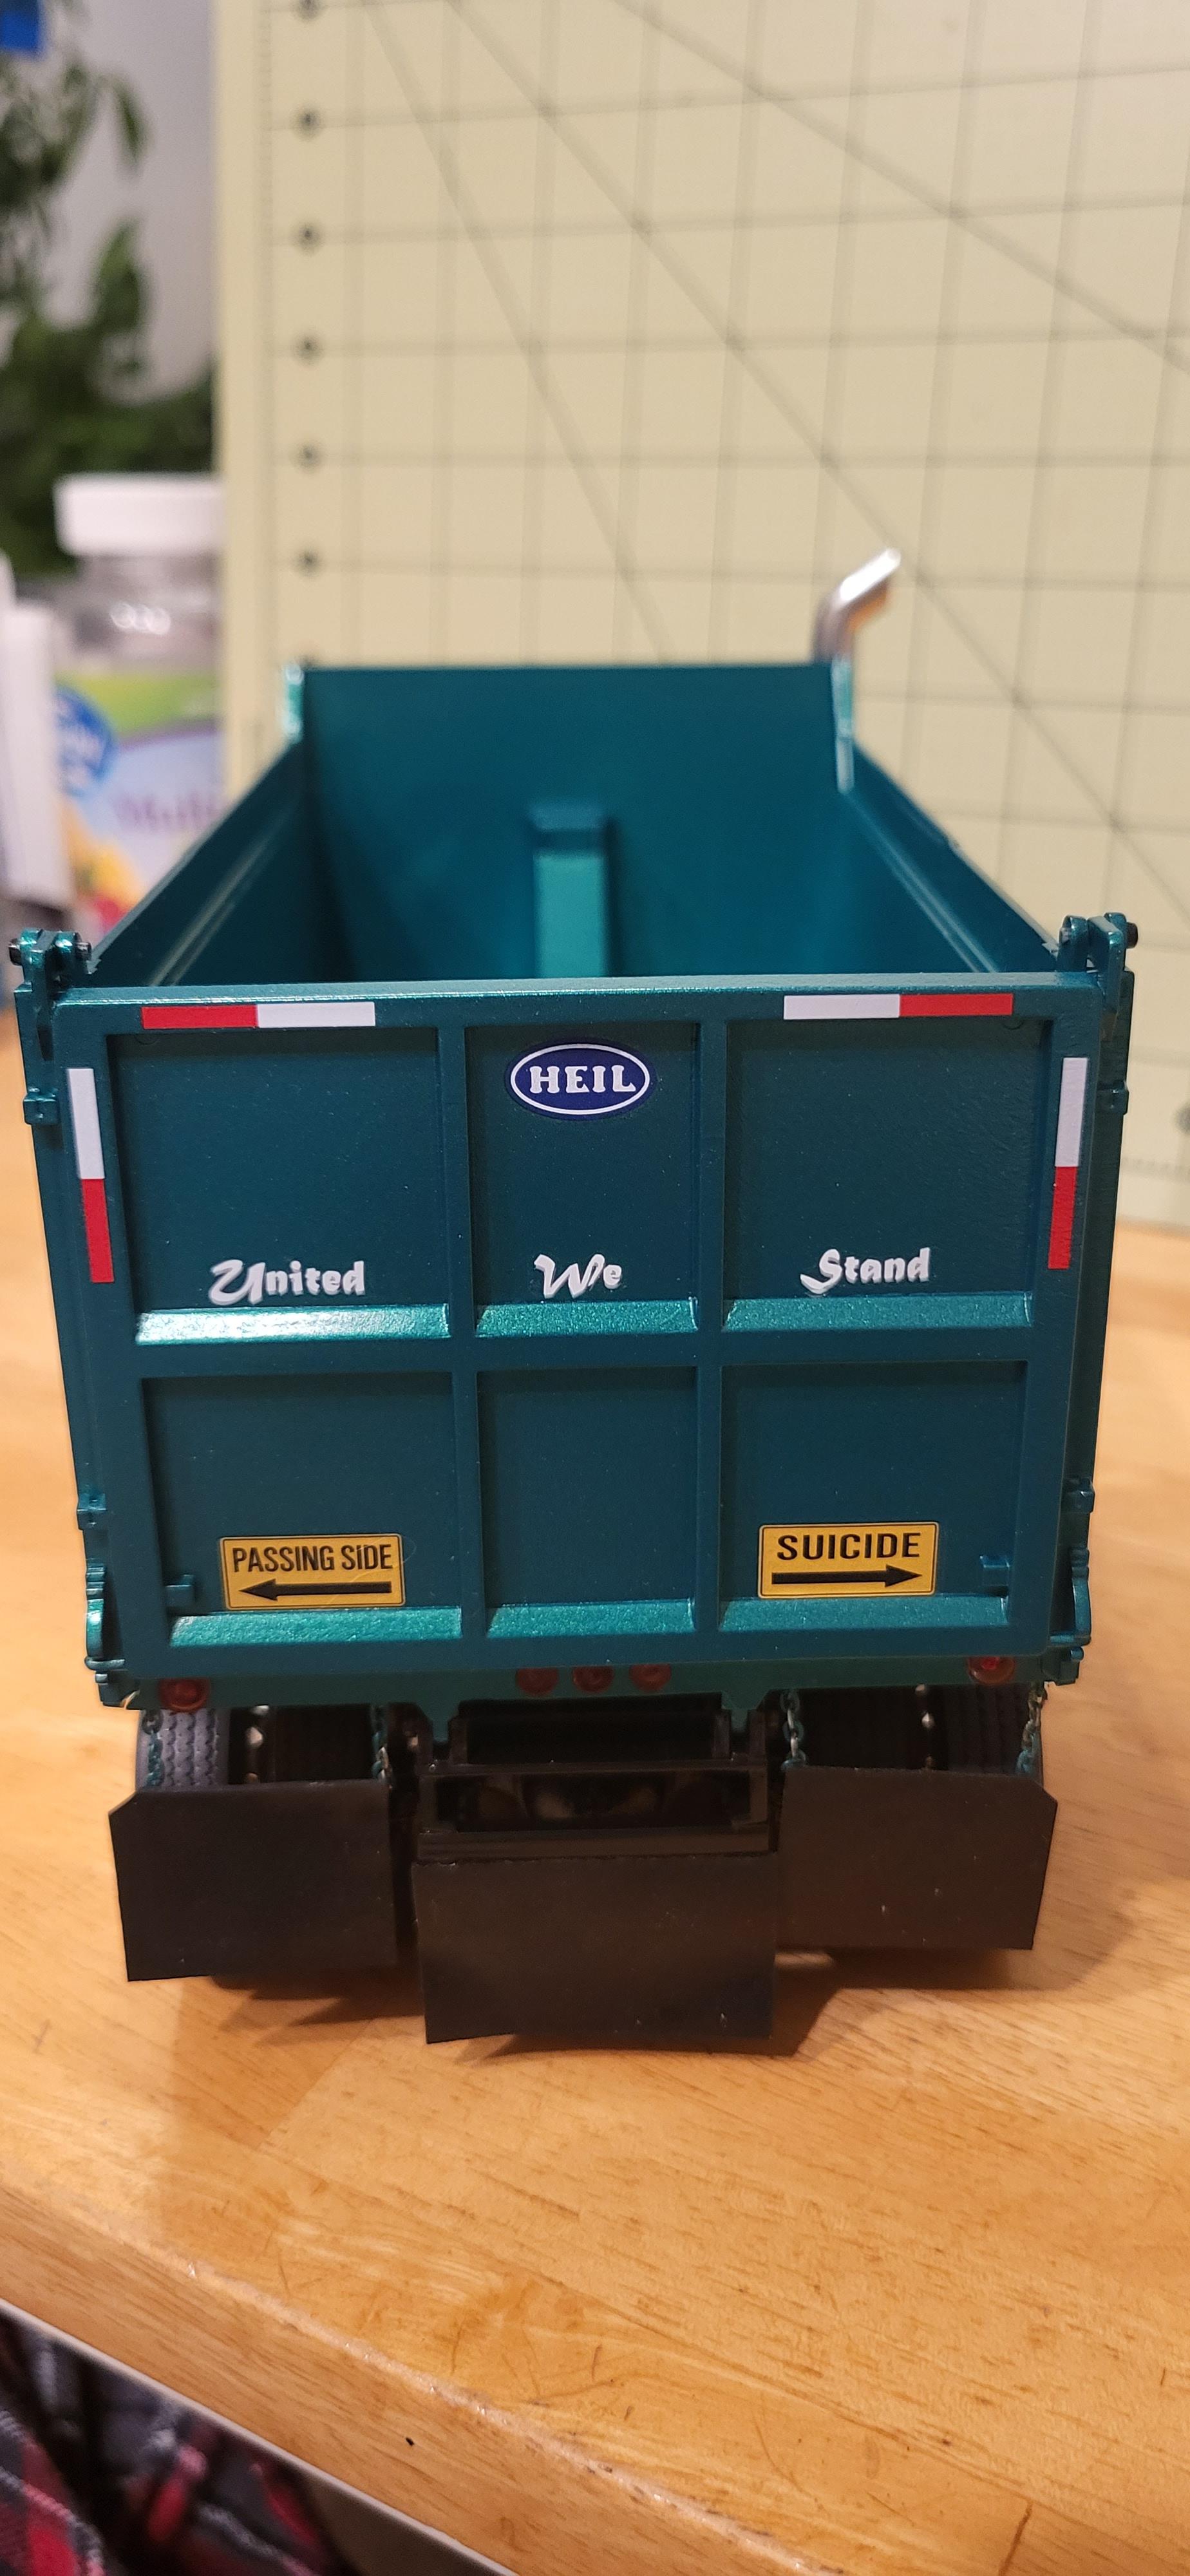
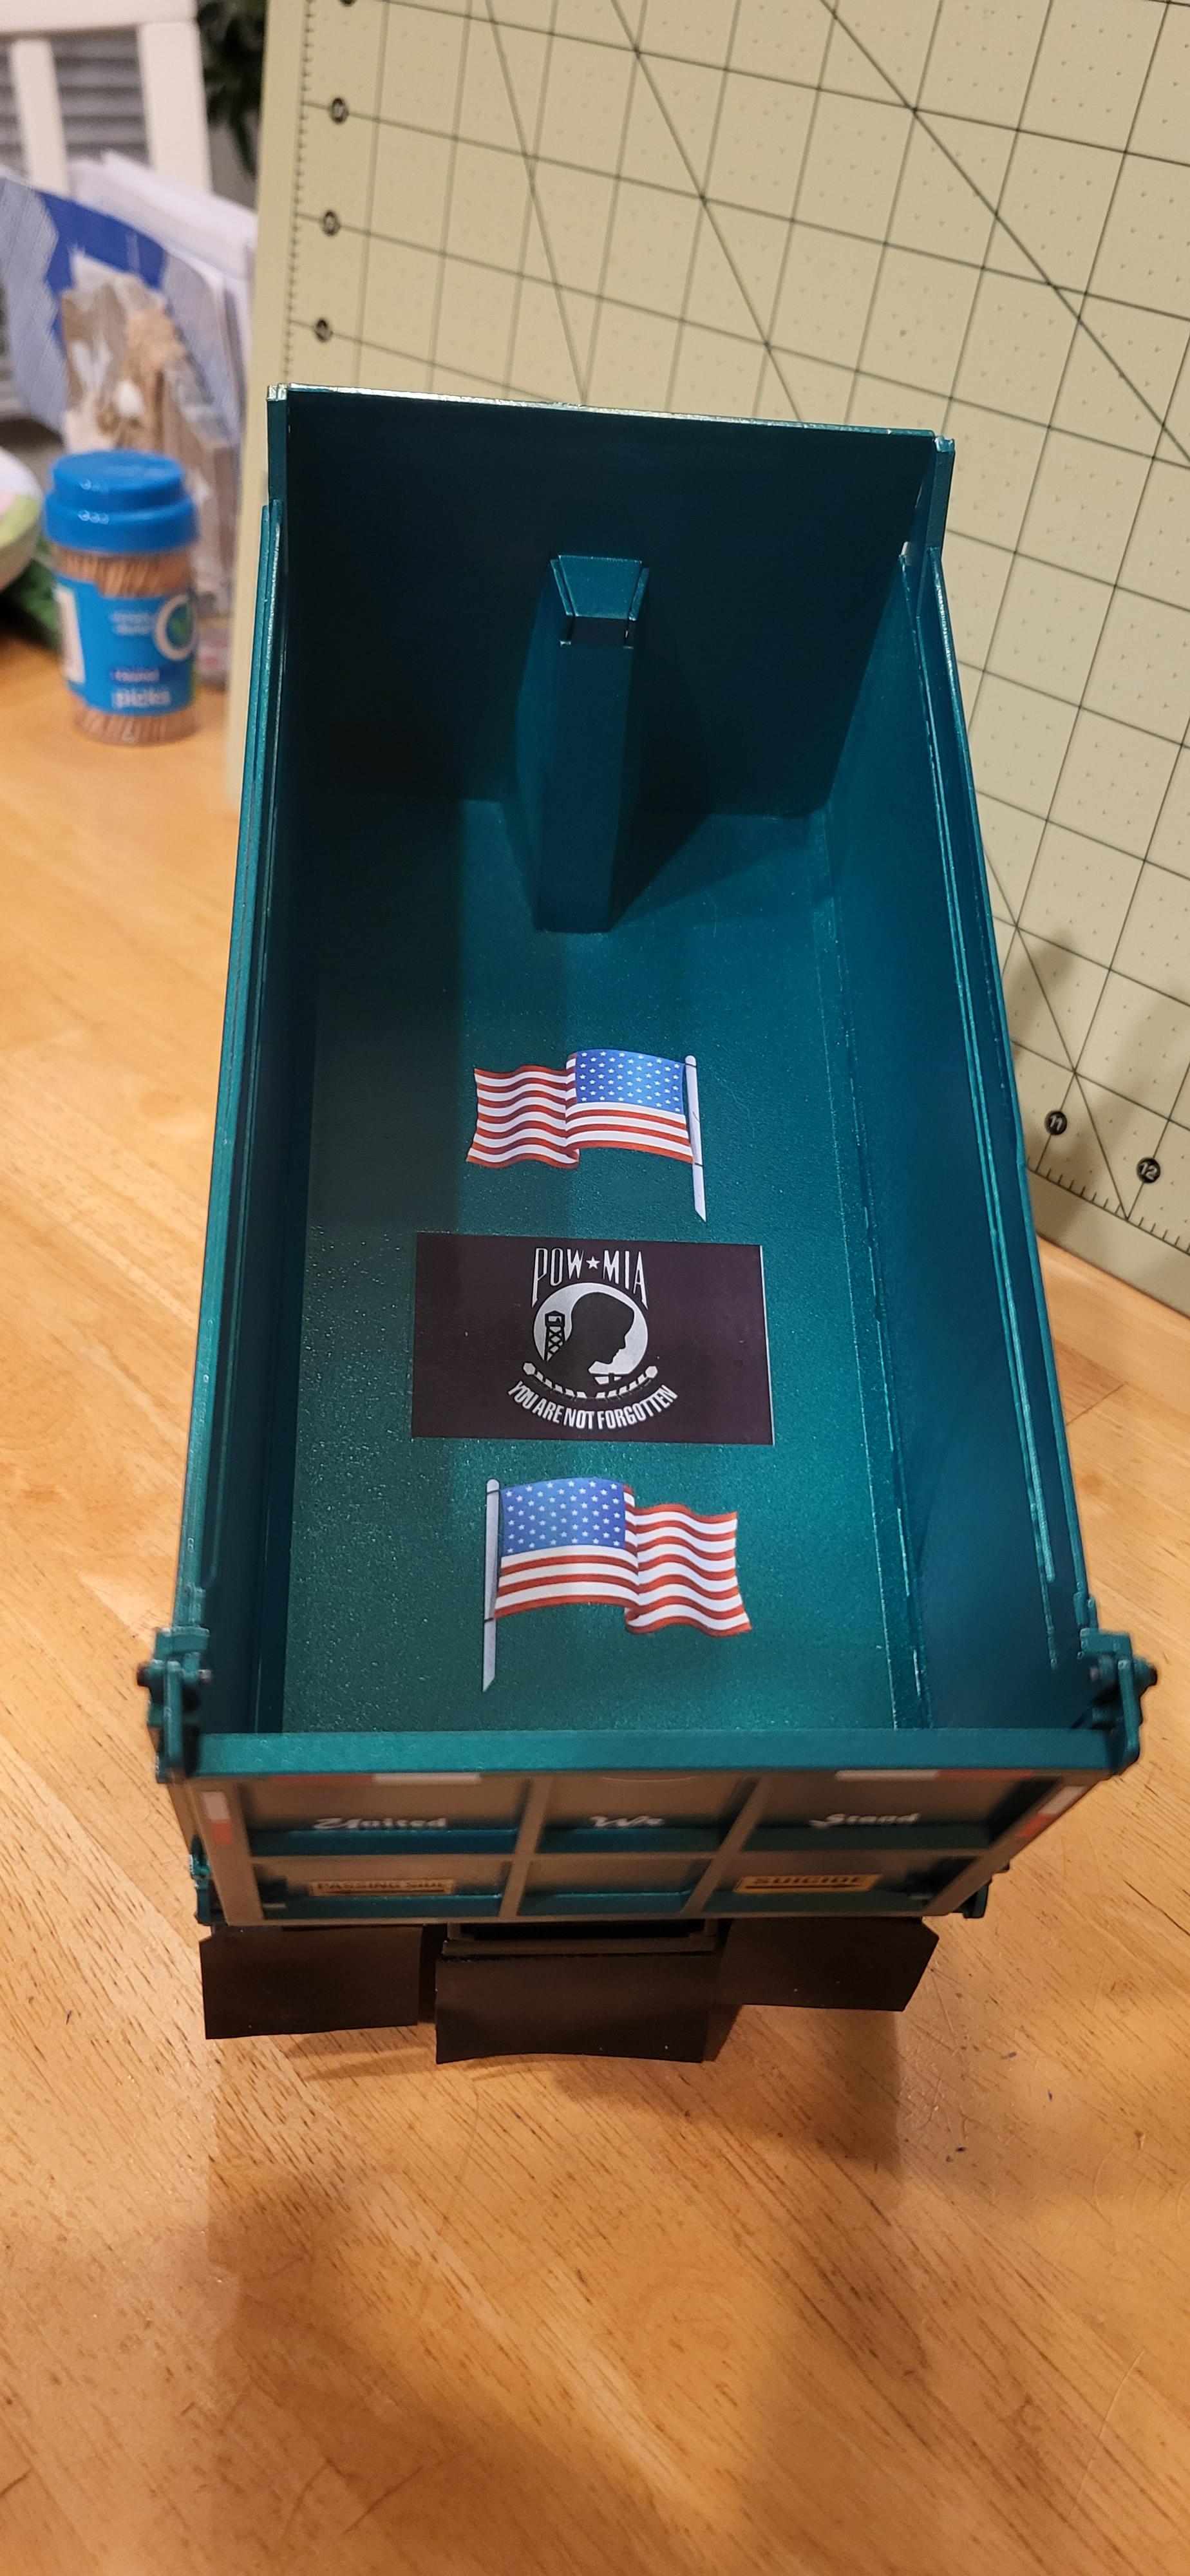
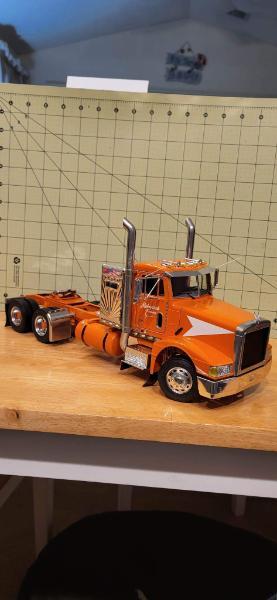
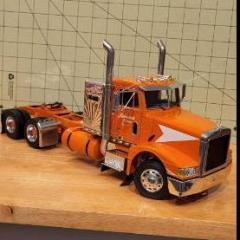
Just wrapped this one up tonight! It was a great kit, everything fell into place and I didn't have any major issues to report on. Here's the mod list in no particular order: rear axles moved forward 1/8", reconfigured/relocated the fuel tank/battery boxes, aftermarket decals, 3d printed turn signals/exhaust, rubber mudflaps all around, modified the body to be a smooth side and look more modern, added a tag axle with 3d printed rims and moebius tires, italeri rims/tires on the drives and steers, along with other little odds and ends! Plus a cool mural in the bed, enjoy!

-
Single Axle Mack Cruiseliner
TruckerAL replied to TruckerAL's topic in Model Trucks: Big Rigs and Heavy Equipment
Thanks as usual for your comments! I just wanted to build a simple work truck that's in a fleet, but has some aftermarket goodies on it. Nothing over the top! -
Finished this up tonight. Quite a challenging kit, but I plan on doing another one or 2 in the near future to get comfortable with these pesky Mack's. The mod list is as follows: air ride suspension from a 352 pacemaker, front axle shimmed a few mm higher, aftermarket exhaust stack, amt diamond reo rear 1/4 fenders, and some other odds and ends. Enjoy!
-
I scored that complete paystar 5000 logger, complete s series, the built up paystar 5000 dump truck, and fire truck for $55 at the show! I haven't fully examined them yet, but they don't seem like glue bombs except for the dump truck.
-
Little late but I bought all this, plus 3 other big rig kits not pictured, at NNL East. Great time!
- 39,181 replies
-
- 4
-

-
- johan
- glue bombs
- (and 1 more)
-
Absolutely gorgeous work! It came out looking amazing
-
NNL East not listed in upcoming contests?
TruckerAL replied to Bill Eh?'s topic in Contests and Shows
I'll be there, really looking forward to it after a 4 year hiatus! -
This is absolutely fantastic! Not a lot of people rework the front axle width and placement, I'm glad you did. Awesome progress, and welcome to the big rig community!!
-
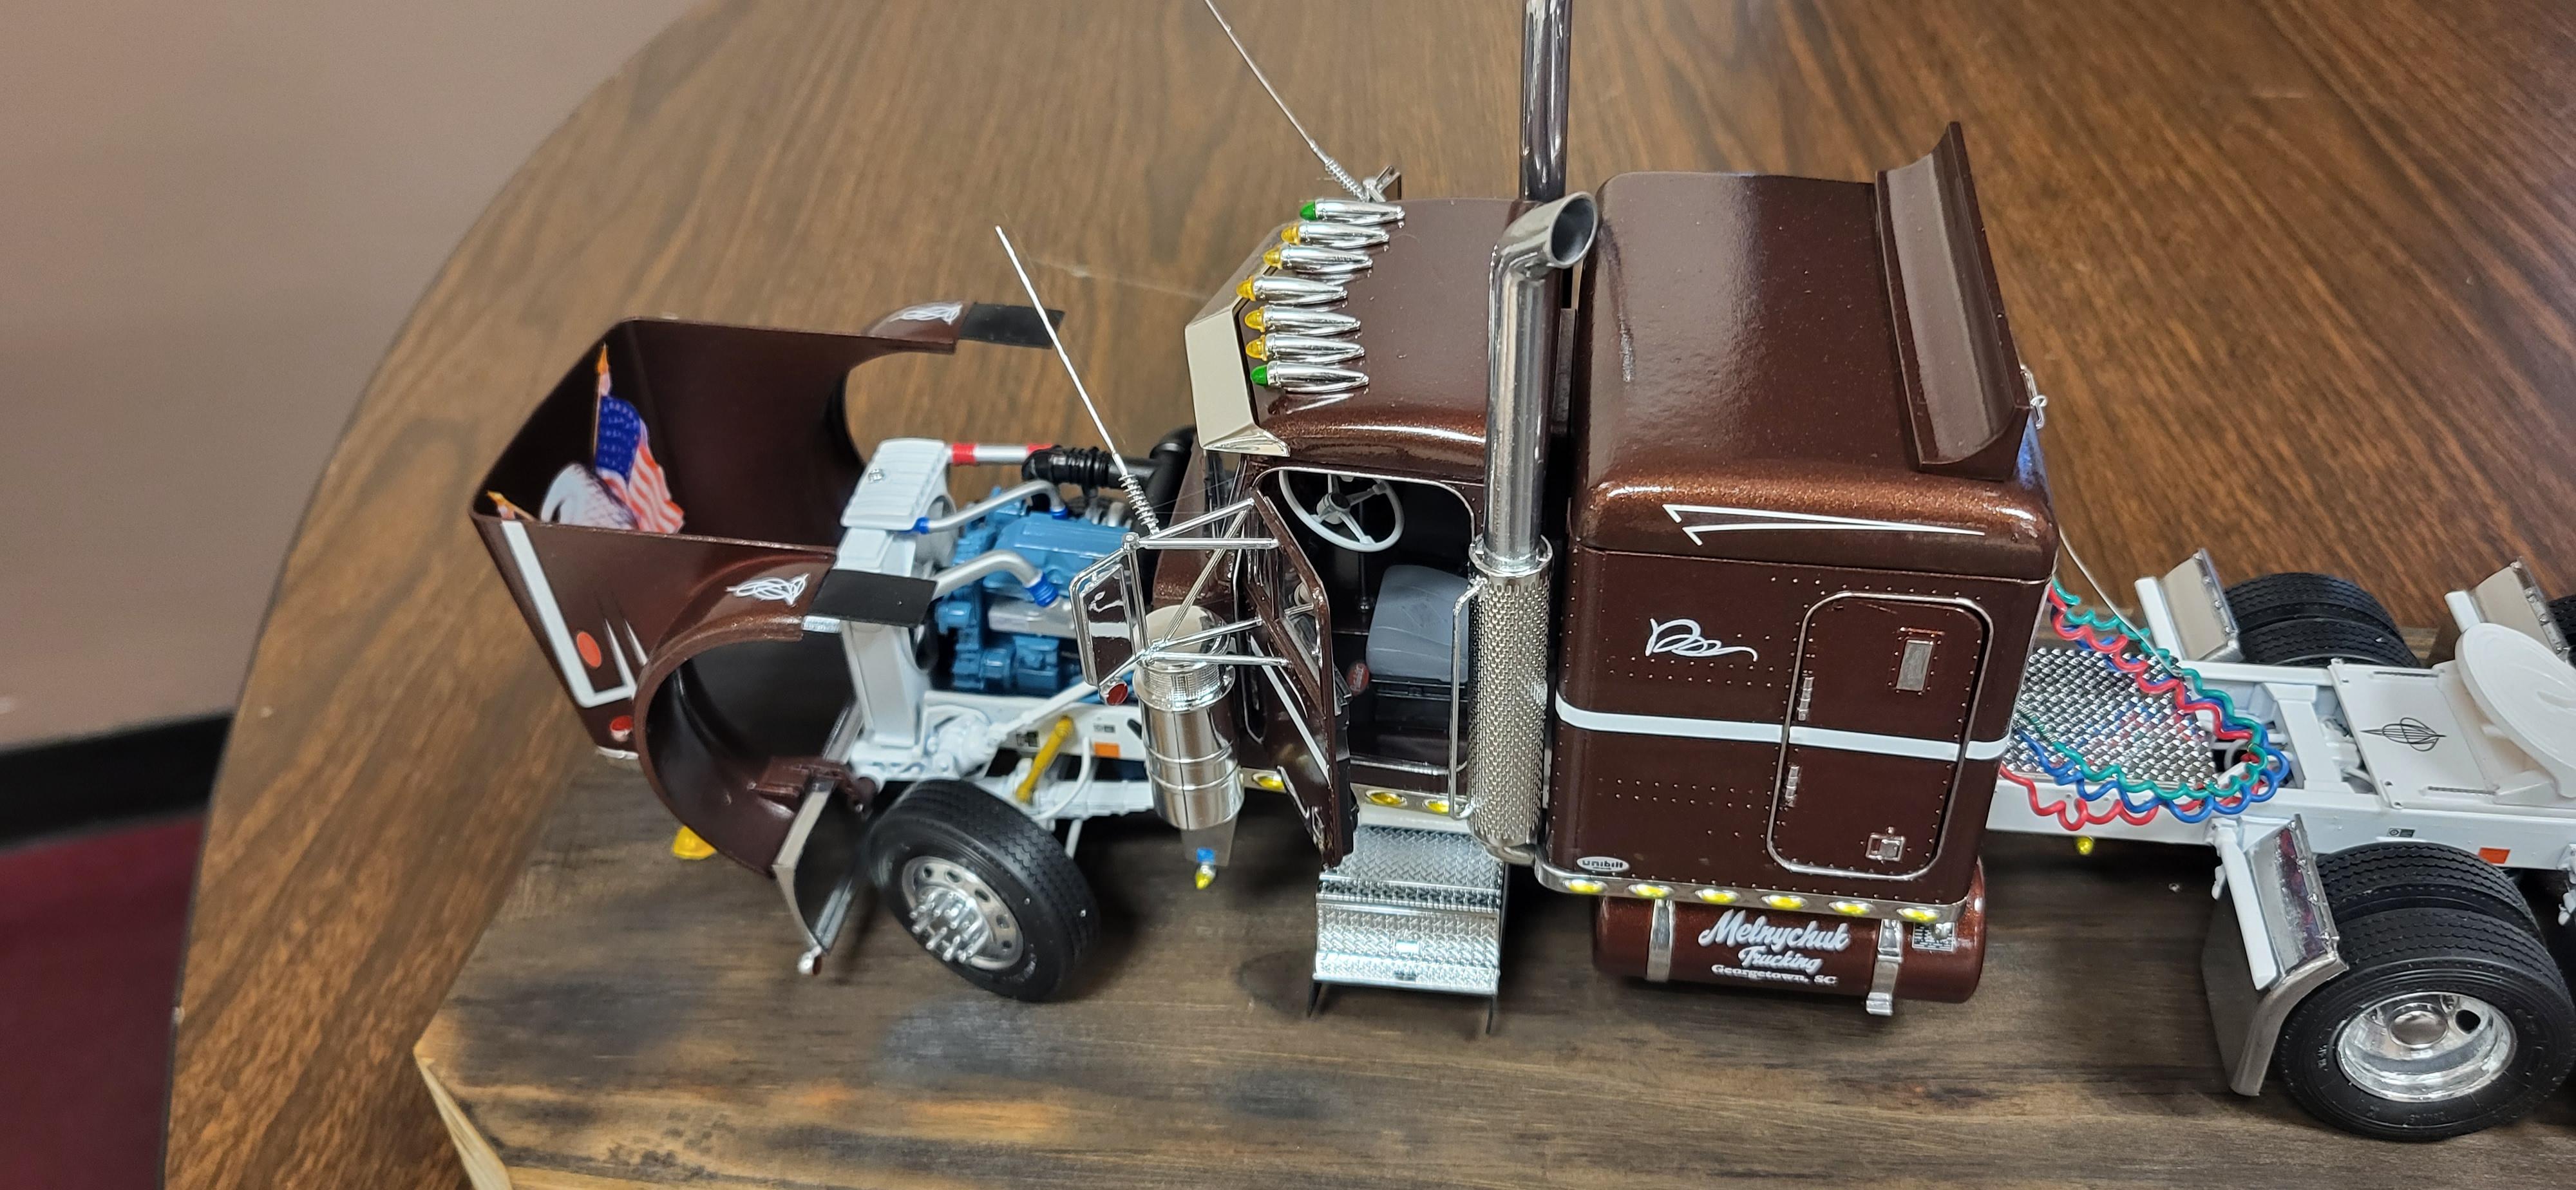
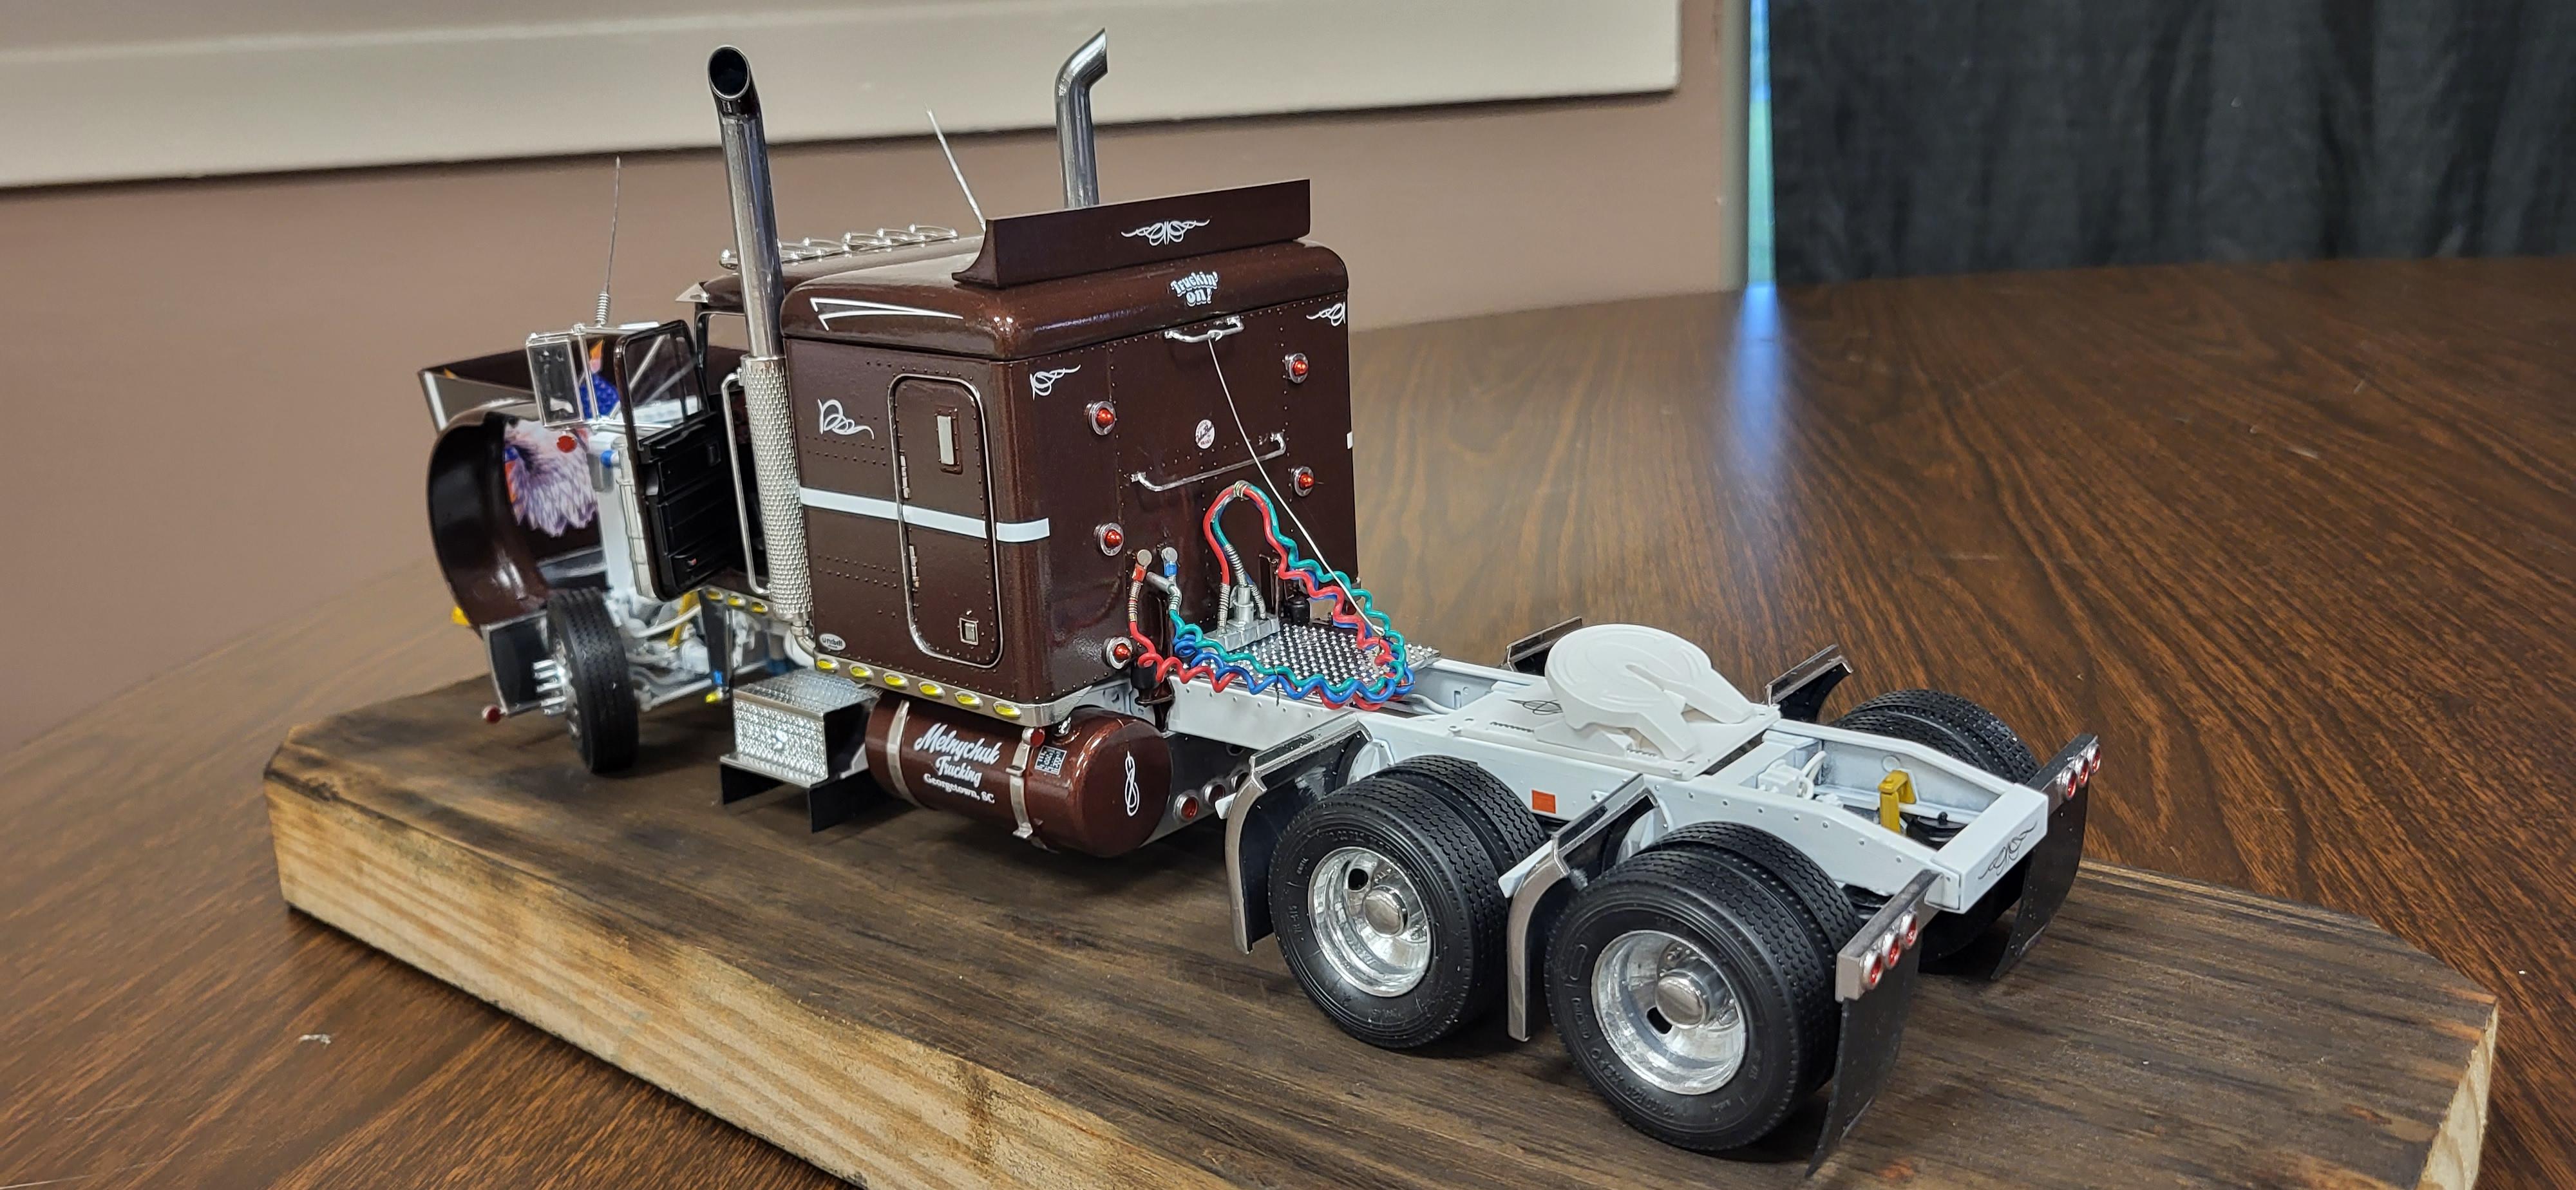
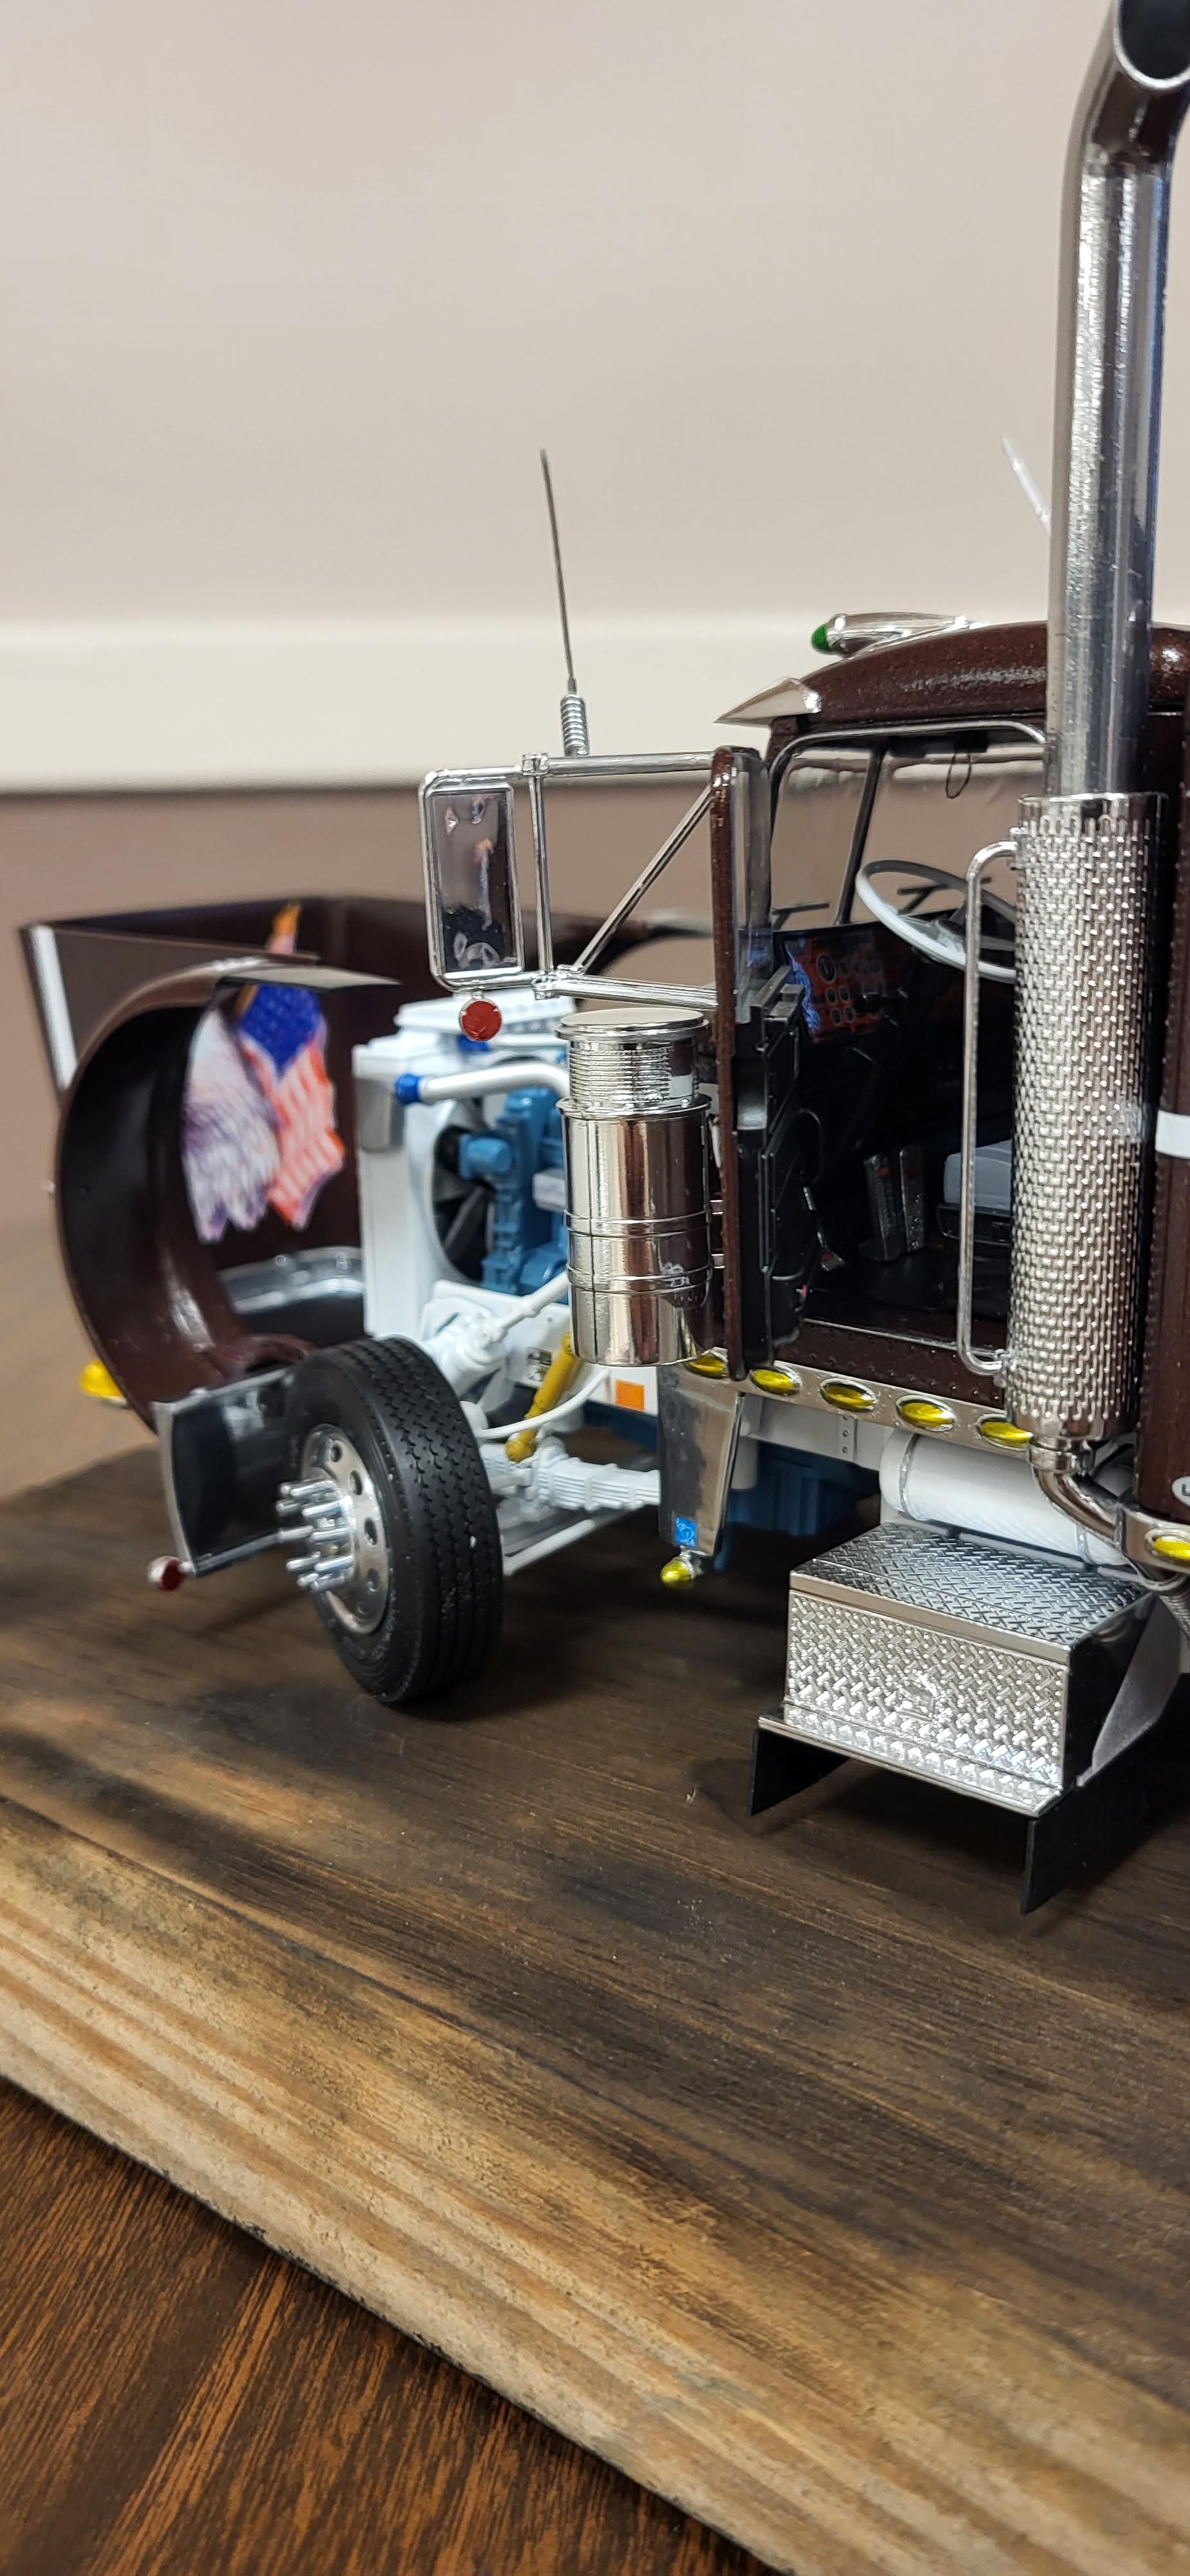
BRBO2023 Italeri 378 showtruck
TruckerAL replied to TruckerAL's topic in Model Trucks: Big Rigs and Heavy Equipment
Well I brought it to another show today and it took 1st place!
-
1/25 AMT Chevy Titan 90
TruckerAL replied to cifenet's topic in Model Trucks: Big Rigs and Heavy Equipment
You chose one challenging truck kit to do as your first. But, it came out fantastic! -
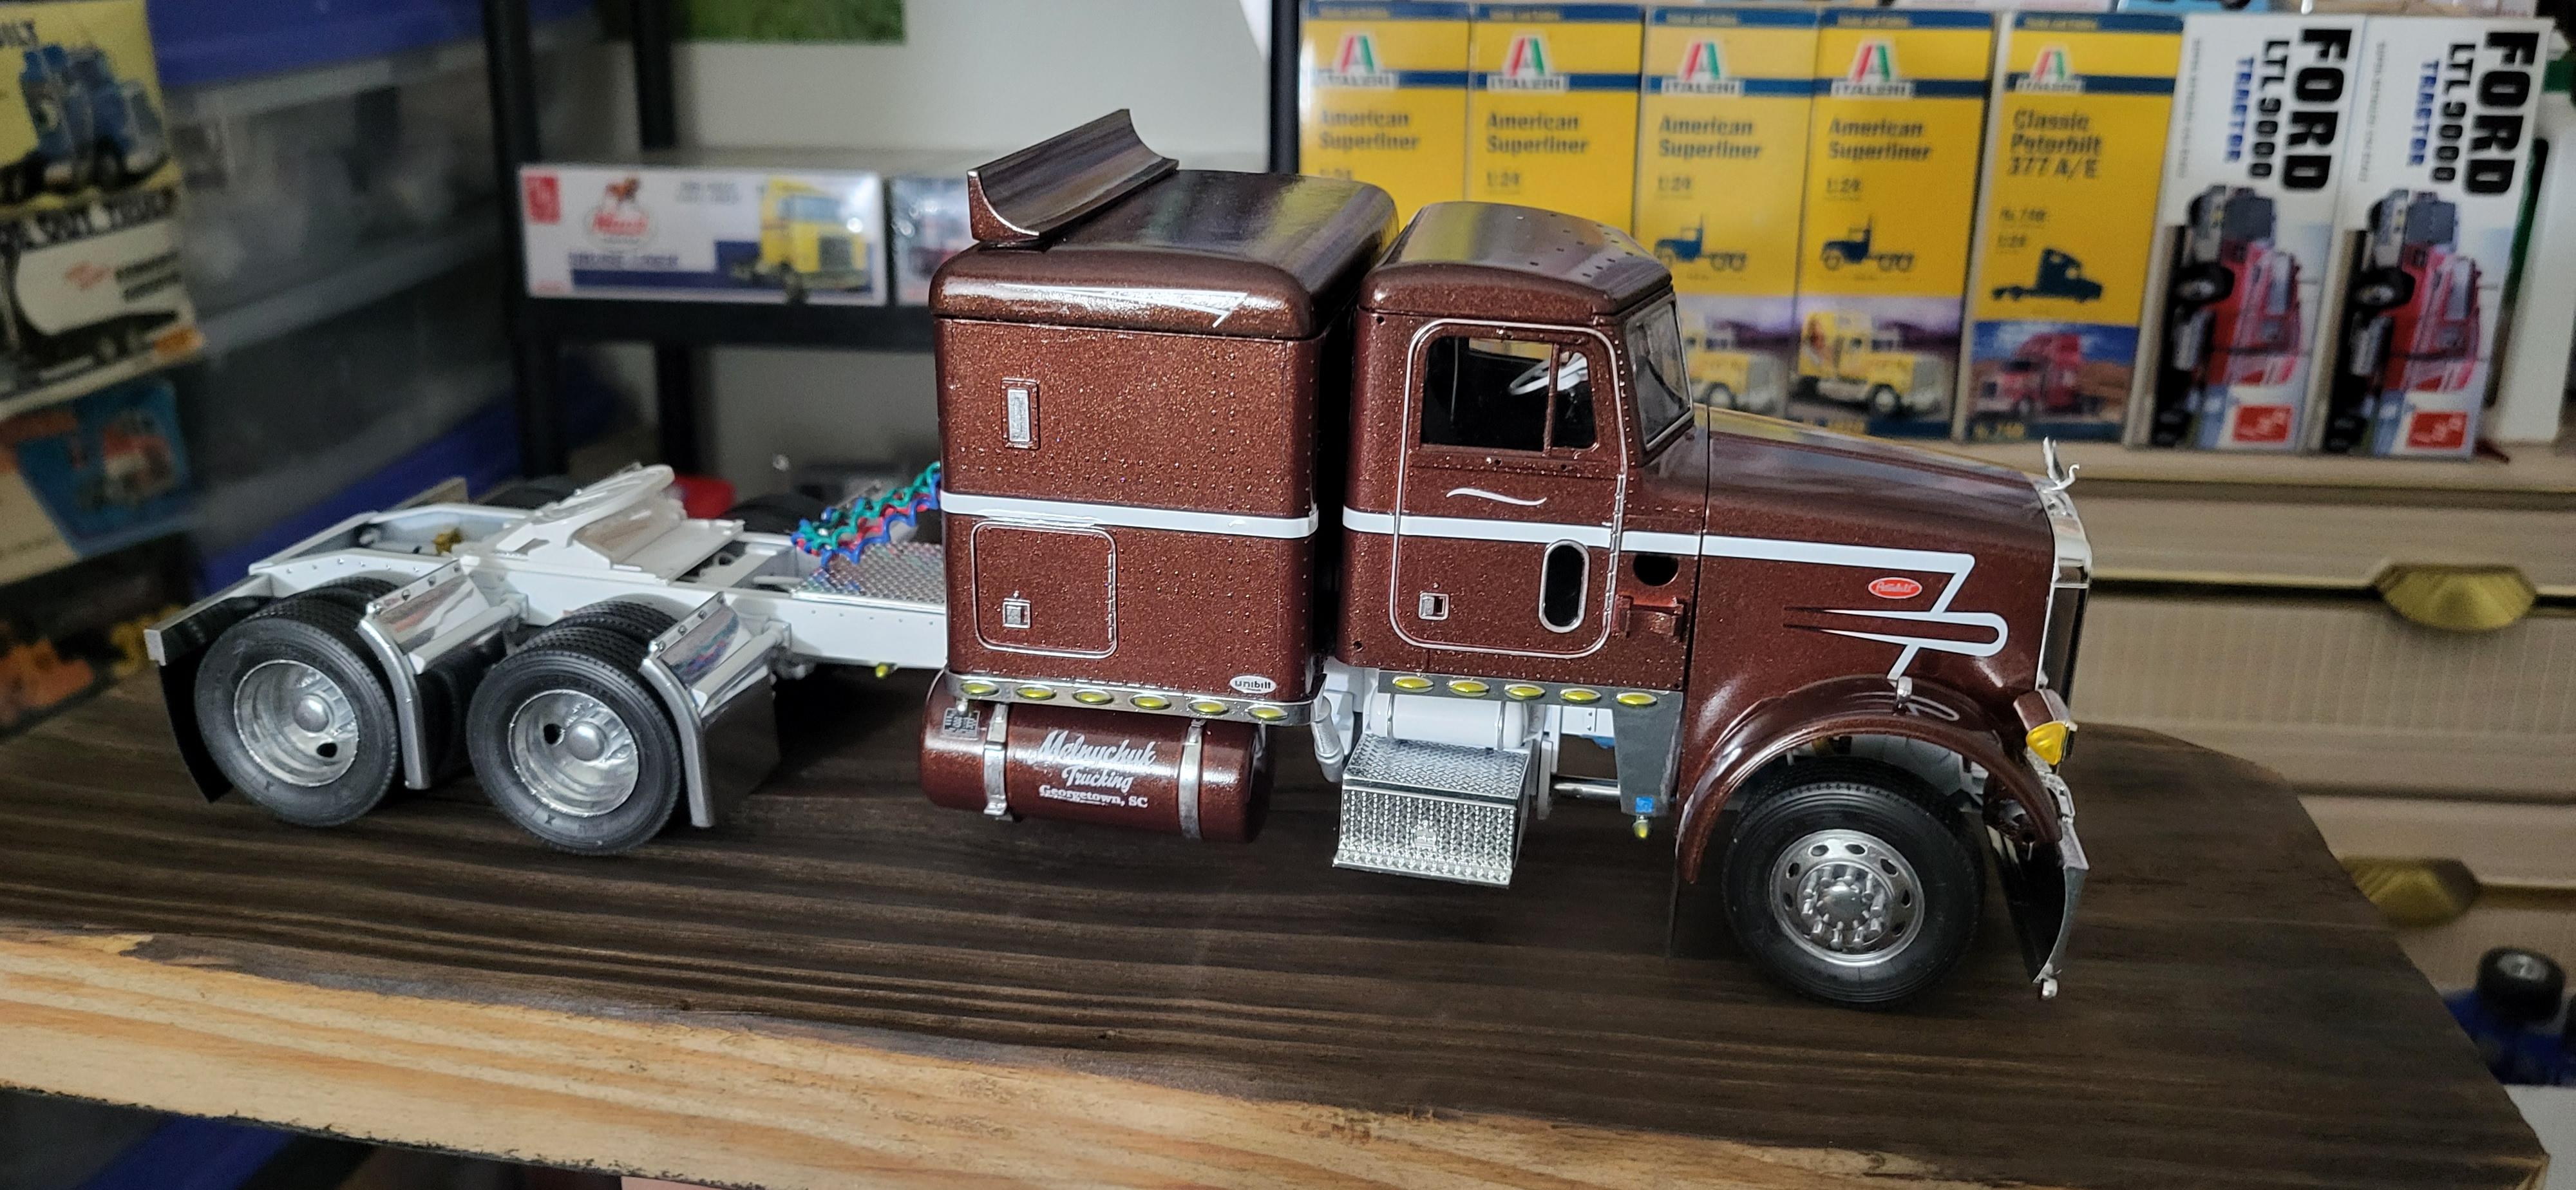
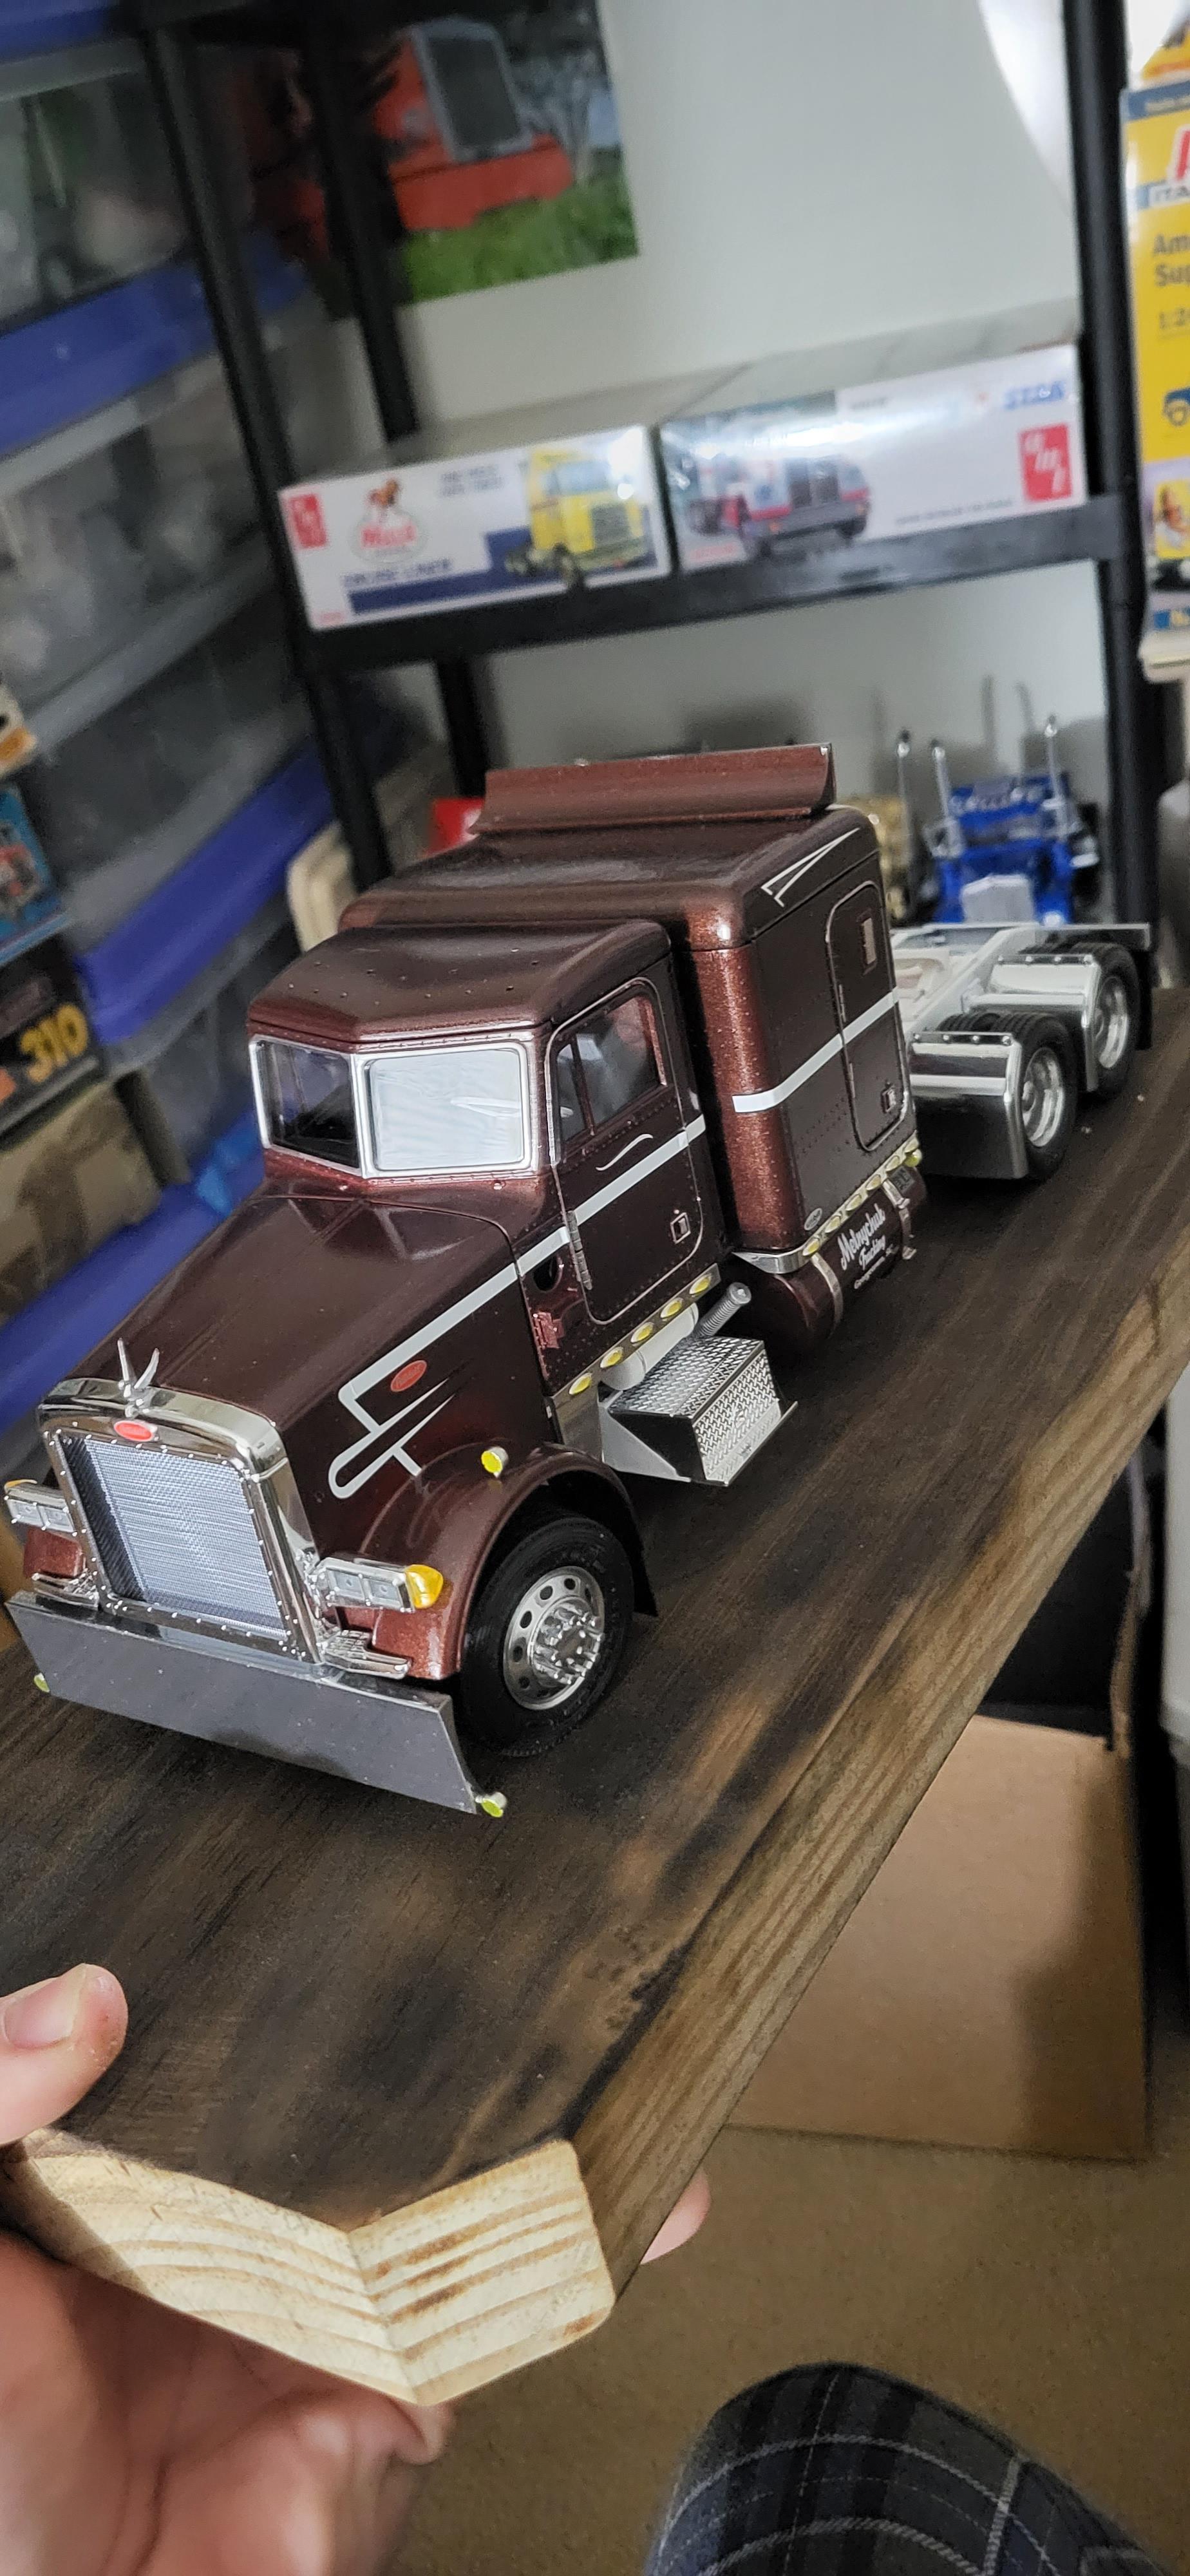
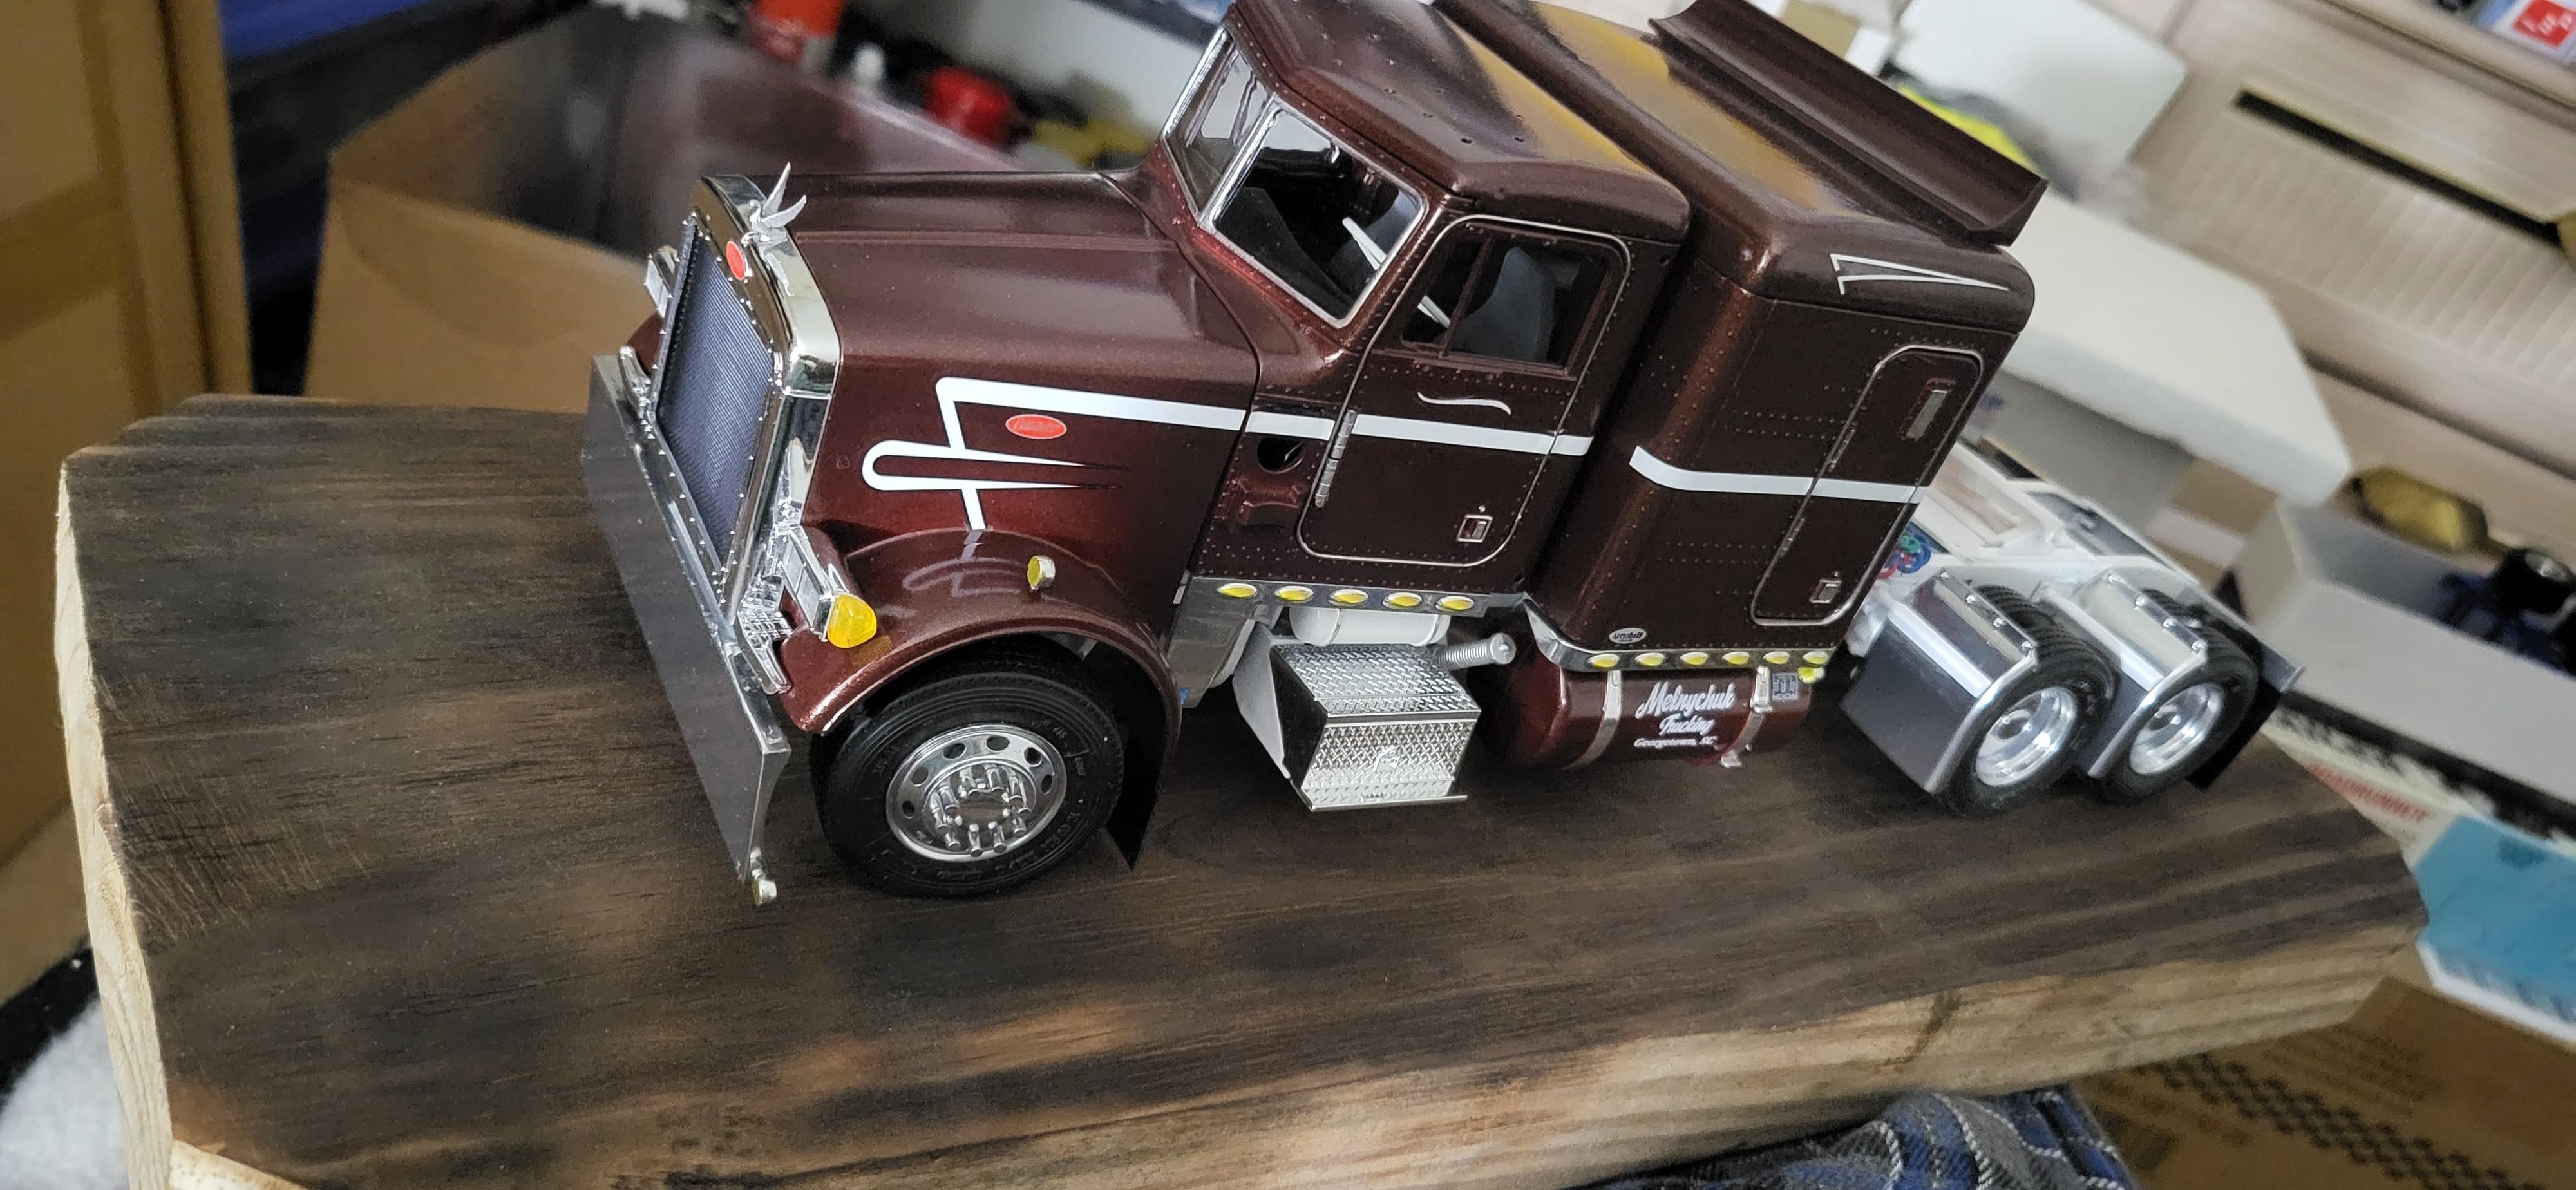
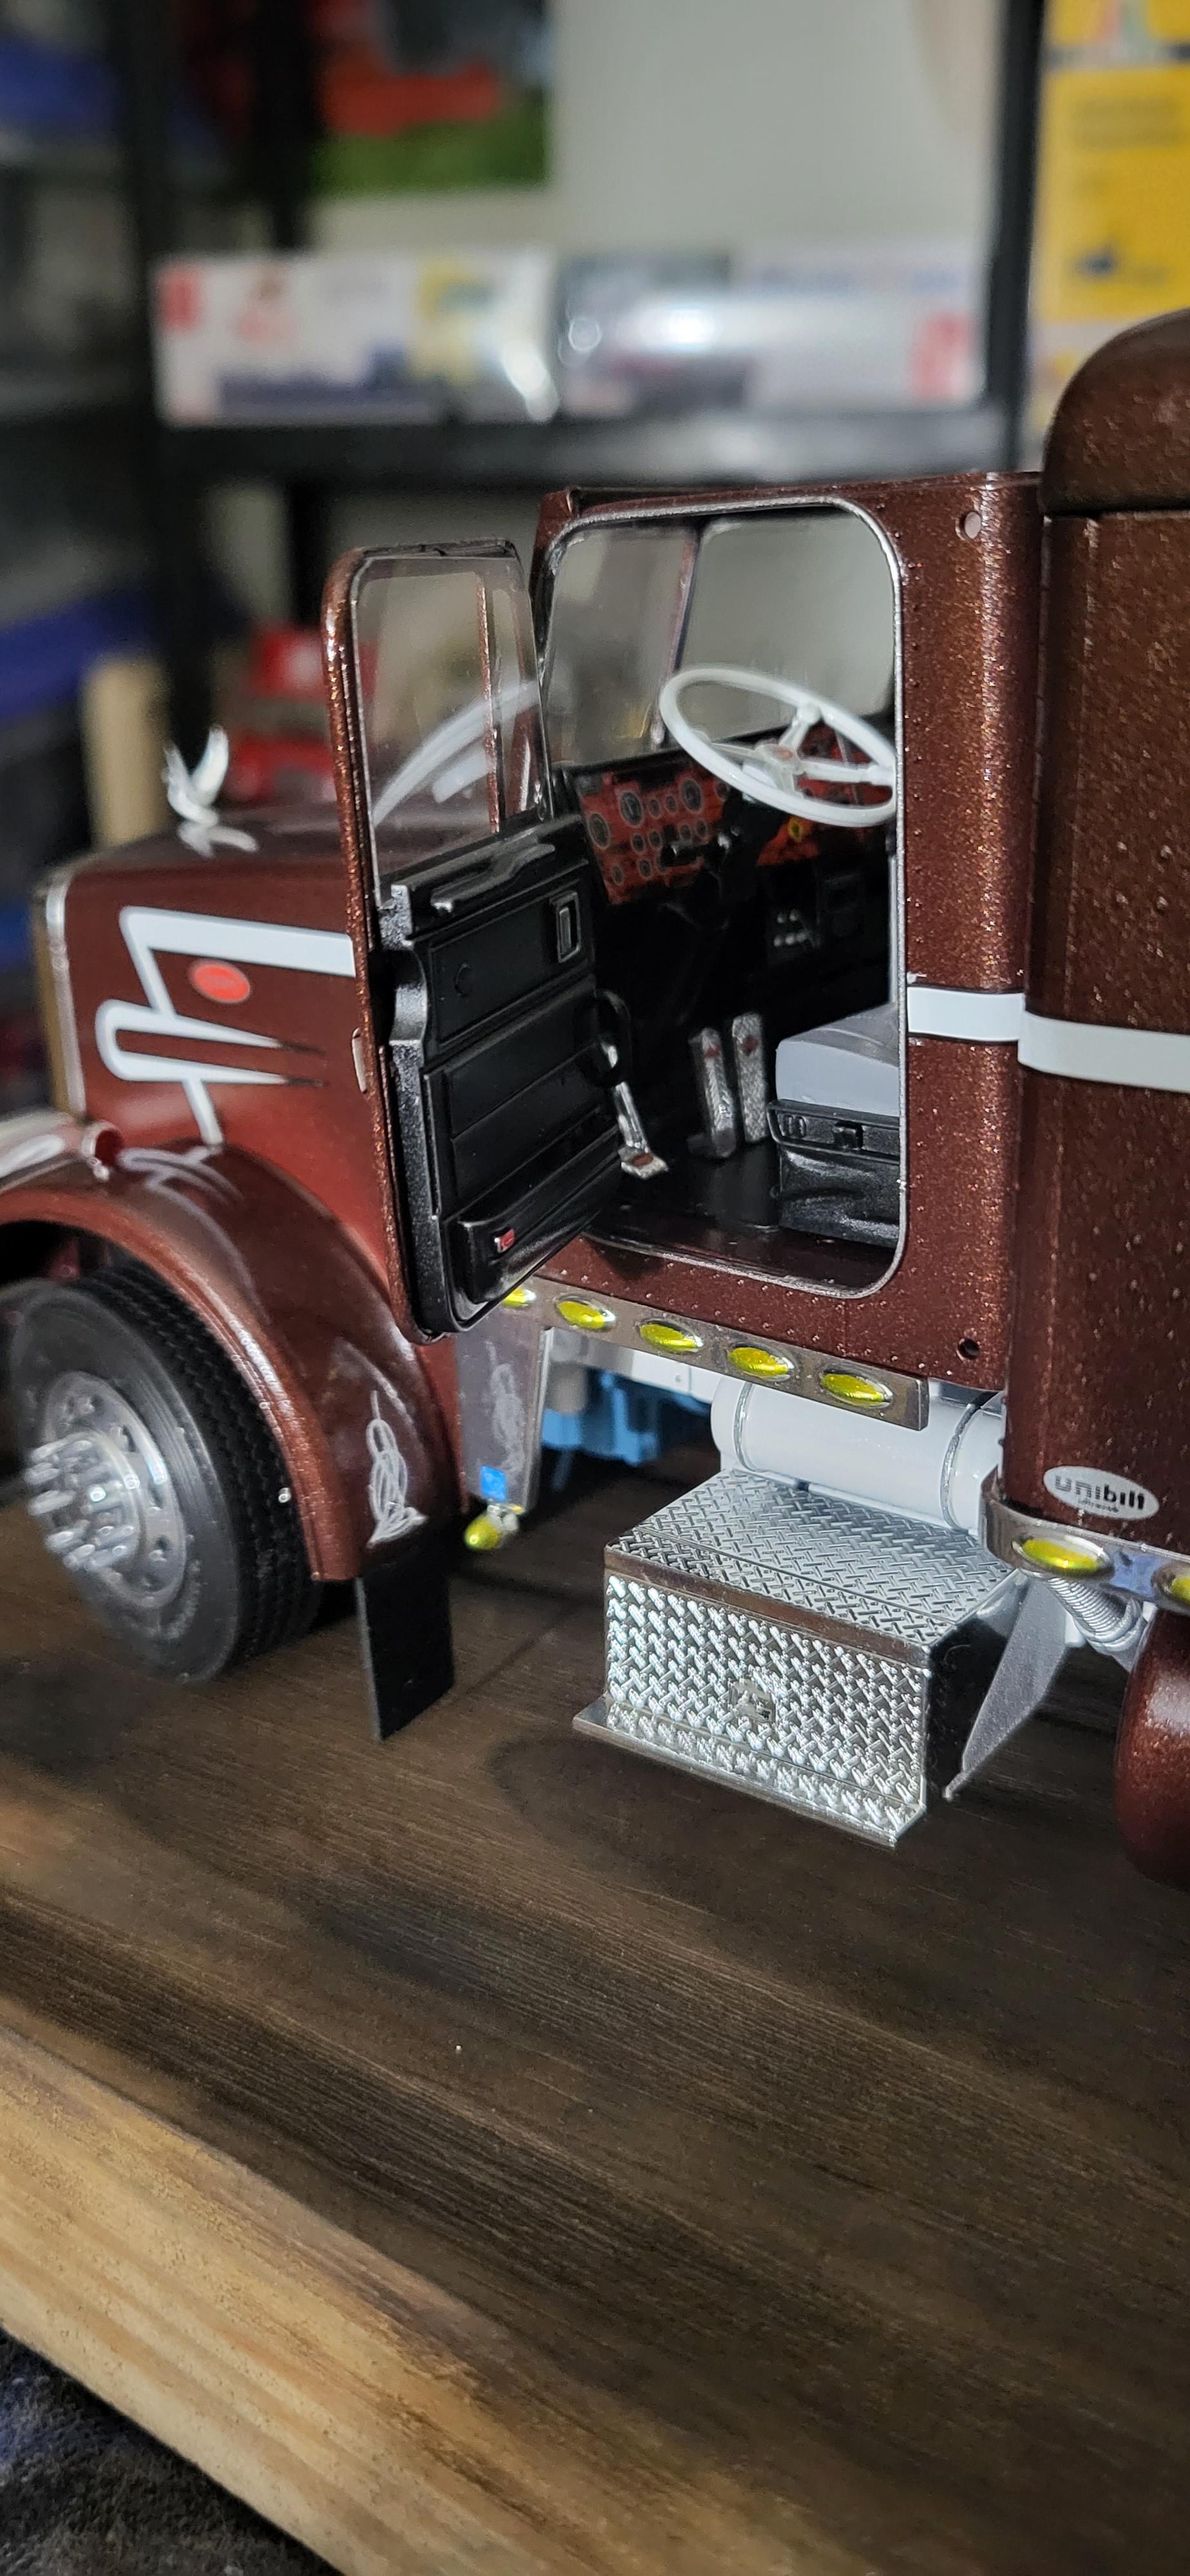
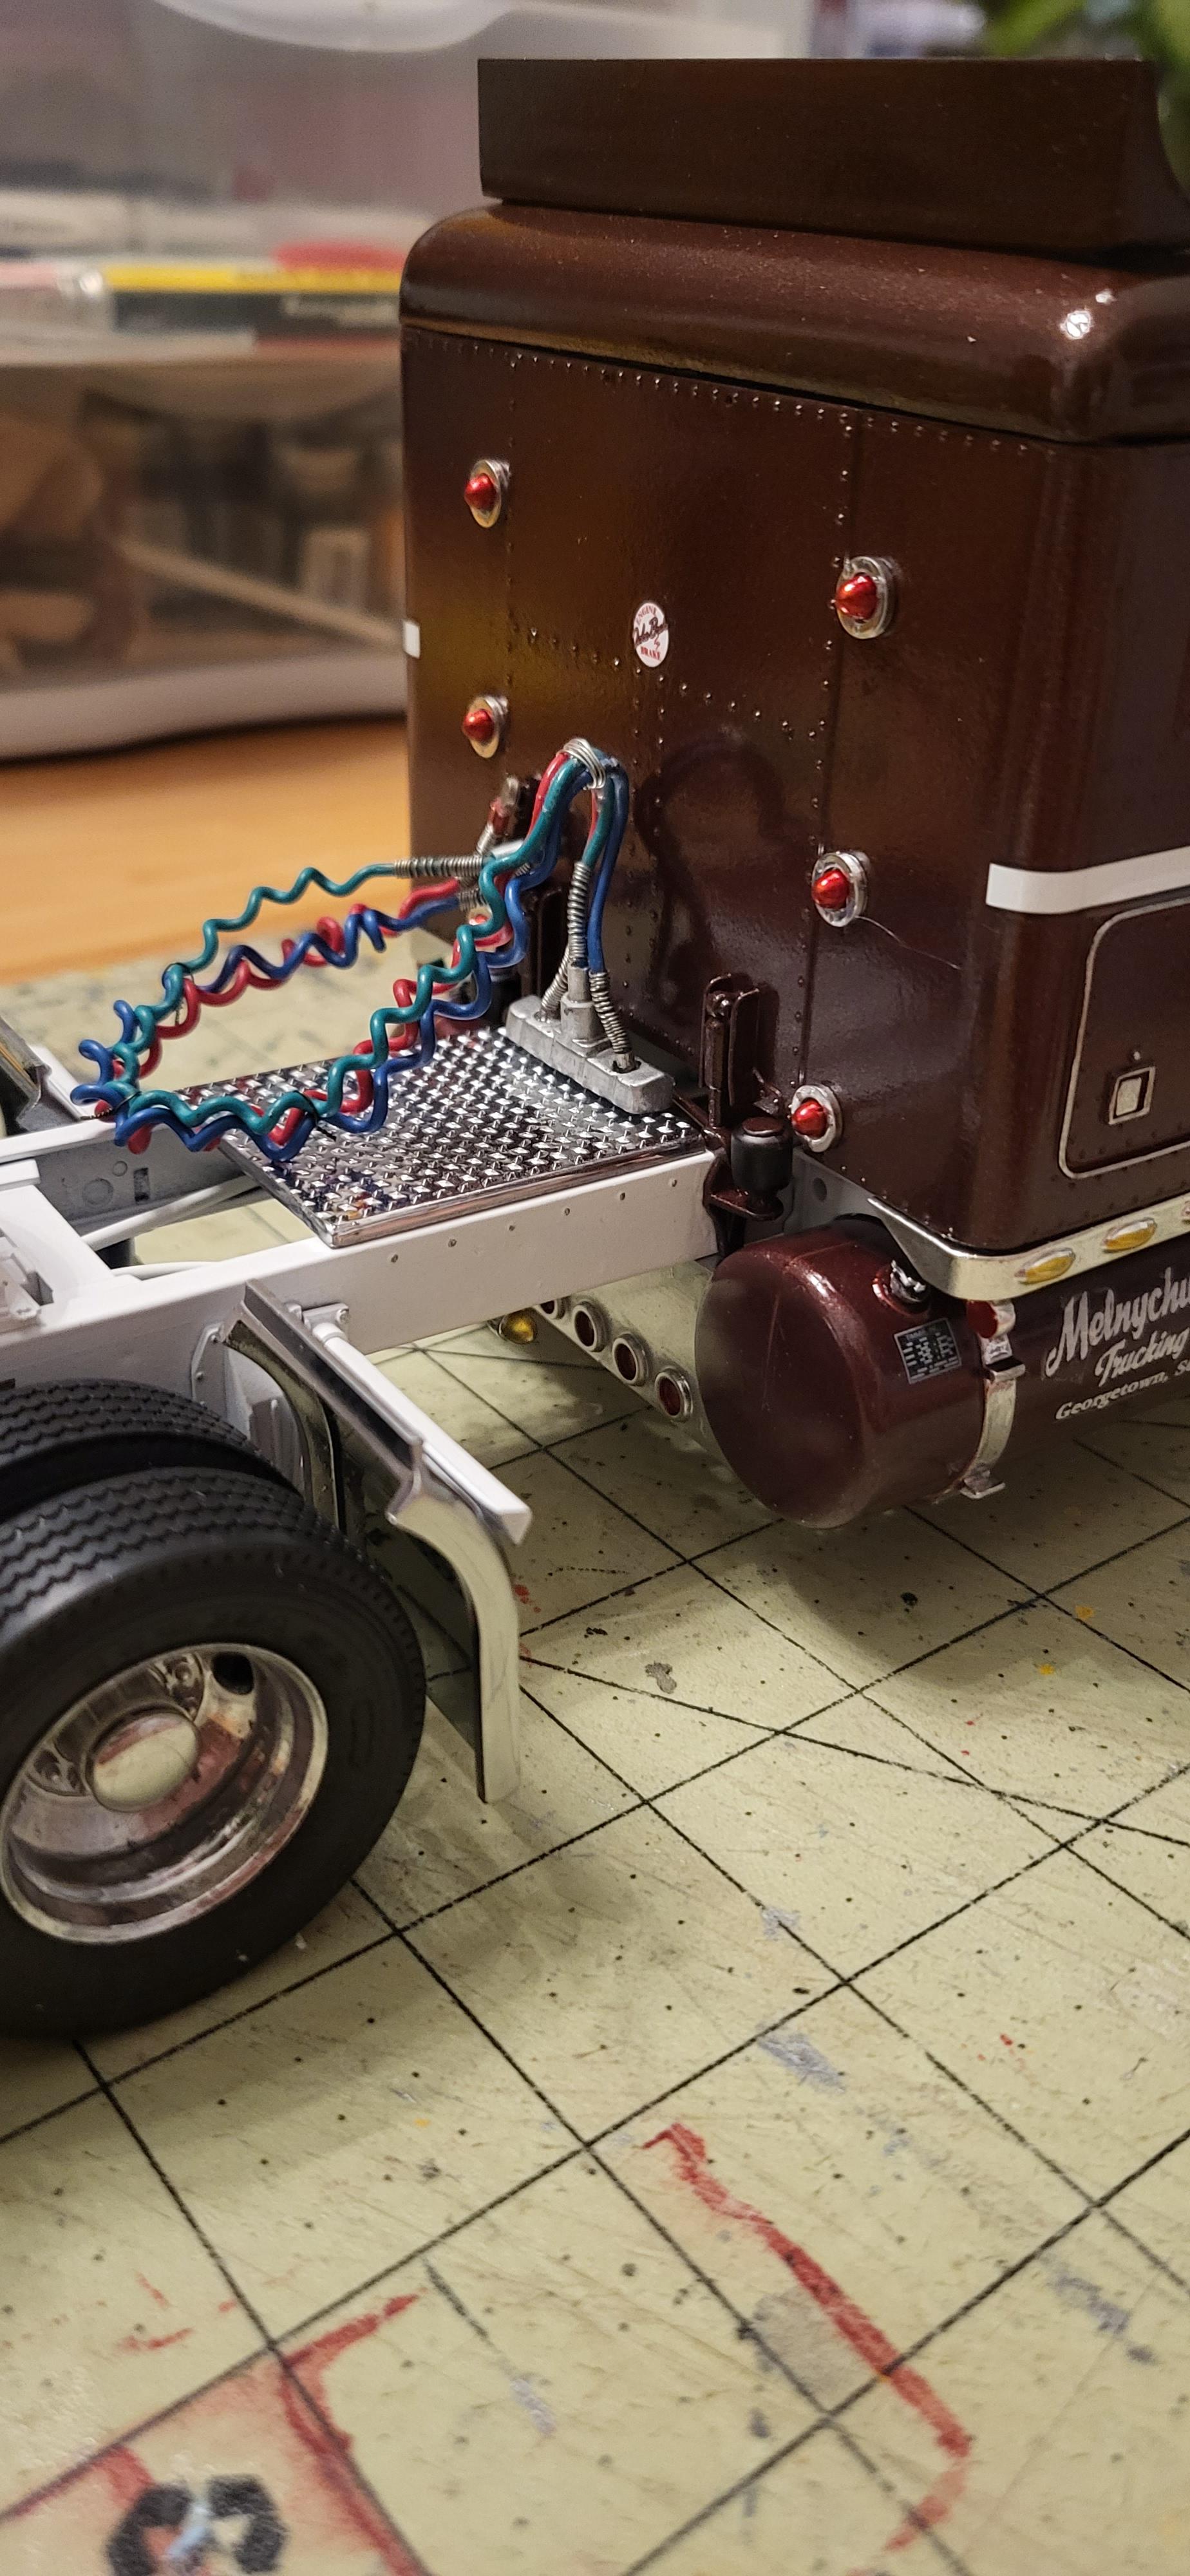
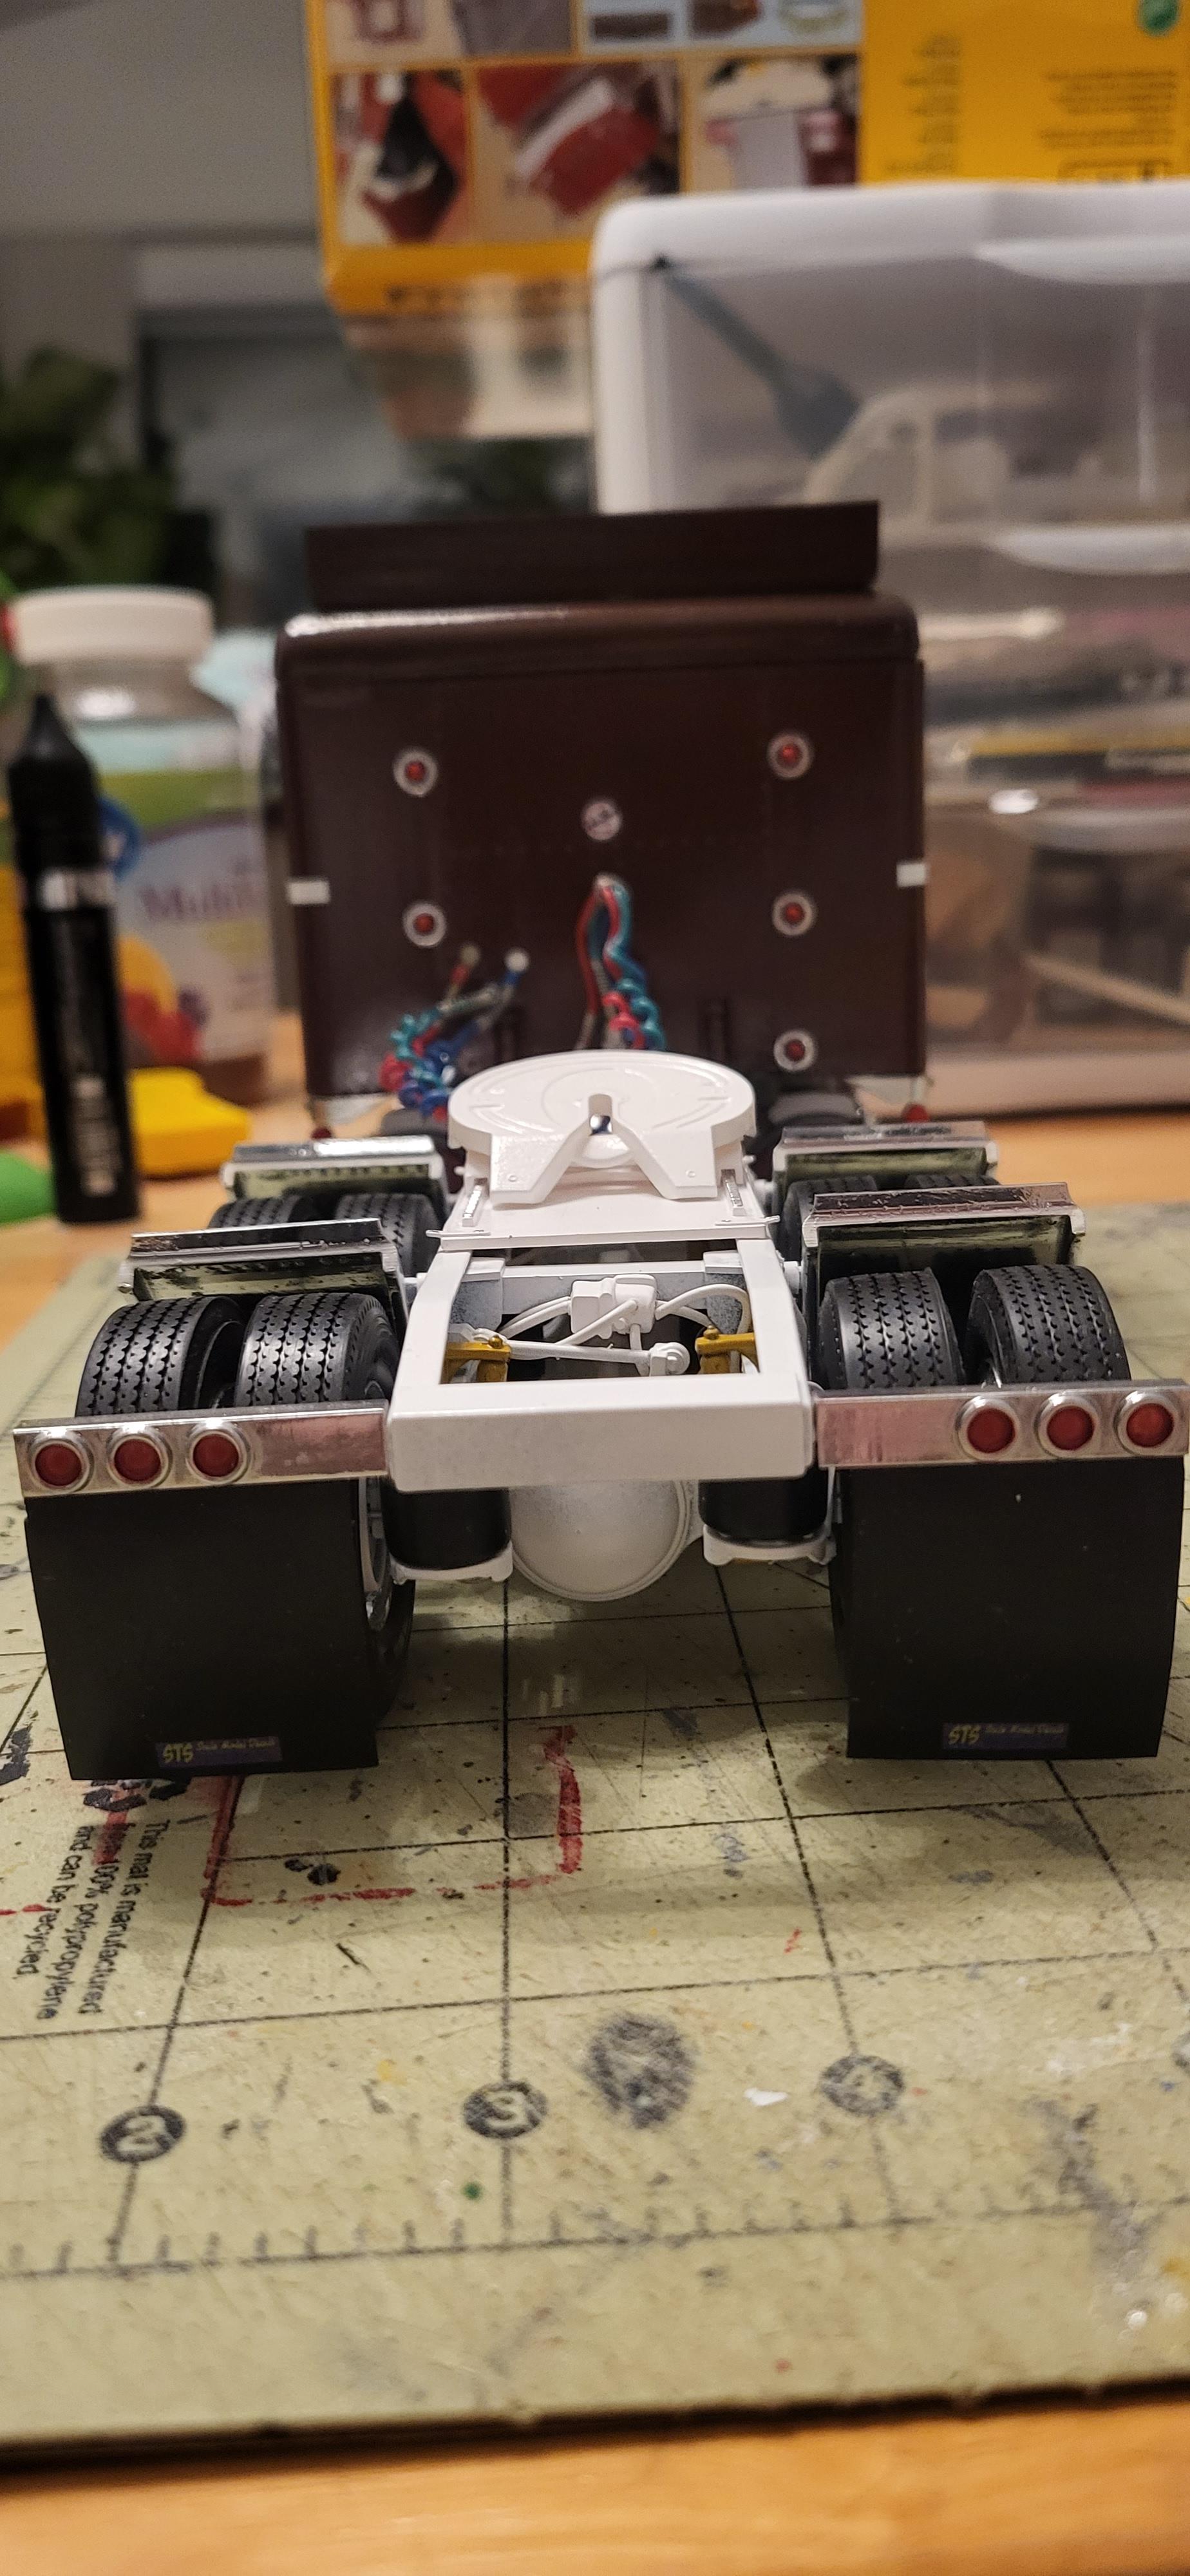
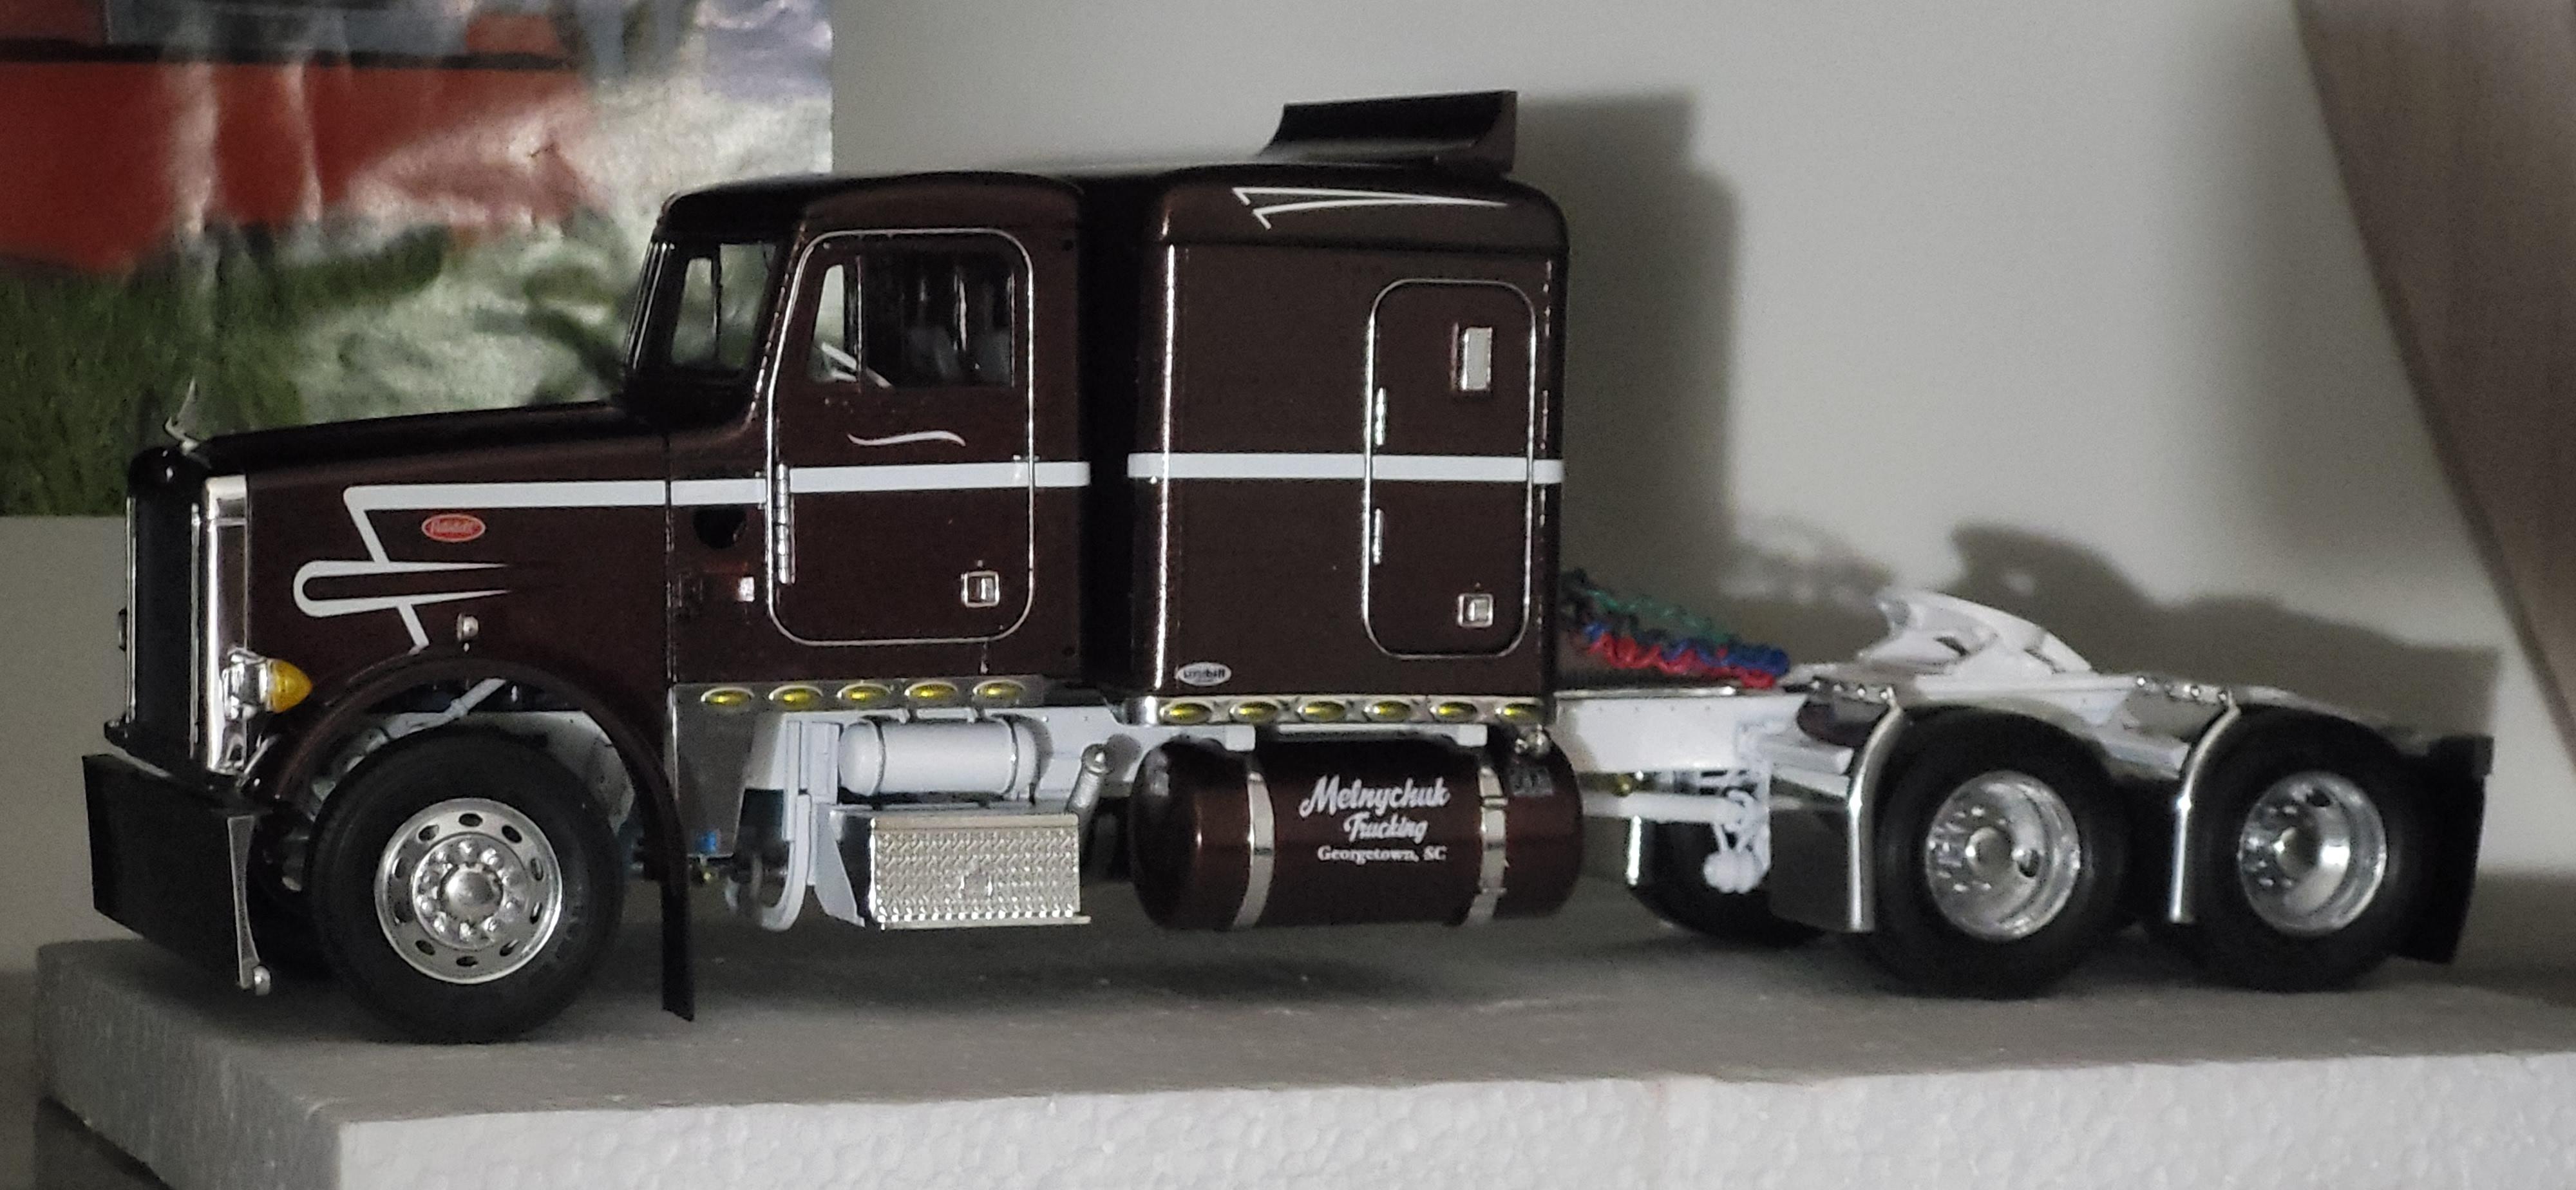
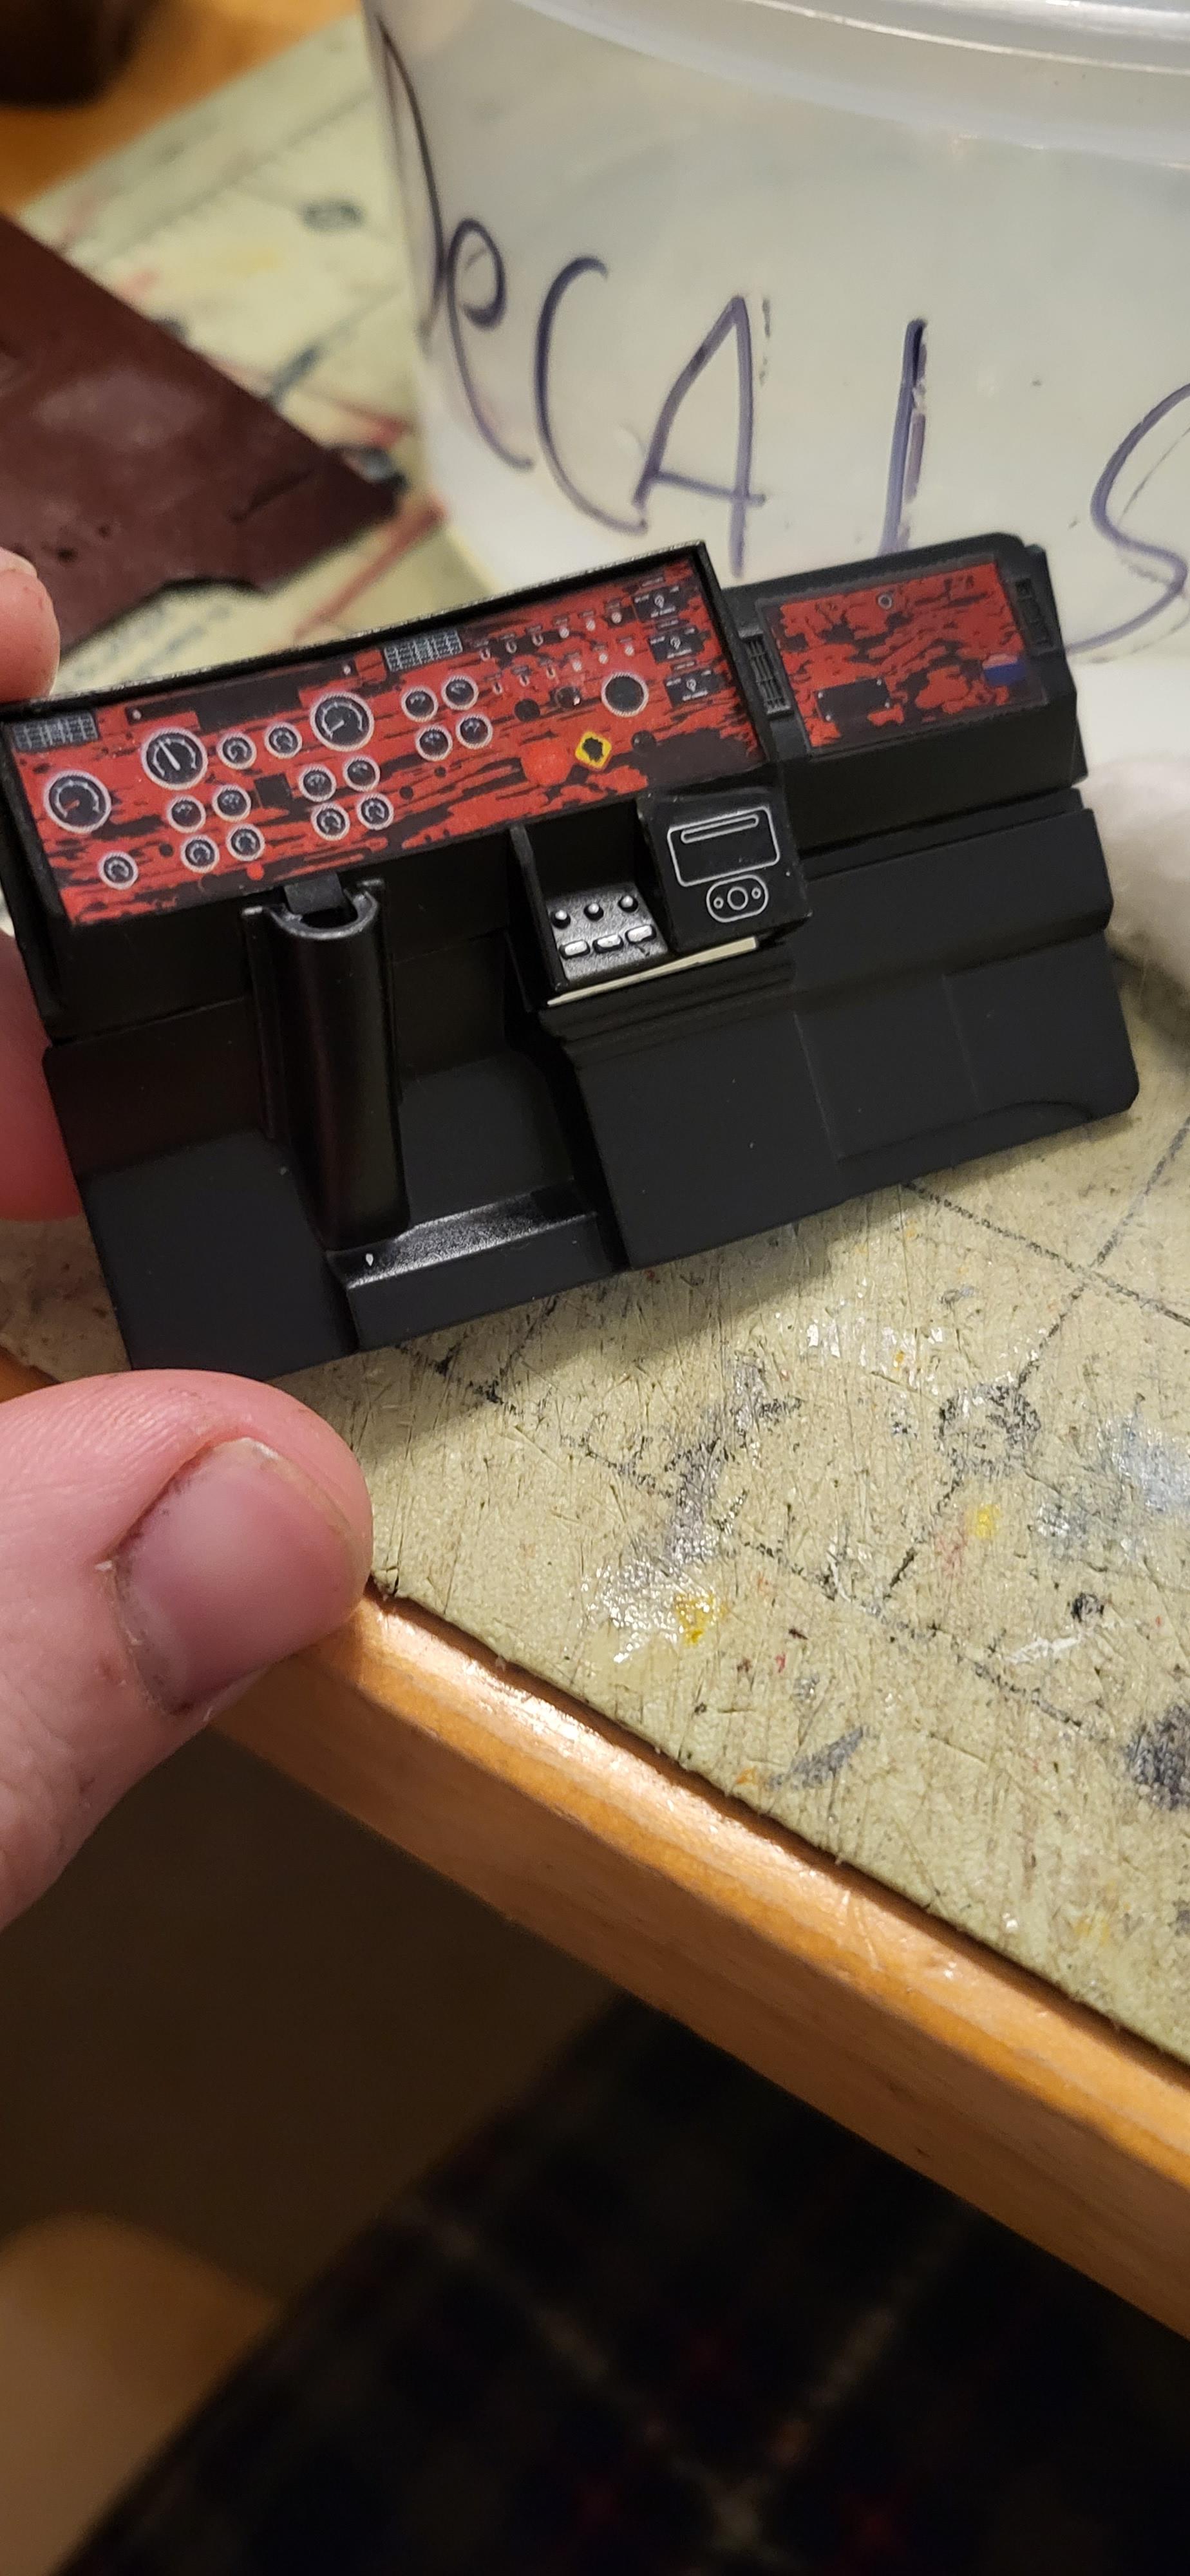
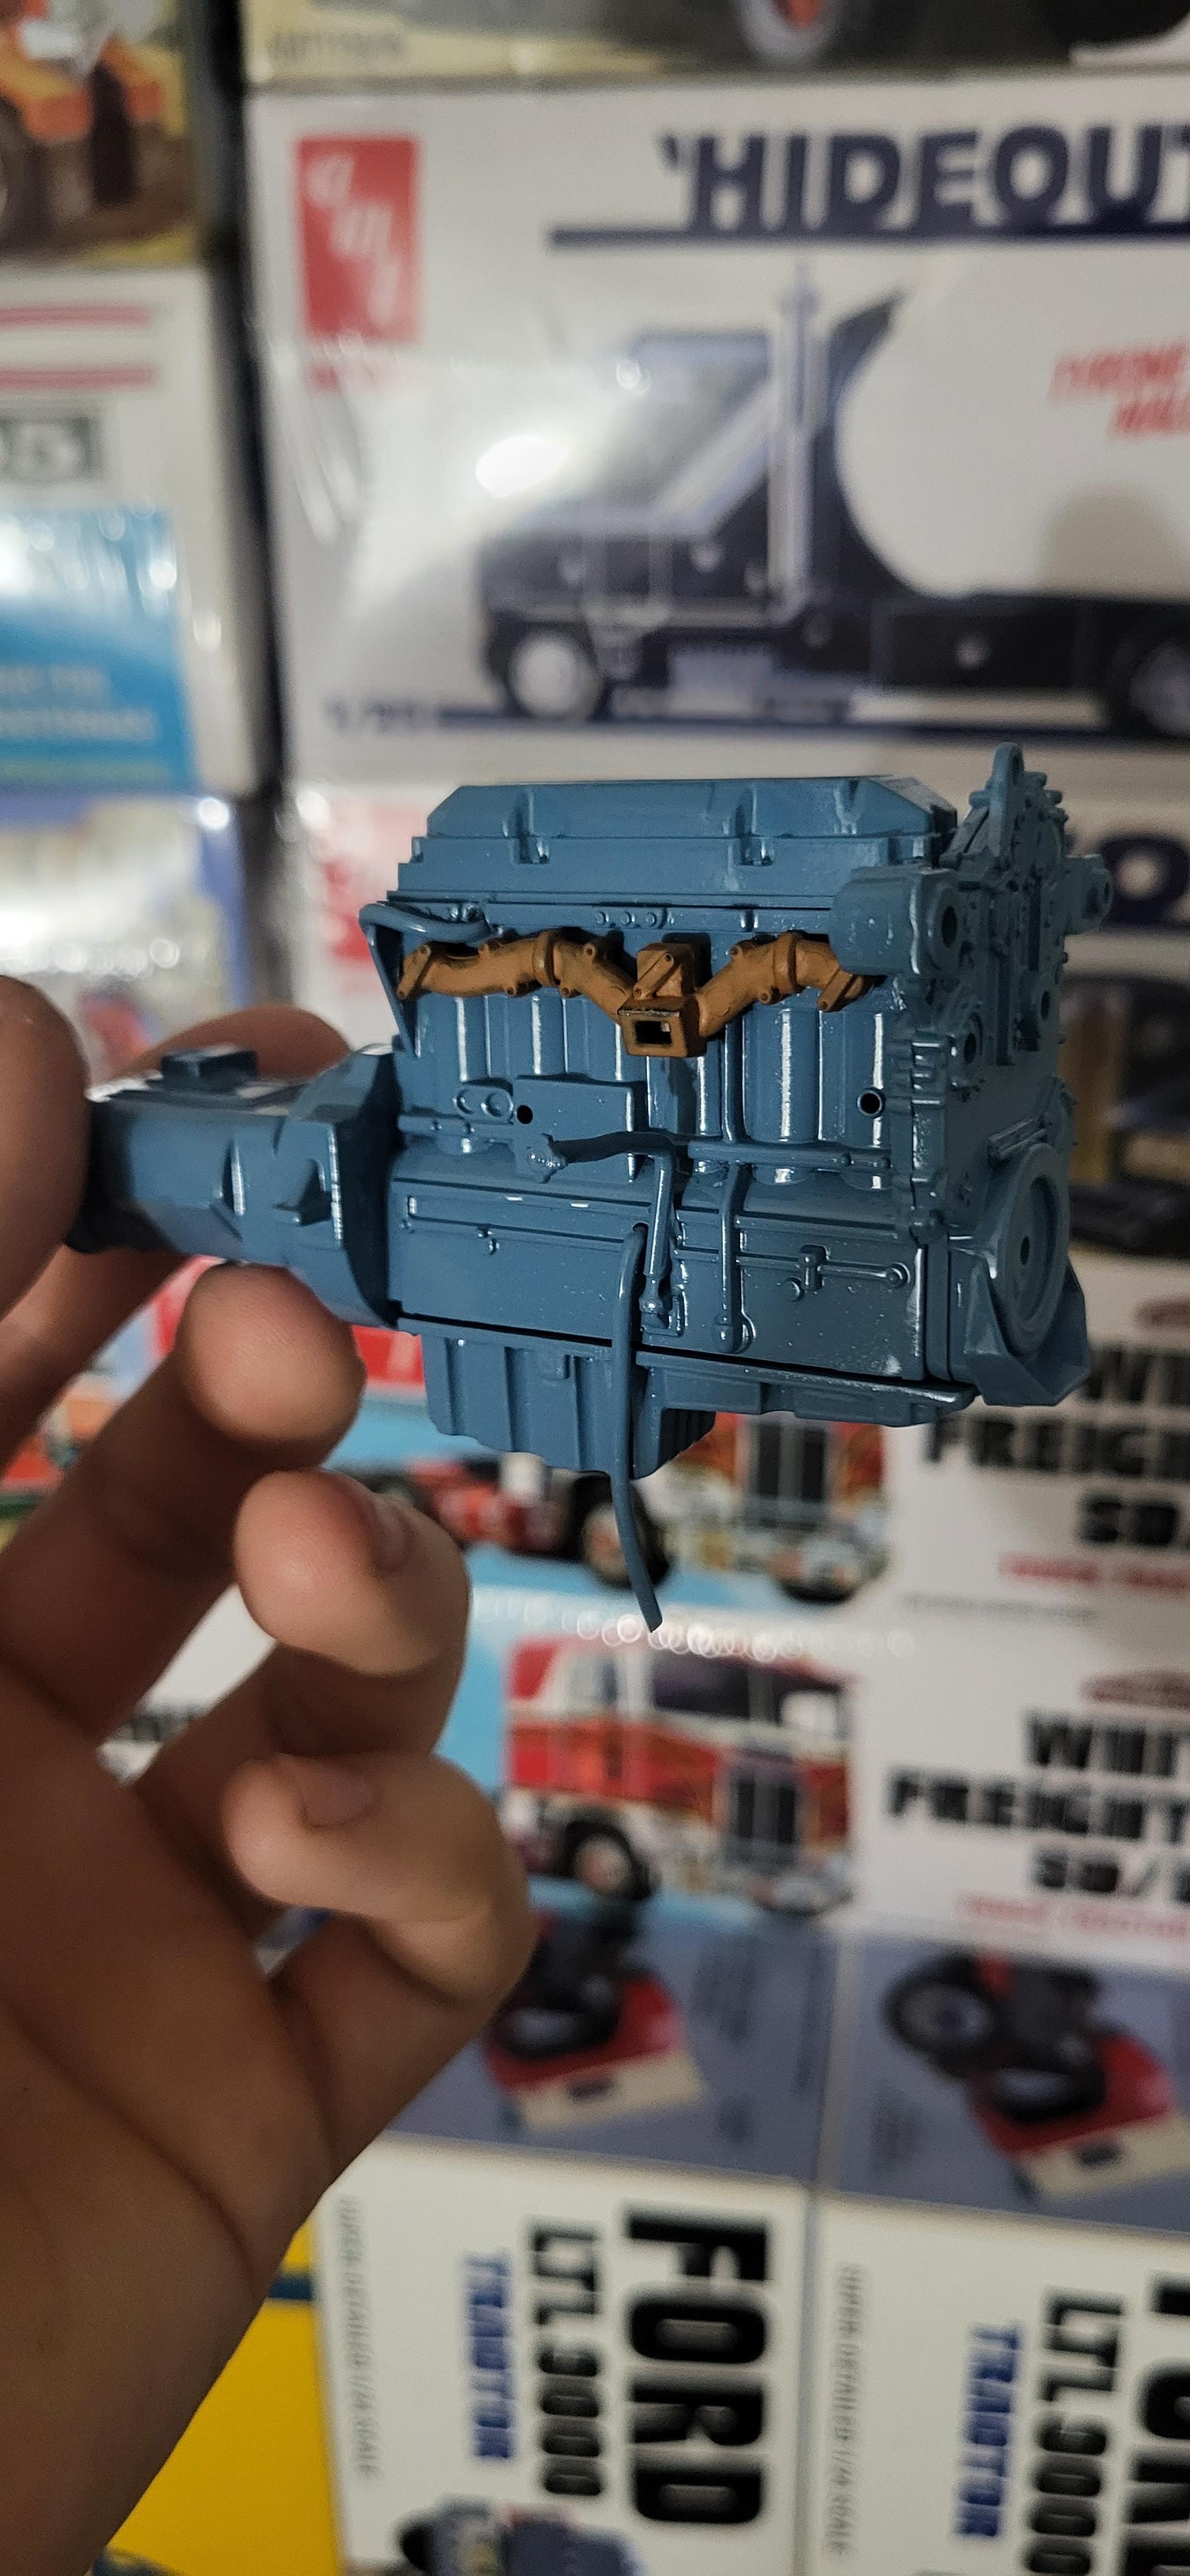
Alright, the long anticipated completion of my major 378 project is completed. Finished it Friday night, and displayed it at its first show today! To my knowledge it didn't place, but I did place with another rig. But enough of that, here are the pictures and the description, enjoy it. It's my most favorite build to date! -Lowered the front and rear suspension a few millimeters -Gary Wallace flat top roof sleeper conversion -3D Printed: 2 hole rear rims, steer rims lug nuts, antennas, rear 1/2 fenders, sleeper whale tail, front bumper, cab and sleeper chicken light panels, tank panel light, mudflap brackets, exhaust tips, cb radio, hood ornament, and misc lighting -Fully functional driver door hinge and sleeper door hinge -Frame fully plumbed with brake air lines, electrical lines. Control valves from the AMT Mack R kit -Rubber mudflaps all around -Fully plumbed and wired Detroit Diesel 12.7 60 series engine with a CCV tube, and scratchbuilt oil filler neck -Extensively reworked cab and sleeper interiors -AMT: Throttle/brake/clutch pedals, seats with modified bases, steering wheel, 5th wheel assembly, etc -Scratchbuilt shifter, floor mat, and all sleeper components -Air lines from parts box -Decals from various AMT kits, and custom made from STS Scale Model Decals
-
BRBO2023 Italeri 378
TruckerAL replied to TruckerAL's topic in WIP: Model Trucks: Big Rigs and Heavy Equipment
This project is COMPLETE! Will post in under glass tomorrow! -
BRBO2023 Italeri 378
TruckerAL replied to TruckerAL's topic in WIP: Model Trucks: Big Rigs and Heavy Equipment
Work was slow today thankfully, which gave me a great idea: make a display base for my project. Took an old scrap piece of wood, cut it size, and "stained" it with a torch. It's beautiful, never done anything like that before
-
BRBO2023 Italeri 378
TruckerAL replied to TruckerAL's topic in WIP: Model Trucks: Big Rigs and Heavy Equipment
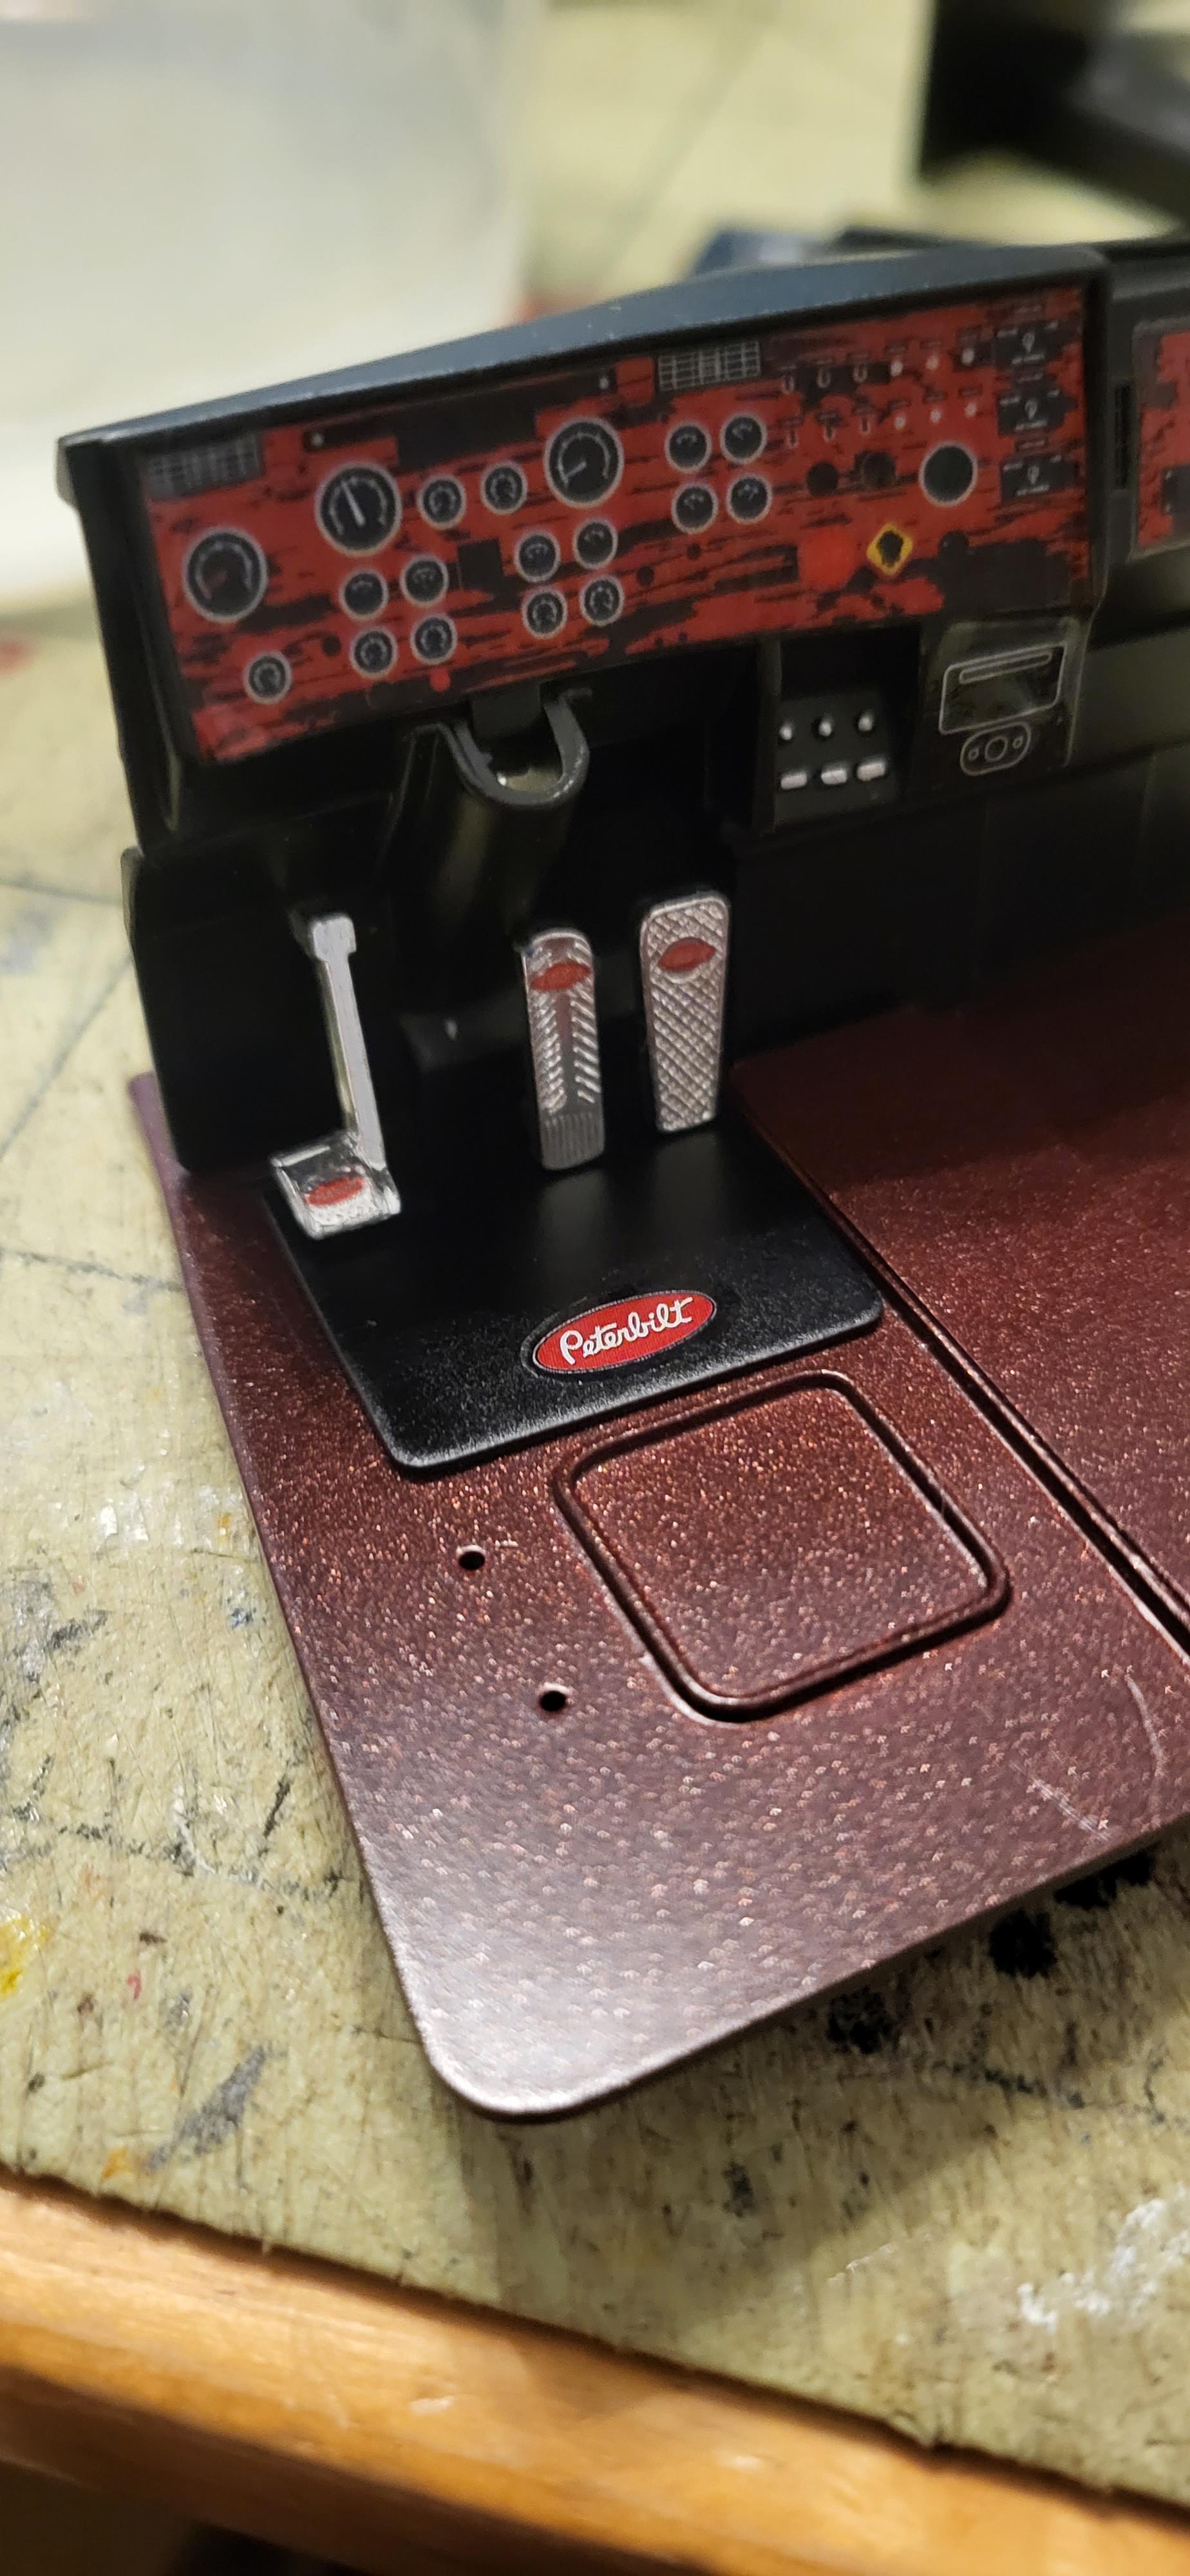
Thank you! So the pedals are from an AMT KW W925. I modified them slightly around the edges, and then added AMT 359 steering wheel decals to the pedals? -
BRBO2023 Italeri 378
TruckerAL replied to TruckerAL's topic in WIP: Model Trucks: Big Rigs and Heavy Equipment
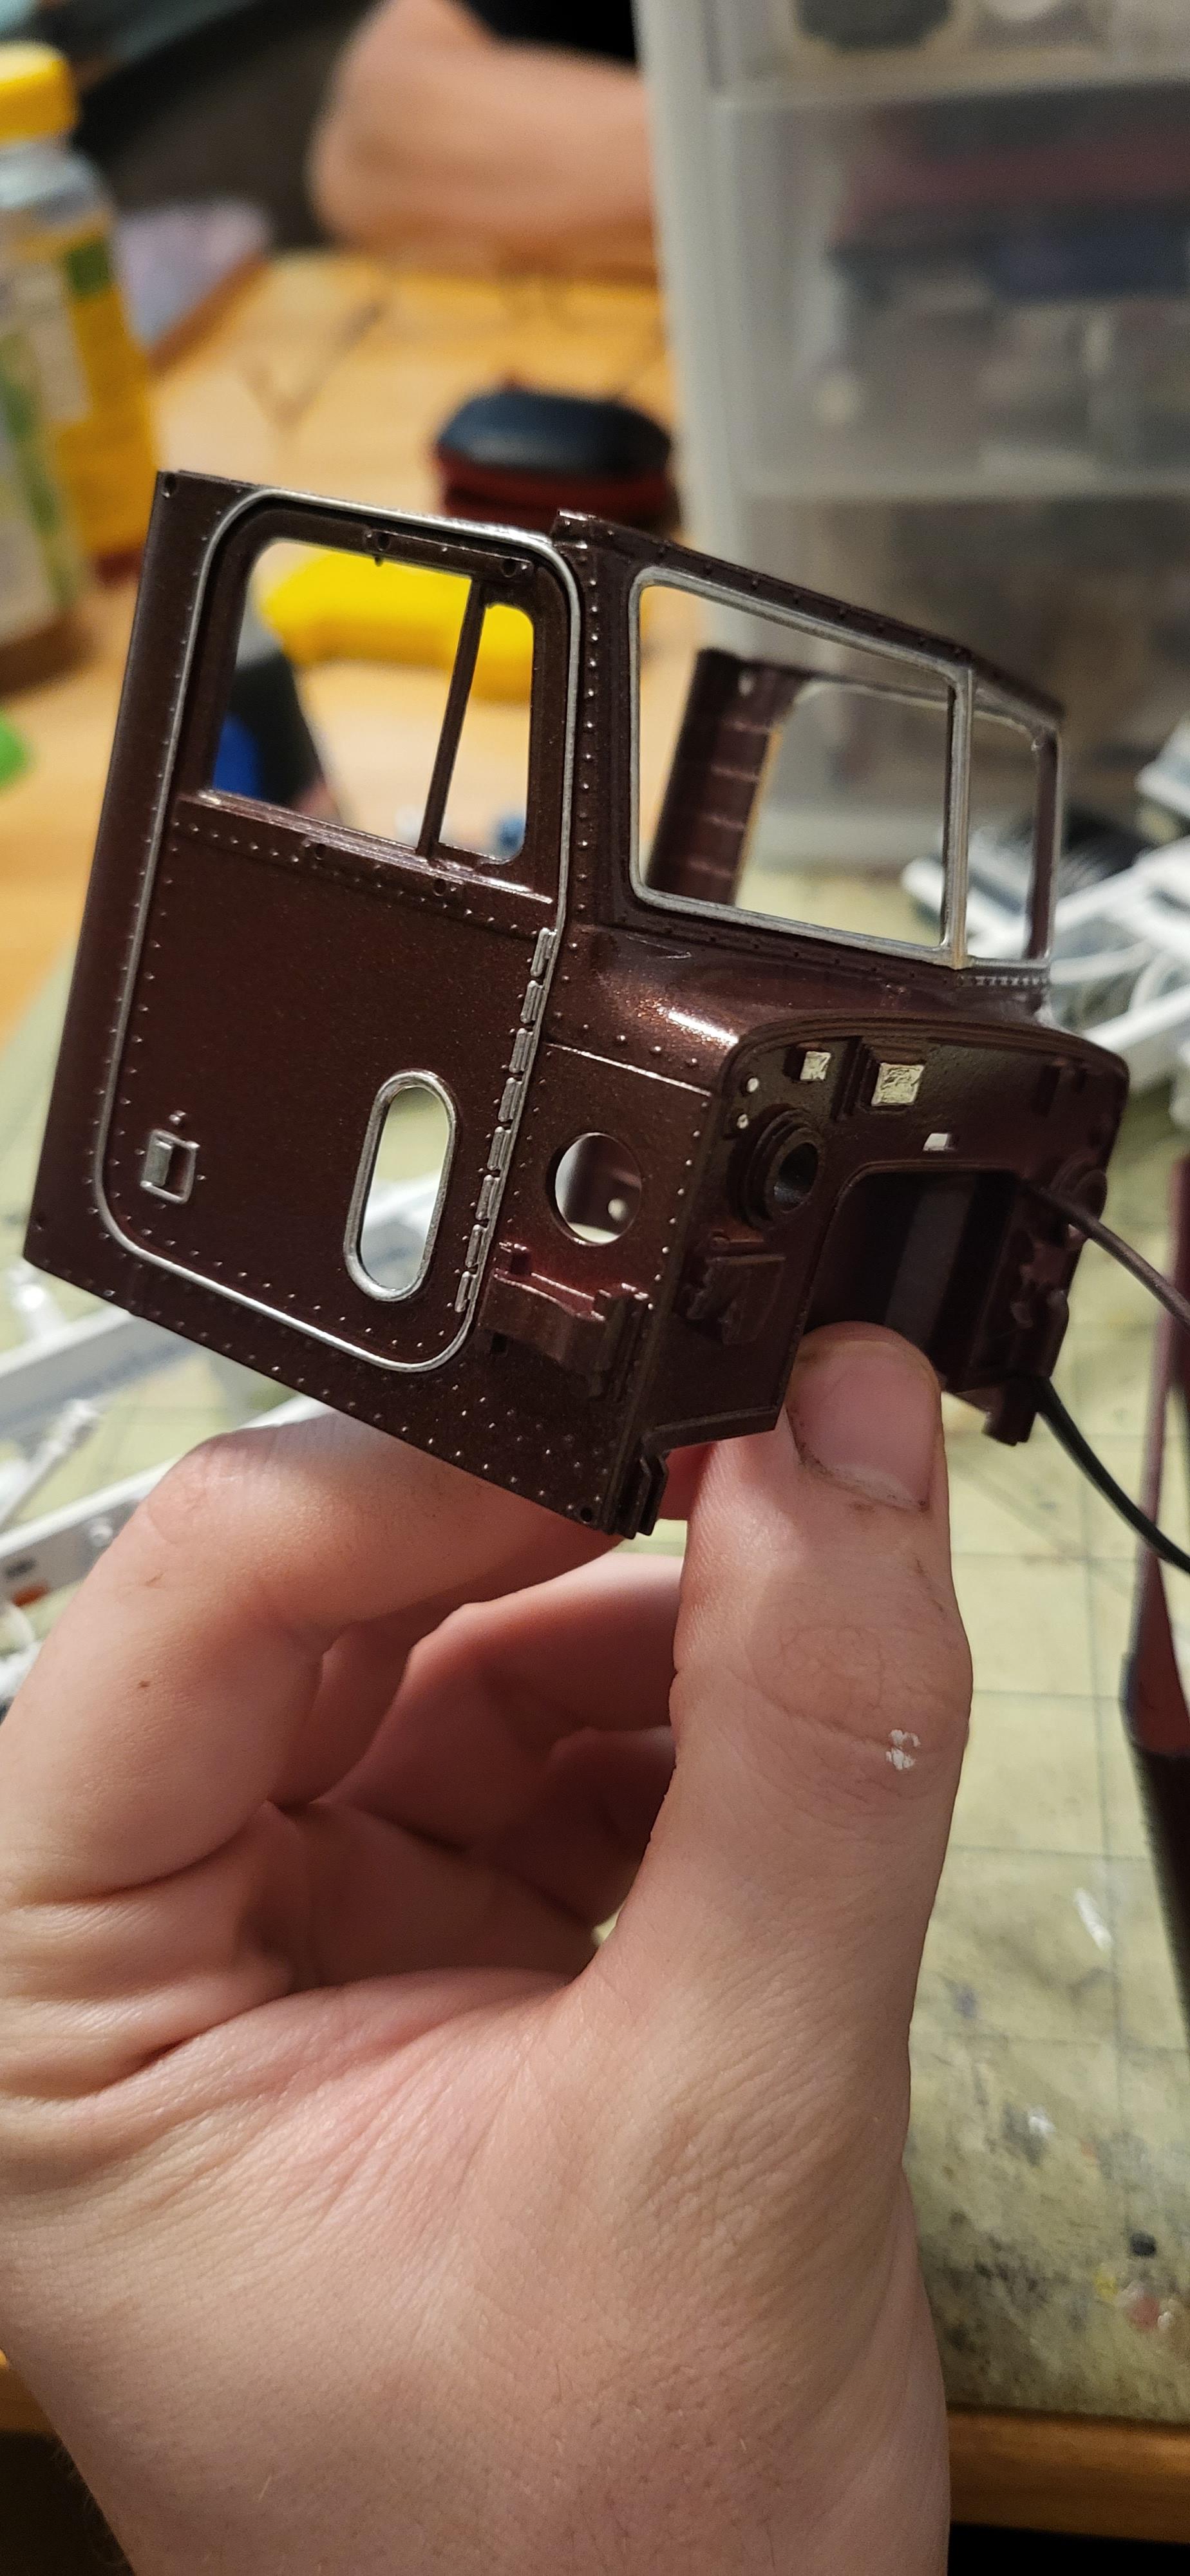
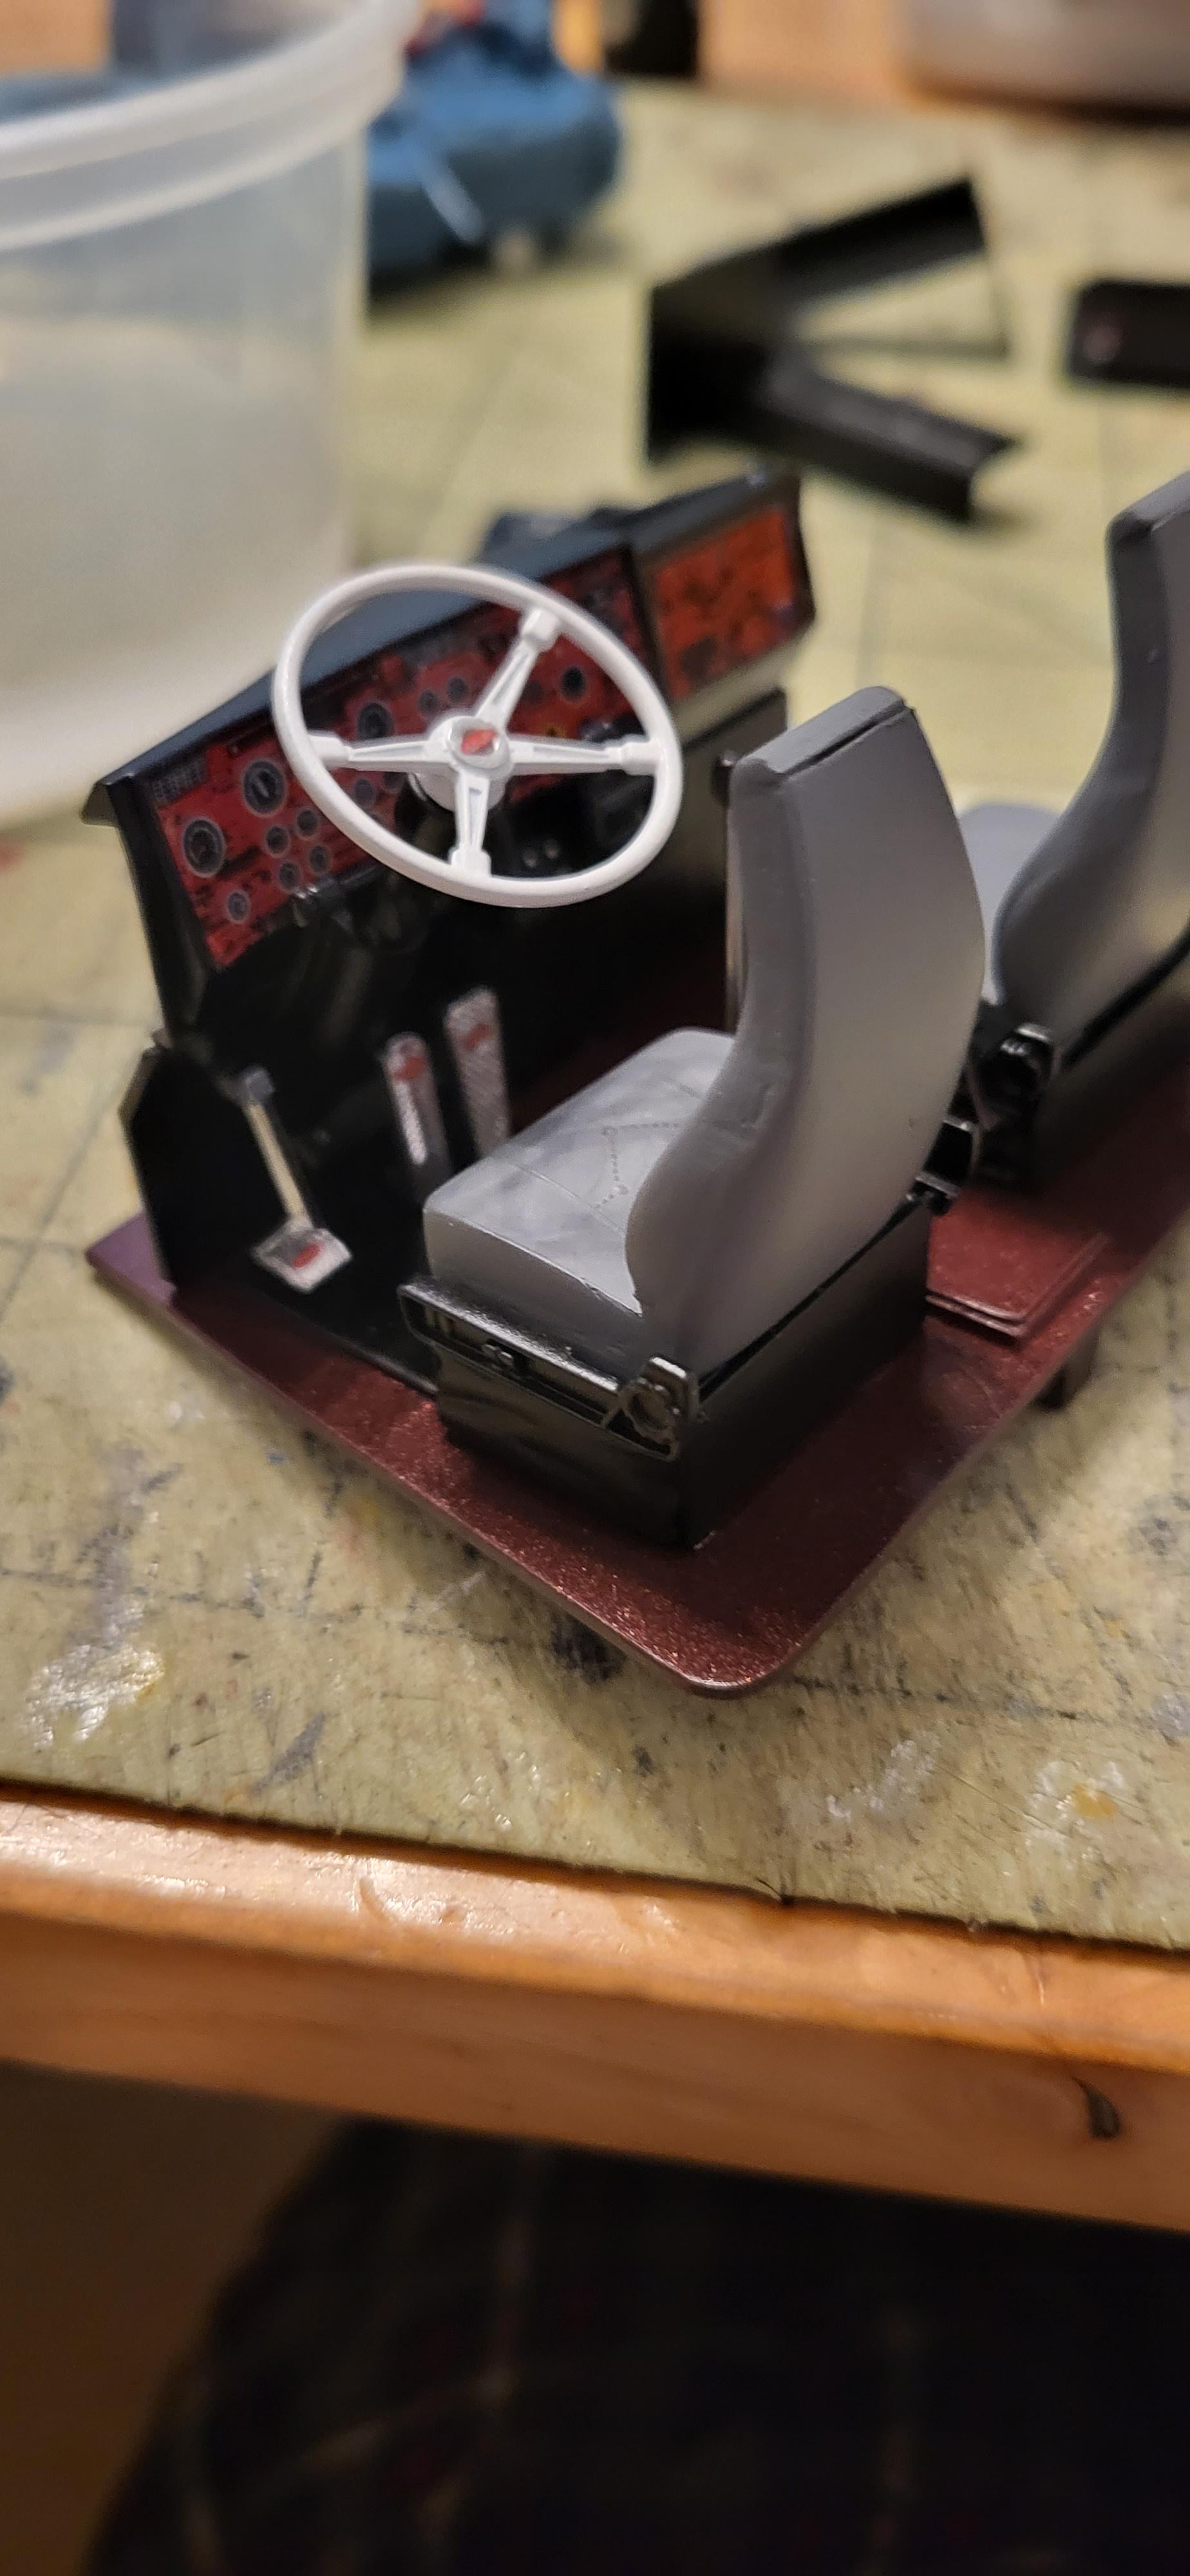
Thank you everyone for the comments! I enjoy reading the feedback? So here's where I stand at the end of this weekend. I have no idea how, but I ran out of glue and can't find my spare tube ? so this project is on hold until I get more this week. By Friday, this build will be finished! It's been kicking my ass, but it's shaping up exactly how I envisioned it. Here's another big photo dump, enjoy!
-
BRBO2023 Italeri 378
TruckerAL replied to TruckerAL's topic in WIP: Model Trucks: Big Rigs and Heavy Equipment
Busy weekend so far, and still one more day left. It may be done tomorrow, we'll see! This truck has been testing me though. Hit 2 major roadblocks, but got around it for now I think. There's too much to type out, so I'll just let do the pictures do the talking
-
BRBO2023 Italeri 378
TruckerAL replied to TruckerAL's topic in WIP: Model Trucks: Big Rigs and Heavy Equipment
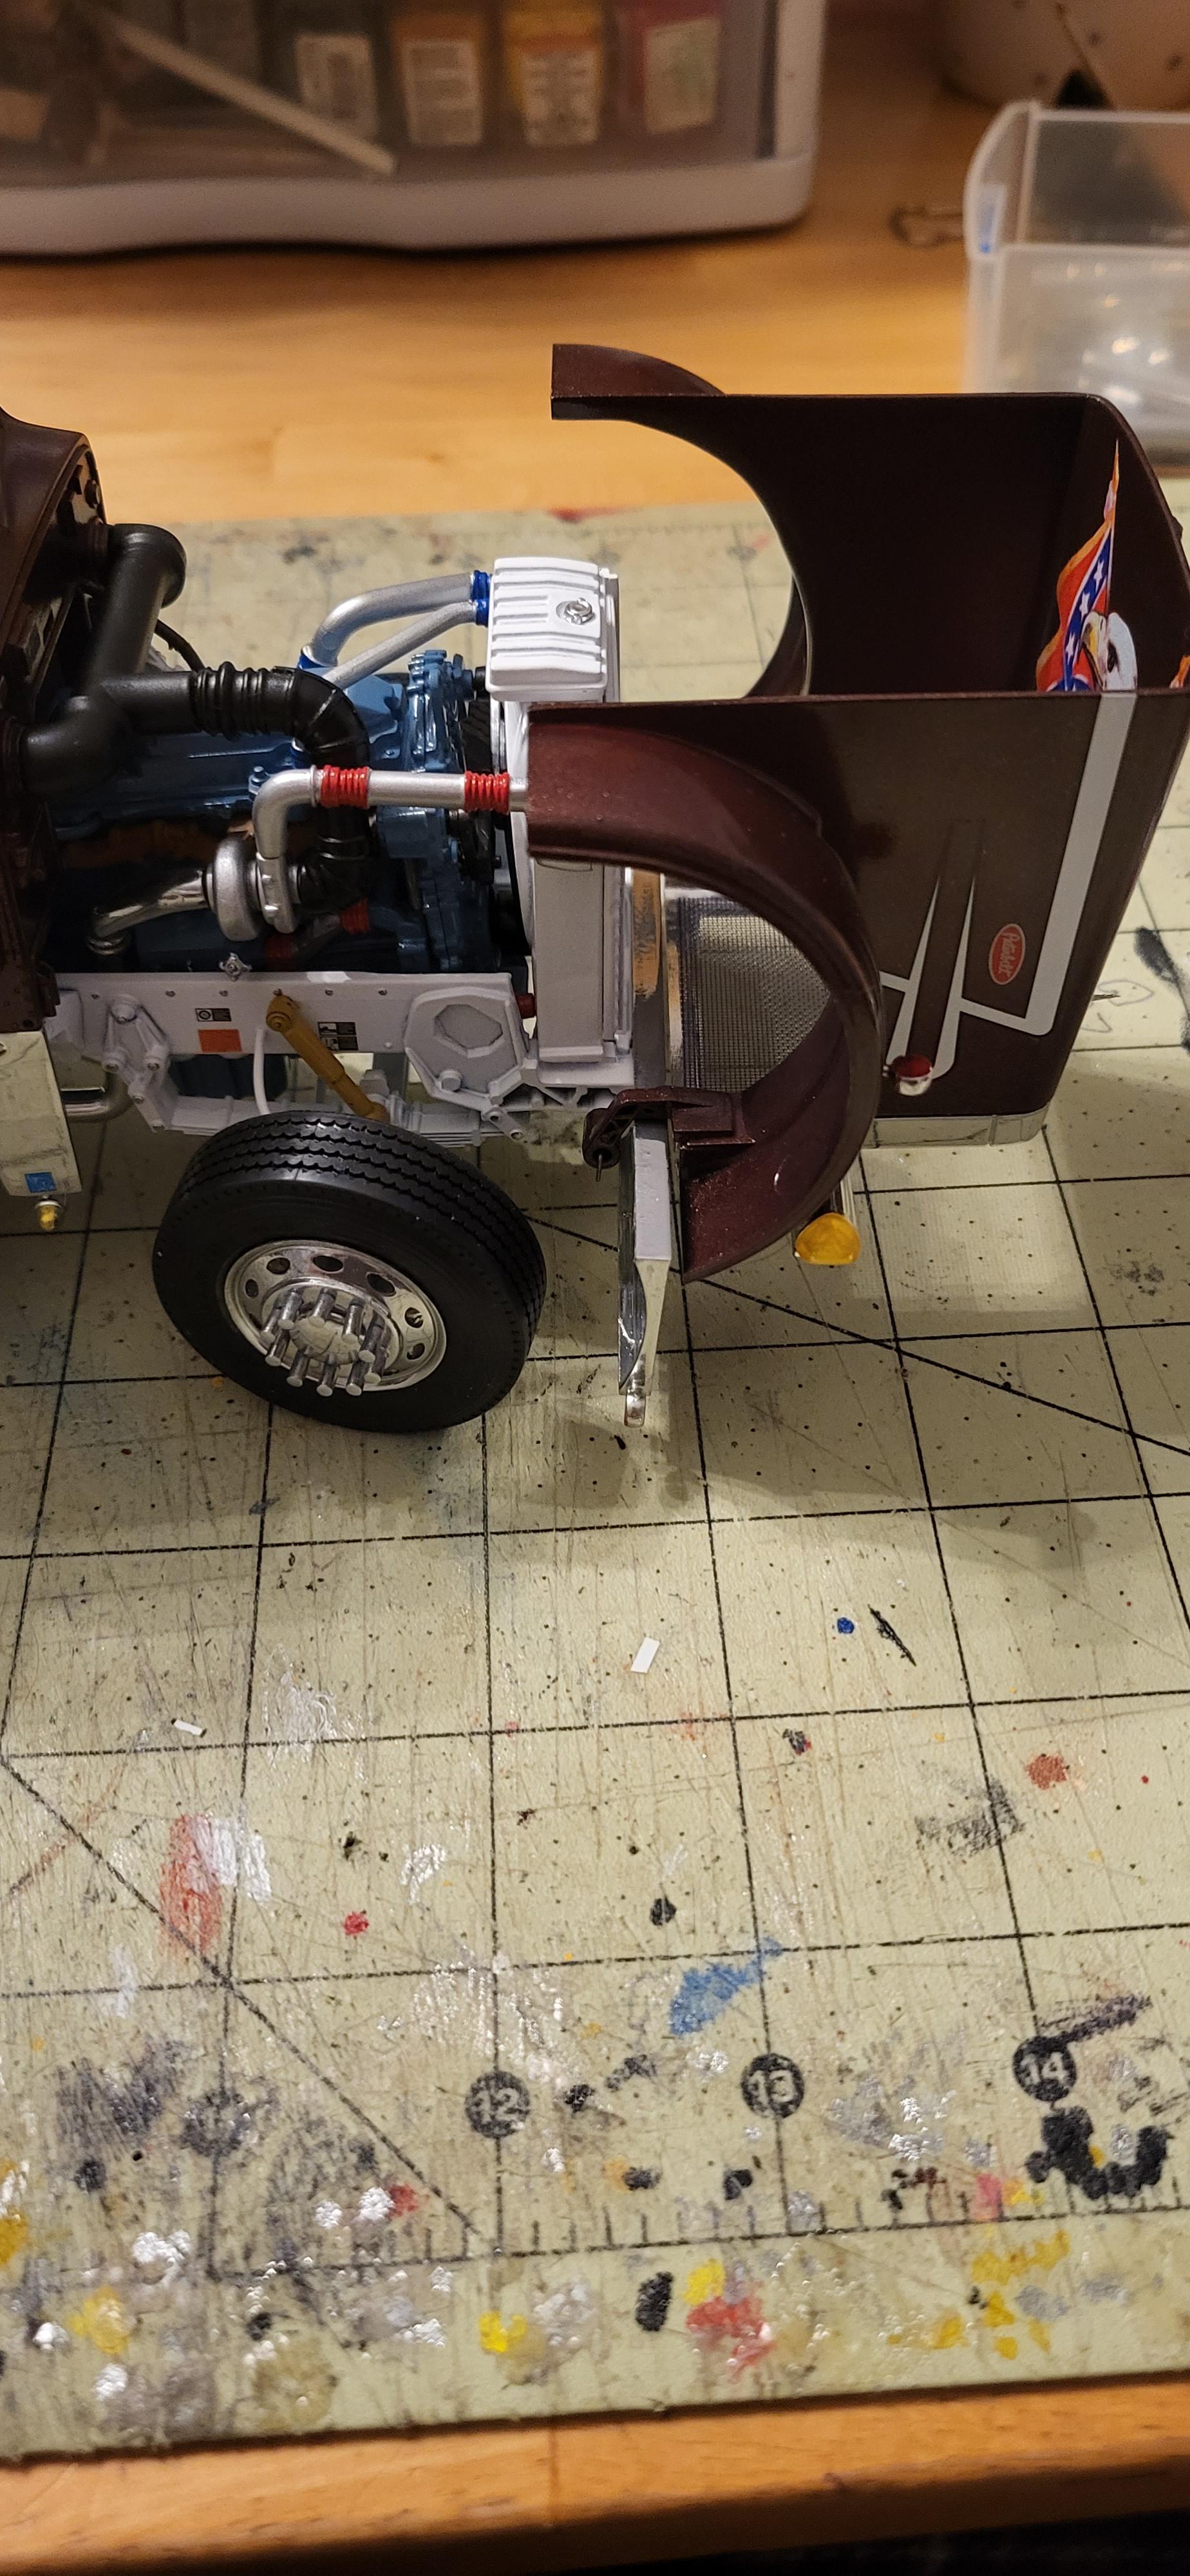
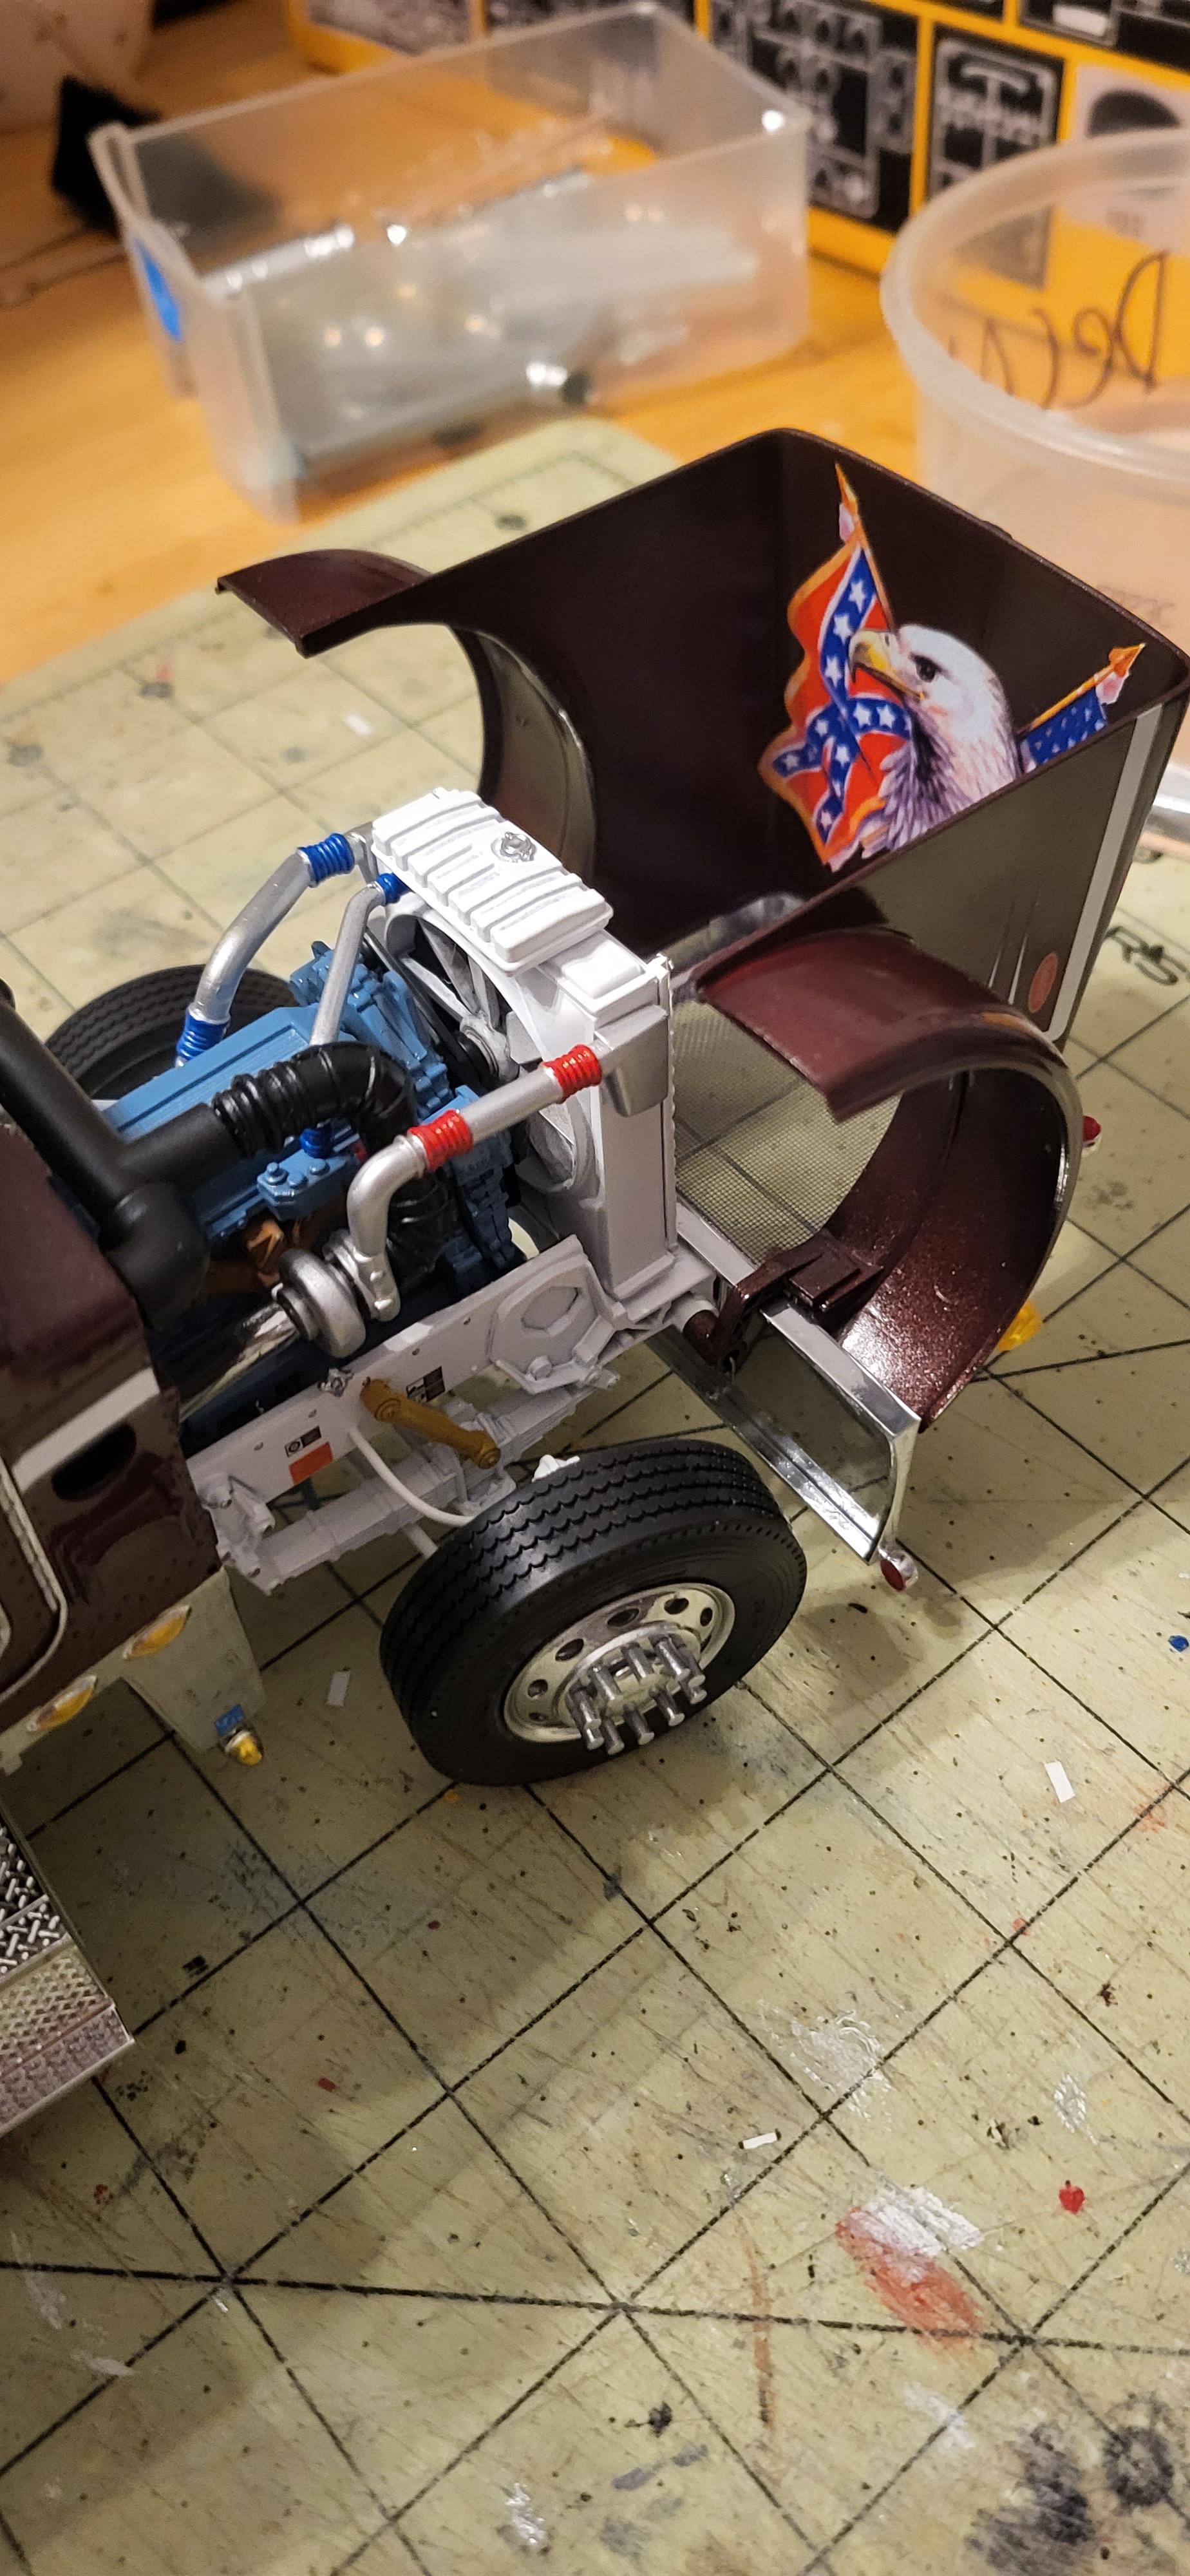
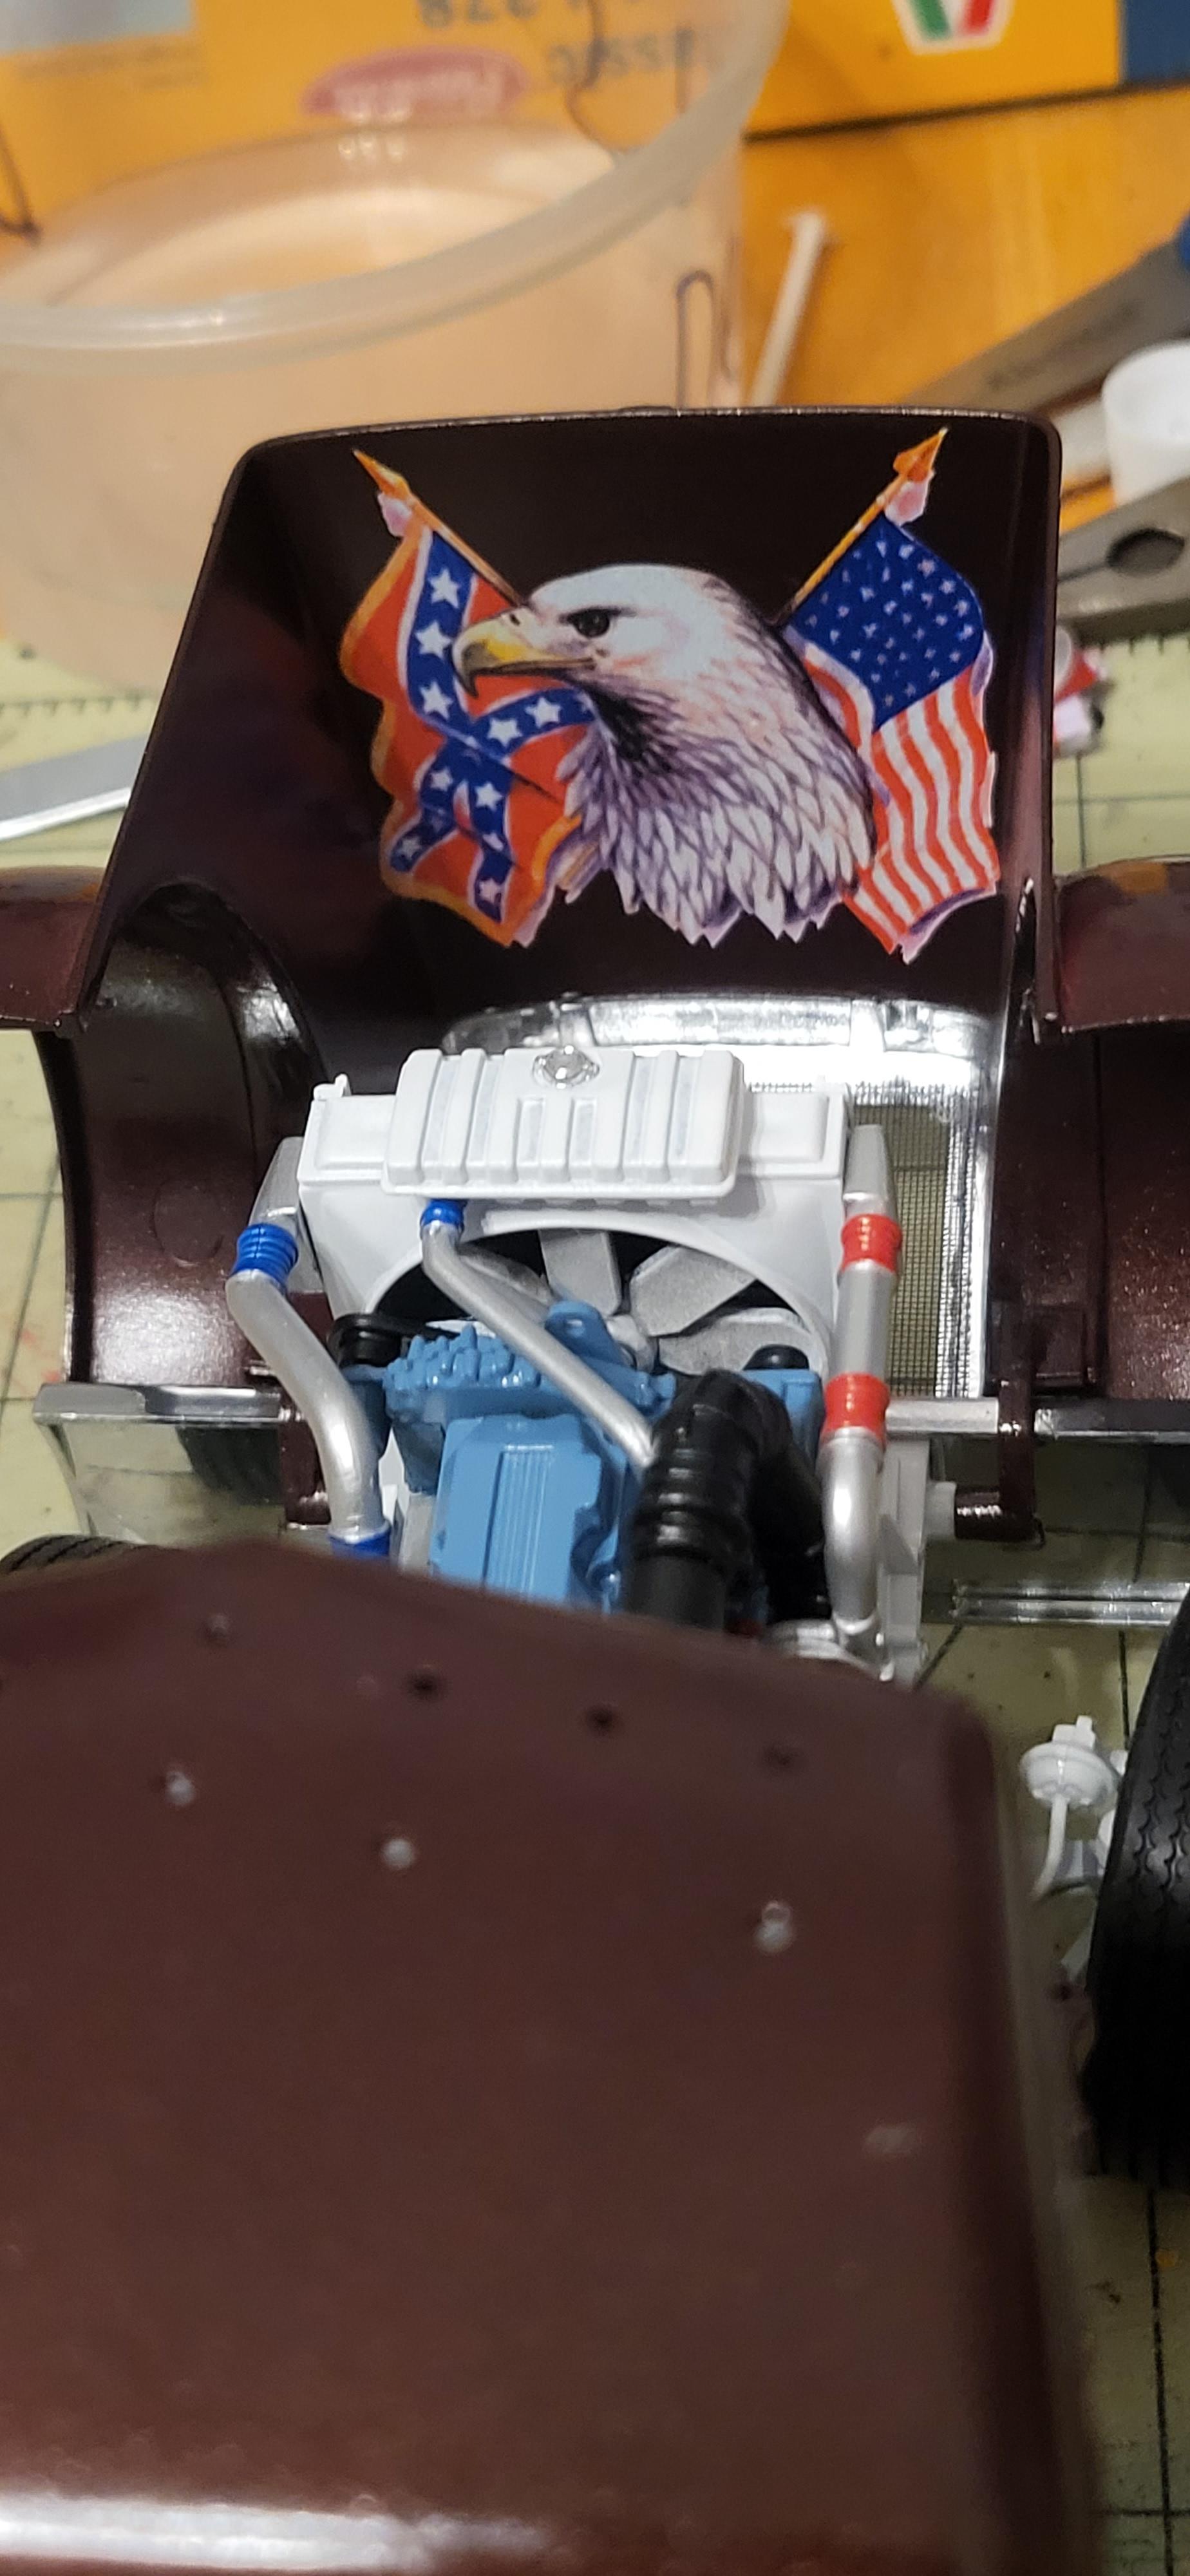
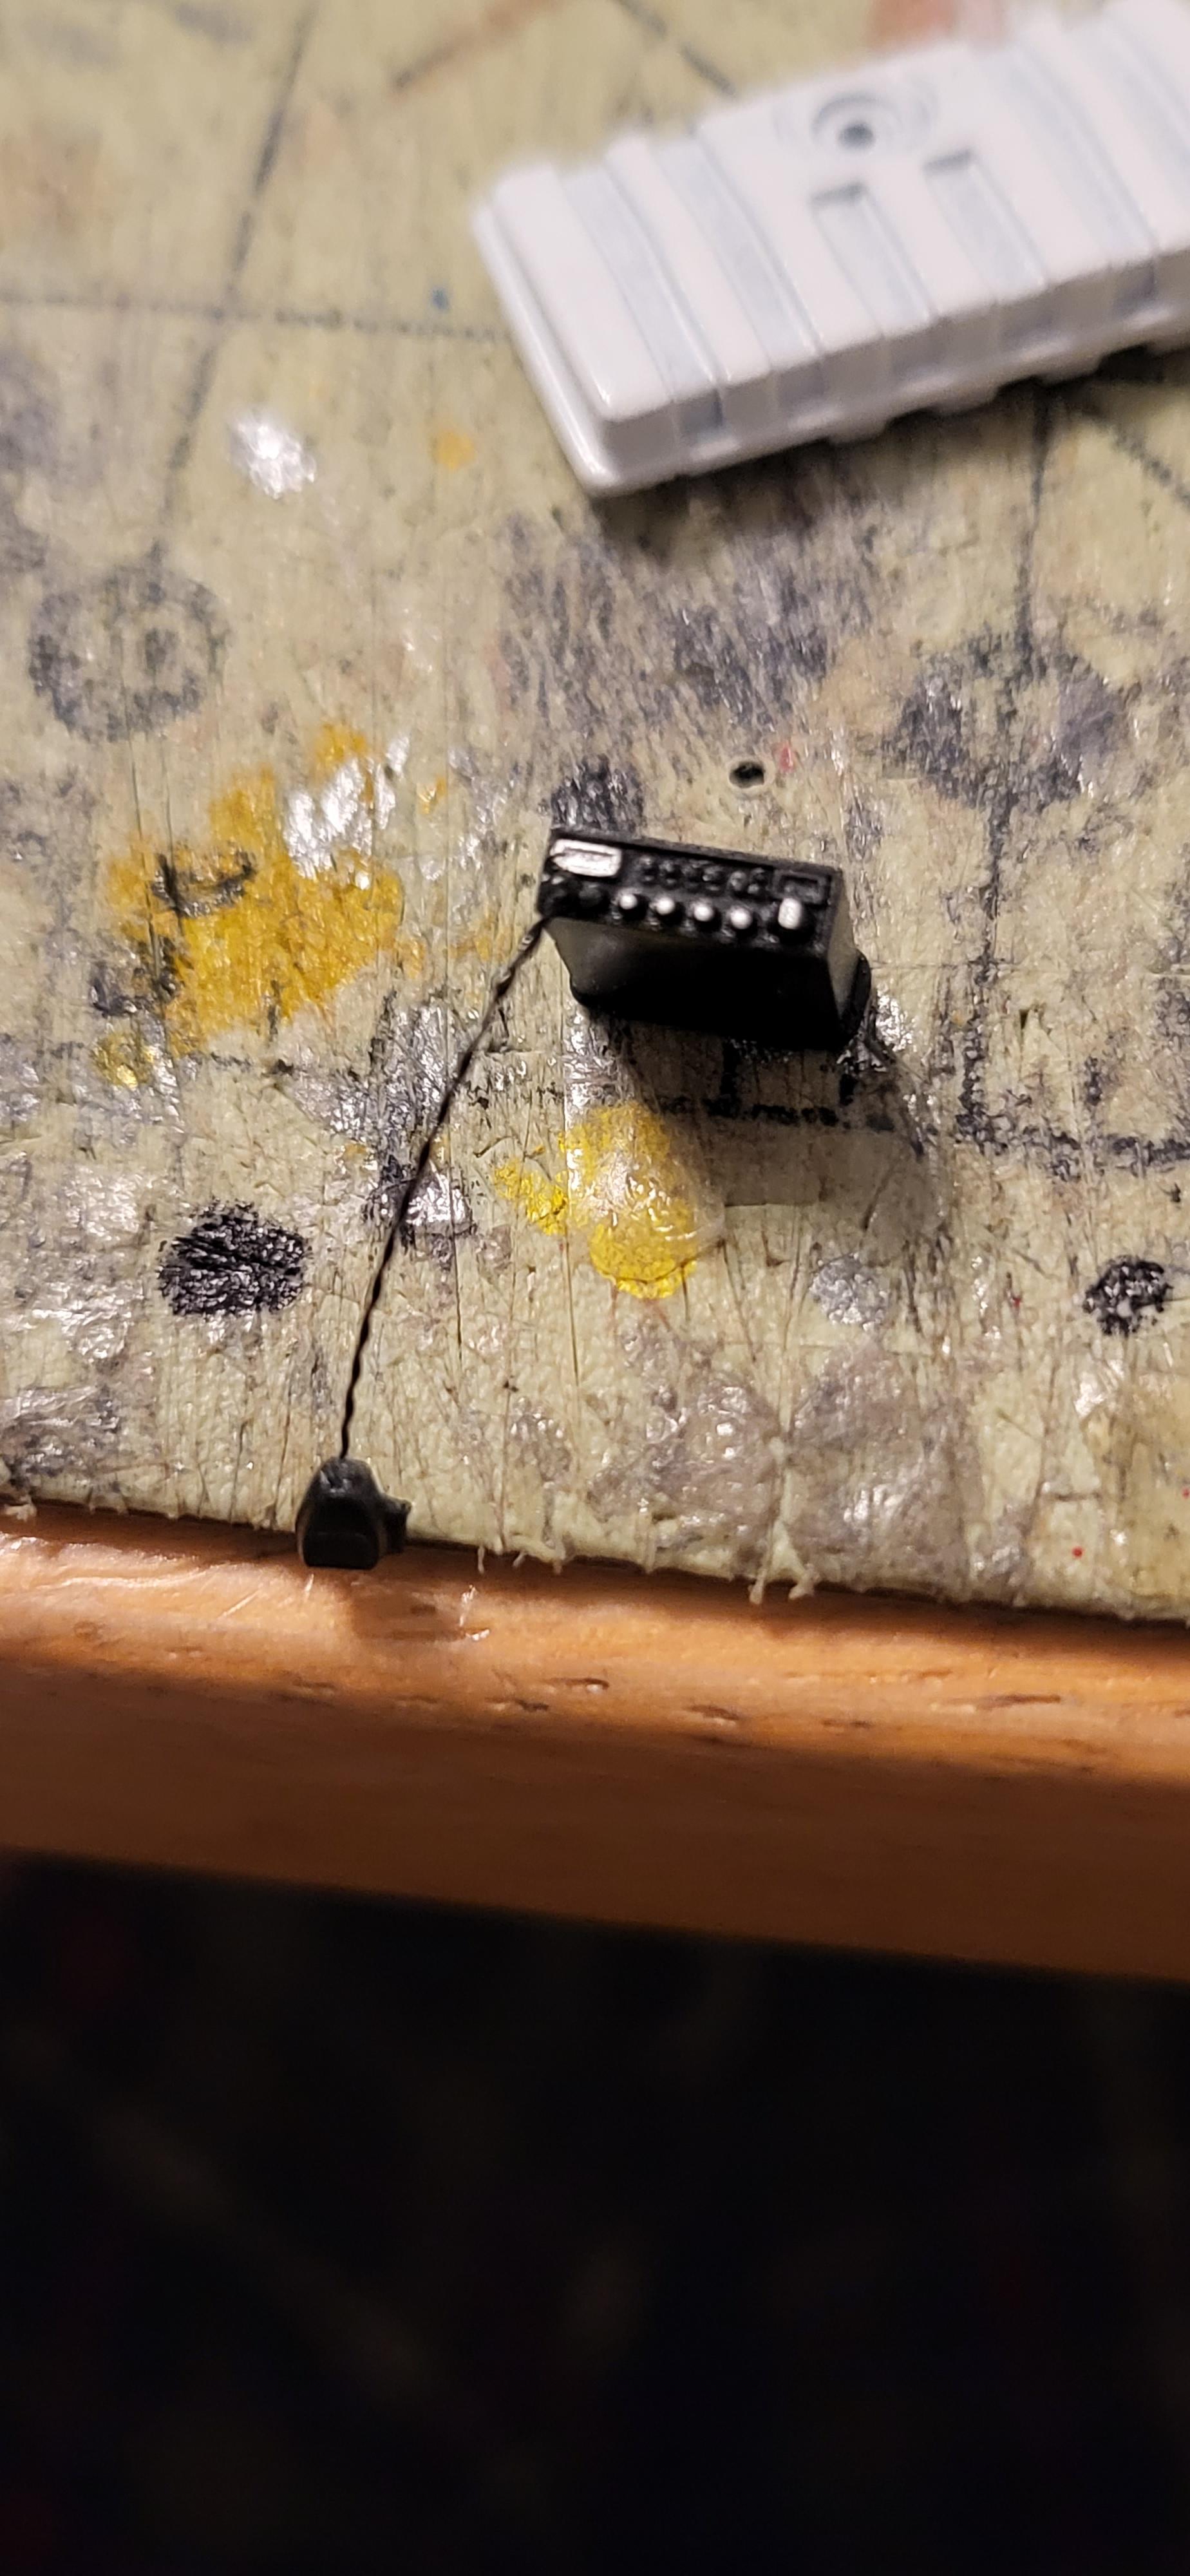
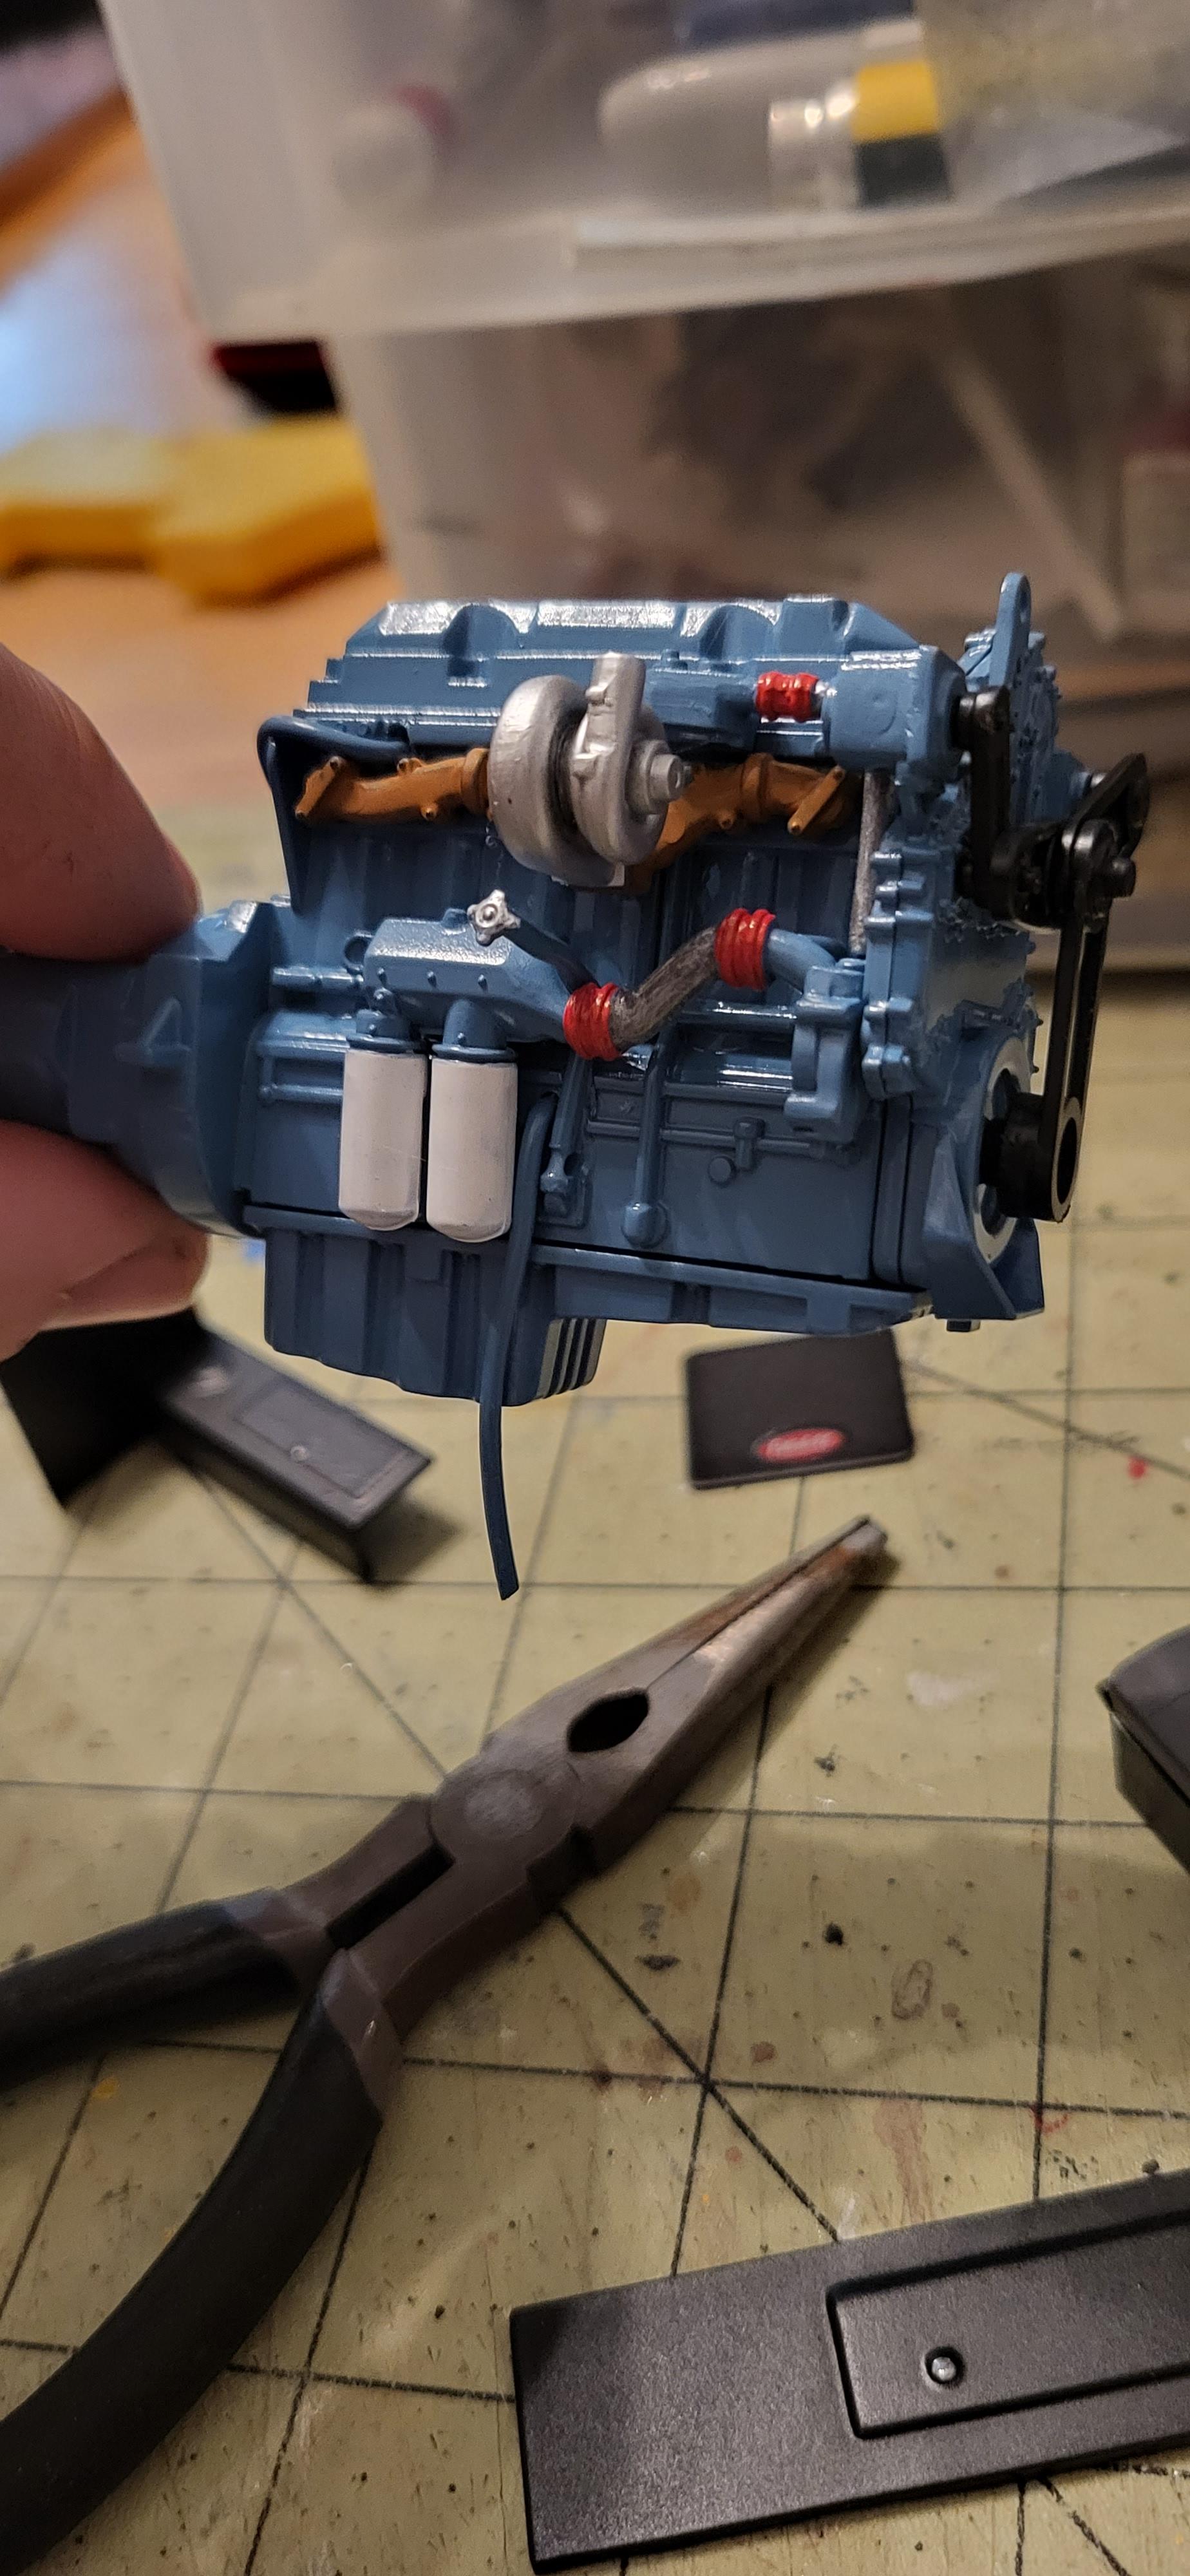
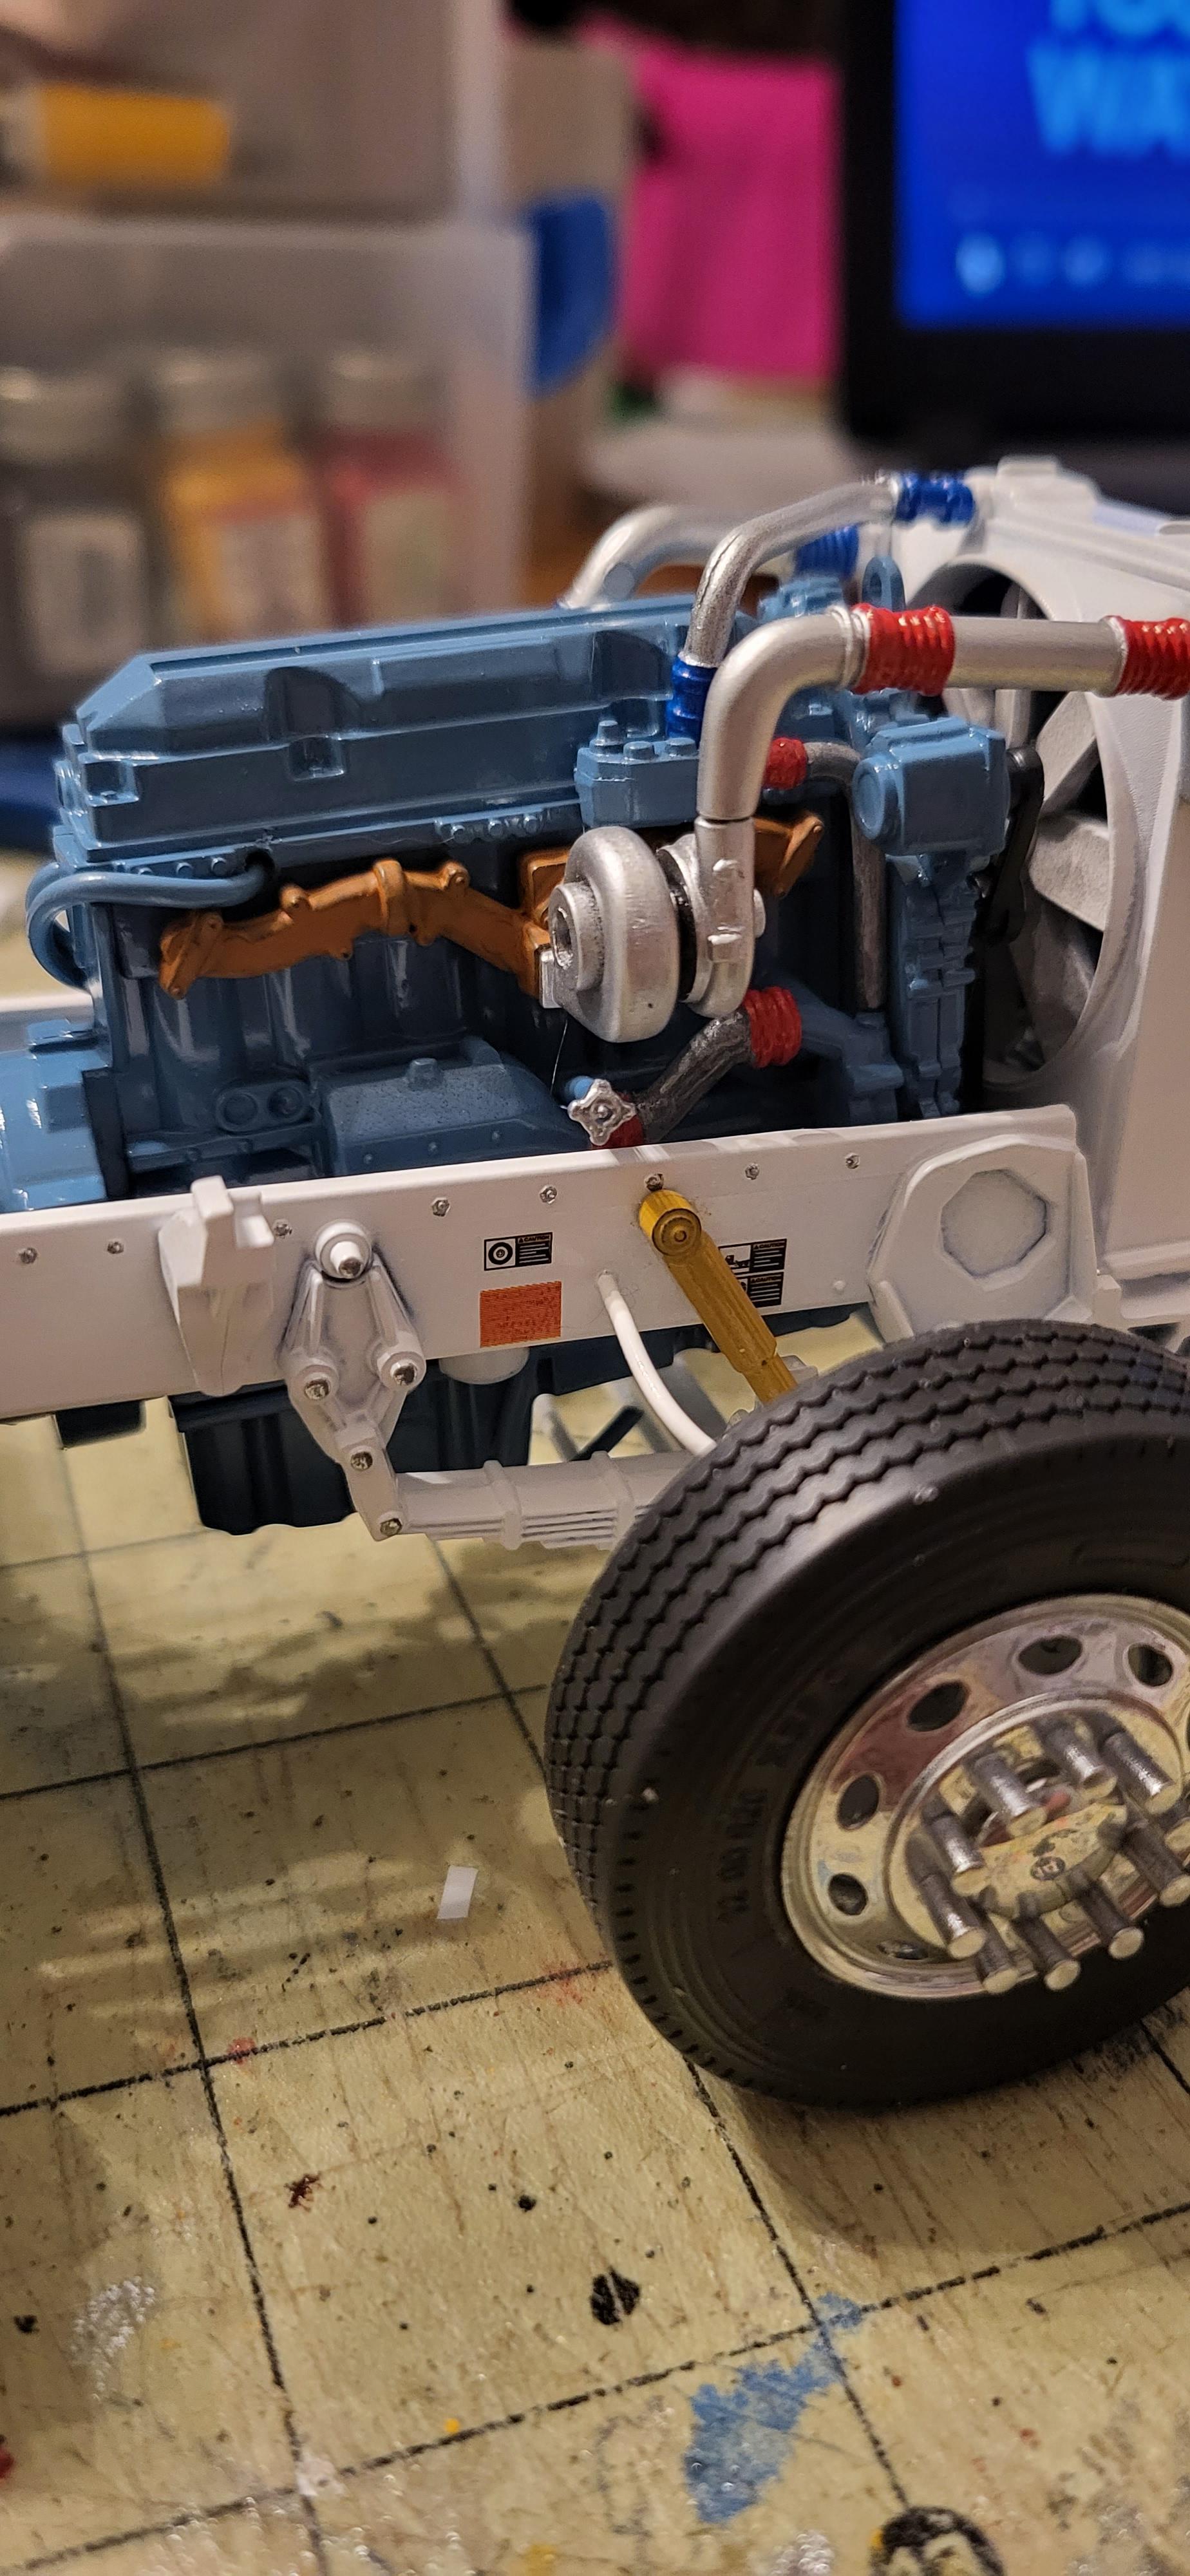
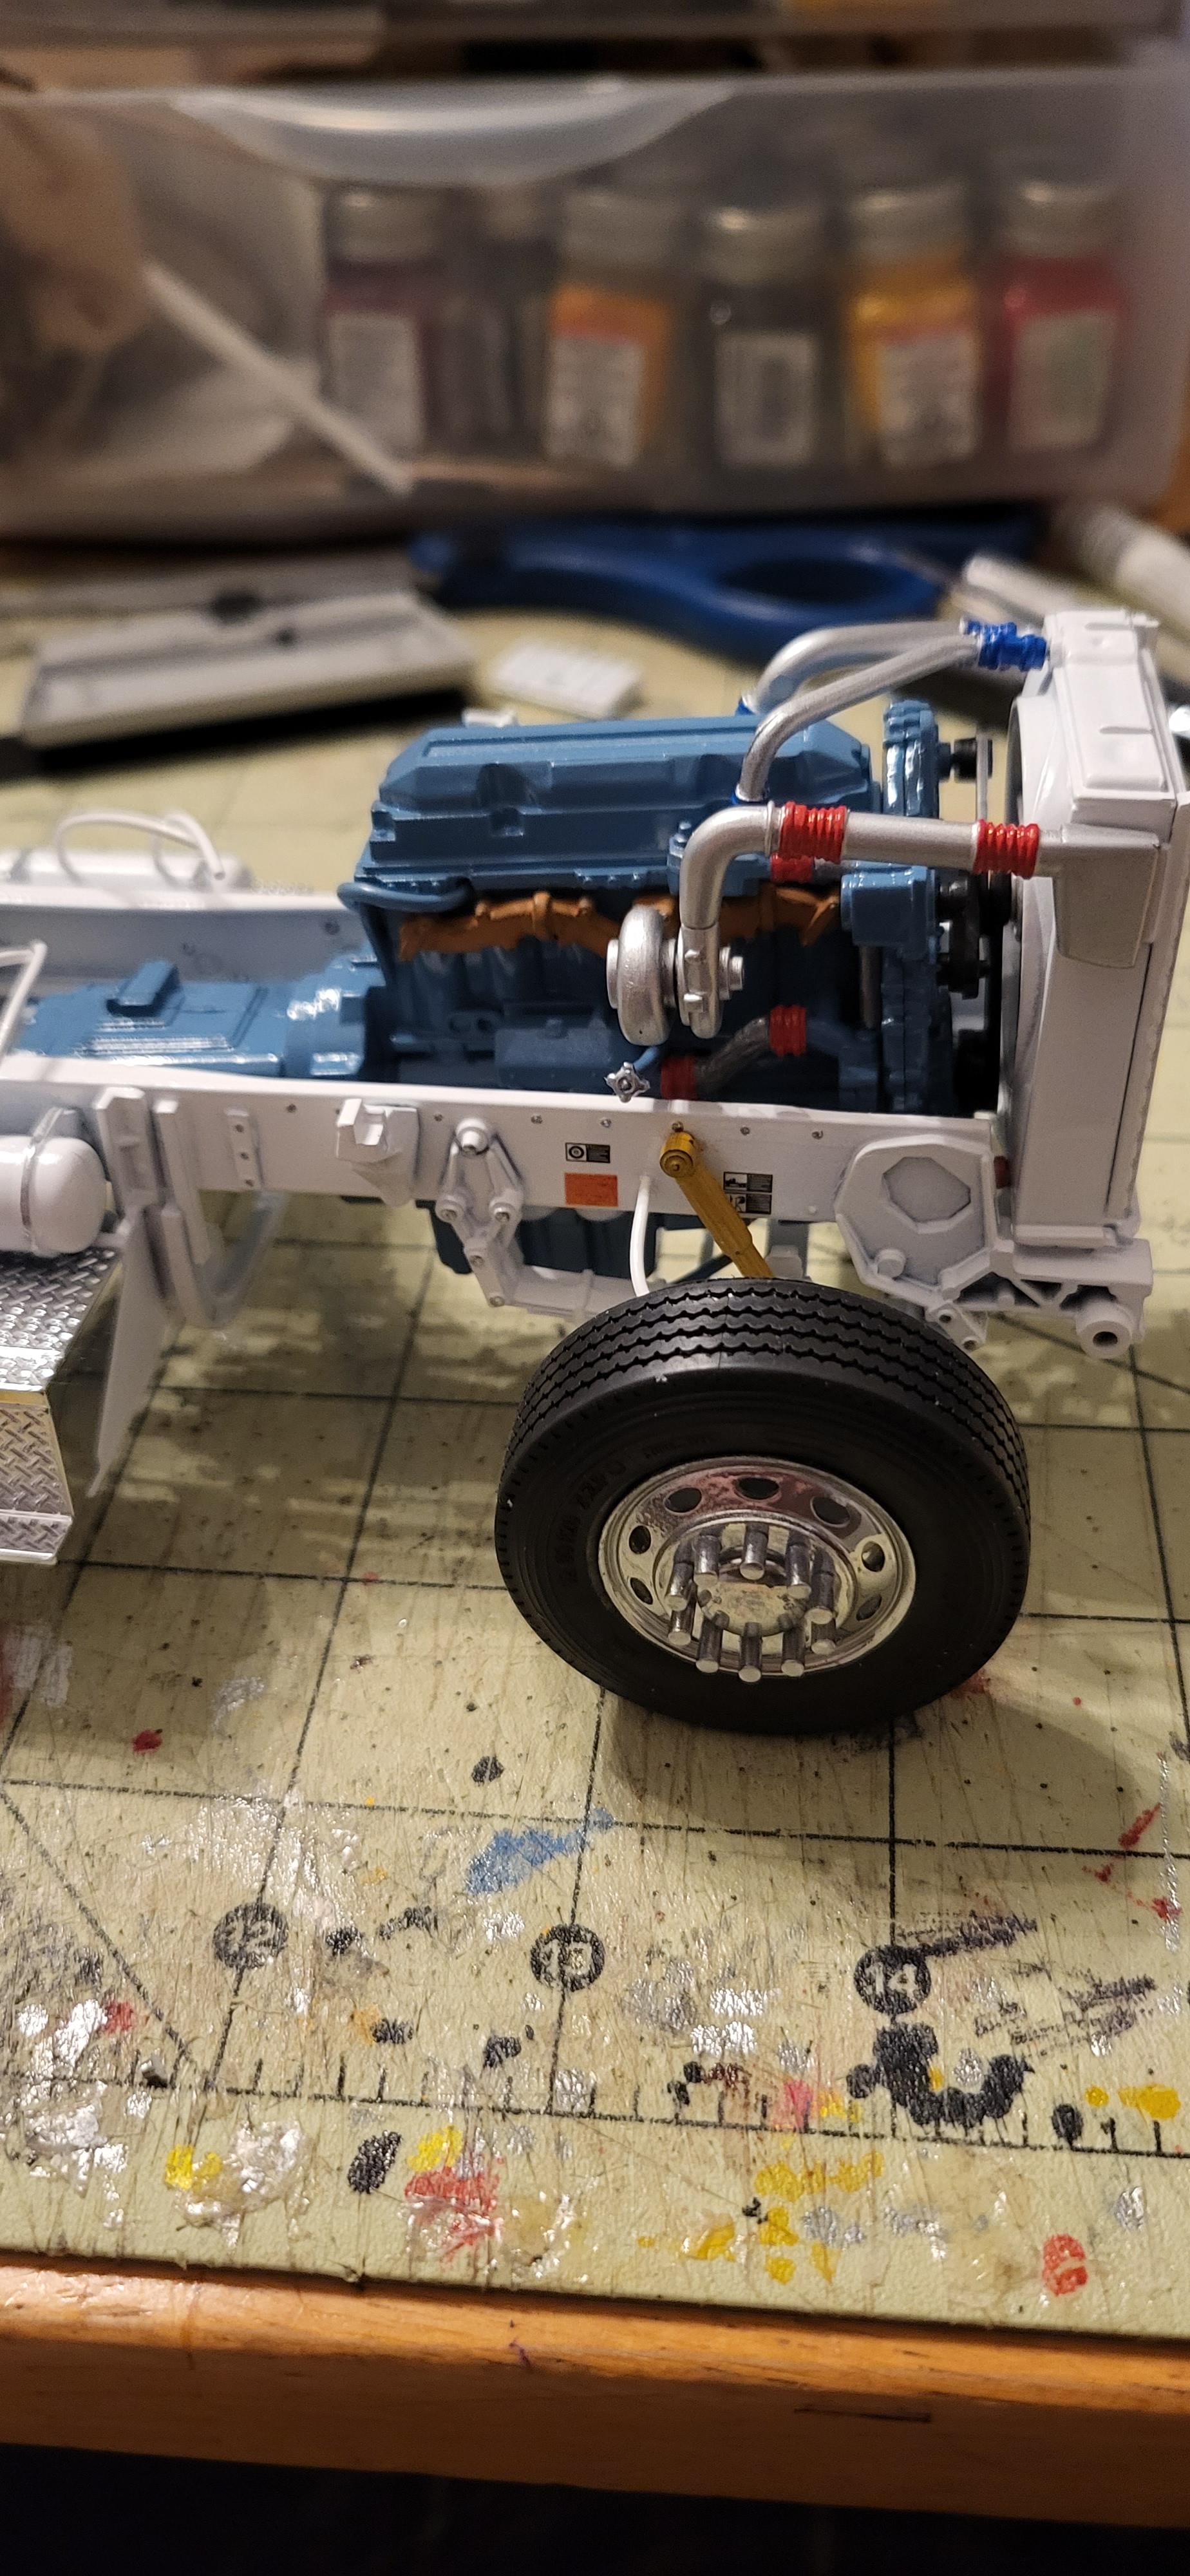
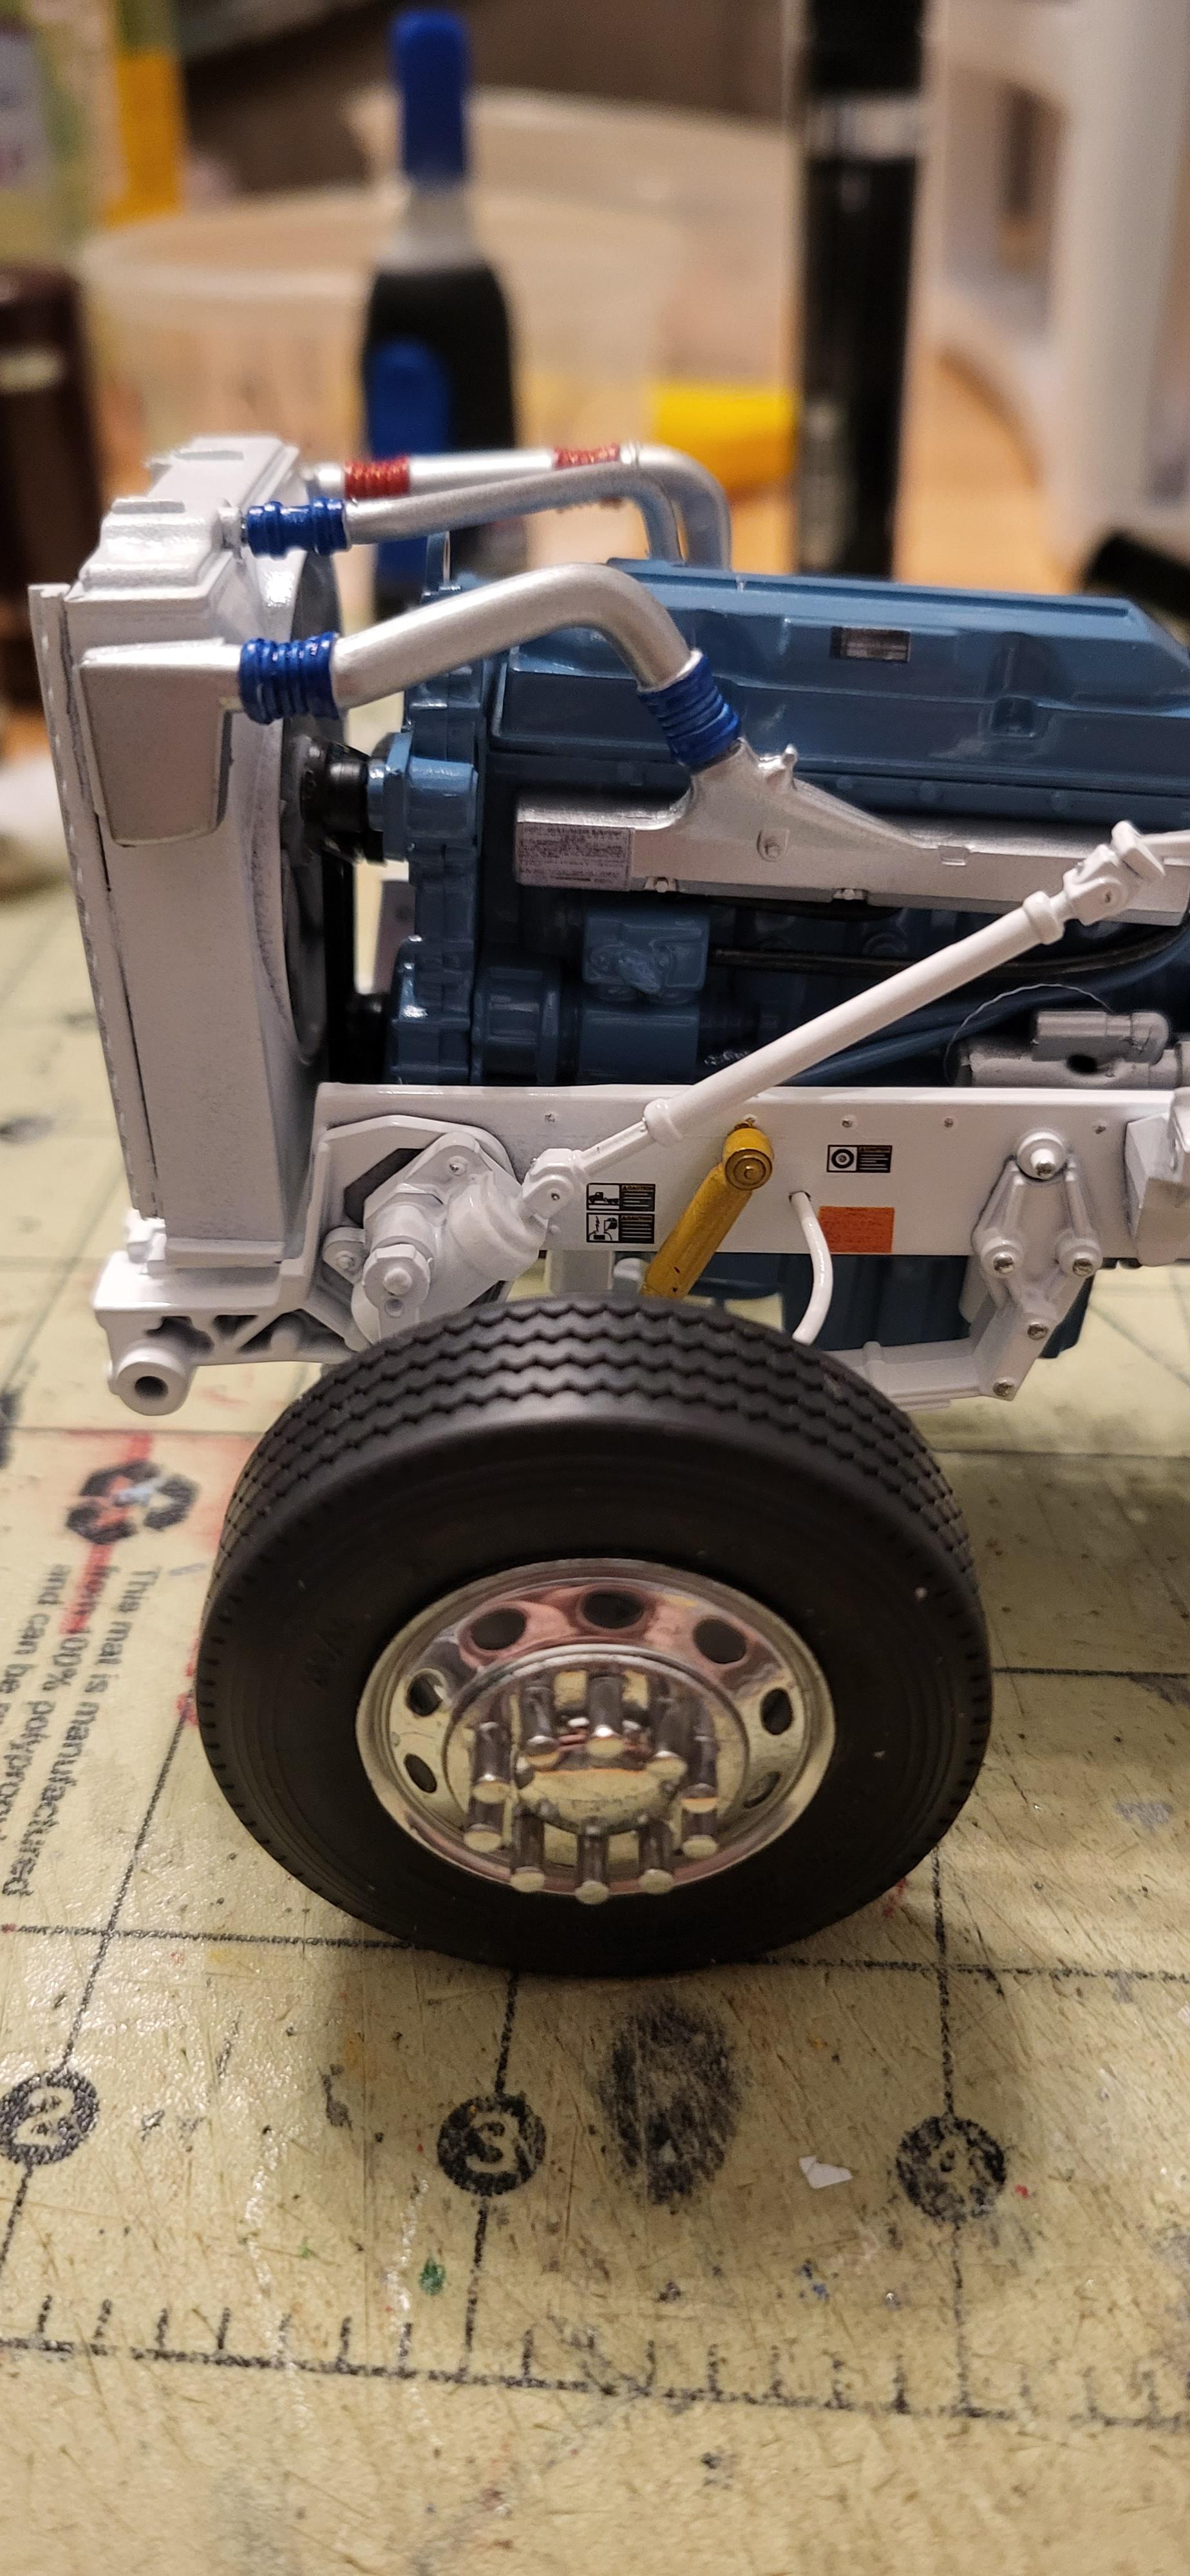
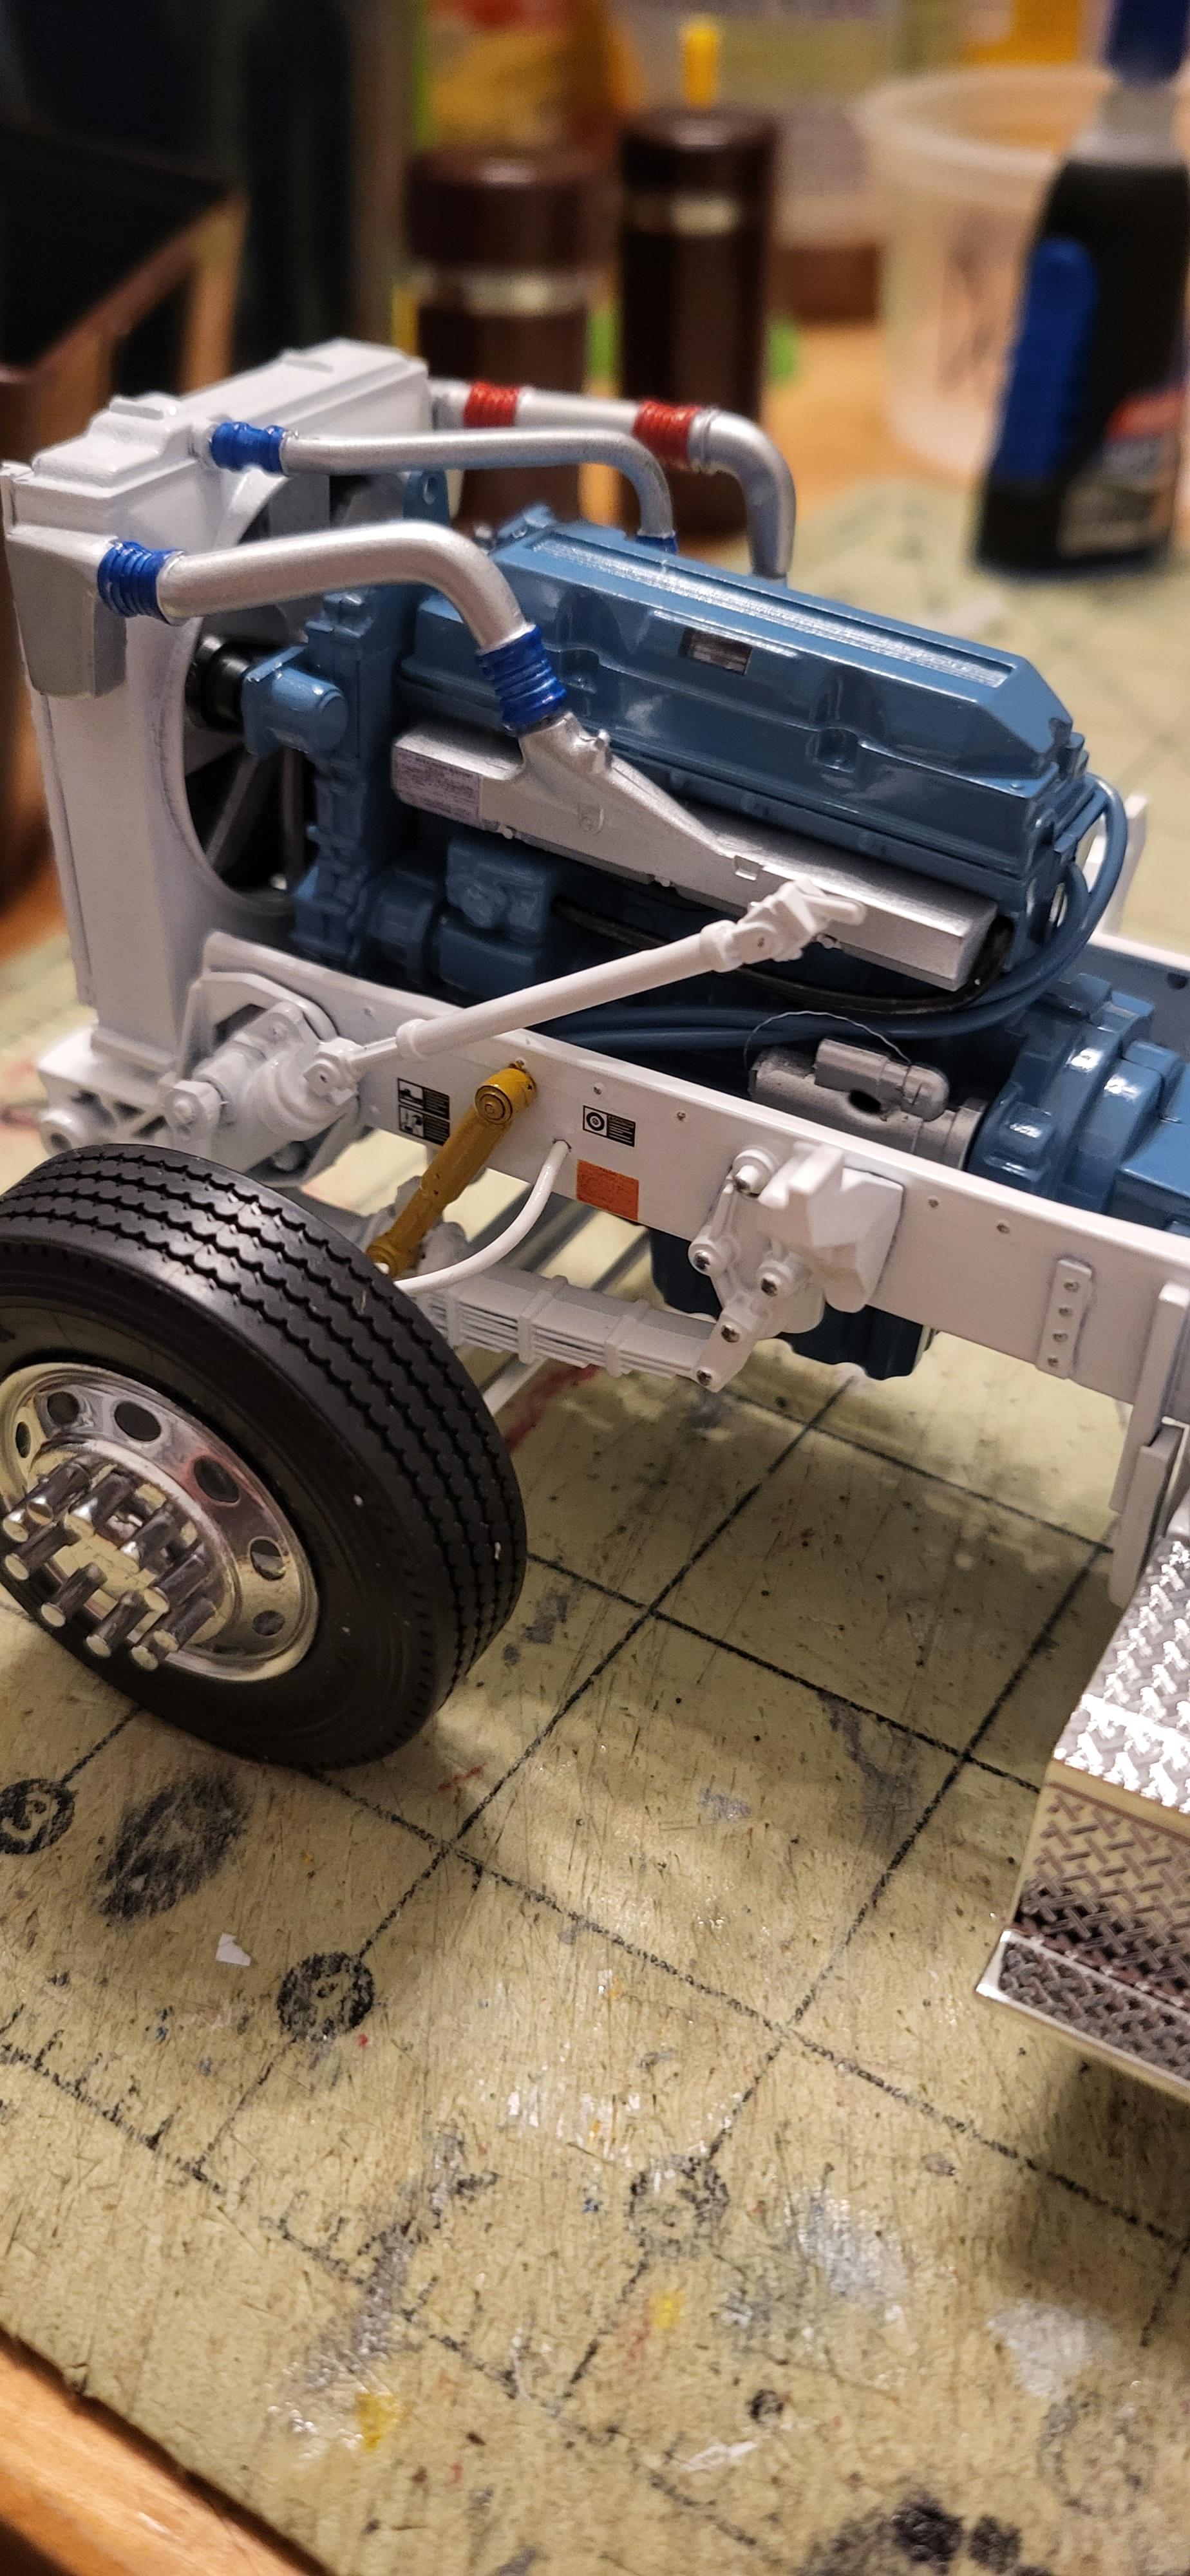
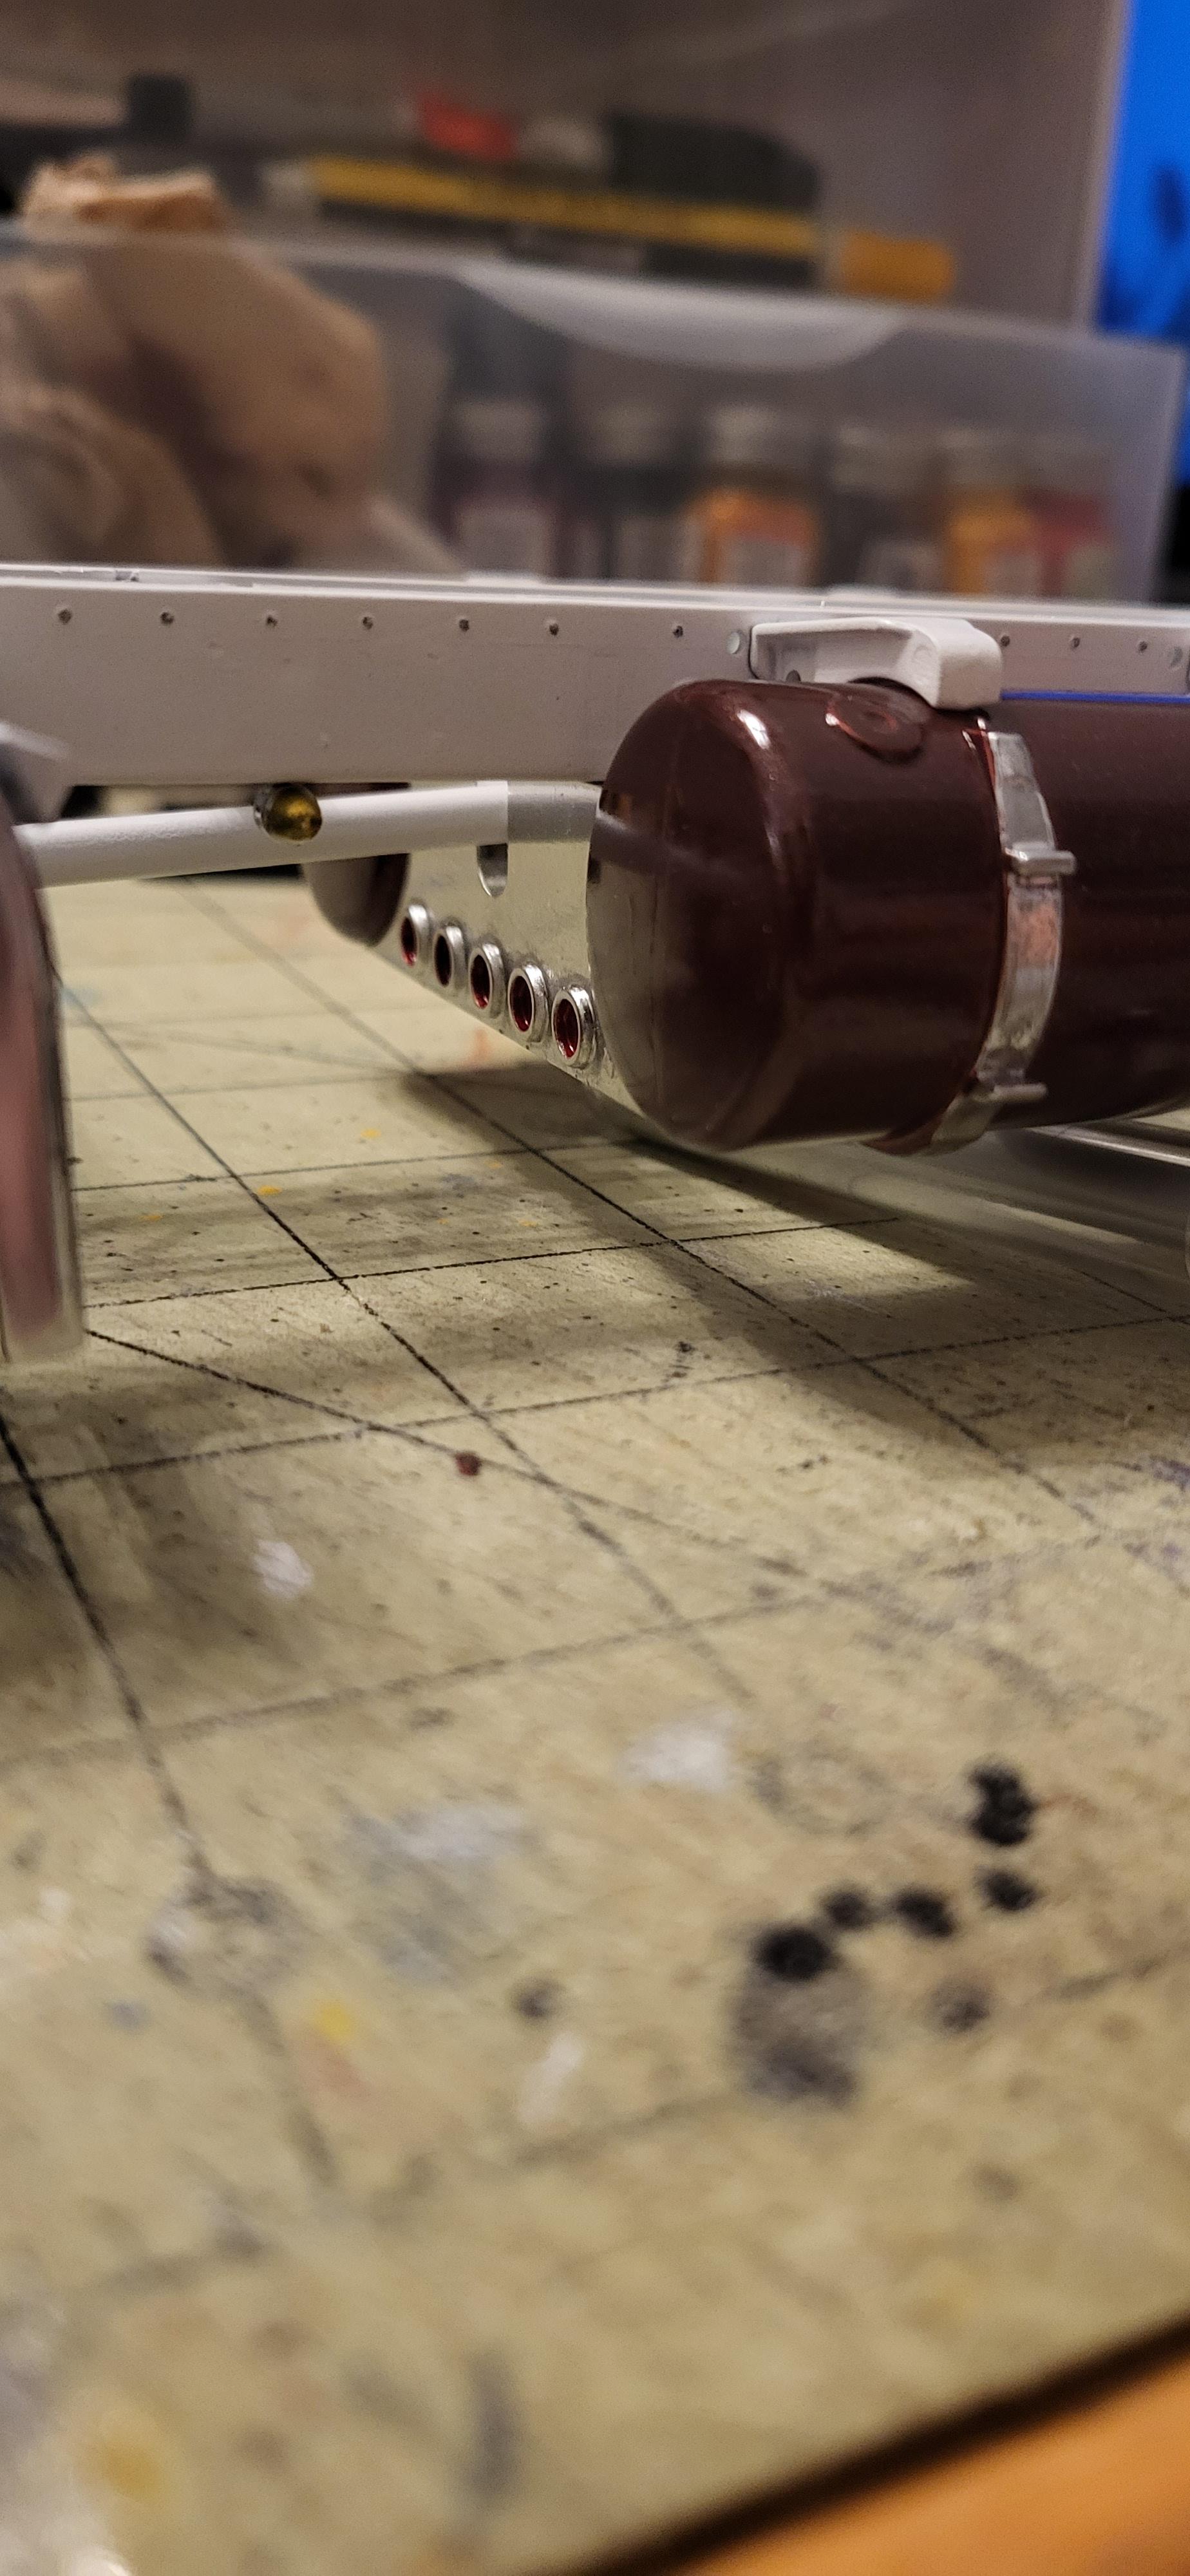
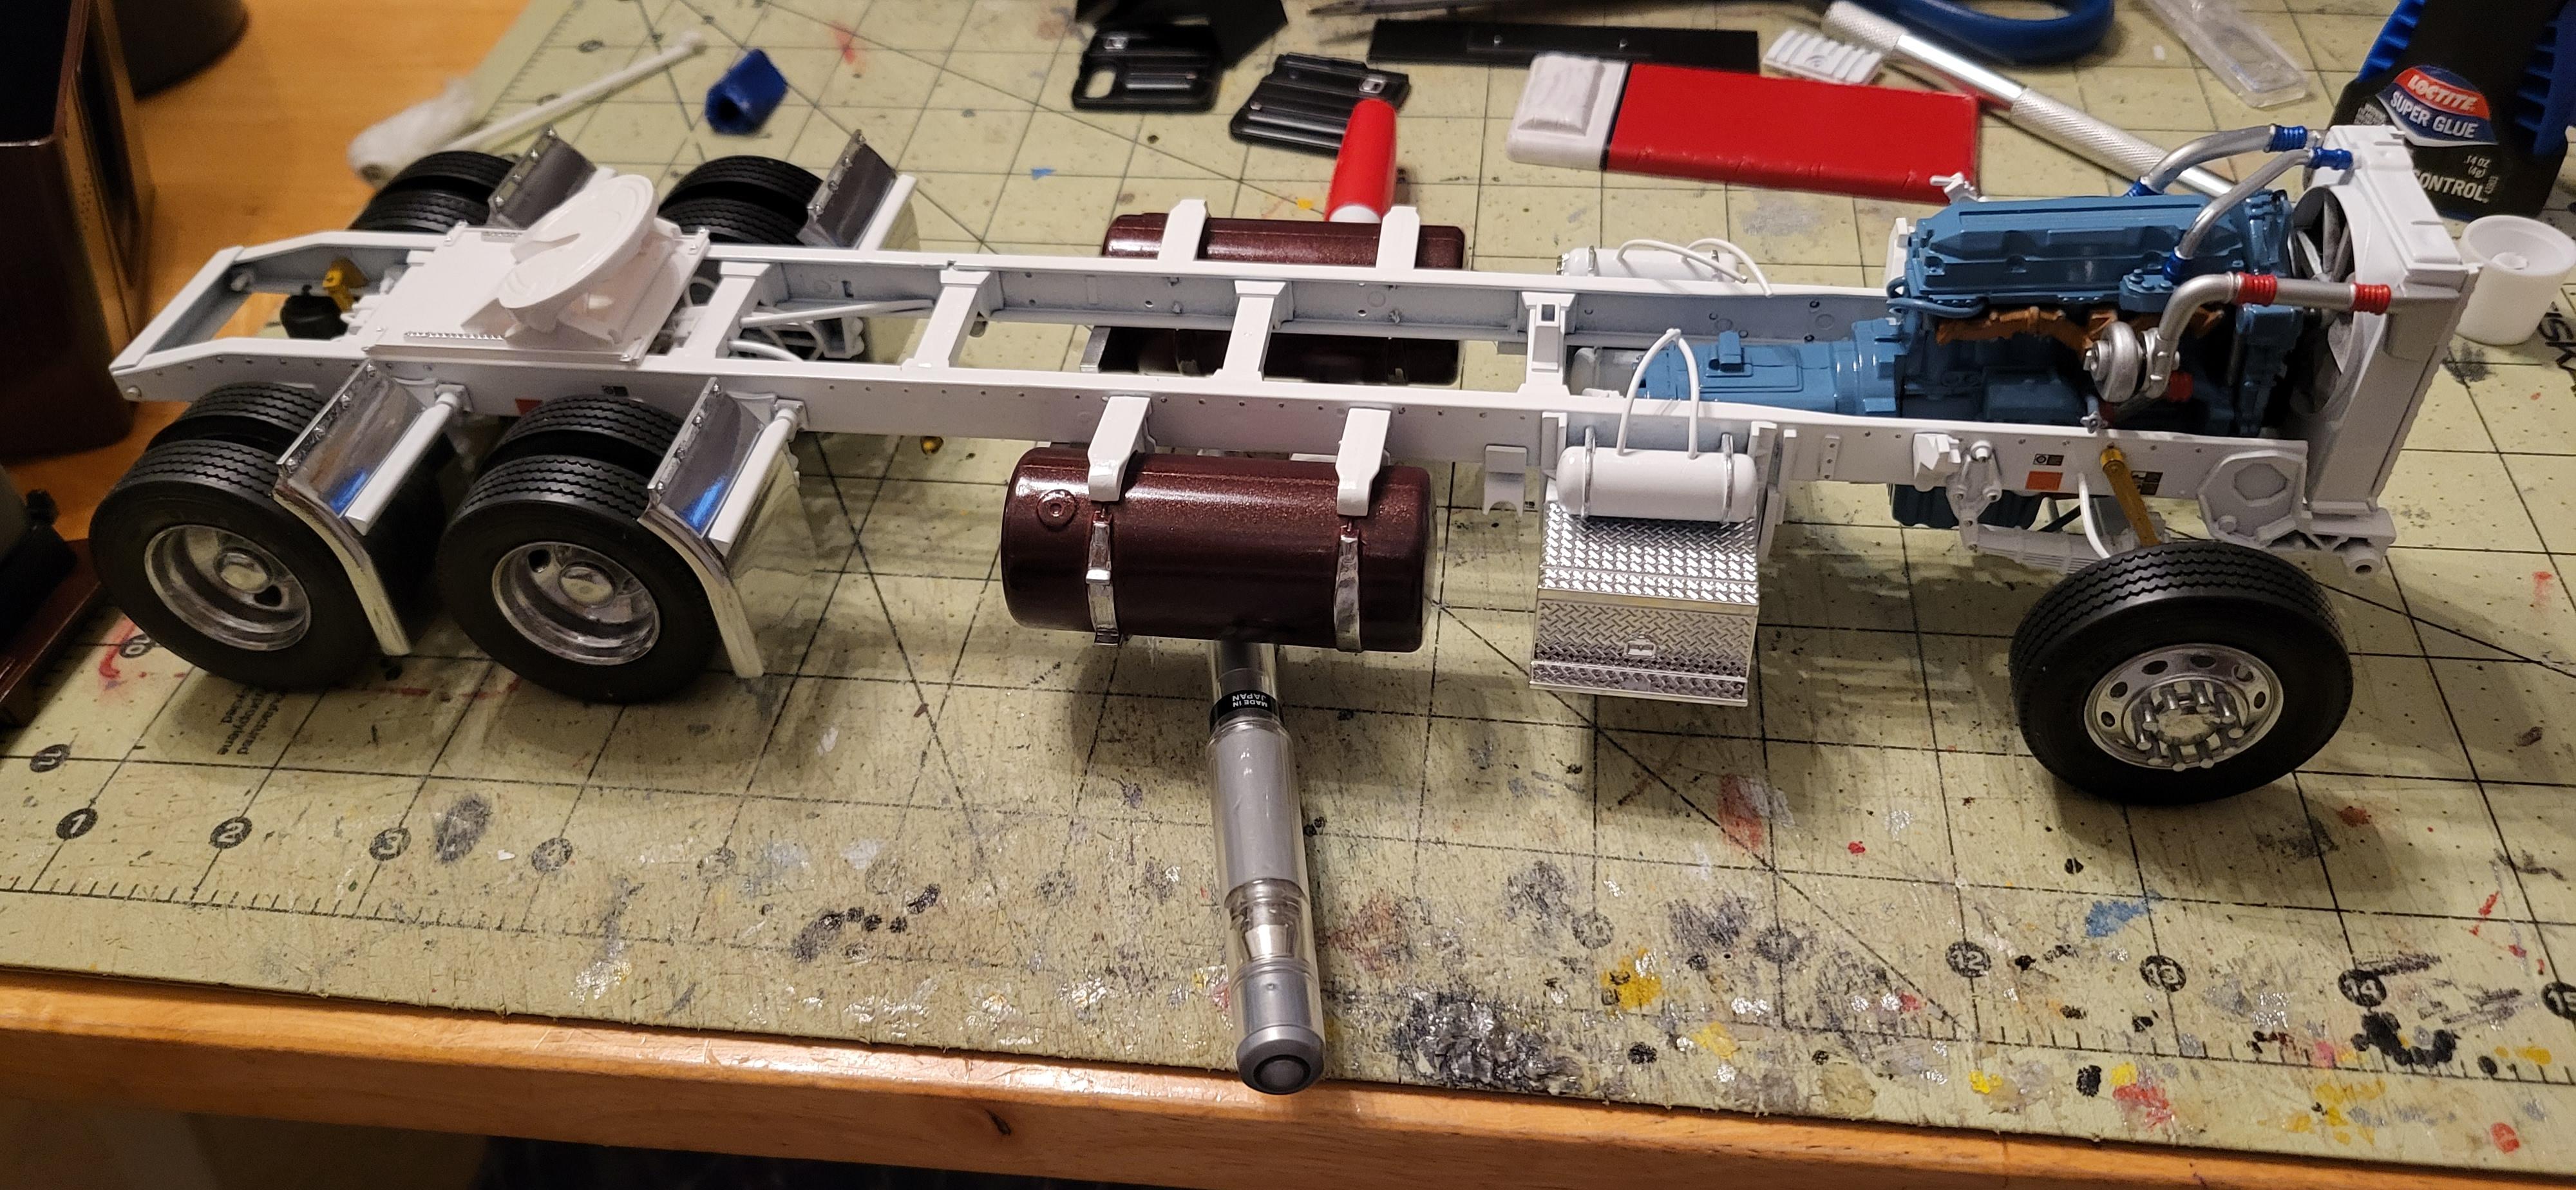
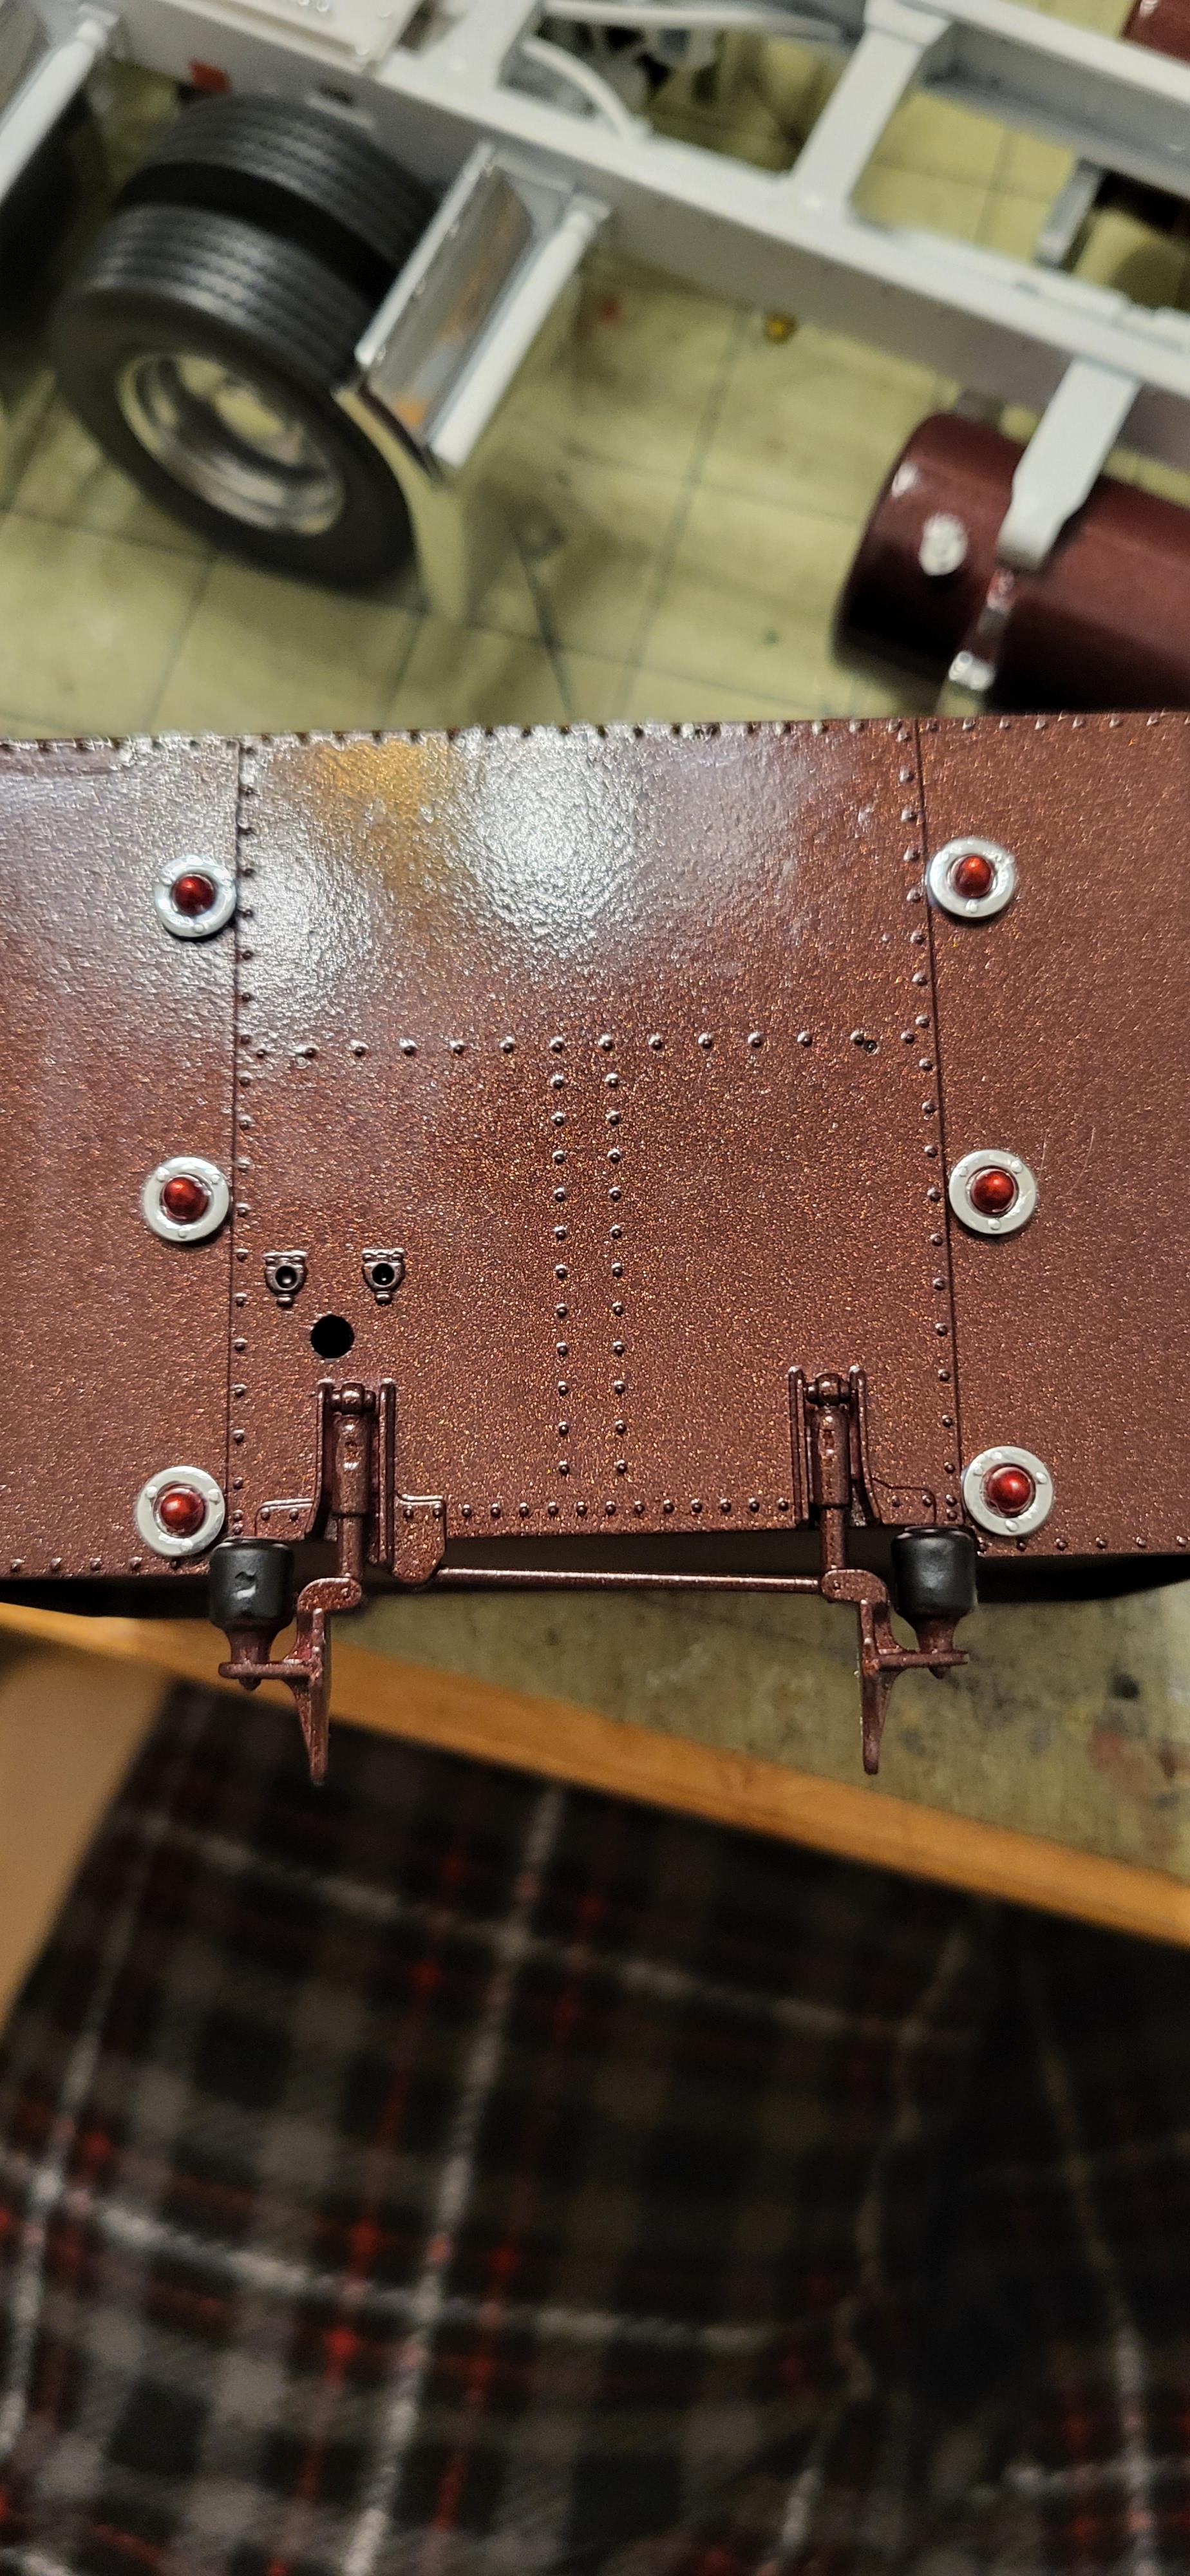
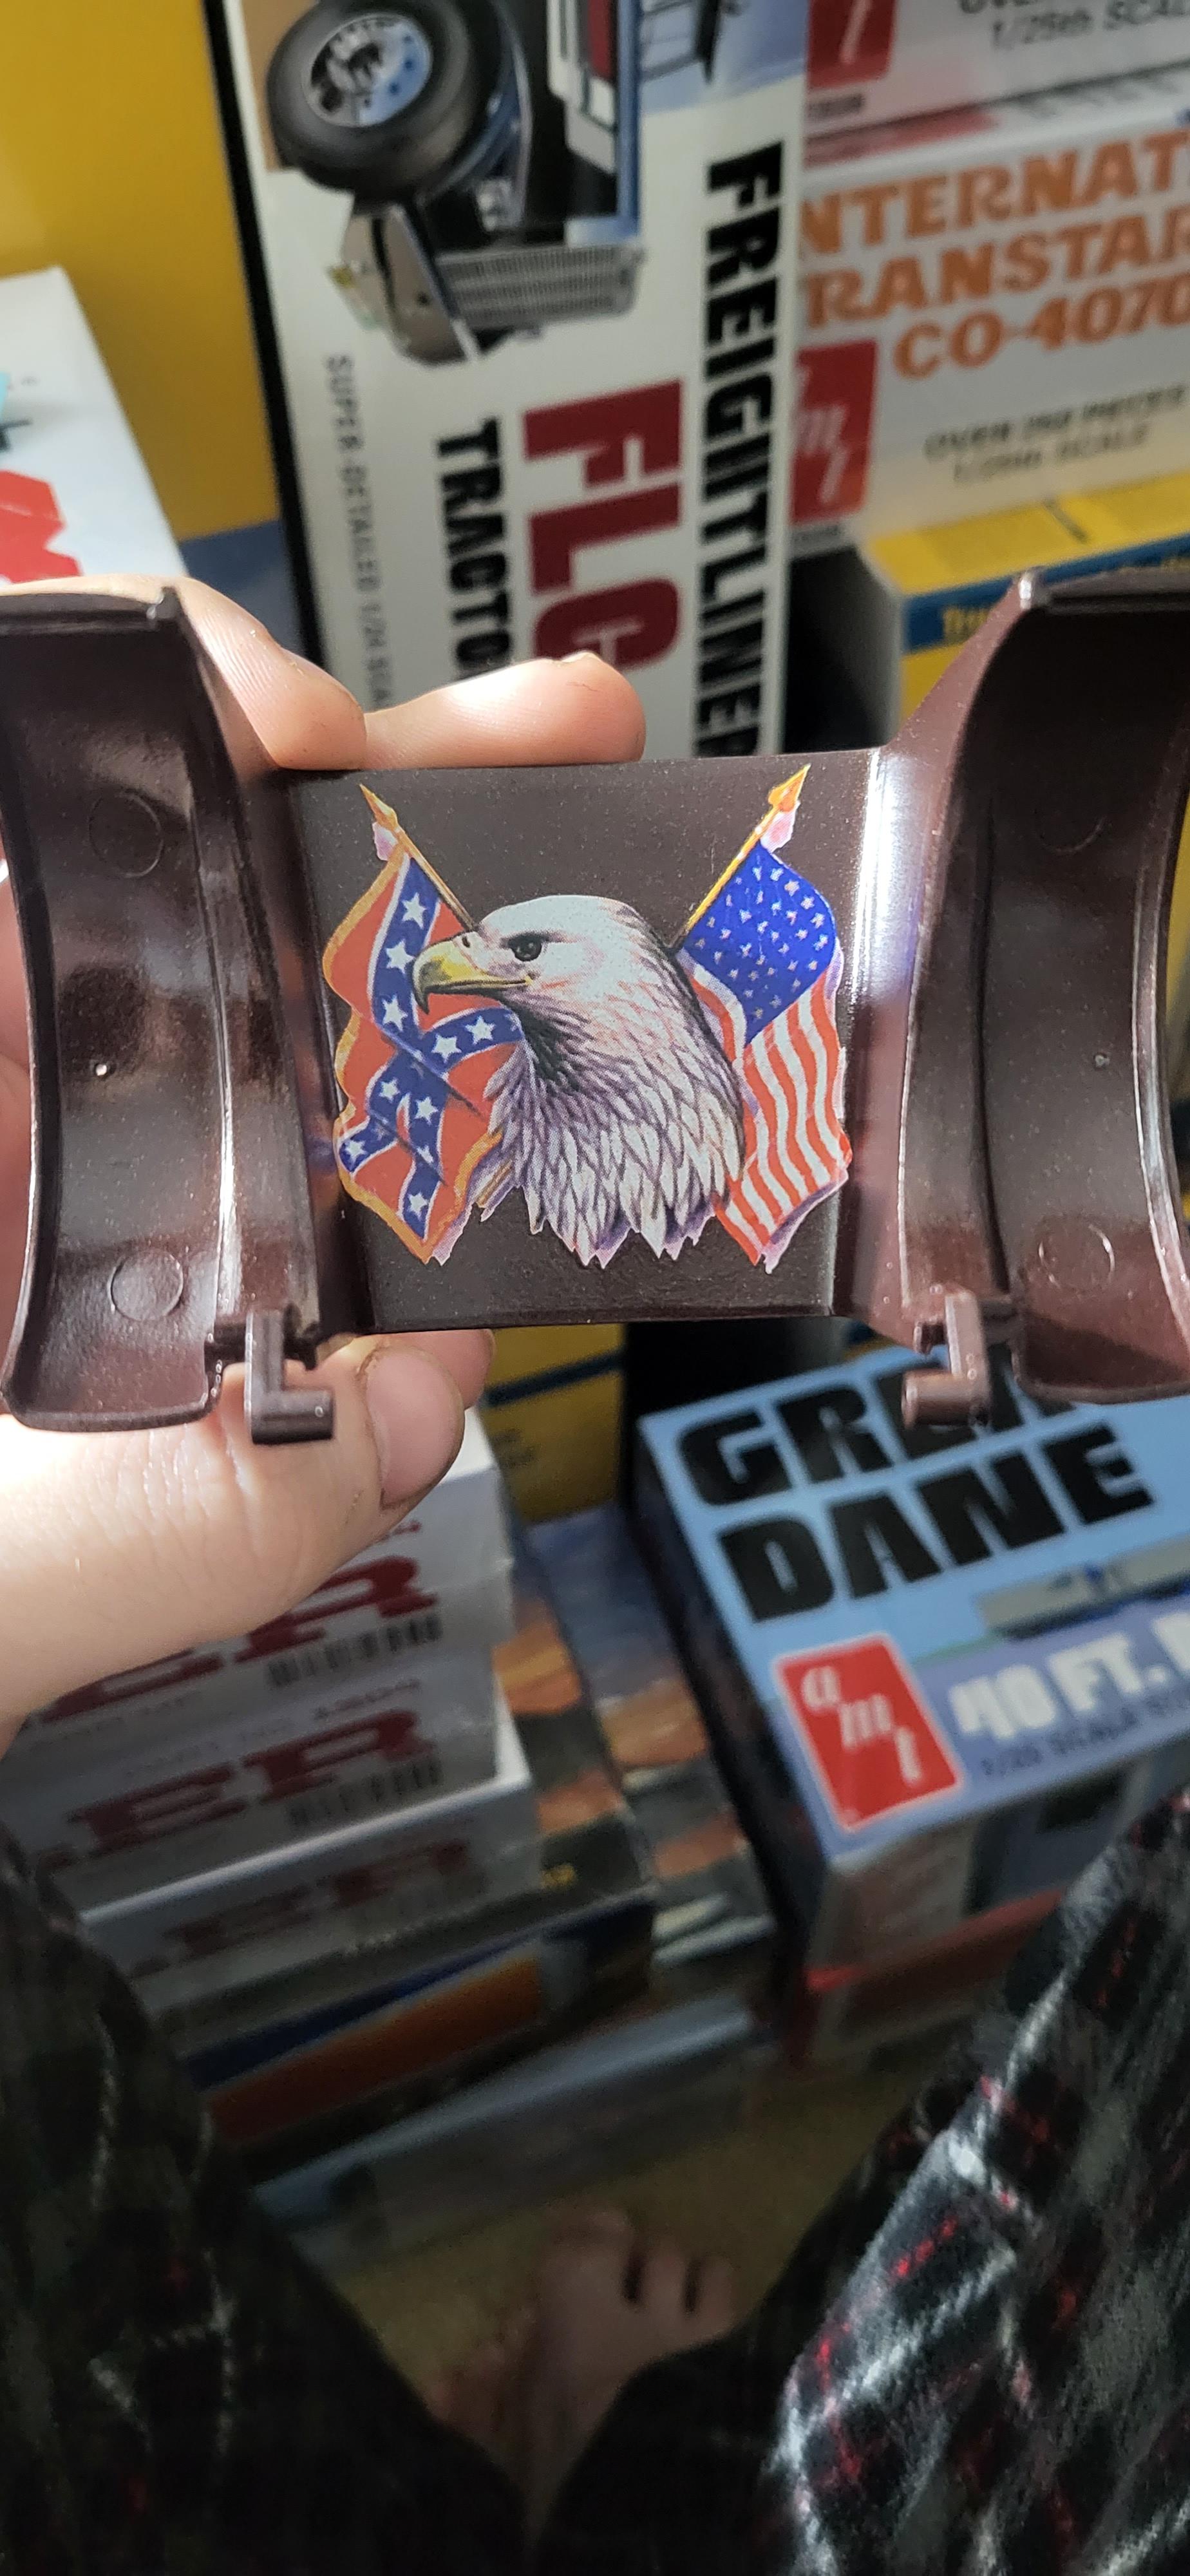
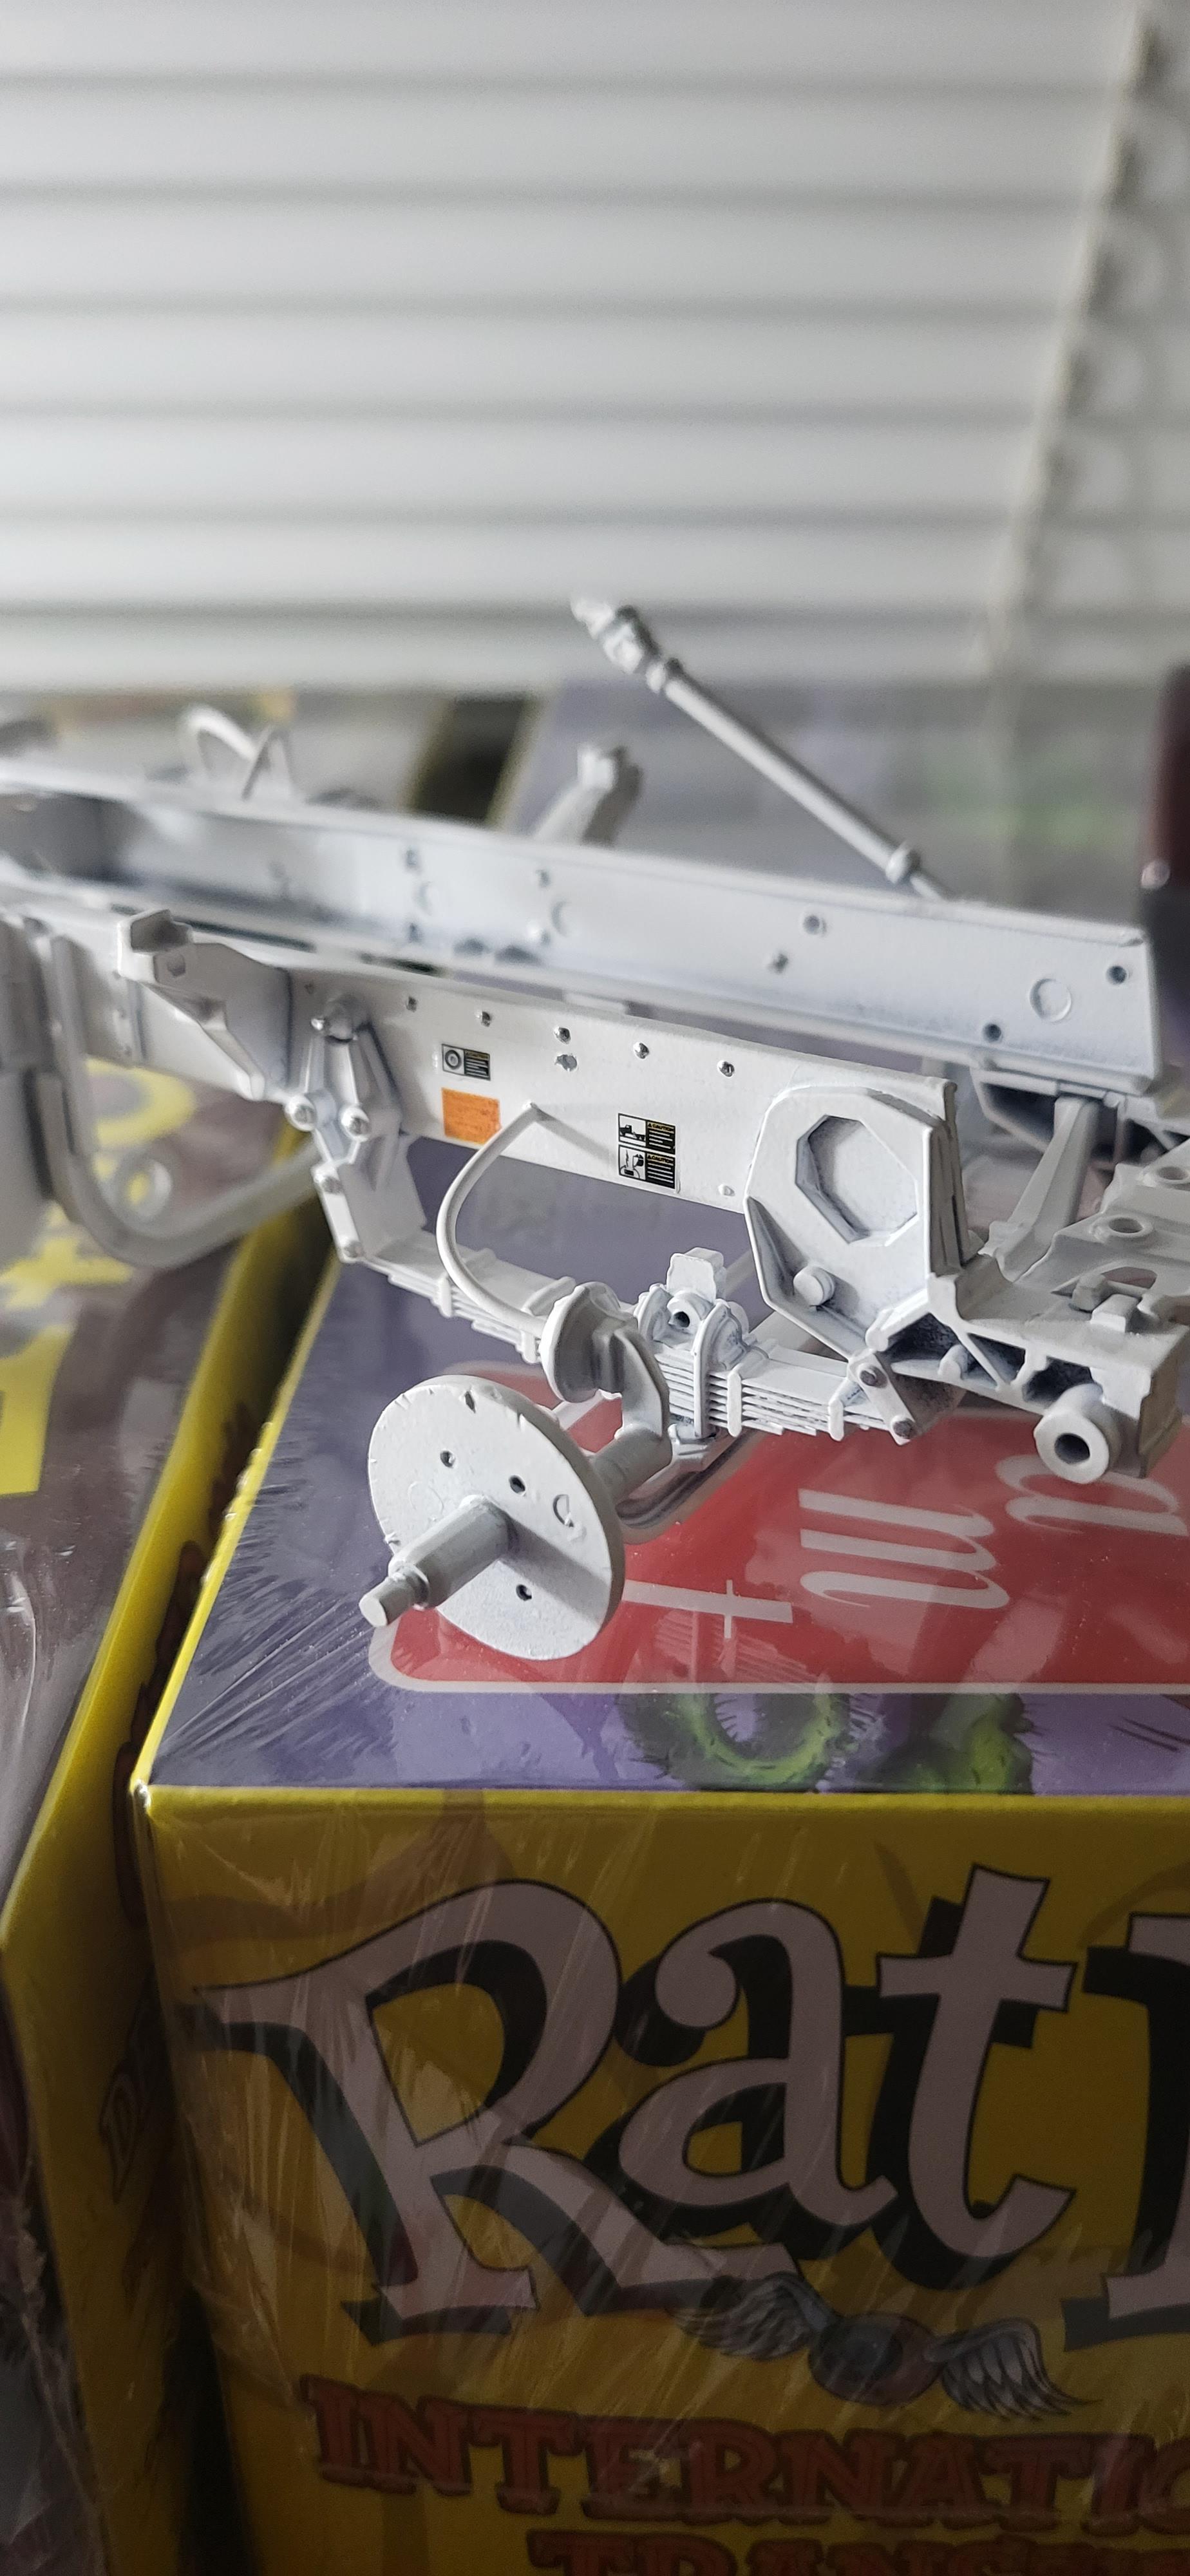
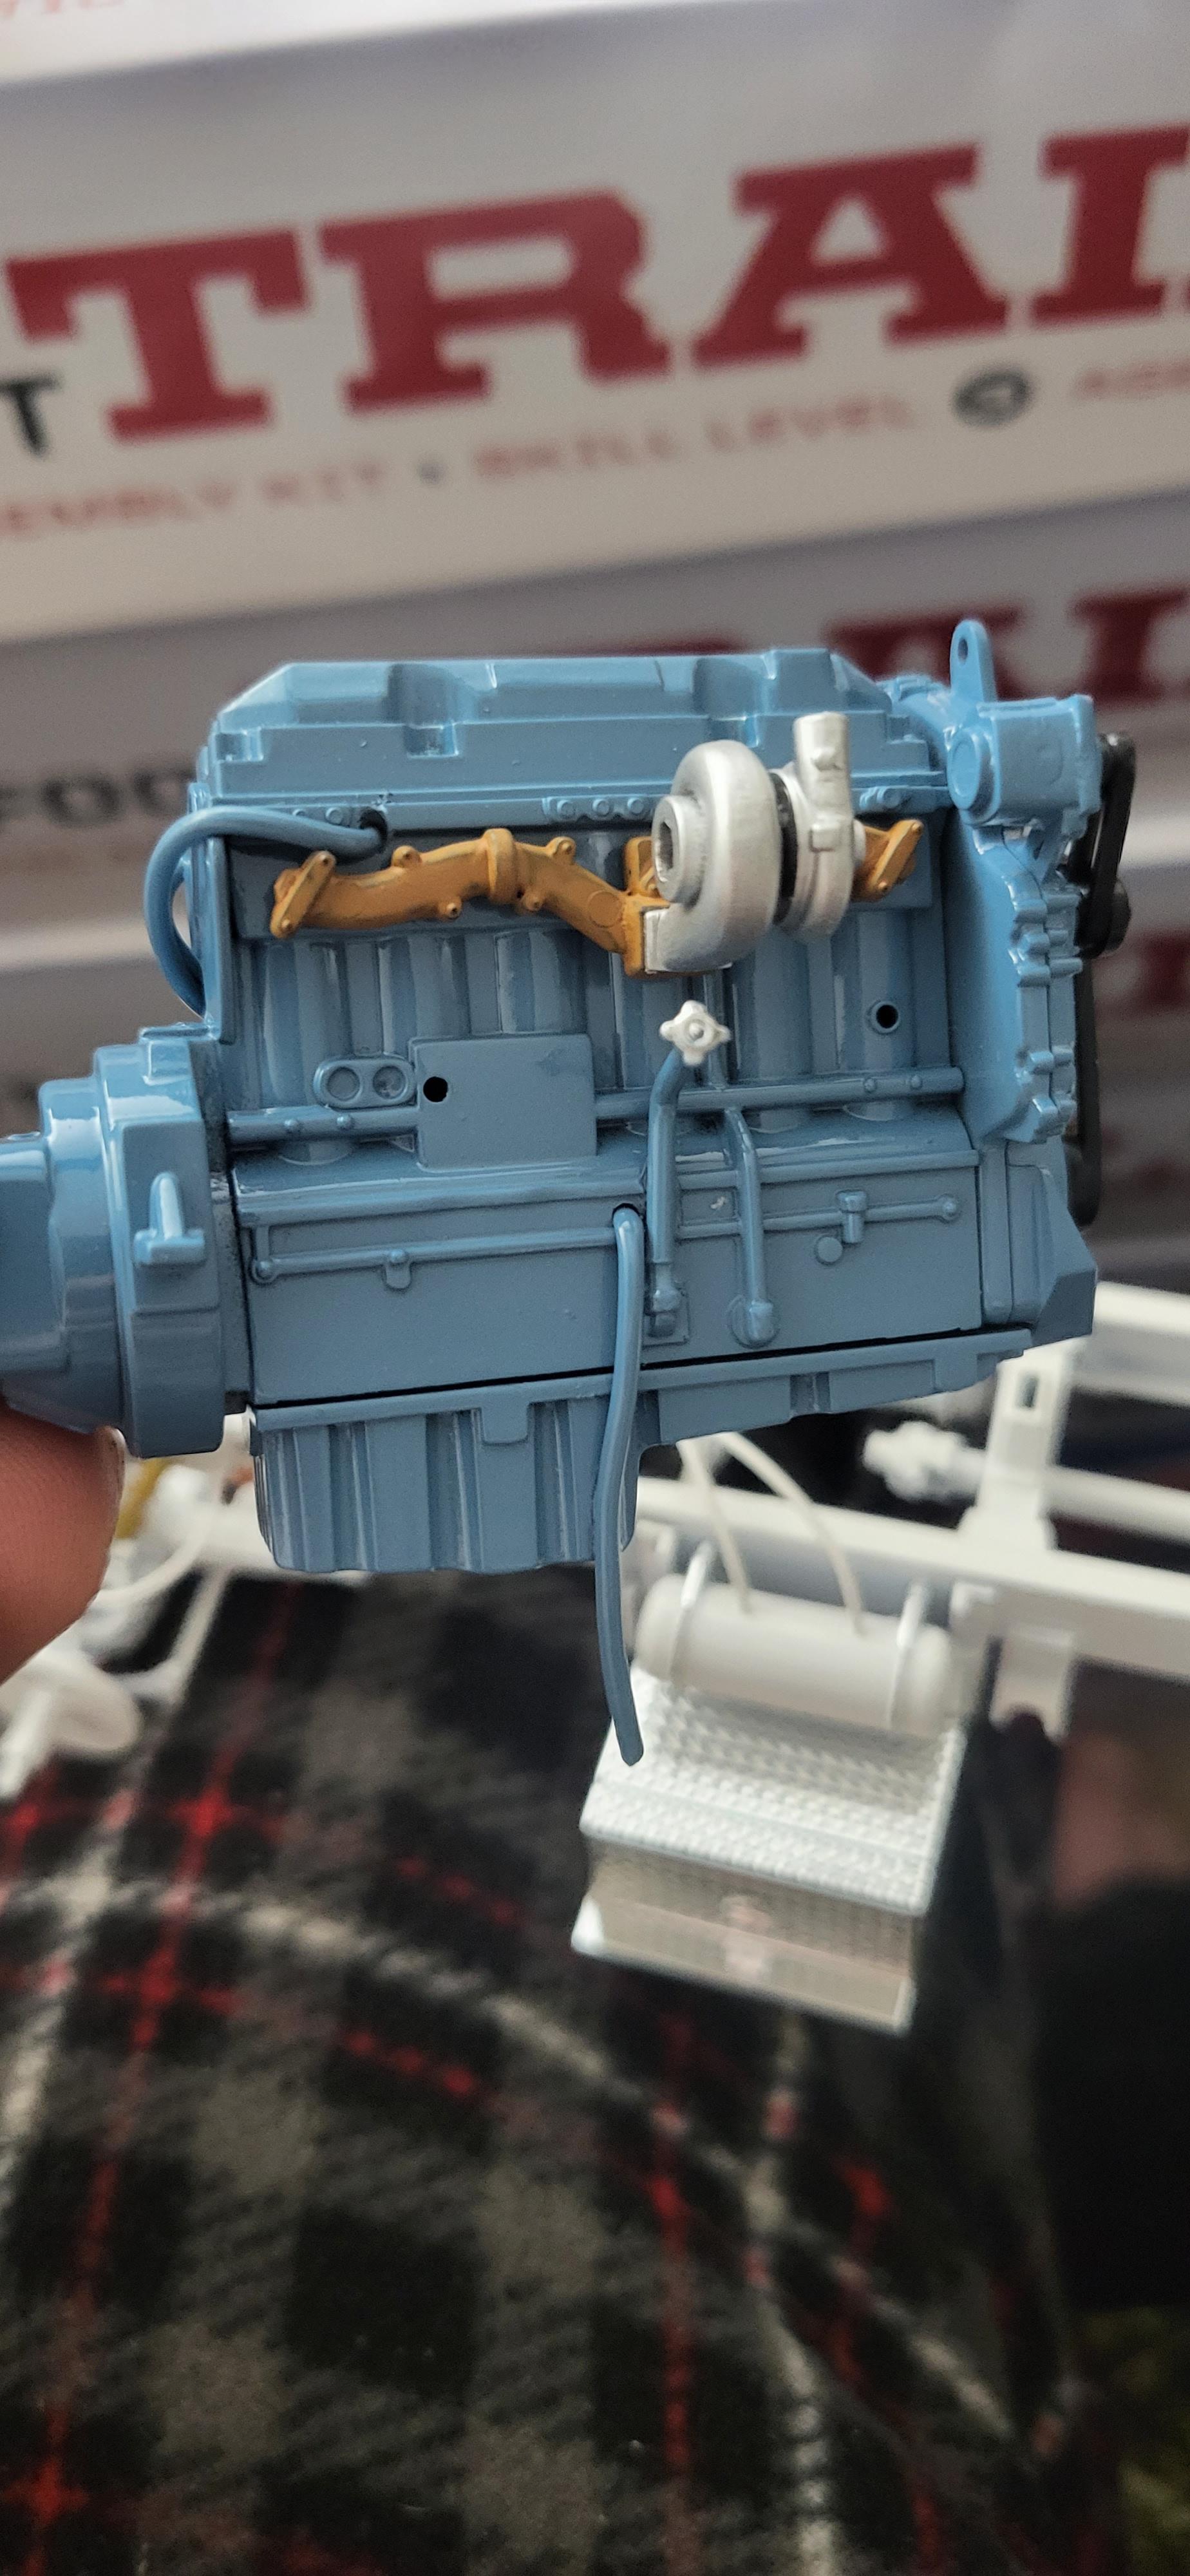
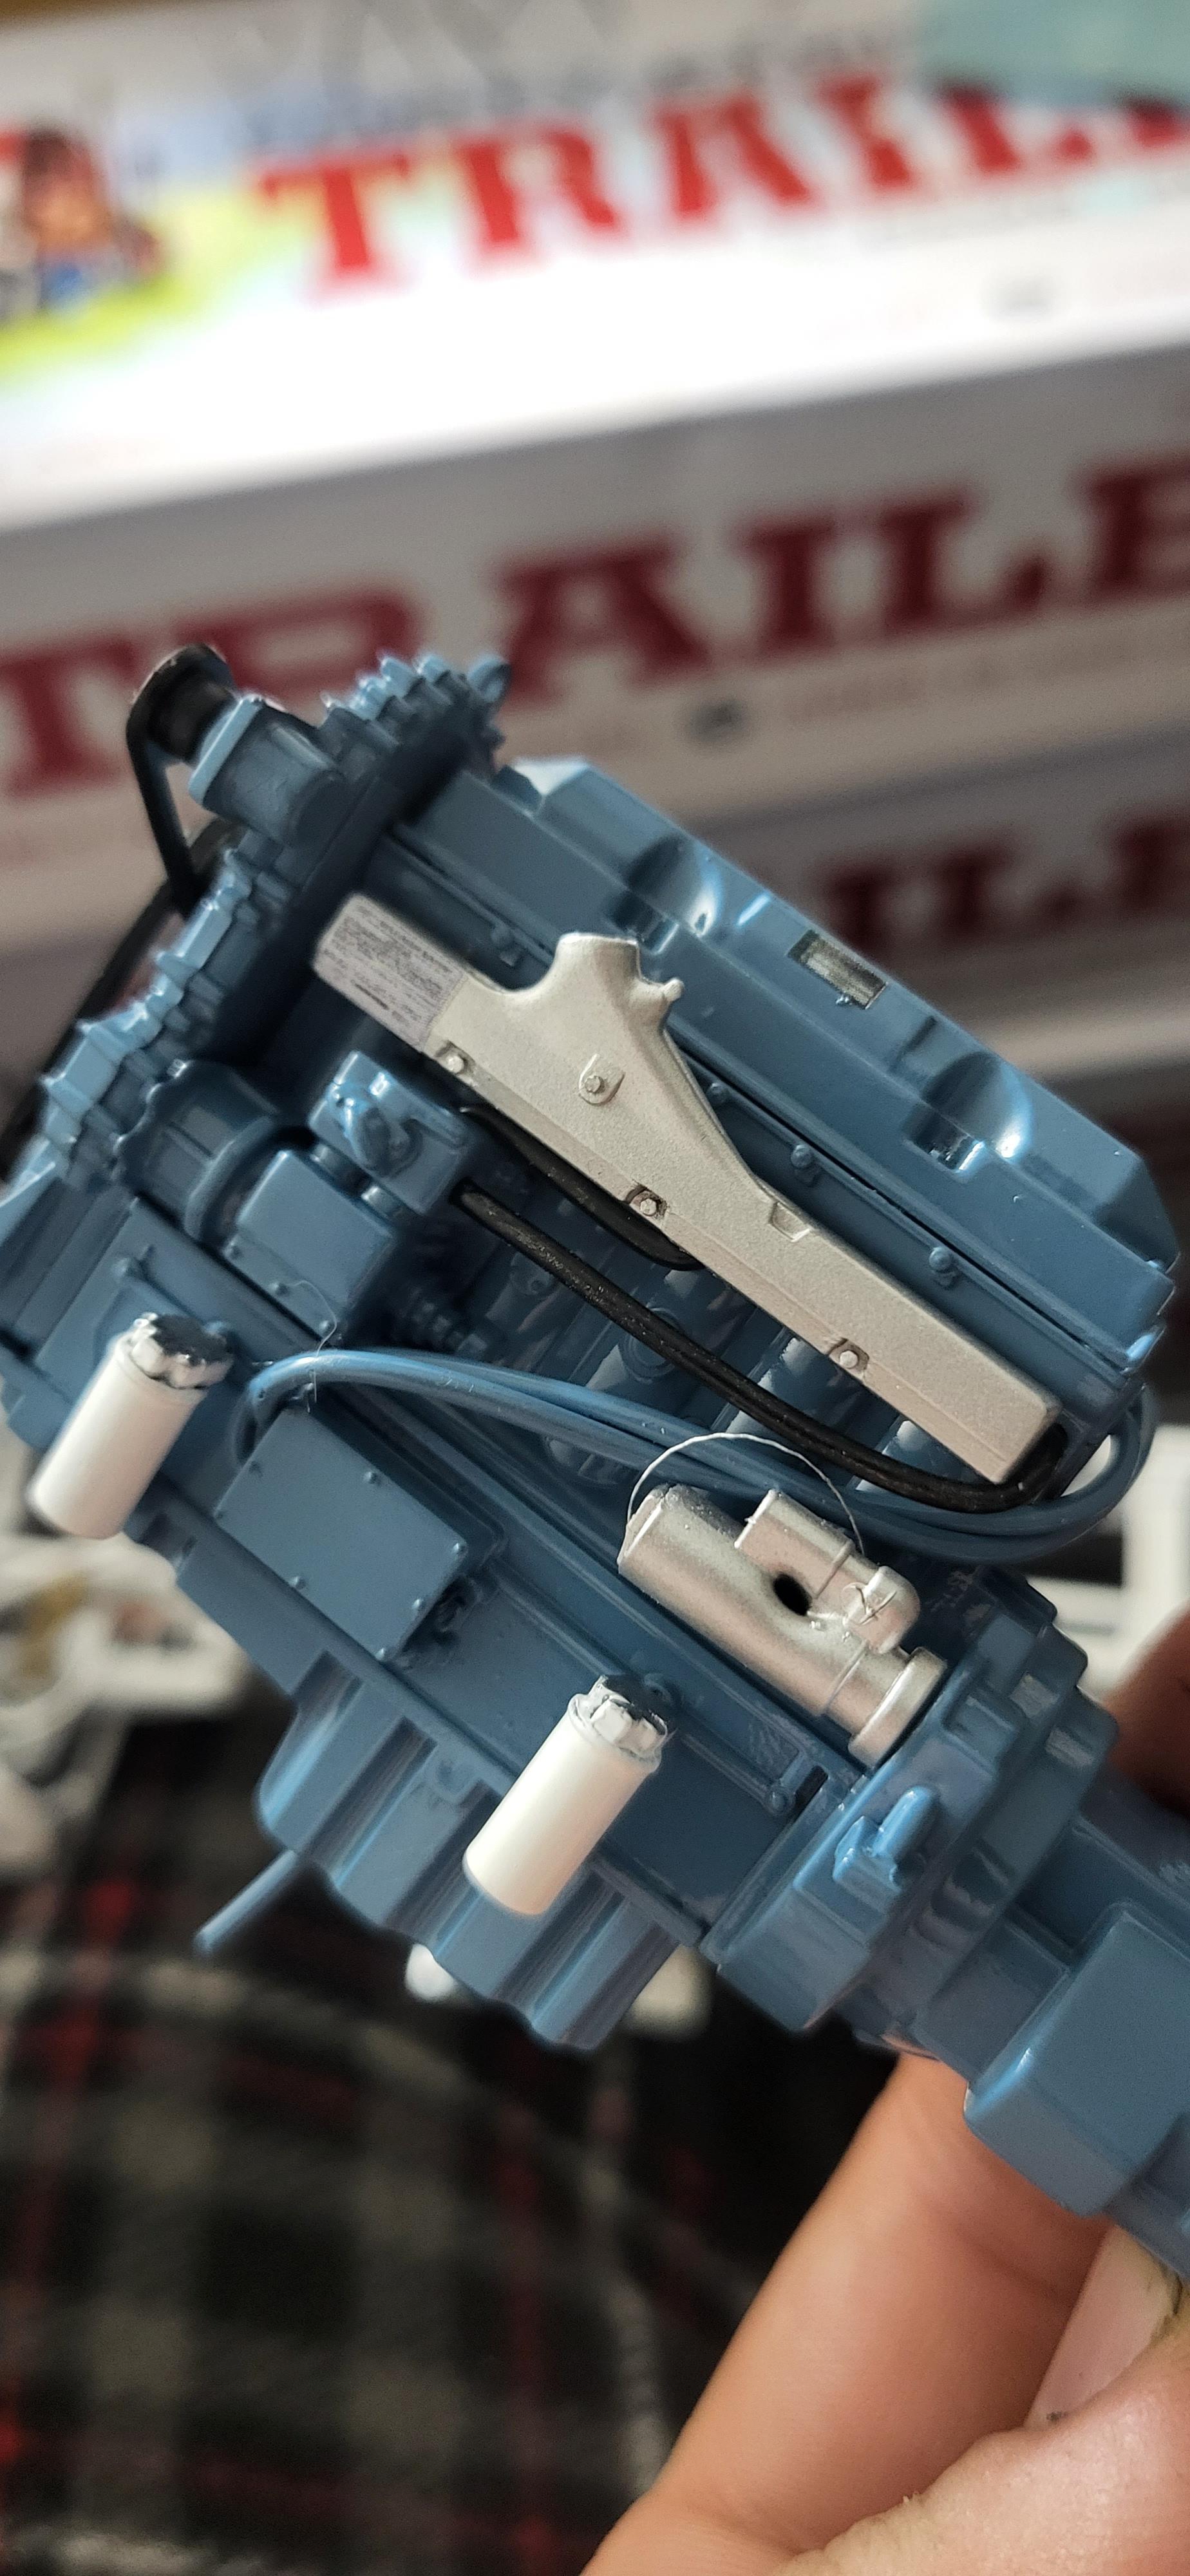
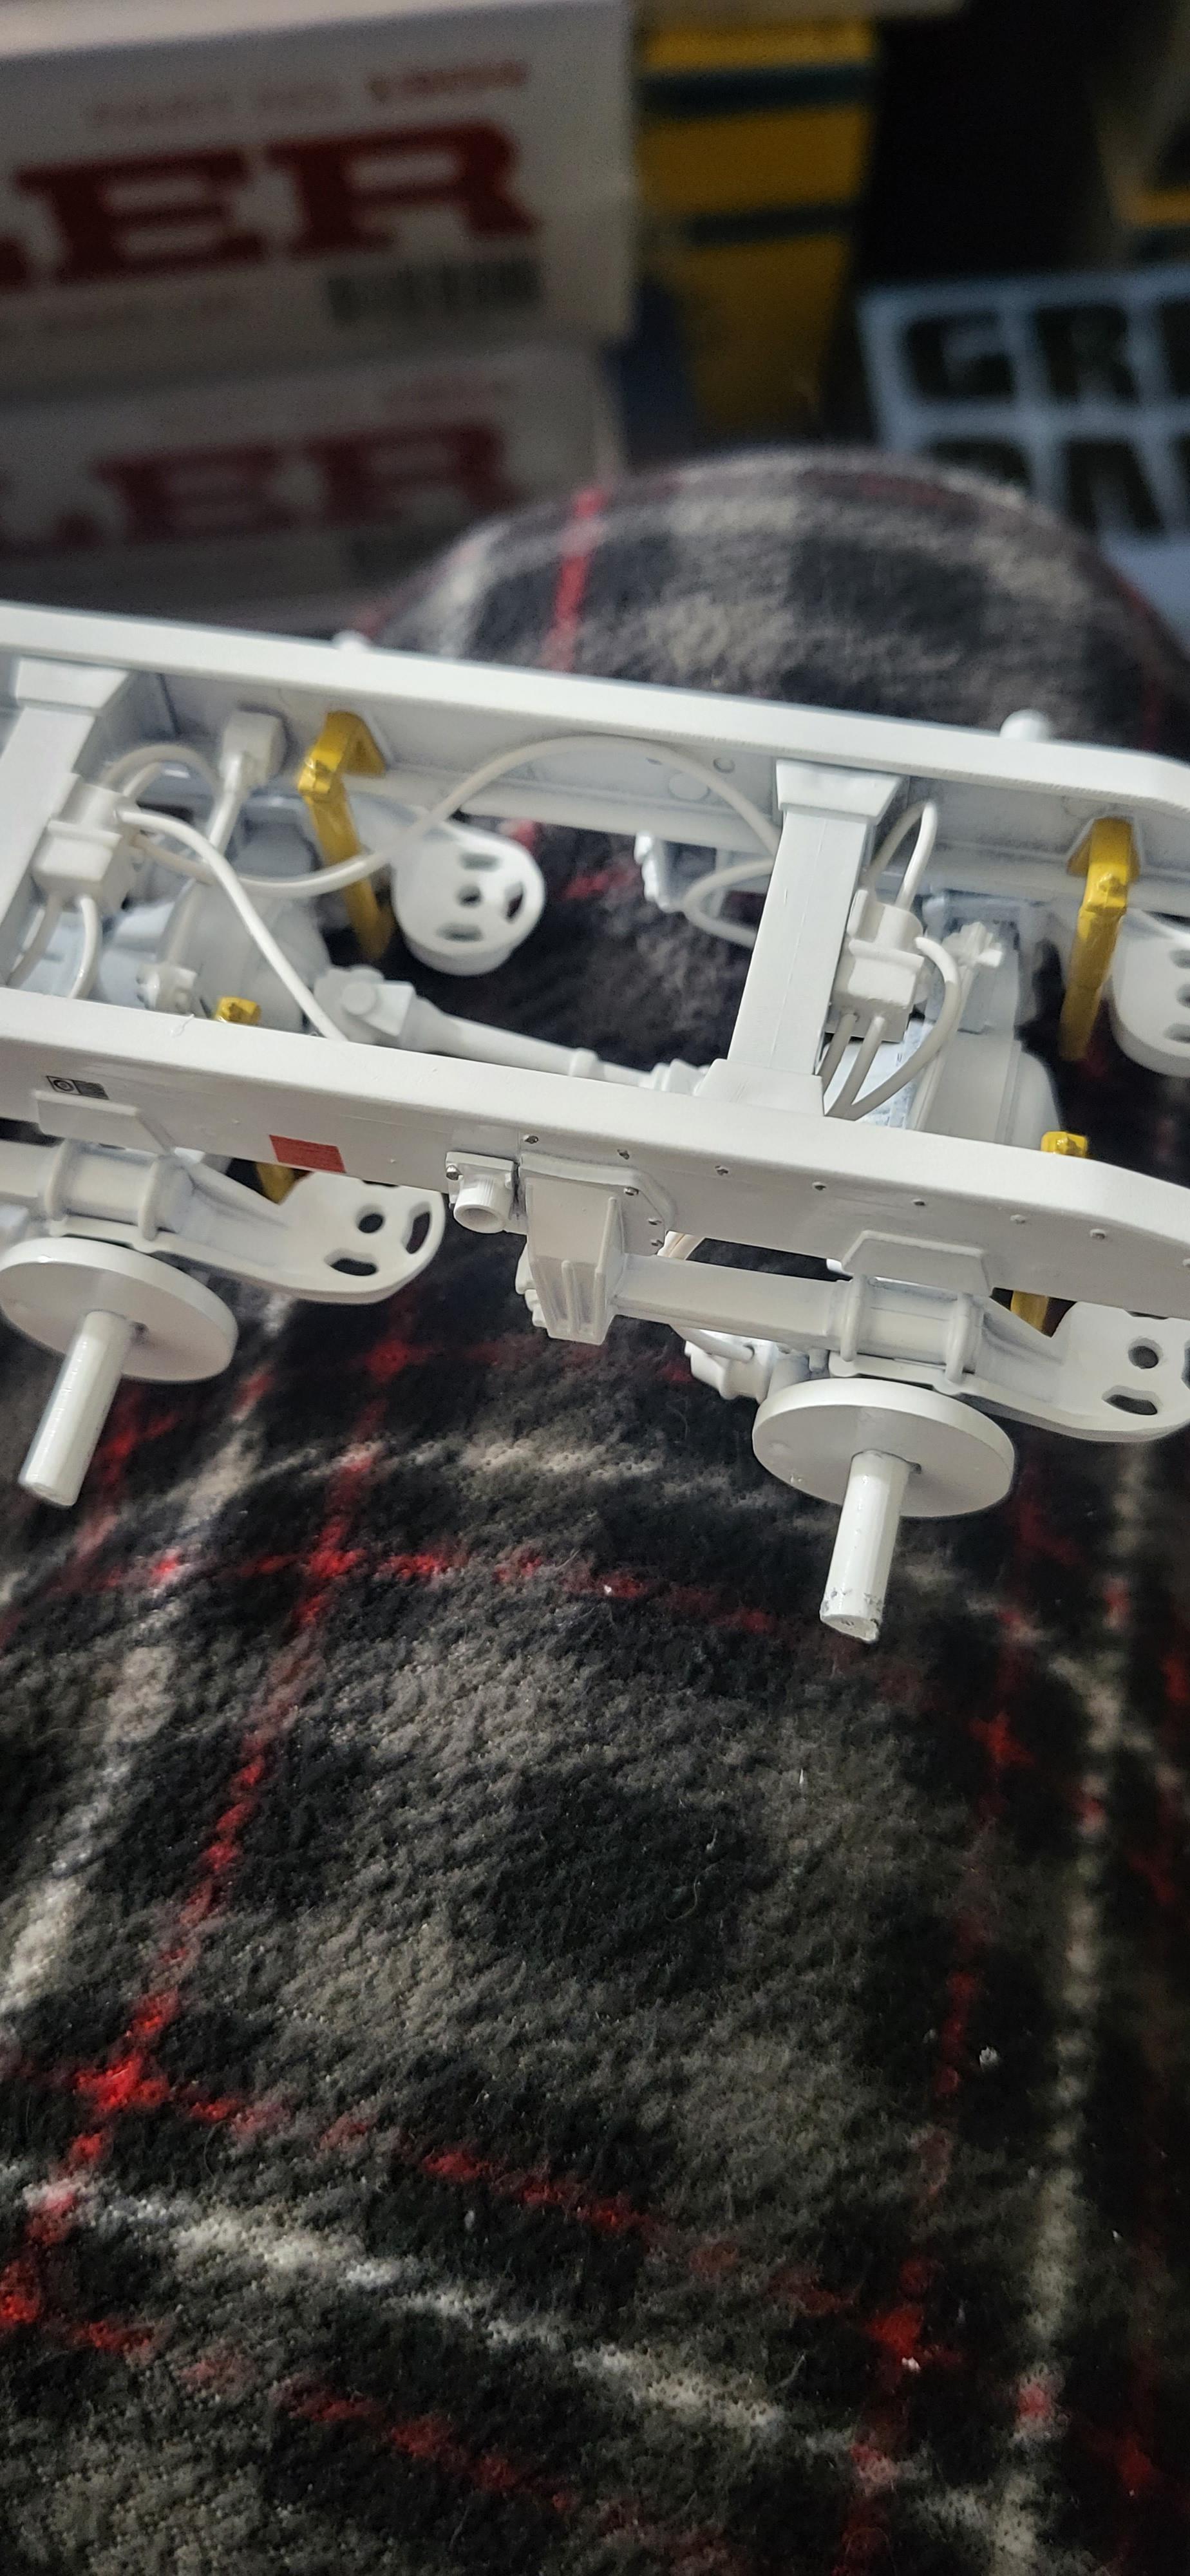
Couldn't sleep, so I got to working on this project full force! Tomorrow I will paint up a lot more parts I hope. But here's what I've got done so far: -Cool mural under the hood -Frame warning decals as well as all the shocks, airbags, and battery box covers -Turbo installed on the engine, pulleys/belts on, and some engine spec decals. My hope for tomorrow is to paint all the engine piping/radiator fan/misc pieces, and install the engine into the frame. Then get the rear fenders glued and mounted, rims and tires installed, and paint the interior panels up. It's a lot for one day, but I think I can do it
-
BRBO2023 Italeri 378
TruckerAL replied to TruckerAL's topic in WIP: Model Trucks: Big Rigs and Heavy Equipment
It's worth it. Pricey indeed, but the results are better than kit chrome! Just thoroughly let it dry, and don't clear coat it. -
BRBO2023 Italeri 378
TruckerAL replied to TruckerAL's topic in WIP: Model Trucks: Big Rigs and Heavy Equipment
Before work today I had the itch to atleast see how everything would look together. I had to do a quick mock up, and I'm 100% pleased so far!
-
BRBO2023 Italeri 378
TruckerAL replied to TruckerAL's topic in WIP: Model Trucks: Big Rigs and Heavy Equipment
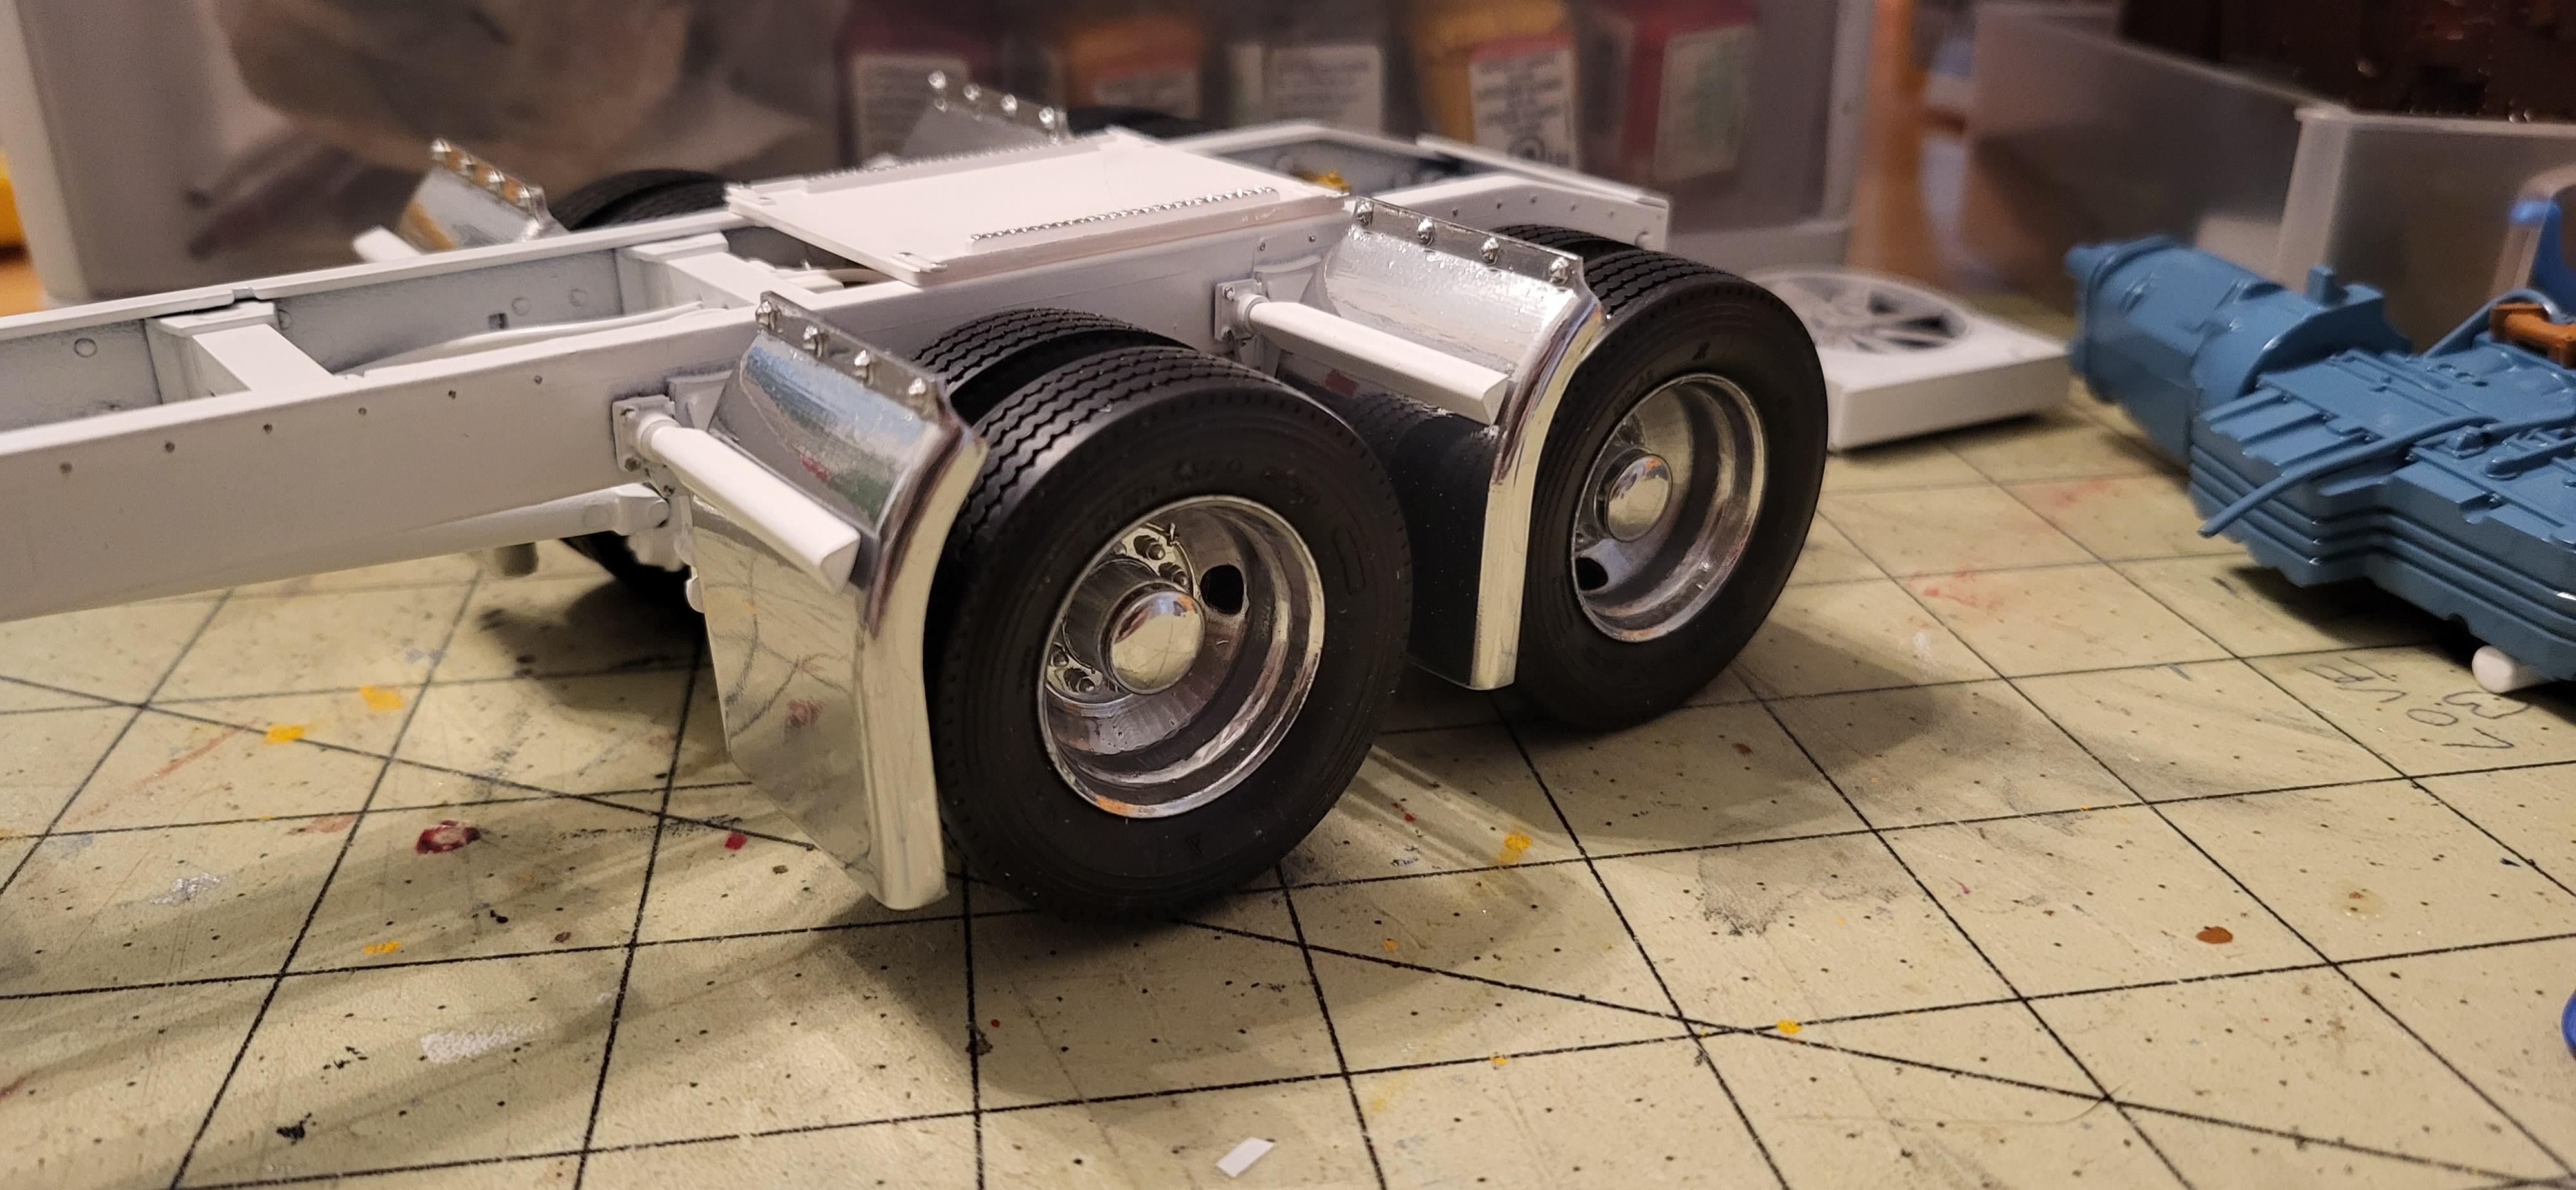
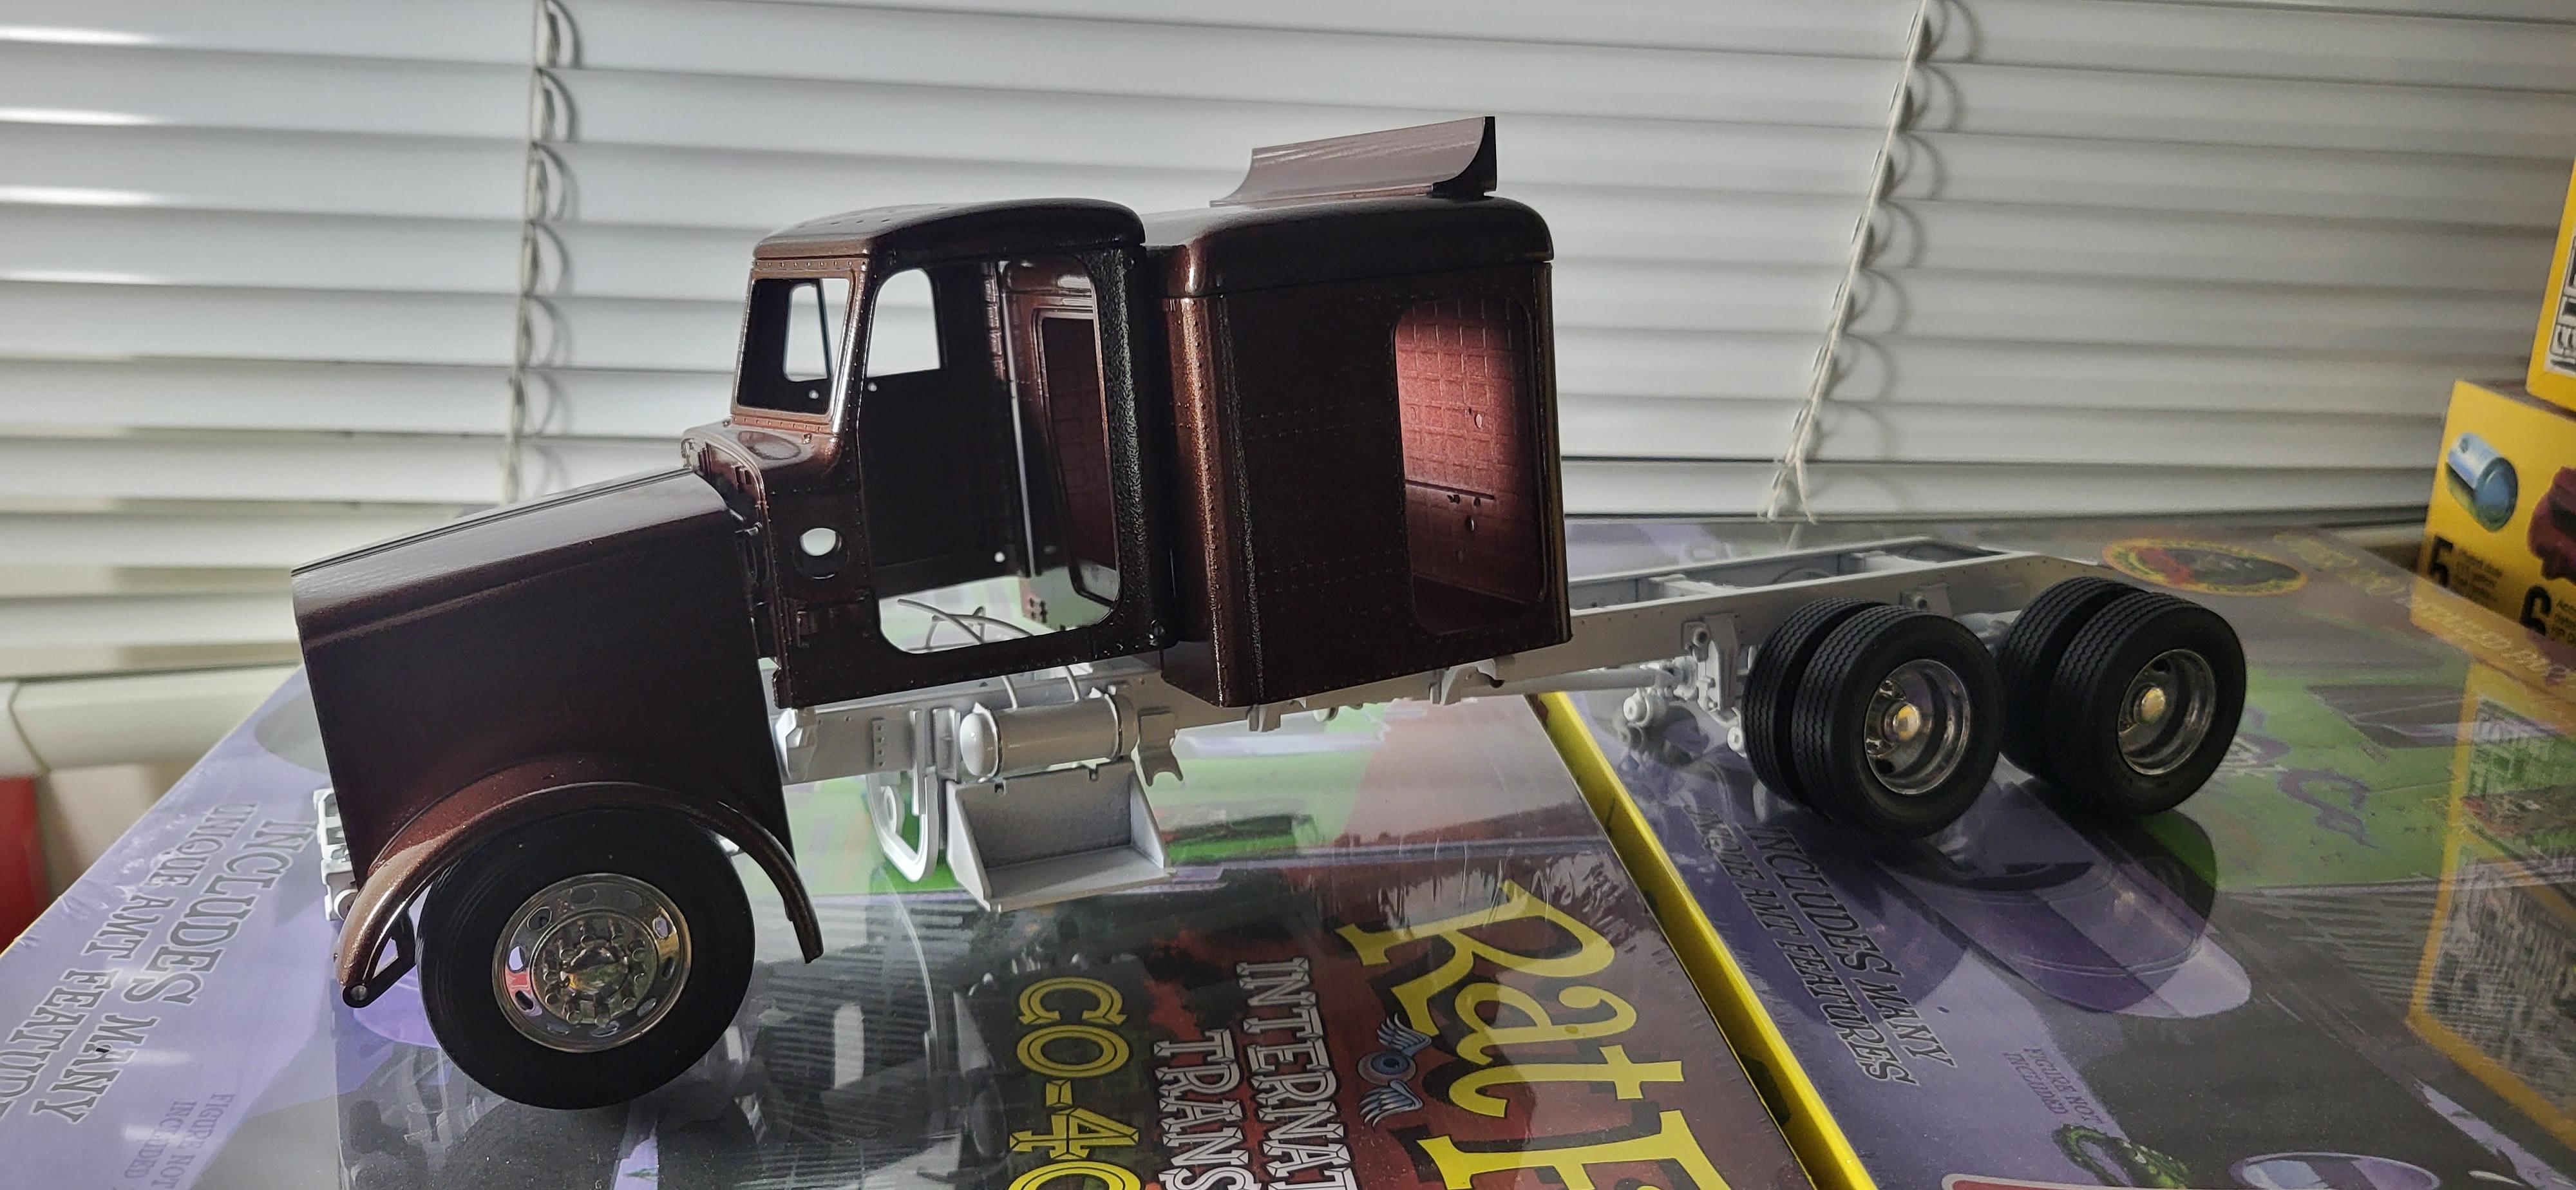
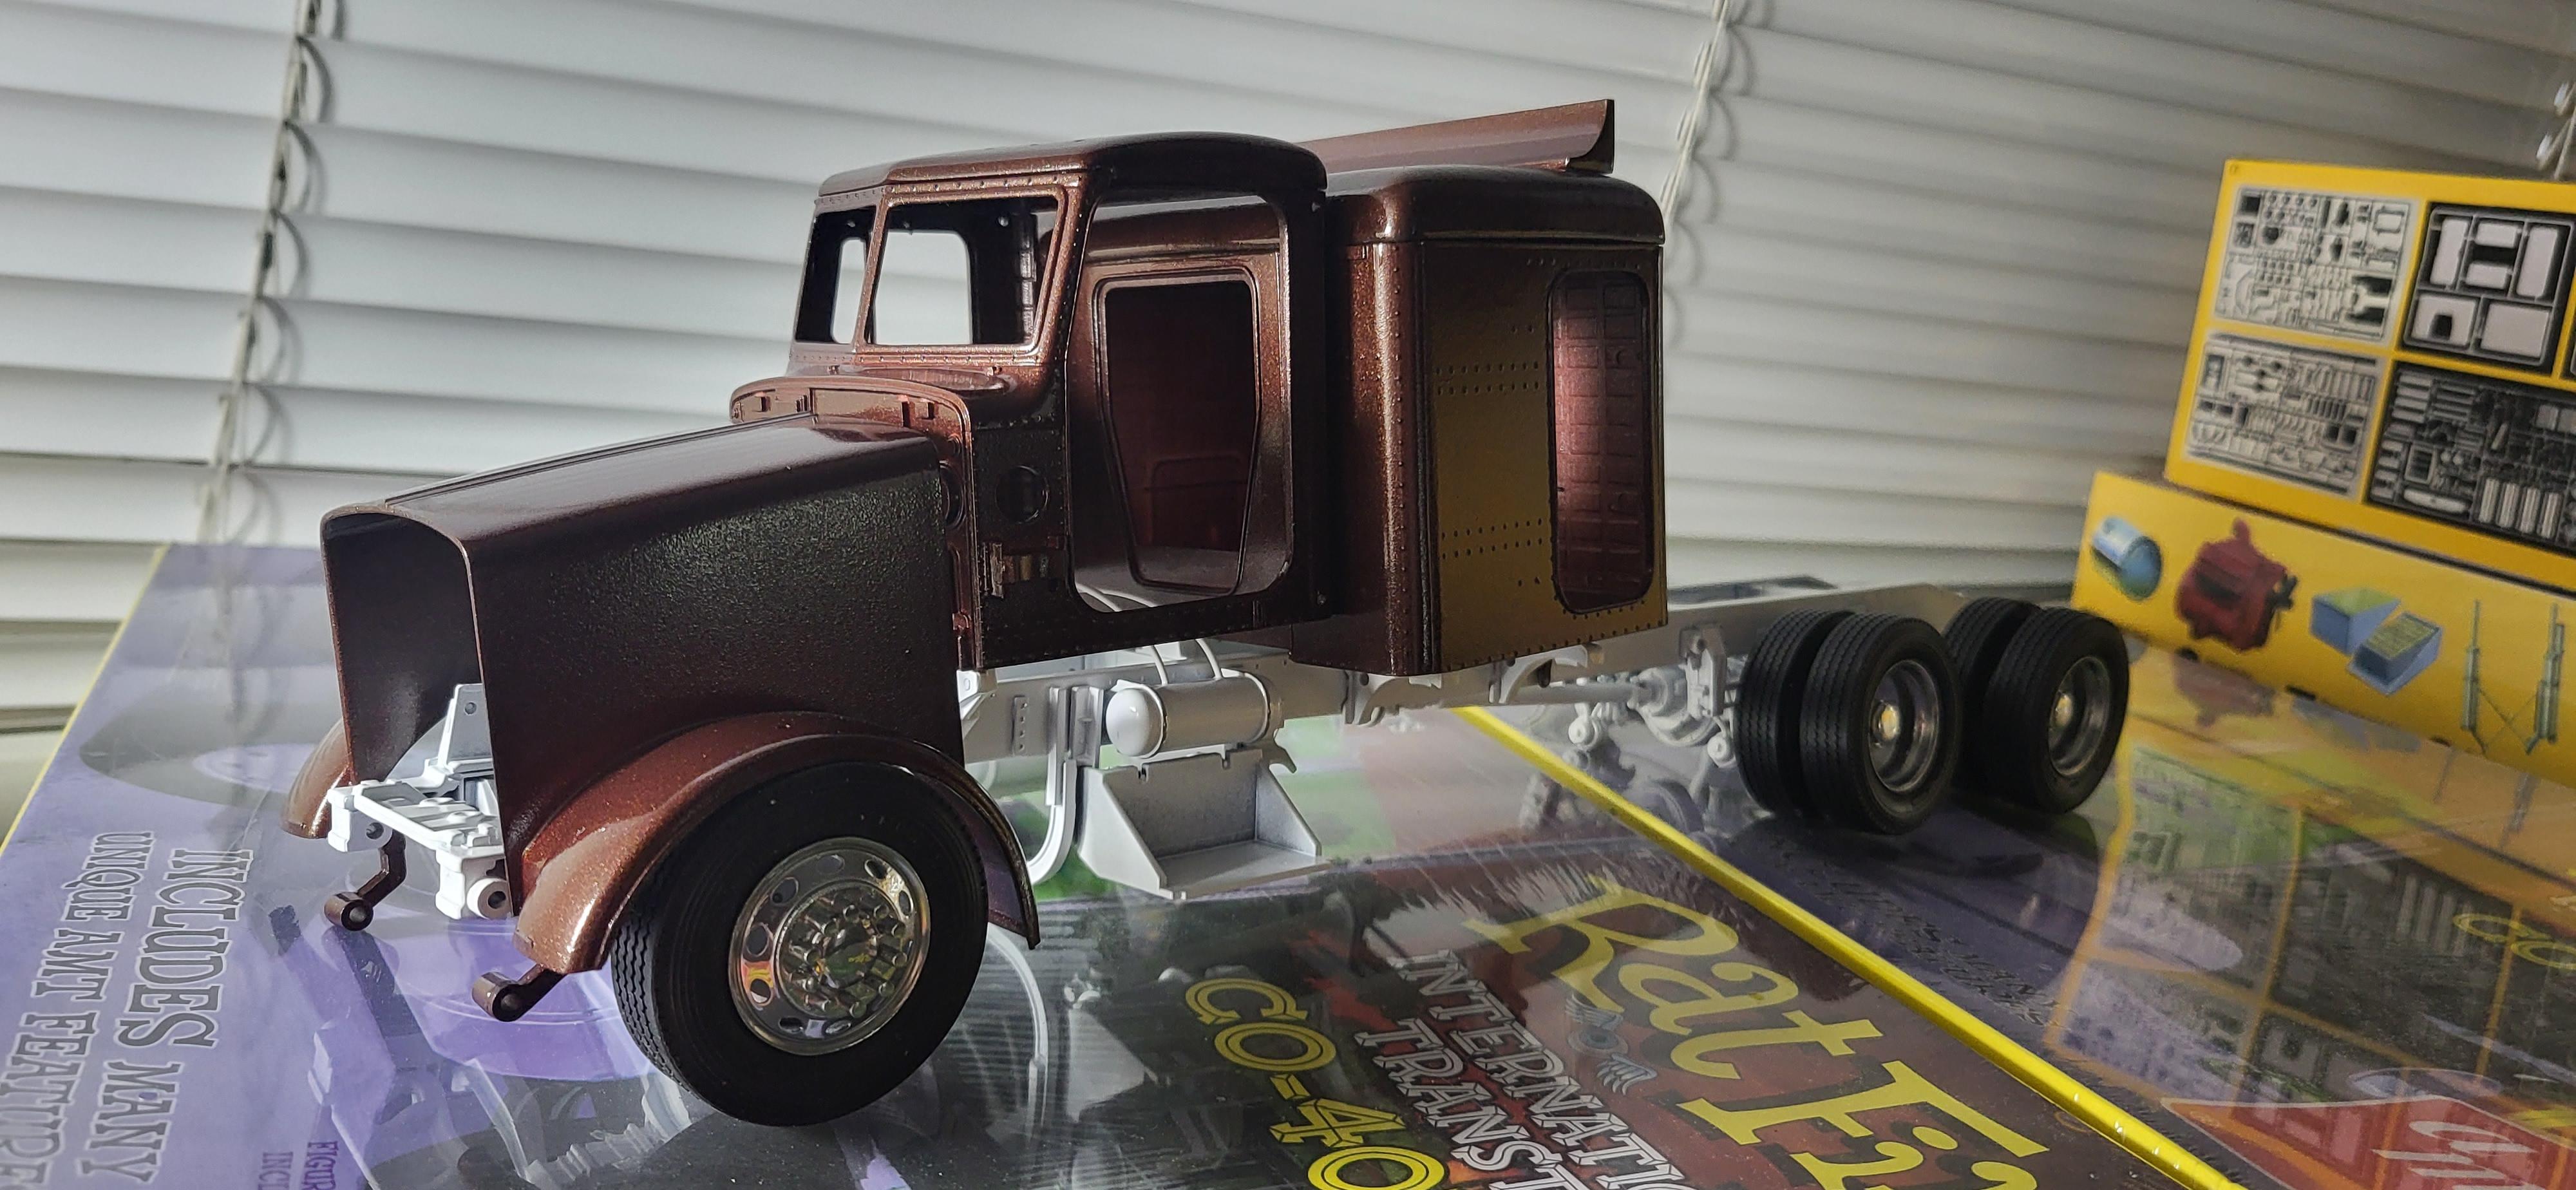
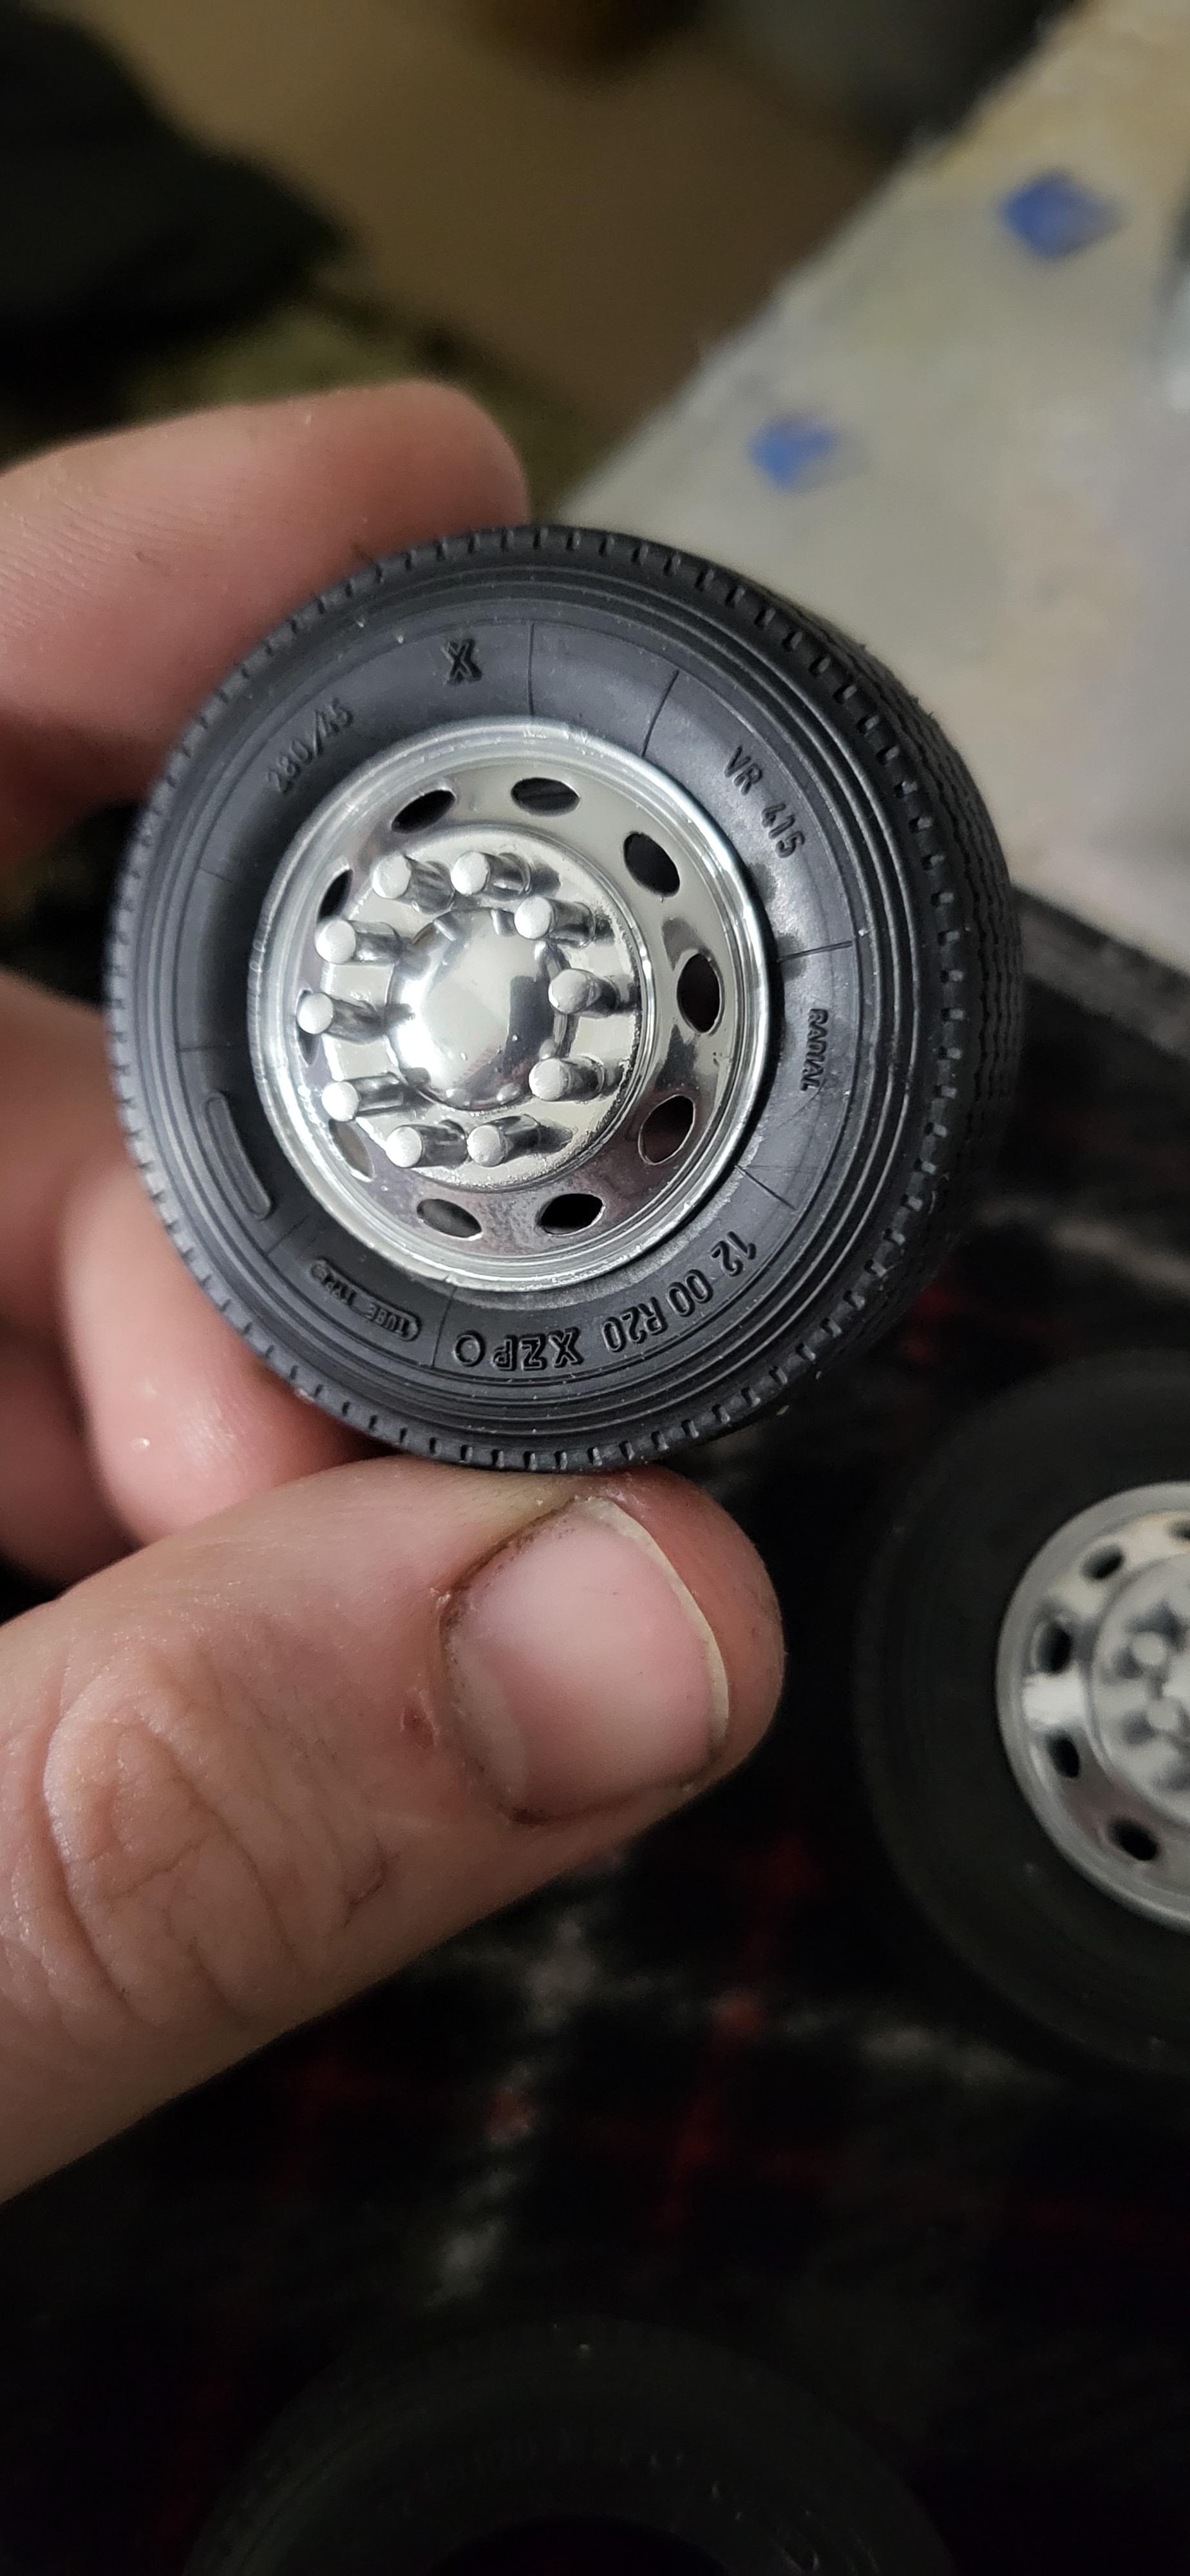
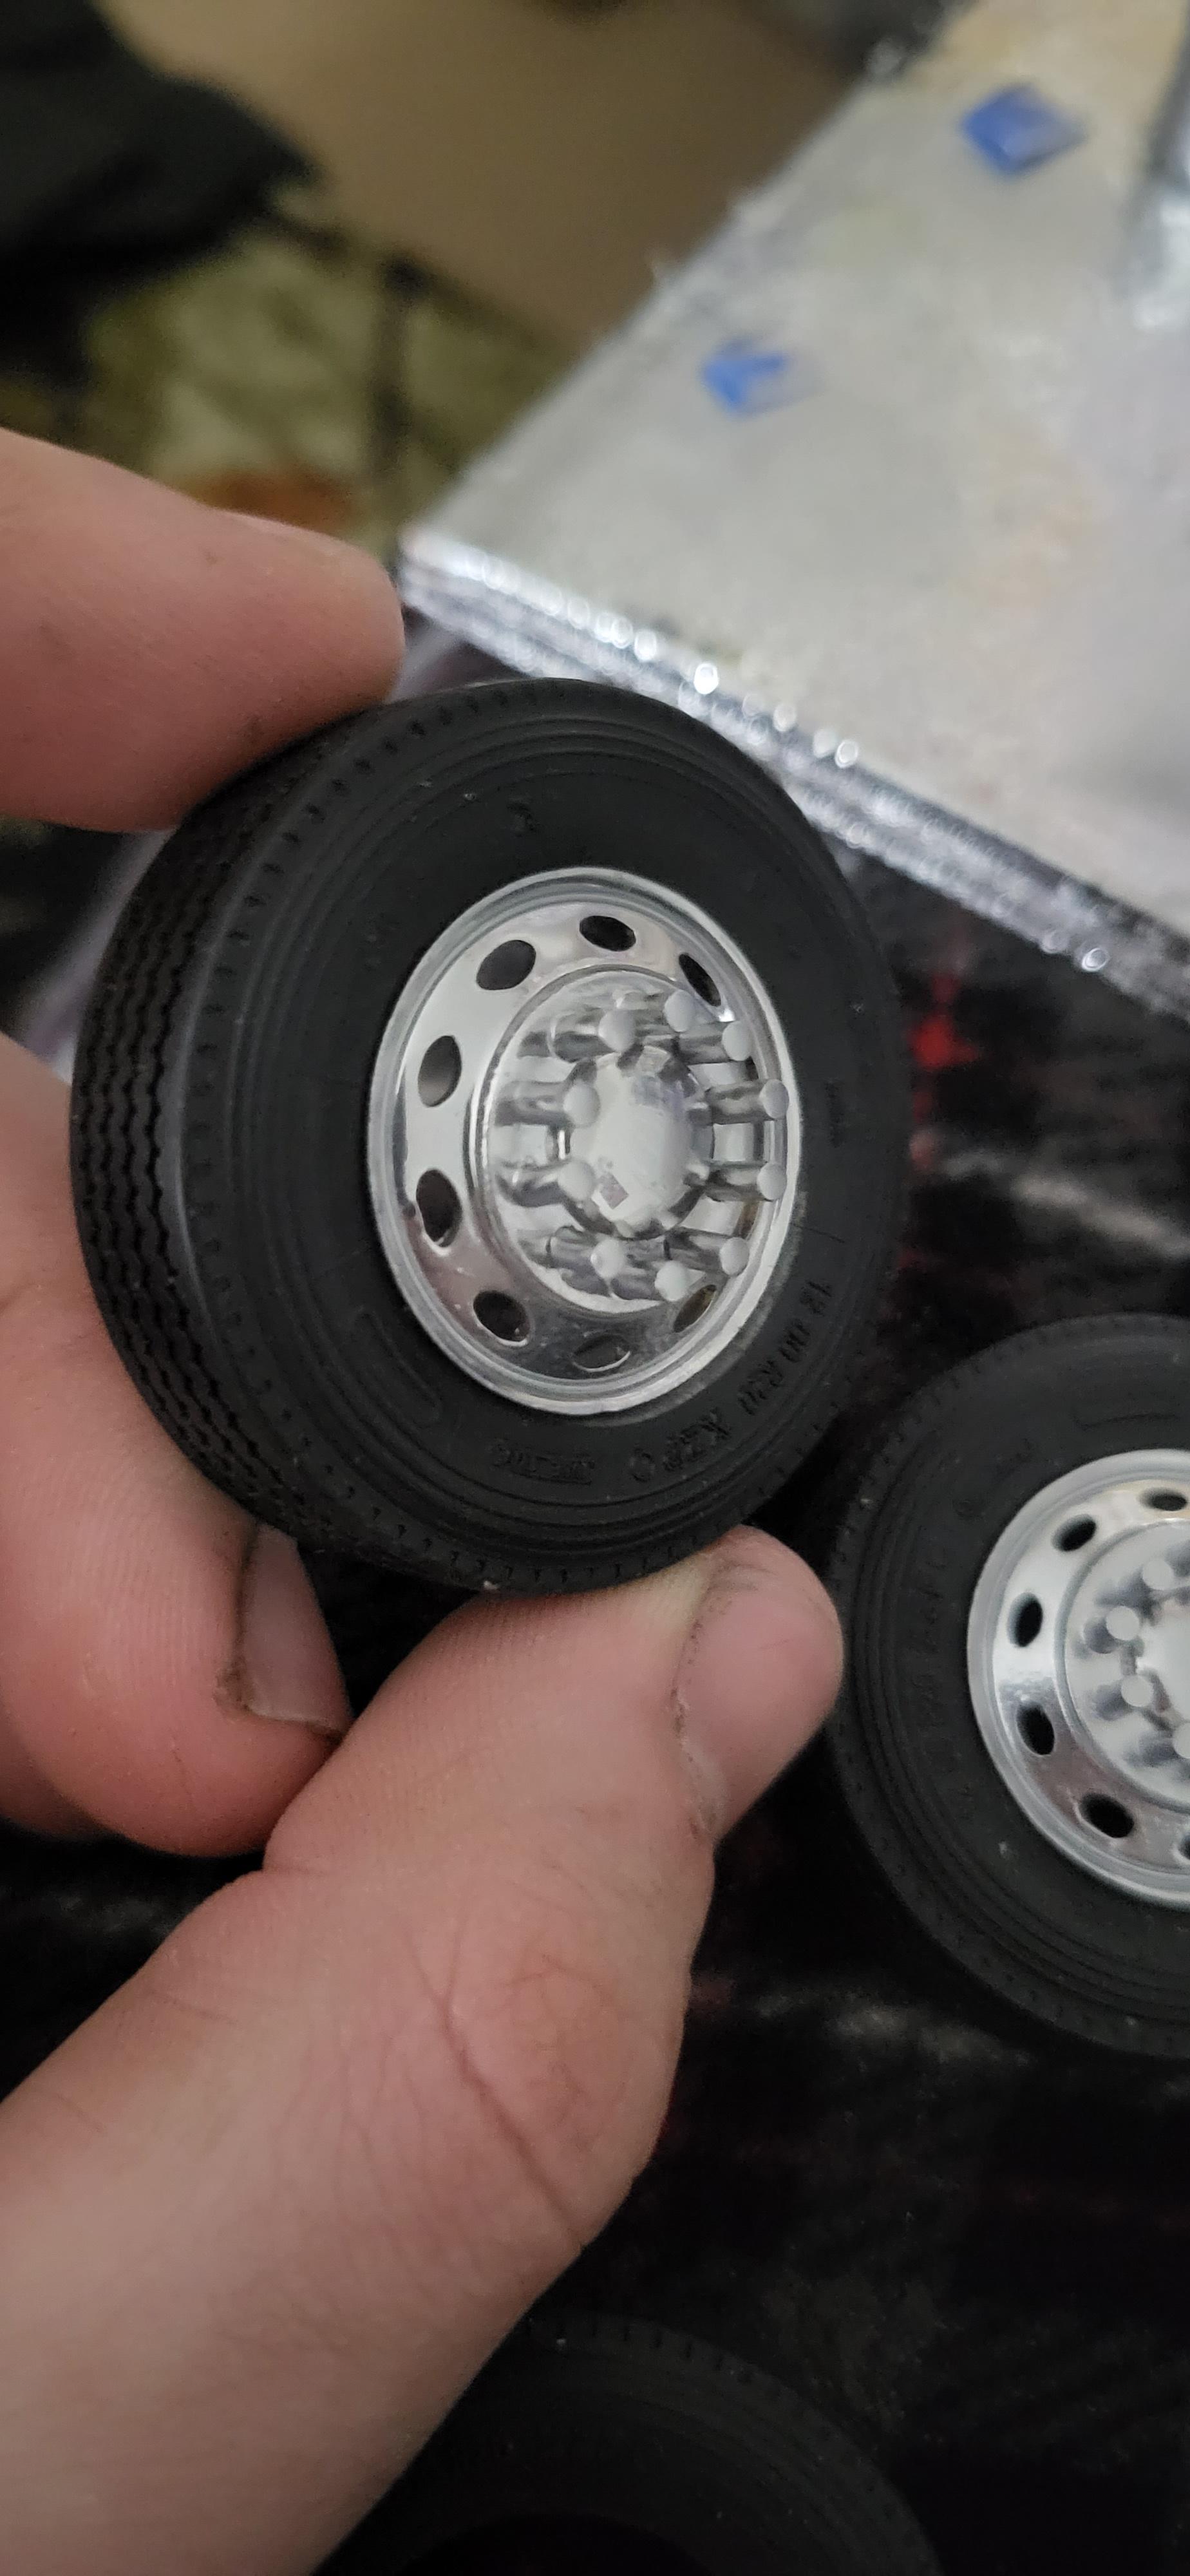
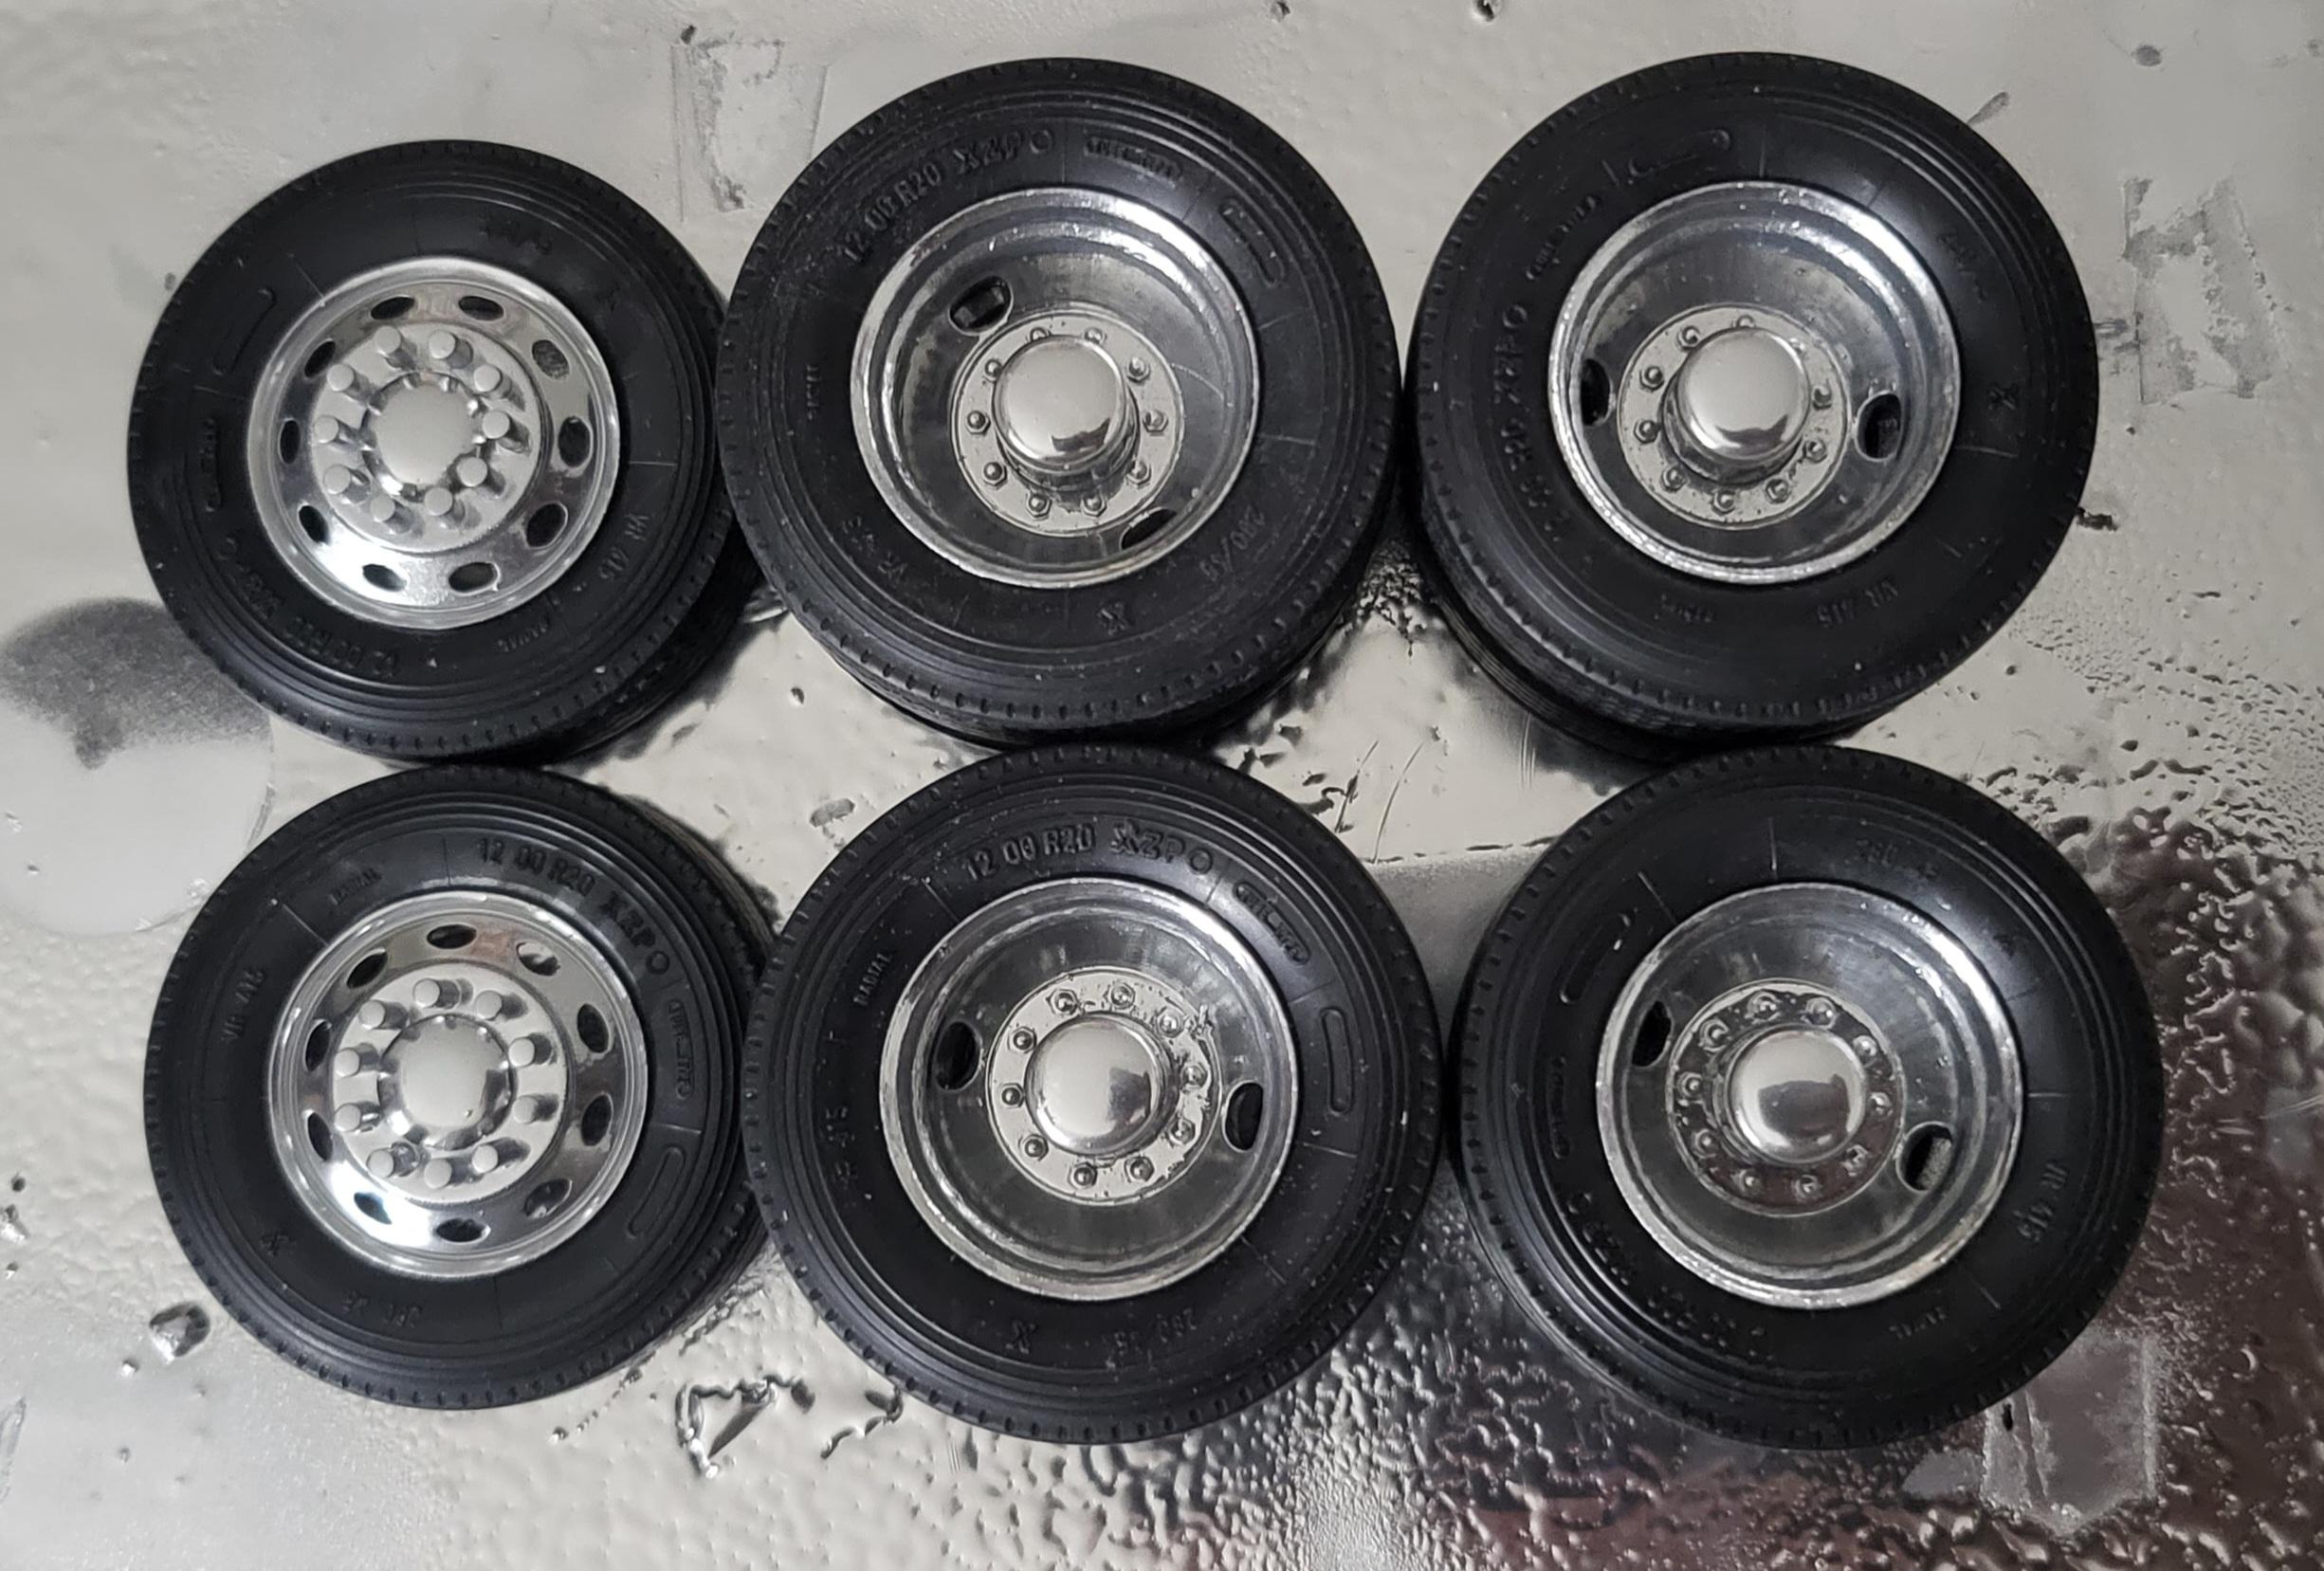
A rare mid week update here, got the clear and everything on all the parts. And I just had to get the rims and tires together. I'm blown away, this is looking awesome so far!
-
BRBO2023 Italeri 378
TruckerAL replied to TruckerAL's topic in WIP: Model Trucks: Big Rigs and Heavy Equipment
Thansk everyone for following along! The chrome paint I'm using is the new revell chrom spraypaint. Expensive yes, but the results are absolutely amazing, as you can see! -
BRBO2023 Italeri 378
TruckerAL replied to TruckerAL's topic in WIP: Model Trucks: Big Rigs and Heavy Equipment
It's not done just yet, but I got some engine parts on. So far so good, it's all starting to come together
-
BRBO2023 Italeri 378
TruckerAL replied to TruckerAL's topic in WIP: Model Trucks: Big Rigs and Heavy Equipment
Well everything at the moment is drying, all the final coats are on, and one coat of clear on the body pieces. I'll polish it out when the clear dries. Here's a little sneak peek of the chrome parts. I'll photograph the body parts after the polish stage!
-
BRBO2023 Italeri 378
TruckerAL replied to TruckerAL's topic in WIP: Model Trucks: Big Rigs and Heavy Equipment
First coat of paint has been laid earlier today. The second coat will go on tomorrow. It'll dry for a full week then I'll add the clear, polish, and get to assembling it. Making great progress. Pics to come soon?