TruckerAL
-
Posts
408 -
Joined
-
Last visited
Content Type
Profiles
Forums
Events
Gallery
Everything posted by TruckerAL
-
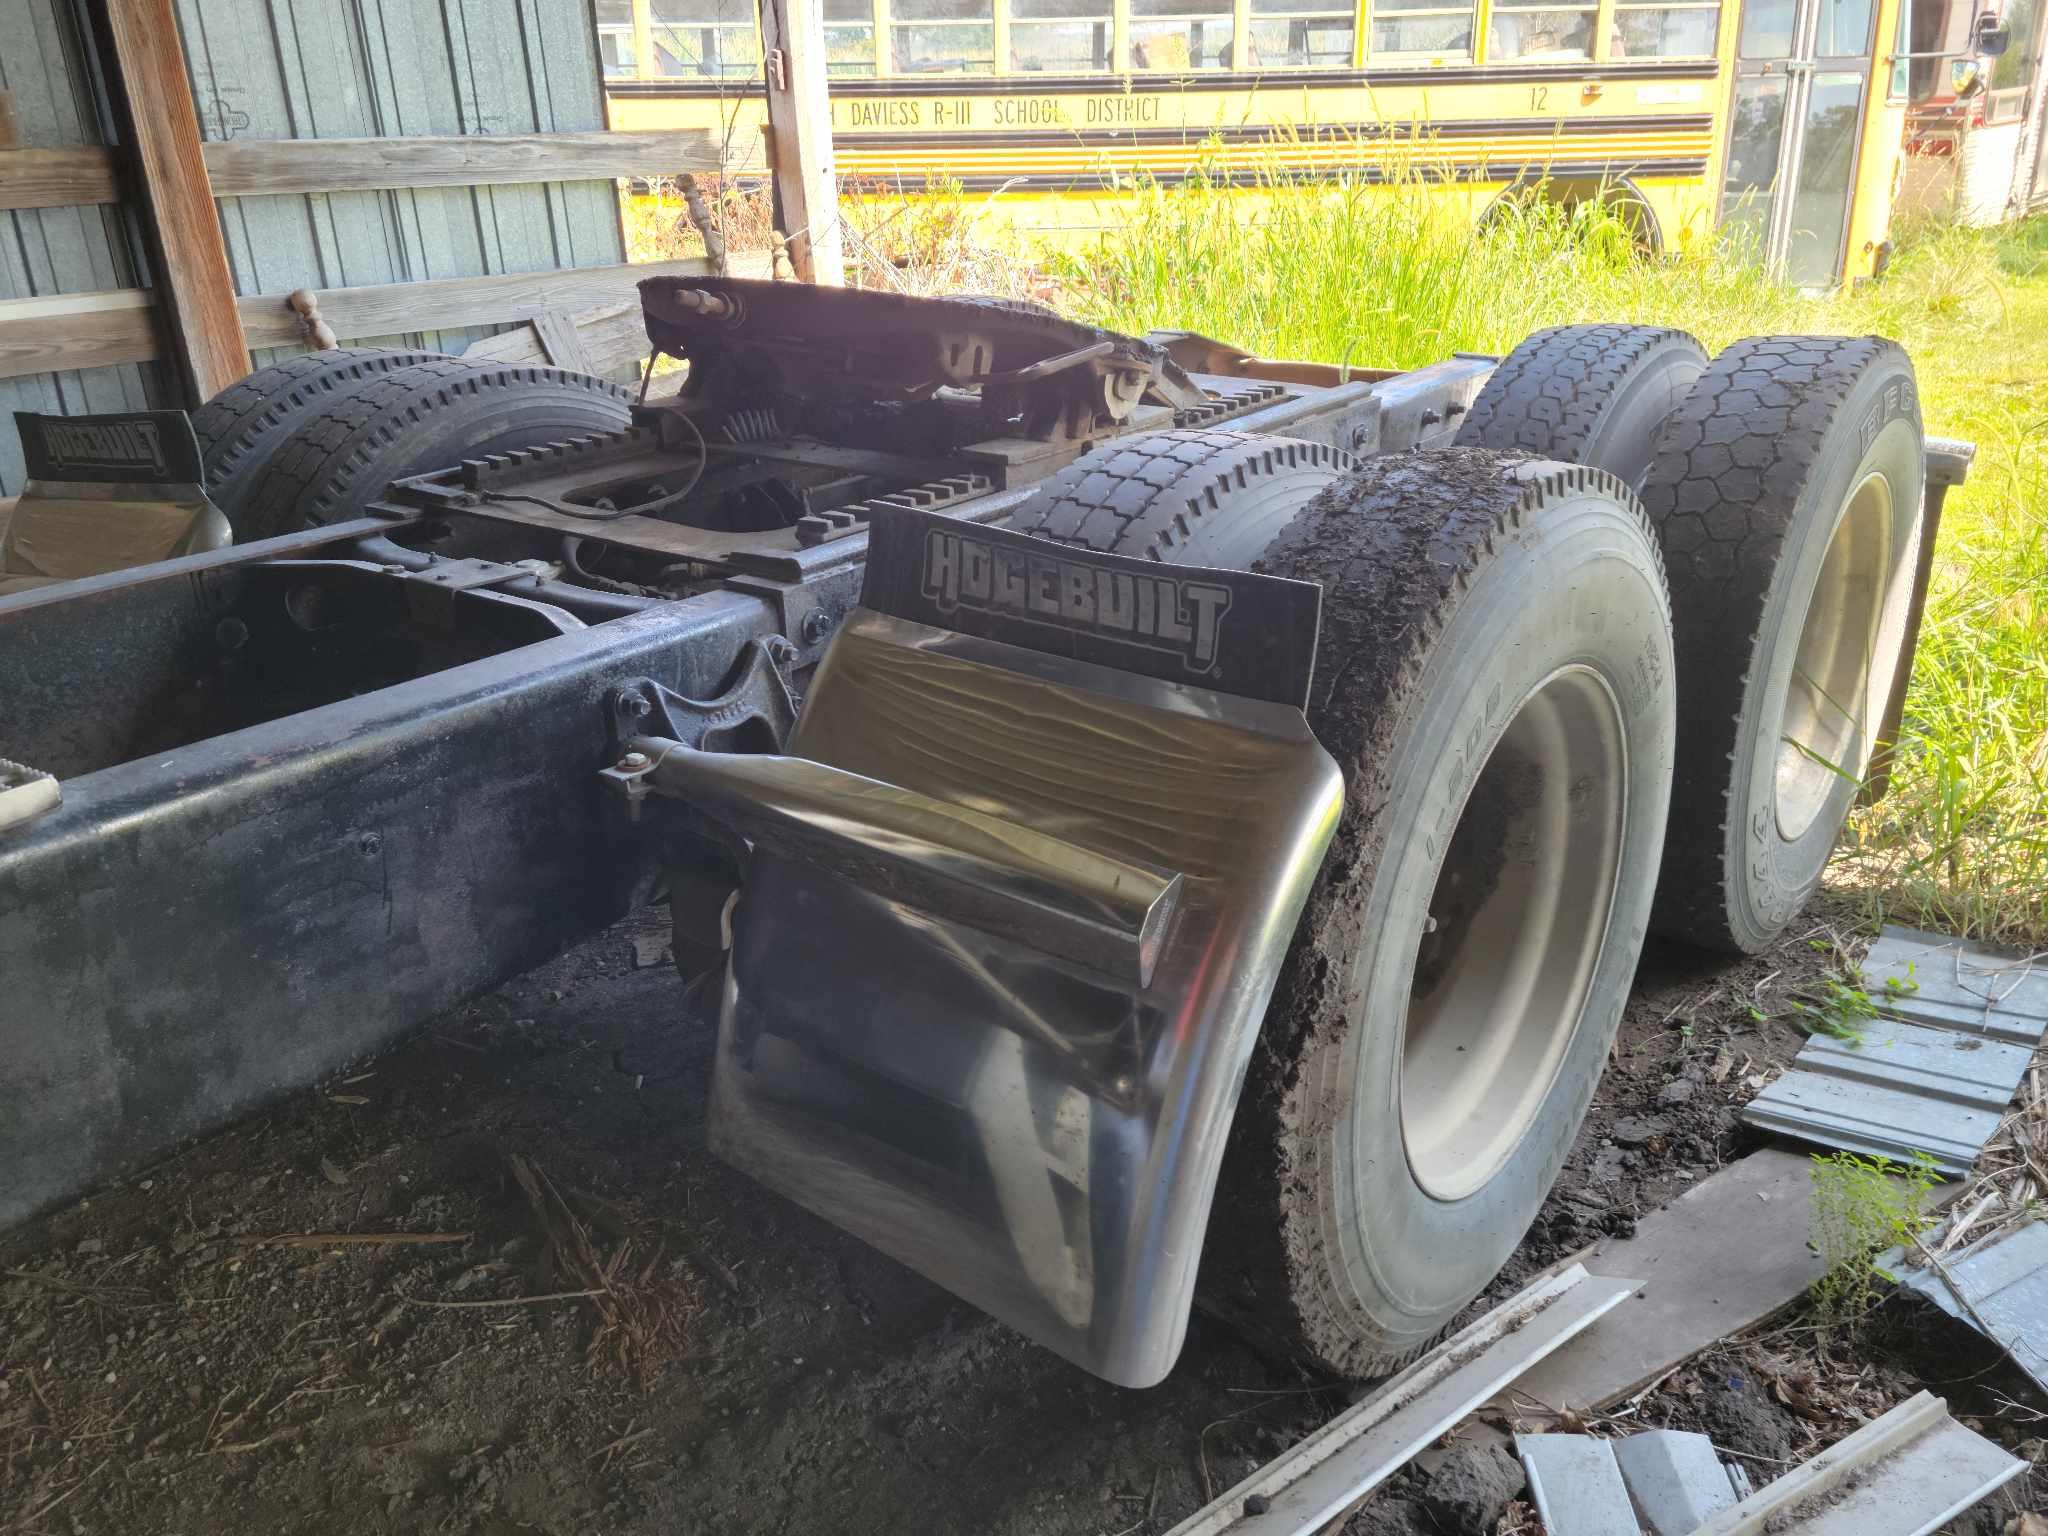
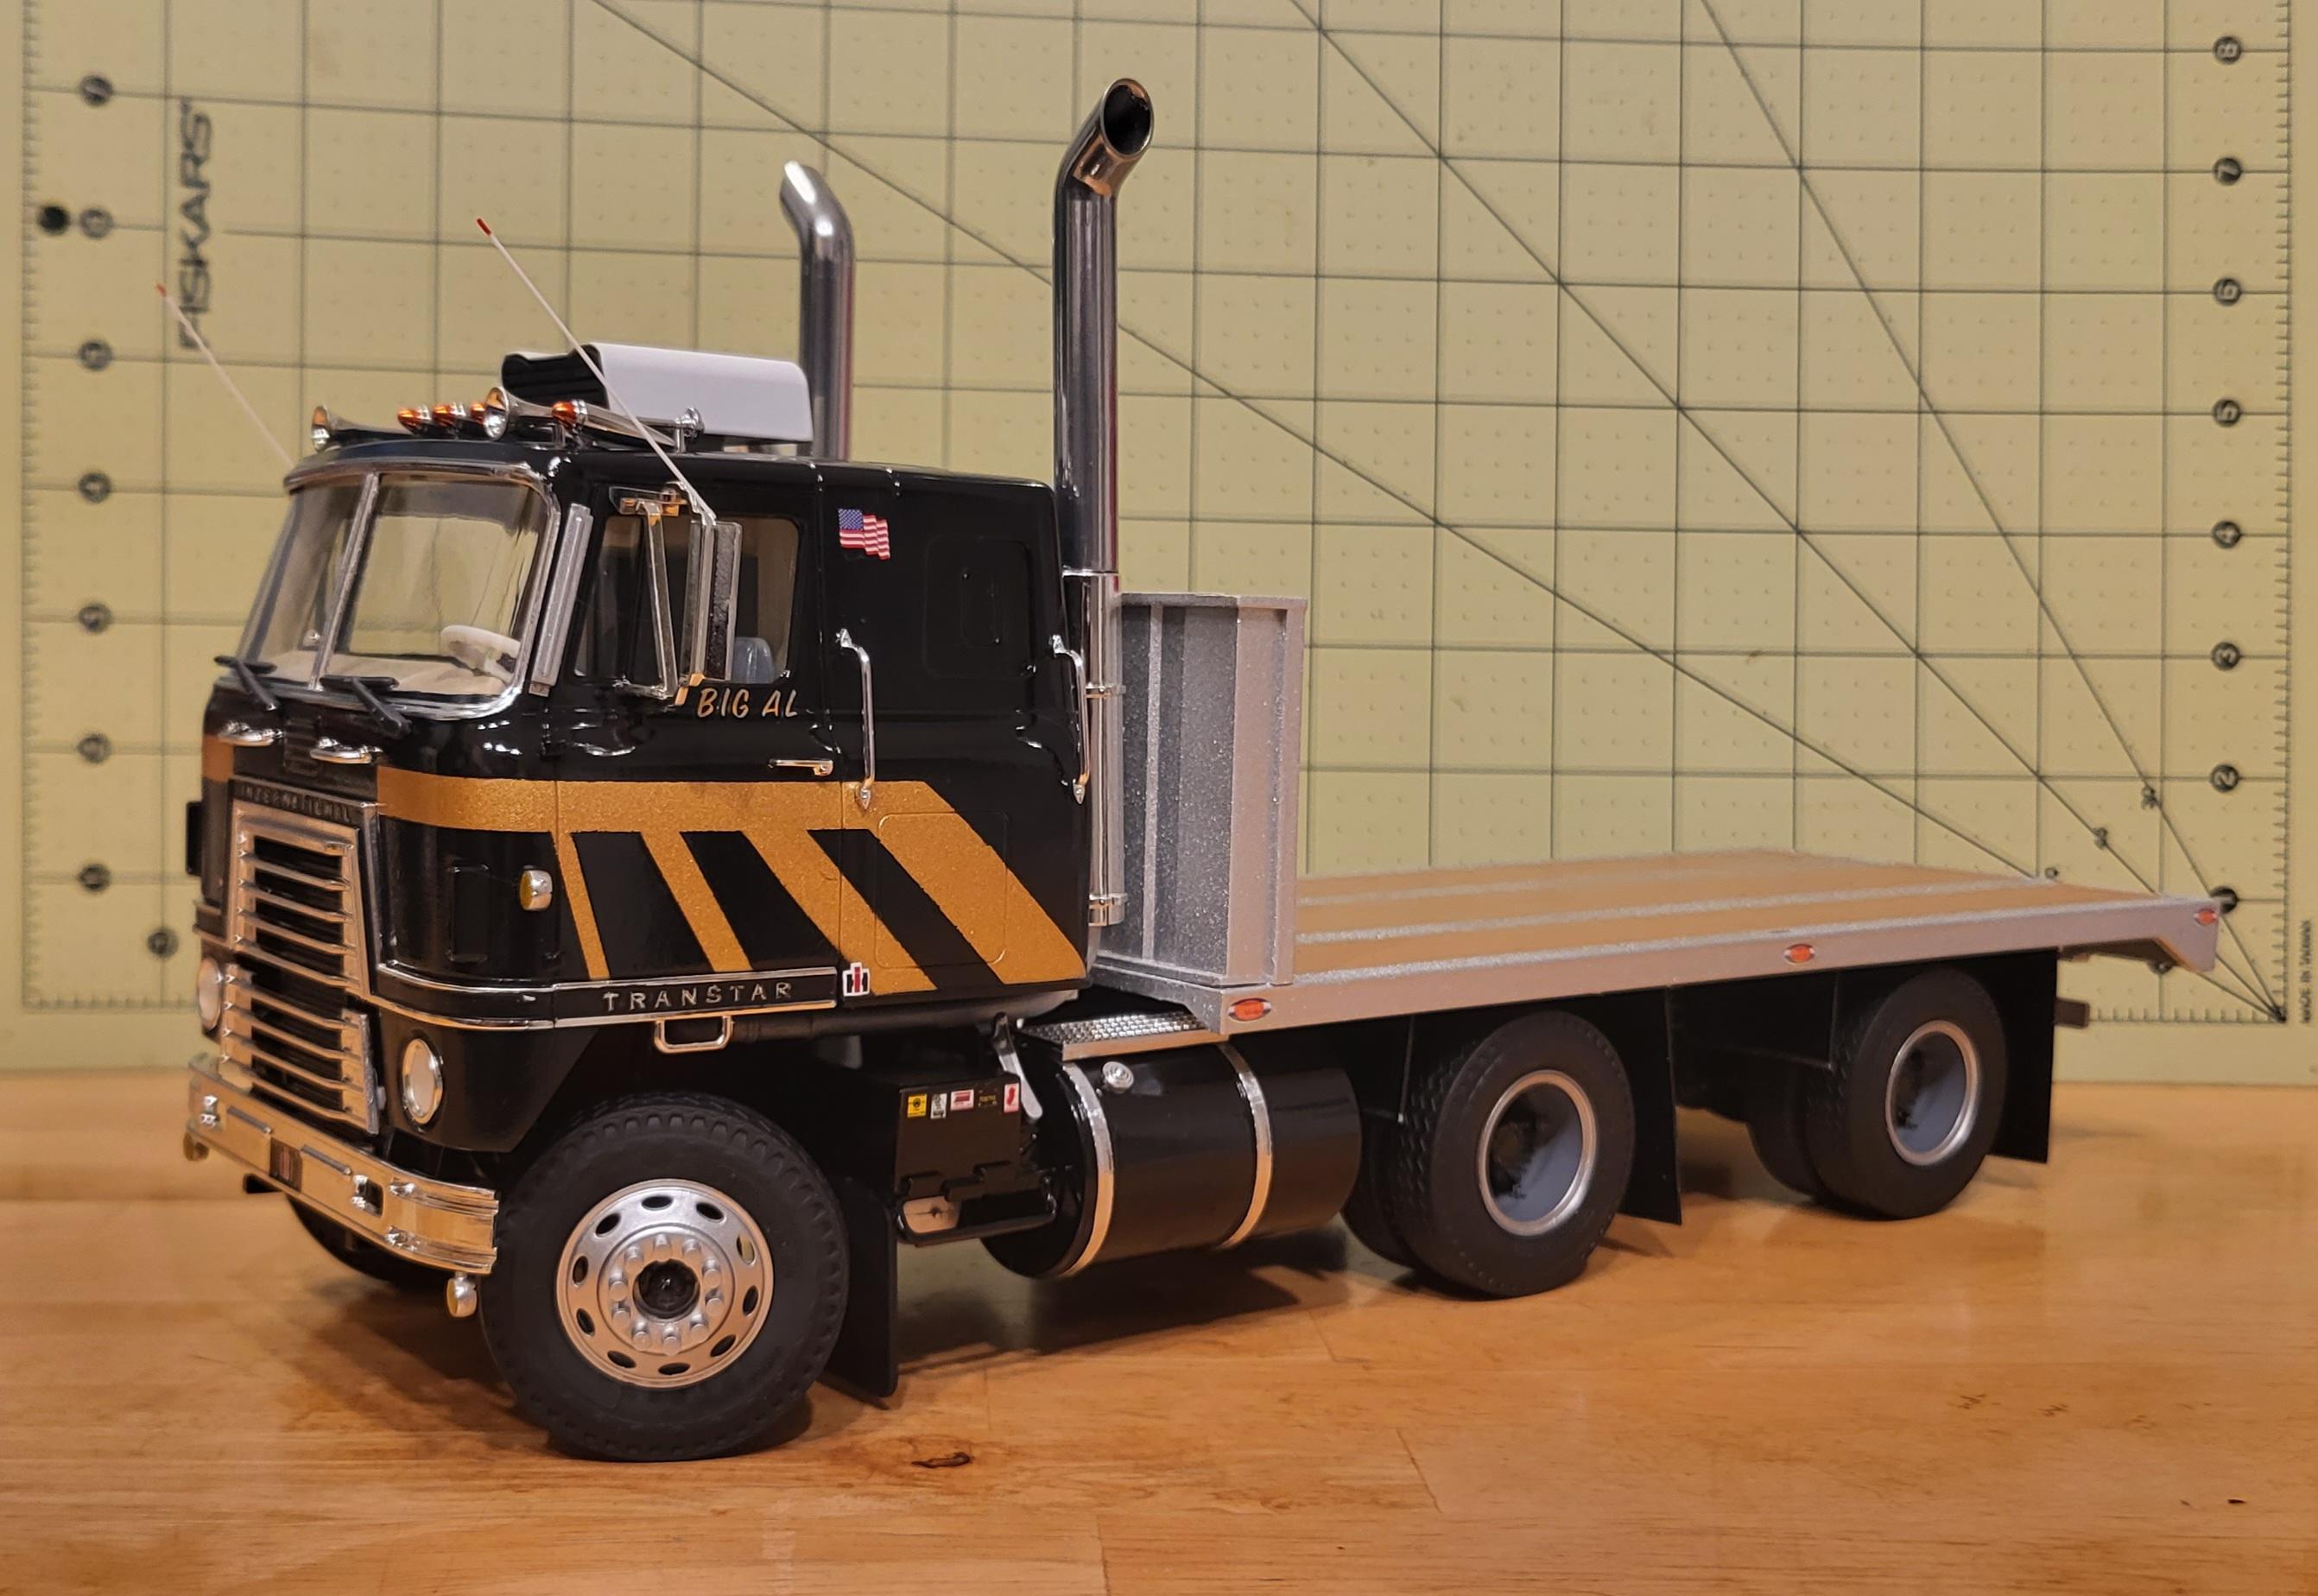
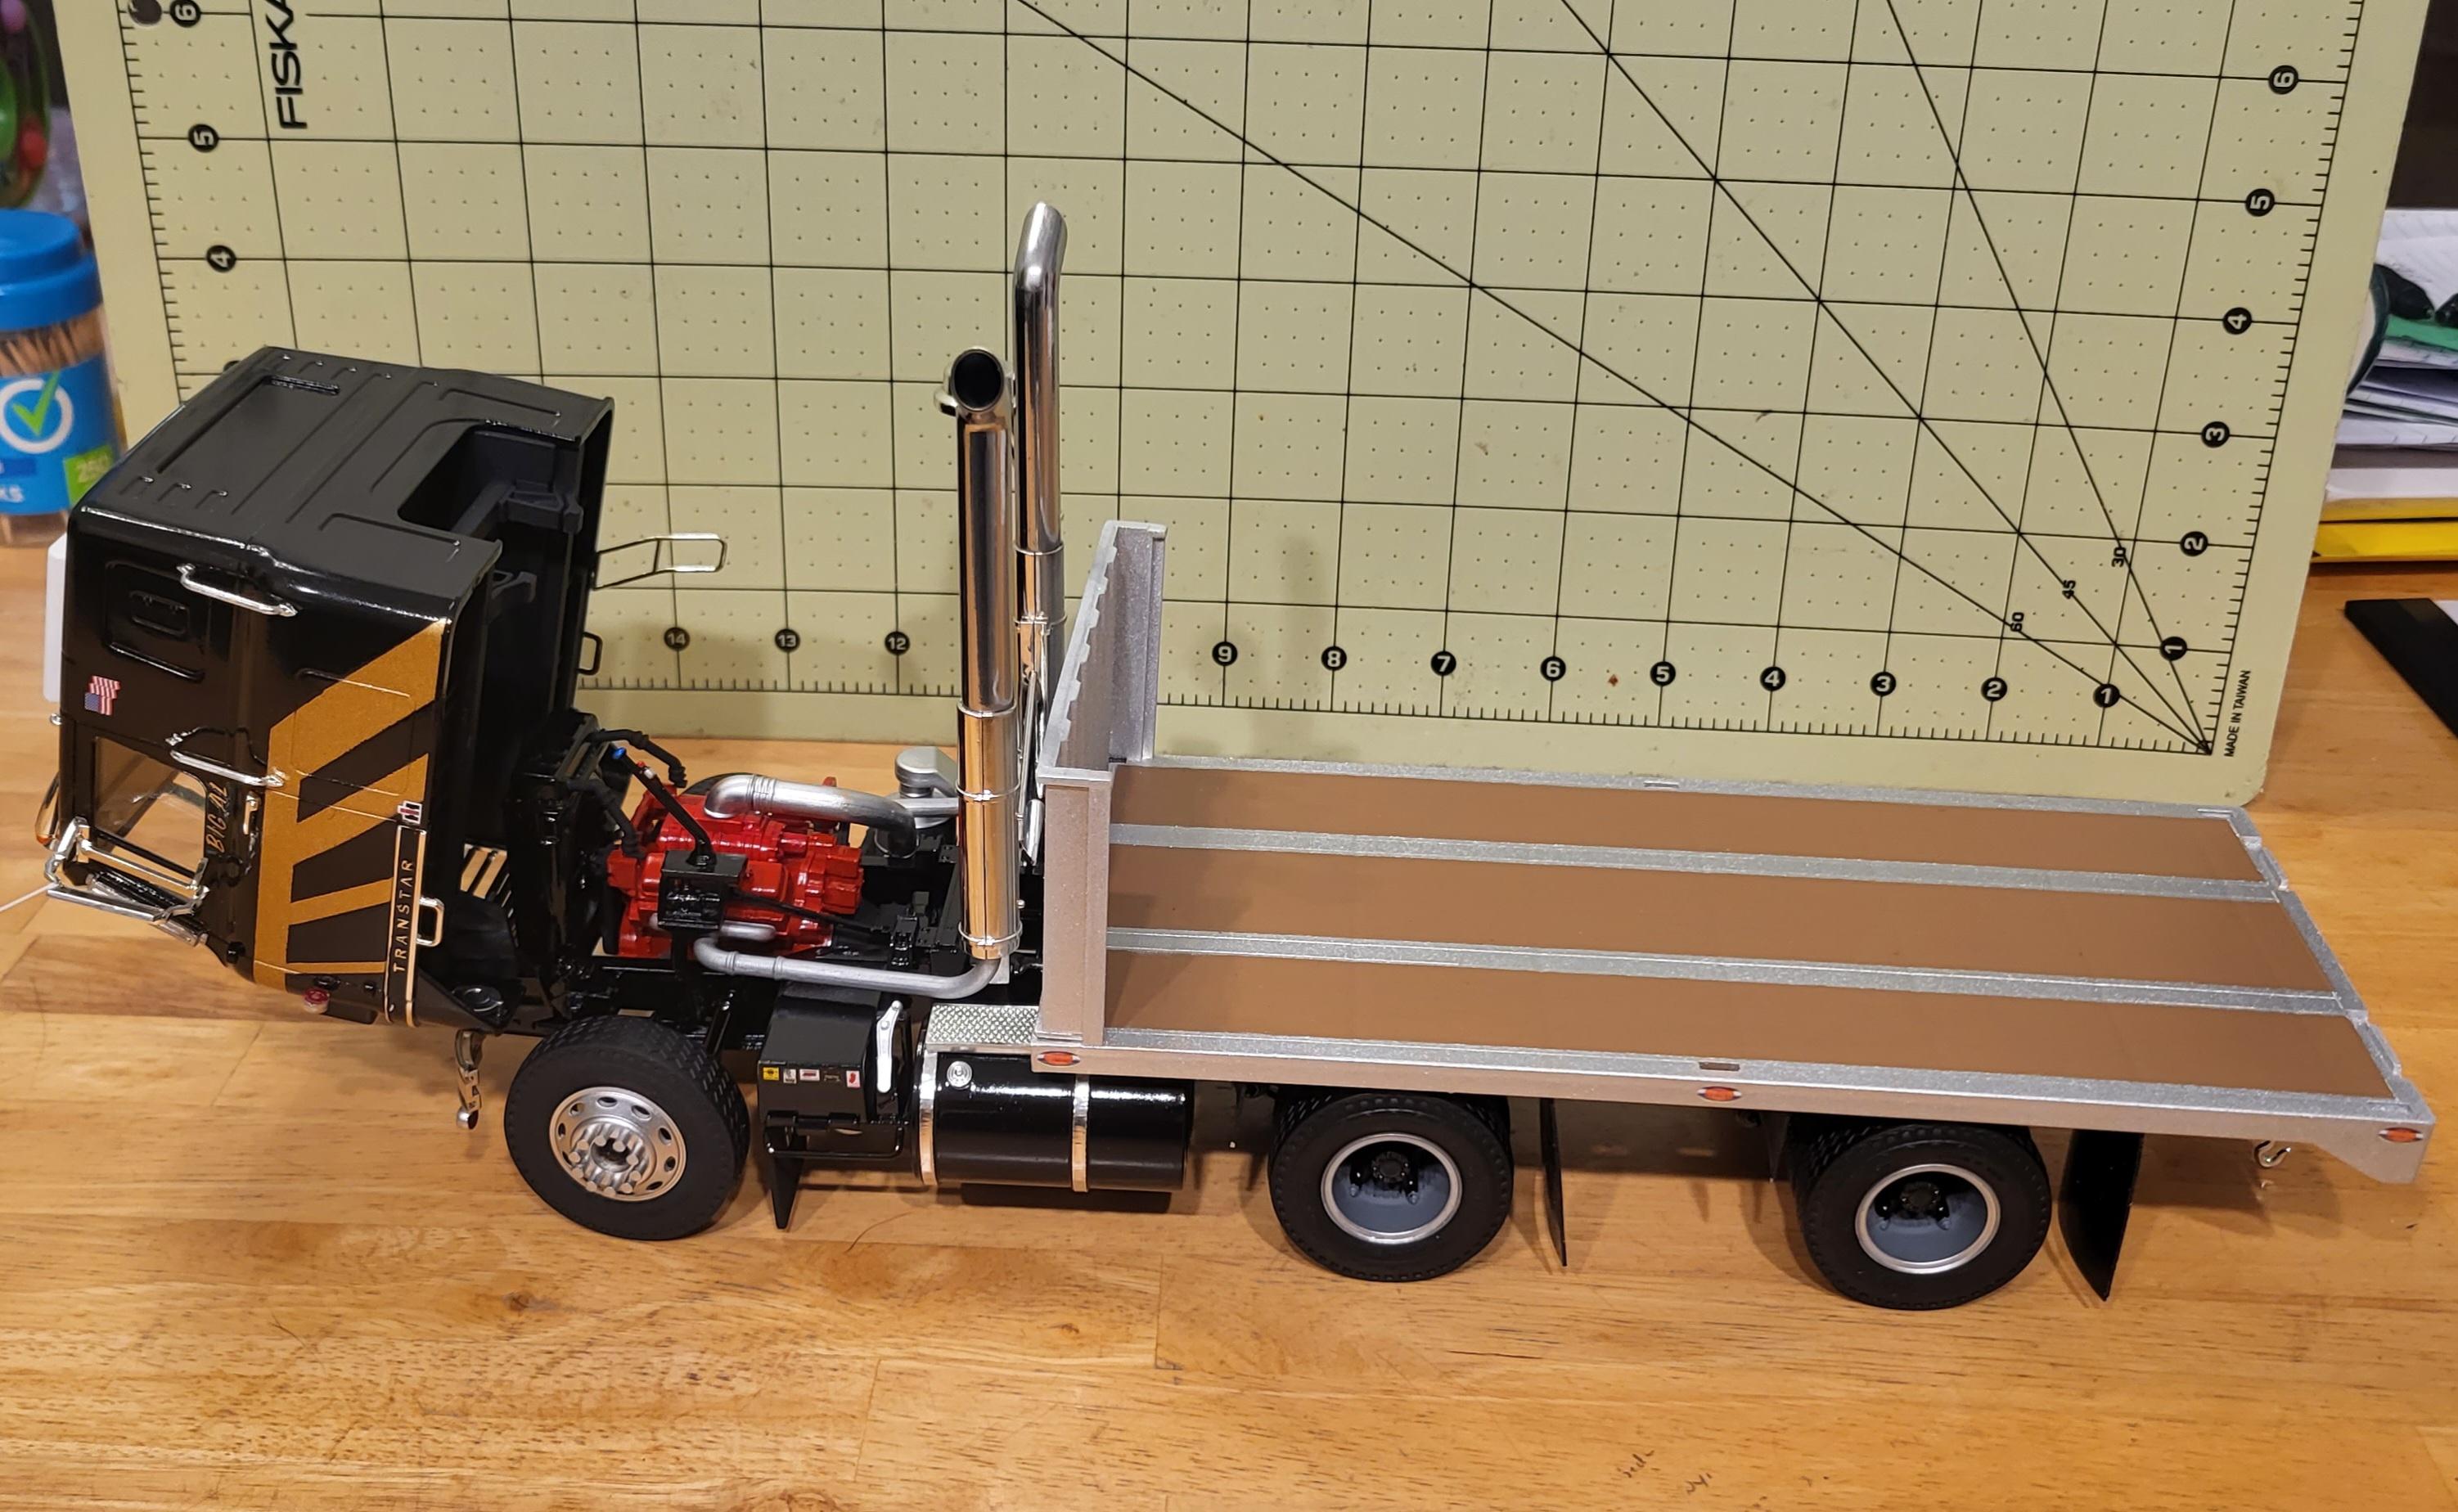
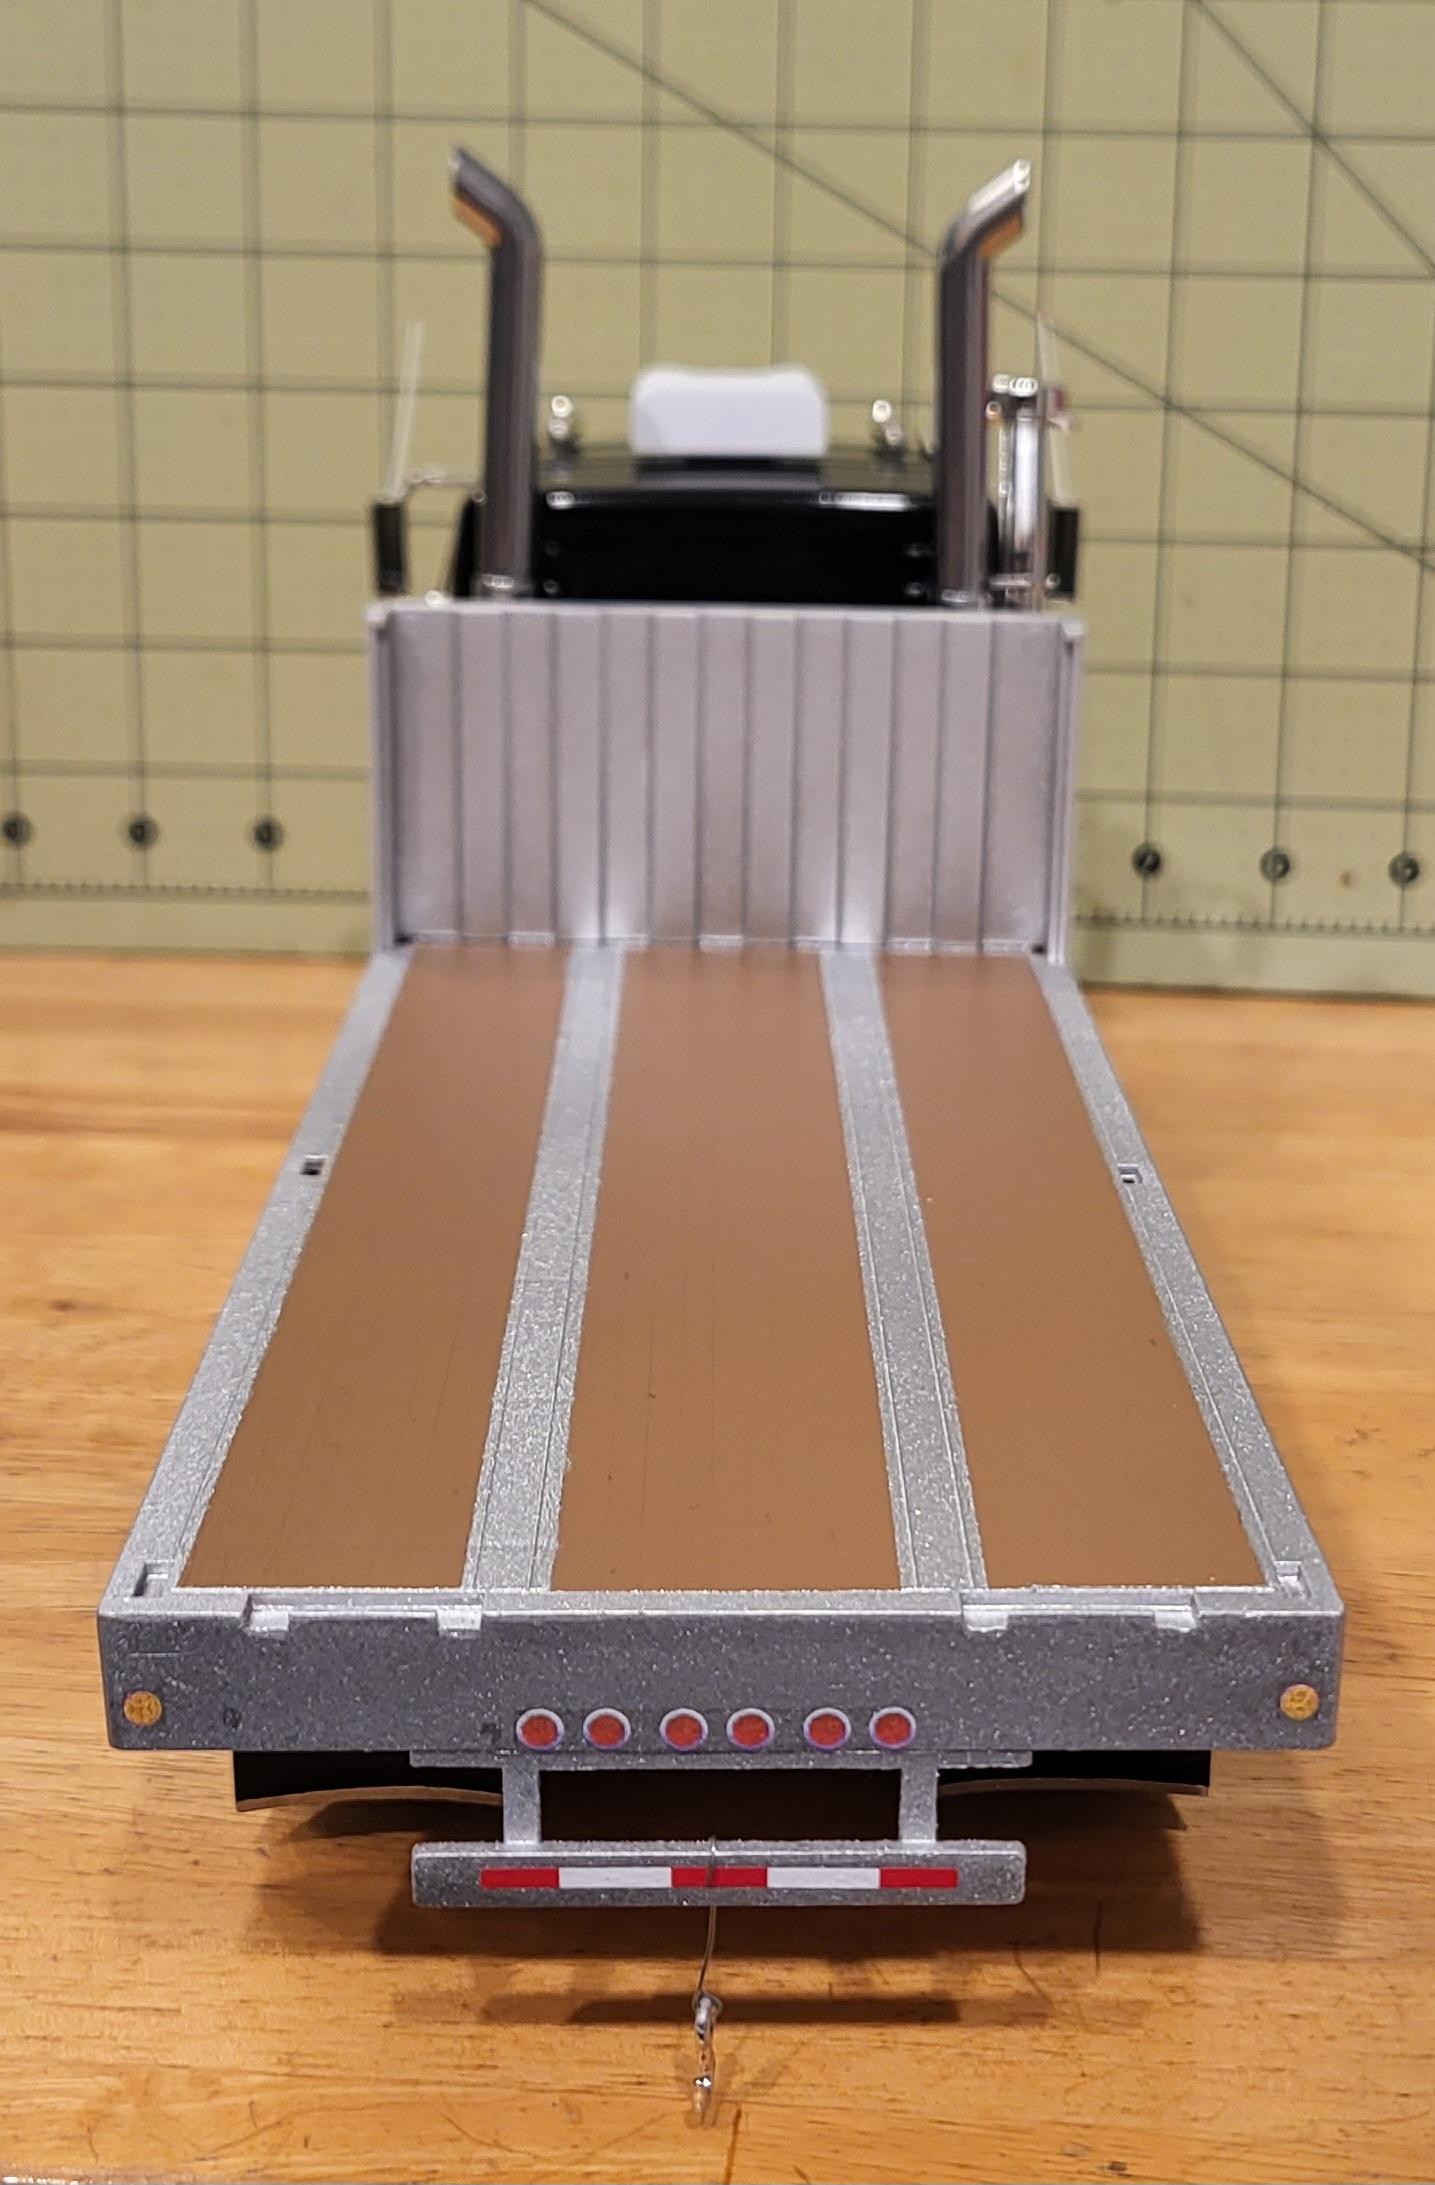
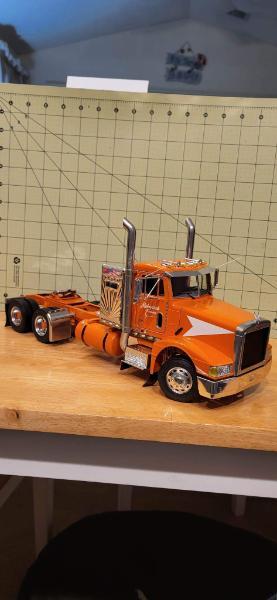
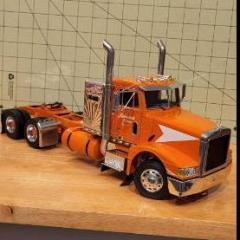 I'll post better photos at a later date, but I just wanted to get this posted and show it off a little. I built it using nothing but loose parts from my collection. Nothing on here is brand new except for the exhaust stacks those are 3d printed and the mudflaps I made. The rest is all either scratch made, or sourced from parts bins. There's atleast parts from 20 trucks on here!
-
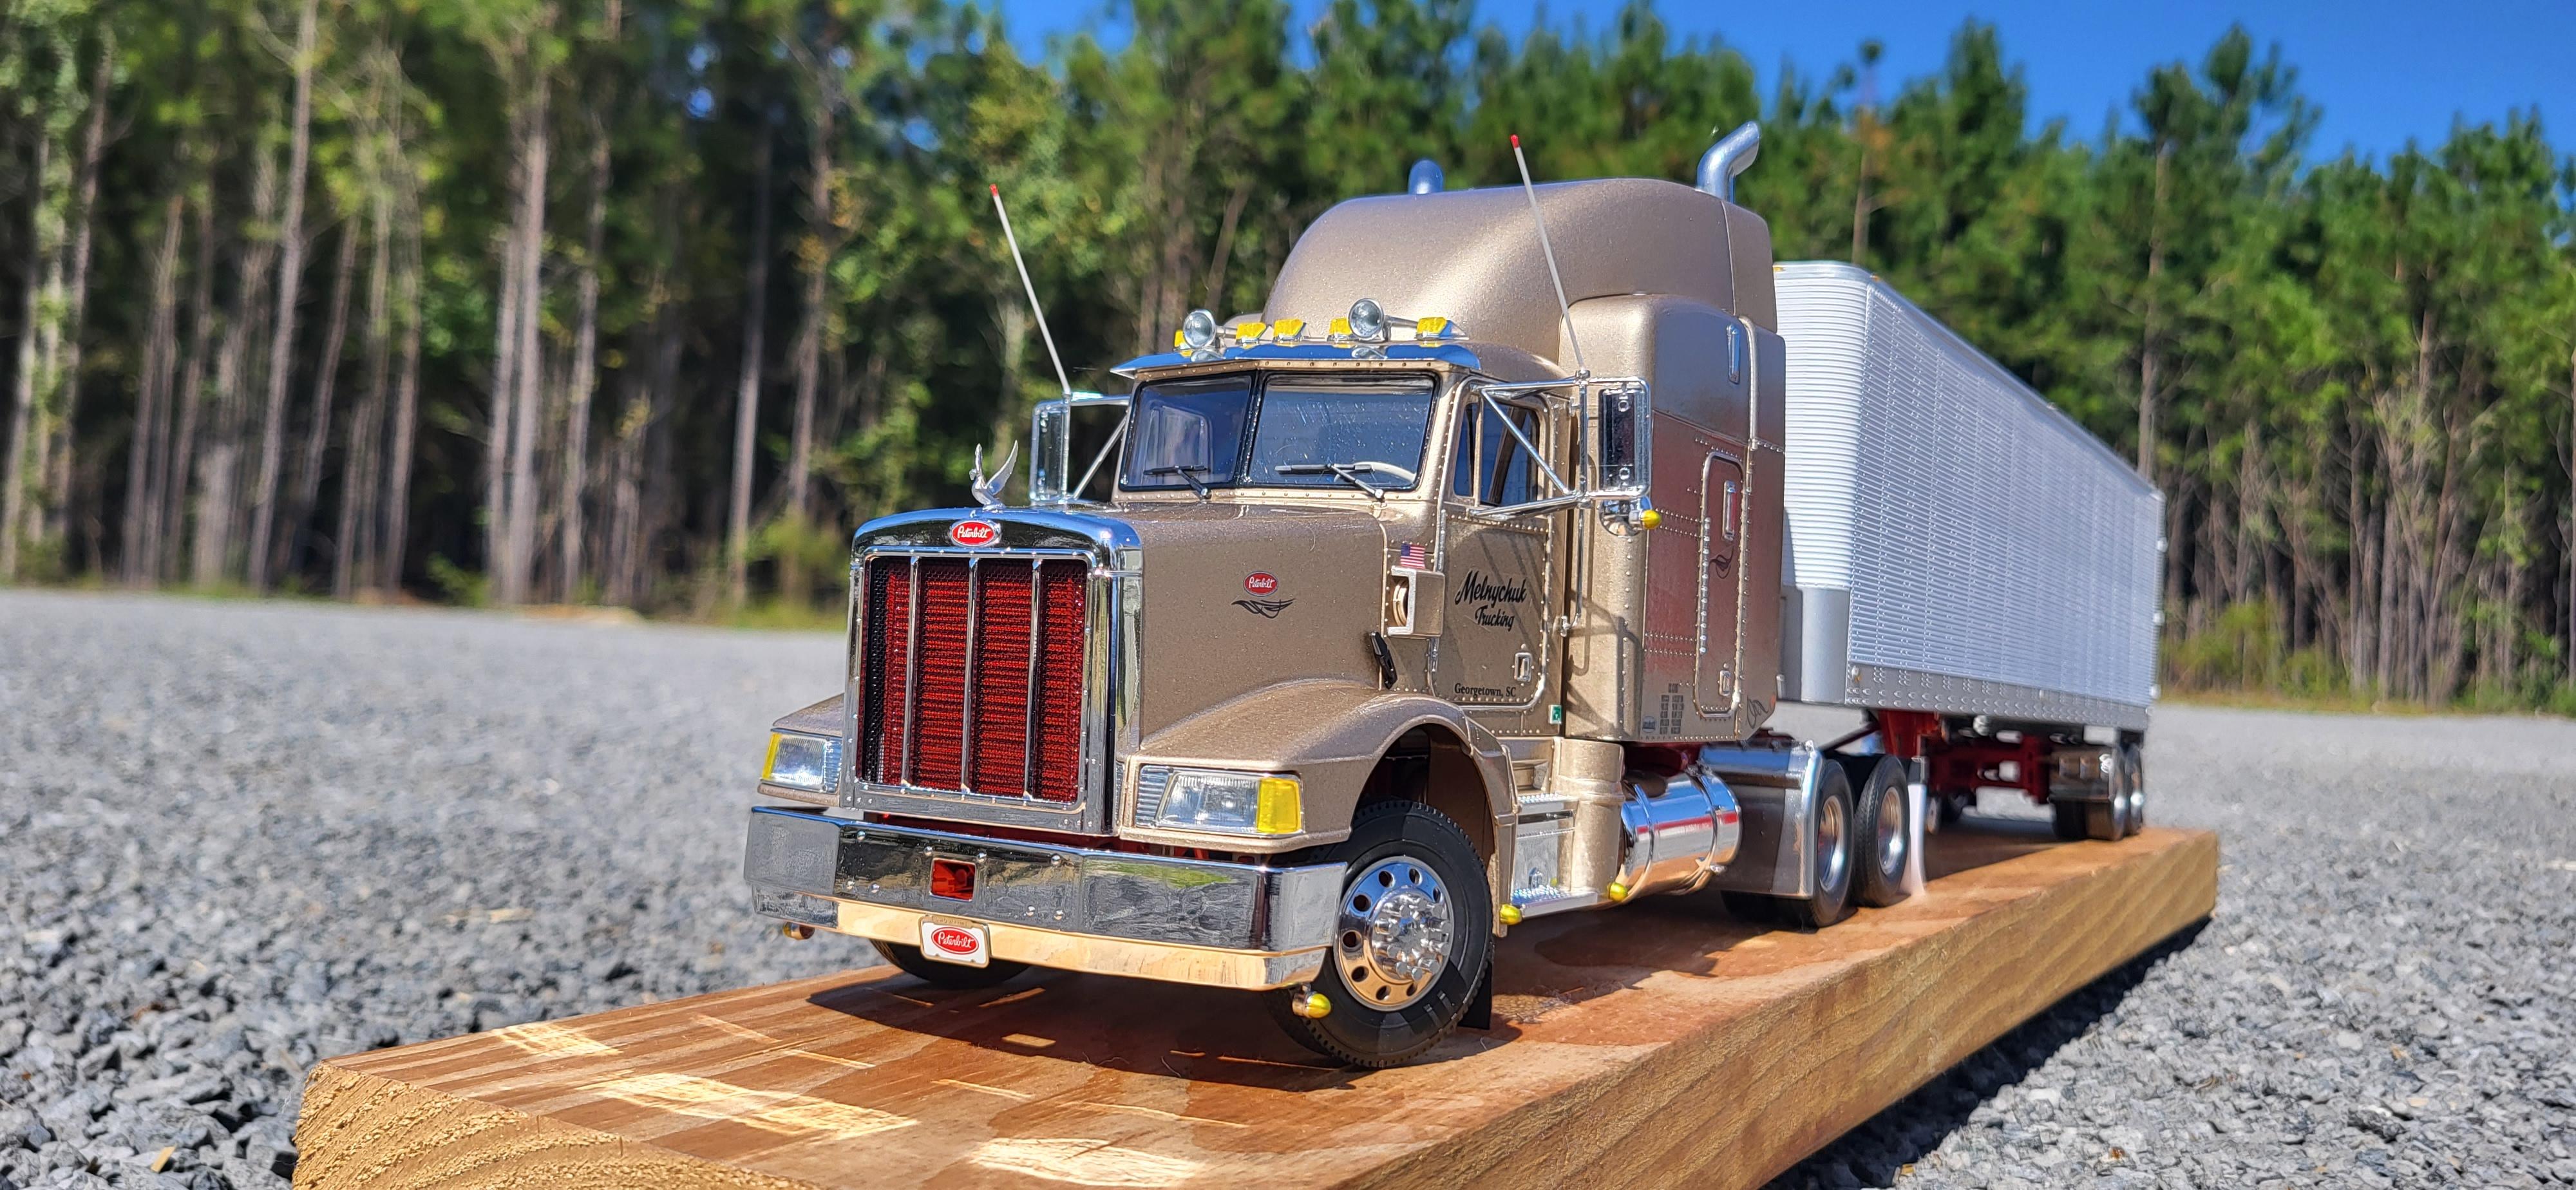
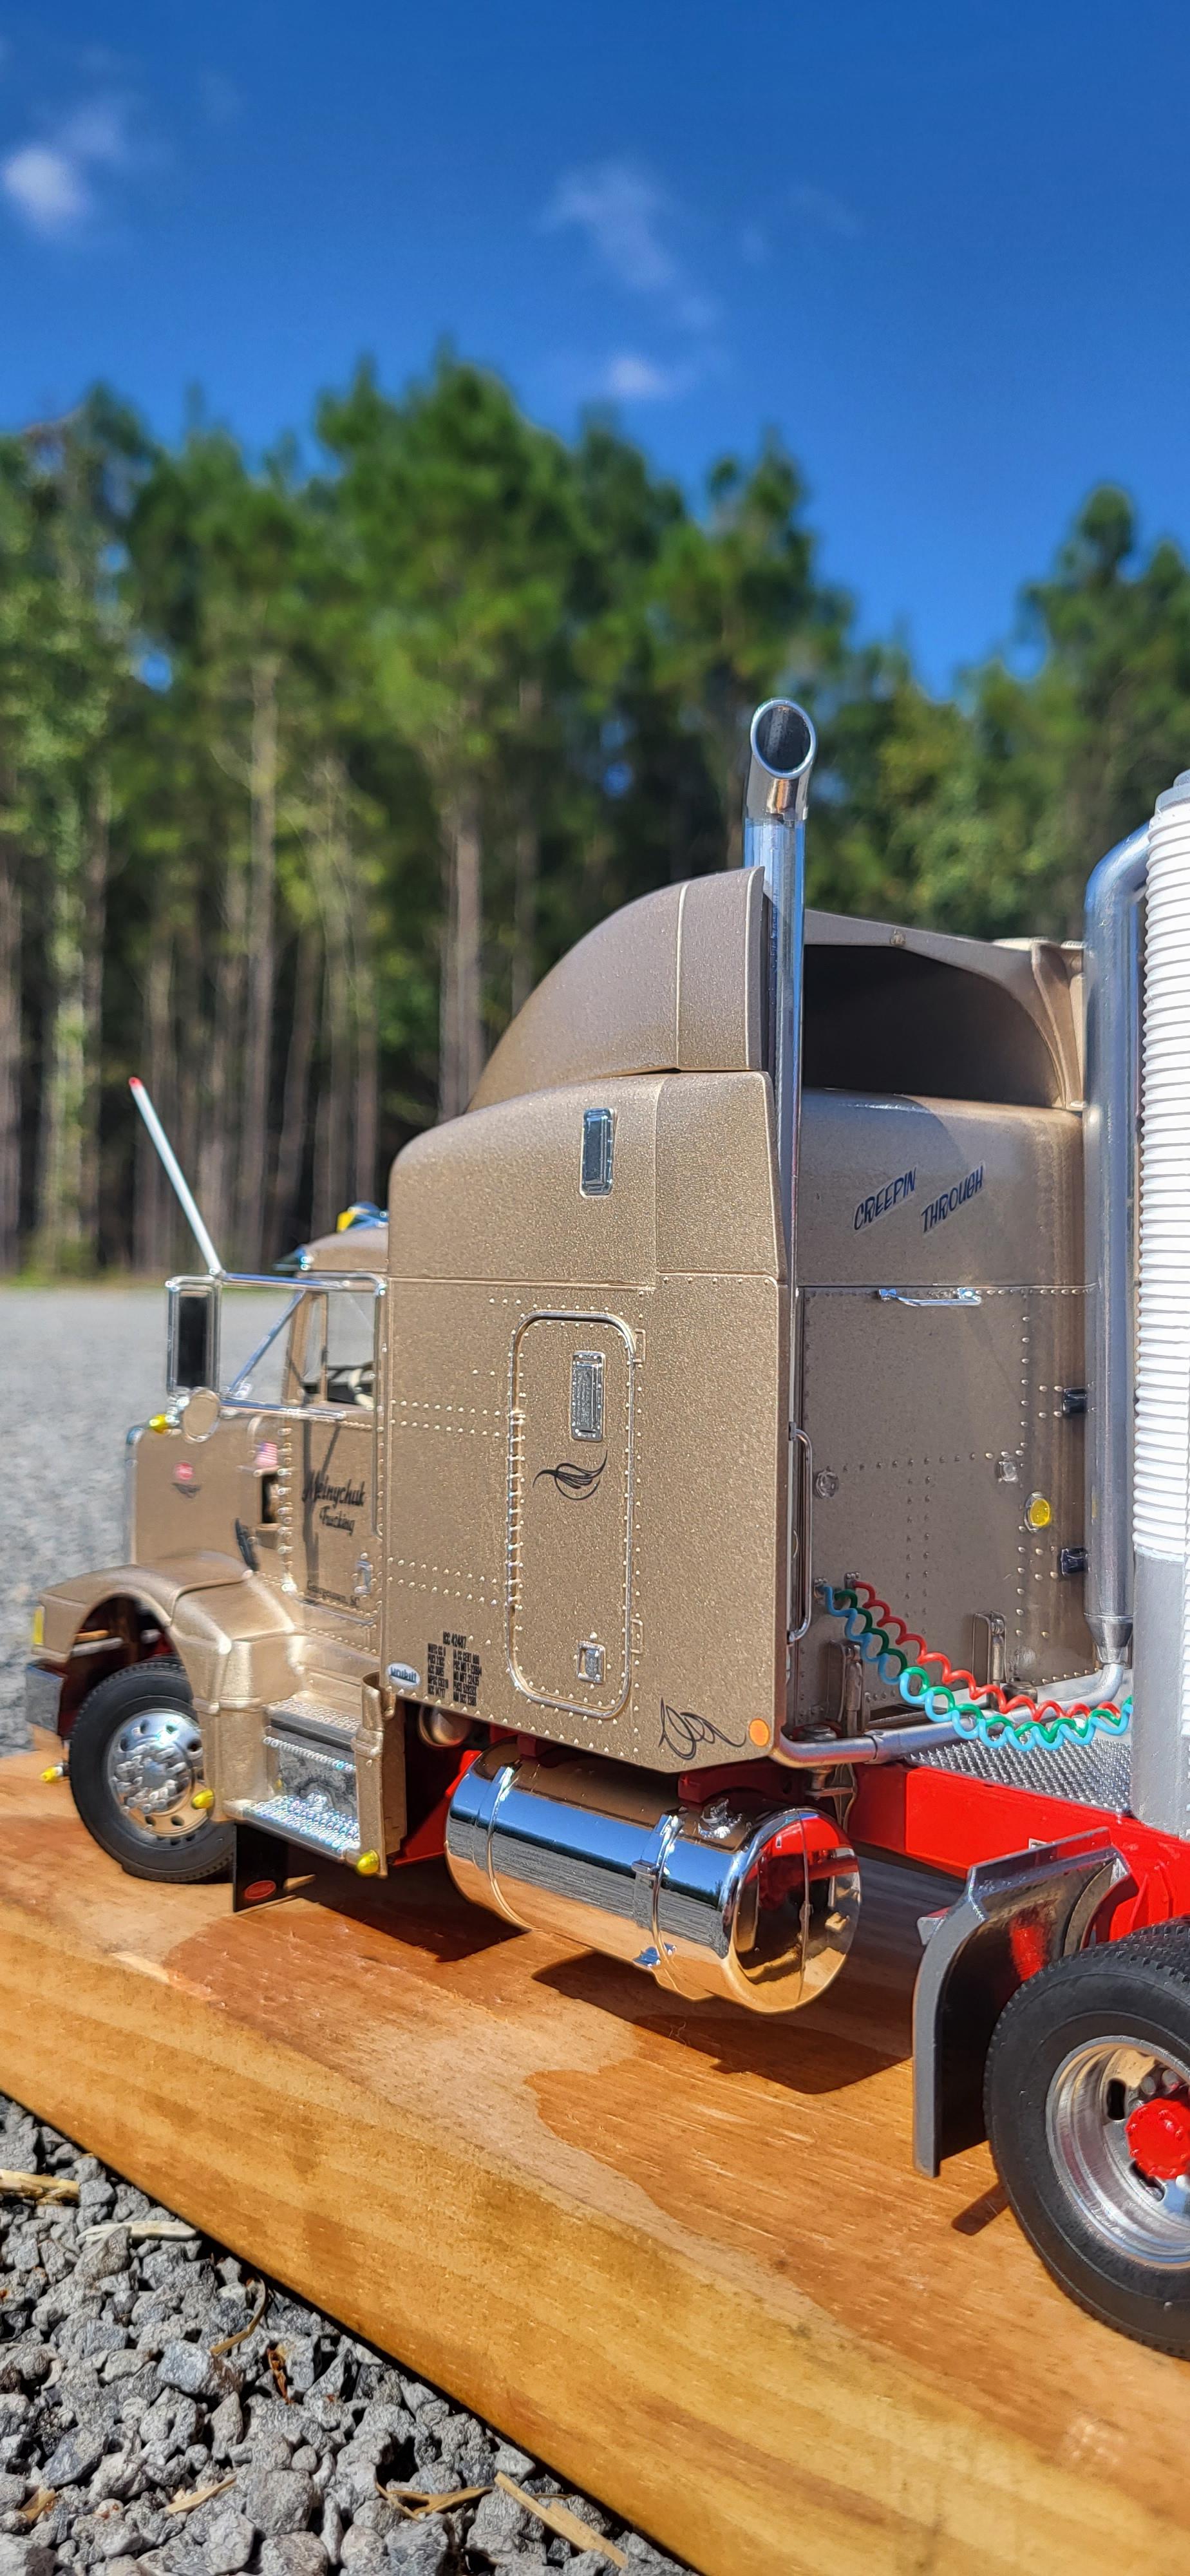
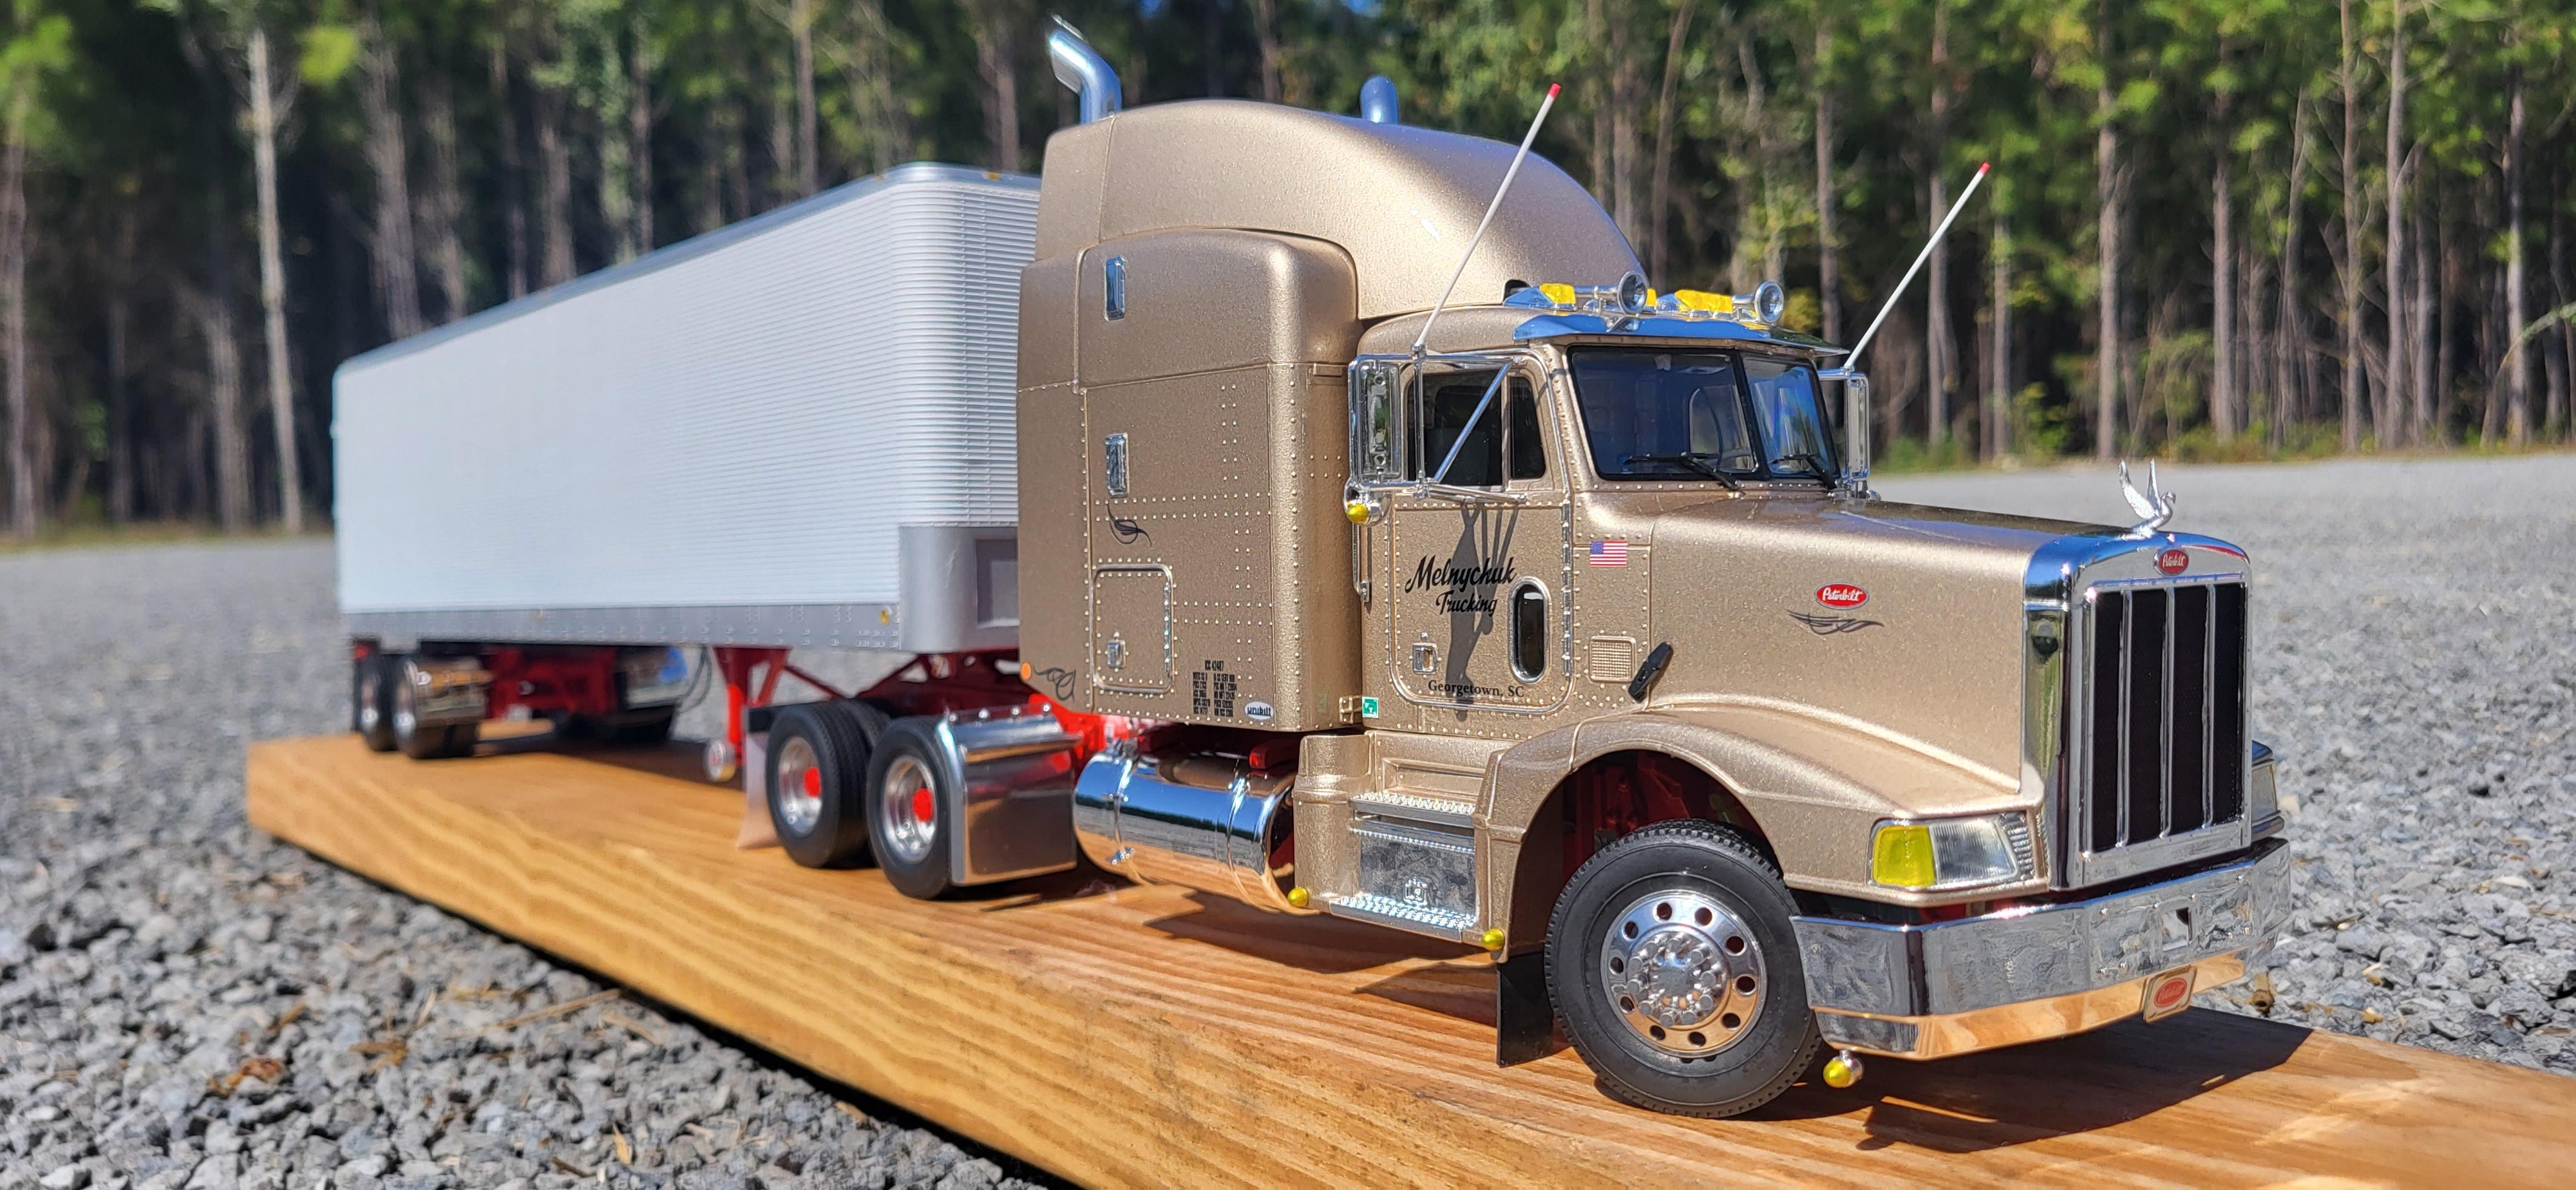
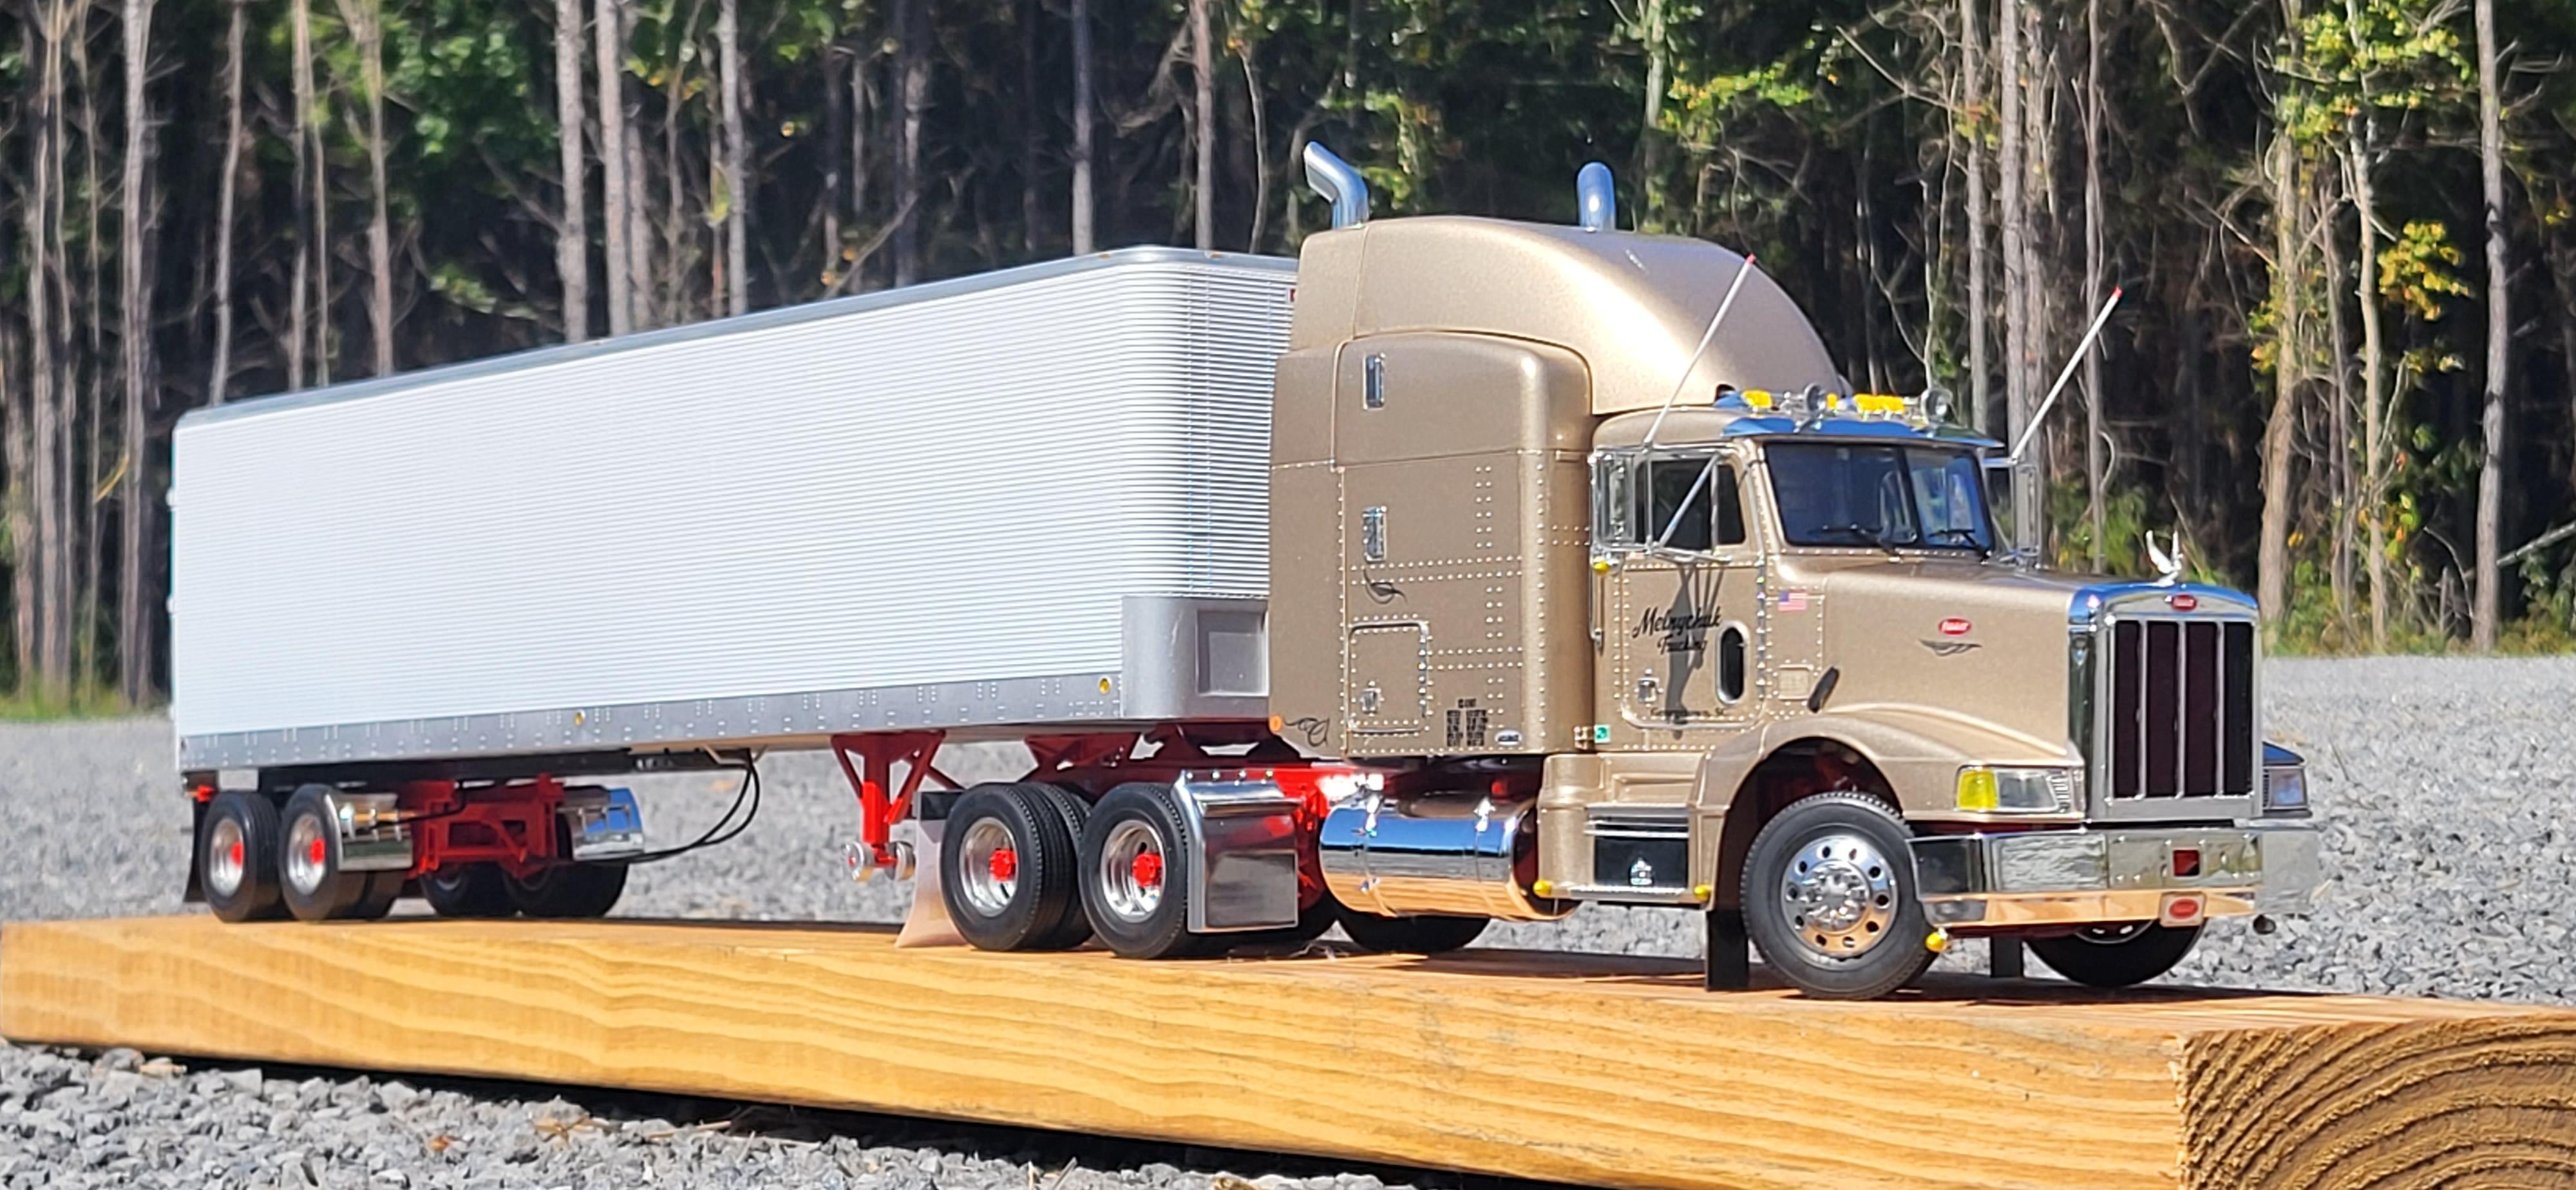
OldSchool Peterbilt 378 and Trailer
TruckerAL replied to TruckerAL's topic in Model Trucks: Big Rigs and Heavy Equipment
Thank you everyone! It's definitely one of my favorites. It's unlike anything I've ever built in the past. The chrome trailer really sets it all off. If I had to guess, maybe 100+ hours total? It definitely was a lot of time -
First year I'll be there, looking forward to it!
-
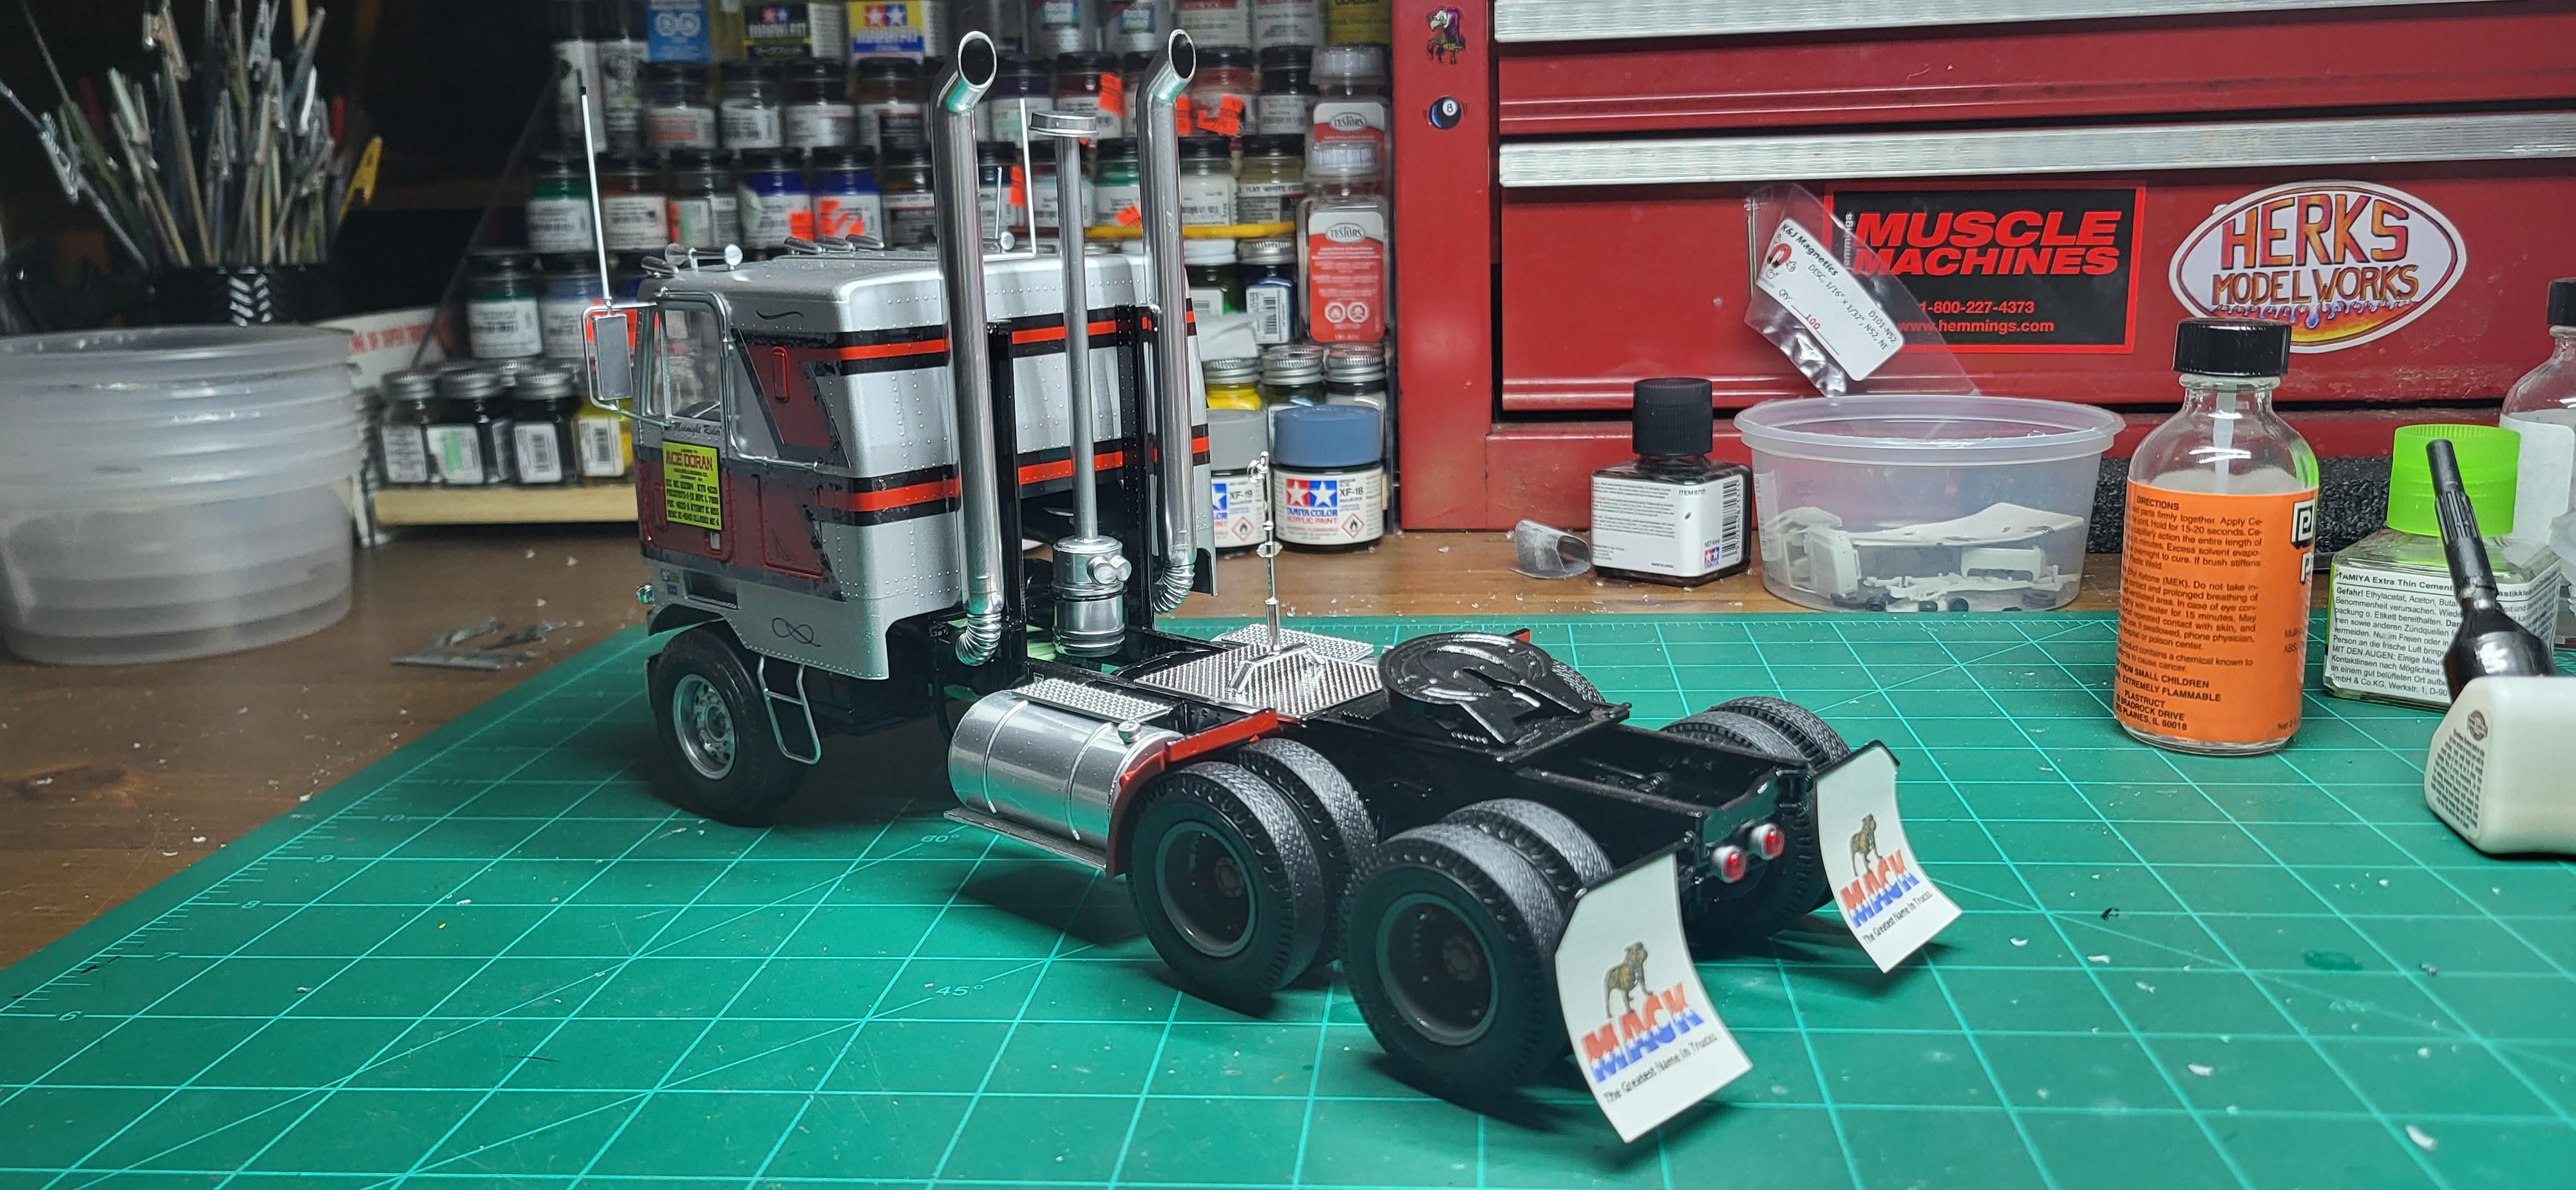
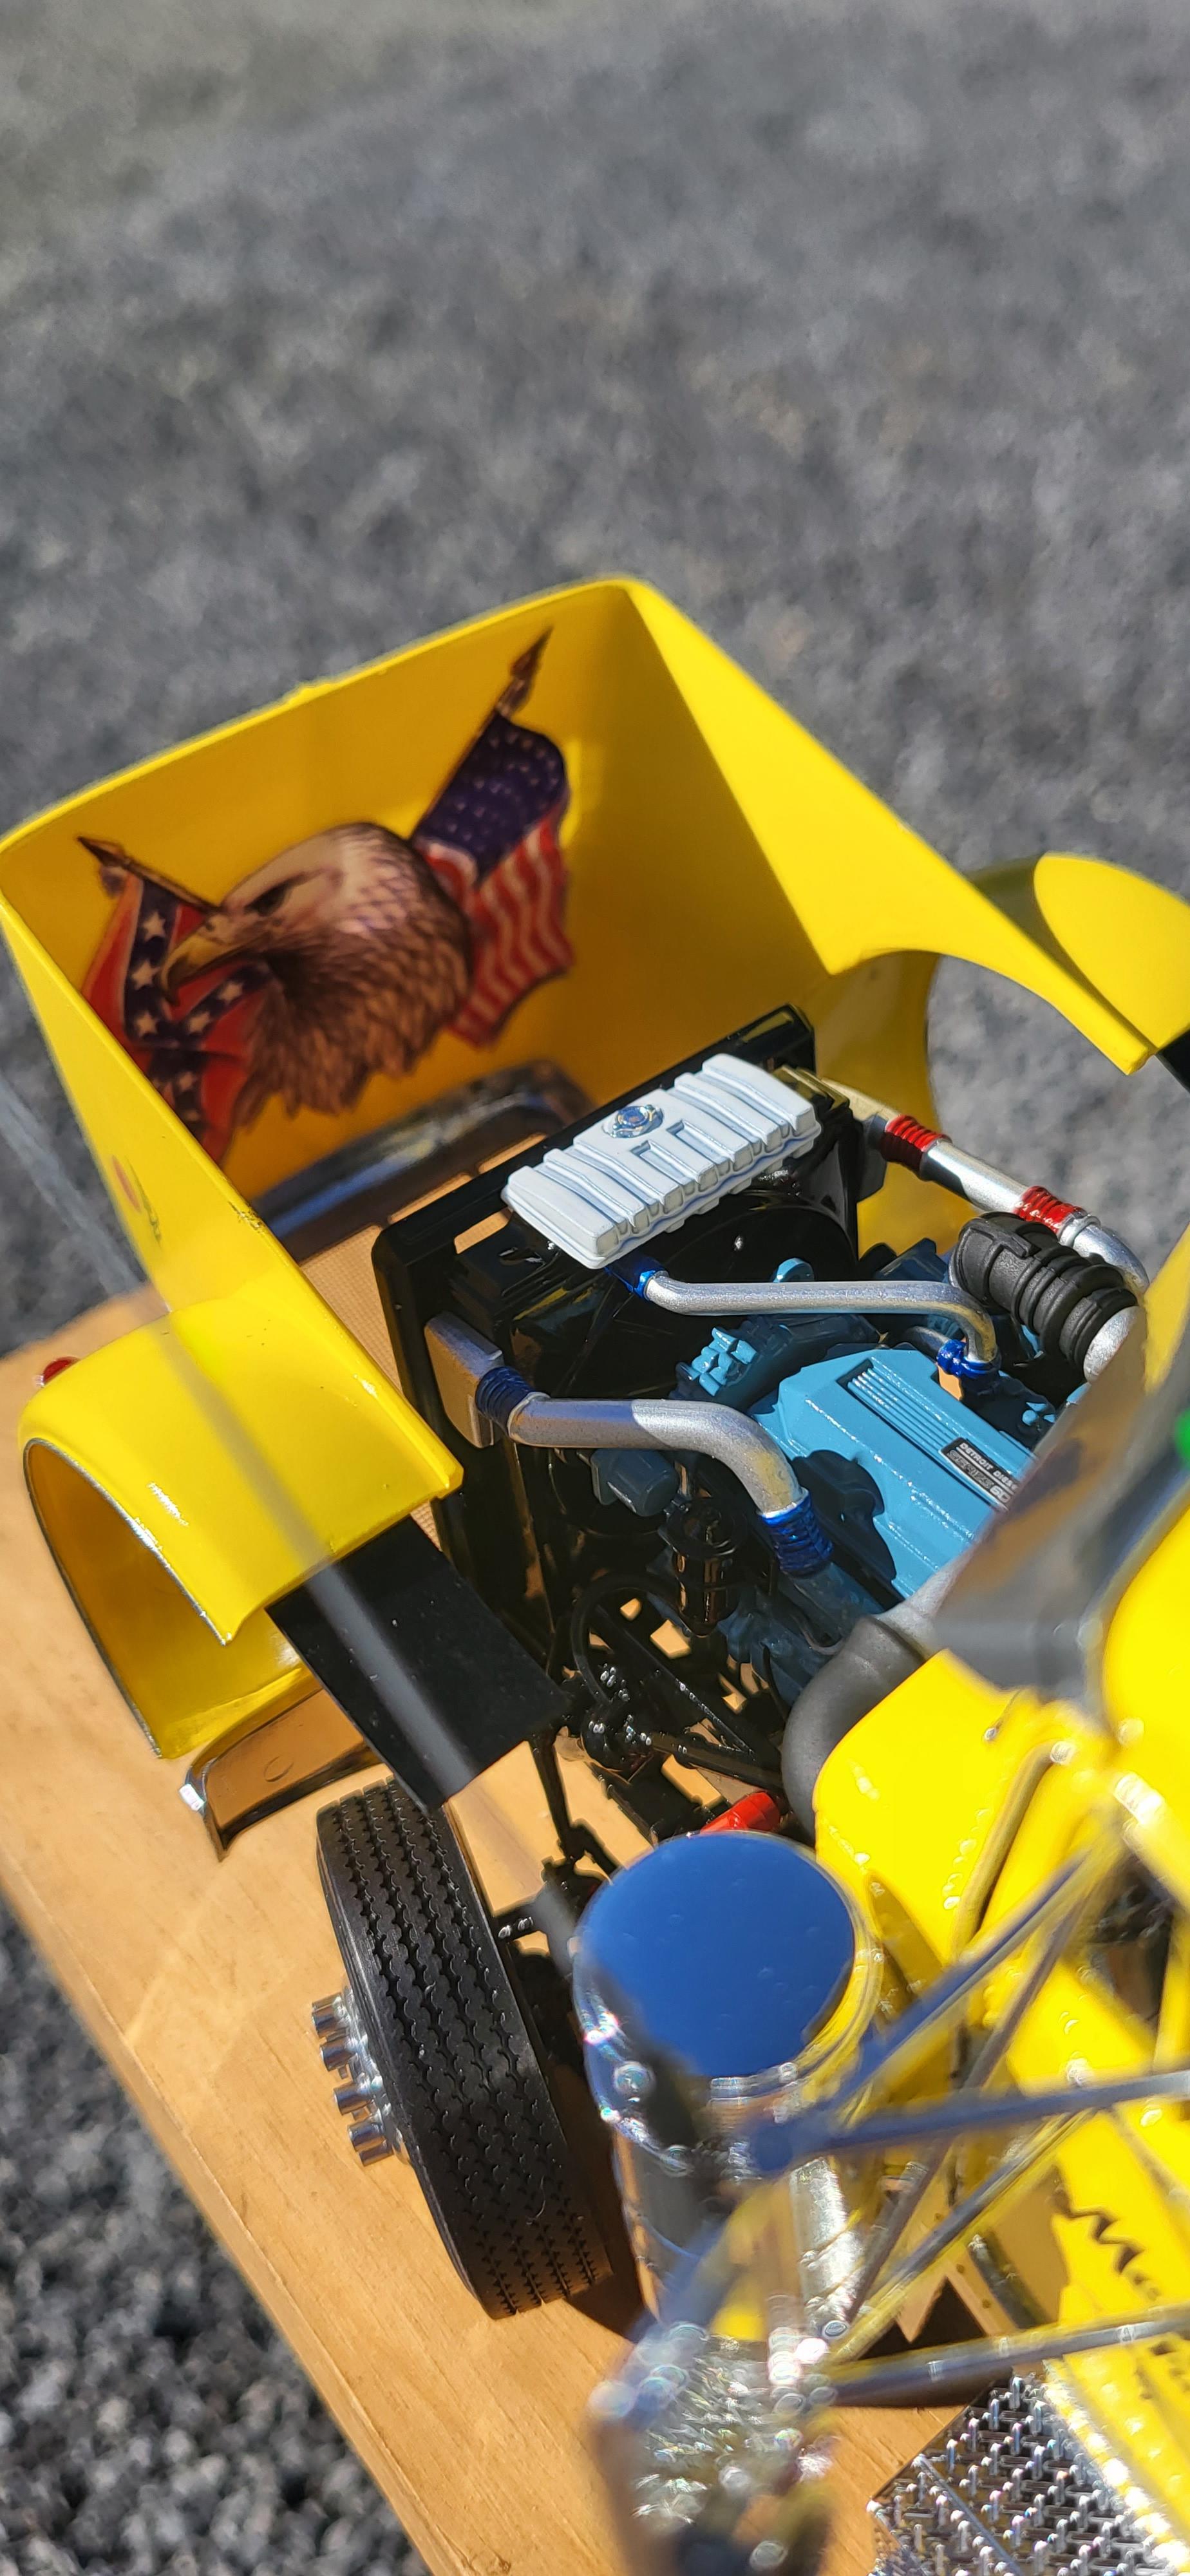
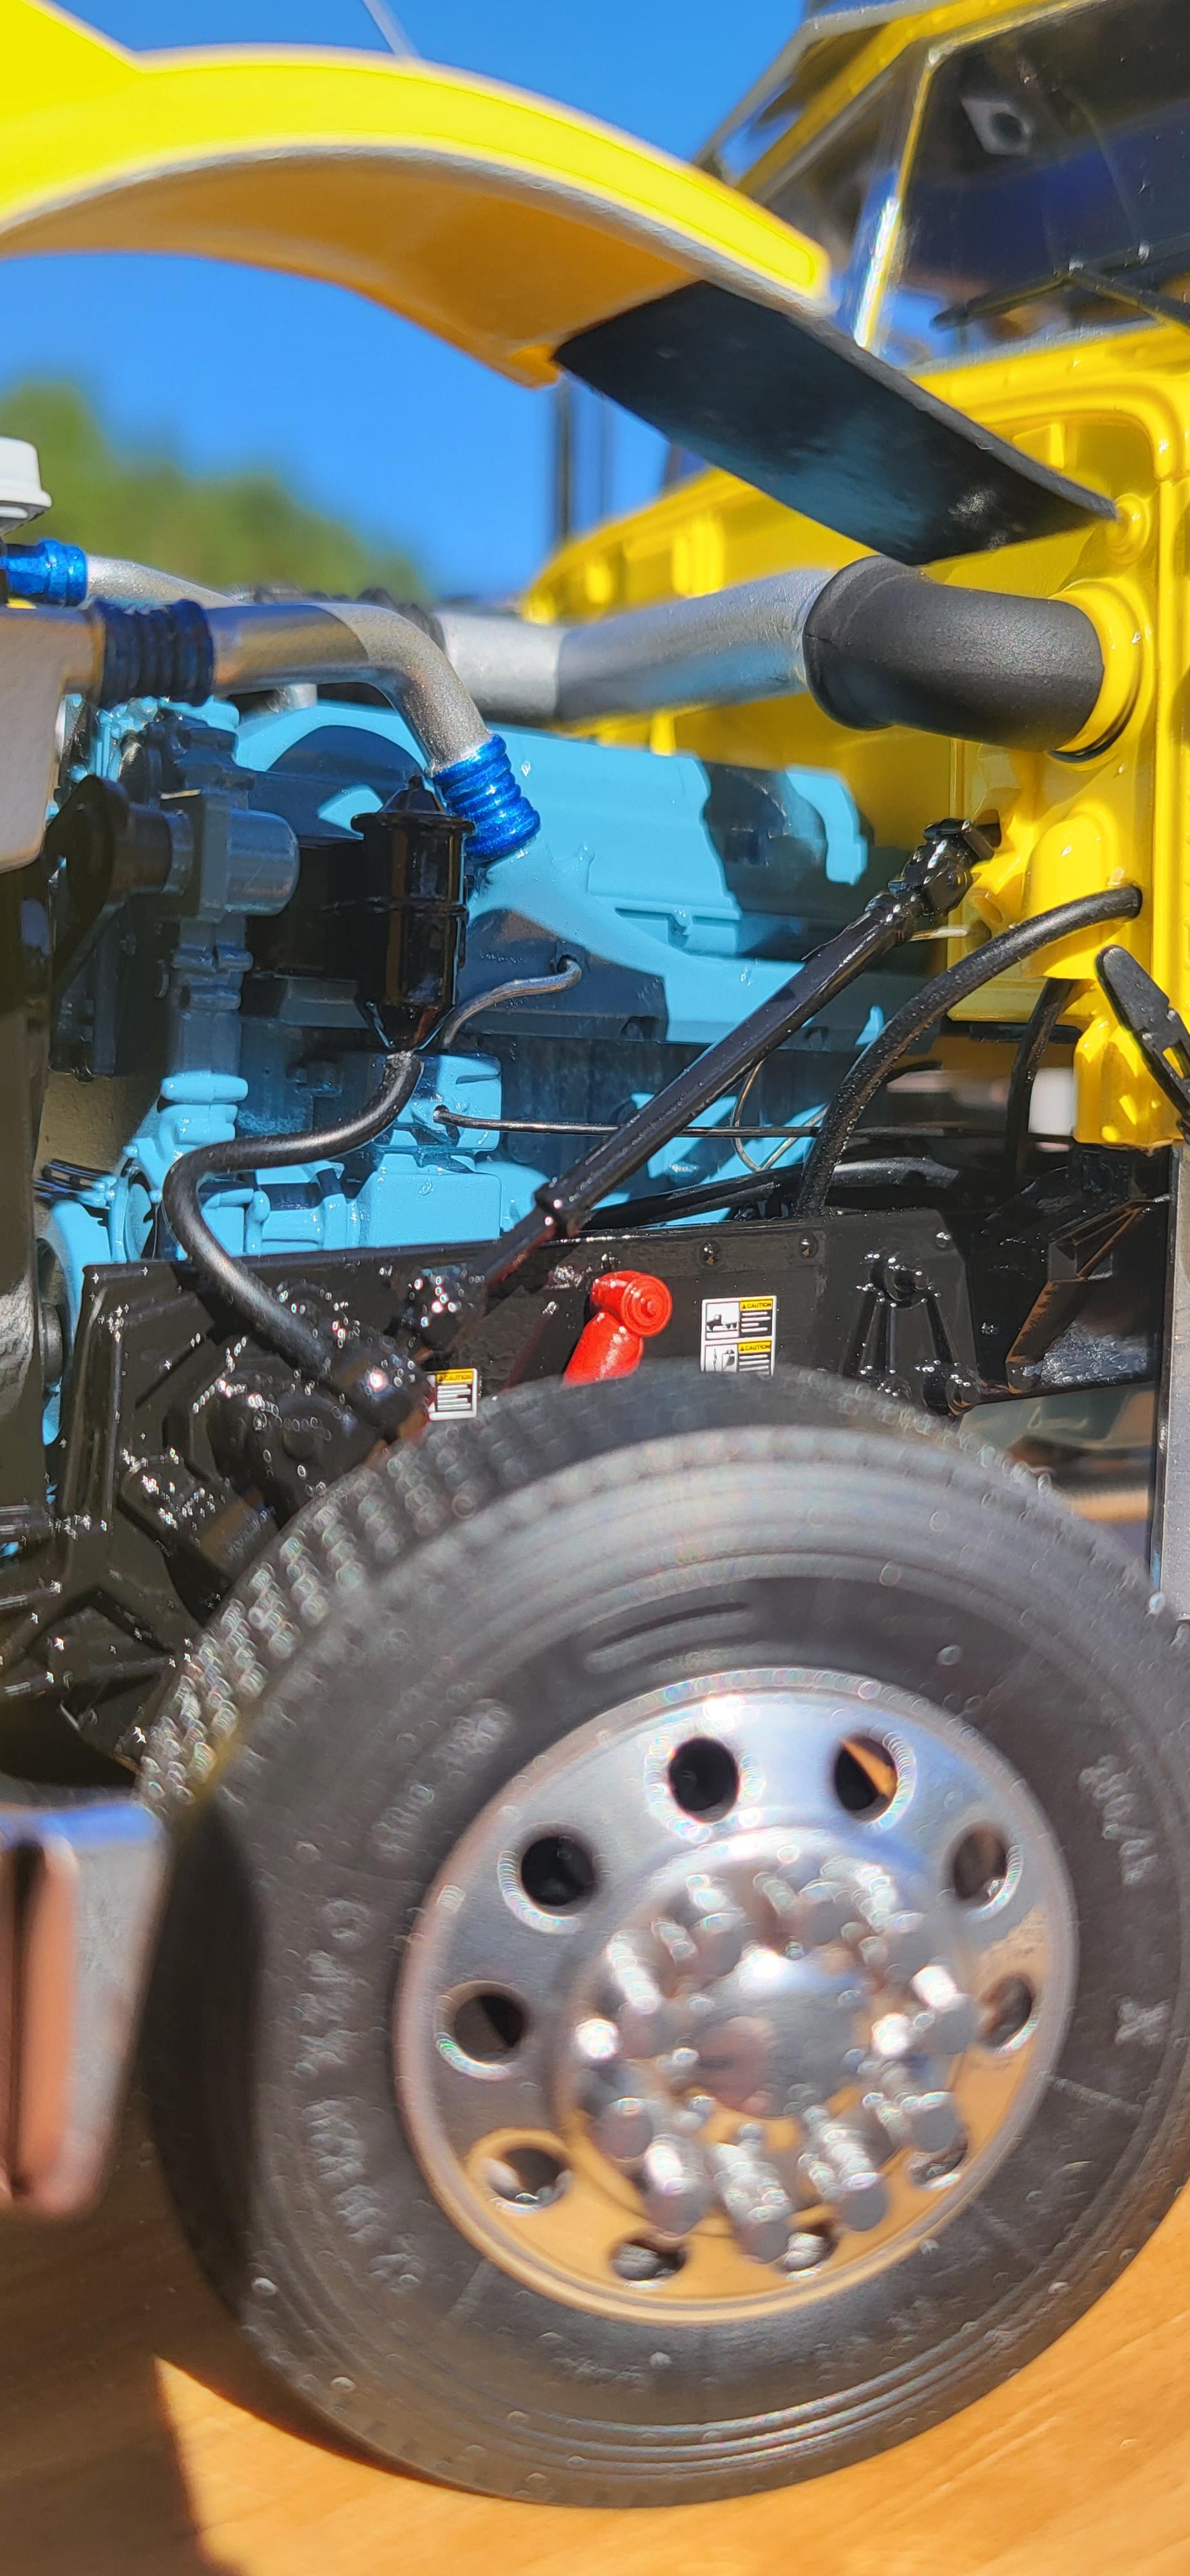
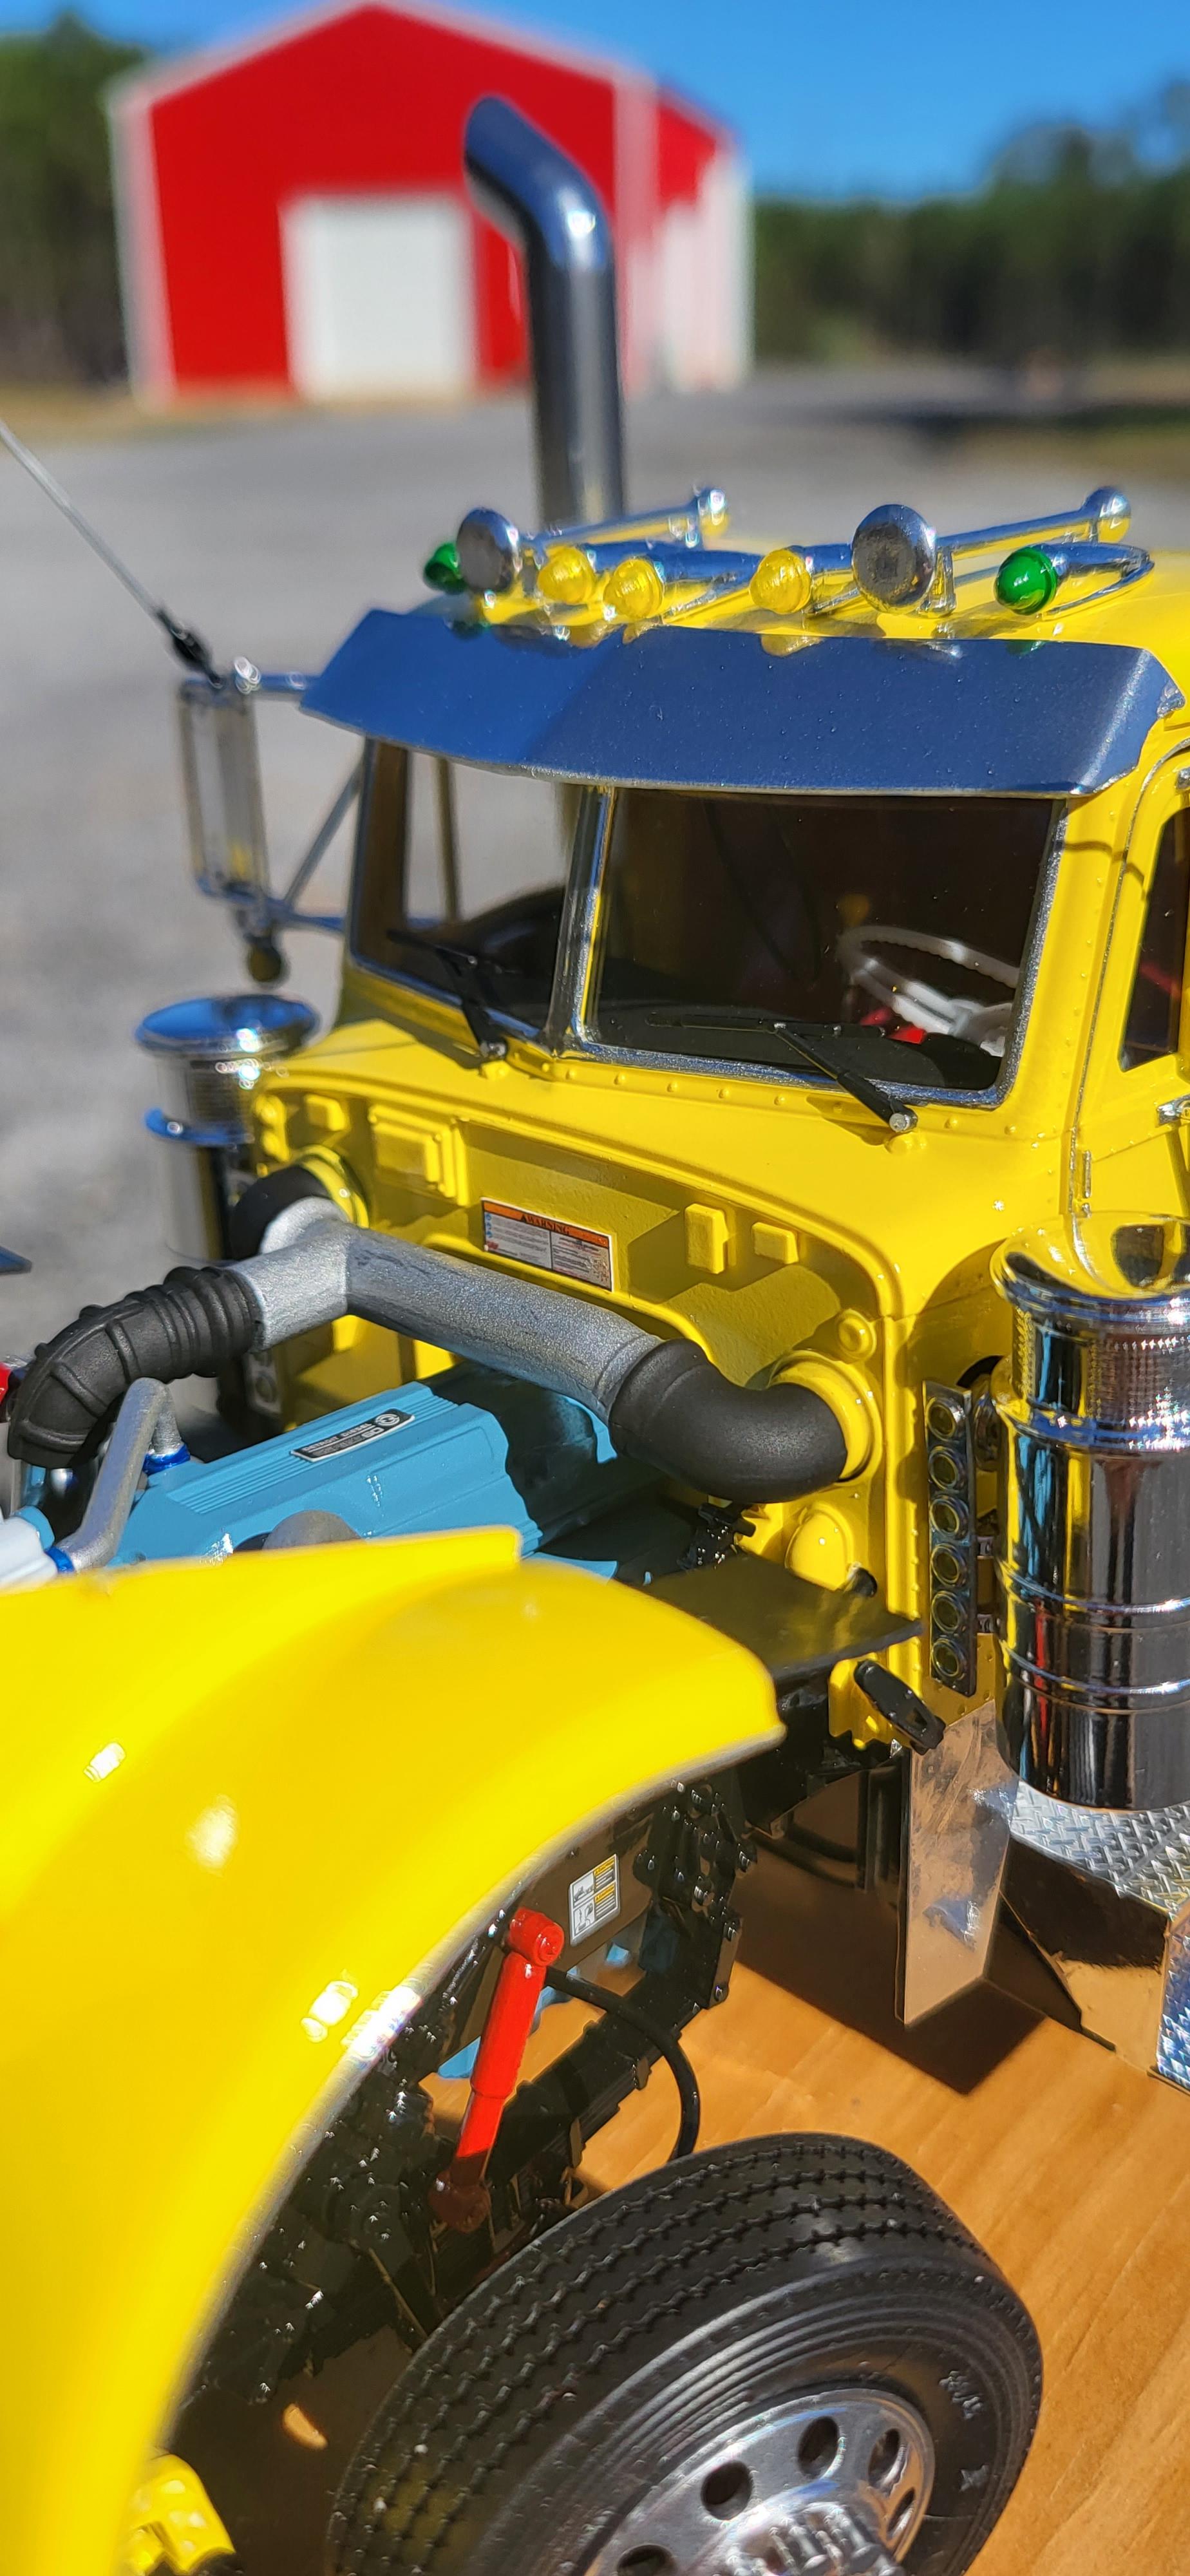
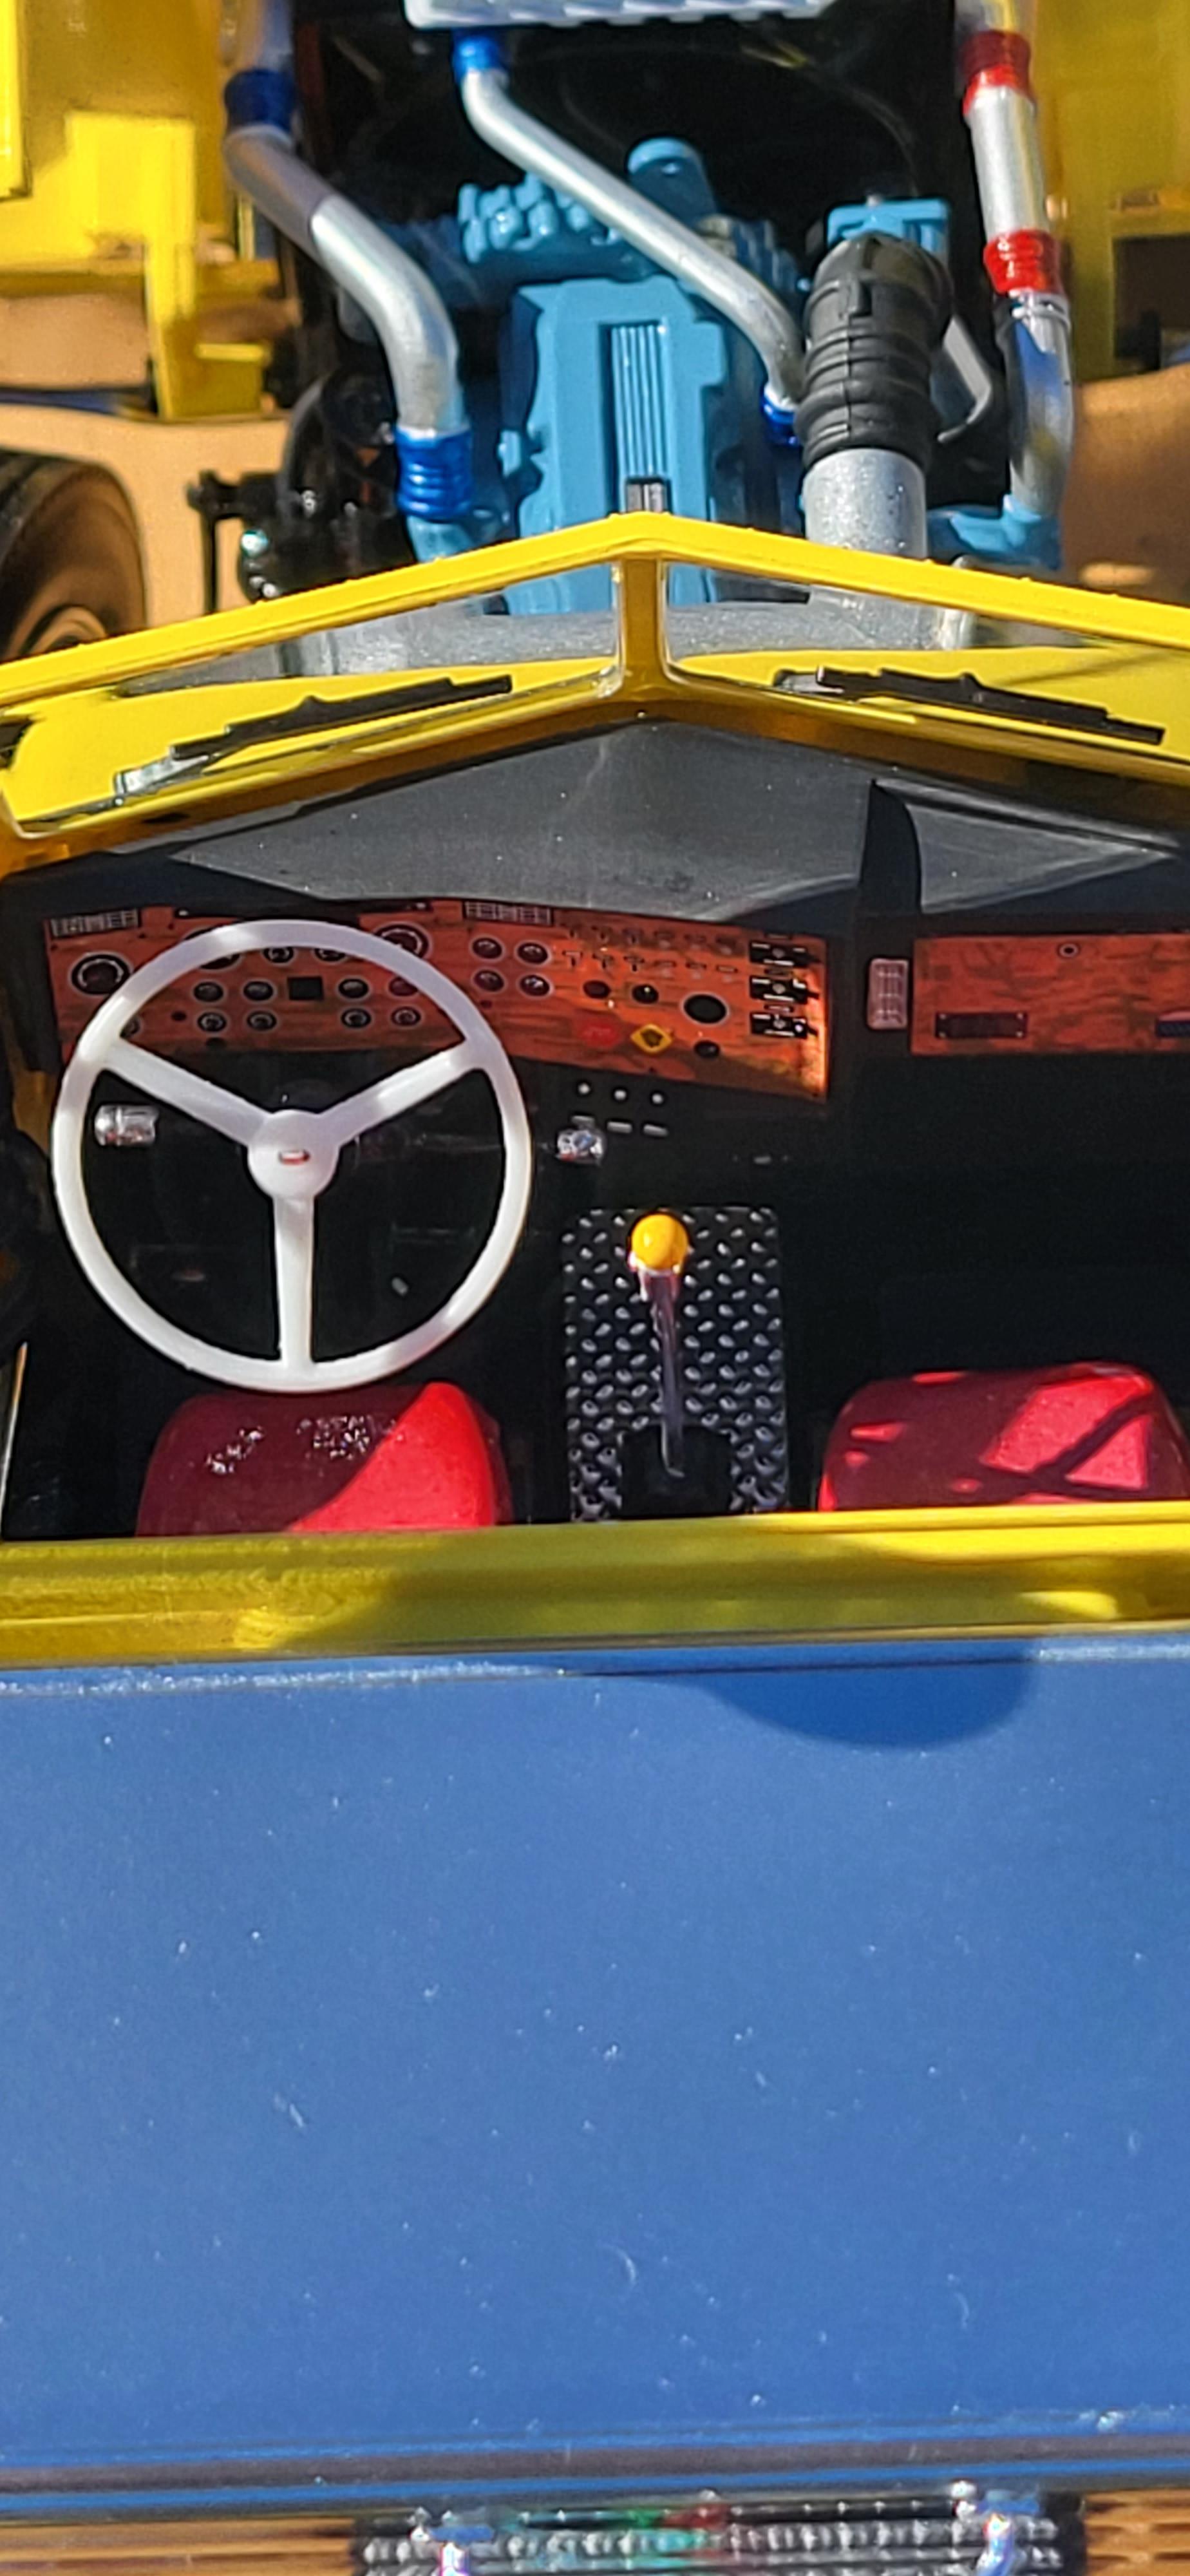
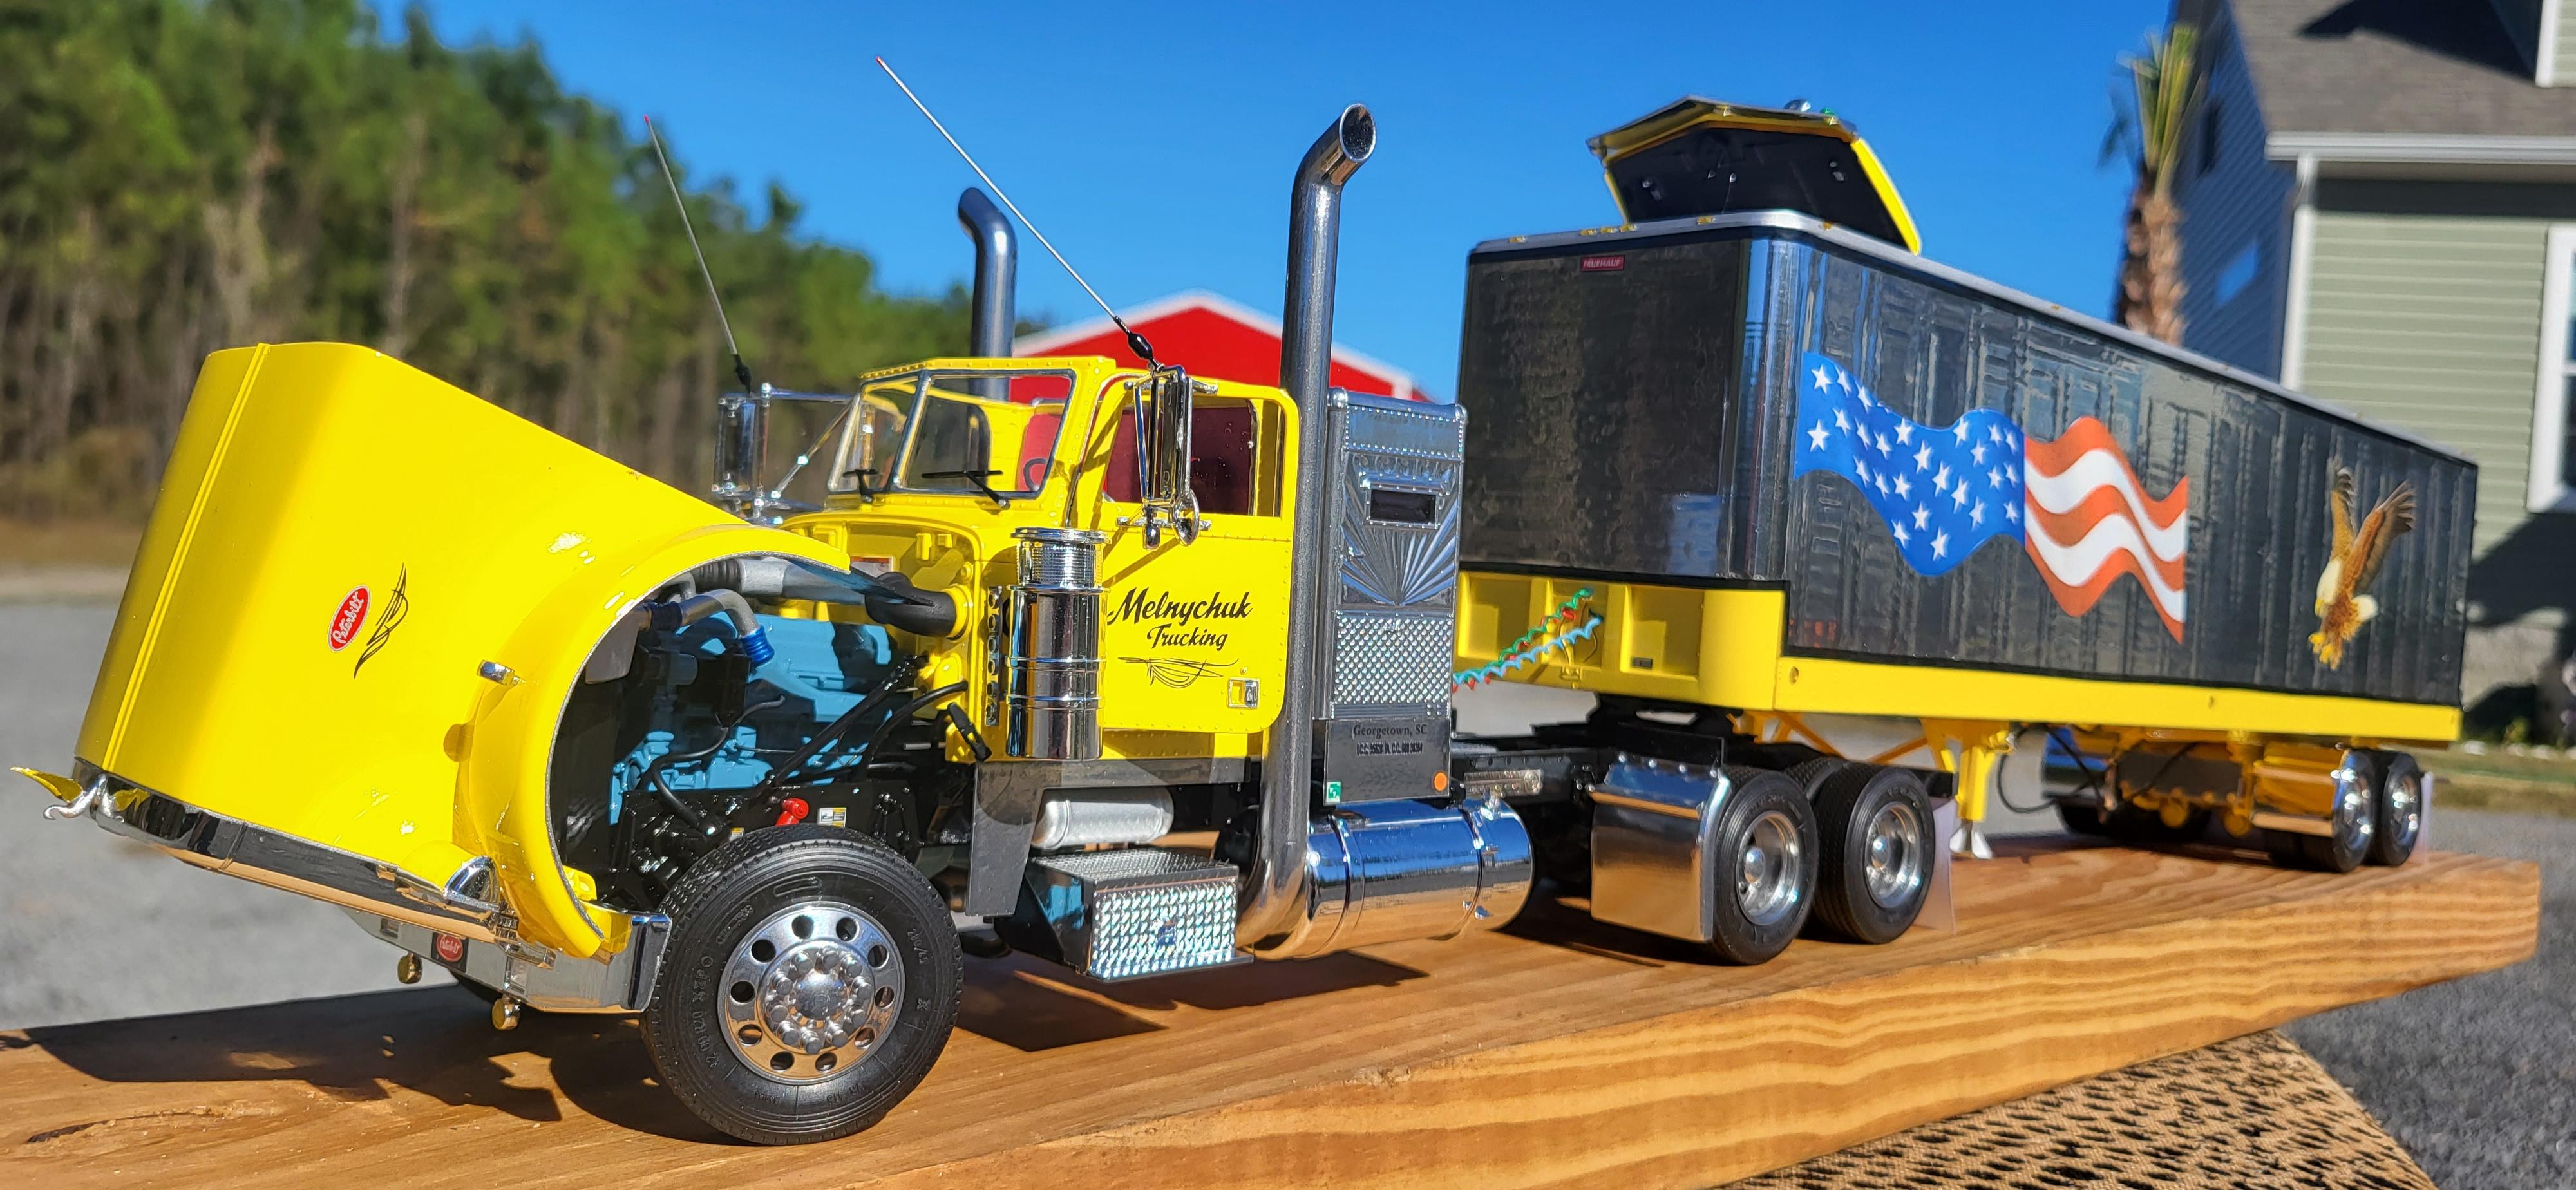
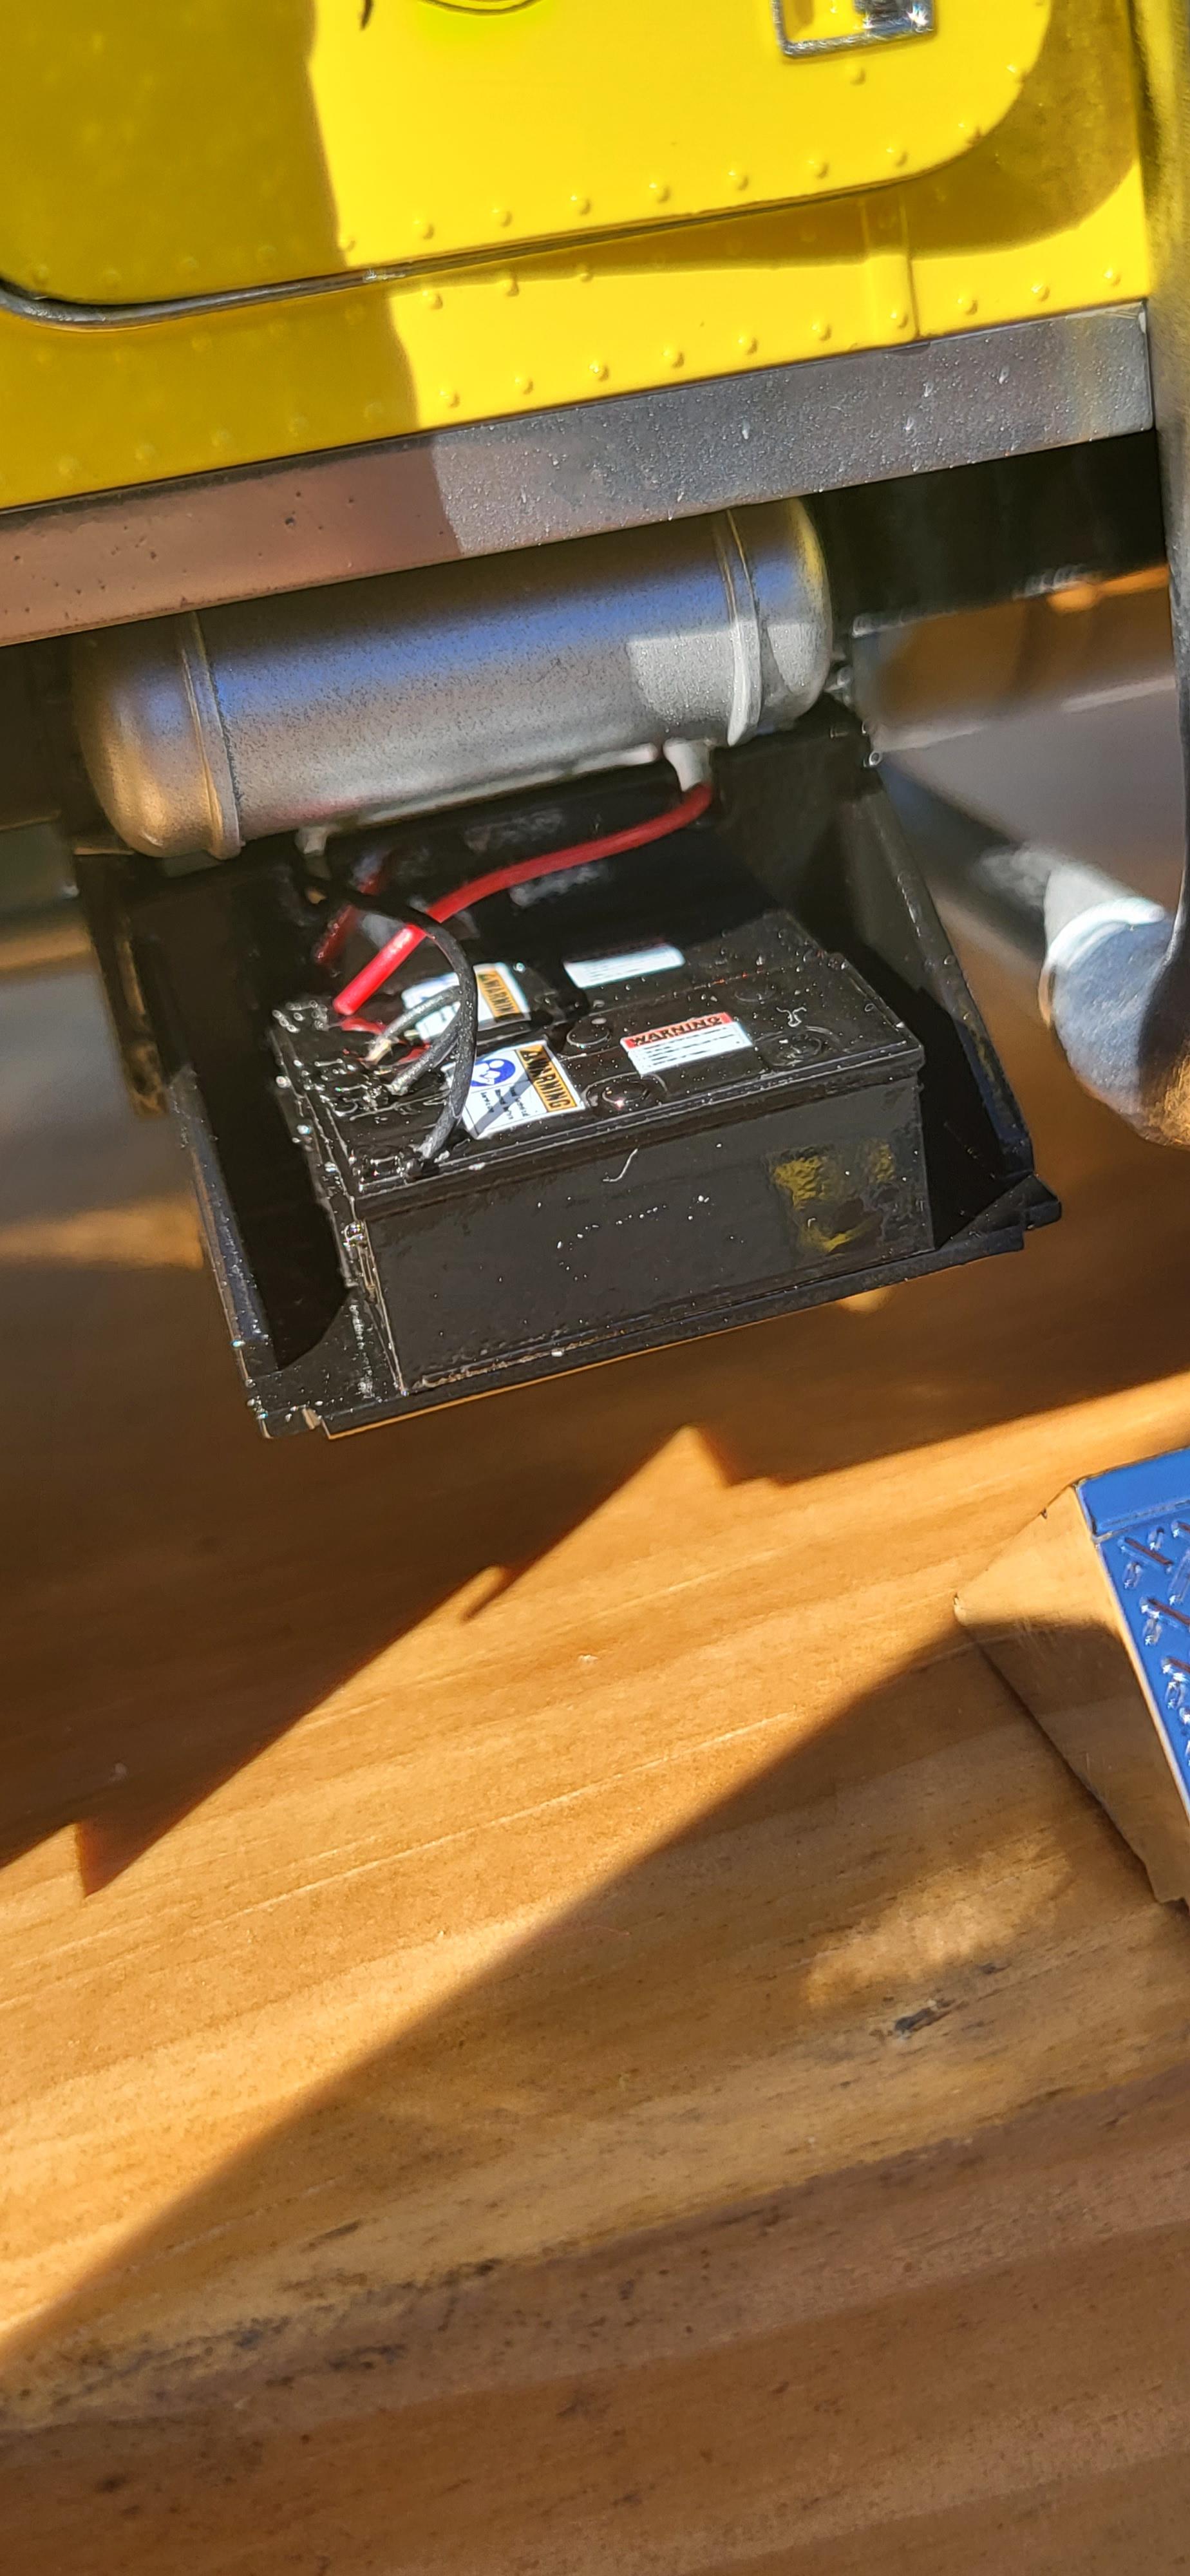
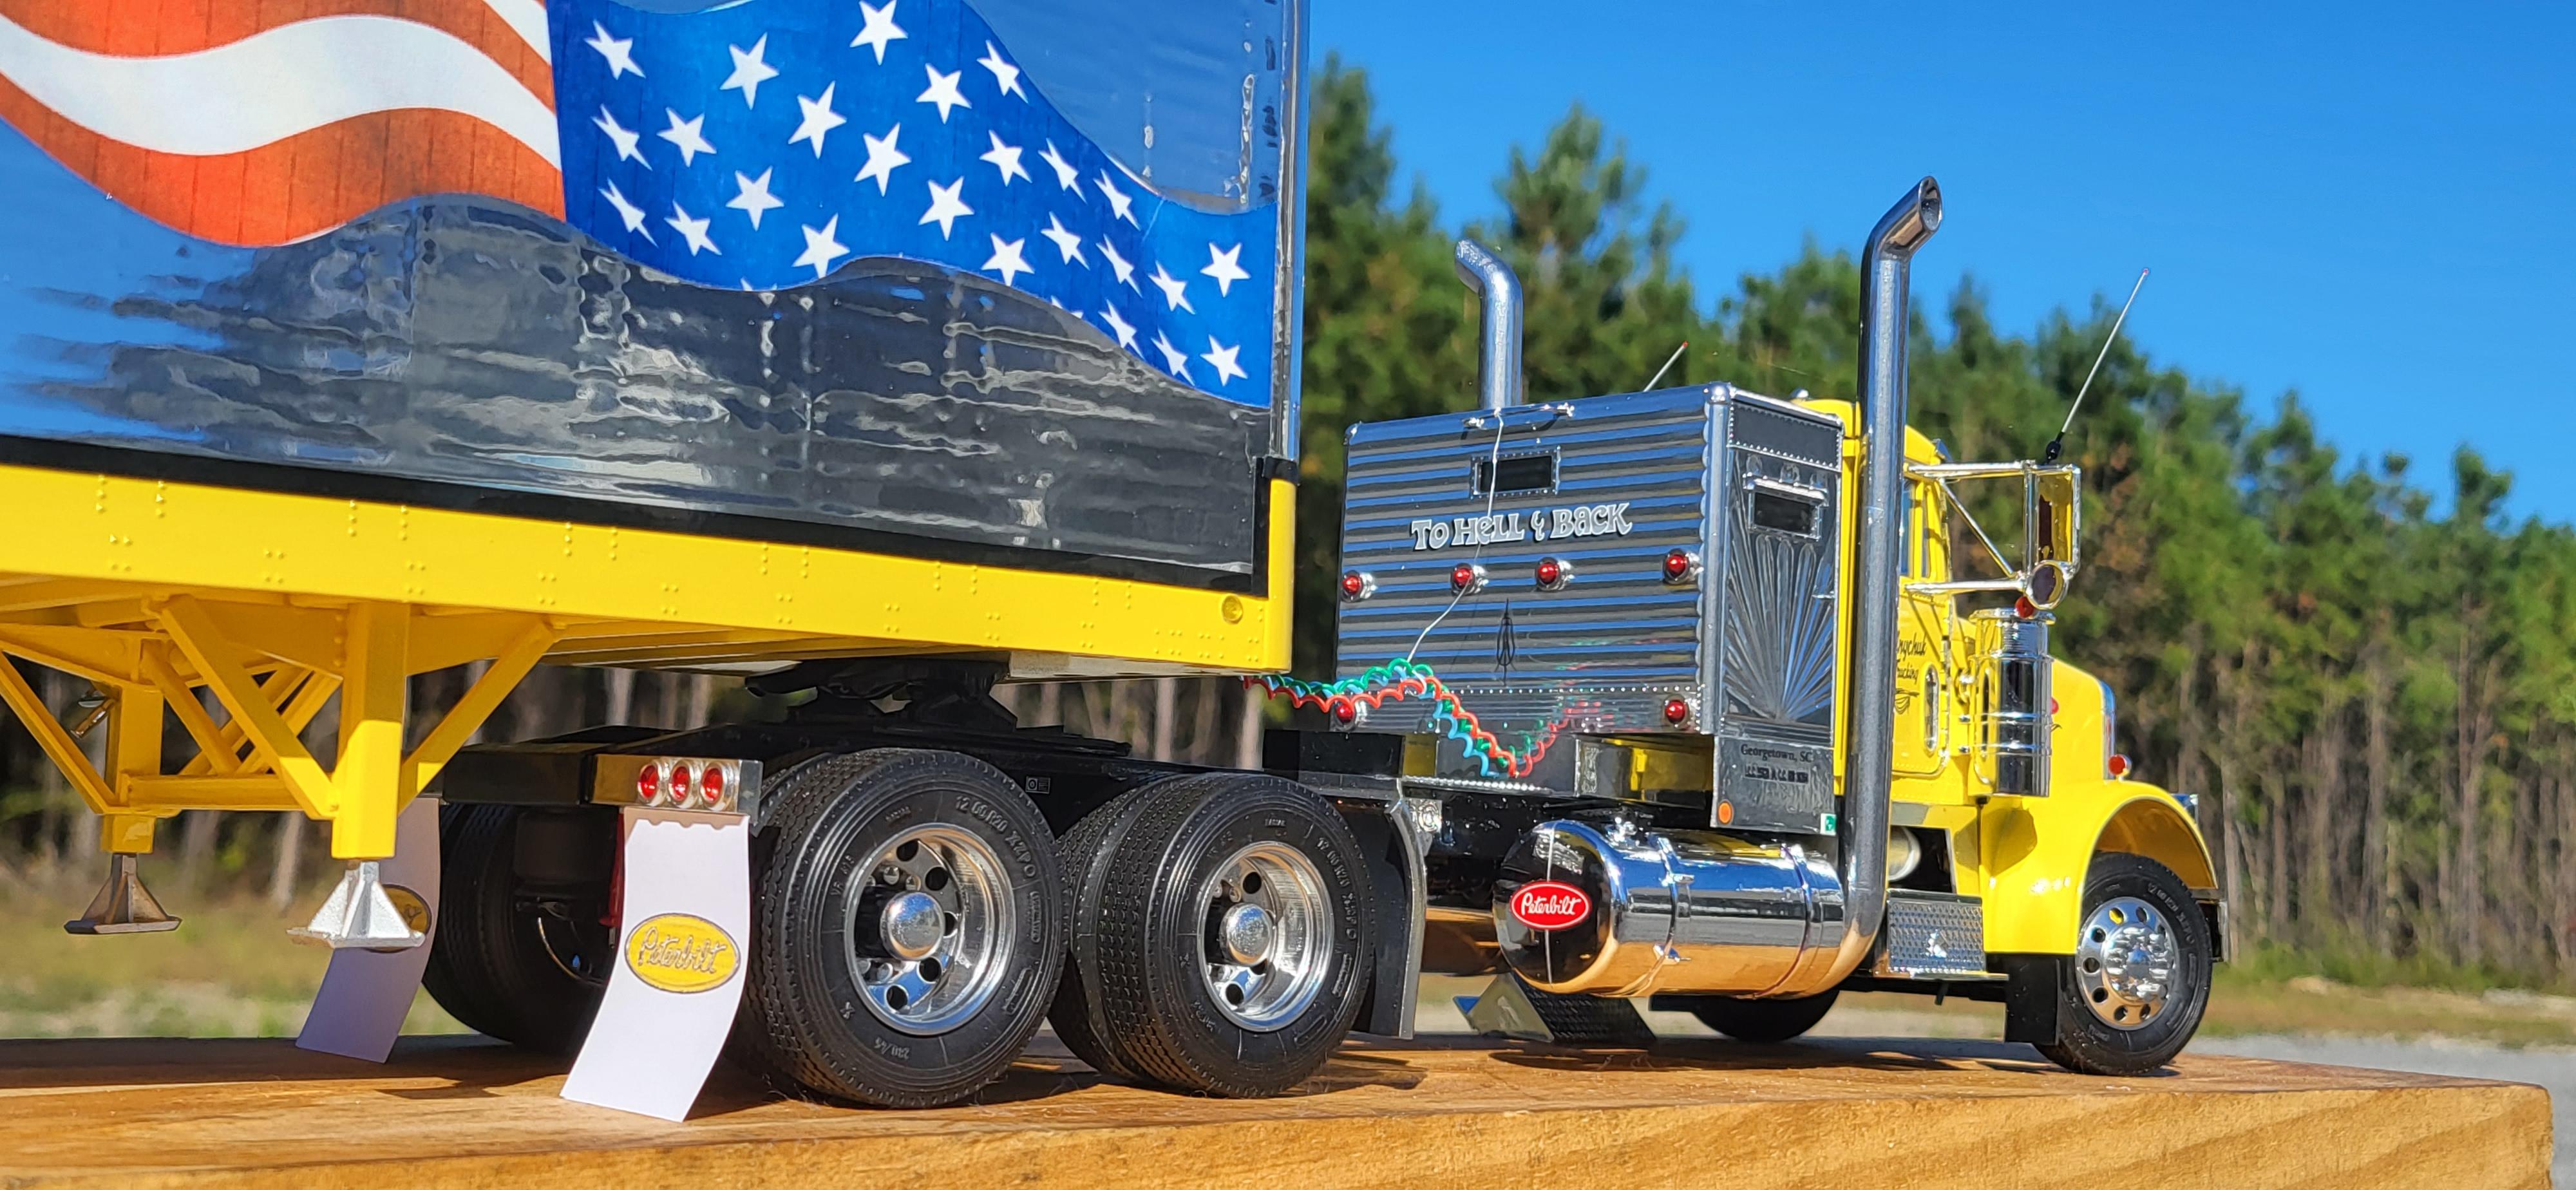
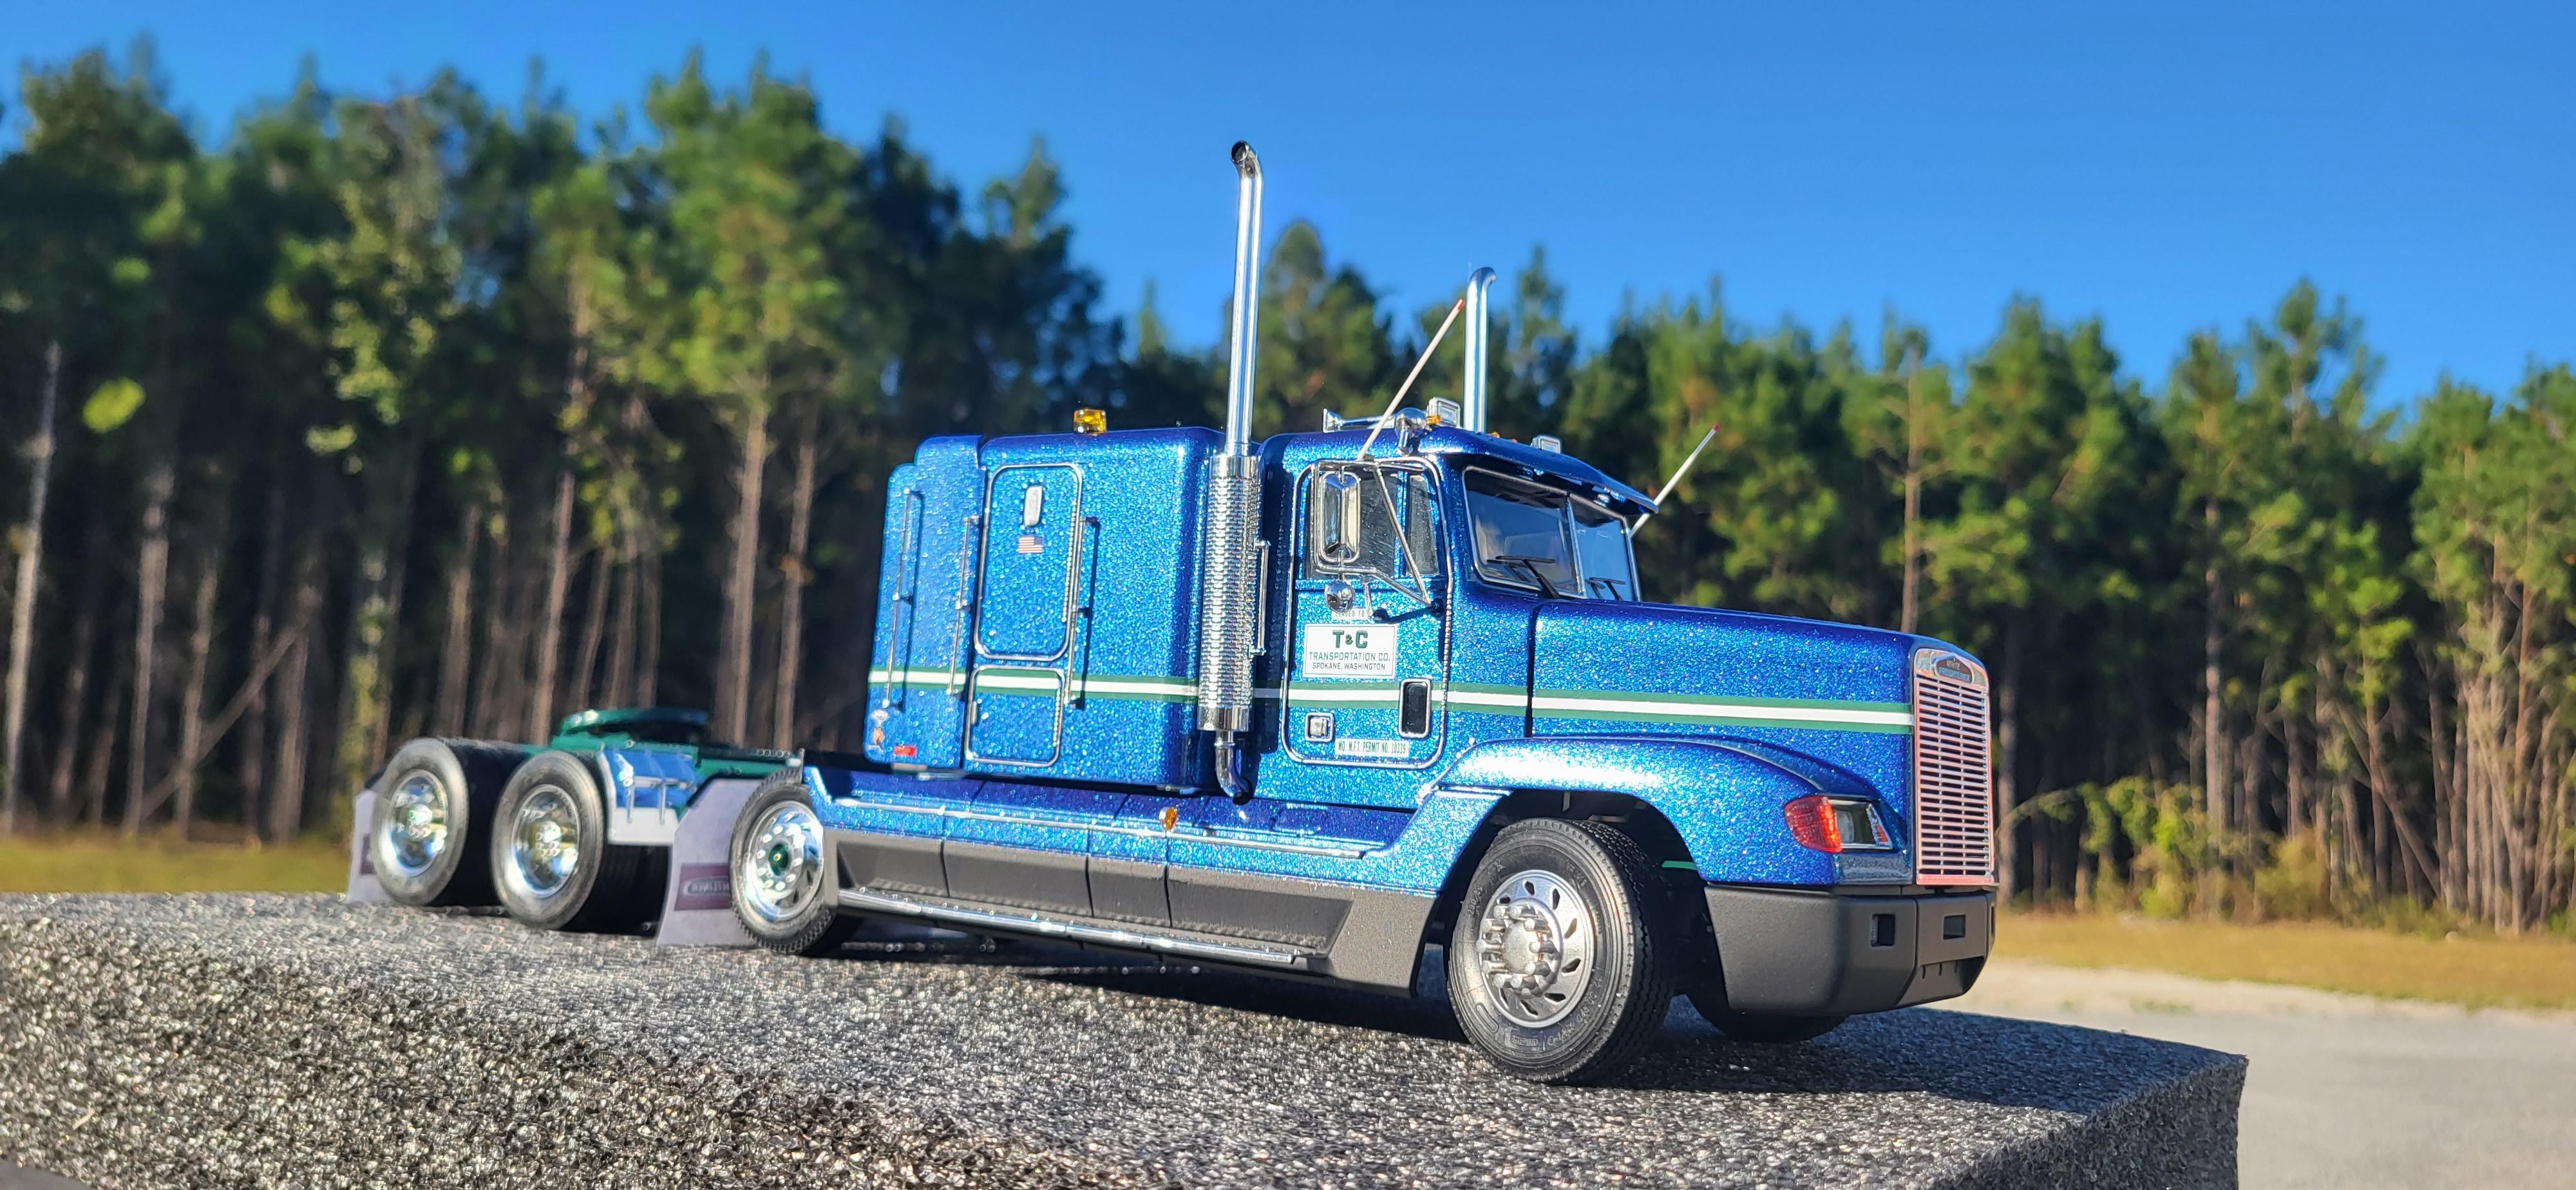
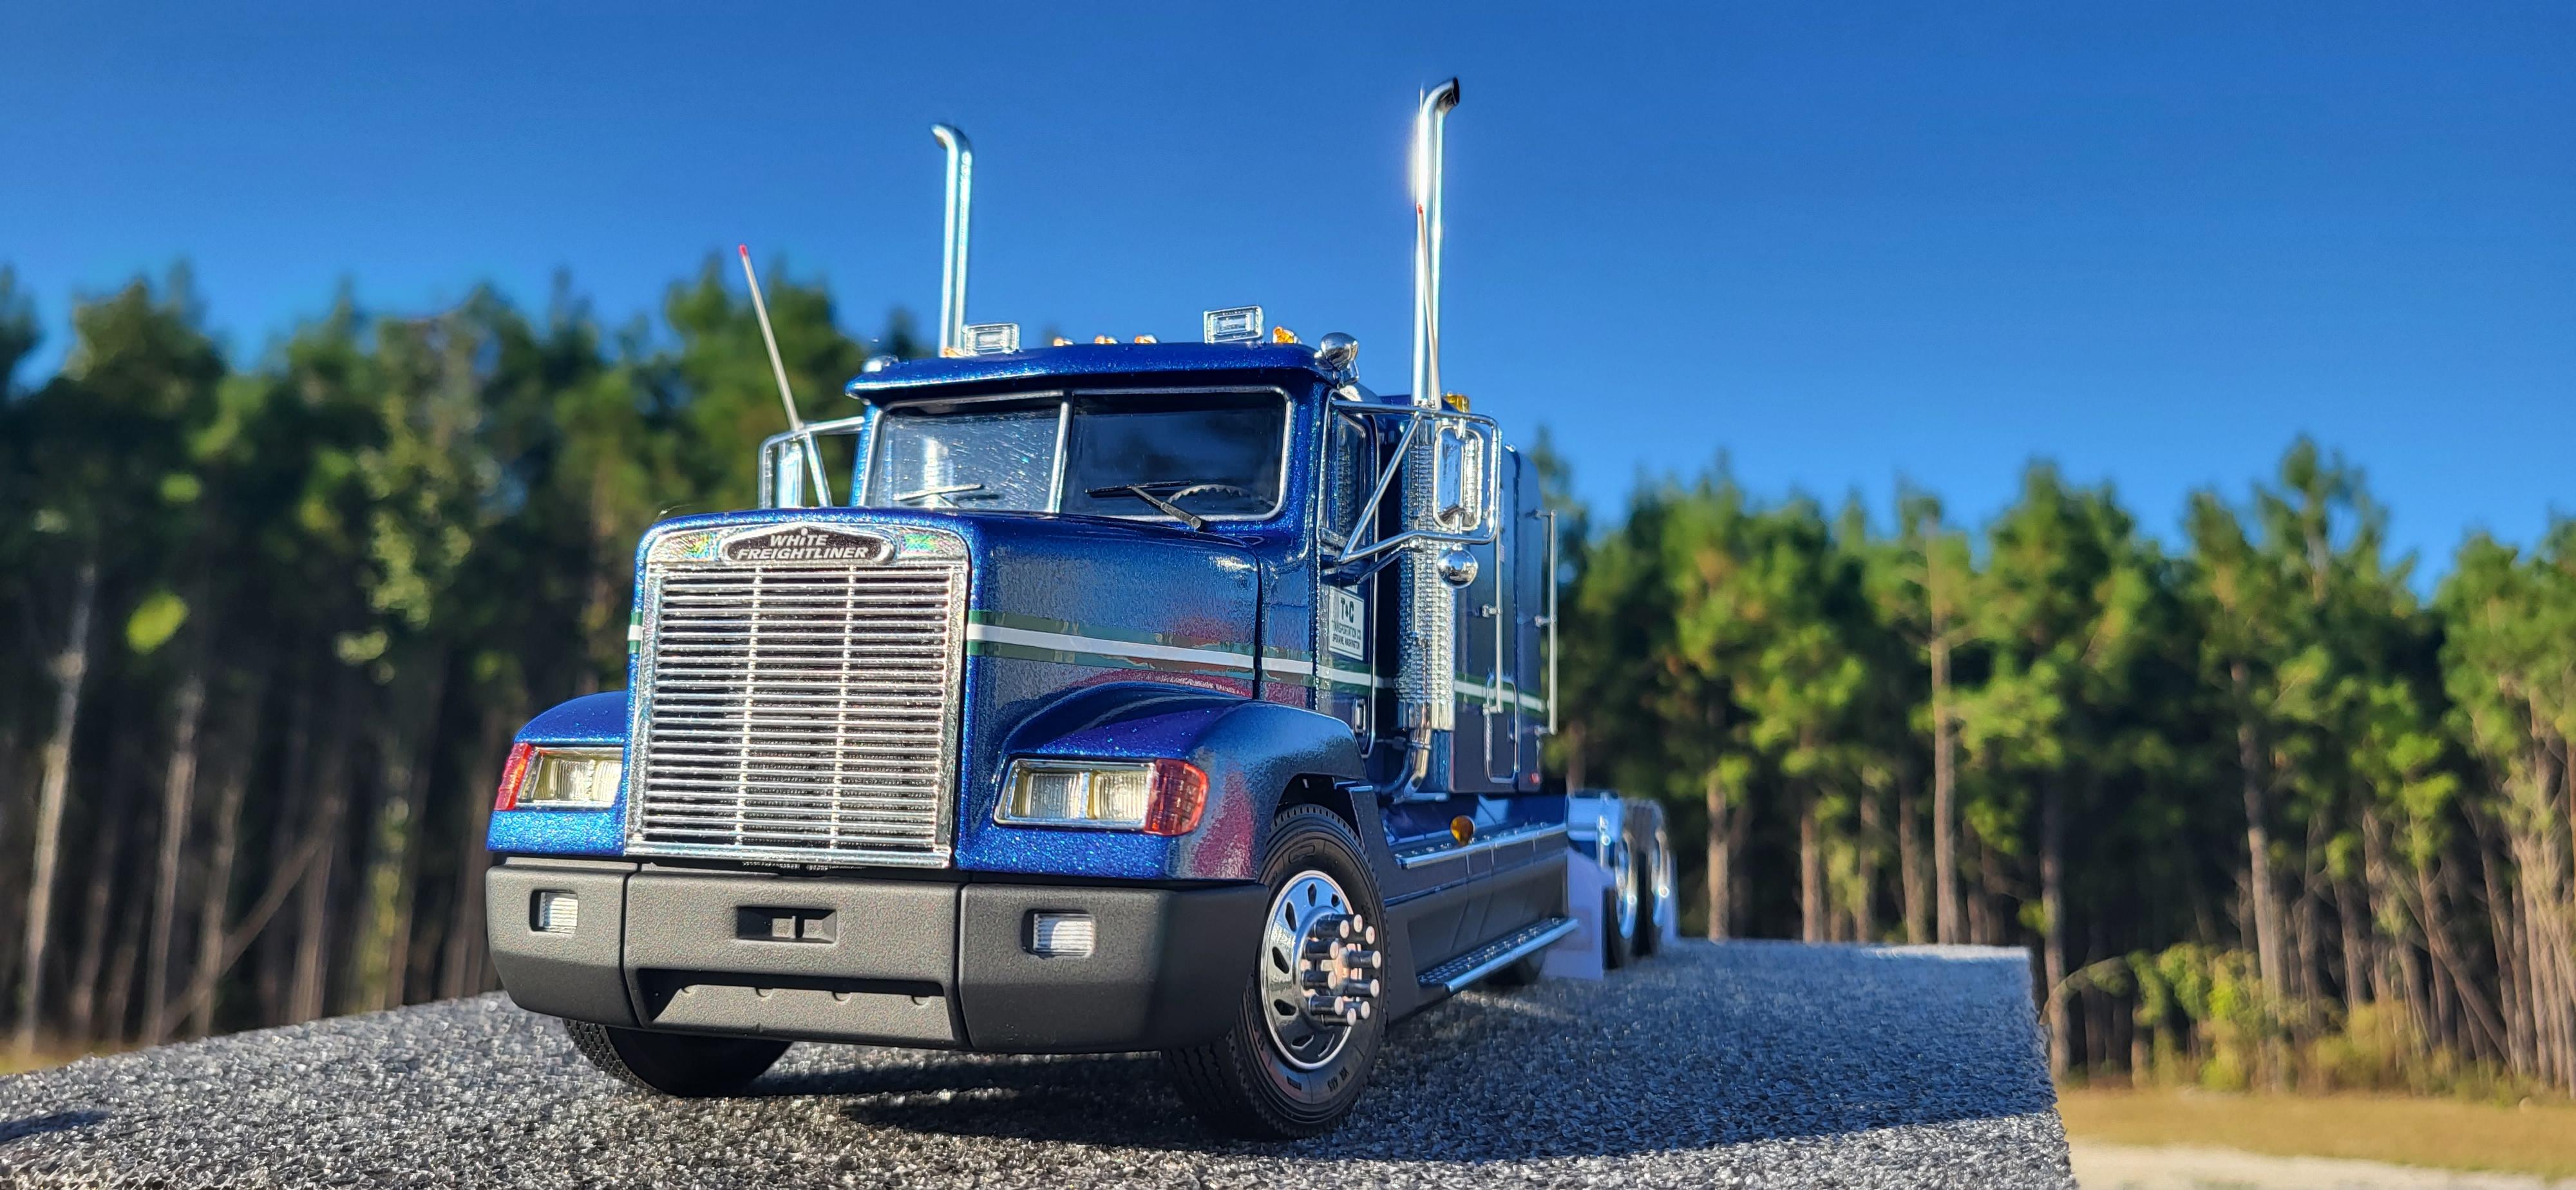
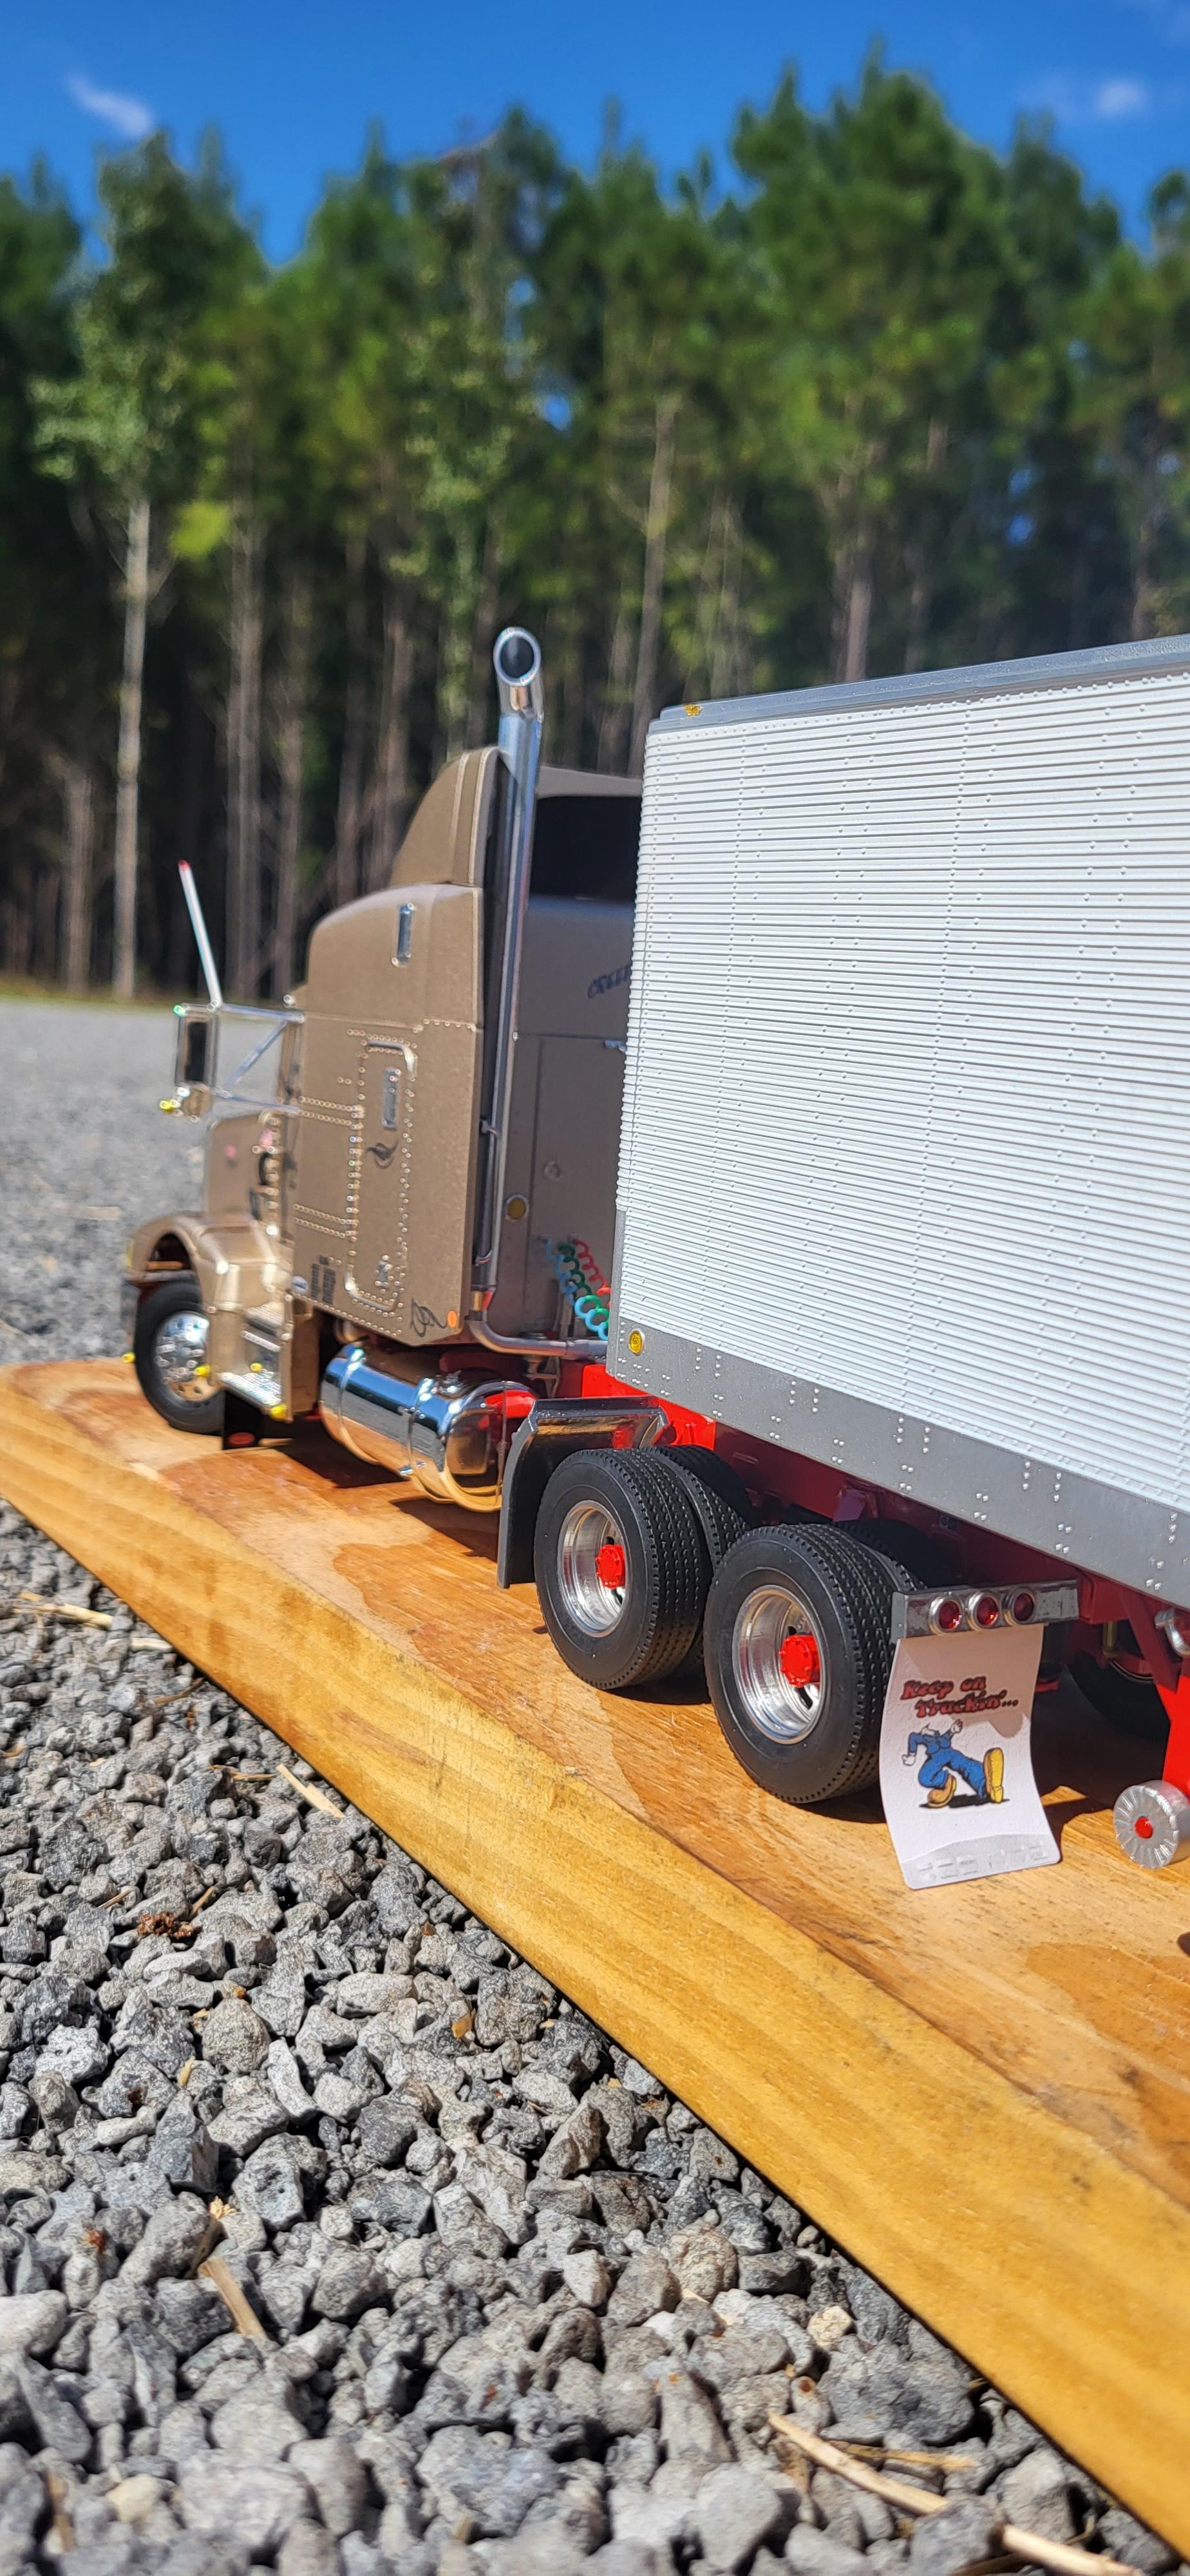
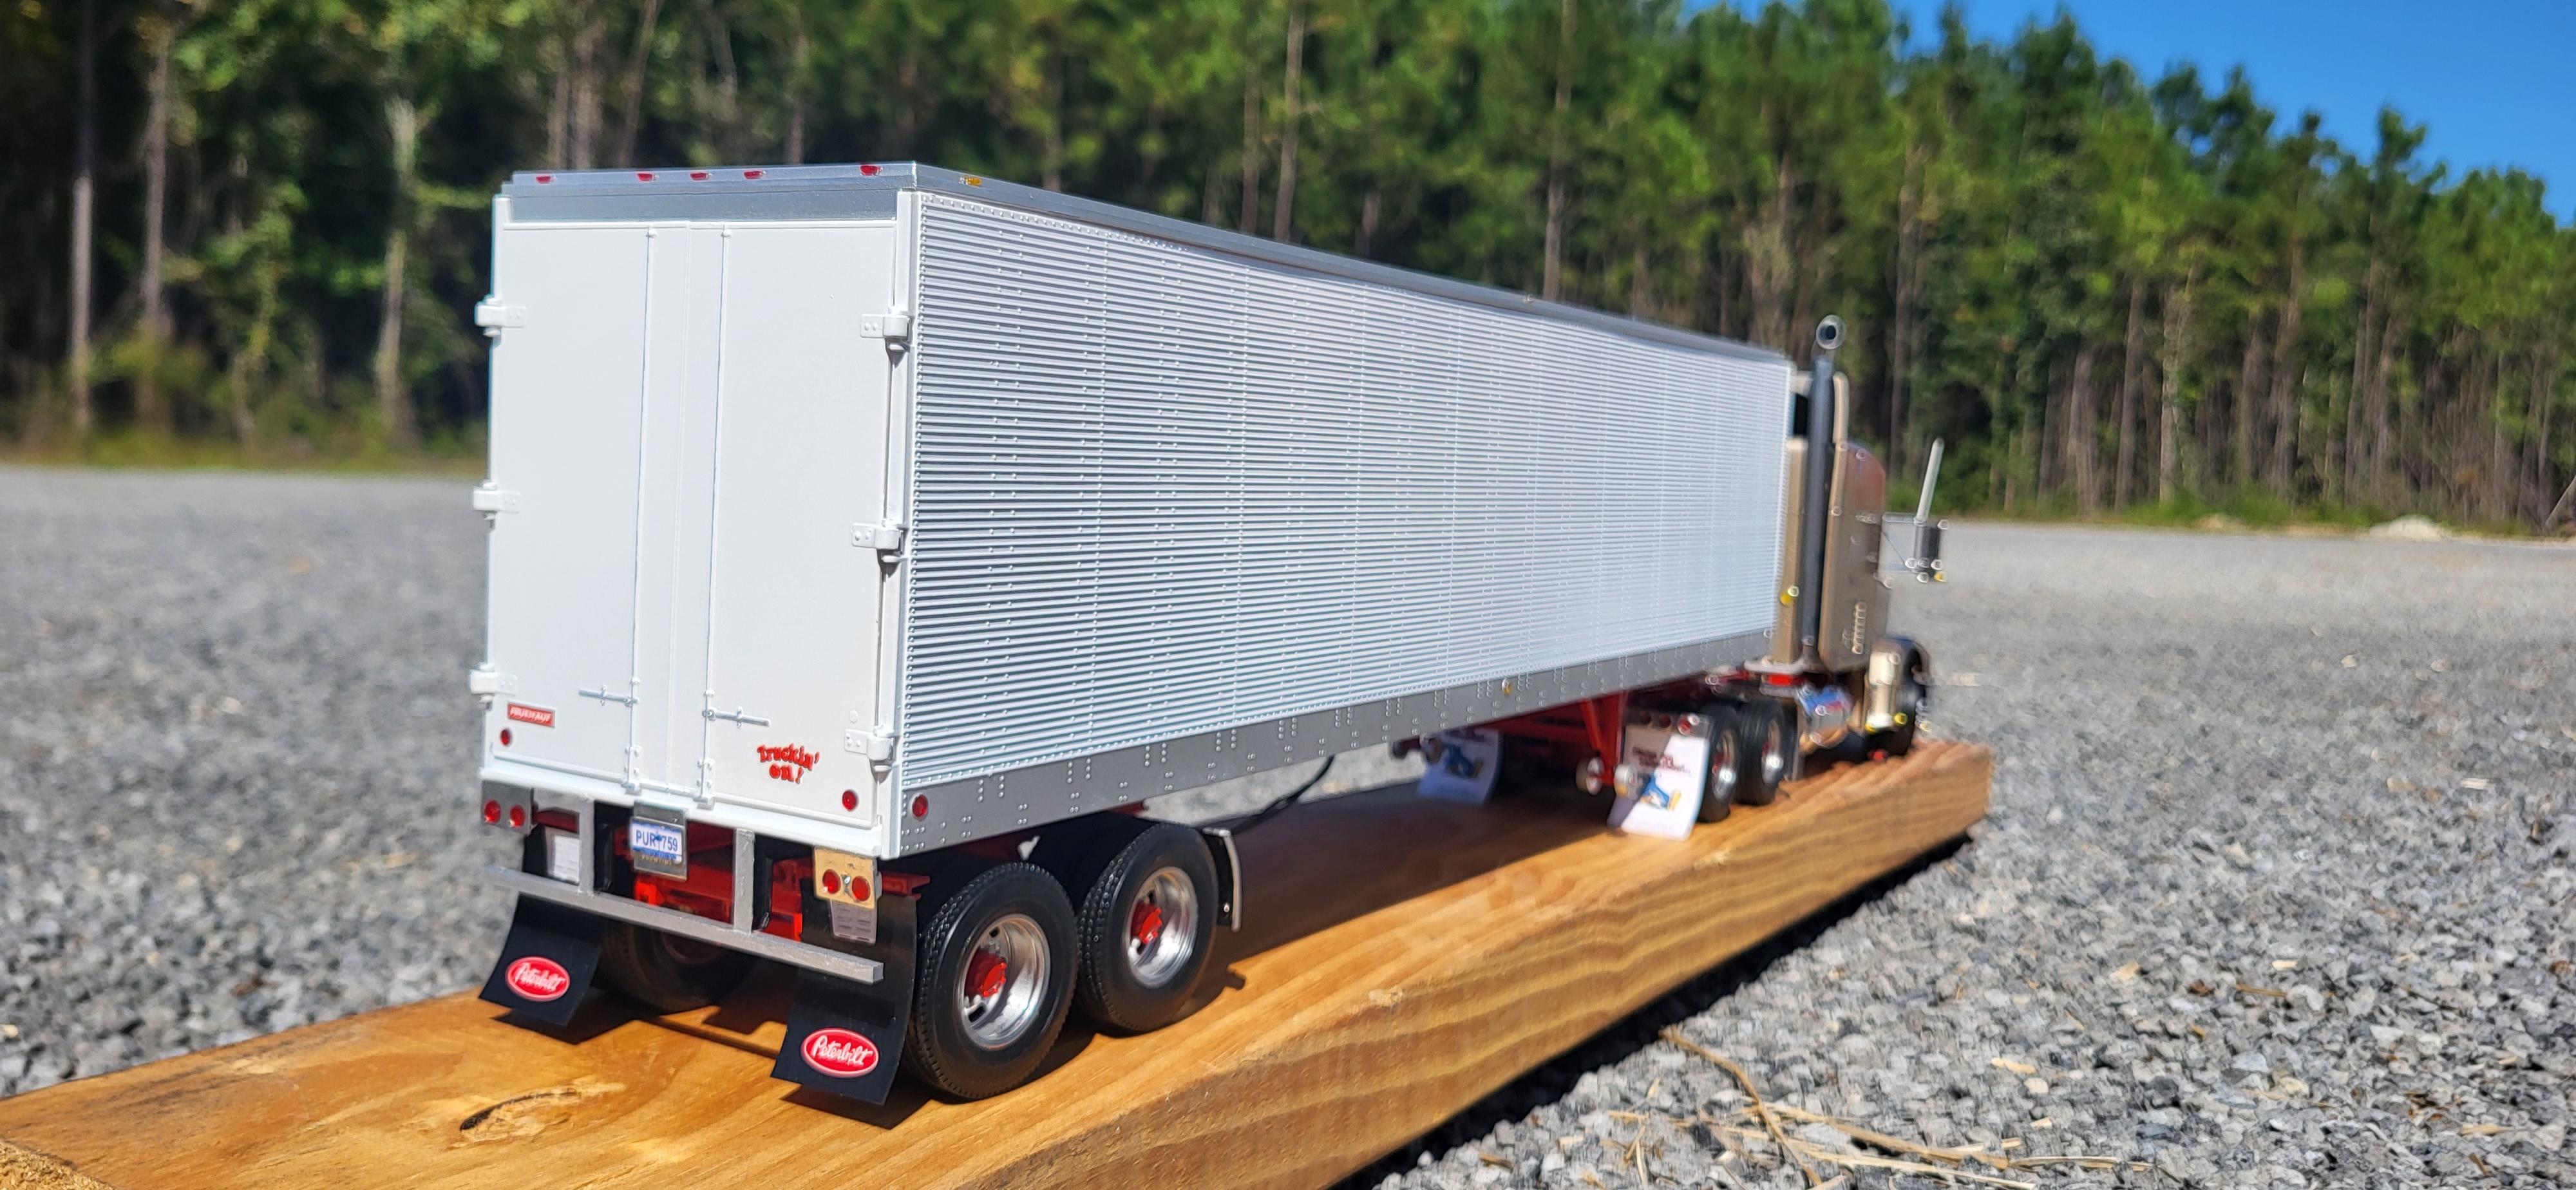
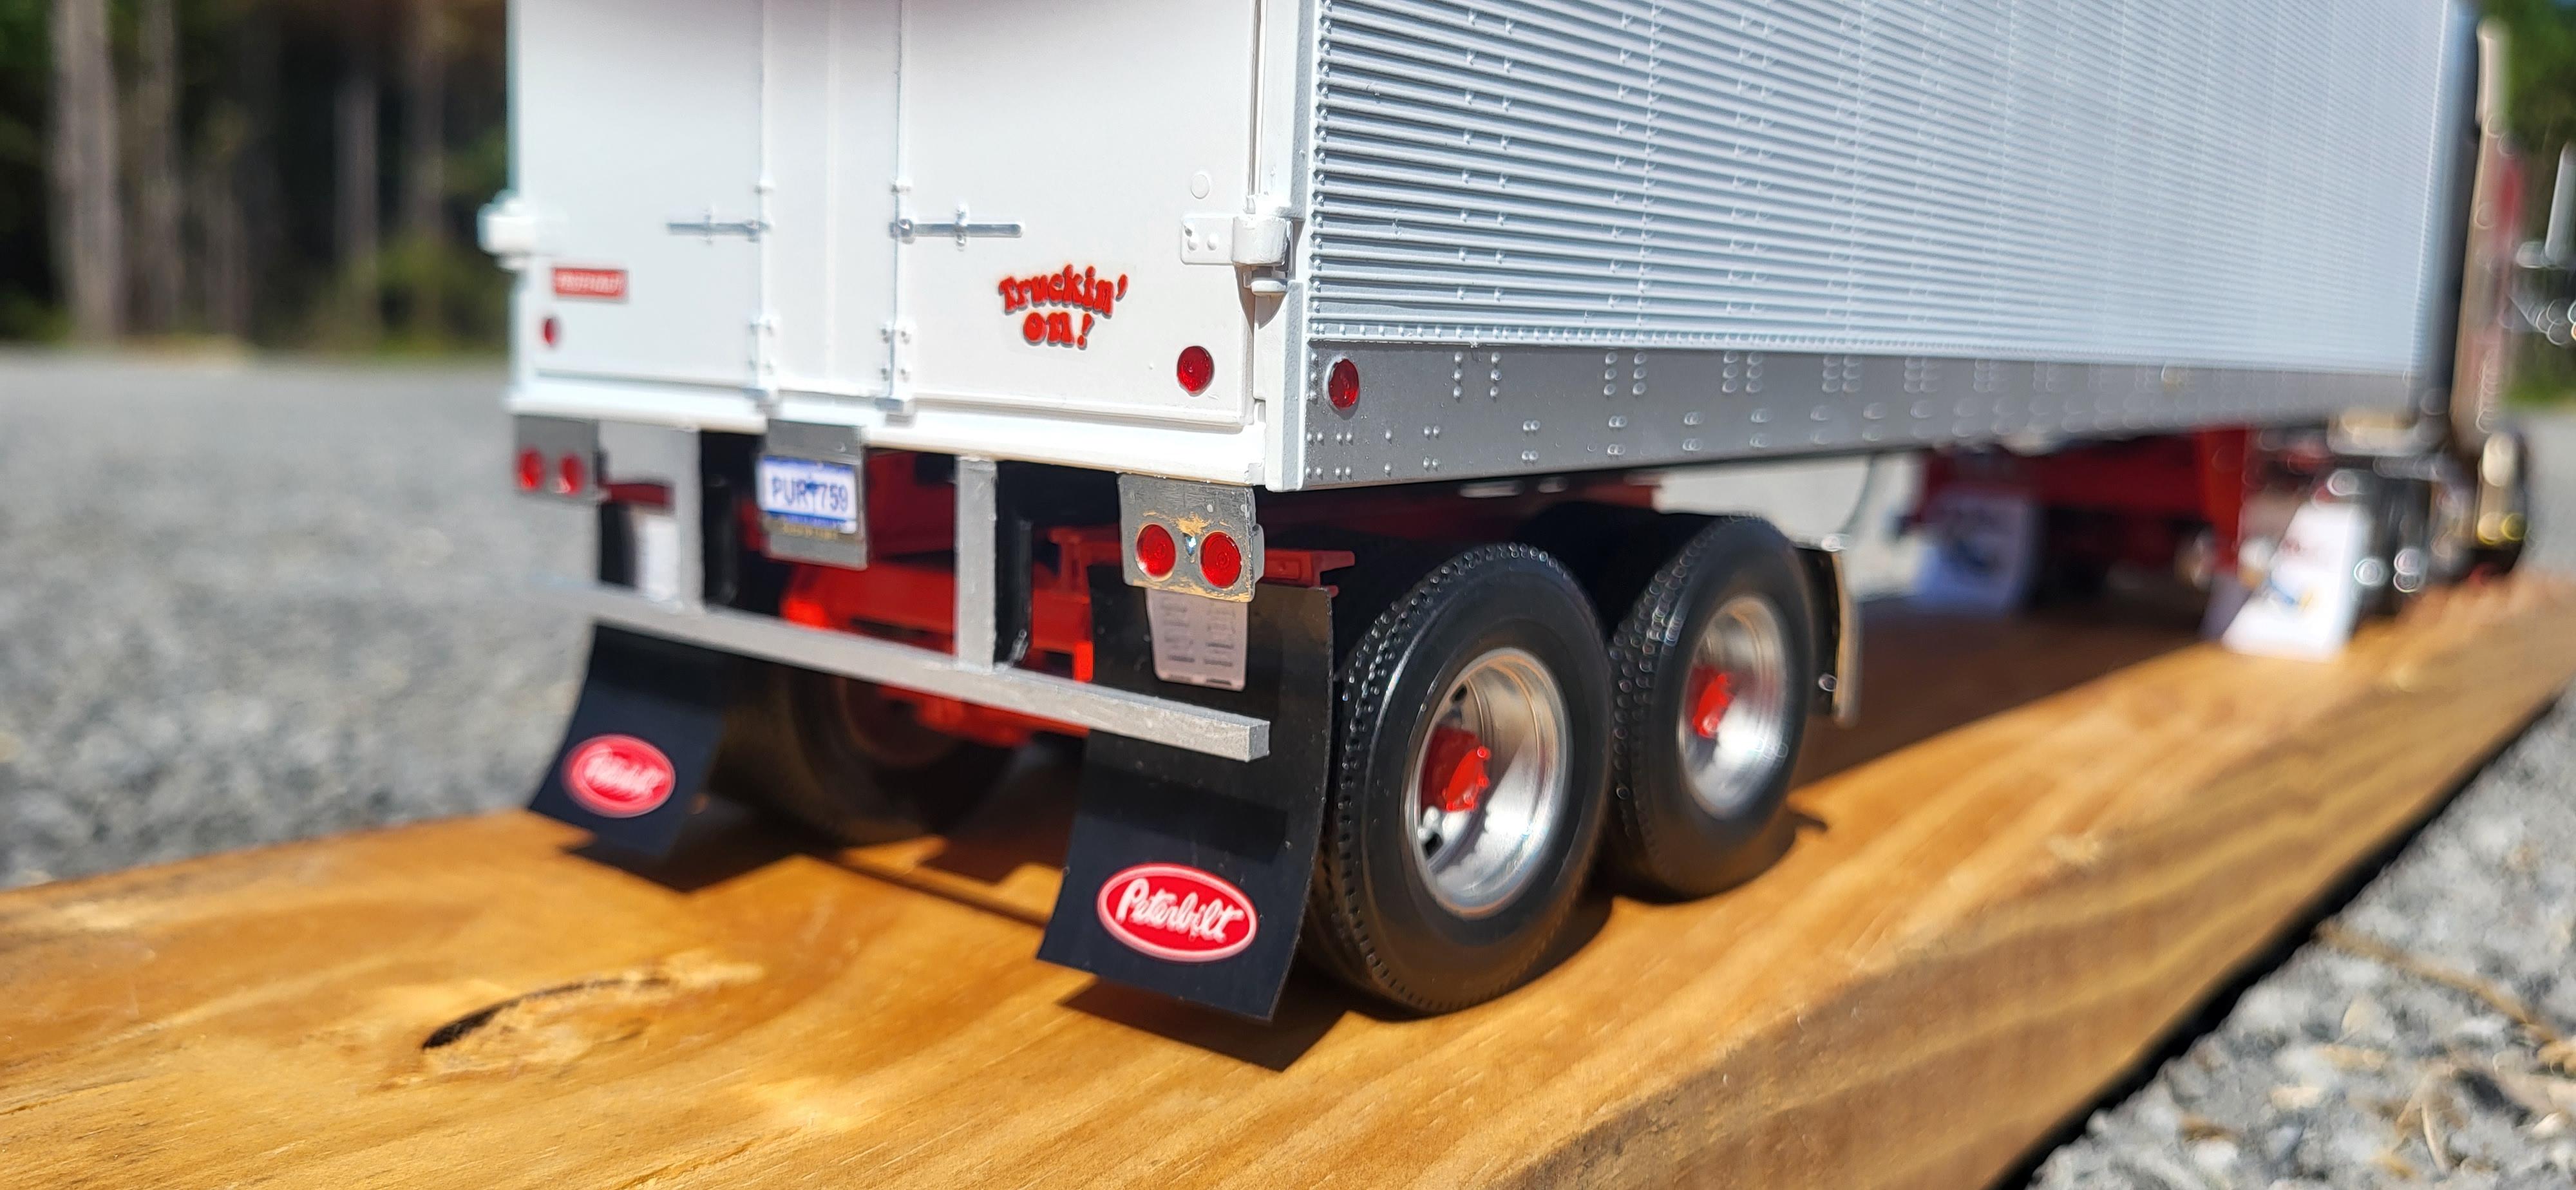
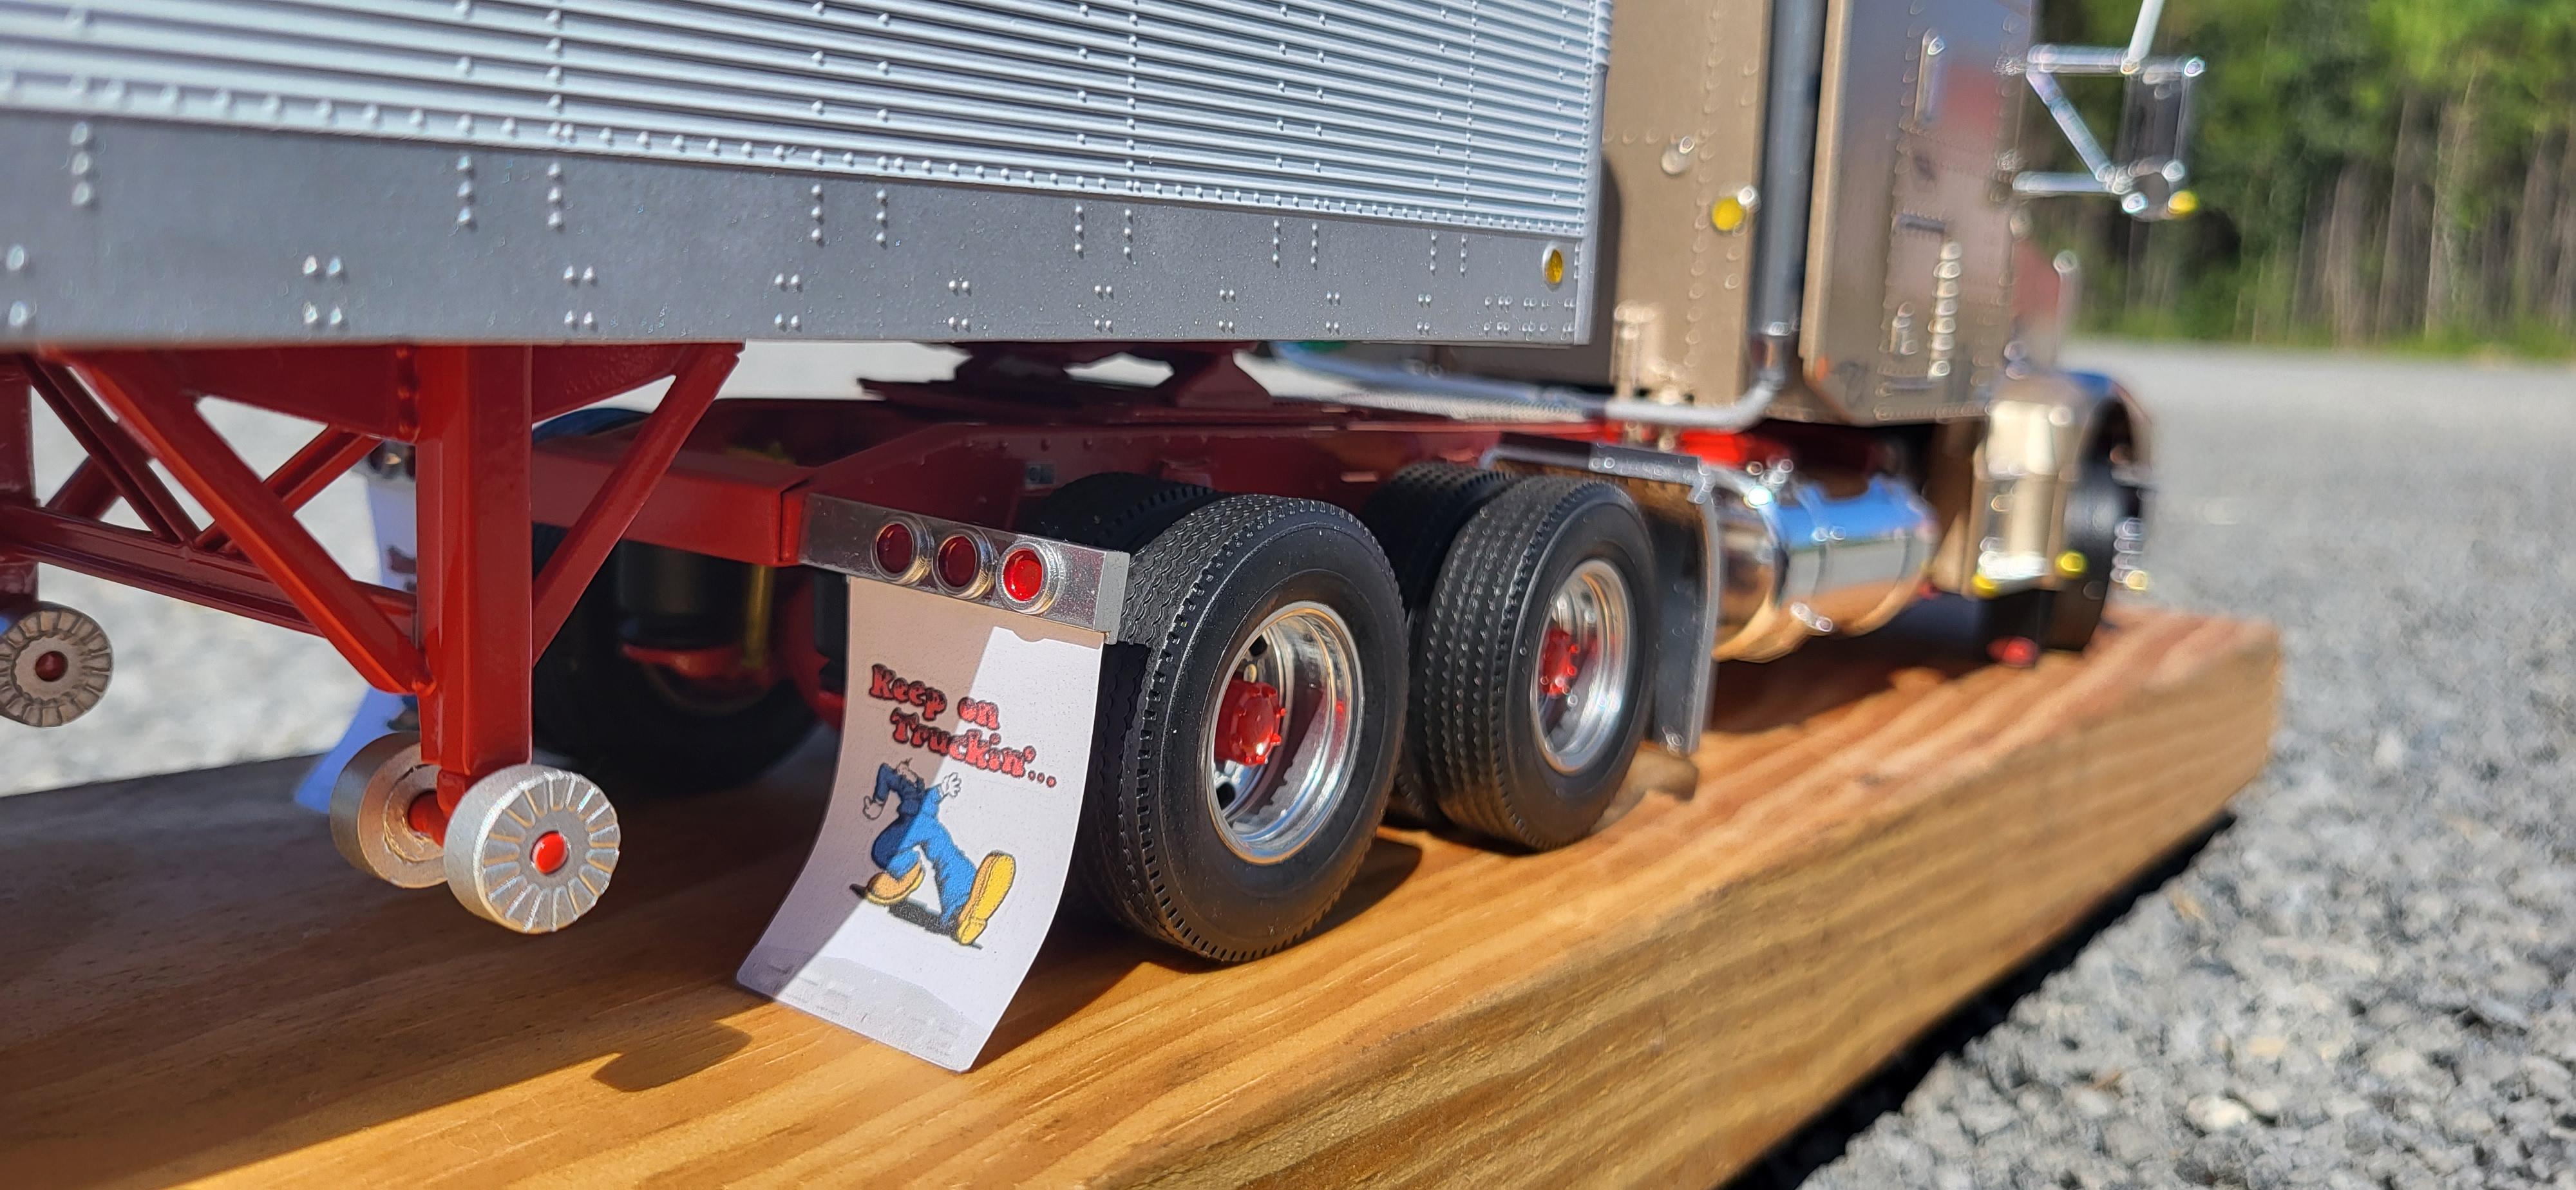
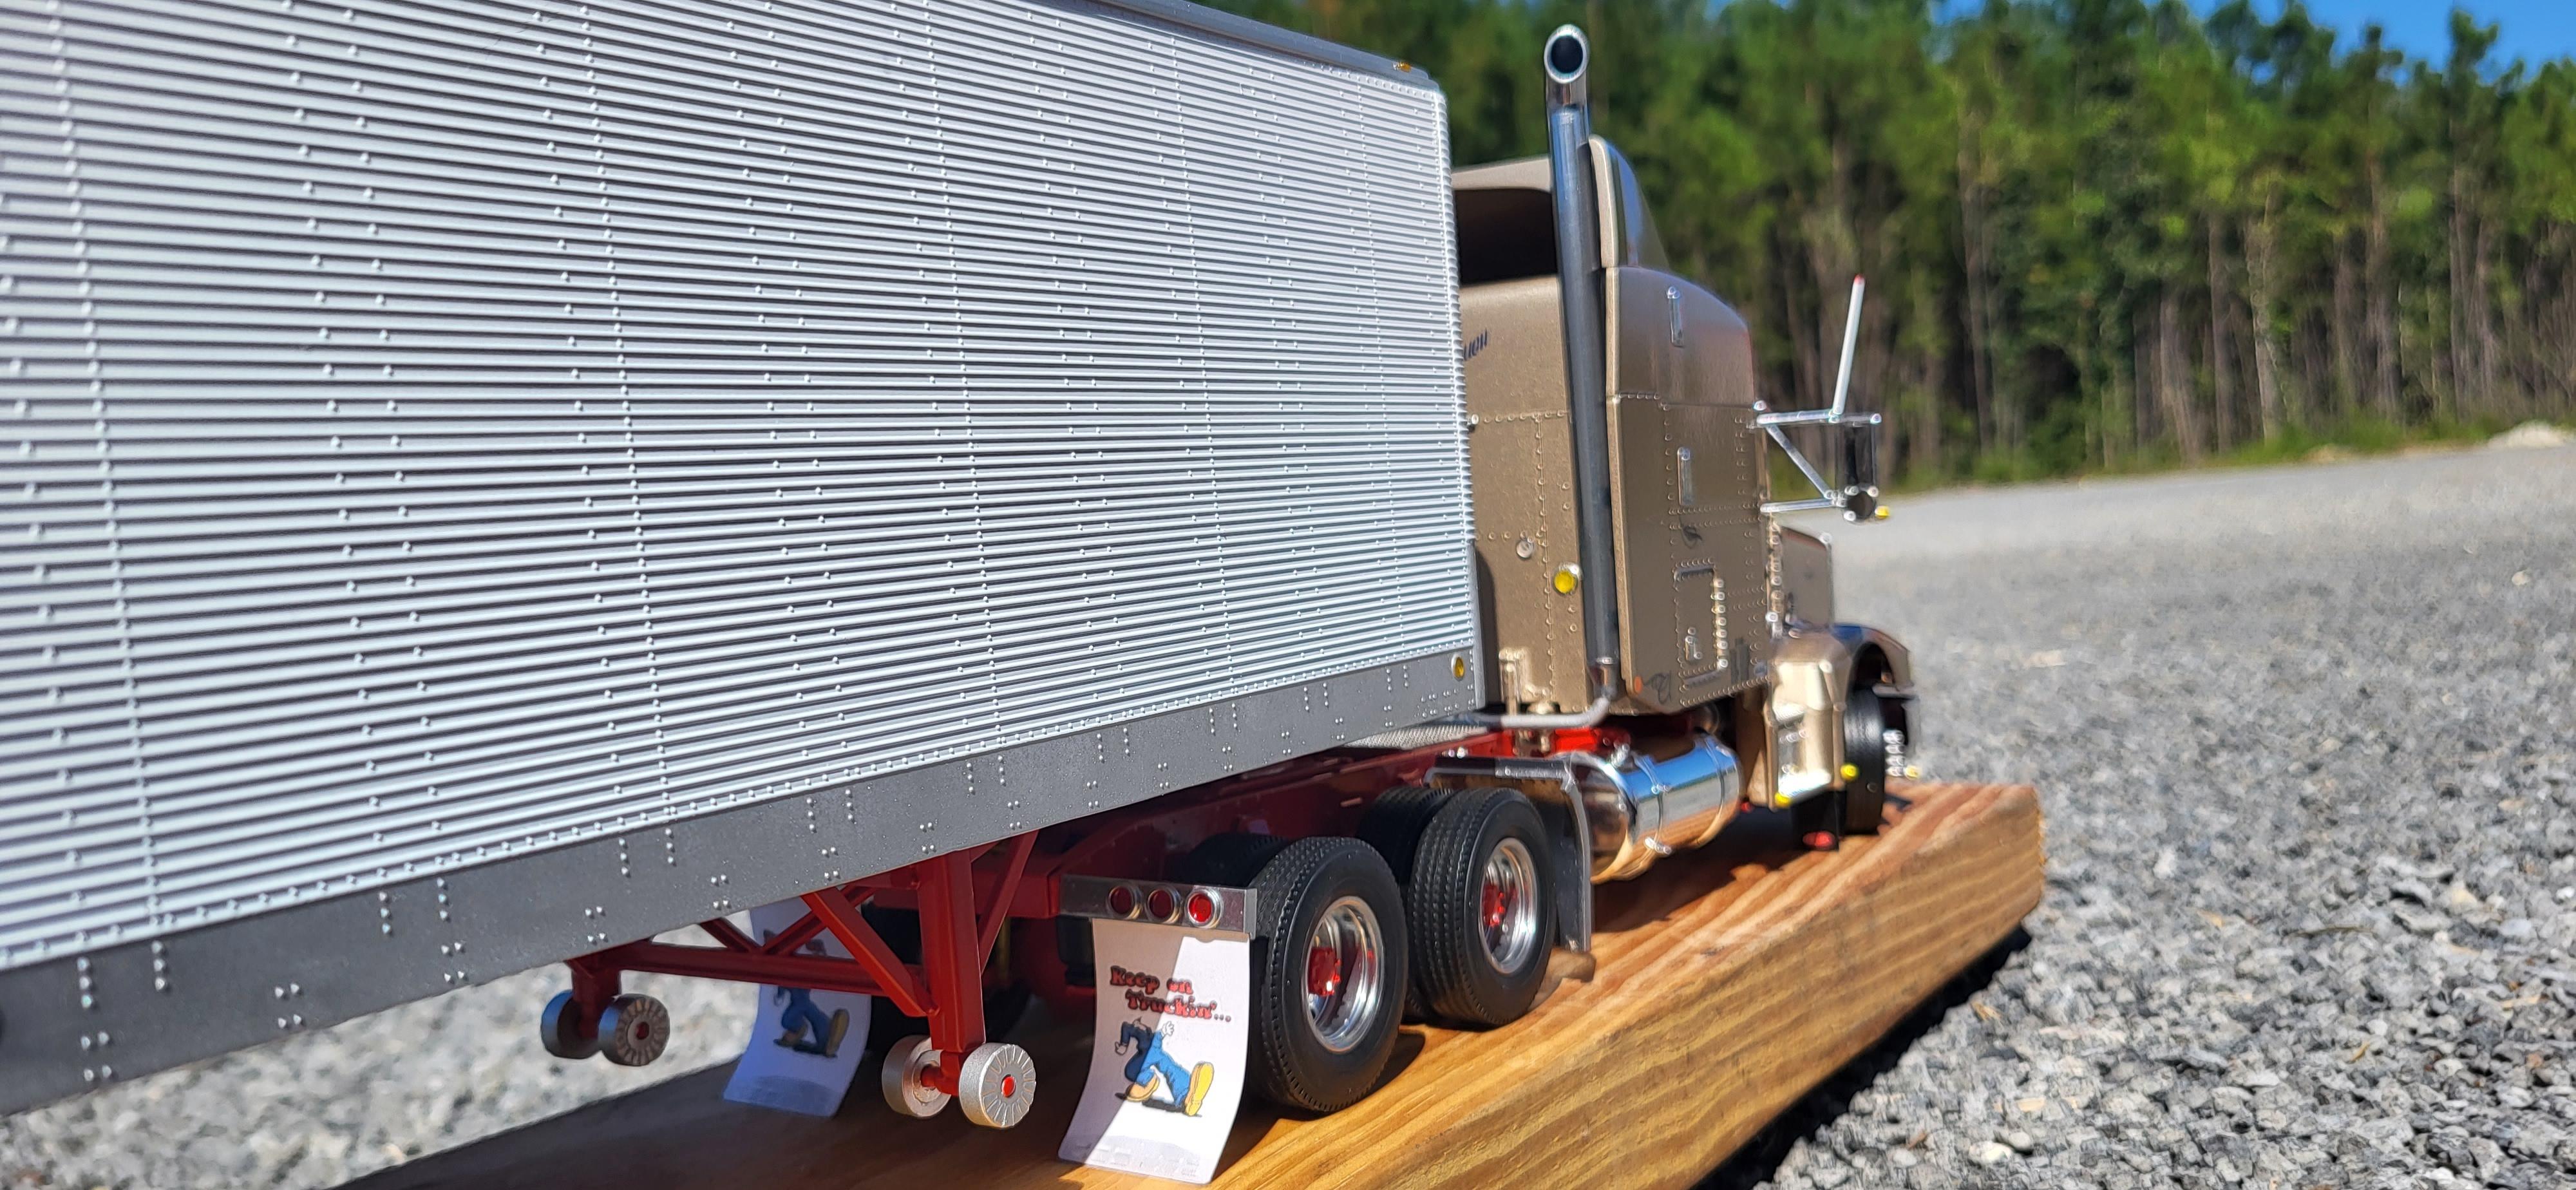
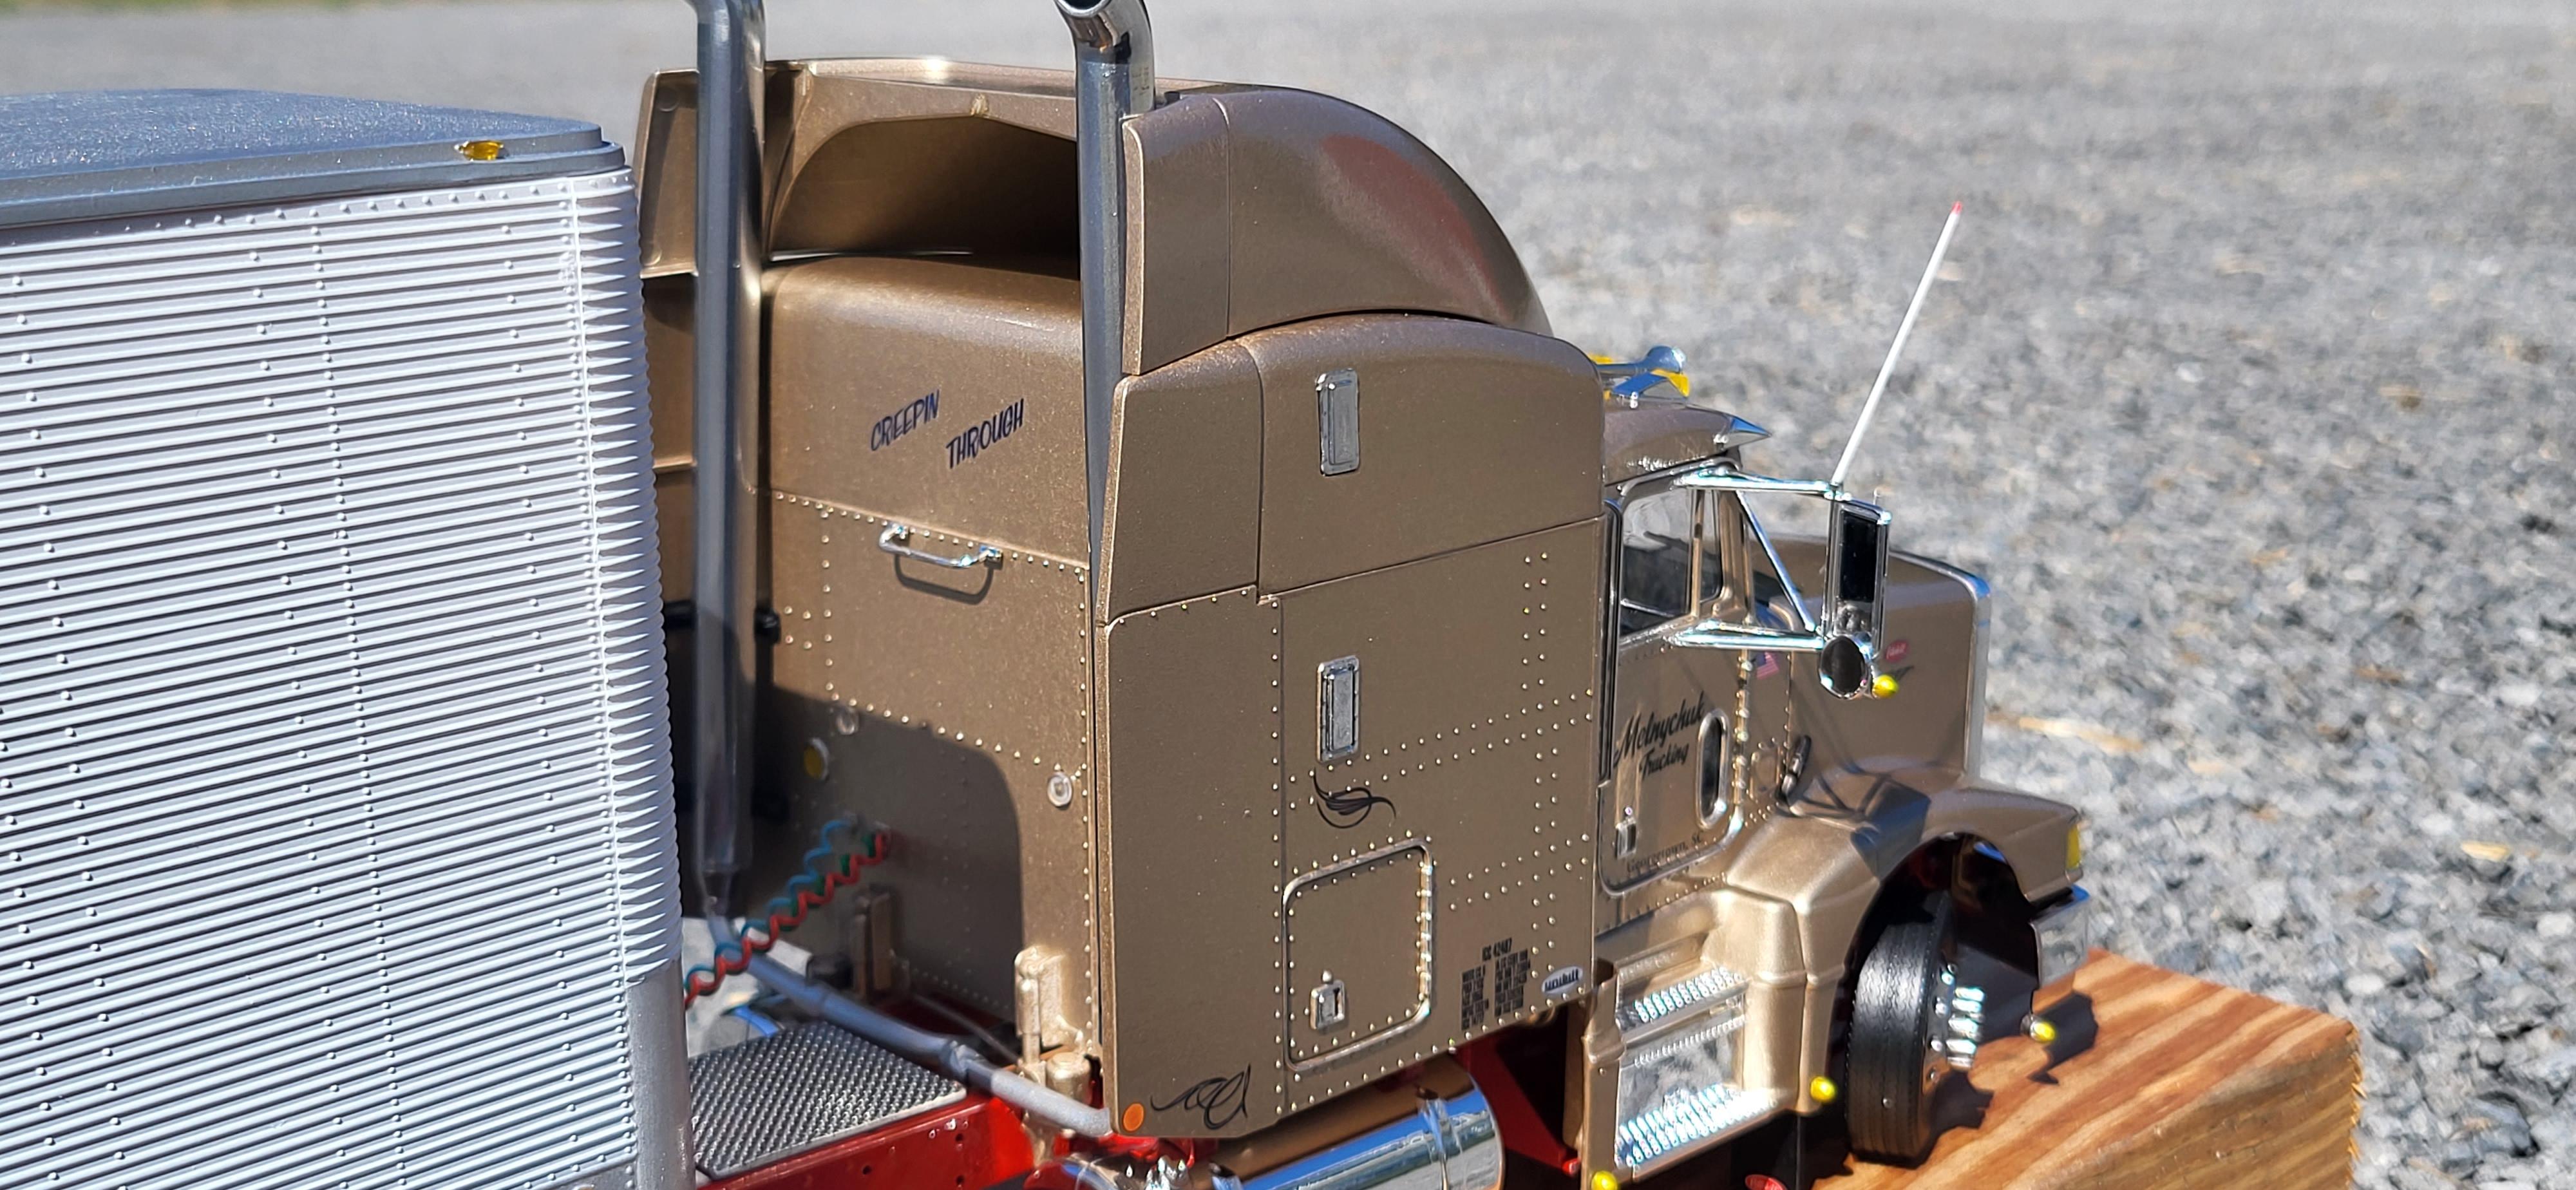
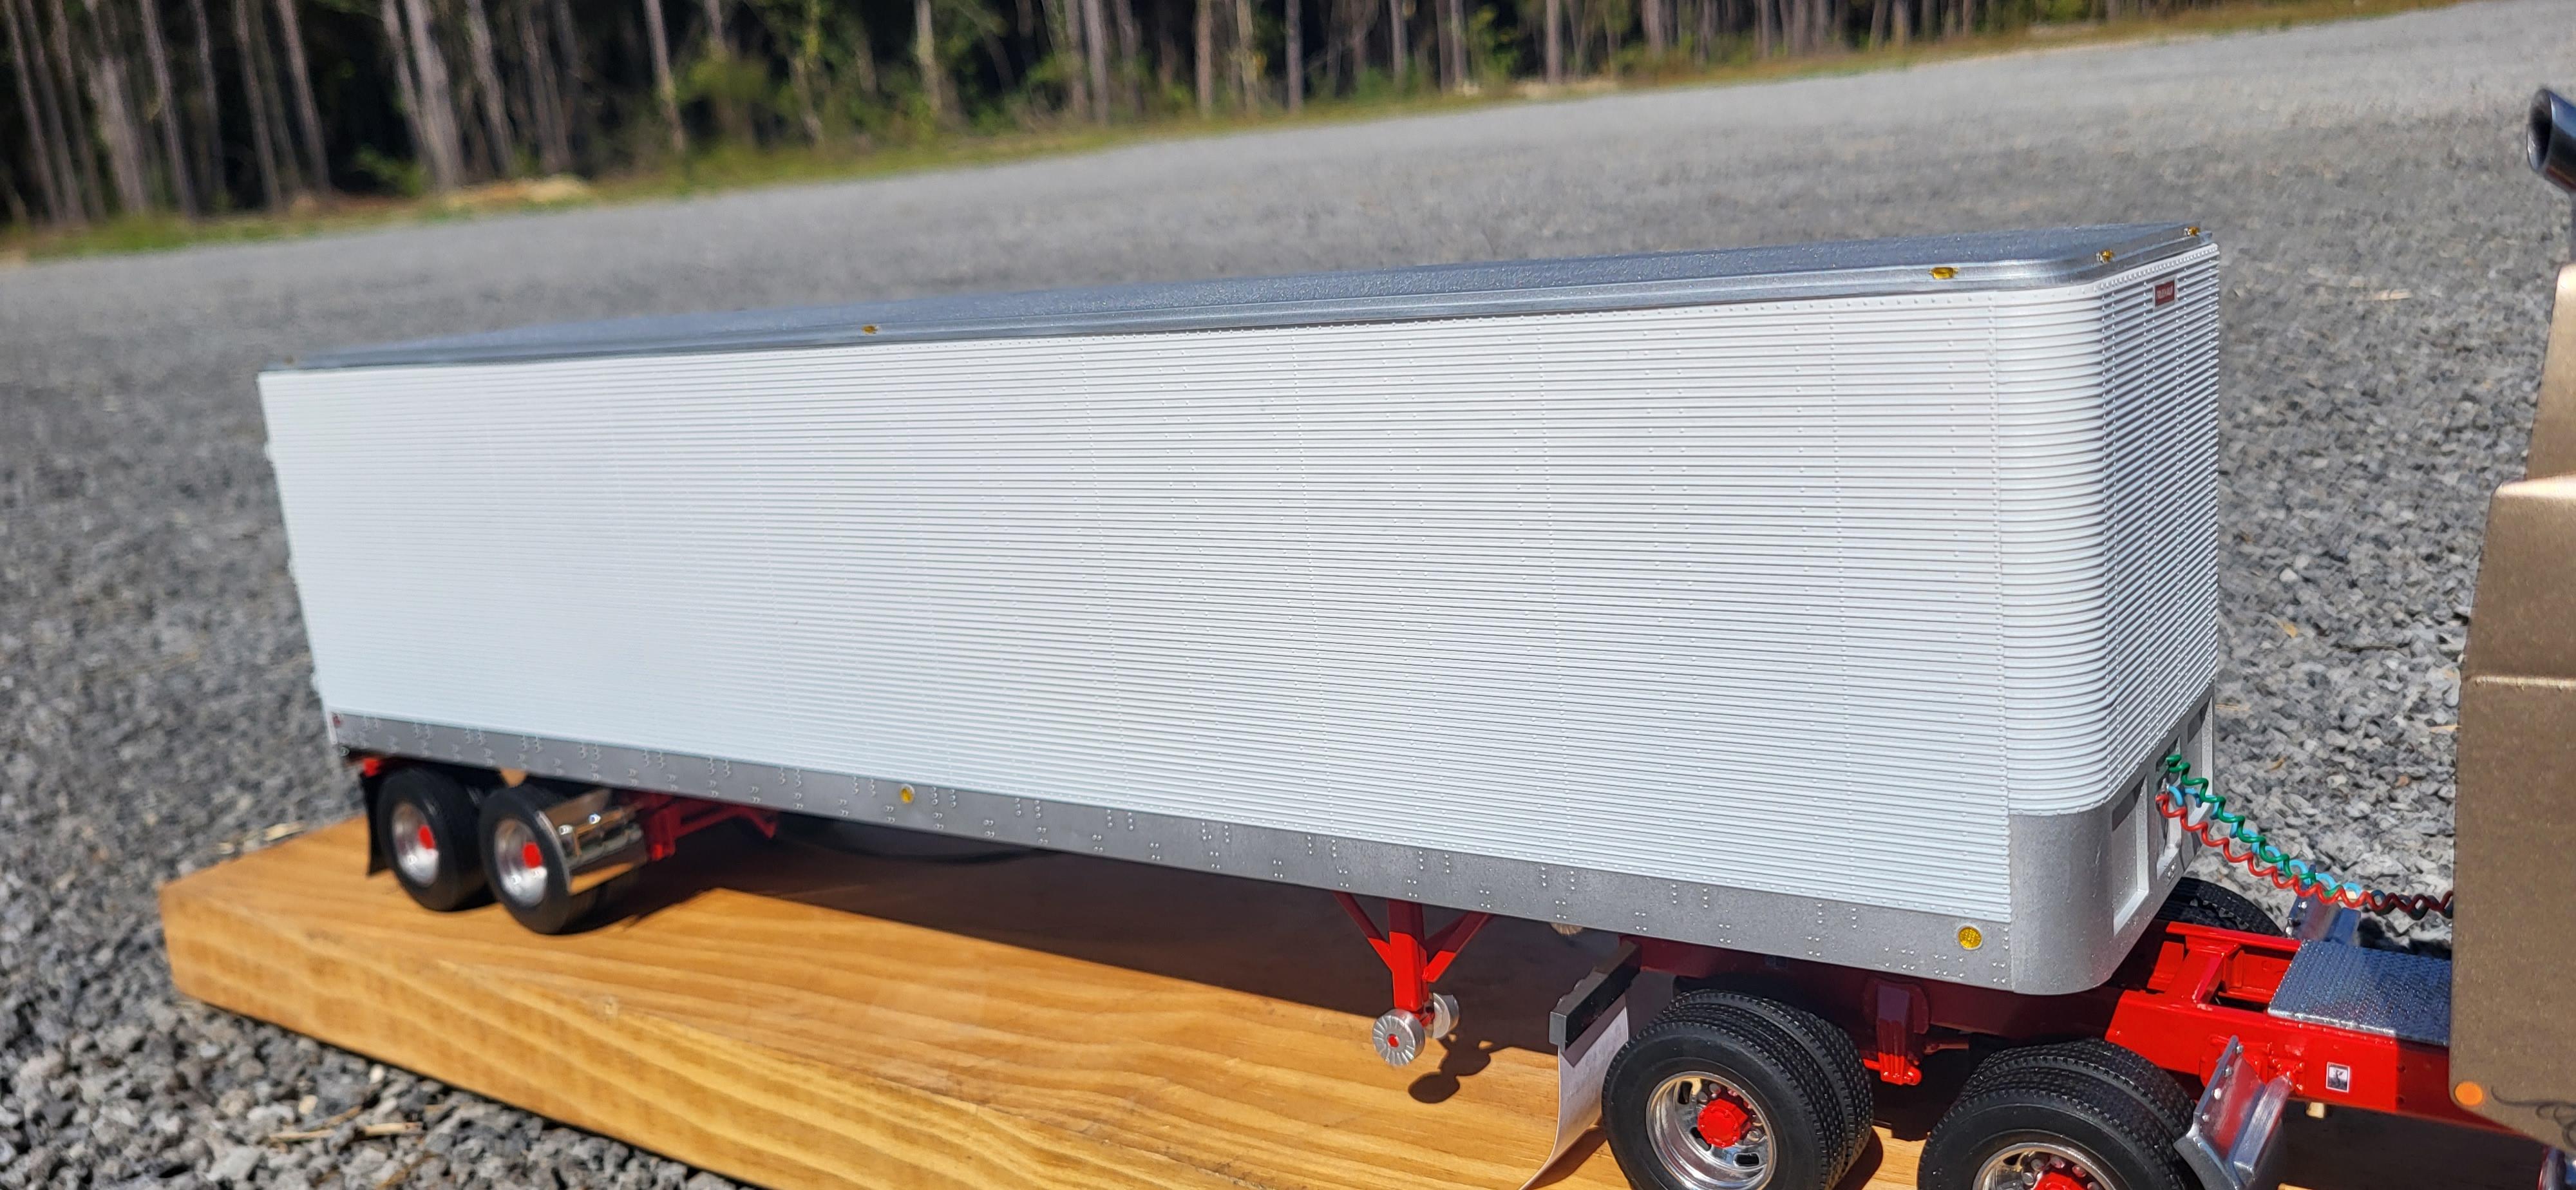
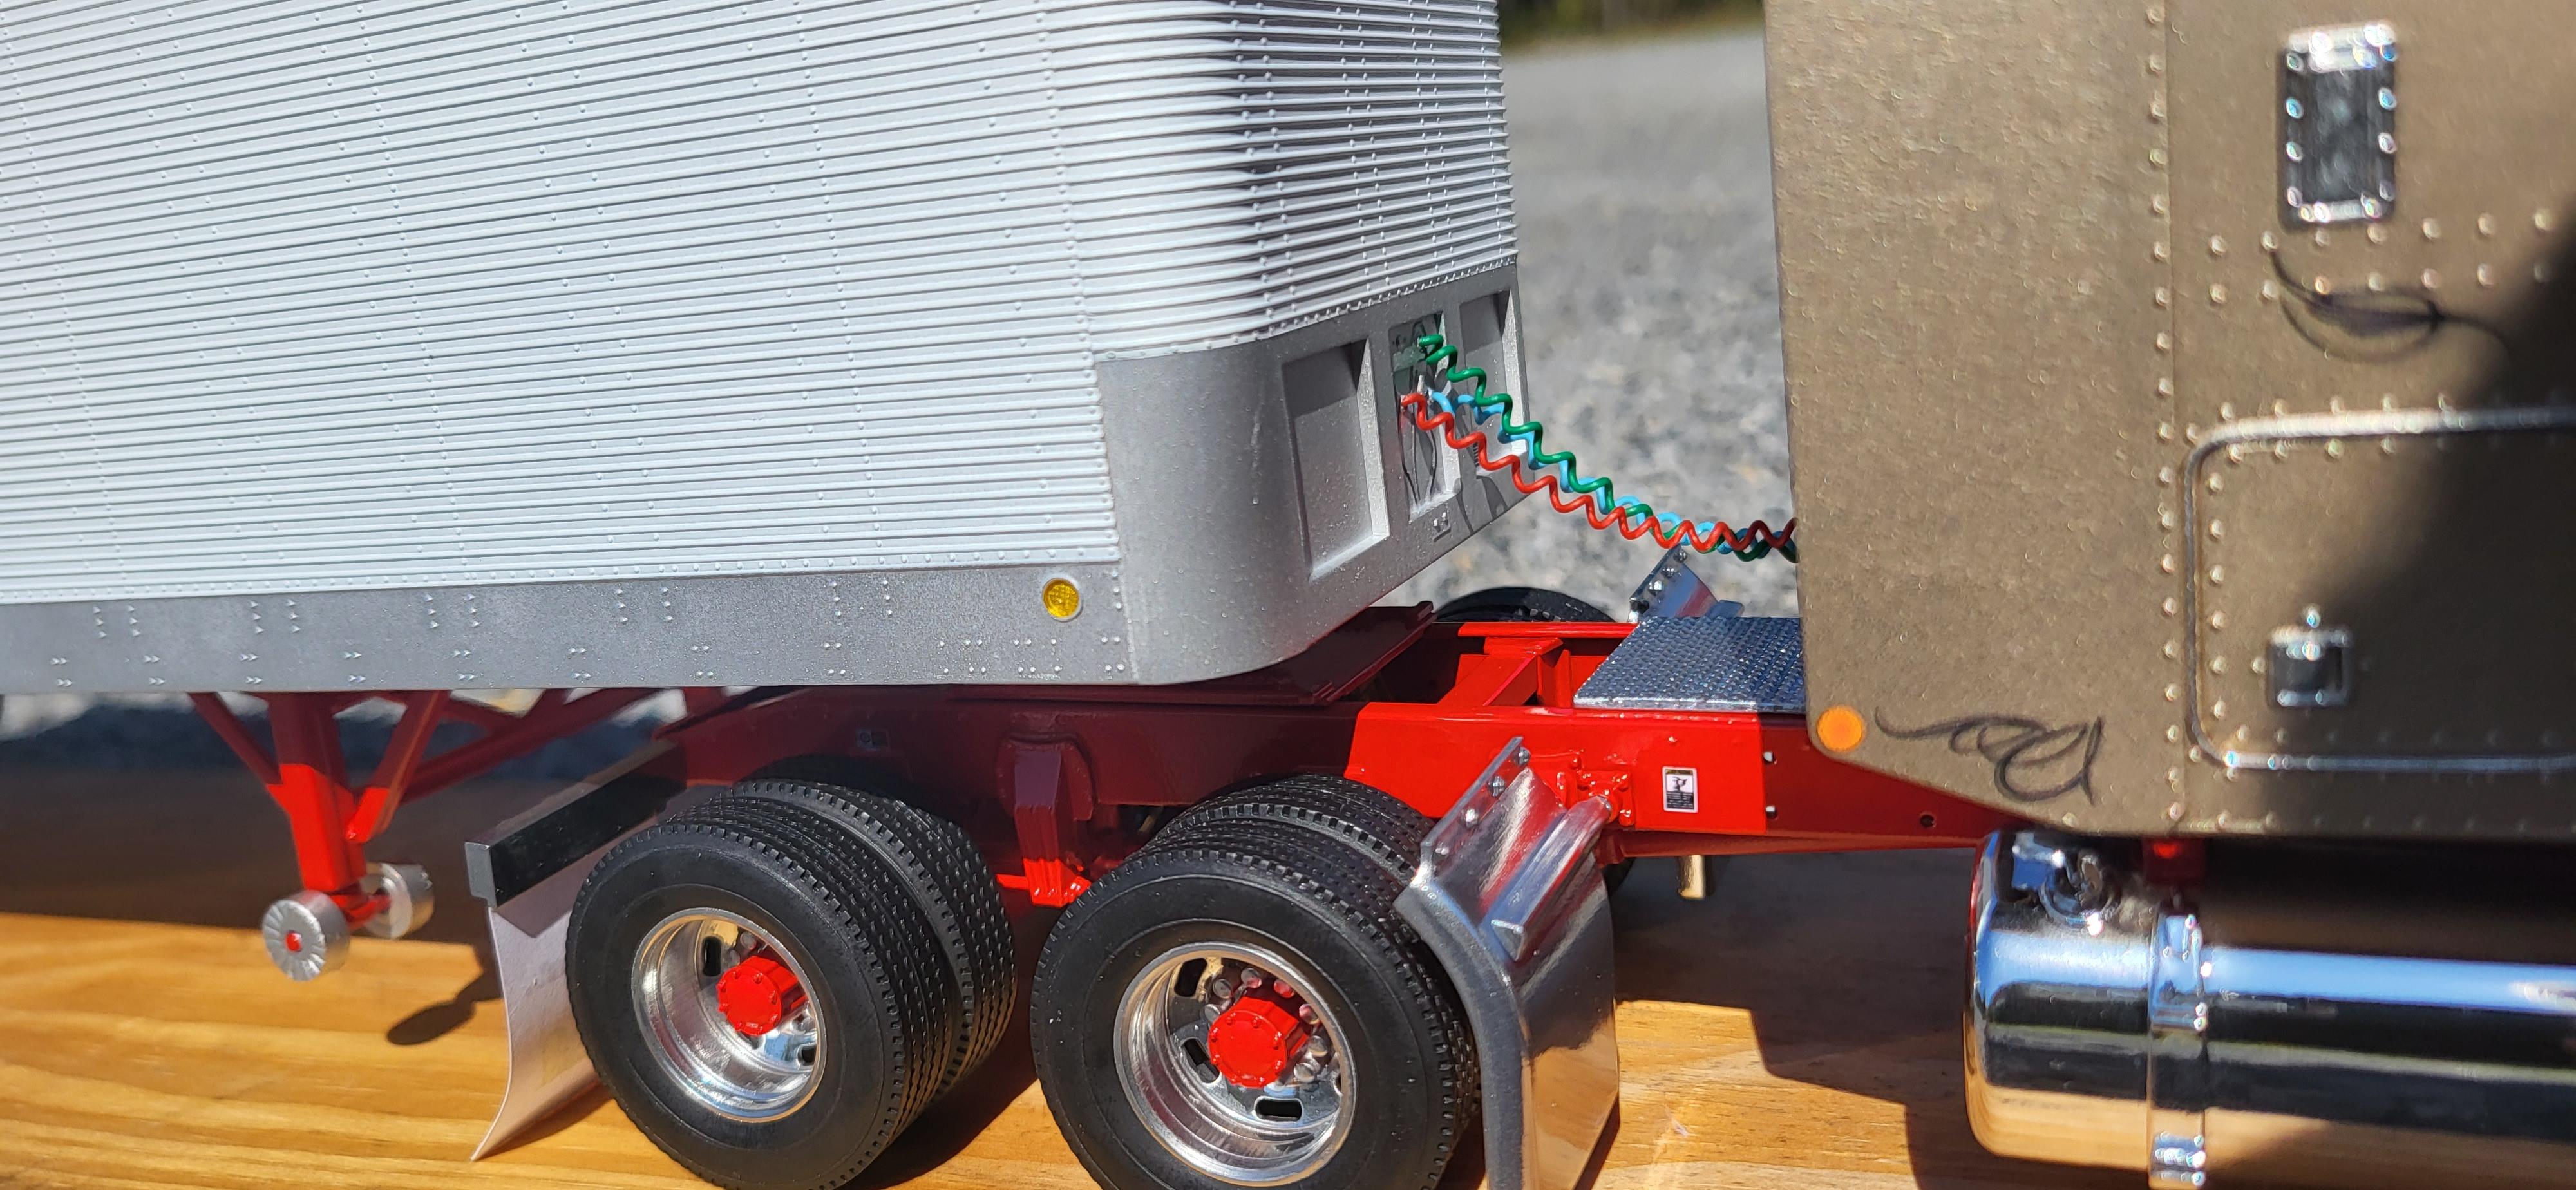
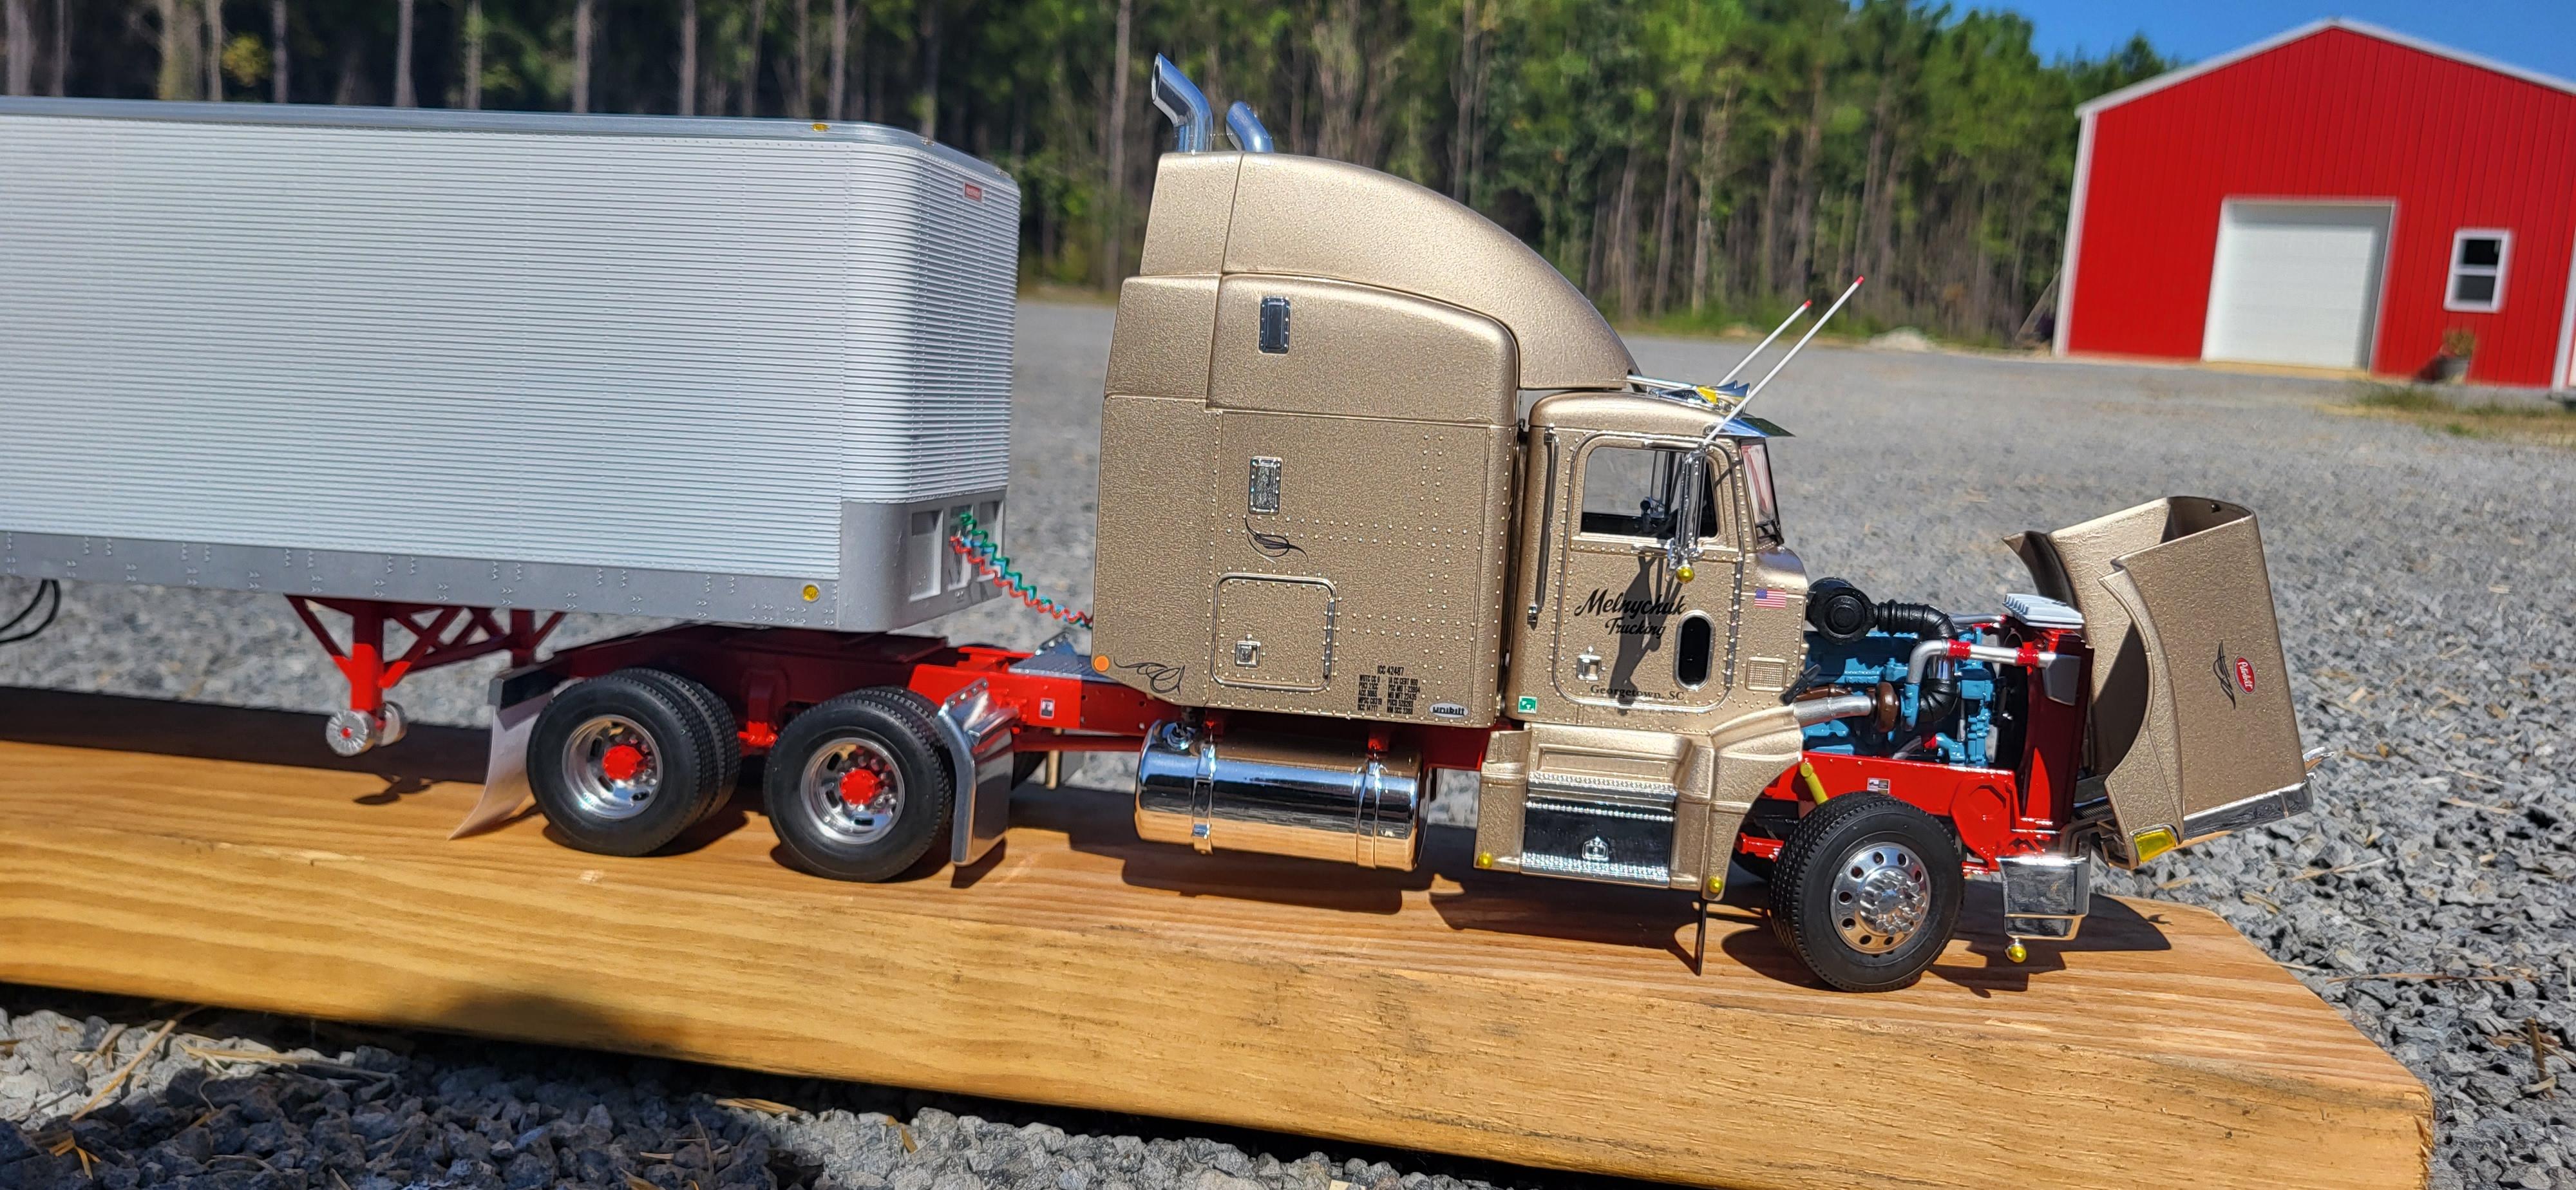
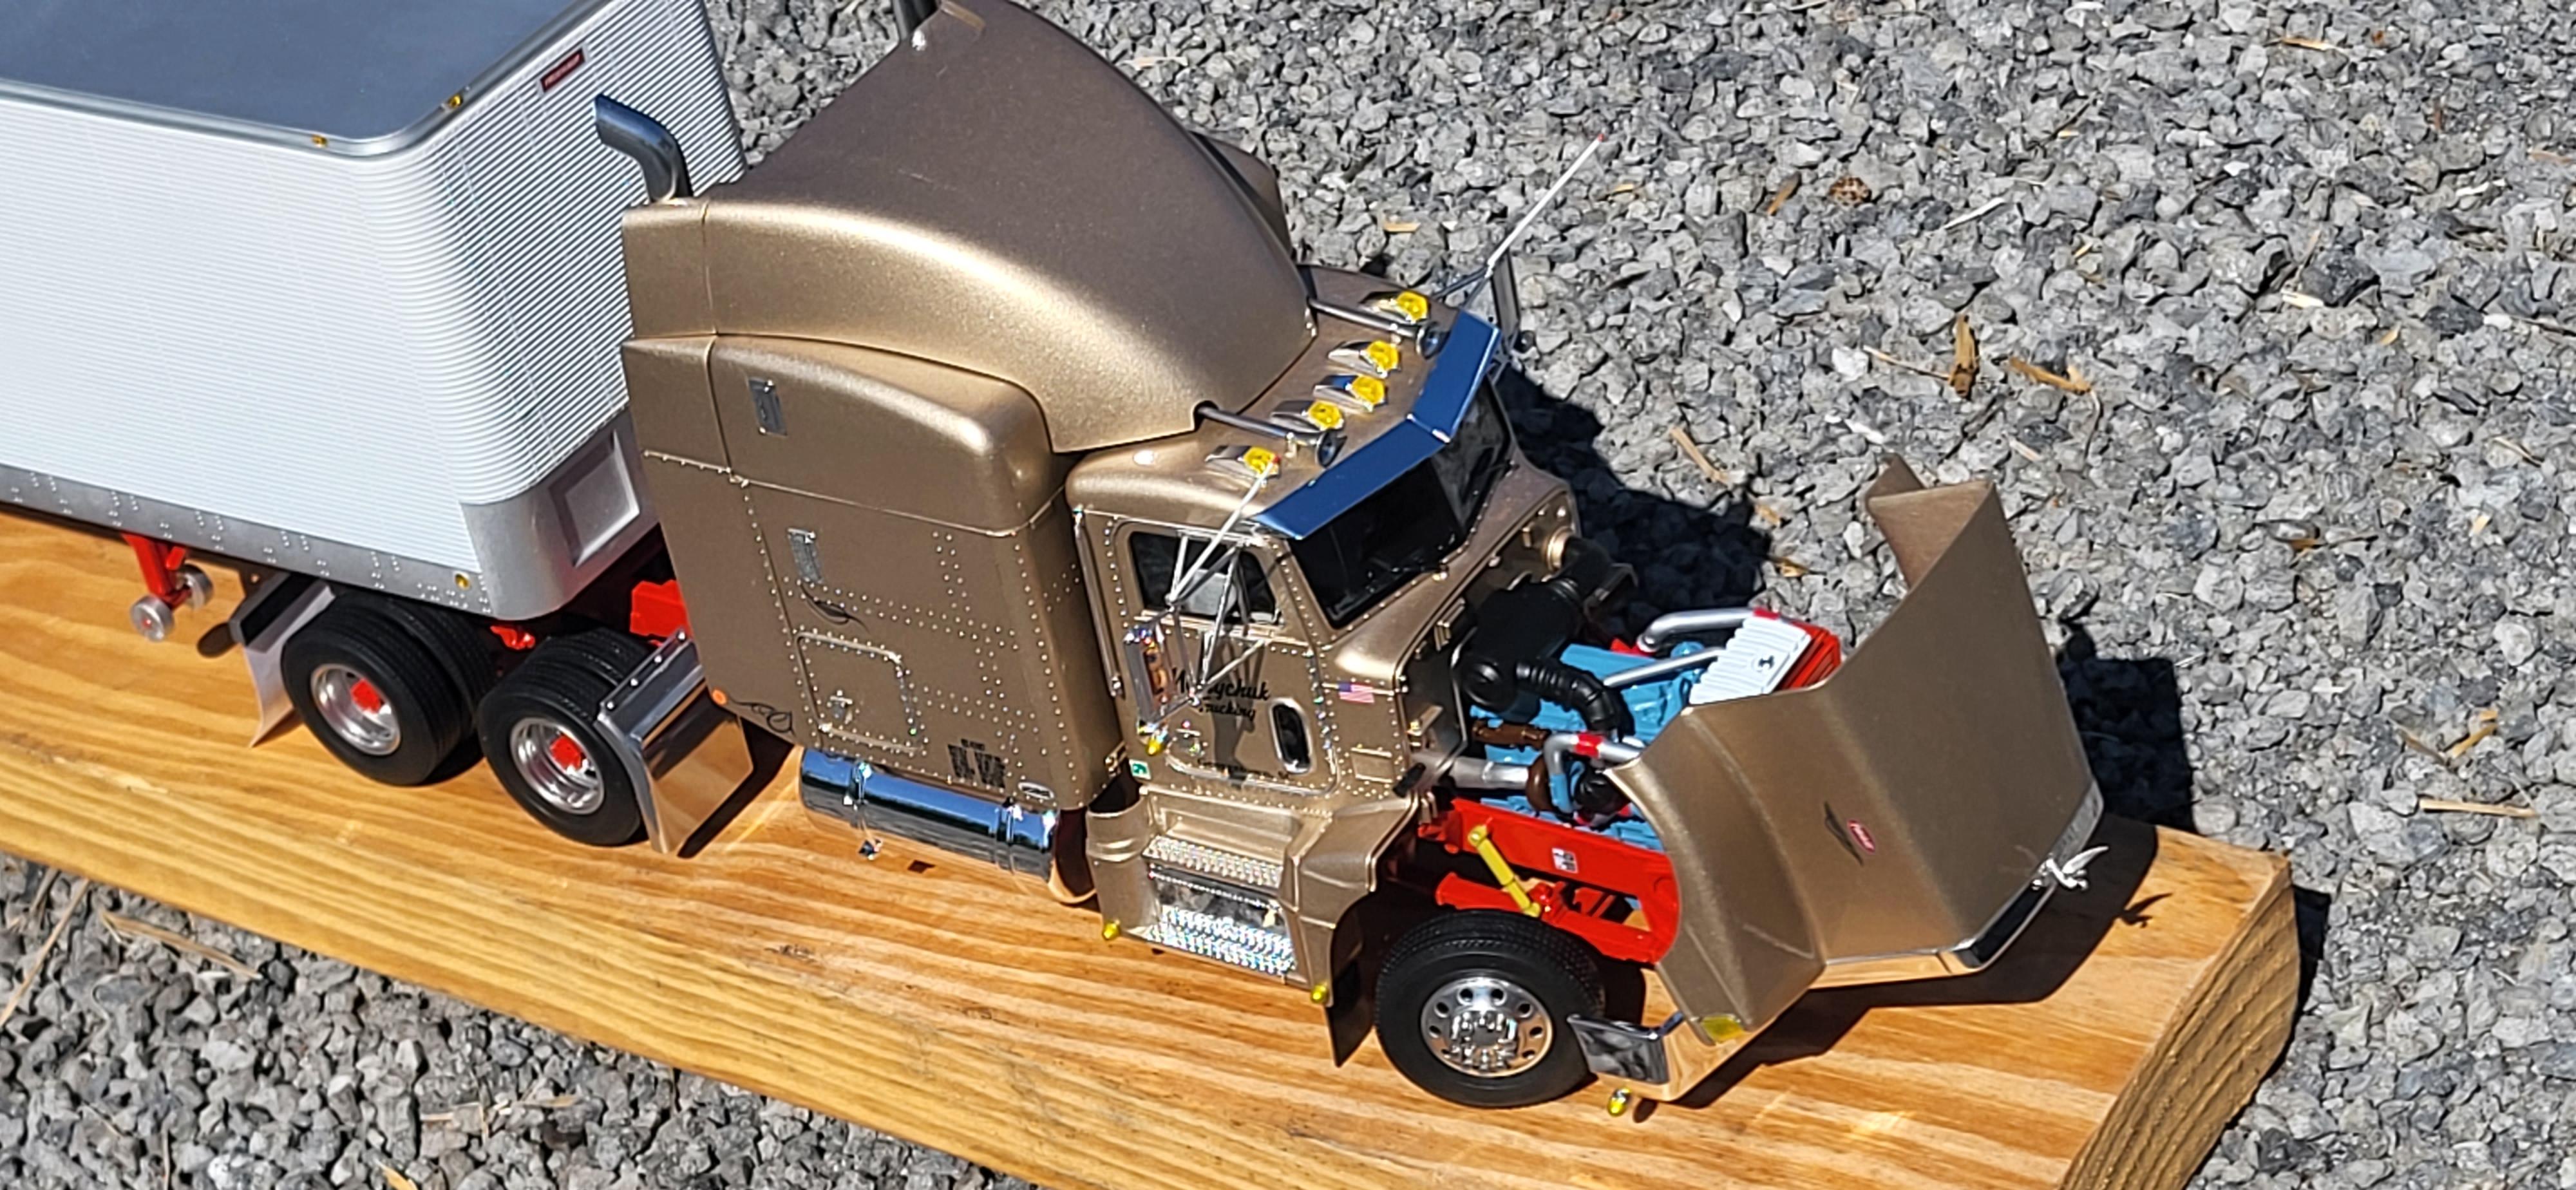
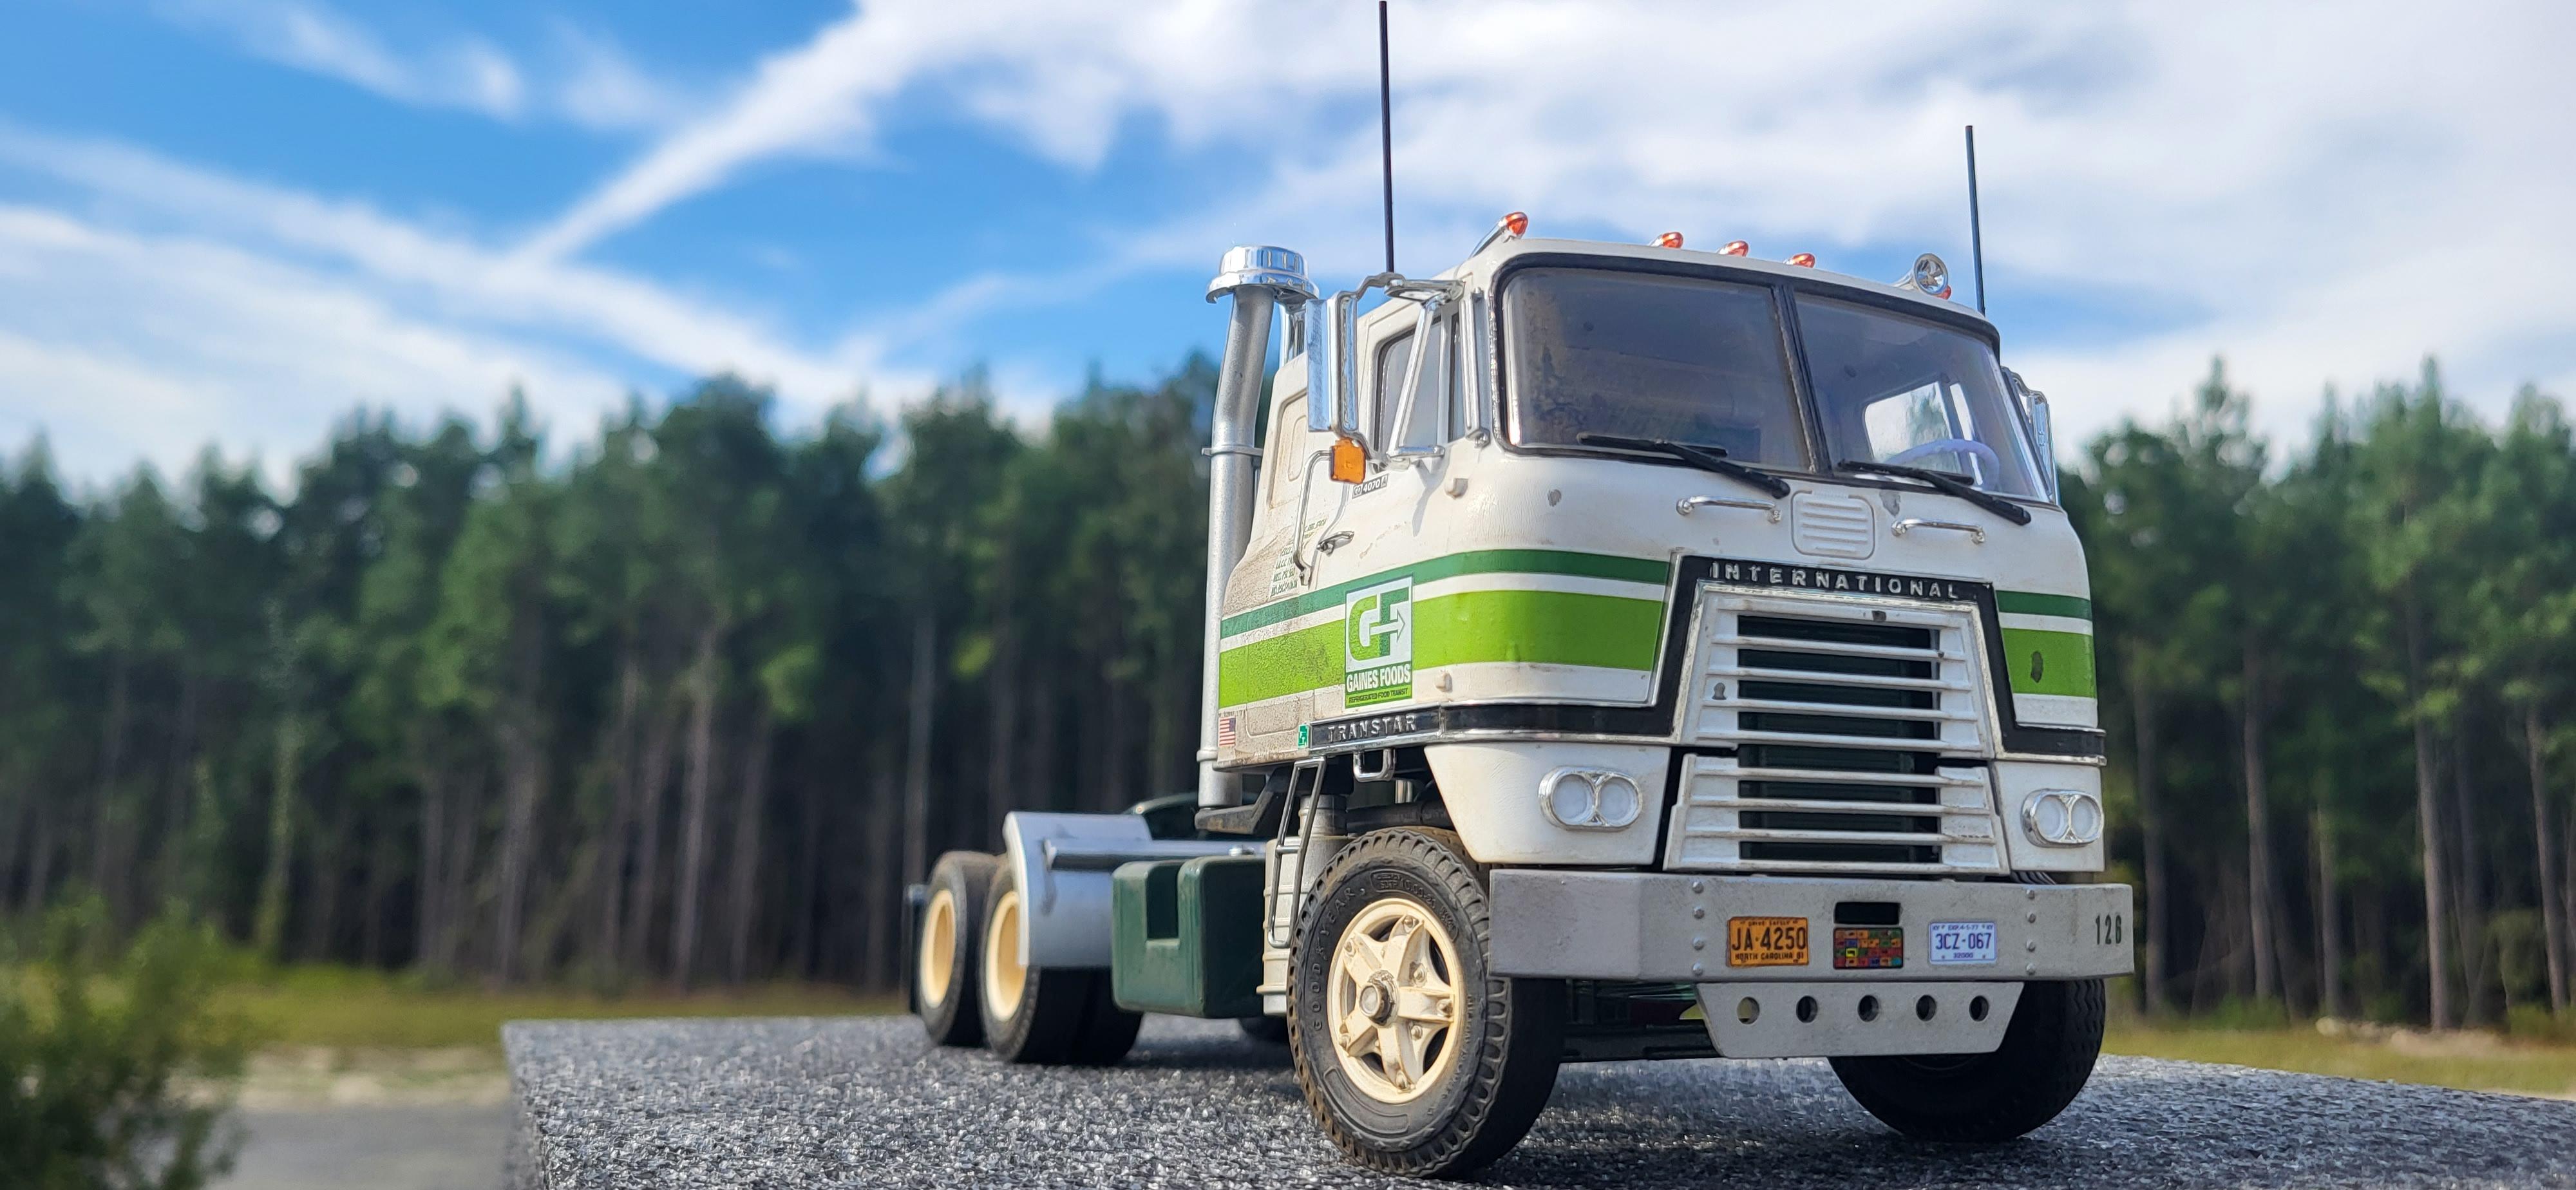
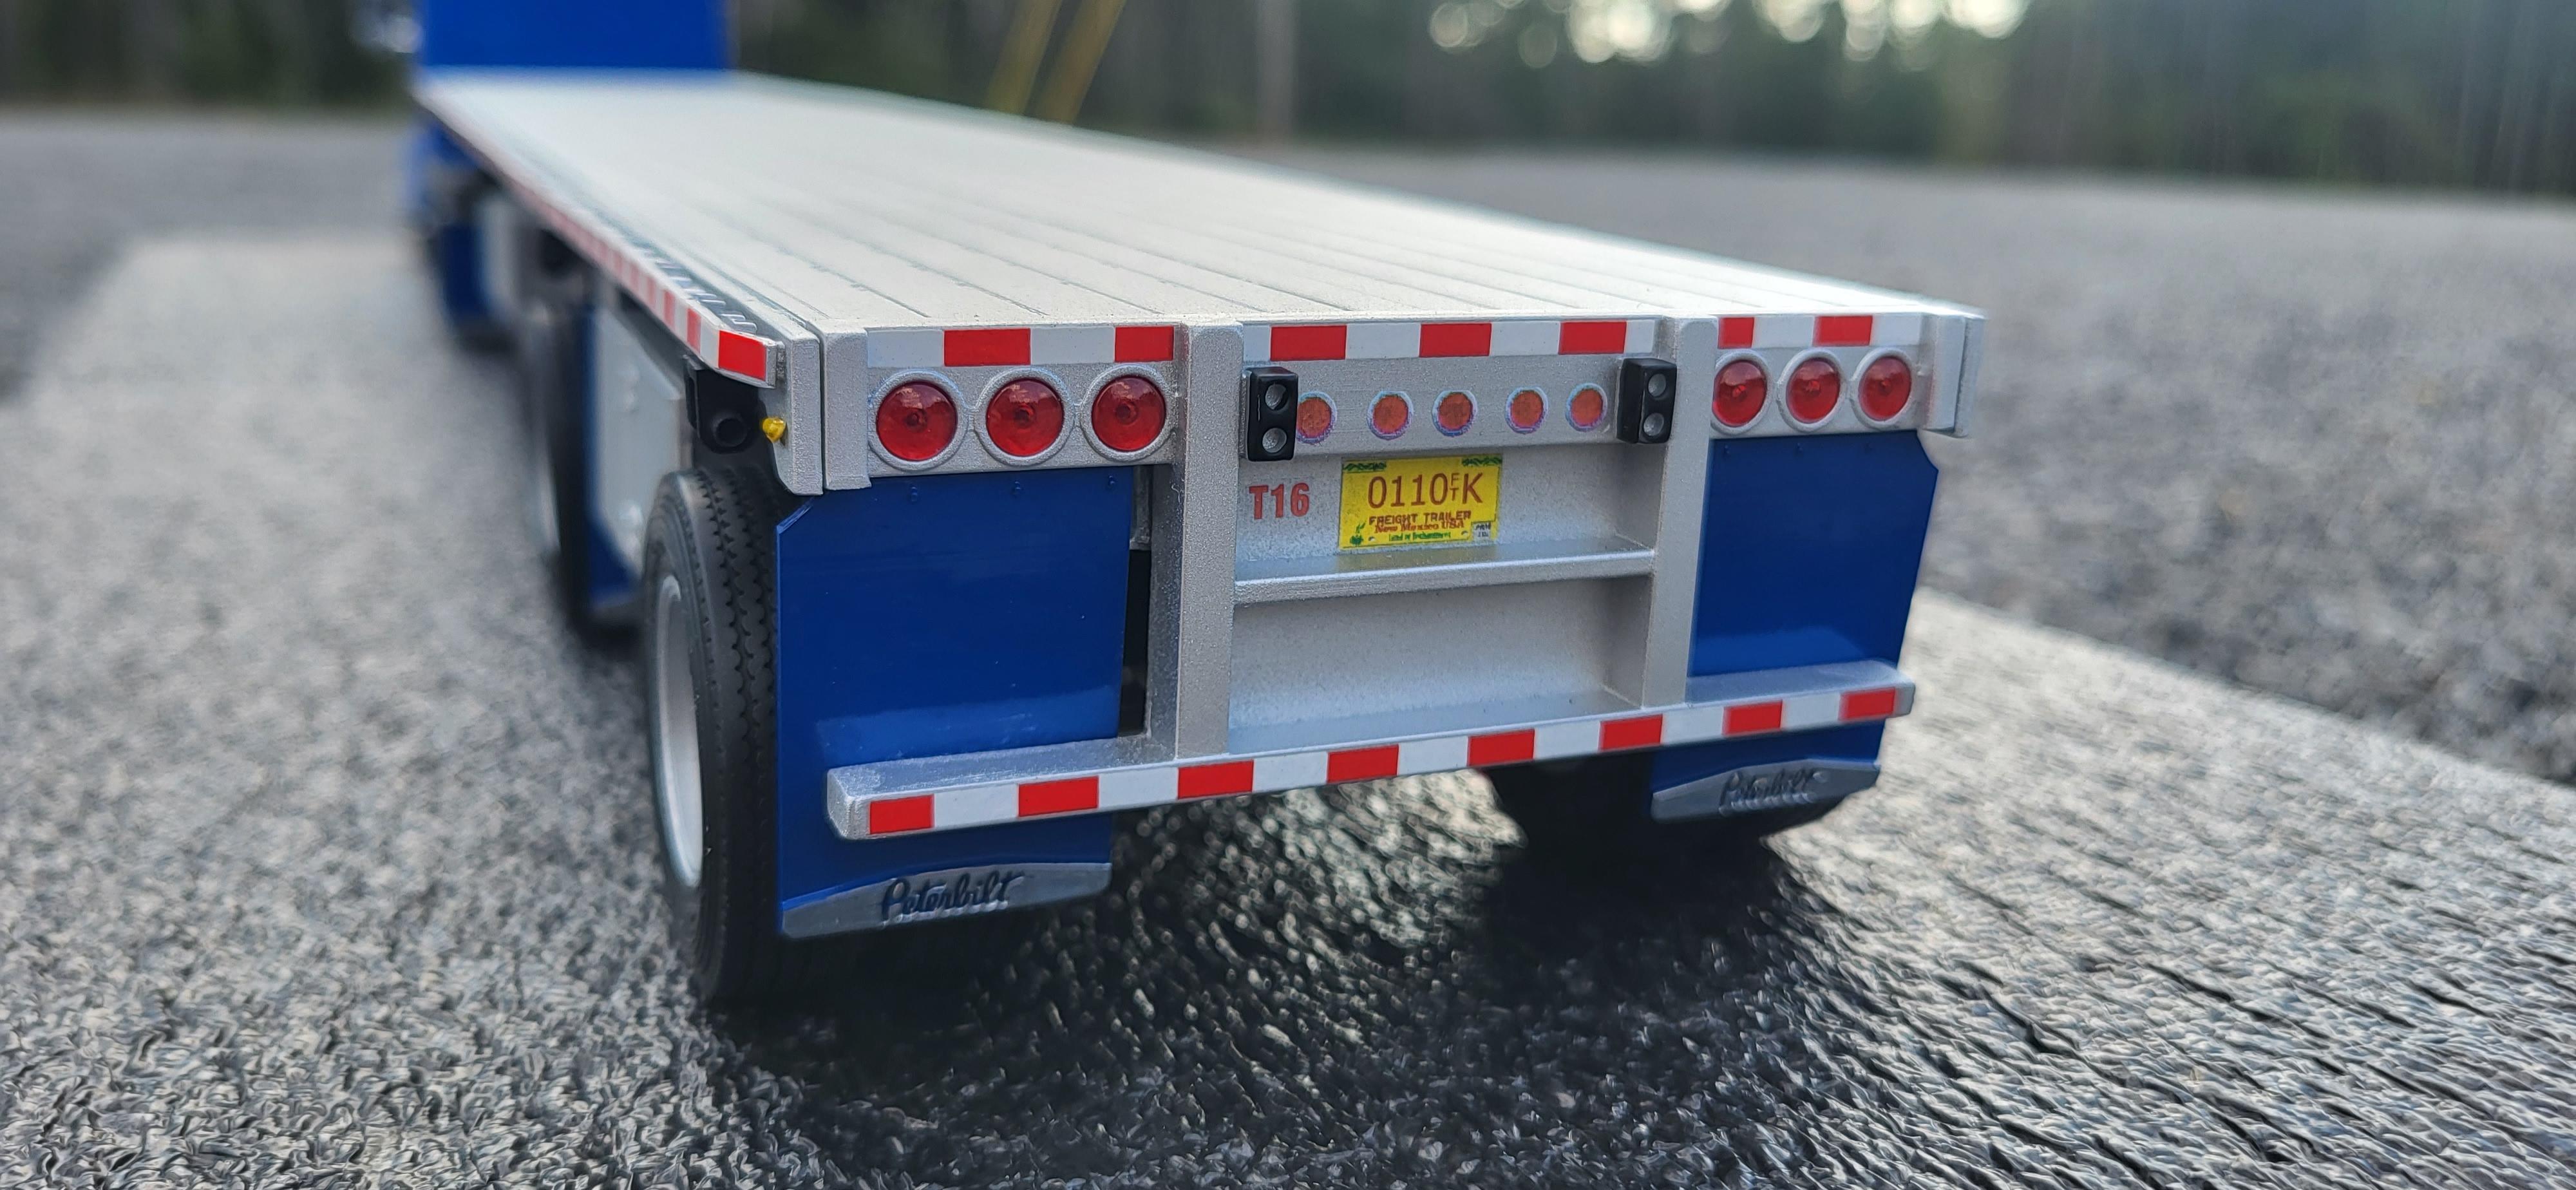
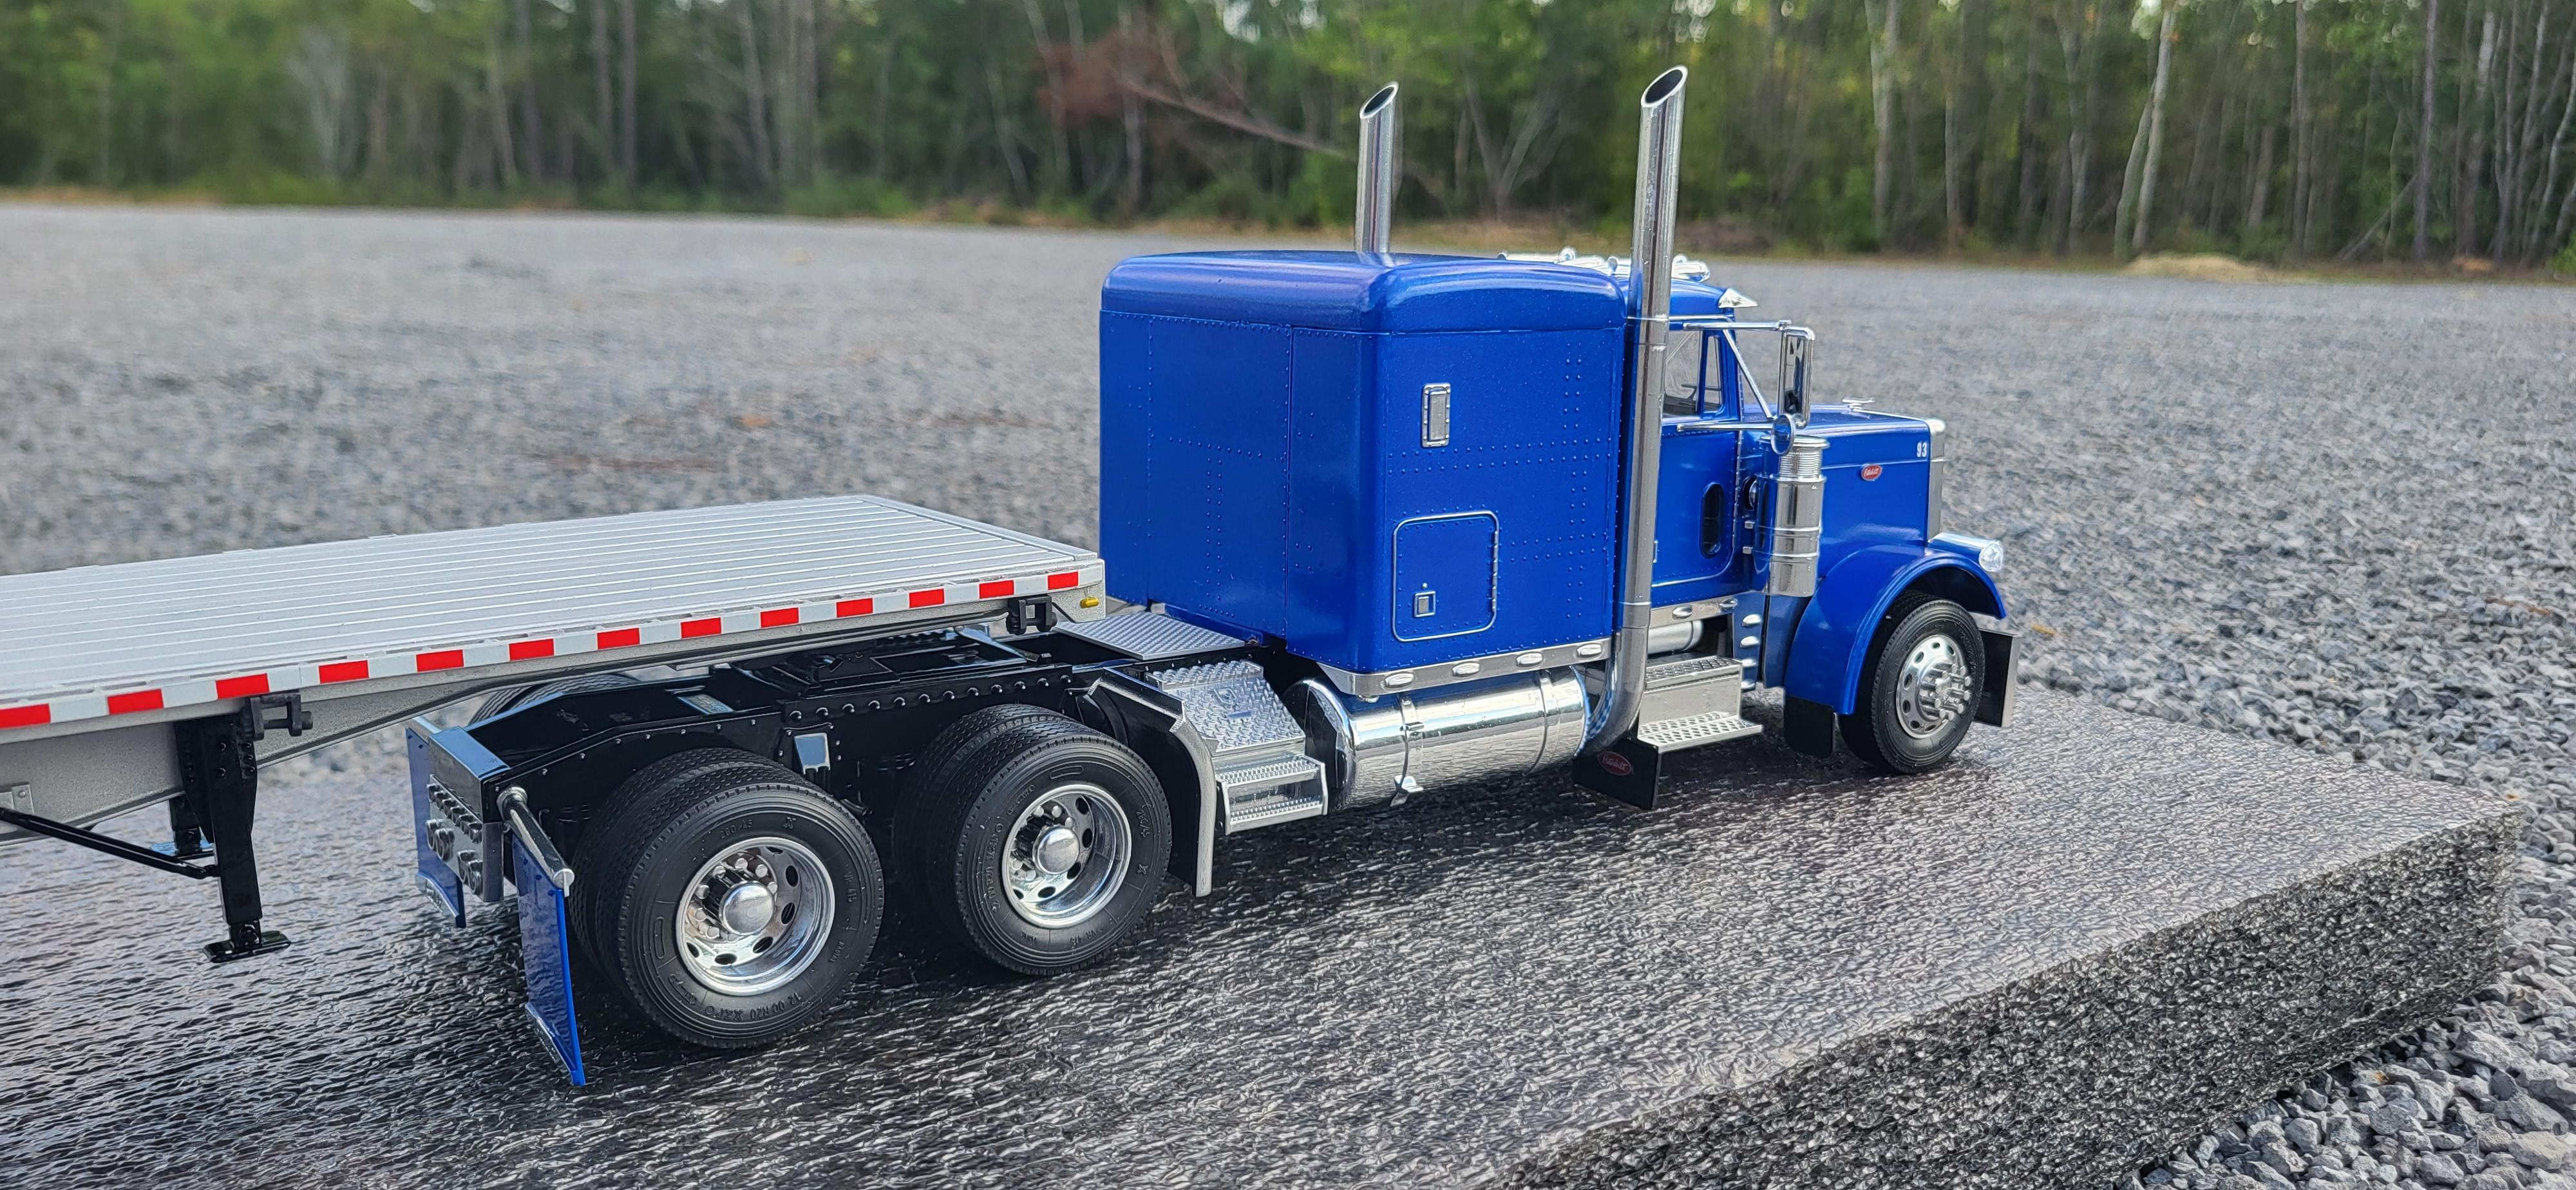
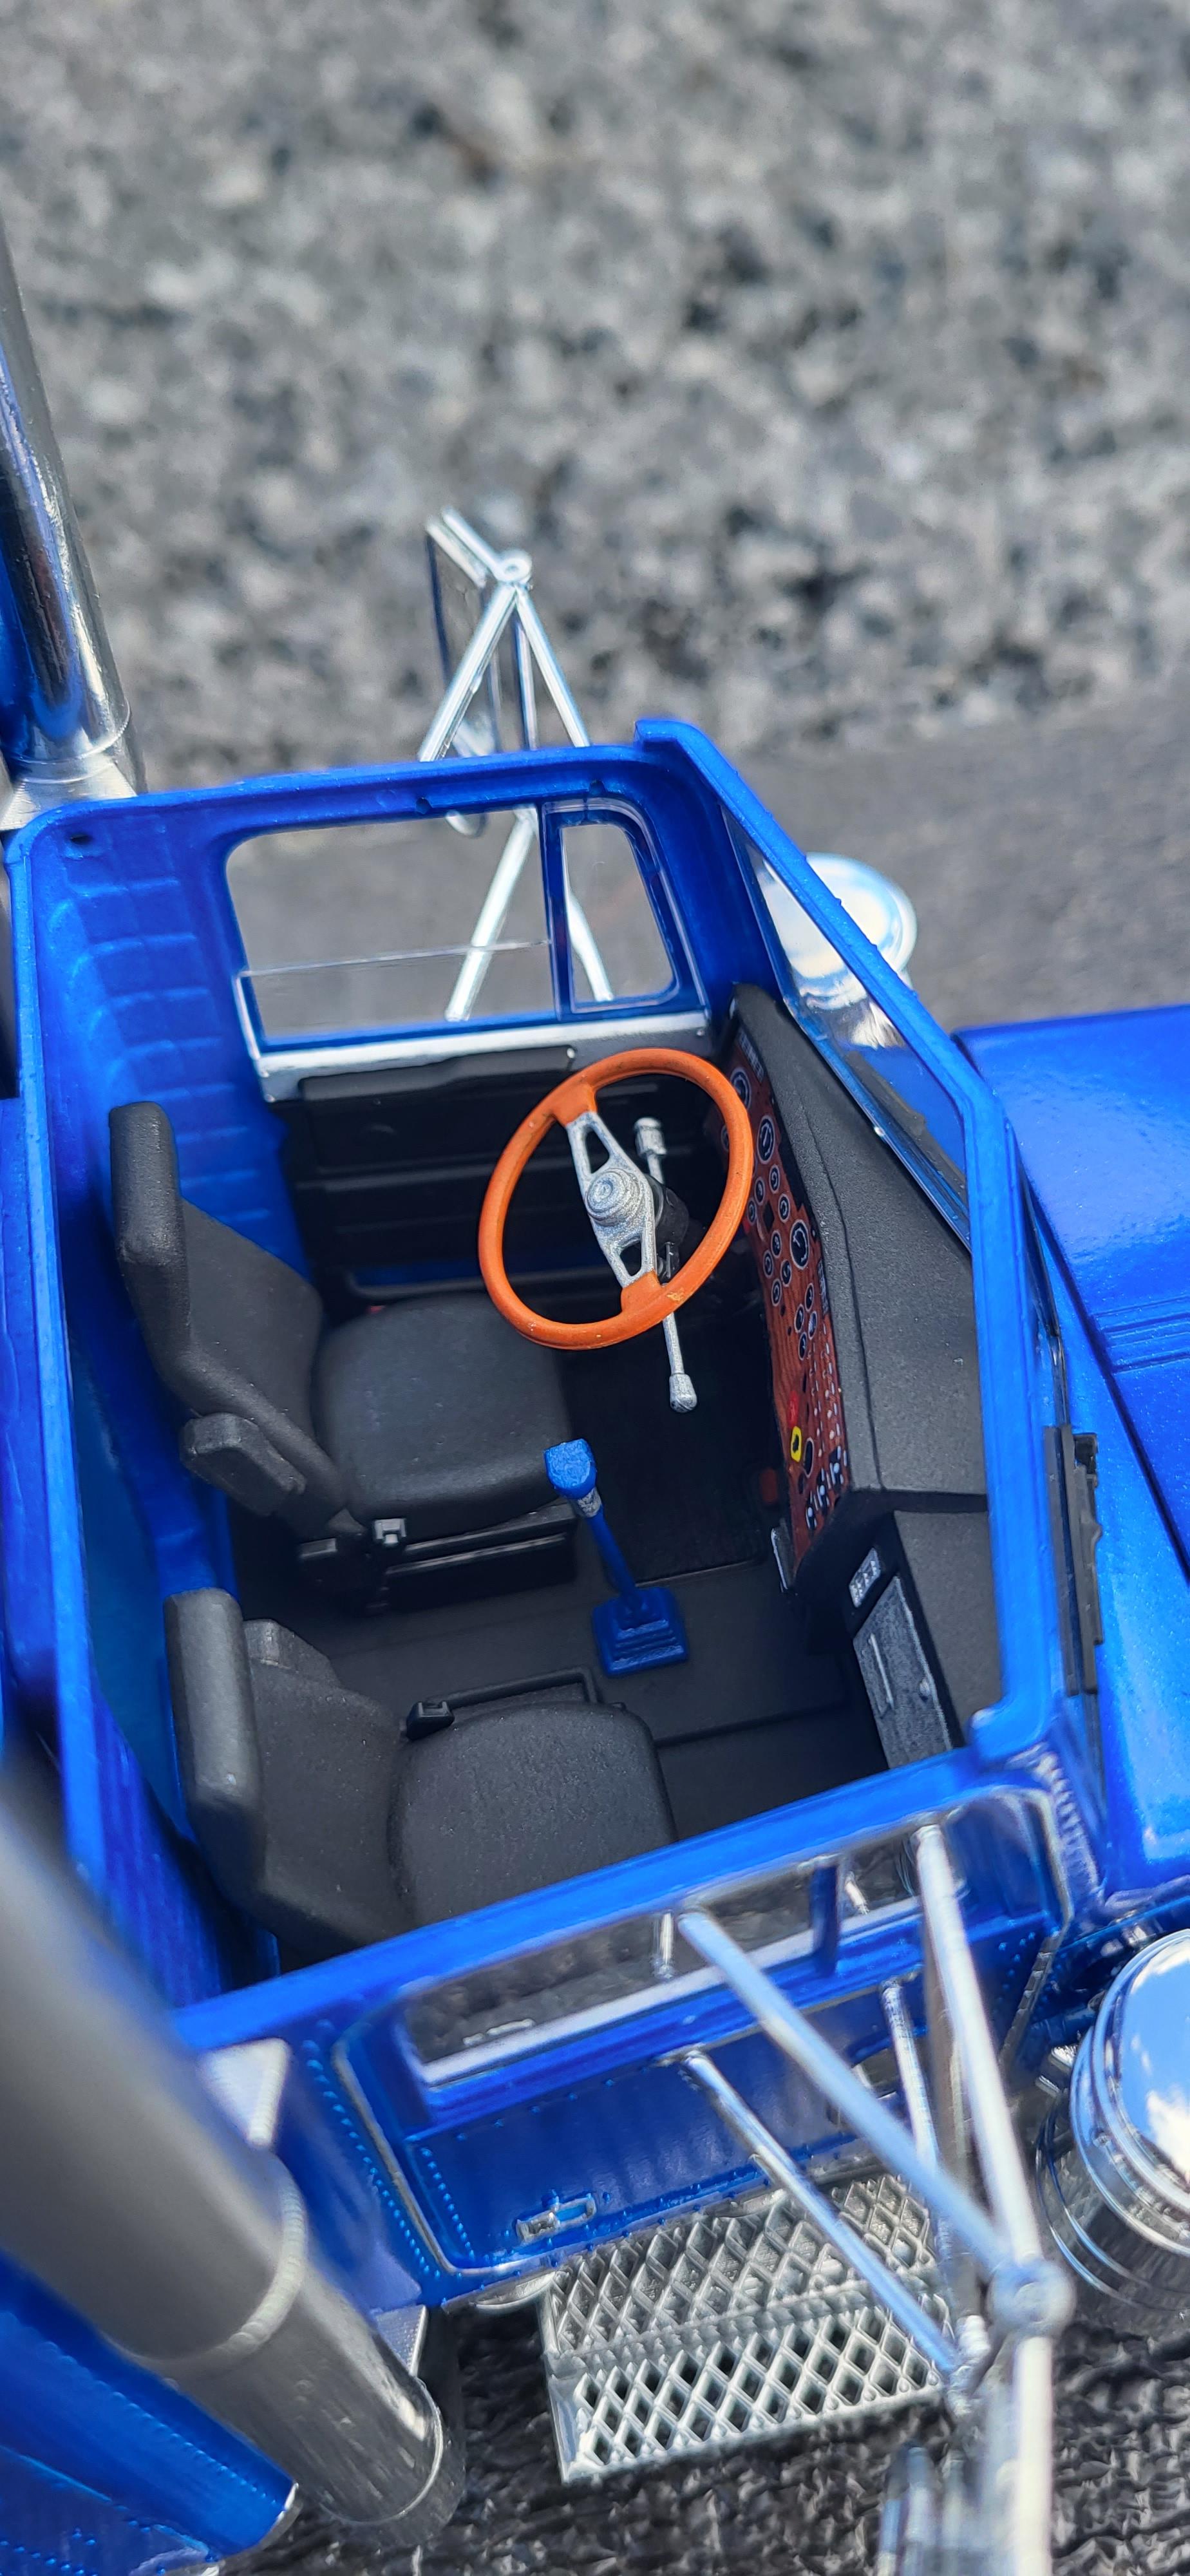
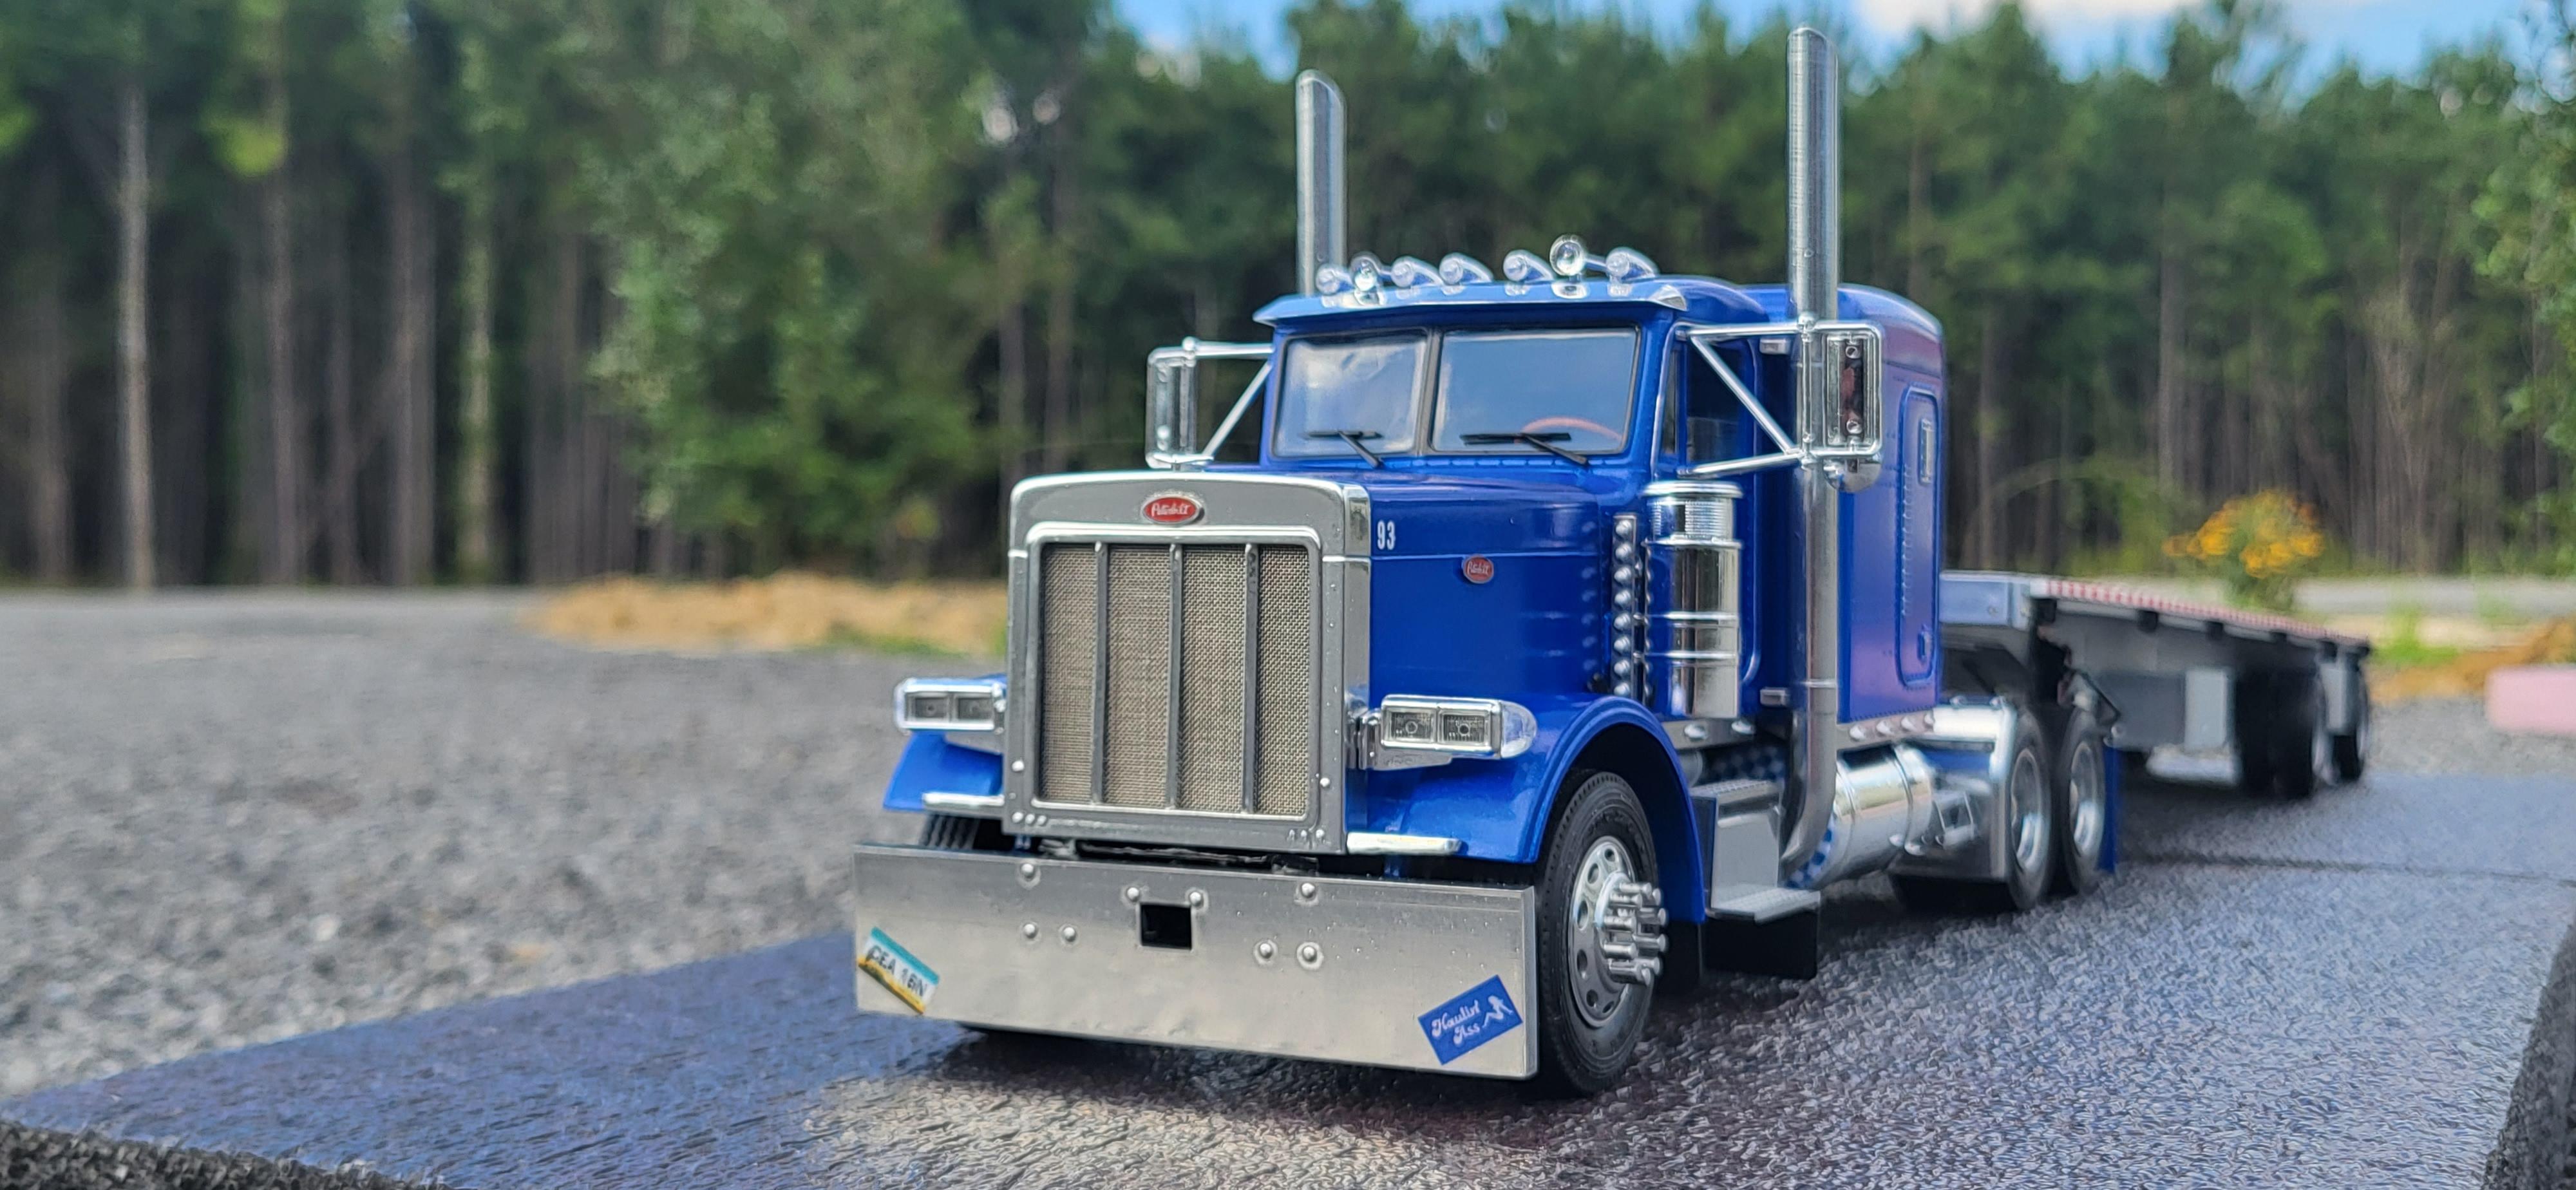
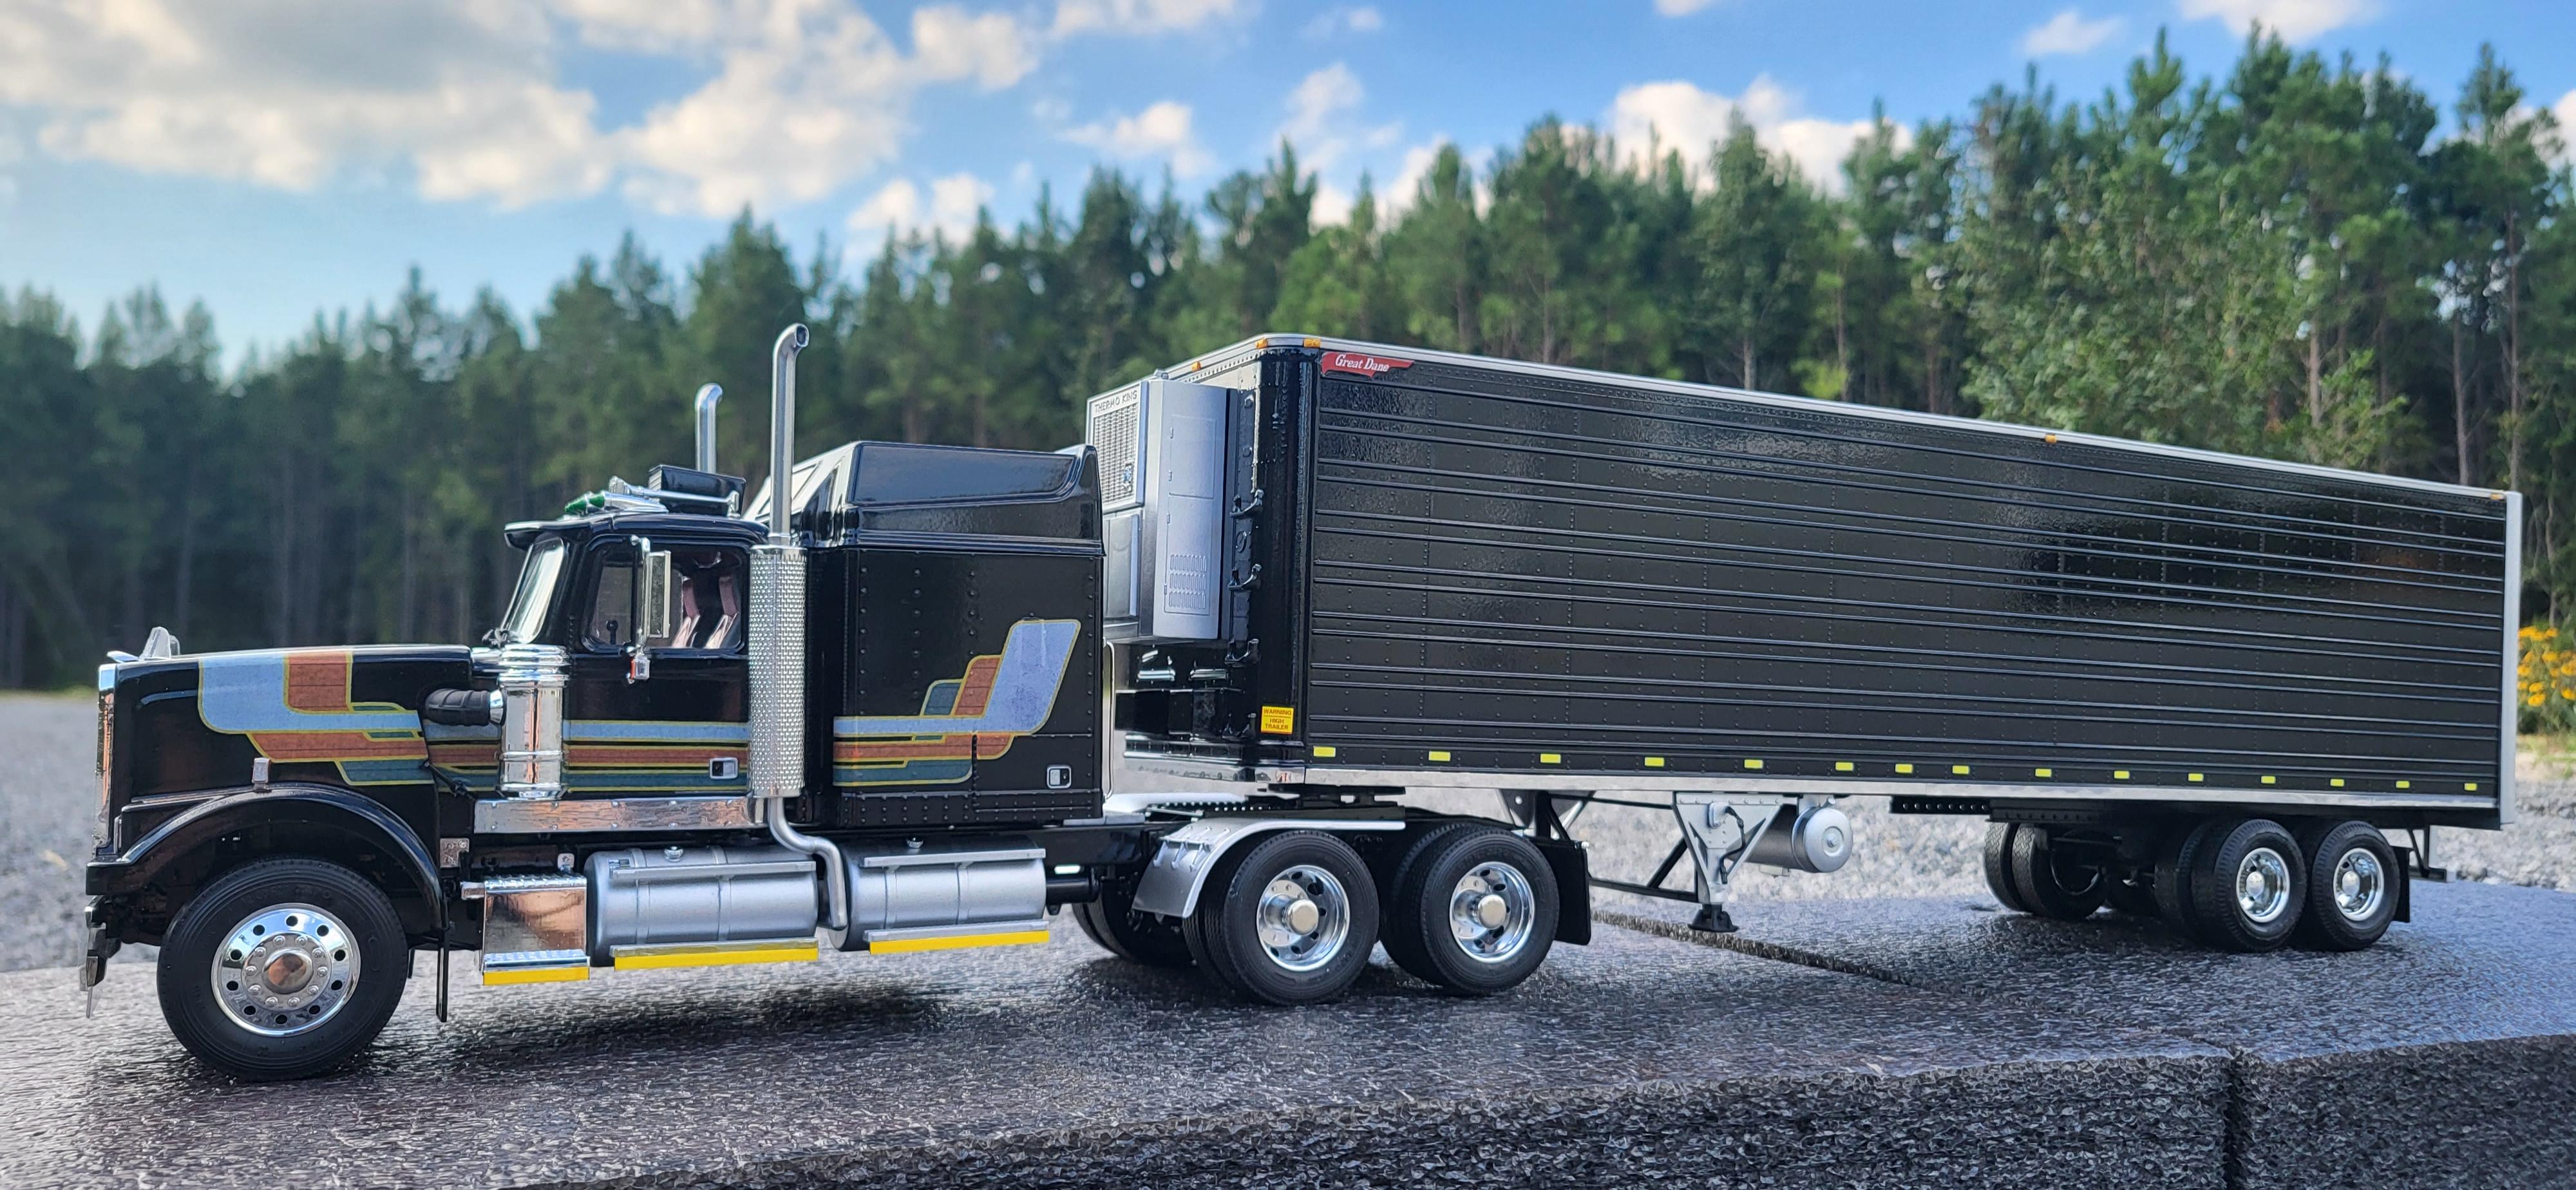
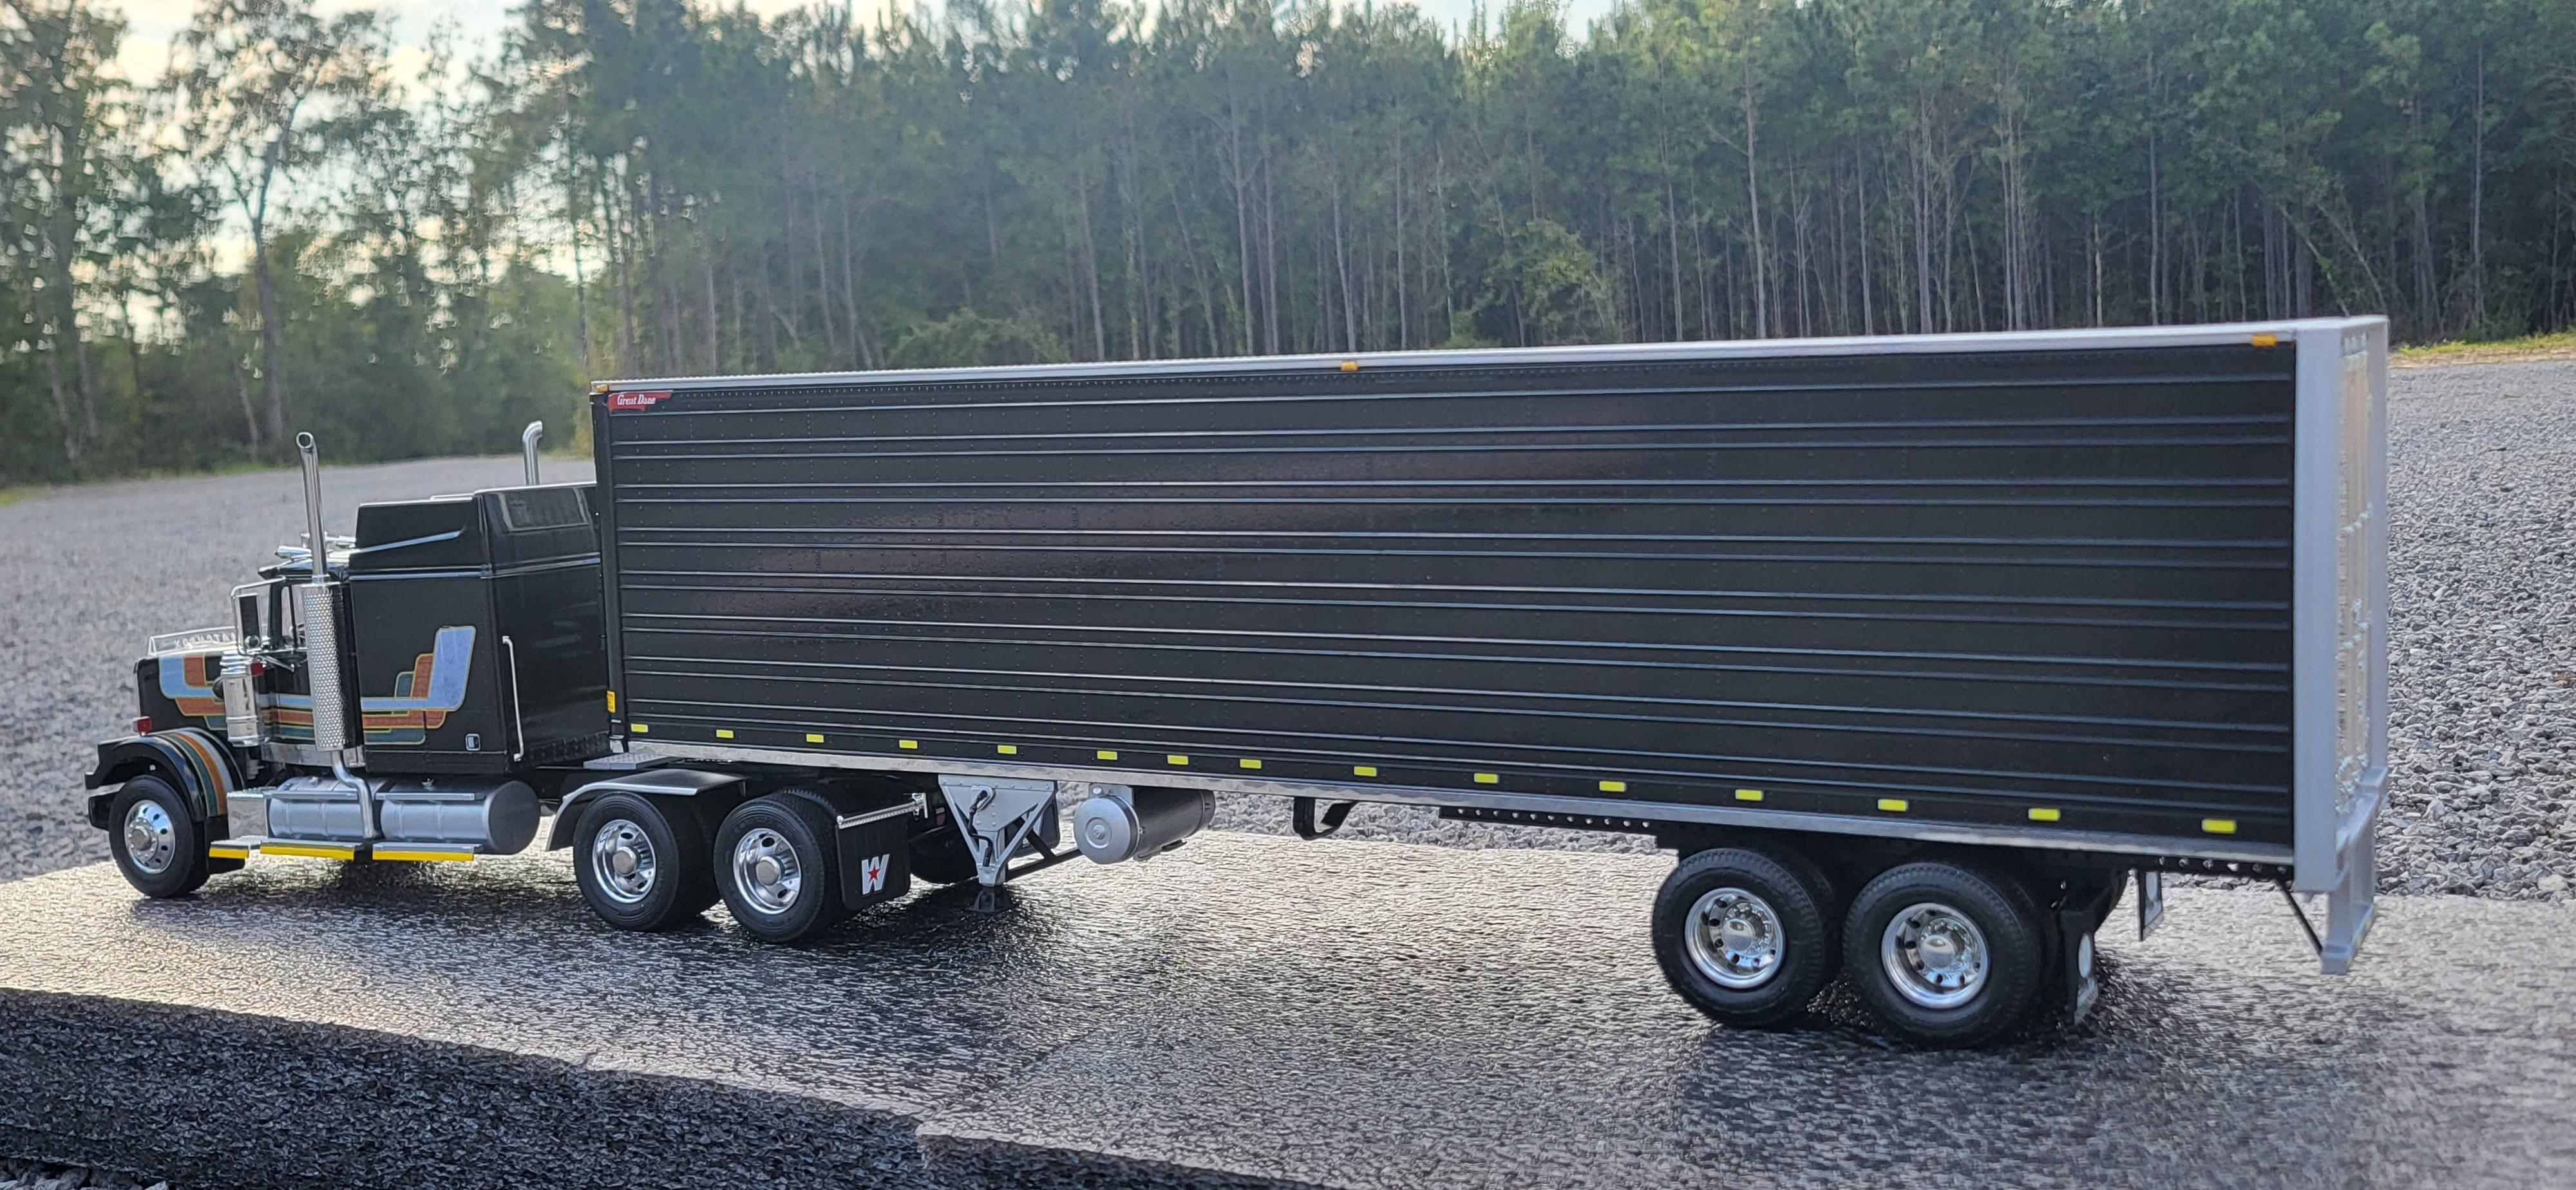
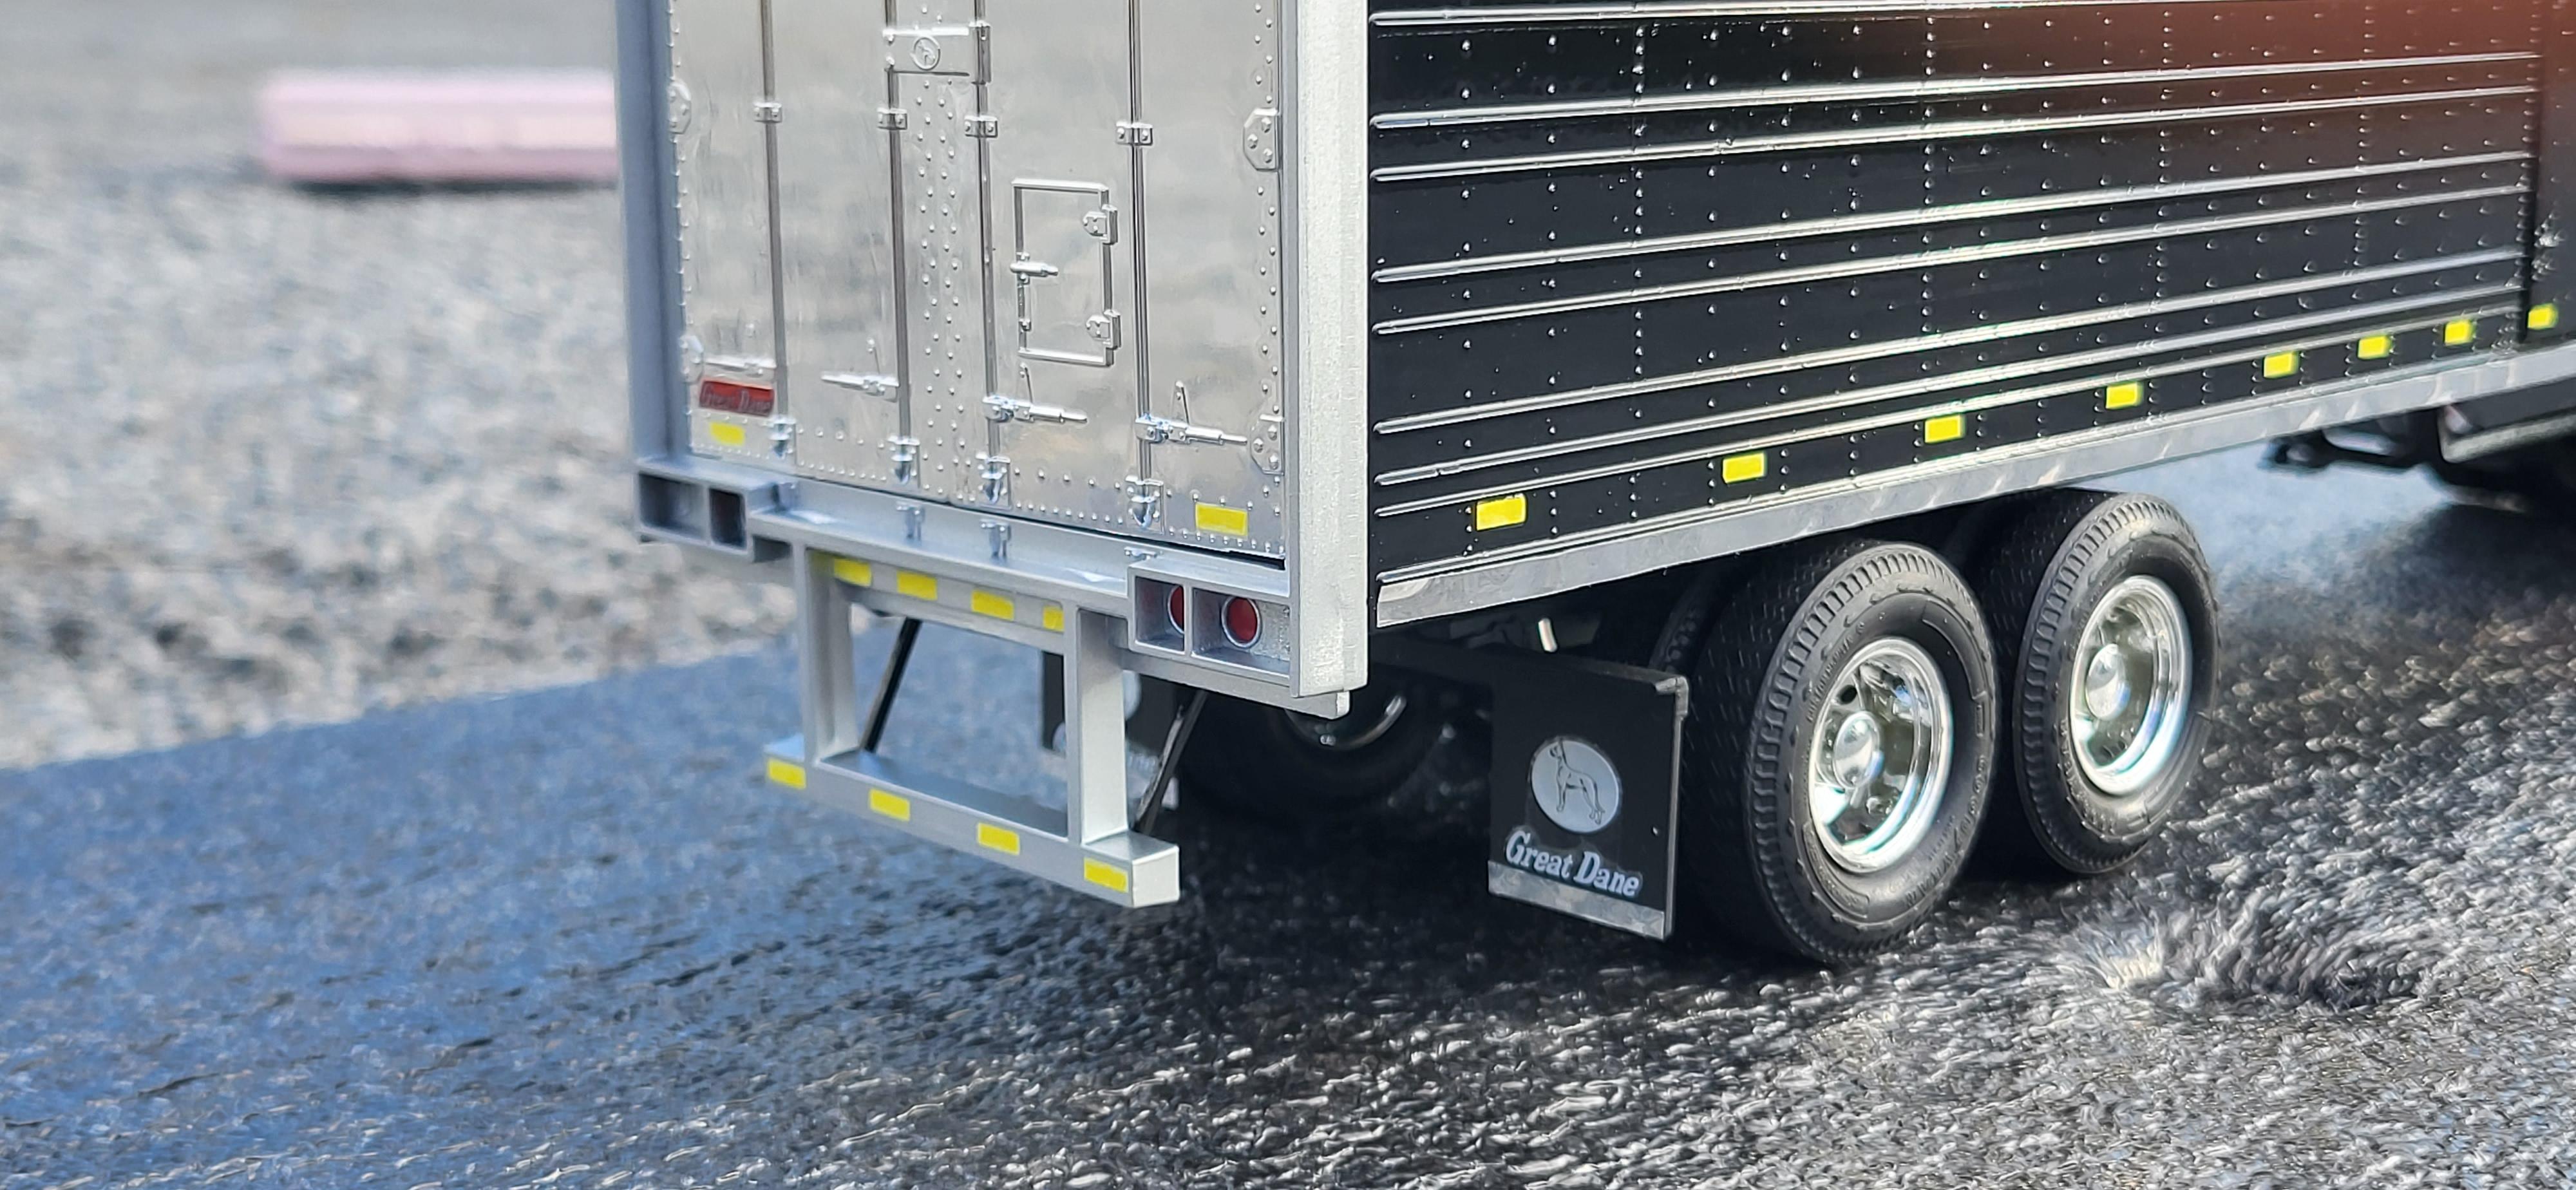
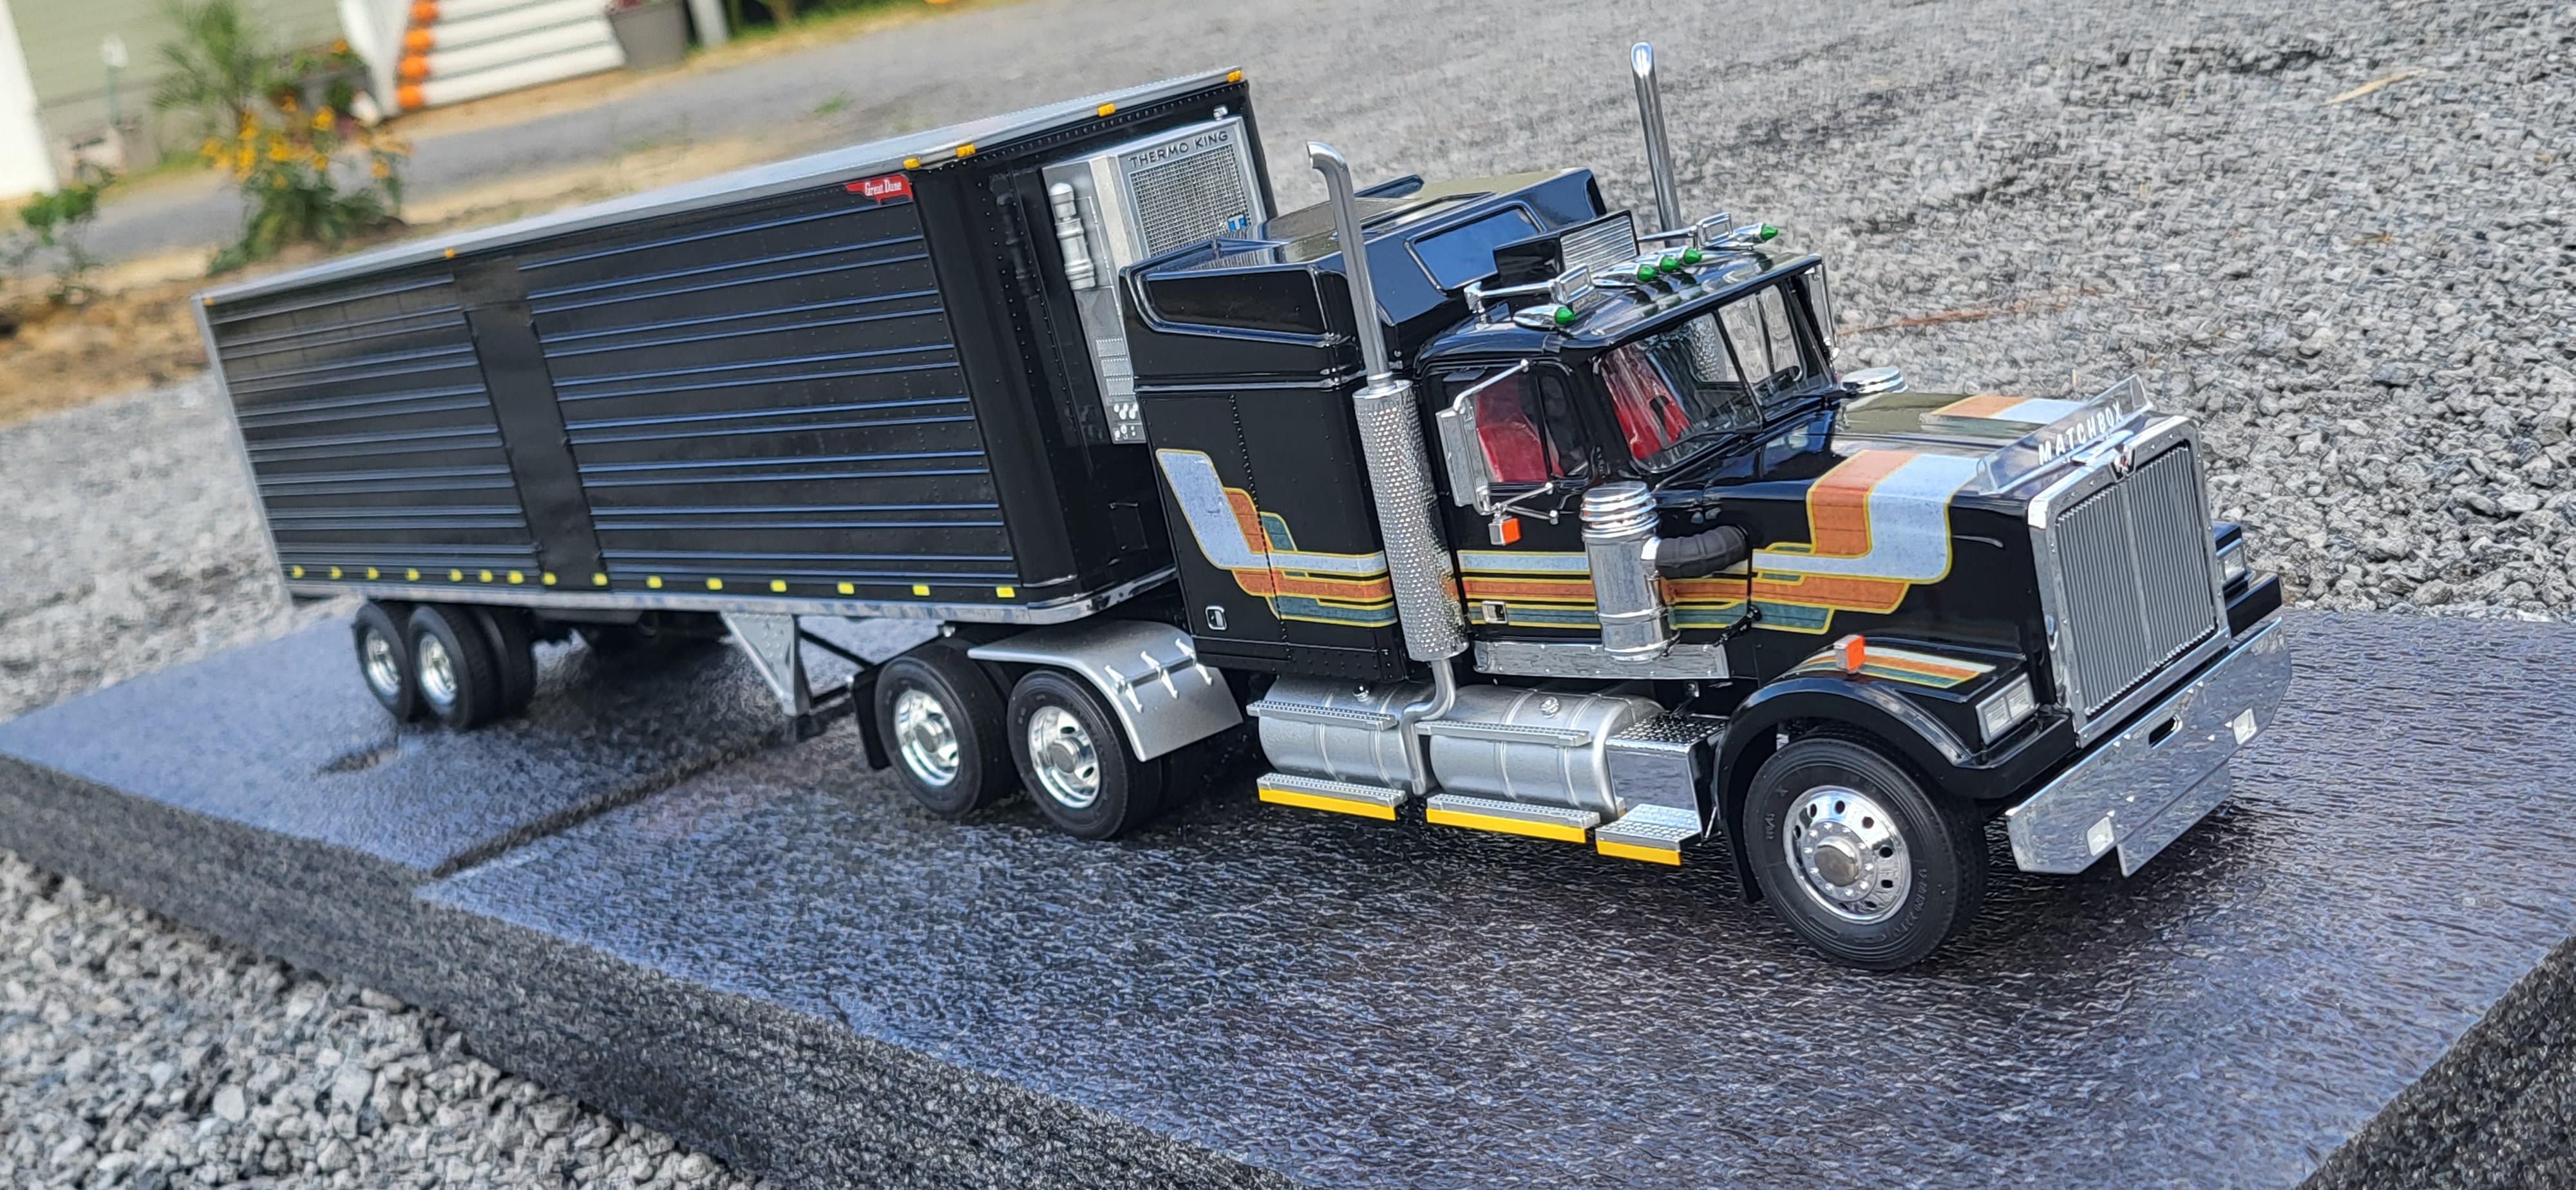
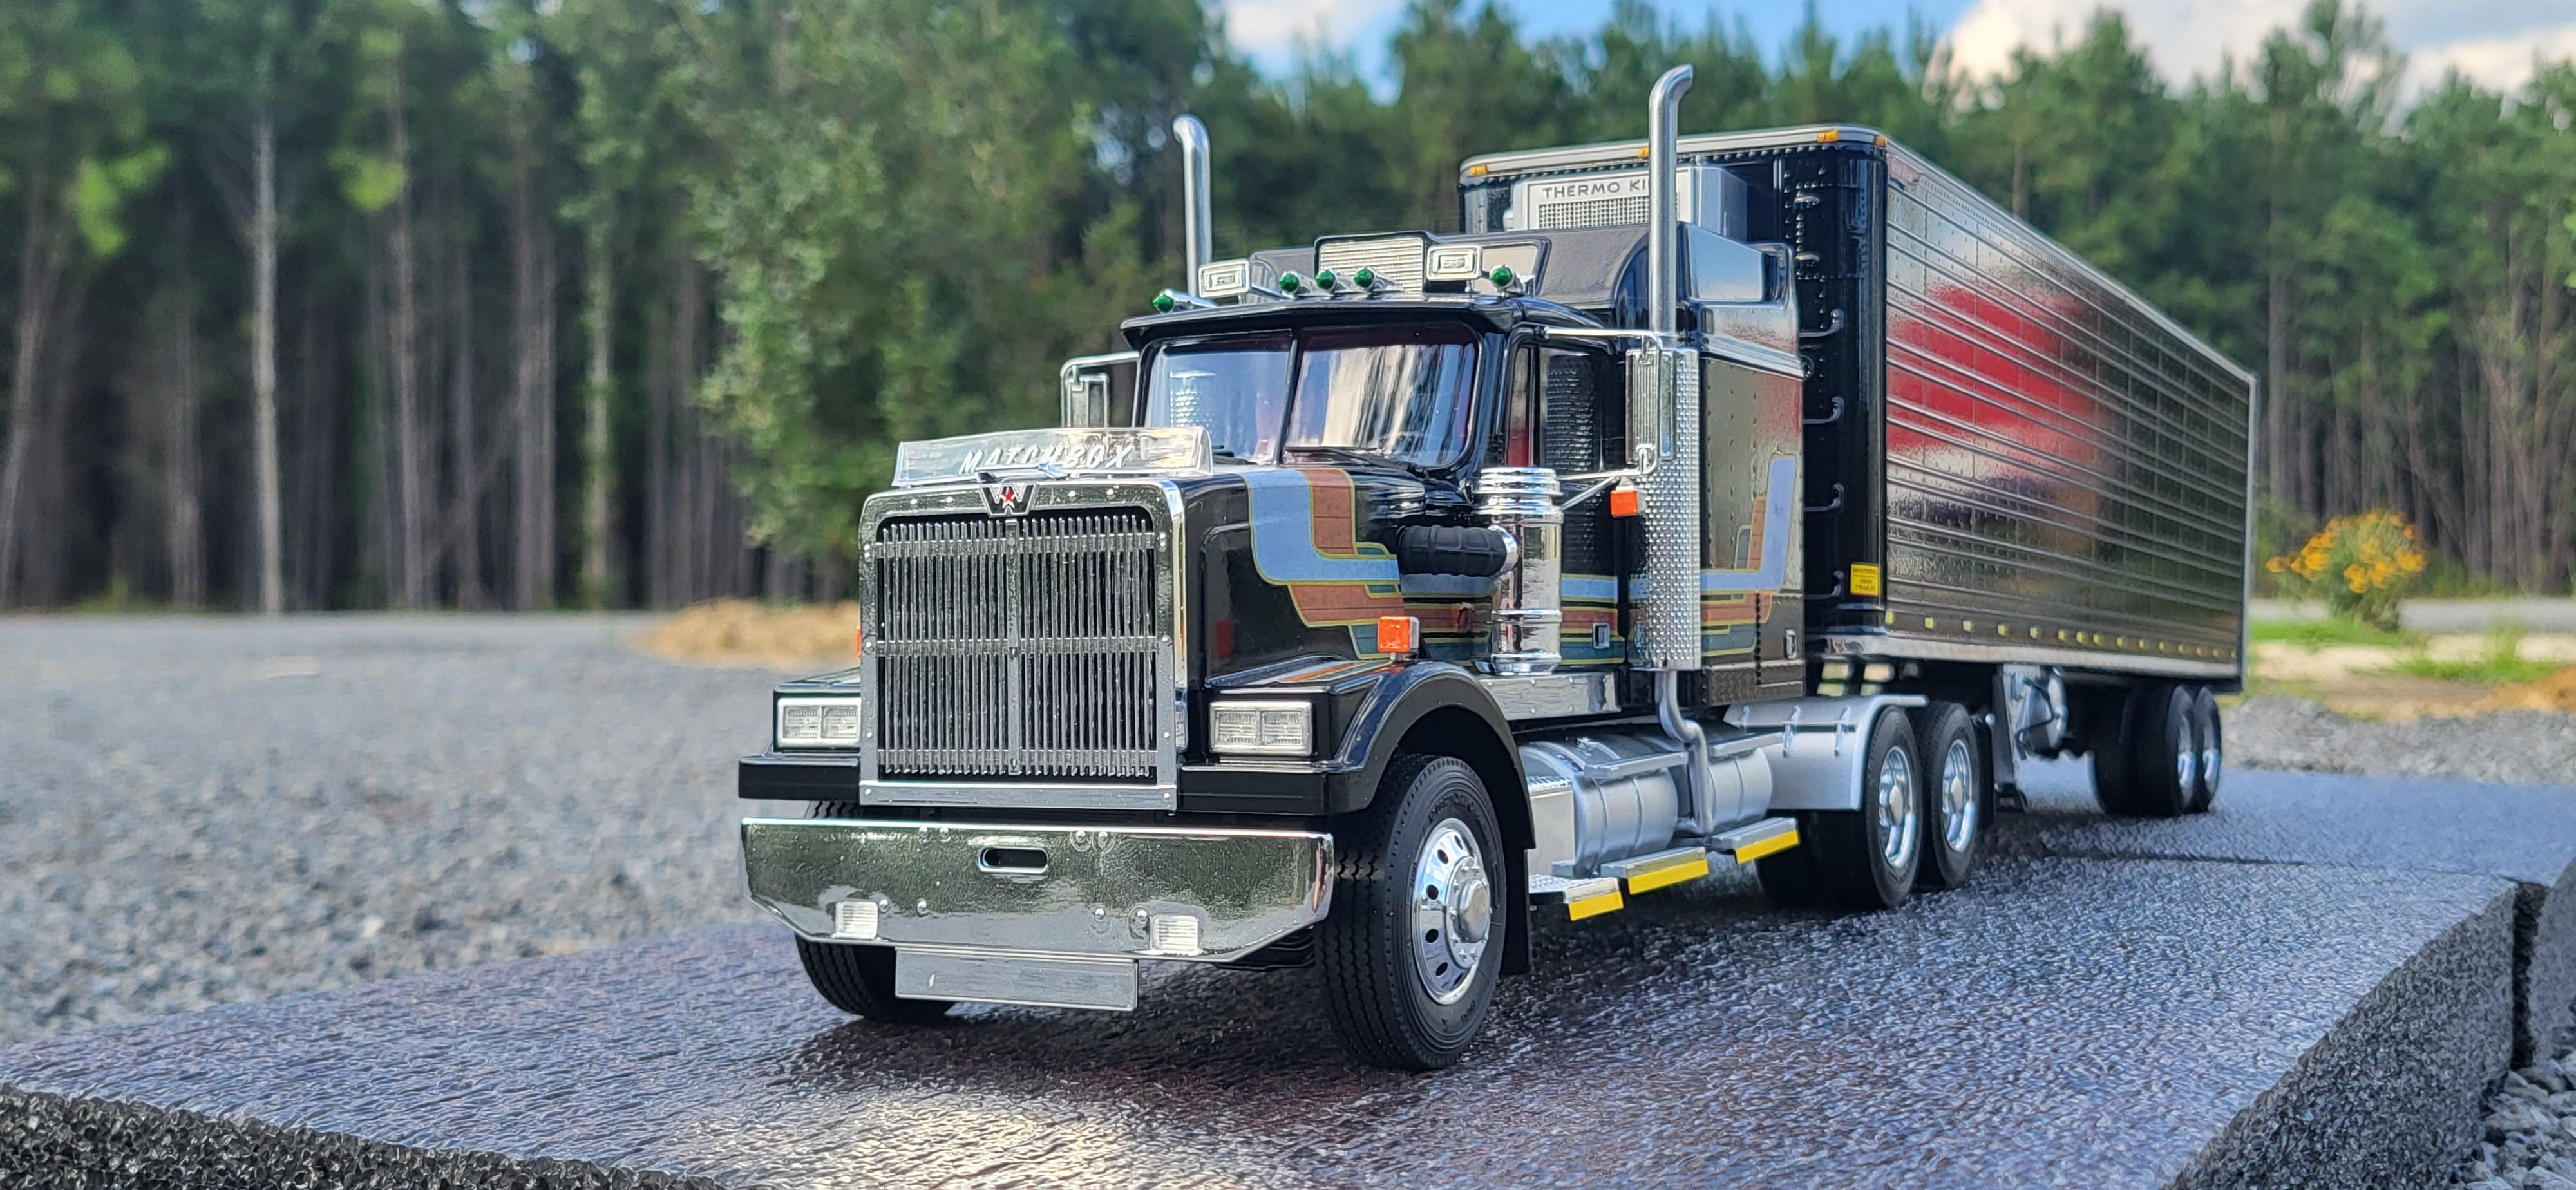
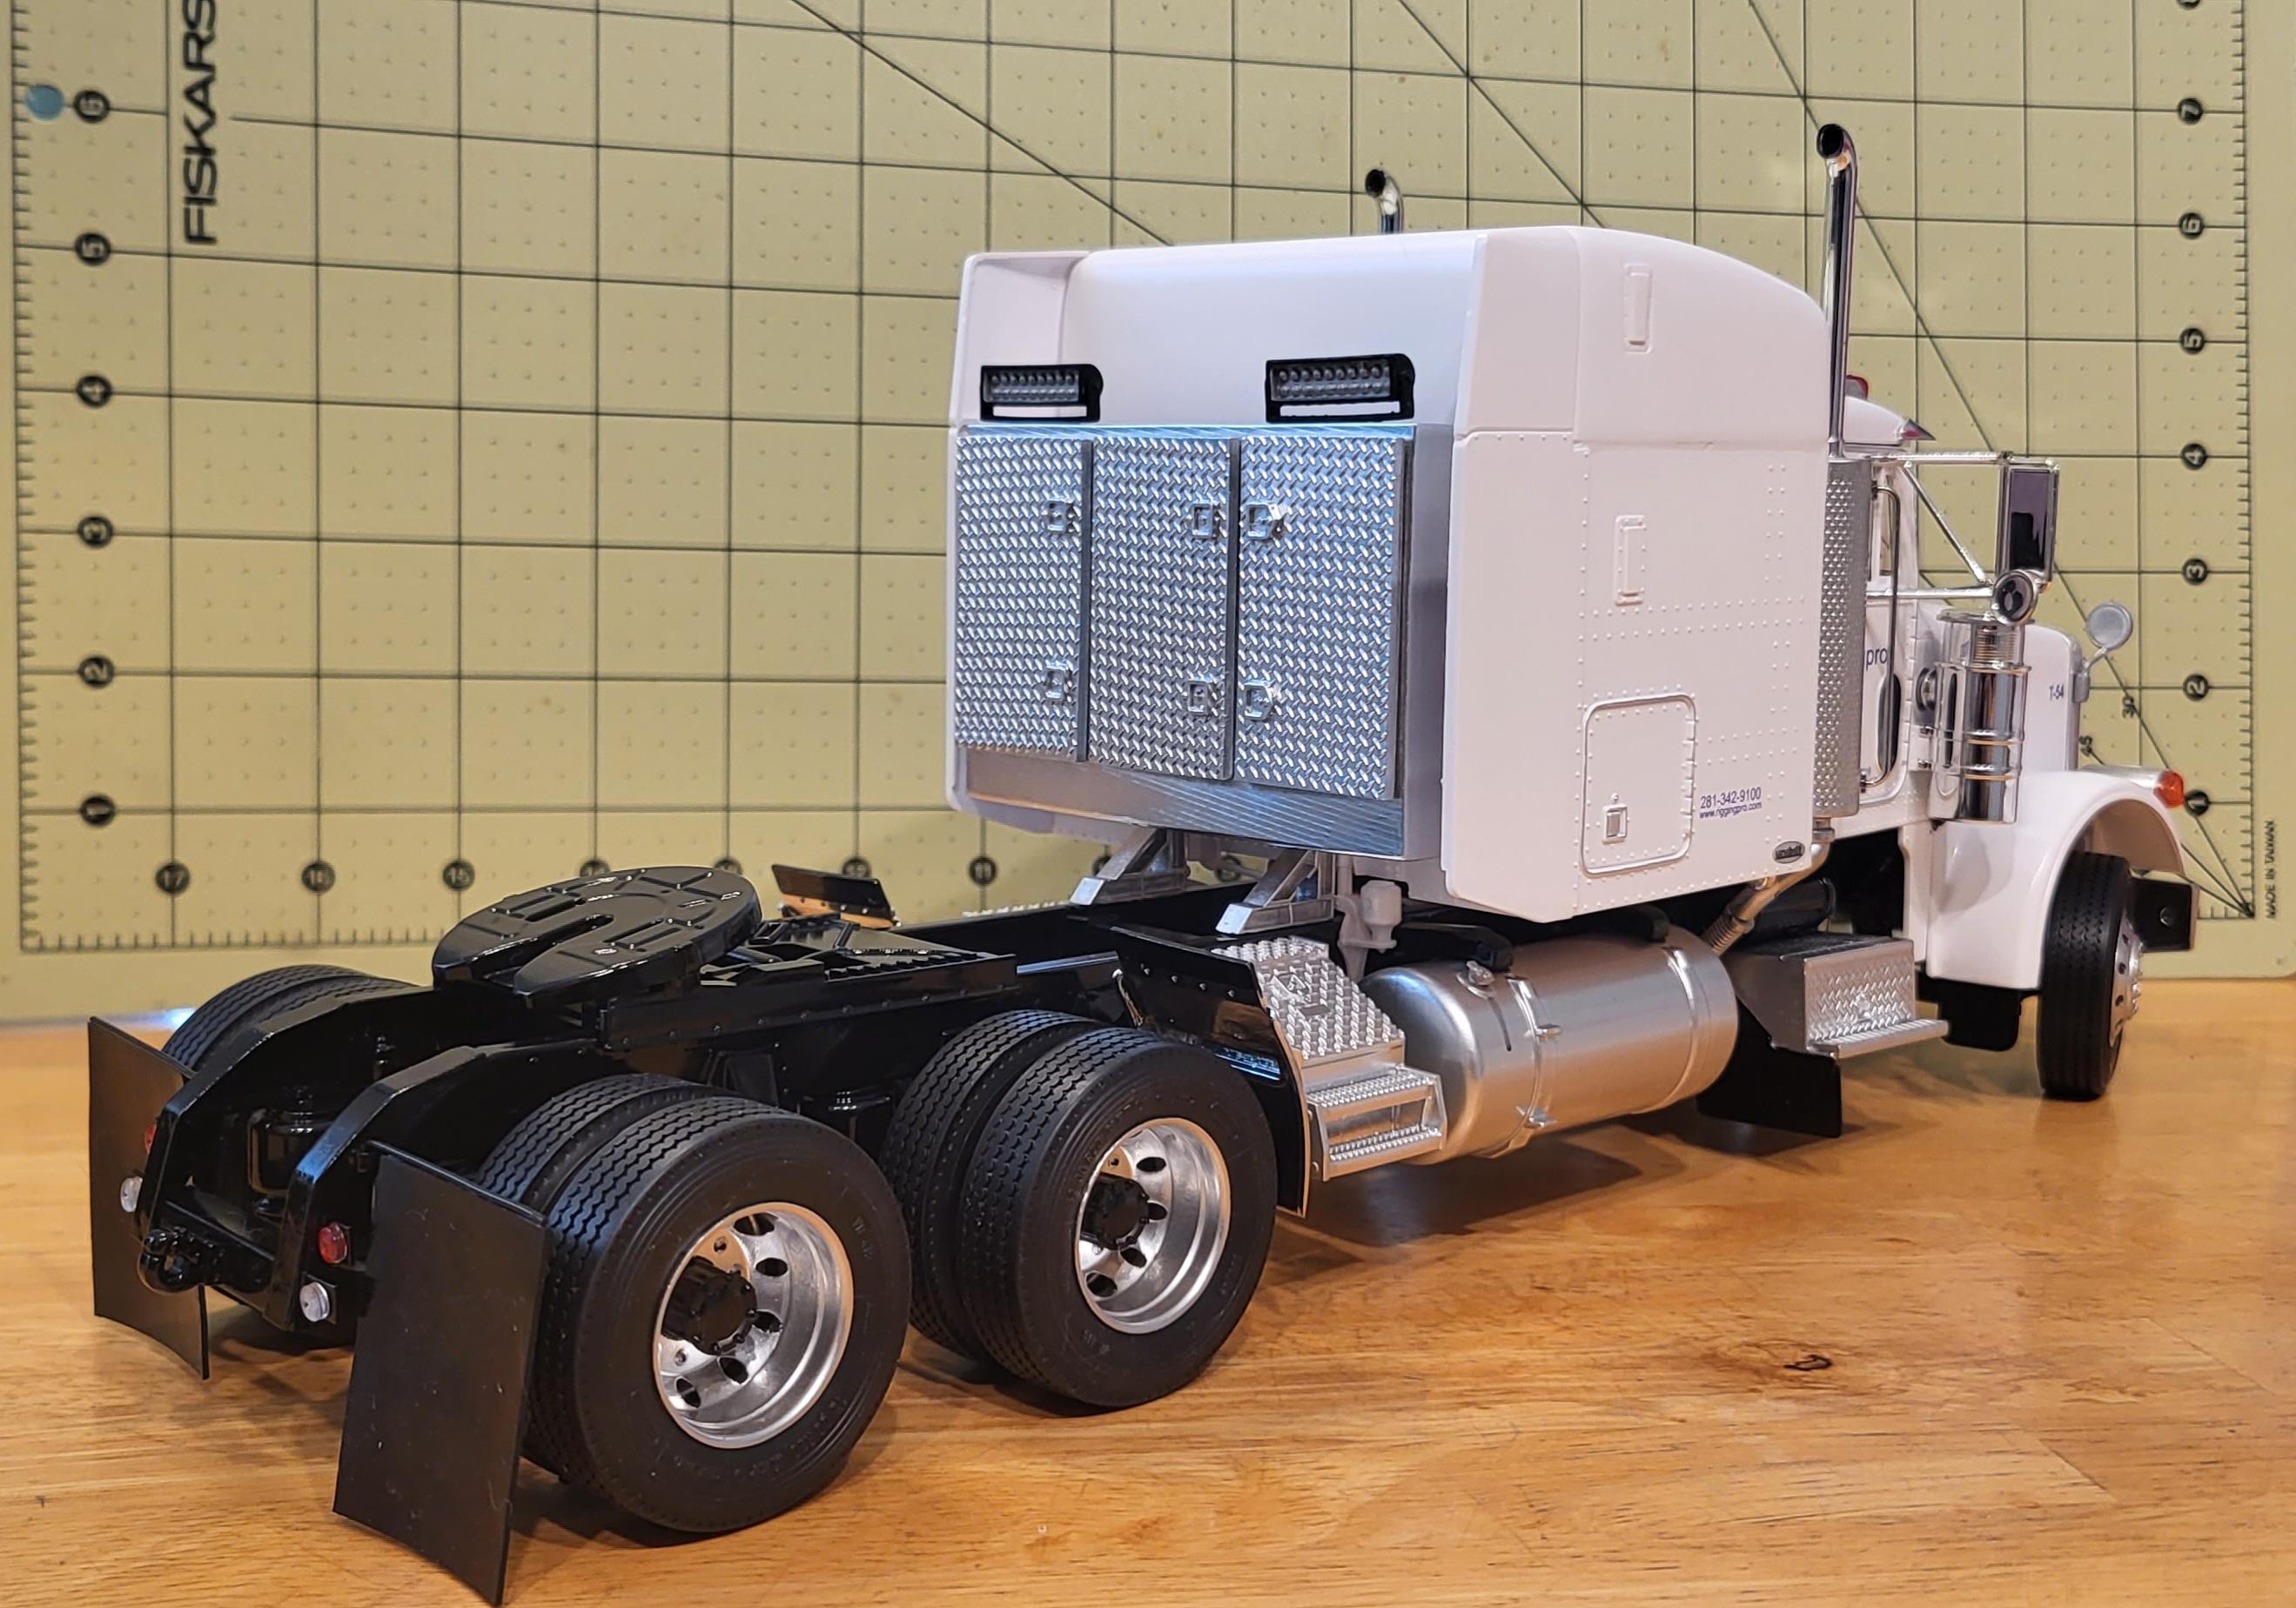
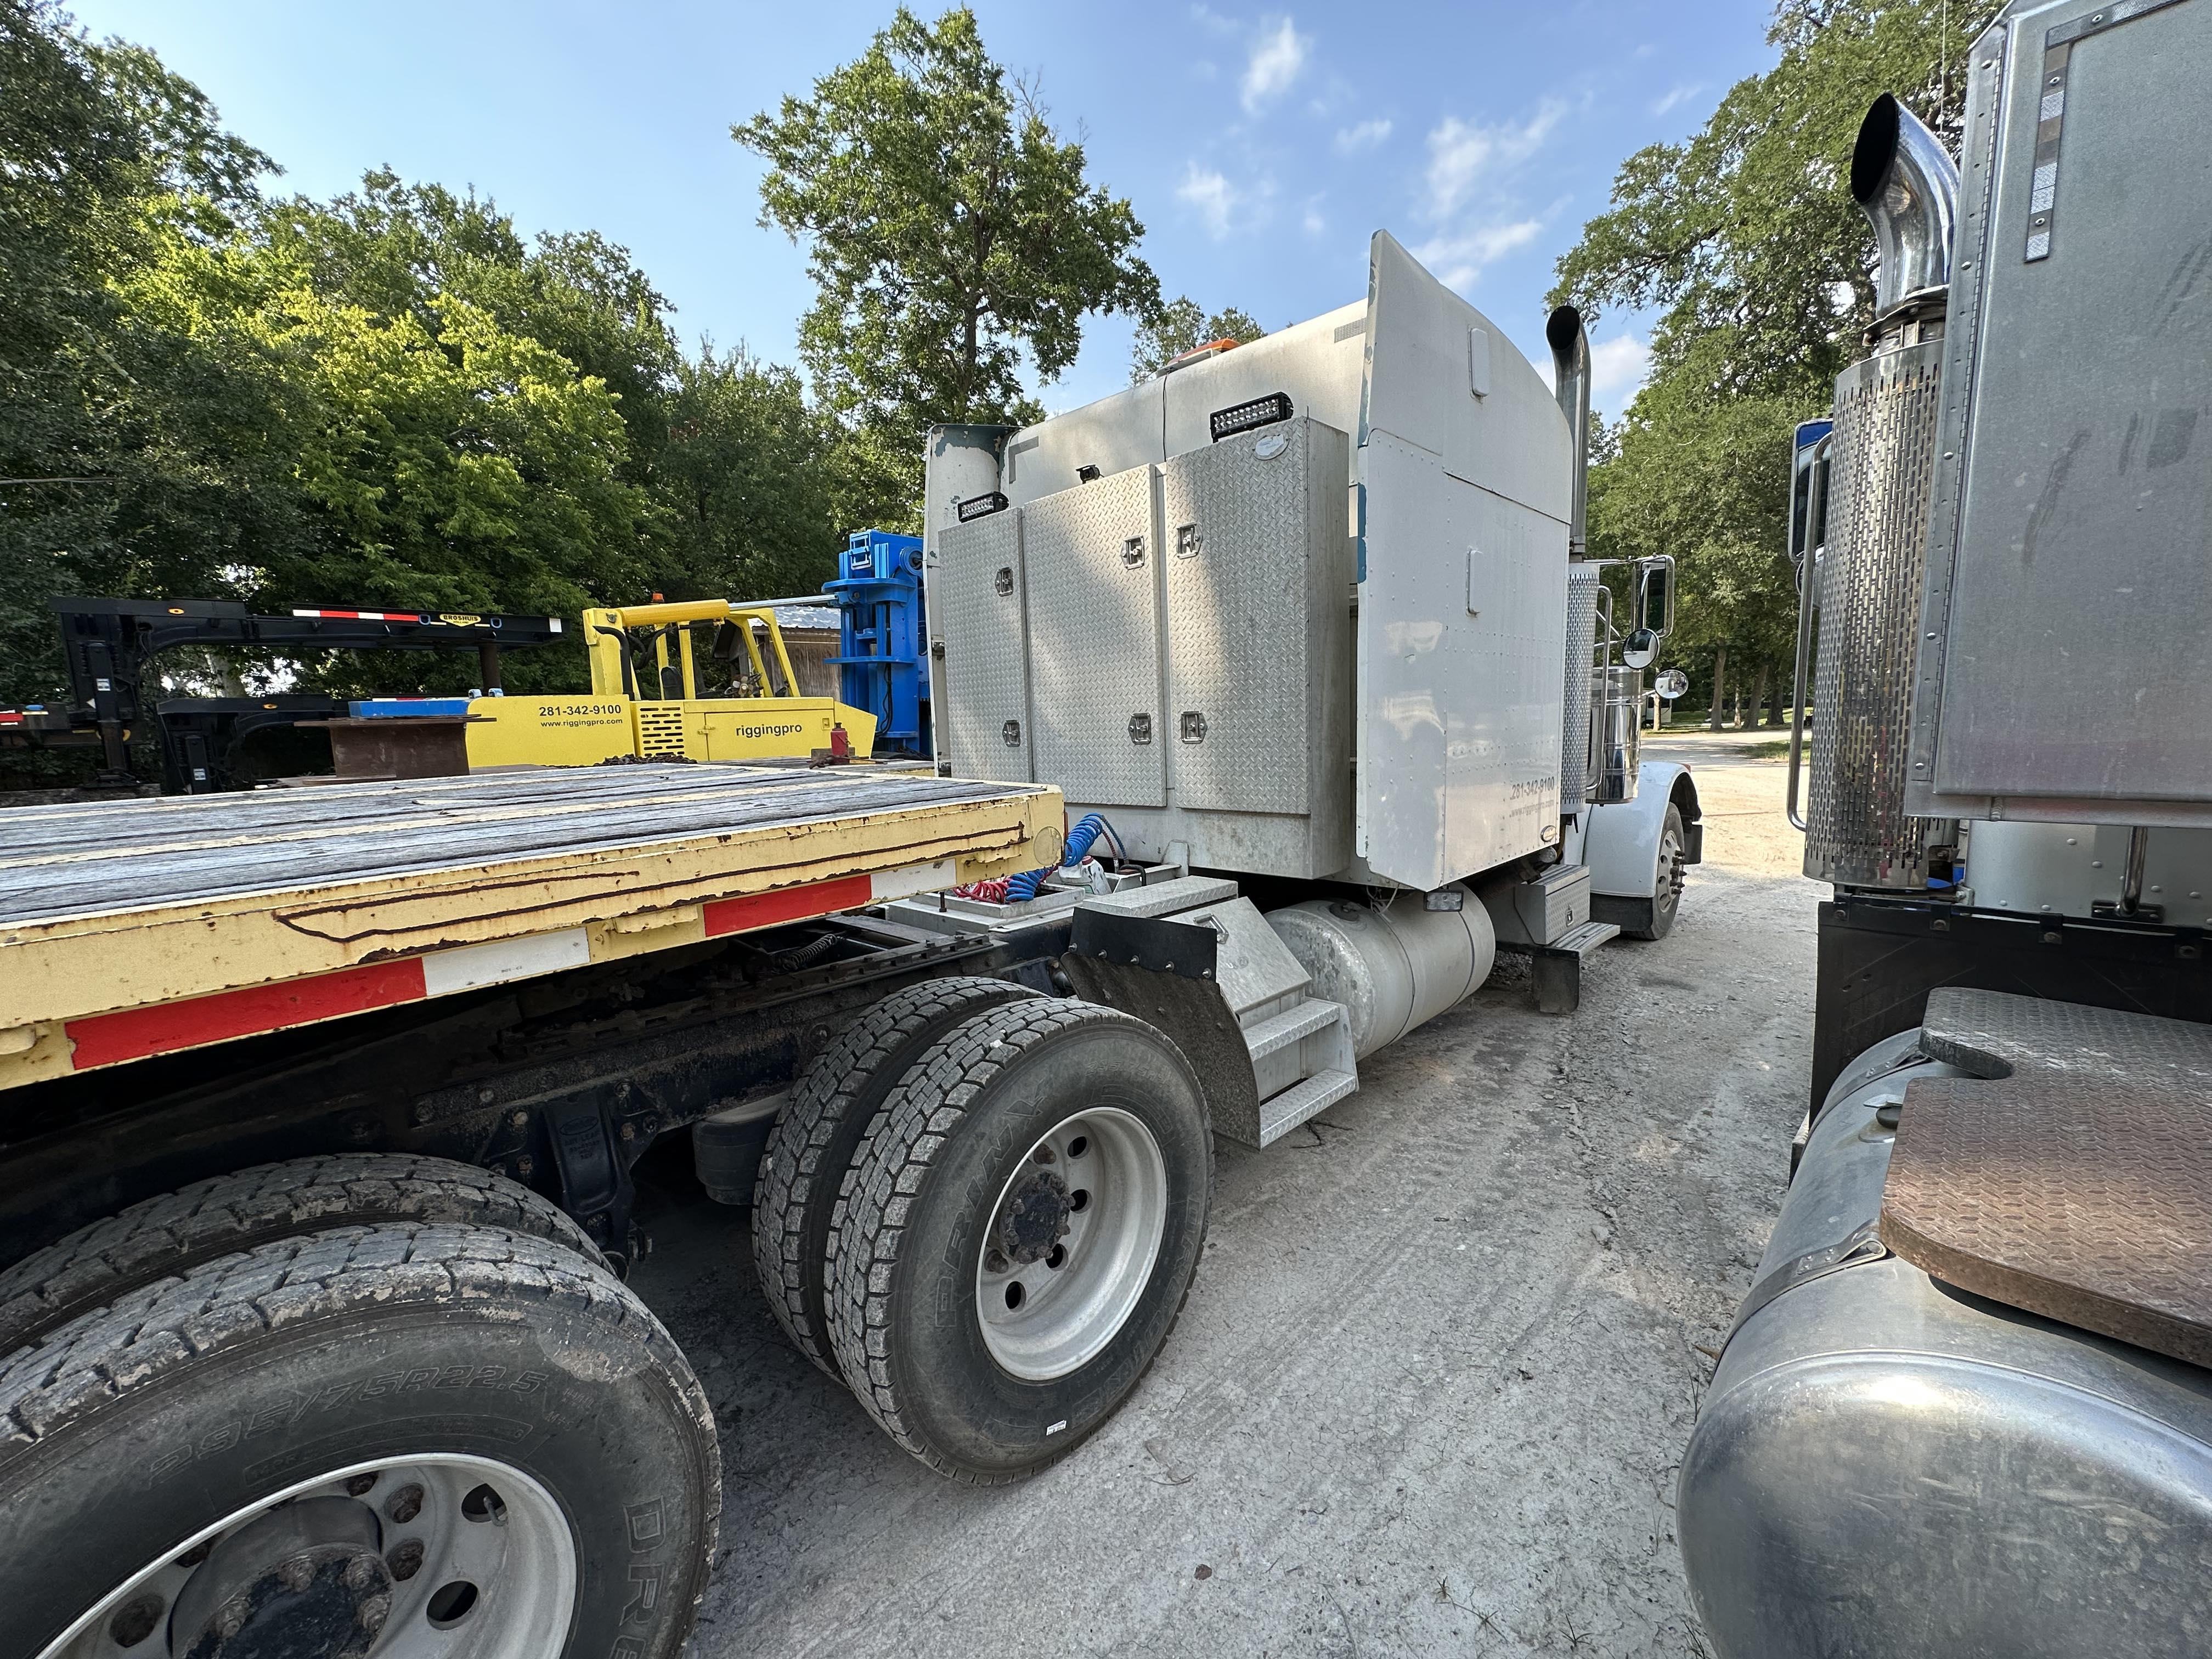
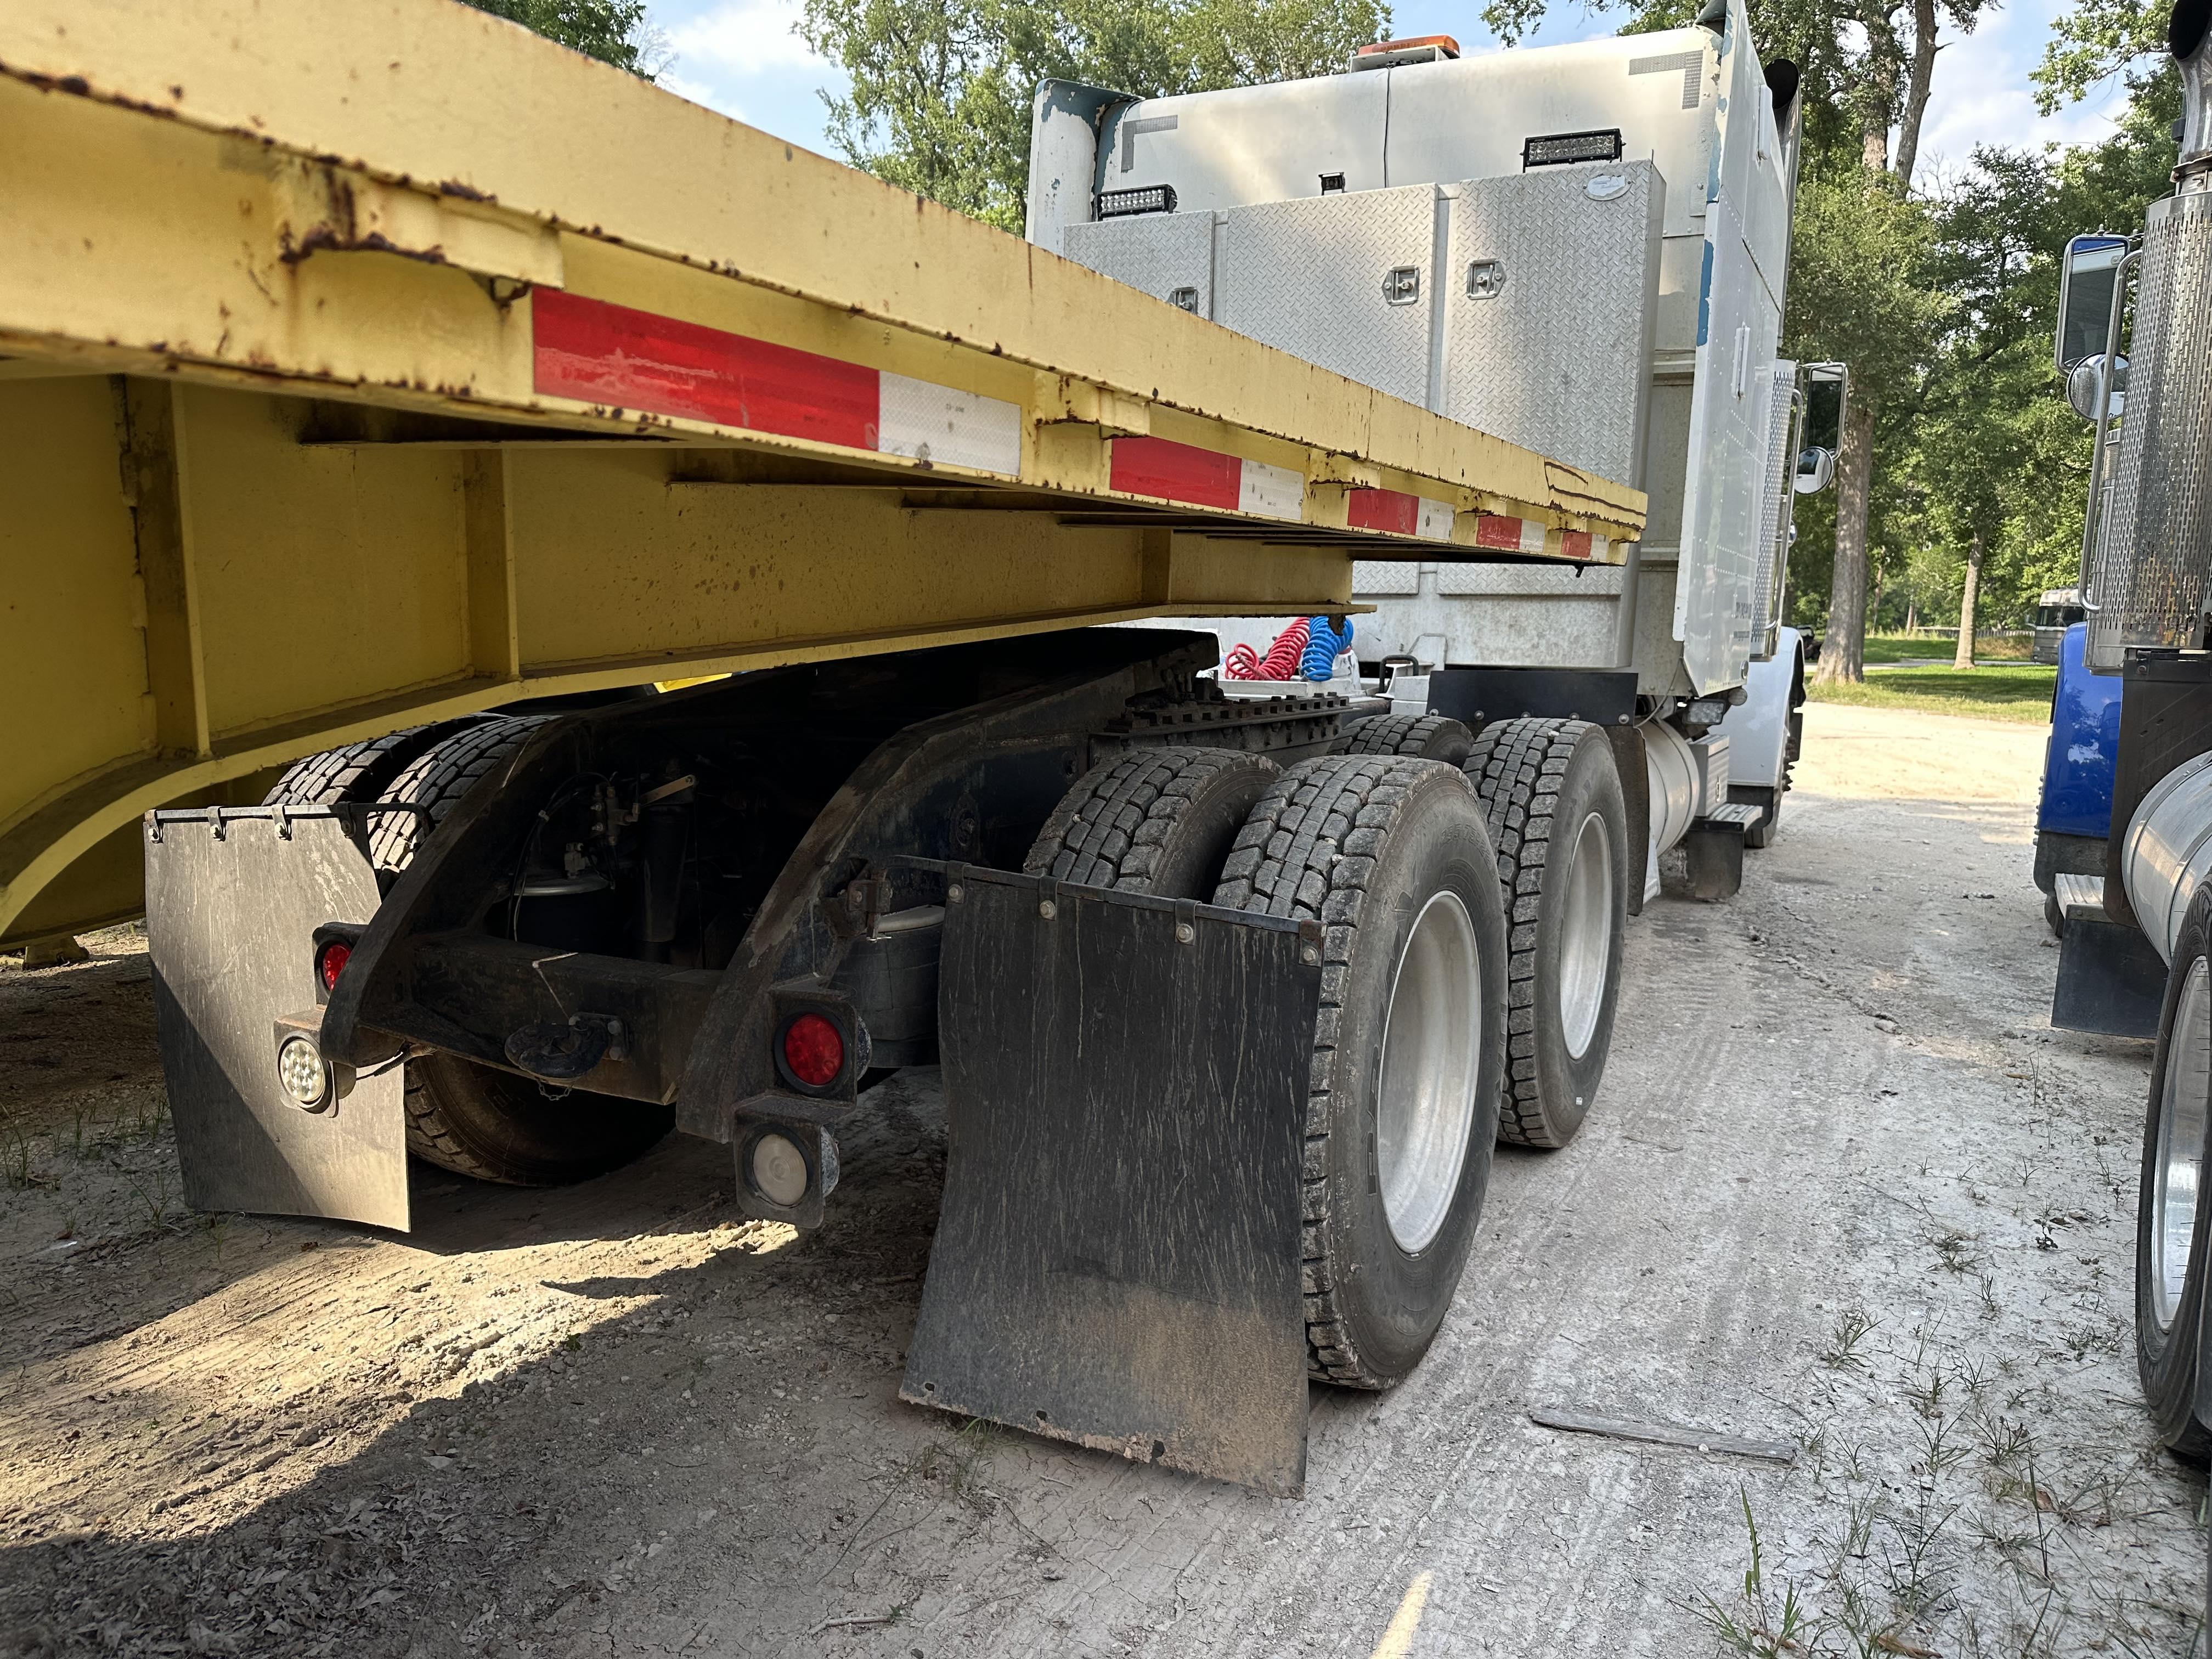
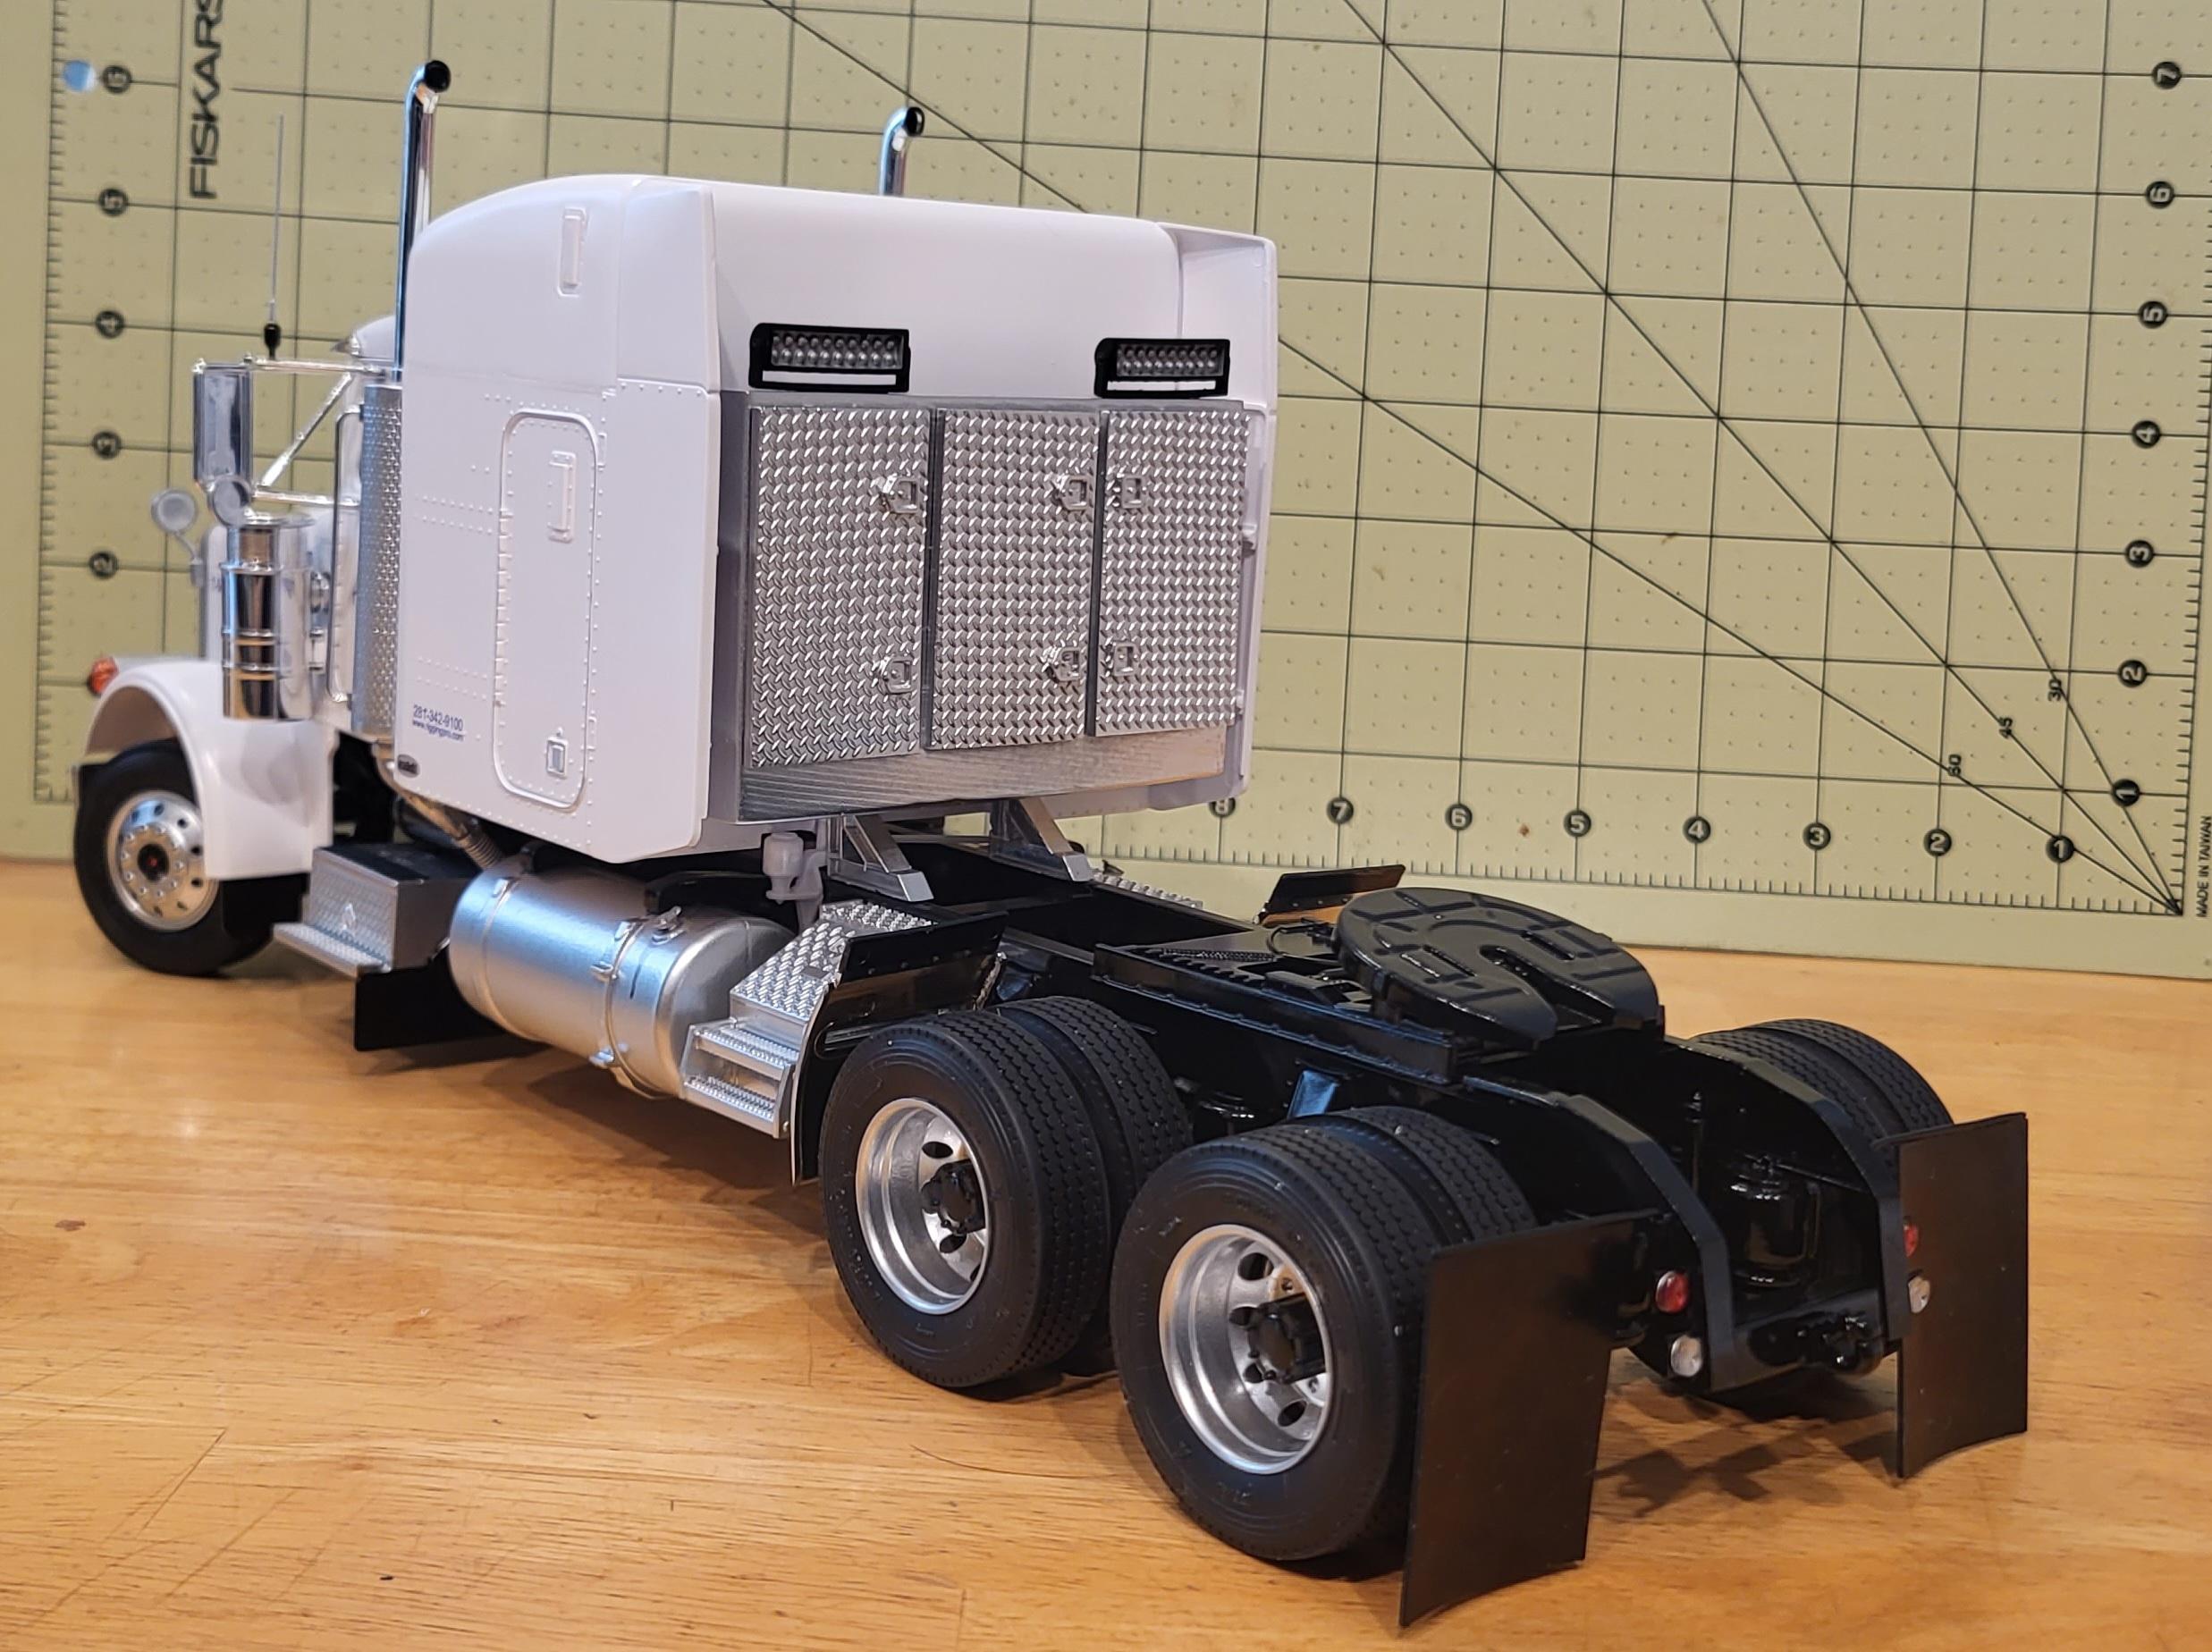
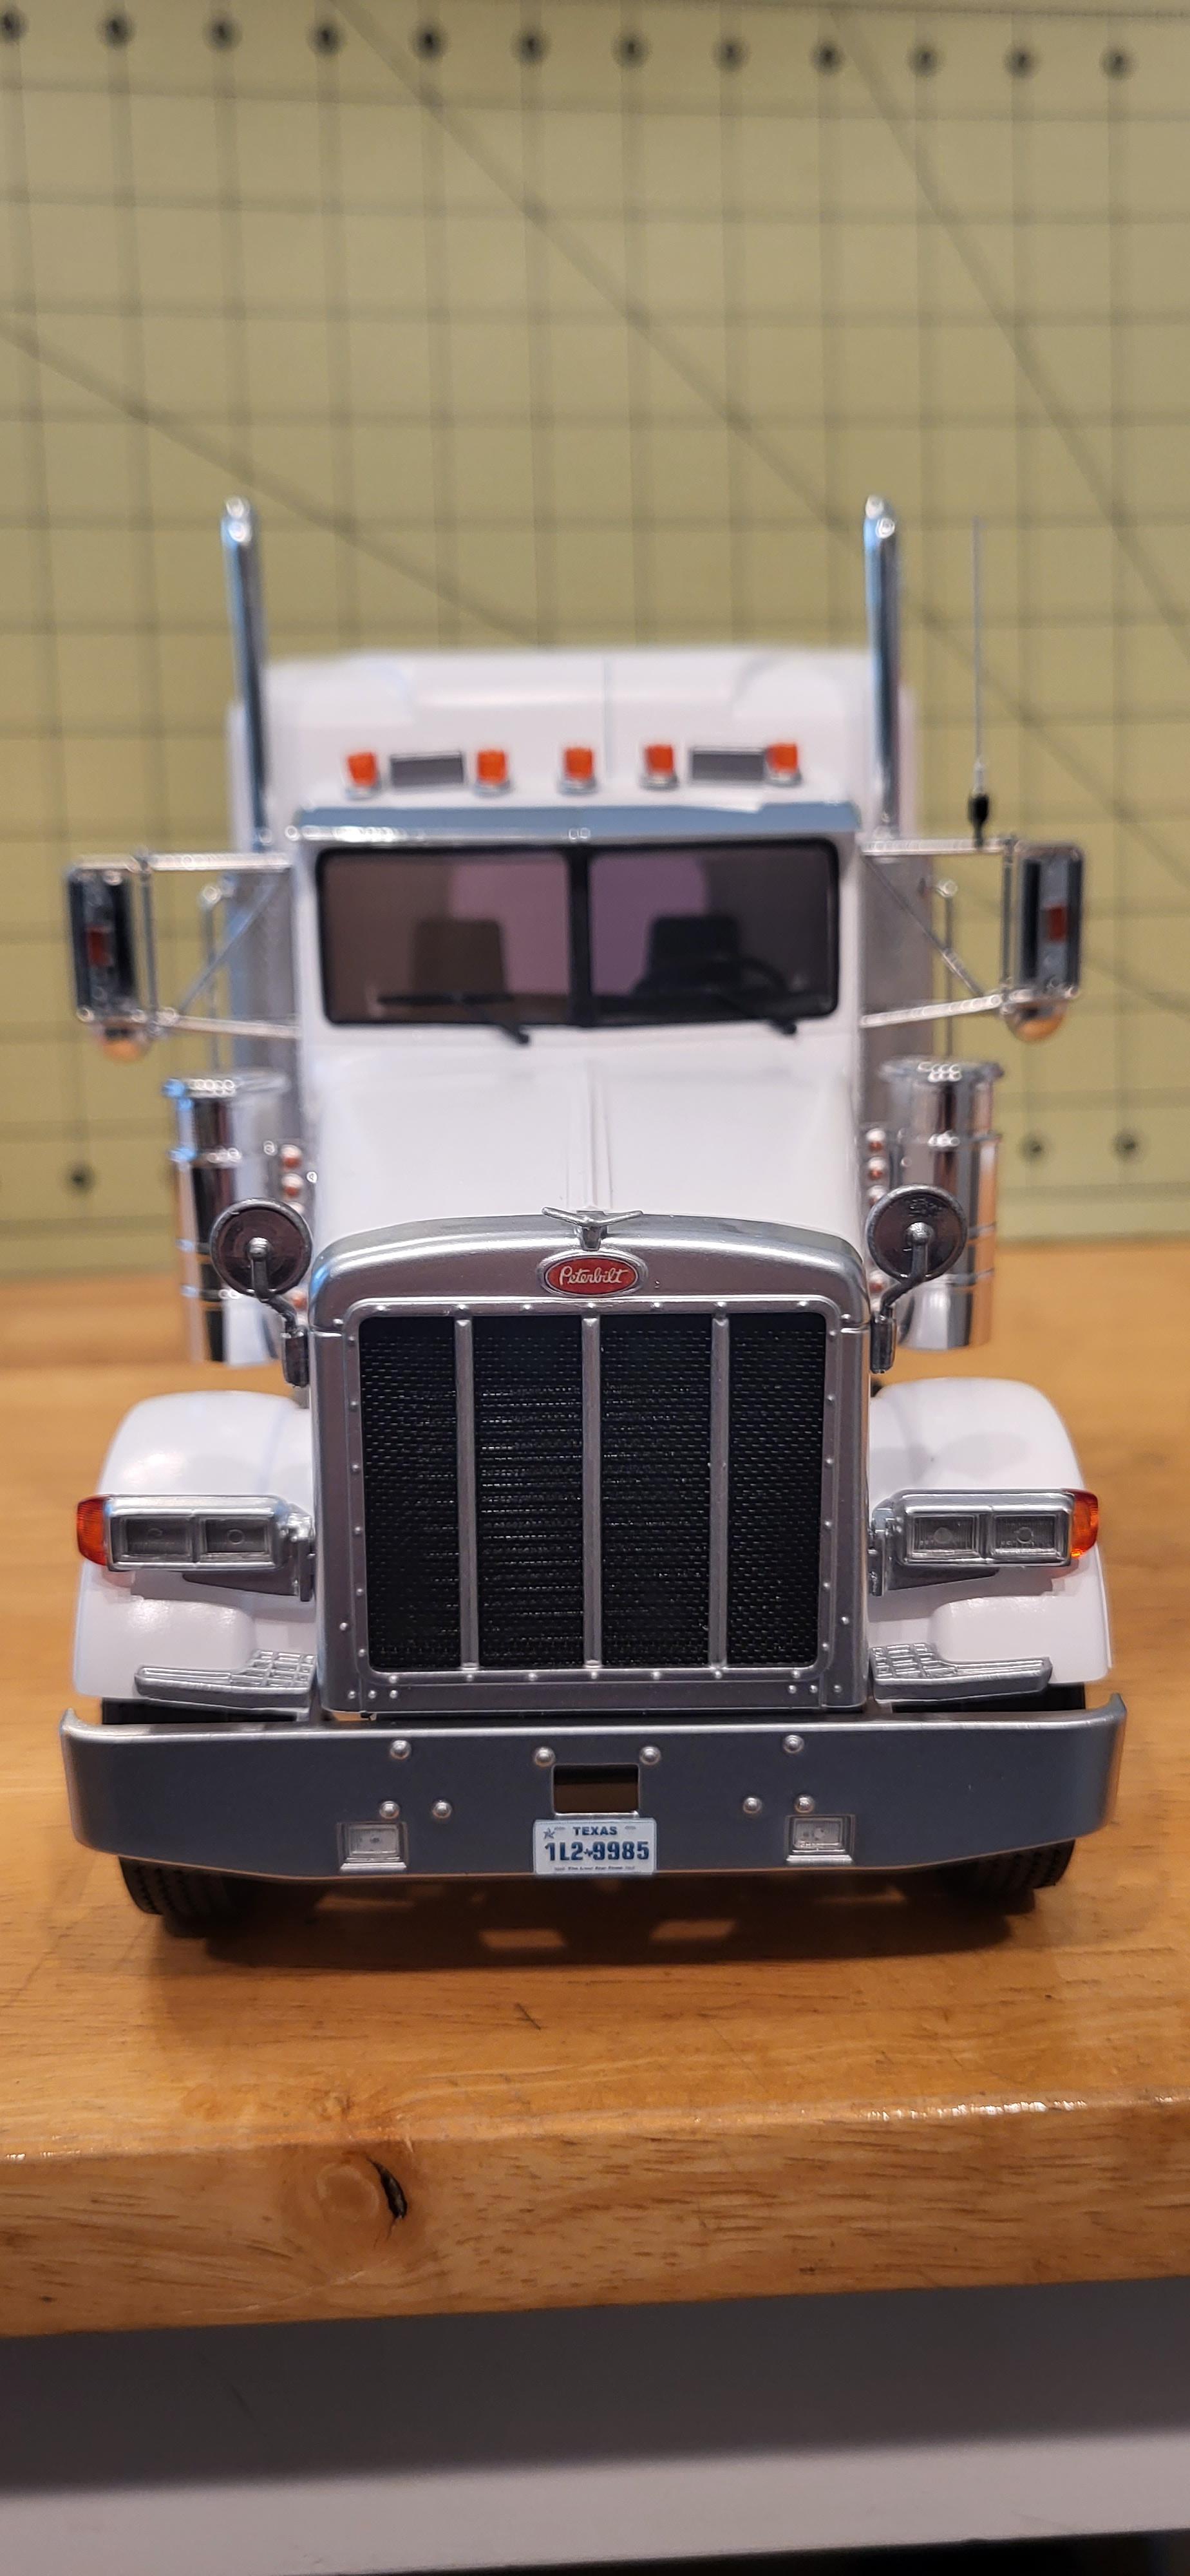
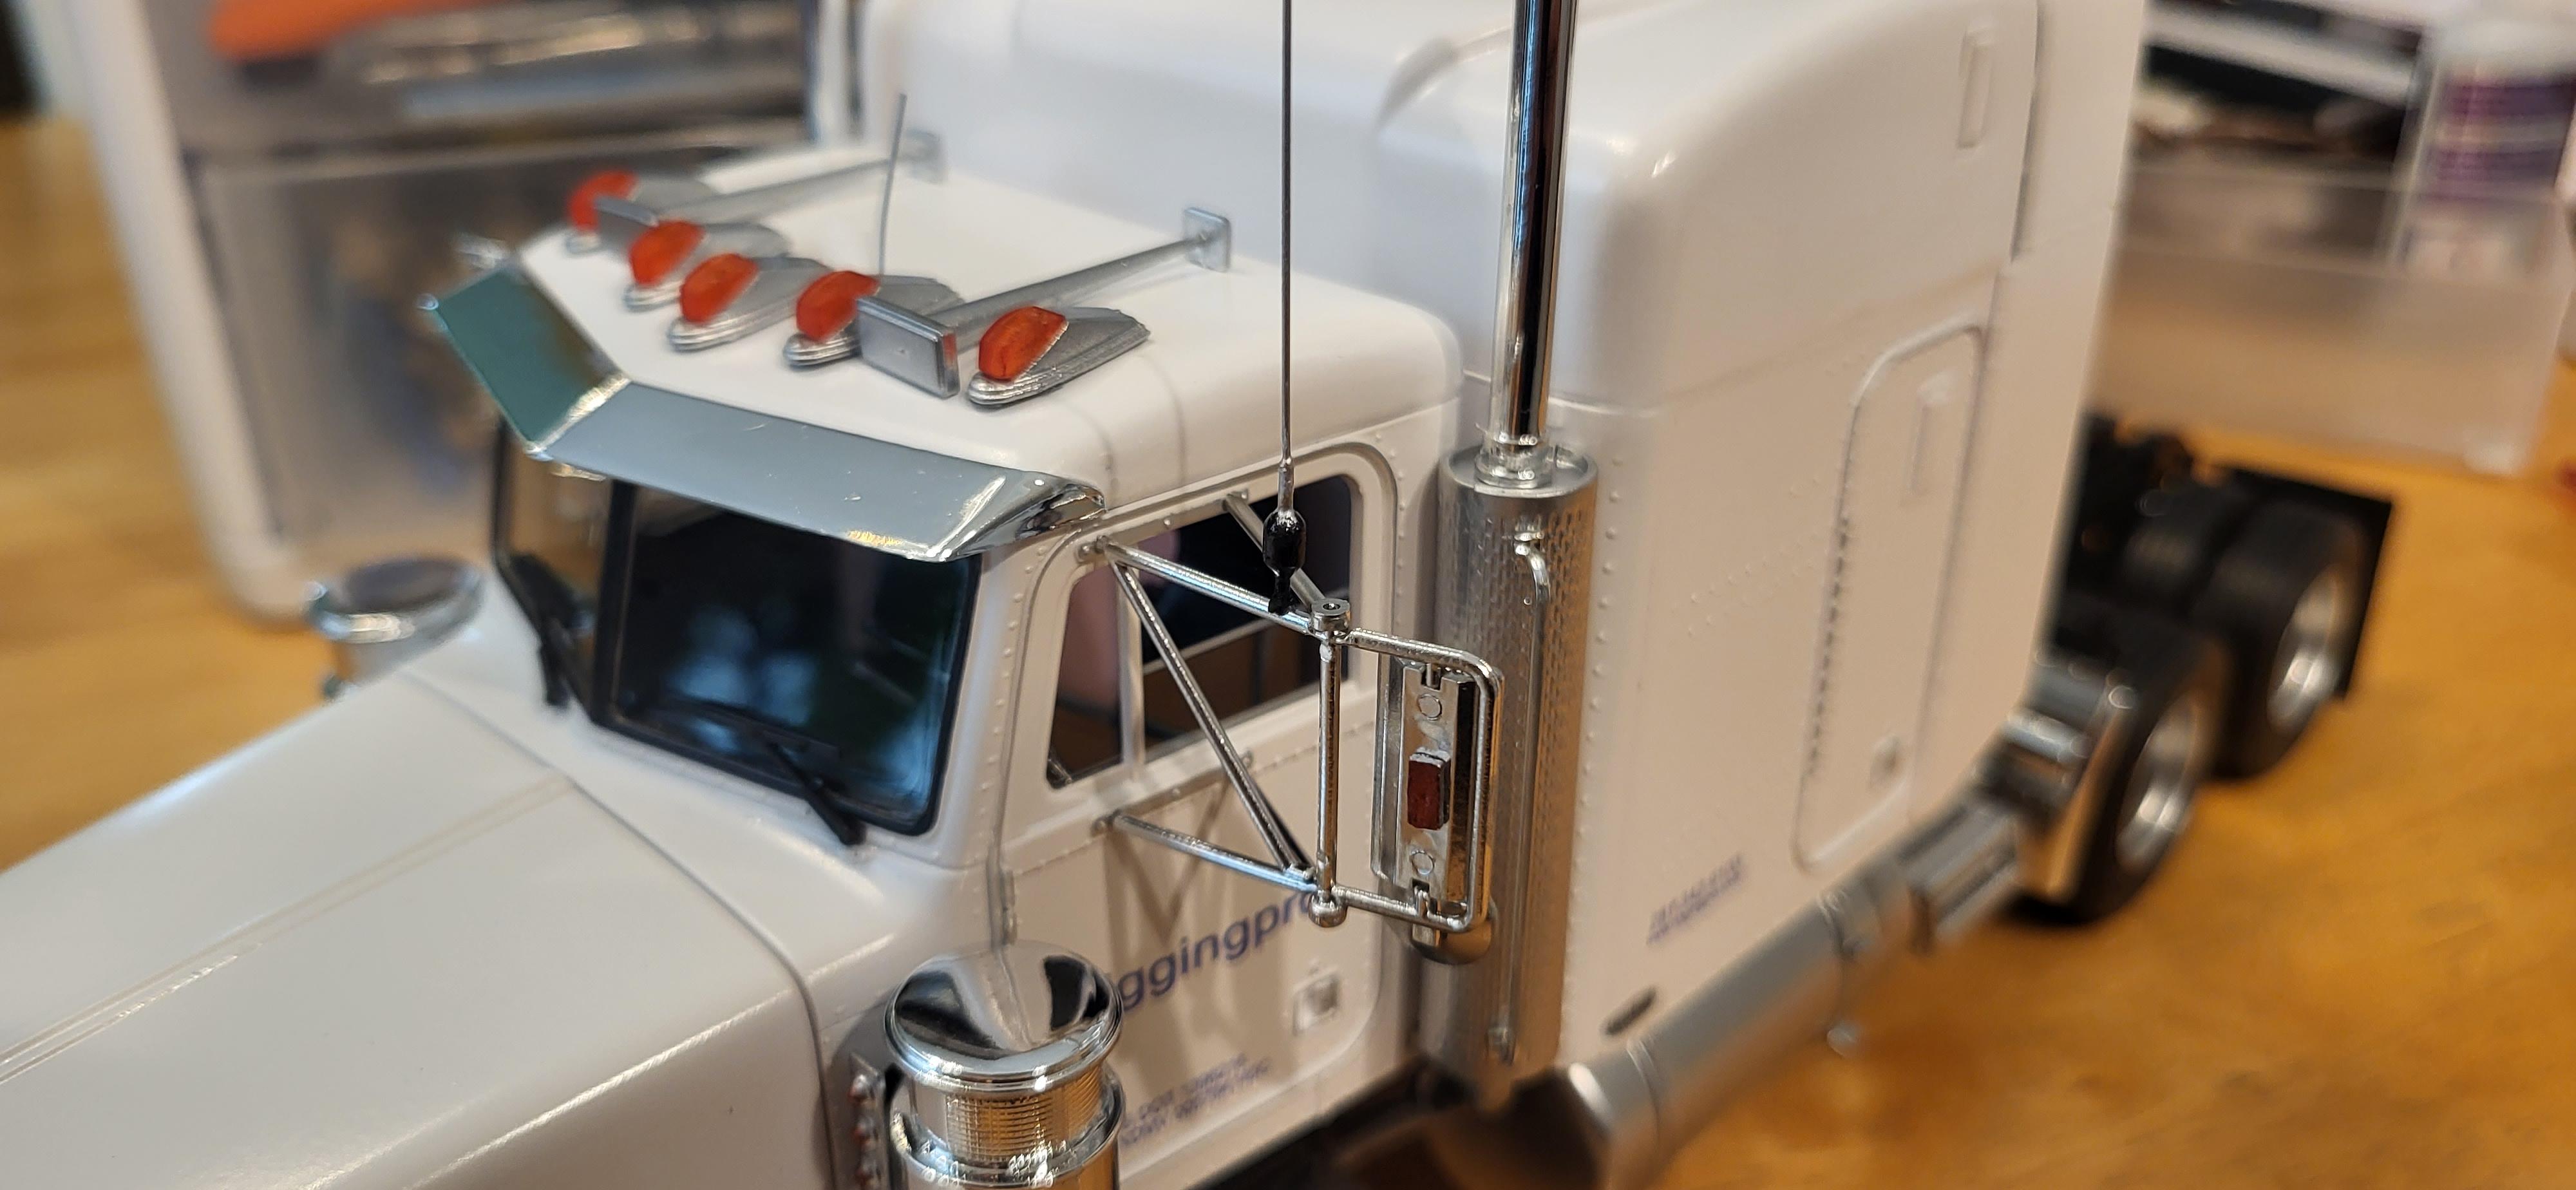
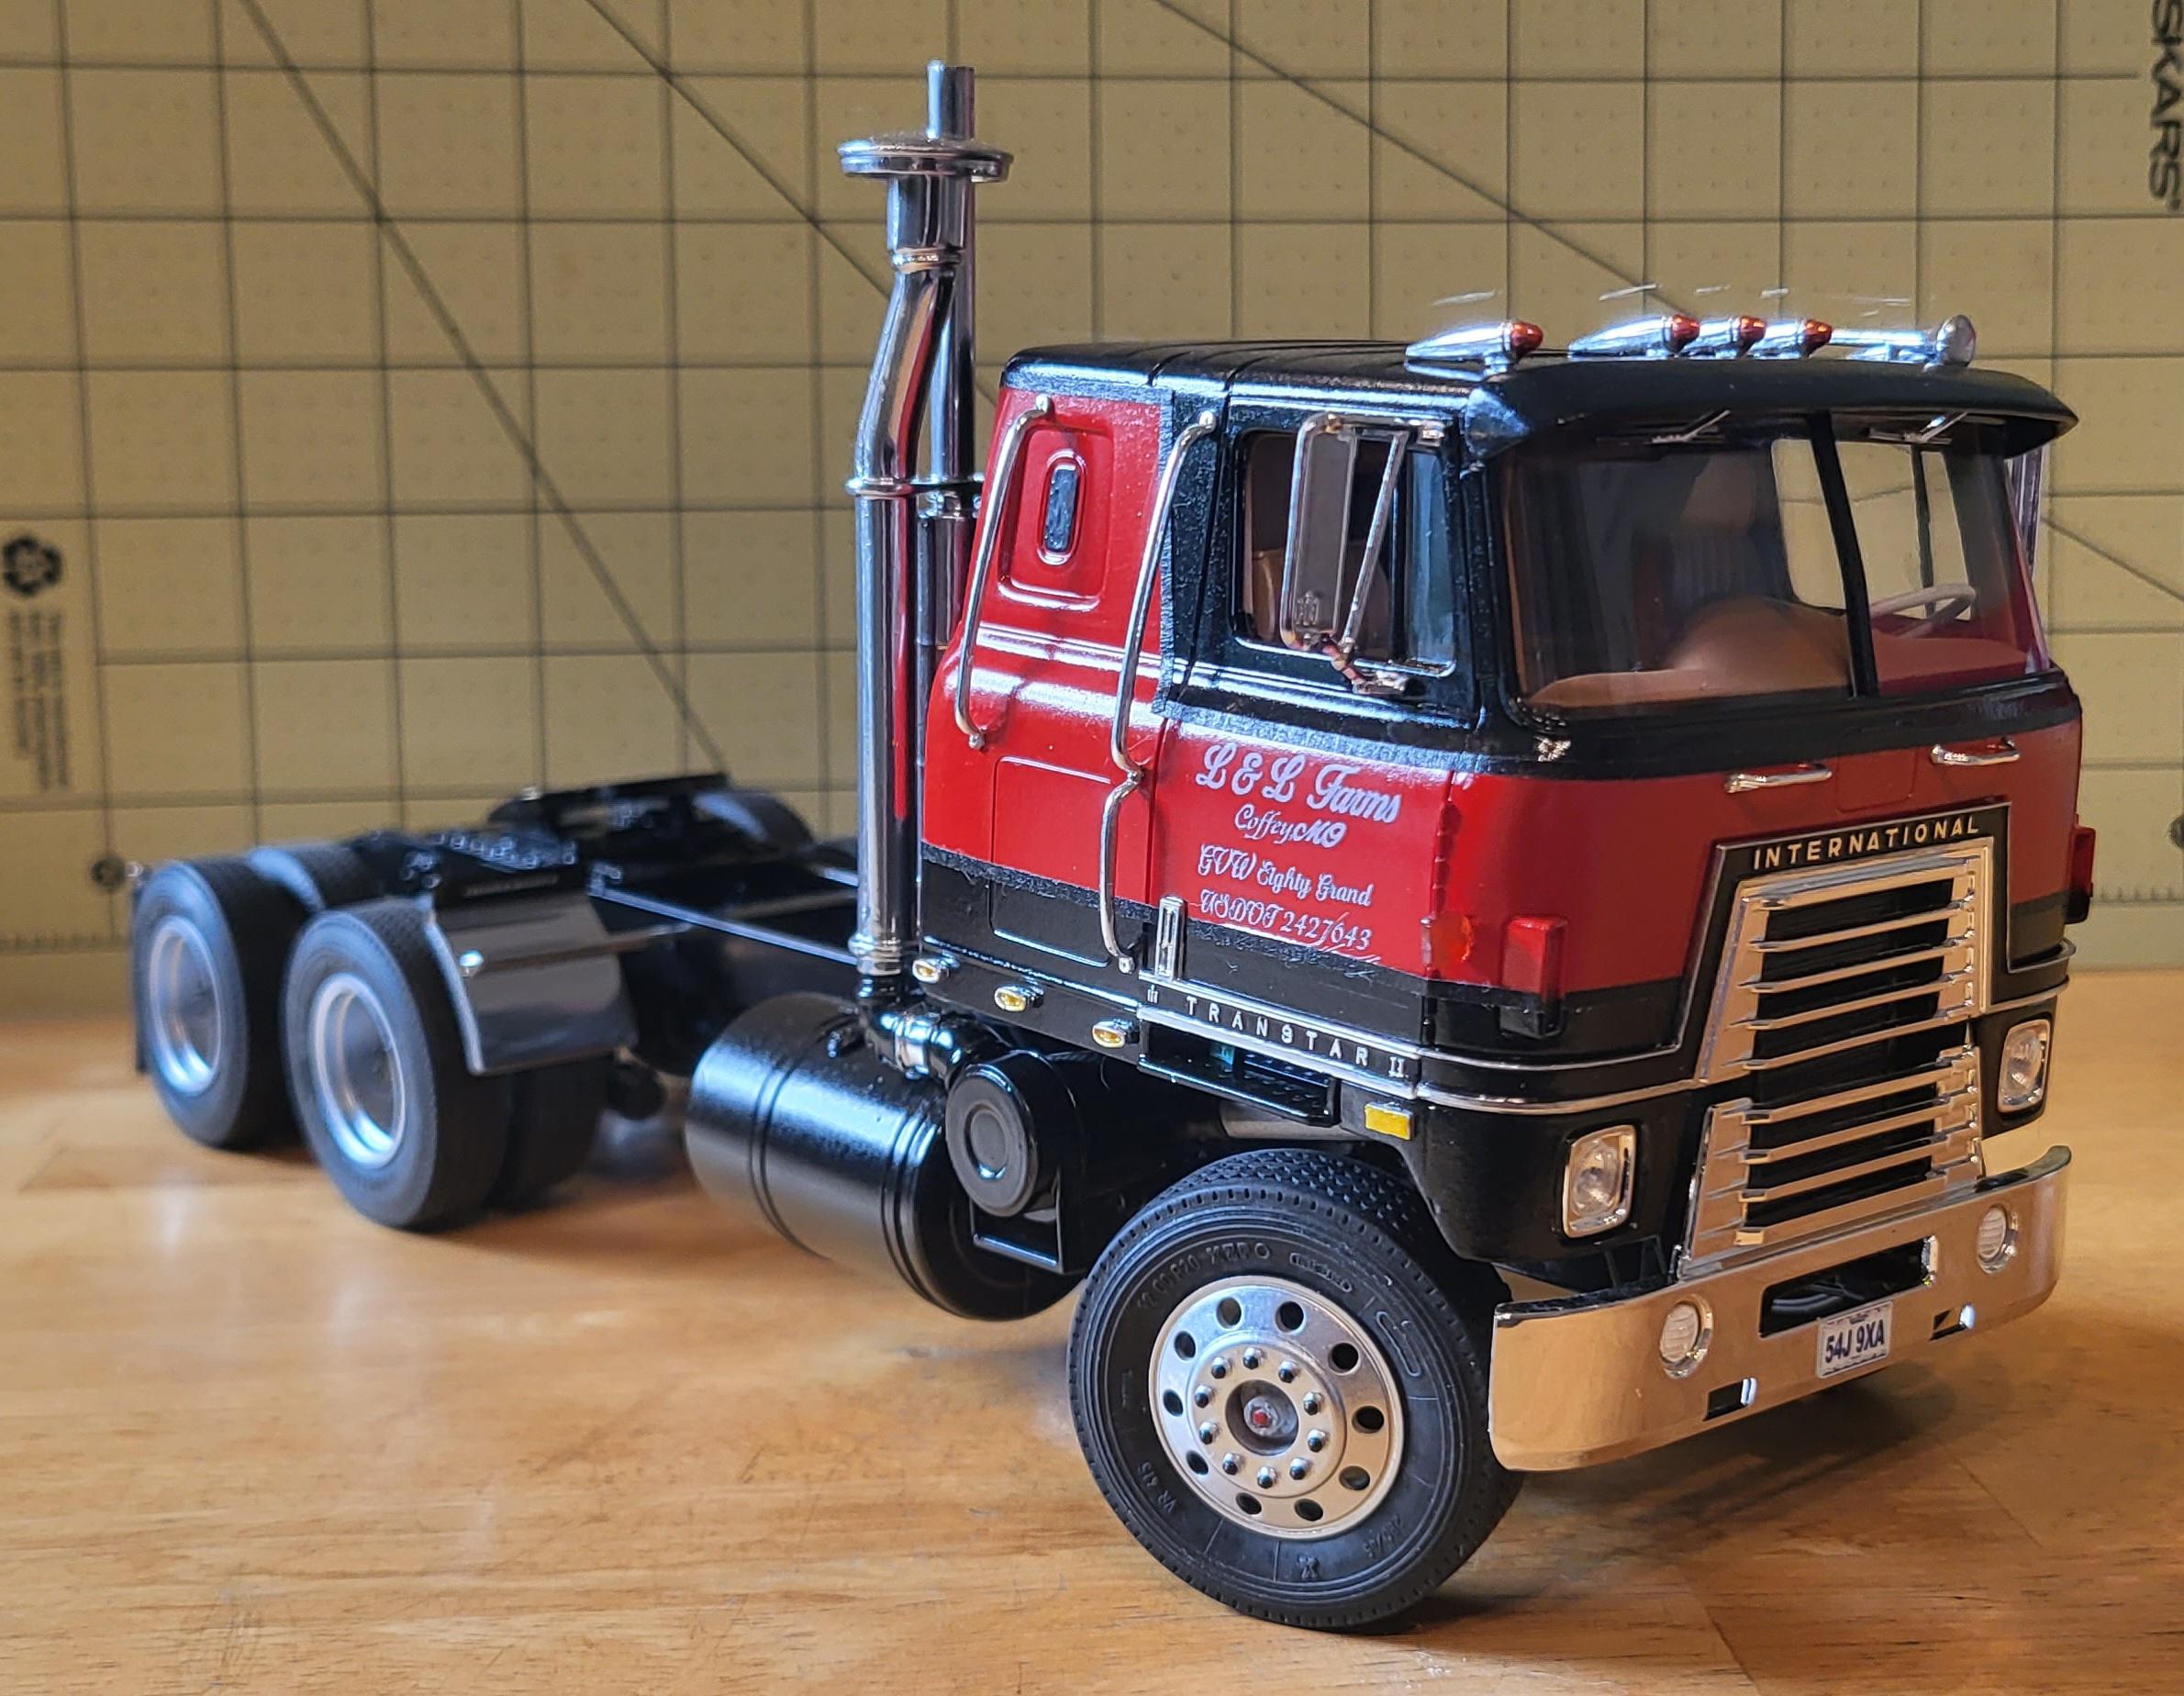
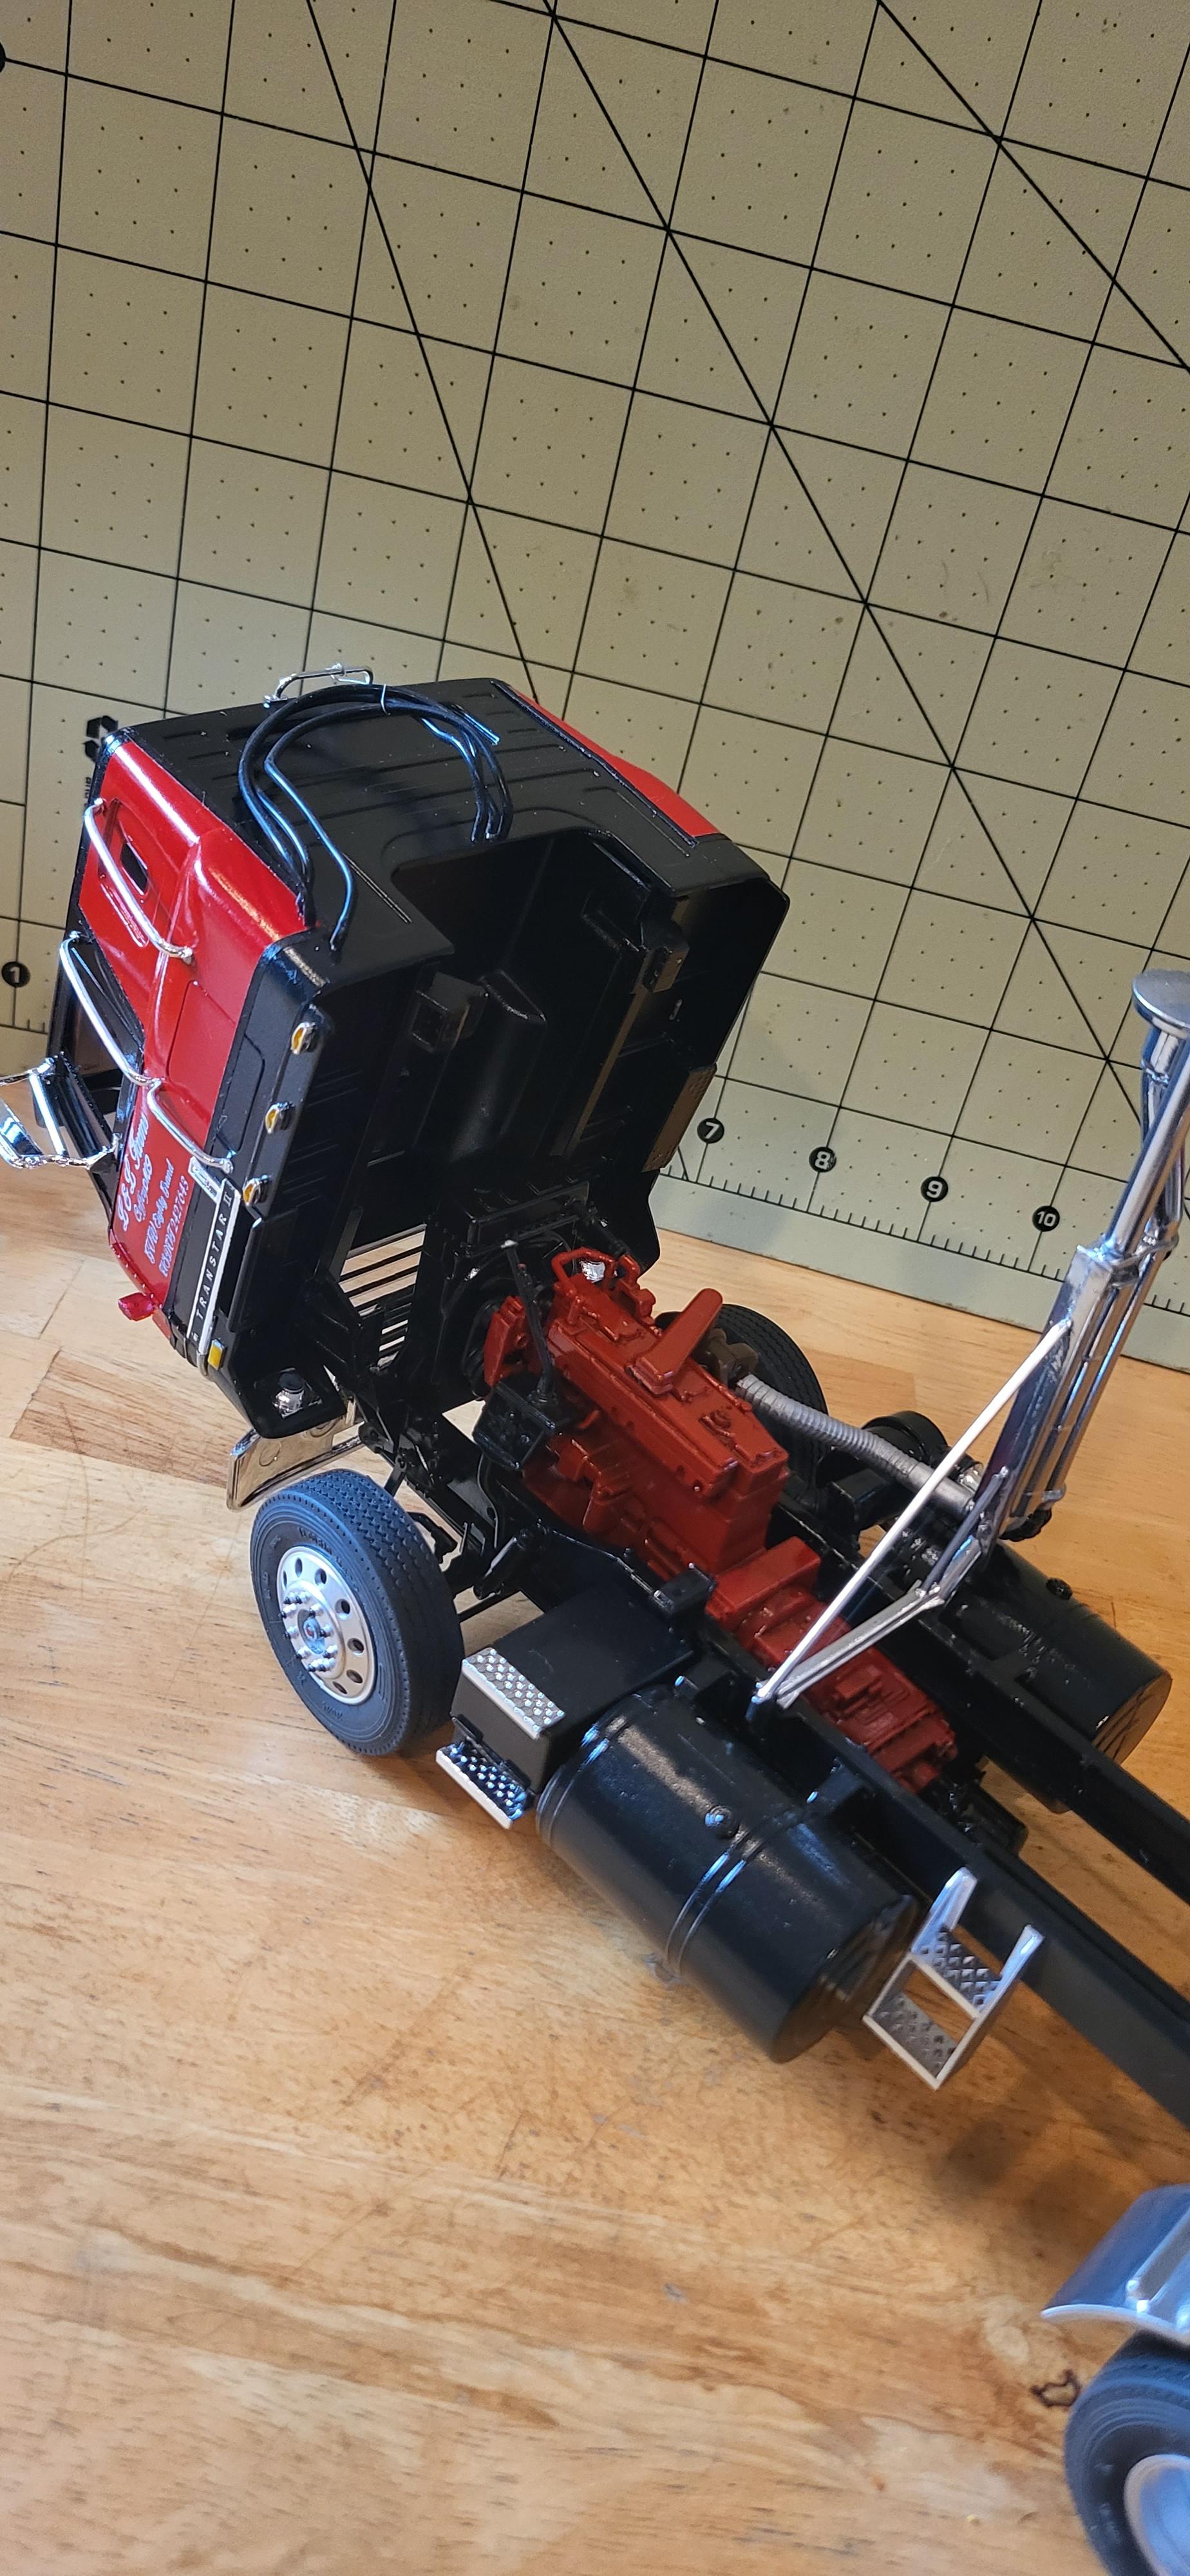
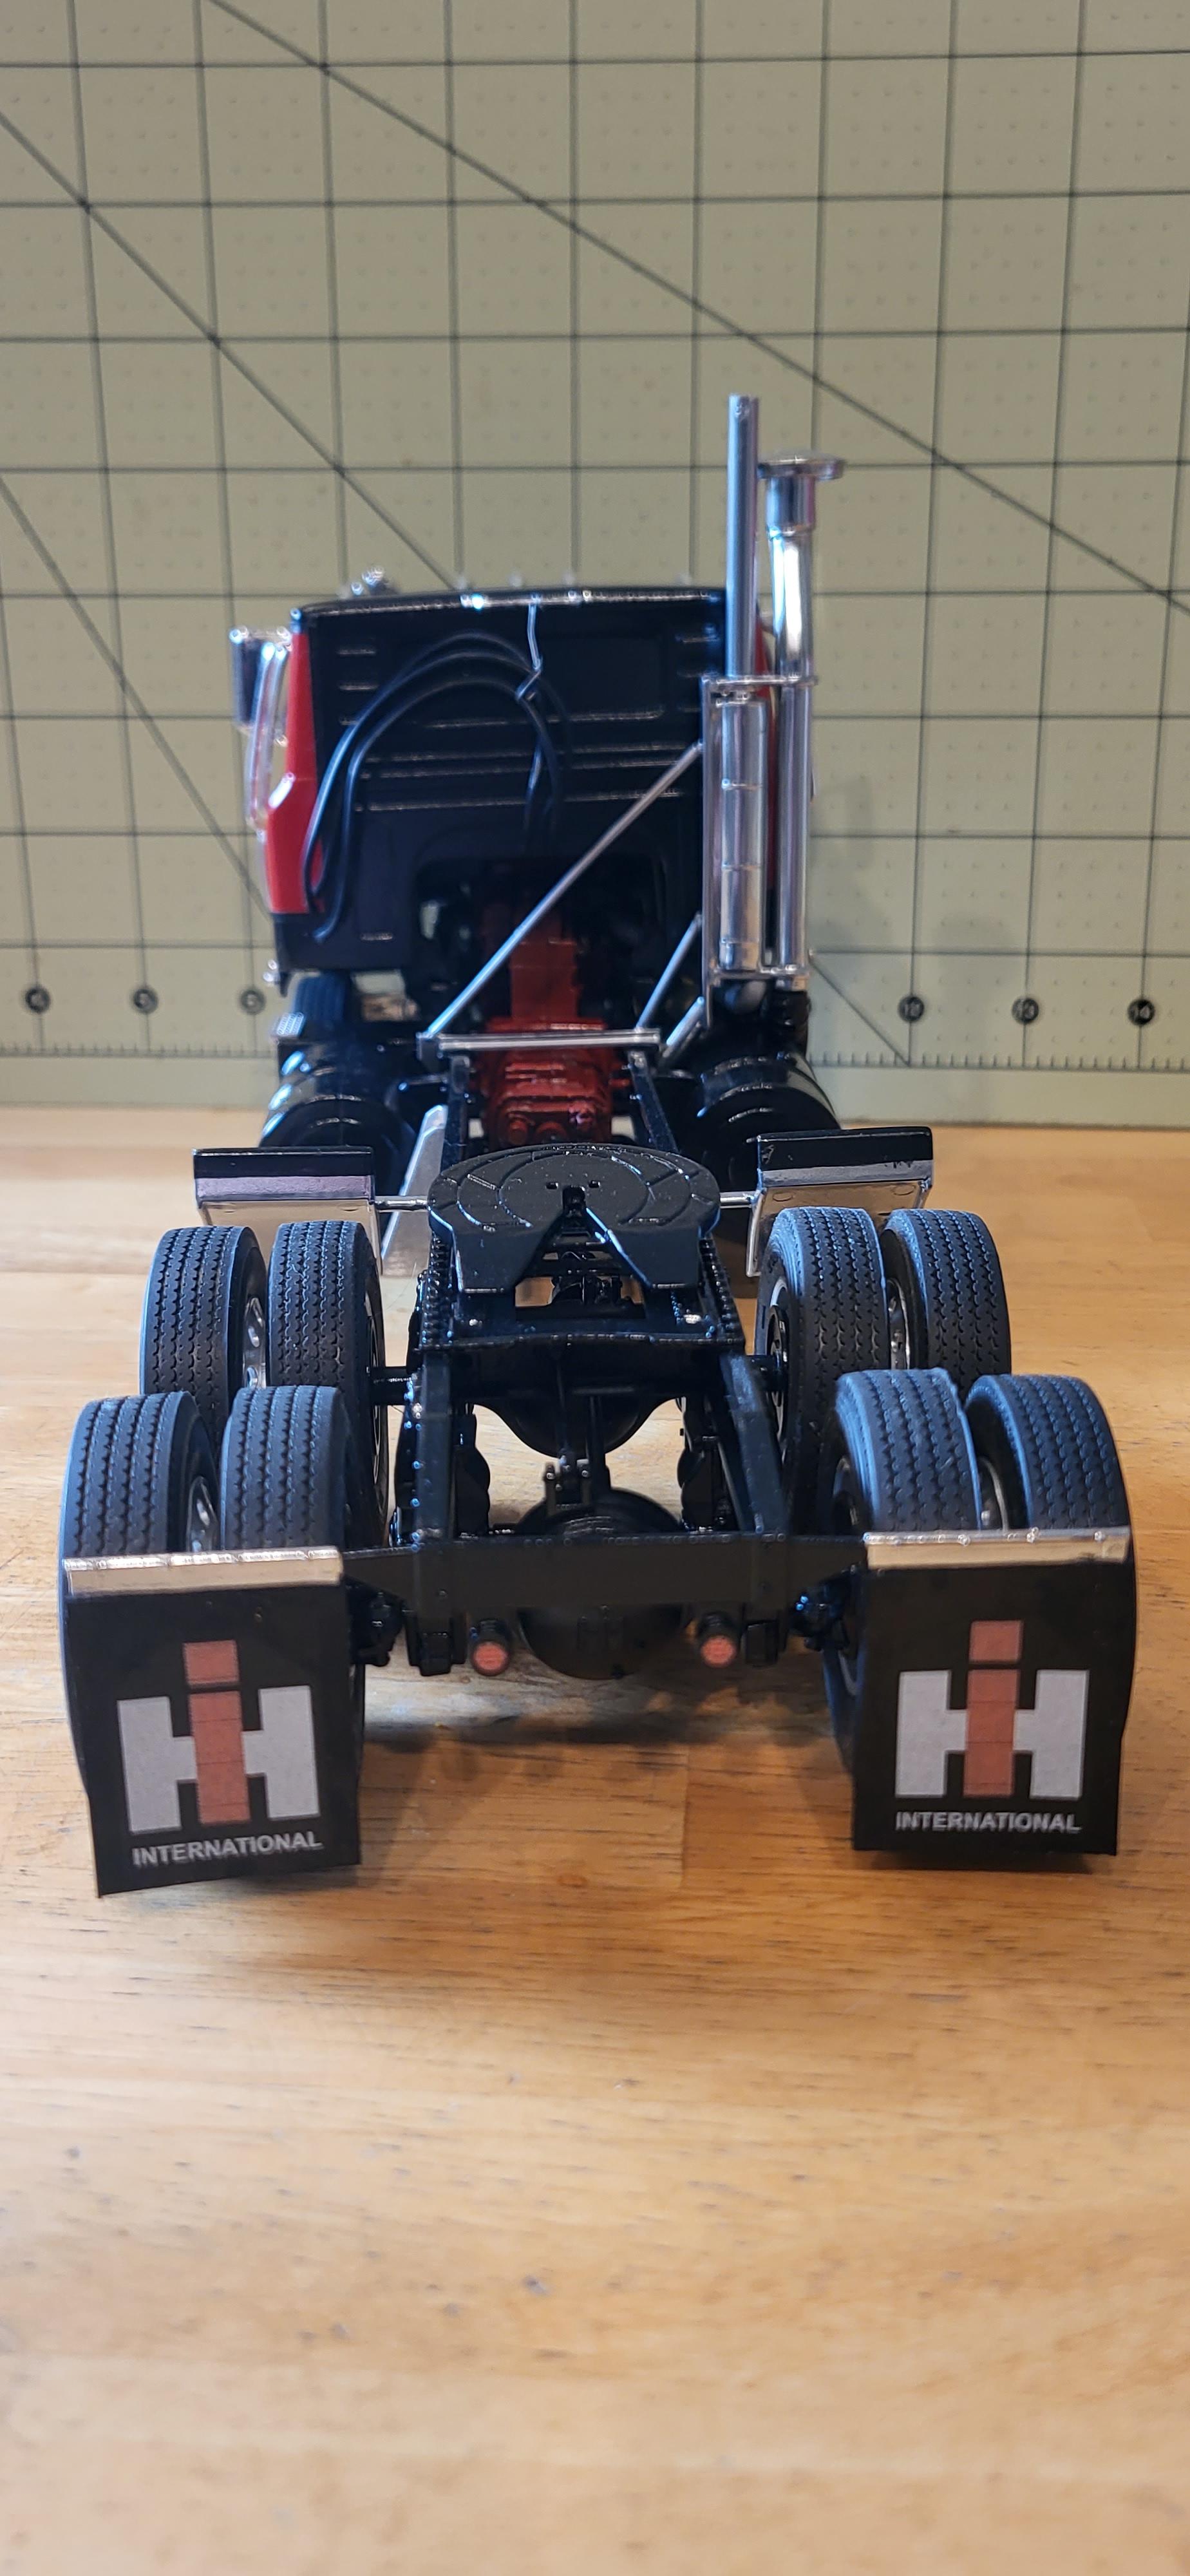
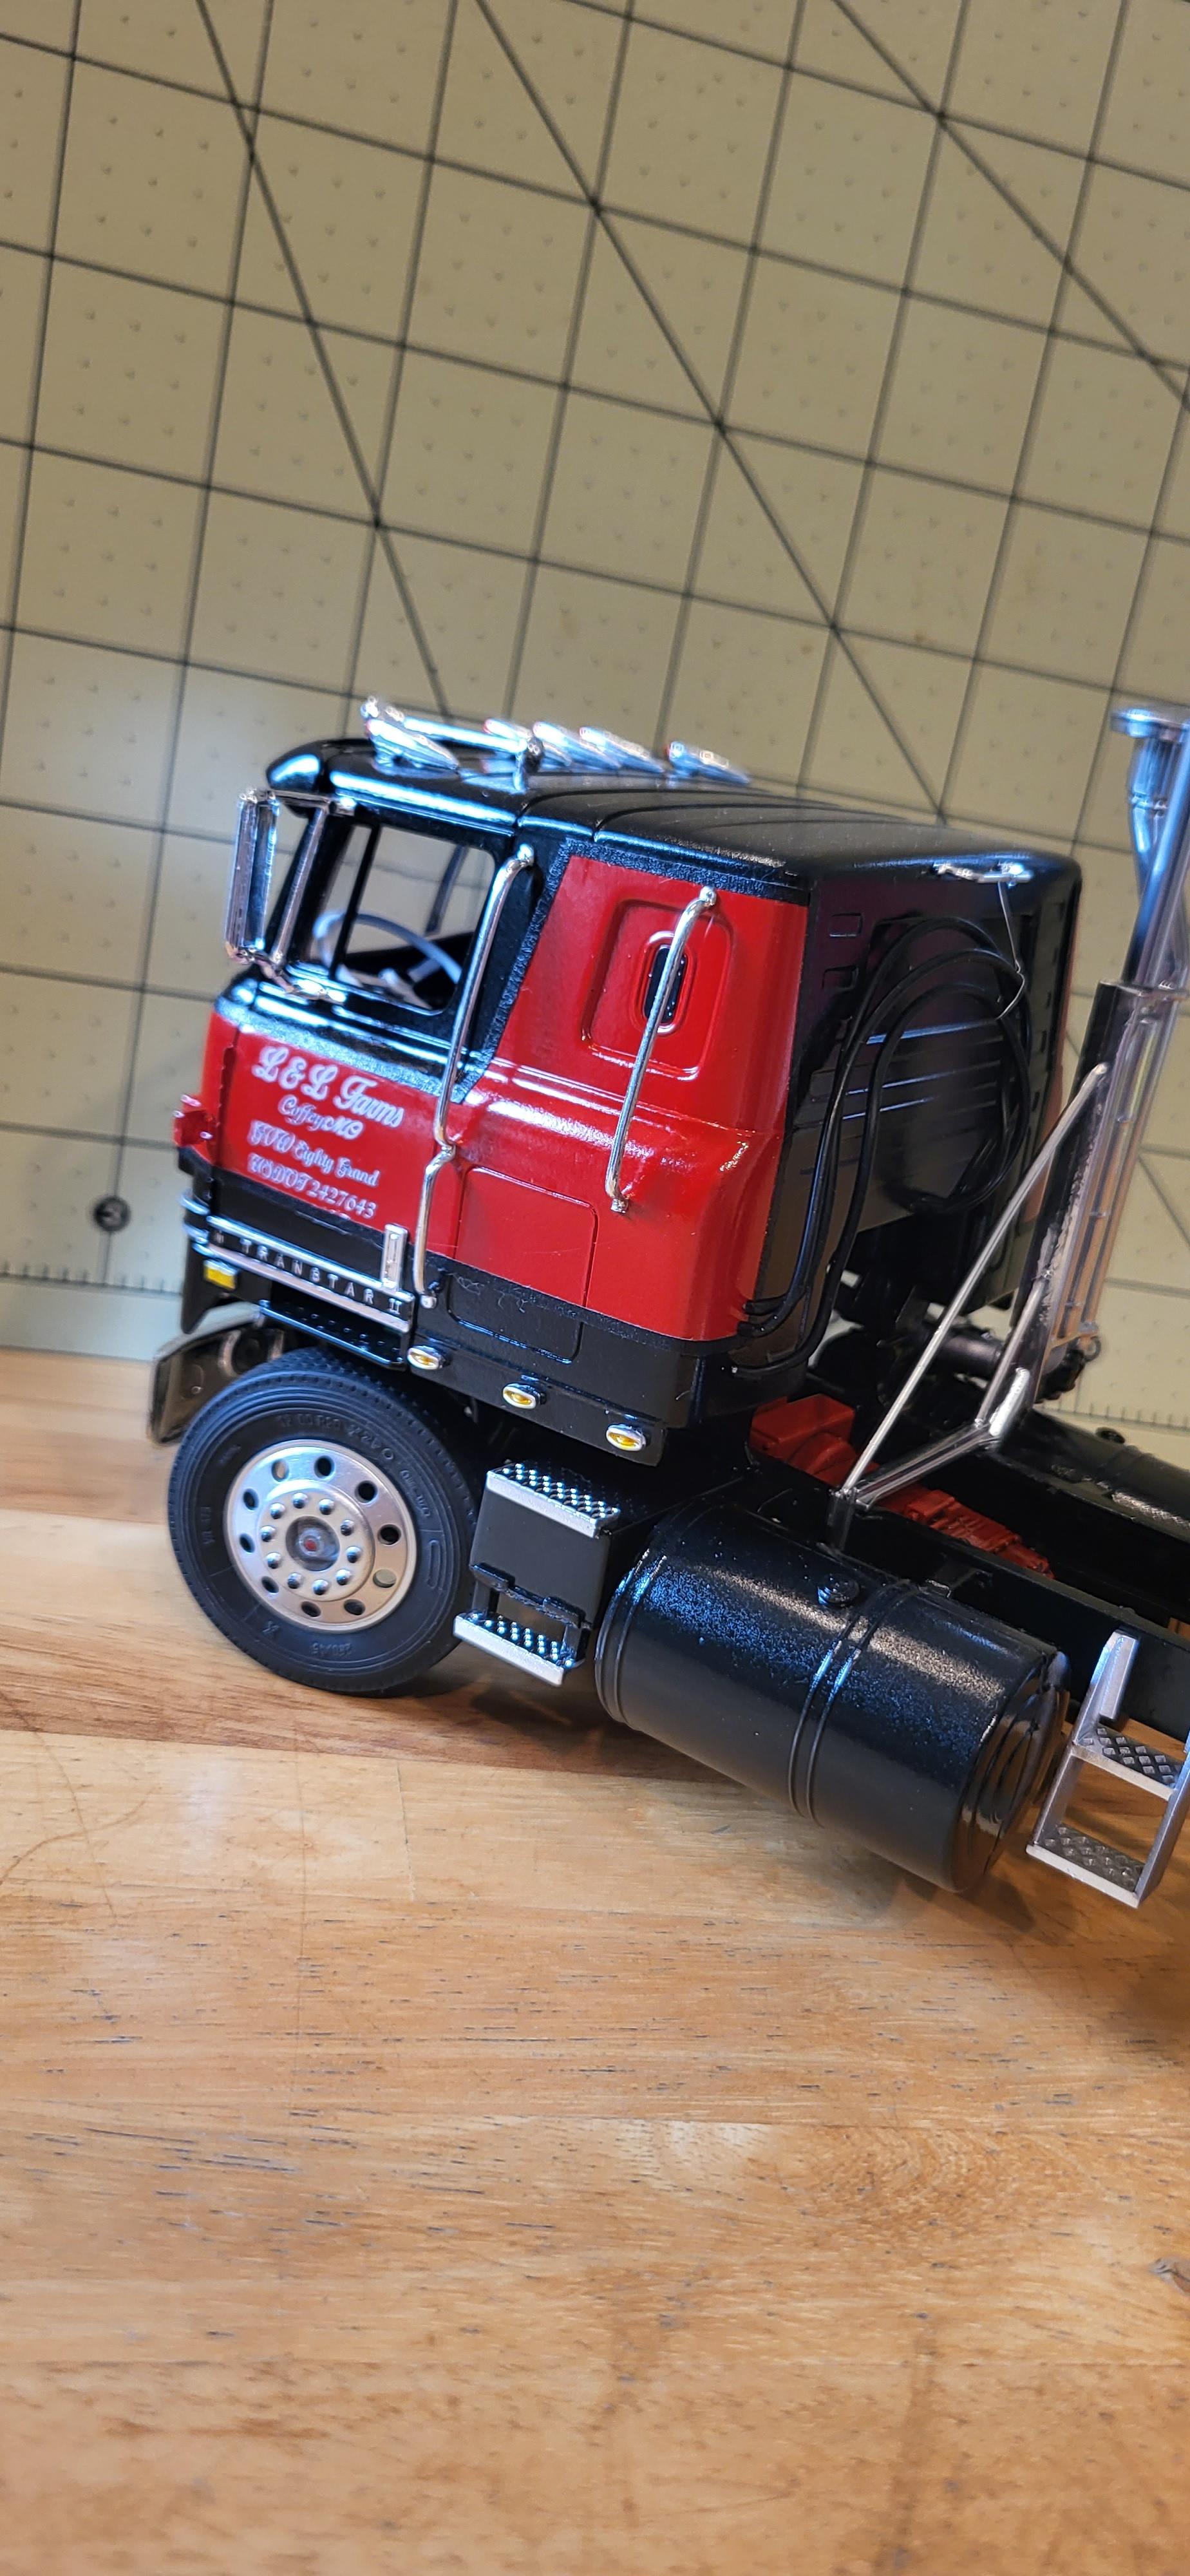
Here's one of my new top 10 favorites I just wrapped up yesterday. It's been a struggle the whole way through, and the name on the back of the sleeper is more than fitting for it. But it's done and absolutely glistens in the sunlight. Here's everything done to it! I'm forgetting some stuff, but enjoy! TRUCK: -3d printed: hood ornament, chicken lights, rims, lower cab panel, shifter, exhaust stacks, 1/4 fenders, rear mudflap hangers, cb radio, antennas -Resin cast: visor, trailer hubs, batteries. -Fully plumbed chassis with air lines and valves. Engine plumbed and wired. Scratchmade ccv tube, and oil dipstick. Batteries in battery box wired. -Fully reworked interior and floorpan. Custom diamond plate center piece, pewter metal pedals, scratchmade shifter, sleeper curtain, and floor mats. Amt steering wheel and fire extinguisher. -AMT 5th wheel assembly, mercury sleeper, cab horns. -Photoetch Detroit Diesel logo on frame, air lines from RMK Parts. -Custom made mudflaps by me, various decals from kits, and STS Scale Model Decals. TRAILER: -Scratchmade ICC bar, mudflap brackets, front axle light panel, rear tail light assembly. -Italeri 1/4 fenders and rims/tires. -Wrapped in automotive chrome tape. -Custom made mudflaps by me, various decals from kits and STS Scale Model Decals
-
This was a parts box special build. Had a box of fld parts and turned it into what you see here! Fabbed up a lift axle, about a 1" frame stretch, 3d printed steer rims, Peterbilt 378 1/4 fenders, and custom made mudflaps. Simple, but looks good, enjoy!
-
This is easily one of my top 10 favorite builds of all time now, no questions. I truly love how this one looks, I had the vision and nailed it. It's based off of trucks I see running all the time on I95 down here in the south. Here's the mod list in no order: 3d printed- rims, exhaust stacks, chicken lights, 1/4 fenders, hood ornament, and mudflap brackets. Moebius tires all around. Rear exit exhaust, with fully scratchbuilt exhaust system. Photo etch license plate frames. Air lines and electrical line. Custom made mudflaps. Decals from various kits, and custom made. Enjoy!
-
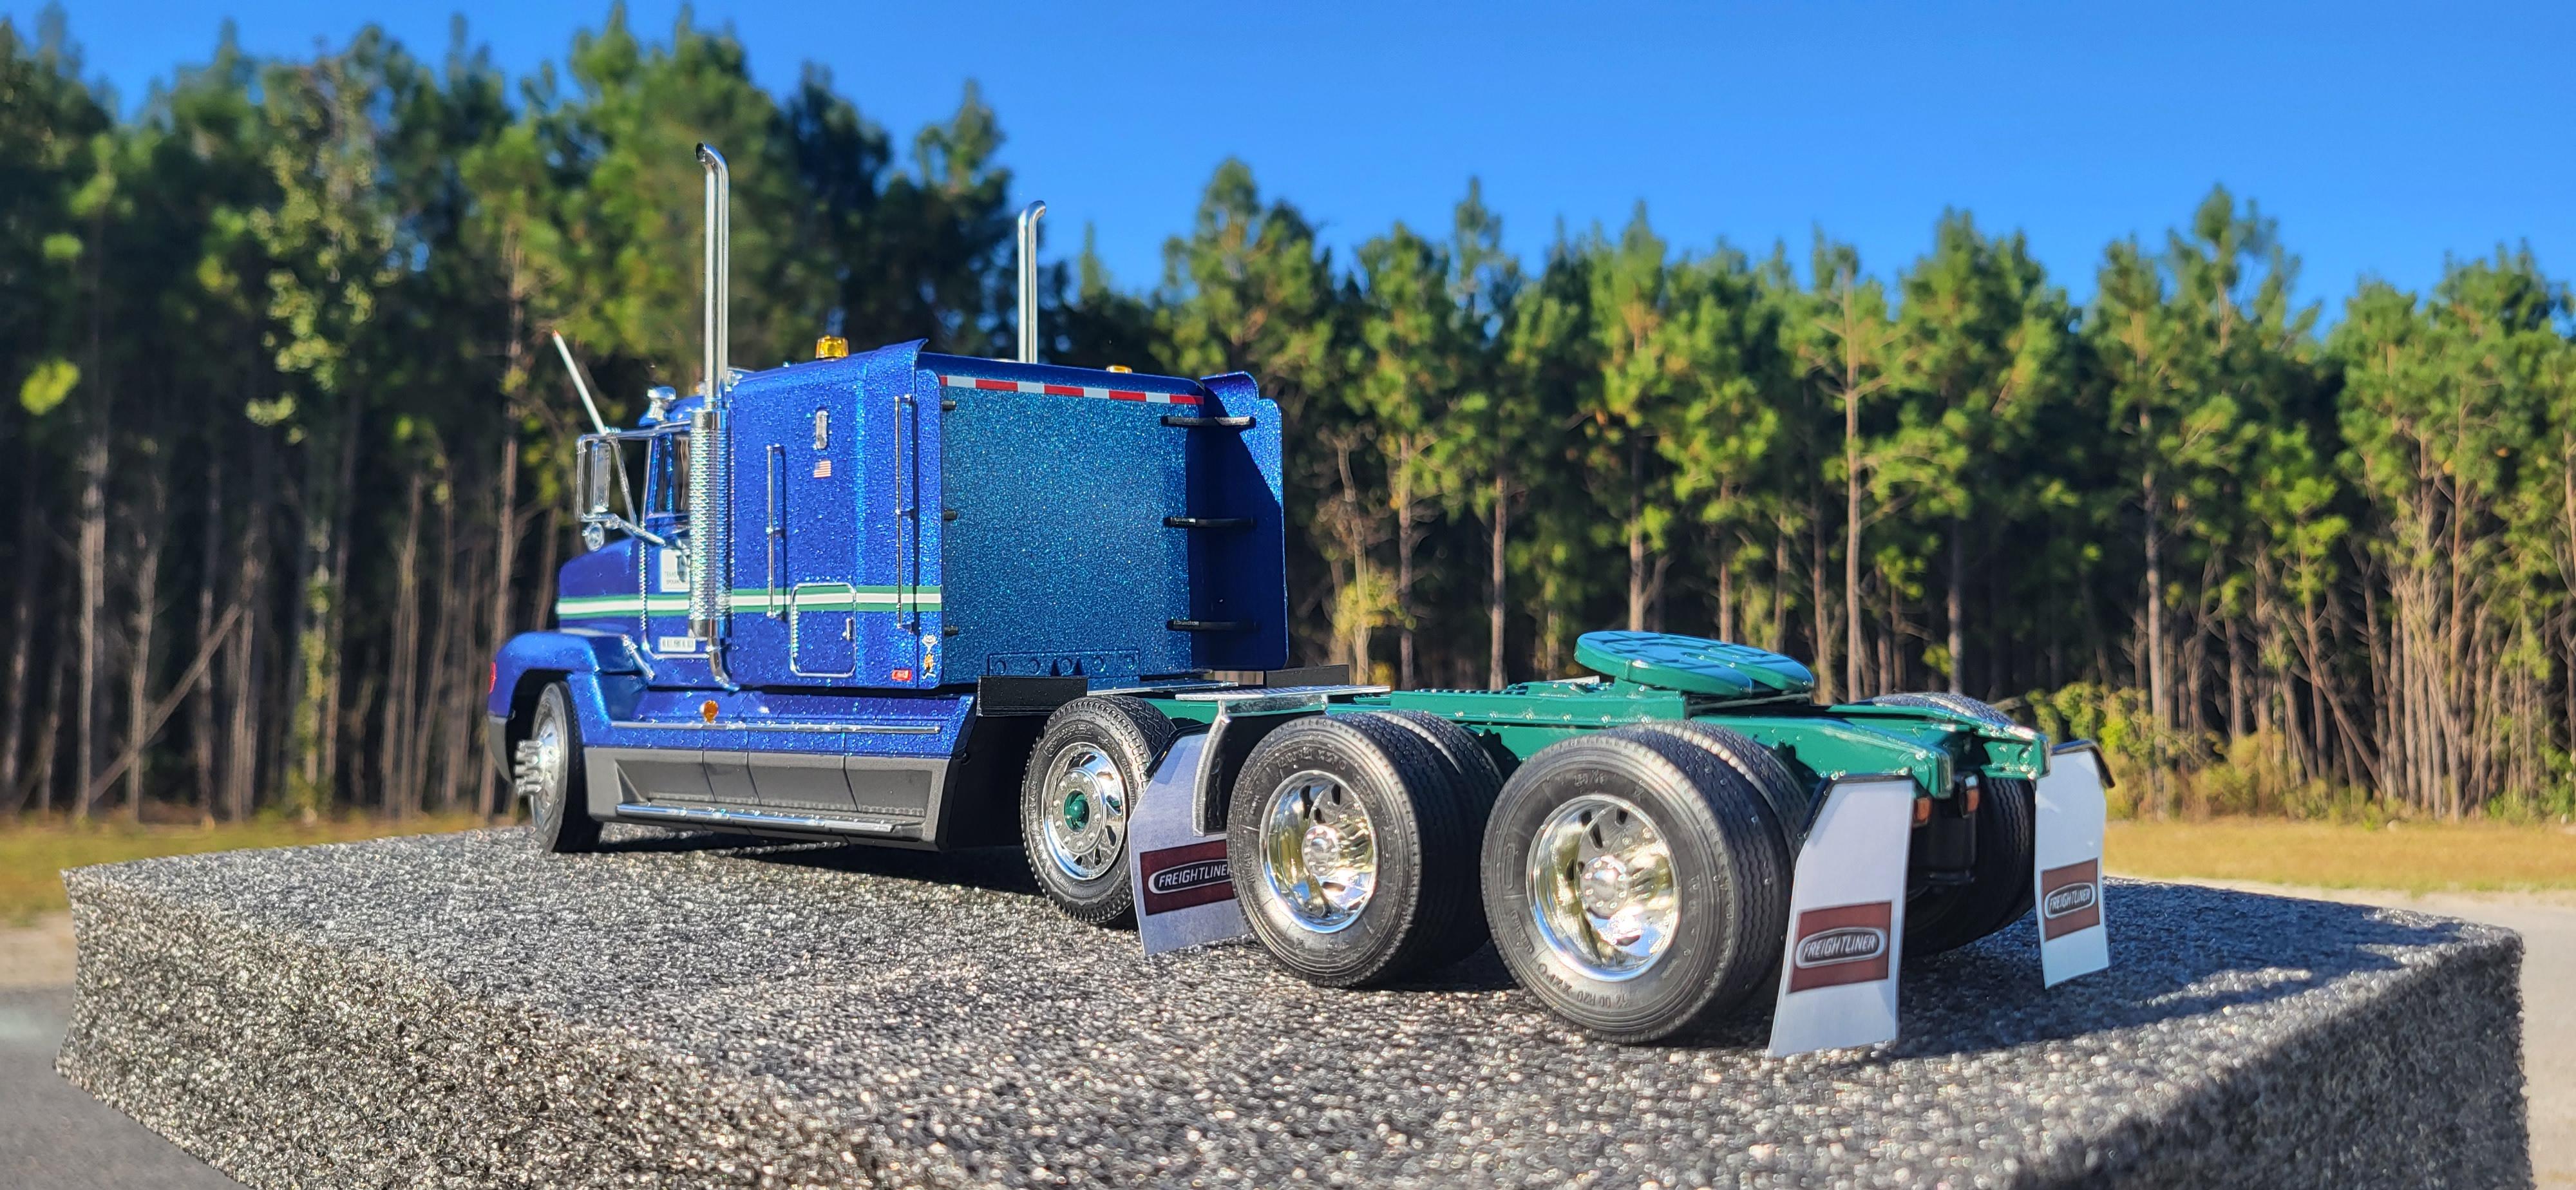
Started out with the Rat Fink Transtar, along with a few handfuls of spare parts, and came up with this truck. Tried my hand at bettering my weathering skills up, and it's definitely much better! Here's the mod list: GMC Astro square fuel tanks, radiator guard, and Hendrickson rear suspension swap. Diamond Reo rear 1/4 fenders, sprue tree exhaust tips, Mack DM800 front bumper. Most noticeably I swapped out the single headlight for dual headlights. Decals from various kits. Enjoy!
-
Here's another long project I just finished for a buddy of mine. This took about a month and fought me the whole time. Results were worth it, but the progress to get here wasn't! I'm glad it's done, it did come out fantastic though. The mod list is as follows: resin 379 hood conversion kit from Moluminum. 3d printed: bumper, battery boxes, cab/sleeper light panels, flattop sleeper roof, air cleaner lights, rims on truck and trailer, tool boxes, exhaust system, rear fenders, mudflaps, 5th wheel assembly, and rear light panel. Fuel tank end cap covers are custom made fabric pieces from STS Scale Model Decals. The trailer is relatively box stock. Light Decals from STS, 3d printed rims, mudflaps and tool boxes. Modified the rear tail light/mudflap area to accommodate the new pieces. Enjoy!
-
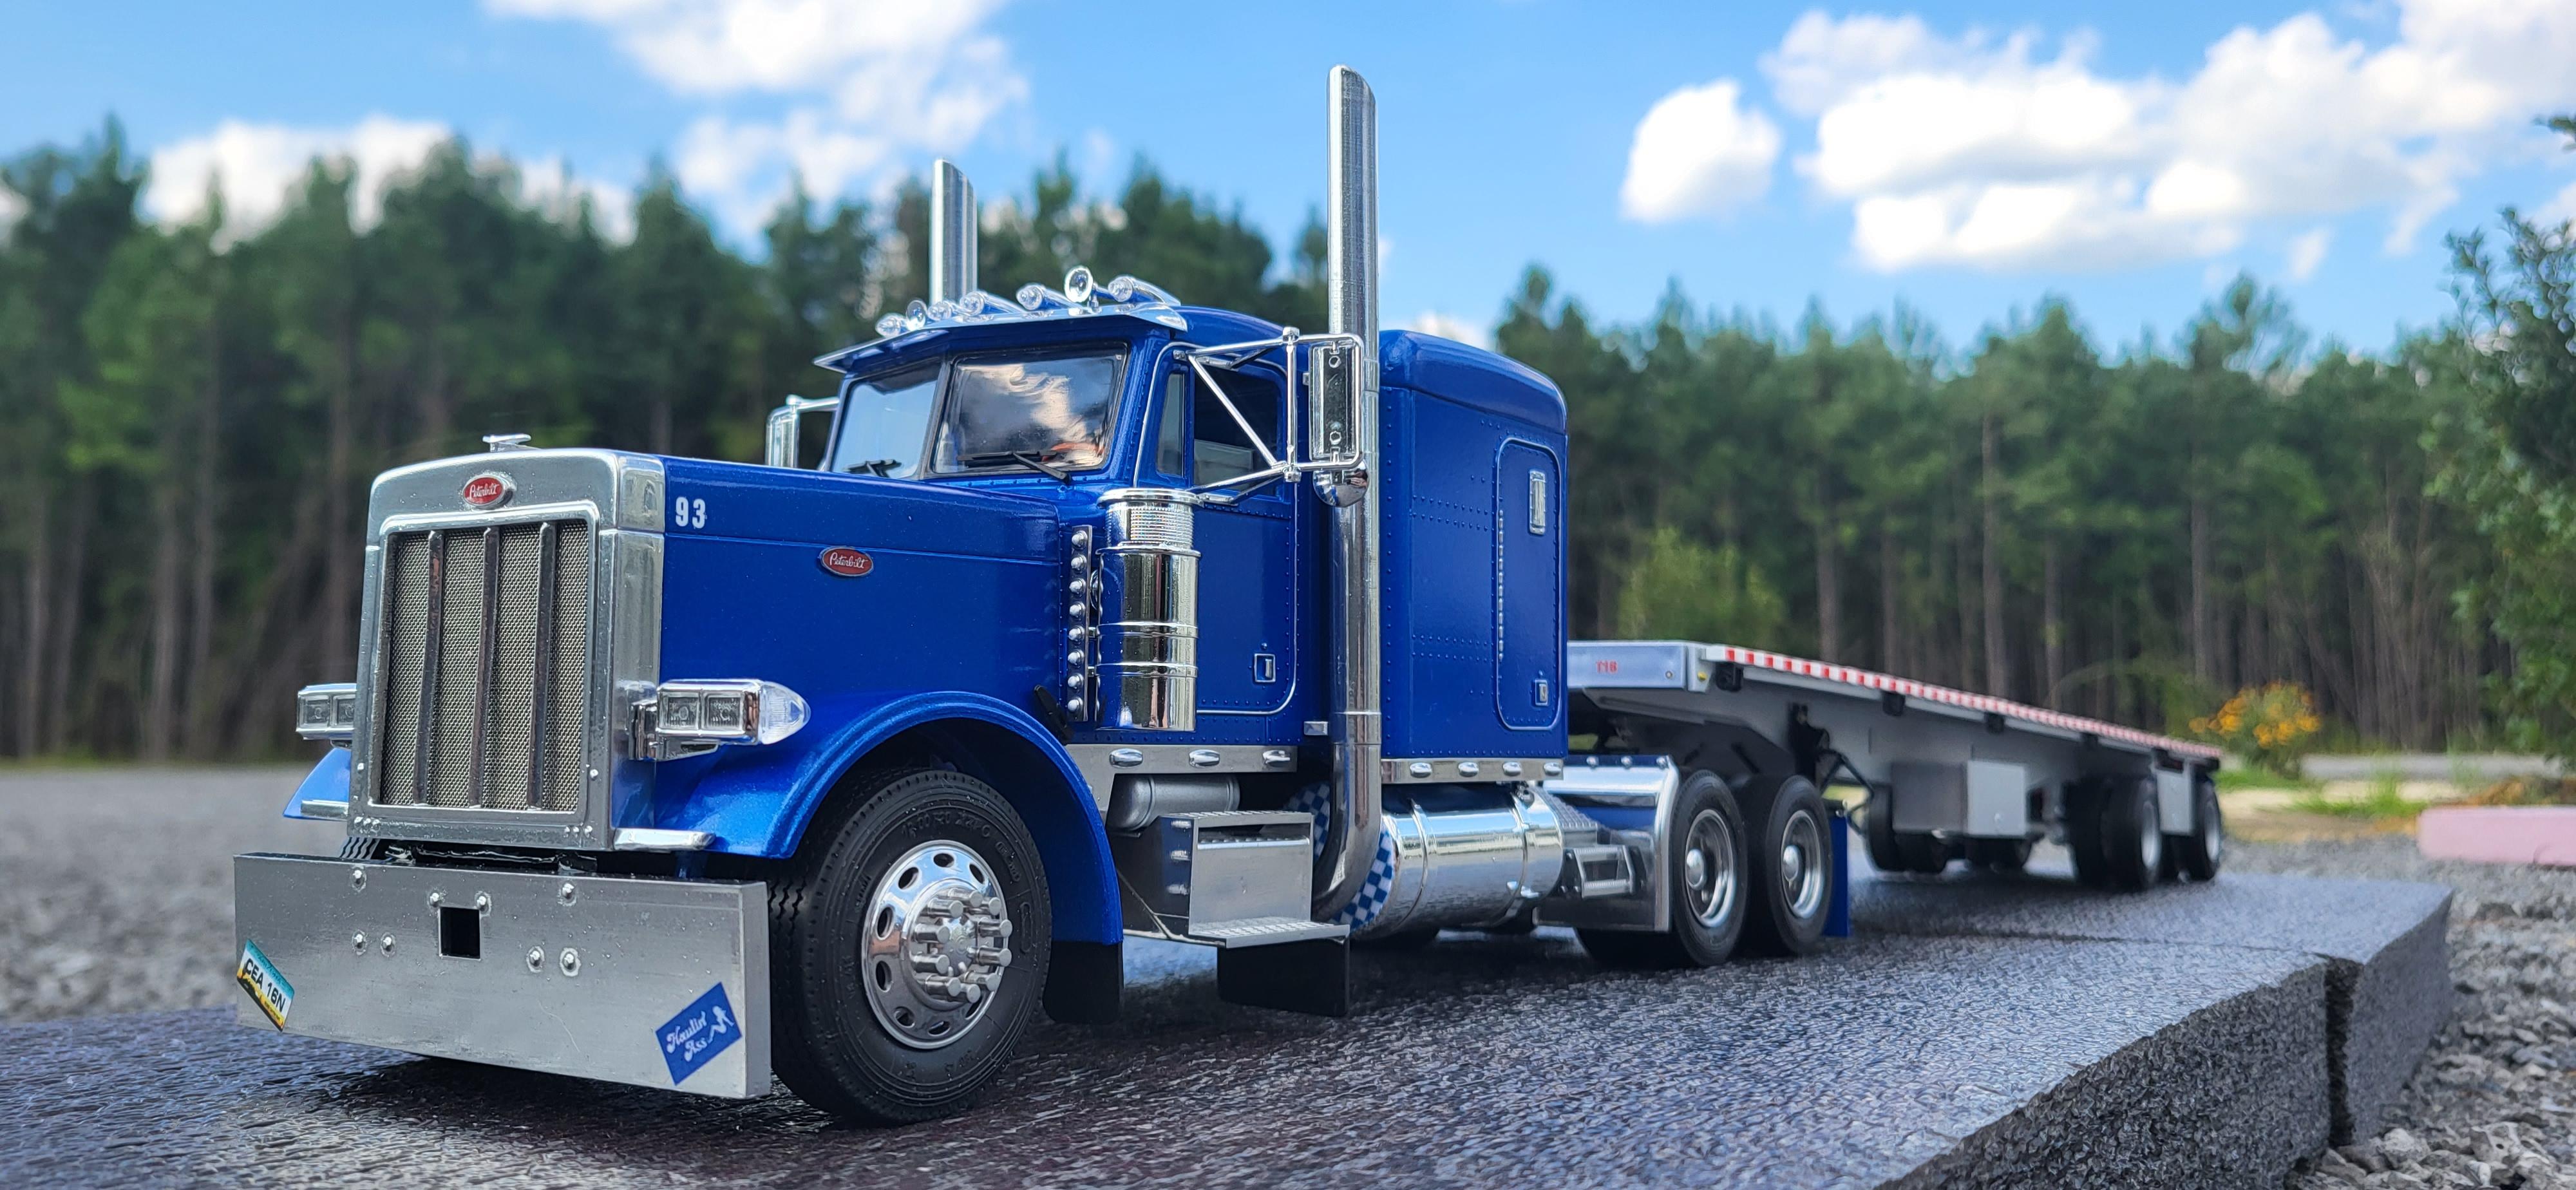
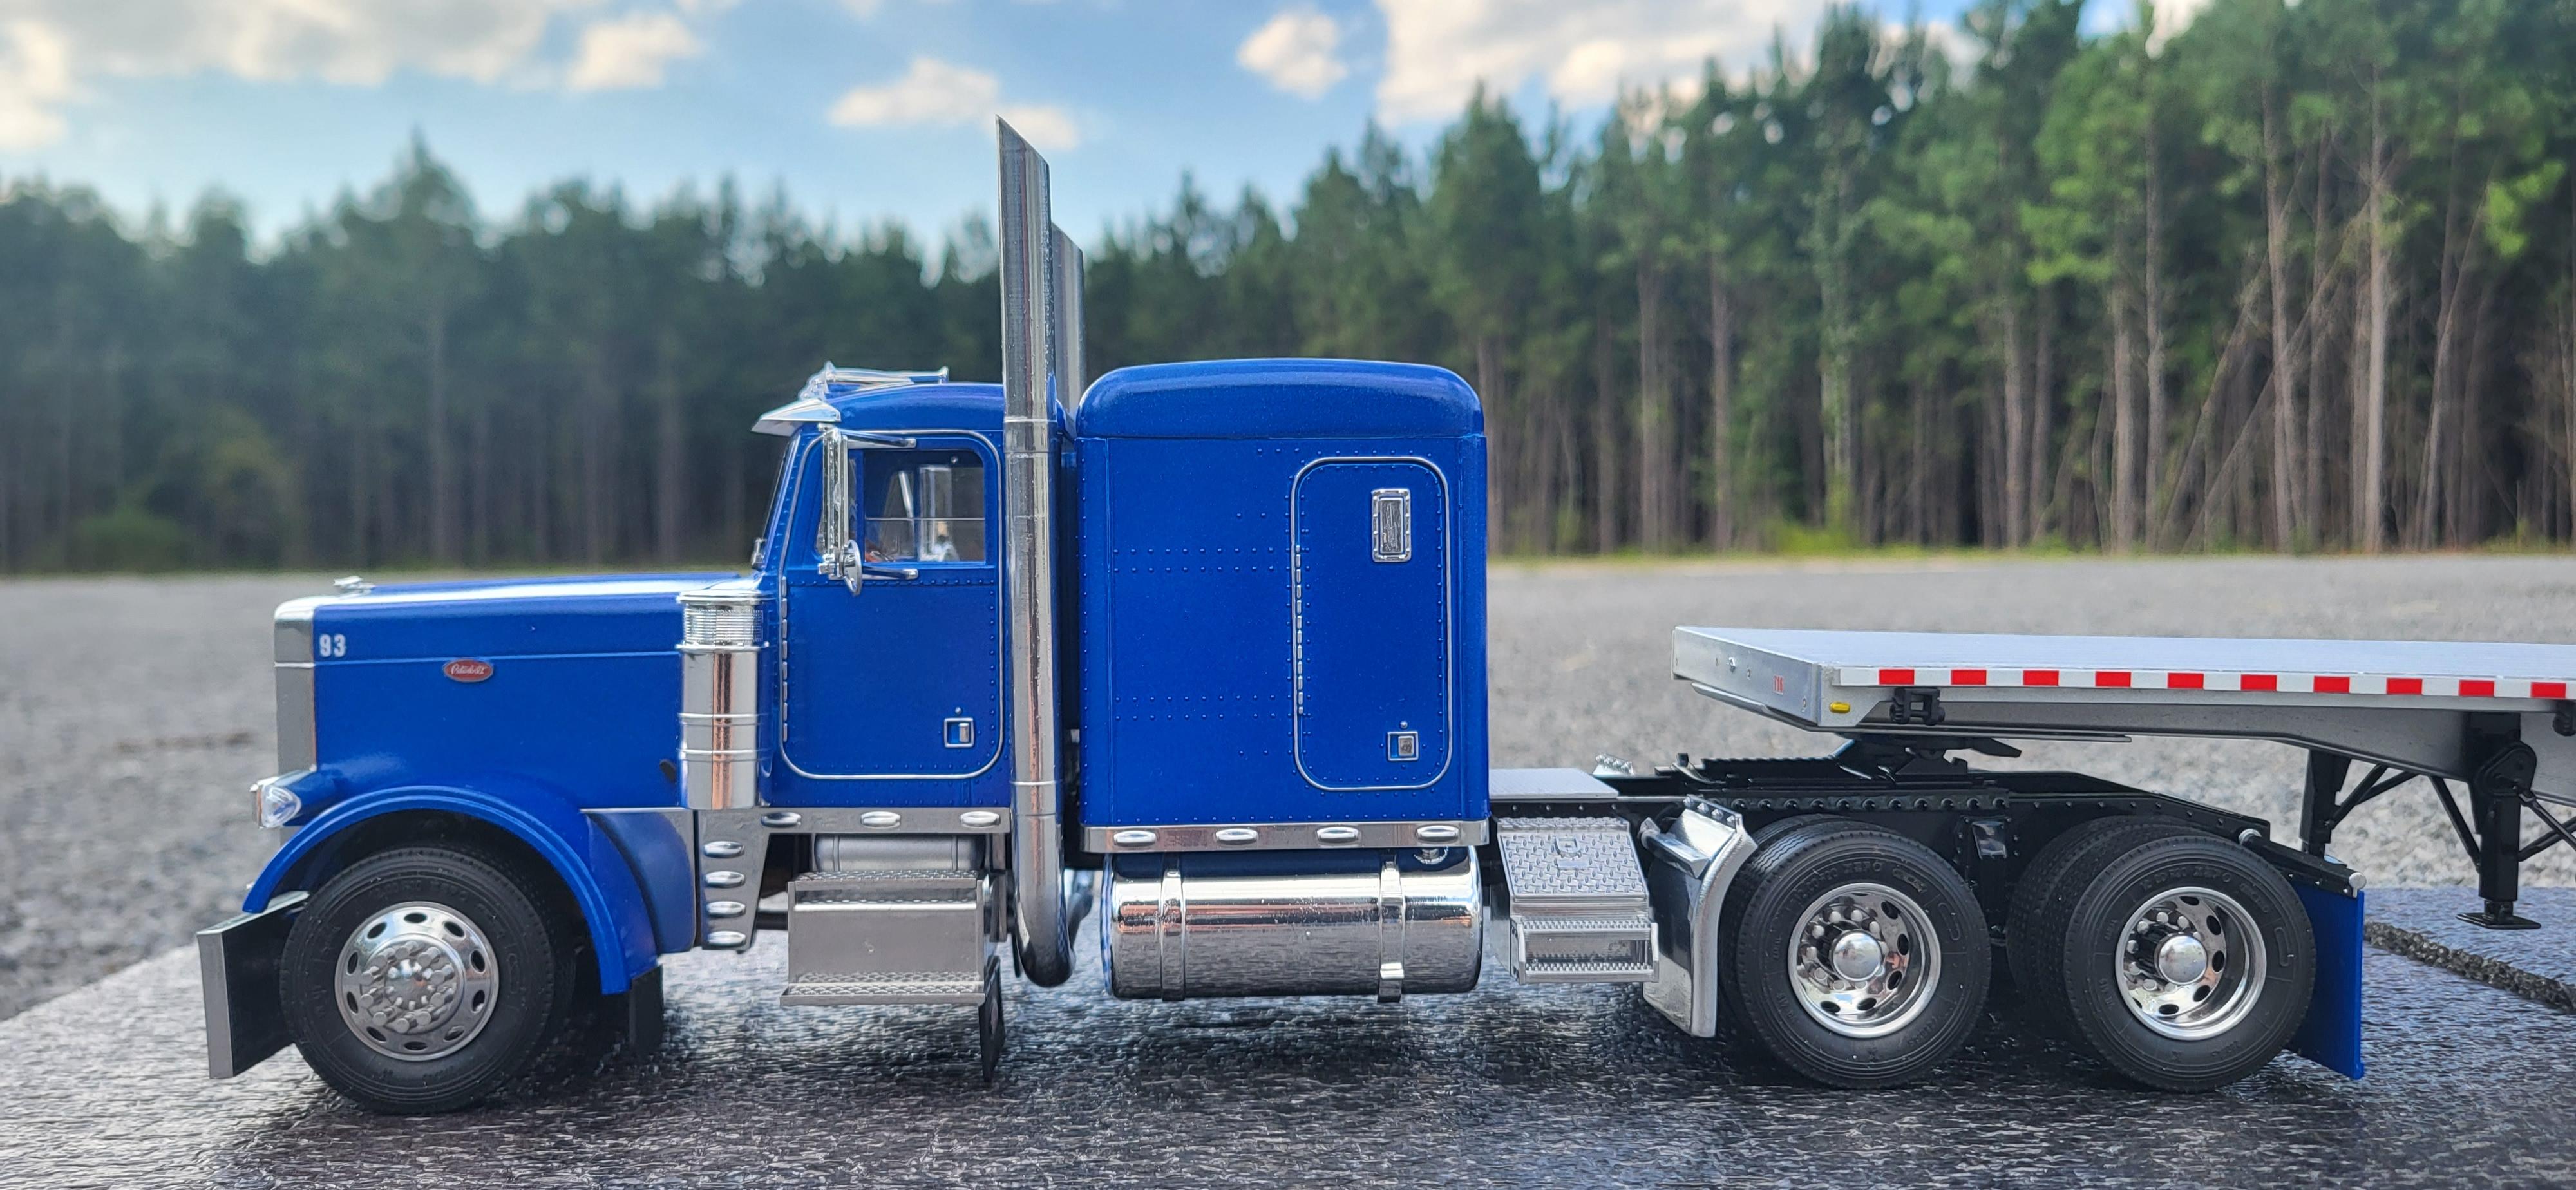
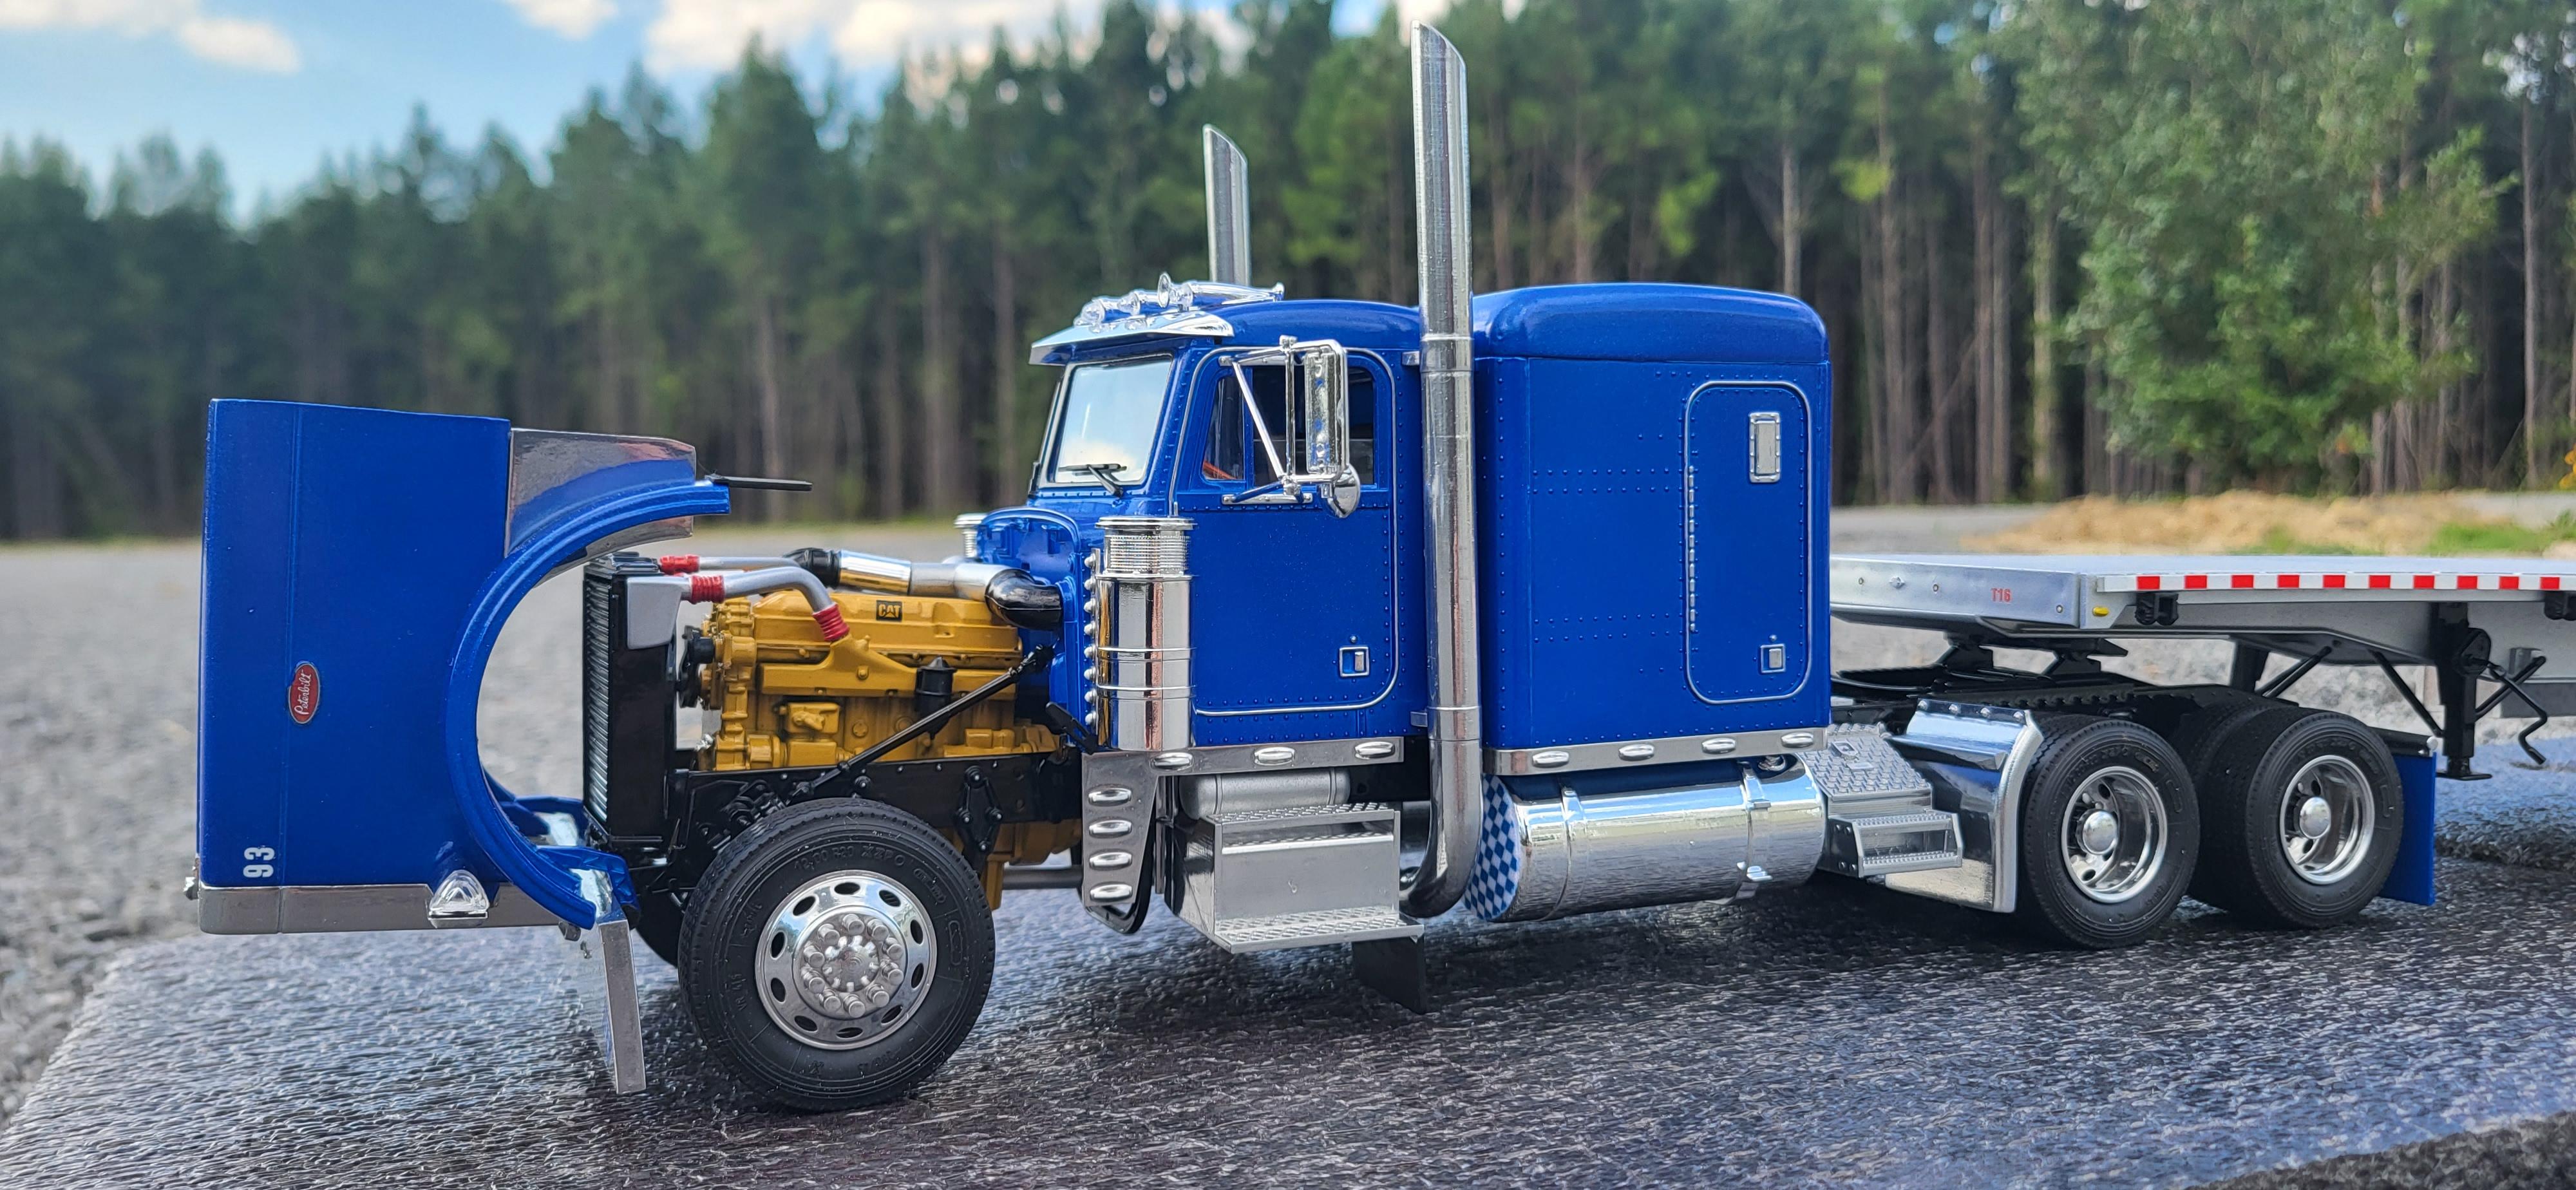
Well now I can officially say this build is done. The trailer is all wrapped up and paired with the tractor. Totally spot on compared to the photos I have. It's relatively box stock except for the rear rims, and added safety reflector decals.
-
1/25 Revell Peterbilt 359
TruckerAL replied to JamesBC's topic in WIP: Model Trucks: Big Rigs and Heavy Equipment
That's a pretty tough kit to start as your first one back. But, don't let that discourage you. It's an awesome result once it's all done! If you have any questions, don't hesitate to message me, or ask the guys here in this forum. They're great -
Commission build Italeri 4964
TruckerAL replied to TruckerAL's topic in Model Trucks: Big Rigs and Heavy Equipment
Thank you guys! It was quite a challenge, even with mock ups and test fitting, but it's done and looks great. The trailer should really make this truck pop!! Stay tuned for it soon -
Commission build Italeri 4964
TruckerAL posted a topic in Model Trucks: Big Rigs and Heavy Equipment
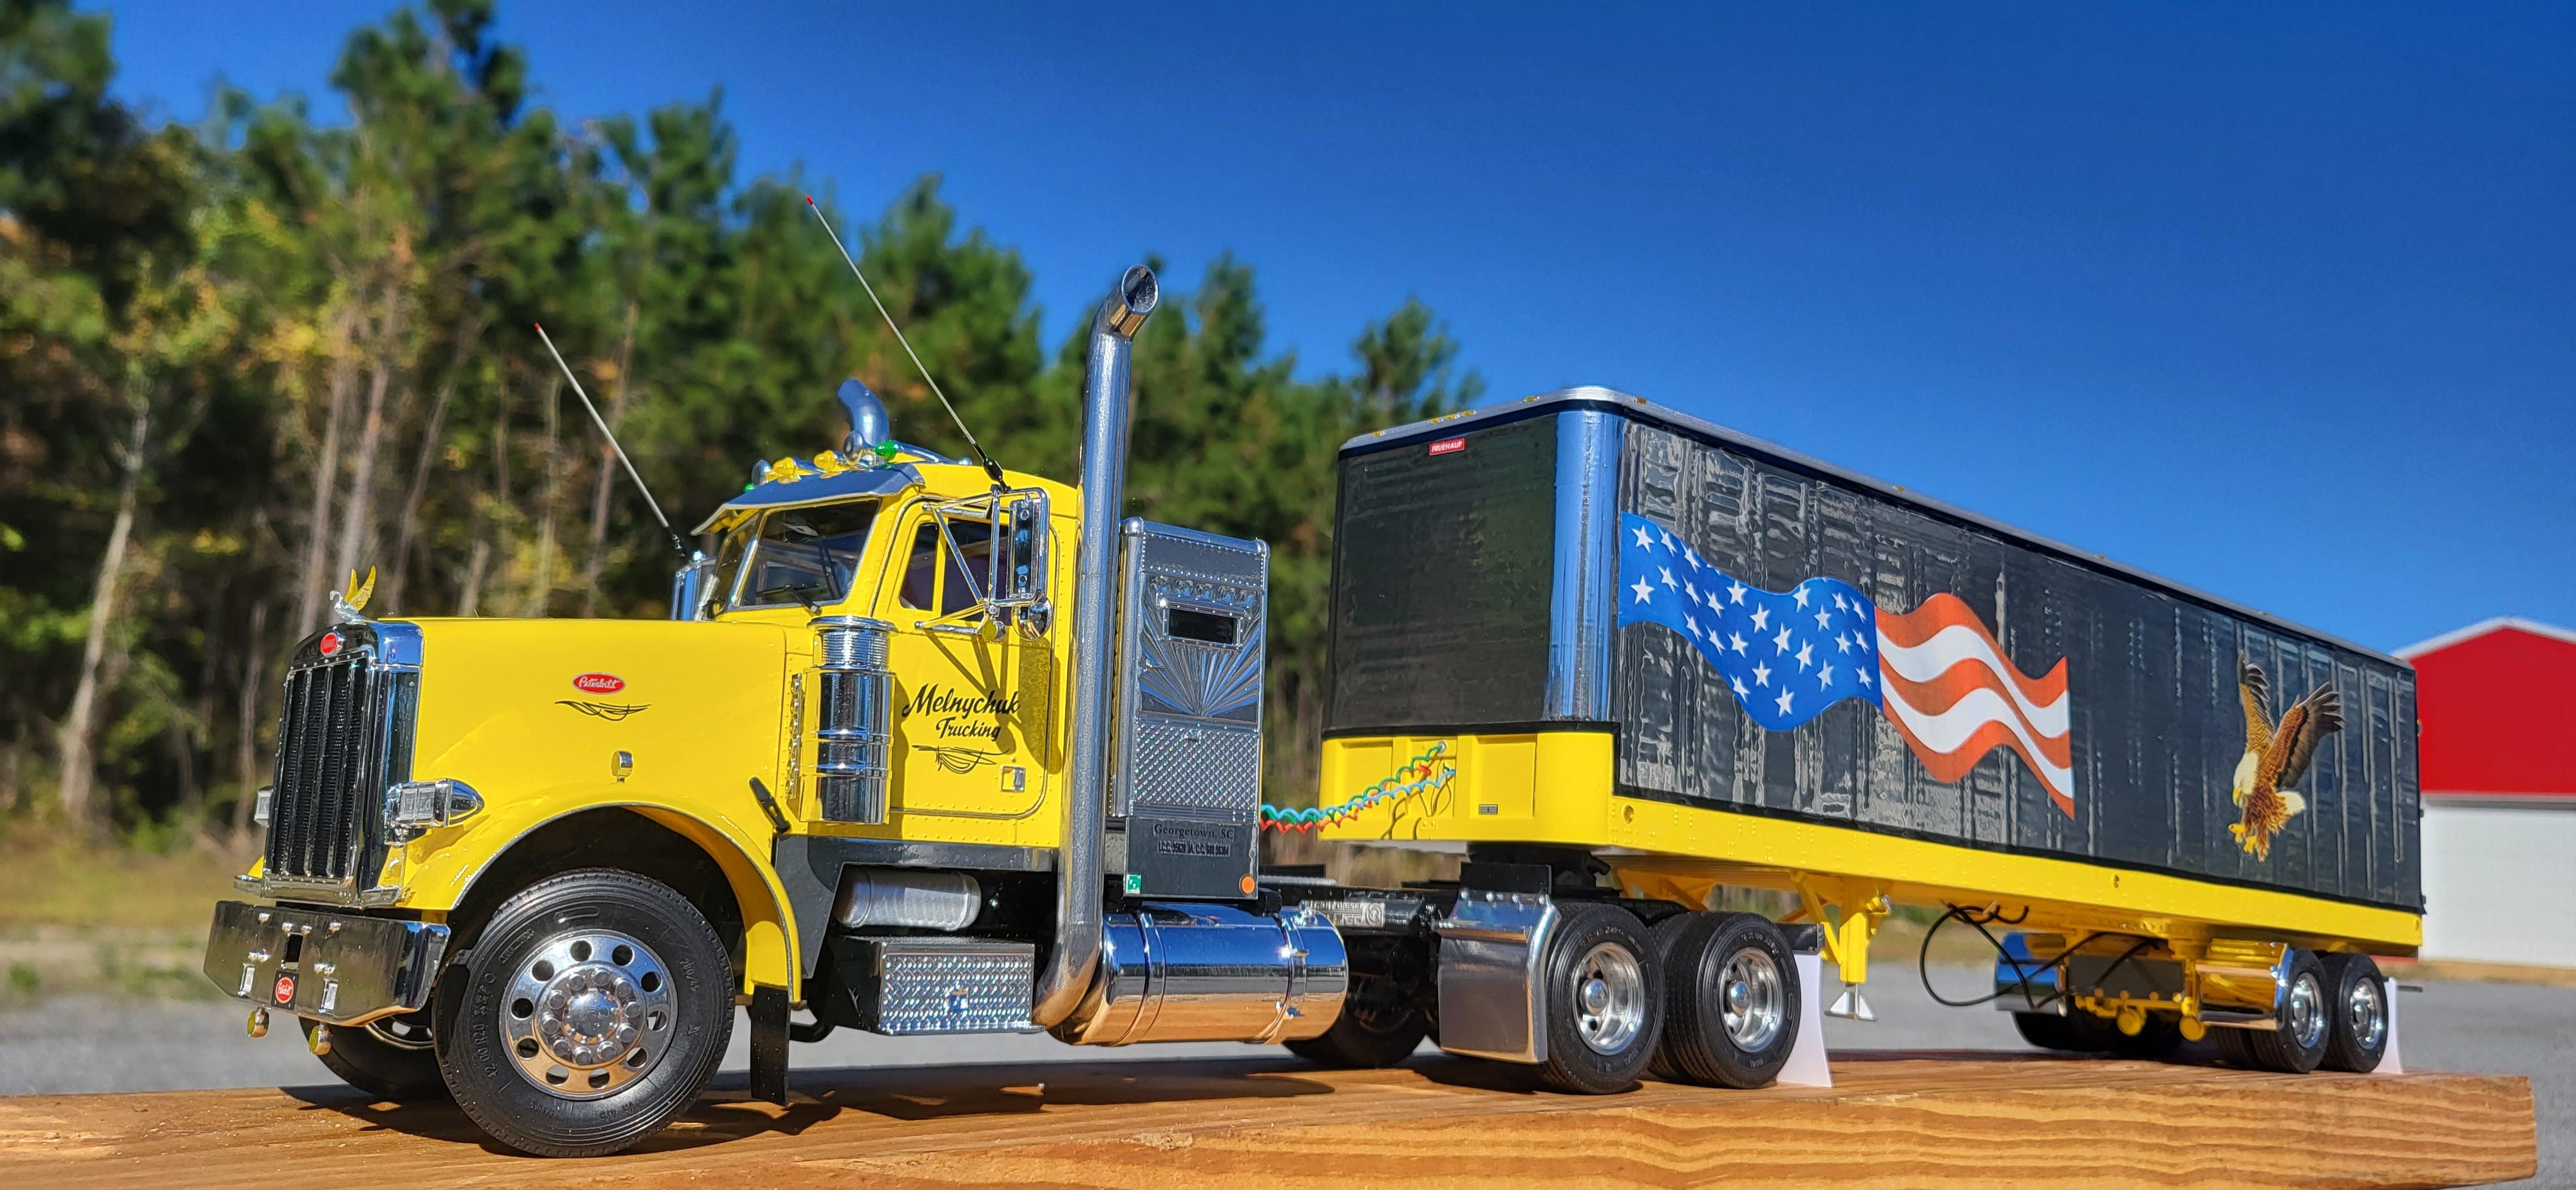
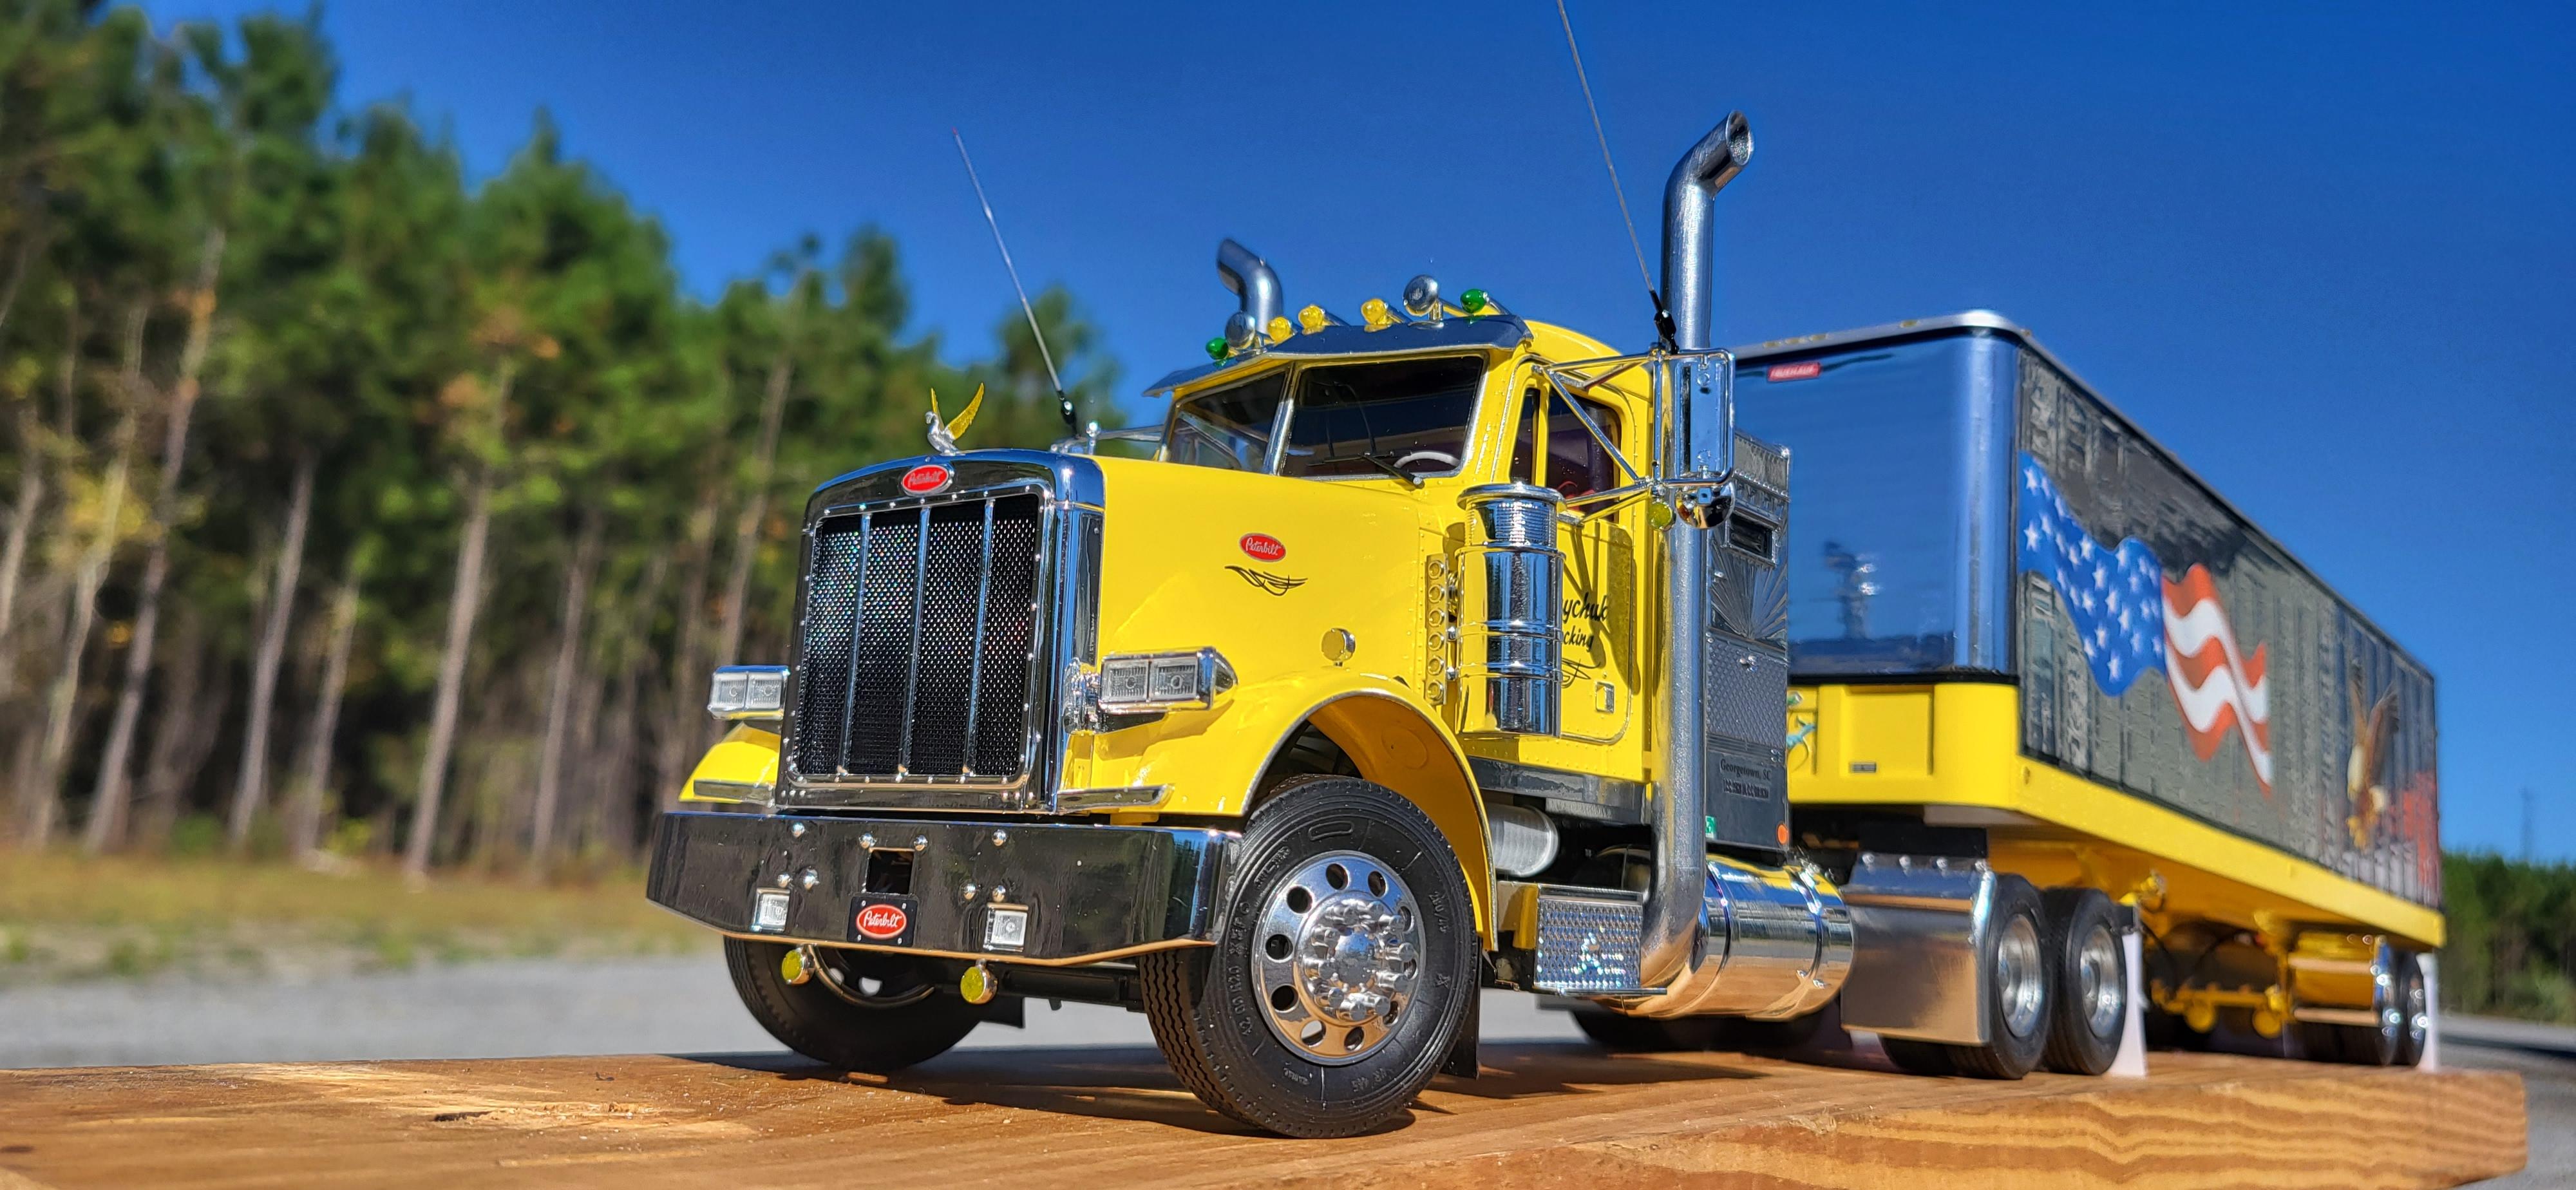
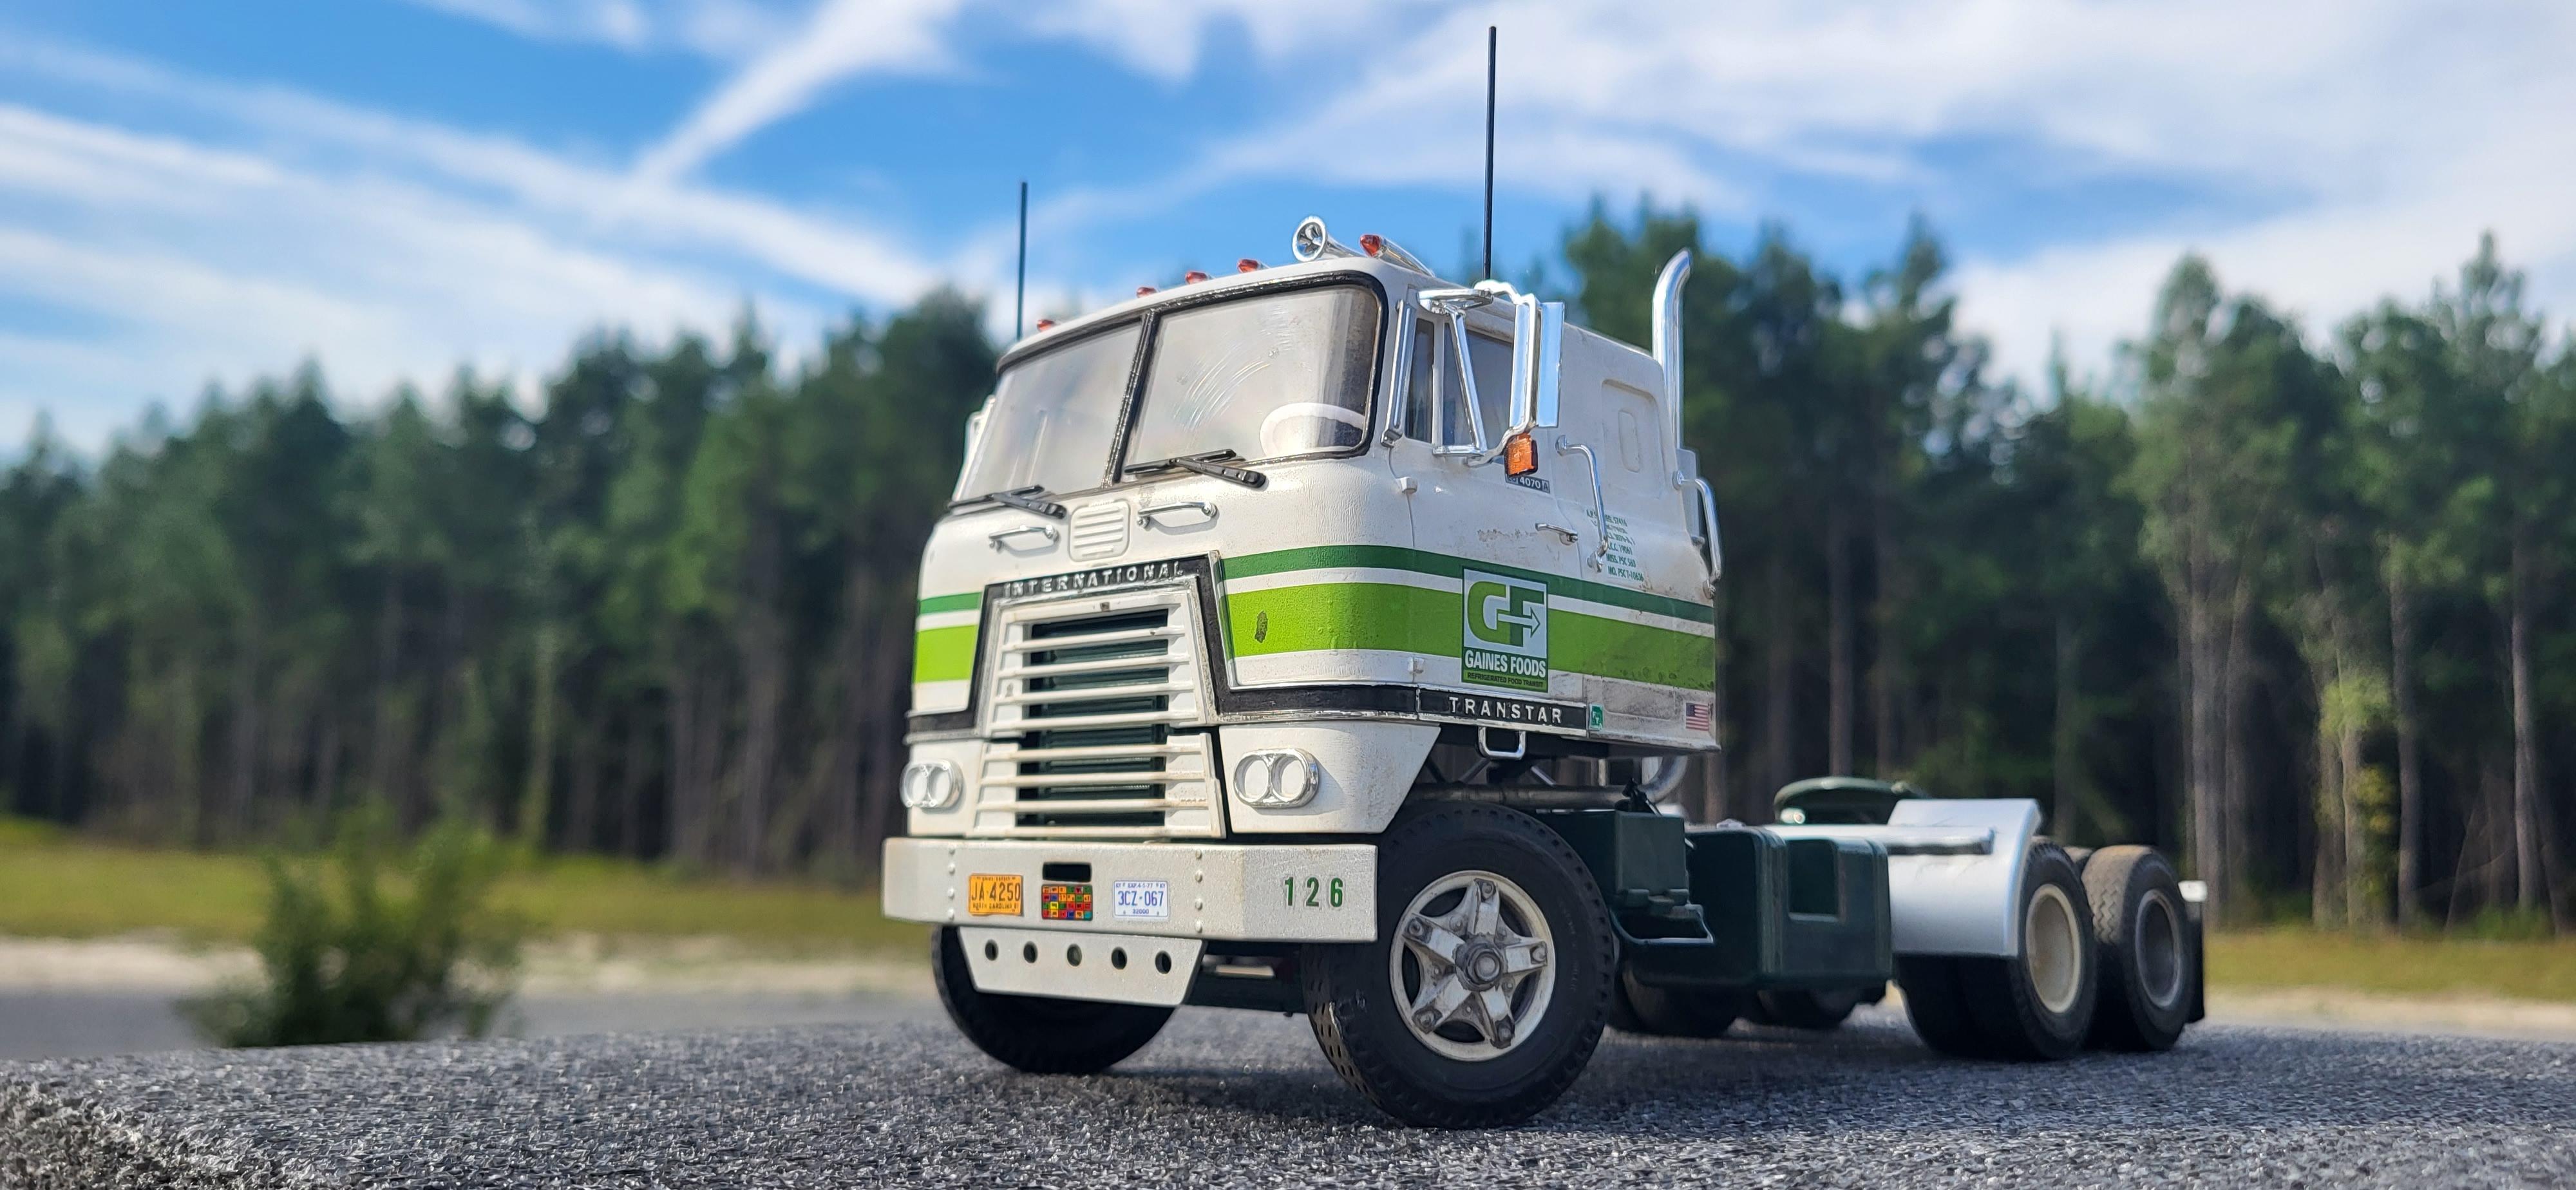
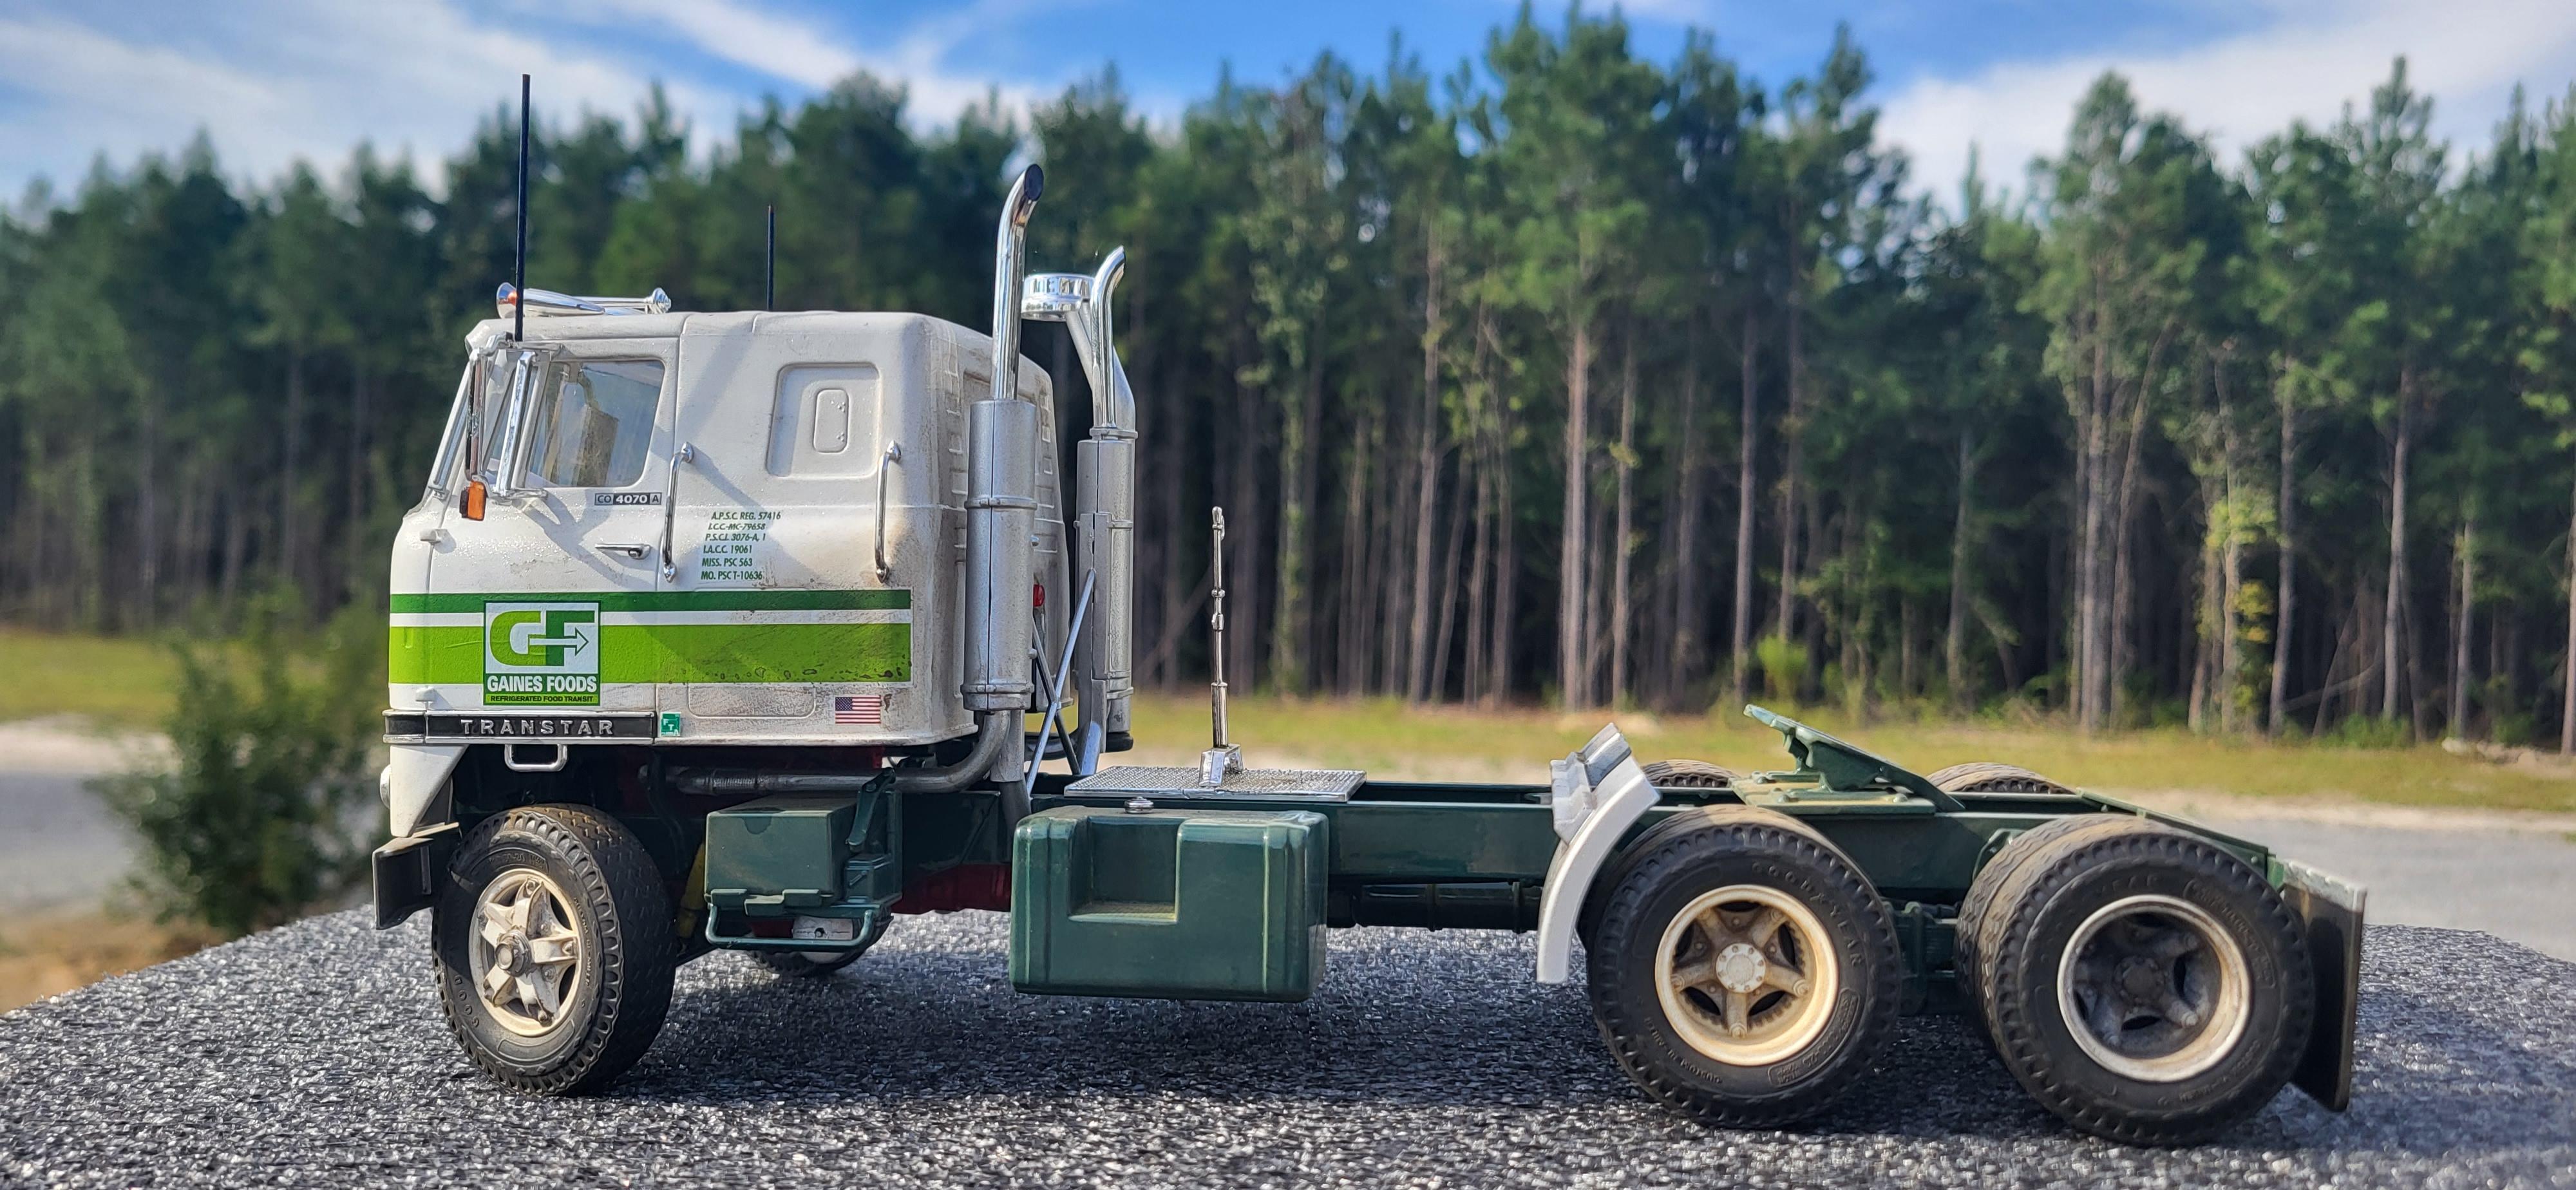
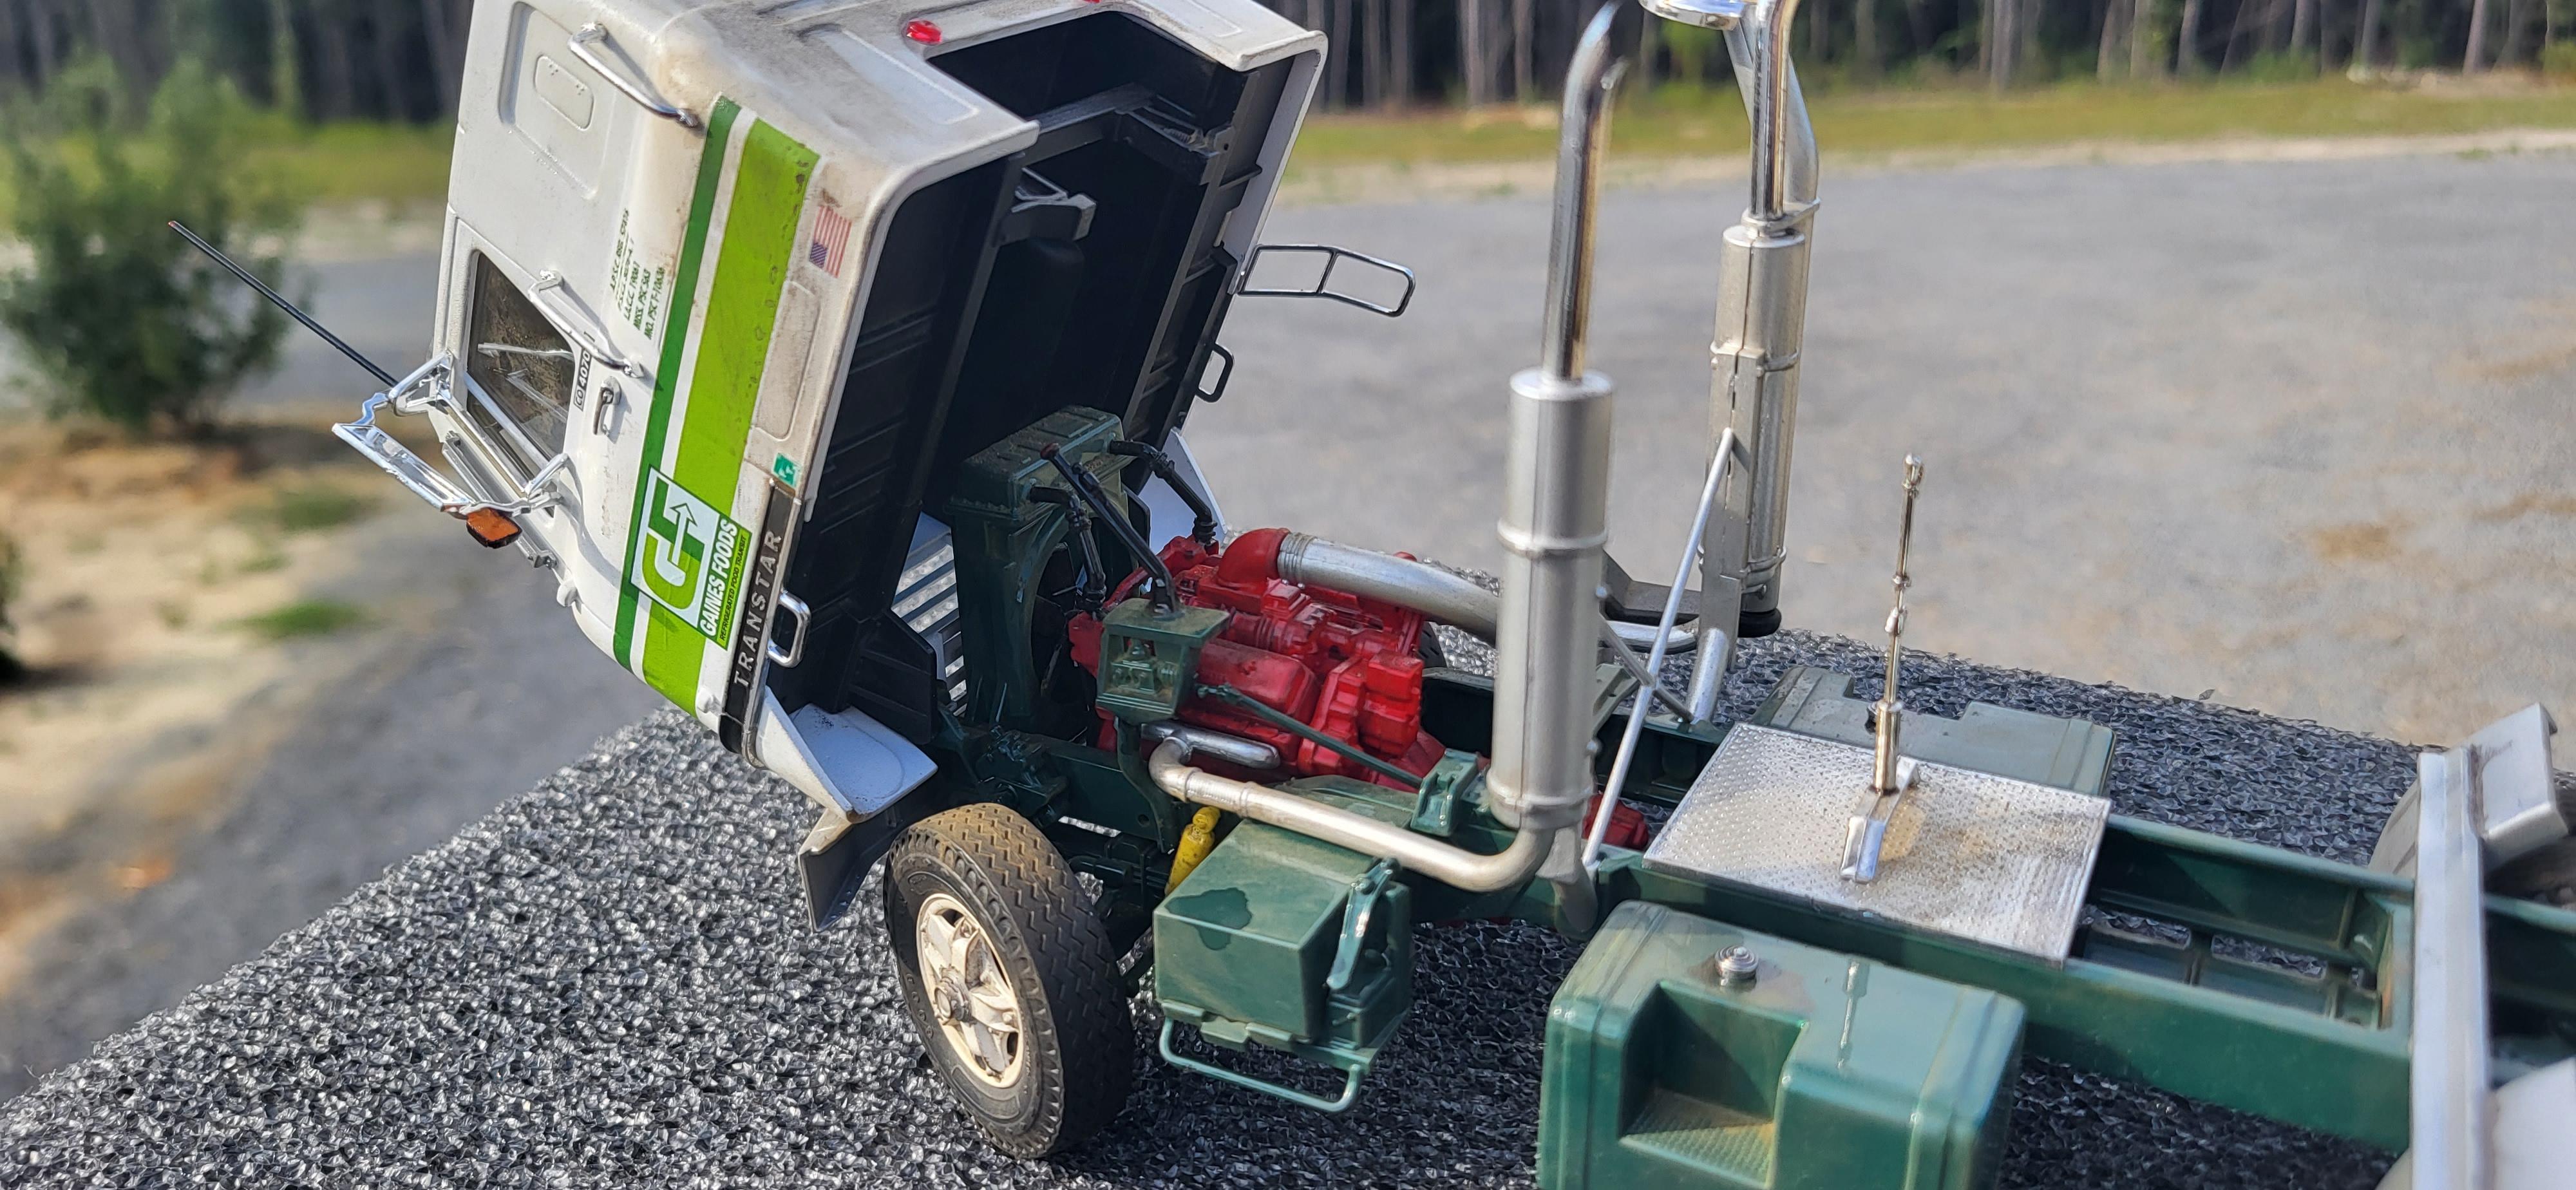
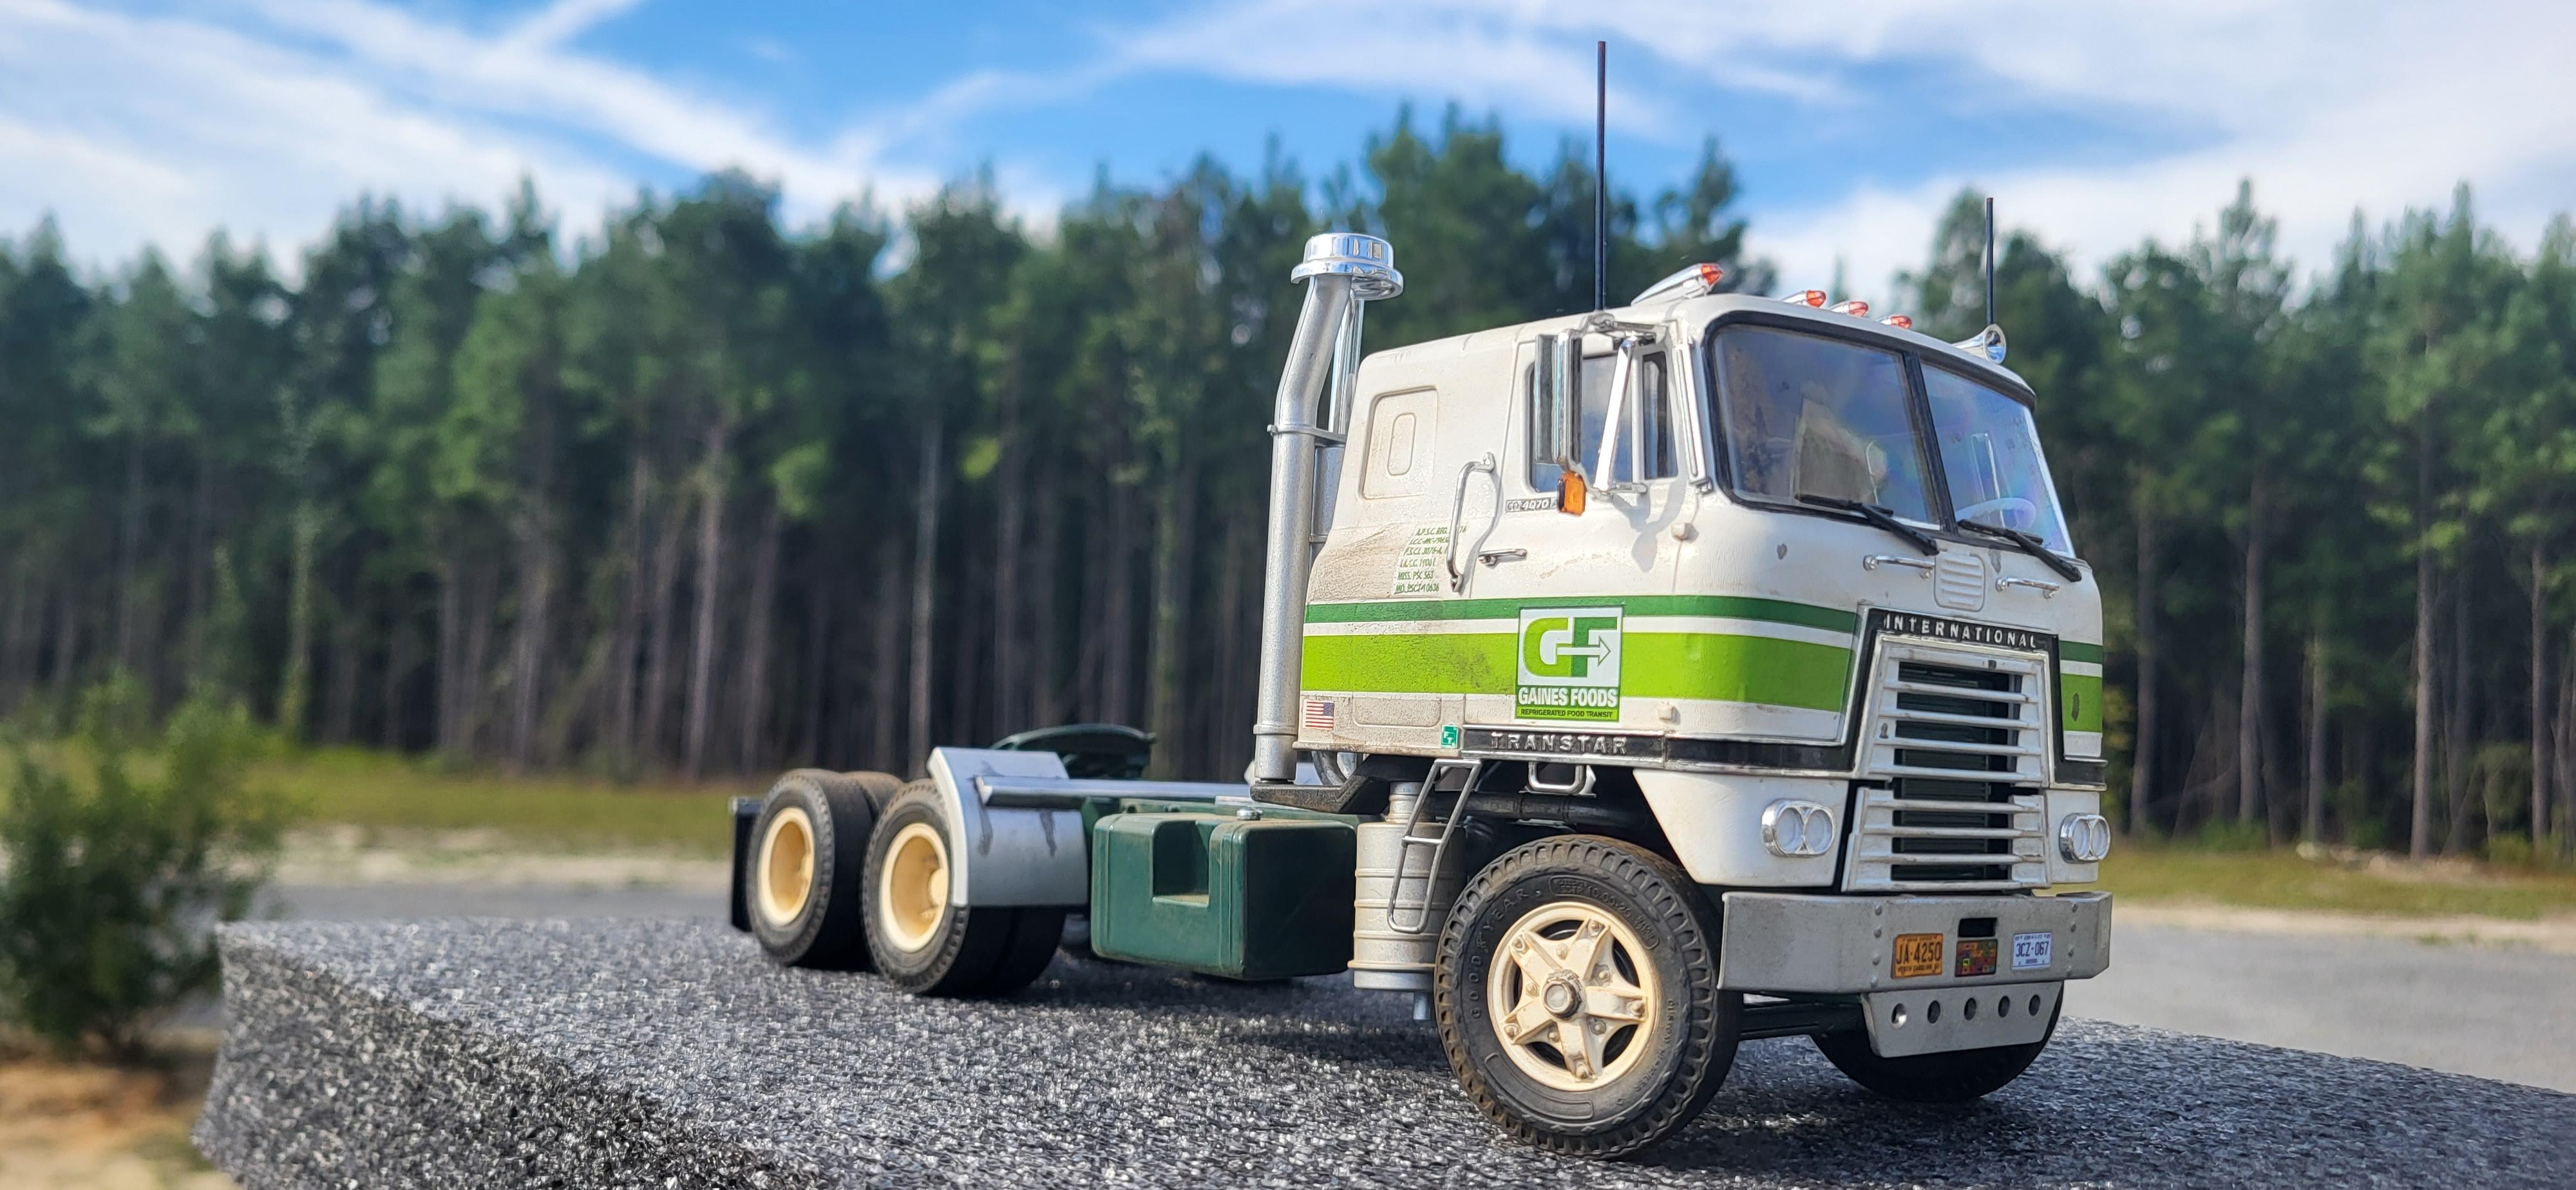
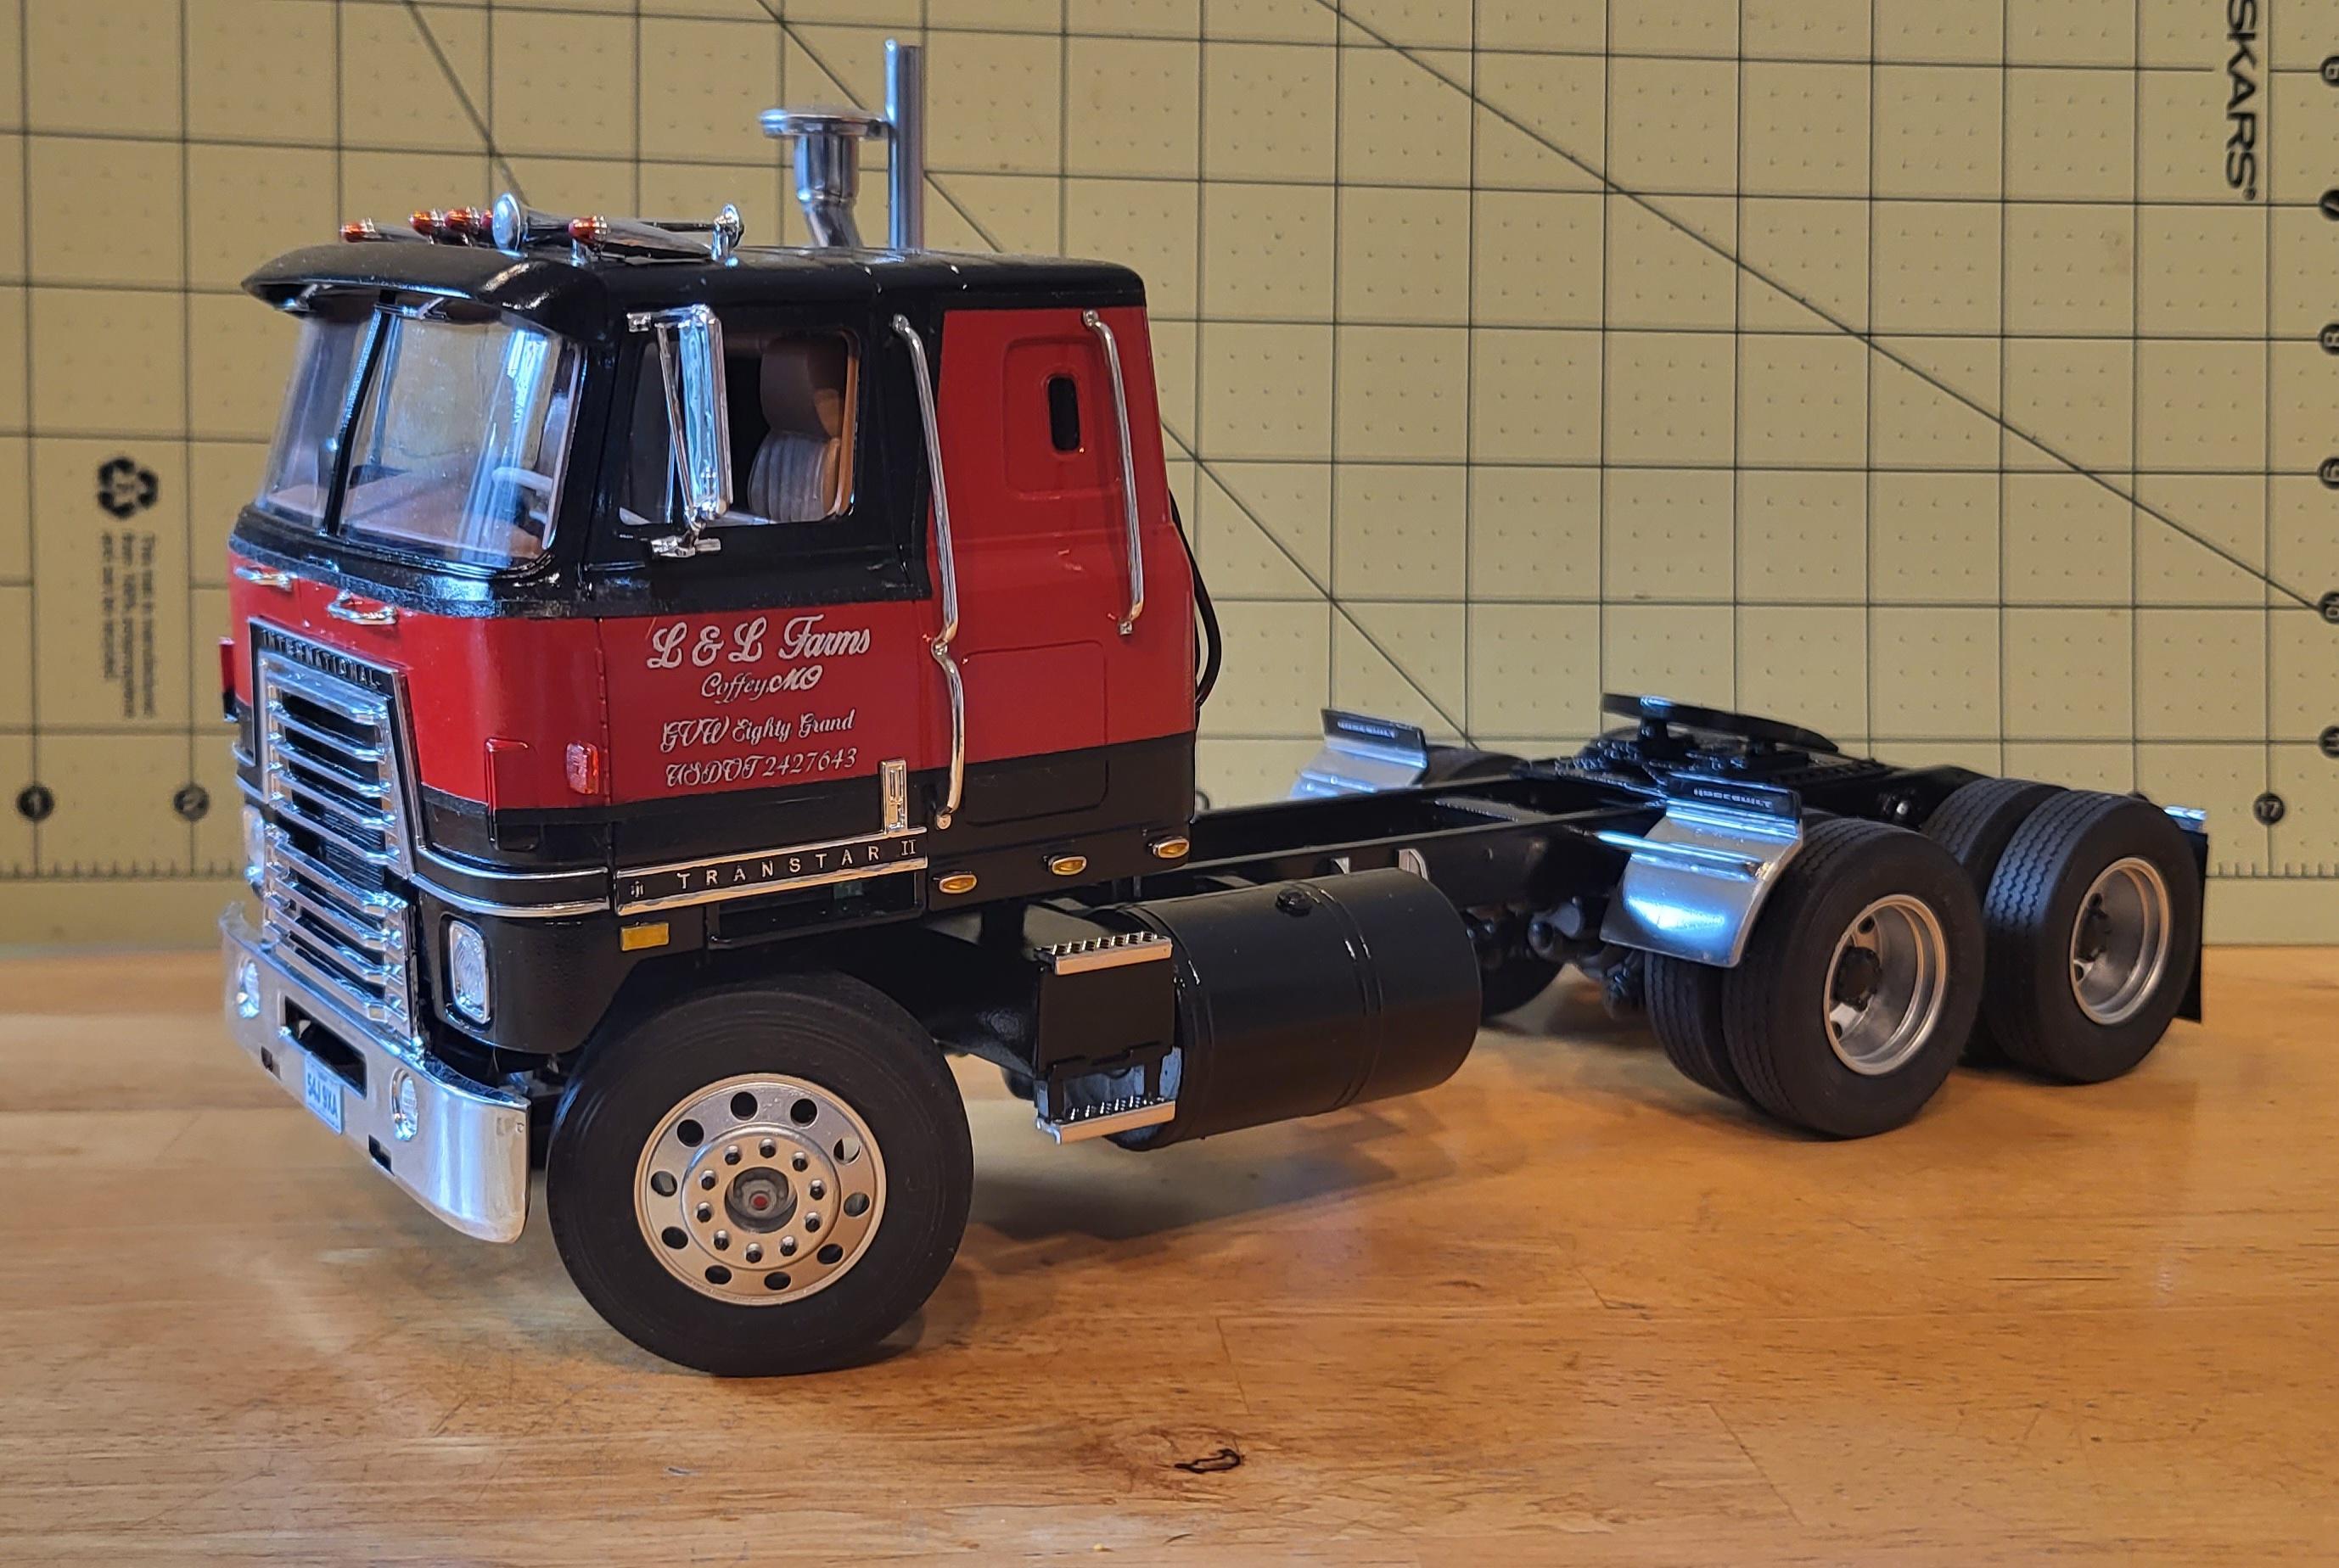
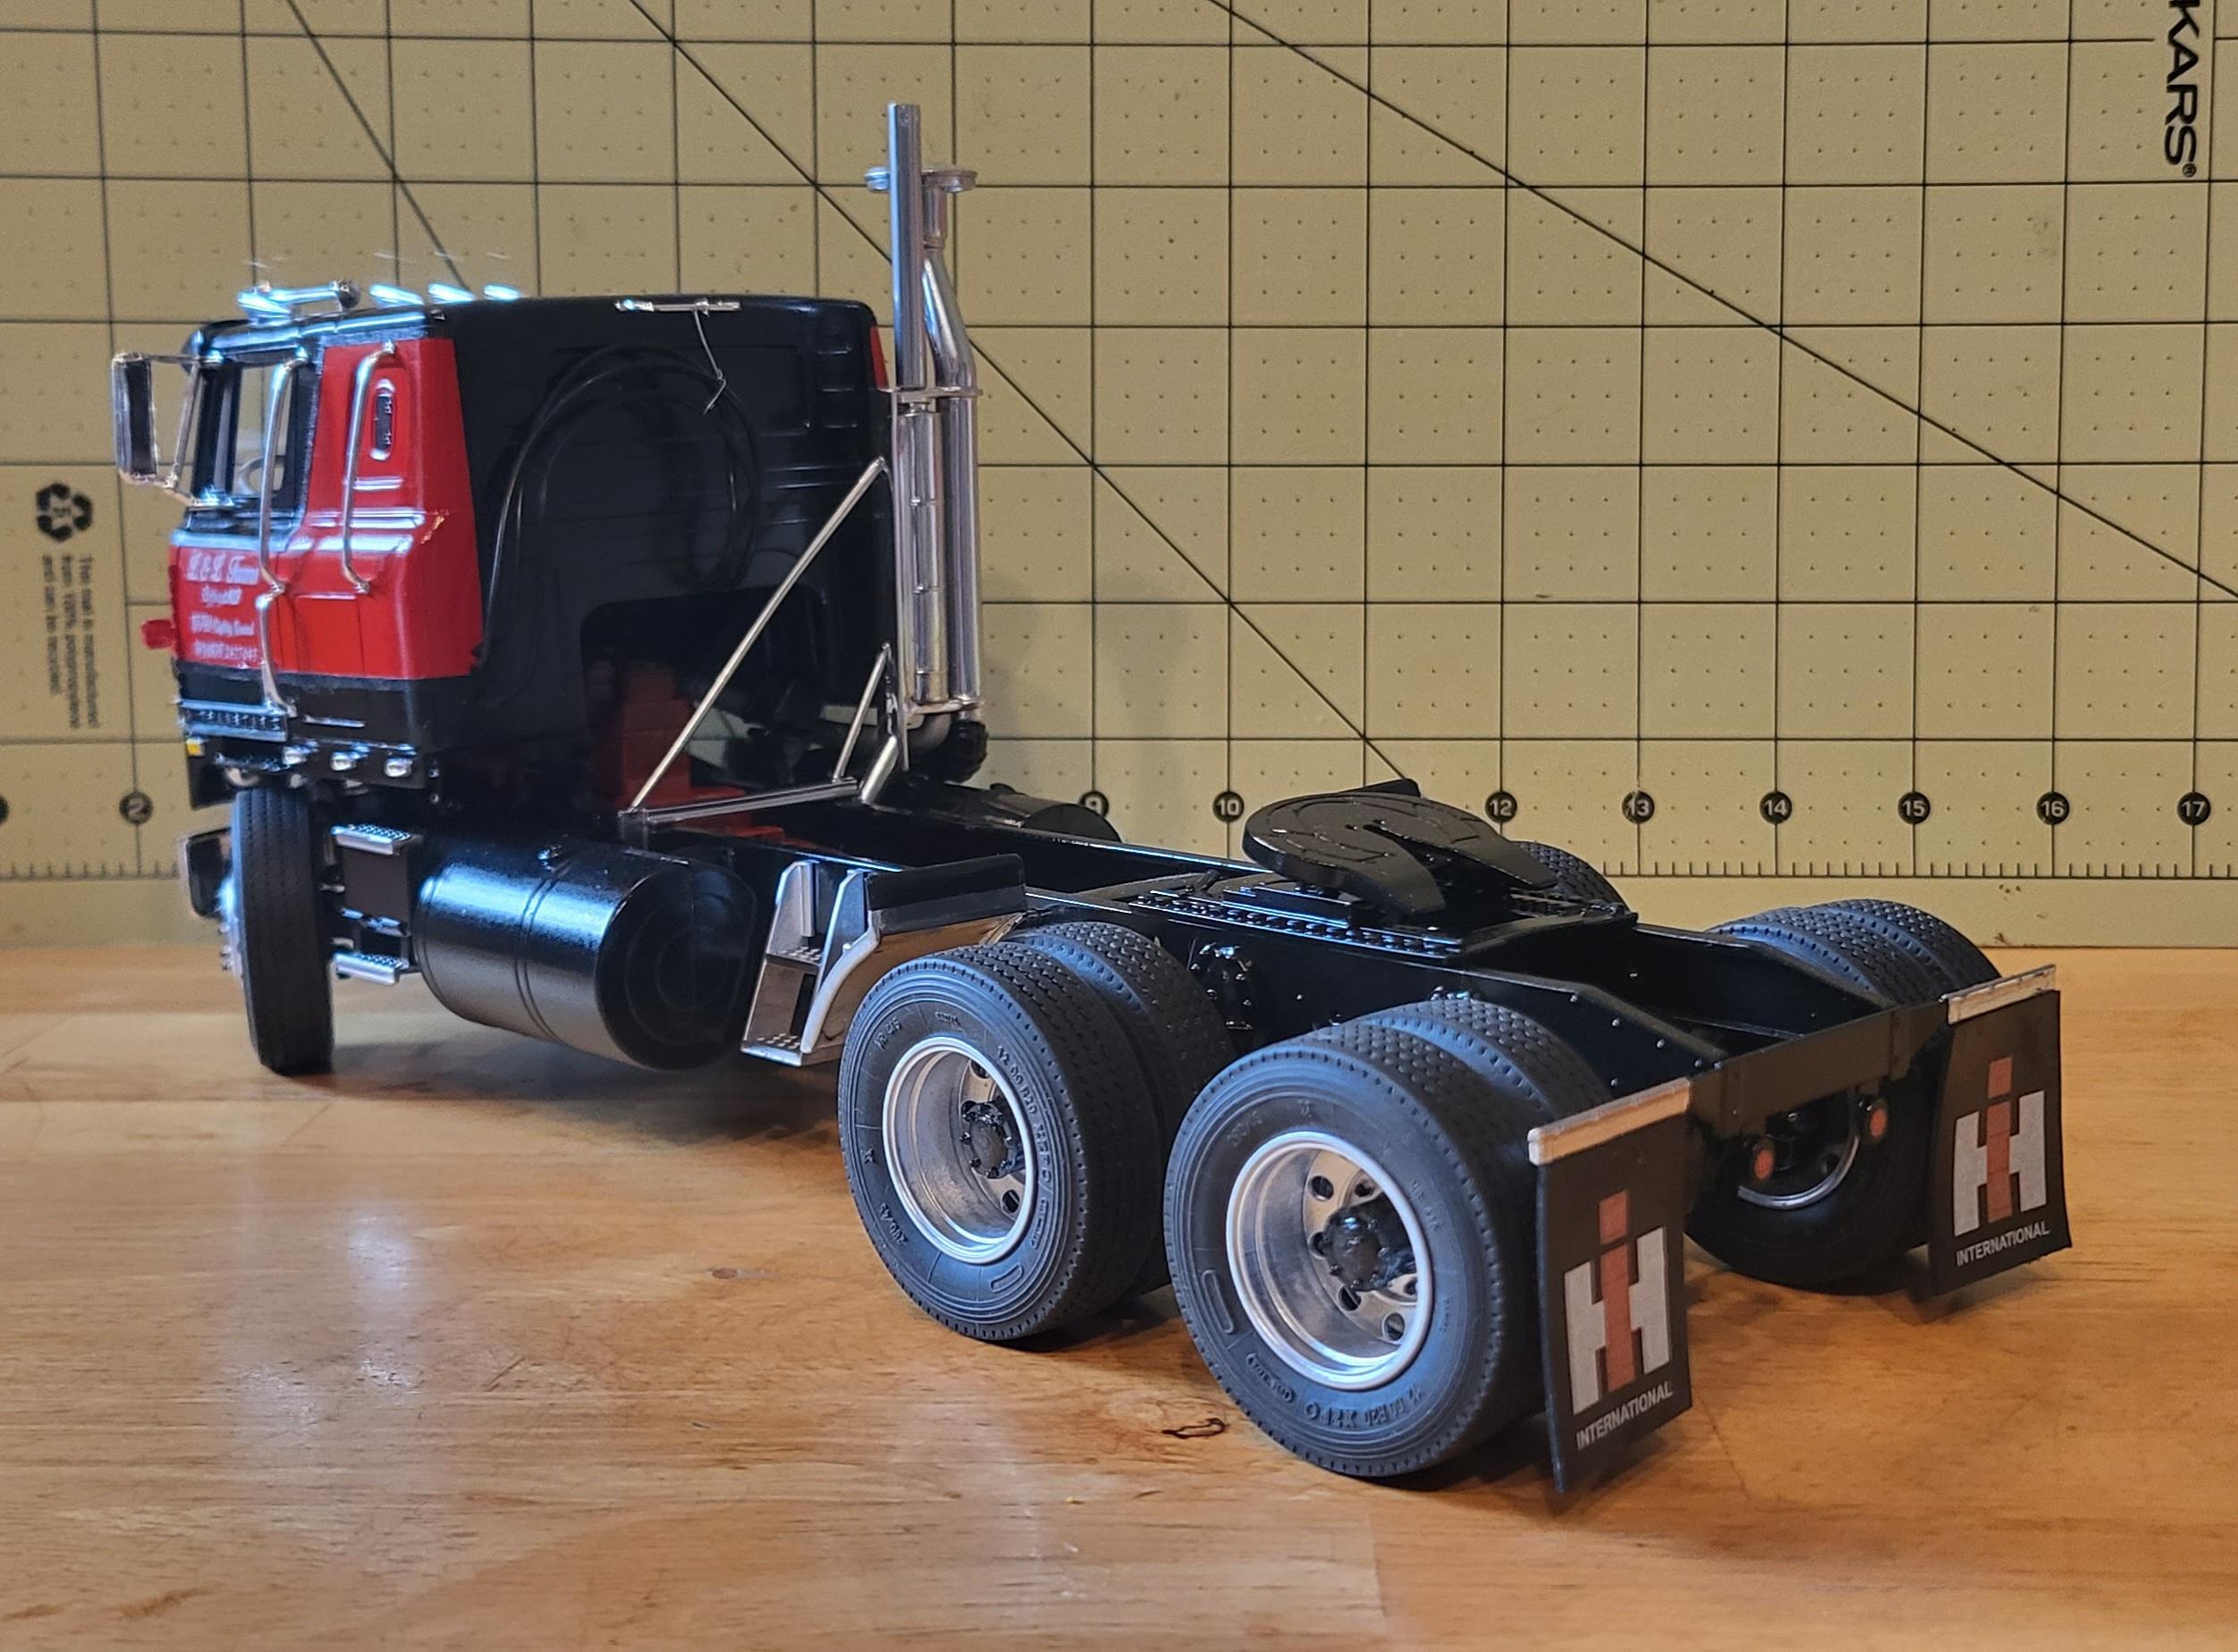
Welp, after a long time in the works, (going way back since about mid June), this truck is finally done! I hit a few snags, but it came out fantastic. Custom made decals, quadruple fuel tanks, fully scratchbuilt exhaust piping, 1/2 fenders, and bug shield. The trailer is up next! Real truck is at the end. Enjoy!
-
Mack DM 600 GW Trucks tribute build
TruckerAL replied to gotnitro?'s topic in WIP: Model Trucks: Big Rigs and Heavy Equipment
Gary was the absolute man when it came to quality resin! I love your build choice. Ill be following along. I did my own tribute truck to him too. Used a handful of his parts on my buildtruck. It's my favorite in the collection. Long live Gary ?
-
New house, New project!
TruckerAL replied to TruckerAL's topic in Model Trucks: Big Rigs and Heavy Equipment
Thanks guys!! It feels great finally having my own hobby space! So much room now! I'll try my best to upload pictures once it's fully organized and finished. -
An everydayFord day cab tractor
TruckerAL replied to BIGTRUCK's topic in WIP: Model Trucks: Big Rigs and Heavy Equipment
Looks cool so far! Where did you get those magnets? -
AMT White-Freightliner to Optimus Prime
TruckerAL replied to Devyn's topic in WIP: Model Trucks: Big Rigs and Heavy Equipment
I've built over a dozen of these white freightliners. A few tips I can give you are: -Shorten the front axle by 1/8" as it's too wide. -Add thin styrene strips on the inside of the cab along the seams to give it structure when you install the interior. -If your interior tub is tight, shave down all the edges, and shave down the front of the interior tub on the bottom where it mates with the front of the cab. -The mirrors when you get to that stage is a pain. Scrape the chrome plating away, glue one of the ">" brackets to the to of the "]" bracket. Let it dry then do glue the bottom one on, and then install the rectangular mirror on, then install on the cab with superglue. -And finally, with the metal axles going in the drums, they are the right length. Over time, the molds have worn down and made the holes smaller and smaller, making it tough for the axle to slide in freely. Either drill the drum hole out slightly, or tap the metal axle into the drum with a hammer! Hope all this makes sense, best of luck to you. It's a great kit, and your project is looking fantastic so Far. Beautiful colors ?- 32 replies
-
- 2
-

-
- amt
- freightliner
- (and 1 more)
-
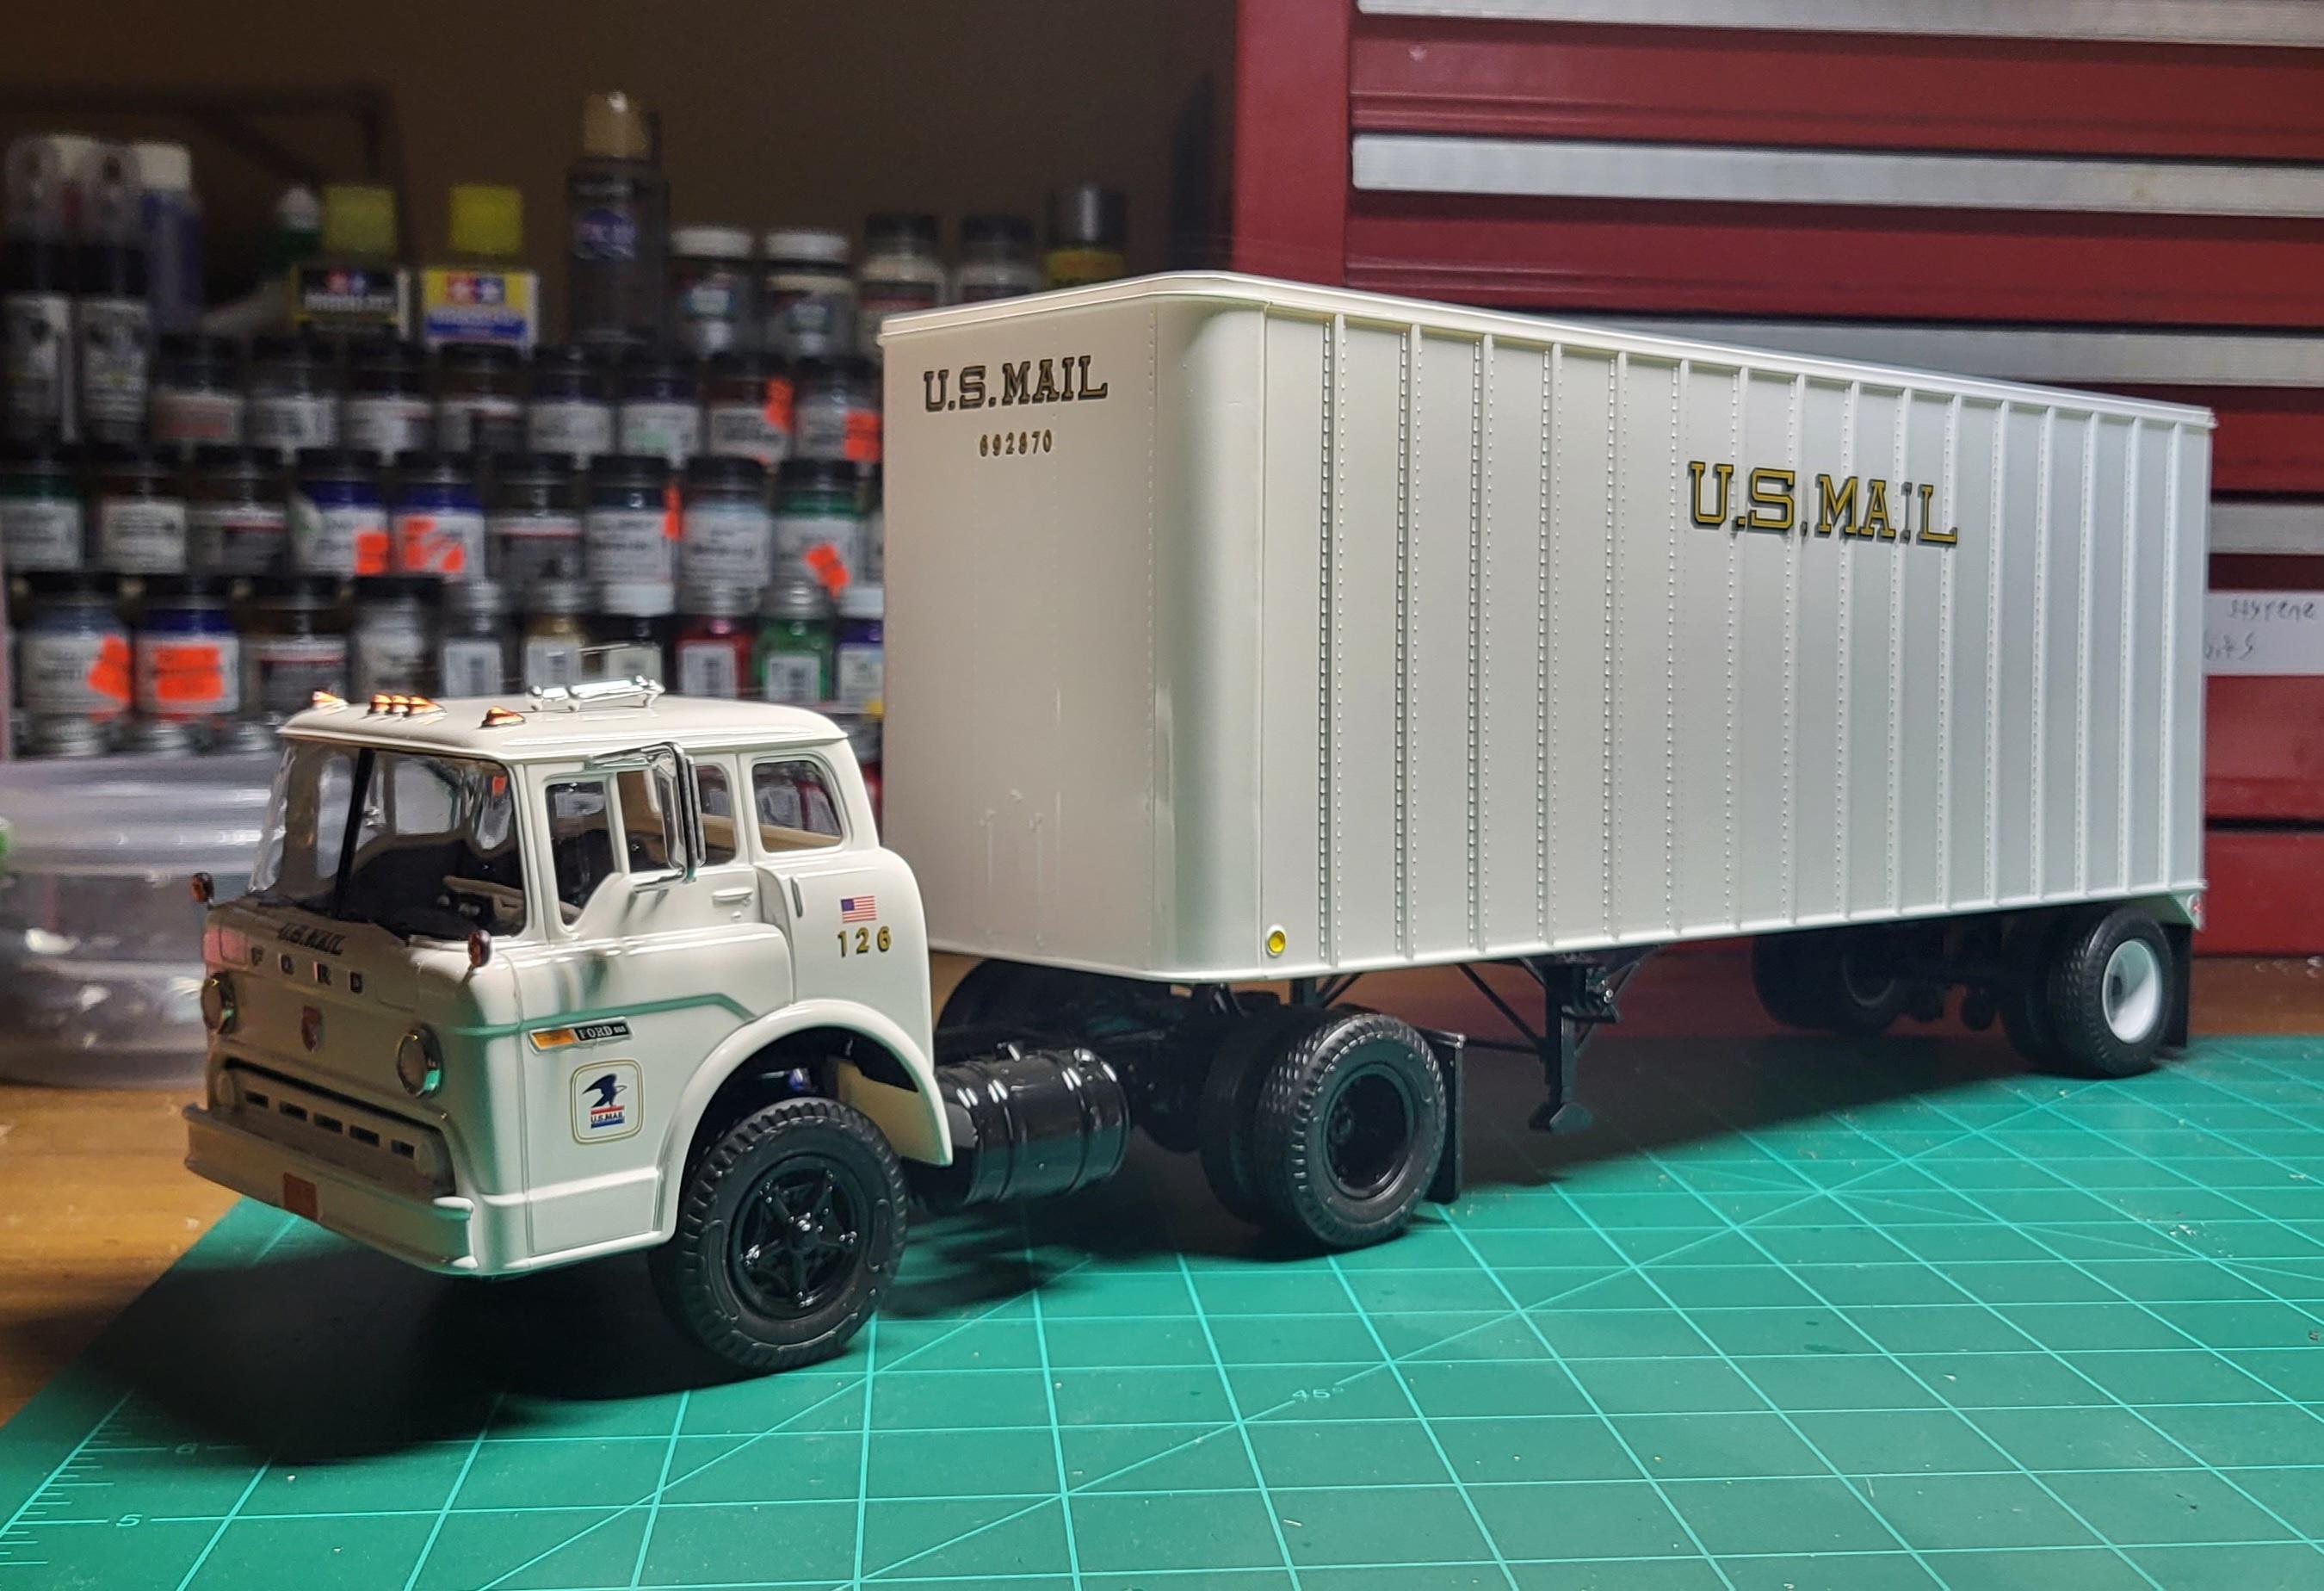
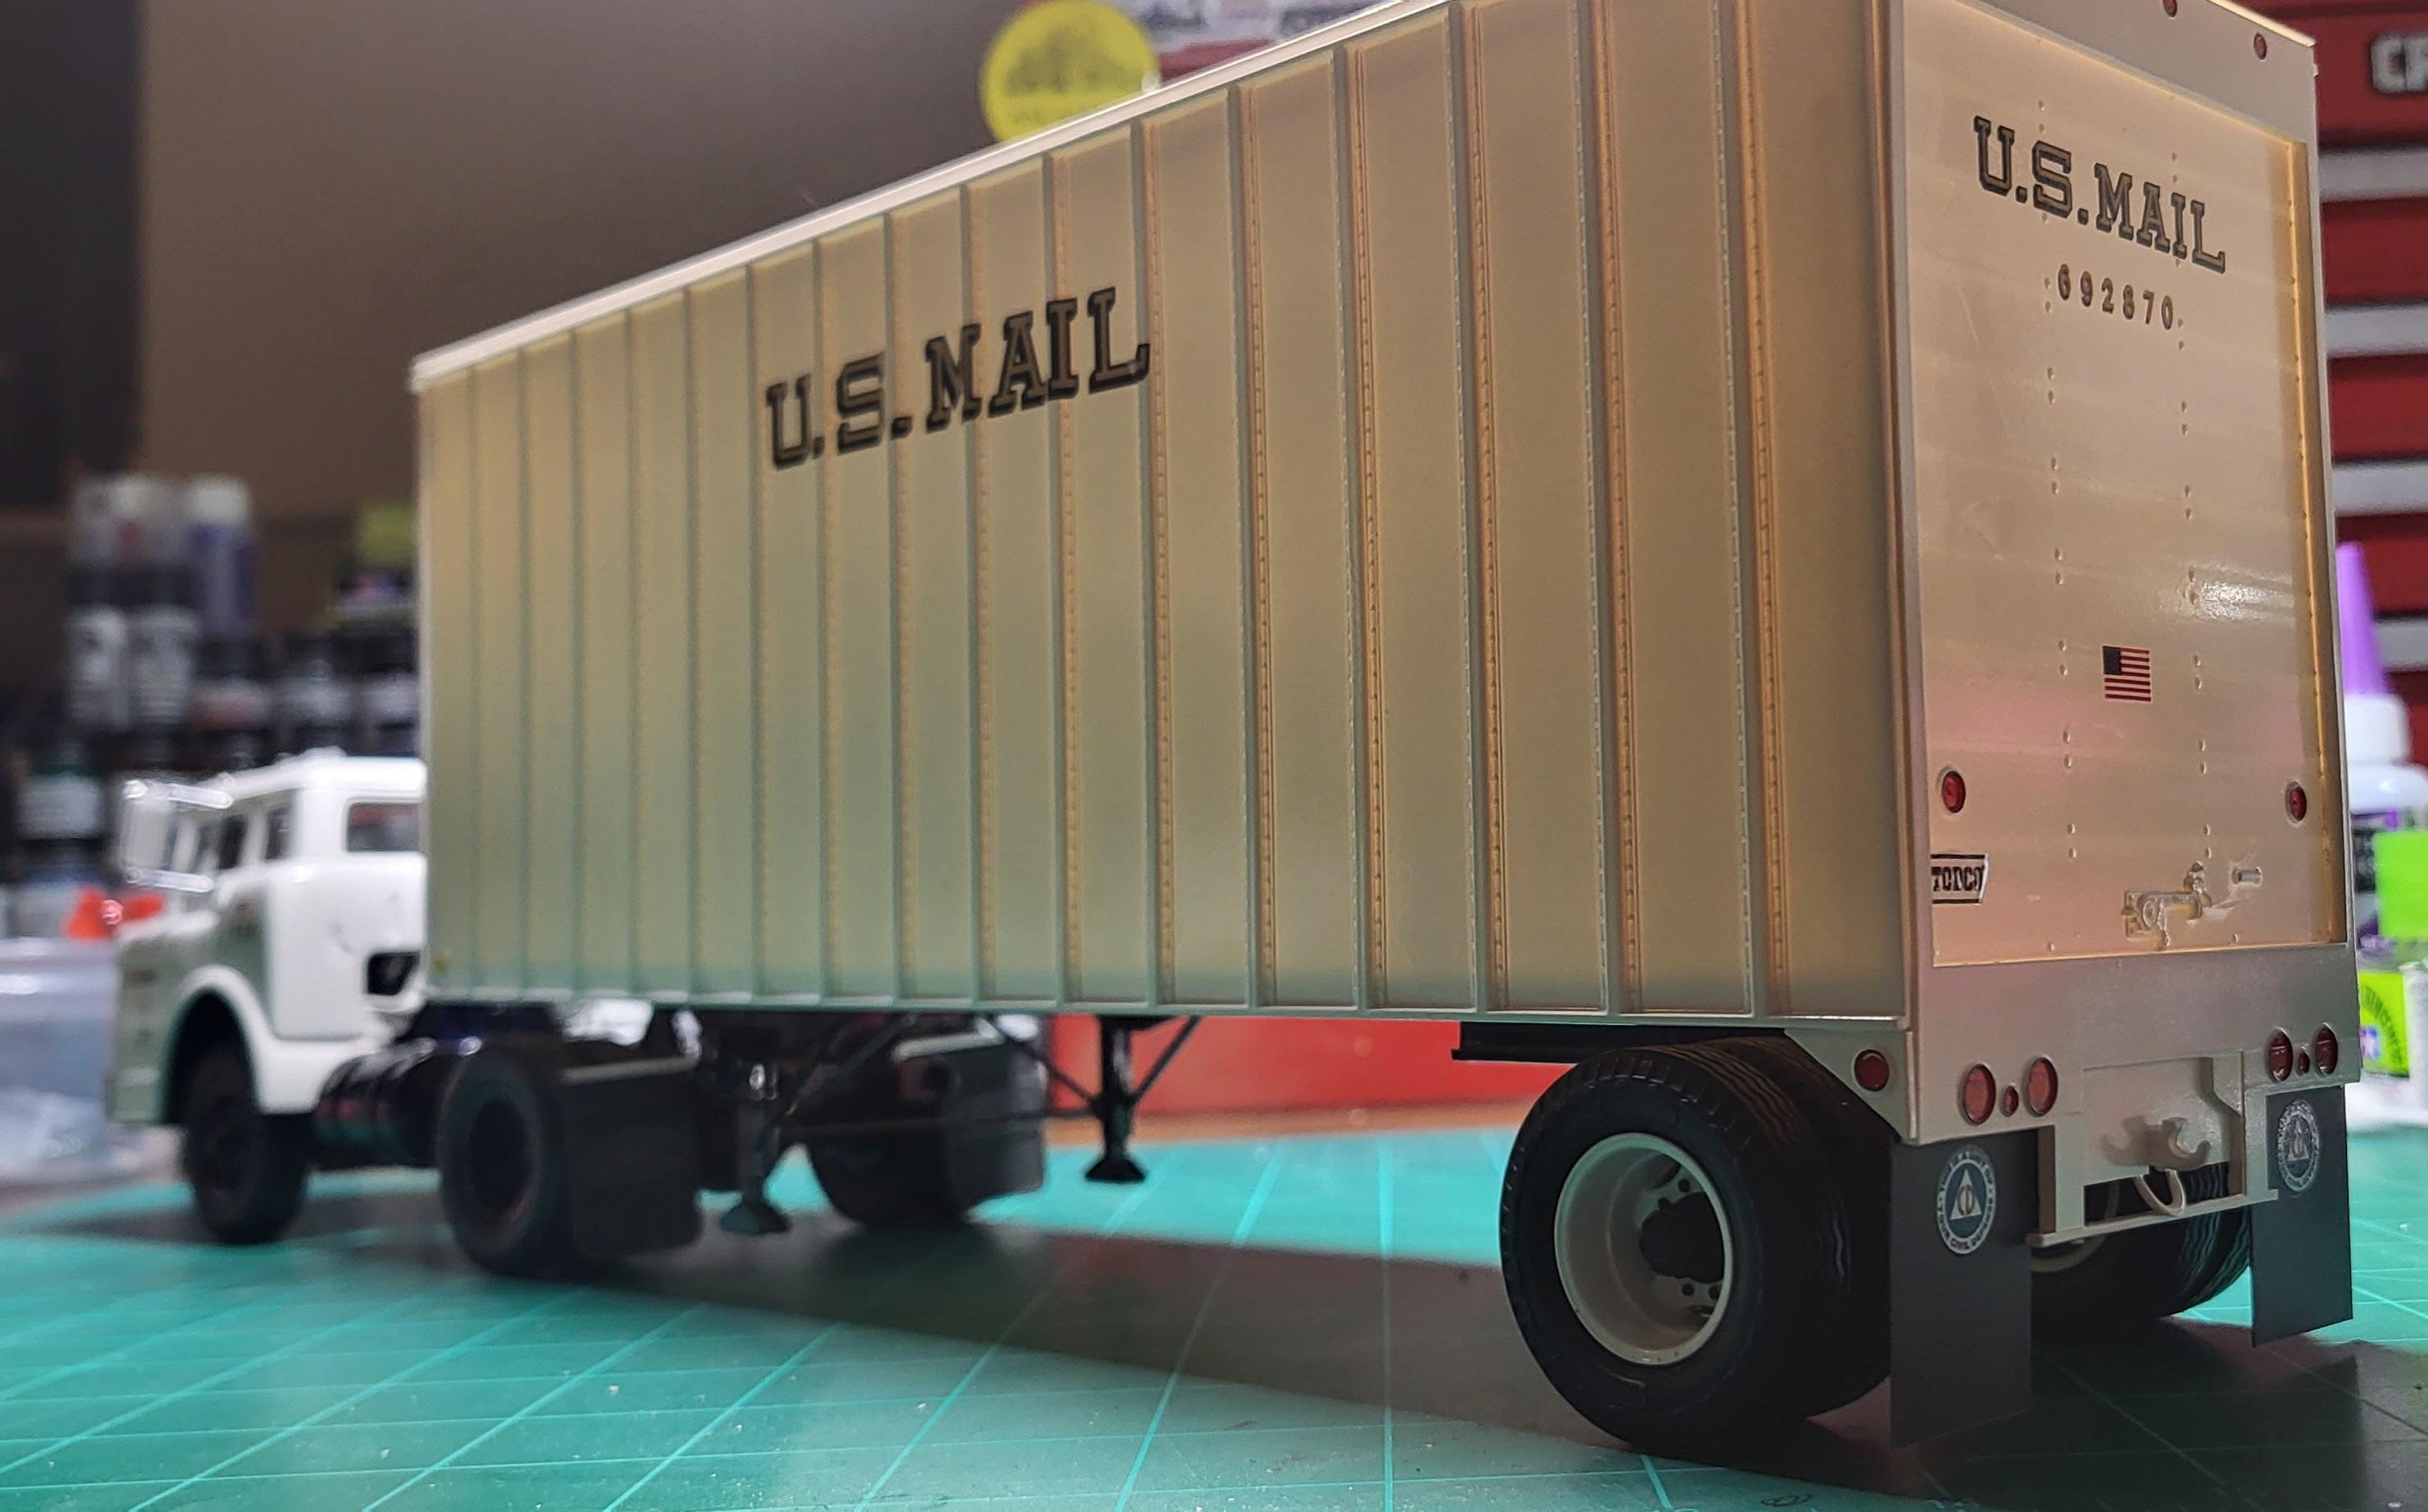
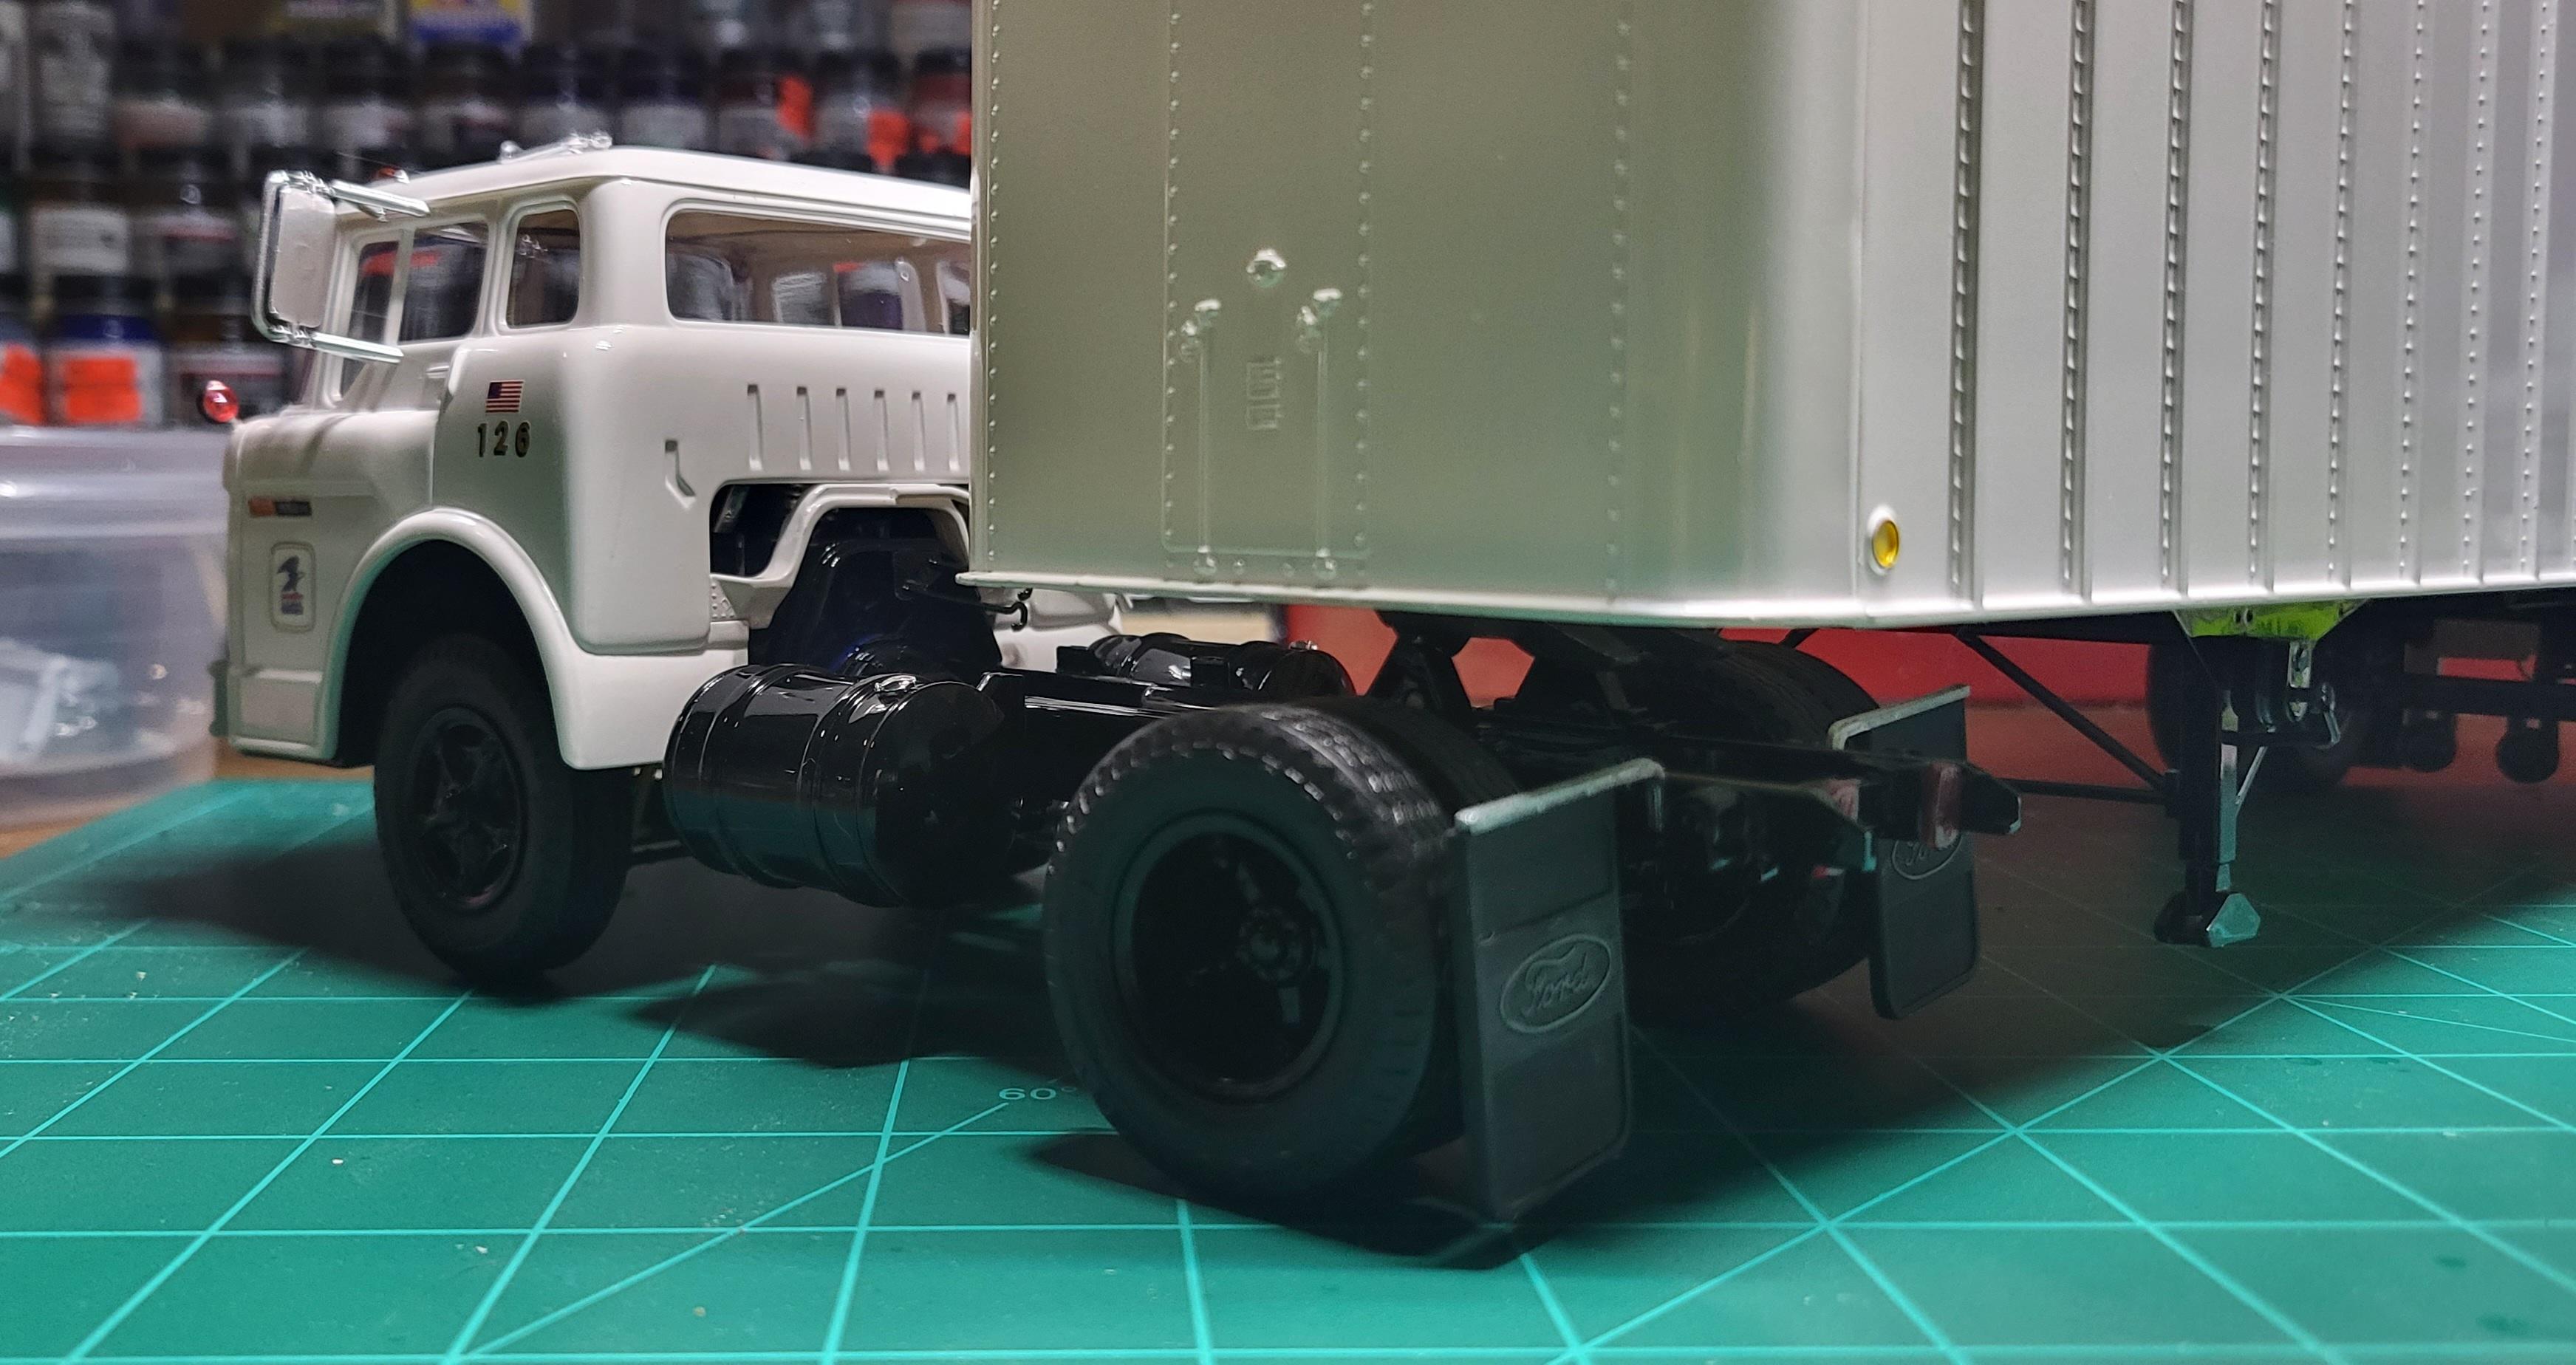
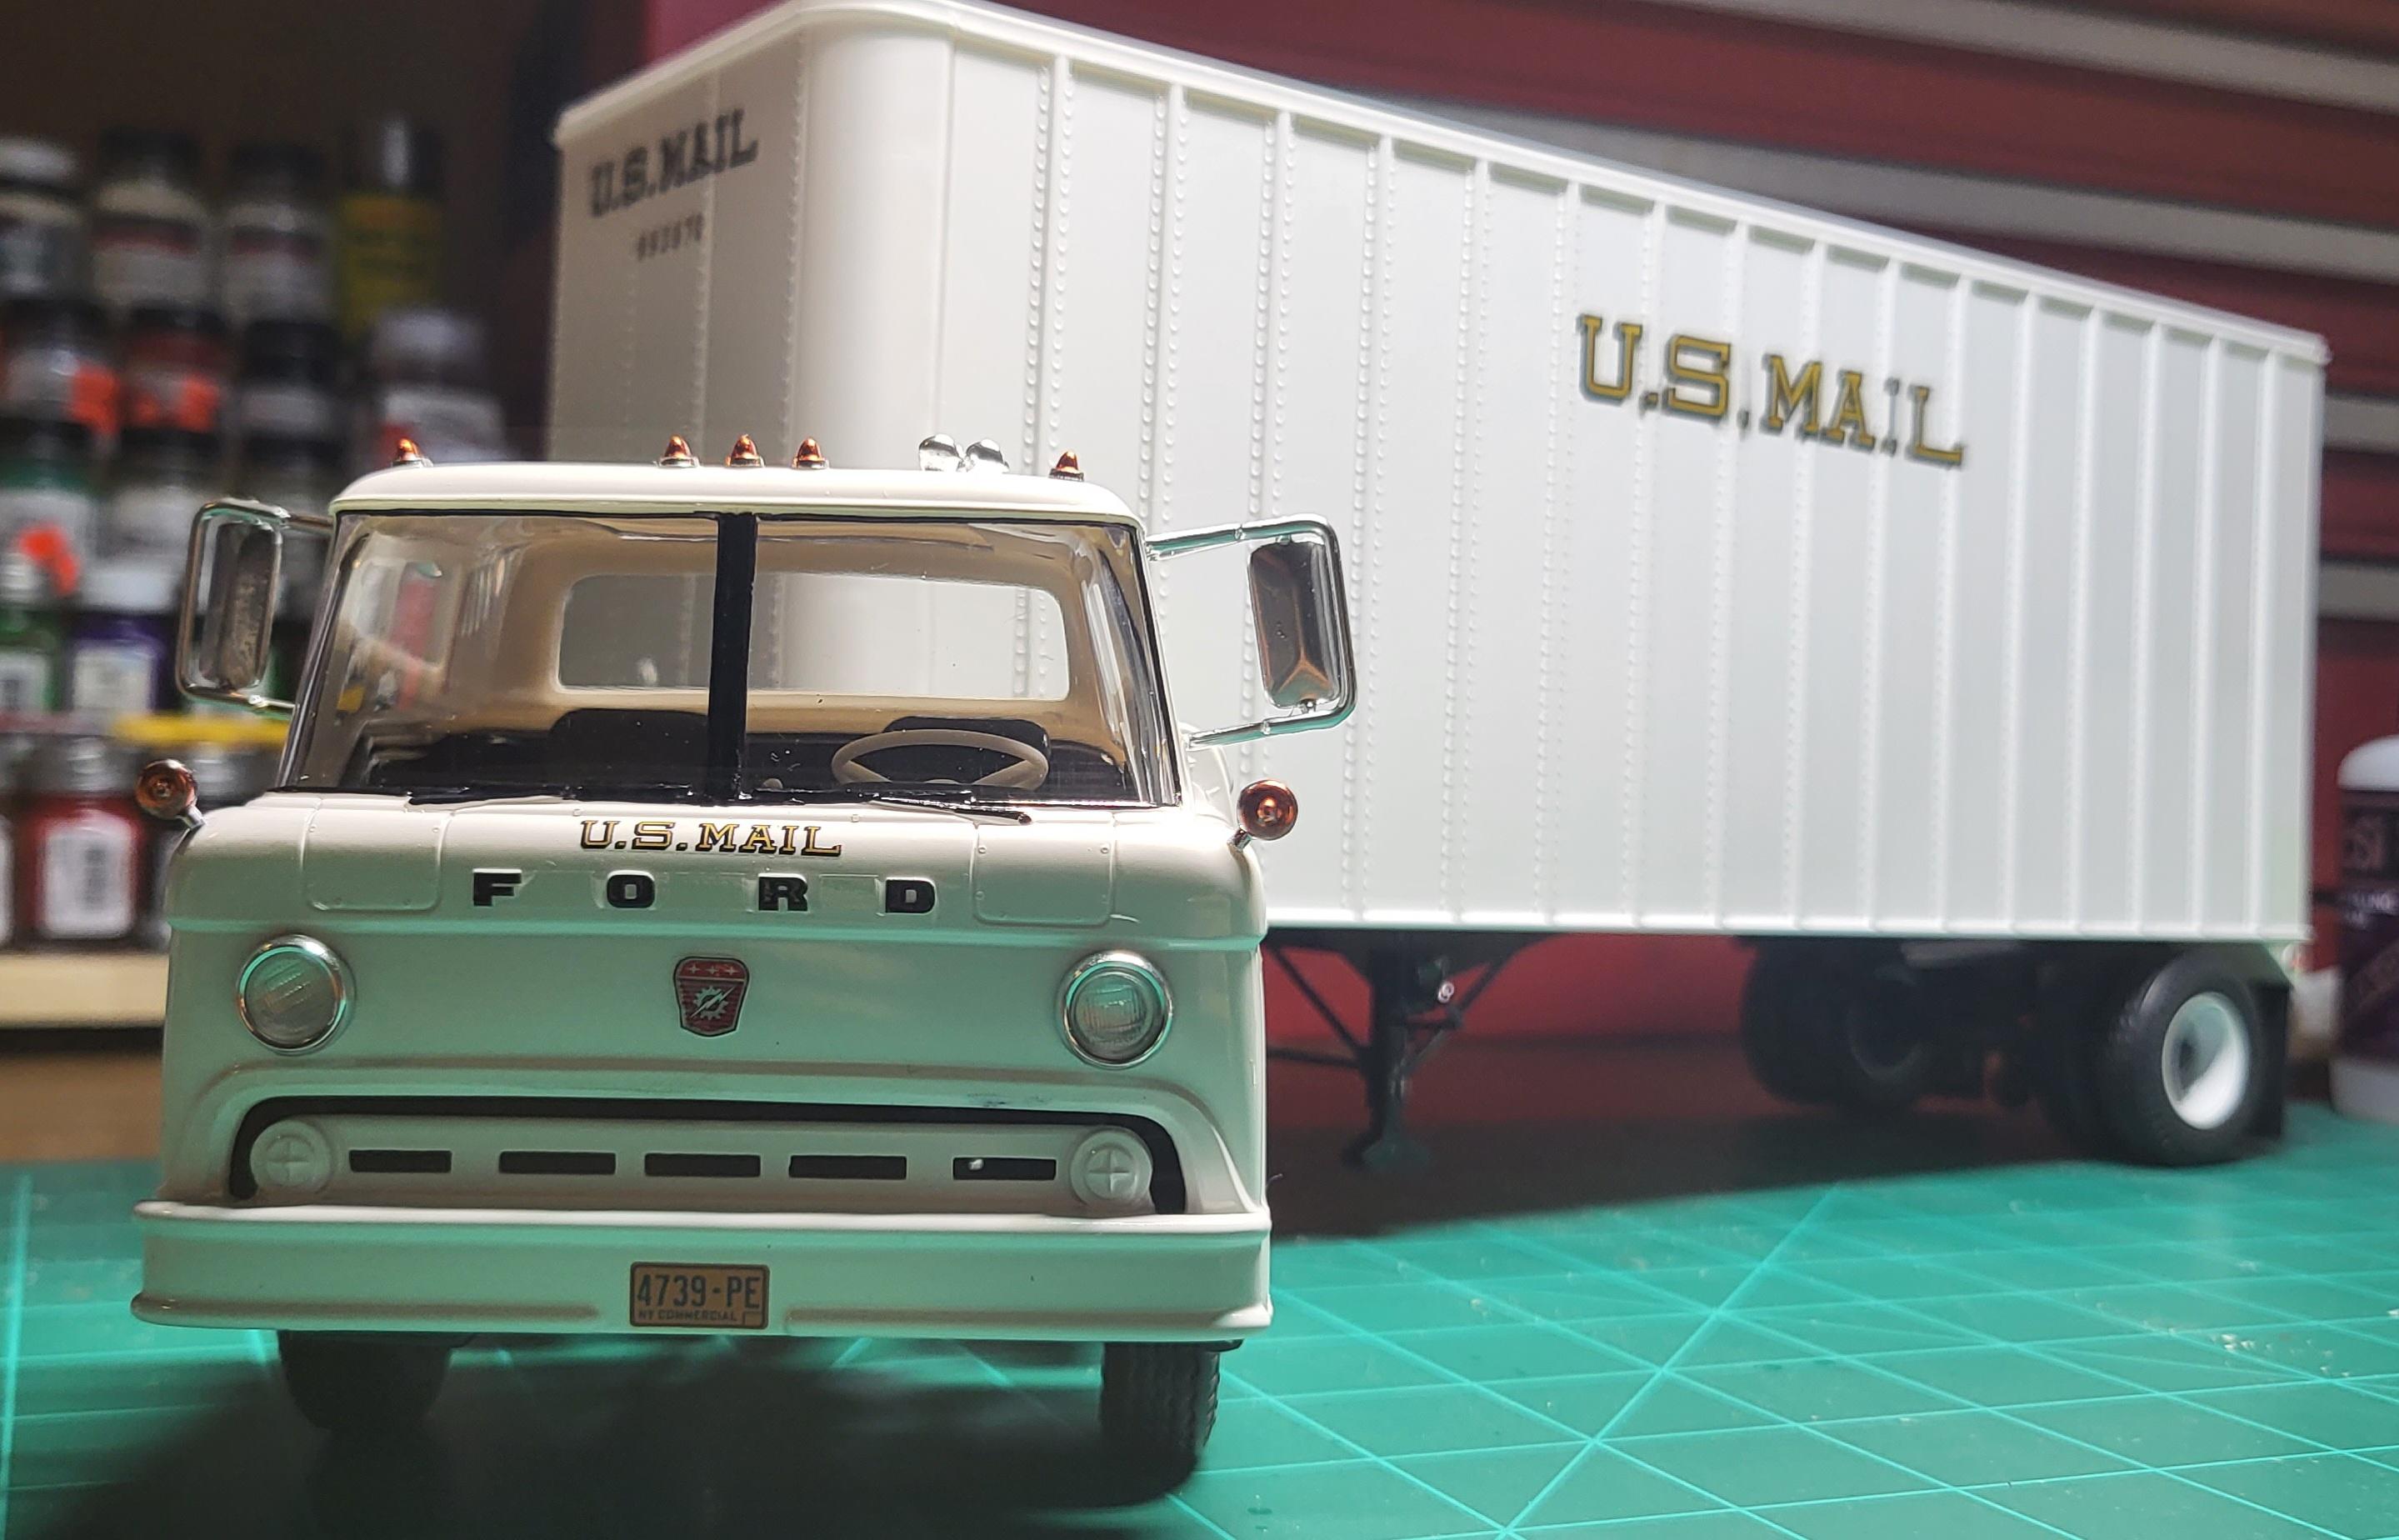
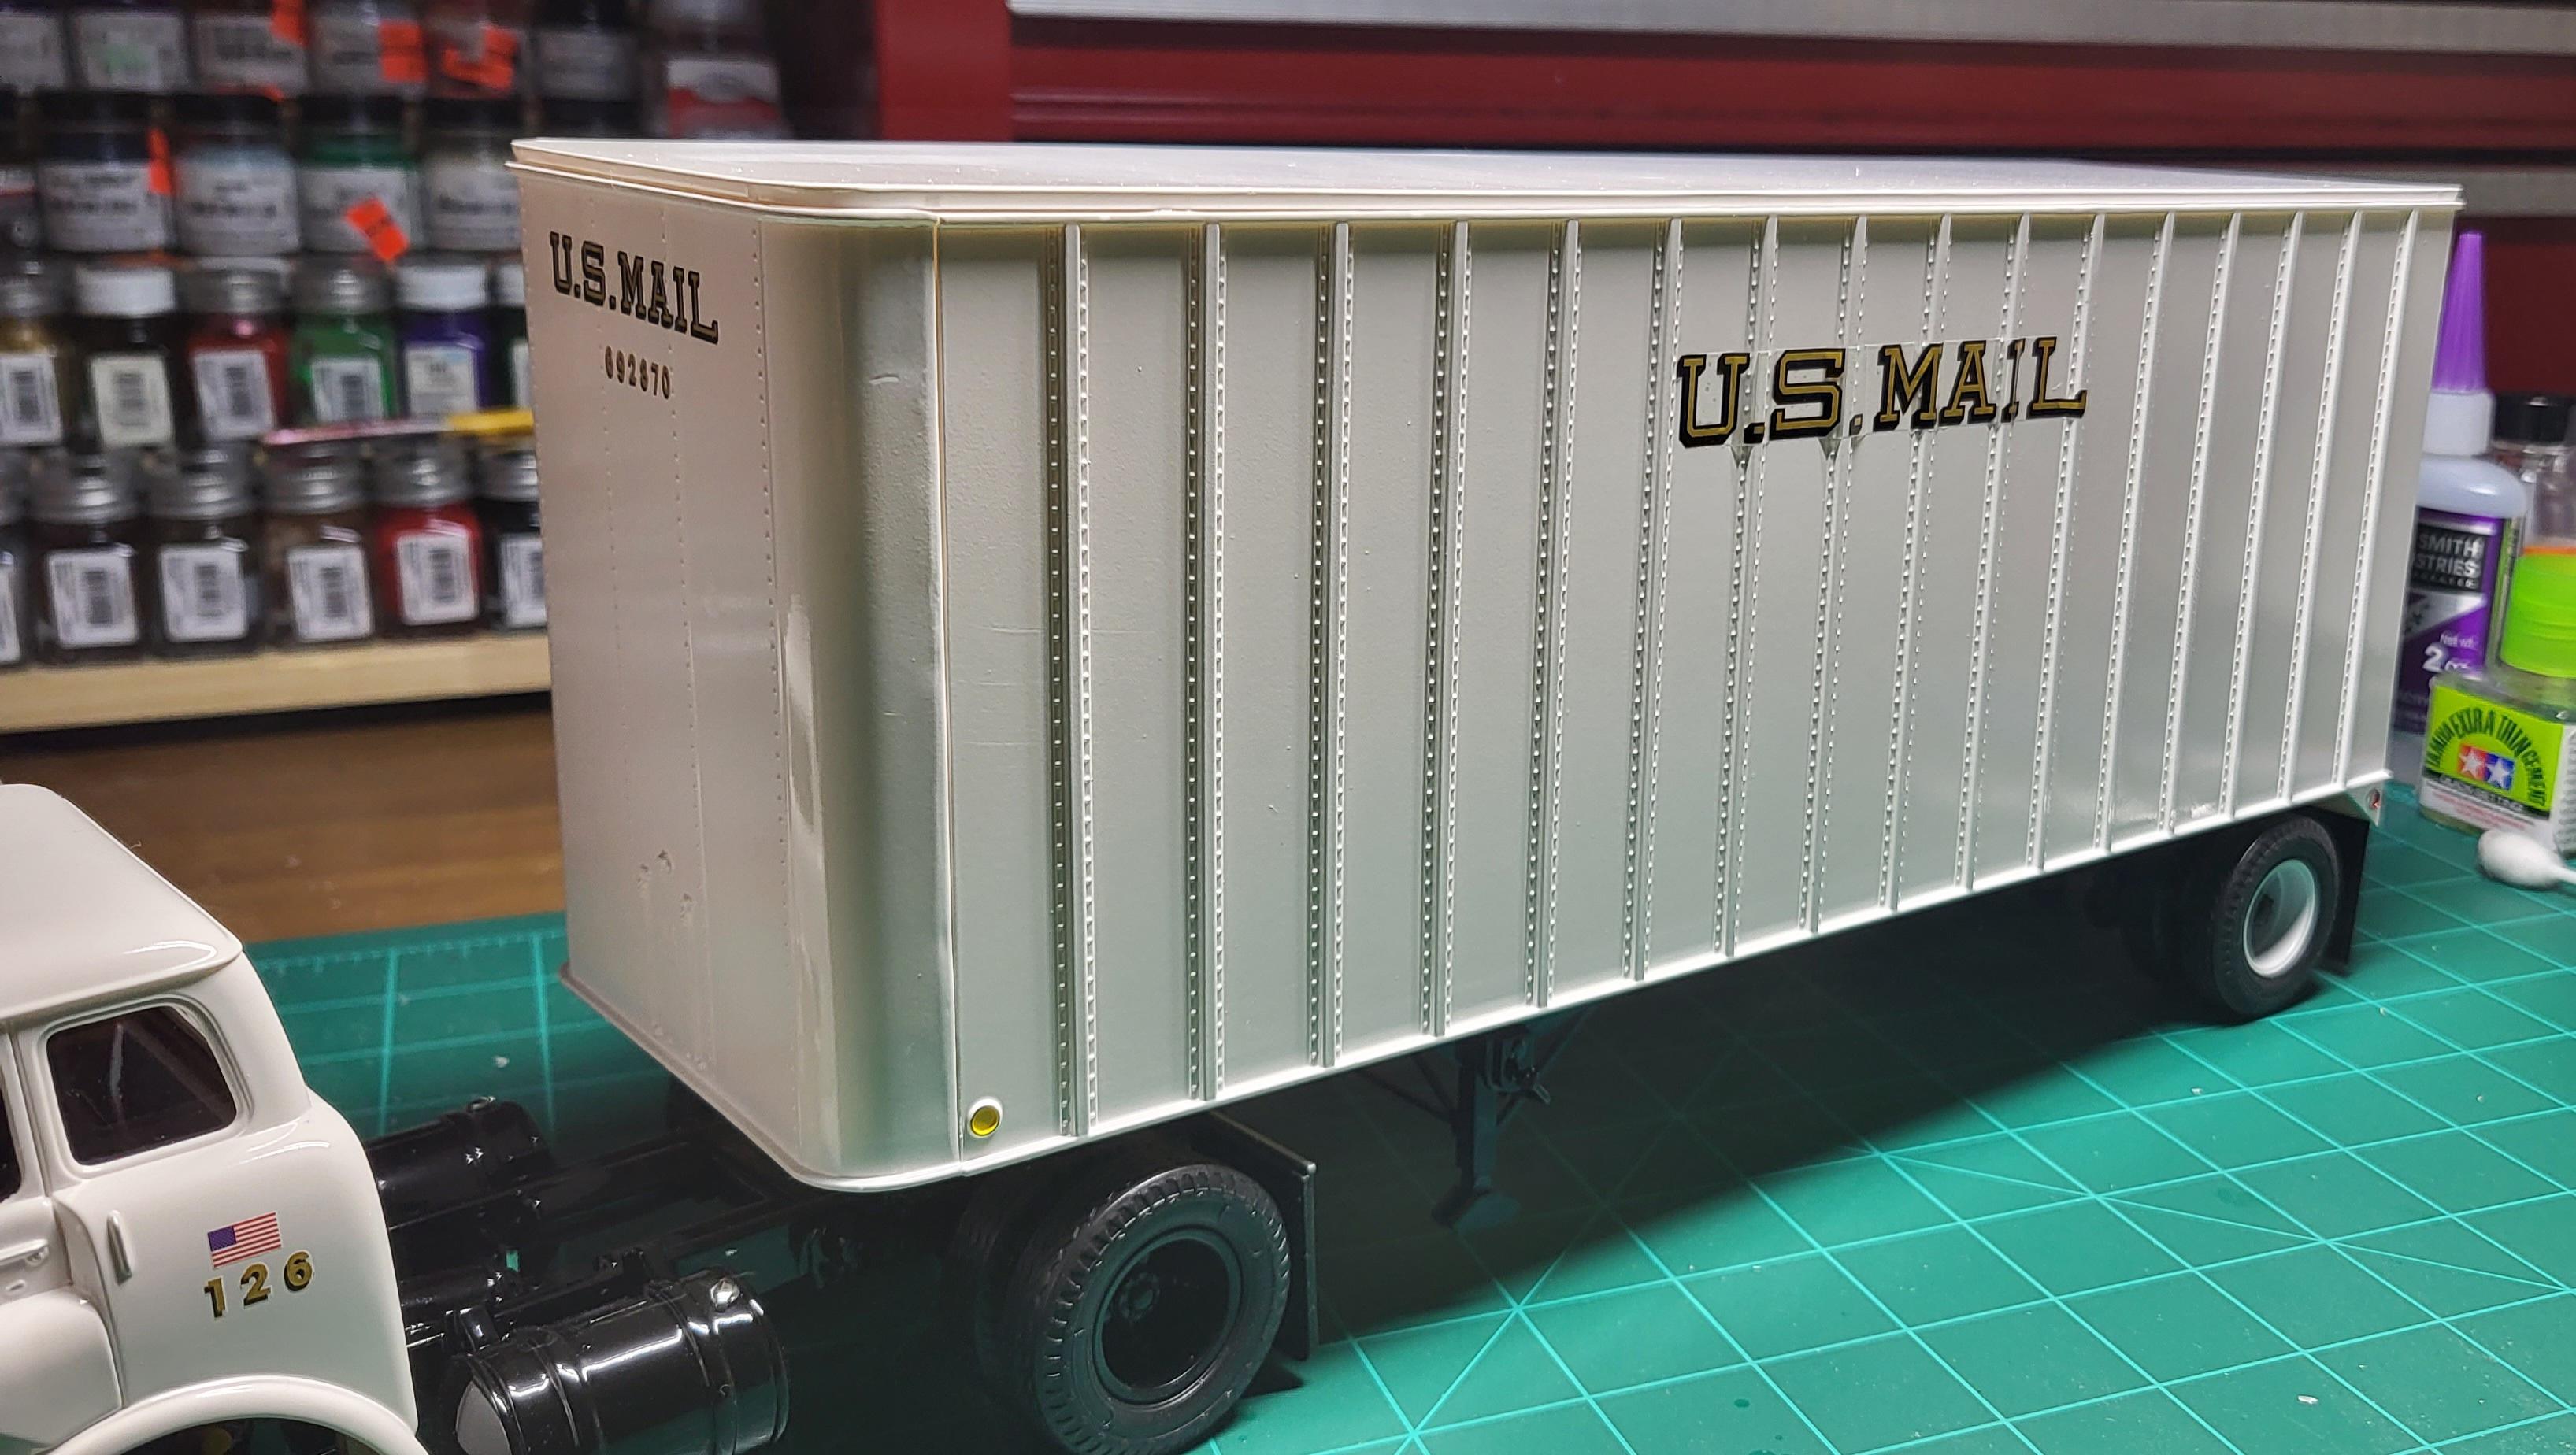
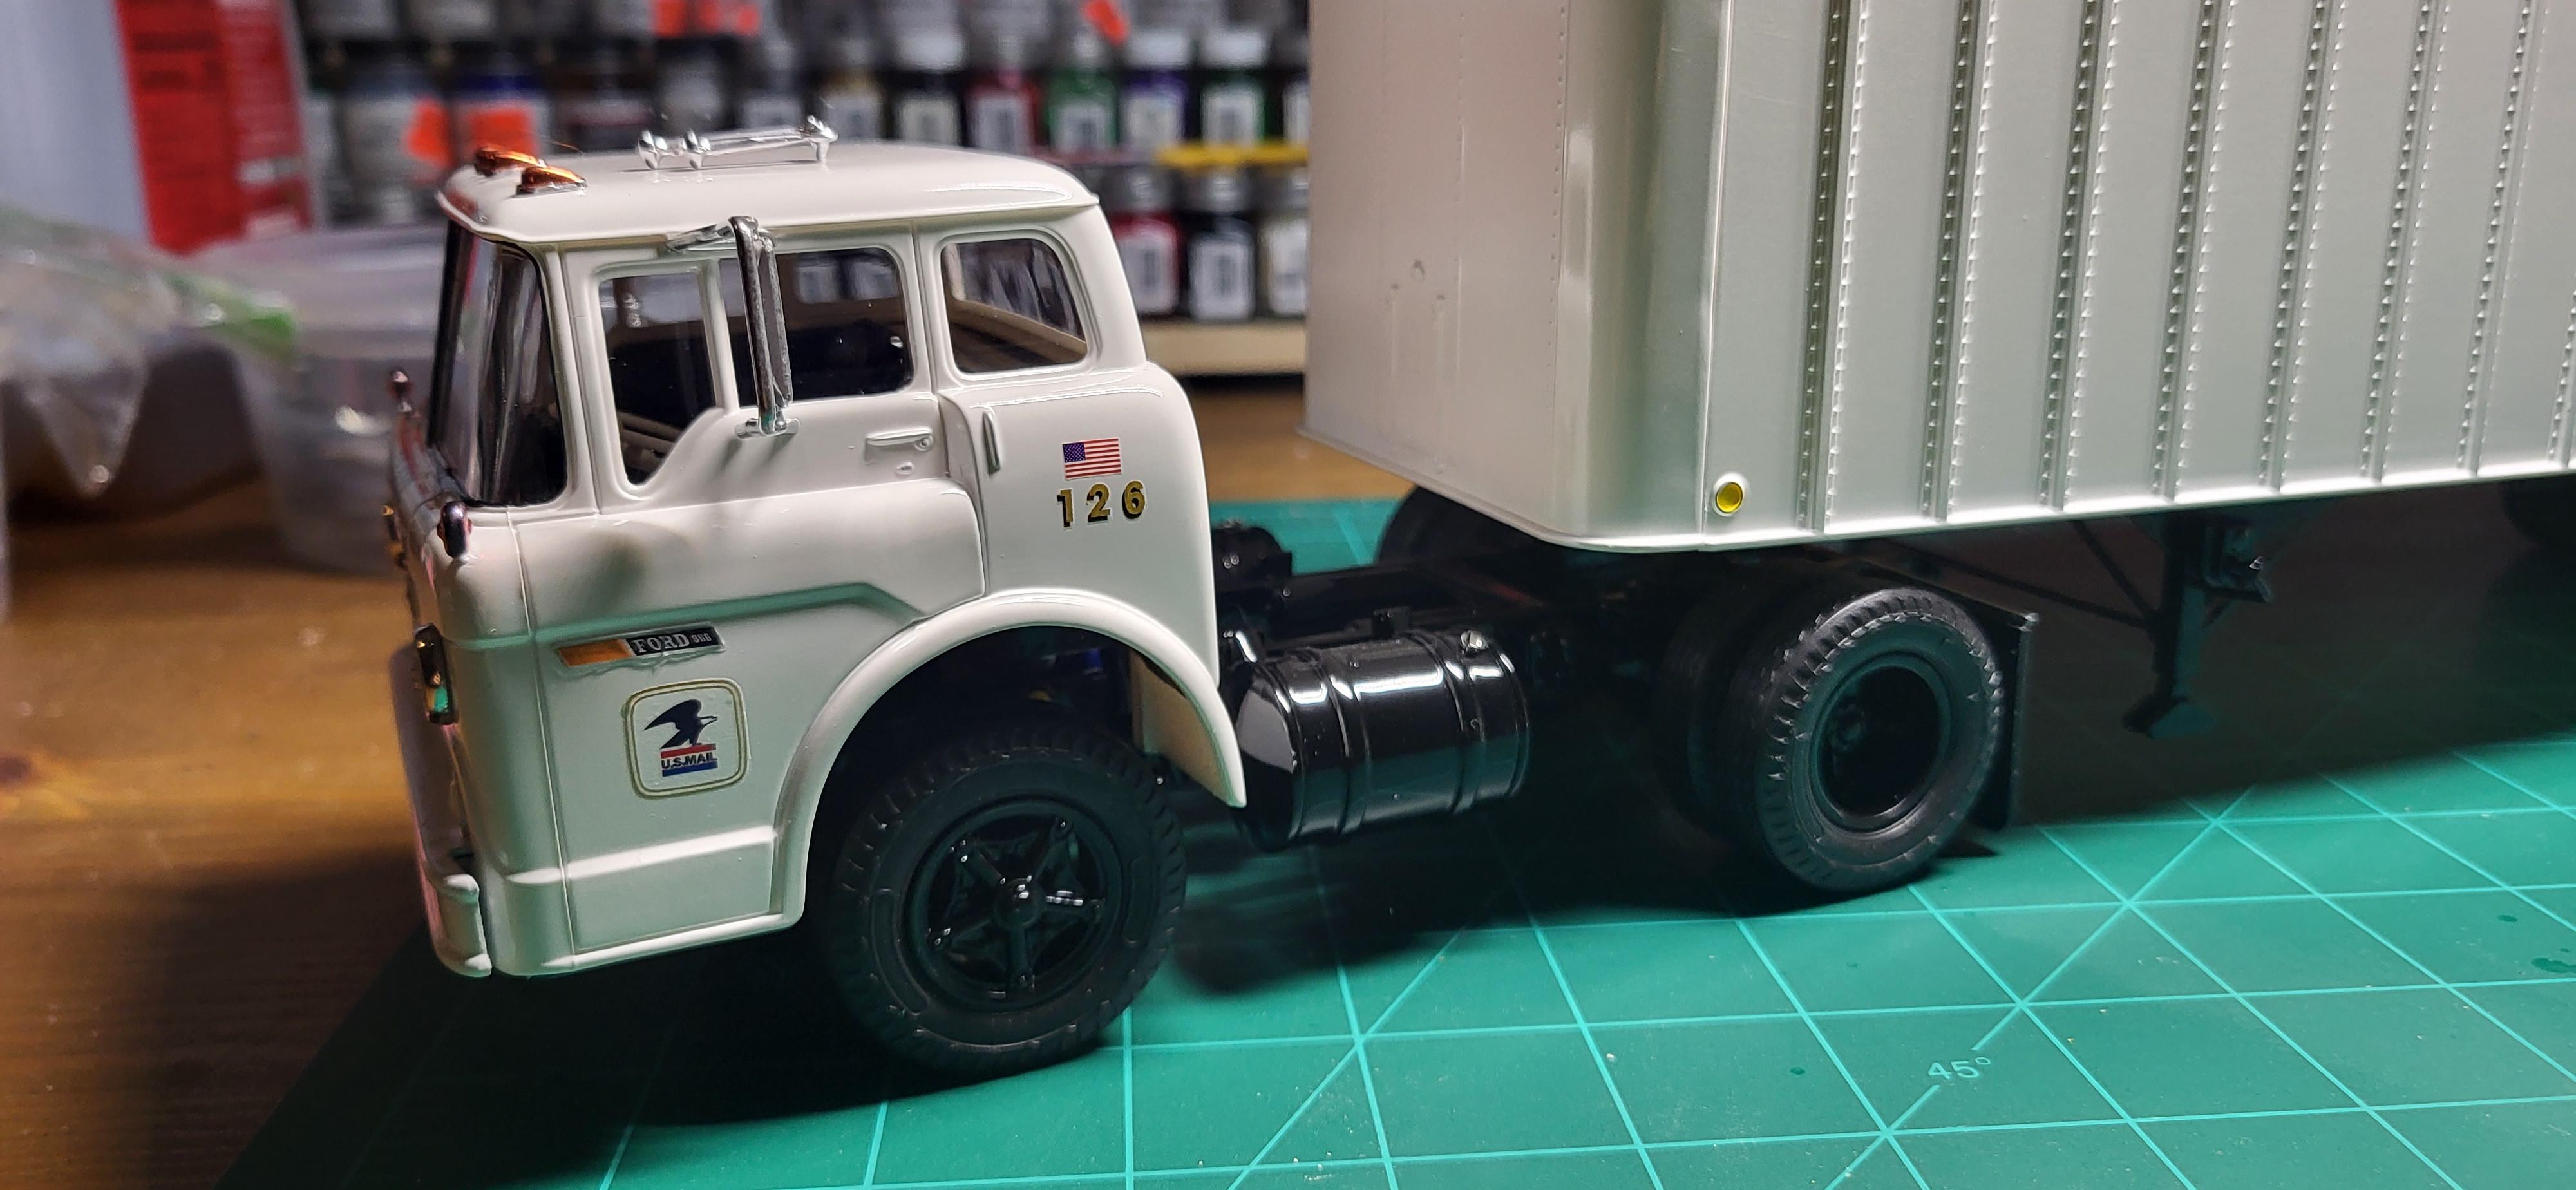
Finally moved, and somewhat settled into my first ever model room! I finally got my first build out of the assembly line. It's the AMT US mail set, pretty much 100% box stock minus making a few adjustments to the trailer, and new mudflaps. Simple and easy combo.
-
Final build, Peterbilt 378
TruckerAL replied to TruckerAL's topic in Model Trucks: Big Rigs and Heavy Equipment
Haha yes pretty much! They're both from my buddy in Canada. Kootenay 3d Model Parts -
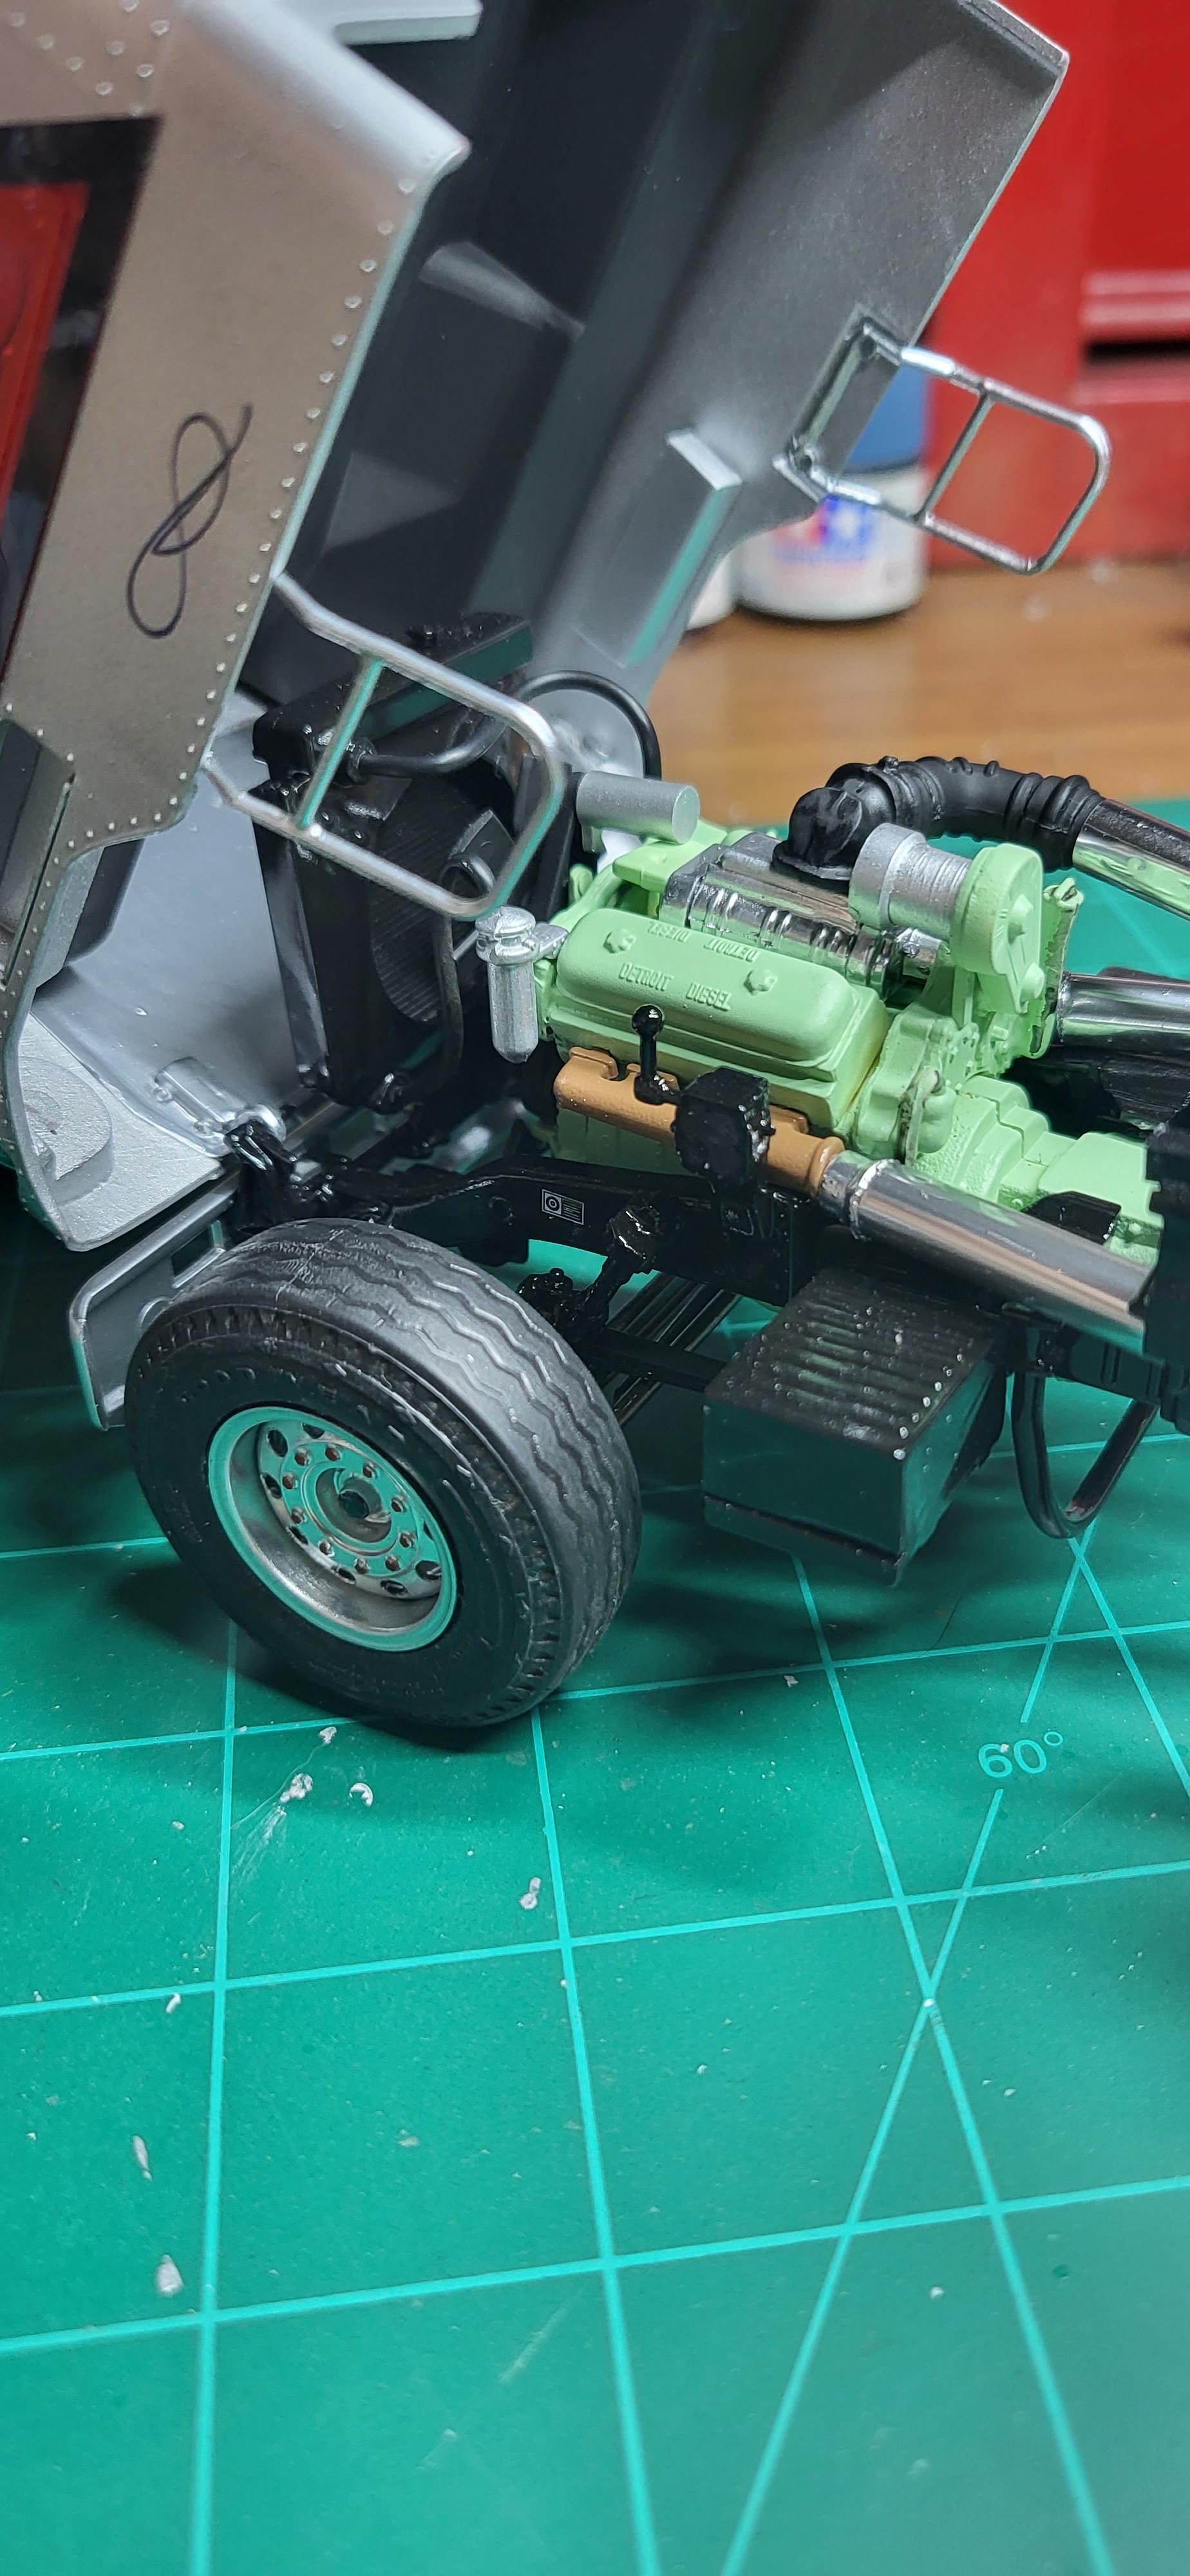
ERTL IH Paystar 5000 dumper
TruckerAL replied to TruckerAL's topic in Model Trucks: Big Rigs and Heavy Equipment
Thank you! The color is a rustoleum automotive color. I don't remember the exact name, but I think It was gloss emerald? Or metallic emerald? -
This is my final build before I move this week. Finally got it done, and it's heading out this week. I had a blast building it! Here's the mod list: 3d printed headache rack, light bars, tool boxes, antenna, cab lights, horns, fender mirrors, trailer hitch, and drive/steer hubs. Scratchbuilt rear frame section out of styrene bits and pieces, along with the mudflap assembly. Custom made decals. Plus some other odds and ends, enjoy it!
-
Finally finished this one up tonight. Been waiting for parts to get it done, and now it's good to go. It's the second to last build before I move this week! Mod list: Italeri Cummins engine swap, 3d printed rims, 5th wheel assembly, and frane step, custom printed decals all around, rubber mudflaps, stove top exhaust tip, and other small odds and ends. Enjoy!
-
That truck is actually based out of mid-east Pennsylvania. They recently added that extra 5th axle in the rear a few years back. Beast of a rig!
-
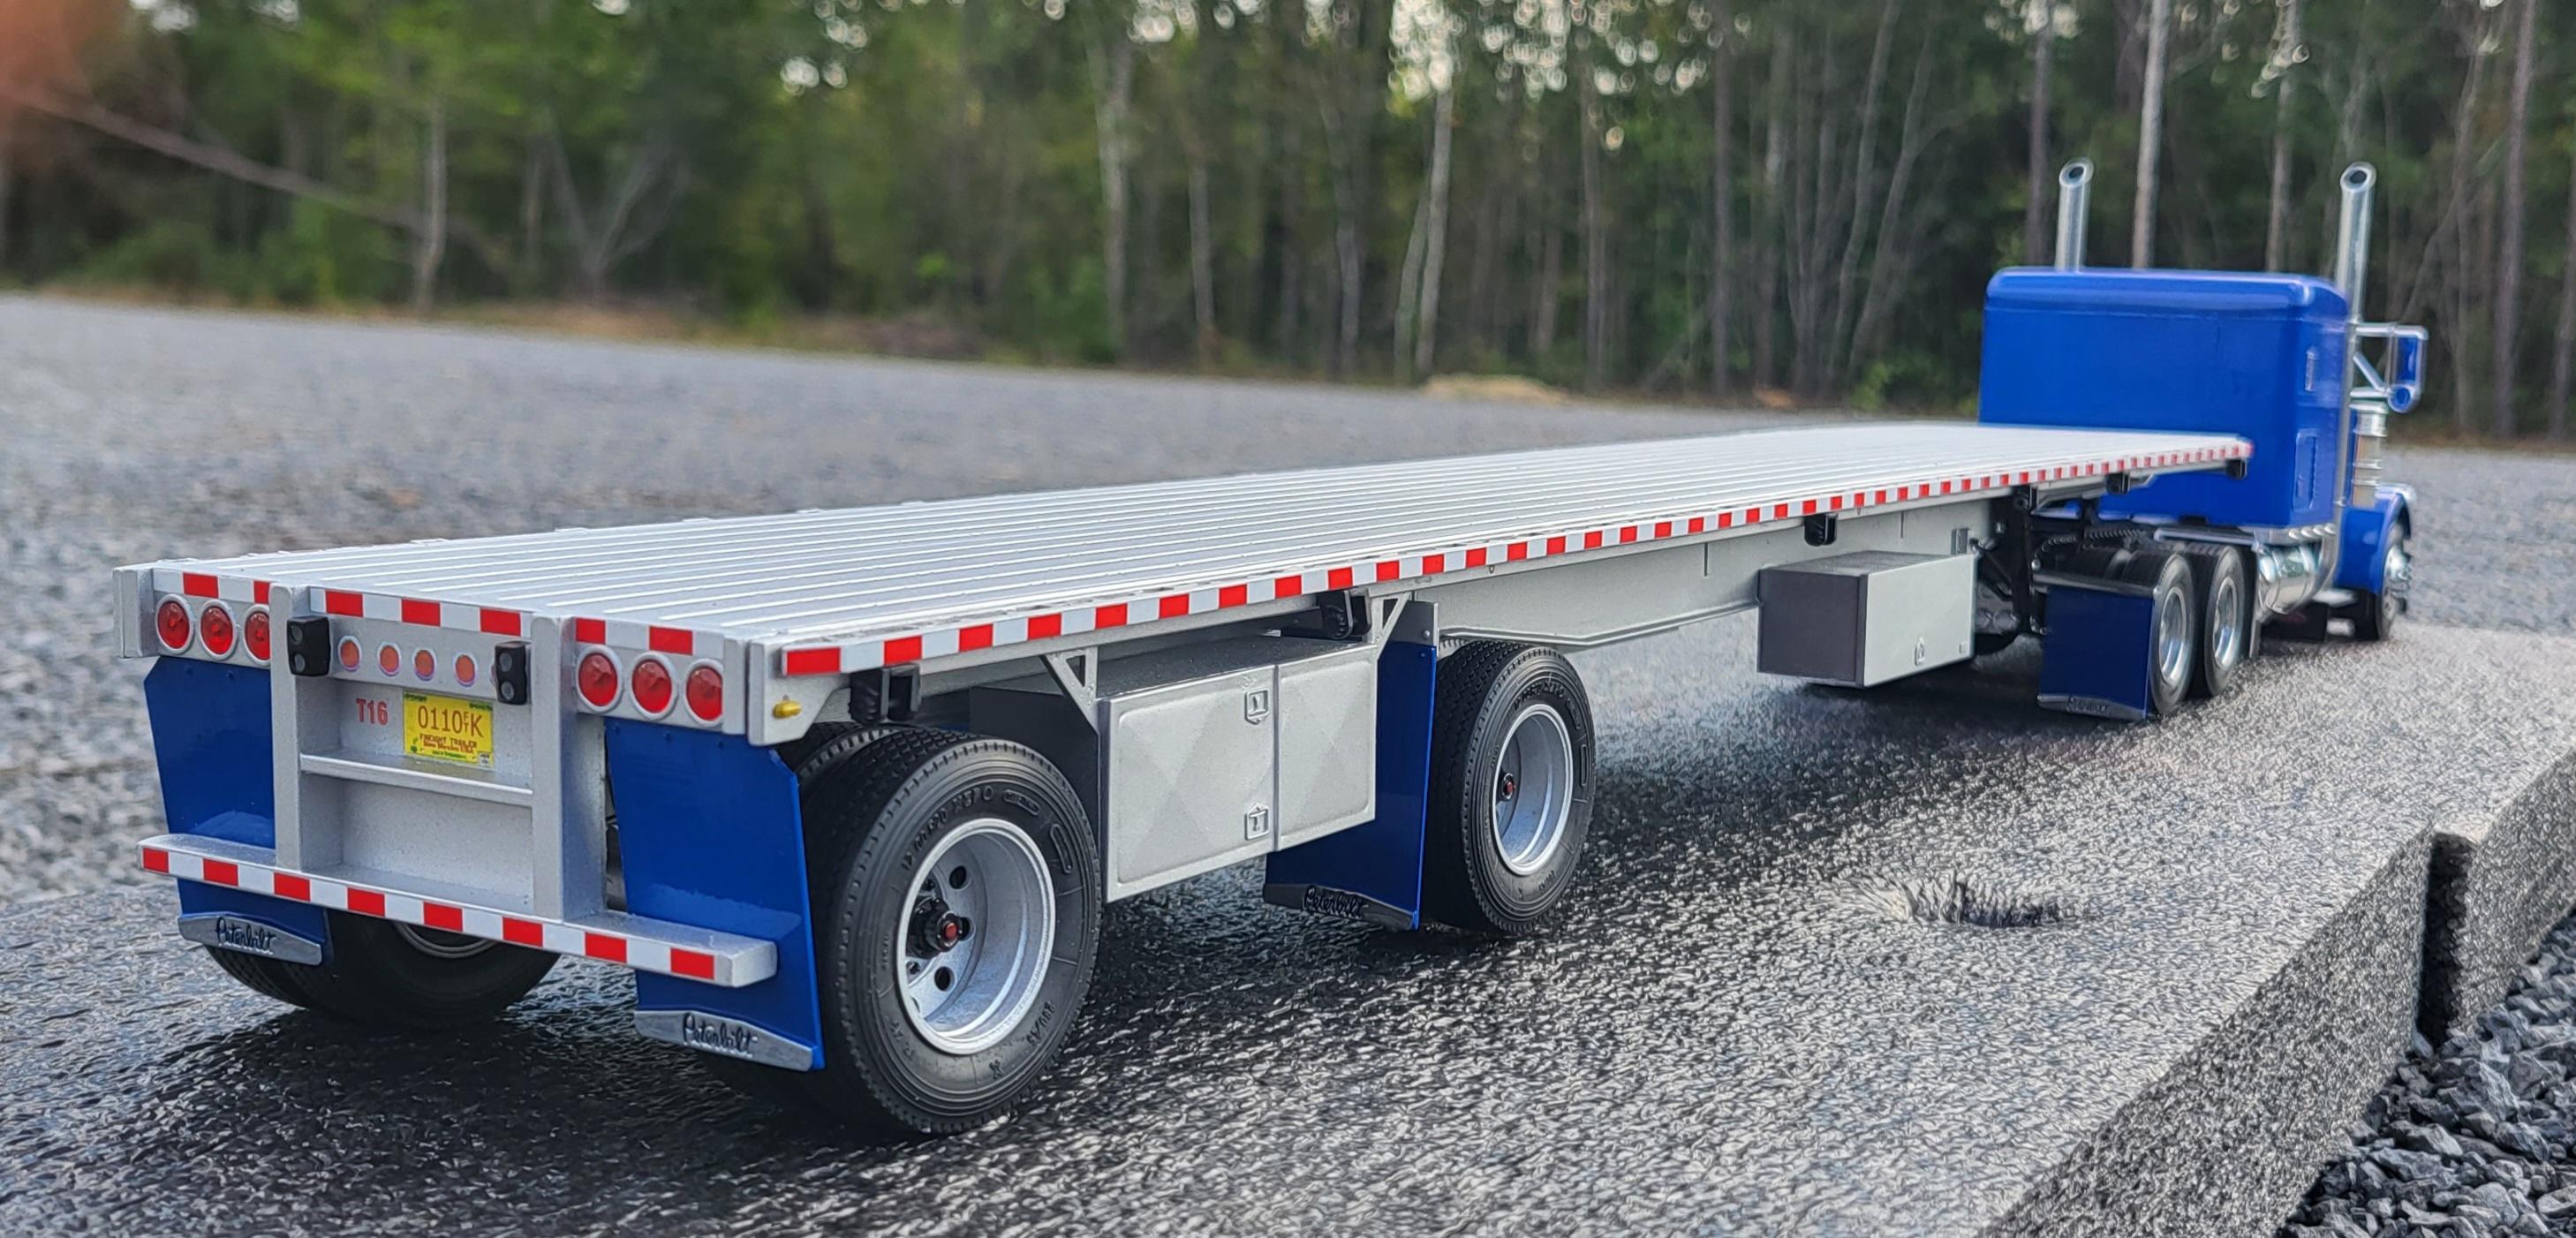
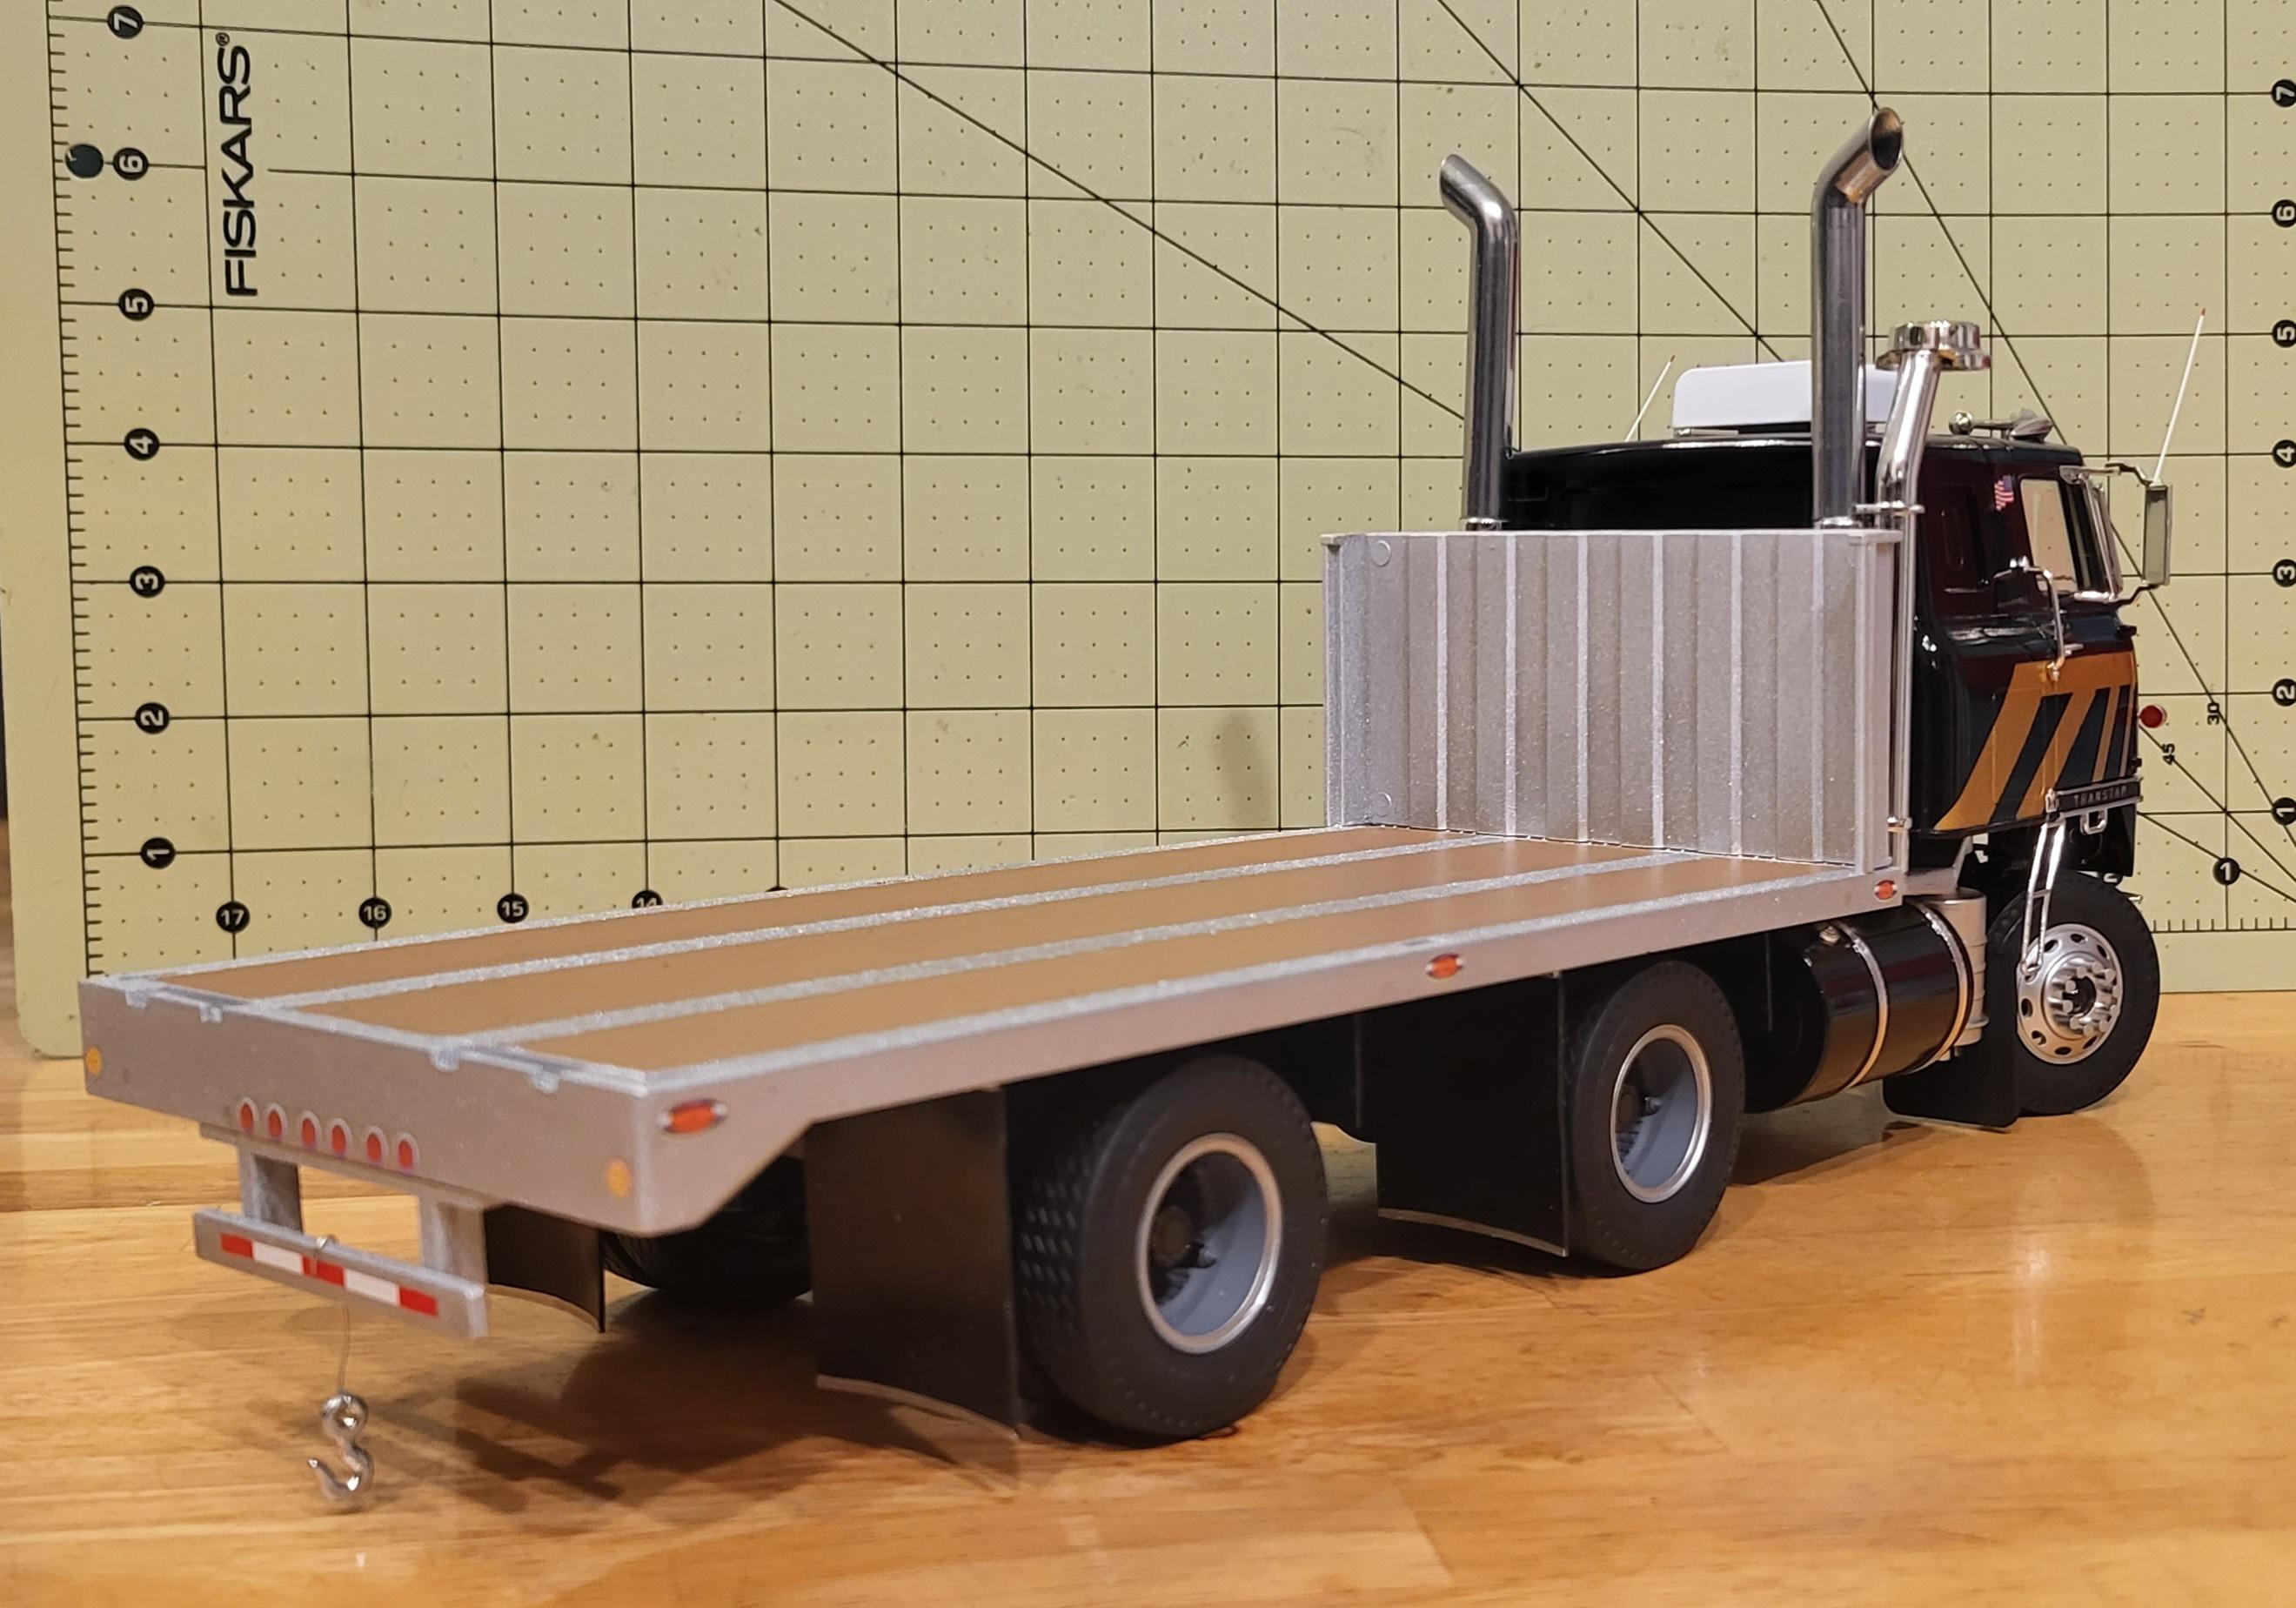
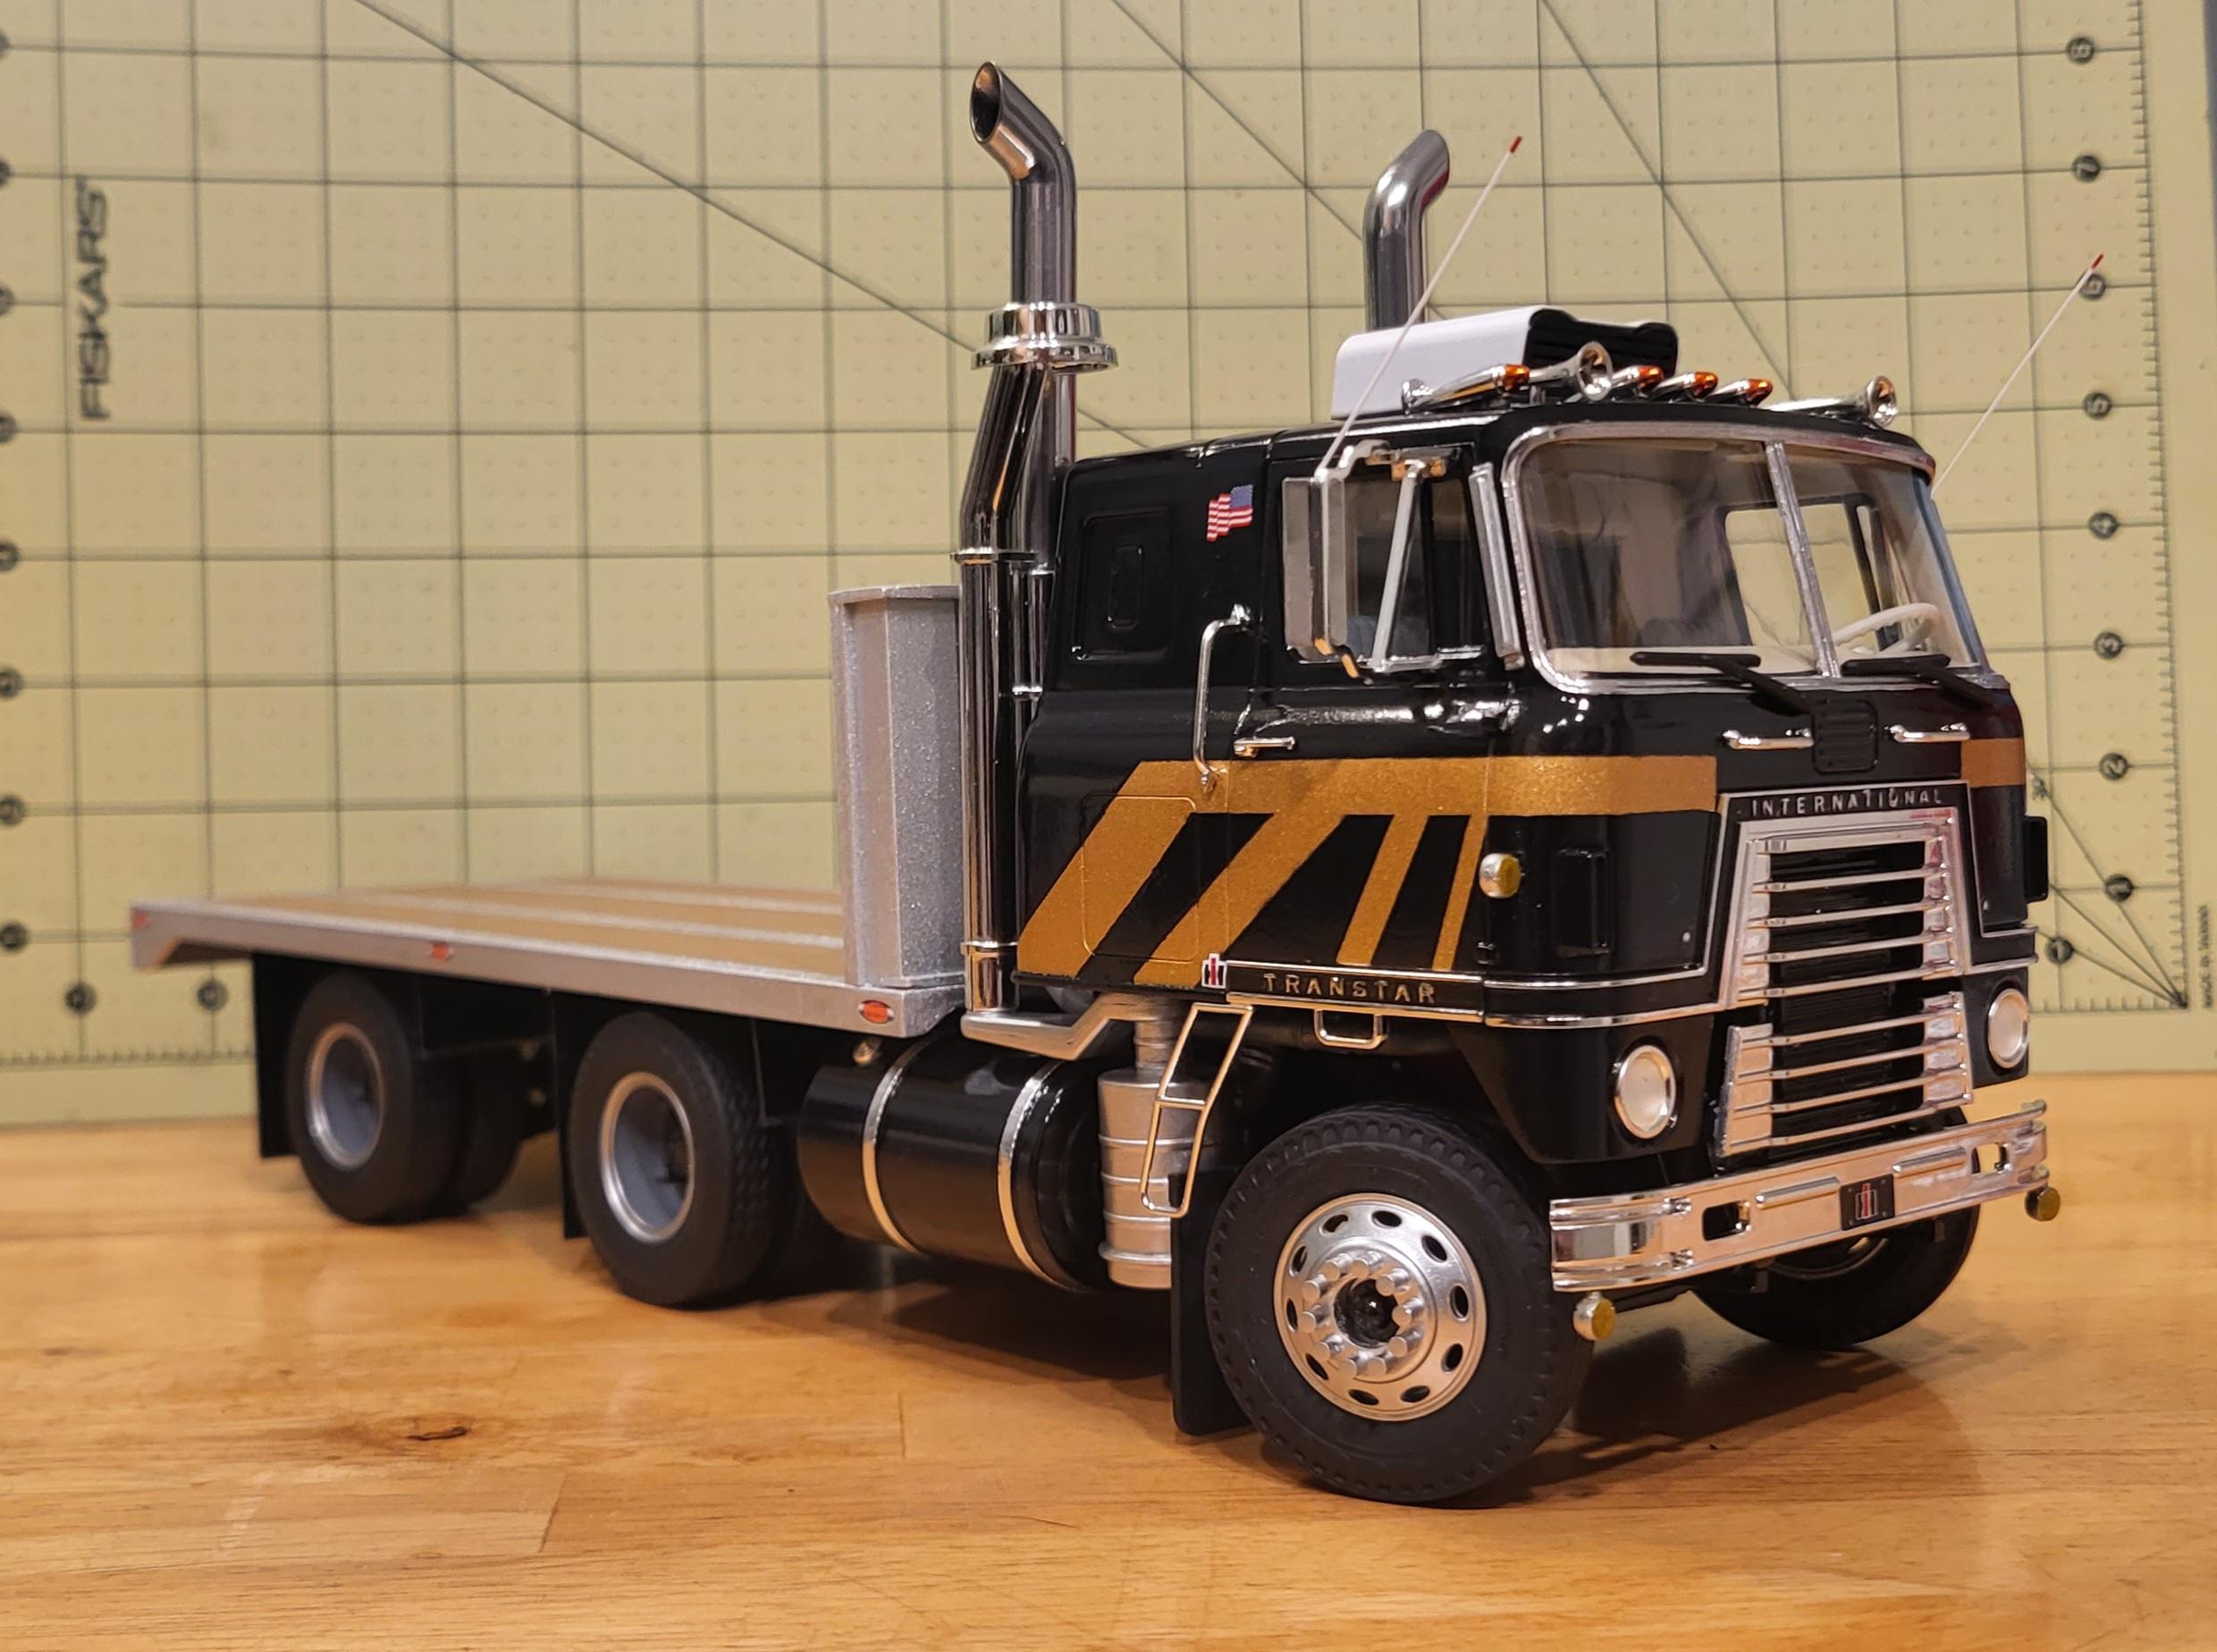
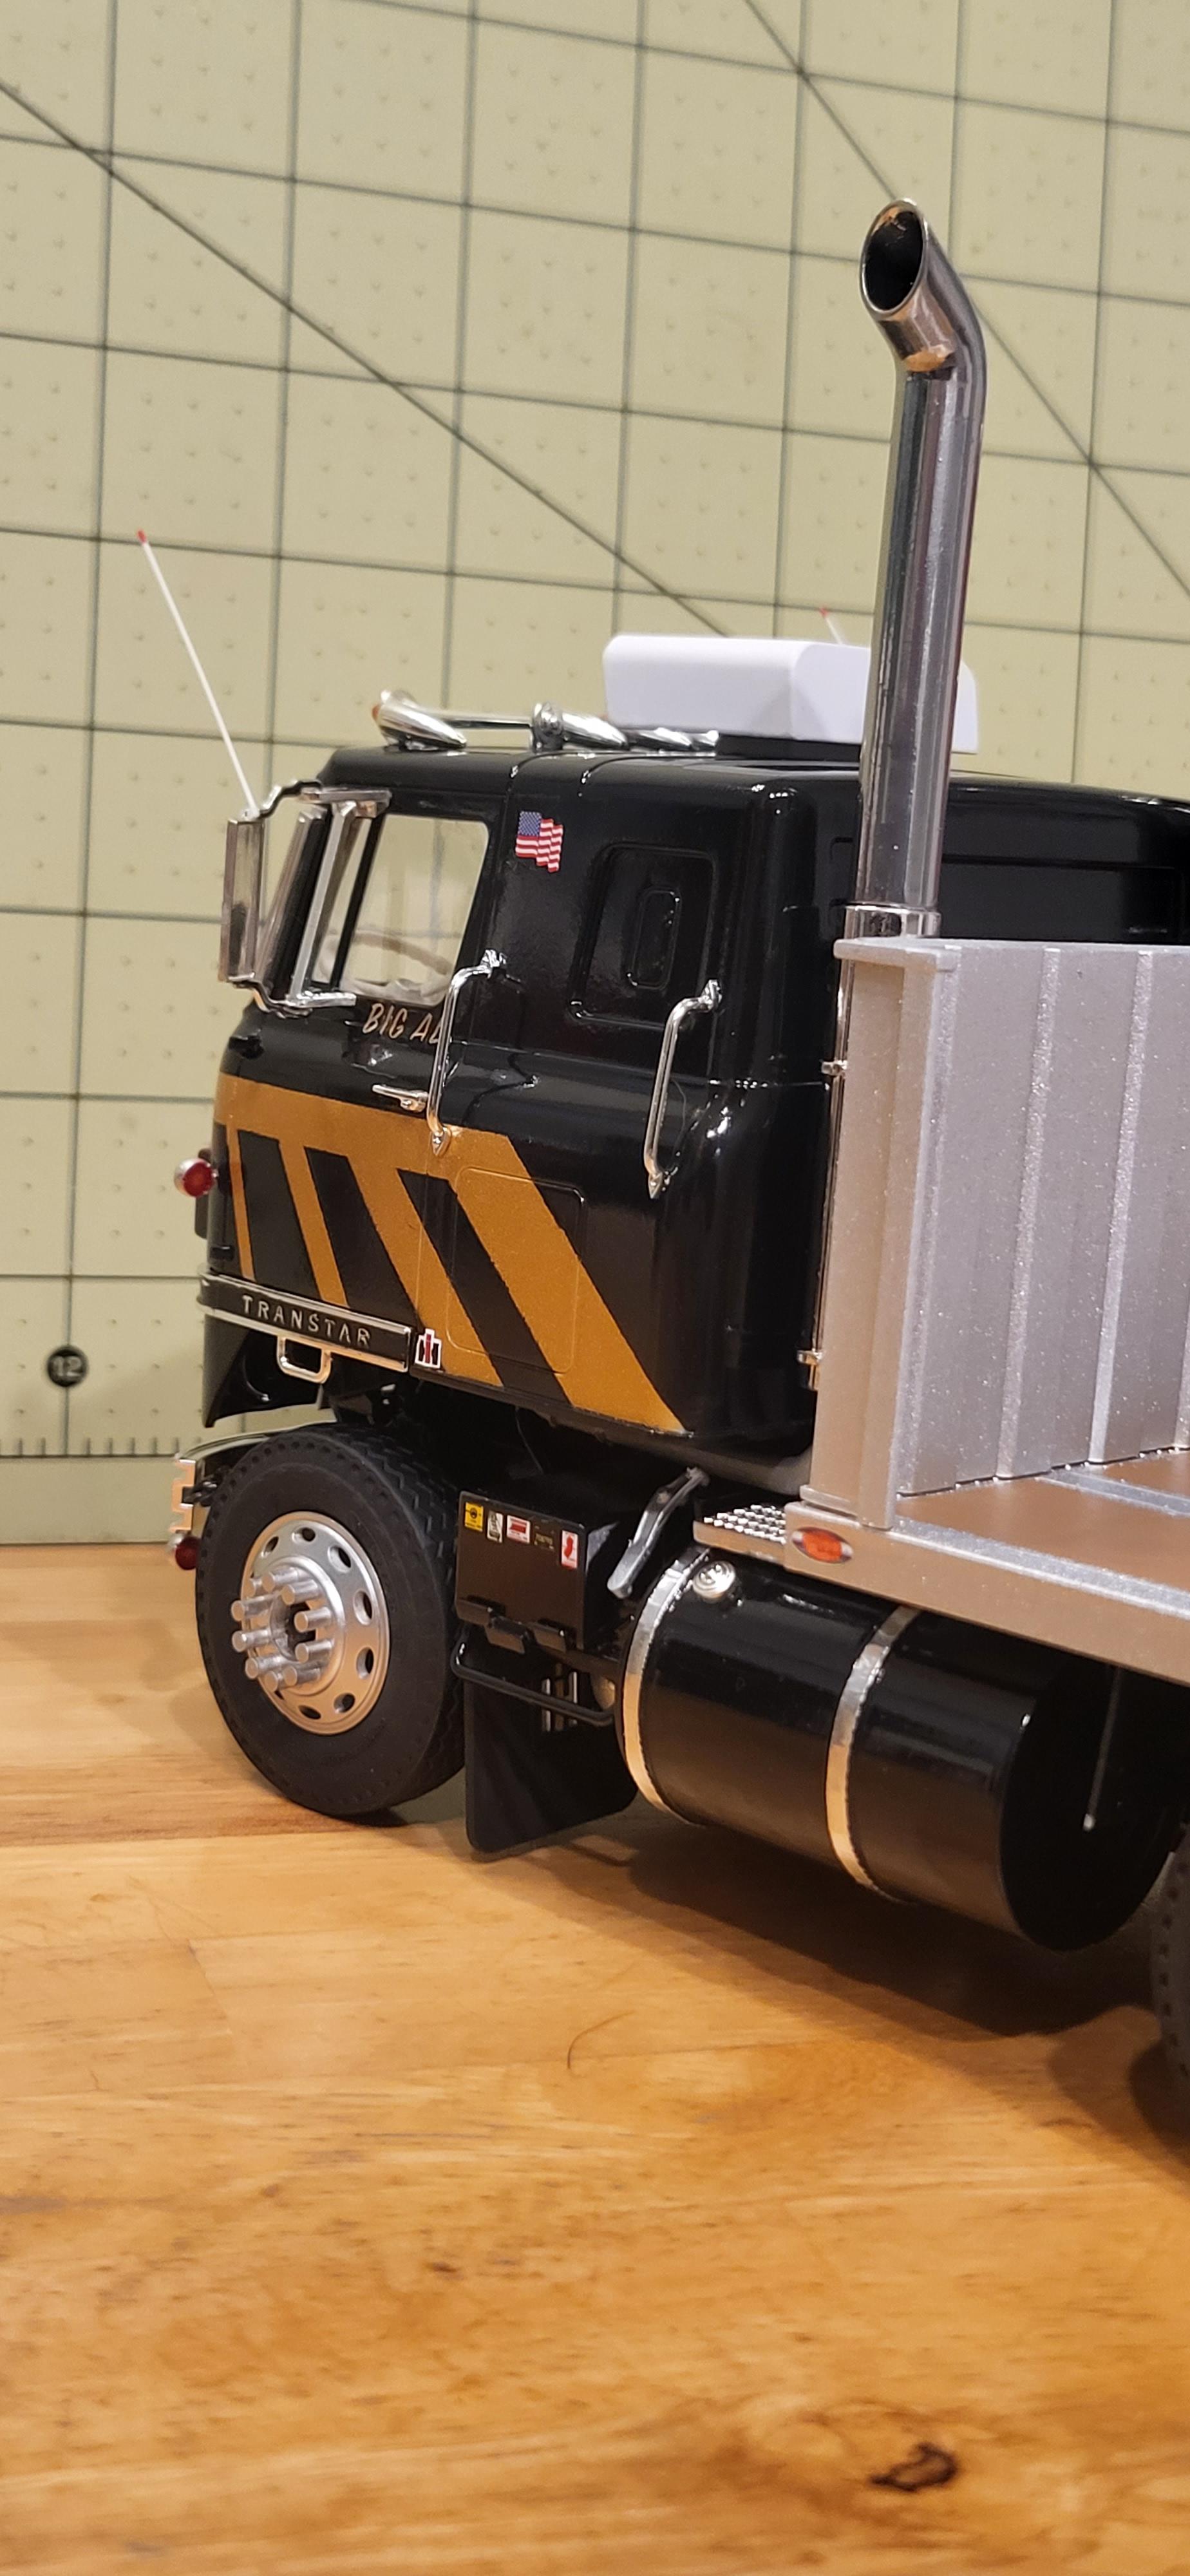
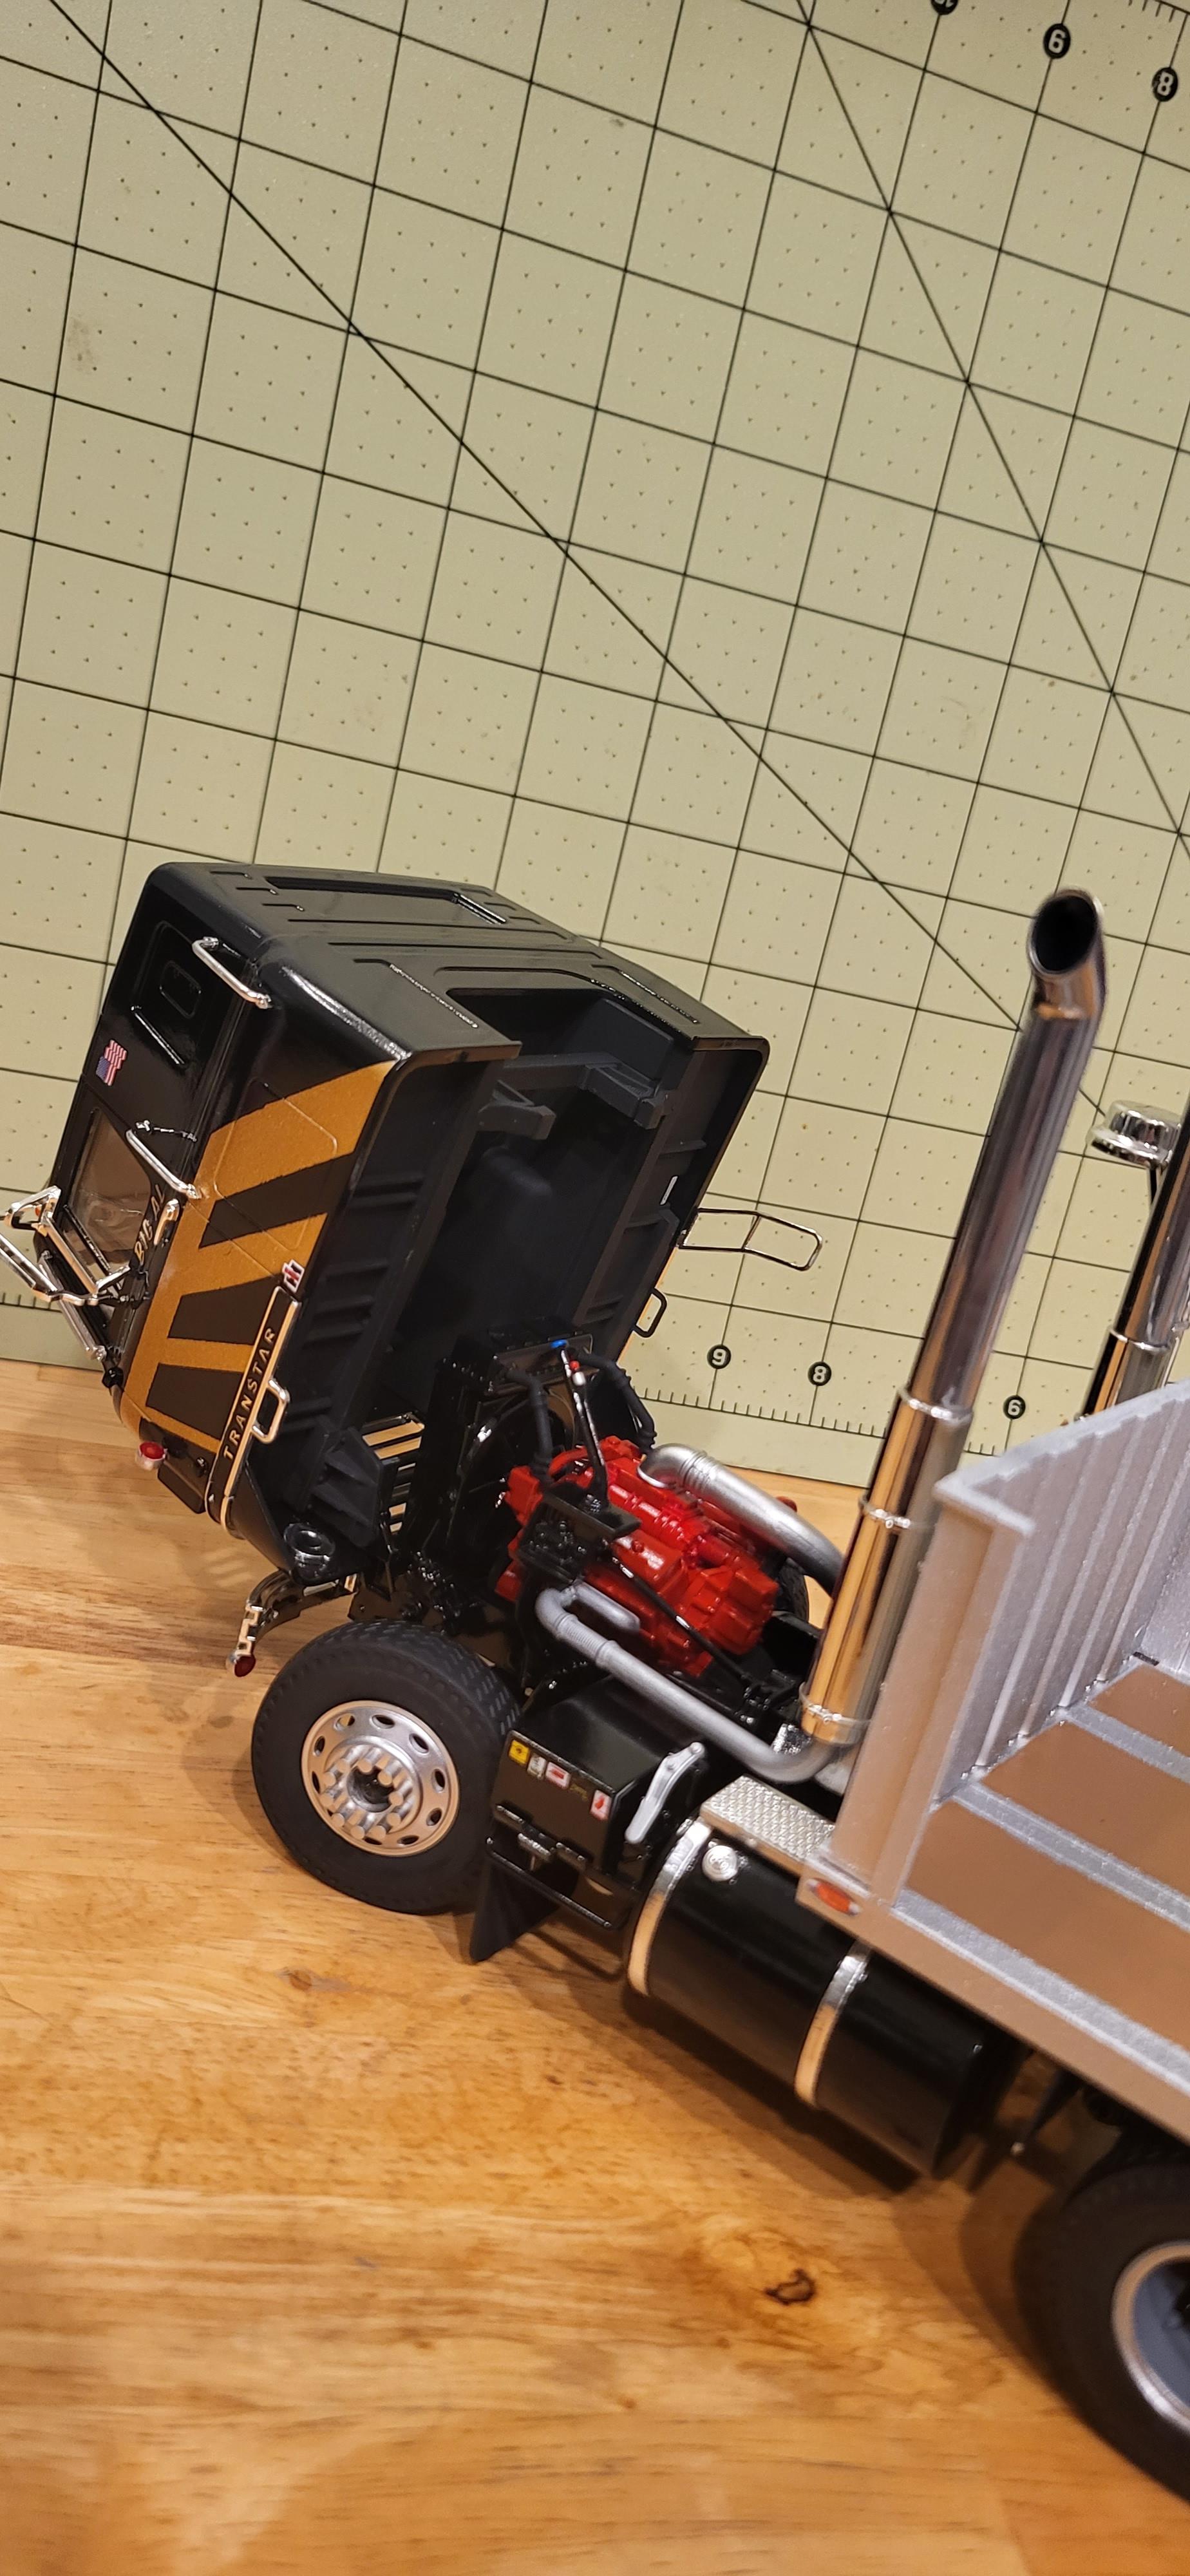
Finally finished one, that didn't give me any major problems! I'm in love with how it turned out. As usual, here's the mod list: spread the drive axles apart, IMC flatbed body with a Moebius cab protector, rubber mudflaps. 3d printed steer rims, exhaust tips, chicken lights. Italeri A.C. unit, various kit/custom made decals. And a hood dangling off the back just because. Enjoy!
-
Italeri Freightliner FLC
TruckerAL replied to TruckerAL's topic in Model Trucks: Big Rigs and Heavy Equipment
Thank you each and every one of you guys!! -
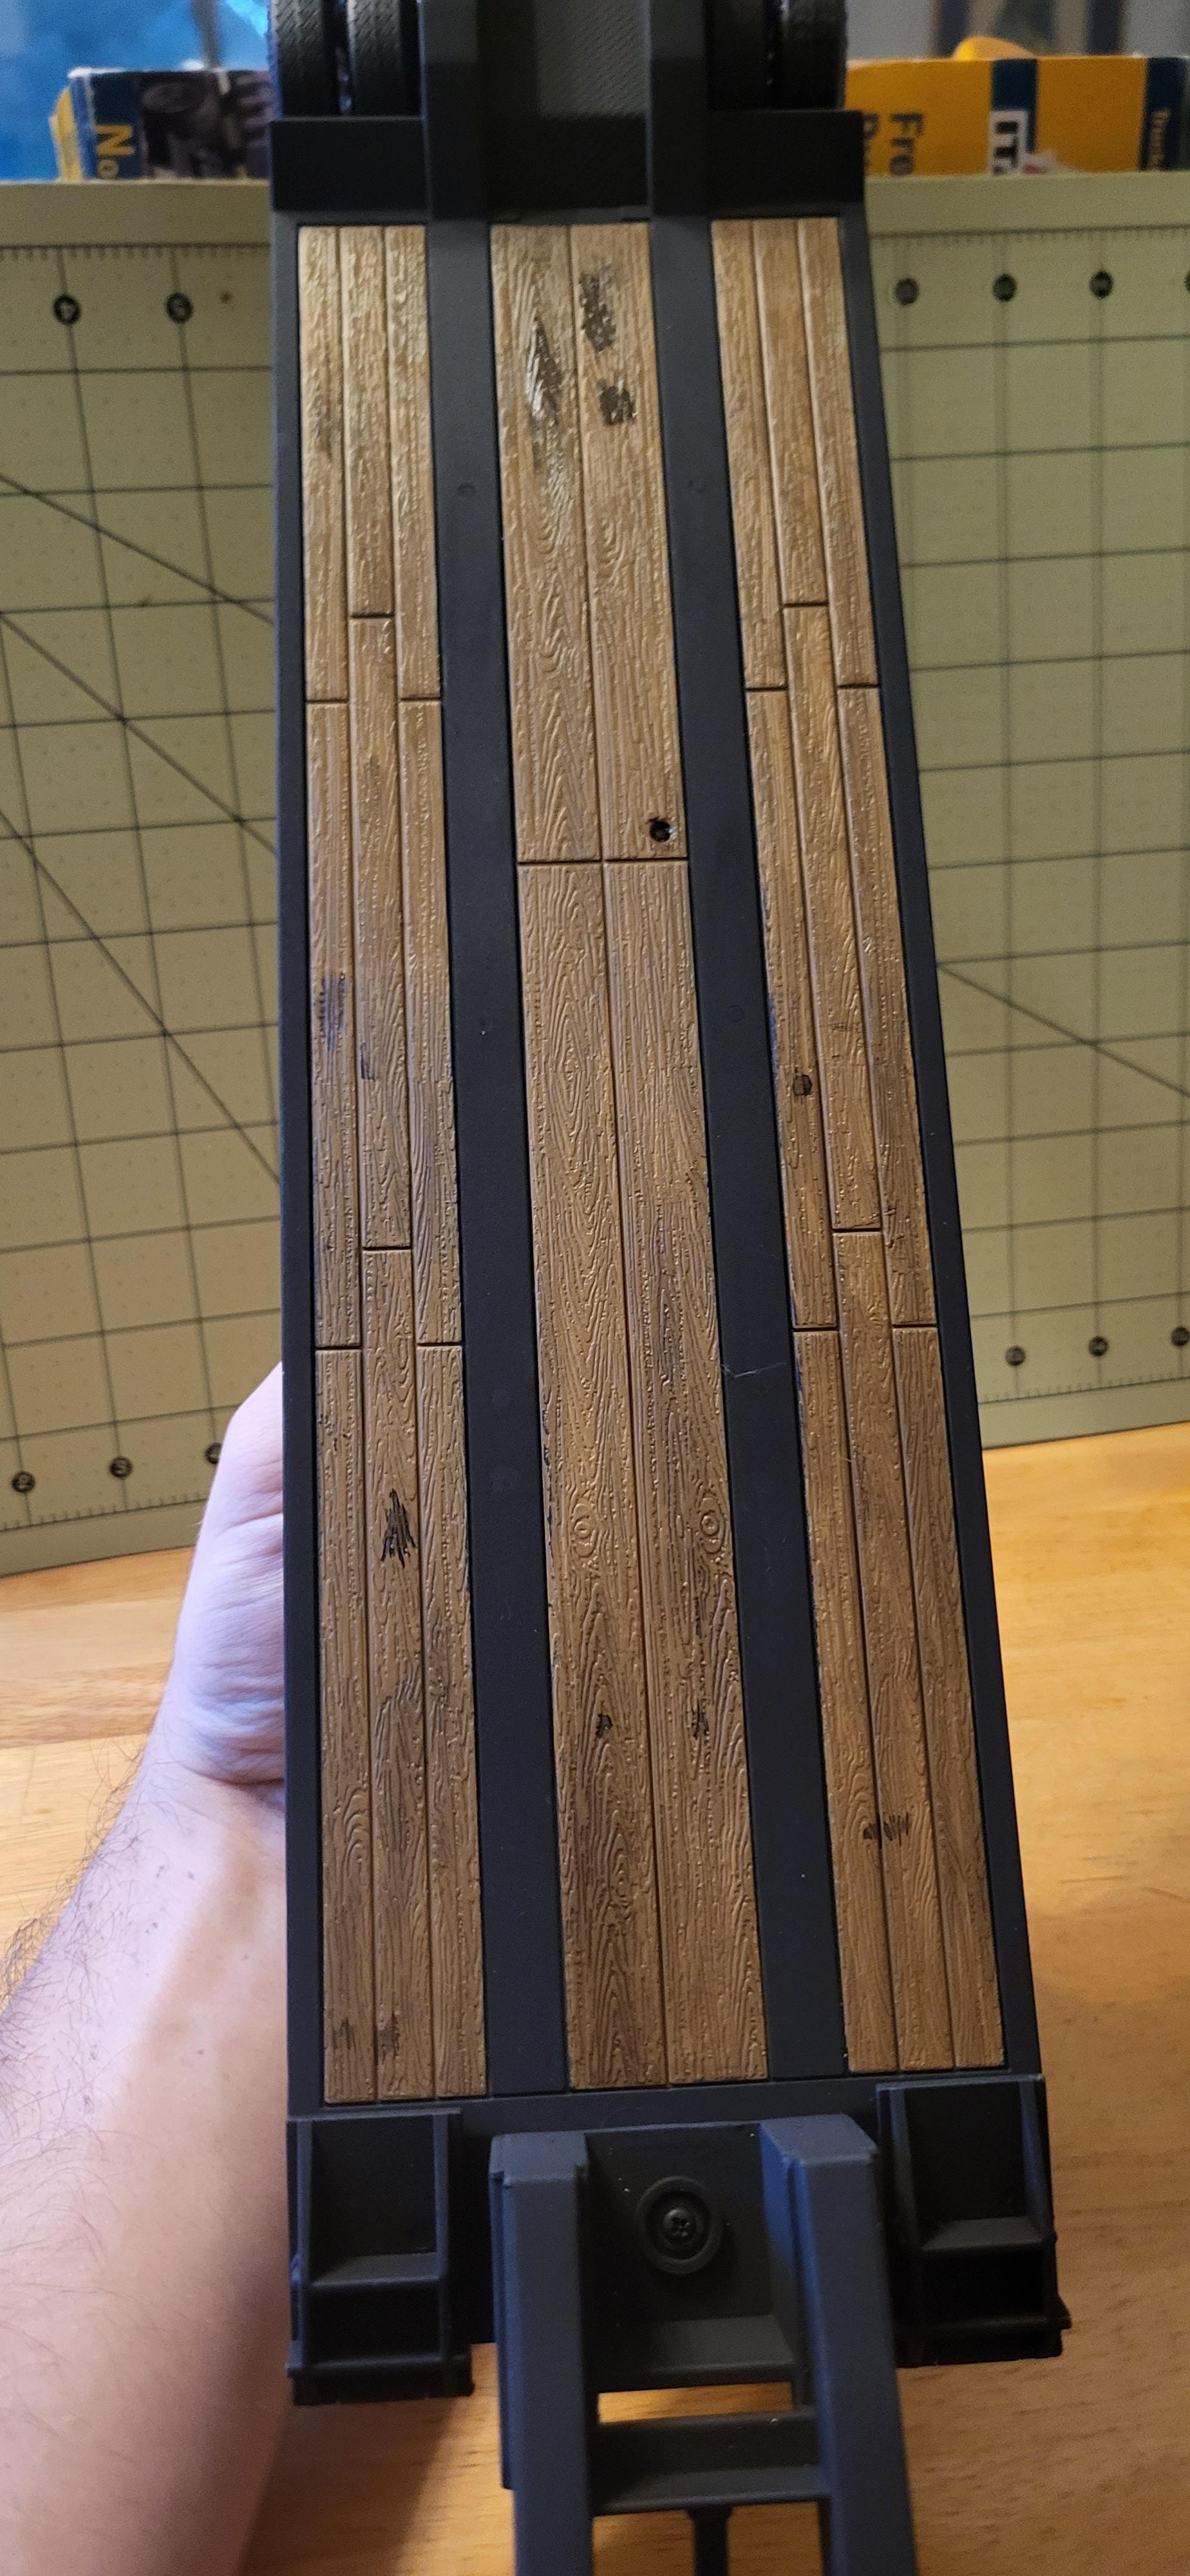
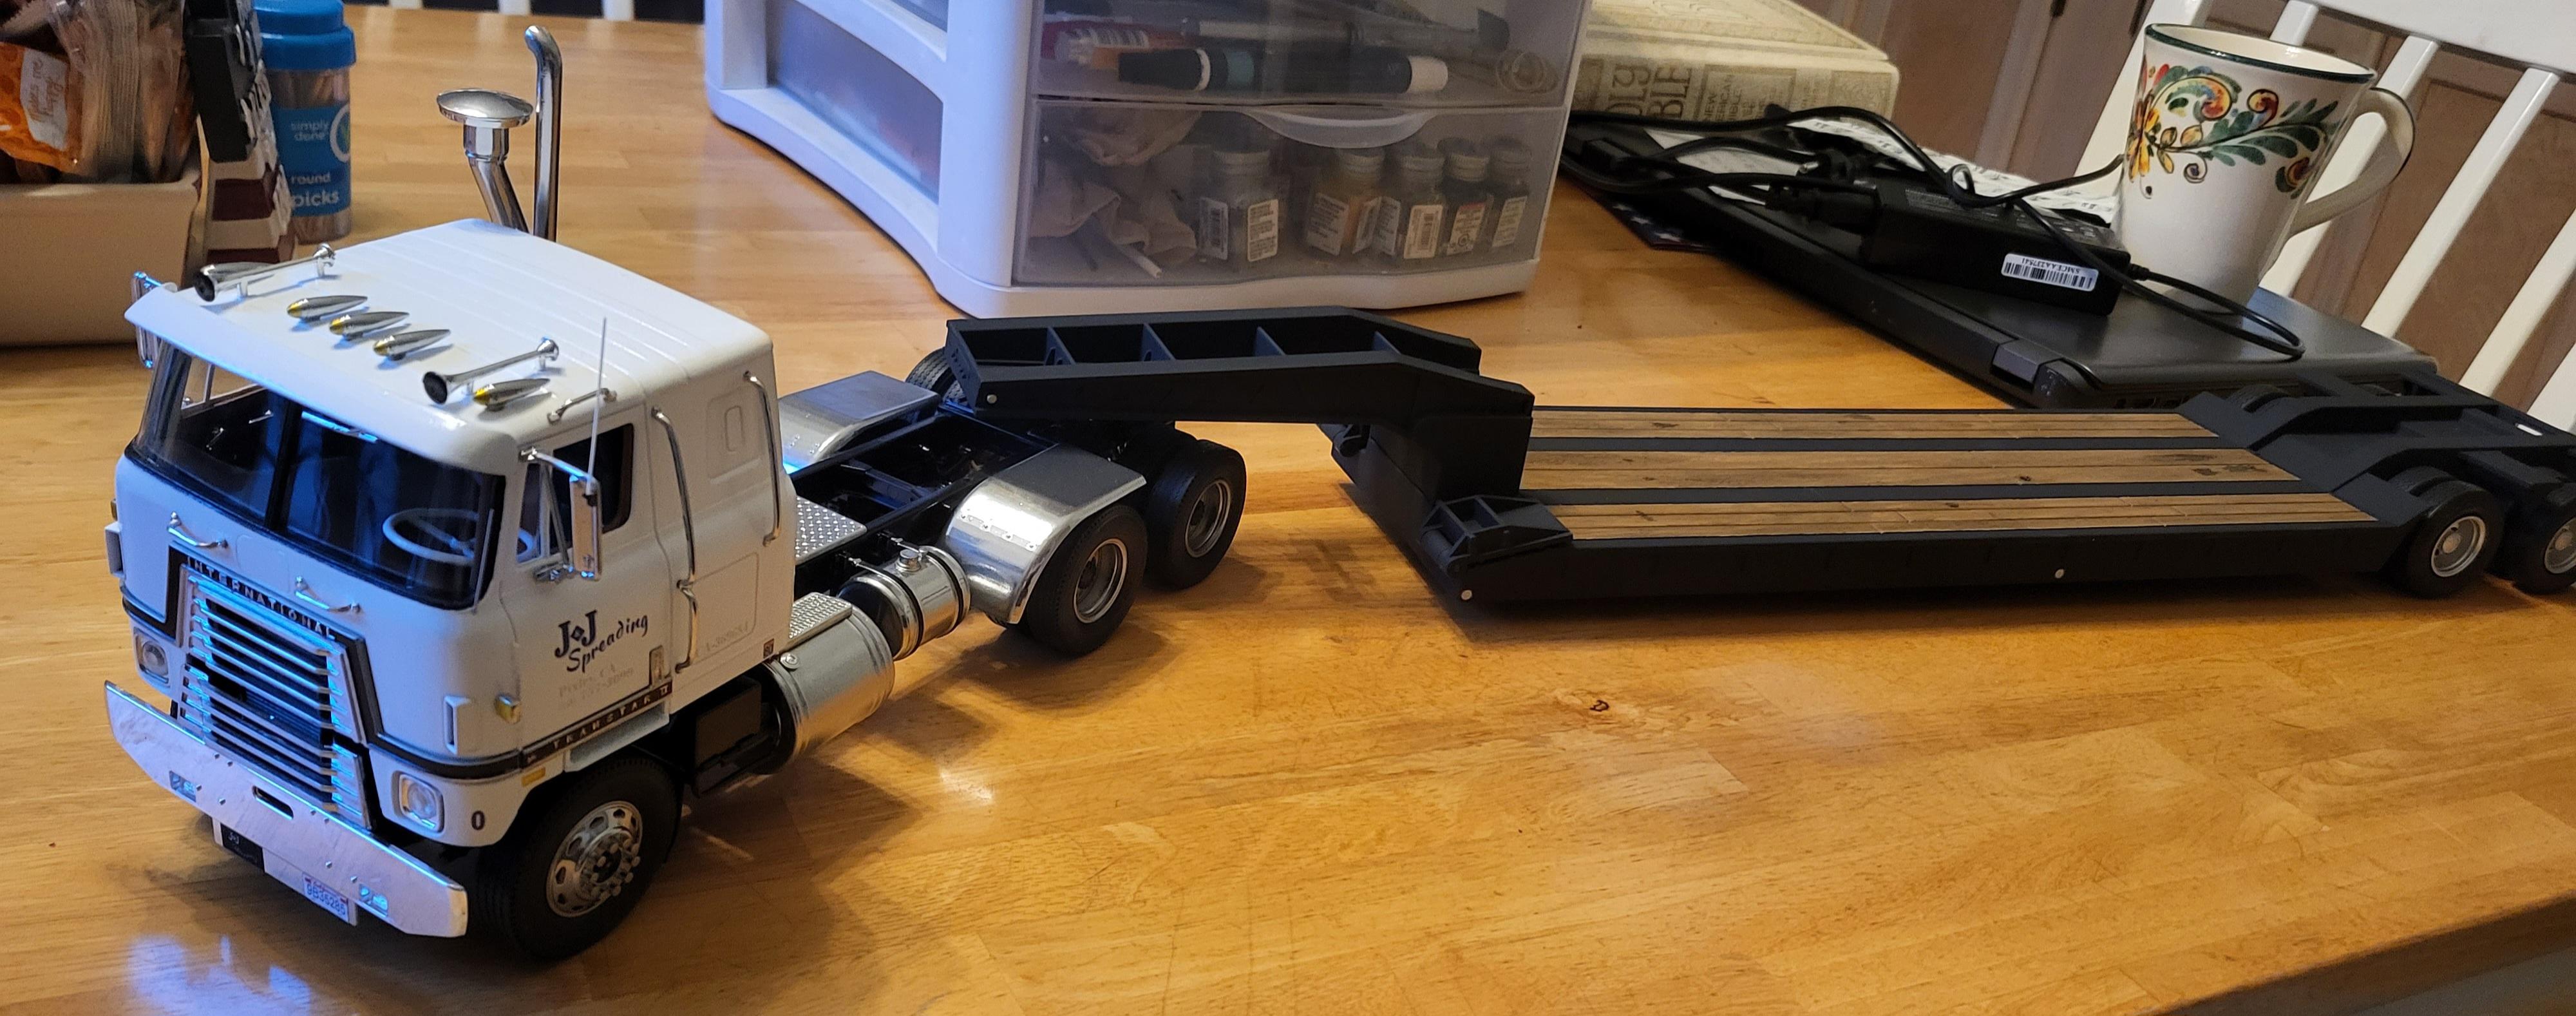
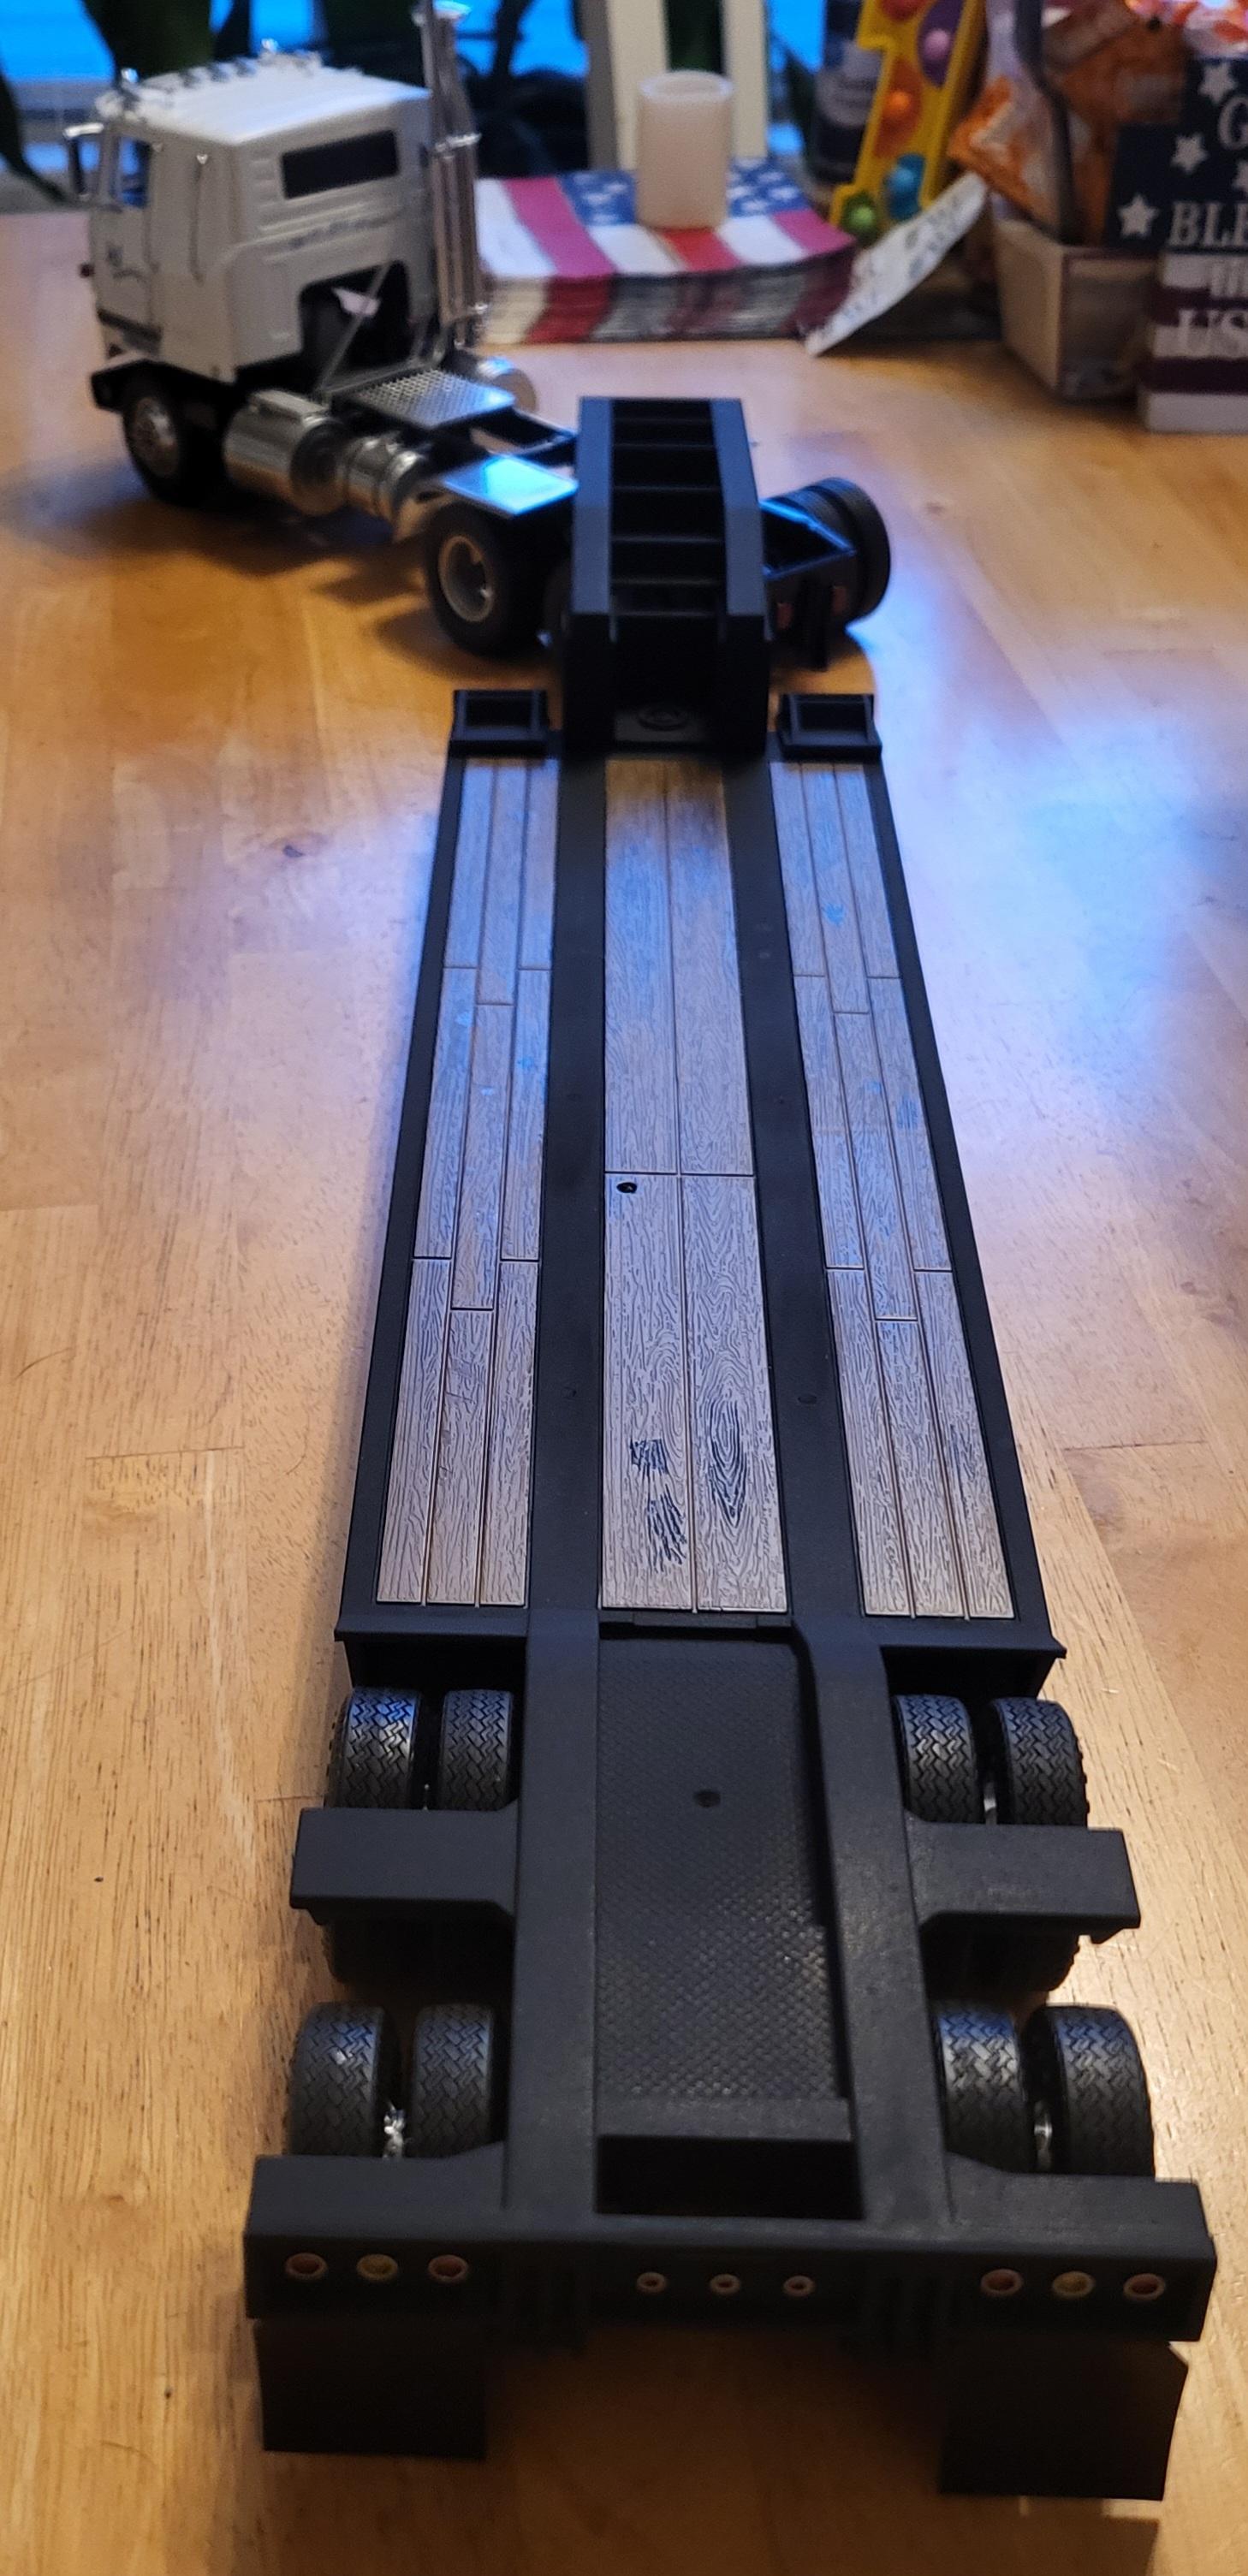
Here's a quick little 2 day build I did this week. Took a Neway lowboy and reworked it to make it less toy like. Filled in and sanded any excess holes/sink marks, removed mold lines, swapped out the rims and tires, new mudflaps, new paint job, weathered the deck up, and added some light work.