Katsusauce
-
Posts
331 -
Joined
-
Last visited
Content Type
Profiles
Forums
Events
Gallery
Everything posted by Katsusauce
-
I decided to cut another hole in the dash....the glove box to be precise. Printed up an android home screen for the audio opening, and a Sony home screen for the glove box monitor. I decided to go with Tamiya's Bright Blue and Black for the interior colors.

-
It's USC Kombi Spot Putty.
-
Next I'm going to try and make a touch screen for the audio, maybe another screen below the HVAC controls, and a digital dash cluster.
-
I'm using the bucket seats from the 59 Cadillac for the fronts. They looked a little short, so I fabricated tall seat rails for them. Kind of looks to big for the little Cube..... what to do.....🤔🤔🤔🤔🤔
-
I had some Revell 59 Cadillac seats in my "junkyard" and decided that's what I'm going with. Here's the rear mockup.
-
First off, I wanted to move the stock rear seat all the way back to the rear, but both the front and rear seat bottoms were molded into the floor pan. So I decided to cut them both out, patch the holes, and try and decide what to do about seating.
-
I'm going to try and build this Nissan Cube in a VIP Style.....😂
-
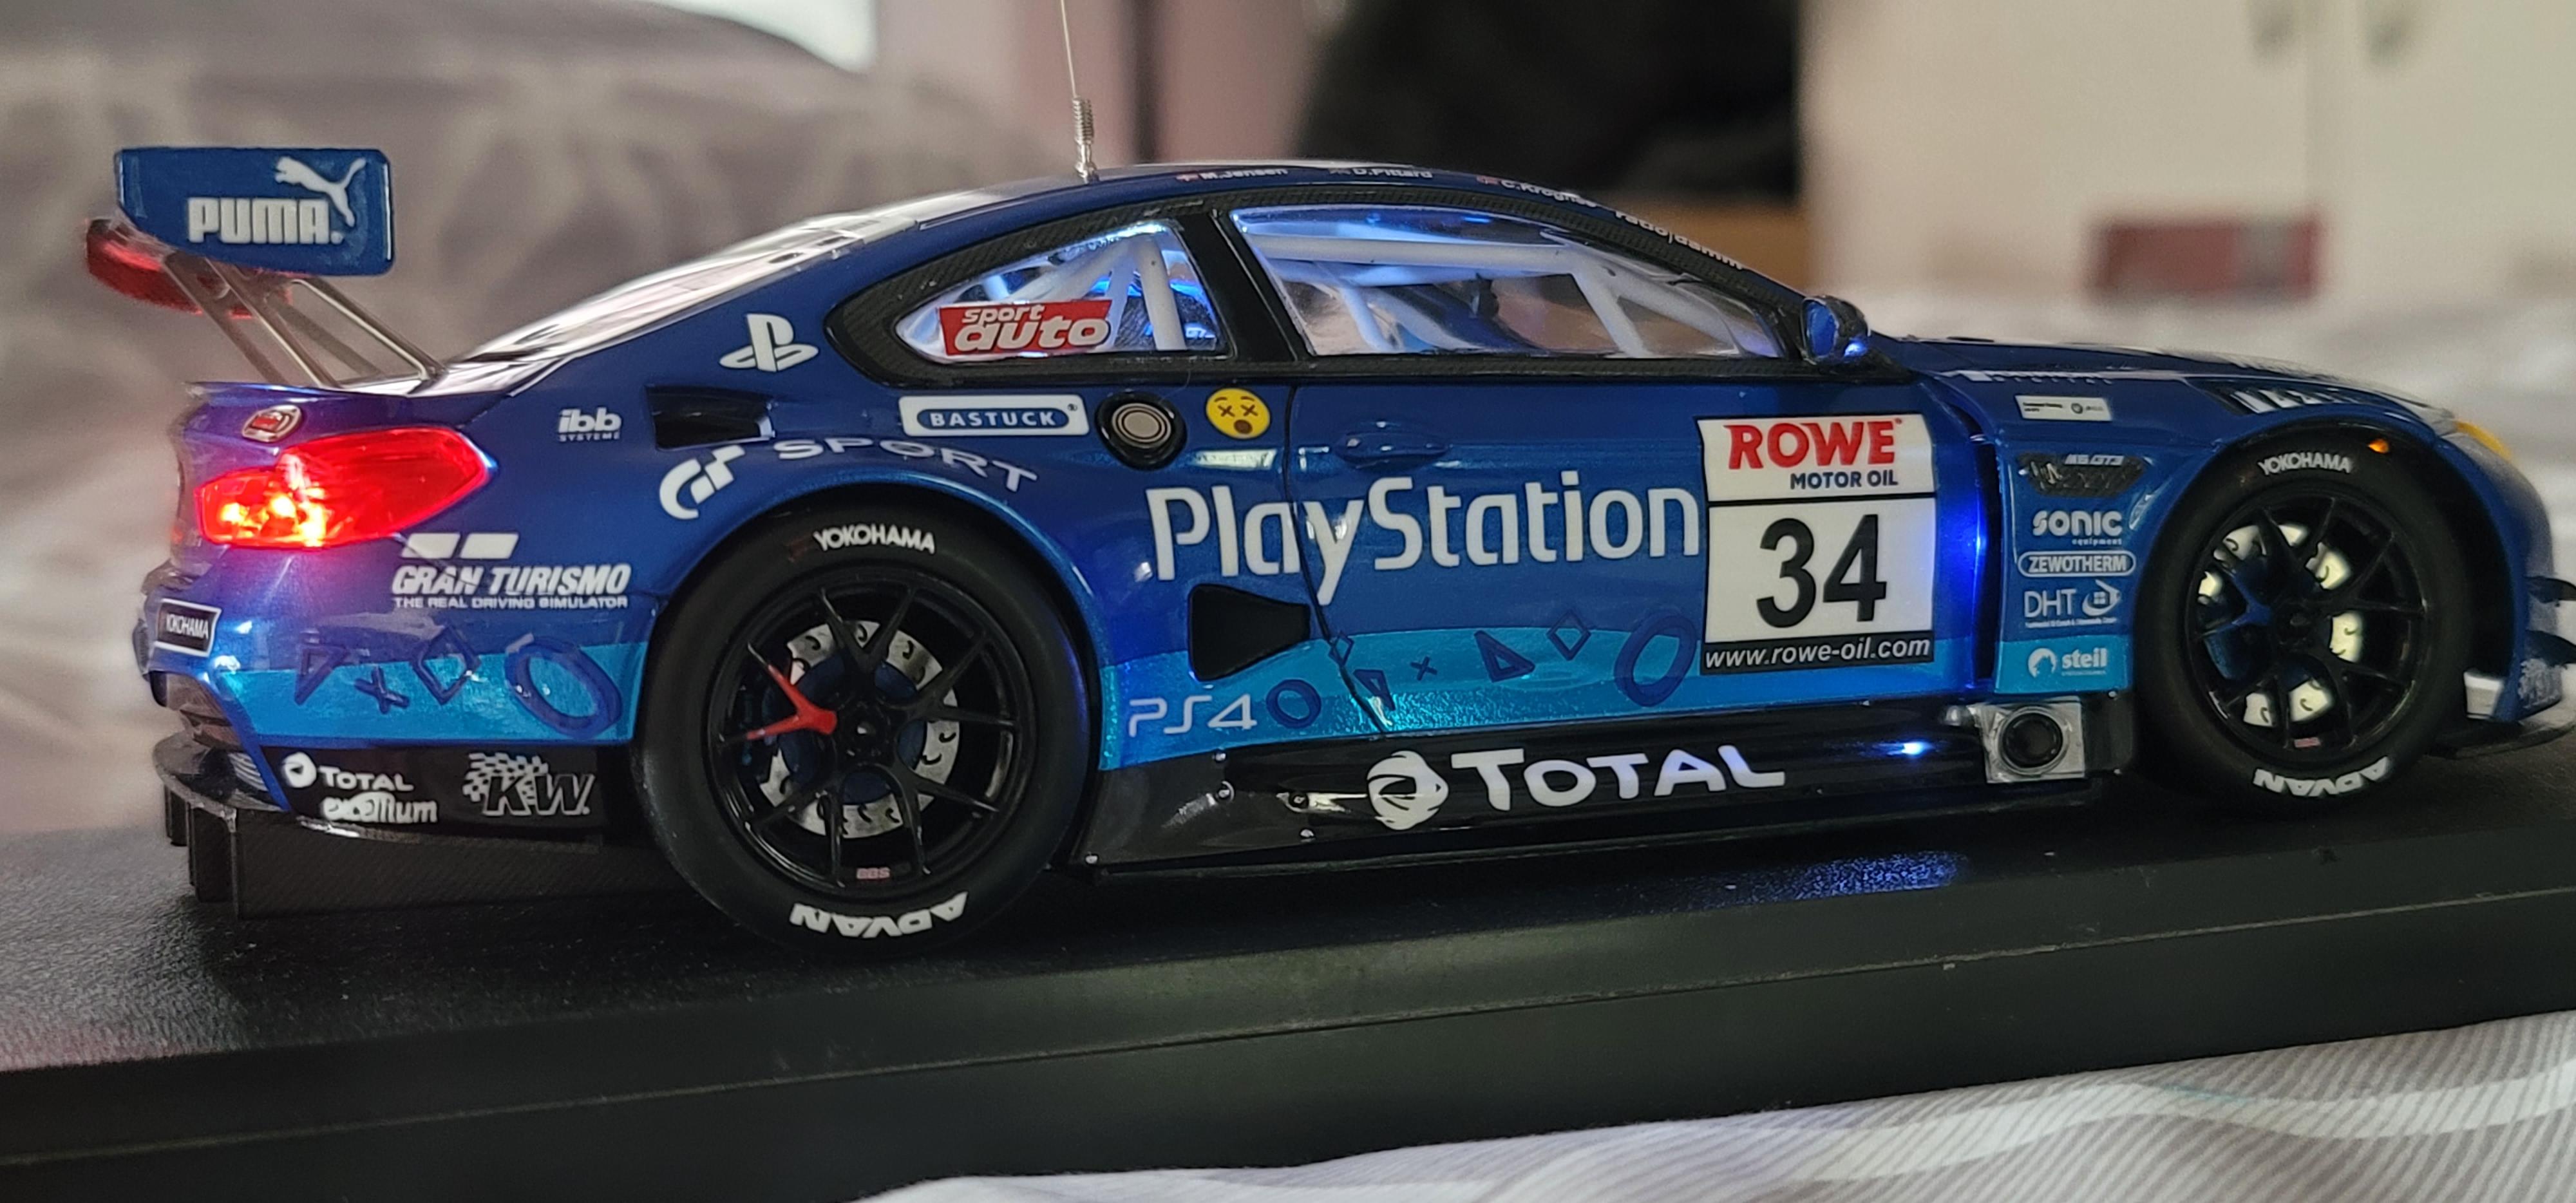
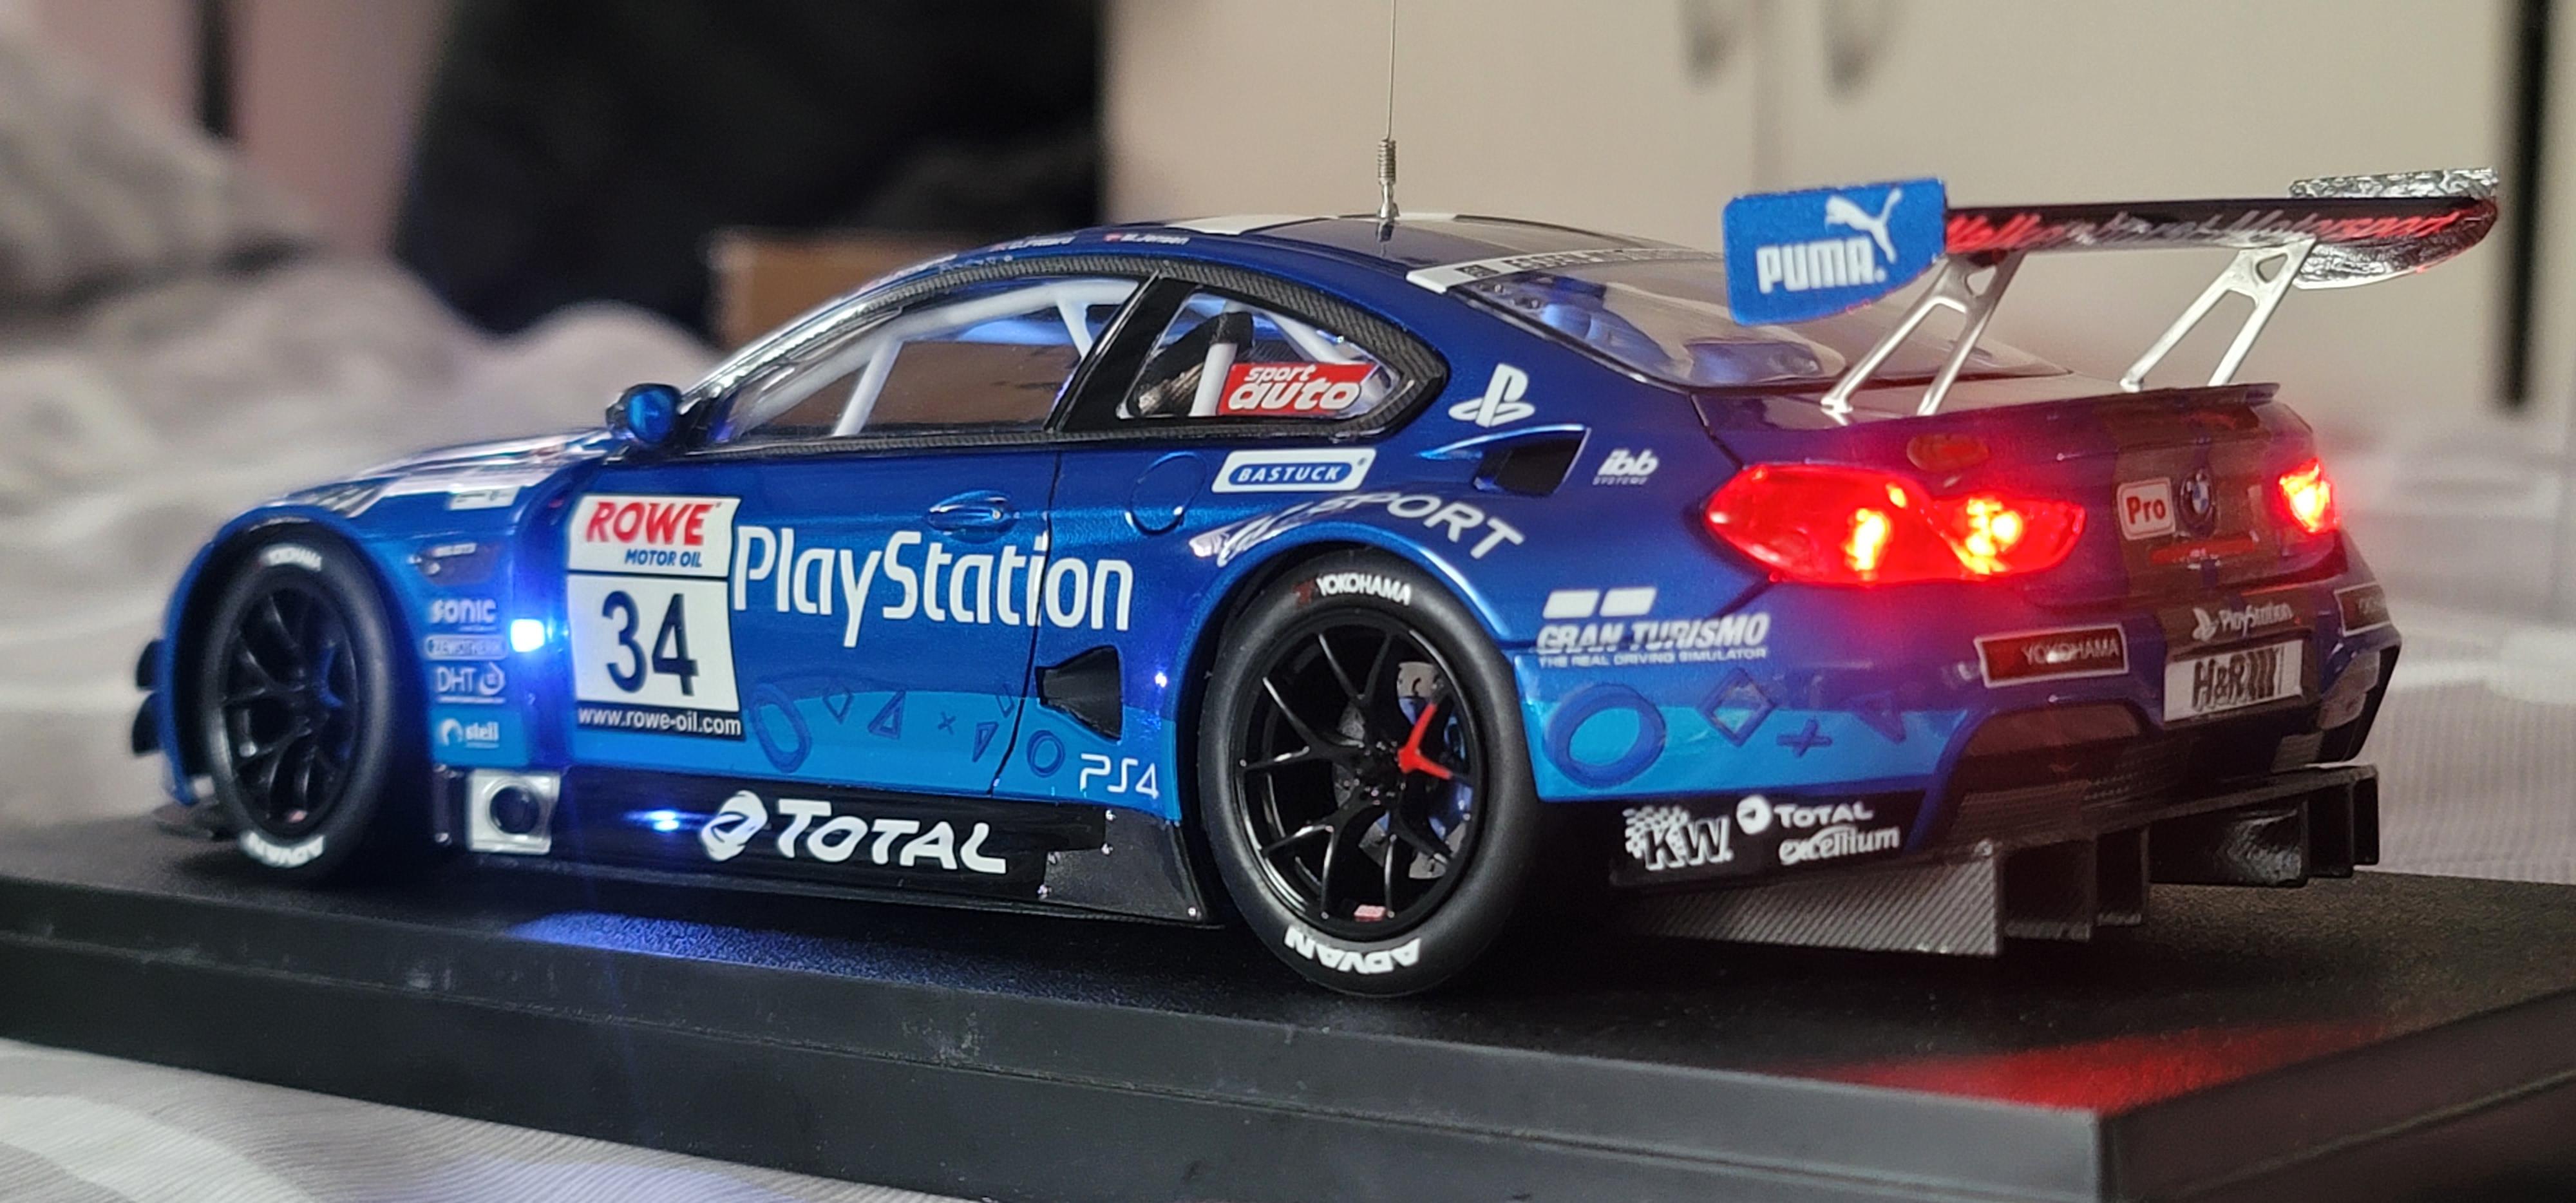
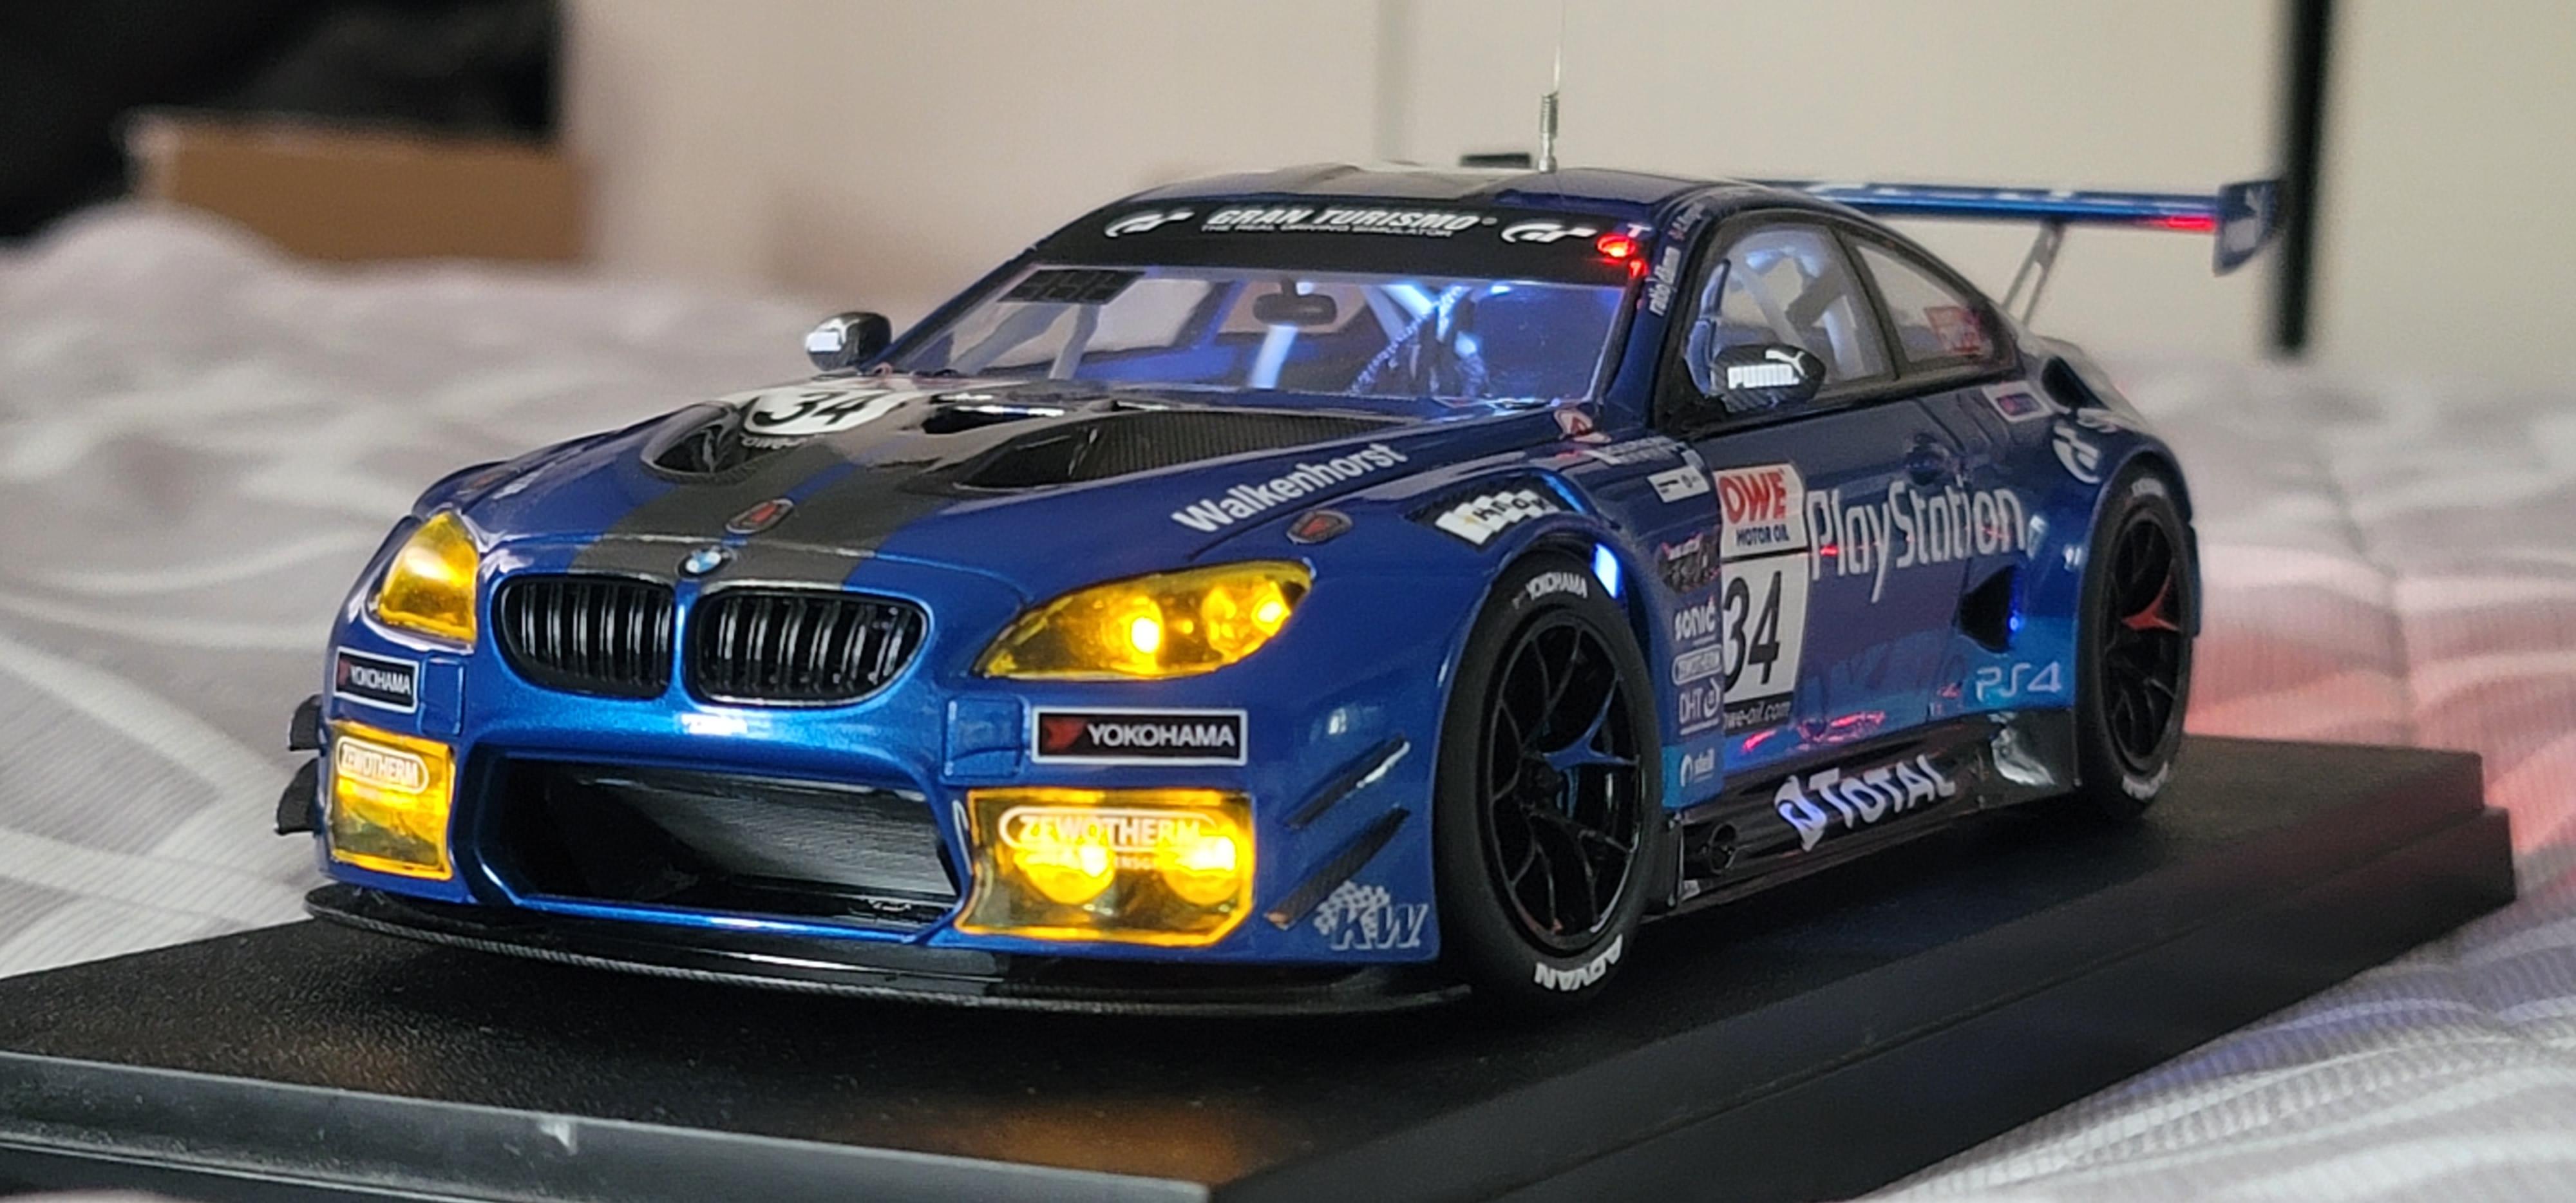
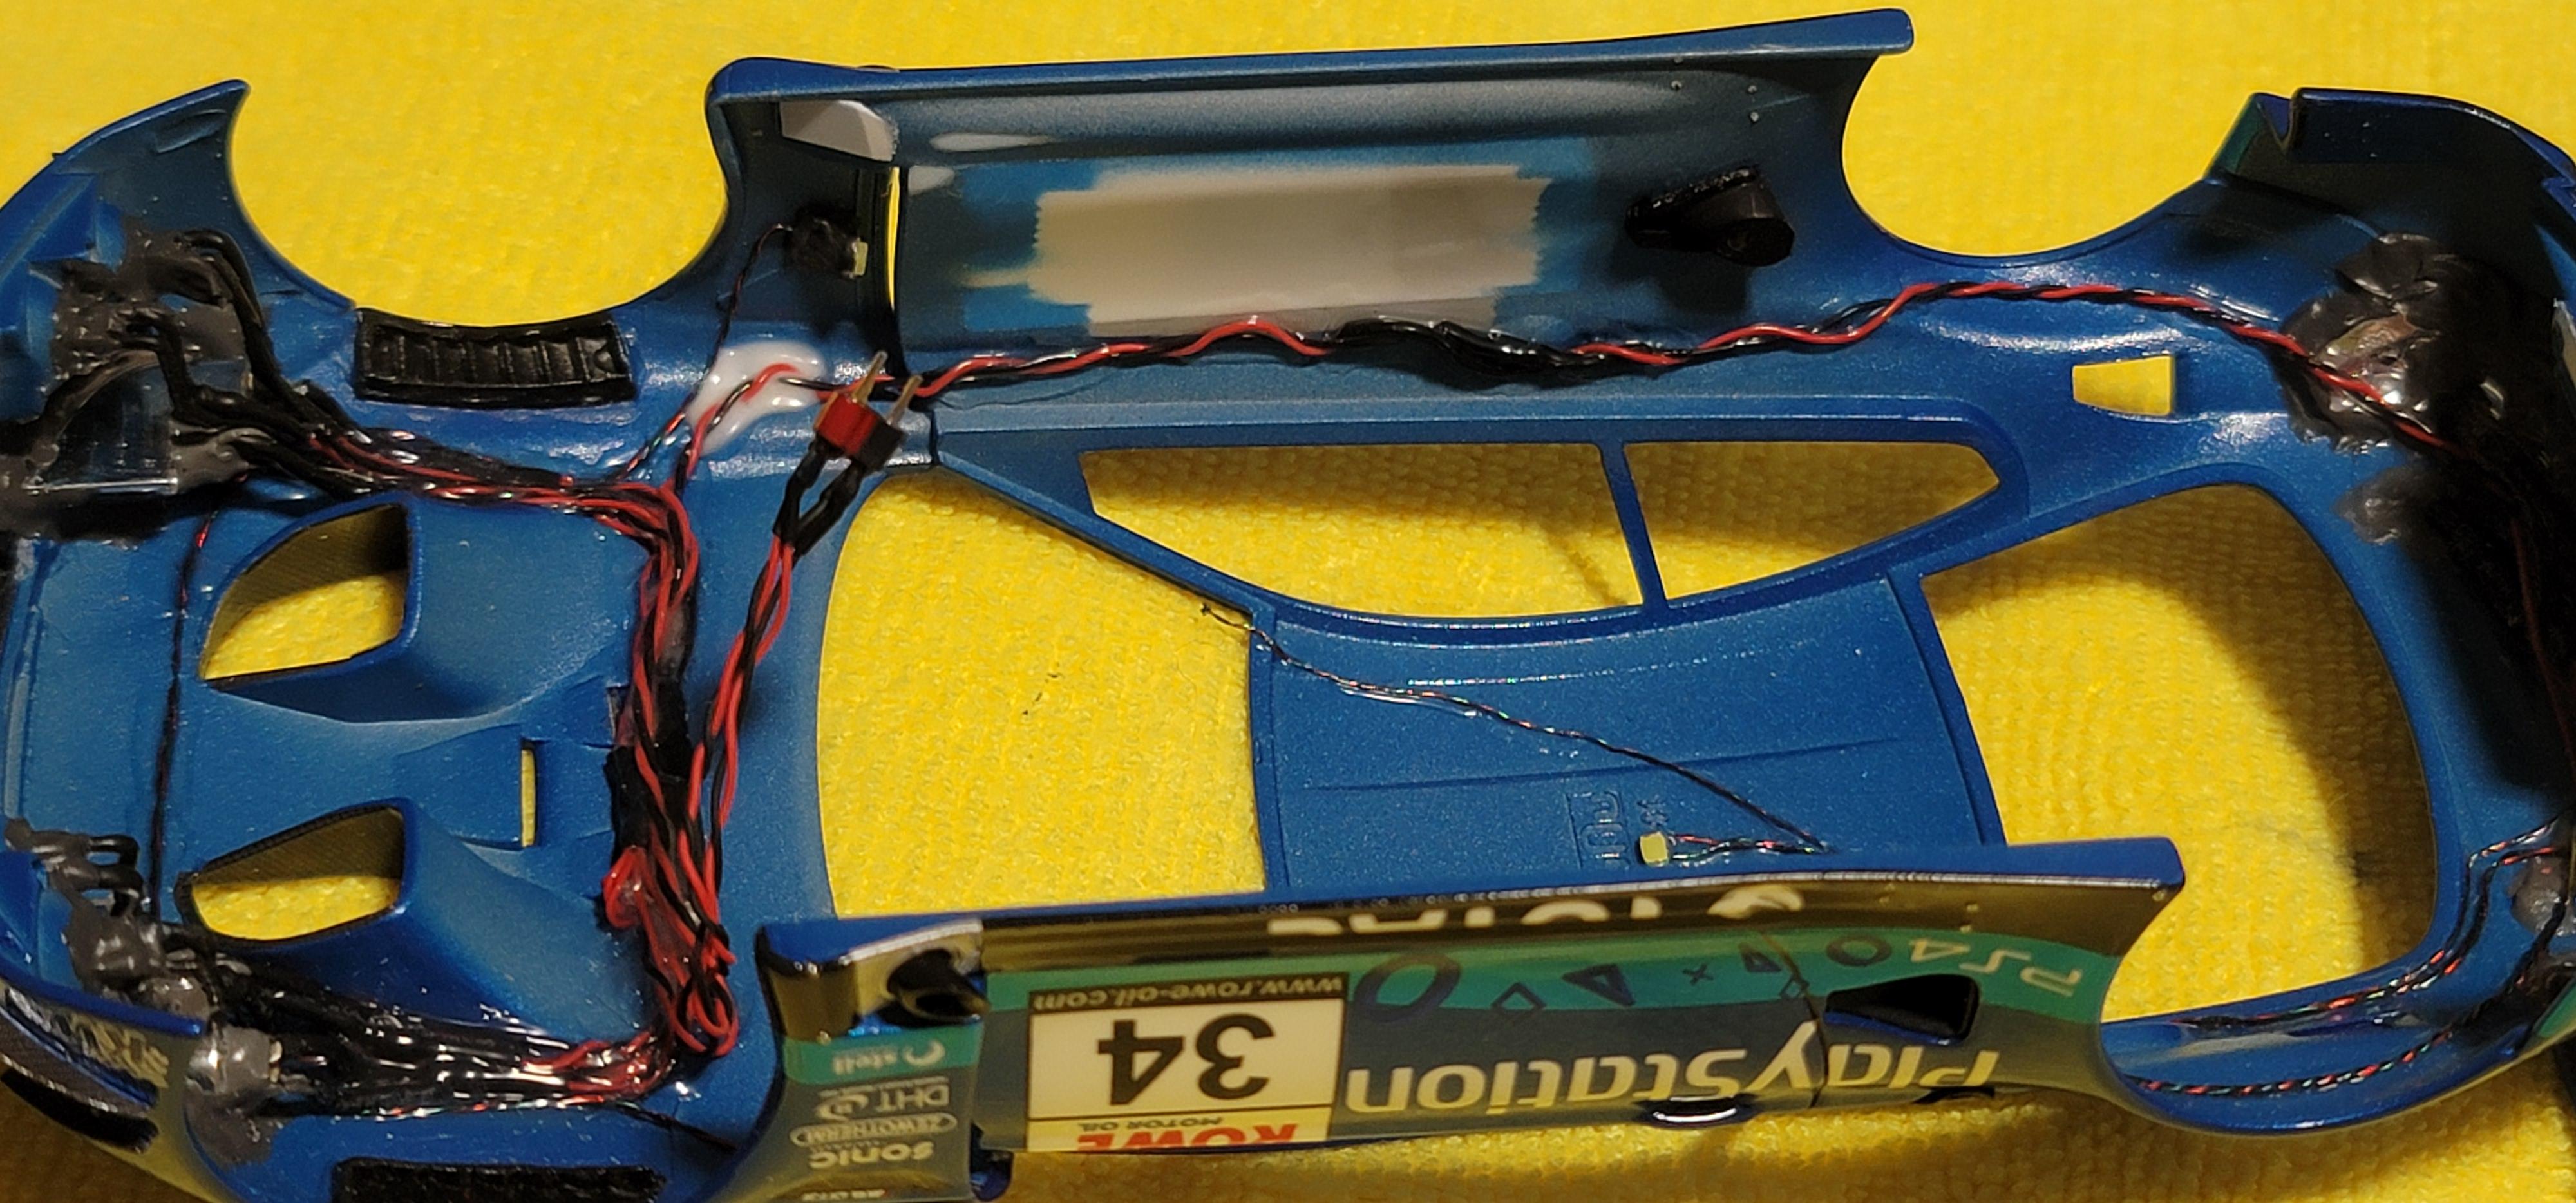
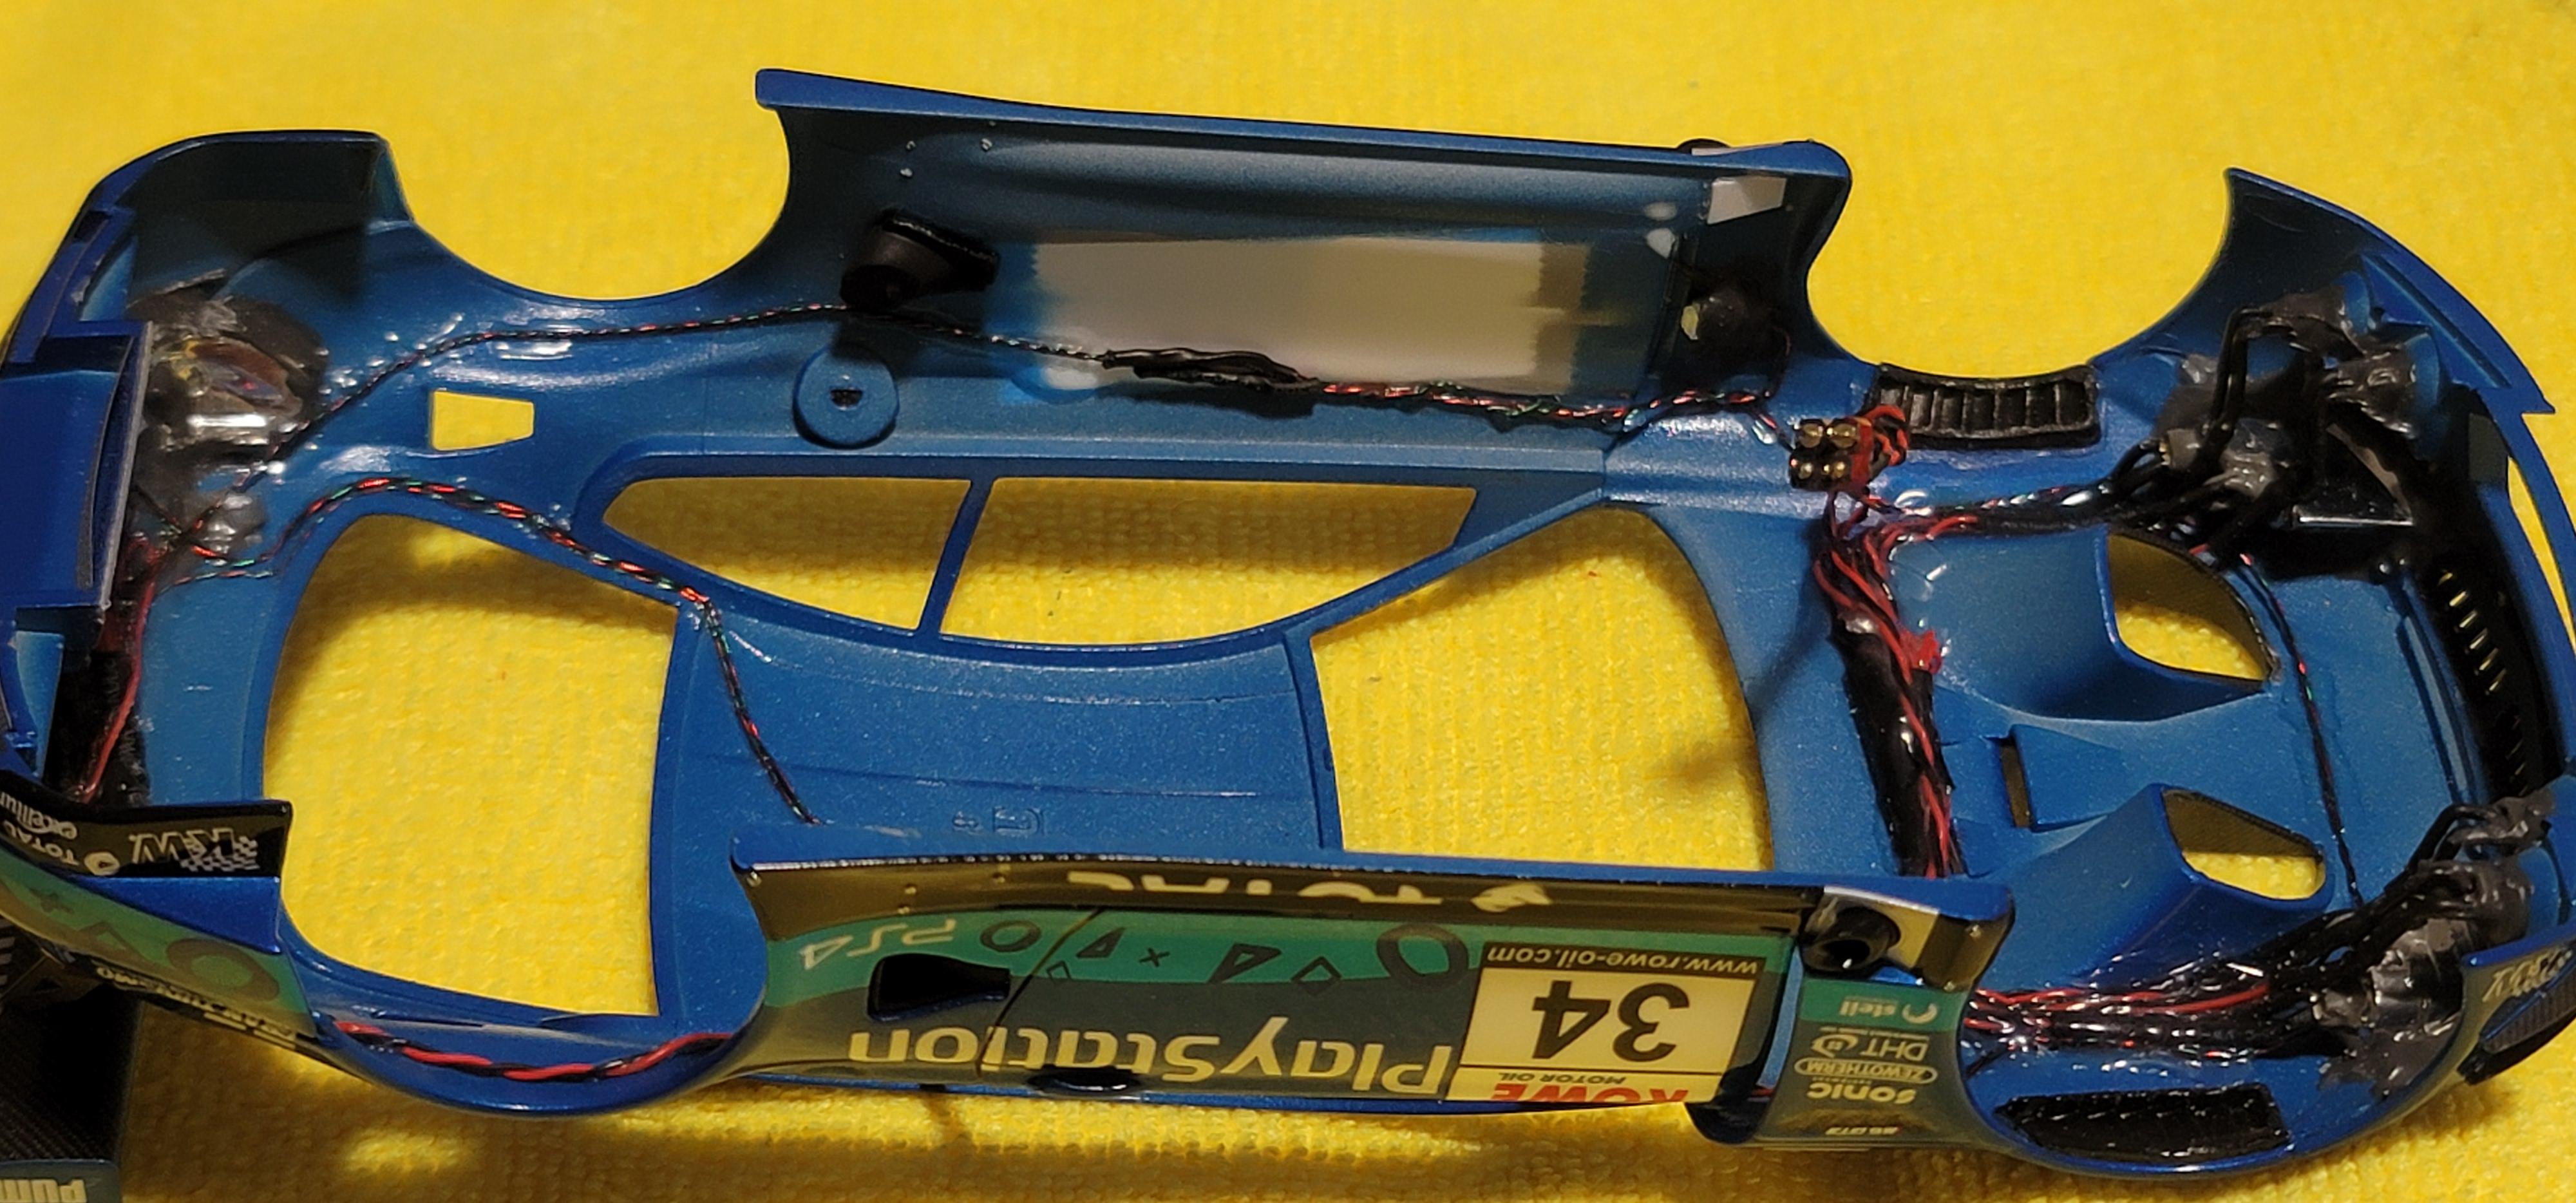
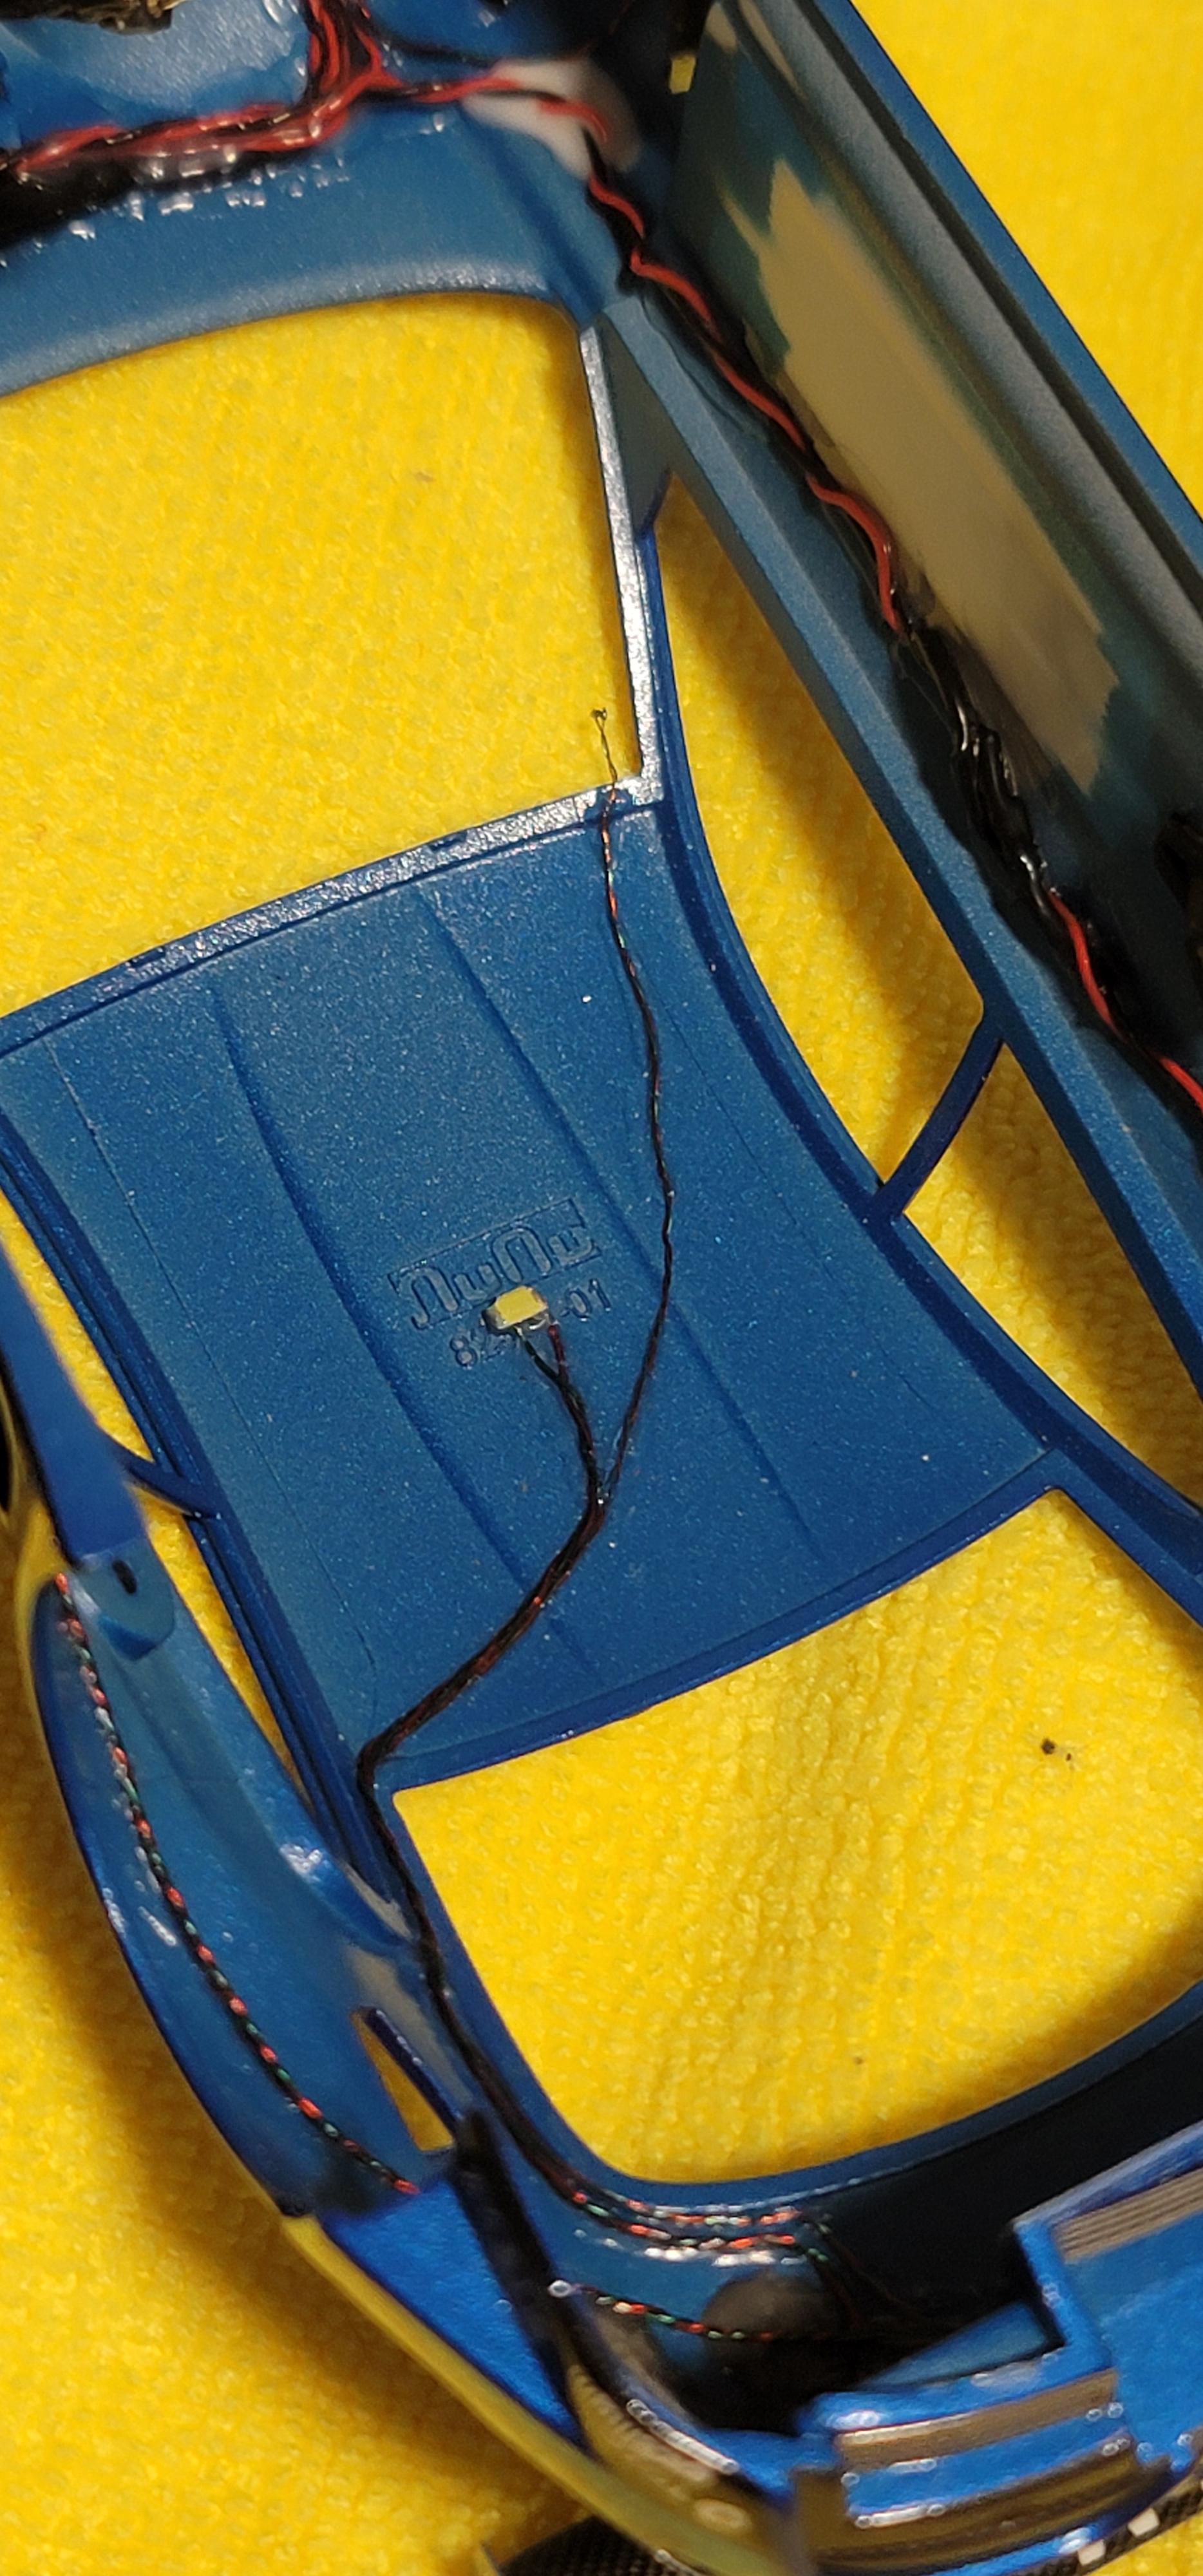
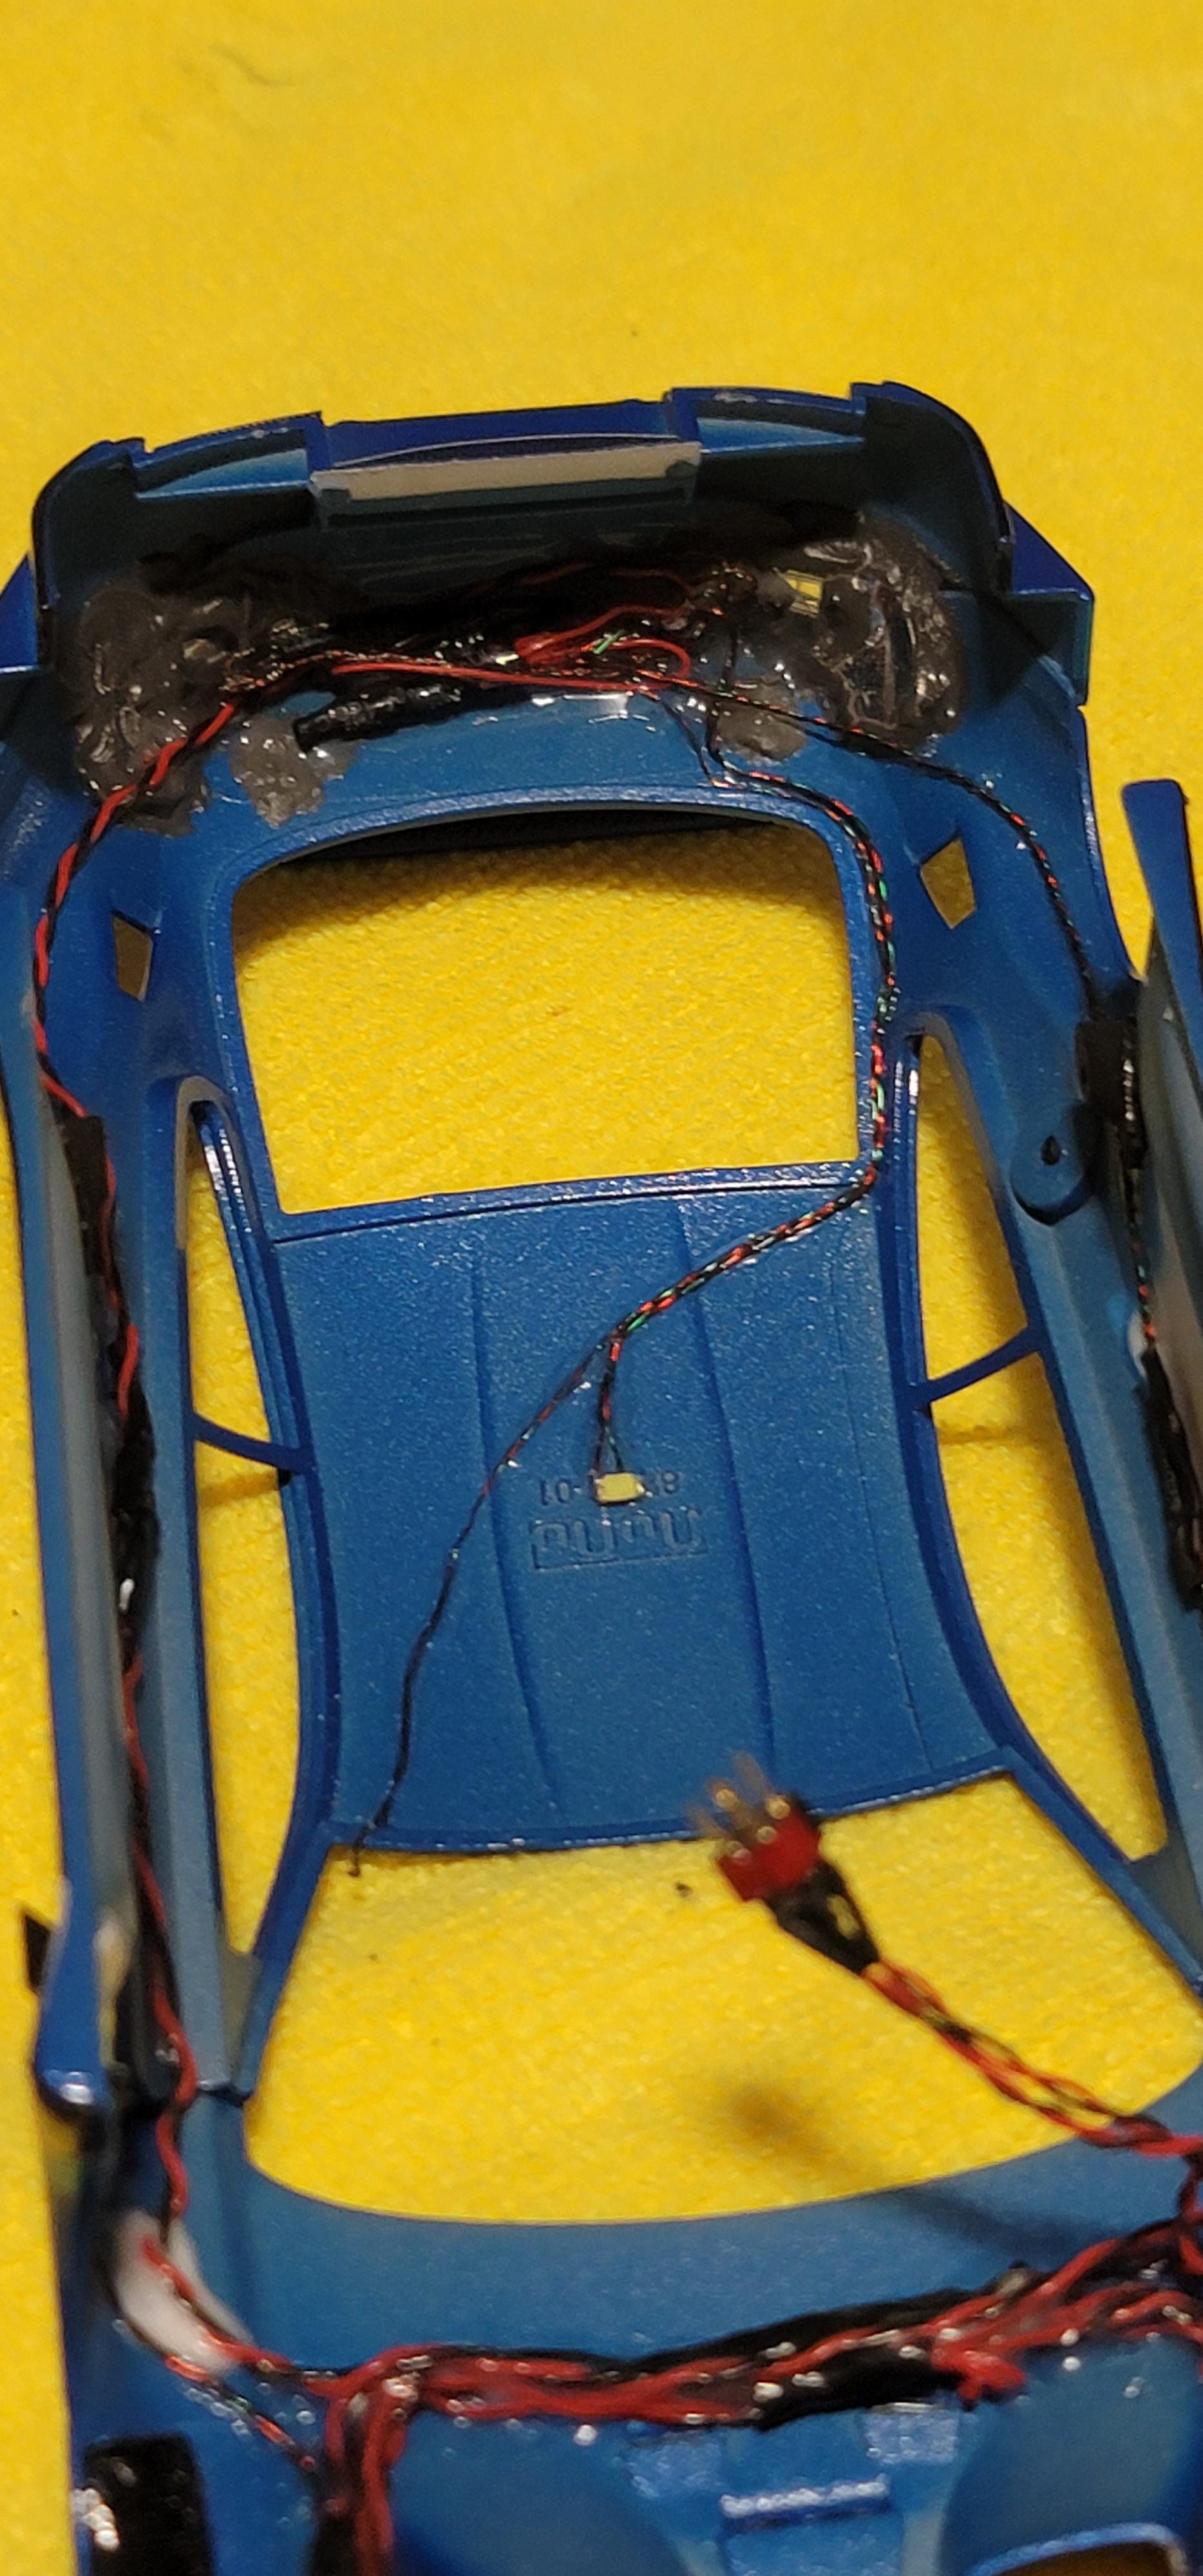
 3v. batteries and swithches are on the chassis, and all 16 LED's are on the body. Everything is from Evans Designs.
-
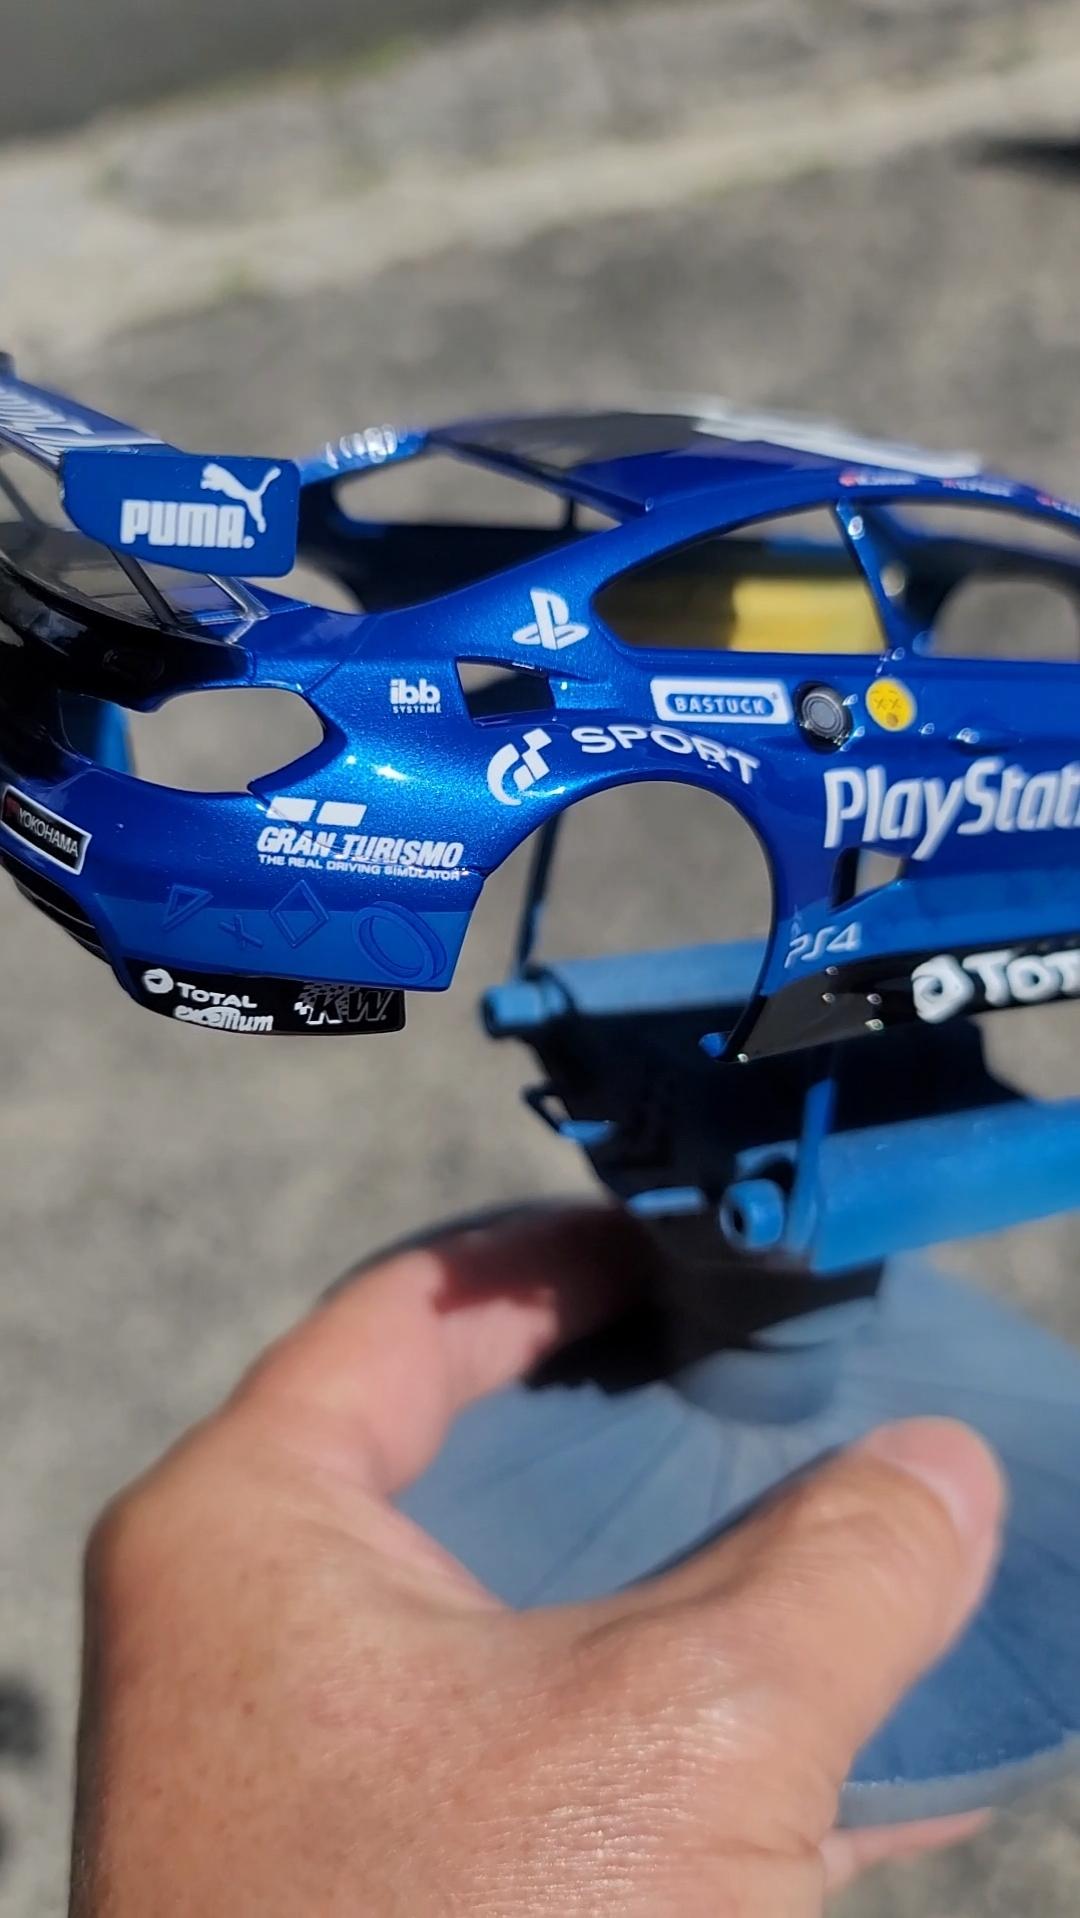
NuNu Hobby BMW M6 GT3 Rundstrecken Playstation
Katsusauce replied to Katsusauce's topic in WIP: Model Cars
The only part left to install is the front lower screen....
-
NuNu Hobby BMW M6 GT3 Rundstrecken Playstation
Katsusauce replied to Katsusauce's topic in WIP: Model Cars
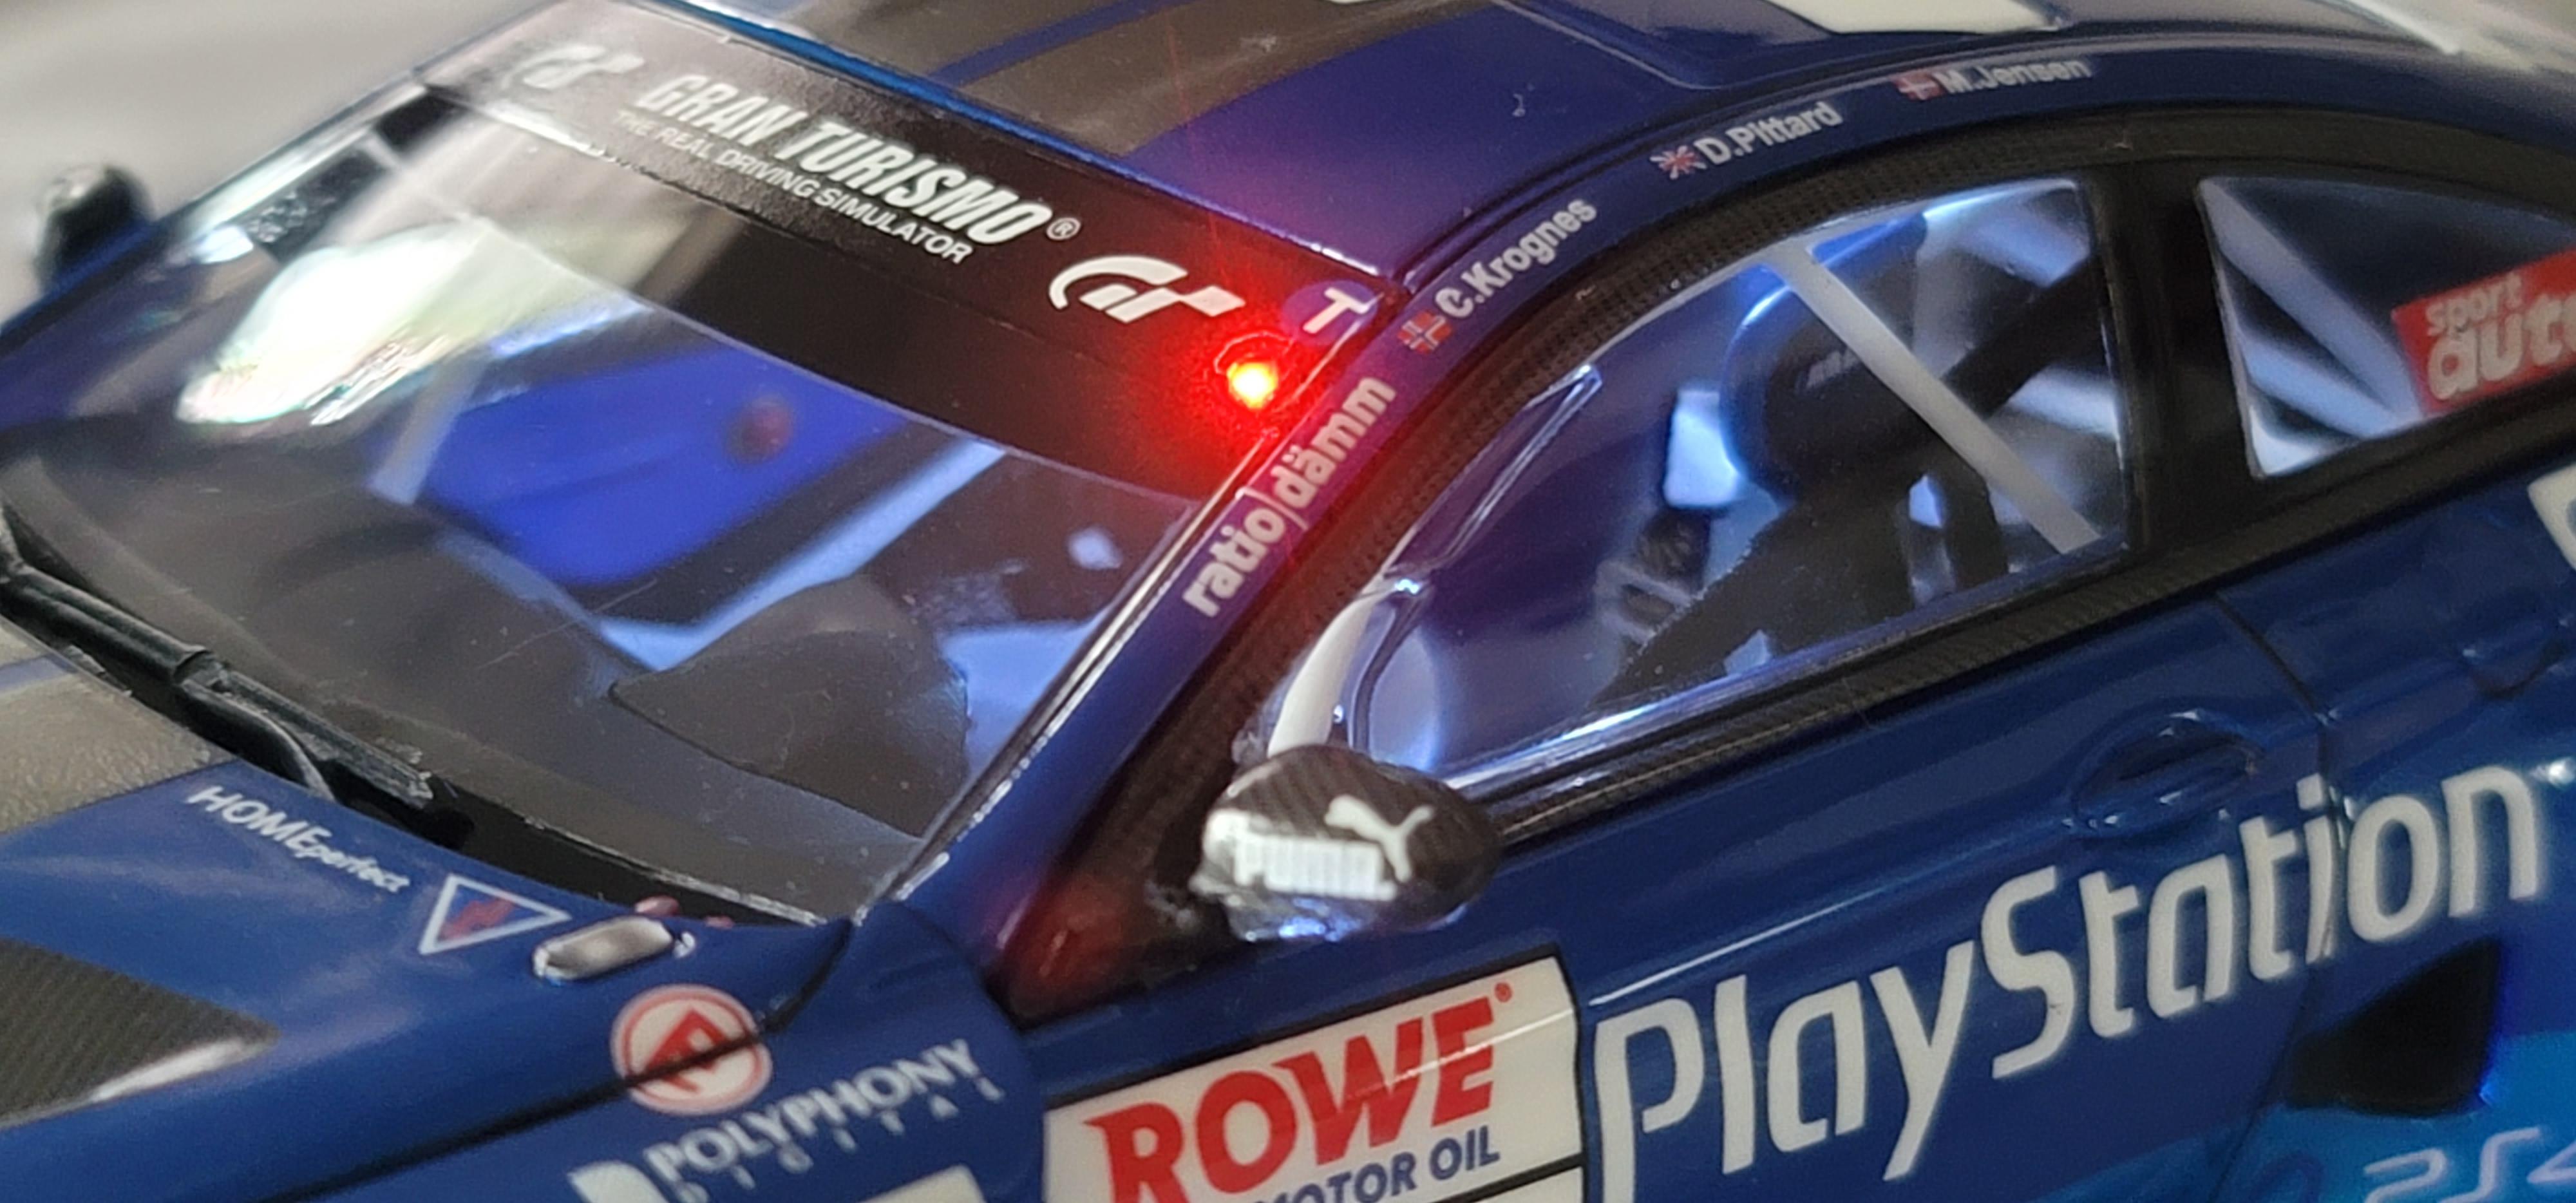
Here's a few pictures of my wiring throughout the car. There are a total of 16 LED's running on 2 circuits. The switches and batteries are all on the chassis with a connector between the body and chassis.
-
NuNu Hobby BMW M6 GT3 Rundstrecken Playstation
Katsusauce replied to Katsusauce's topic in WIP: Model Cars
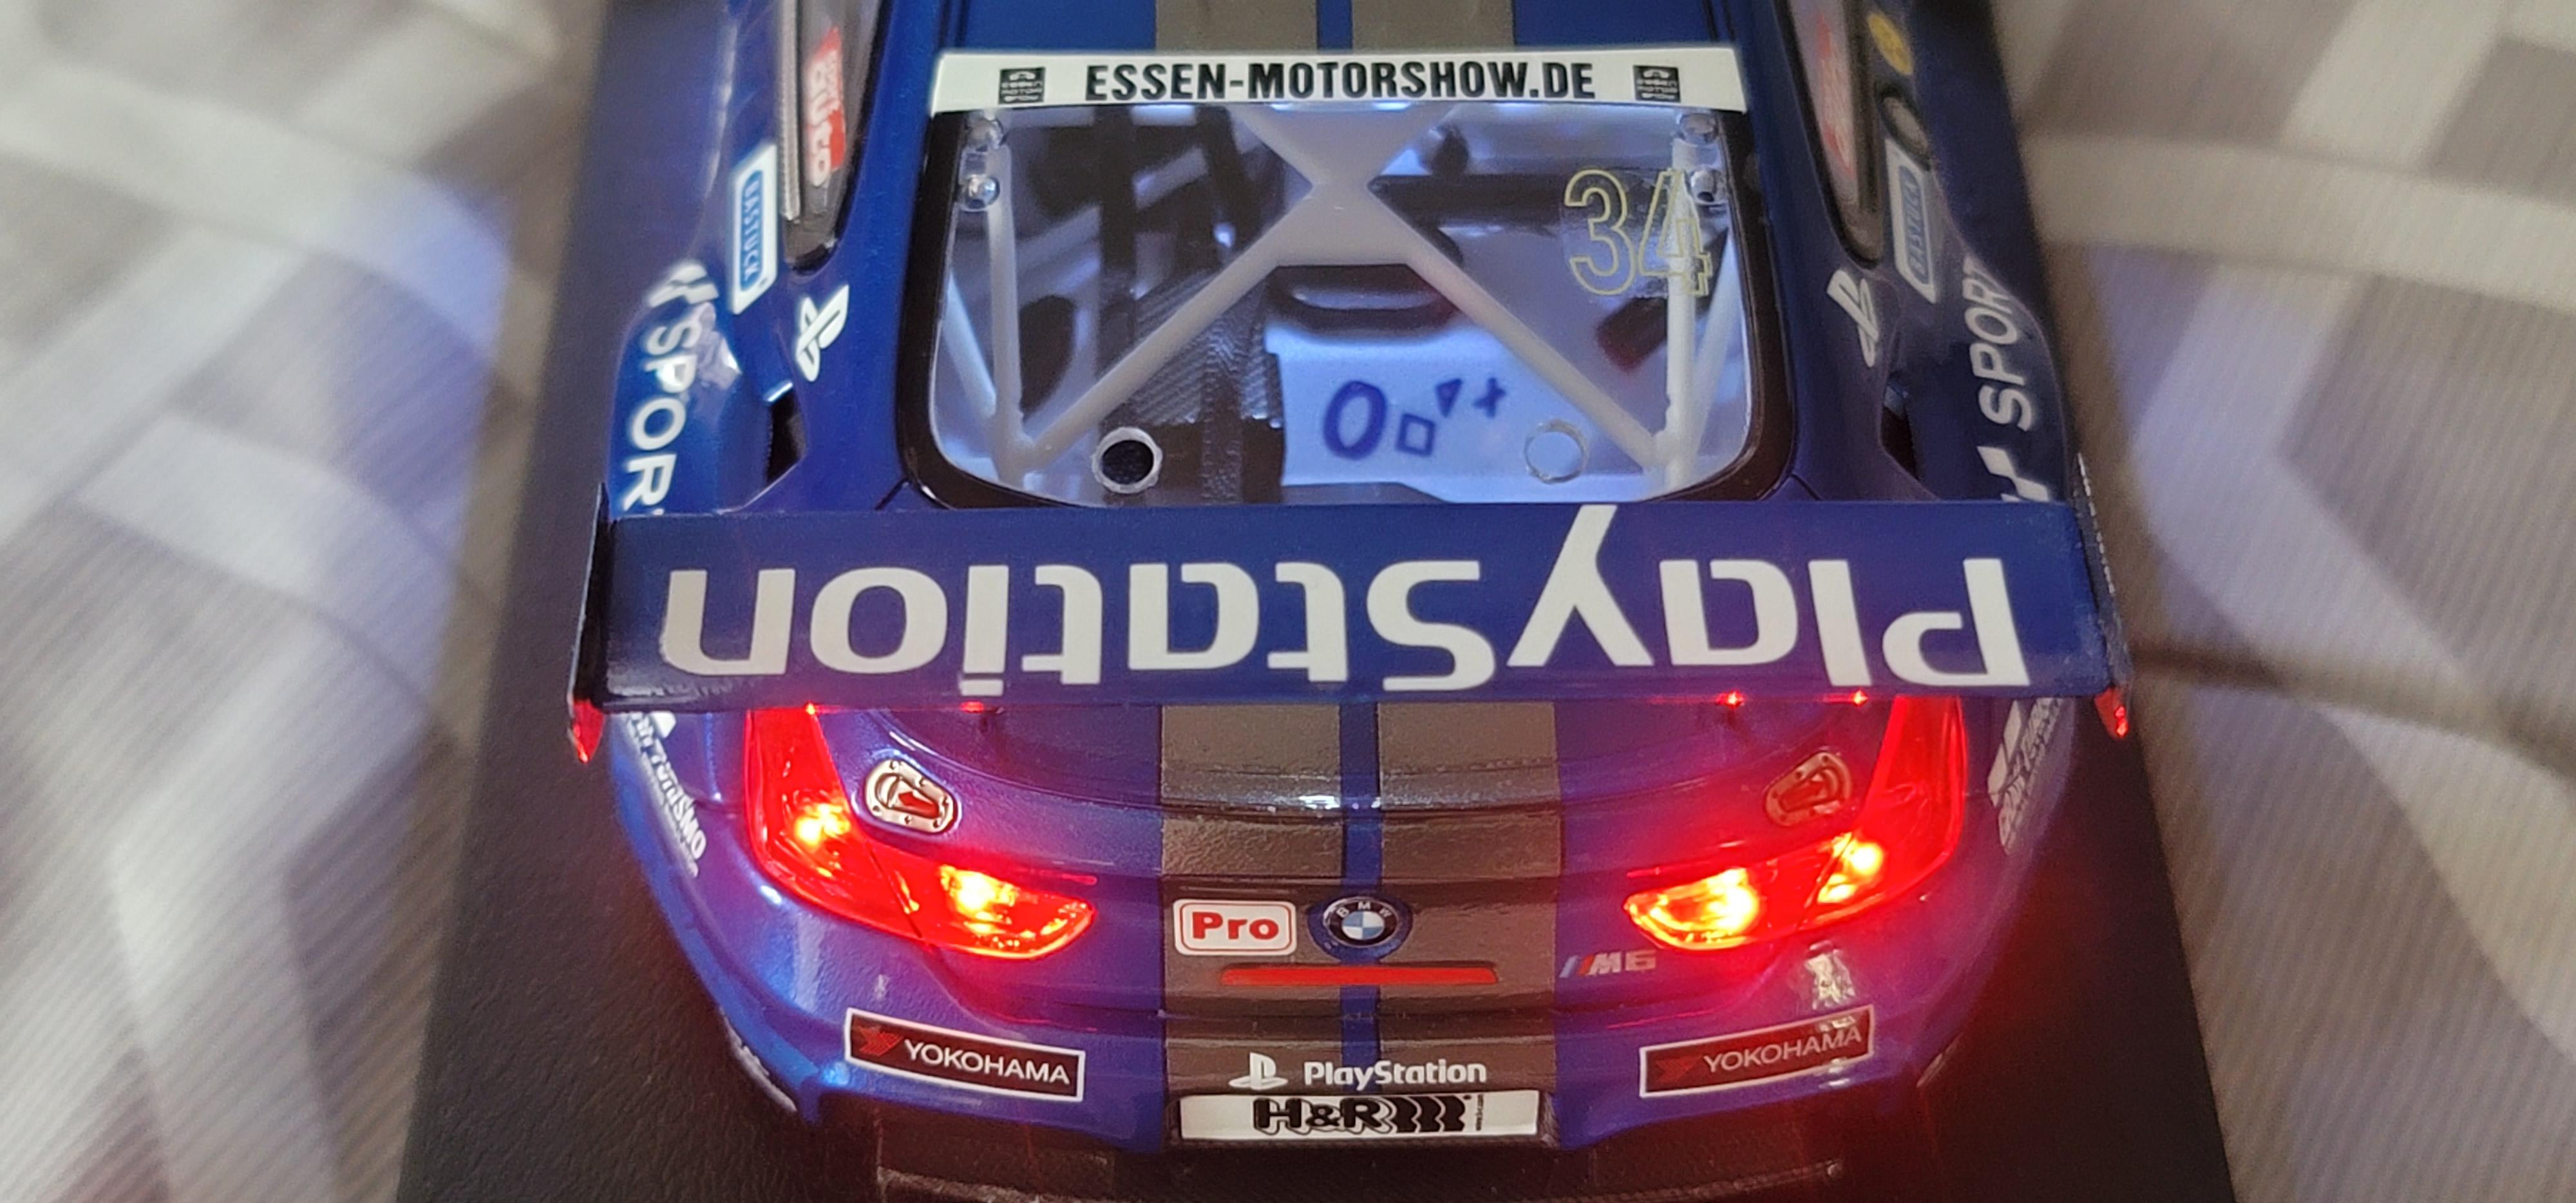
So, for those of you who've been following this build, I mentioned a superprize. In this picture, the 2 round button looking things are just that....push button switches accessible through 2 holes I drilled through the rear windscreen.
-
NuNu Hobby BMW M6 GT3 Rundstrecken Playstation
Katsusauce replied to Katsusauce's topic in WIP: Model Cars
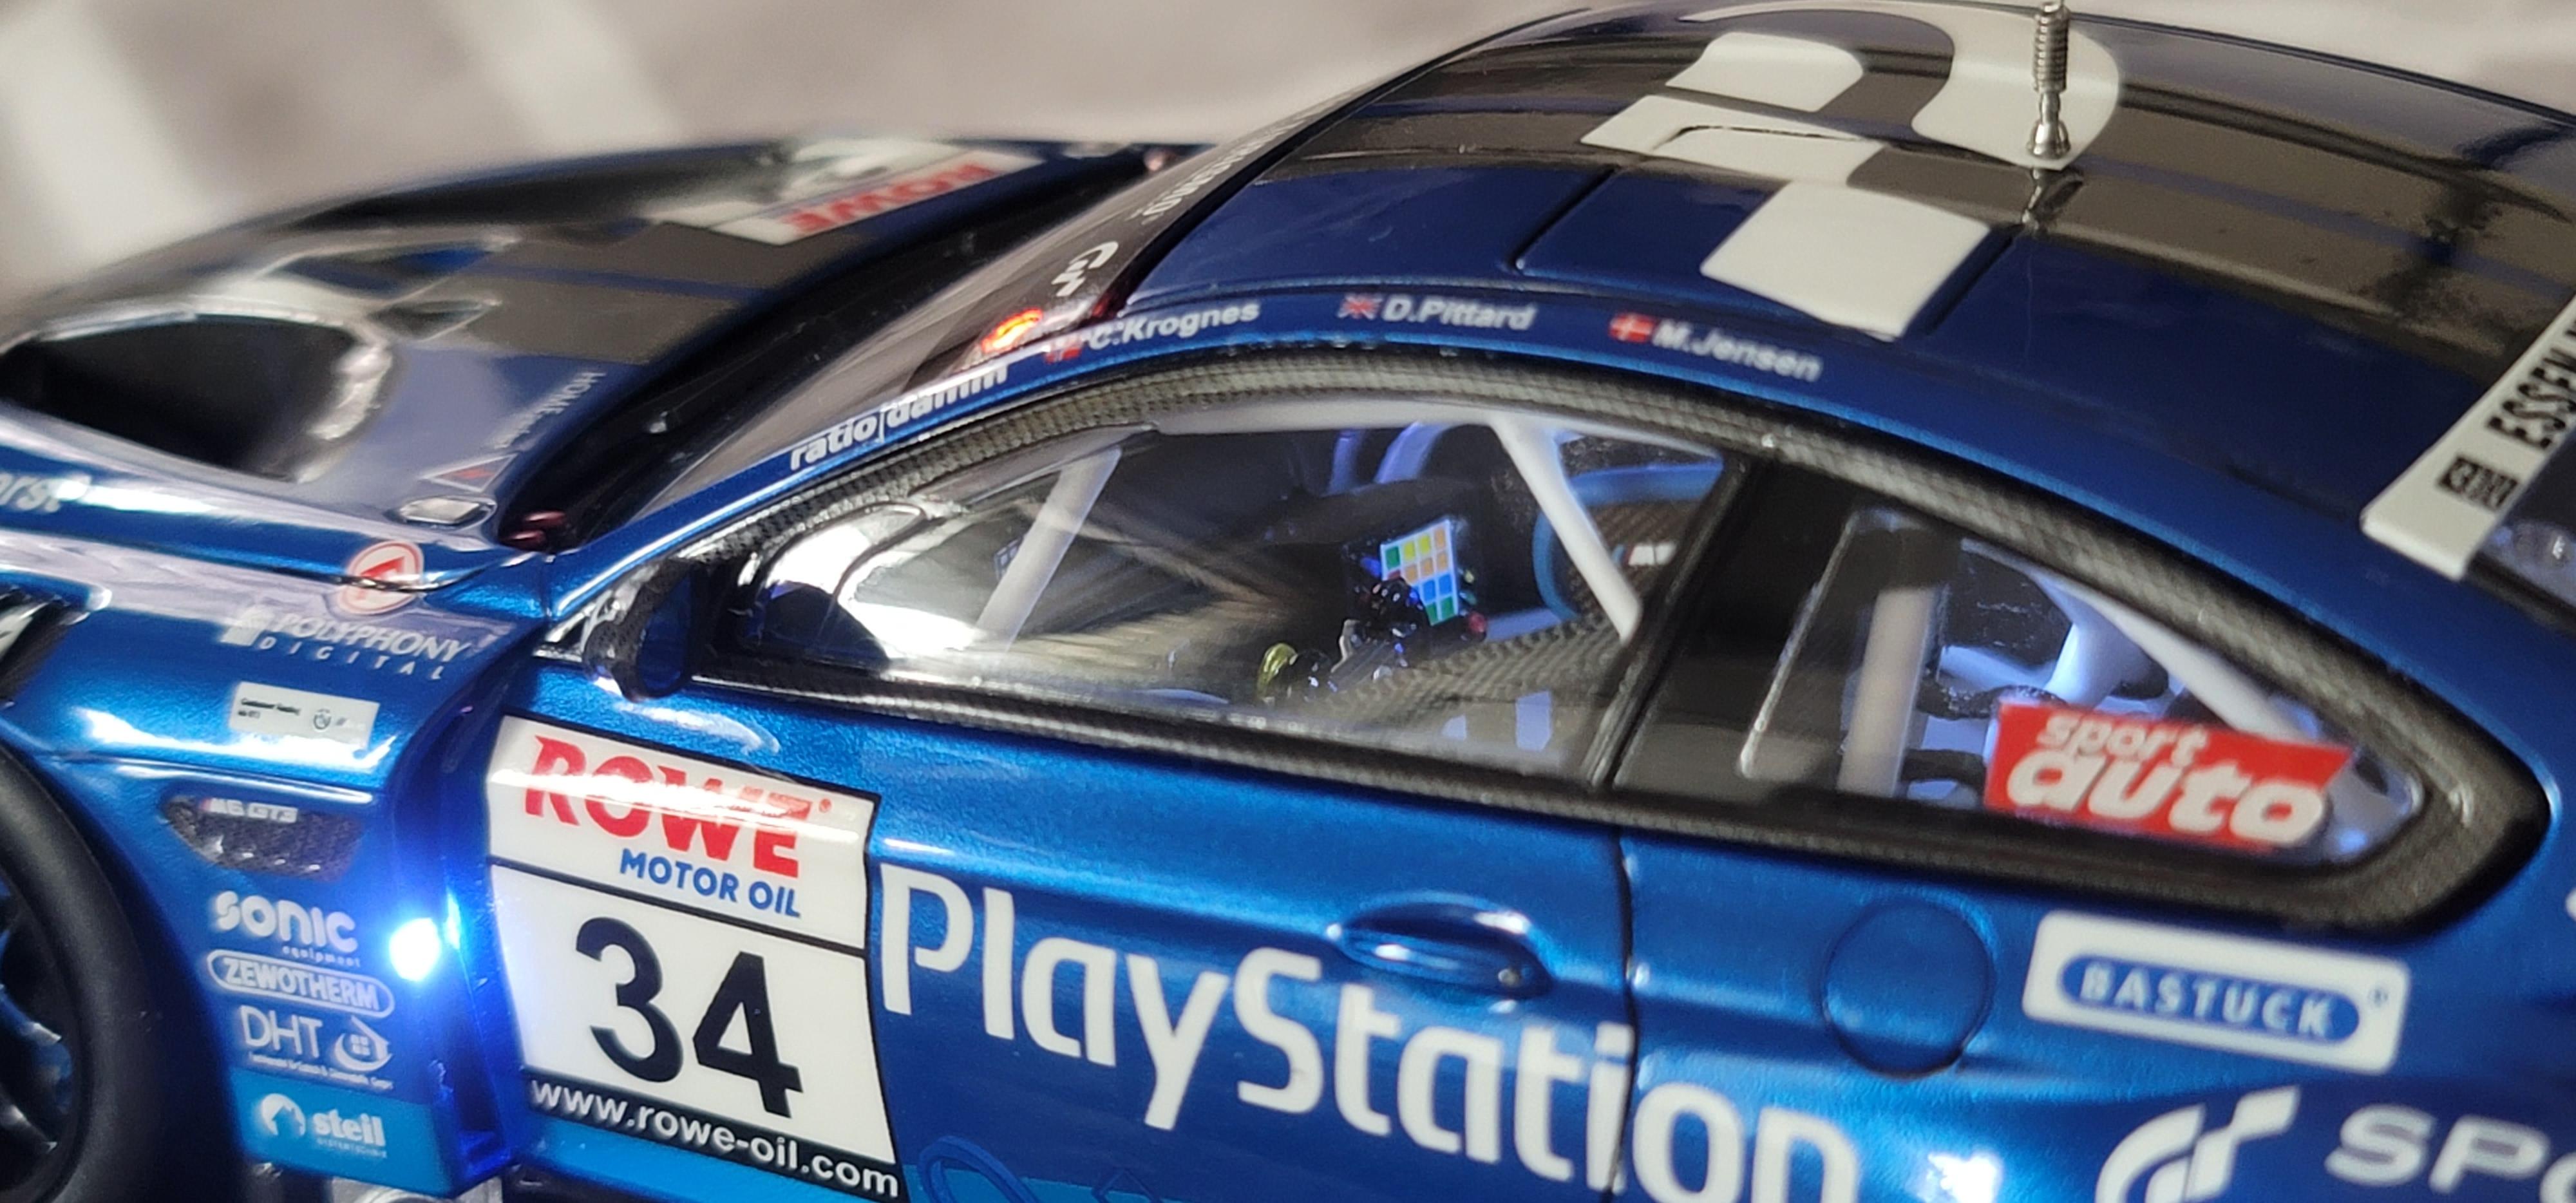
I experimented with some clear UV paint on the dash panel. It goes on clear, and reveals it's color under UV light, or even LED's. I painted it right over the decal.
-
NuNu Hobby BMW M6 GT3 Rundstrecken Playstation
Katsusauce replied to Katsusauce's topic in WIP: Model Cars
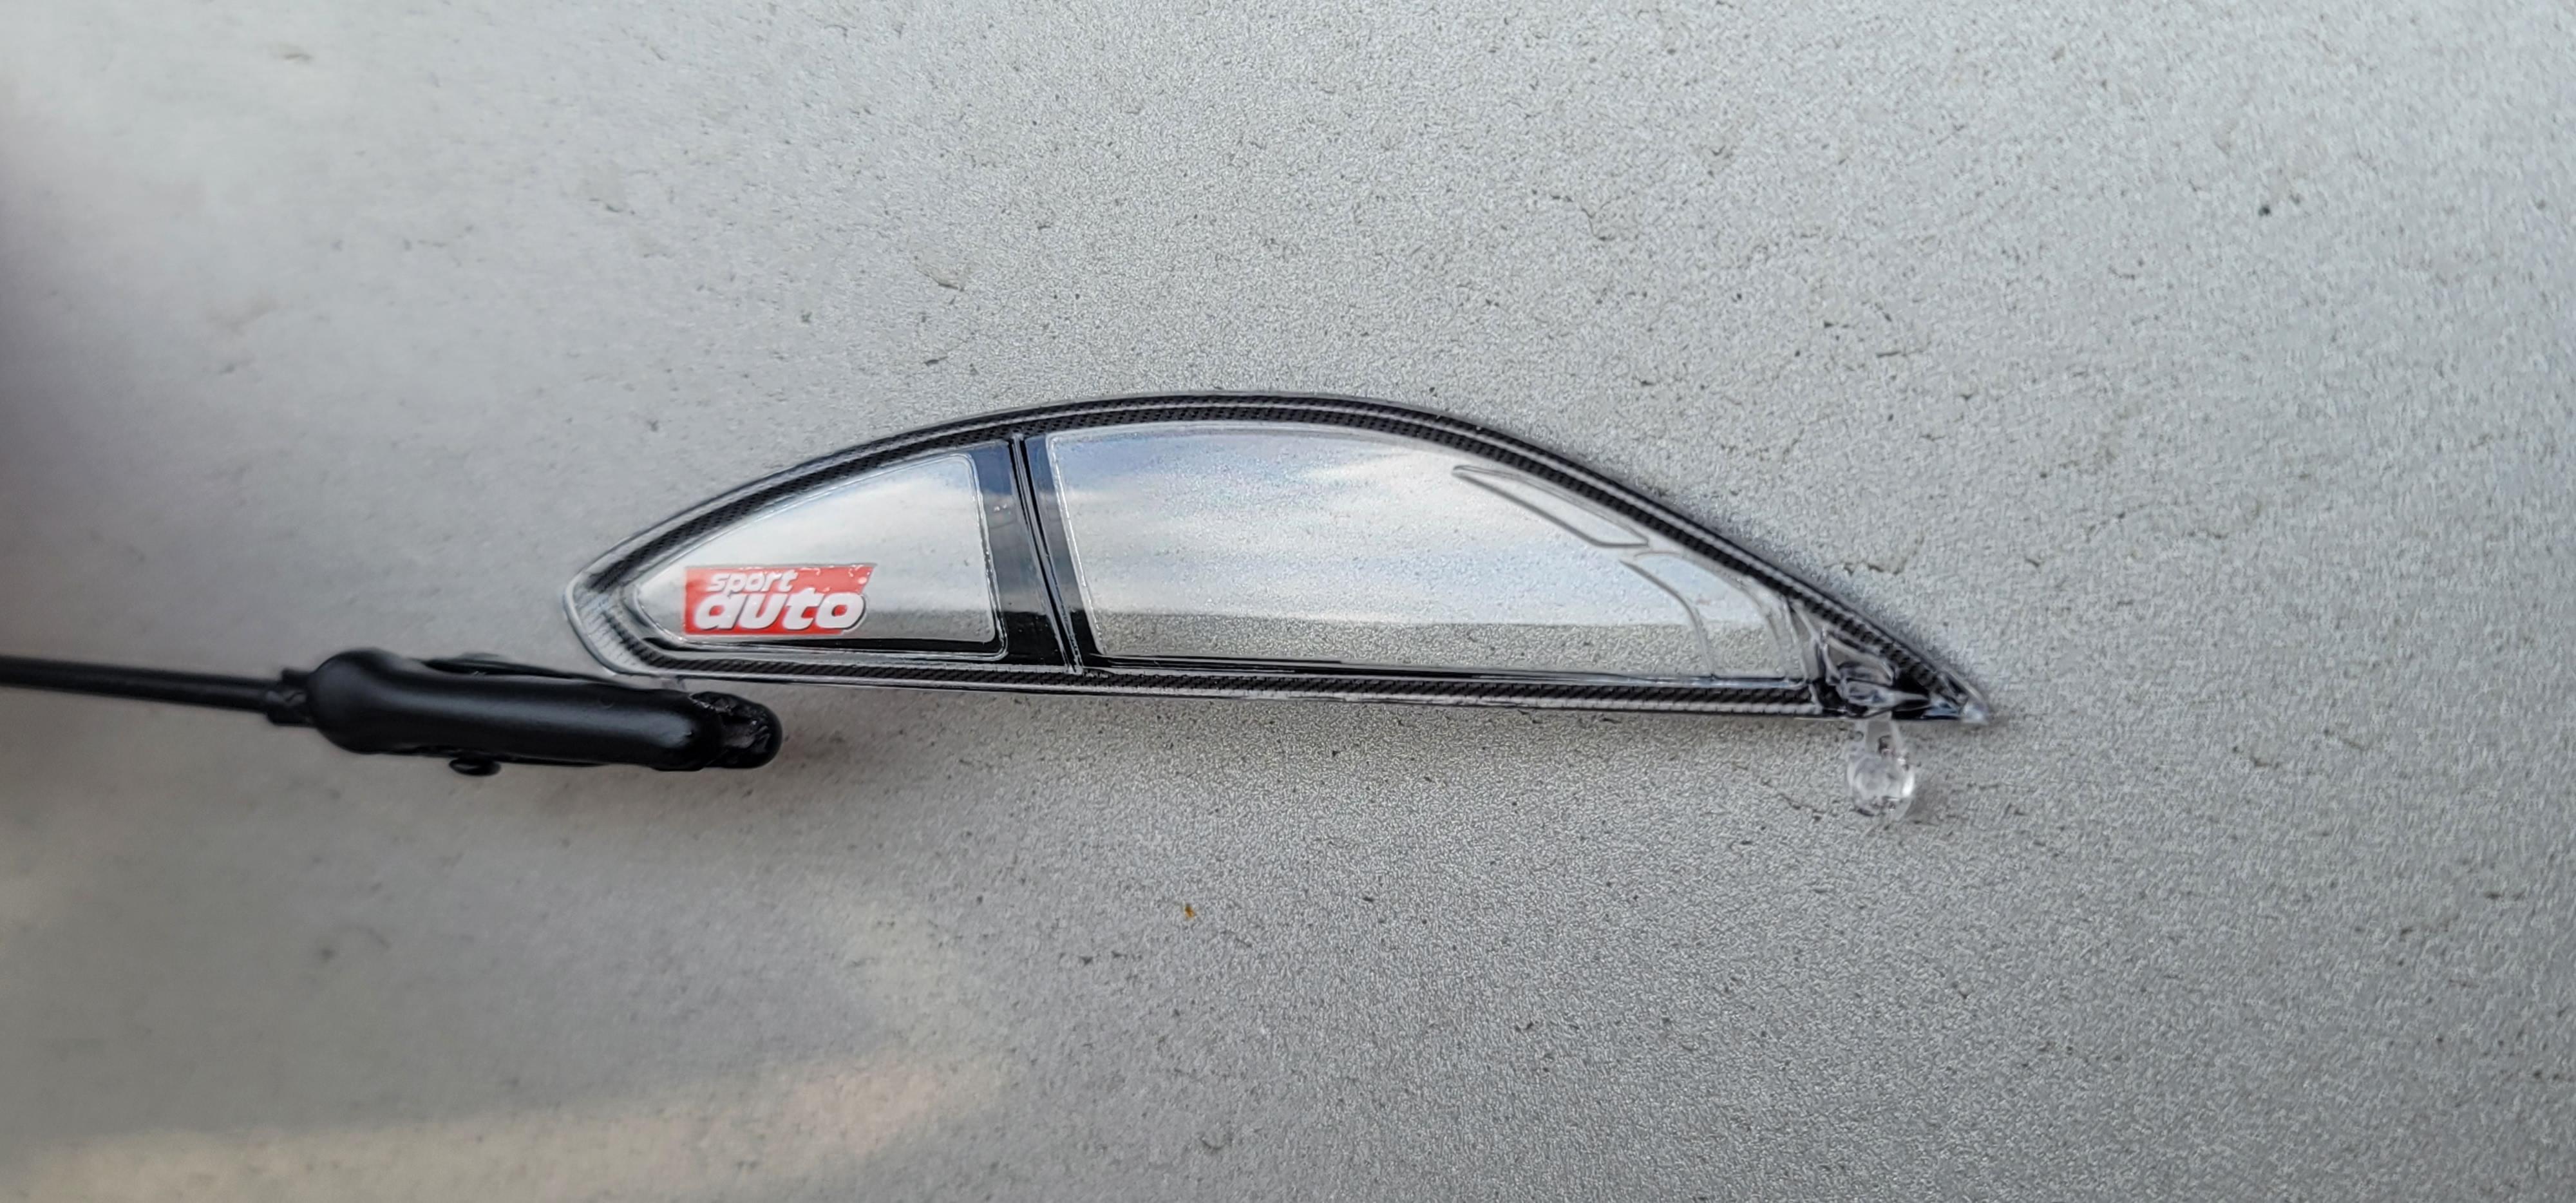
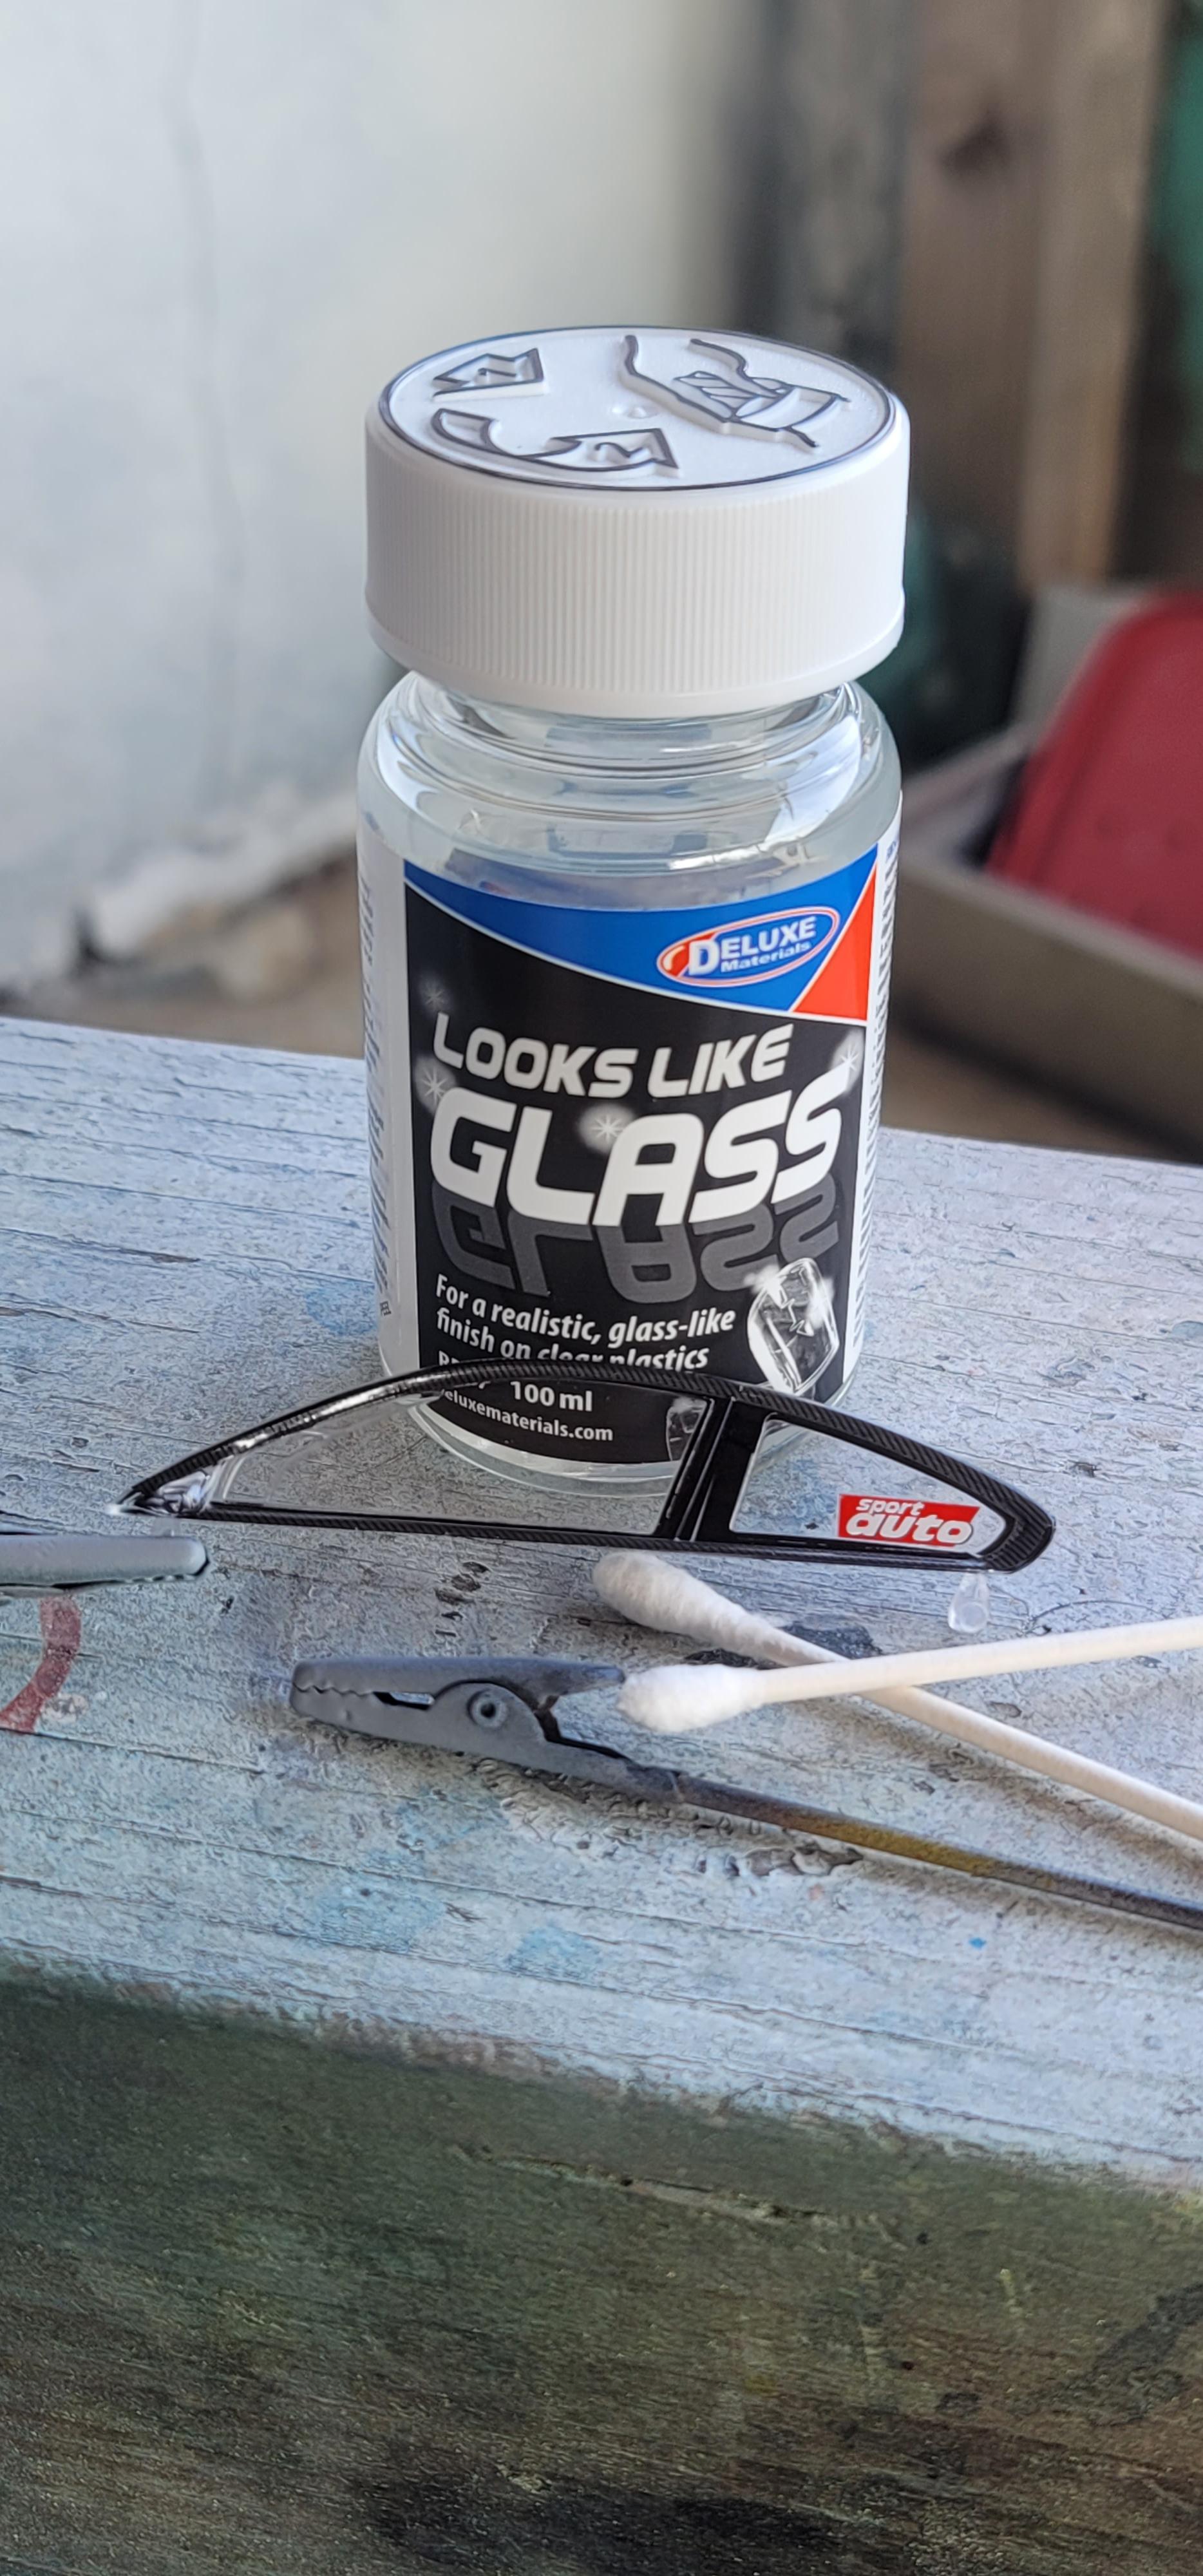
After 24 hours, we got the side glass done.
-
NuNu Hobby BMW M6 GT3 Rundstrecken Playstation
Katsusauce replied to Katsusauce's topic in WIP: Model Cars
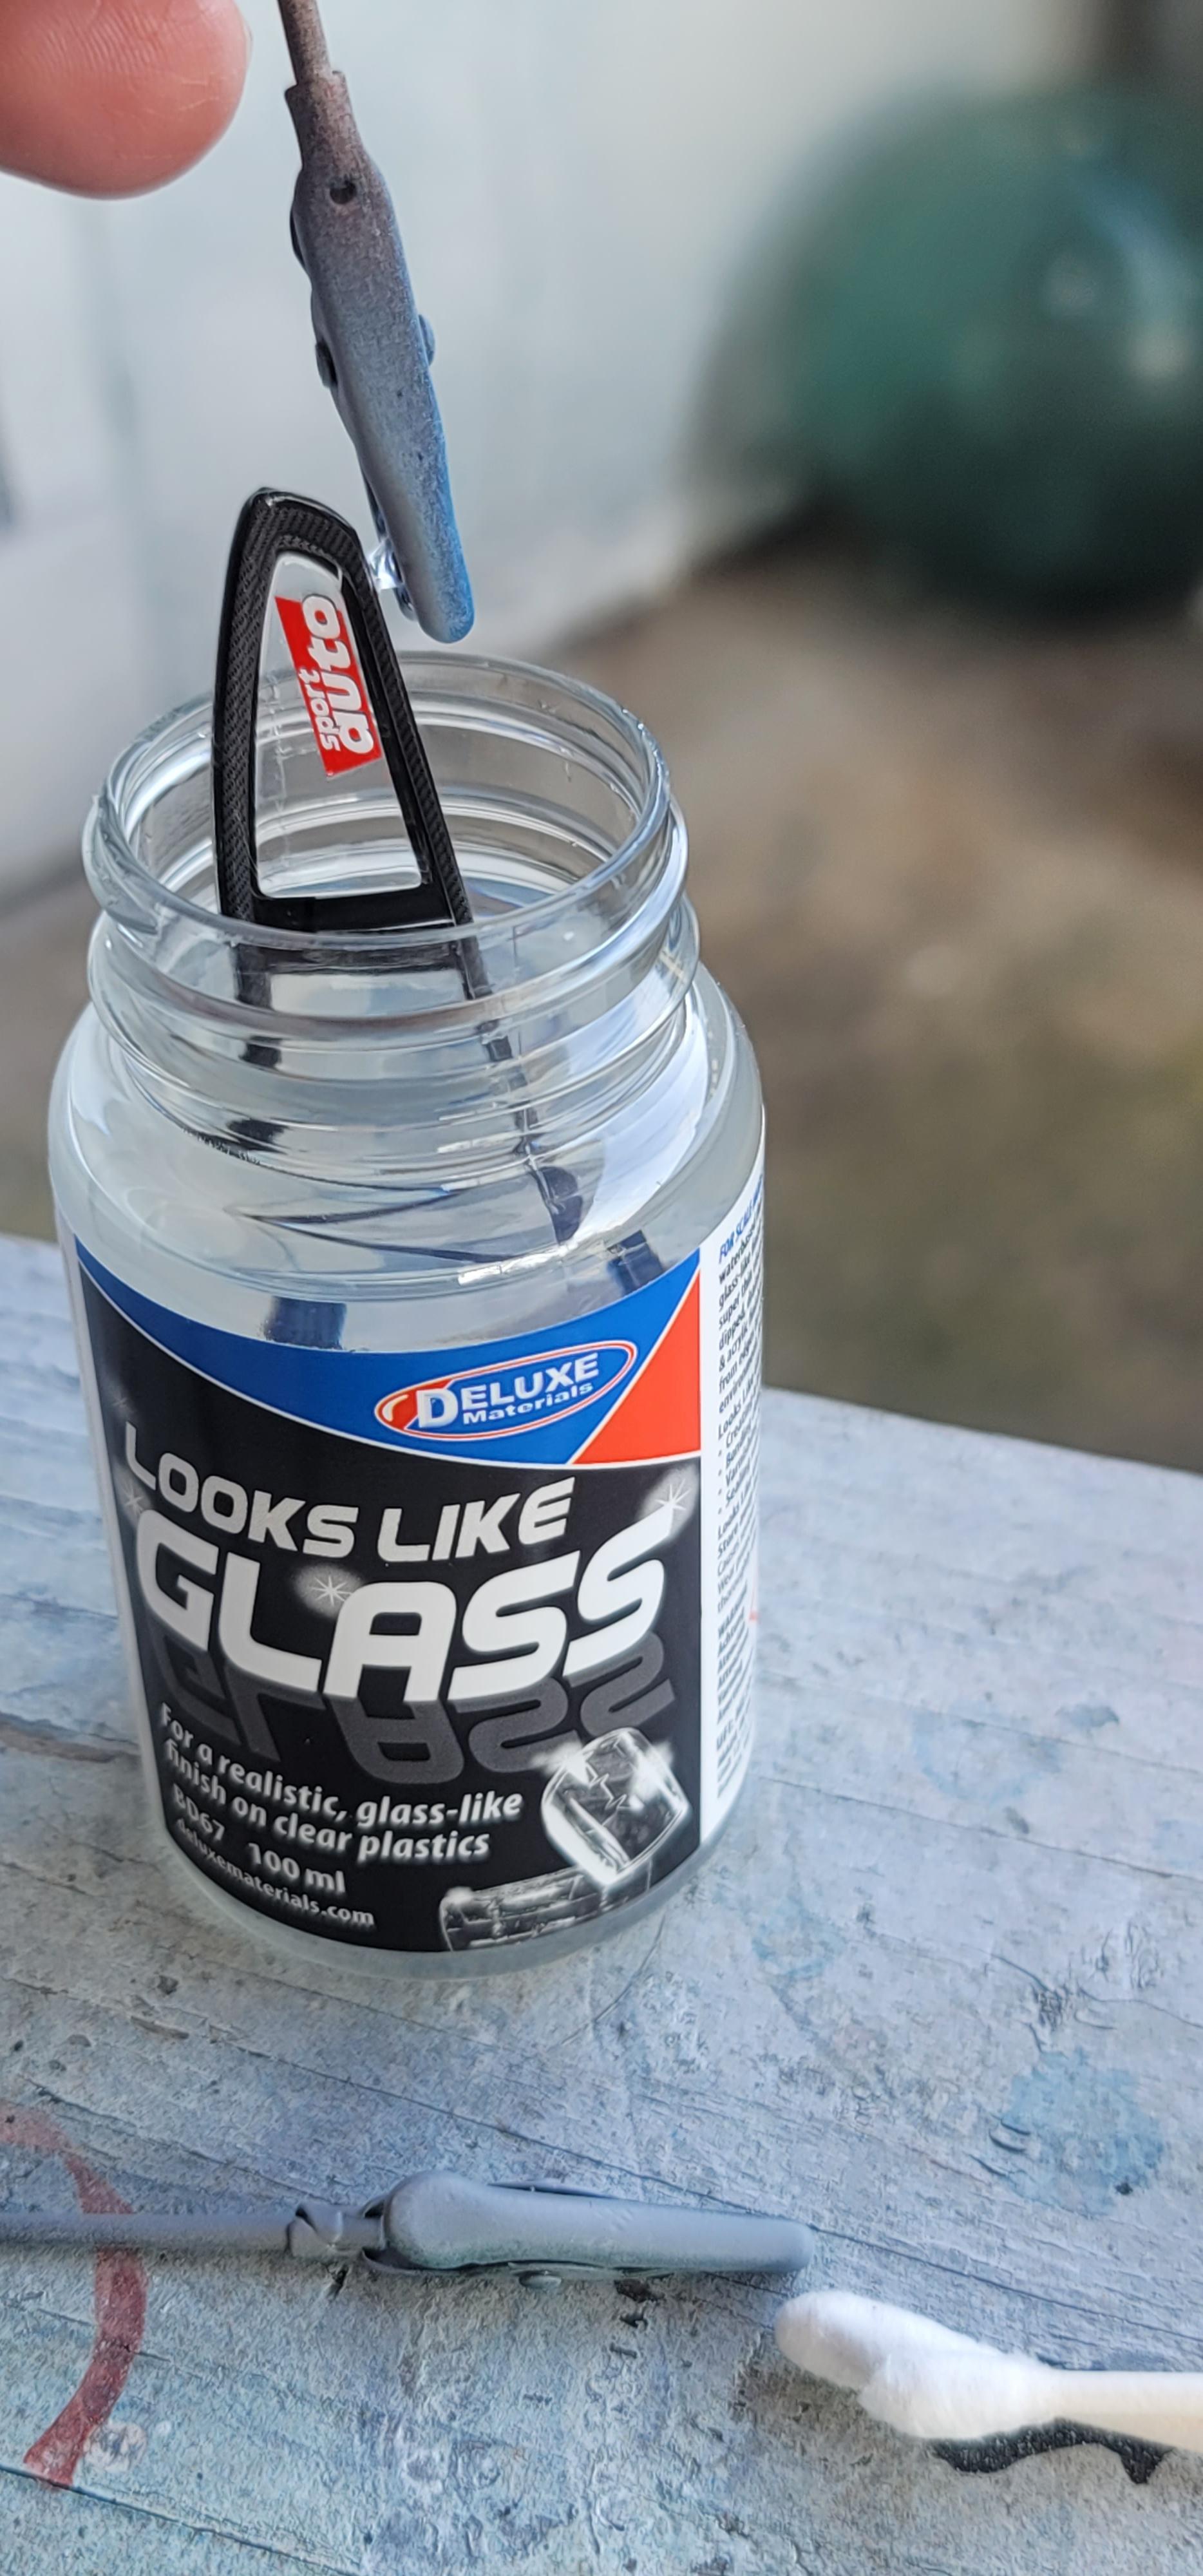
Sop up the excess liquid.....
-
NuNu Hobby BMW M6 GT3 Rundstrecken Playstation
Katsusauce replied to Katsusauce's topic in WIP: Model Cars
Dip, flip the window over and dip again....
-
NuNu Hobby BMW M6 GT3 Rundstrecken Playstation
Katsusauce replied to Katsusauce's topic in WIP: Model Cars
-
NuNu Hobby BMW M6 GT3 Rundstrecken Playstation
Katsusauce replied to Katsusauce's topic in WIP: Model Cars
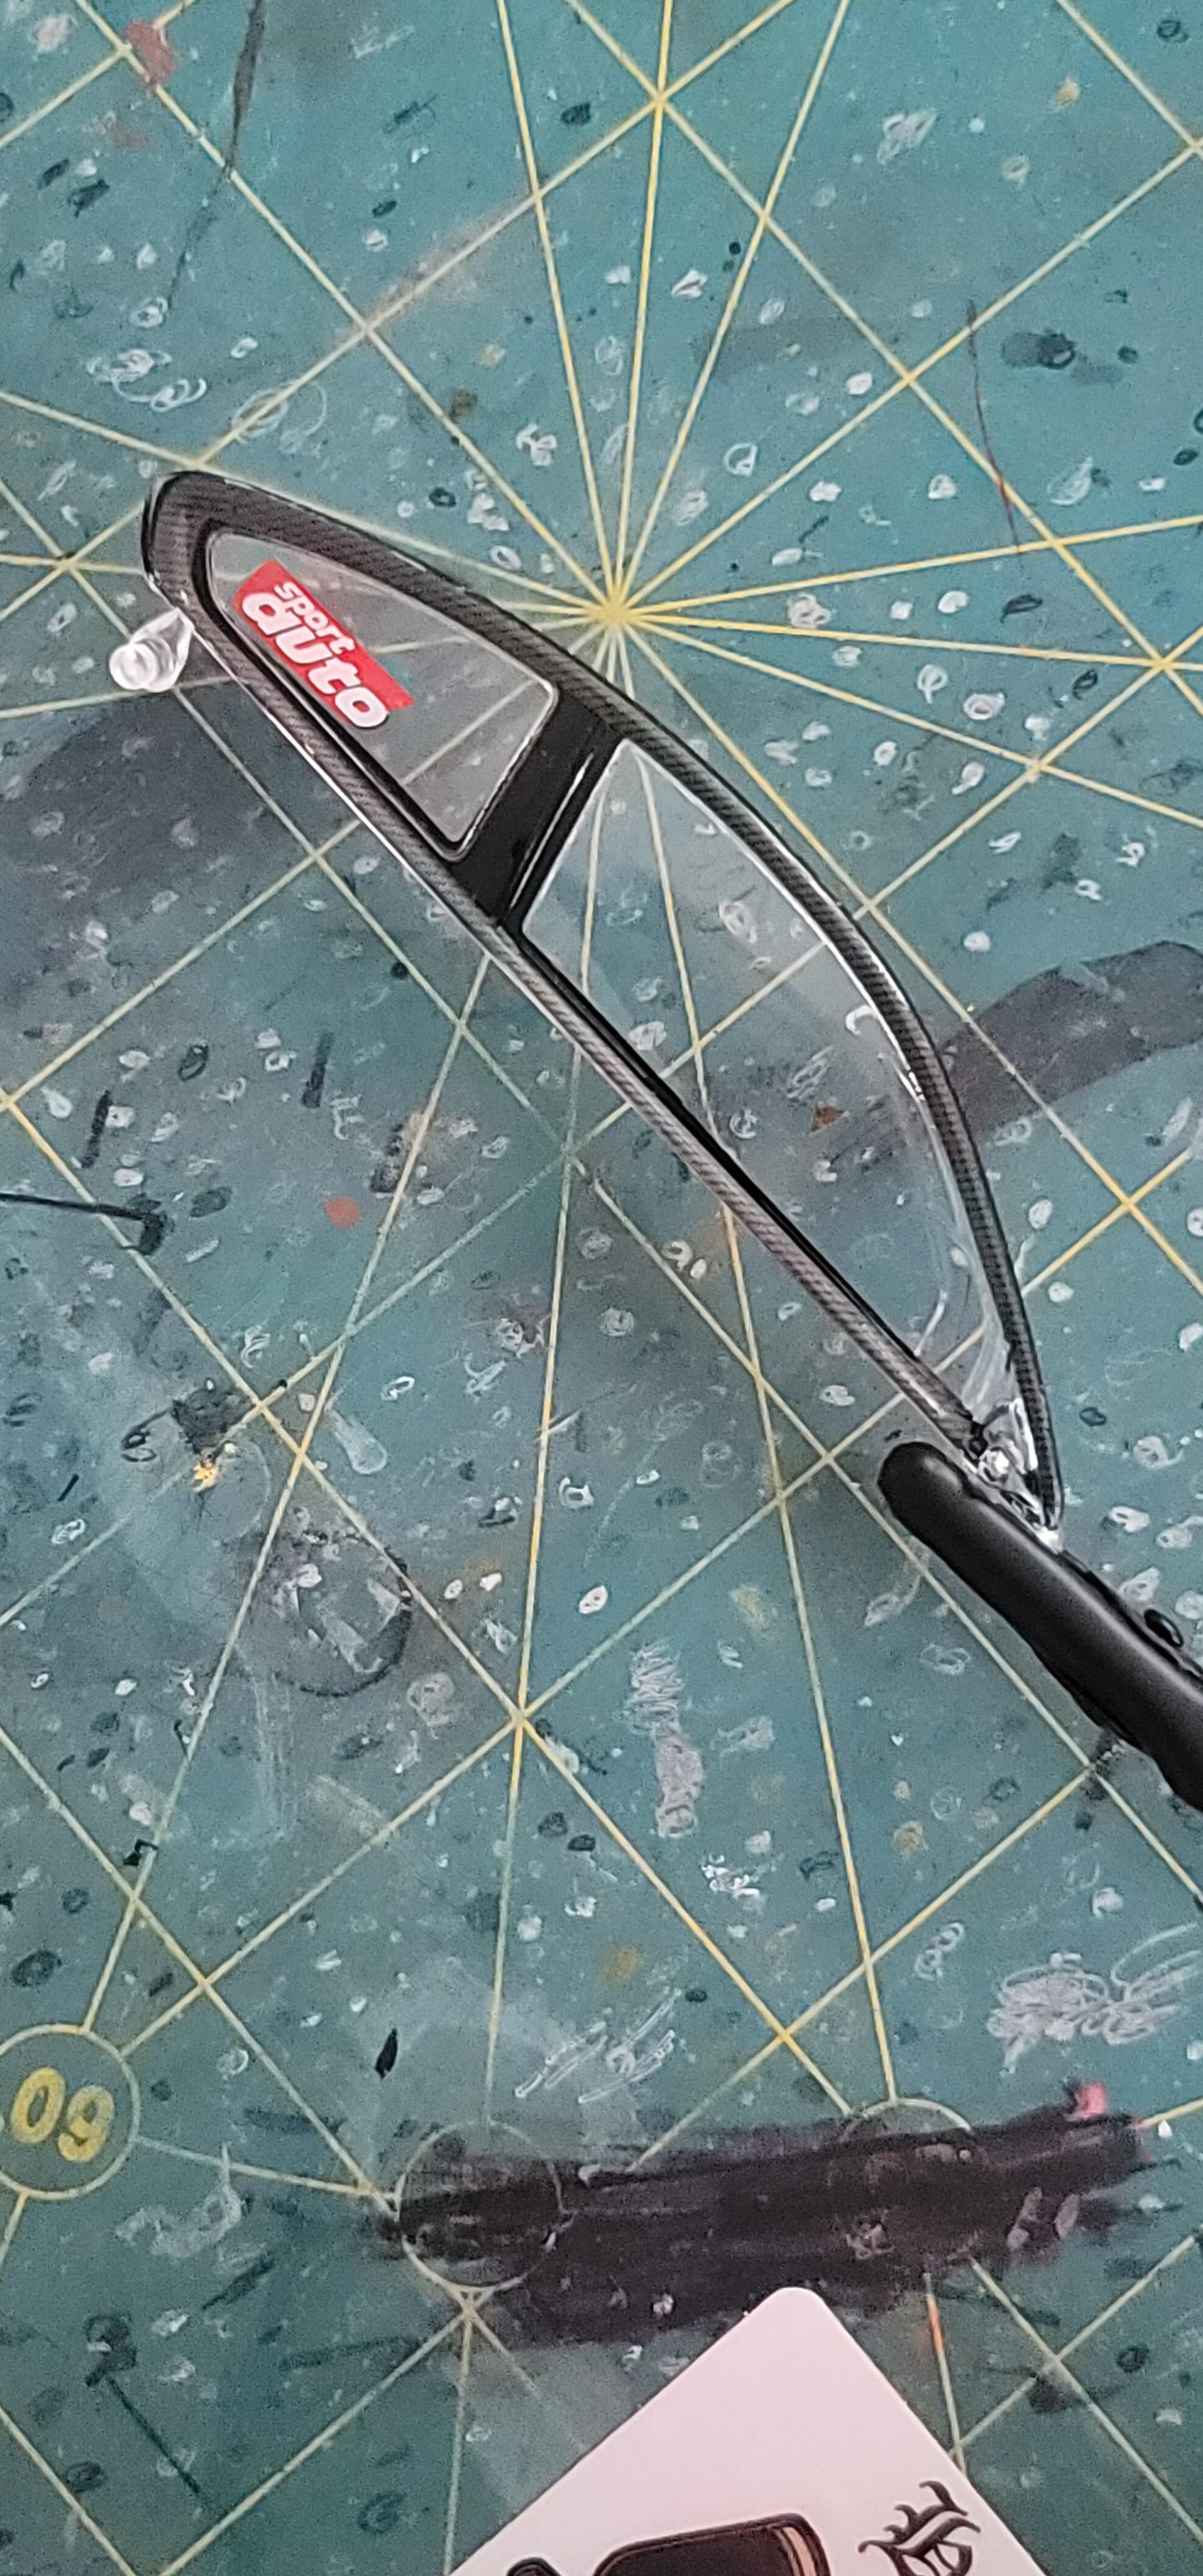
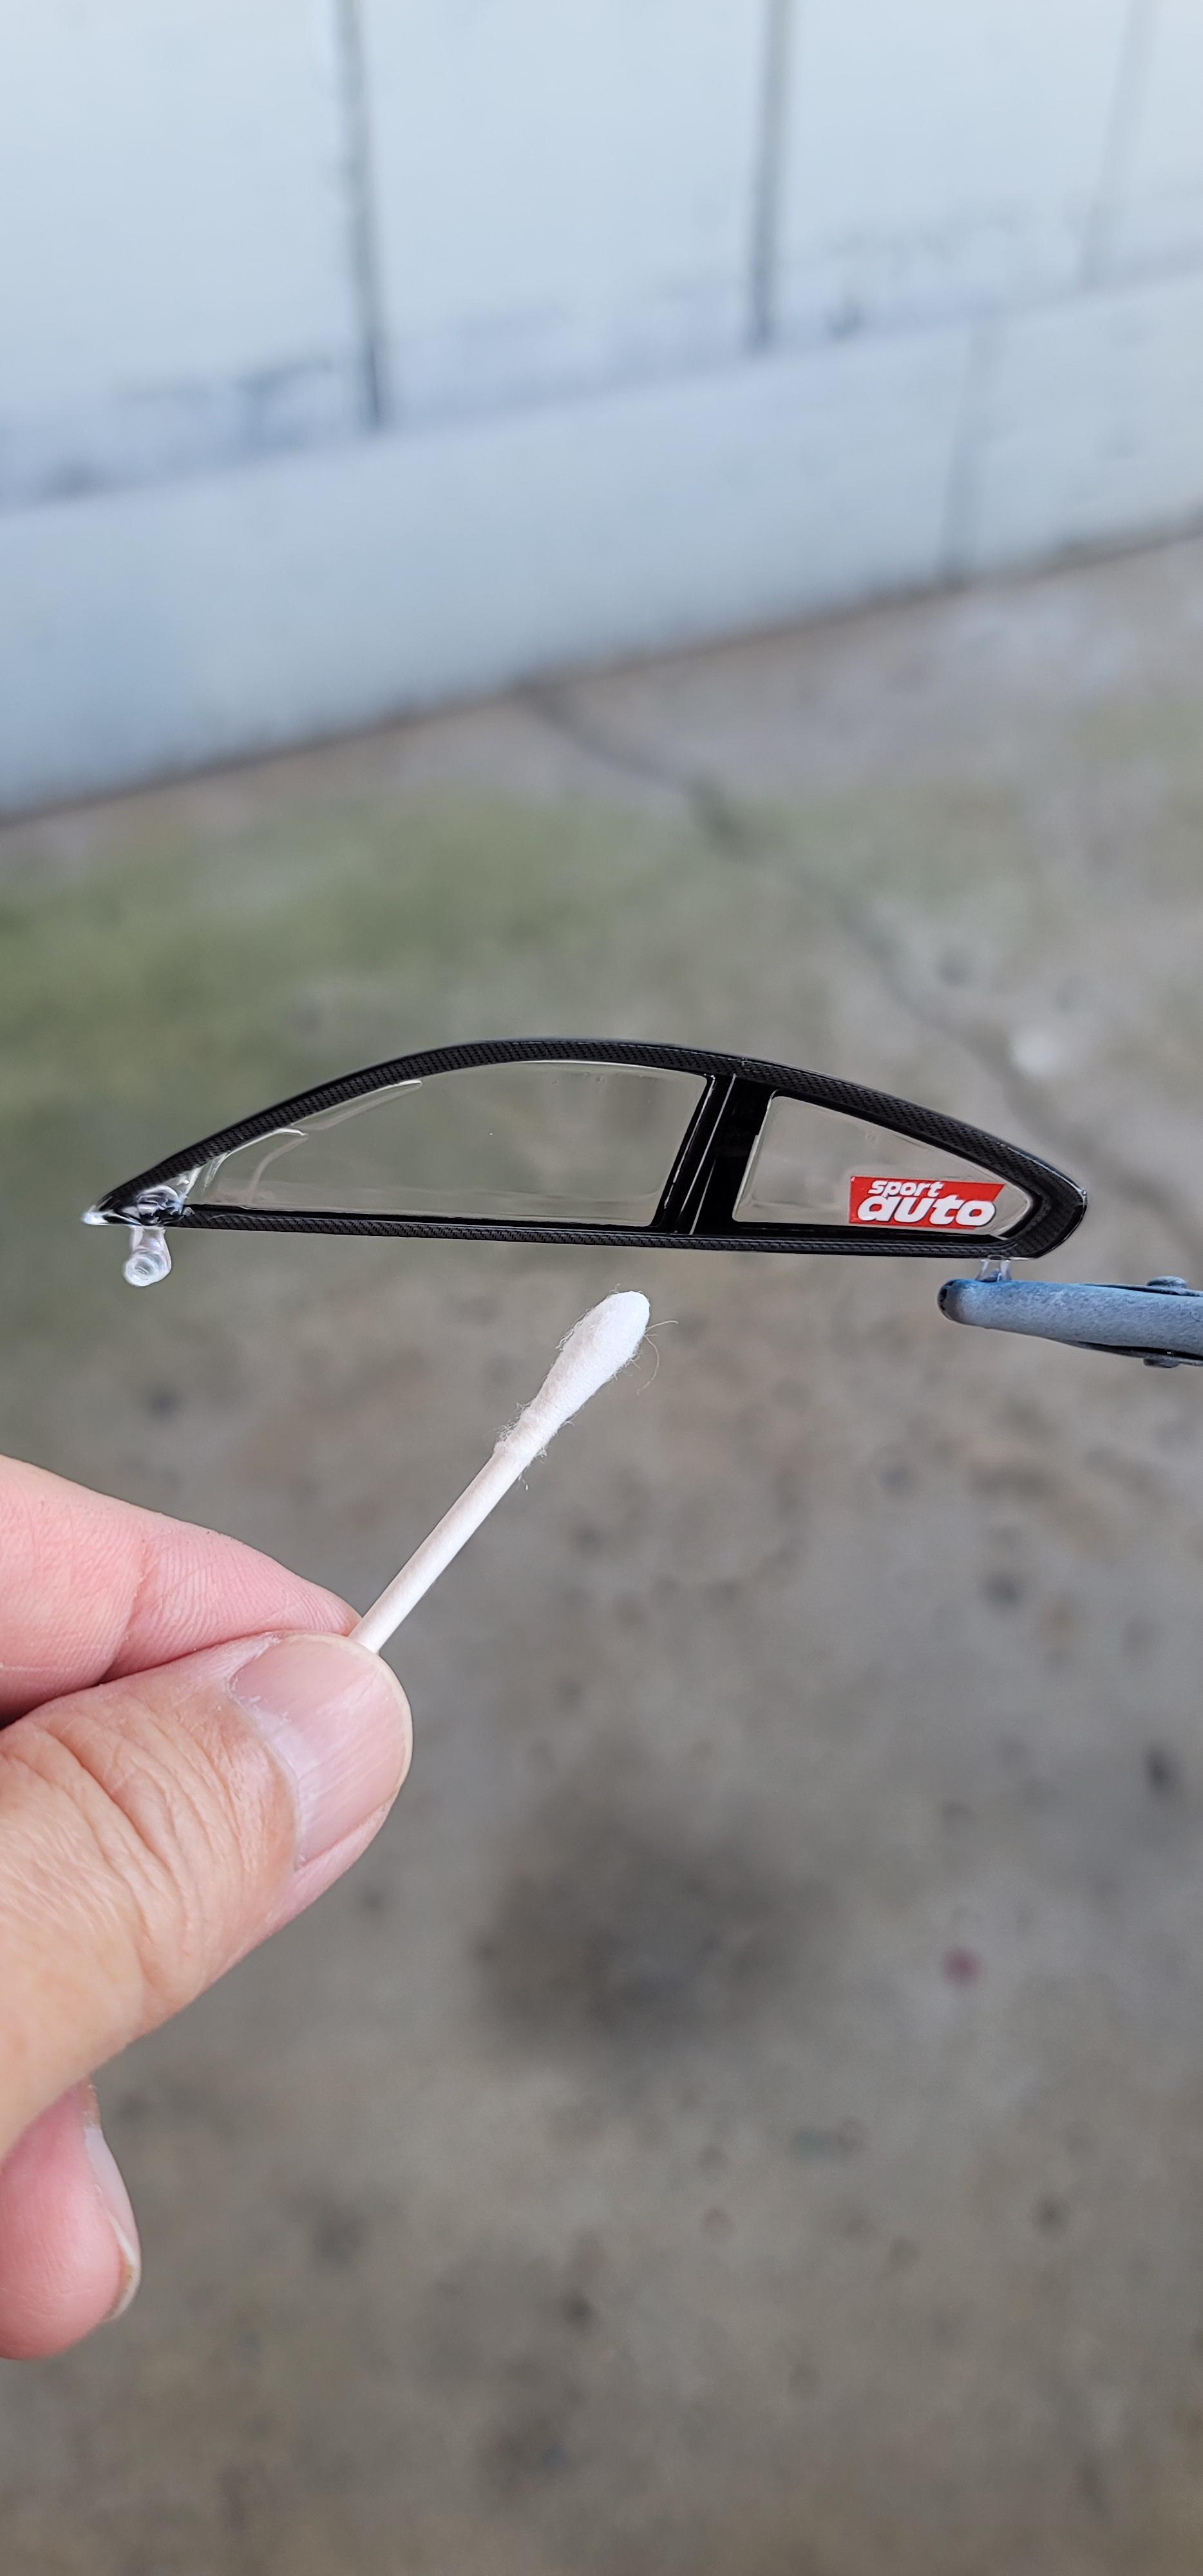
Doing glass work.... The trim has been painted,and all the decals are on including the Carbon Fiber frame. Ready for a swim in "Looks Like Glass"
-
What an awesome looking Rivi‼️
-
Revell 1966 Pontiac GTO in Tamiya Titanium Gold.
Katsusauce replied to Dragonhawk1066's topic in Model Cars
Beautiful build 👍👍👍 -
Excellent work so far.....love your attention to detail.
-
NuNu Hobby BMW M6 GT3 Rundstrecken Playstation
Katsusauce replied to Katsusauce's topic in WIP: Model Cars
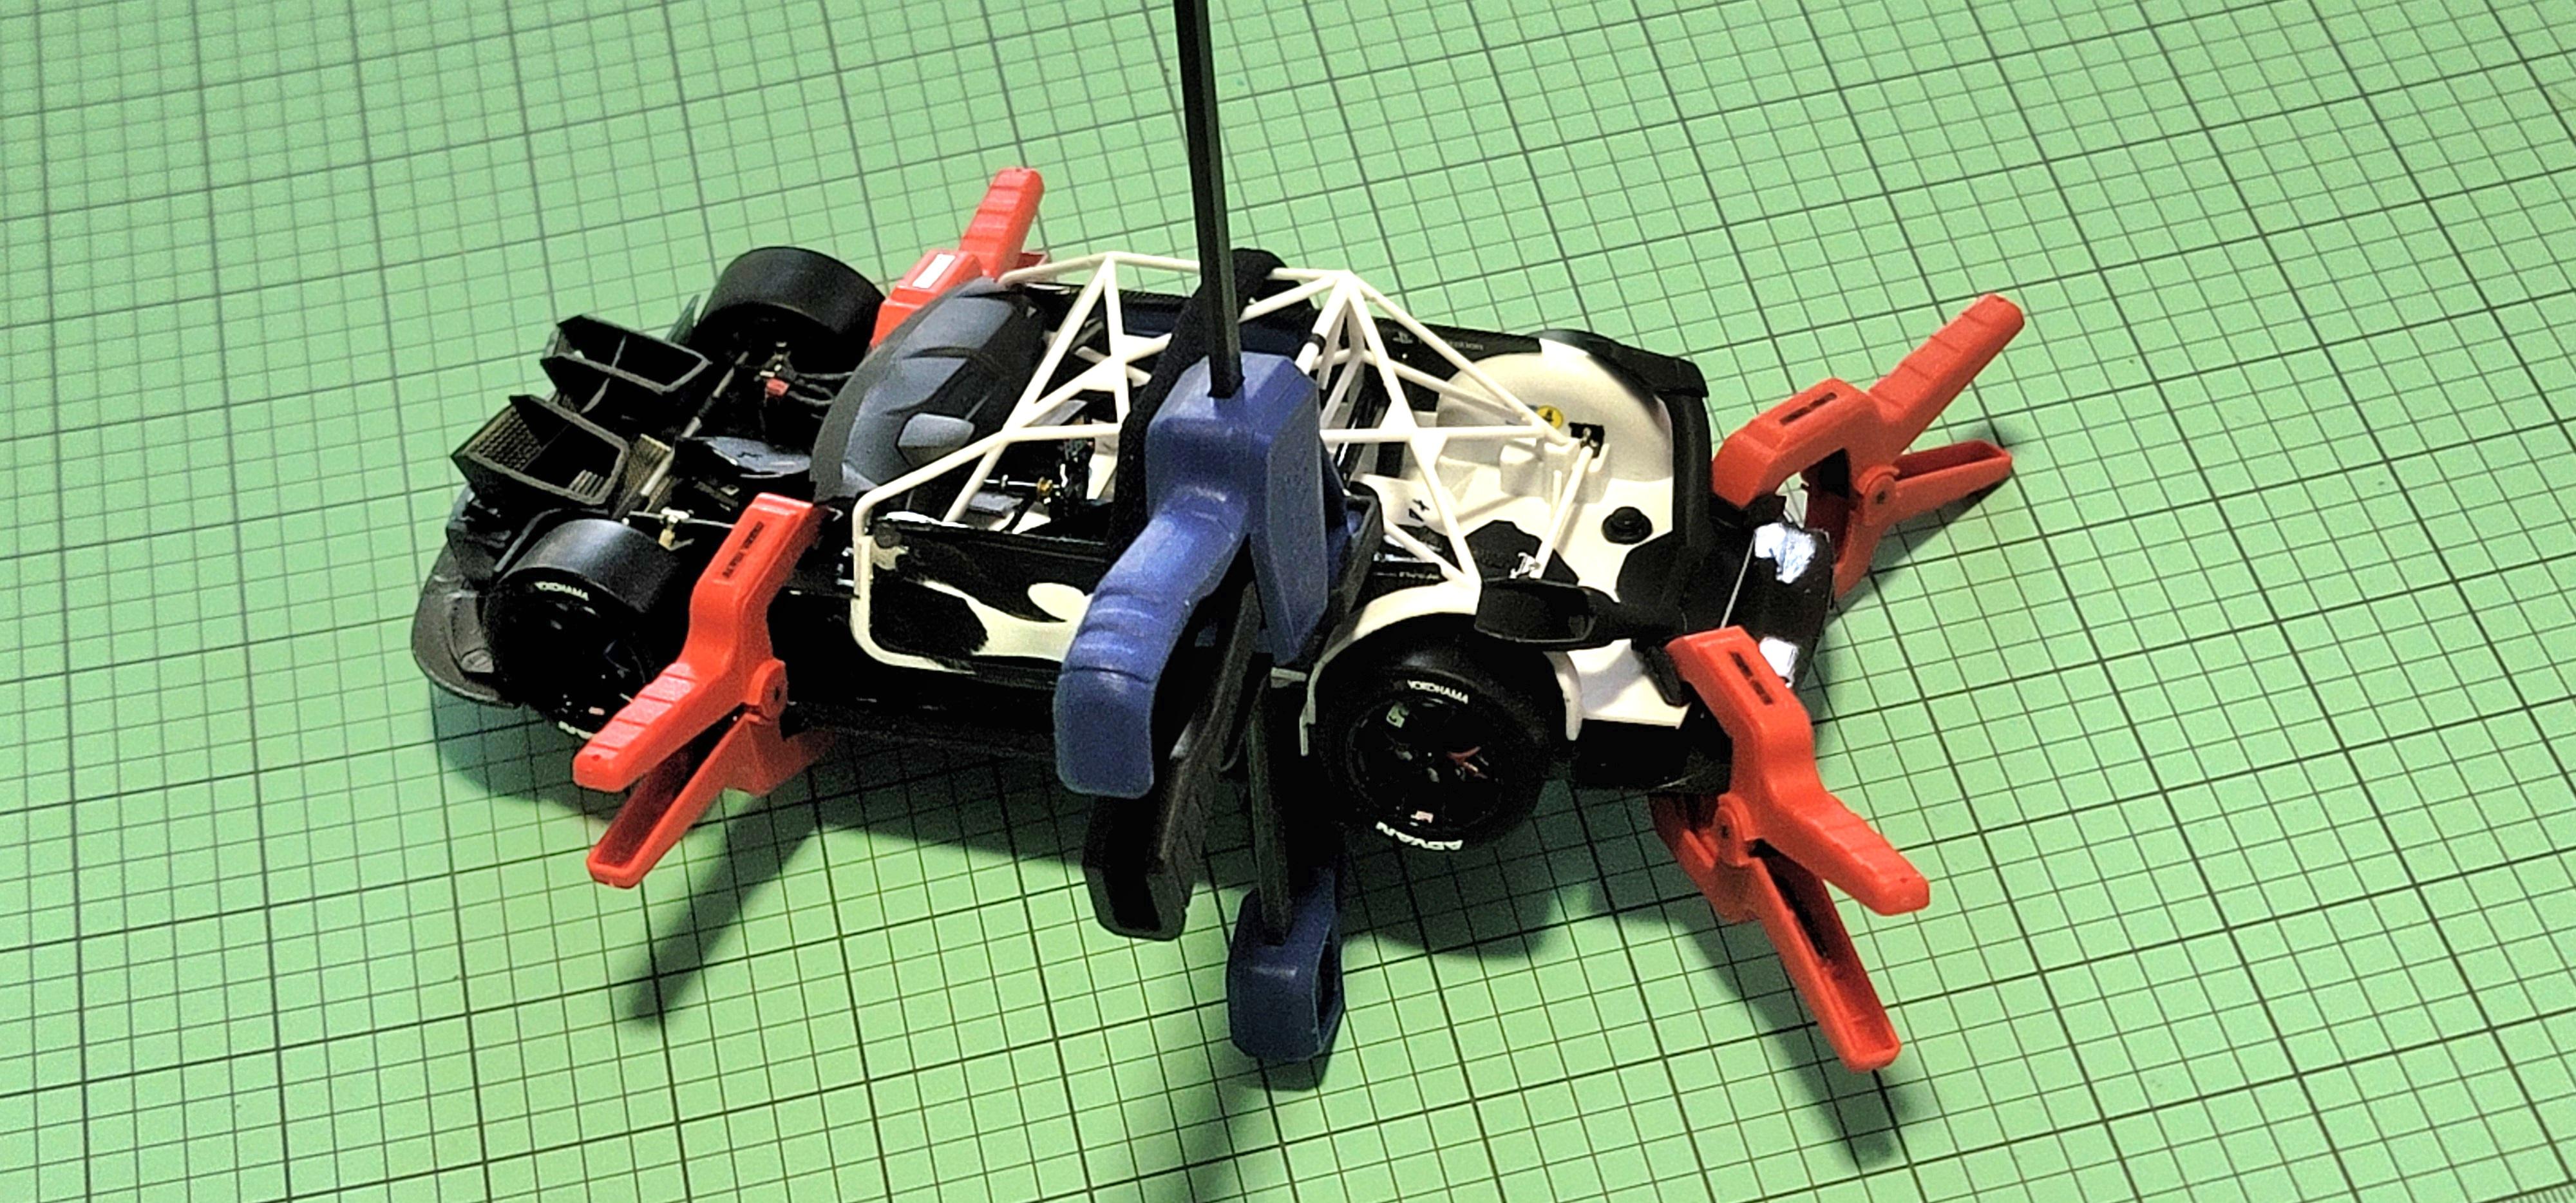
I'm adding a lot of extra stuff to this build....I'll share it all with you later (if it all works....that is 😂) So some tweaks to the chassis and interior tub was needed. Time for some rubber bands, clamps, and clips to hold it all together while the glue dries. 🤪
-
NuNu Hobby BMW M6 GT3 Rundstrecken Playstation
Katsusauce replied to Katsusauce's topic in WIP: Model Cars
The video I tried to upload doesn't seem to work, so here are a few screenshots from it. It was taken 2 hours after the 2k clear was shot. It's still not 100% dry, but I wanted to see how it came out.
-
NuNu Hobby BMW M6 GT3 Rundstrecken Playstation
Katsusauce replied to Katsusauce's topic in WIP: Model Cars
20250314_130206.mp4 -
NuNu Hobby BMW M6 GT3 Rundstrecken Playstation
Katsusauce replied to Katsusauce's topic in WIP: Model Cars
Finally a decent weather day to lay down the clear coat. 🥰 See you in 48 hours. 🤙
-
1/25 Revell '72 Hurst/Olds Cutlass Kit
Katsusauce replied to W-Machine's topic in Car Kit News & Reviews
I got them from ZForce Modelworx 👍