smartdriver
-
Posts
107 -
Joined
-
Last visited
Content Type
Profiles
Forums
Events
Gallery
Everything posted by smartdriver
-
Hello, well Pyro catches the overallShape and Look relativly Good. But on the Details you see the Age. Airfix is much more detailed. I get this Pyrokit from an Antiqueshop on malta, around 12.-€ Harry
-
Hello Guys ? Today i managed to get it ready for the diorama. The "Devils Eyes" where a real Challenge............an the folded Roof....build something like a Frame with thin Wire and added self Adheshishe Plaster. First Try how it Looks on the Street.... Next Step are the Pilots, Alfa has fitte his Drivers with very professional dark red Overalls.I try to get close to the Original. Now for the "Devils Eyes" , they are a Legend, but nothing more than Dustcovers. Removed for Nightdrive and use the Headlights. After some Trys with heated Foil, i go with Furniture Stoppers. For me they do the Part. Too Bad , the LED bent a bit so the little Alfa squint a bit. The Parts are so secure cemented , i cannot correct this Added etched Handles and Fittings, Last Lighttesting, than the Wheatering, and its Ready ? FORZA ALFA ! And now up to Airfix' Alfa 8C, dont know how to make those Mudguards..... Kind regards !
-
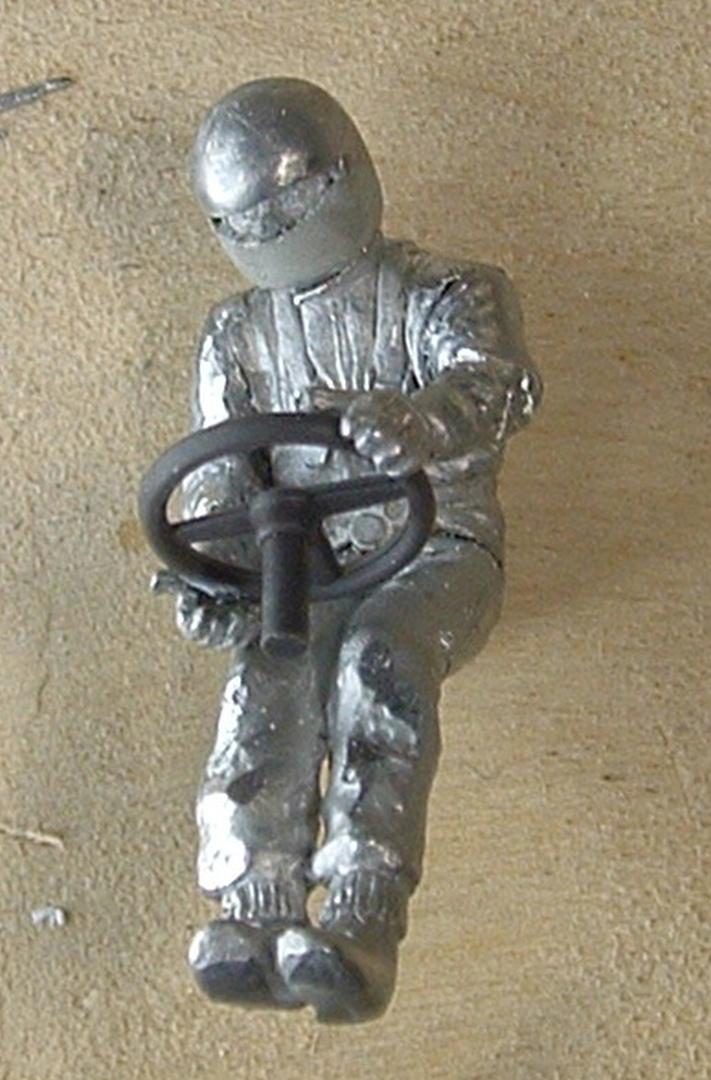
Hello Guys ? after some Weeks of gluing, carving, casting, painting, some Try and Error Issues, the second Car get near finisch. its a Pyrokit from 1966, it should represent the famous Alfa Romeo 6C1750 GS Zagato with Giuseppe Campari on the Wheel.. The overall Shape is not Bad, but due the Age of this Kit, Details are rare or simply not there. So the Wheels are 2 Plasticdiscs with engraved, but not see-throug Spokes, only the Driver Side Door was there, the Spare Wheels sit way to high on the Reardeck and so on. So all on the kit, thas not red, i have added. Casted some Side vents, added Wire for Steering and Breaking Linkage with Parts from old Tankkits and so on. Figures are altered ones from Penelepoe Pitlane.The Rims are absolutly Stunning Turn Alloys with Etched Spokes from Peter Saeger-Thomas After Paint this little Thing, i have to rebuild it partially, because i killed the superthin wires on one Side , so the "Lamps" dont light up...?.. .still a WIP, but the Finishline is near. This Car has a Light for the licensplate also. I recreatet it with some Brass from a Etchpart and a small Tube. Brass Tubes , in this case square ones, also used for the Frontlightbar The Cooler is also a bit Weird, so a real Mesh got there. In reality this was a bit before the Cooler, but there is simply no Space to do it right.... First try how it looks and if the Lights are functional After this Test, I also recreate the Windowframe with add-on Side Mirror/Lamp , the Original Kitpart looks simply odd. fresh out of the Paintbox and after the Rebuild So only the Cockpitlight is nearly invisible. lets see if i can make it a bit brighter. Kind Regards from Vienna !
-
Hi David, you are welcome. It is a registered Trademark and patented untill 2018 if i understand it right. "Kapaline and Kapafix" come in different Styles , , white , Gray or Black, with one side or both Cardboard, with selfadheshive etc etc. I have tried some other , but only on the original , now called "Kapa-Tex" you can remove very easy the attached Cardboard. And then you have a fine structured Board. Here in Vienna i buy it in 2 Artist Shops, btw i buy much of my Needs in this Shops. If its good enough for an Artist its good enough for a Modeller ? https://www.gerstaecker.at/index.php?cl=search&searchparam=KAPA&filter[marke][0]=KAPA https://www.boesner.at/kapa/ and here is ia very useful Link ! https://davidneat.wordpress.com/materials/surfacing/kapa-line-foamboard/ Regards Harry
-
A few Words about the Pavement.I received real Stone mats with single Stones ( http://www.ch-kreativ.eu and www.jokerrügen.de ) for the Pavemant and some Rubber Molds. This Molds are a bit to "crude" more for the Military modeller, For the Sidewalk on the House with Arcades i used the big brown Plates. I carved them to smalle ones, this is very easy but a bit messy. Also i carved 2 Strips of small Tiles to add a bit variation on them, clearly seen on 3rd Pic. On the Cornerhouse i added curbstones, made with the Rubbermolds out of plaster. the round "Hole" will hold a little Tree. The Rain Drains are Lasercut Cardboard from greenline, for the Roads i use 2 different size of Cobblestone. To add abit high for the Sidewalks i glue thick cardboard first on the ground, then the Stonemats. For the Roofs i use different Resincastings from Left to right Verlinden, Model Victoria and Macone. The small One left Foreground is a upgraded Miniart Vacupart. The Model Victoria Parts have full detail all around, so i added some Wooden beams on all others to simulate the Roof truss. Paint 'em with 5-7 different Orange to dark Brown Acrylics, then 3-4 different Washes.
-
Thanks Guys ? David, the "Kapaline" Boards are a bit different to all the other Foamboards. They use Polyurethan , all others Polystyrol, so this Boards are a lot stiffer. I have used them a few Times, never had any Troubles. Kind Regards Harry
-
The first car, Airfix Bugatti 35 B, try to modified it to the 37 A . Its the only Car on this Diorama i couldnt find out anything more than the Drivers names, what Car it was and the Racenumbers, so its a bit Fantasy. First thing i close the Hole on the Bonnet, that was for the Supercharger fittet Eingines, and sand down the Radiator to imitate de small ones fittet on the T37. All other ist straight from the Box, only added a Winsdshield, Wire Brakelines and Lights. These Lights are prewired SMD LED , the smallest on the Market, powerd with a 12V Charger . The Mudguards where on the 1932 Car very small, so i think it was a year earlier, sand them down and change the brittle Plasticrods to wire. Changed the Airfixdriver a little bit and scratched from various Parts the Codriver with a Immense Miniatures Head. OK lets see the Pics i hear you yell...here we go ? on to the Spraybooth..............i used Vallejo Aircolor and a Clubfriend prints the few Decals for this Project. A few Etchparts for the Hoodbelts , the Belts itself are Tamiya Tape and a Metalring for the Tirestrap on the left Side, thats all additional Parts. and at last it sits under the Doorway with aEnginefailure....the Smoke is made out of a little bit Cotton Wool One of thr Spectators a bit too Enthusiastic, dropped his Beer..... Andone more Time with all Lights on ? , now going on to the next Car, Airfix Alfa Romeo 8C. https://youtu.be/DdAJ3dqe6V8 Thats it for now, hope you enjoy it a bit !
-
Paint the first Figures, made them out of several Miniartparts and from srap, the Youngsters are from Mantis and the Girl in the Bathroom is old Verlinden Figure. Painted with Acrylycs and oil, not so good as most others , but for me its good enough. Also completed the Italian Style Electriccable Salad ? For the Balcony i ordered a 3D Print and also a 18+ Gag, not sure if i used it really :oops:
-
Painted the first Roofs.....and soonly the Roof is on, the Pigeons pooping on it..... :eh: and from a Bucket, a Carrim and a Bowl i build some Lights for the other Rooms I used really fine Copperwires, they go throug the Wall and ouside in the electricboxes , i let the solder seams disapear in these Boxes, just like in real Italy... ? And i didnt tell you , that this dont functions at first try....?? But then there comes the Light ? For the Chapel i use a flickering LED to simulate some Candles Well the Rooms on the Left side, will be without light, they are too shallow for a good Lighting. Too bad, on the Phonepics the Lights are way rtoo bright, in real they are much darker. Beside this i built the first figure out of Miniartparts, naked Feet from Preiser, the Houseshoes from Plusmodel the Coat and the Hair made with Magicsculp A little Vid https://www.youtube.com/watch?v=VBcTmrn9NVA
-
All Shutters are done, very much and hard hard Work . The bad Verlindencopies are warped, Bubbles everywhere, the Miniart ones must be cut down to fit, between the Slats much of exess Plastic, Seamlines and so on....and i added somthing like a handle or locking mechanism aut of Wire and Pins. Next Step would be the Streetlights, with some "Glass" , these are from Miniartparts. The Wallmountings are nice, but only one Side engraved.... So the Streetlights work, i added some "Glass", grinded Clear Plastic. A Friend give me the Idea to Light the " deep Rooms on the Right. So i build out of Scrap and a Needle the ,then very popular, Bankers Table Light and a bigger Floorlight. Inside them a very very tiny SMD LED do the Lightig. I remove the Wooden Roofconstruction, i was not happy with , also with the Mould and casting from Js Modelwork. I buy Resin Roofings . So i can take some better Pics of the Rooms. Here will take some Furniture place Outside i added the typical Clothes line, once again sonme scrap Parts for the Hinges and Plusmodelresinparts. As i wrote before , iam not happy with the Rooftilecastings. The Js Modelworks mould is a 2 Partaffair, i didnt make them equally thick. And the Mould is straight, not Conocal. So a try a Verlinden Part. After 10 Colors and Washings , i like it ? And something funny, a Adverisment for Magneti Marelli from 1930, found on a Auction in the www.
-
Comparsion between the Verlindenceramicpart and my Foamboard Build And the Painting goes along..... ] Groundwork/Diobase is nearly done, added some "Water" to the Fountain, Faller Seafoil and a heatet Plastikrod, some Foliage and Testfitted a garbagebin, note the Cat ? Playing around with a5€ Fisheyelens from China....... [/quote]
-
Next Step building the Doors, blend in the Houses and finetuned some details. And a View how it should look finally. Still a long way to go but a Interview for the Employee Magazine of Viennas Government ( i work for the City Government)...... ? A few Pics of the finished Doorway and some Interiorshots After the testing how the Houses look togehther, i dont like how massive the Corner Building( Royal Models Sicilian Ruin...) look. So i build it partially new, use only the Stairway and the Well. Also the Small Tower, its easier to build it new than altered the Verlindenceramic . First A pic how the Corner come nad how i made it into a "Full" house. For my Eyes it looks to massive with its plain Walls. So the Wreckingball come in.... And with some try and Error , i came up with this, thats the look i wanted. A bit of Chaotic "Skyline"
-
I made the Floors with carved and scratched Evergreen Sideboarding. From Miniart comes the Dark ones , the small Room between the Roofs will be changed to a Bathroom. Floortiles for the Locals are simply carved Plasticard. For the Furniture and the Grammophone i used Sets from Plus Model, very massive "sprues" and altered Miniart Parts. Also from Miniart are all the Bottles and Crates. The Typewriter is a small Scratchbuild. Untill waiting for some Ideas how to finish the Rooms, i started the Painting on the Doorway. This is also Carved foamboard and Part of a Verlindenkit.The Verlindenpart raised about 1cm from the Bottom, the Doors are too Narrow for 1/35, with a temporary Mold and plaster. Doors where made with Balsawood and Matshsticks, the Windows are H0 Parts A bit of Colorwork....the Windows are Resin from the VerlindenKit, they where warped and have "full Size" Castingblocks on the Backside, much Sanding and with boiled Water correctet. Build the Doorhandles out of Historex Figure Parts. A little Pigment adding and this is ready to go on the Diobase.
-
On the left the Original Verlinden, right the New One To see if the Colors are not too bright i placed it on the base, think its good. The Front for the Osteria , made out of Balsawood, added some Advertisments from this Timeperiod and a Menucard. i've covered the ugly "Window" With a wooden Billboard, made with a Piece Balsa and some Matchsticks. All the Advertisments are Scans of the real ones from 1930/31. ☺️ And i cannot resist , i added a little Joke. In one of the Don Camillo Movies, there is a Cartoon painted on a Wall, it says "Freshly Painted". This is Restored and can still see in Brescello, where this Movies made. I painted it Free Hand with a Fineliner. some pics with the House in its Place on the Dio..and i chance some Things in the Barroom, addeed some Posters.
-
Beside the Church i place a Doublehouse. Originally i want to use a Verlinden Plasterbuilding, but this Thing is 1.way to Narrow, more for 1/48 and 2. heavy as a Rock. So i build this new, also Foamboard. Floors are Carved Plastic, the Tiles are only for Photosurpose, i make new ones. The Osteria and Caffeteria are based on real ones , the " Da Trombicche " in Siena, very nice ! and the "Il Cantuchio" in Castellina in Chiant, also very nice and both have good Food and Wines ? ? ?
-
On the other Sidei placed a small Church for Don camillo ? Also Foamboard with real Wood Doors and Brass Bells from RC Boats. This weathered with Modern Solutions, they will get verdigris. A bit of Washing , Etchframes and Wood Supports.
-
And then the Paintfun begin with Peppones Workshop. First a very light Gray, then dufferent Shades of Yellow and orange, Washings and so on. All done with Acrylics, the Foamboards dont like Oils..... i added some Prints, found in the WWW and Windows, Doors and Shutters from Miniart, cut down to fit and detailed with Metalrod etc etc. Detailing for the Rooms because this House will be open at the back . Its a Bunch of cut to Fit Miniart, Verlinden, Plusmodel and Eduard etchings . Workshop or Office, nothing Special, only Scratchbuilded Wallmounted Telephon.
-
After a rethinking and some input from Firends i found a funny pic,a italian Petrolstaion in the 1920', this i want ? So i ordered the beautiful Kit from Modelvictoria i will also have a verlinden kit "French Bakery" , but its a very heavy and massive Plaster part, use it only as a "Blueprint" I rebuild all Buildings new out of Kapaline Foamboard. Two Reasons why, the Verlinden and royal Model Kits are heavy and massive , the Issue with Miniarts way too big Windows/Doors and the Fit of the Parts is cruel. I remove the Cardboard from the Foamboard after cutting all Openings, carved and pressed the Stones and cracks with a Graficcutter, hard Pencil and a engraving Needle. its pure Fun to work with this Material, very easy to cut, engrave , pressed and sanded. Lets see how it takes the Paint. here now some pics, first is "Peppones" Workshop, the Square Opening in theSidewall will be filled with a Sheet of Brickwork and stores the Petrolpump as i posted before ? For the Guys , who don't know the Name "Peppone", its the Citymajor in a Series of Italian Movies from teh 50ies-60ies, called "Don Camillo and Peppone" In this Movies a Priest and He are the Main Characters, still very funny ! Oh yes the priest, Don Camillo, will have also a Place on this Dio...? a small Church, where Don Camillo hold his sermons ? The Bells are originally for Shipmodels, this are real Brass. They would become a wooden Suspension, also a real wood Door will be there. The Figure is from miniart set "French Civilians" The next one is a little reminiscence of the Local, http://www.datrombicche.it , where we have a great Time in Siena. Based on the Verlinden plasterrock, it was a bit more Work then the others , but i think it looks not so bad and is way lighter ? Added the little resin part that comes with the Kit And in comparsion with the Originalpart All together to show the size Work continious with a new Doorway Regards Harry
-
Hello from Vienna, i have started another big Project, a different theme for a Diorama, rarley seen. i will build a Scene from the 1000 miles Race 1931 trough Italy. This was held from 1927 on to 1957, 1000 Miles in one Day ! then it was cancelled, much to dangerous a race on normal Streets with also normal traffic, there where severeal heavy Accidents and dead People. Today this "race" is a historic Event , held on the classic Route but in 4 days. I will use the old Matchboxkit Mercedes SSKL as Rudi Carraciolas/ Werner Sebastians (Mechanic) Ride to Victory and a much older , around 1966, kit from Pyro for the second placed Alfa 6c with Giuseppe Campari behind the Wheel and his Mechanic Attilio Maroni. Also two Airfix Kits, the Alfa 8C and the Bugatti 35C, both will be convertet to the Car Version i need. Here is how matchbox Kit look, for the Age and Scale not so Bad , i have seen Carkits in 1/24 from Today they look not as good....some Flaws are here, so the fenders where a dark Red not Black, some Details are a bit crude Well the Alfa is another Thing, the overall Dimensions are right, but crude Details. See the 2 half Wheels, no Spokes just plain Plastic...... The first Thing to change are the Wheels, i will use etched Ones with Alurims, a bit complicated but ....see yourself I want a Drive-trogh-town-scene so i try a few MiniartKits and a Verlinden Relief fassade and this is how it should look First i try to altered the Italian Townbuilding. A lot of Sanding requiered since this Kits are Vacuformed and have some faults and round Edges.....and to line up the 2 Wallsections is a challenge too :shock: Well the vacukits from miniart took more Work then expected, and i altered two of them a bit. So the italian Building will not have the big Balcon, i moved the inner wall forward, will add a small balcon like on the Verlinden Building. So it should look, Boxart Paper Mockup Work in progress Size Comparsion Verlinden-miniart, Minart uses much bigger Windows and Doors..... First try with the full Scale Buildings I added the Royalmodel Sicilian house to the Project, i like the Shape. As most of the offered buildings, this is a plaster made ruin, so i must first rebuild it to not damaged. But only after glue the broken Walls togheter, like a puzzle :shock: ....i manage this with Lego and patafix , making a partial Mold, then pour Artist Plaster in this, a little Sanding and voila.... So here it is glued togheter with out the Stonebench before the Wallfountain. And too bad, it looks way to massive...... With that i play around with the Layout. The Cooktop is the Size, so a bit of the House to cut off. The Small one on the Right side will be a little Church.On the Leftz Side i think on the Alfa 8 C with tirechange, nuvolari suffered from 9 changes on this race, the SSKL in Front , behind the Alfa 6c and in the Doorway the Bugatti. And i began the work on the MB SSKL. The matchbox Kit has a good fit and is finly detailed,but in a few Spots tehy are wrong. As all Modelmanufacturers , even CMC, they molded too much Holes in the Frame, on Original pics you can spot somewhat like a Sheetmetal ohe frame, so i build this with thin Plasticard. Drilled the remaind holes with 0.5 and 1.00 mm and also rebuild the Frontdamperrod
-
Hello Guys, iam absolutly new to this Theme, althoght i always loved the Winged Warriors ? I was lucky and get my Hands on a Revell Charger Daytona. So the disaster took its course....and i buy Polarlights Mercury and Ford, got a Jo Hann Superbird and to bring something other a Chevelle and a Olds. So my Question is , what looks the Chassis on the later 2 ? Are there good Books about this Cars or Races ? I have the Books "F.Moriarty, Supercars: The Story of the Dodge Charger Daytona and Plymouth Superbird", " S.Lehto, Dodge Daytona and Plymouth Superbird" and "A.Gabbard, Nascar's Wild Years: Stock-Car Technology in the 1960s" Regards from Vienna and stay safe !
-
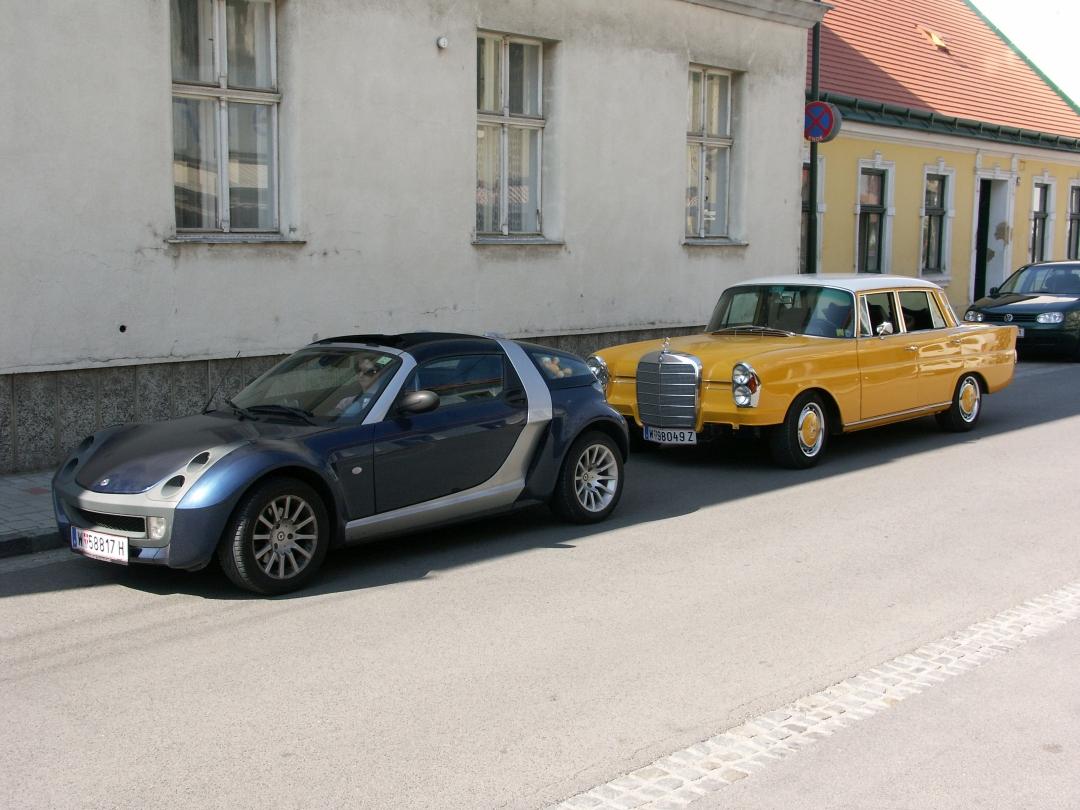
Hello Guys, thirst thank you all for your kind Words ☺️ A word on the "fat man", this Guy is based on a Real life Friend of mine, he own a garage. there he restored especially Mercedes benz. If he see this thing he called me with a dirty Smile "Axxhole....ggggg".....and if he see what car i buy he mean " you are complete crazy...." ohh, yes, we are still friends ? btw the yellow 300 SE is his ride. The other Guy is based also on a Friend, he laughs really loud at this. Greetings from Vienna and stay safe !

-
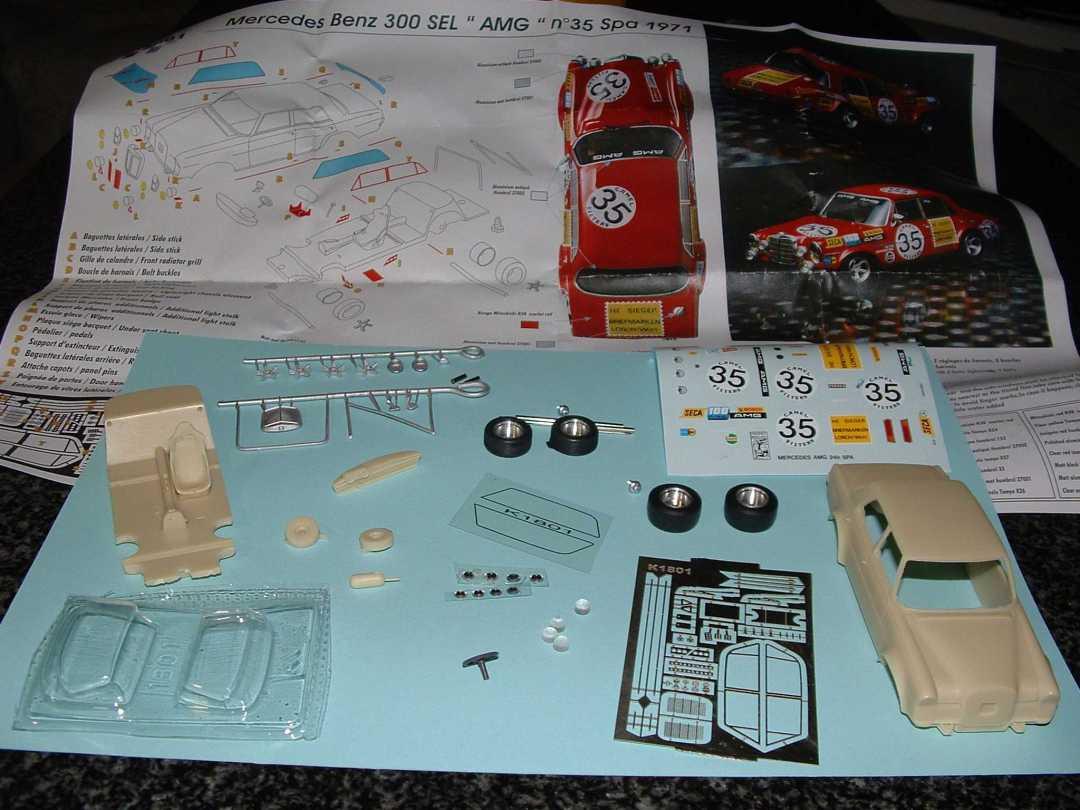
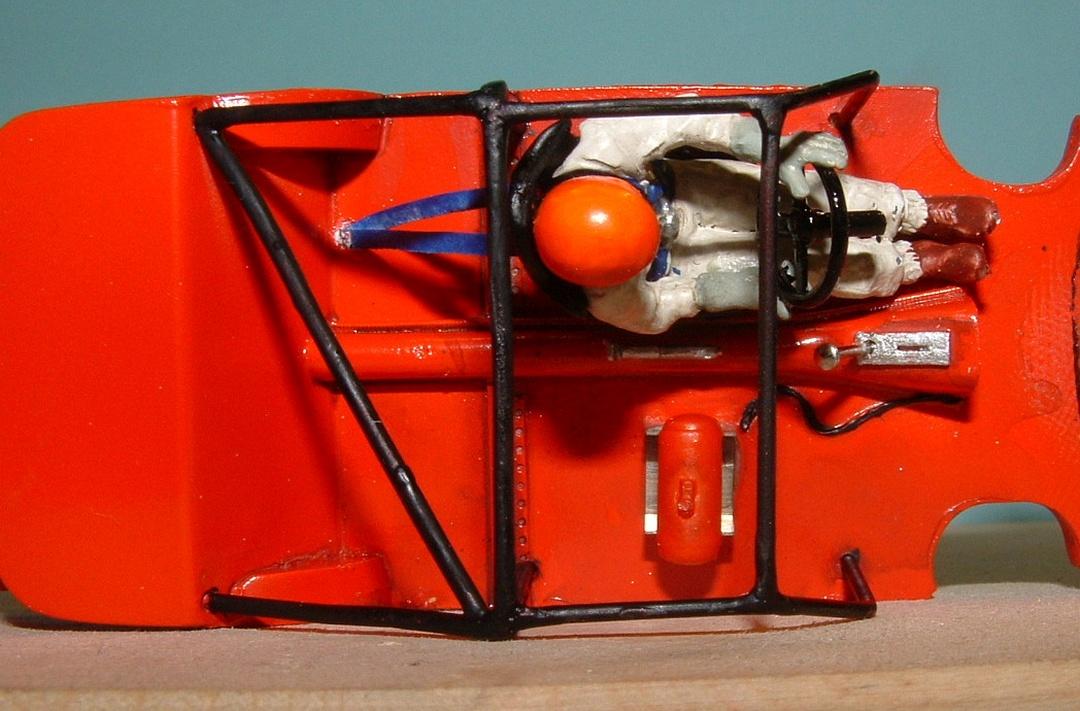
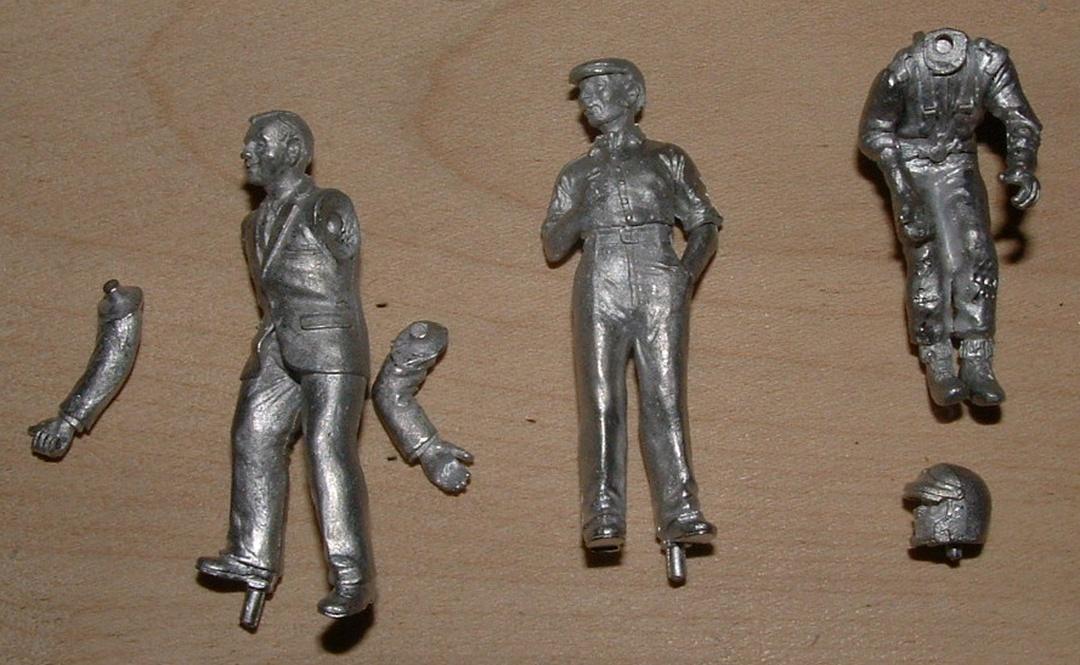
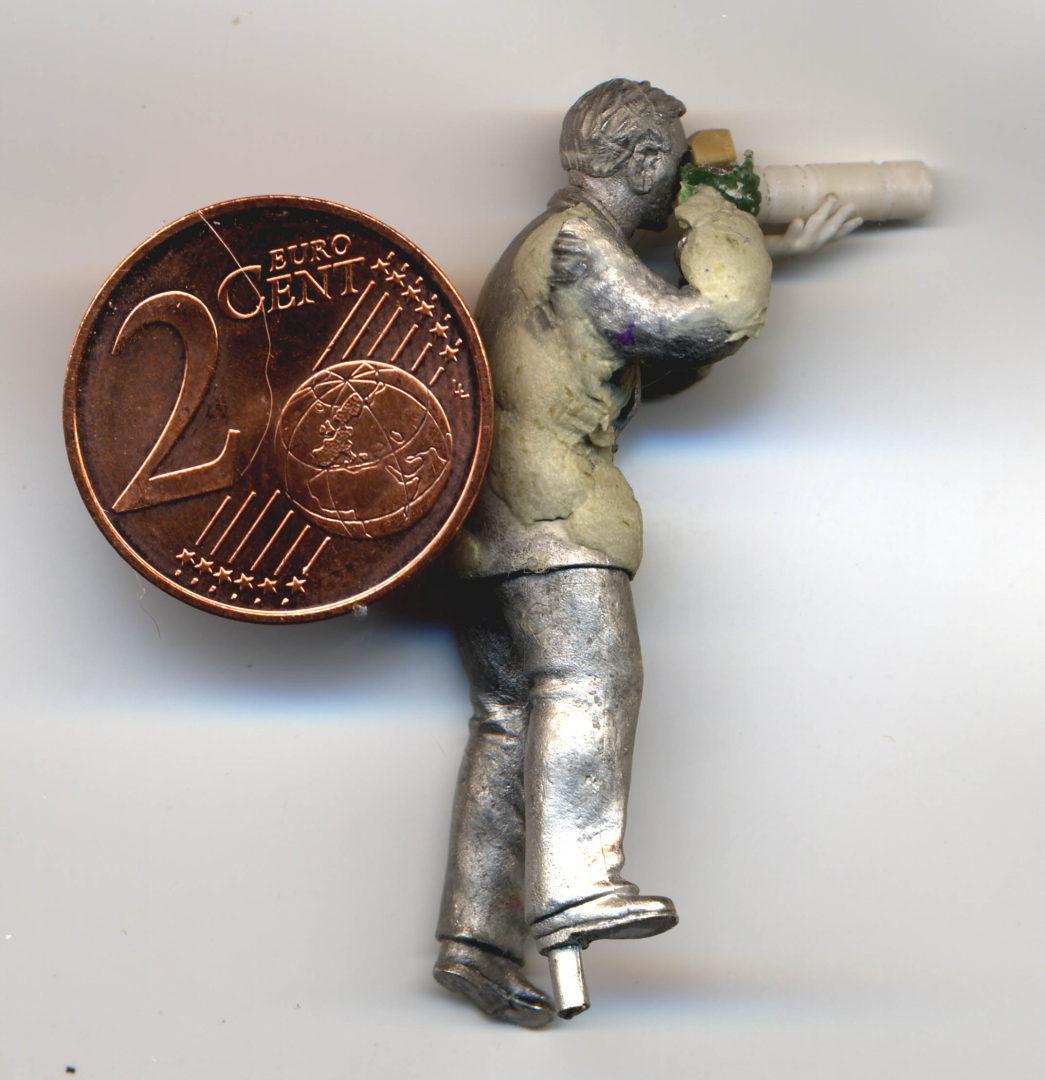
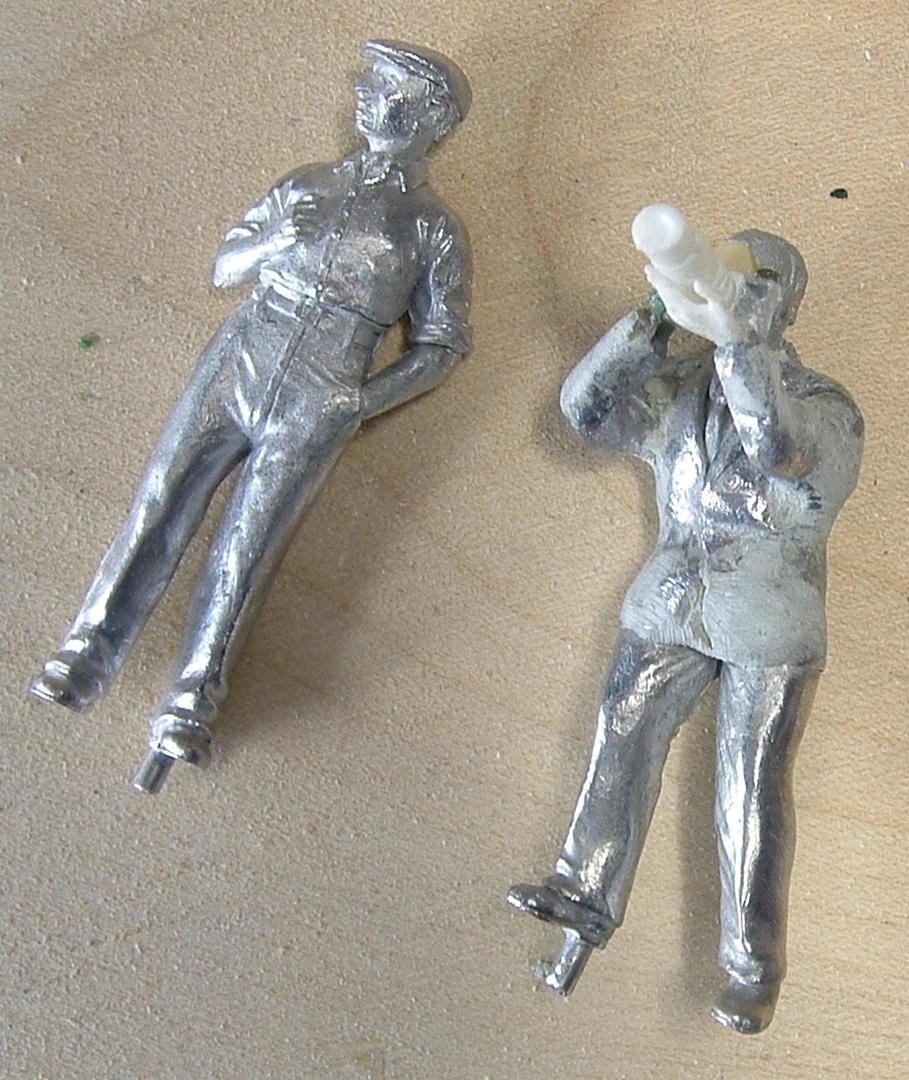
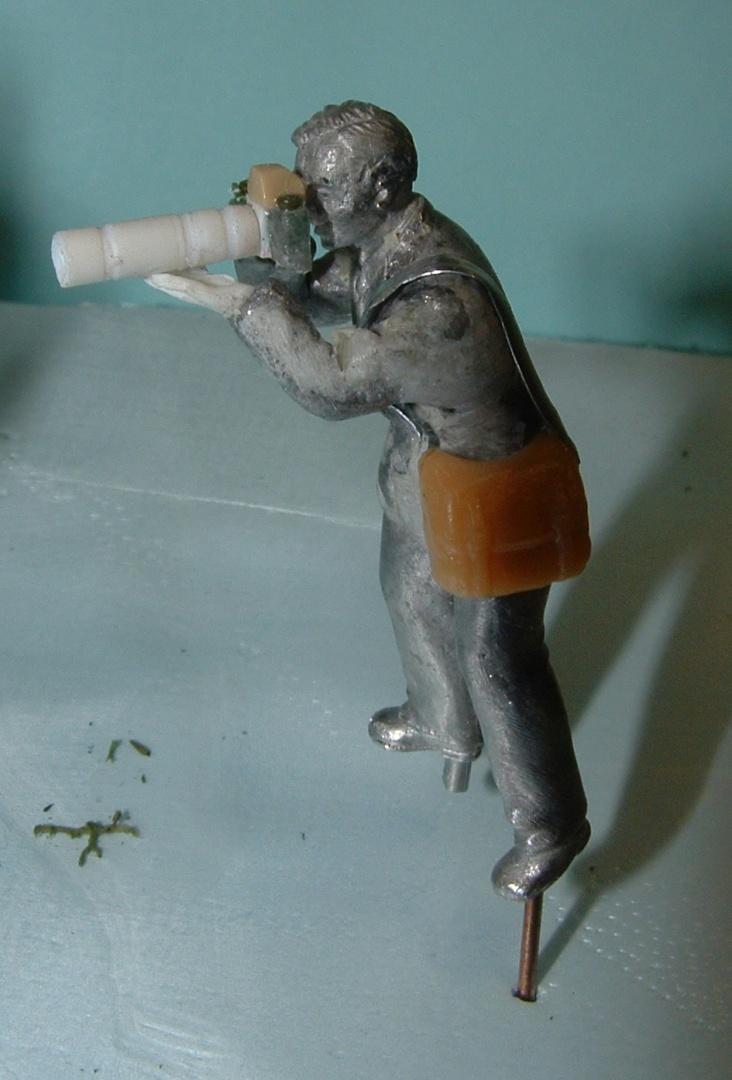
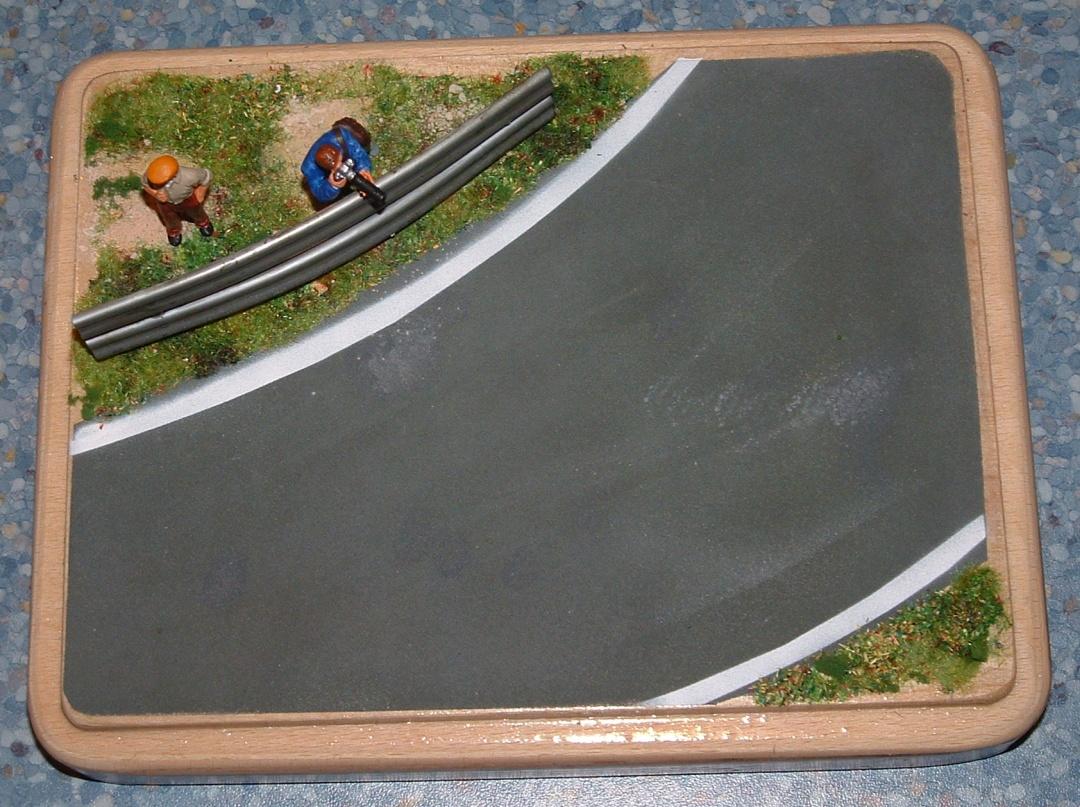
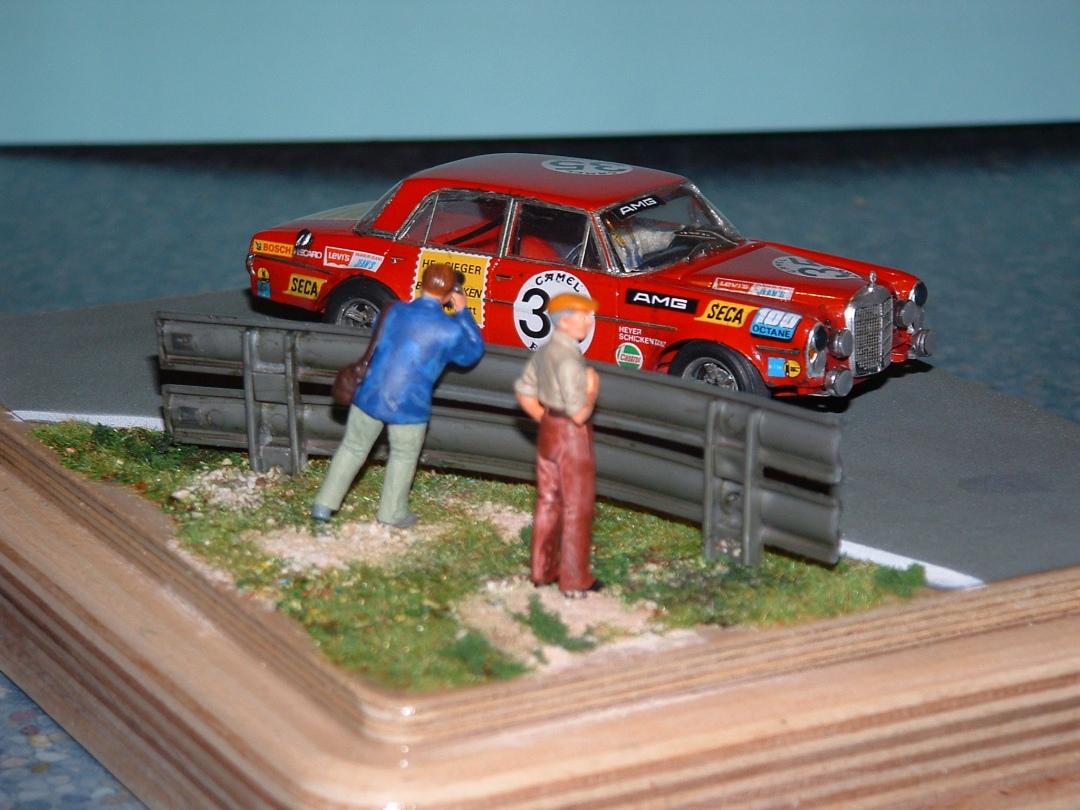
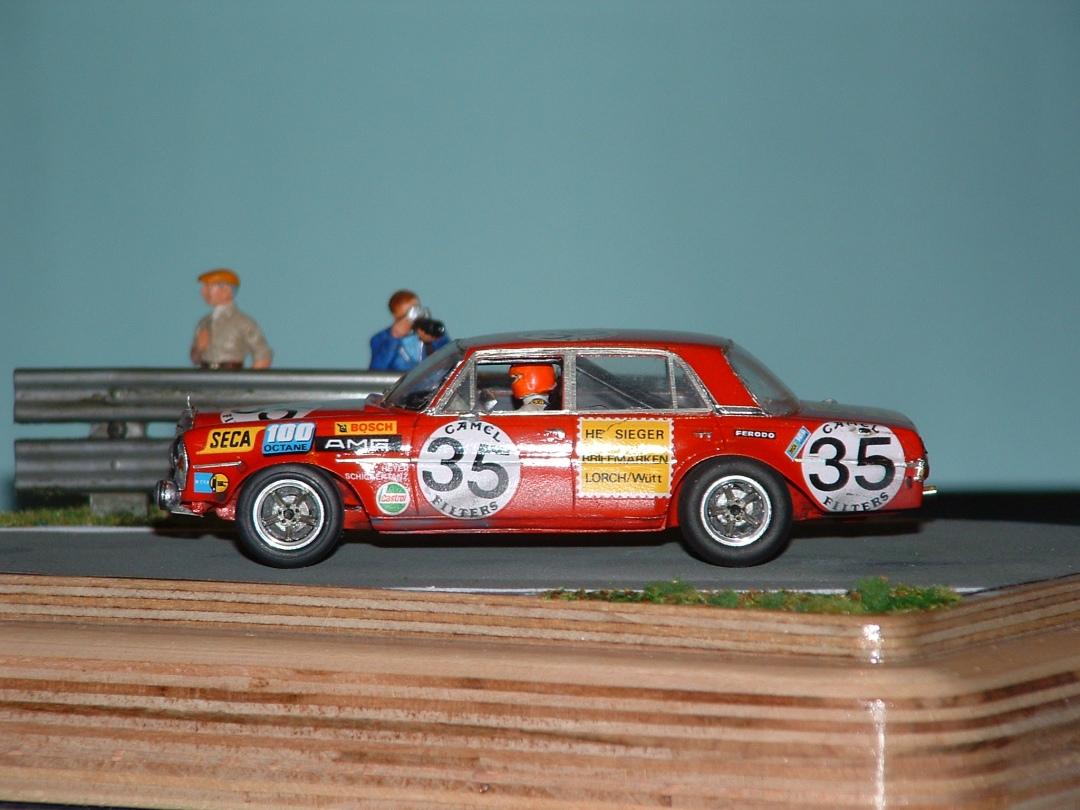
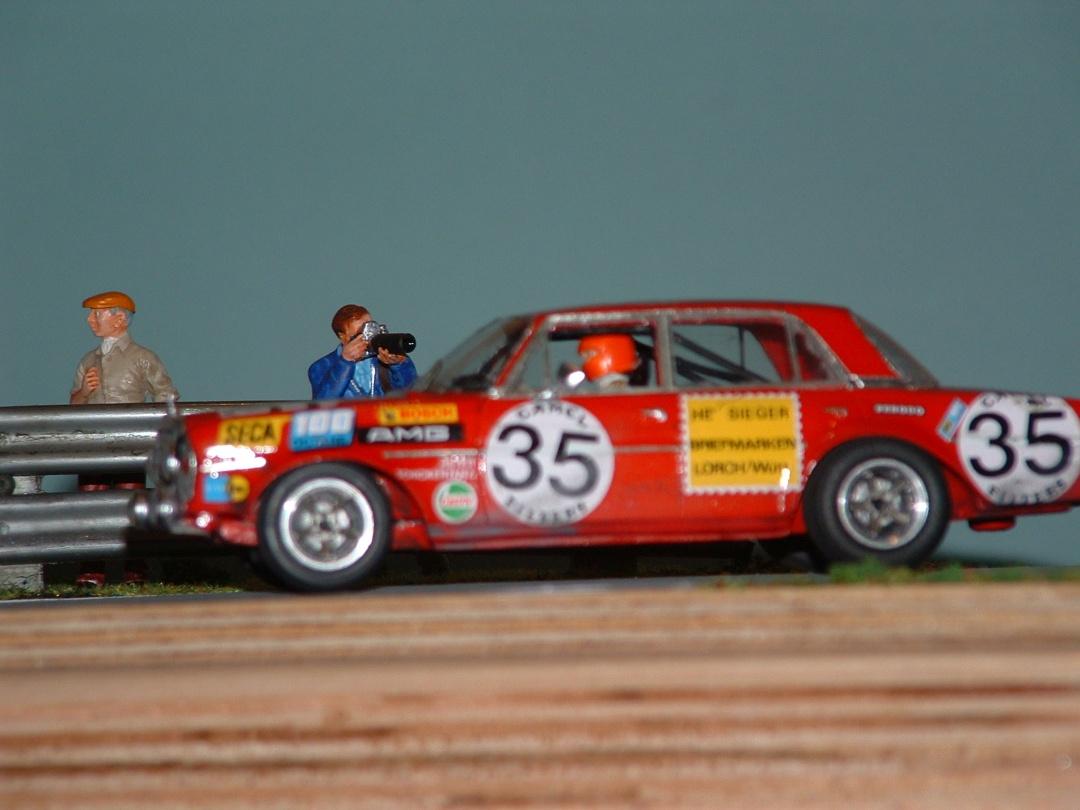
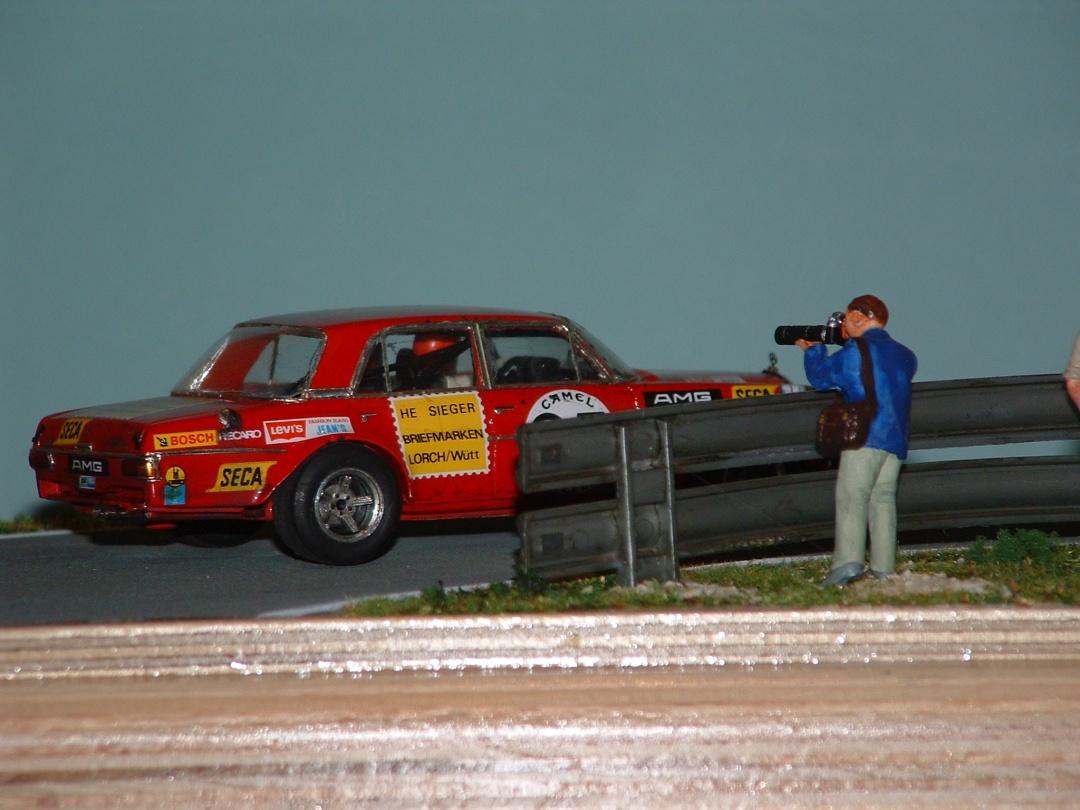
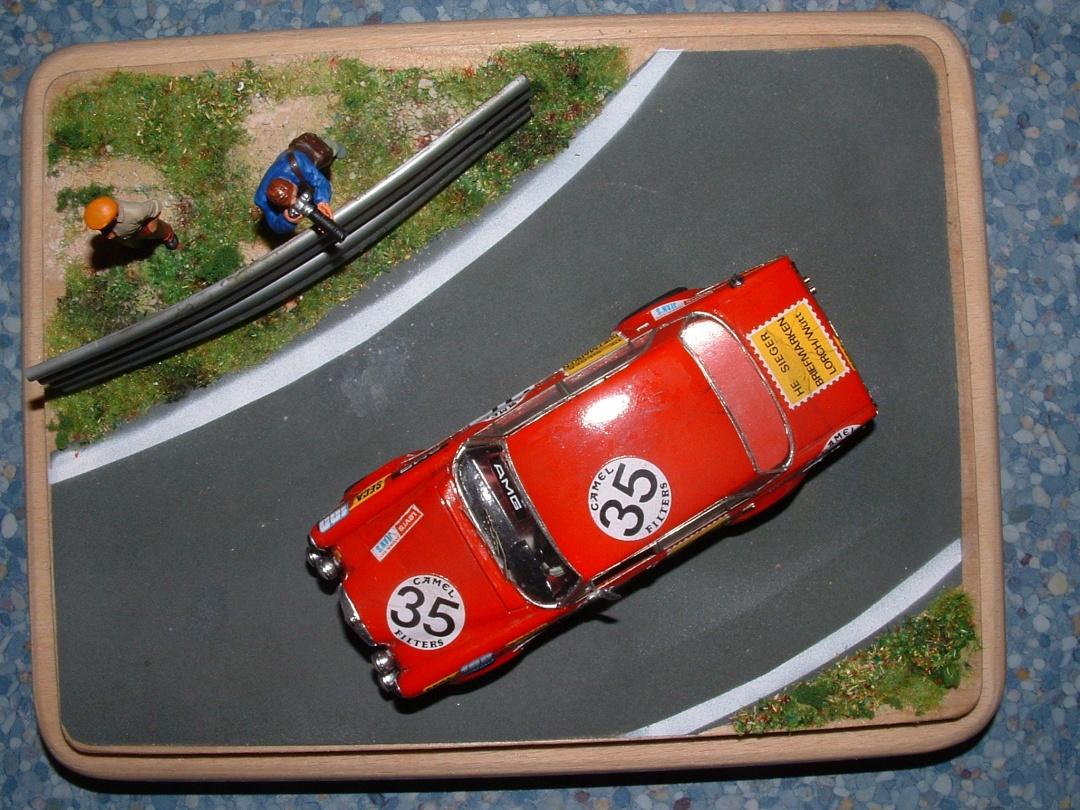
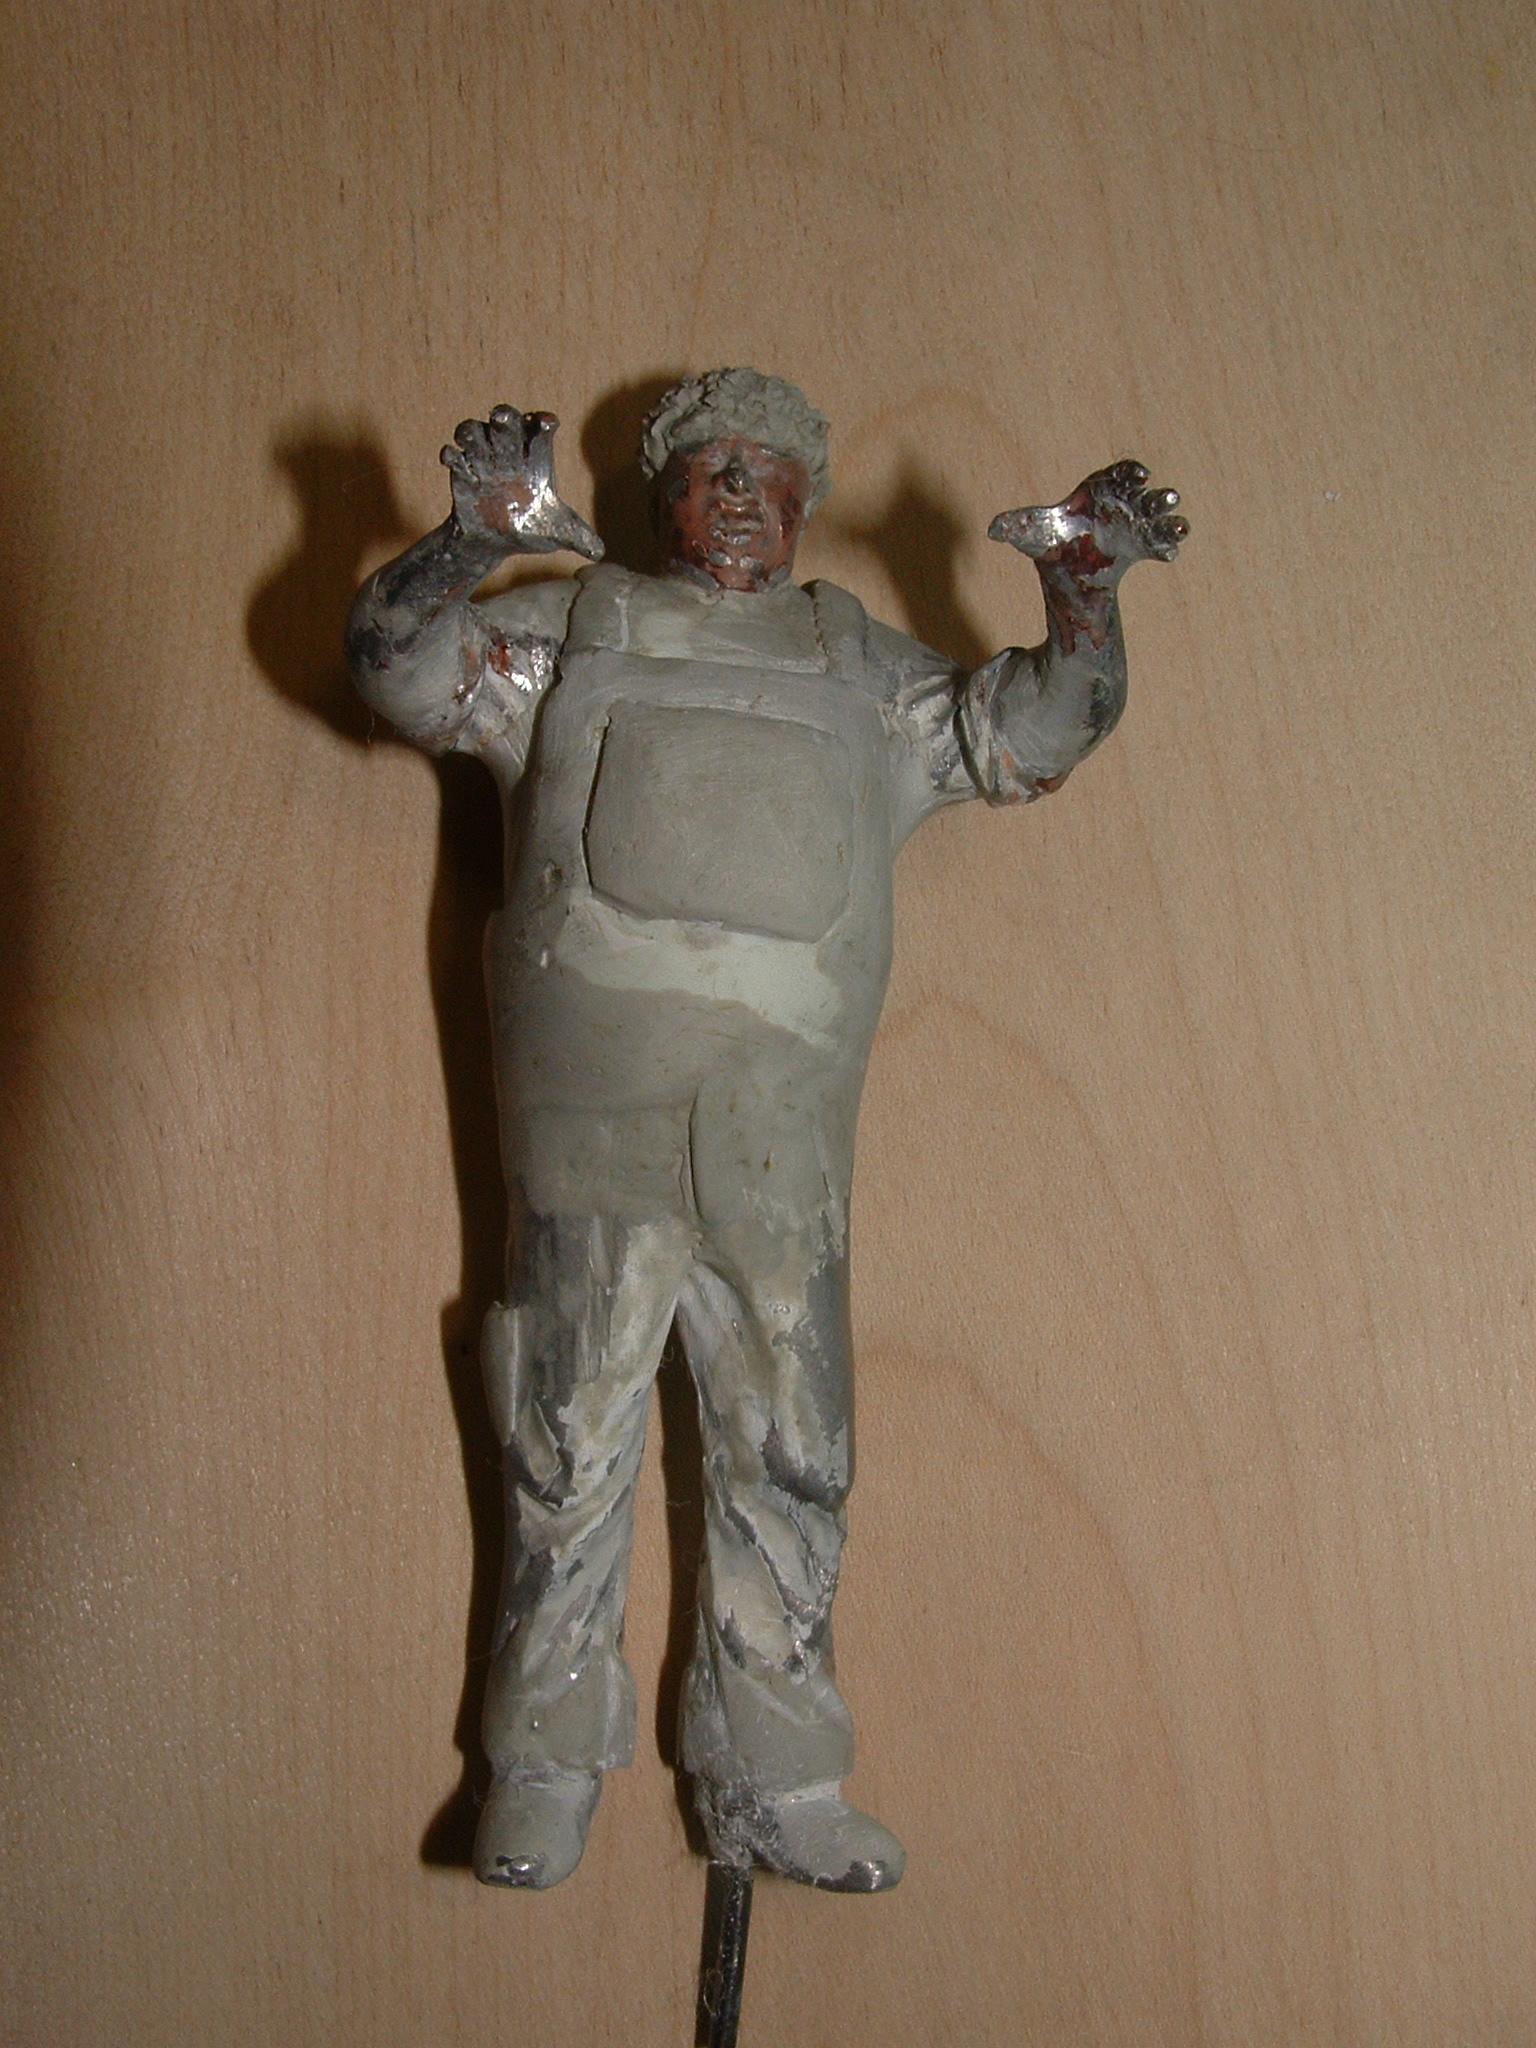
This is a little 1/43 Diorama for a good Friend about the famous "Red Pig", the AMG 300 SEL from the 24 Hours Race at Spa 1971. I use an old Provence Moulage Kit and Pewter figures from Denizen. The Kit lacks all Details on the Chassis and inside, too bad i receive correct info Months after finished it. So it is absolutly incorrect ? AMG drove this Car with full Interior, Woodinlays, leather and so on......I go the wrong Way with a bare raceinterior. Build a full Rollcage with Copperwire, added Plastic strips on the Rear to simulate the Wheel Innerarch. Convertet a Denizem Figure to fit inside.After painting i added the provided Fireextingusher and added two paperstrips for the Harness. Paint is Acrylic as always, dont now anymore what brand, i think i used Gunze. The Wheels are turned Aluminium Rims with Pewter inlays. This Inlays got a slight polish and a bit Weathering with very thin Oilwashing. I glue the Wheels all on the Rods and on the Chassis. This got underside a flat black paint. The Bodyshell is very fine casted, no Bubbles or inaccuracies, a bit fiddly are the Chromestrips around the Car. This are very fine Etchparts. I paint it with the same bright red, added the Etchparts with Woodglue, Decasl as usual and go over it with Gunze Gloss clear. This takes Weeks to harden.....A big Challenge where those Windscreens. Must be cut out from Vacuformed Clearplastic, i have never done this before, well my Neighbors knows iam at home ?? meanwhile i altered a figure from Denizen. The man with the Flag got to be a Photographer, as seenn on a Originalpic from the race. A bit Cutting an d bending, Putty do the rest. Camerabag is some bag from 1/35 Militaryfigure. The Camera itself should represented a Canon F1, build scratch from Plasticparts. For the Dioplate i use two Woodplates , glue together, paint the Road, added a bit Grass from Modelrailroad Supliers and a Rail from my Slottrack. Now this little Thing has a Special Place in the Office of my Friend. Btw he restores Classic Cars, overall mercedes....? Regards Harry
-
Thank you all Guys !
-

Pearson Torino
smartdriver replied to yellowsportwagon's topic in WIP: Stock Cars (NASCAR, Super Stock, Late Model, etc.)
Very good Build Sir ! This is one of the Cars that catch my Eye and guide me to the "Aero Wars" . -
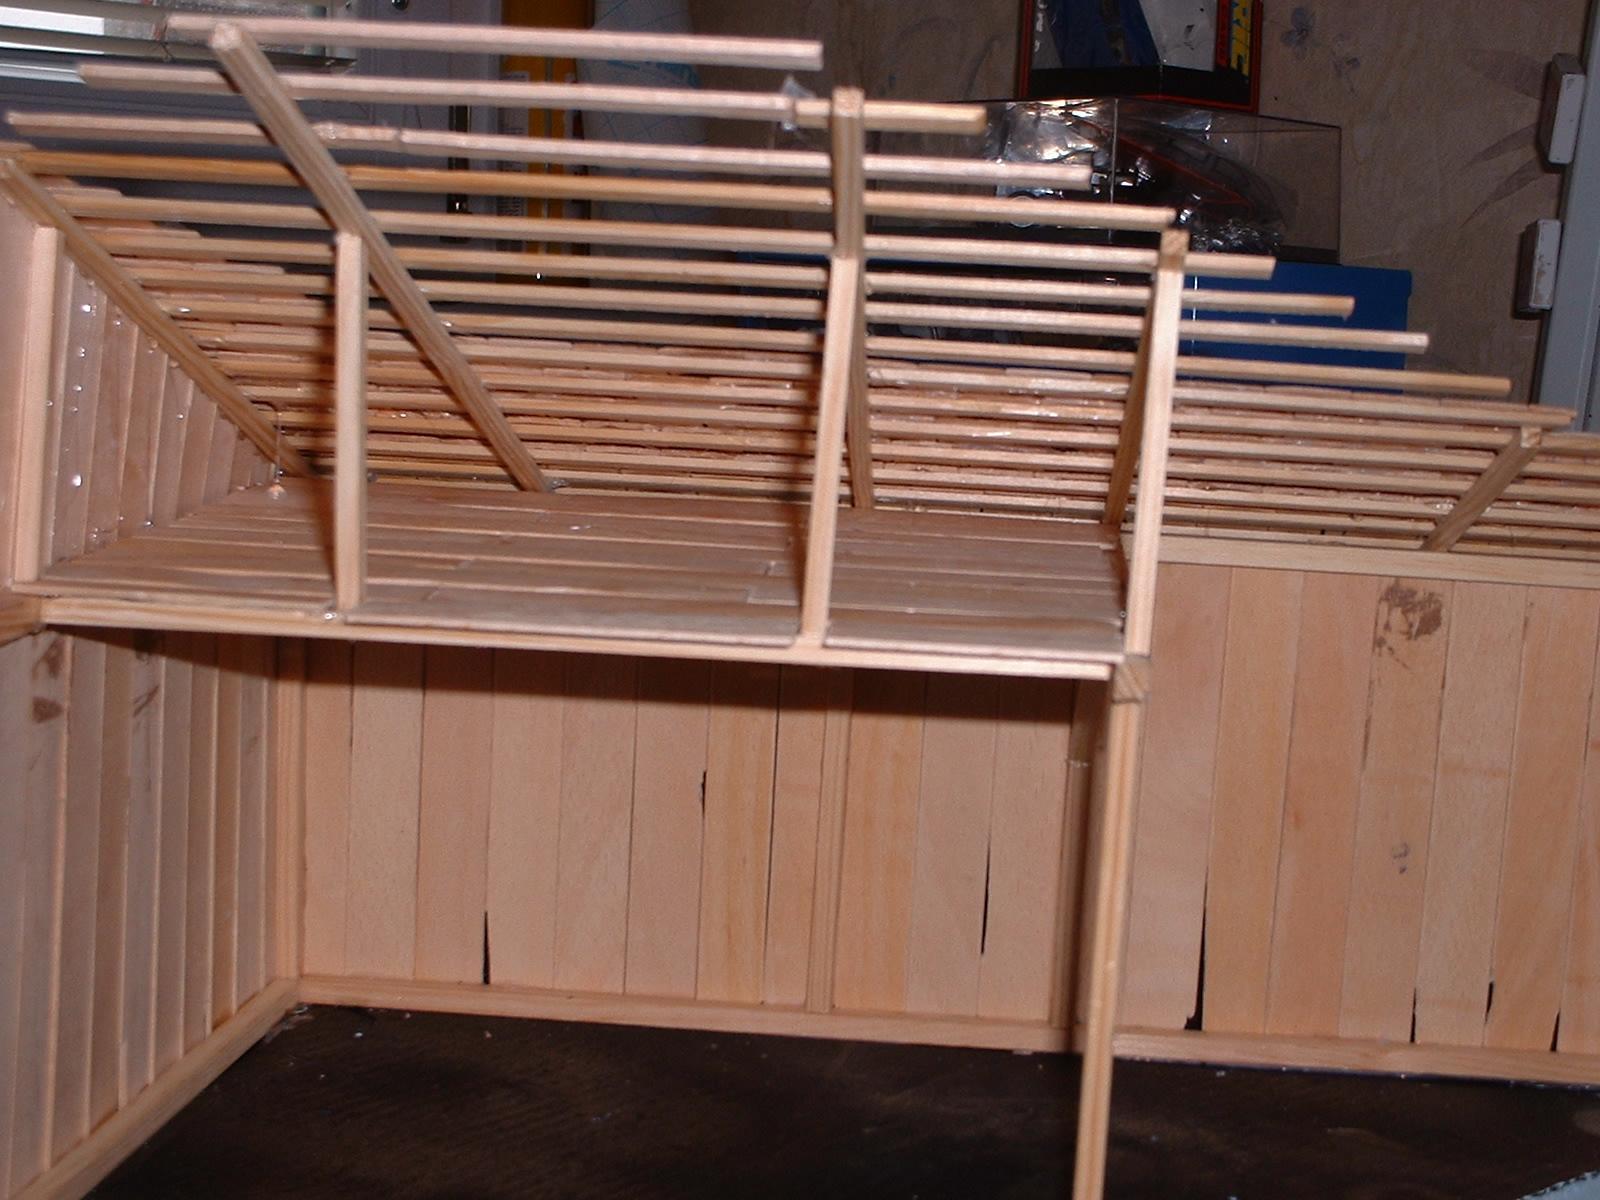
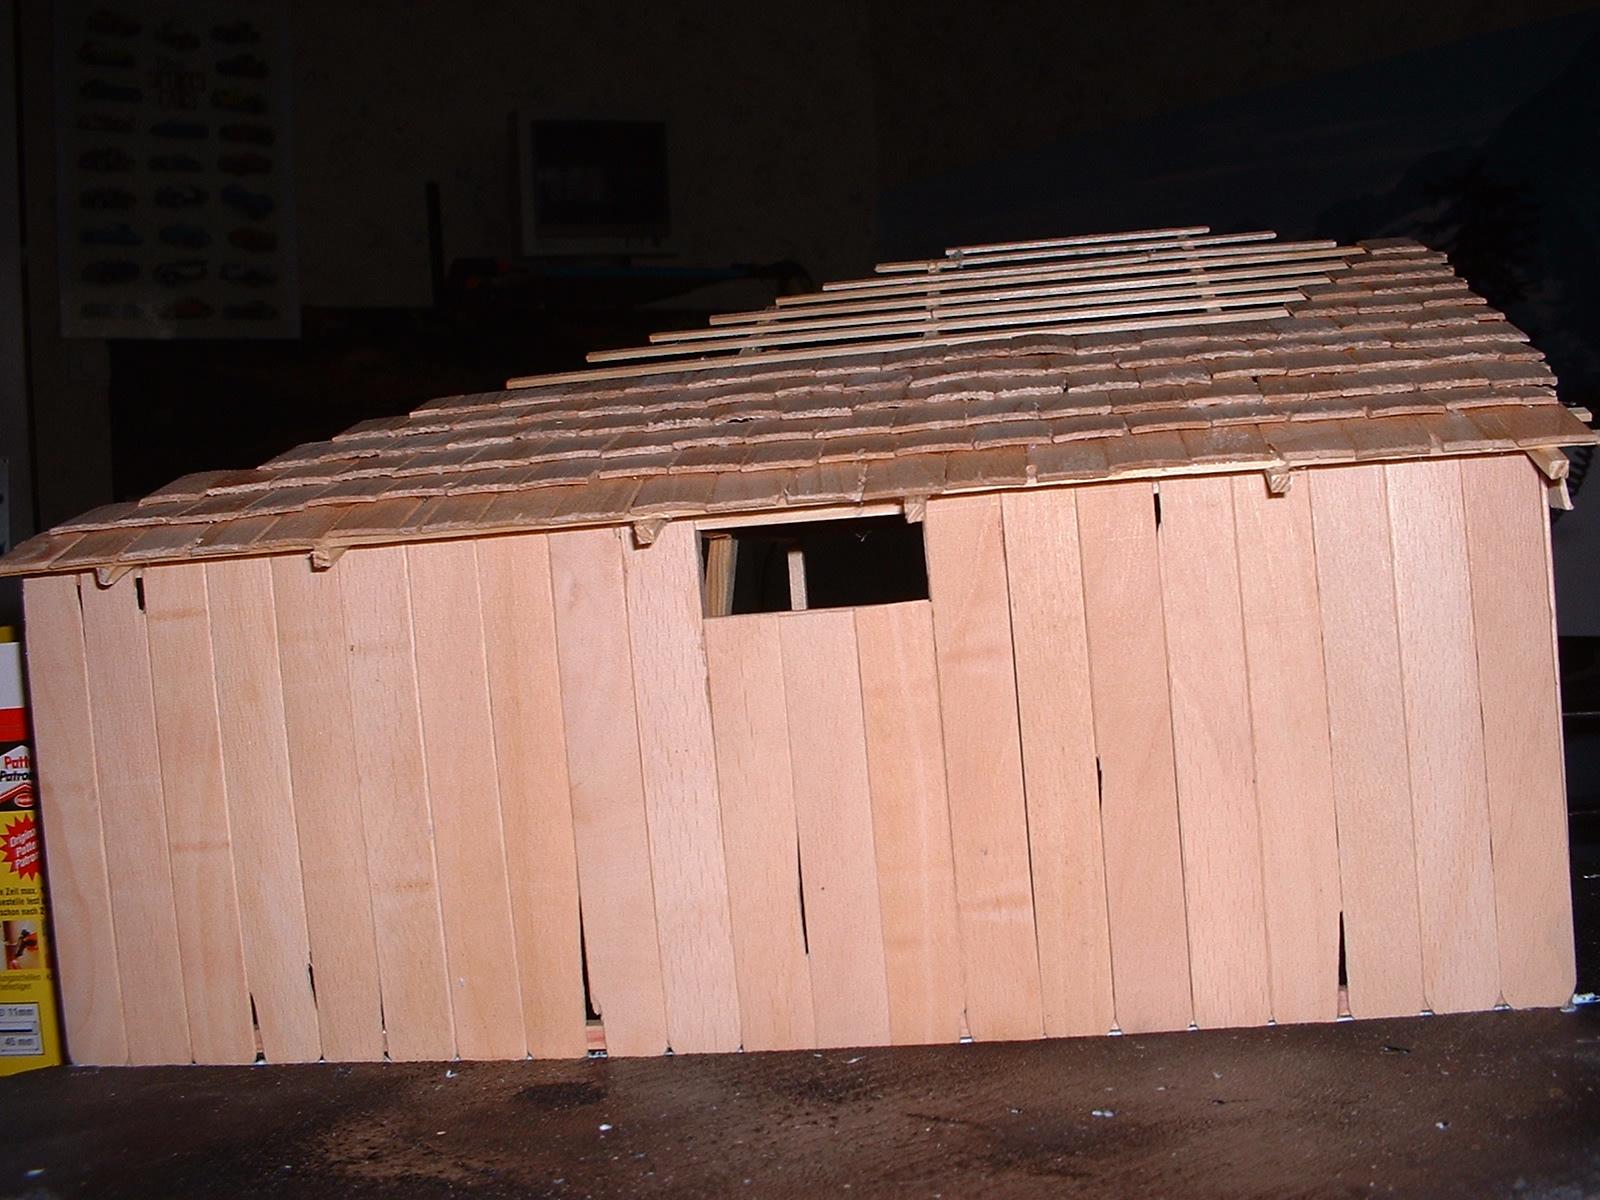
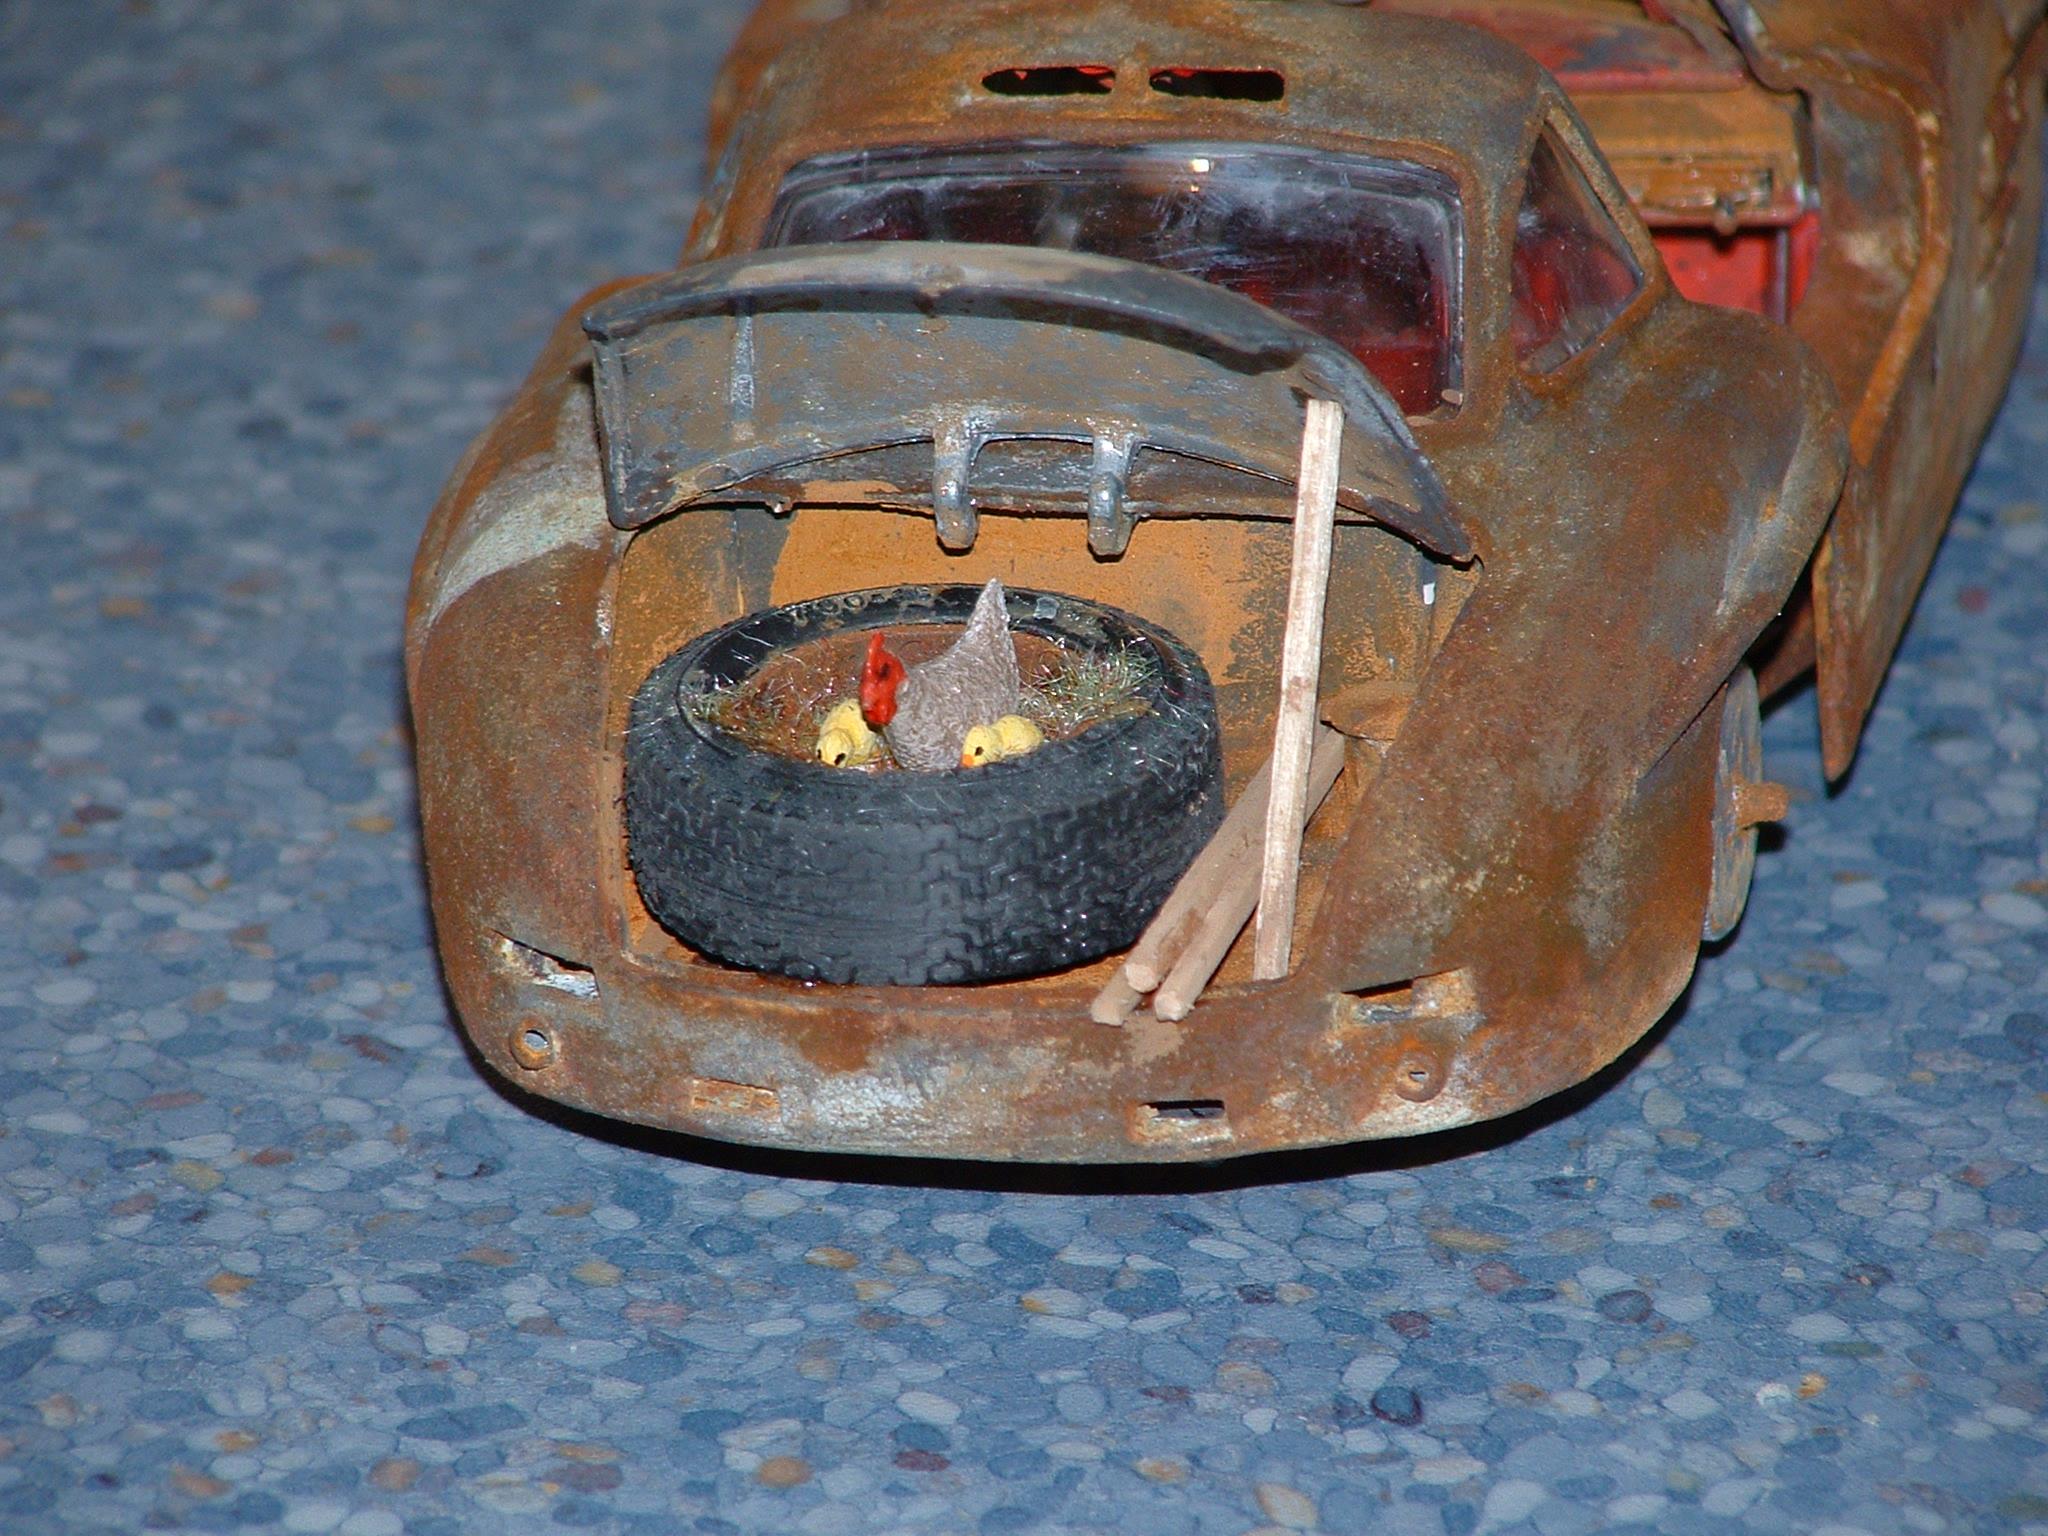
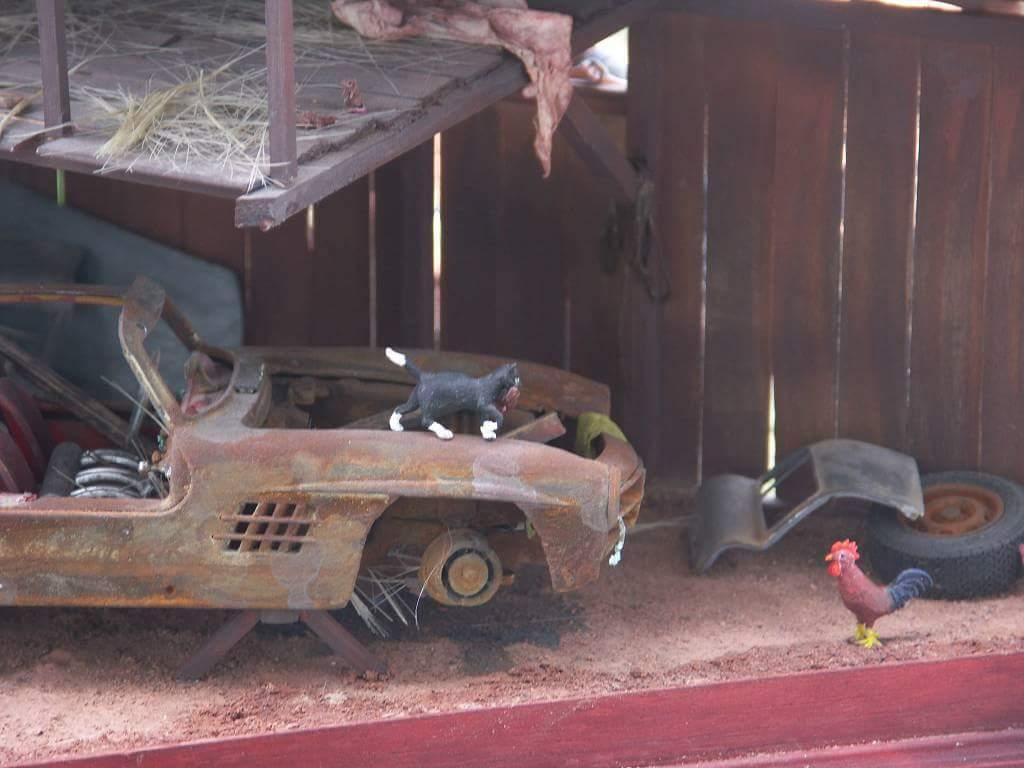
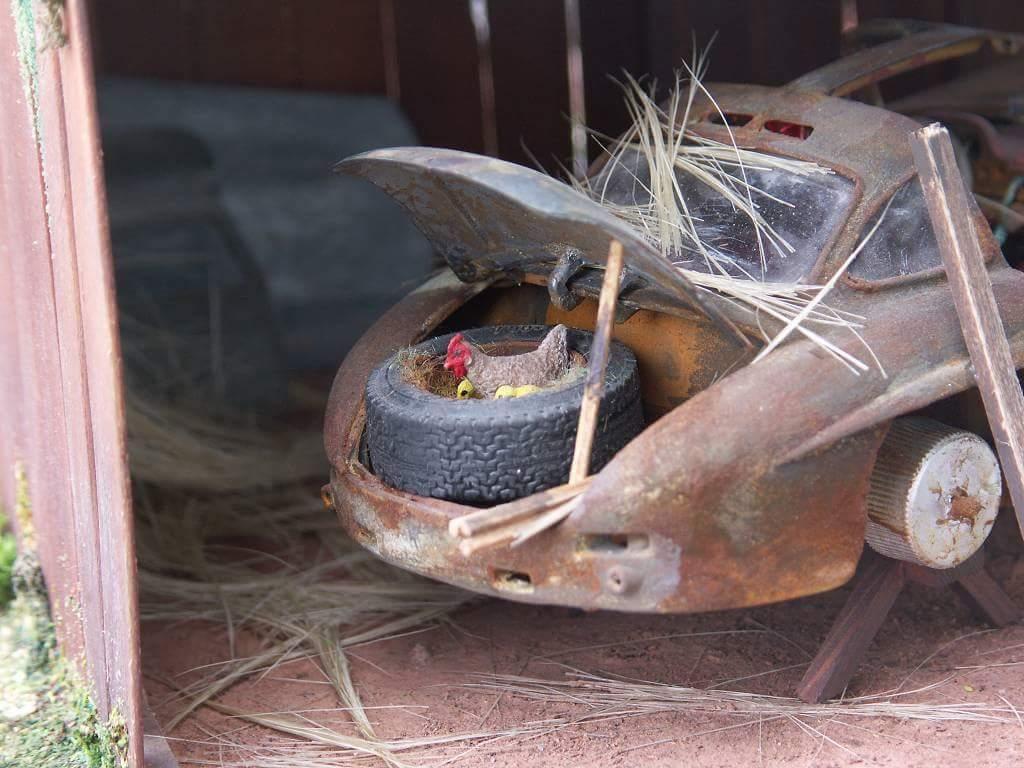
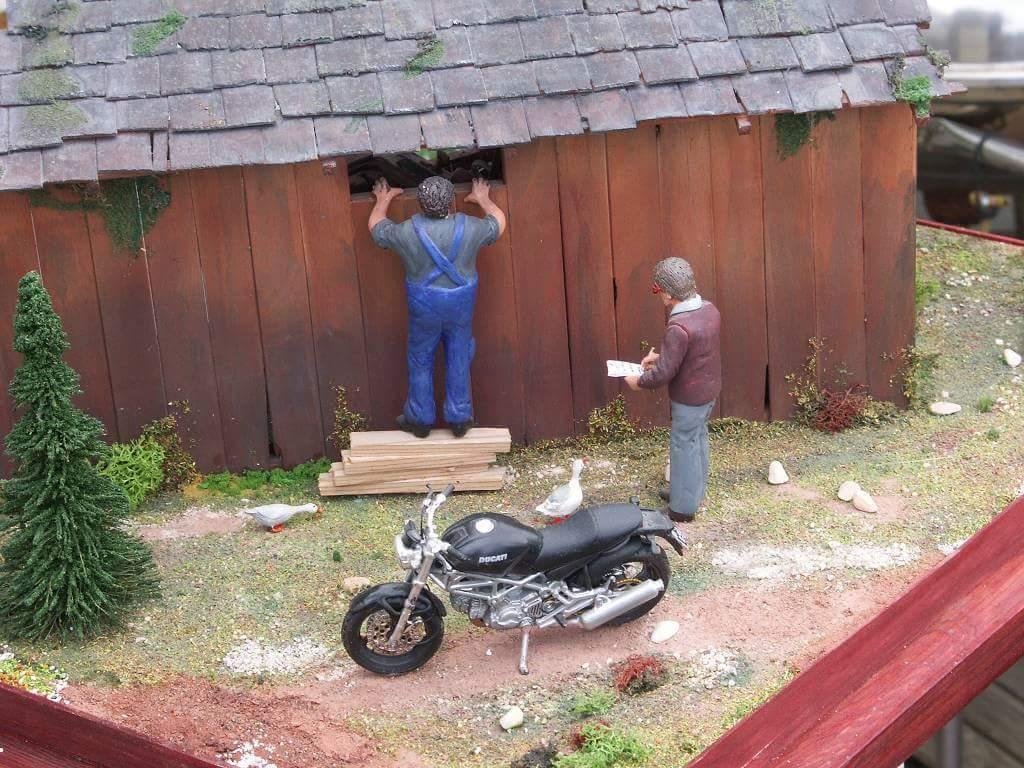
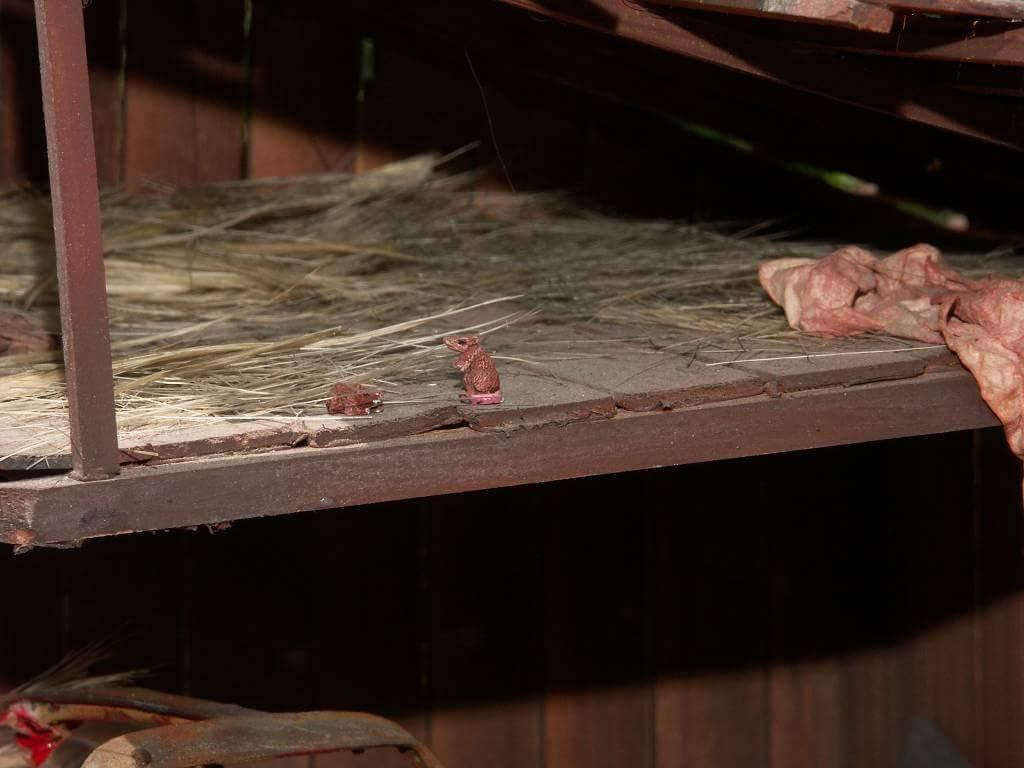
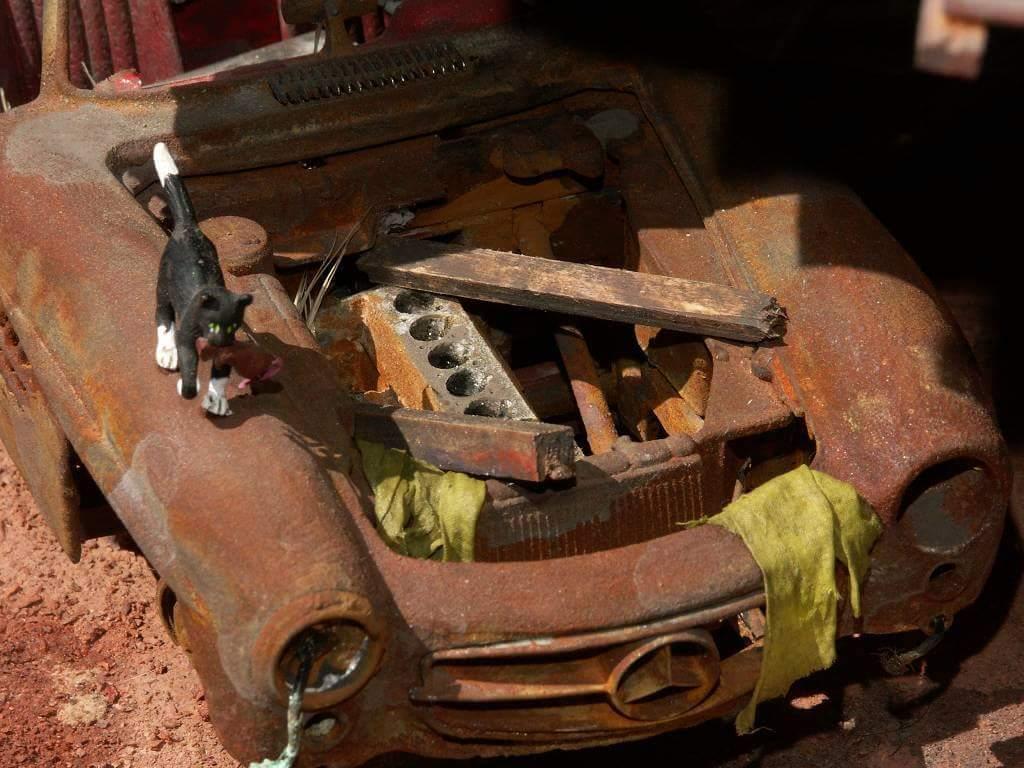
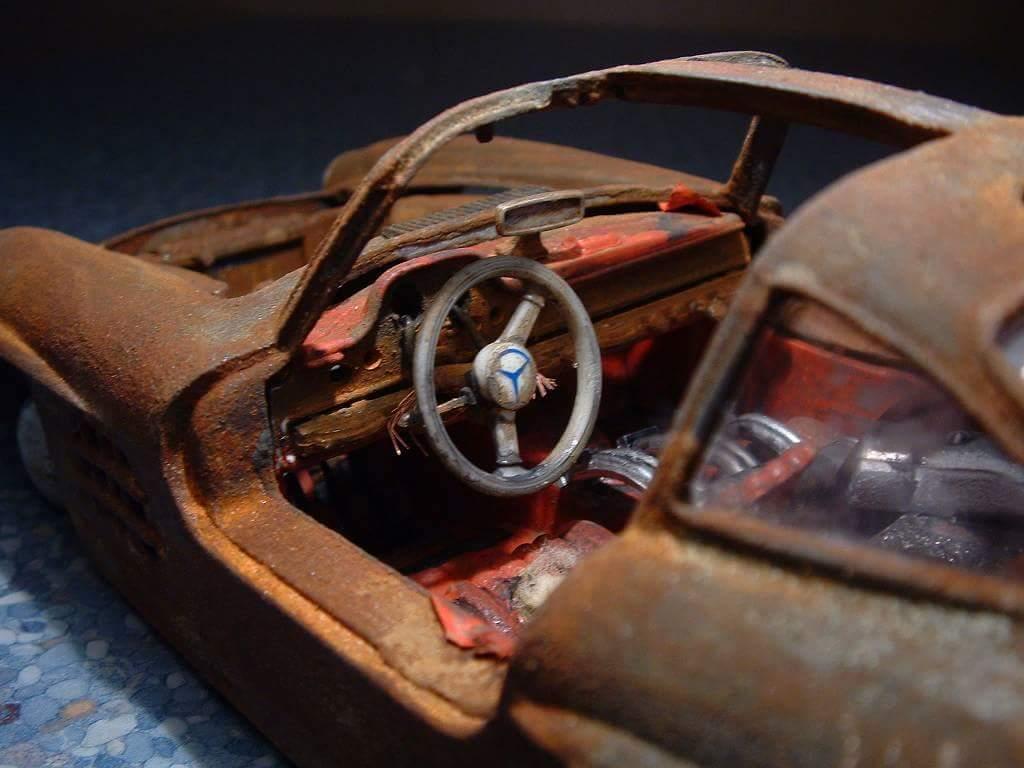
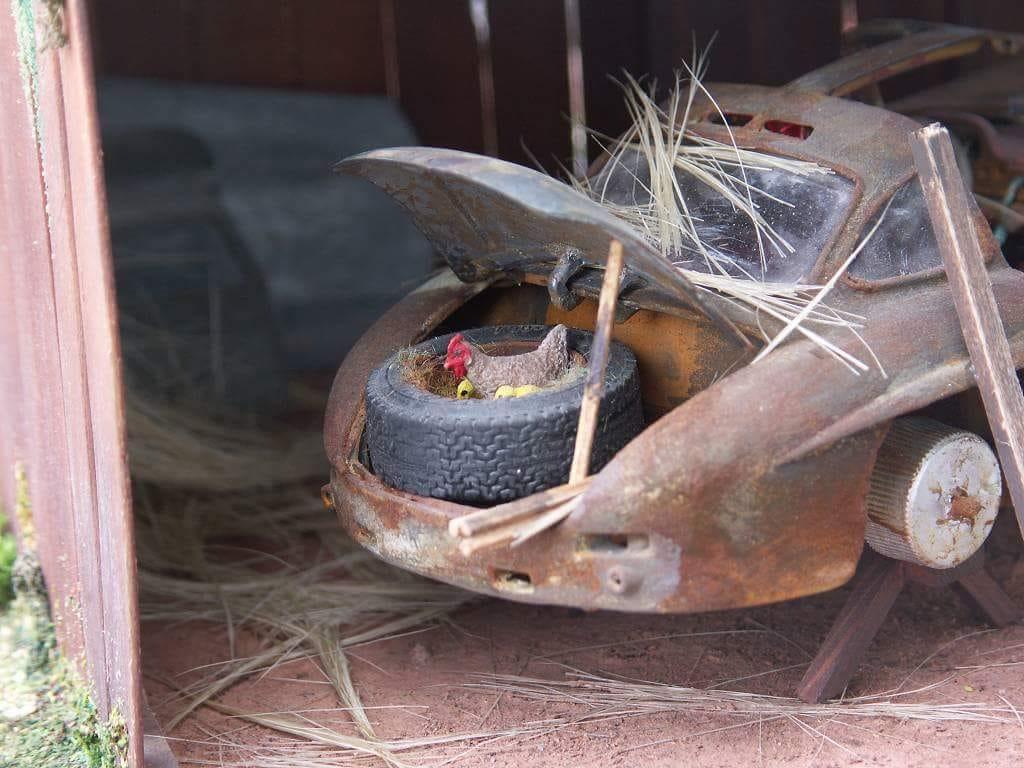
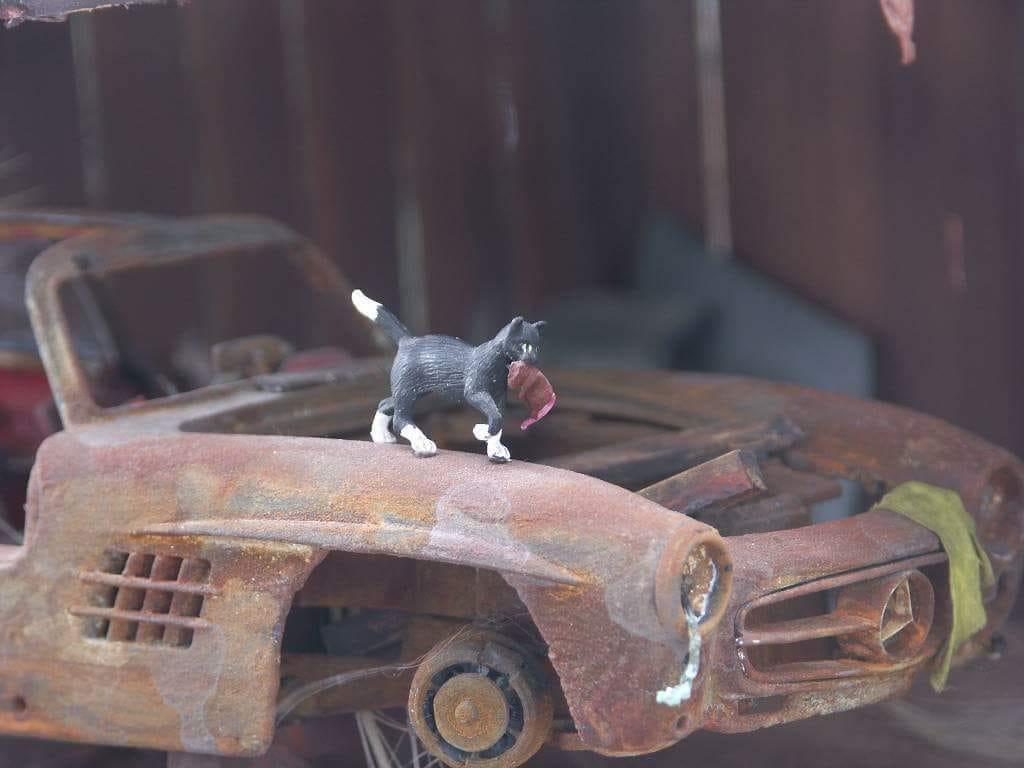
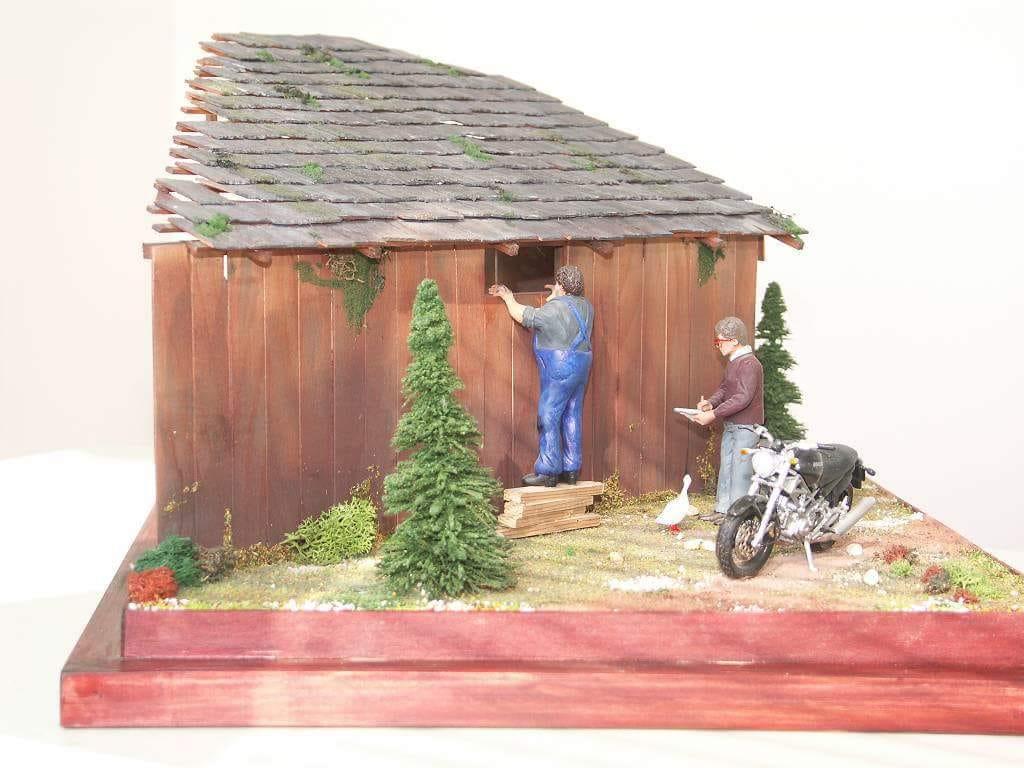
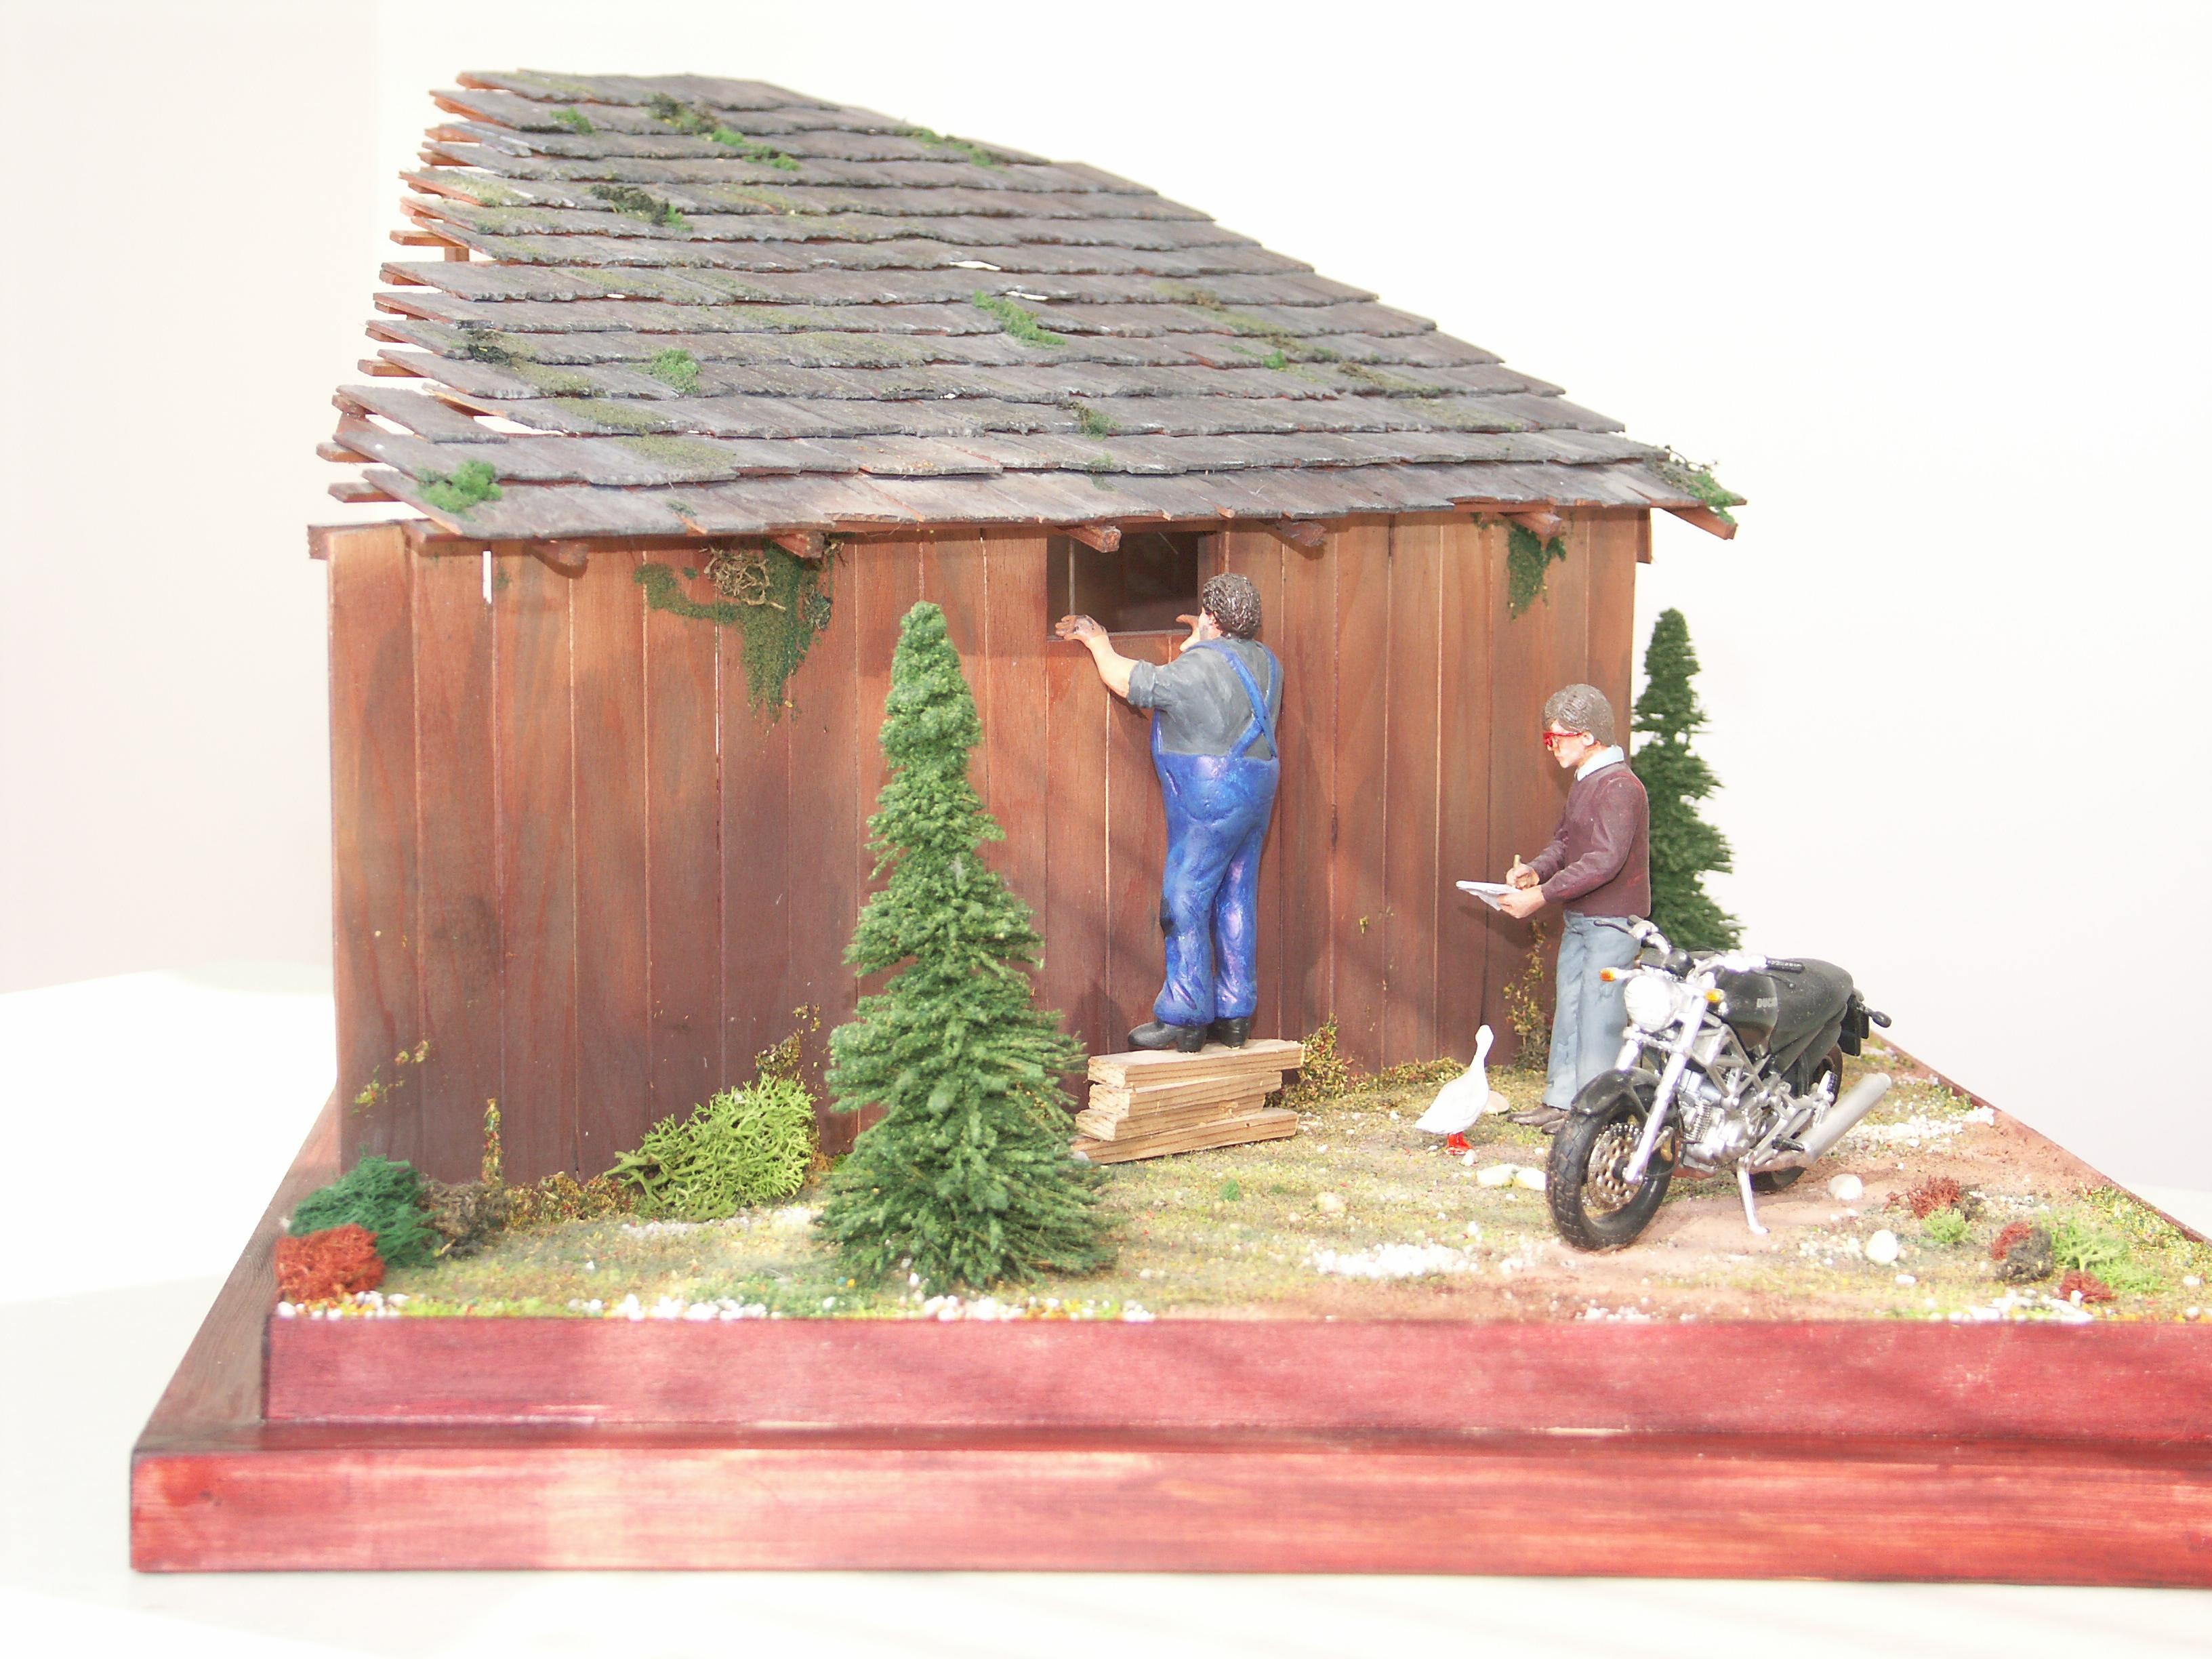
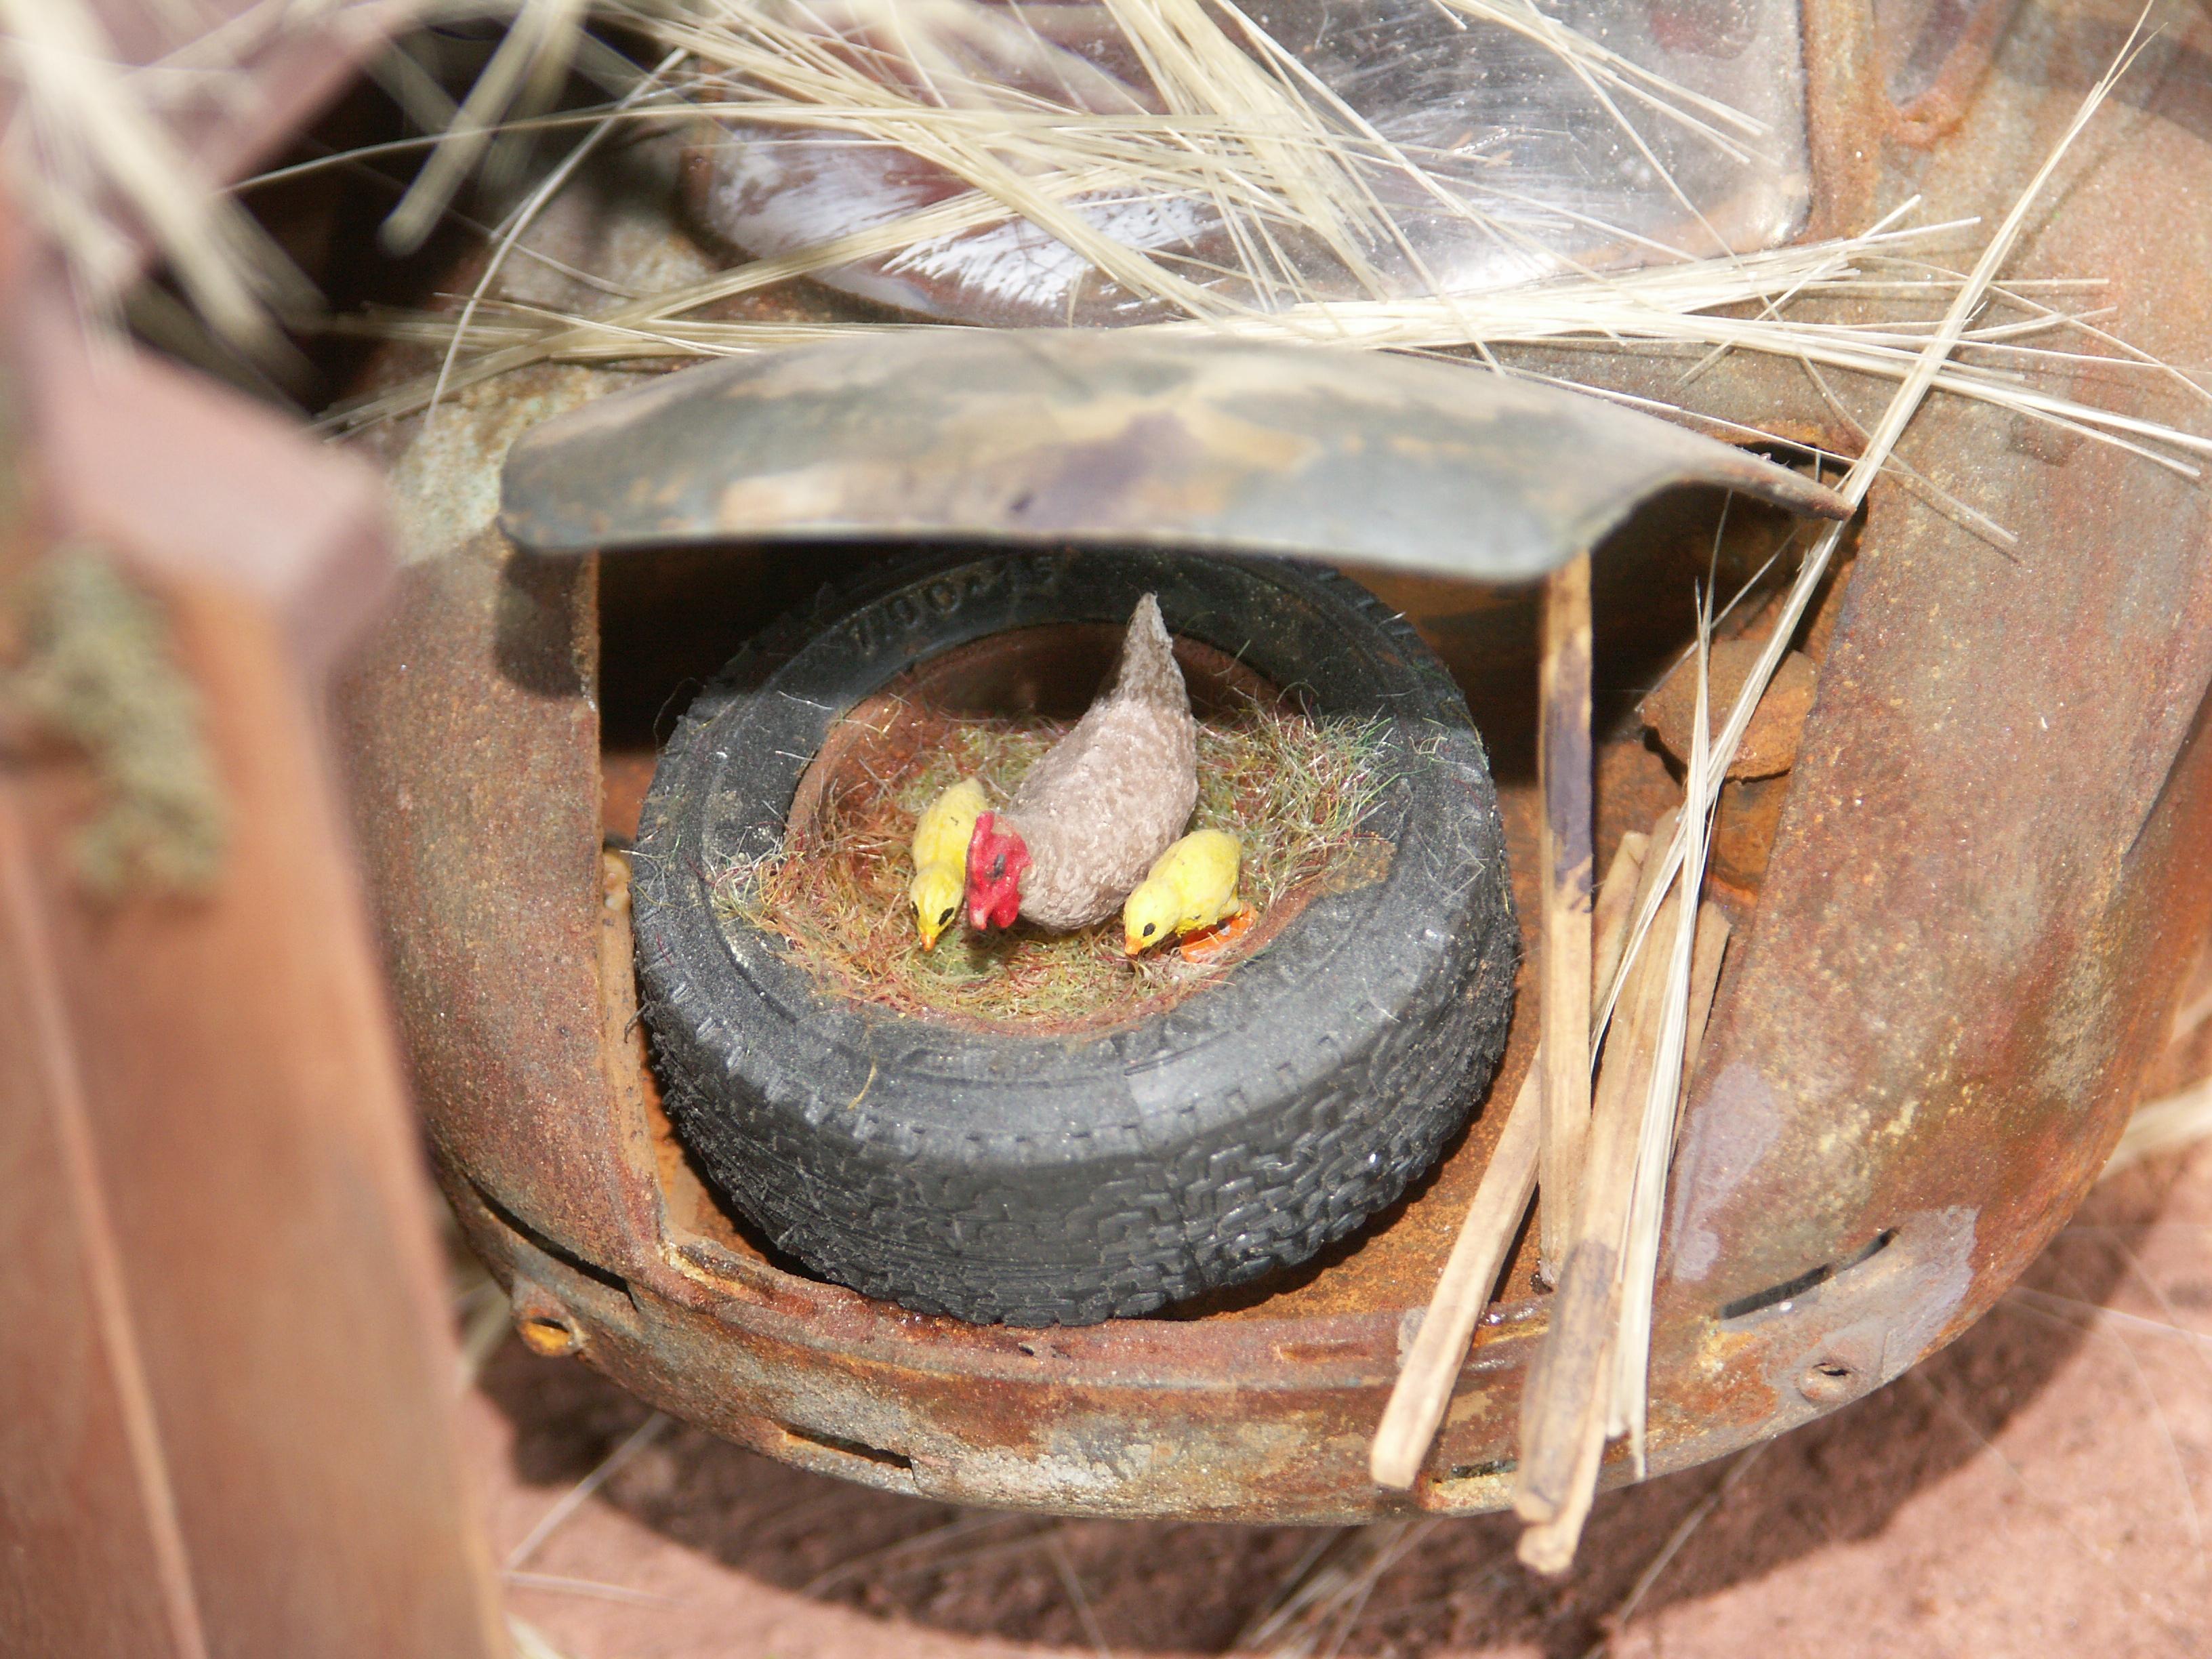
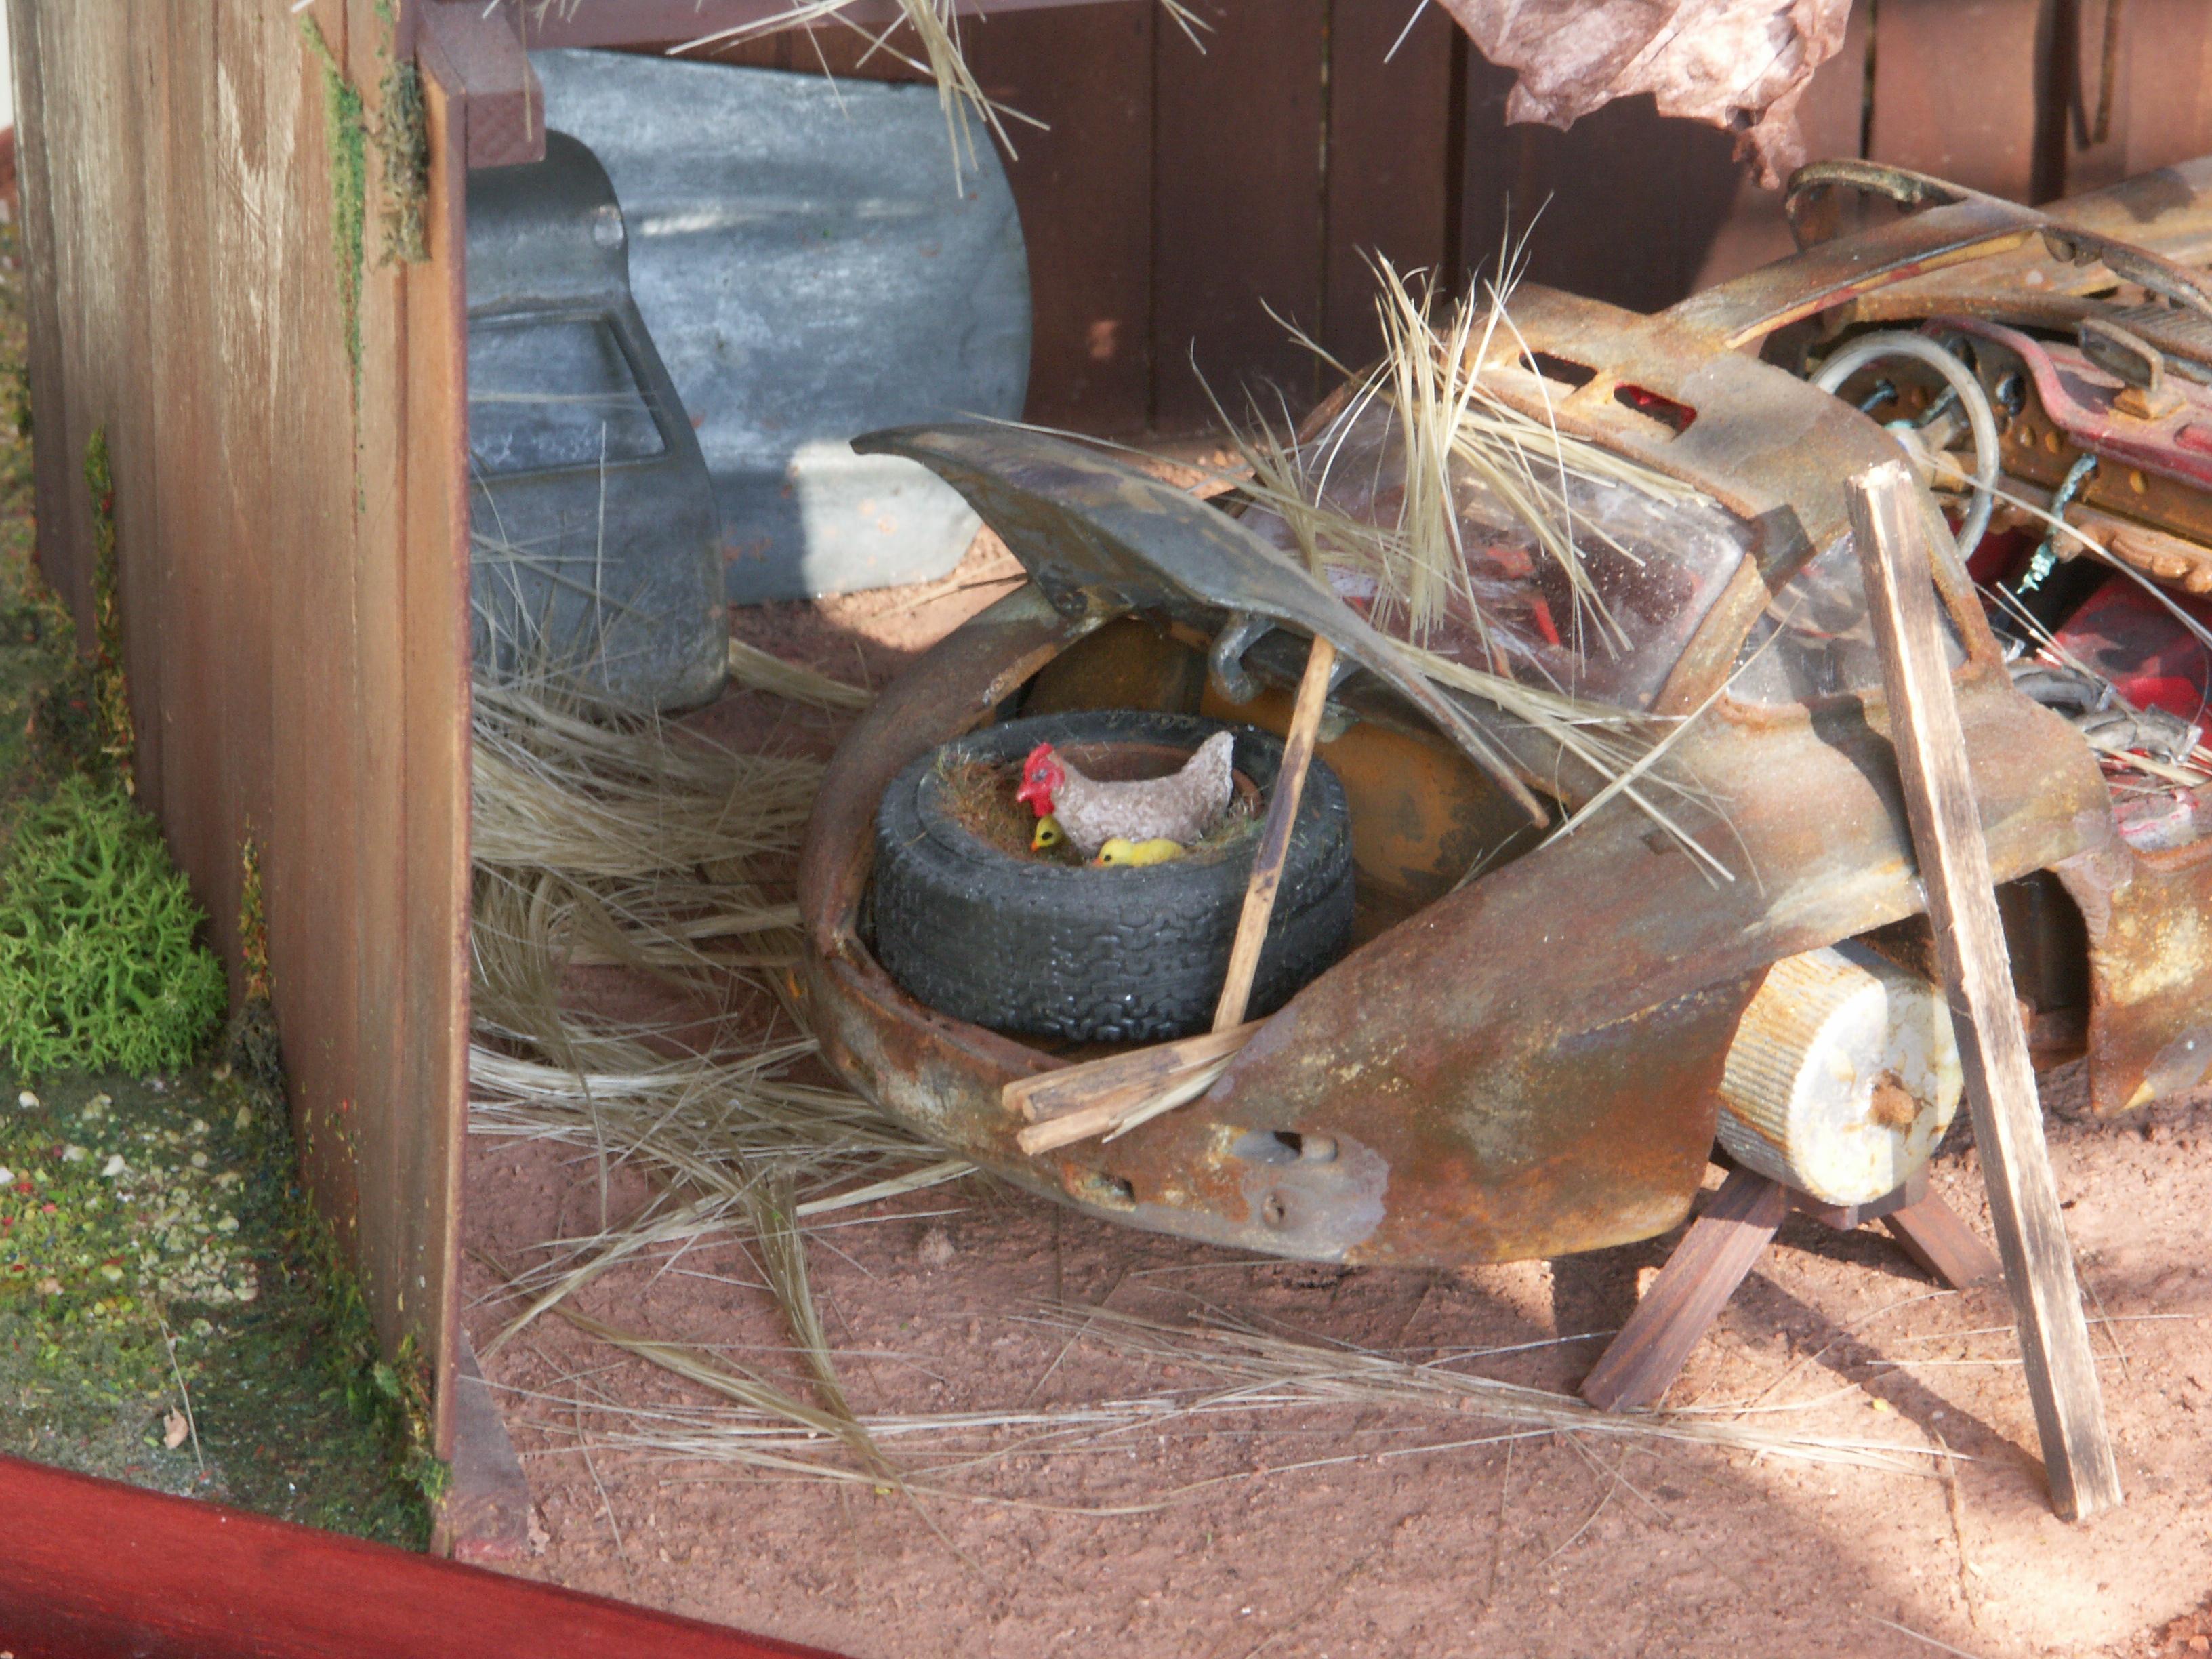
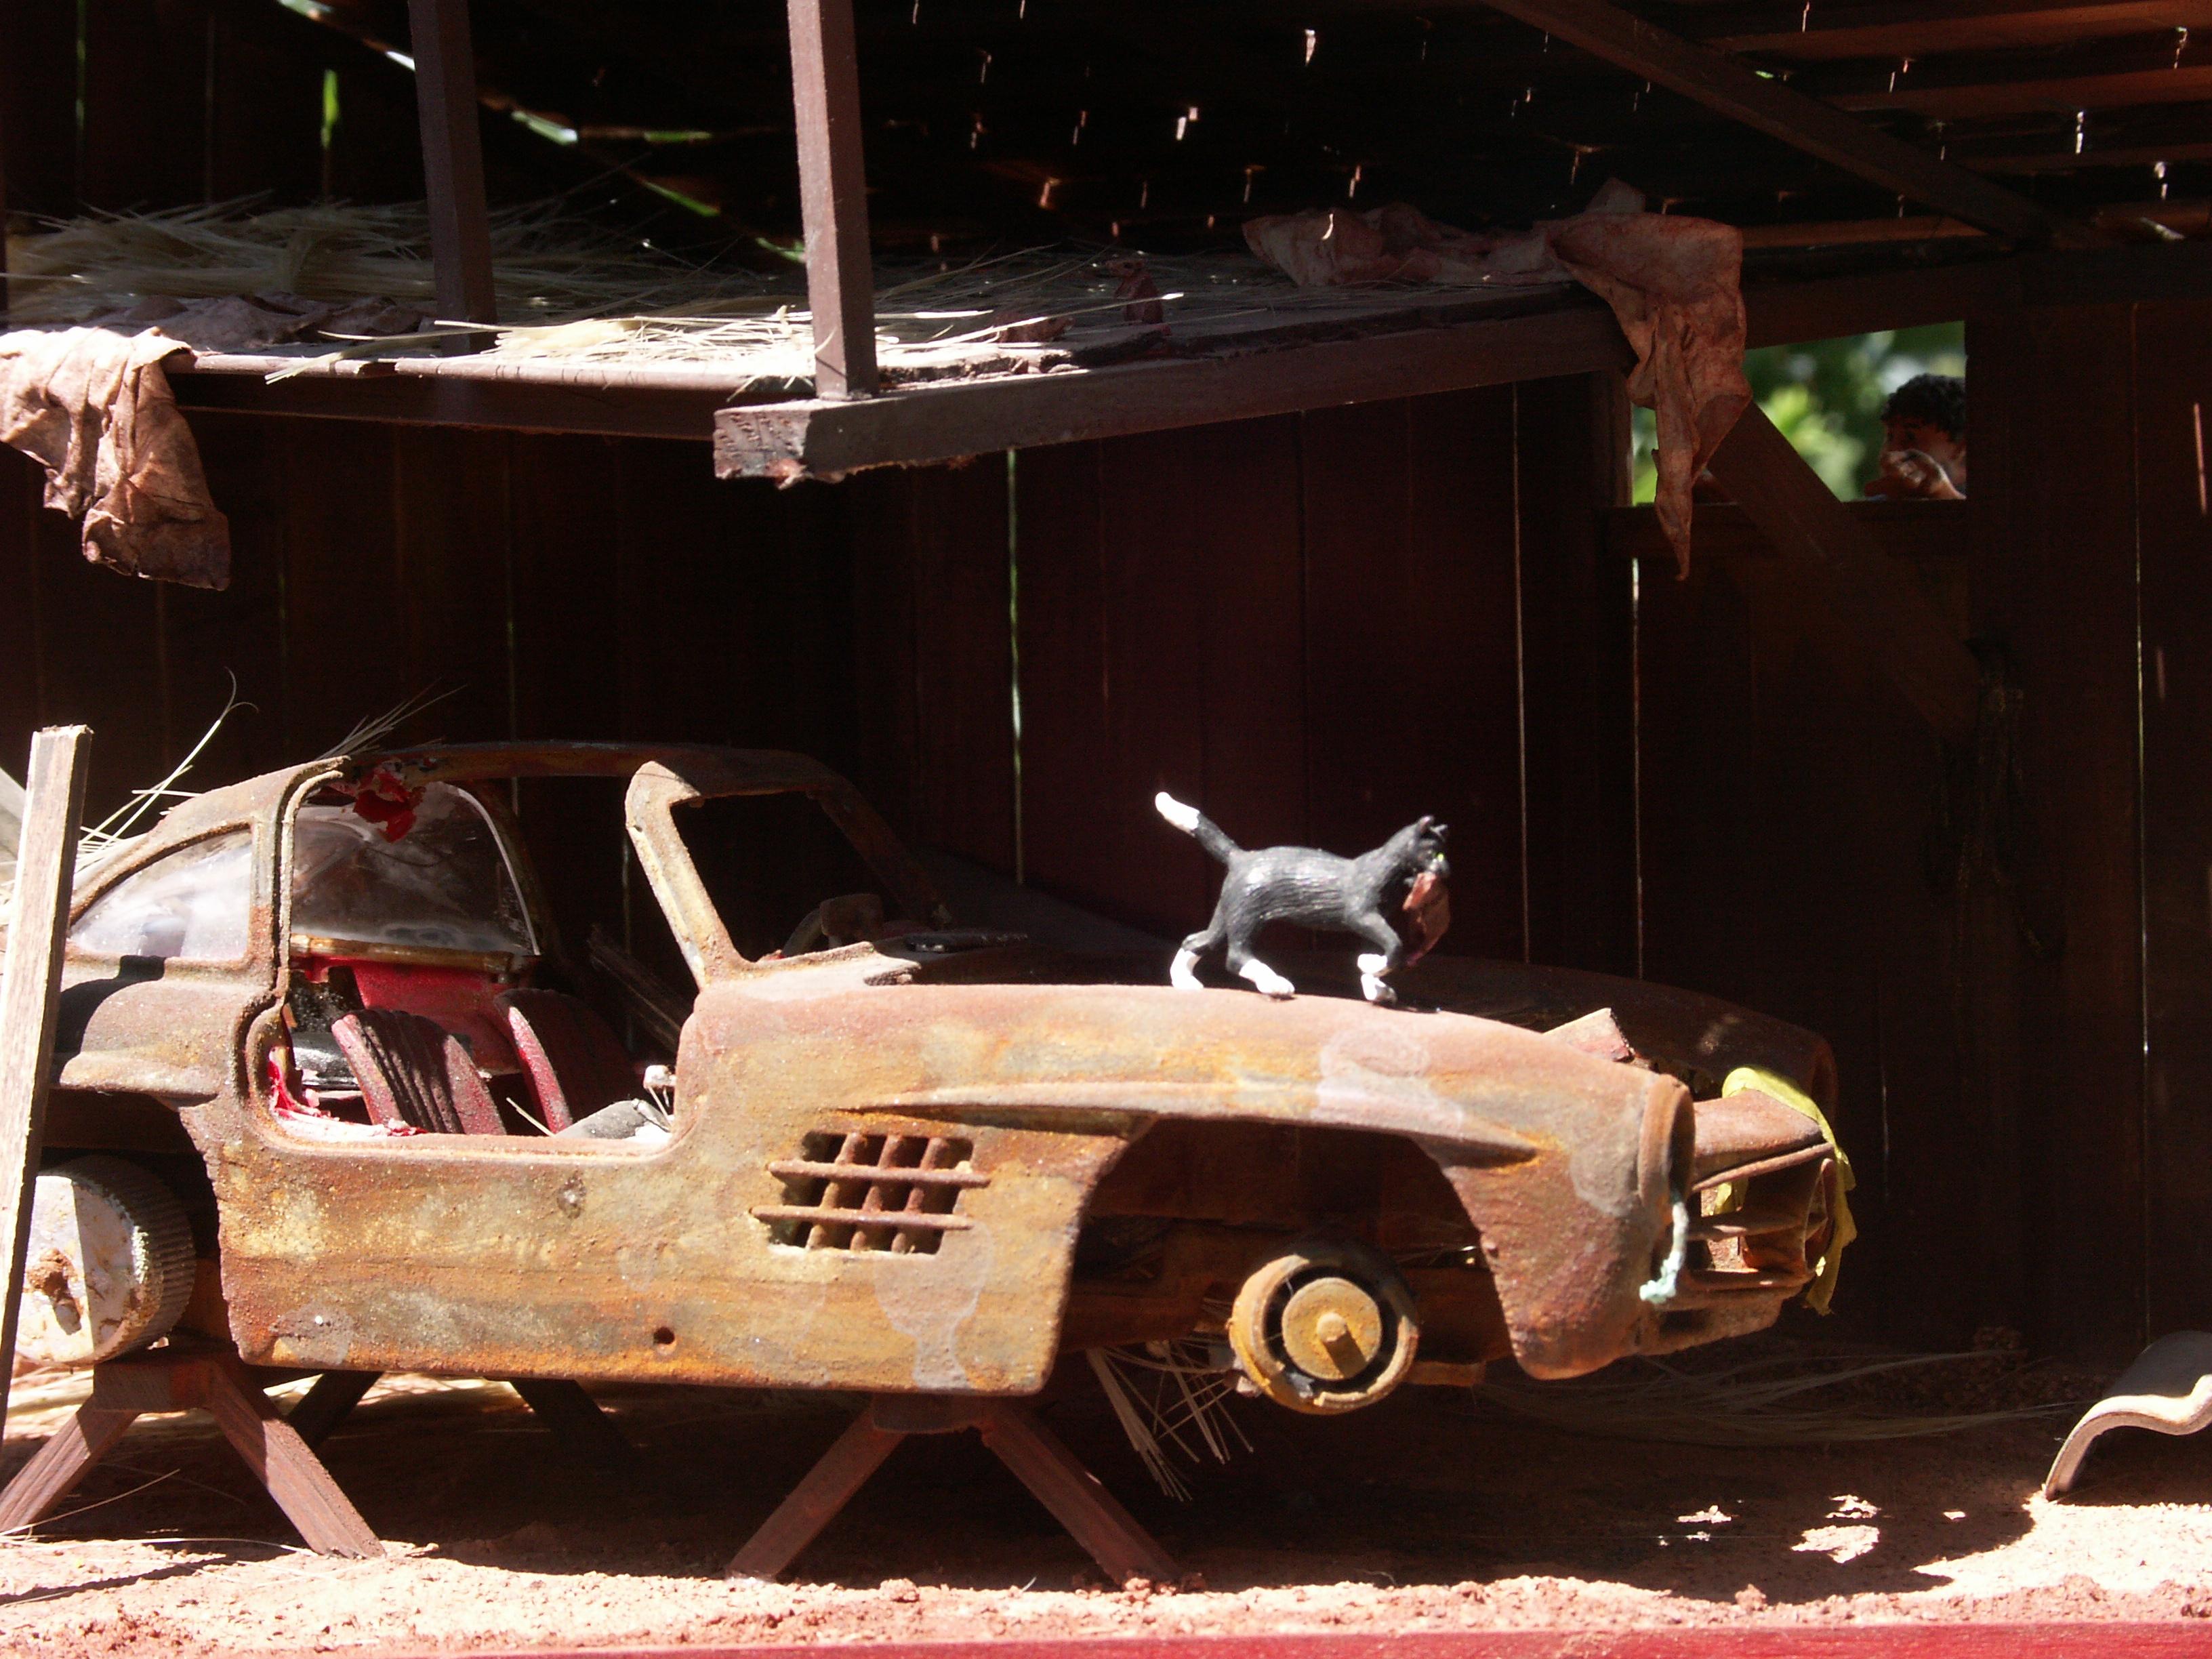
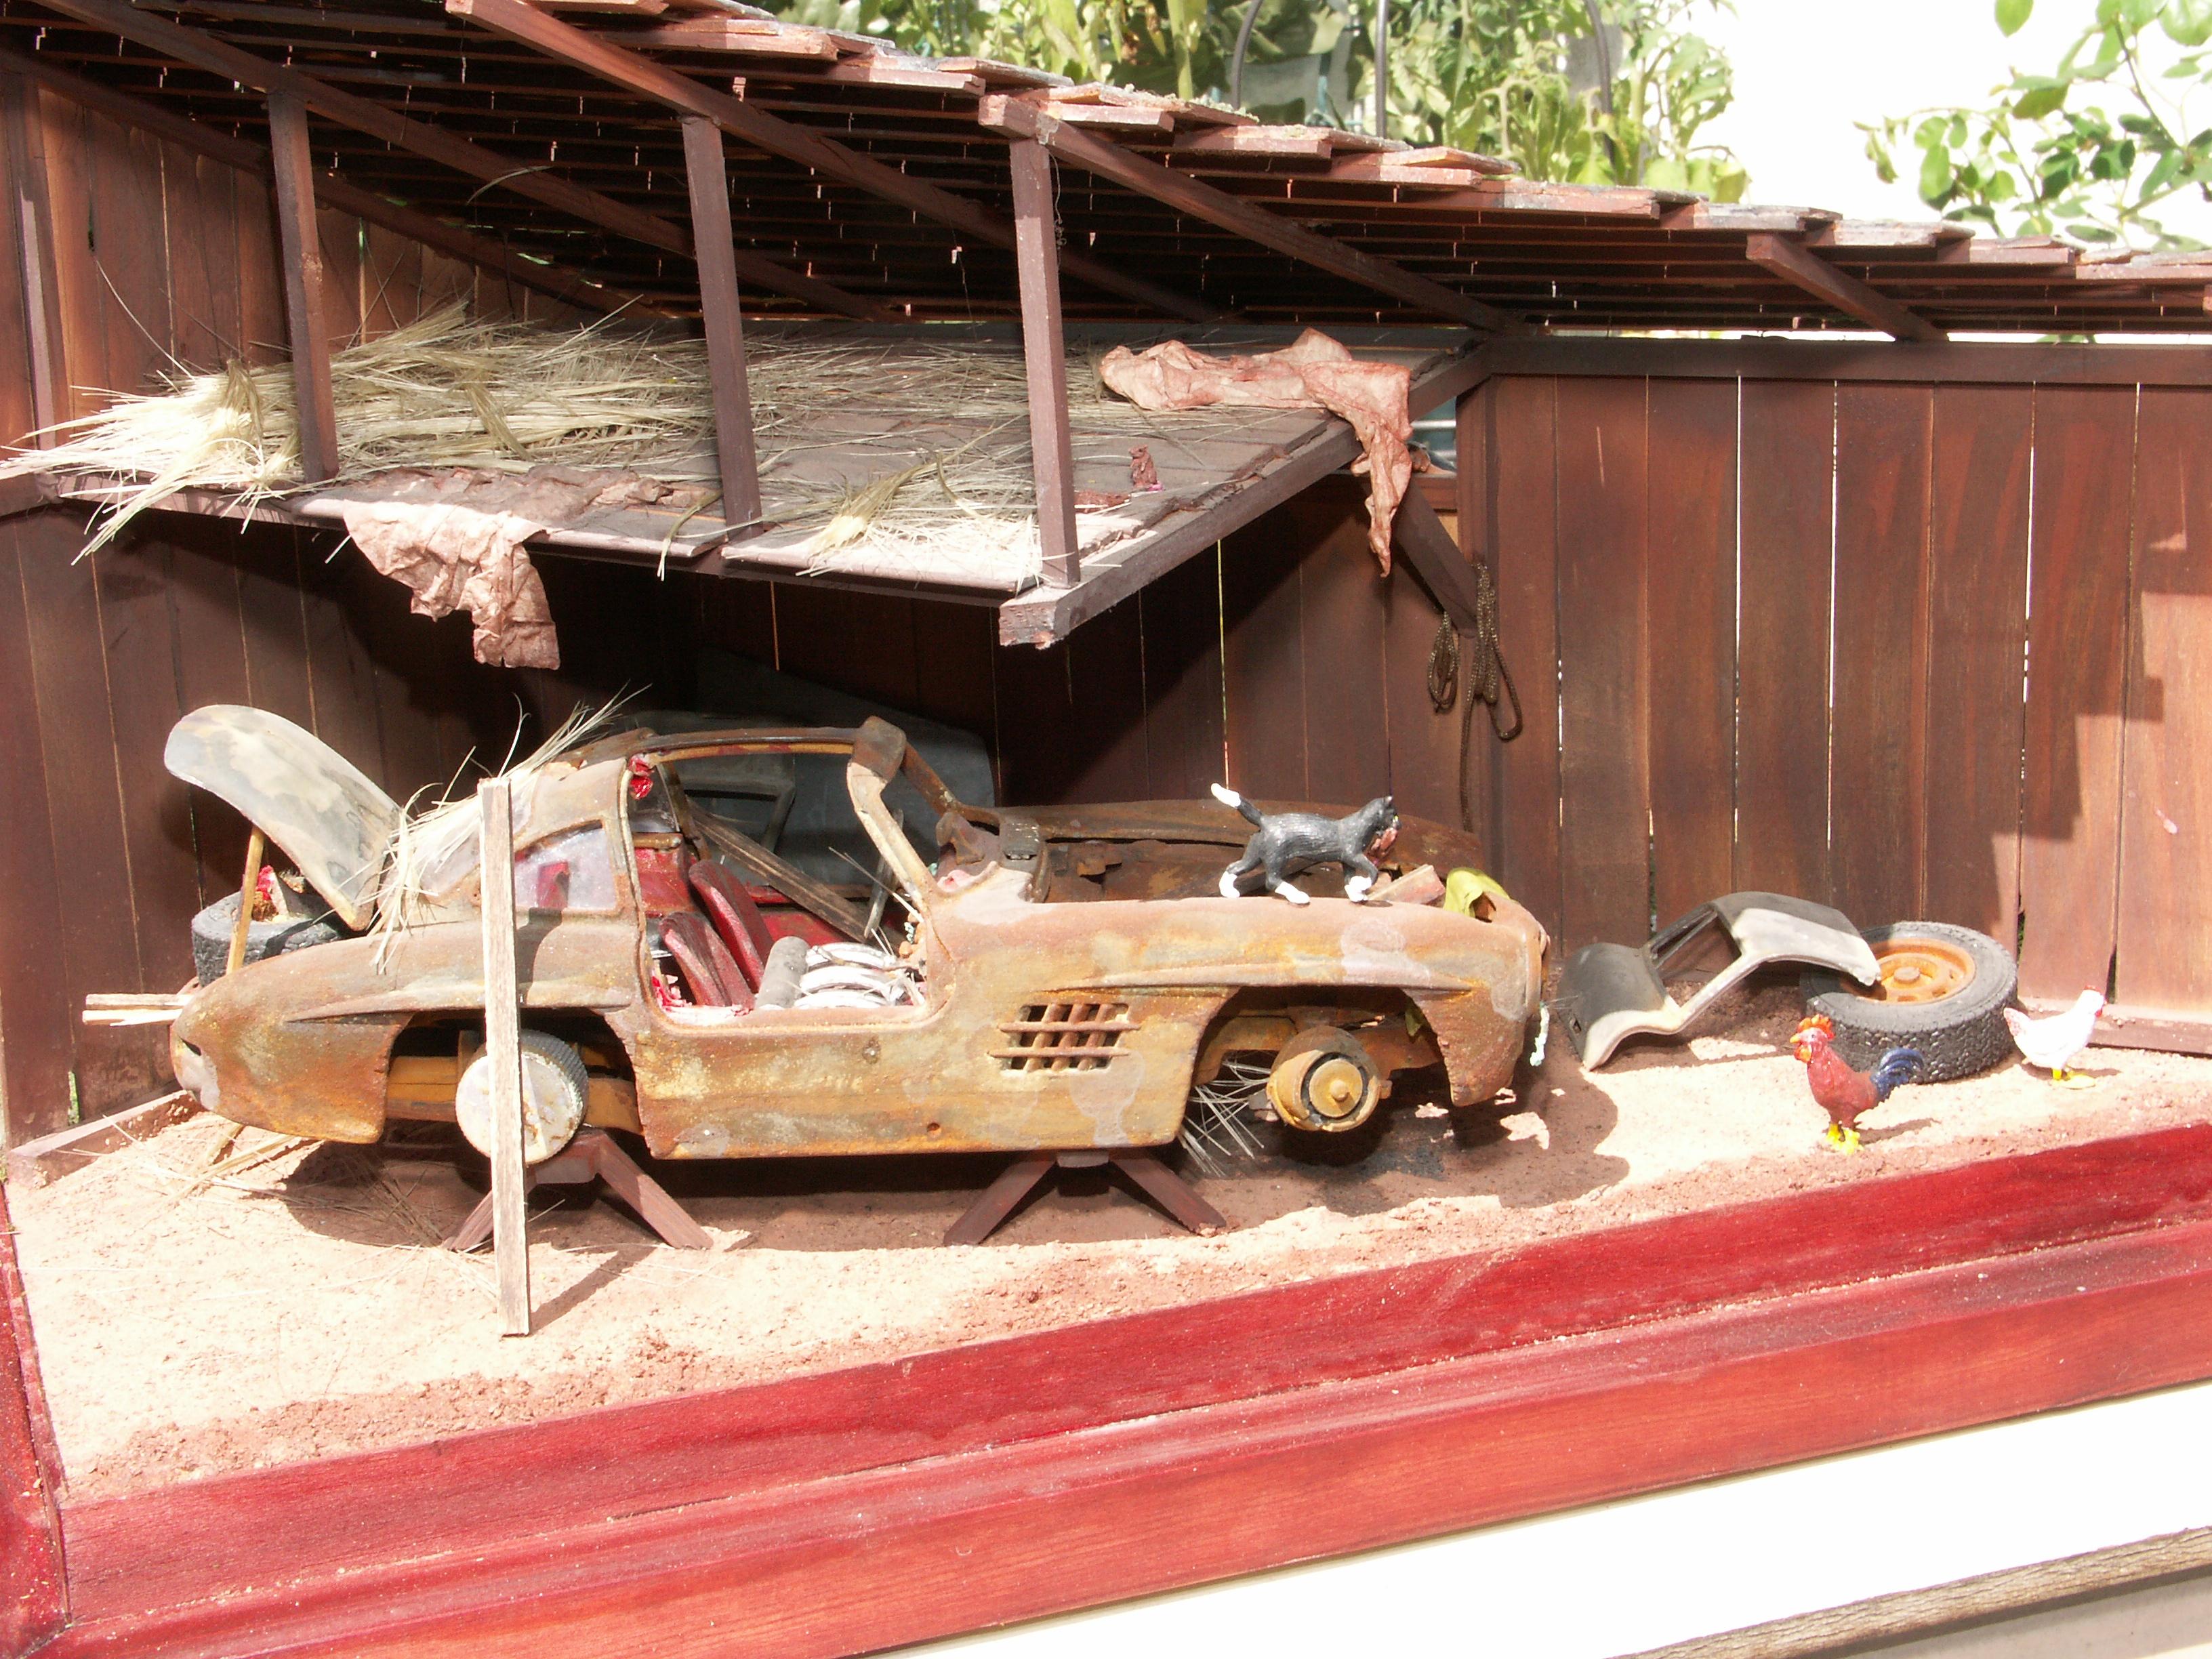
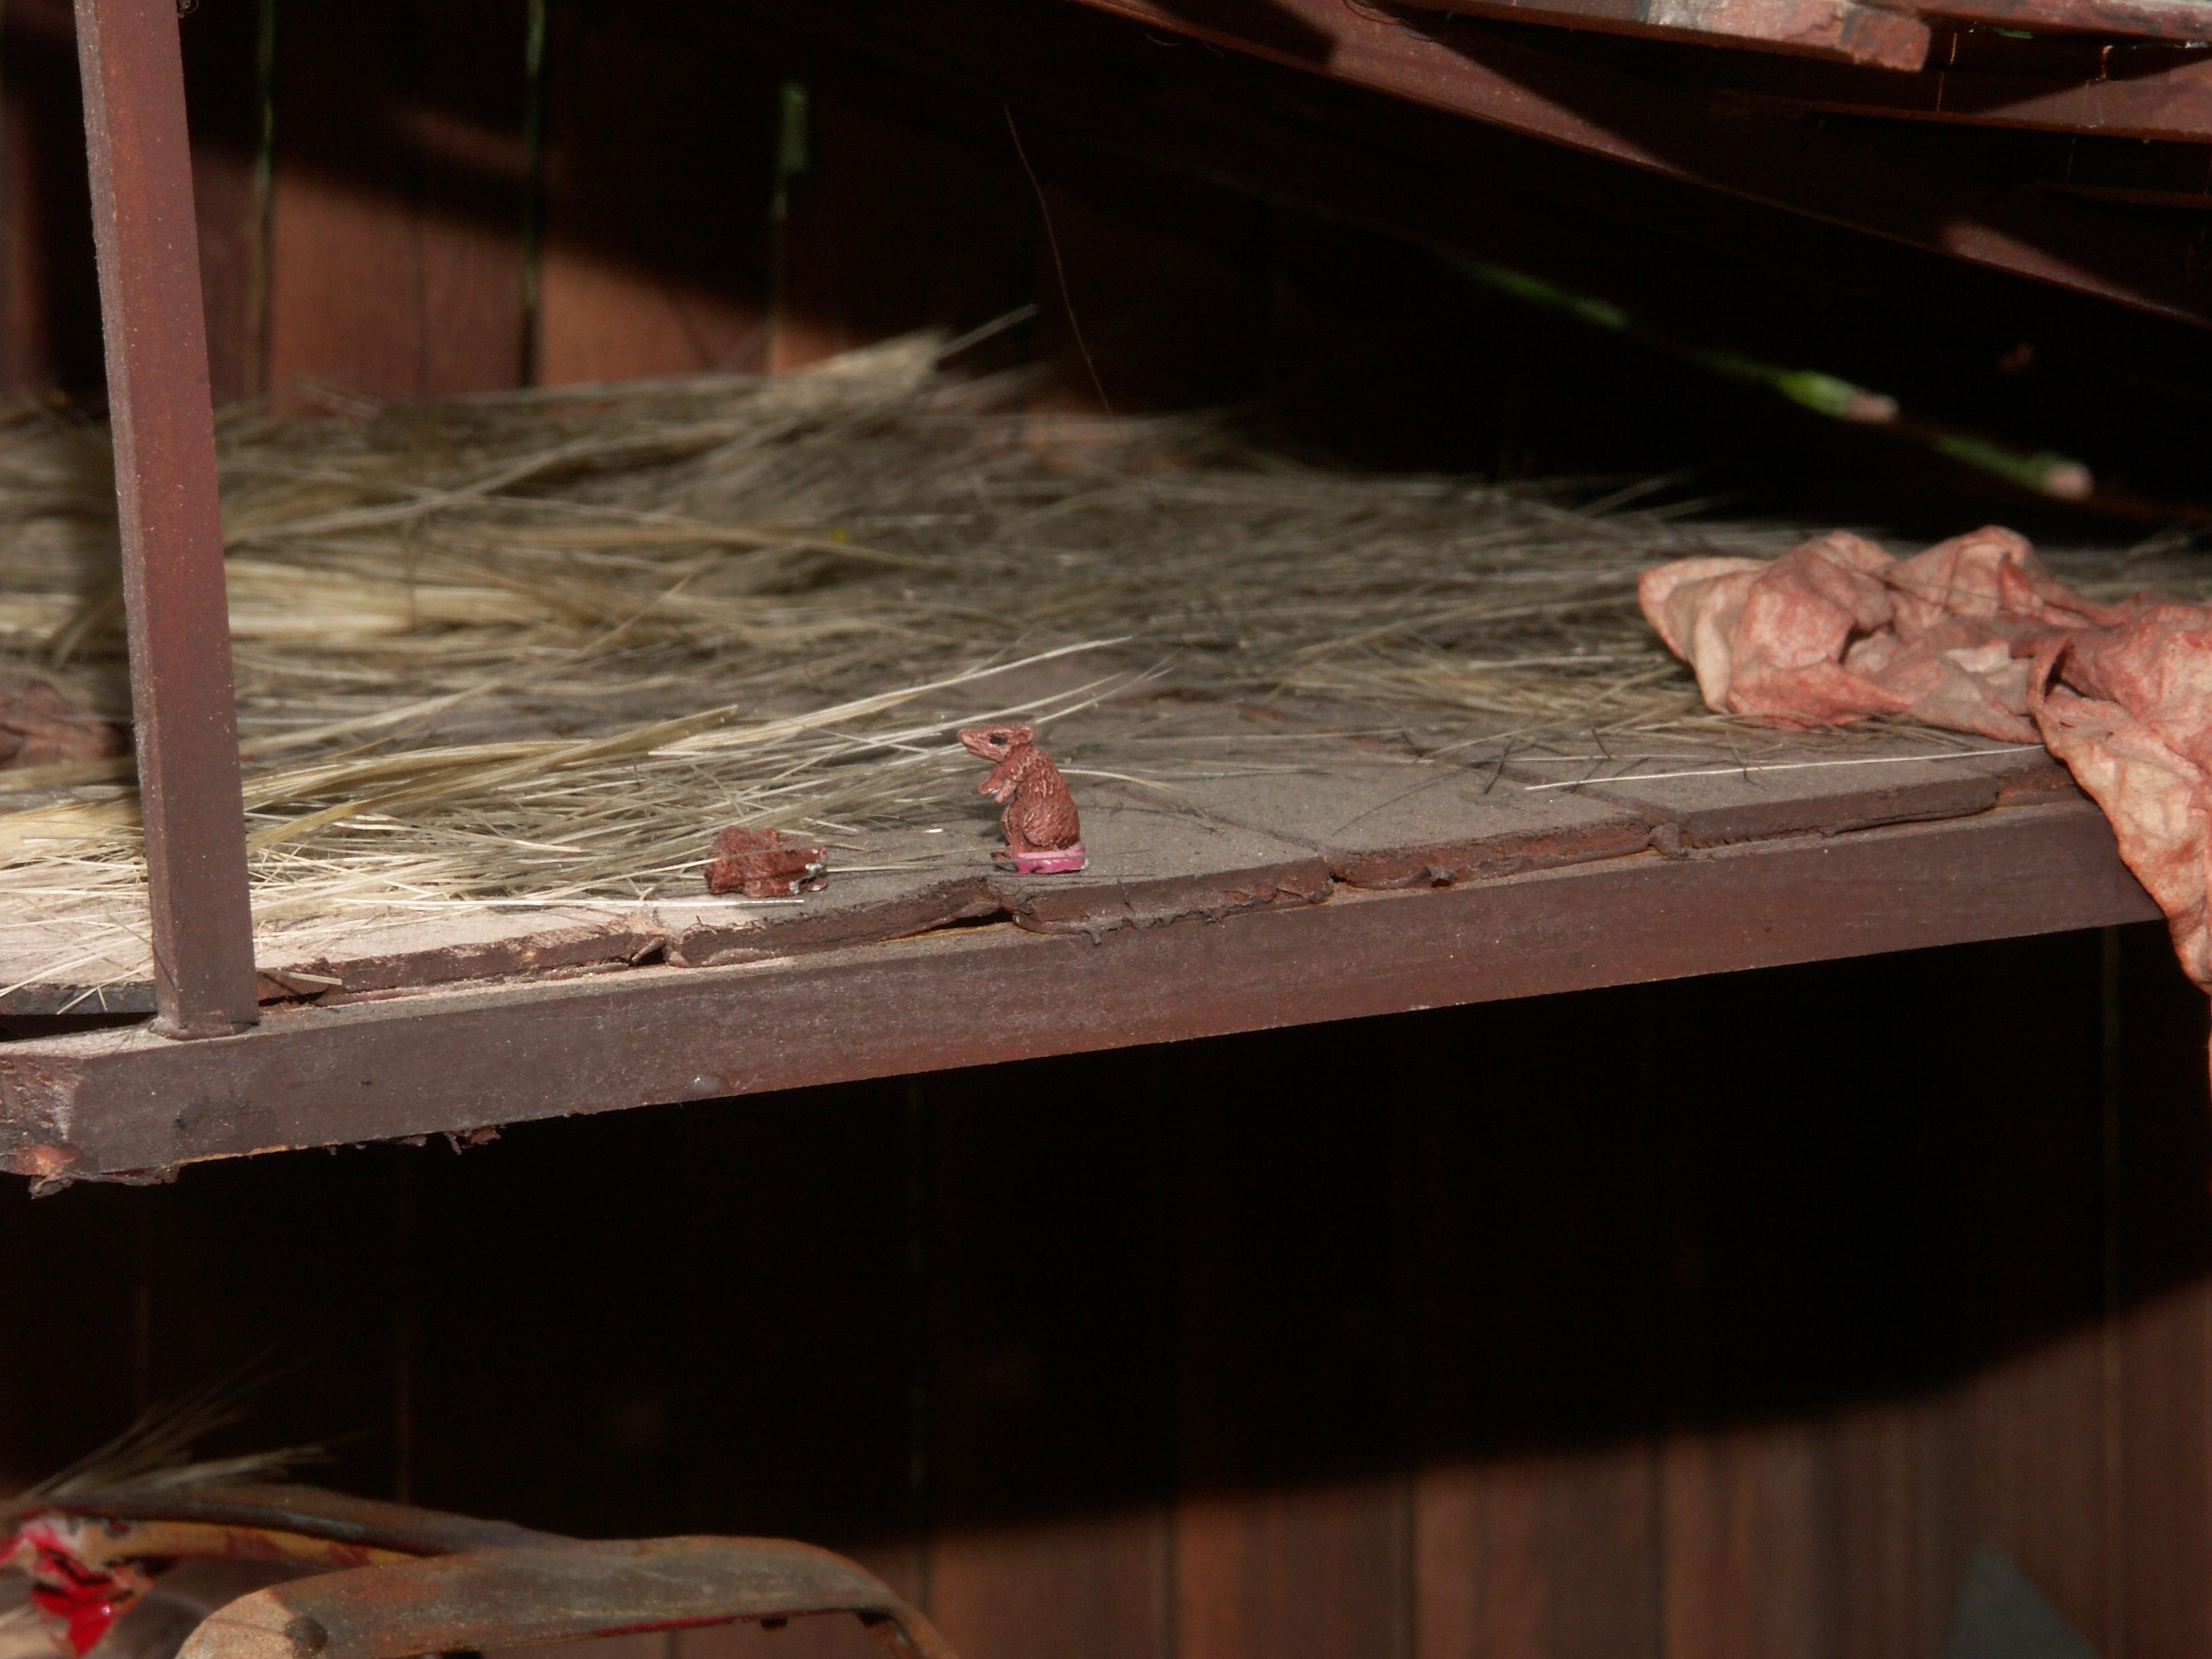
Found a 1/18 Burago Diecast 300 SL Gullwing in my partsbin. Not a good Model, more a Toy. Thoght i made a 3 Dimensional Joke with two of our Clubmembers and Friends. Stripped it down, added some Details , such as a open Engineblock, destroyed Seats and so on. For the first Time i use Modern Solutions "Rust" on the Parts that where on the Original Car Steel. Yeah, only a Handfull Gullwings where Aluminium all over, the most only have Doors from Alu. I know the Brake drums are completly off........? Two Pewter Figures where heavy modified from Cowboys to Mechanics. The Barn was build with Stripwood and Coffeesticks. Some Pewter Animals and a Diecastbike added. Its not my best Work, but as a Joke it works good ? Regards Harry

.jpg.fb468059440c5ccd018d568acbfaabb2.jpg)