Oliver77
-
Posts
145 -
Joined
-
Last visited
Content Type
Profiles
Forums
Events
Gallery
Everything posted by Oliver77
-
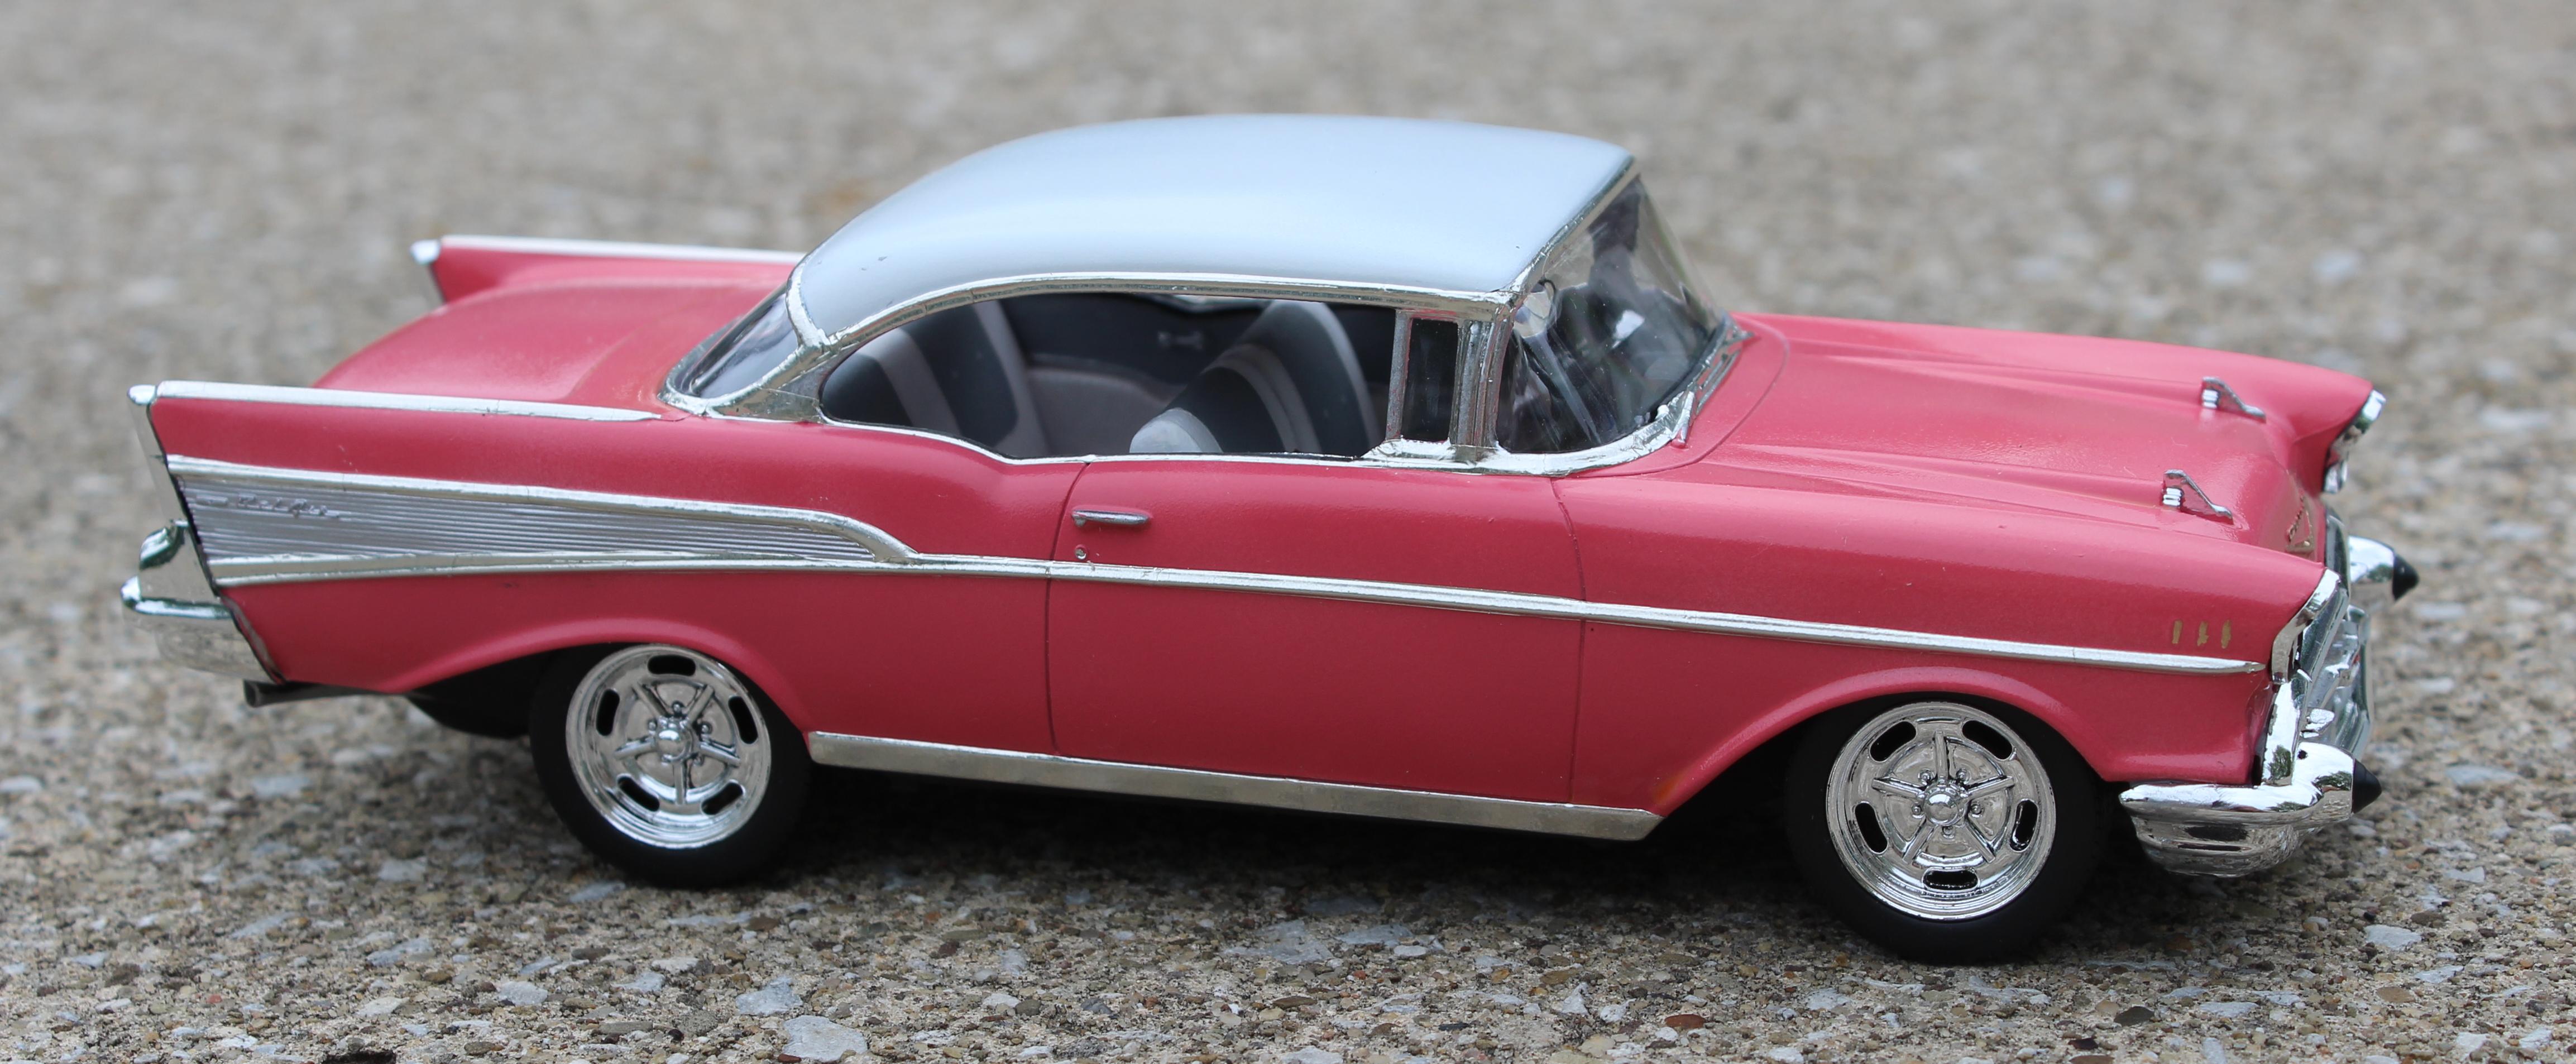
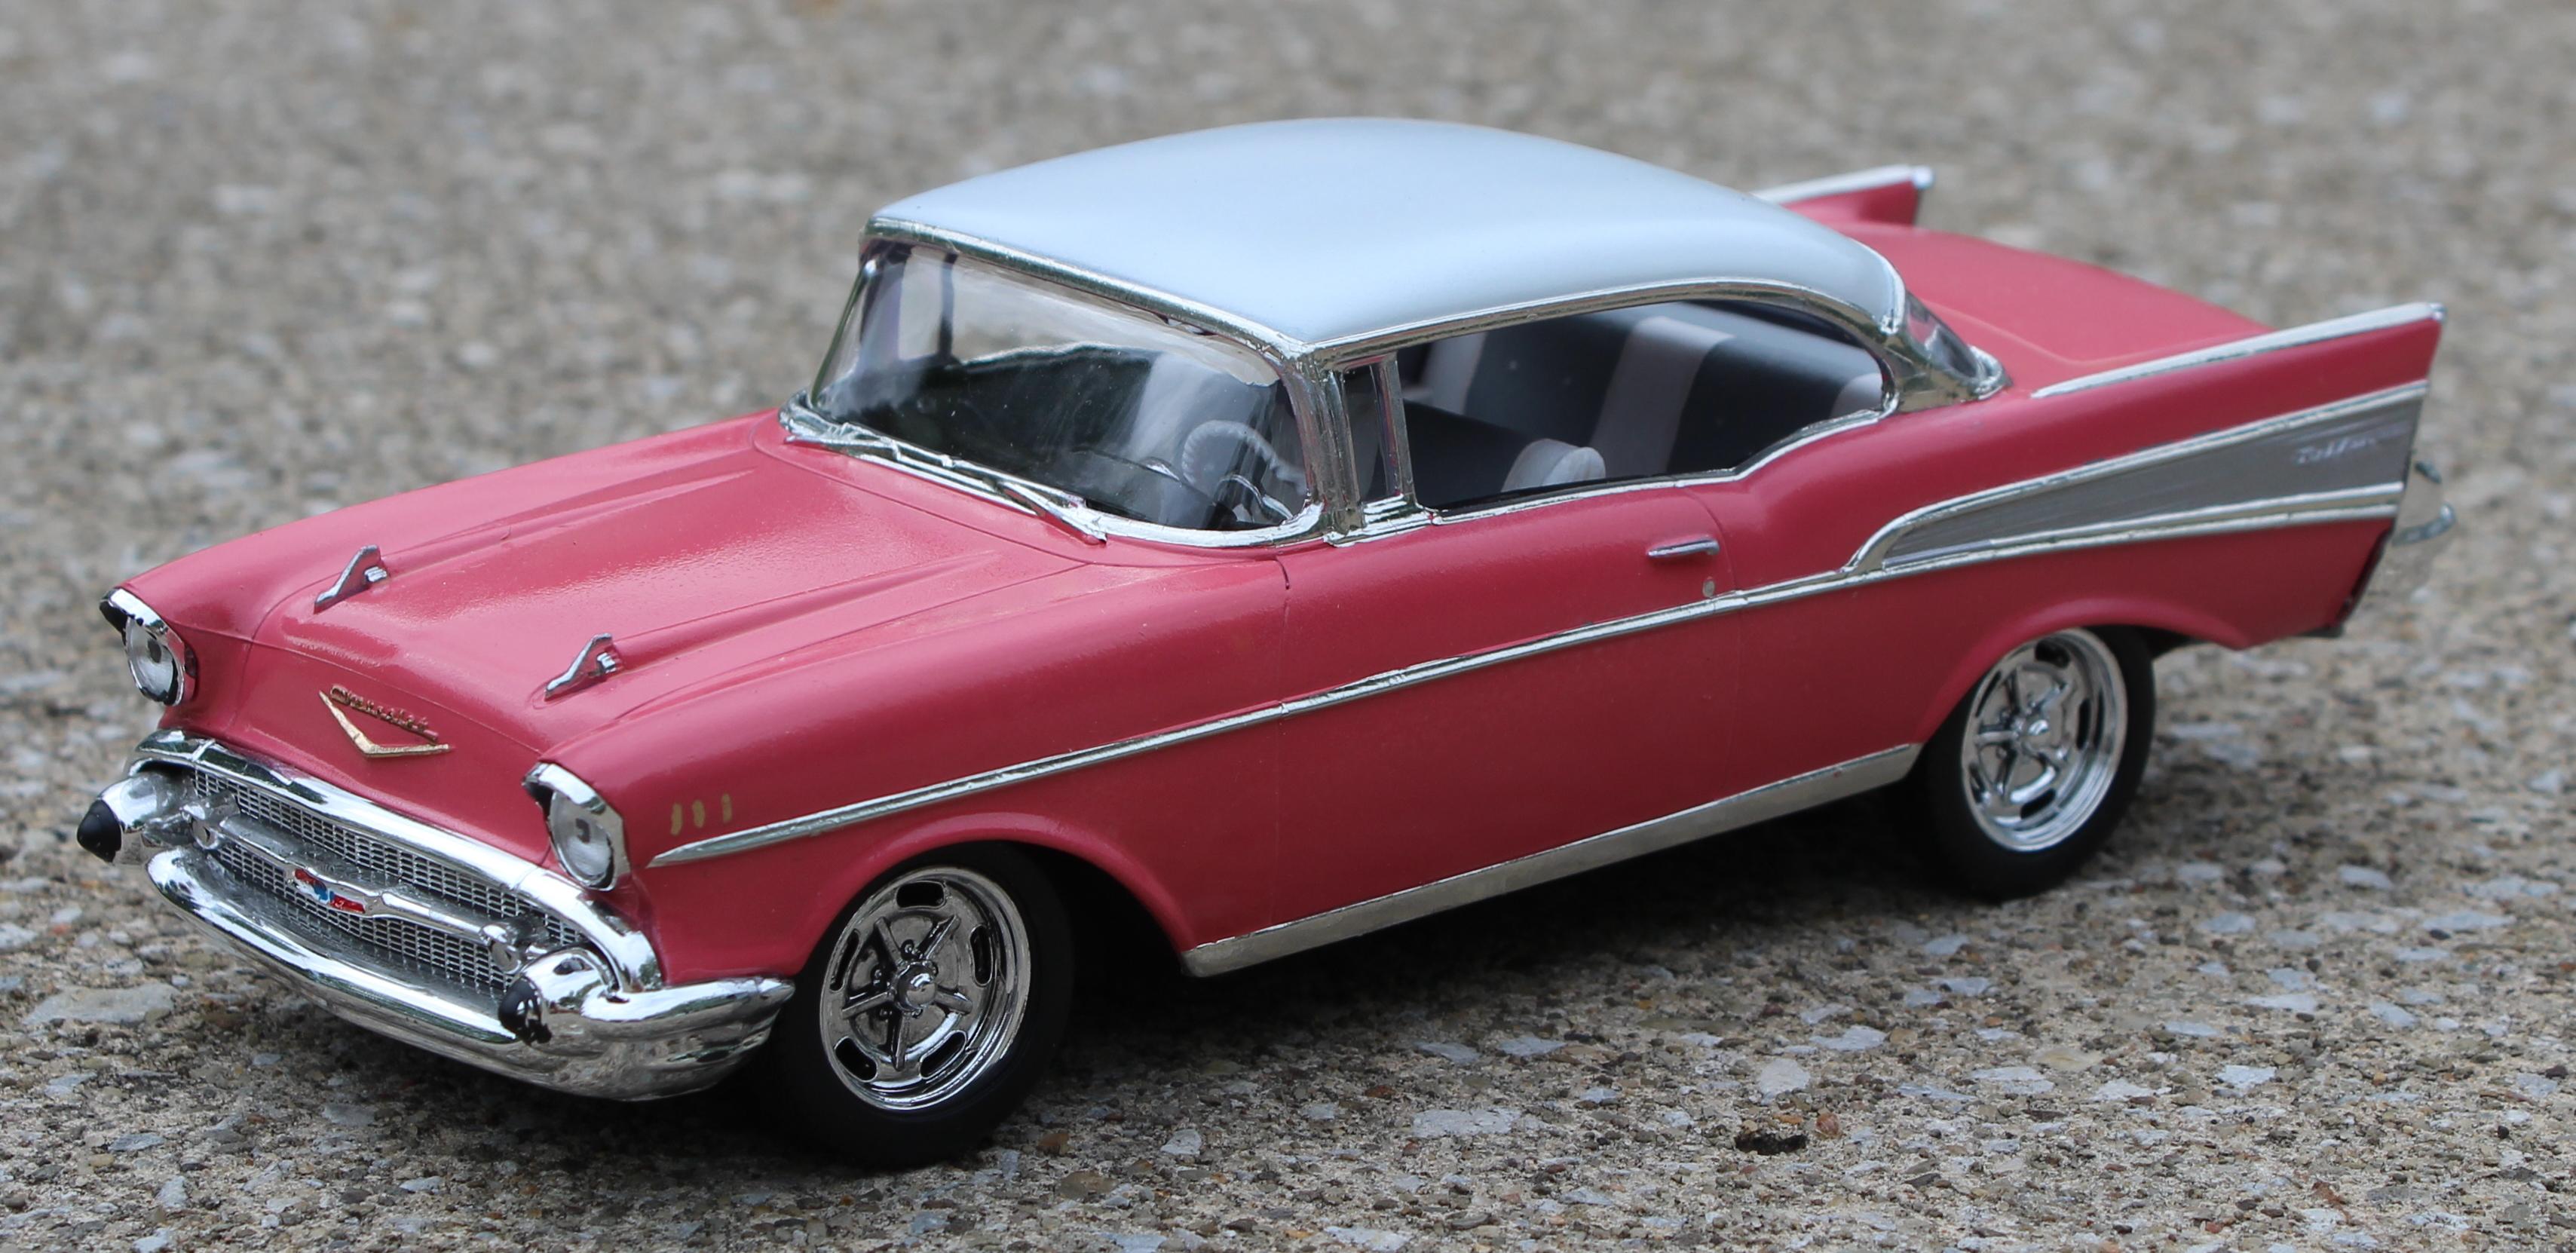
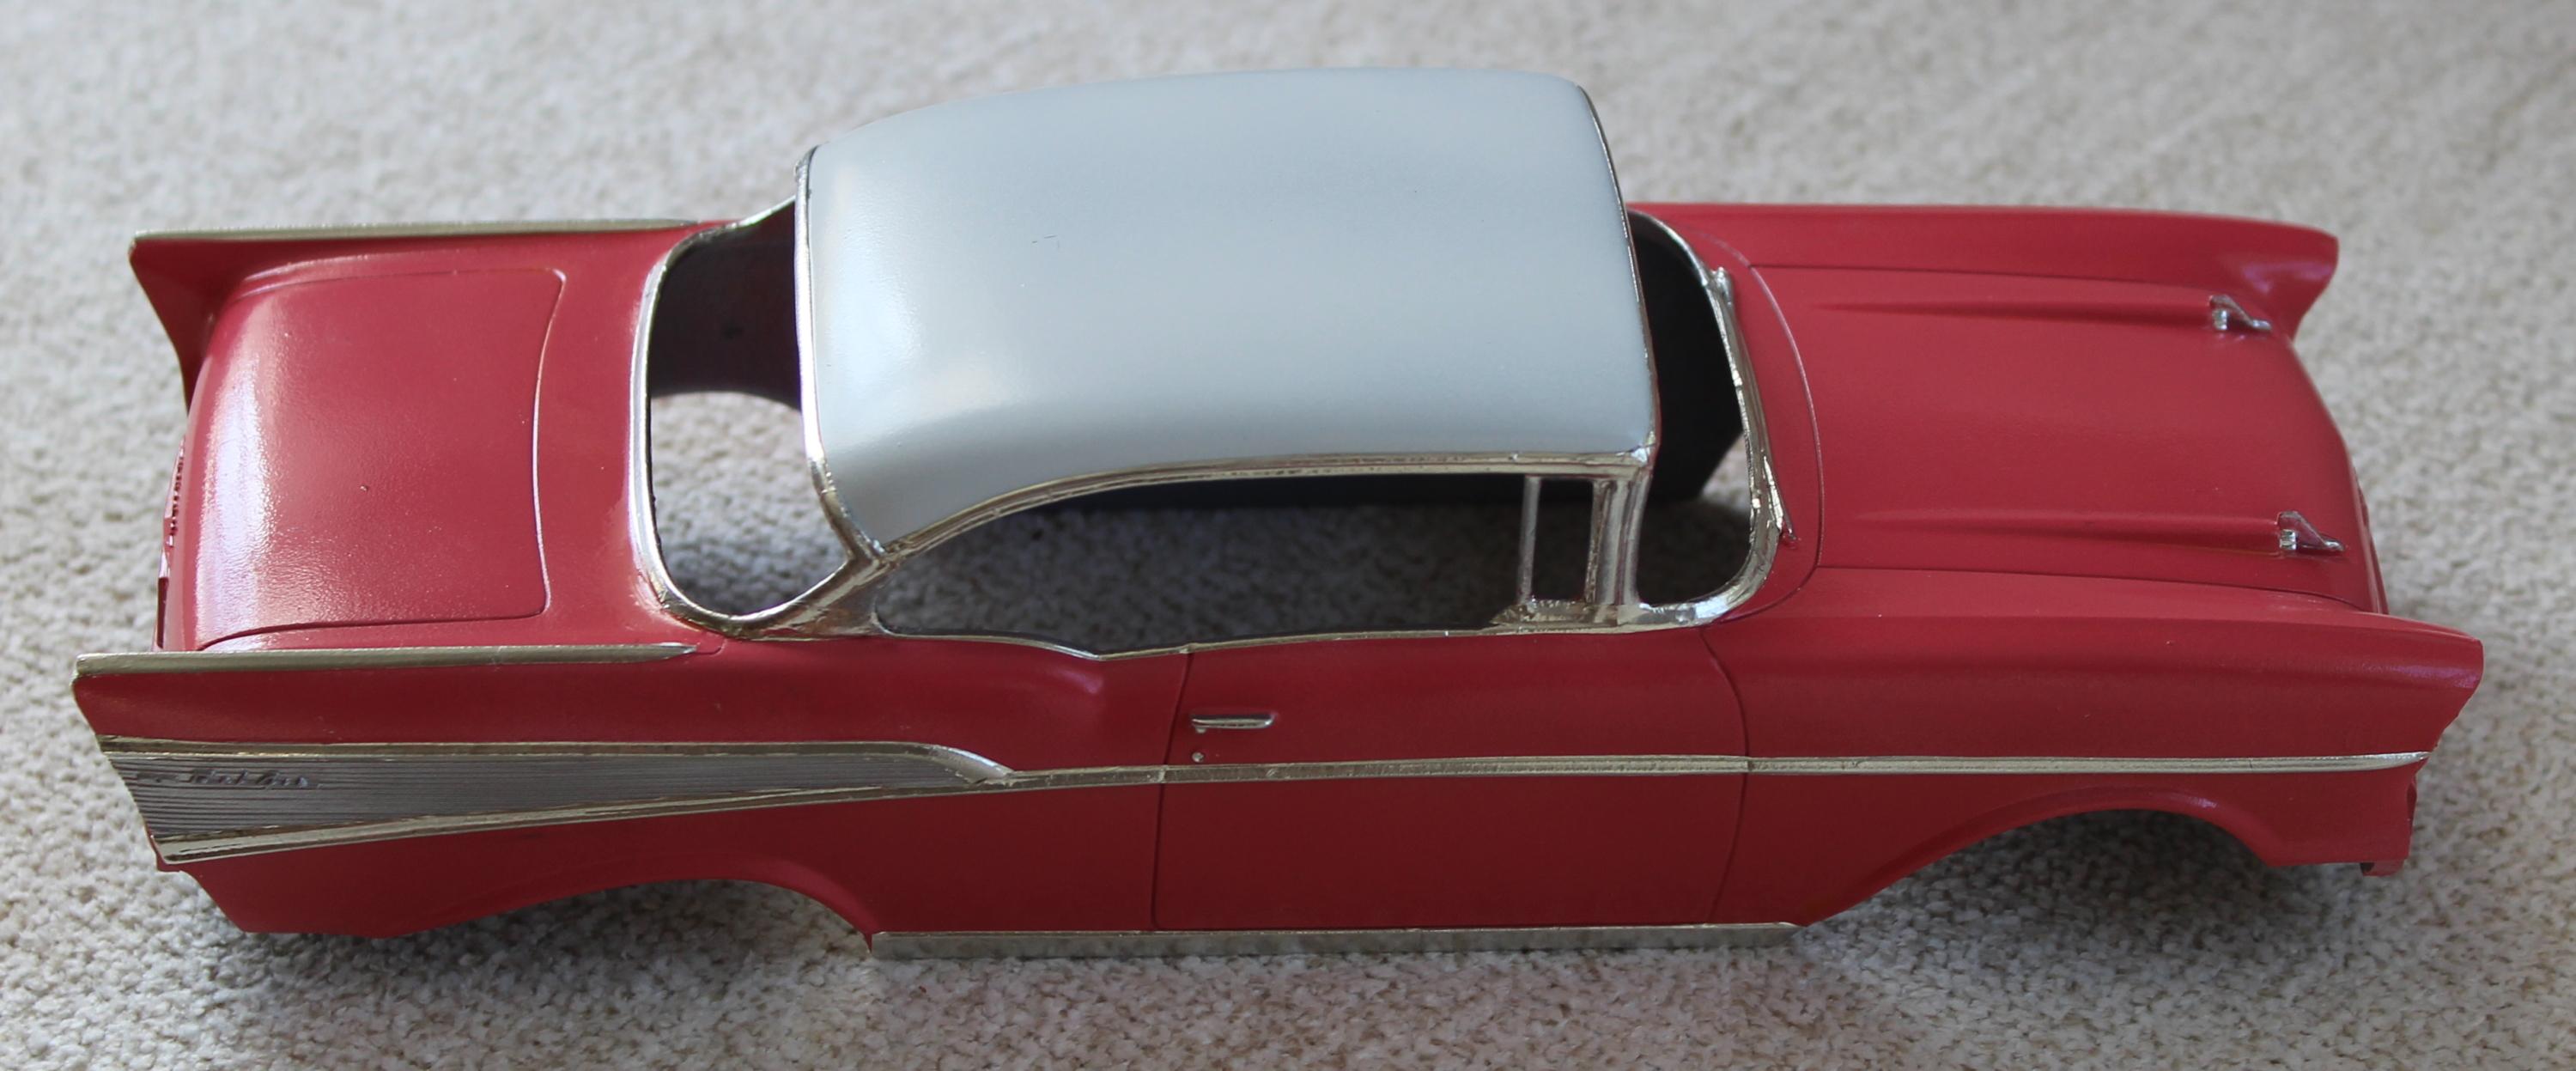
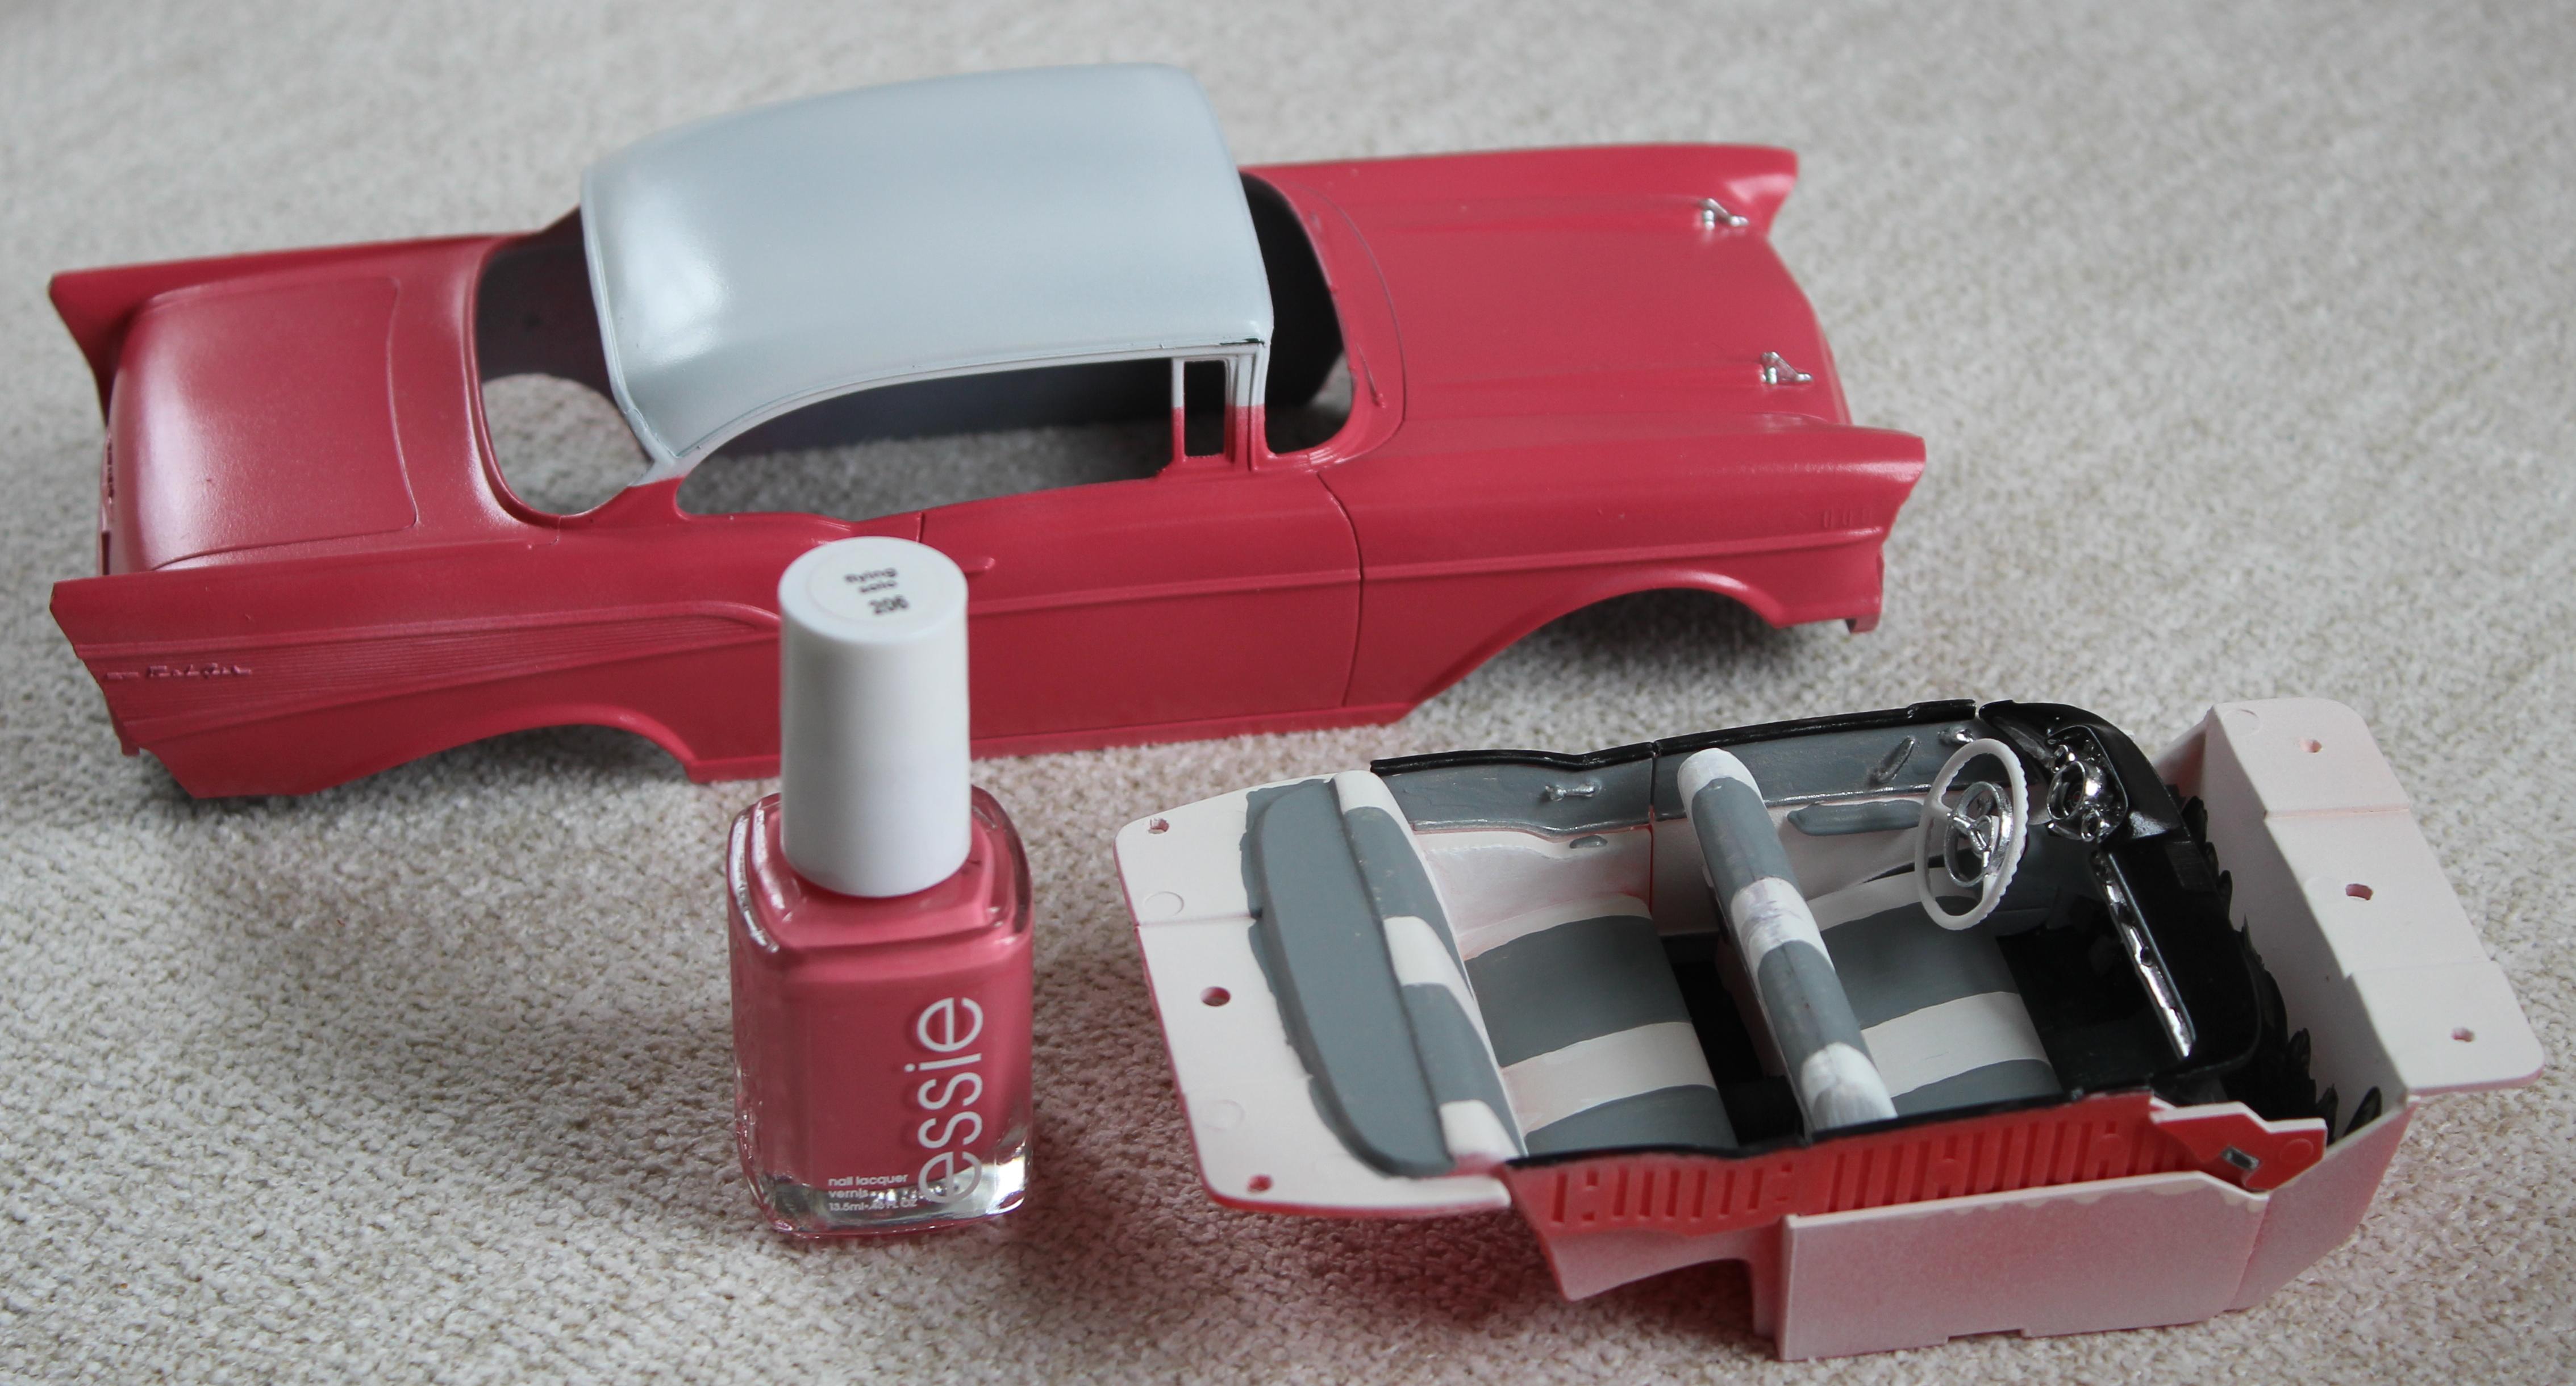
My wife saw a pink 57 Chevy she liked so I said sure! I'll get you one! Built from the box, used the color nail polish my wife selected. Redrilled the front axle hole to adjust the stance.

-
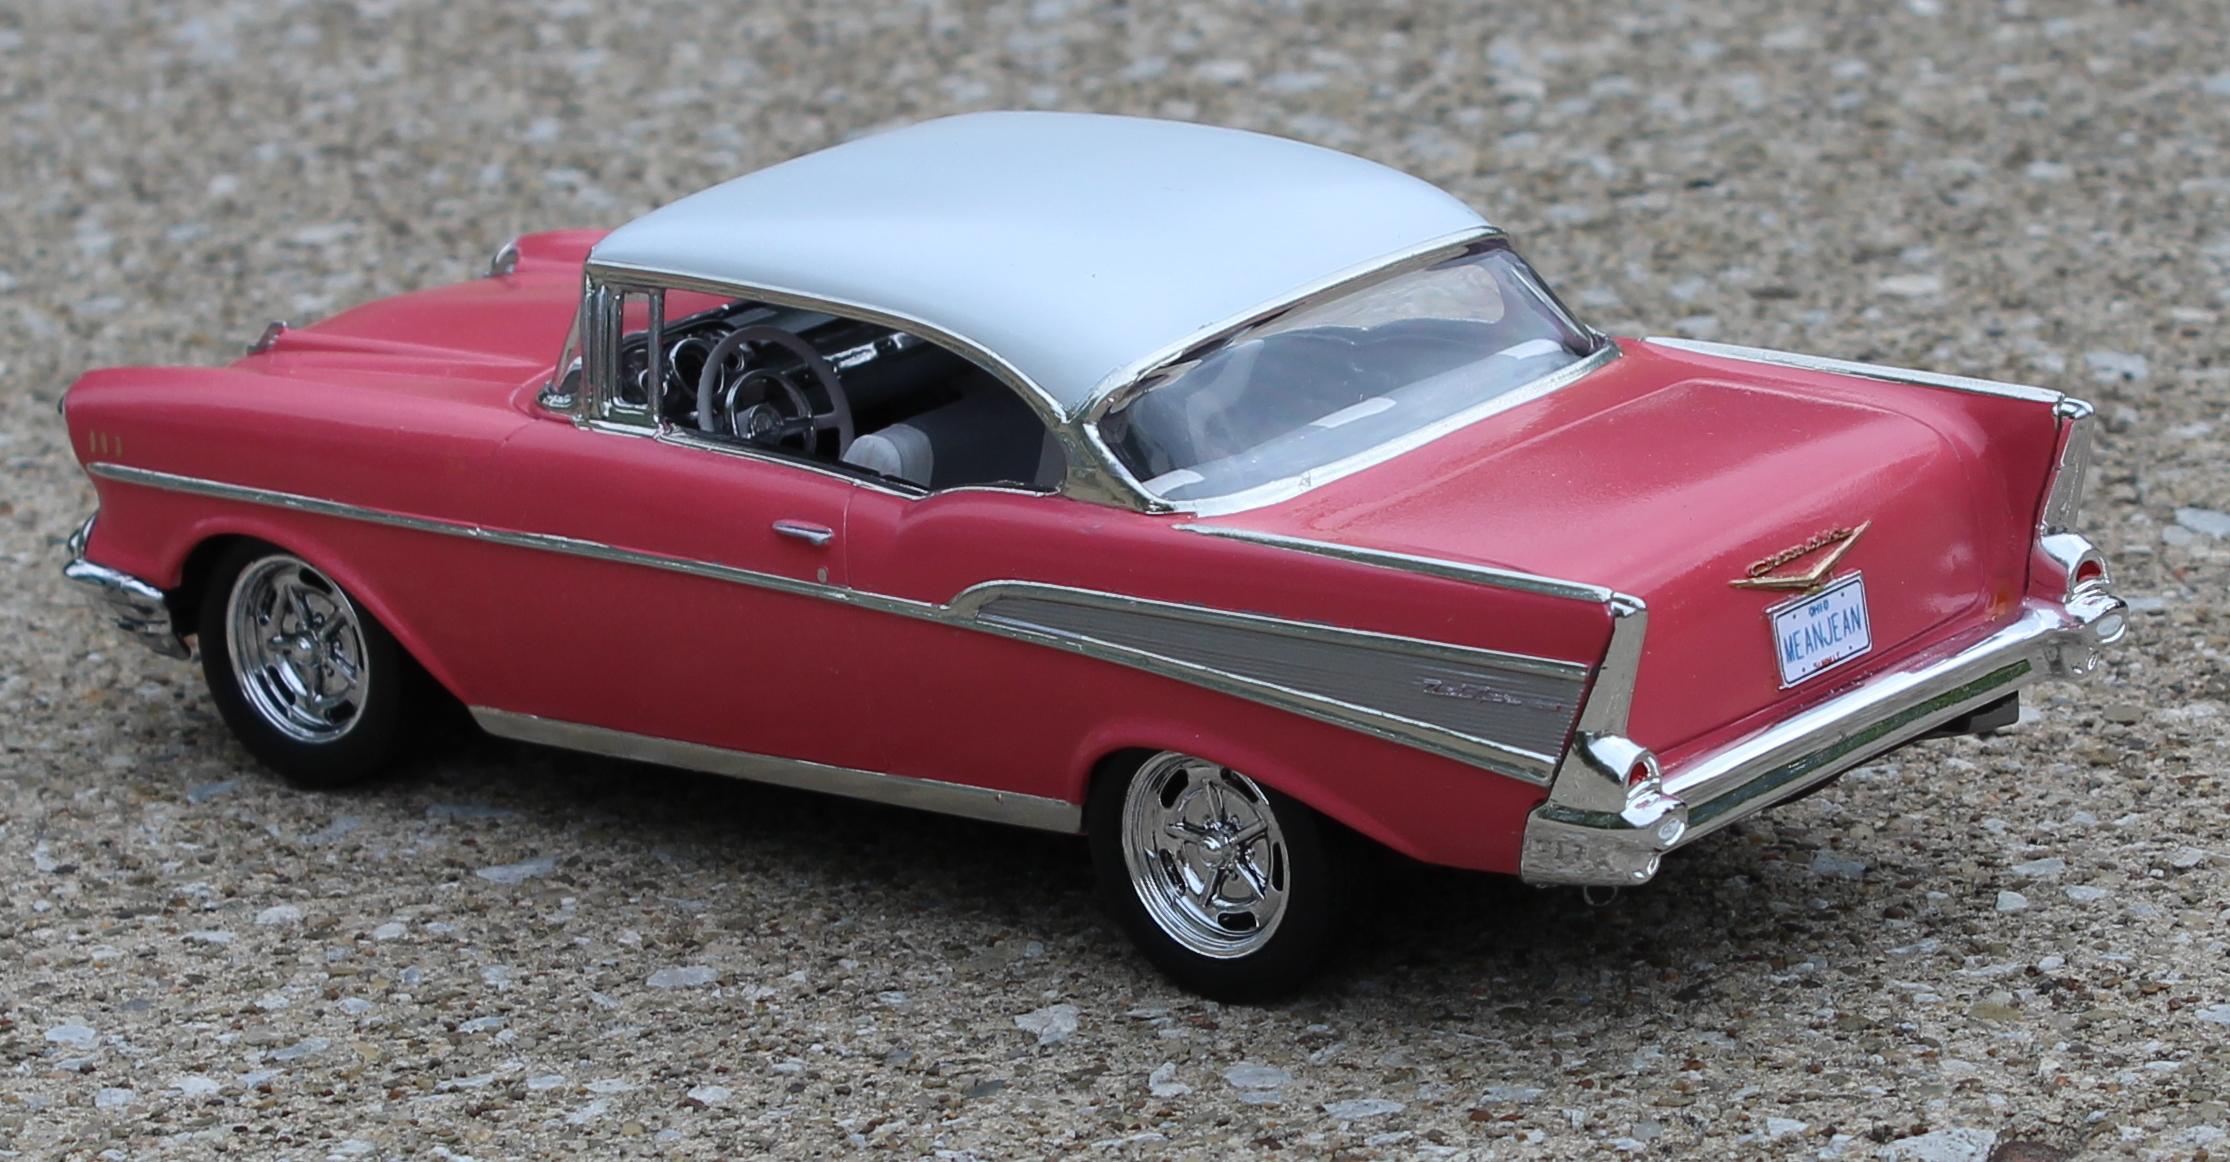
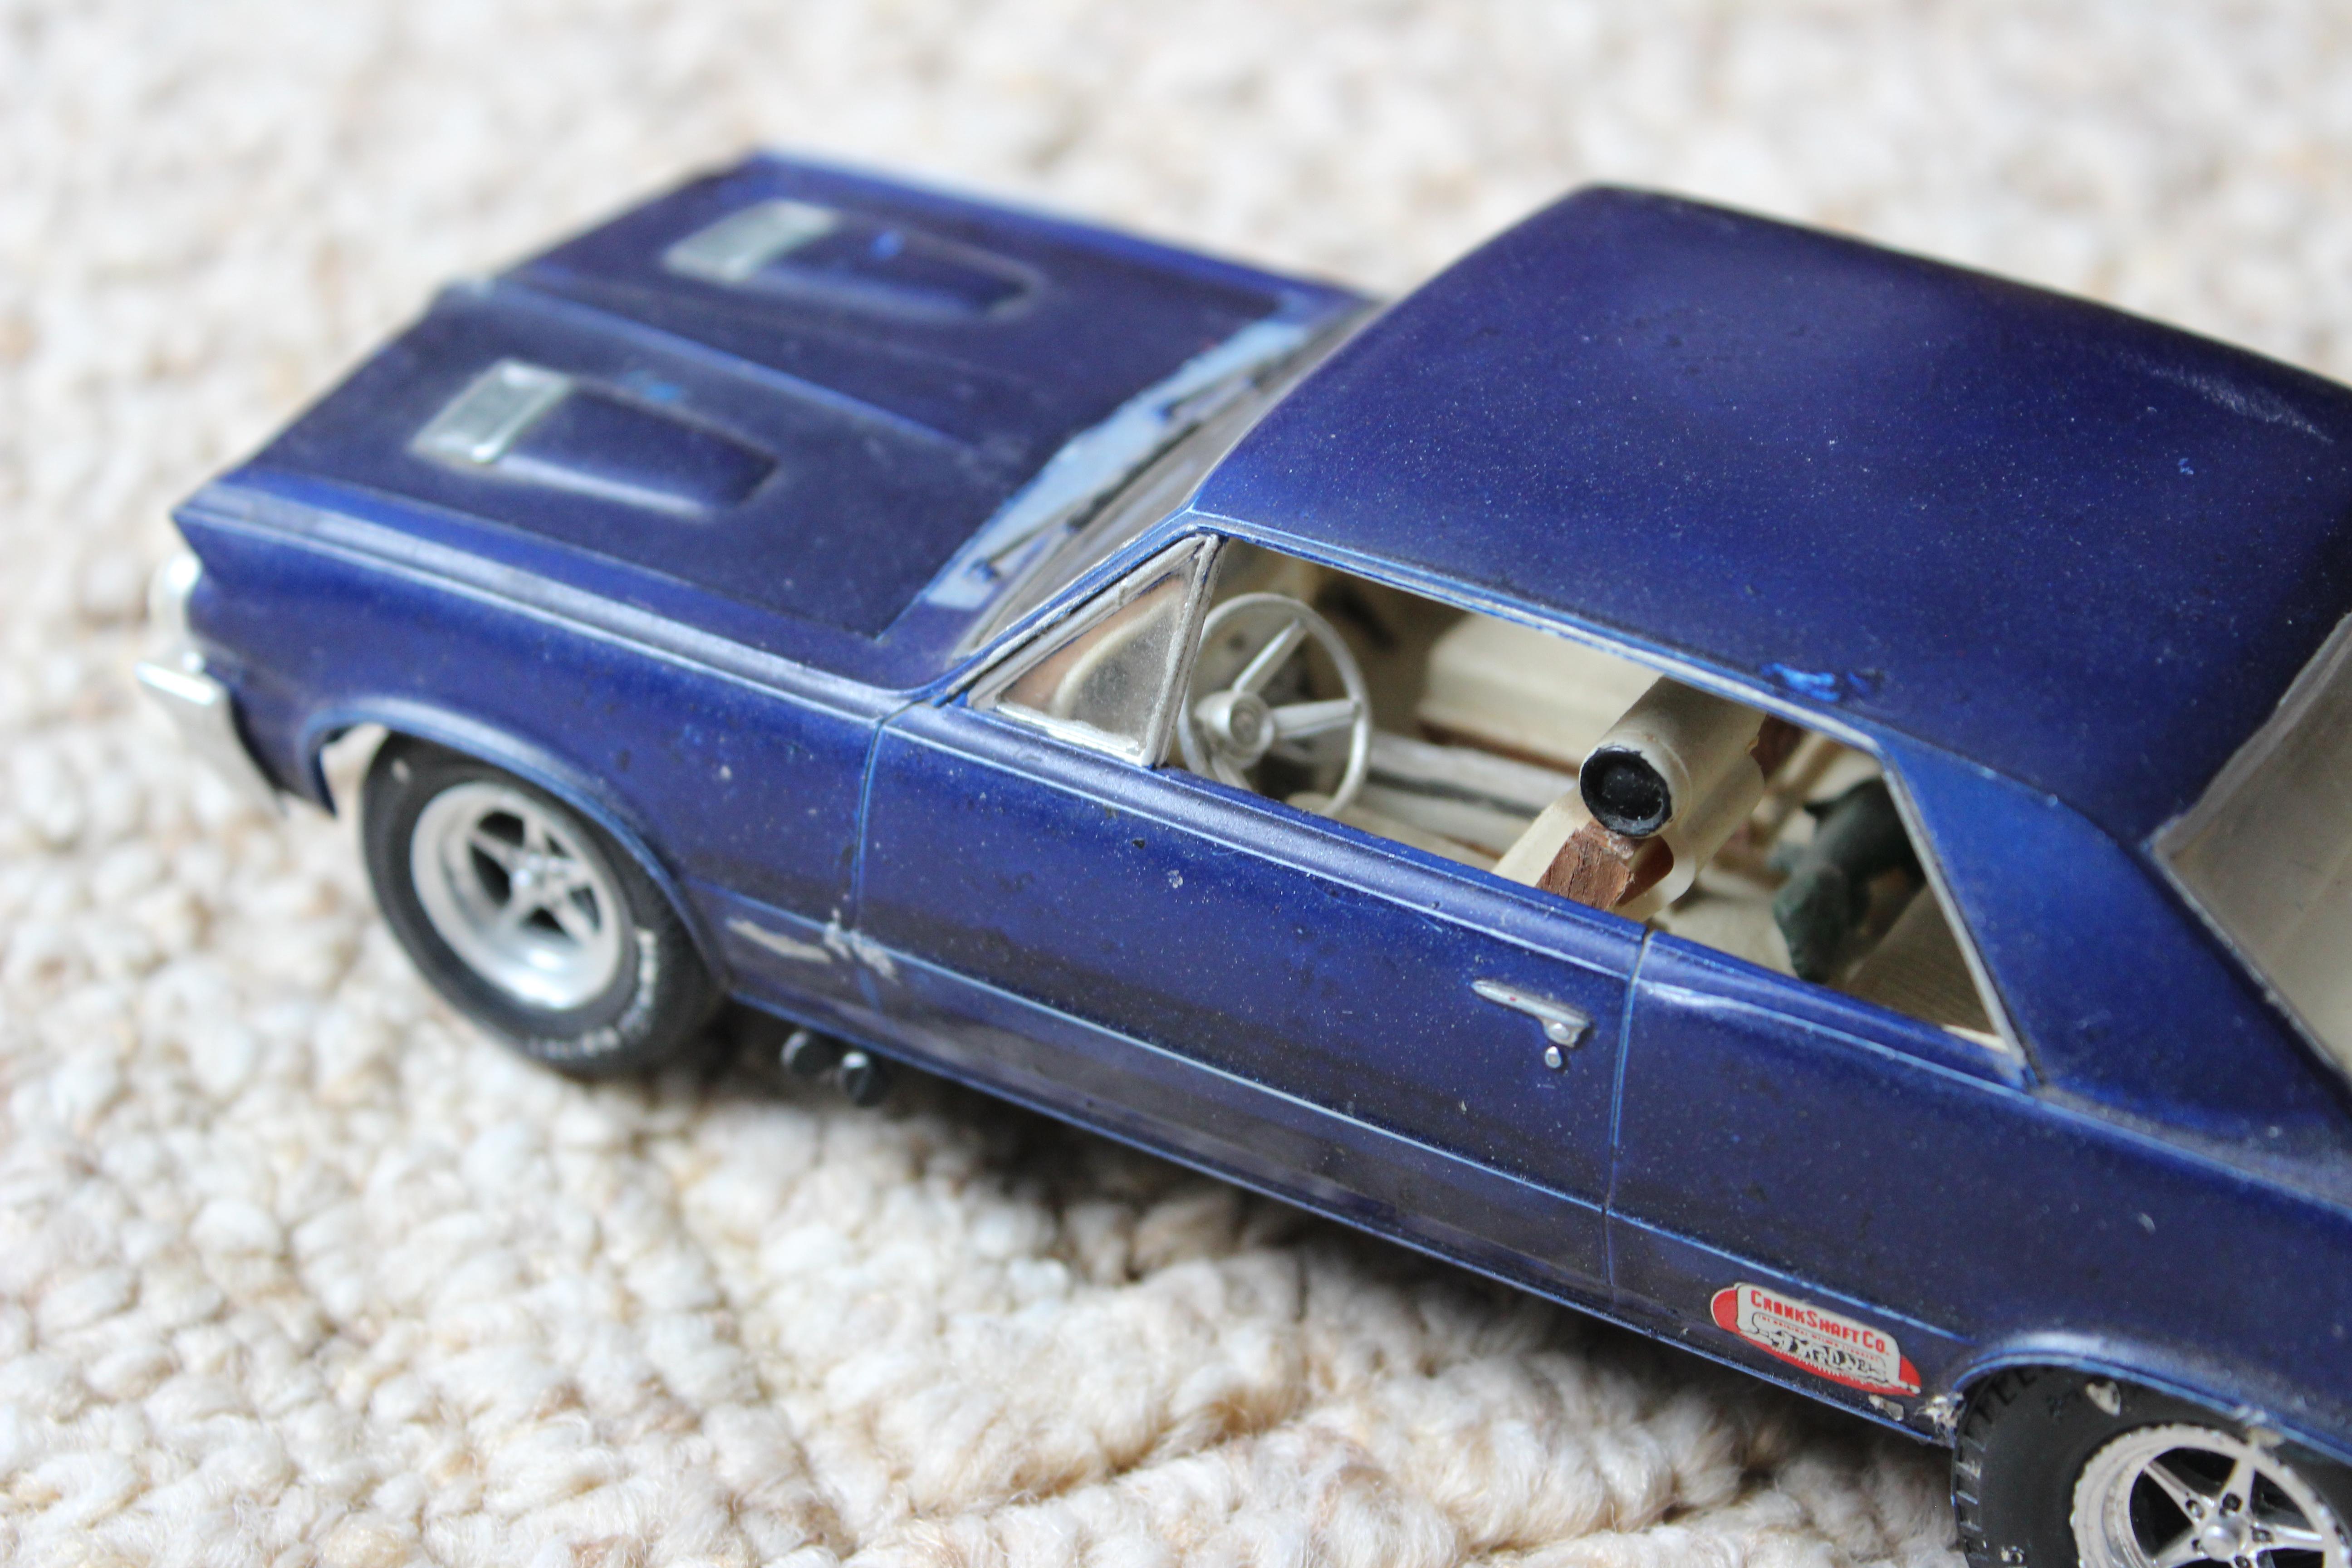
This should be the final WIP for this one, it is coming together OK. I took David's advice and sprayed the insert Tamiya TS-17 gloss aluminum. (Have some handy for the B-52 with X-15 from Atlantis, man they are popping out some fun stuff.) A lot of Bare Metal foil, and my old sheets are kinda fragile so that is fun. The Molotow chrome looks about as shiny as BMF, but the pen is clogged so I have to just blob the ink out on a palette and apply with a stylus. (fancy name for toothpick). I see stuff in the photos I'm not really thrilled with, for a quick build with some new techniques I'm satisfied. Regards, Jeff Oliver
-
This is the type of drills used to make holes in circuit boards. The boards are commonly made of fiberglass reinforced epoxy, which is extremely abrasive. The precision drills turn at way high rpm (10000 or more) and move straight down and up, the drills are strong in that direction, but slight side pressure can snap them. (source: I was a circuit board designer in real life) When (not if!) you break one, you will be glad you have eye protection on. Regards, Jeff Oliver
-
Need some advice from users of the Molotow Liquid Chrome markers. It worked great on the first day. 1mm size. Shook the pen well, pressed down to feed the ink, applied to the model. Looks pretty good! Now today I cannot get it to feed. Multiple pumps resulted in a blob of ink on my 'palette' but not really coming out of the tip. Is the tip clogged/dried? Do they supply replacement tips? Can I clean the tip with solvent? I downloaded the Molotow user guide, it does not address feed problems. Useful suggestions will be appreciated! Regards, Jeff Oliver
-
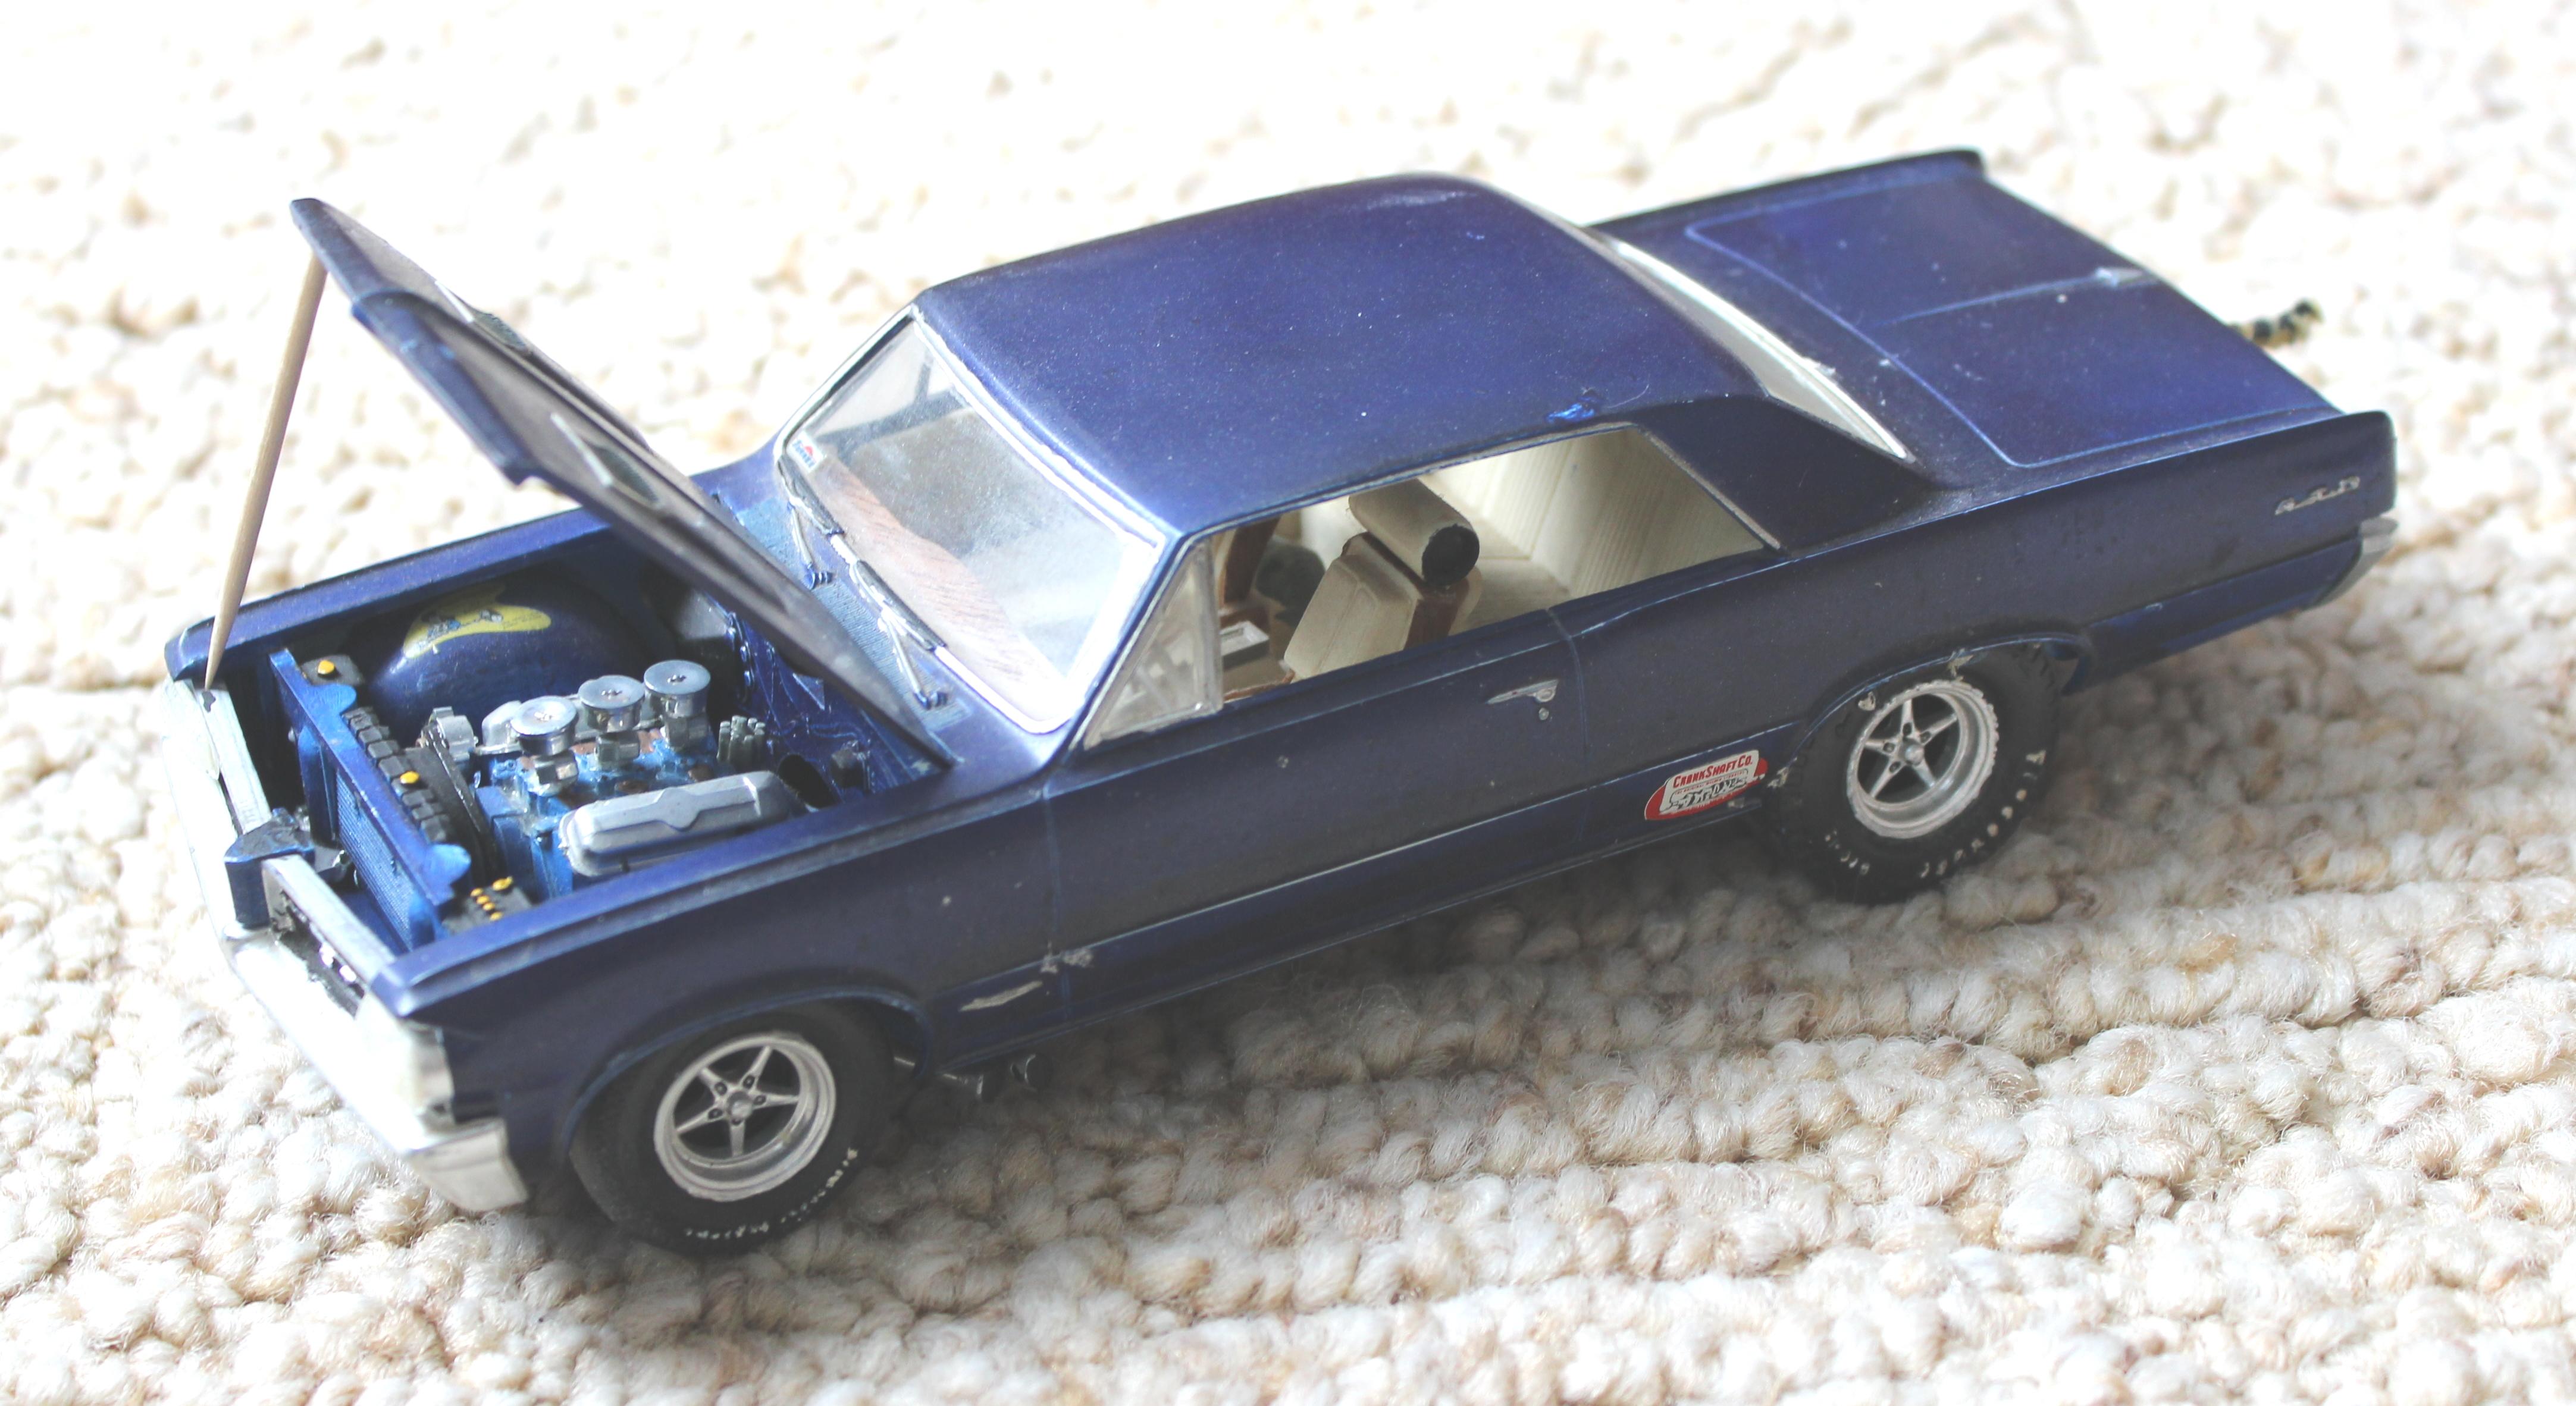
My wife pointed out a pink 57 Chevy she thought looked cool, I said I'll get her one! She supplied the fingernail polish. I used several coats of primer to seal the black body and red (ugh) interior plastic. Rattle can white, then used my Paasche H5 airbrush for acetone thinned color coat. Took it slow to avoid dissolving the plastic. This is the first time I tried a Molotow Liquid Chrome pen. Man there is a lot of chrome on these old cars! Good thing I still have some usable Bare-Metal foil. I guess I'll use the decal for the rear fender areas, not so thrilled about that. Better ideas are welcome! Regards, Jeff Oliver
-
Suggestions for New or Returning Modelers
Oliver77 replied to Ouch1's topic in Model Cars Magazine News and Discussions
Also do not be afraid to do a search on this site. Different key words can bring up an incredible wealth of knowledge and experience. I have been inspired and energized by the works shown here! And please post your results. Old tricks are good, new dogs with new tricks are great! Regards, Jeff Oliver -
Beyond a clean build, this is sanitary! I can only aspire to this skill.
-
Great to see your fine build of this dragster.
-
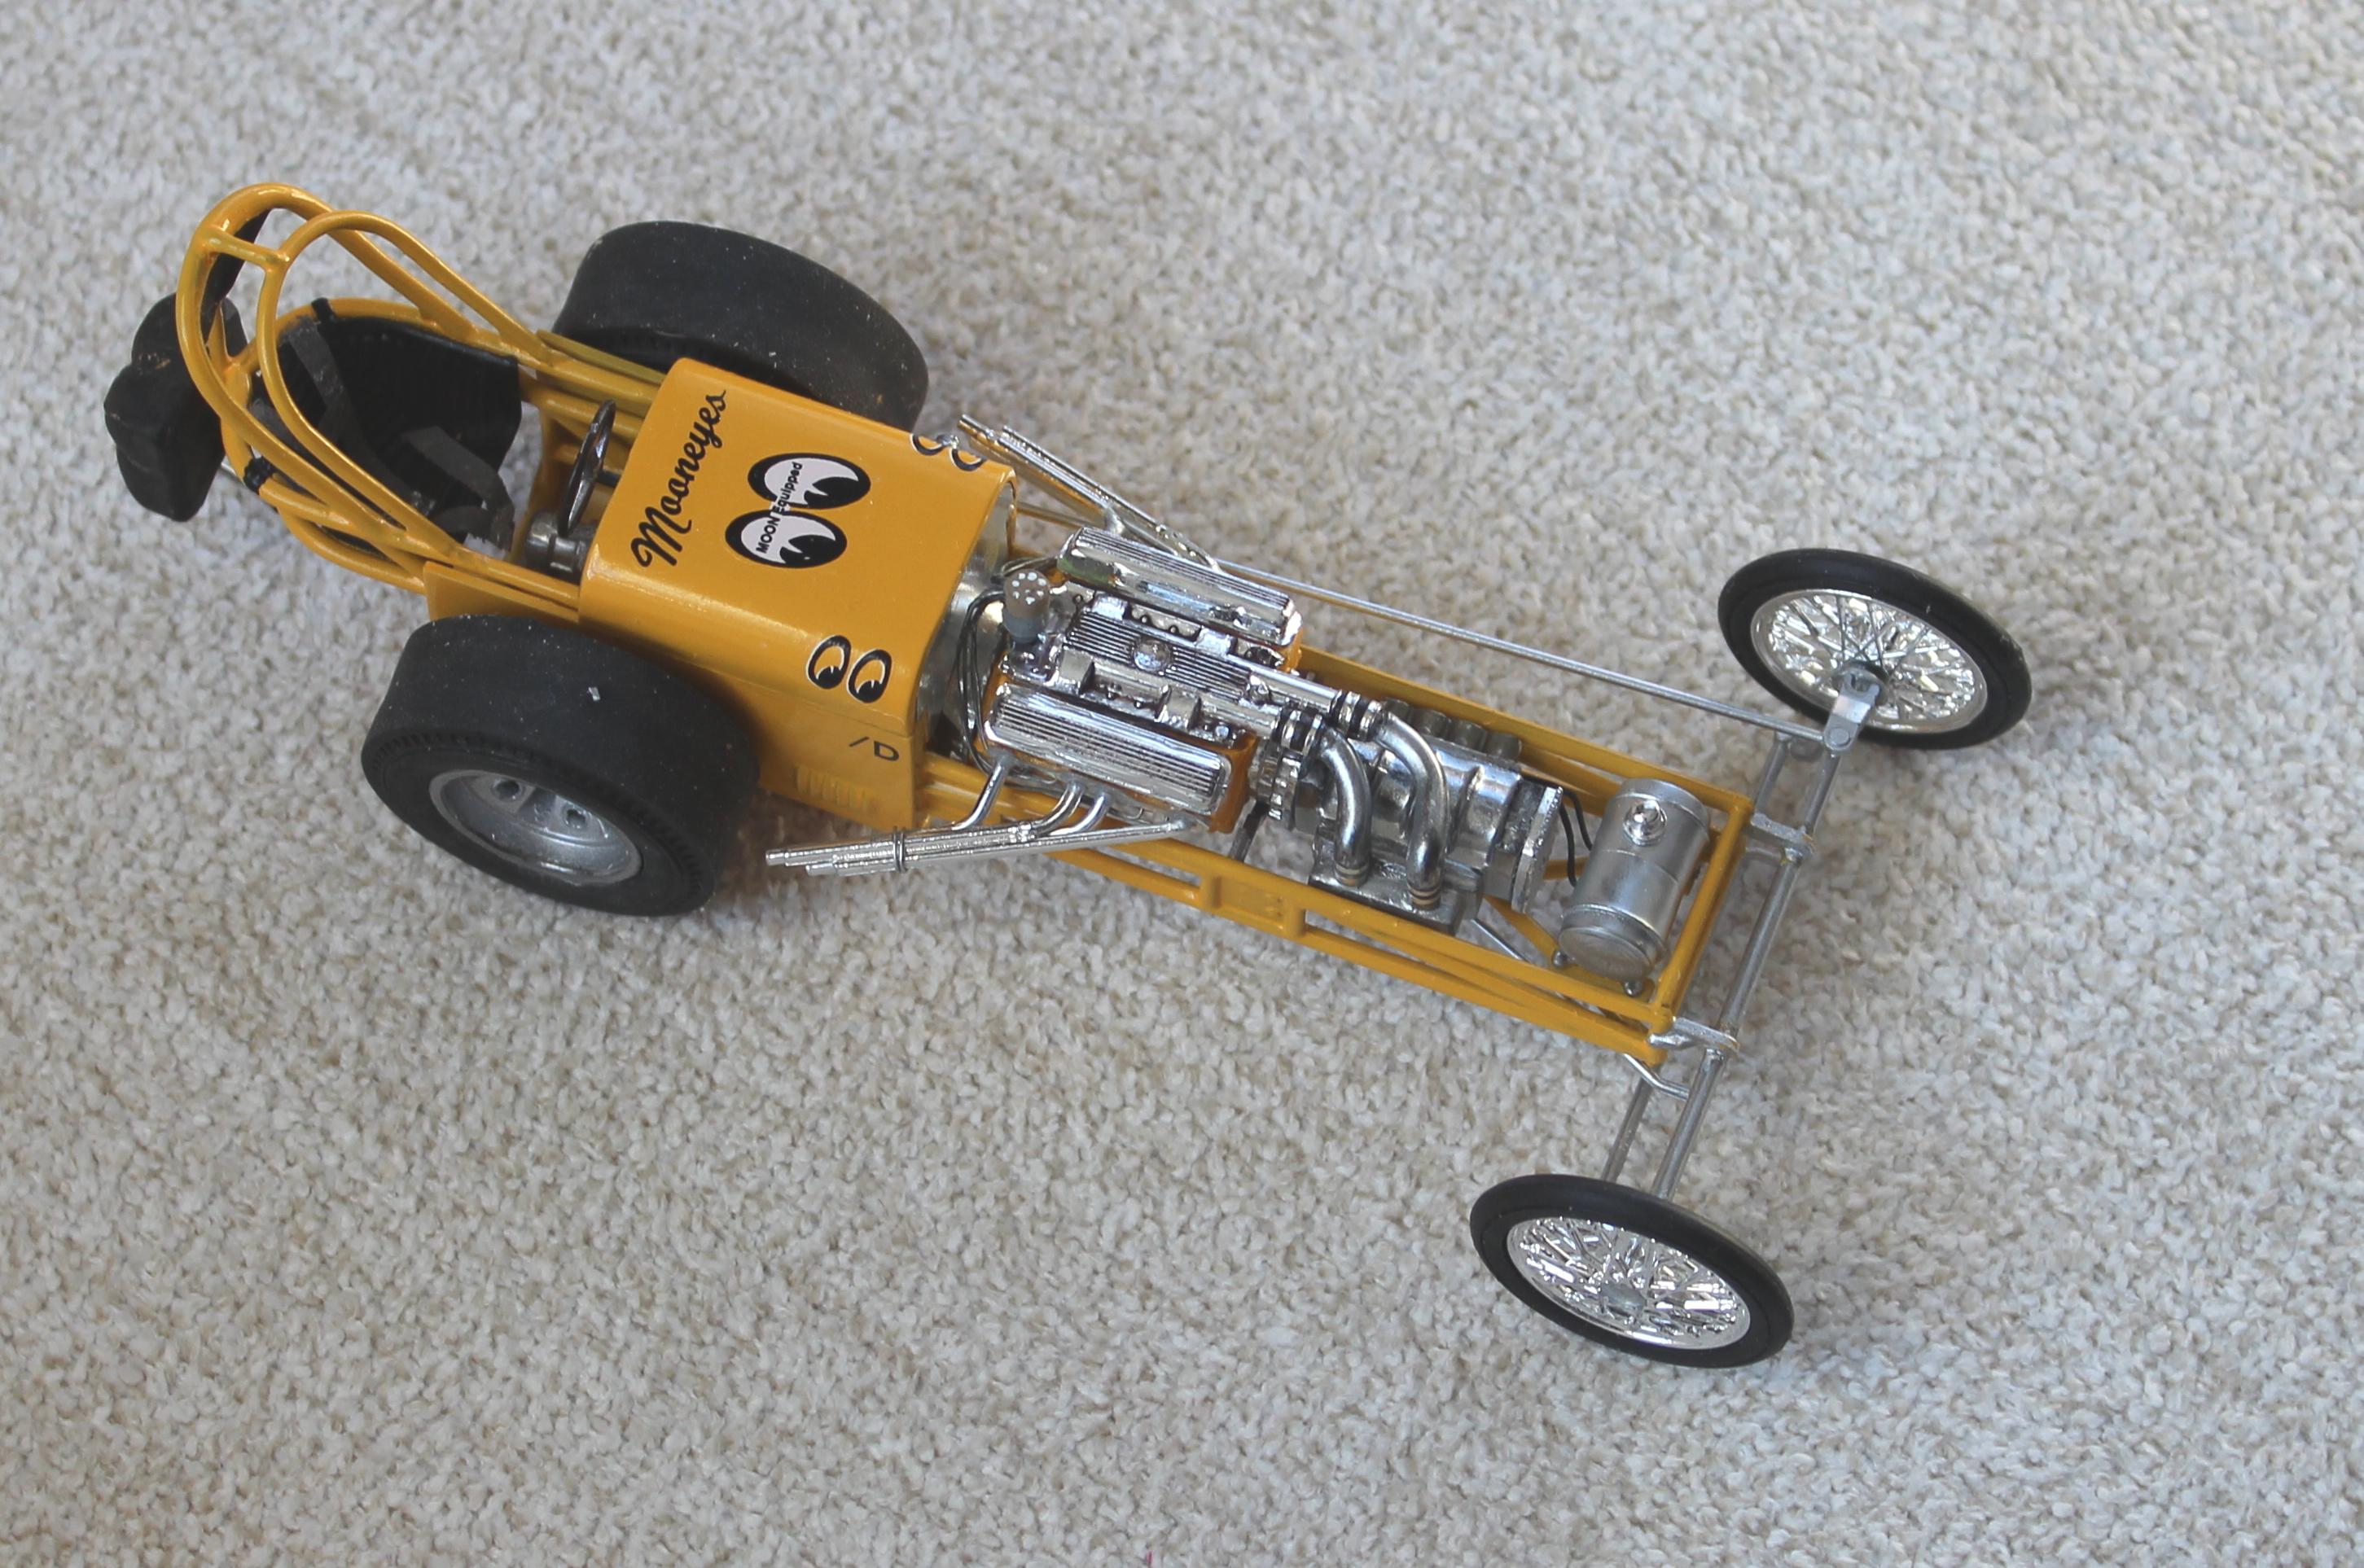
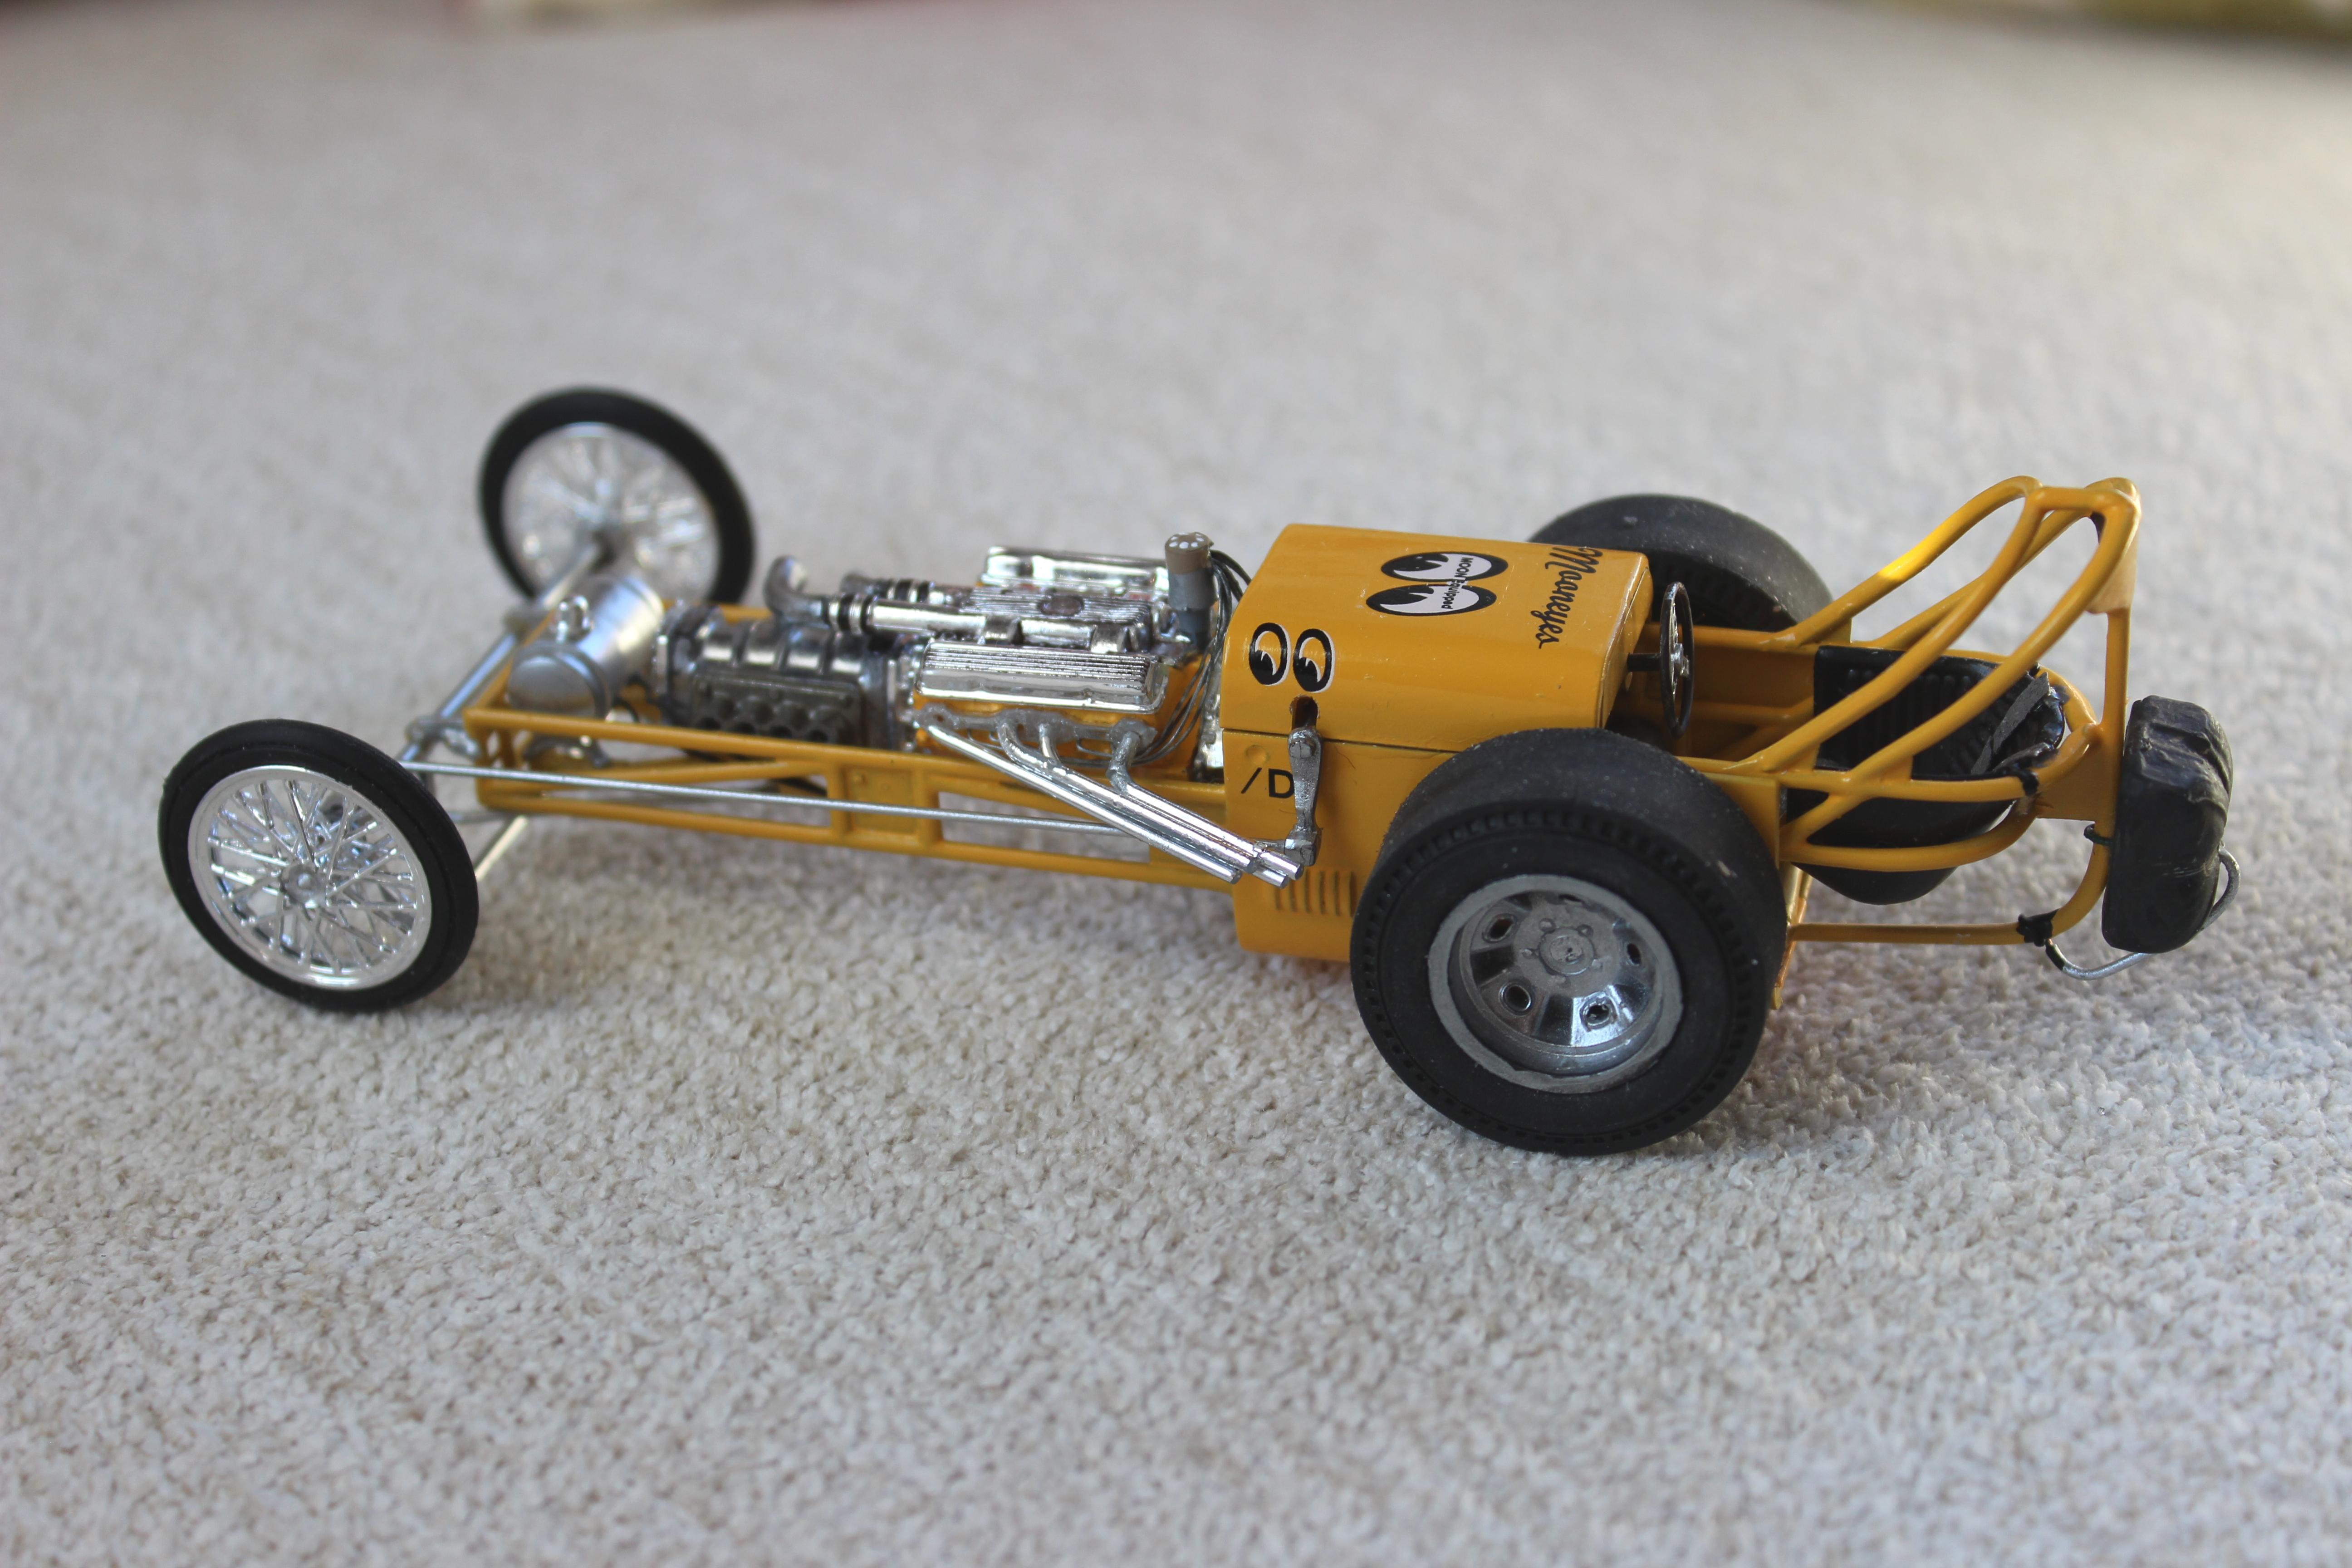
Great to see another box build of the Mooneyes in issue 212! Good work by Tim Kolankkiewicz, with good tips on a couple gotchas this kit has. A tip I would like to pass on about this kit is that the rear axle is too long. It is super easy to whack off the ends then drill through, and use the usual metal axle rod (we have a few spares in the junk box I bet). Also I shortened the injector stacks a bit to squeeze between the frame. I highly enjoyed building this kit! Not too complicated, just enough challenge to be interesting, and such a cool iconic car!
-
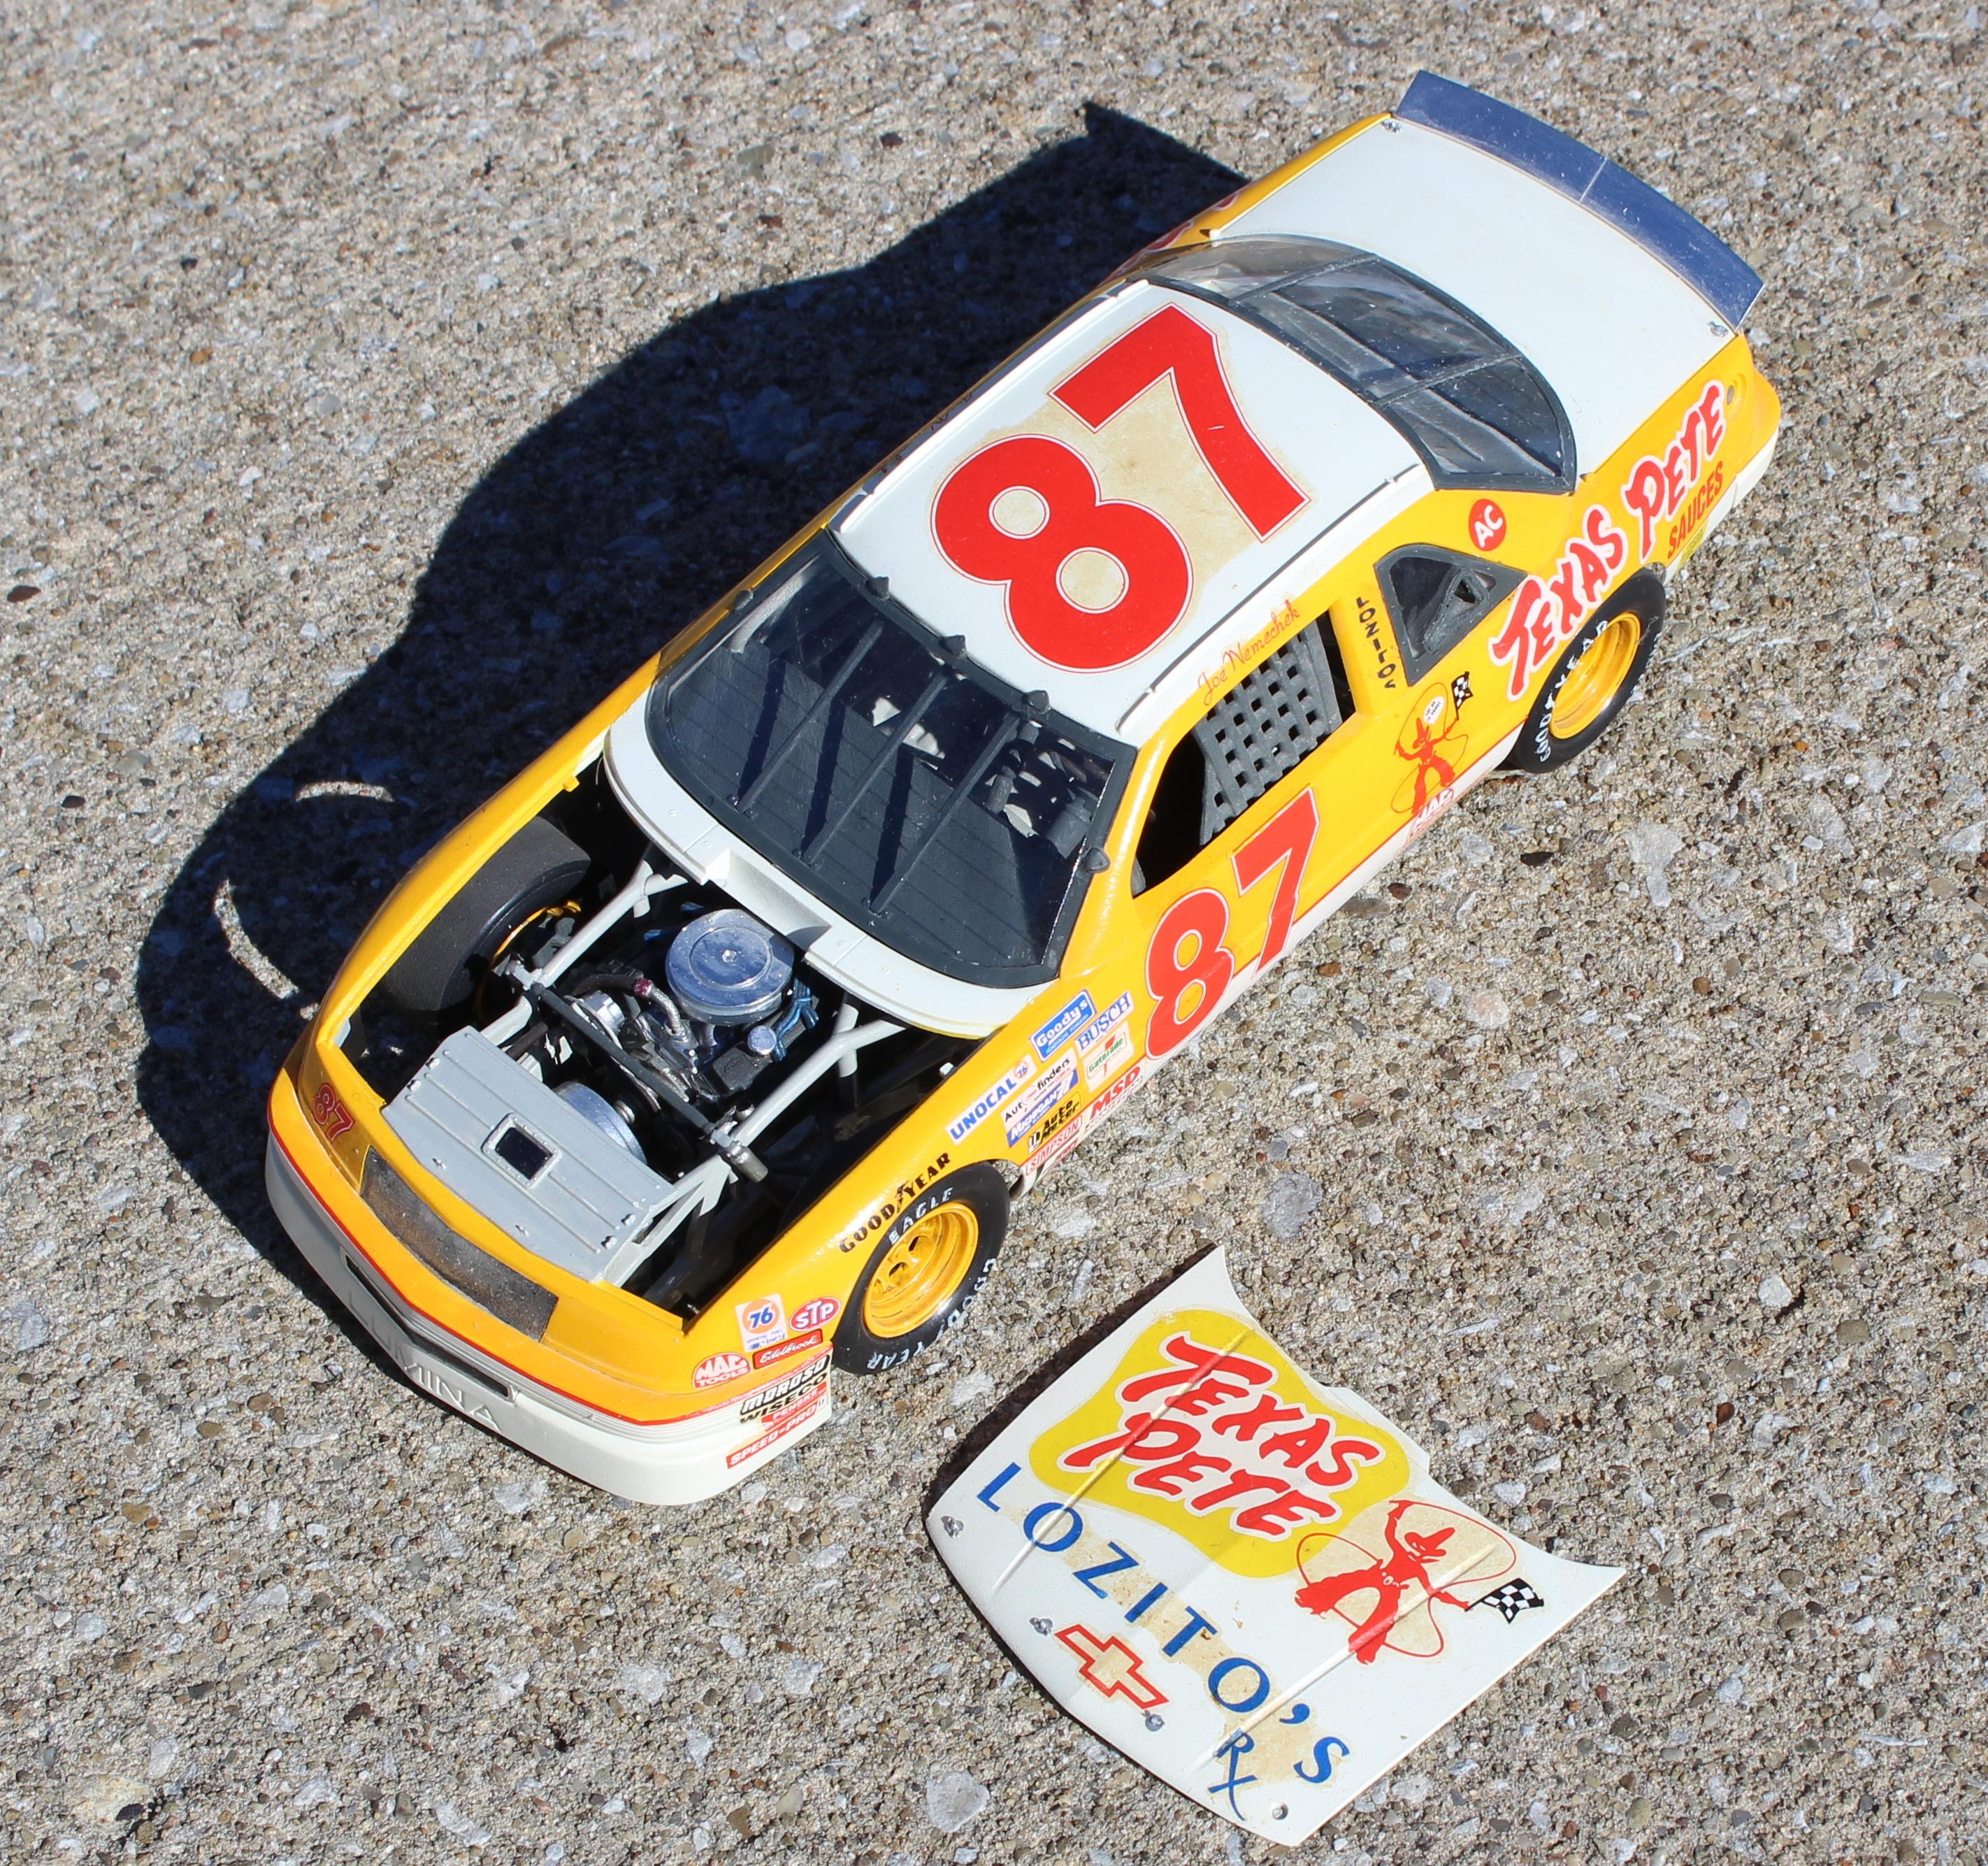
Over 30 years old! I had just gotten a Pasche H spray gun, this is one of the first subjects I painted. I was and am a fan of Texas Pete, the National Hot Sauce of North Carolina! Definite decal yellowing. Not sure to try sun bleaching it, maybe the colors would fade first.
-
1964 PEARSON/OWENS DODGE POLARA
Oliver77 replied to gks1964's topic in Stock Cars (NASCAR, Super Stock, Late Model, etc.)
Looks sharp! -
Petty '64 Plymouth
Oliver77 replied to restoman's topic in Stock Cars (NASCAR, Super Stock, Late Model, etc.)
Looks like it has got a few miles on it. Excellent! -
That is not beat, that is fine patina! Well done.
-
Man it looks great but I don't want to take a ride-along until you get some passenger belts! Killer job on so many details.
-
I agree on the snap kit. I built the 2017 Le Mans detail kit as a street car, which doesn't make much sense! You really cannot see much inside the car, and I hated to not use the beautiful decal sheet.
-
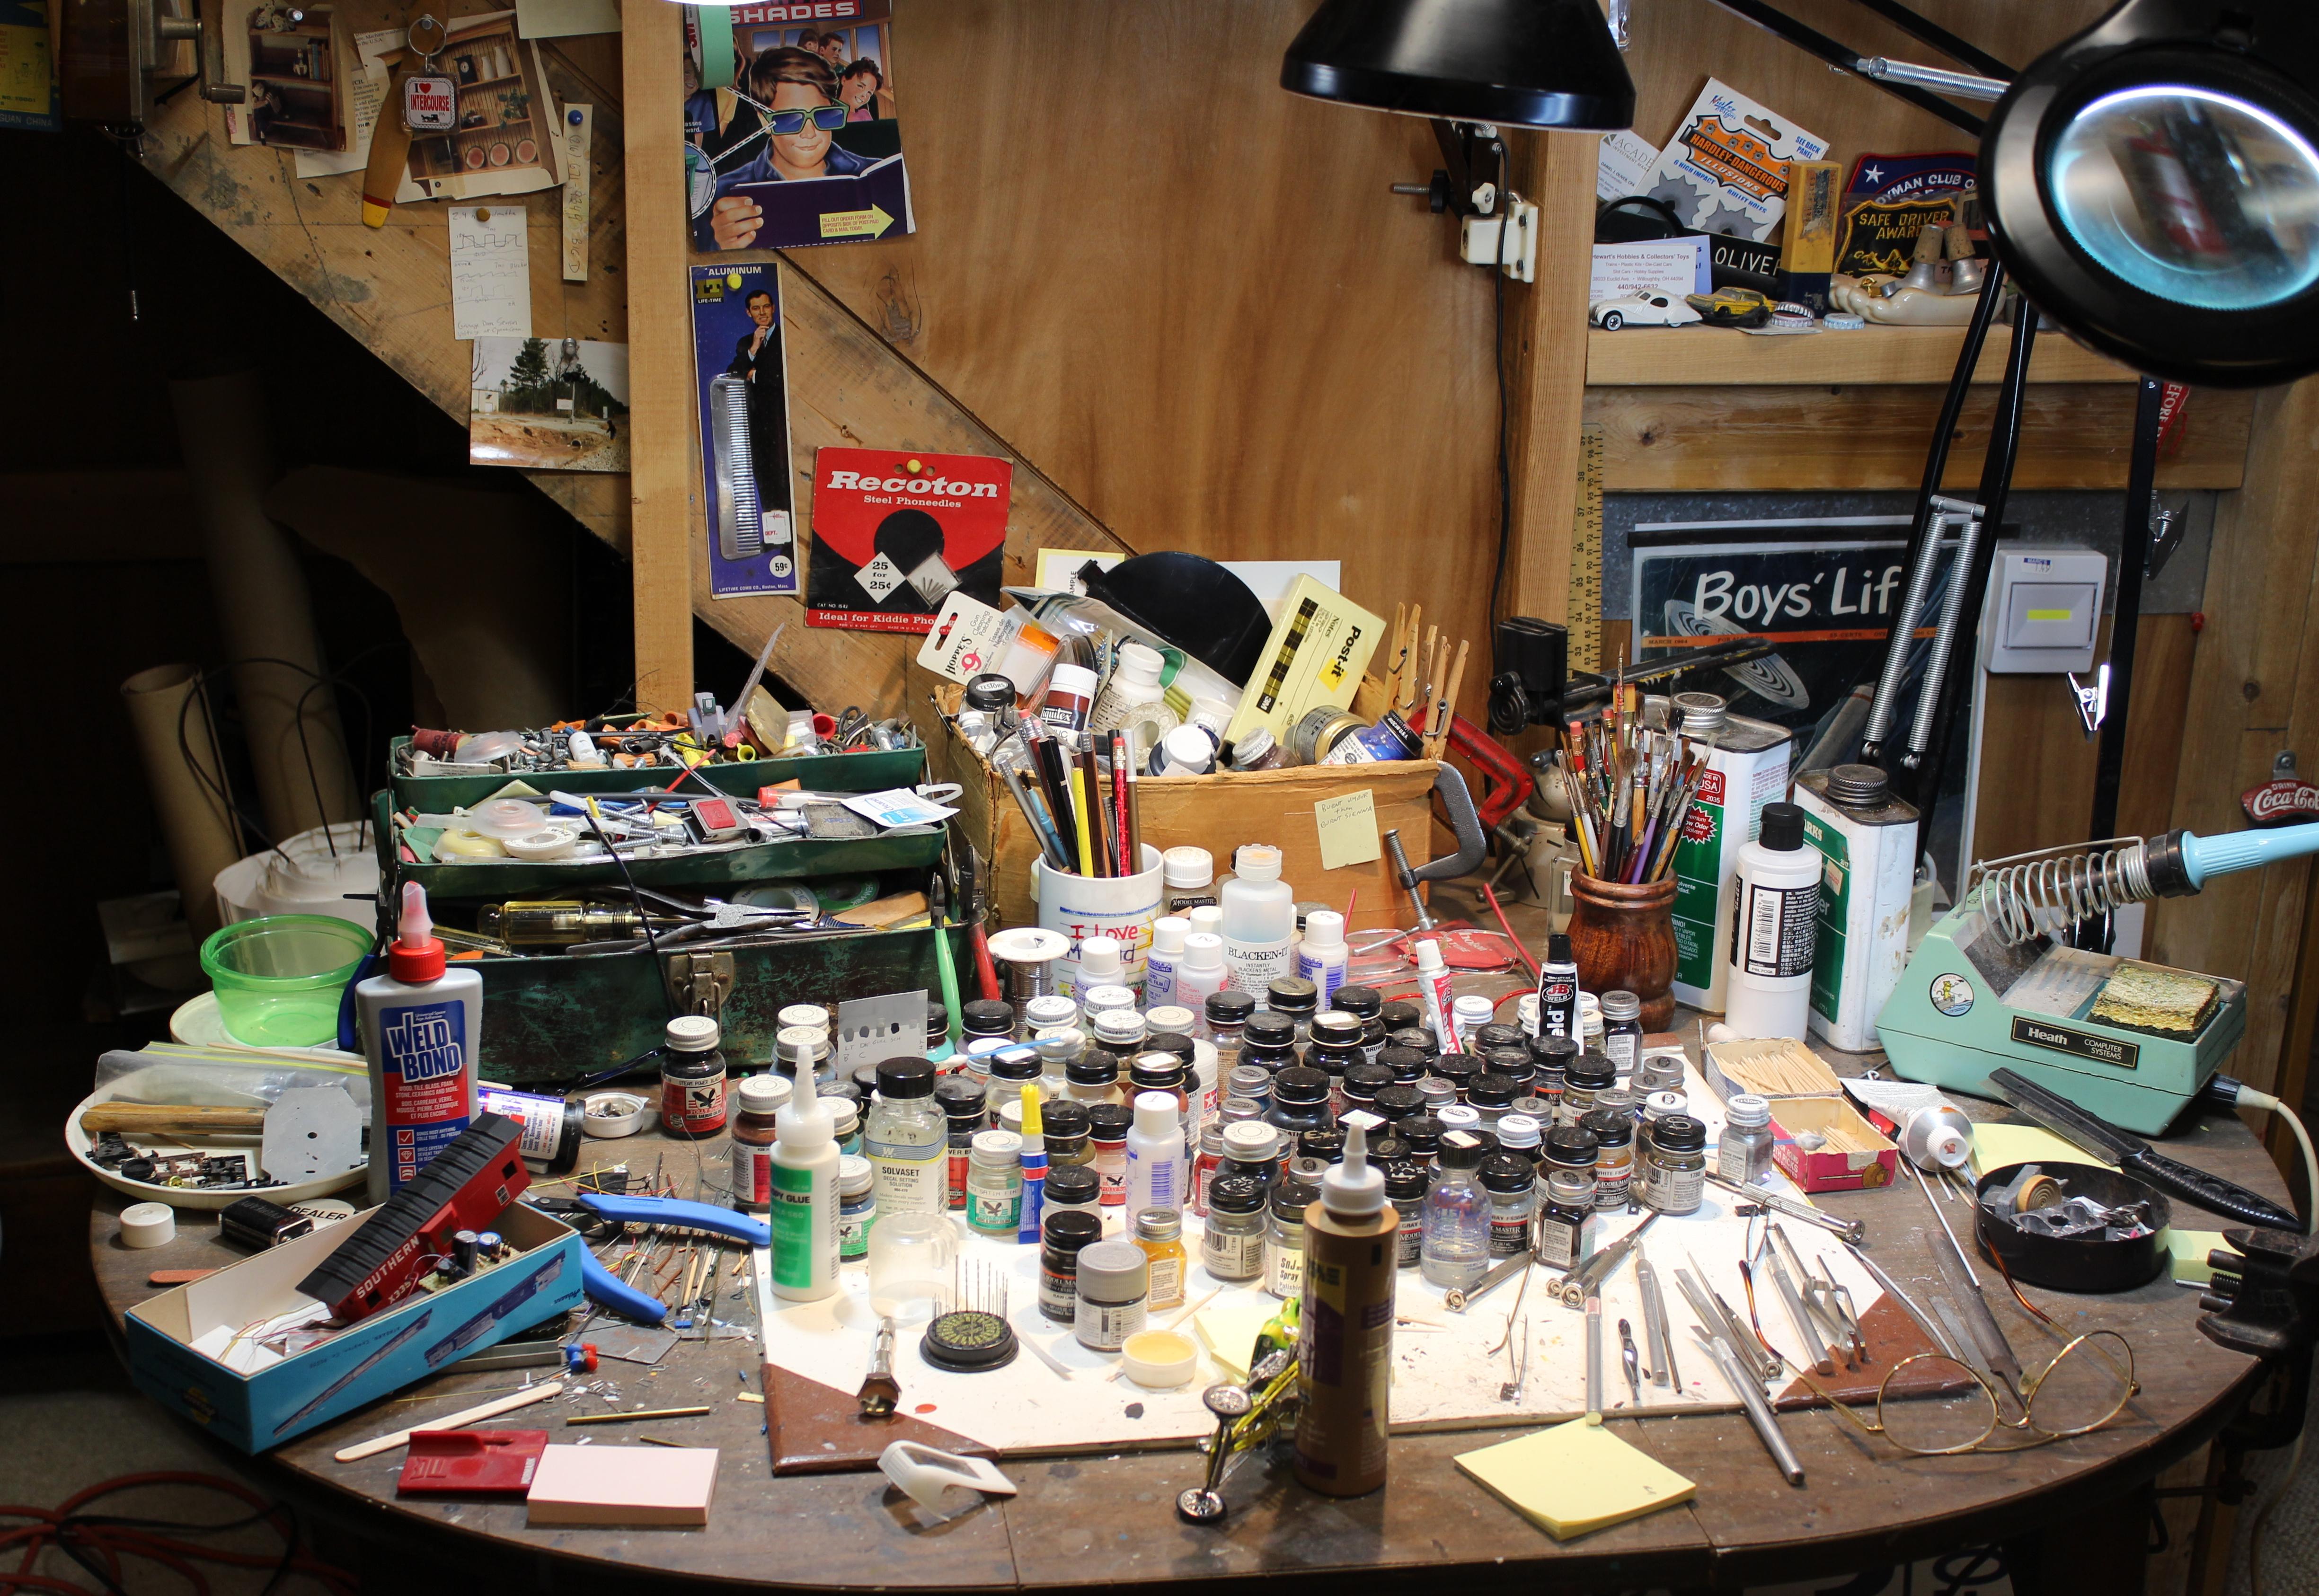
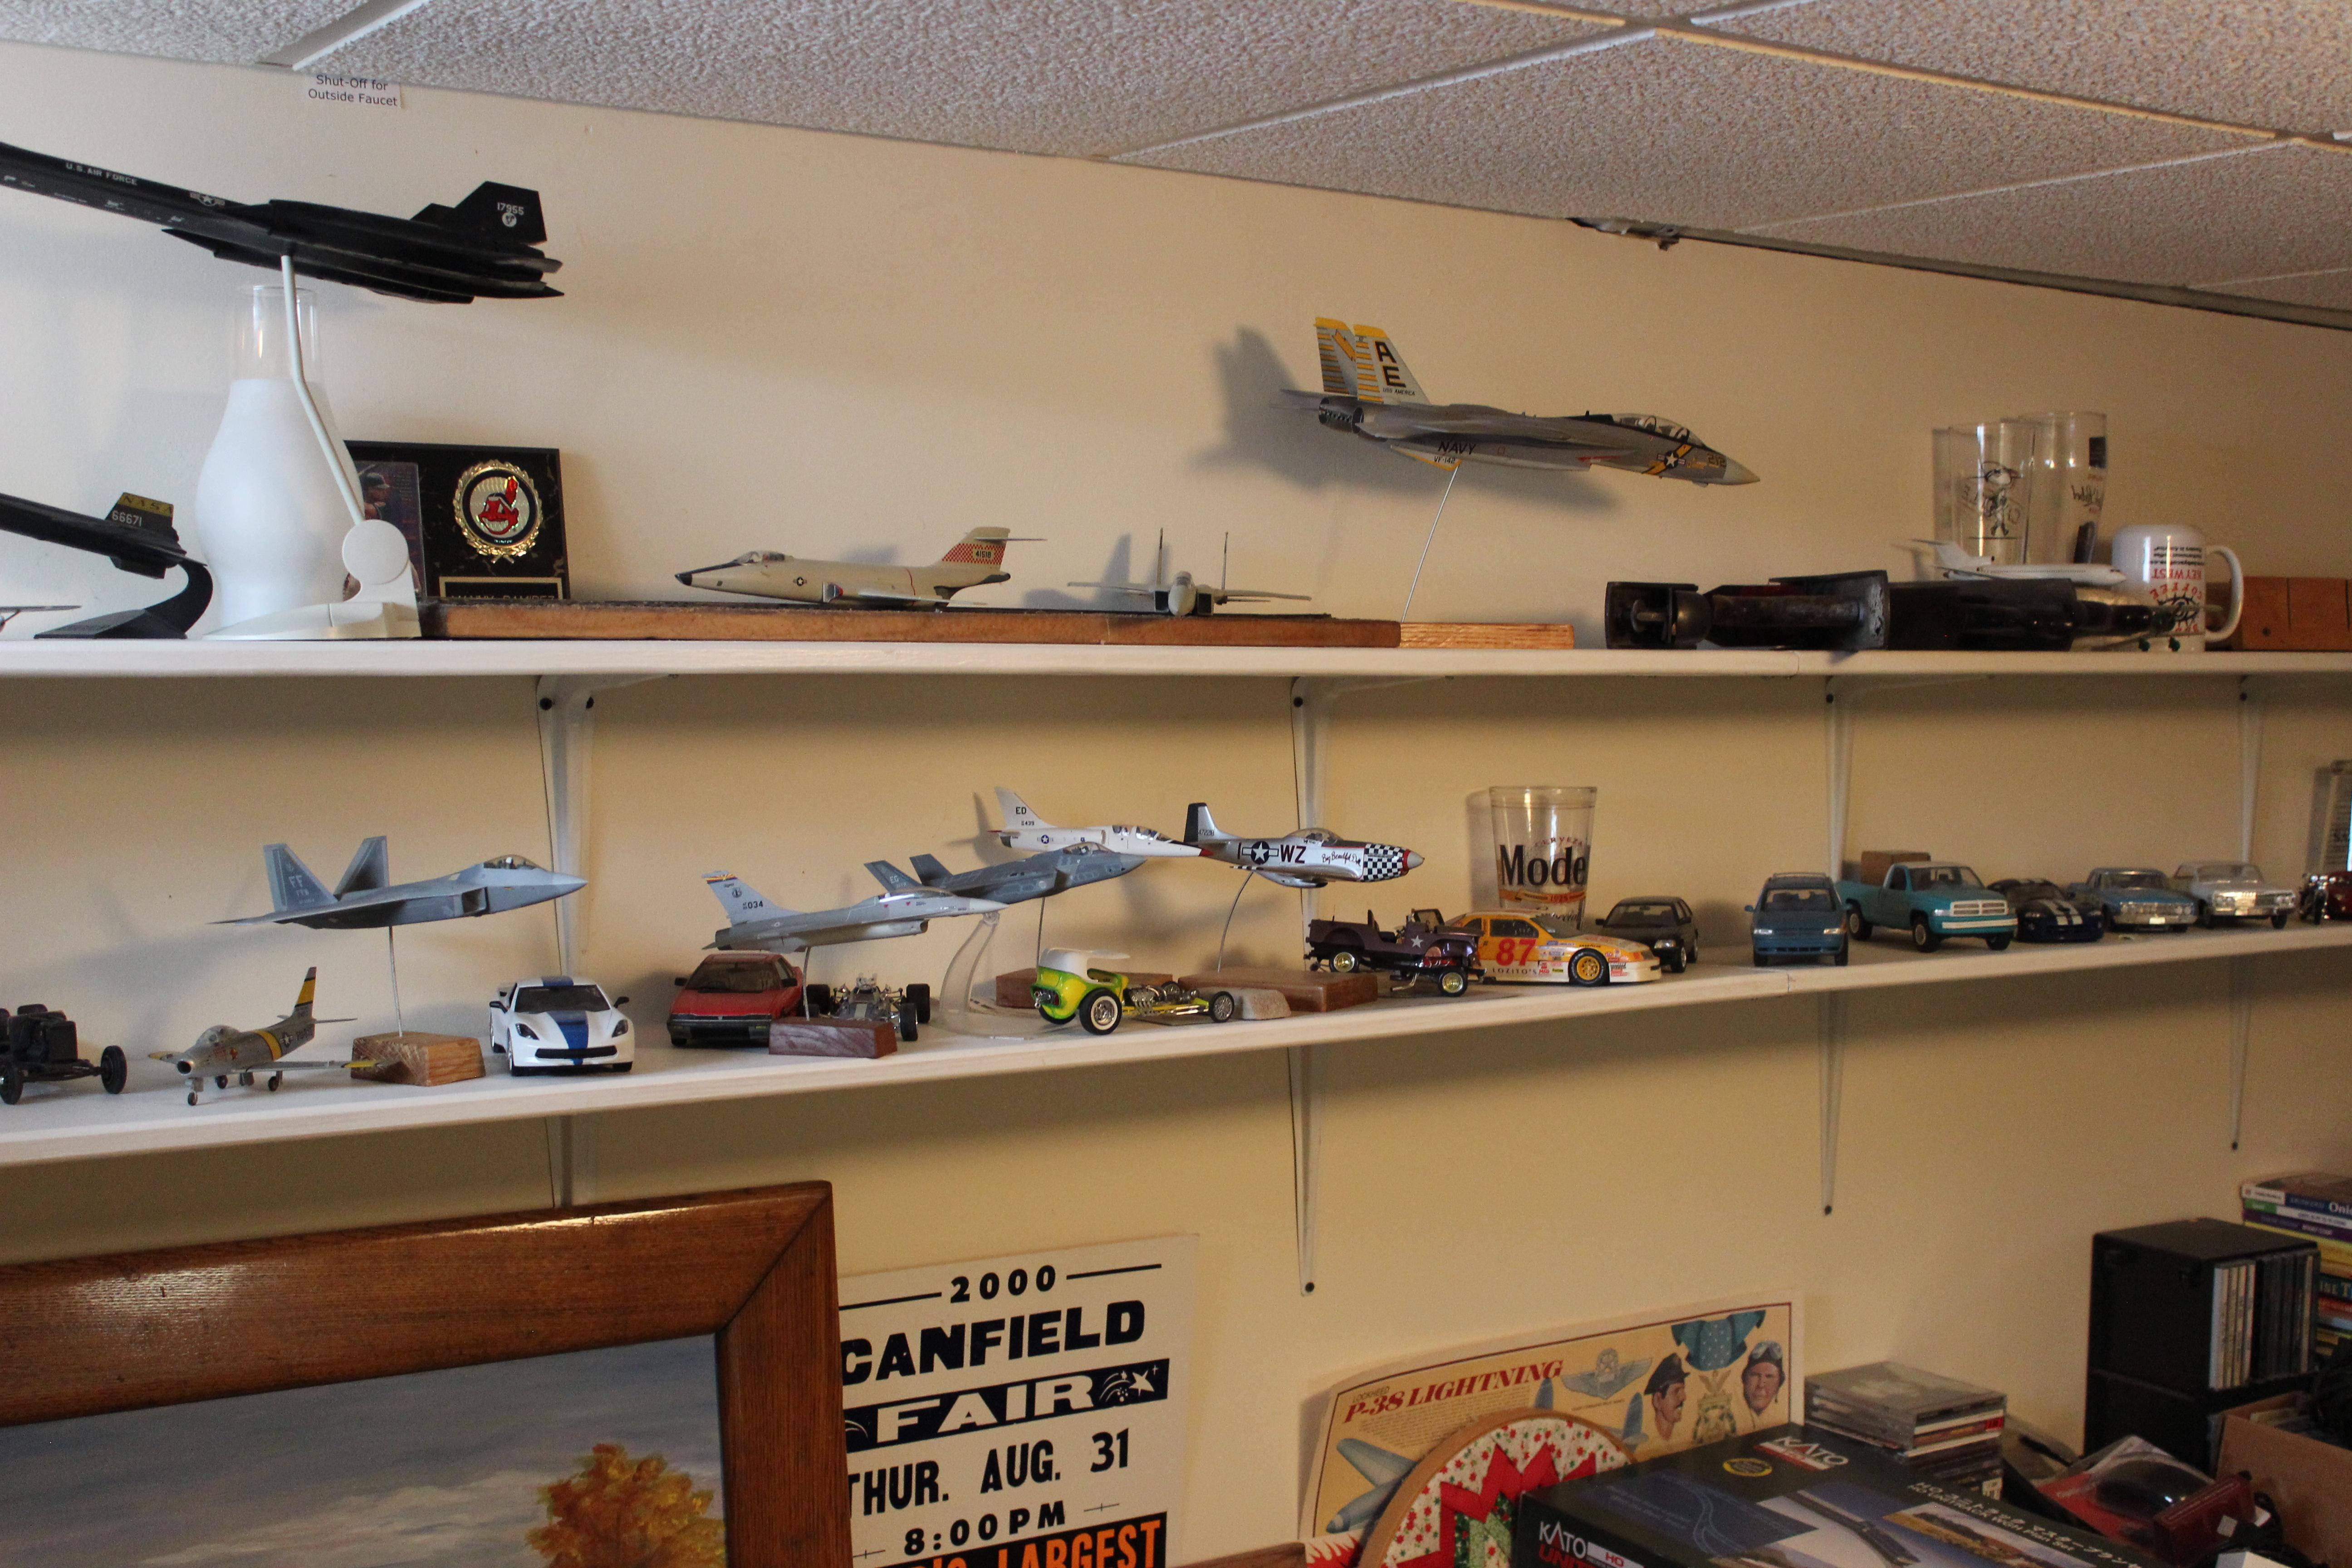
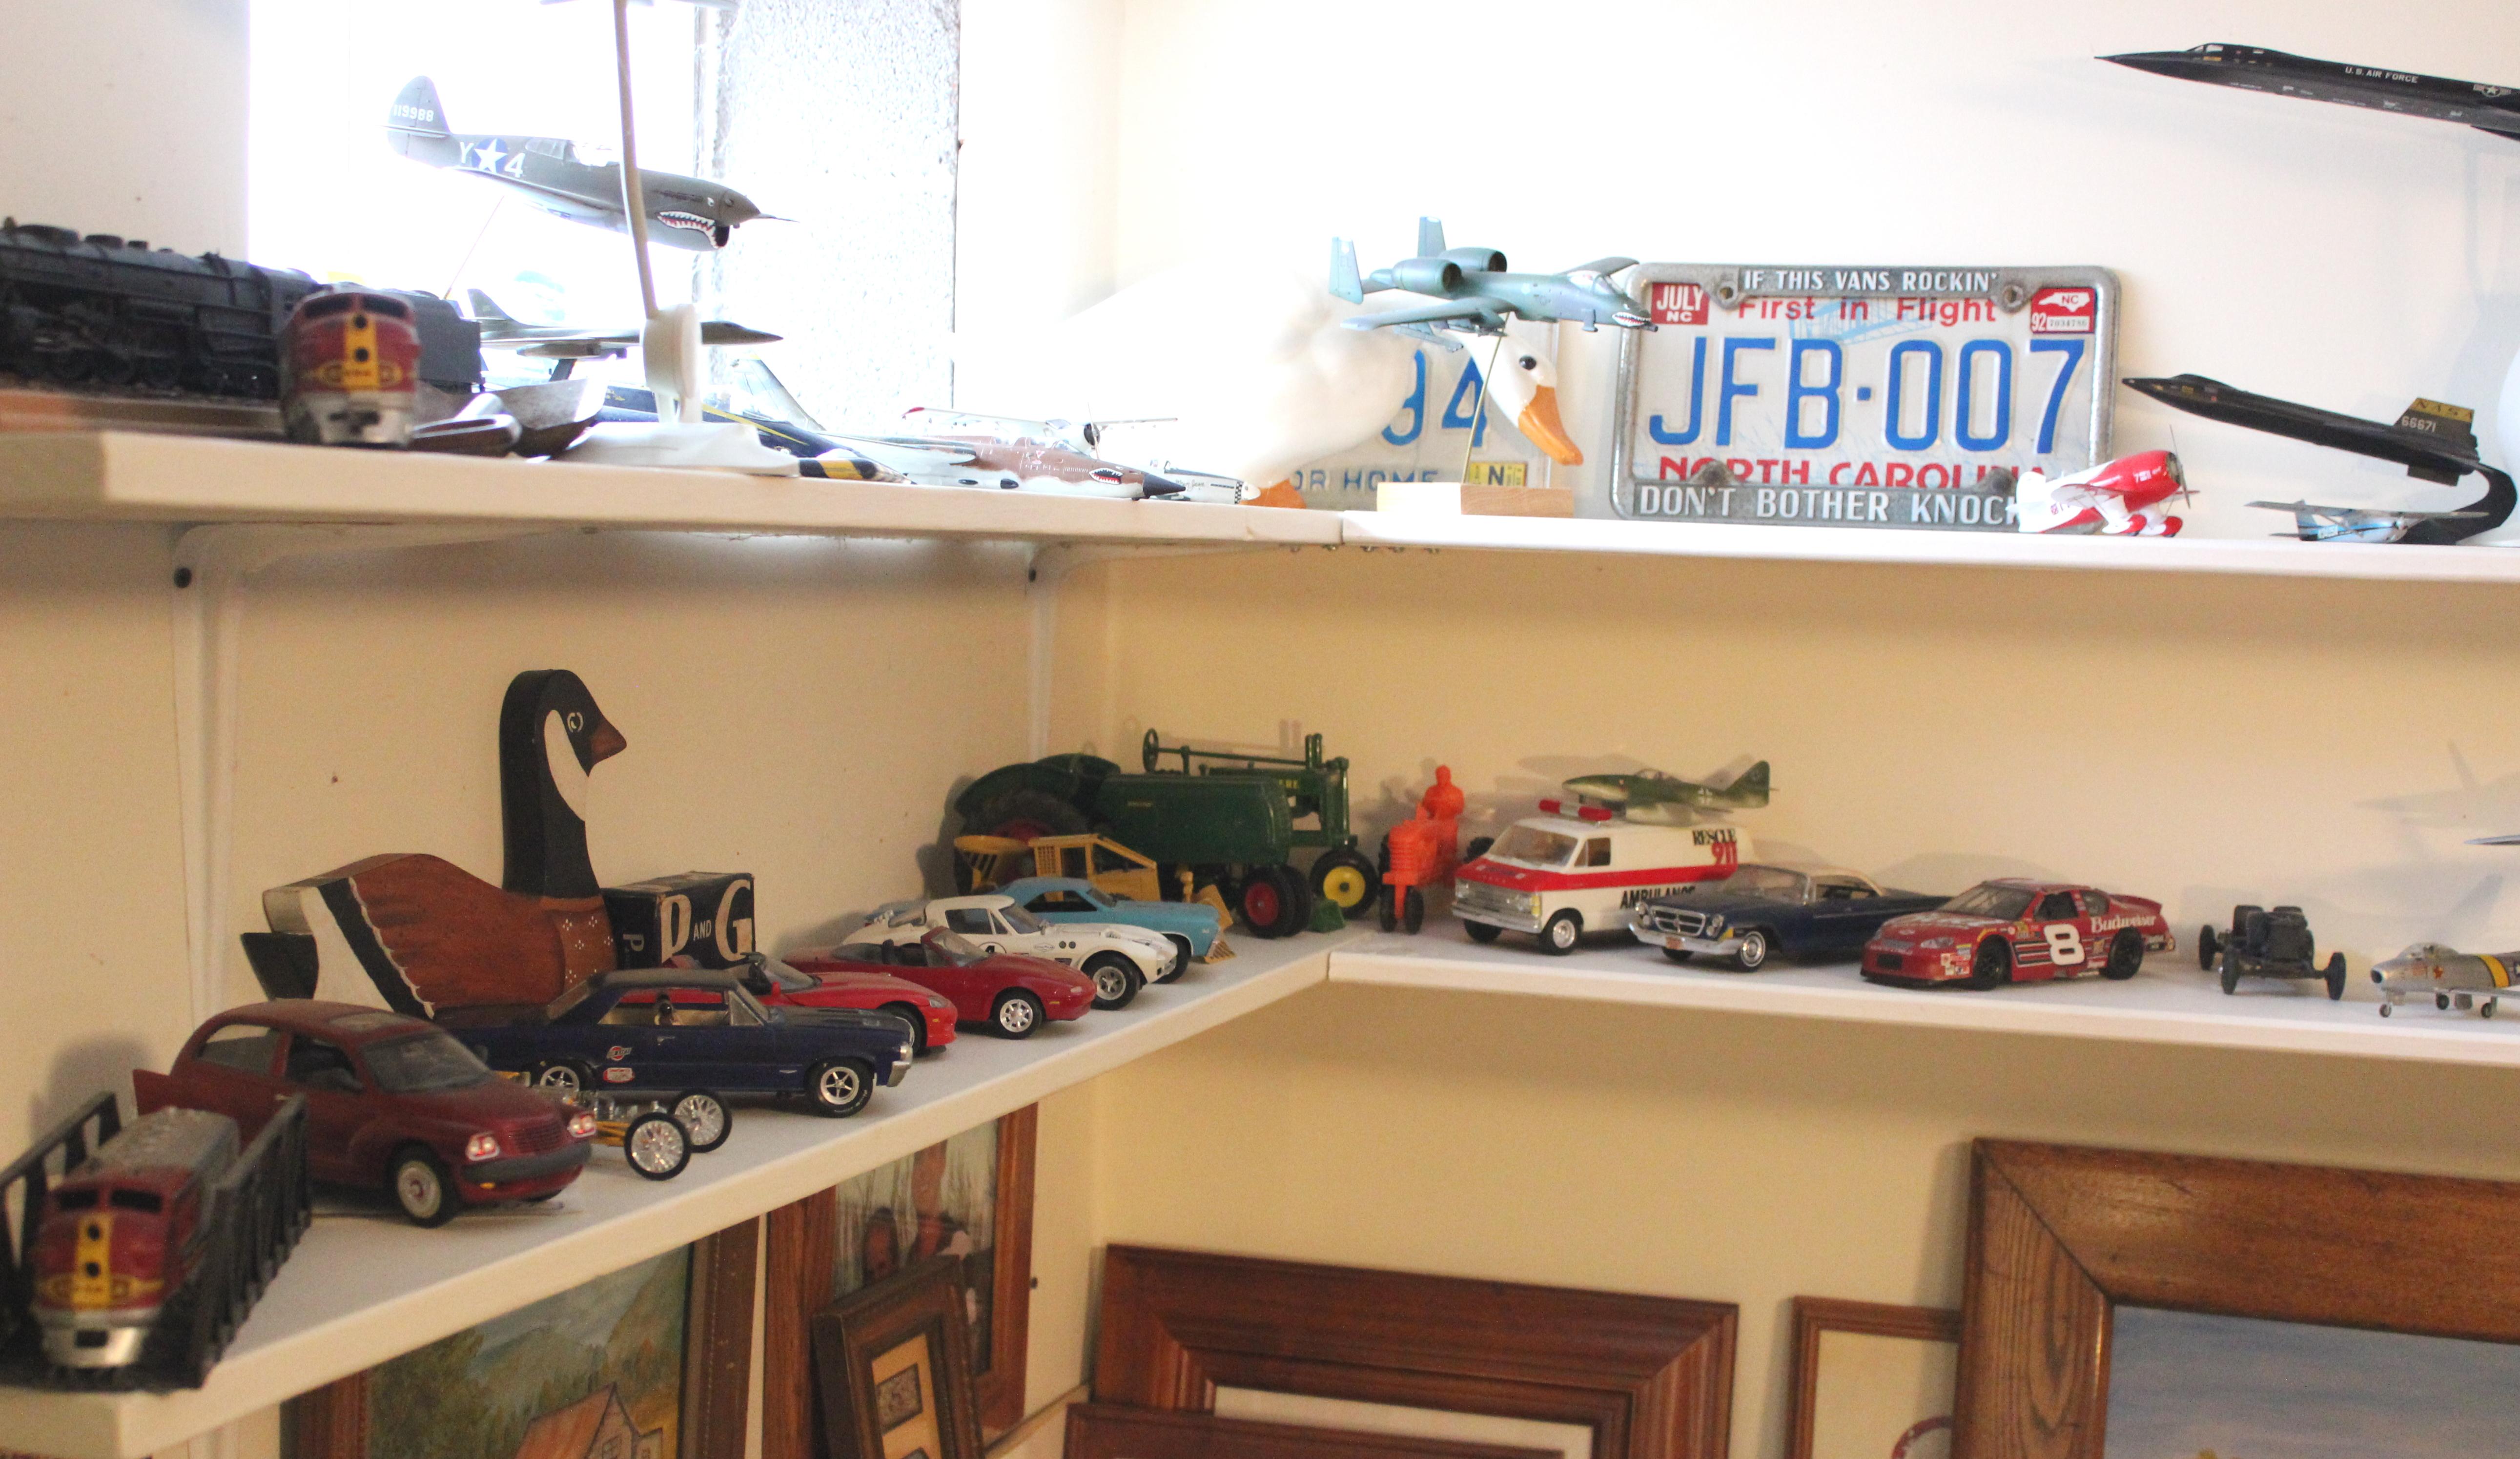
Great to be here! I have been building models since the 60’s, planes, trains, and of course cars and trucks! I’m a long time subscriber of the model car and train mags, sadly some have been declining (cough kalmbach cough) so I have been looking more to internet forums. Then my Model Cars subscription came back to life! Been a while since I built a car so I came here for some research, wow there is a lot of great stuff here. Here are a couple of pictures of my small but untidy workroom.
-
Get a cuppa java... This is my introduction...
Oliver77 replied to Raymond Gallant's topic in Welcome! Introduce Yourself
Your name is somehow familiar! What a comprehensive background. Looking forward to hearing more from you! -
The paint looks great. I have not had this problem with foil yet so I’ll keep this trick in my back pocket.
-
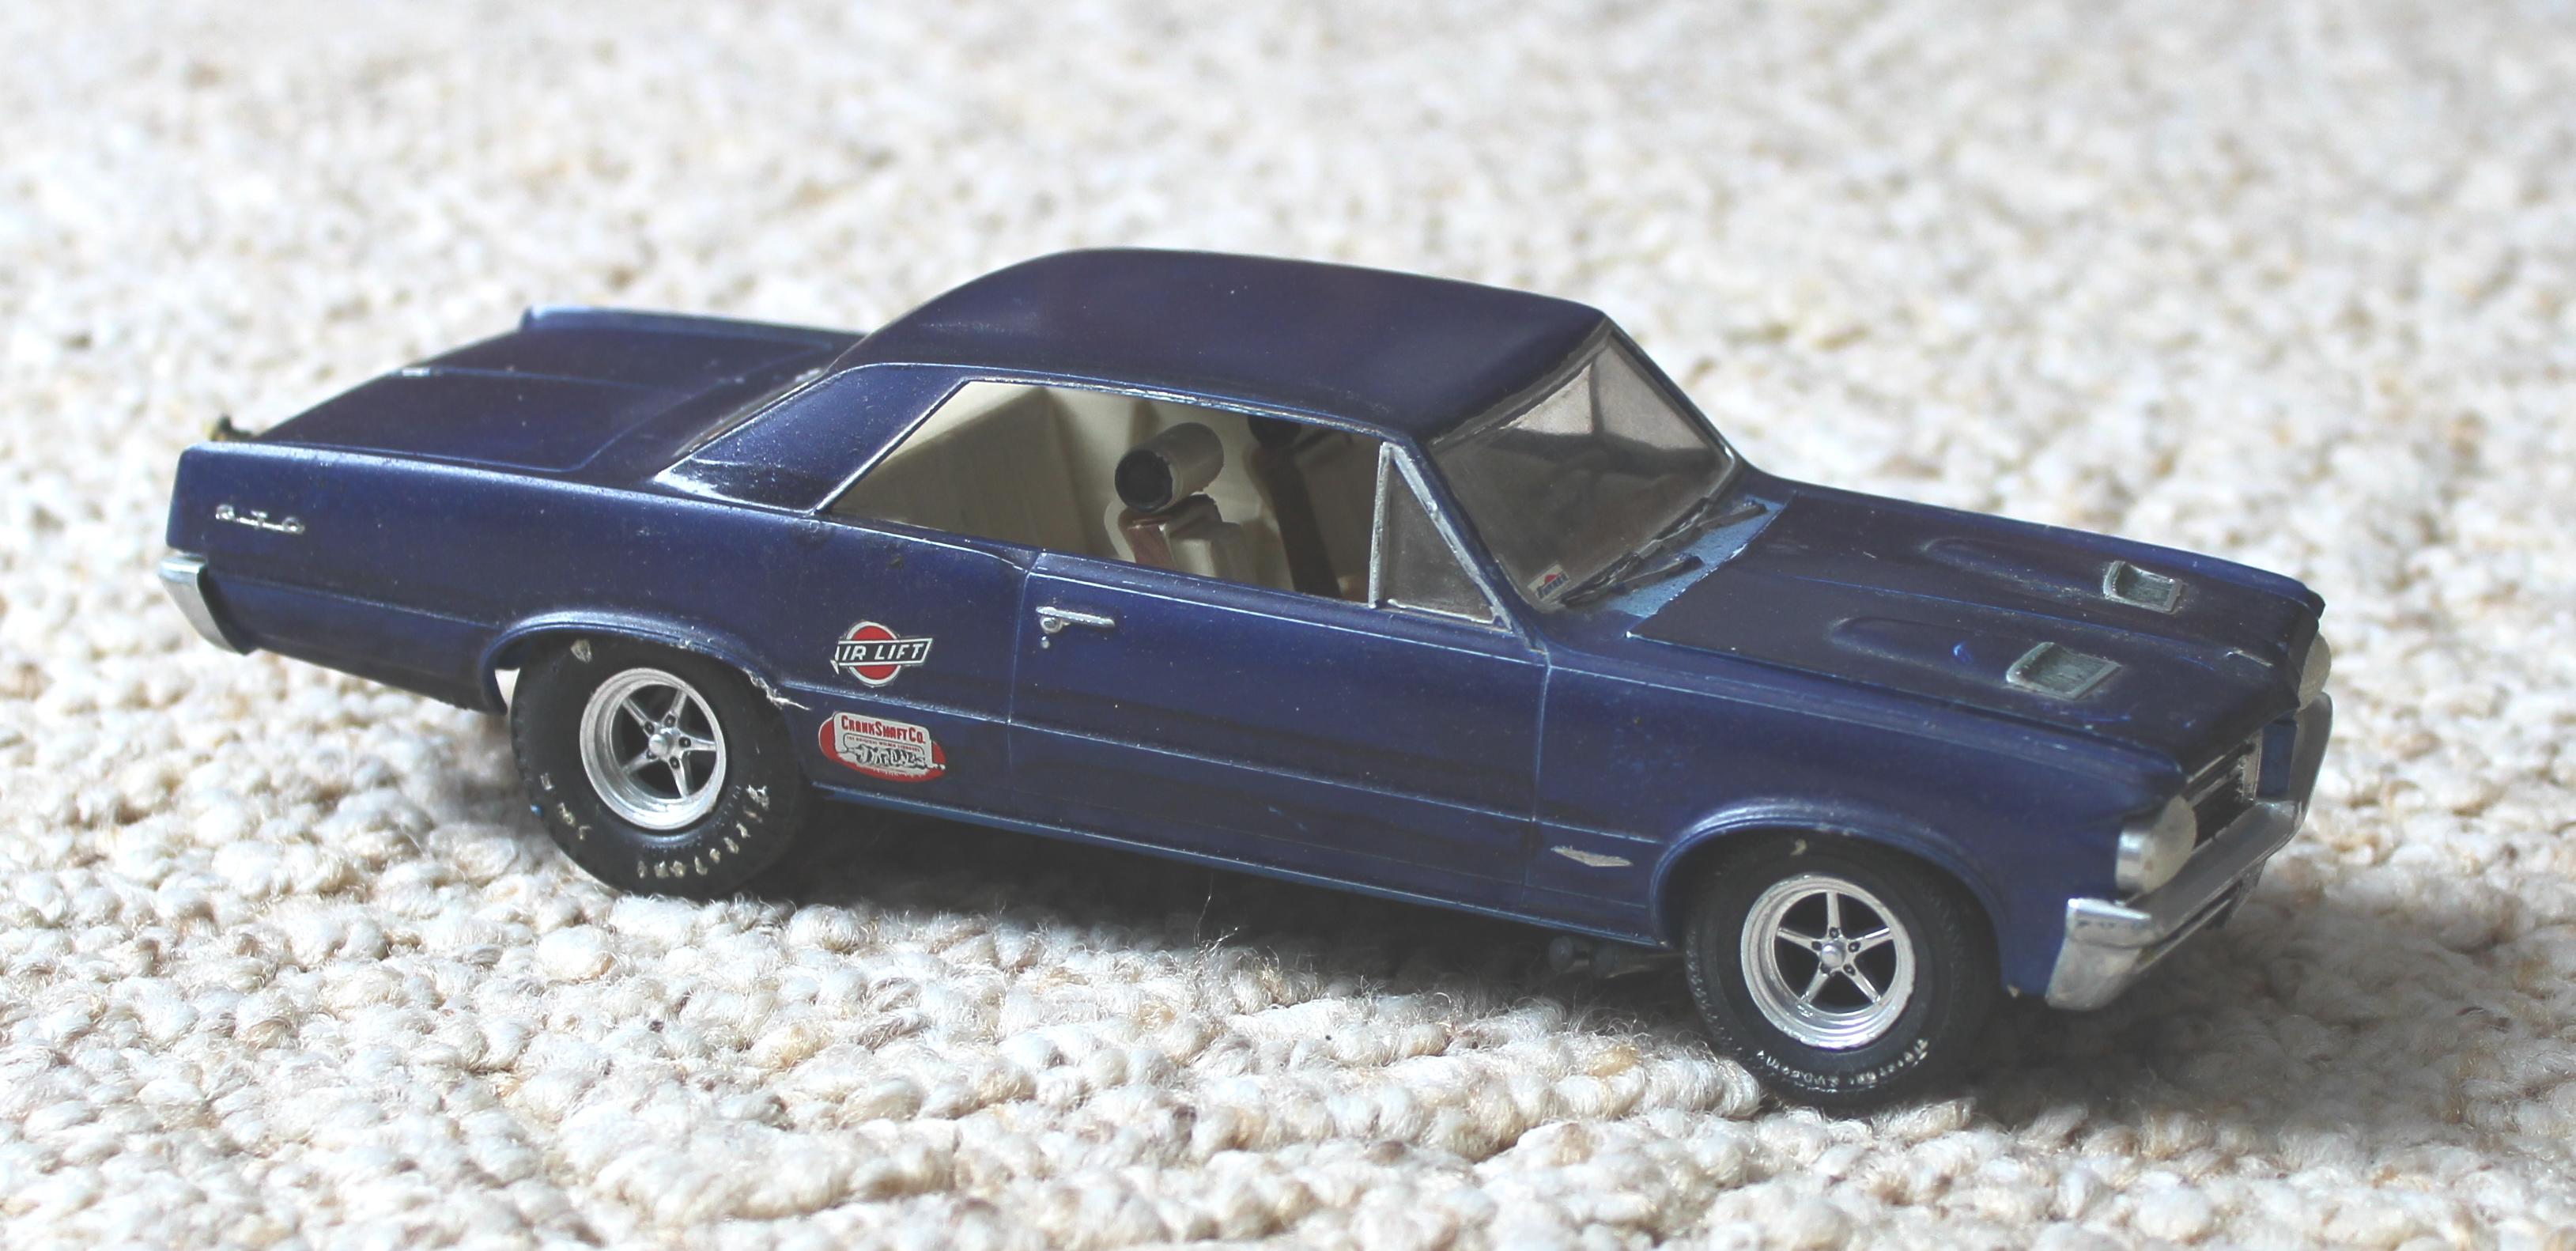
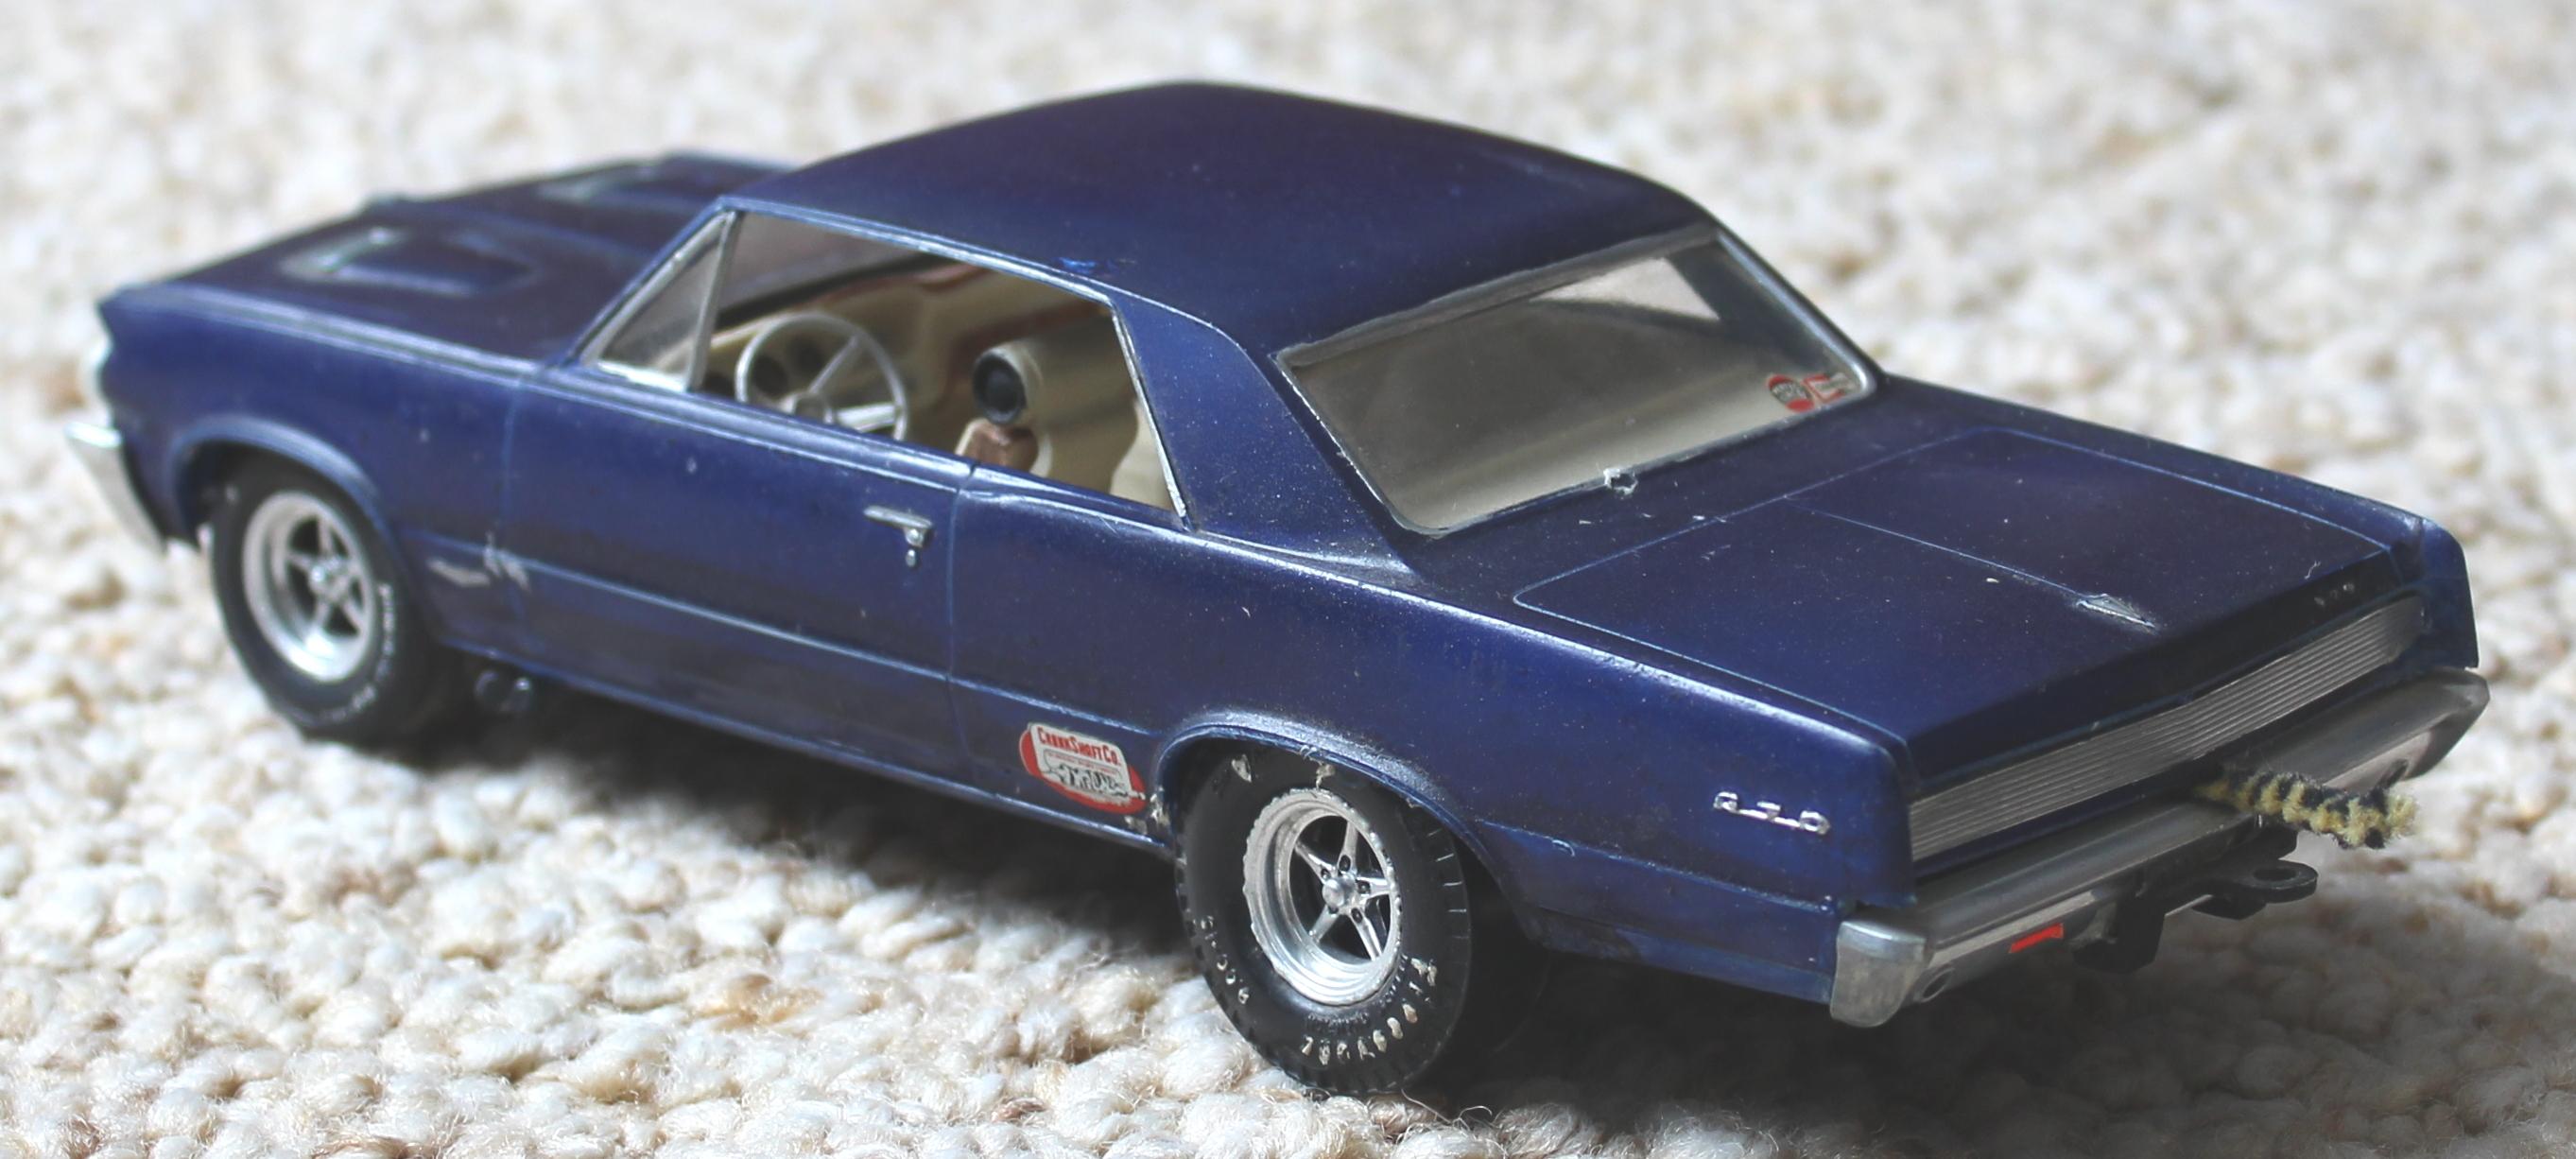
This is a true survivor! I built this when it came out, and it was one of my first spray paint jobs. (Probably AMT lacquer) Chrome trim is Testors brush paint (it is almost dry now, I’ll give it a couple more weeks LOL). A lot of attempts at detail painting. Big rear tires supply the proper stance. The interior uses custom seats, has woodgrain sticker accents, dirty footprint decals on passenger floorboards, even a green alligator on the rear floor! The hood still has the dreaded metal clip installed. Has a rear bumper hitch, and the coolest feature (to 11 year old me) is the tiger stripe pipe cleaner hanging off the rear bumper! It definitely shows decades of shelf wear but dang it, that 64 GTO body is a tuff looking car.
-
Wow there are some beautifully detailed Mooneyes builds here! Mine is much simpler, pretty much out-of-the-box. After the usual cleanup to the frame and body panels, I sprayed Tamiya TS-47 yellow over primer. I stripped much of the chrome in purple Super Clean, and cleaned up the moldings. I just couldn’t leave the Potvin blower setup with prominent seams. I used SnJ polishing powder over black spray enamel to recreate the shine. The rear wheels had some nasty ejector pin marks so they got the same treatment, as did the Moon tank and front axle. The motor was stripped and brush painted Testors flat yellow. (Pictures show a subtle difference of yellow on the motor.) I drilled the magneto and epoxied fine floral wire for plug wires. Not sure about the firing order! Instead of cleaning up the drag link rod, I replaced it with styrene rod. I added a junk box parachute. Man am I happy Atlantis got this out!