BK9300
-
Posts
1,986 -
Joined
-
Last visited
Content Type
Profiles
Forums
Events
Gallery
Everything posted by BK9300
-

1980s MAC Corporation Car Crusher
BK9300 replied to StakerAlloys8's topic in Model Trucks: Big Rigs and Heavy Equipment
Very cool project! -
Single drive crackerbox
BK9300 replied to 53gmc's topic in Model Trucks: Big Rigs and Heavy Equipment
Great job on your modifications - nice looking build. Also like the photography in the sunlight - crisp shadows of truck on the ground makes it look all the more realistic. -
Western Star 4900 FA plow truck
BK9300 replied to BK9300's topic in WIP: Model Trucks: Big Rigs and Heavy Equipment
Weather was good enough today, so warmed up the shed and finally got ready to prime the hood and re-prime the cab. Yesterday, while getting ready to paint today, I was fussing about how I was going to handle the hood, to be able to prime it all over in one sitting. I settled on making a little jig that would attach to the hood, through the holes for the signal lights, and give me something to hang on to while spraying. After snugging up the two little nuts, it was out to the shed. This jig won't work for the top coat, because the inside of the hood will be masked off - The jig is quite sturdy and the hood is very secure - I can turn the hood which ever way I need to, so all of the hood gets primed - First light coat of Tamiya grey primer on the hood - second on the cab - and looks good from this pic. Looks a bit washed out, because desk lamp is right over head - Looking closer, though, I've got some work to do! Front, left of hood has a bunch of little air bubbles in the putty - right side was worked up the same as the left side, so, go figure??!!. There are several other small areas on the hood - sanding scratches and a couple divots in the putty, that need attention (hood looks darker because light angled lower, to see holes). This was a very light coat of primer and I don't know if sanding the hood back will reduce any of the holes, but I'll see. And, with the thin coat, I can still see the borders where puttied areas meet styrene. Again, hoping next two coats of primer will cover that up. Now that everything is no longer white, I like the definition that shows up better, in the hood brace and inner fenders - Even with some work yet to do on the hood and cab surfaces, I'm happy to see them both the same colour - also very happy with how the raised portion of the hood is turning out, too. Going to let things set for the day and start some light sanding and a bit of putty work tomorrow. Also need to get air cleaner and its mounts sorted before too long as well. Overall, hoping for improved results with the next coat of primer. Take care!
-
Fine work on the tail light panel, Scott - was thinking you wouldn’t let that stay unaltered!
-
Do you make notes/memory aids as you build?
BK9300 replied to Mattblack's topic in Model Building Questions and Answers
For my scratch building, I log time spent at the bench in a spreadsheet and take lots of pictures to remember procedure(s) for next builds. Nearing the end of a project, with all the components needing to come together in the right order, it definitely helps me to map out the sequence ahead of time with detailed notes. -
Western Star 4900 FA plow truck
BK9300 replied to BK9300's topic in WIP: Model Trucks: Big Rigs and Heavy Equipment
Thanks very much, Mike - really appreciate it! Definitely not a regular build. The plow lights I made up in Sketchup and @Bren printed them for me. I'm couldn't tell you how to find them, but if you get in touch with him, I think he put some of my plow truck stuff up on his page in Cults. I could also send you the .stl files for the housings and the lenses, if you print your own stuff. Let me know! -
Western Star 4900 FA plow truck
BK9300 replied to BK9300's topic in WIP: Model Trucks: Big Rigs and Heavy Equipment
Raining today, and too humid for me to trust myself painting anything today. So, instead, had a look at something I was going to do after painting the hood, but which makes a lot more sense to do before any painting. I have been delaying work on the headlights, for no good reason, other than I wasn't really clear about what I wanted to do. Gathered up a few pieces from the two Western Star kits, and set out a plan for the headlights. Going to use the headlights from the Alaskan Hauler kit, as housings, and the headlight surrounds and lenses from the Constellation kit - The modified hood was from the Alaska Hauler, so the 'housings' fit in well - The surrounds from the Constellation kit seem, to my eye, to look like the ones on the 2010 WS - I shaved off the raised ring around the Hauler's headlights - this will give me a great surface area to glue the headlight surrounds to - Kicking around some solutions for wiring, that will feed into the spring looms coming (eventually!) from the firewall - I've also been struggling with all the chrome bits, generally. I've test tried Alclad and Revell, the two I considered would give me the best results. Not been excited about the test results from either, for the chrome on the cab and hood. Based on a few topics I've read elsewhere in the forum, I bit the bullet and ordered Alsa's, Easy Chrome, Hobby Kit - have to wait and see how that tests out. Take care!
-
Western Star 4900 FA plow truck
BK9300 replied to BK9300's topic in WIP: Model Trucks: Big Rigs and Heavy Equipment
Charles, I will definitely try the epoxy, and I do have some Bob Smith epoxy (also, good thing I have a few extra light housing pairs, in case I screw up!) I do intend to do chroming of some type on the inside of the bezel, for sure. Thanks for the suggestion! -
Western Star 4900 FA plow truck
BK9300 replied to BK9300's topic in WIP: Model Trucks: Big Rigs and Heavy Equipment
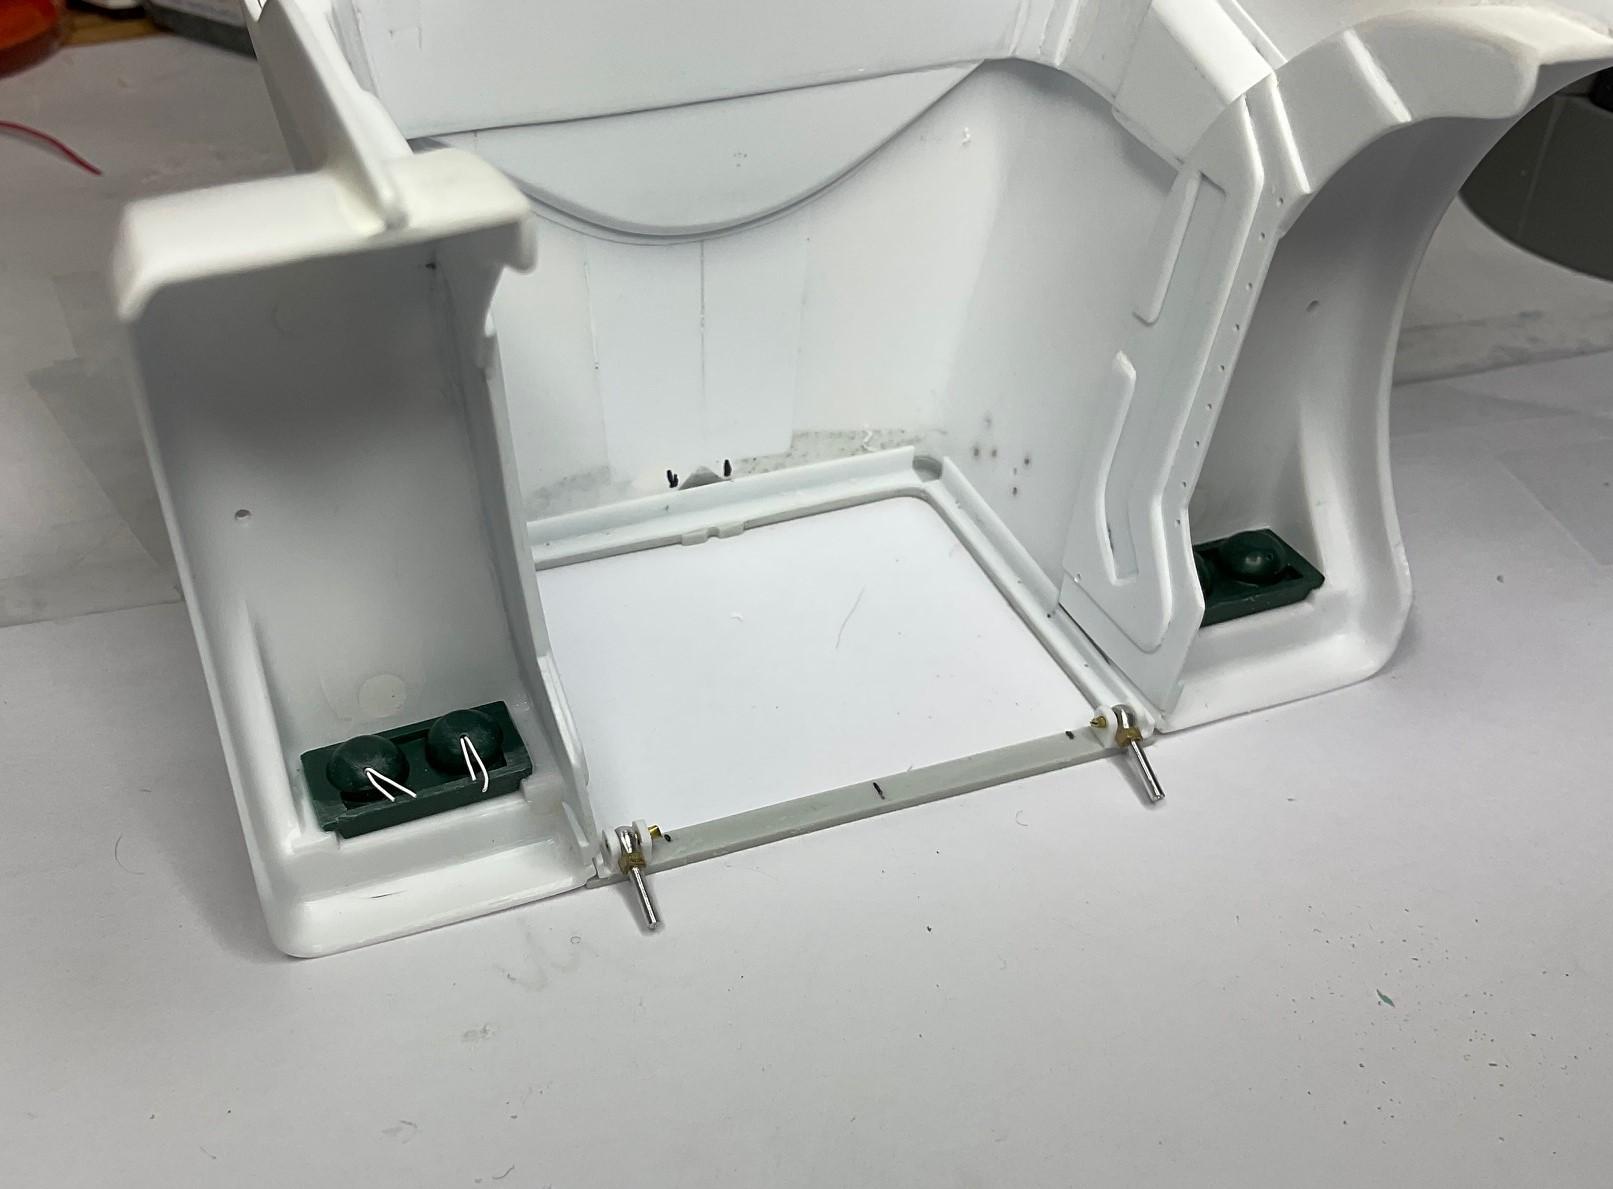
Quick update to earlier post - got the little bolt shafts added in under the angle iron - hoping this helps with stability of the light supports - I feel better about it in the meantime!
-
Western Star 4900 FA plow truck
BK9300 replied to BK9300's topic in WIP: Model Trucks: Big Rigs and Heavy Equipment
Repairs are never needed when you're actually at the shop! Thanks, Jeff. -
Western Star 4900 FA plow truck
BK9300 replied to BK9300's topic in WIP: Model Trucks: Big Rigs and Heavy Equipment
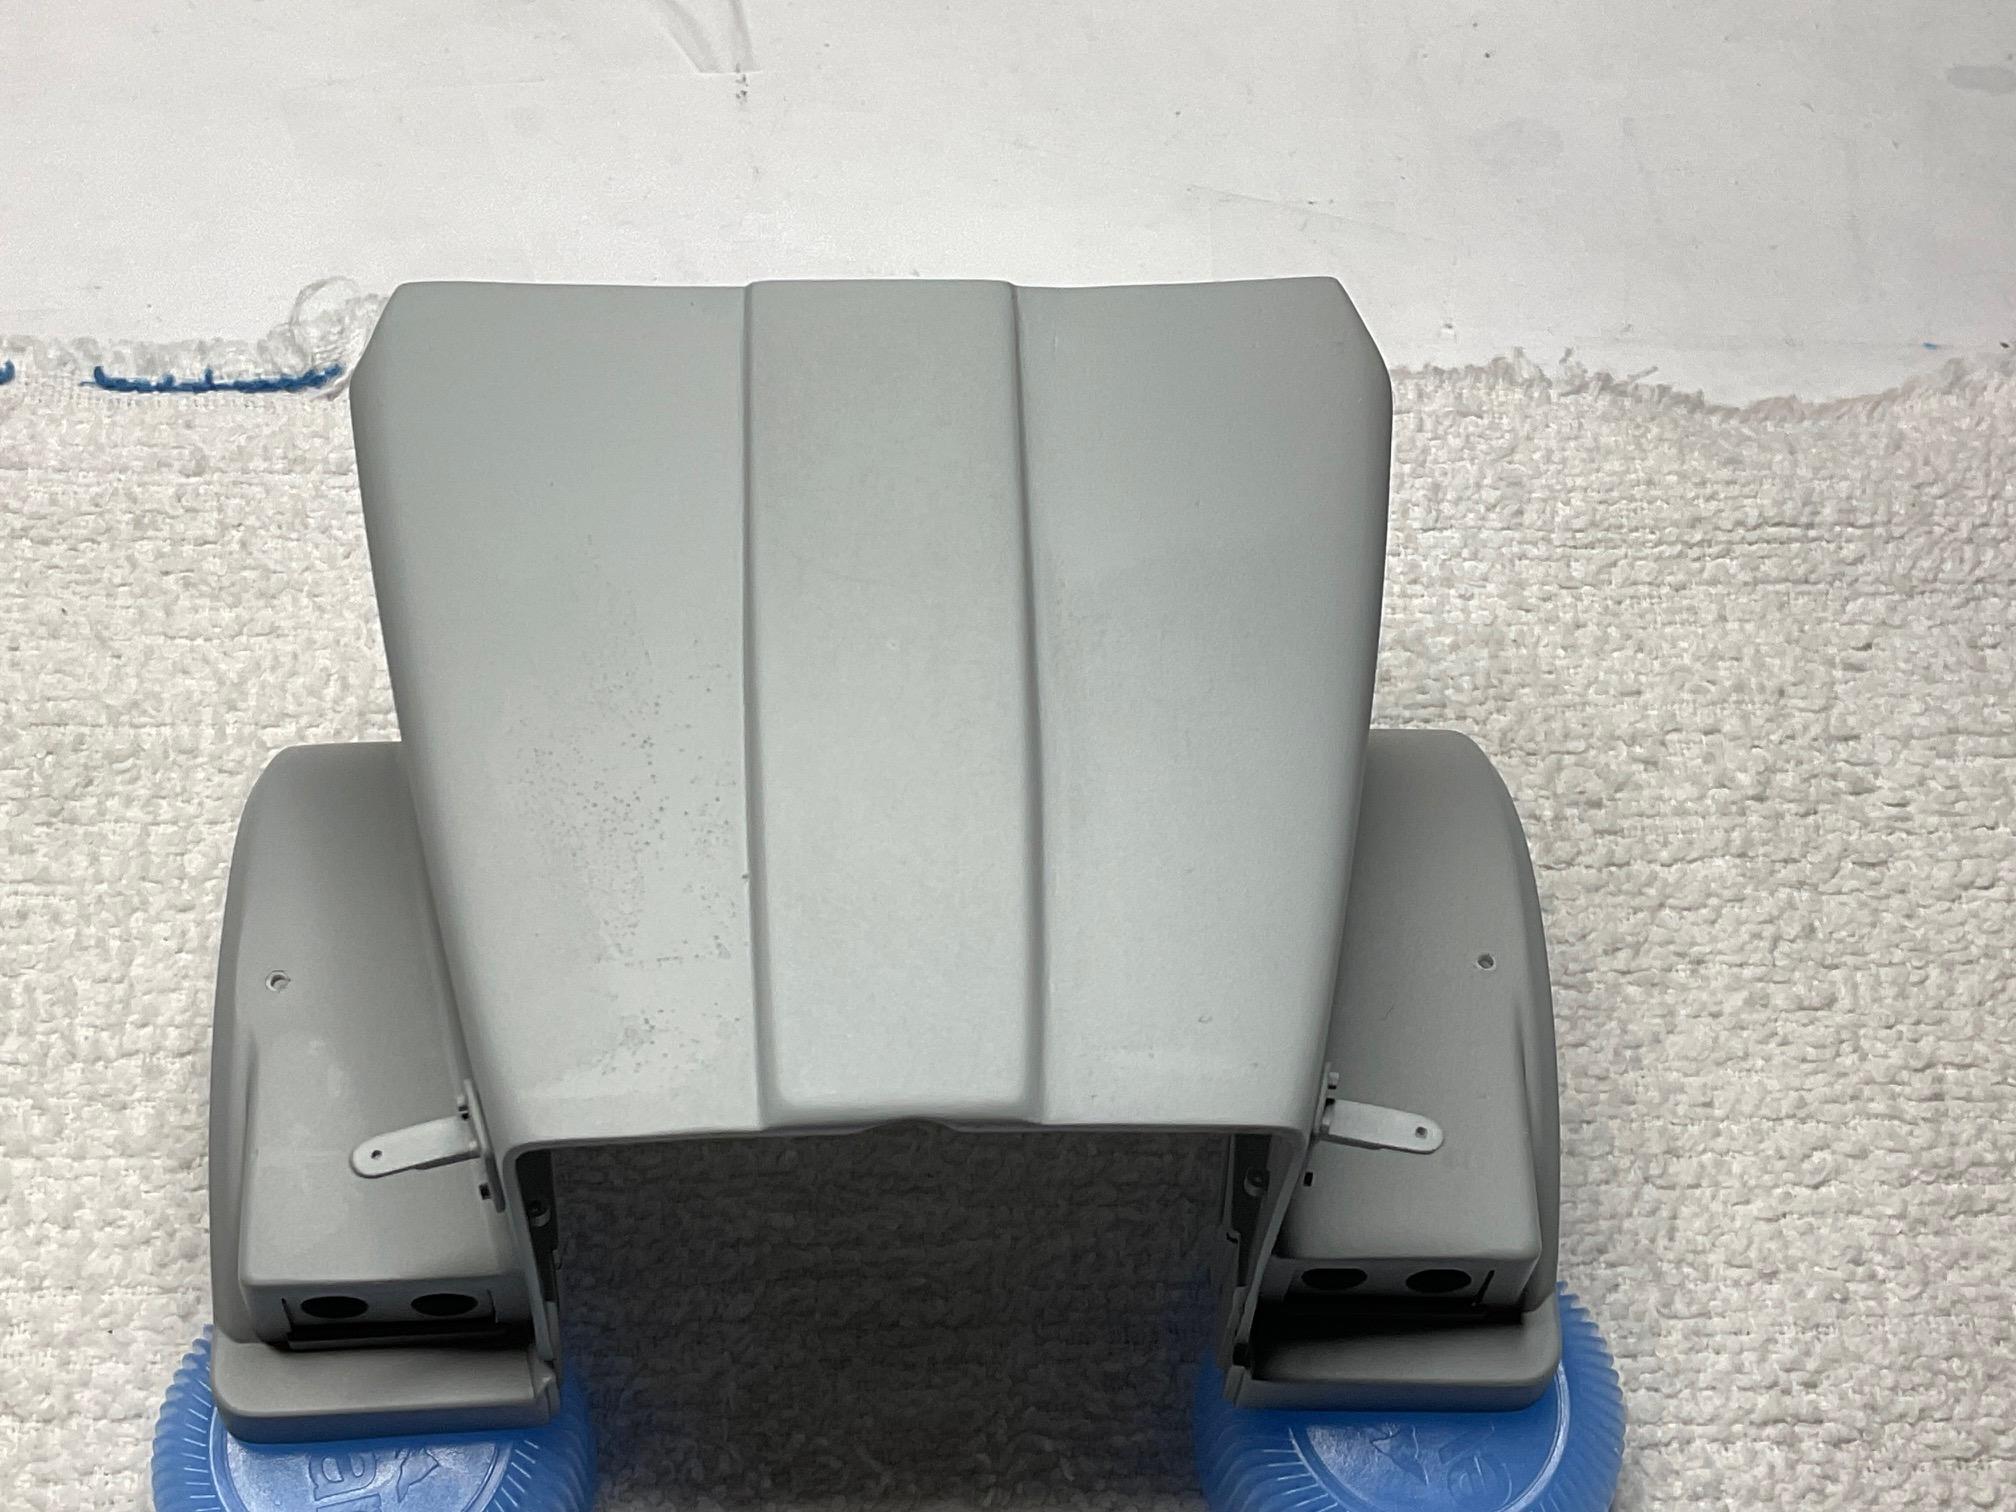
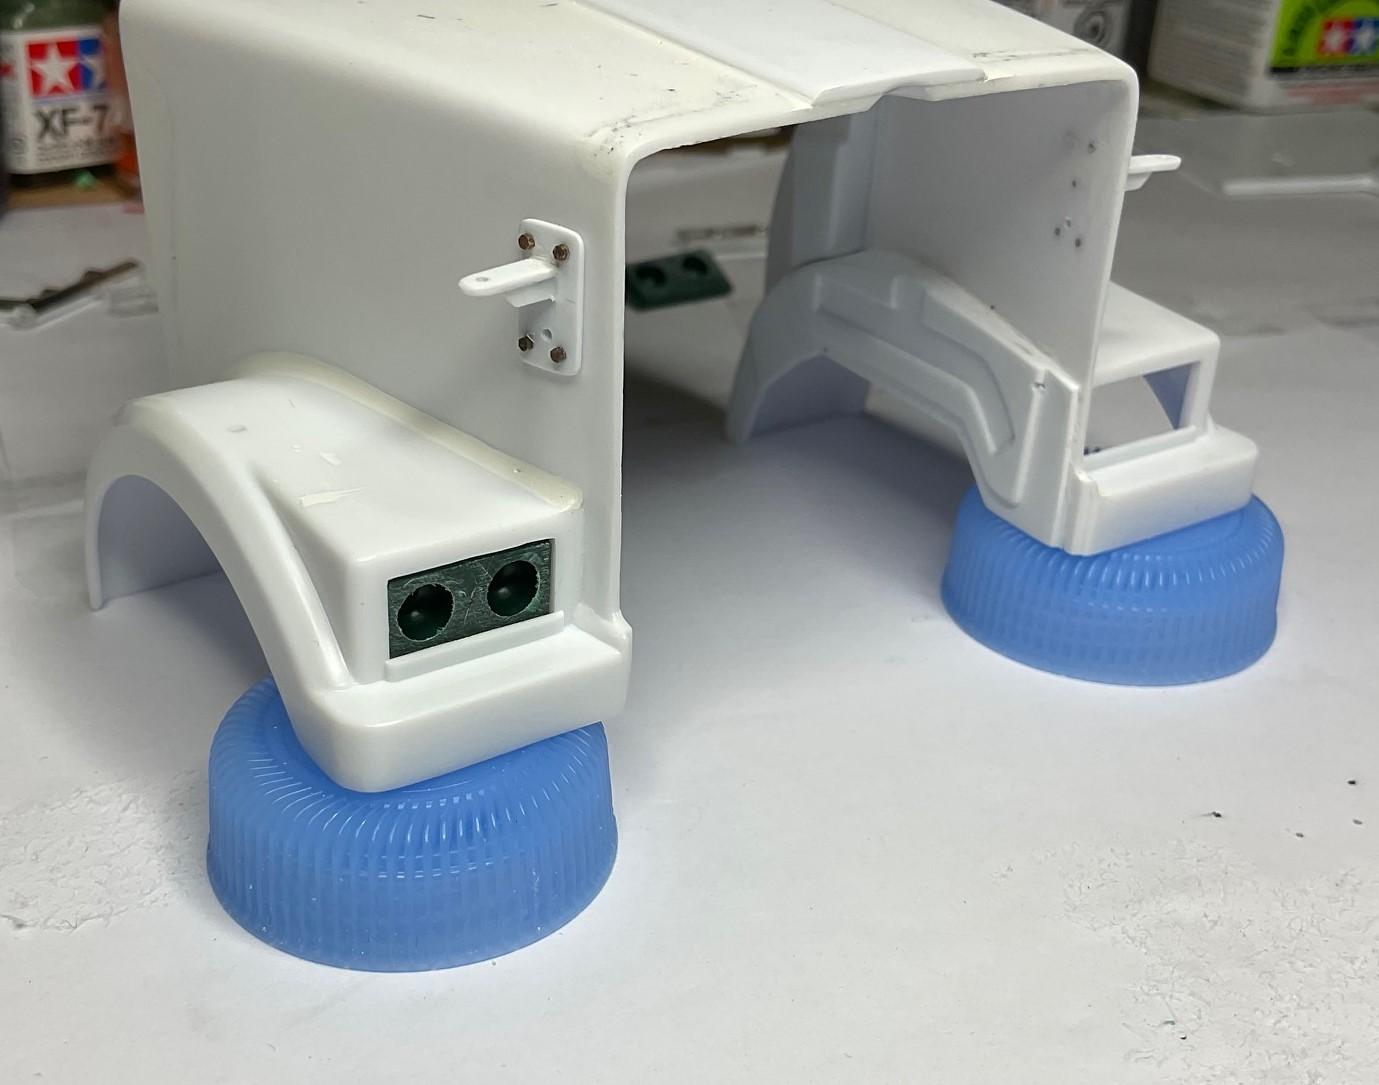
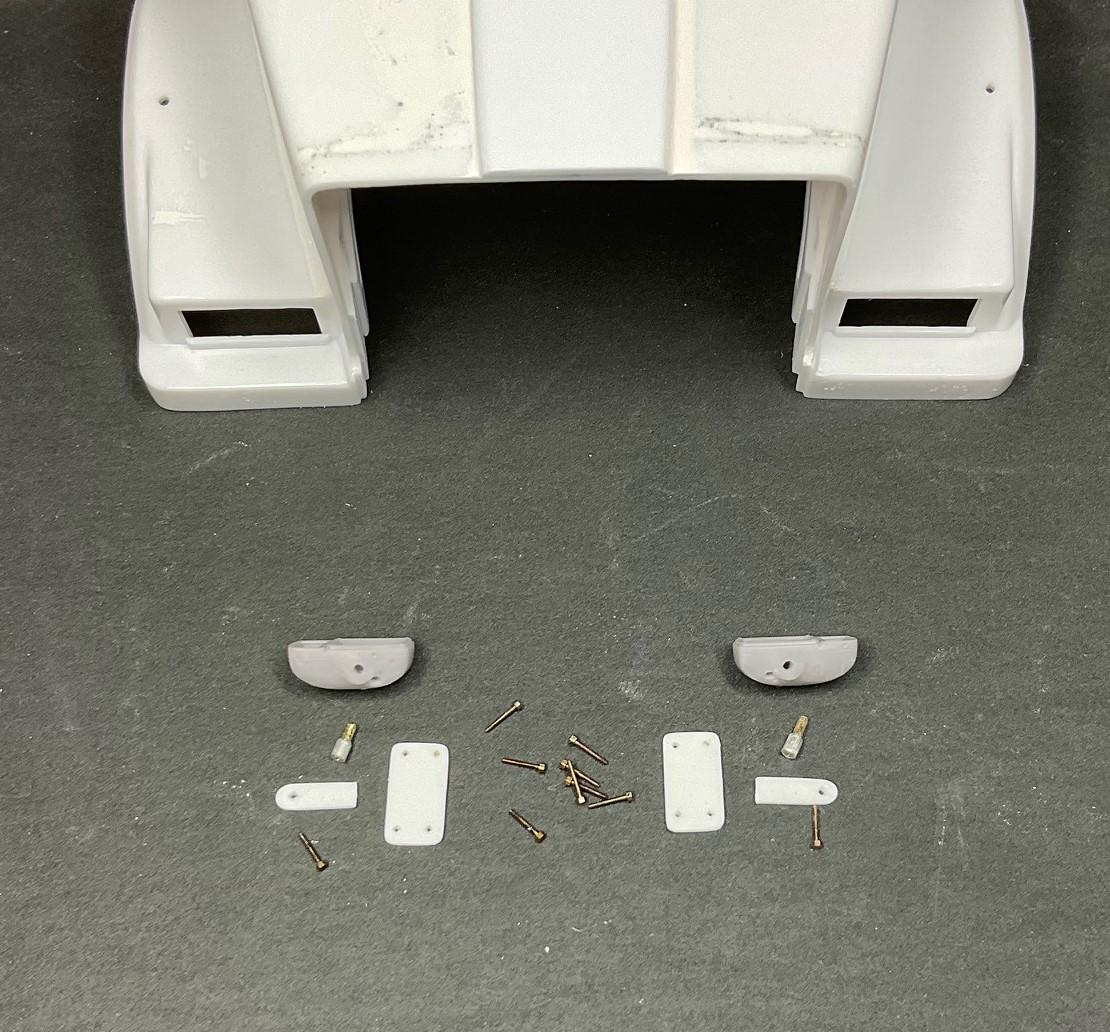
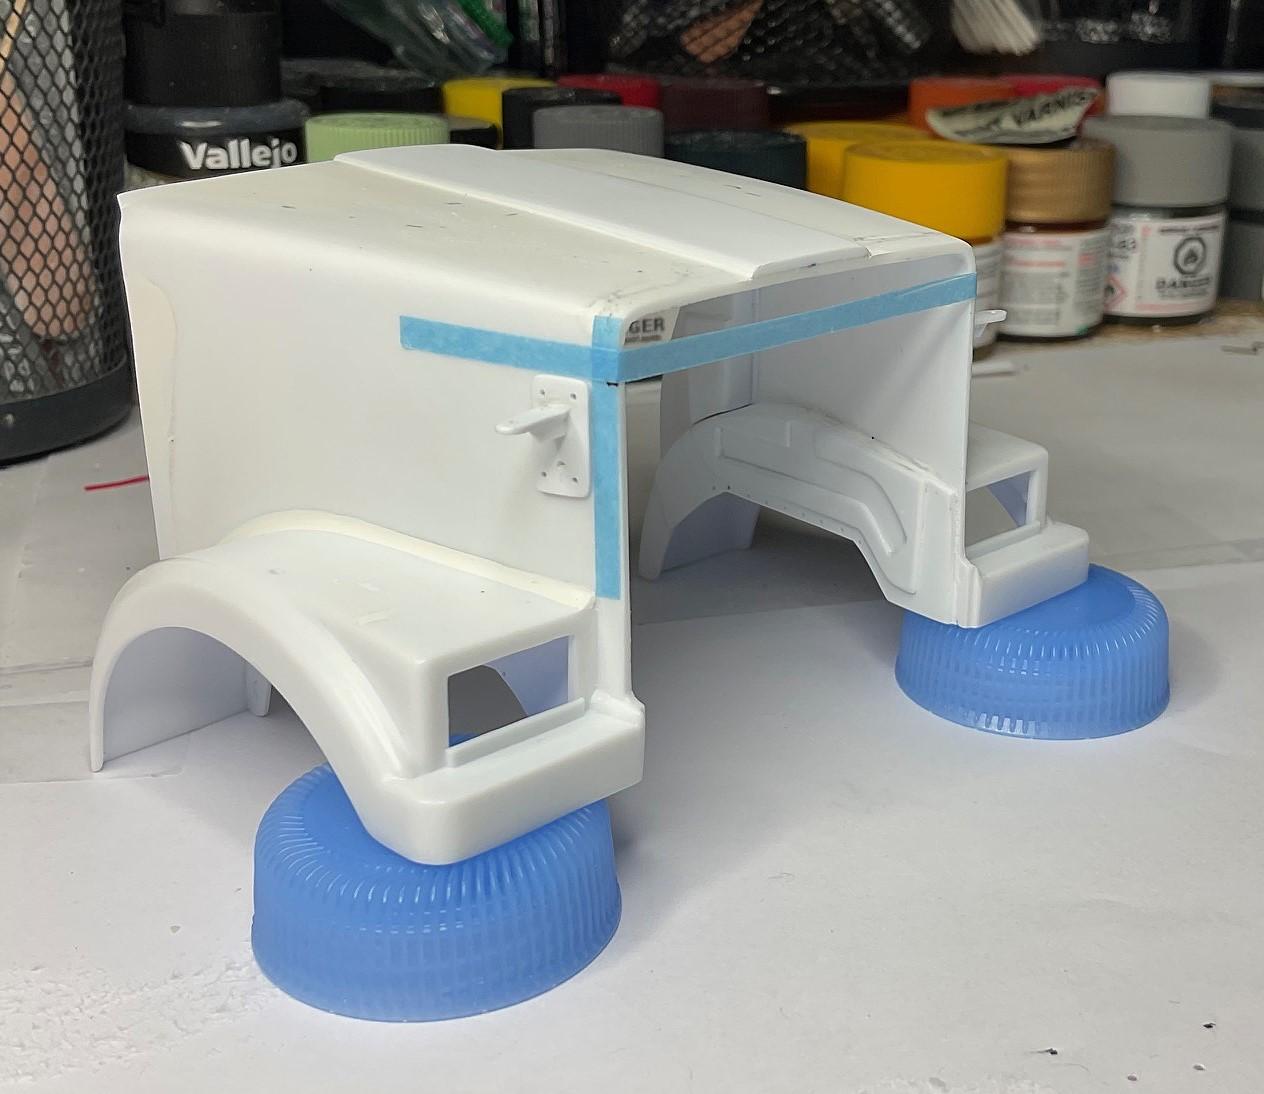
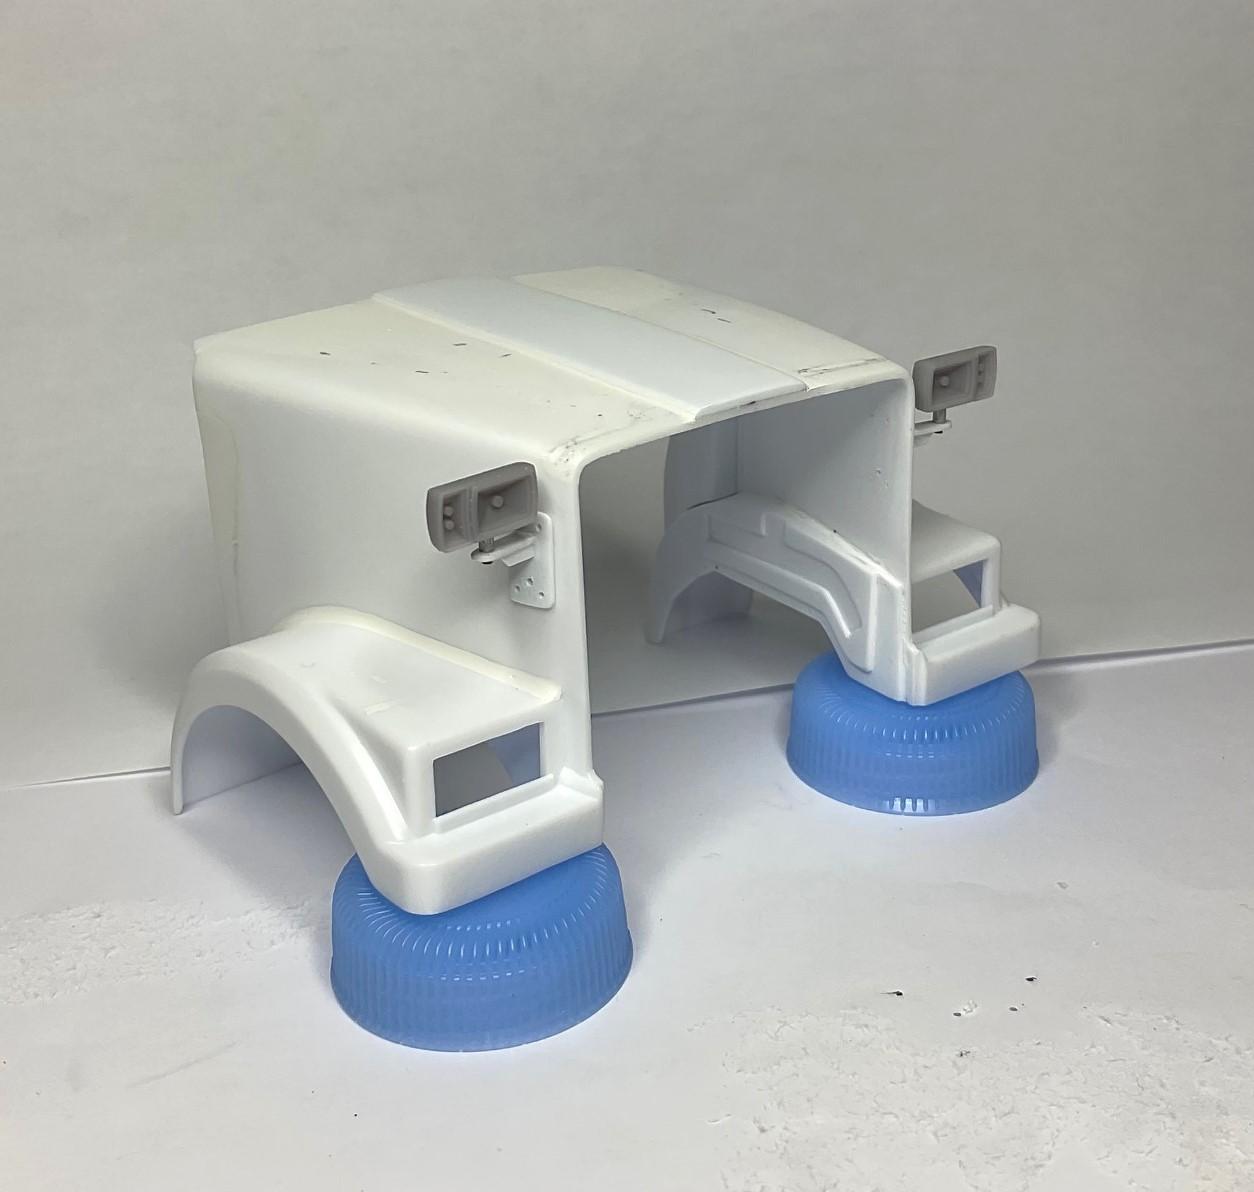
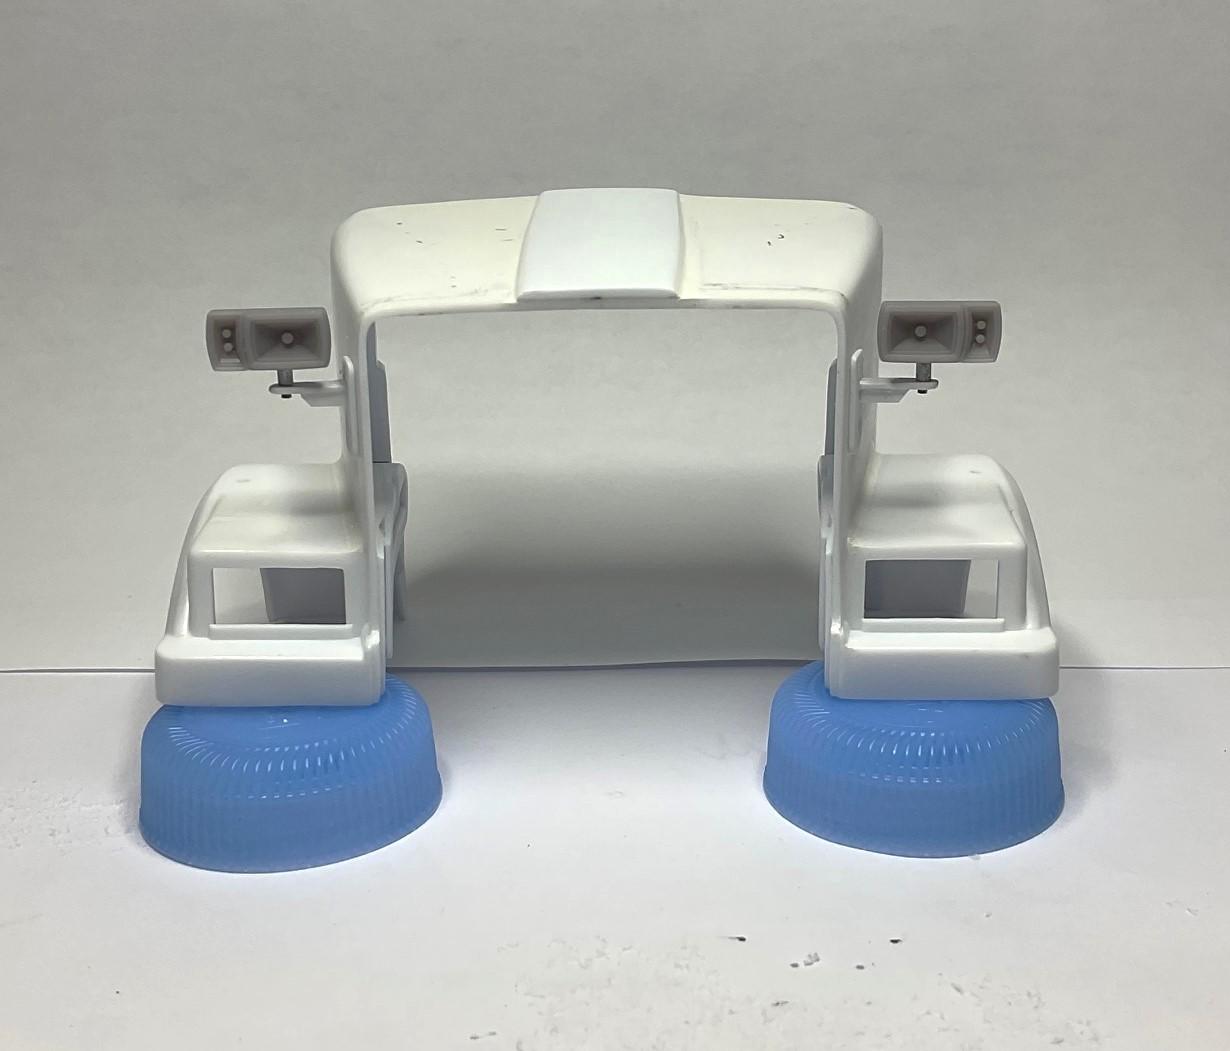
I keep finding last minute things to do before priming the hood - was just about to do the priming this morning, and remembered the plow light mounts that need to attach to the hood. Making those was the the task for today! Fabricated the various parts that make up the light brackets - I'm going to glue the brackets to the hood, use a couple bolts to firmly secure the plow lights and then attach short pieces of bolts to the bracket before painting the hood (the plow light housings are drilled for a bolt shaft, and for the future wire runs from one of the control modules on the firewall) - Tape guidelines to make sure I glue the brackets in the same location on both sides - As a concession to a bit of added strength, I added a short piece of 'angle iron' under the light support legs - this isn't on the real ones, but the legs were too fragile otherwise - Finally get to see what the plow lights that @Bren kindly printed for me look like on the model's hood! Will have to carefully CA glue in the lenses after the light housings and reflector areas are painted. After painting, I'll have a short window of time, with some 20 second CA glue, to get the lights to sit level, and square with the front of the hood. Looks like I still need to do a bit of beefing up on the light brackets - one of them broke while I was taking the plow lights back off. I think I'll use a length of threaded bolt (minus the head) and drill hole through the hood, lined up with the inside corner of the angle iron and CA glue the bolt to the inside of the hood and the inside edges of the angle iron. The bolt won't be visible from the front, and hopefully not too visible from the backside, once the hood is painted. Take care!
-
Western Star 4900 FA plow truck
BK9300 replied to BK9300's topic in WIP: Model Trucks: Big Rigs and Heavy Equipment
Thanks for that, Steve - saving the hardest things till last - body work and painting have not always been kind to me. -
Very fine scratch building, Ron - looks great!
-
Western Star 4900 FA plow truck
BK9300 replied to BK9300's topic in WIP: Model Trucks: Big Rigs and Heavy Equipment
I actually started in Sketchup, a few years ago, to model a few things for a home improvement project. Lots of Youtube videos were watched, to get started! Looking back, it didn't take that long to get past my mistakes and start making cupboards and countertops, etc., that looked like something realistic. Additional rendering software is needed to see a Sketchup project in a more realistic view - I use V-Ray, from Chaos and the latest version has a lot more textures, like paint, metal finishes, etc., and lighting, that can be applied to the surfaces of the Sketchup model to render it more realistically. I still haven't overcome the design difficulties of making something like a truck cab or hood, and that's why I purchased the digital Western Star 4900 cab and chassis from Hum3D. Geometric shapes - circles, cylinders, flat panels, like much of the rest of the plow truck - were much easier to produce . Knowing what I know now, I think I would have learned to model in Blender - much better design tools for organic, or curved surfaces of vehicles, although I understand the learning curve to be a bit harder than Sketchup. Many people use Fusion 360 too, but I know nothing about that software. I've still got lots to learn in Sketchup, but for now, it's really helped me to see what it is I need to model. Given a background in CAD, I wouldn't think it would be difficult for you to master 3D software - just that learning curve to get past! -
Western Star 4900 FA plow truck
BK9300 replied to BK9300's topic in WIP: Model Trucks: Big Rigs and Heavy Equipment
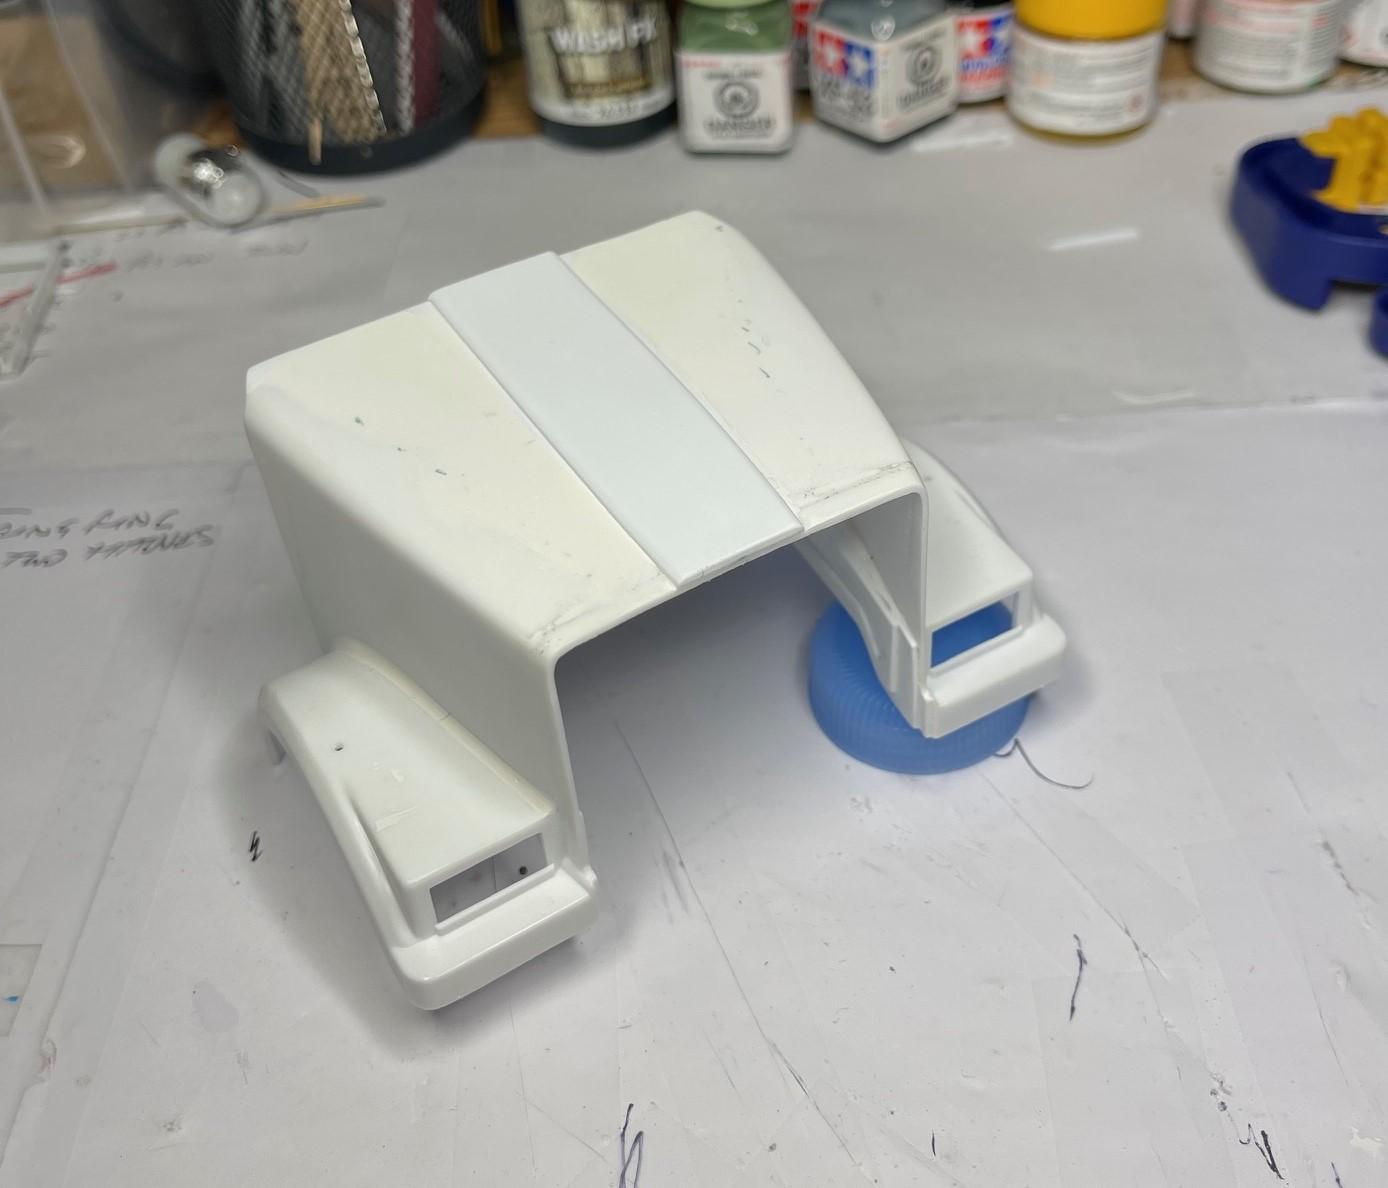
Got the cab primed a couple days ago and did some of the final work on the hood today - I needed to put the raised central section on top of the hood. Prep work turned out better than I thought it would - a few spots I can see in picture will get some needed attention - Sample, central hood section I needed to add on - The raised section is 1 mm thick and the sides are tapered slightly, from about midway, through to the front edge - Rounded the sides slightly before gluing the section down - I now need to taper the depth of this added section, to thin it to almost nothing at the rear edge. Will also need little bit of sealing along the edges. Some final sanding on that and a few other spots on the hood, and it can be primed, too. Been busy last few days working in Sketchup, getting a few things sorted from all the pics I took last week for the next project. Still have lots to do, to finish with the pics, so will let you all know soon as that process is completed - take care!
-
HI-Rail Mercedes Maintence unit out on the tracks. Wall Repair
BK9300 replied to Model Builders Mafia's topic in Dioramas
This is exceptional, Adam - what an awesome build! My eye keeps going deeper into the detail inside the truck body, to the tool boxes, etc. Wonderful work! -
The metal look on your engine turned out really well. Should look exceptional with all the other parts added on - nice work!
-
This build is coming along really well, Bob. That paint sure looks 'deep' - very nice polishing job. The mesh in the grille looks pretty special, too.
-
Western Star 4900 FA plow truck
BK9300 replied to BK9300's topic in WIP: Model Trucks: Big Rigs and Heavy Equipment
Thanks, Steve! Getting very close now to being finished. What’s next on your build list? Thanks, Charles - I appreciate that. Funny about the key - after some kidding from Gary, a key set was added - just a bit hard to see but it’s visible in some of the interior close ups! Thank you, Jürgen! -
352 Peterbilt Wrecker with C60 Dump
BK9300 replied to DRIPTROIT 71's topic in Model Trucks: Big Rigs and Heavy Equipment
You do amazing detail painting on your builds - more you look the more detail stands out. Great work! -
Very well done, Randy - beautiful paint finish.
-
Western Star 4900 FA plow truck
BK9300 replied to BK9300's topic in WIP: Model Trucks: Big Rigs and Heavy Equipment
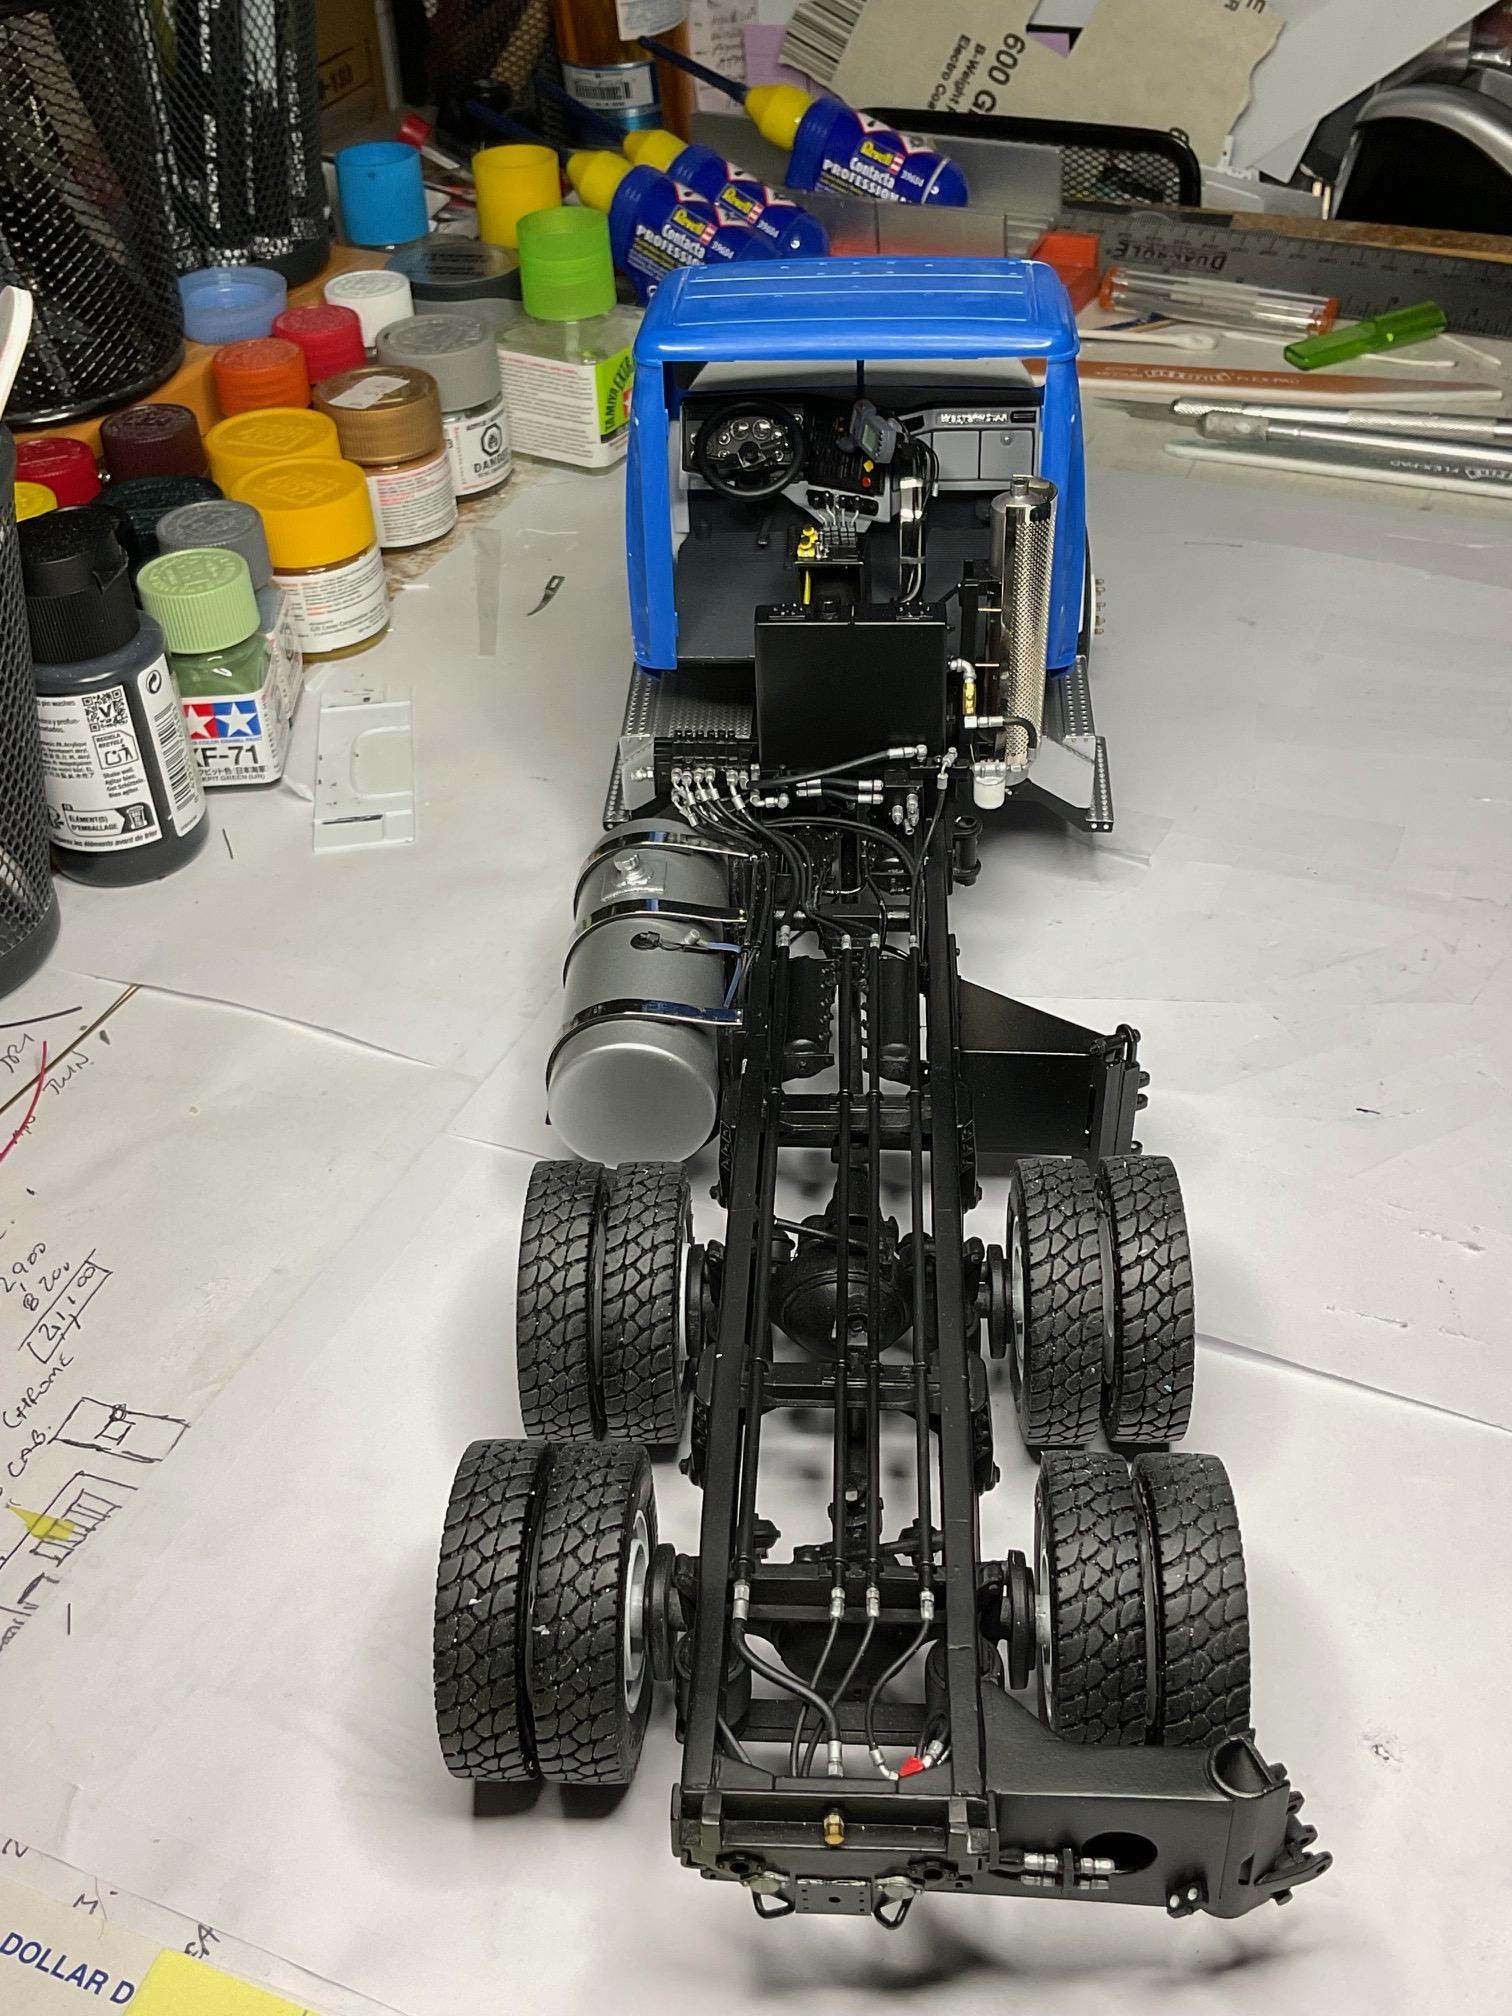
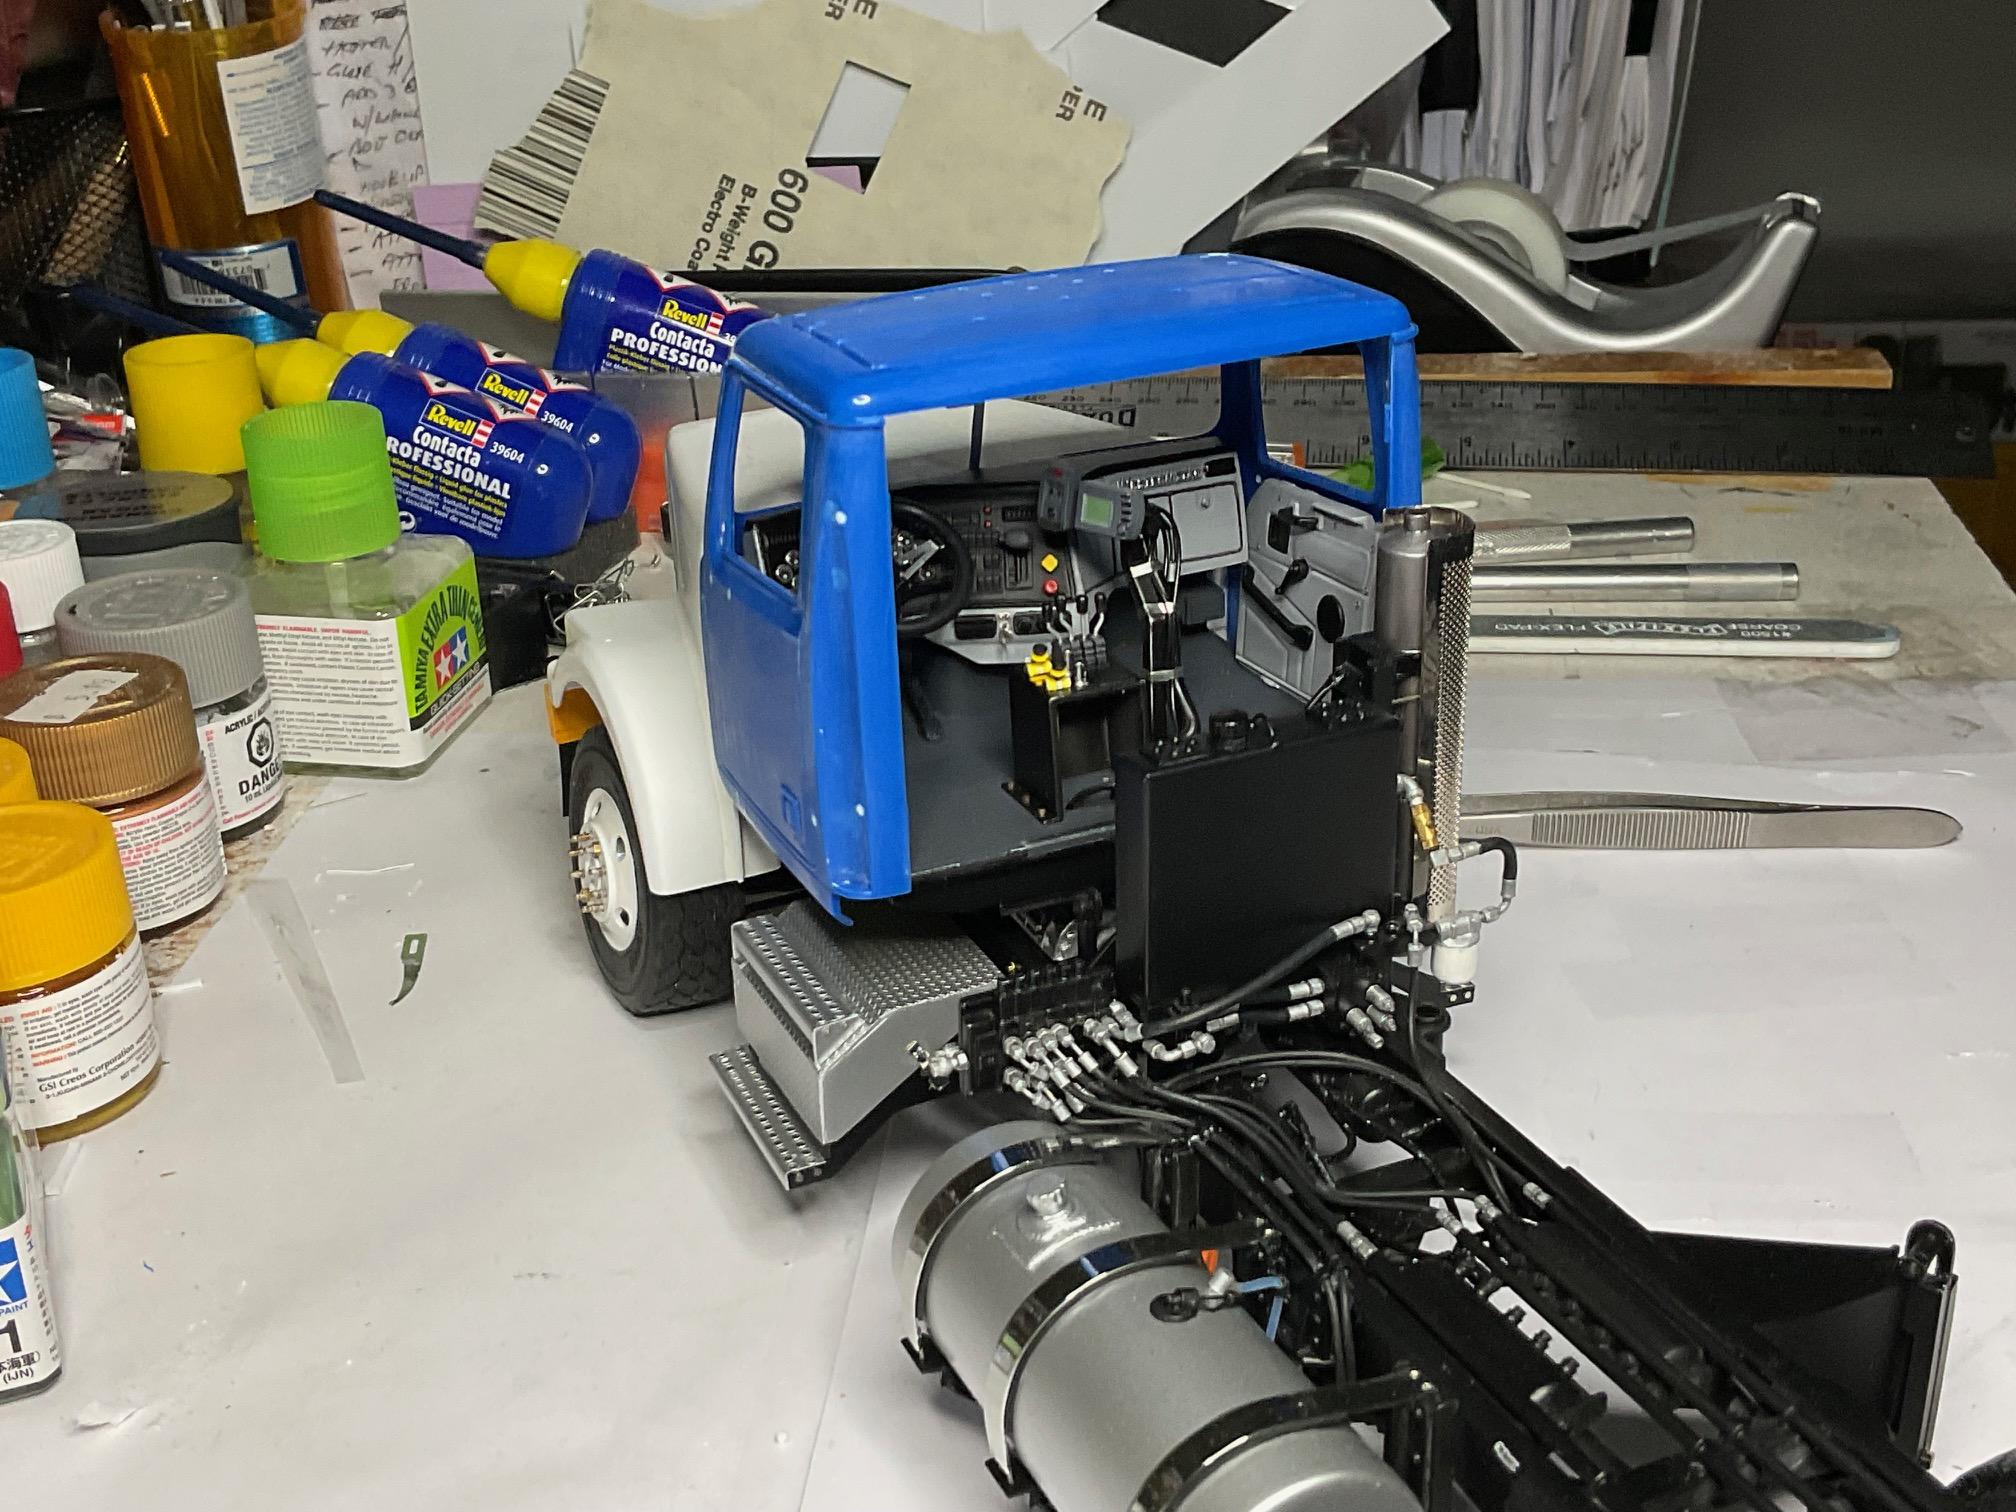
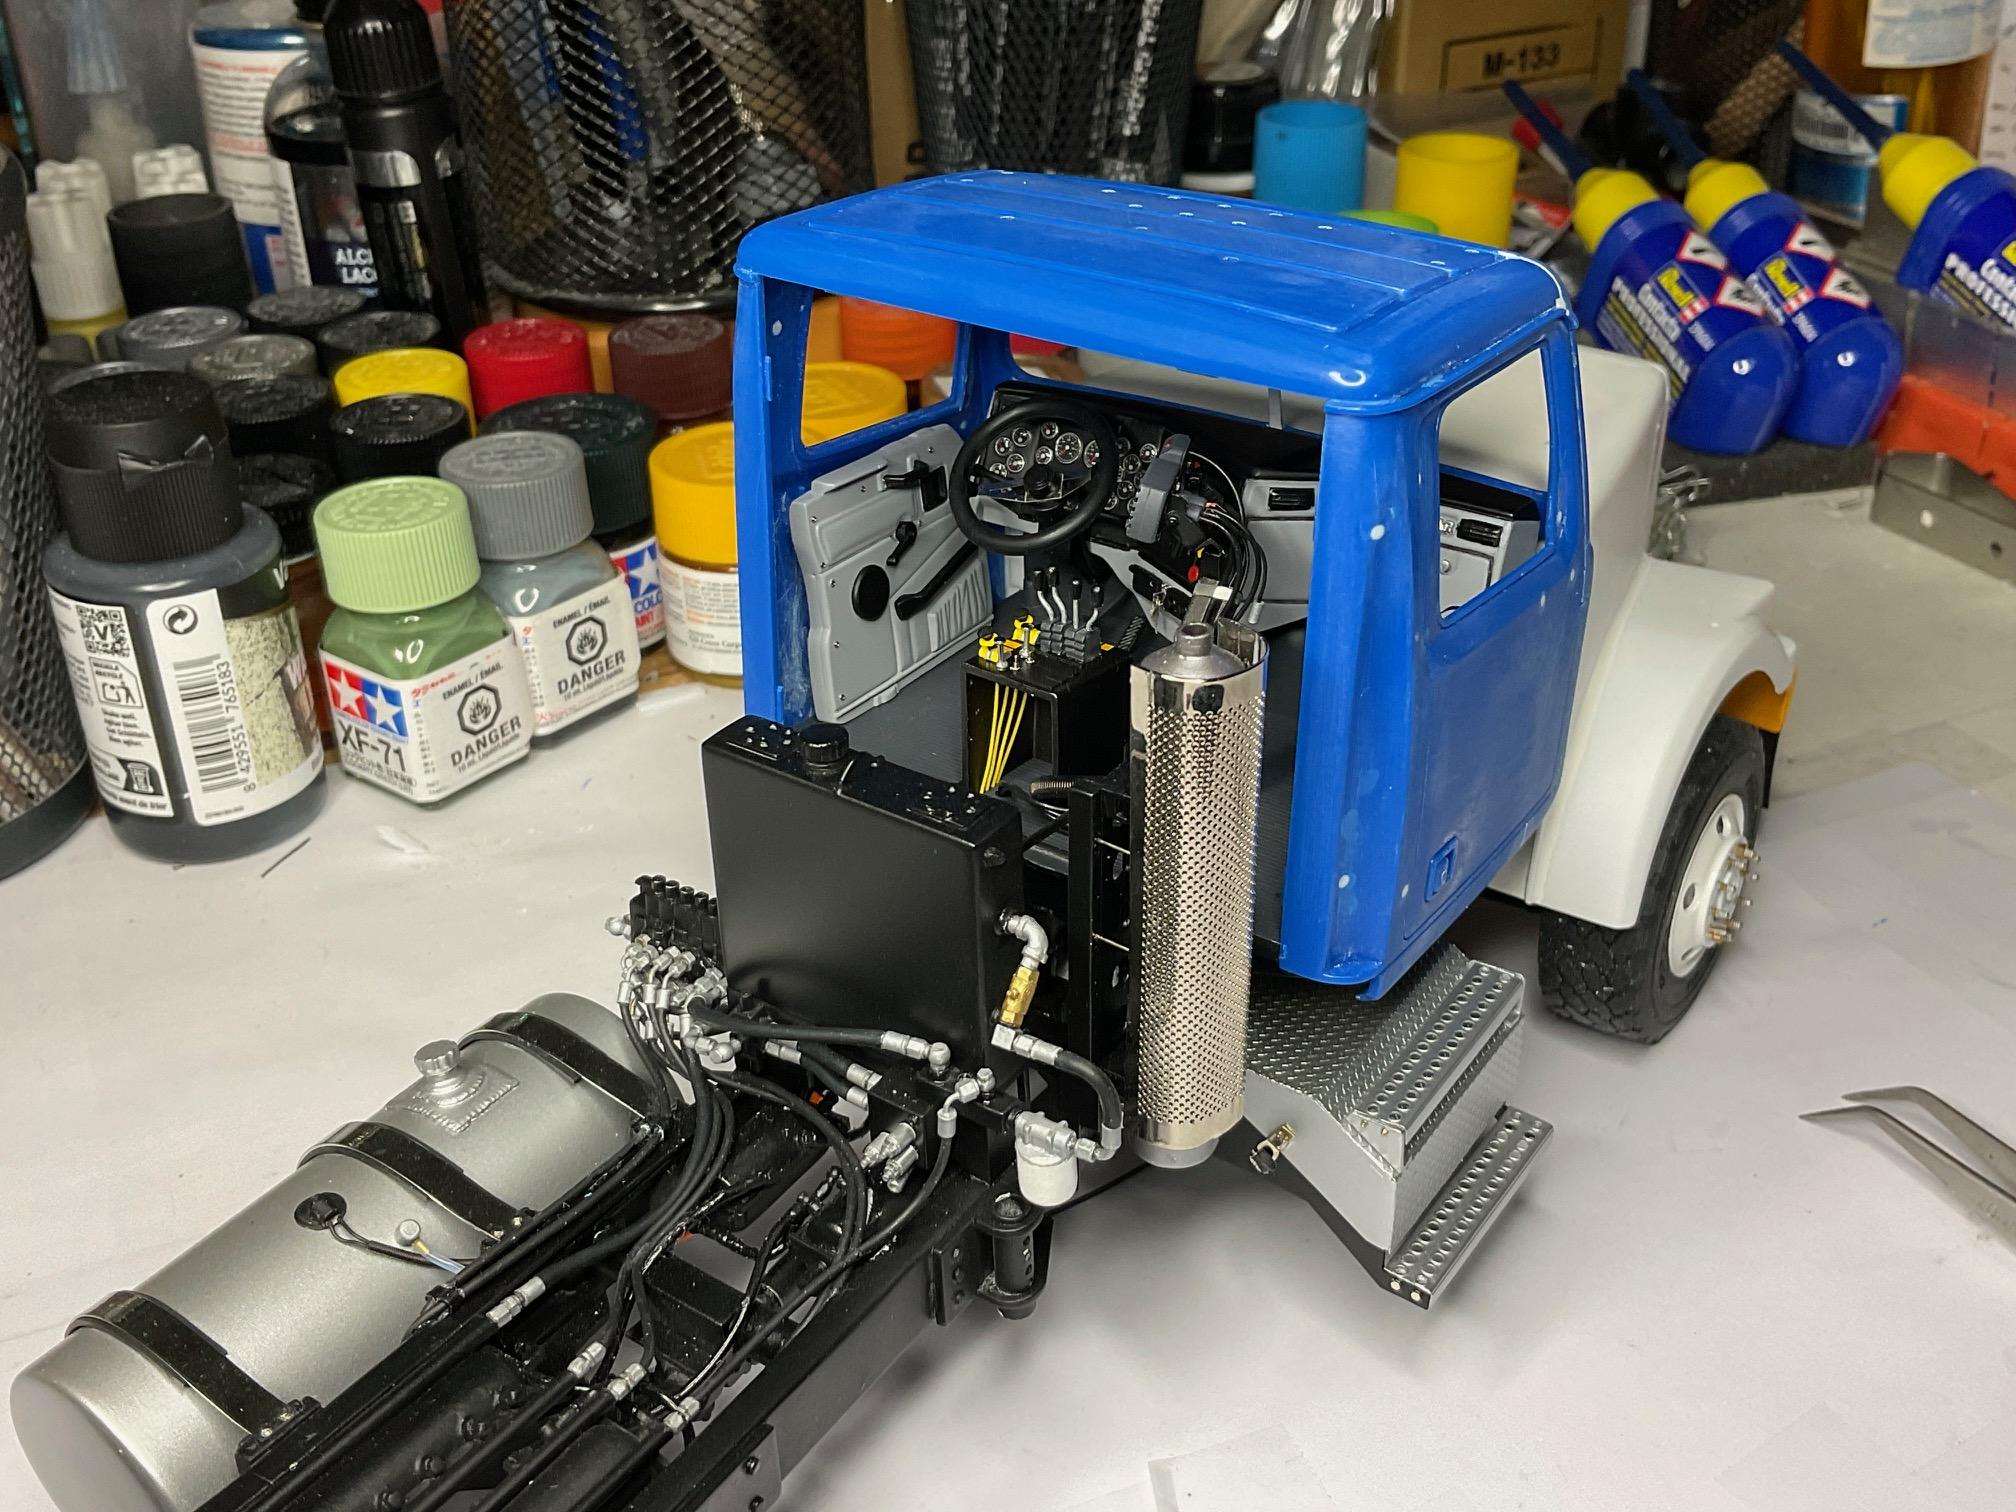
Was doing some last minute prep on the cab, before priming and saw I hadn't yet cut the hole in the driver side firewall apron, for the air intake tube from the air cleaner. Had to temporarily put interior back in cab, so I could set the cab and hood in place and mark the center for this hole finally. Before I put everything but the cab back in the cabinet, I set in the door cards and took a few pics - getting excited imagining it put together once and for all! door card sitting little lower than their final position - Going to give the cab a scrub down, dry it off, and give it a coat of primer later this afternoon. Hope everyone has a good weekend - take care!
-
80ish Autocar DK-64 HH tractor.
BK9300 replied to ShakyCraftsman's topic in WIP: Model Trucks: Big Rigs and Heavy Equipment
Just like your Sketchbook rendering - striking colour, Ron! -
Convoy, take 7
BK9300 replied to Jürgen M.'s topic in WIP: Model Trucks: Big Rigs and Heavy Equipment
Very cool to be able to print up a ‘test’ cab, to check out how things fit together. The resin printed cab Bren did for you should look great on this build! -
Western Star 4900 FA plow truck
BK9300 replied to BK9300's topic in WIP: Model Trucks: Big Rigs and Heavy Equipment
Thanks, Francis! The interior doors are a bit of practise - not very visible, but still a challenge to see if they could be improved.