BK9300
-
Posts
1,986 -
Joined
-
Last visited
Content Type
Profiles
Forums
Events
Gallery
Everything posted by BK9300
-

My Bronco “Penny”
BK9300 replied to James2's topic in Model Trucks: Pickups, Vans, SUVs, Light Commercial
Just a really excellent build, James - fantastic paint and finishing details all around - well done! -
T41 Bugatti sport coupe
BK9300 replied to charlie libby's topic in WIP: Other Racing: Road Racing, Land Speed Racers
All around, a very special accomplishment - you must be very proud of what you’ve created. Very well done! -
Building the AMT Ford F100
BK9300 replied to OldNYJim's topic in WIP: Model Trucks: Pickups, Vans, SUVs, Light Commercial
Like following your builds, and this one is no exception - everything is very well thought out, and well executed. Treat to watch. -
Excellent work on your upholstery upgrade - looks great!
-
Cool back story, Scott. Lots of detail in the chassis and motor - maybe you can display it with body off? From the looks of your first pic of the resin body, and the one photo of the real car, likely would have been a hell of a job to separate the hood from the body, cleanly. Coming together nicely.
-
MACK SUPERLINER HEAVY HAUL
BK9300 replied to Swamp Dog's topic in Model Trucks: Big Rigs and Heavy Equipment
Nice bonus - well done! -
Great overhaul on your DAF, Jürgen! Never set eyes on one in real life, but, from your model, it sure looks like a workhorse of a truck.
-
Progress of any kind is good - summer’s a busy time for everyone, so good to see any movement forward. Looking good!
-
Looking good, Jeff - delicate work going on here!
-
‘55 El Camino
BK9300 replied to NOBLNG's topic in WIP: Model Trucks: Pickups, Vans, SUVs, Light Commercial
Your bed floor and rails look exceptional - and all the rest is looking just as good. -
Very precise work on your rims, Steve - the improvement is dramatic!
-
Link-Belt HC-218 Truck Crane
BK9300 replied to redneckrigger's topic in WIP: Model Trucks: Big Rigs and Heavy Equipment
Lots of work ahead of you! From my very limited experience with resin printed items, I think your styrene booms will be stronger than printed ones would be. Going to be impressive! -
Good modifications, Ron - posable steering will definitely be a bonus for the truck - nice work.
-
Western Star 4900 FA plow truck
BK9300 replied to BK9300's topic in WIP: Model Trucks: Big Rigs and Heavy Equipment
Appreciate that, Jeff! Painfully slow, but still moving ahead. -
Must be very satisfying to design and print your own kit. A whole bunch of new skills needed to do that, for sure - your results are amazing! What scale are you using for these models?
-
Big improvement on your slicks - that process could be a post in the 'Tips and Tricks' section. Tough (and fast!) looking car.
-
MACK SUPERLINER HEAVY HAUL
BK9300 replied to Swamp Dog's topic in Model Trucks: Big Rigs and Heavy Equipment
Awesome build, David - love the tri-drive! Any plans for a trailer to go along? -
Another excellent build, Scott - can spend a lot of time looking at all your detailing!
-
Western Star 4900 FA plow truck
BK9300 replied to BK9300's topic in WIP: Model Trucks: Big Rigs and Heavy Equipment
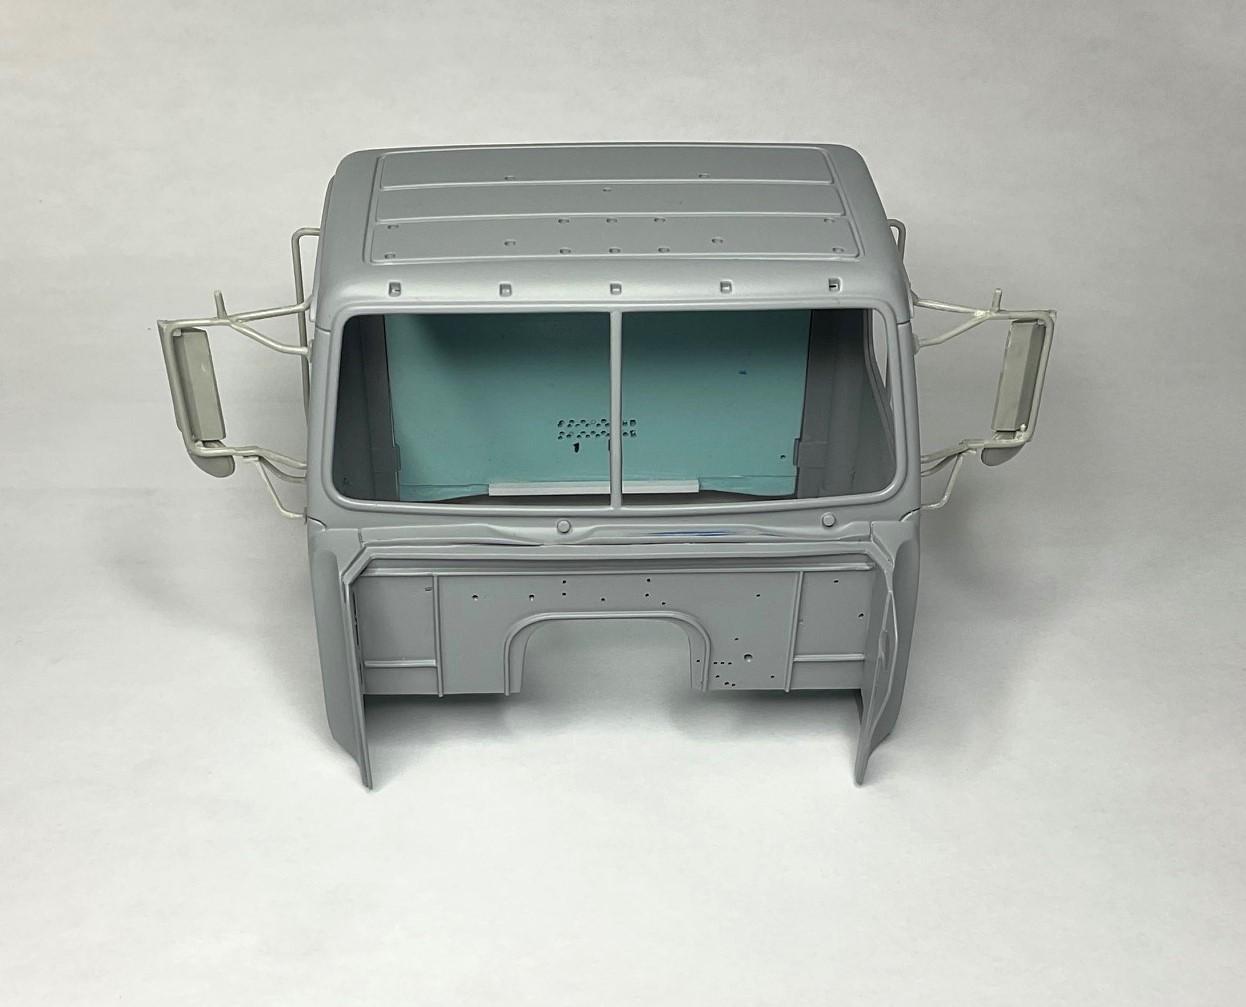
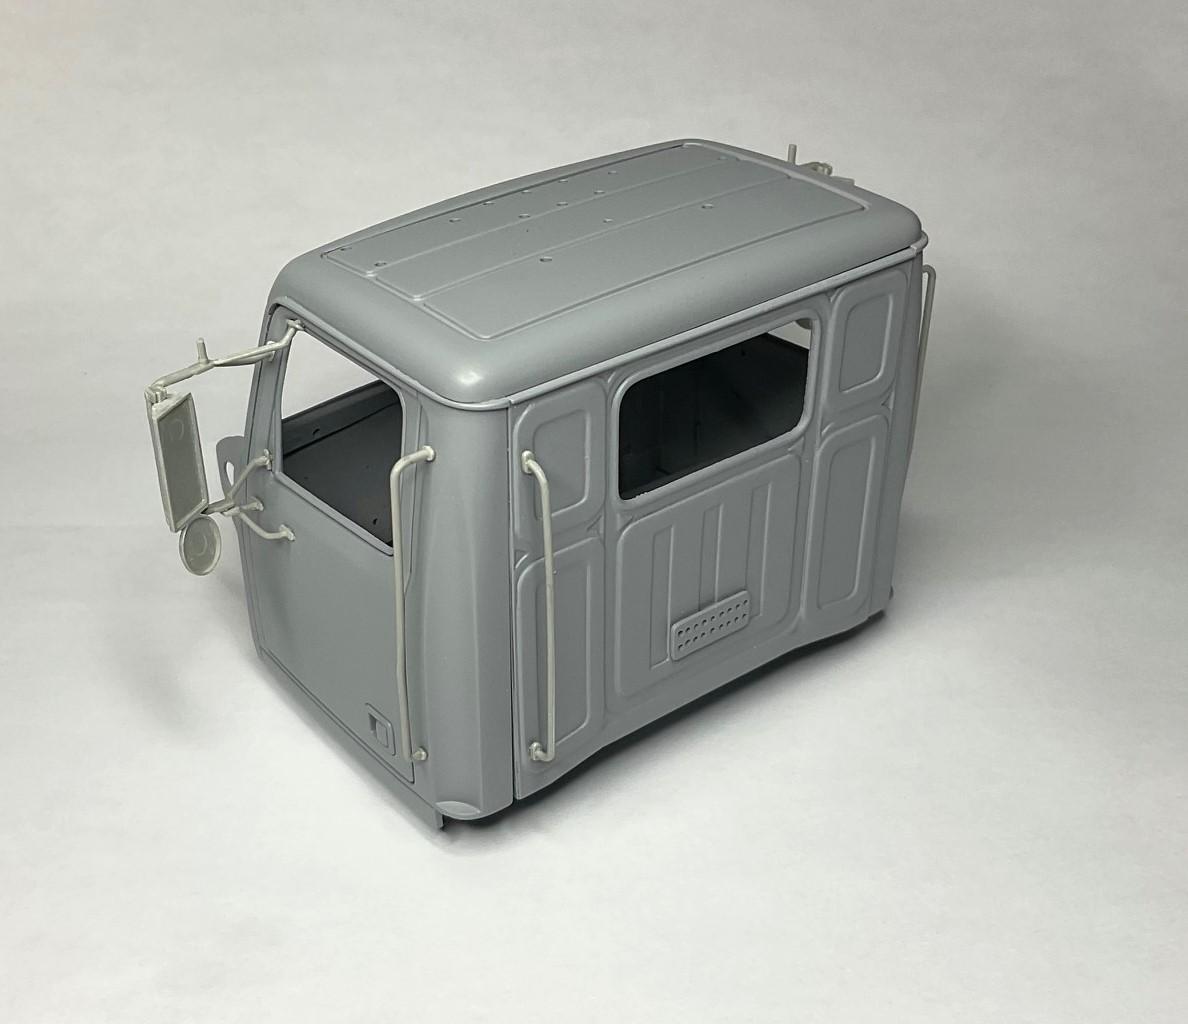
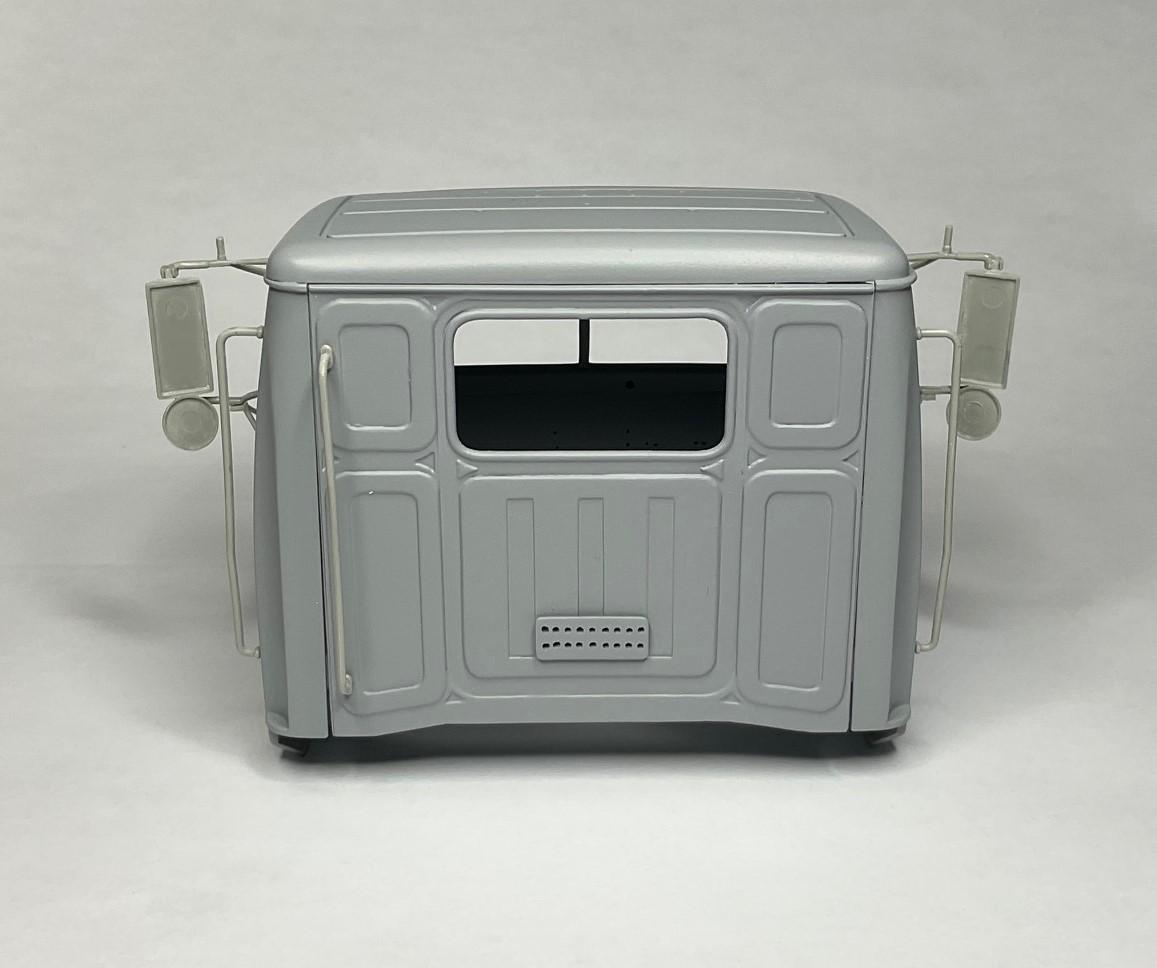
I've never done any de-chroming of kit parts before. Common knowledge to many out there, but sure was amazed at how well oven cleaner does the job! Was able to spend some time today cleaning up the de-chromed parts for the cab - removing what I could of the parting lines on the thin mirror braces, and some injection pin marks, etc. Because I opted to use the kit parts for the mirrors and hand rails, instead of making my own, I now had to re-drill all the locating holes for the kit parts - that sure felt like a step backwards! Basically ready to do some test chrome painting and then on to the cab parts for real. A few mock up pics of the mirrors and handrail/grab bars sitting in place on the cab - (day cab panel not glued in place just yet. . .) Once the grab bars, mirrors, etc, are re-chromed, I going to use some of the Tamiya Mirror Finish film to make the mirror inserts. Still not going to get much build time in during the coming week or so, but will do what I can - take care!
-
Class 325 Pumper is finished.
BK9300 replied to Chariots of Fire's topic in Model Trucks: Big Rigs and Heavy Equipment
Charles, you topped this excellent build off with even more details! All of the detailing is well dont but I'm very intrigued with your leather strap and buckle hold downs. -
1965 Peterbilt 281
BK9300 replied to leafsprings2's topic in Model Trucks: Big Rigs and Heavy Equipment
Very nice build! Hard to find rubber tires like the ones you have on this truck. -
KW 86 inch Aerodyne
BK9300 replied to k100's topic in WIP: Model Trucks: Big Rigs and Heavy Equipment
Thoughtful idea of using Jamie's mud flaps on the headache rack. Really like all your detail work and paint highlighting - very cool build, Mark! -
Revell historic series Pete 359
BK9300 replied to Andria H's topic in WIP: Model Trucks: Big Rigs and Heavy Equipment
I have one of those Bandag Bandits, in a box in storage, and your pics reminded me of that. Nice colour for your 'Old Iron' tribute!- 6 replies
-
- 1
-

-
- custom trucks
- kitbashing
- (and 2 more)
-
Western Star 4900 FA plow truck
BK9300 replied to BK9300's topic in WIP: Model Trucks: Big Rigs and Heavy Equipment
Going to be hit and miss for the next couple weeks - more things to do besides bench work! Did start on de-chroming a bunch of little parts and hope to fit in some painting on those in the next while. Will keep checking in, though - always good to see what else is being built in the forum!