Andy Oldenburg
-
Posts
346 -
Joined
-
Last visited
3 Followers


Andy Oldenburg's Achievements
MCM Avid Poster (5/6)
-
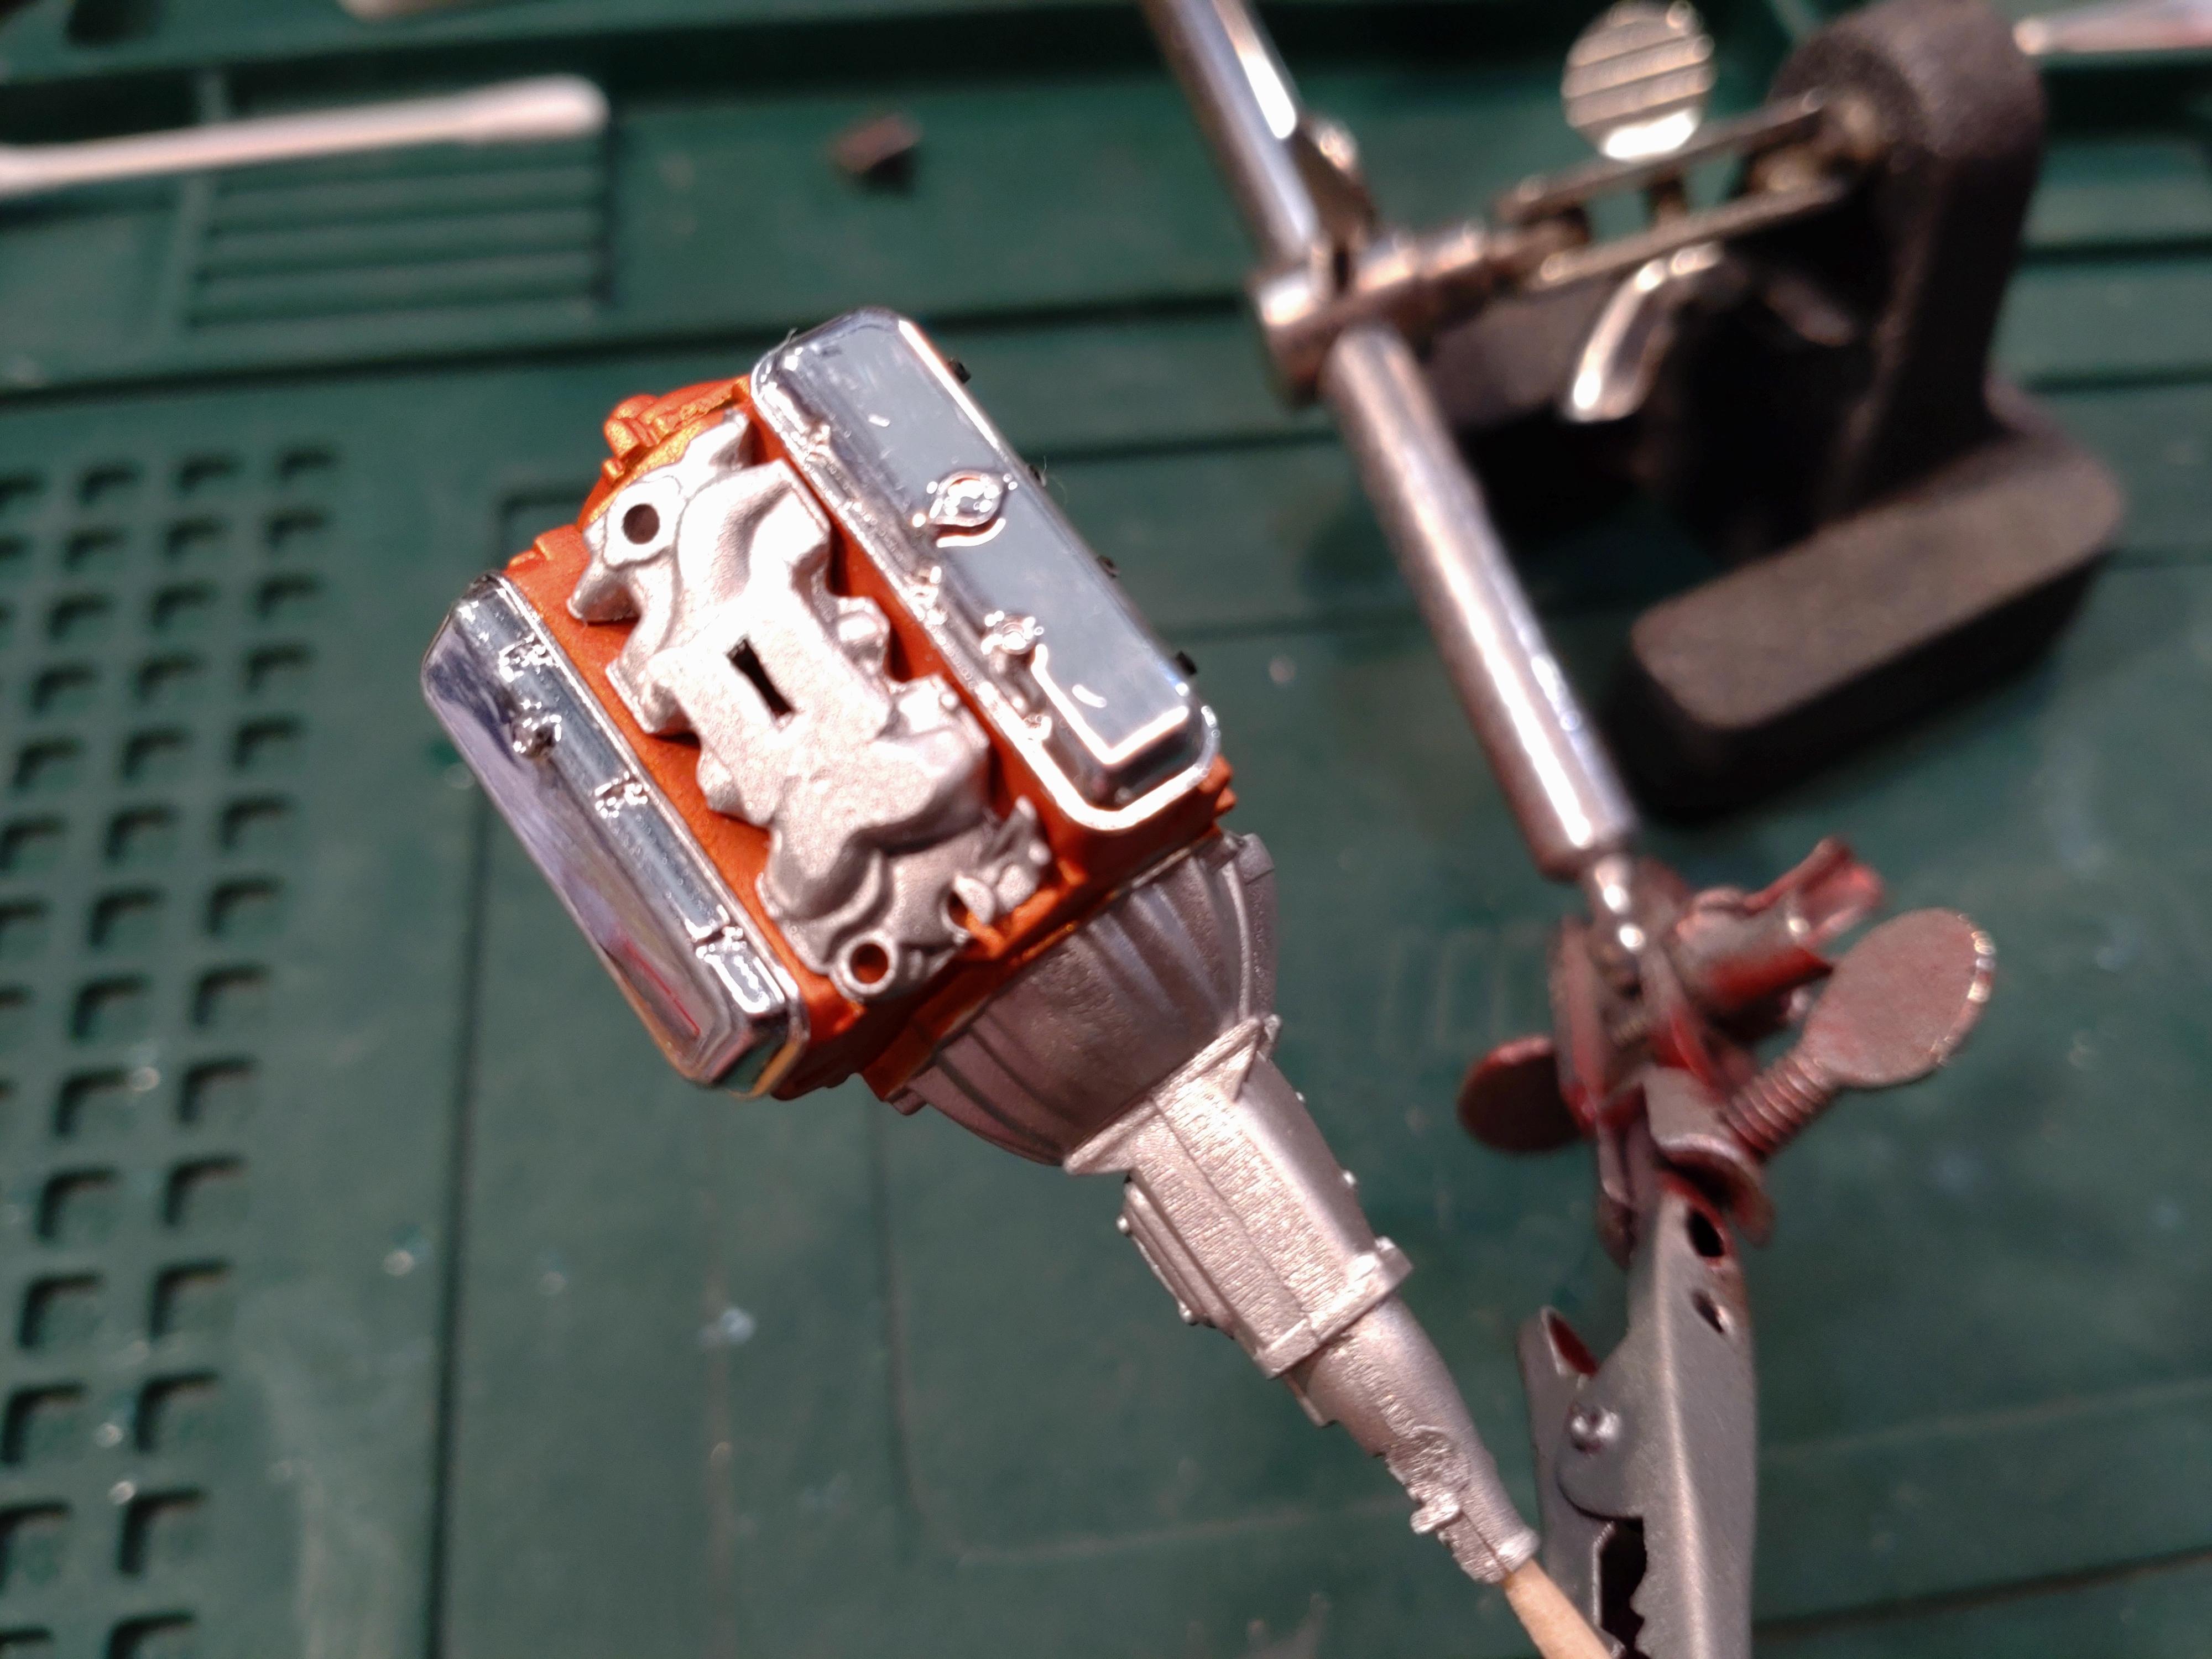
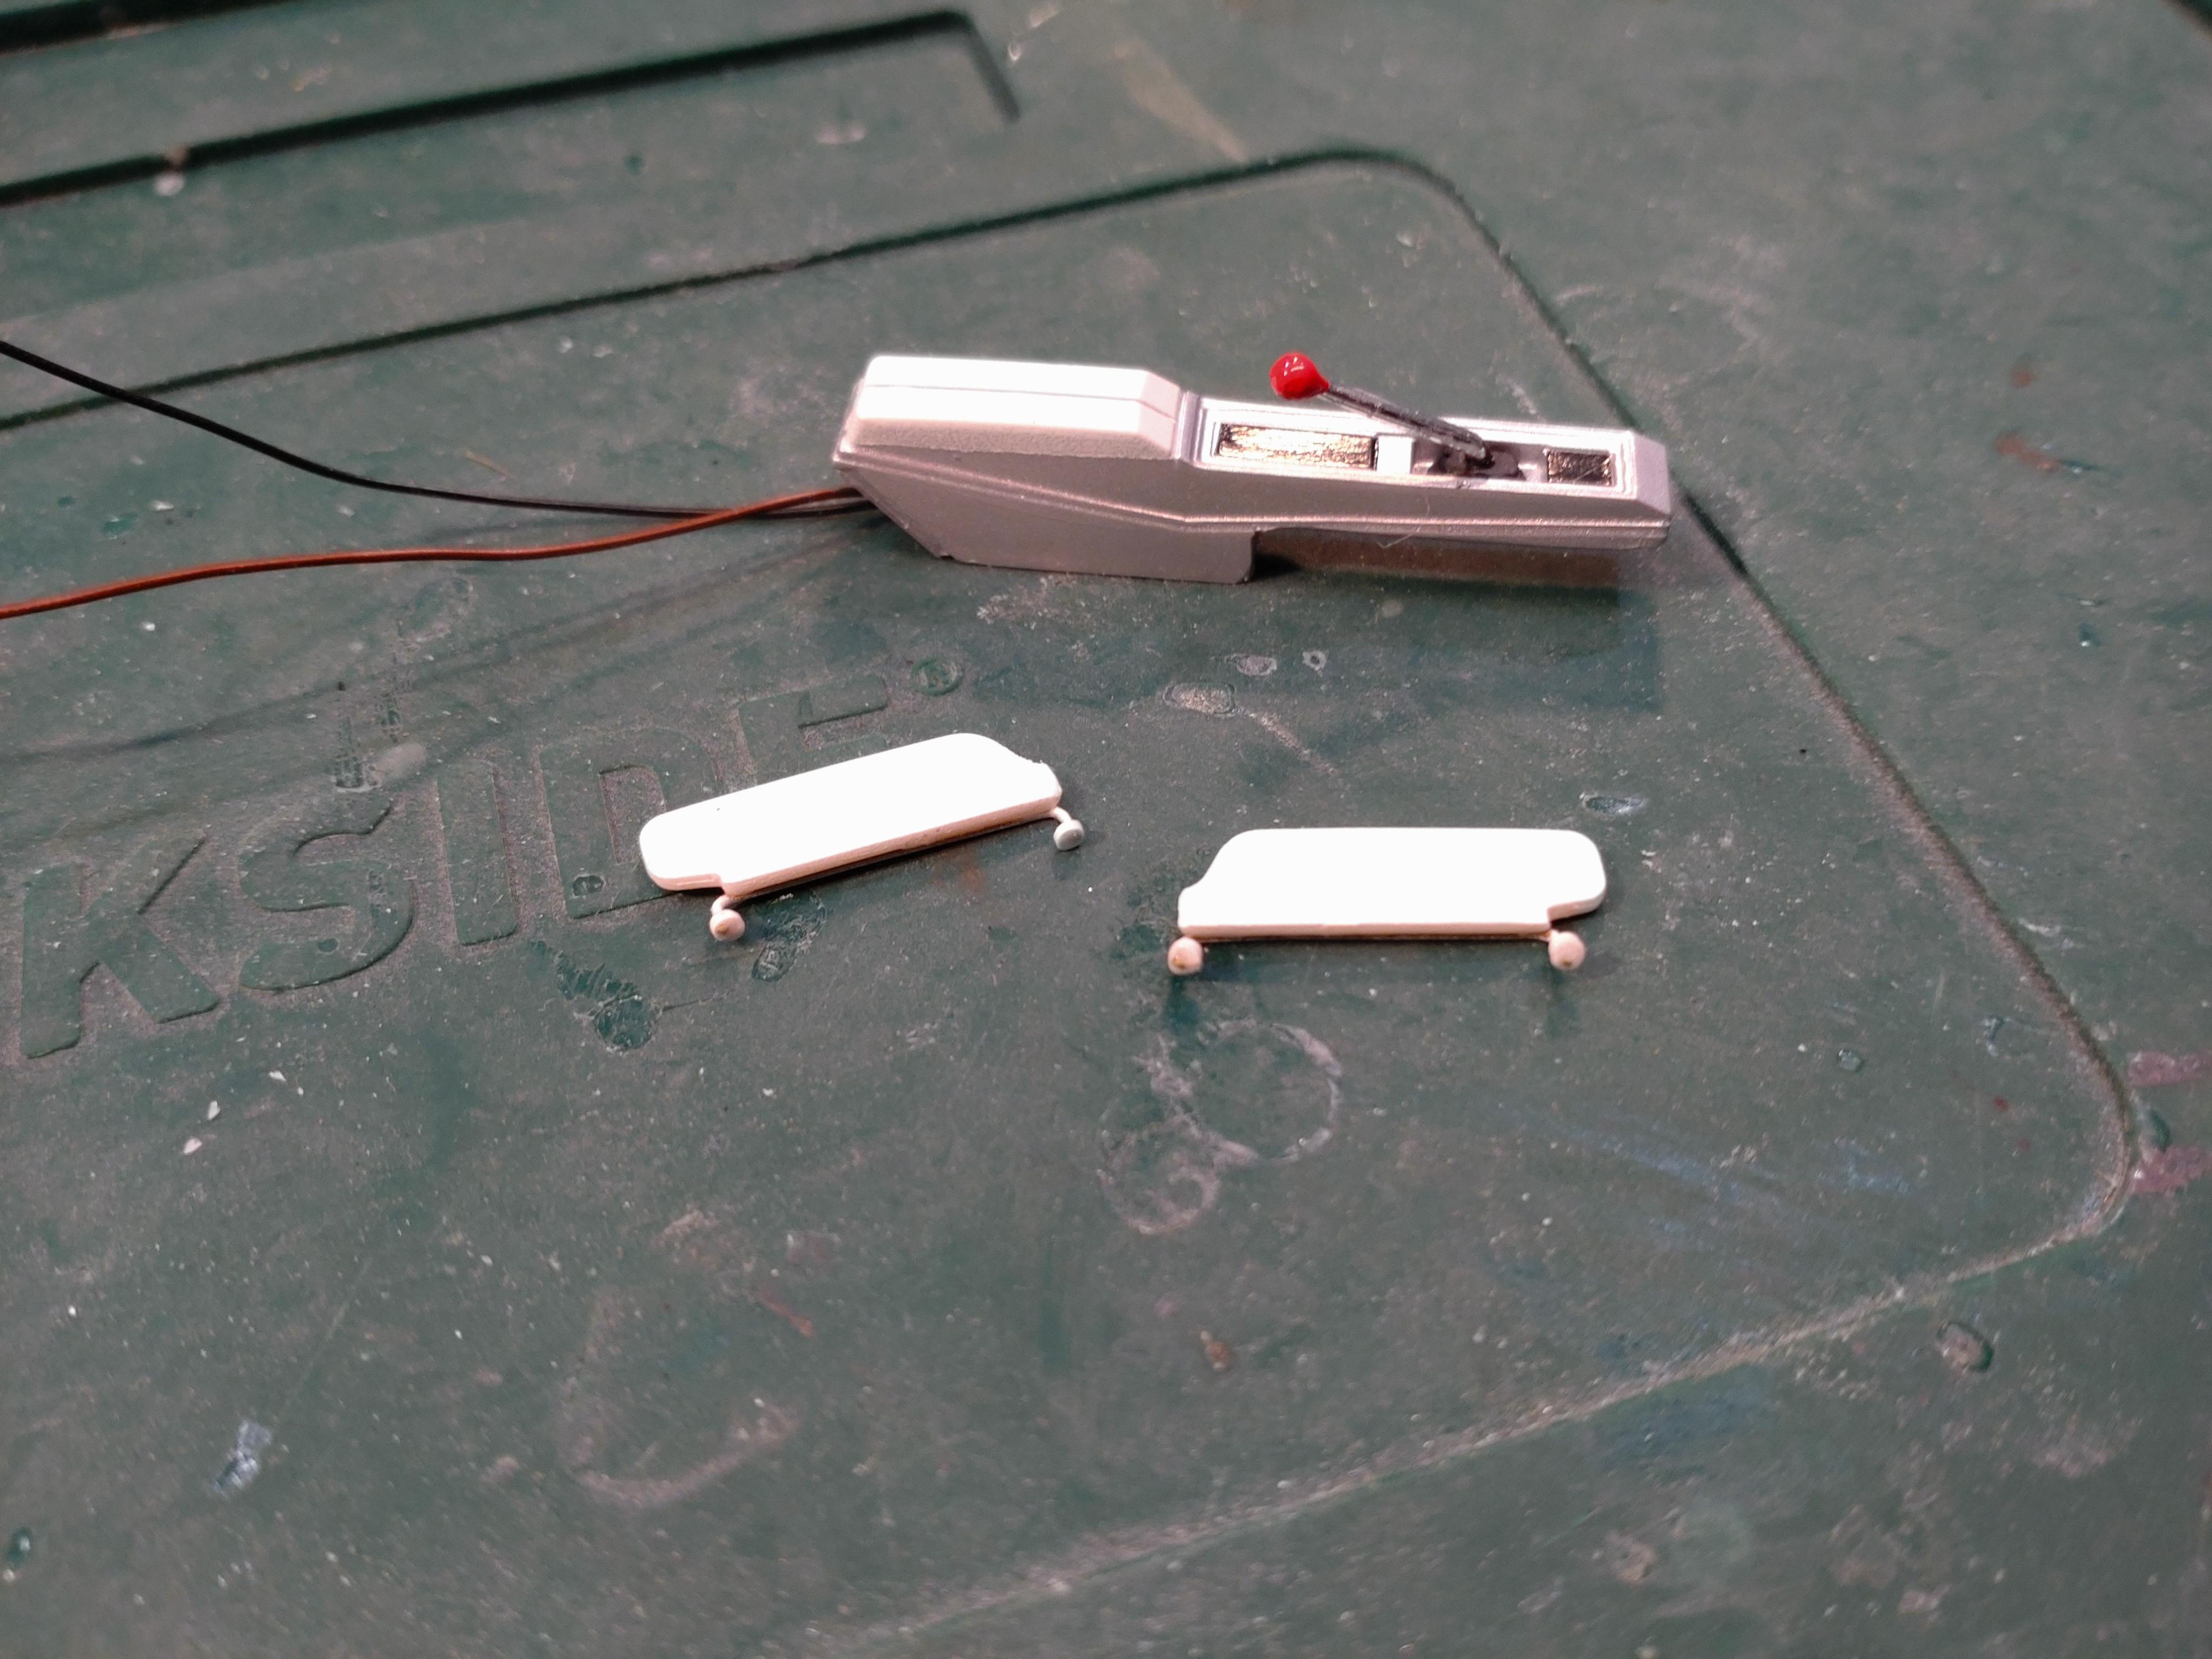
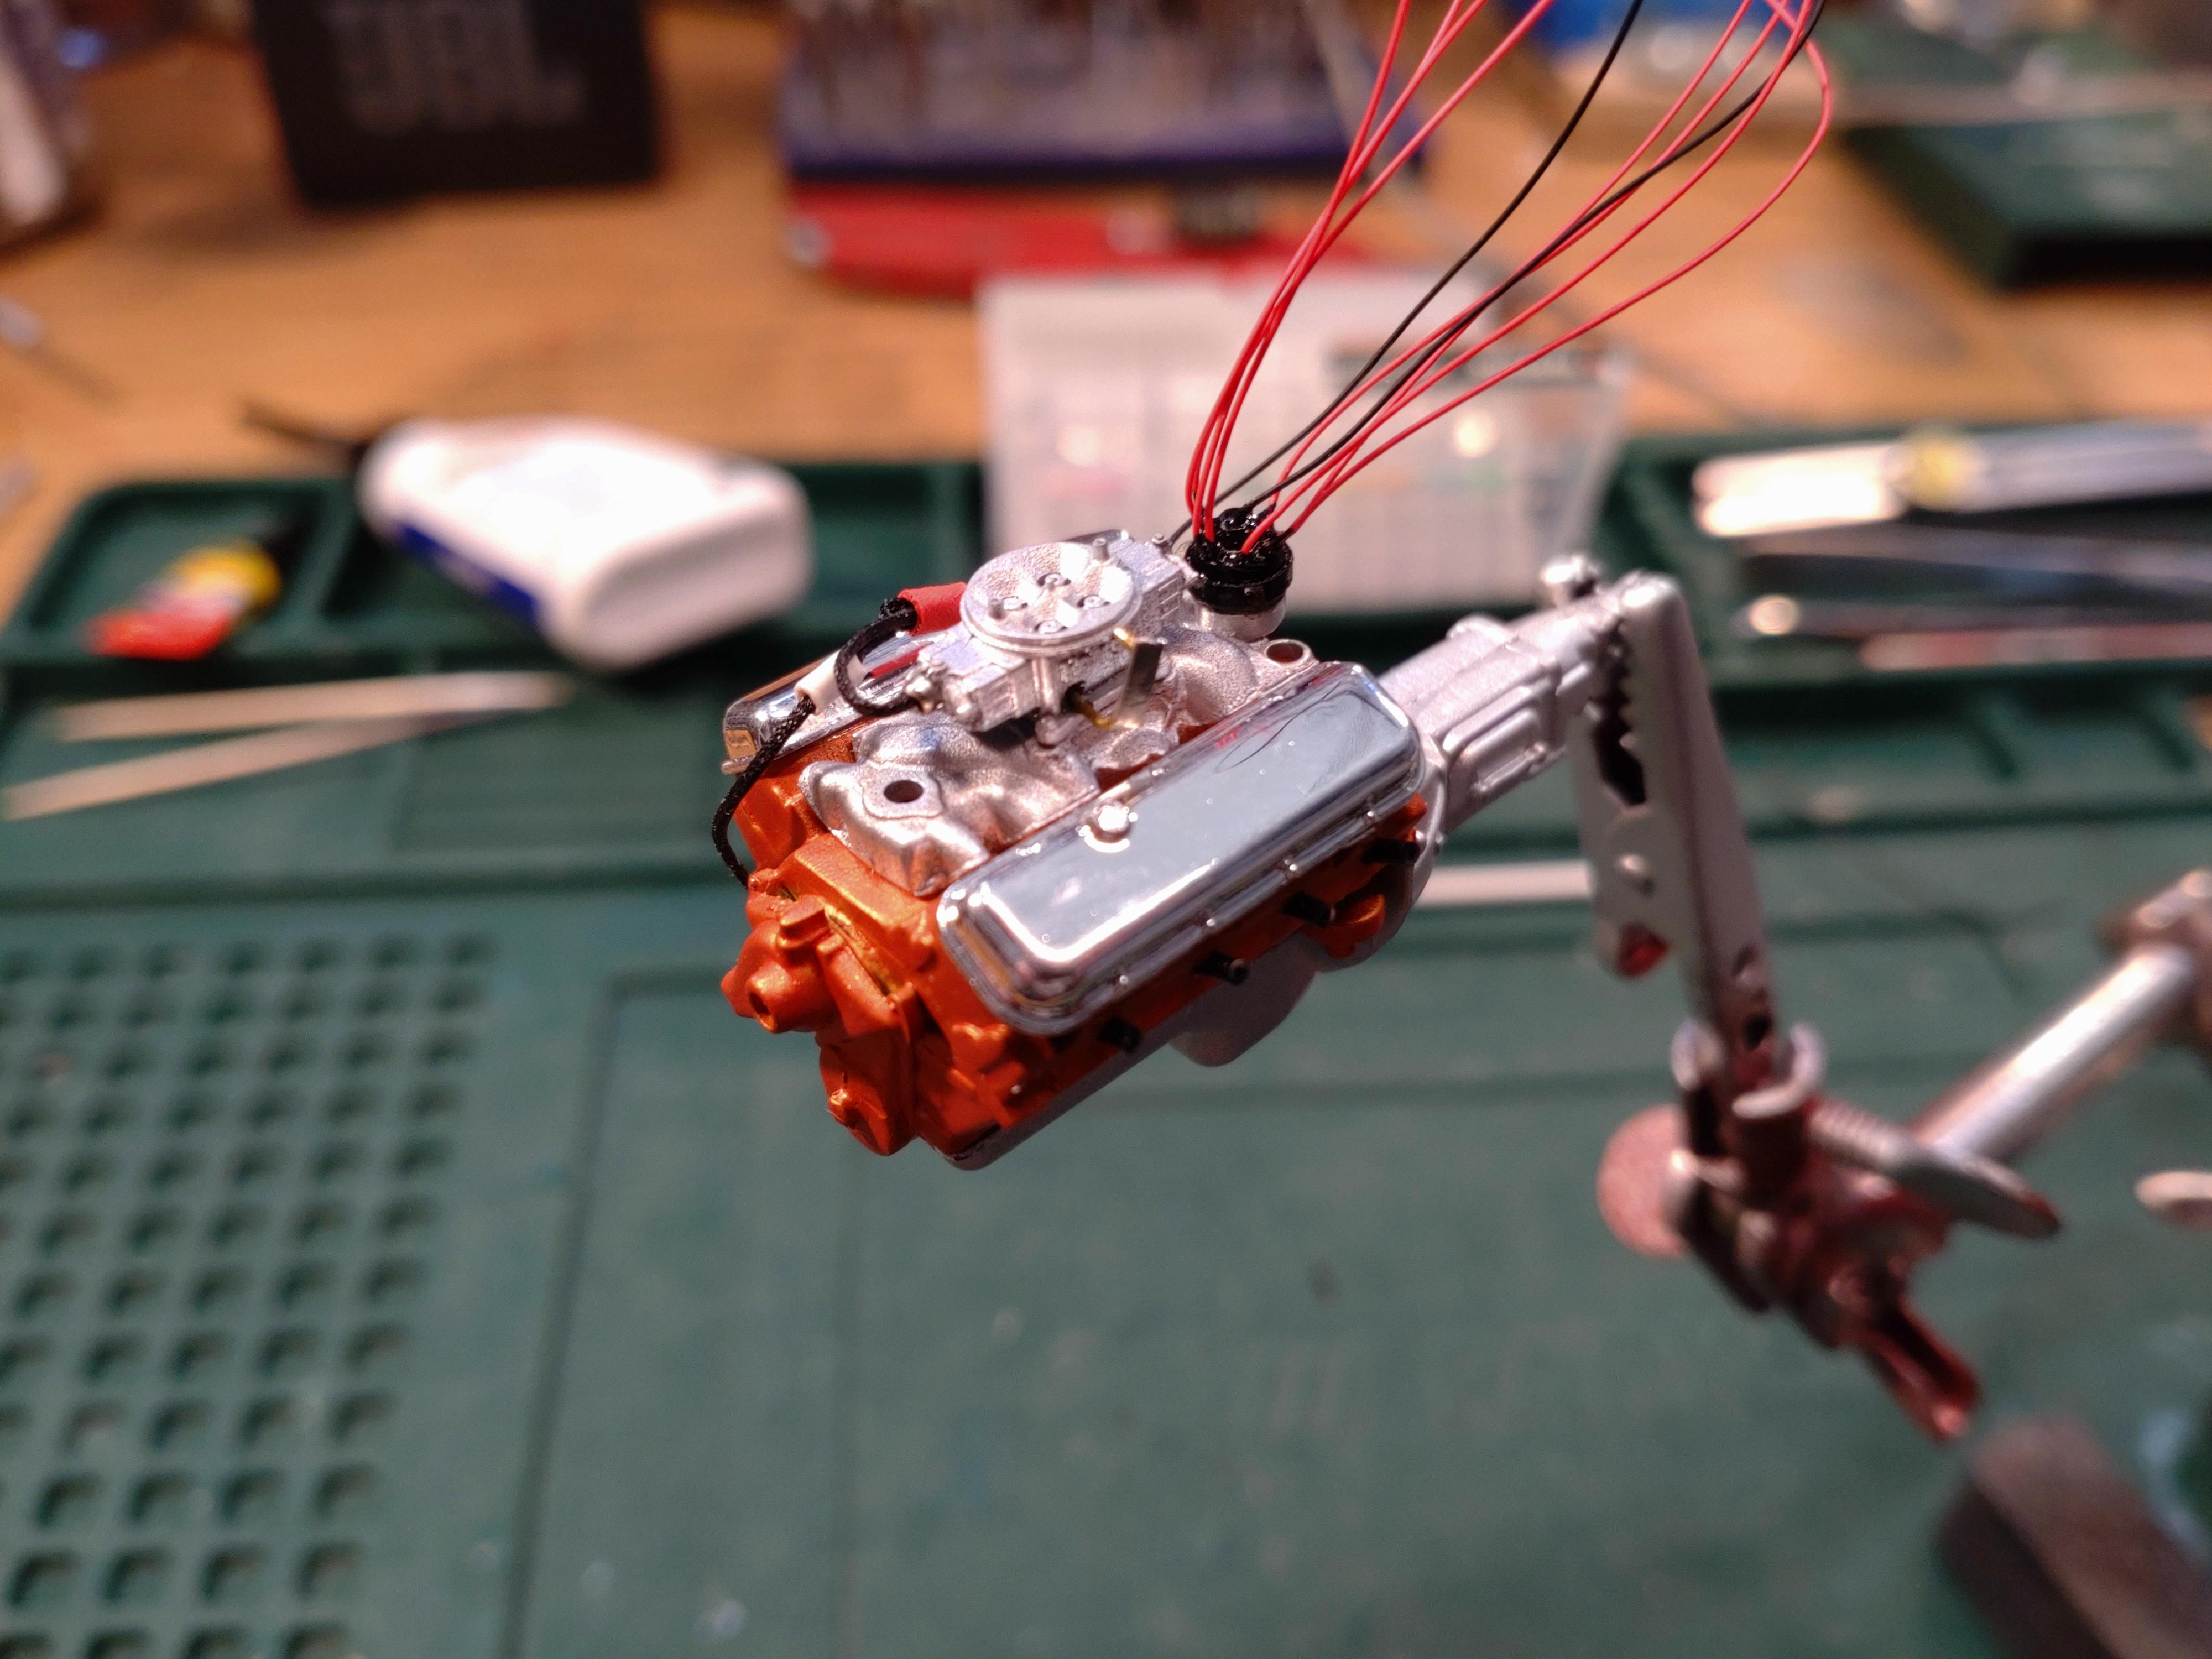
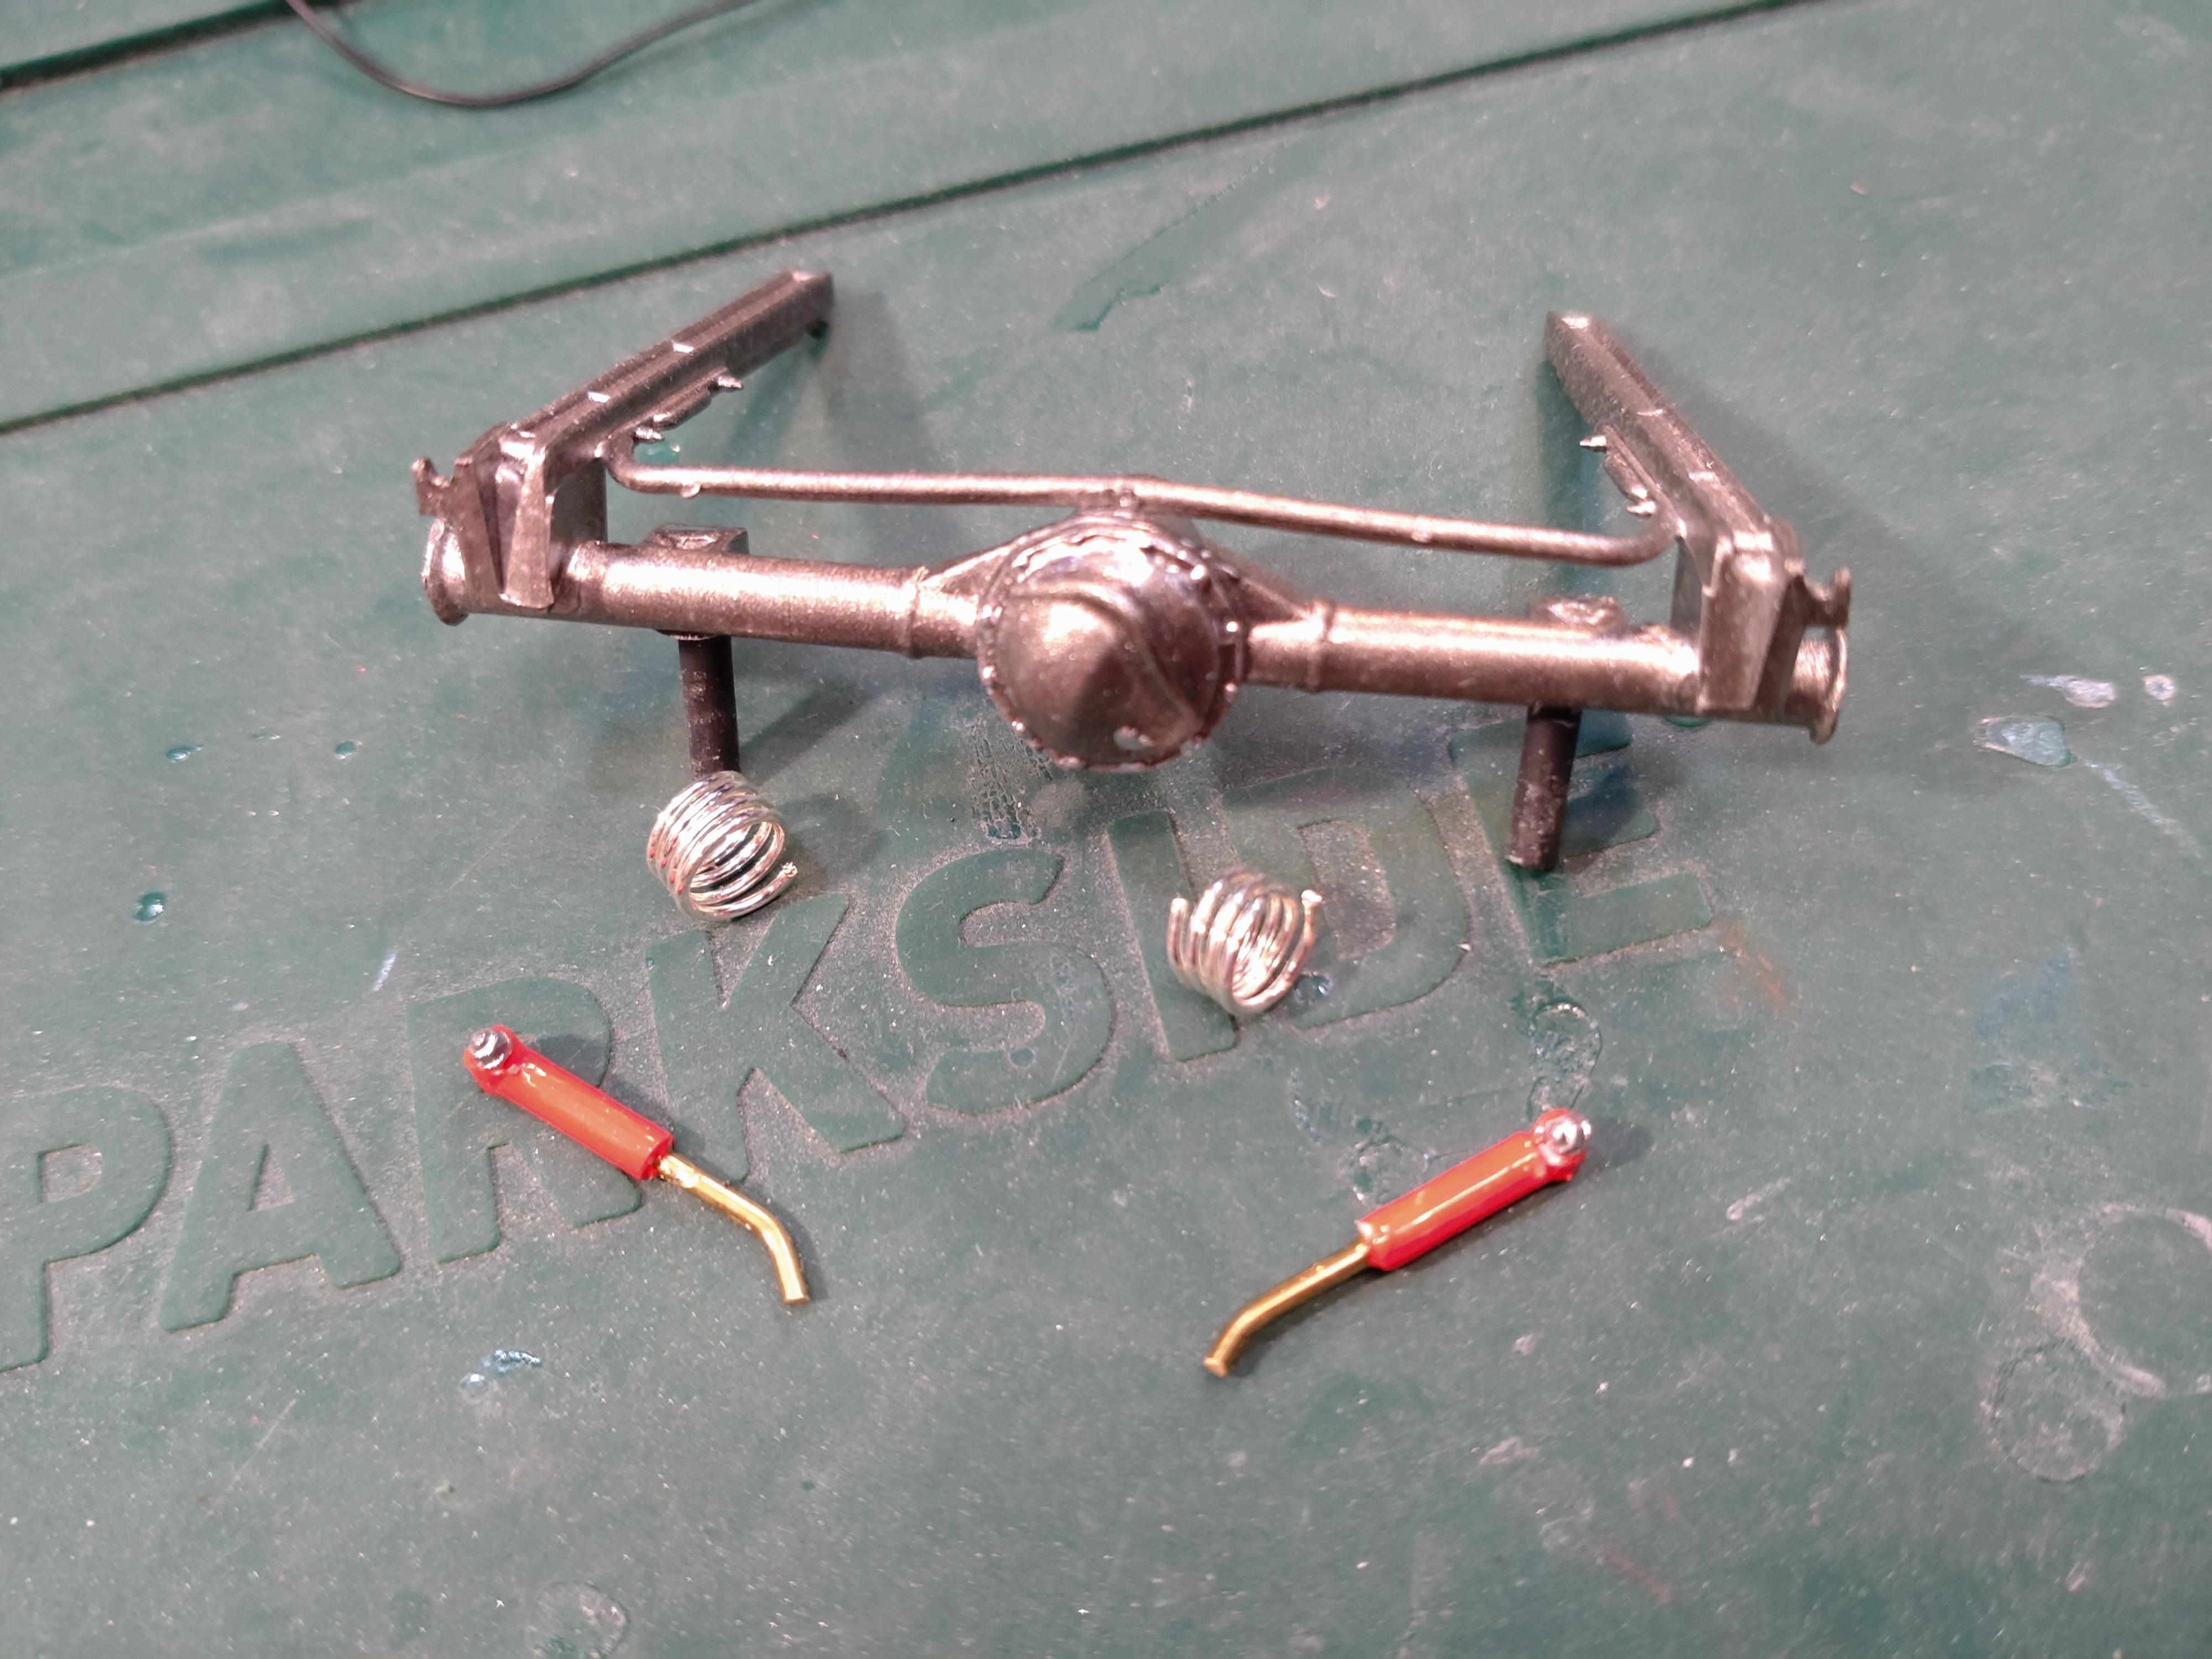
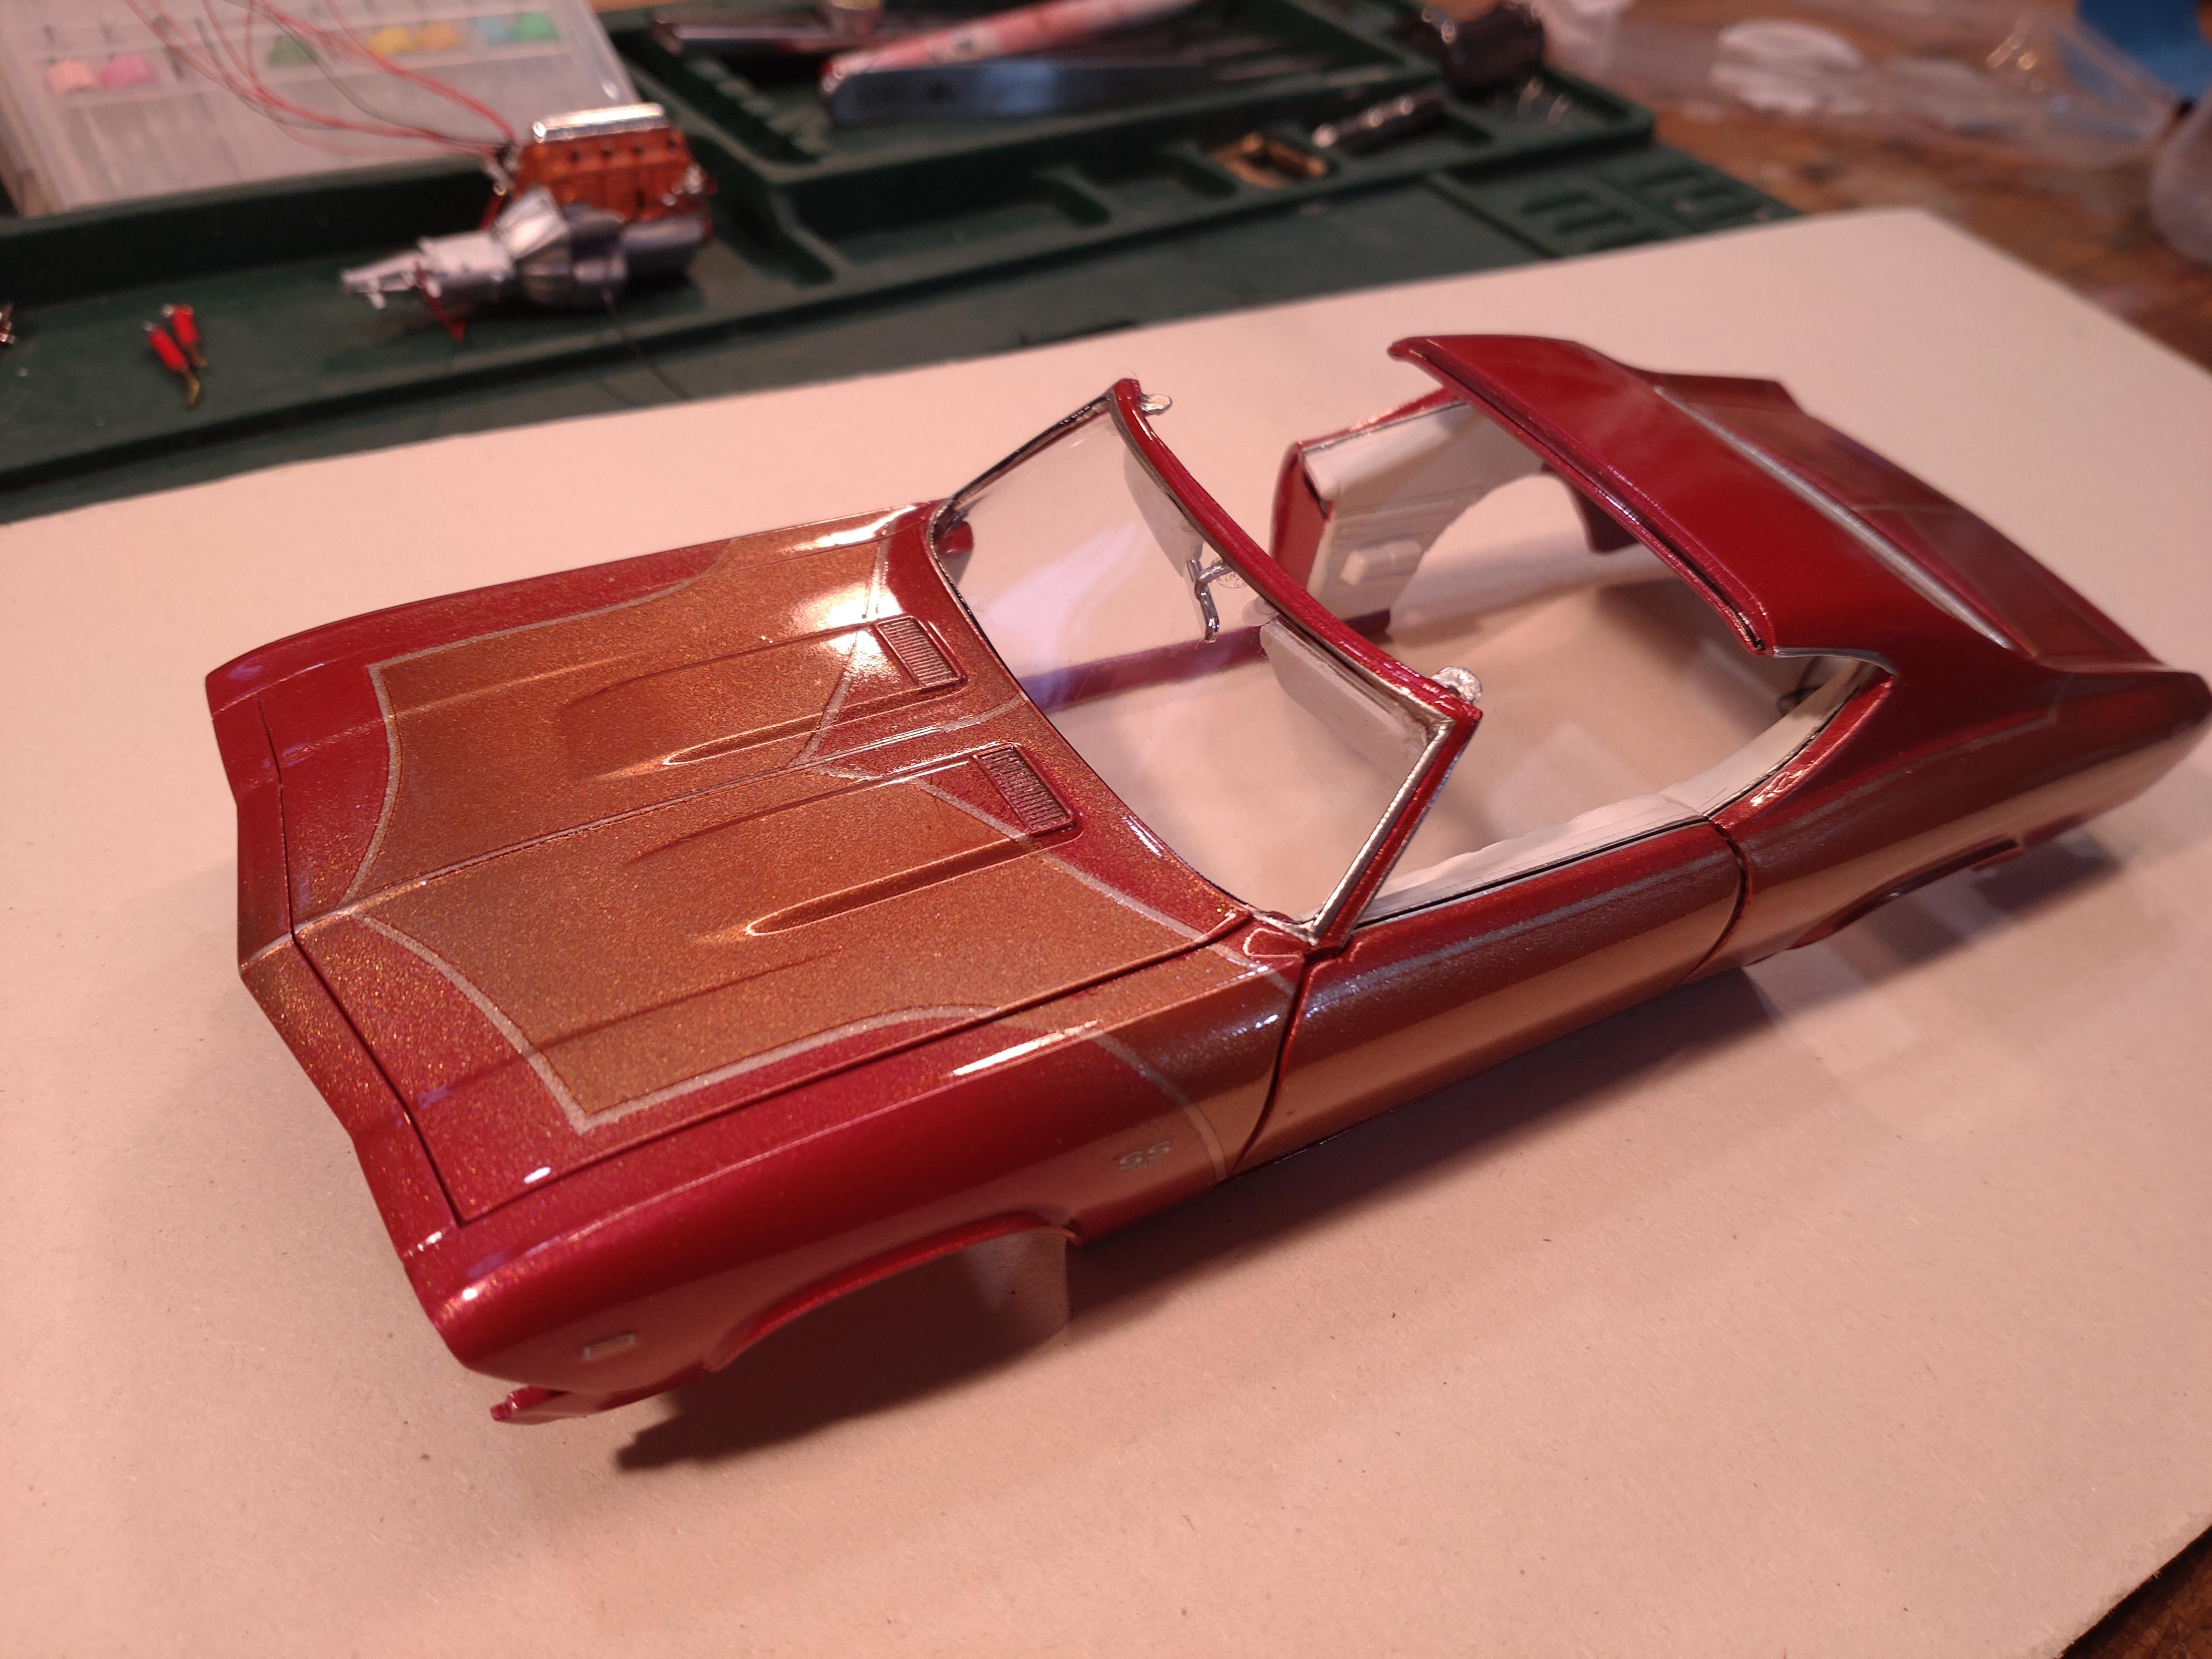
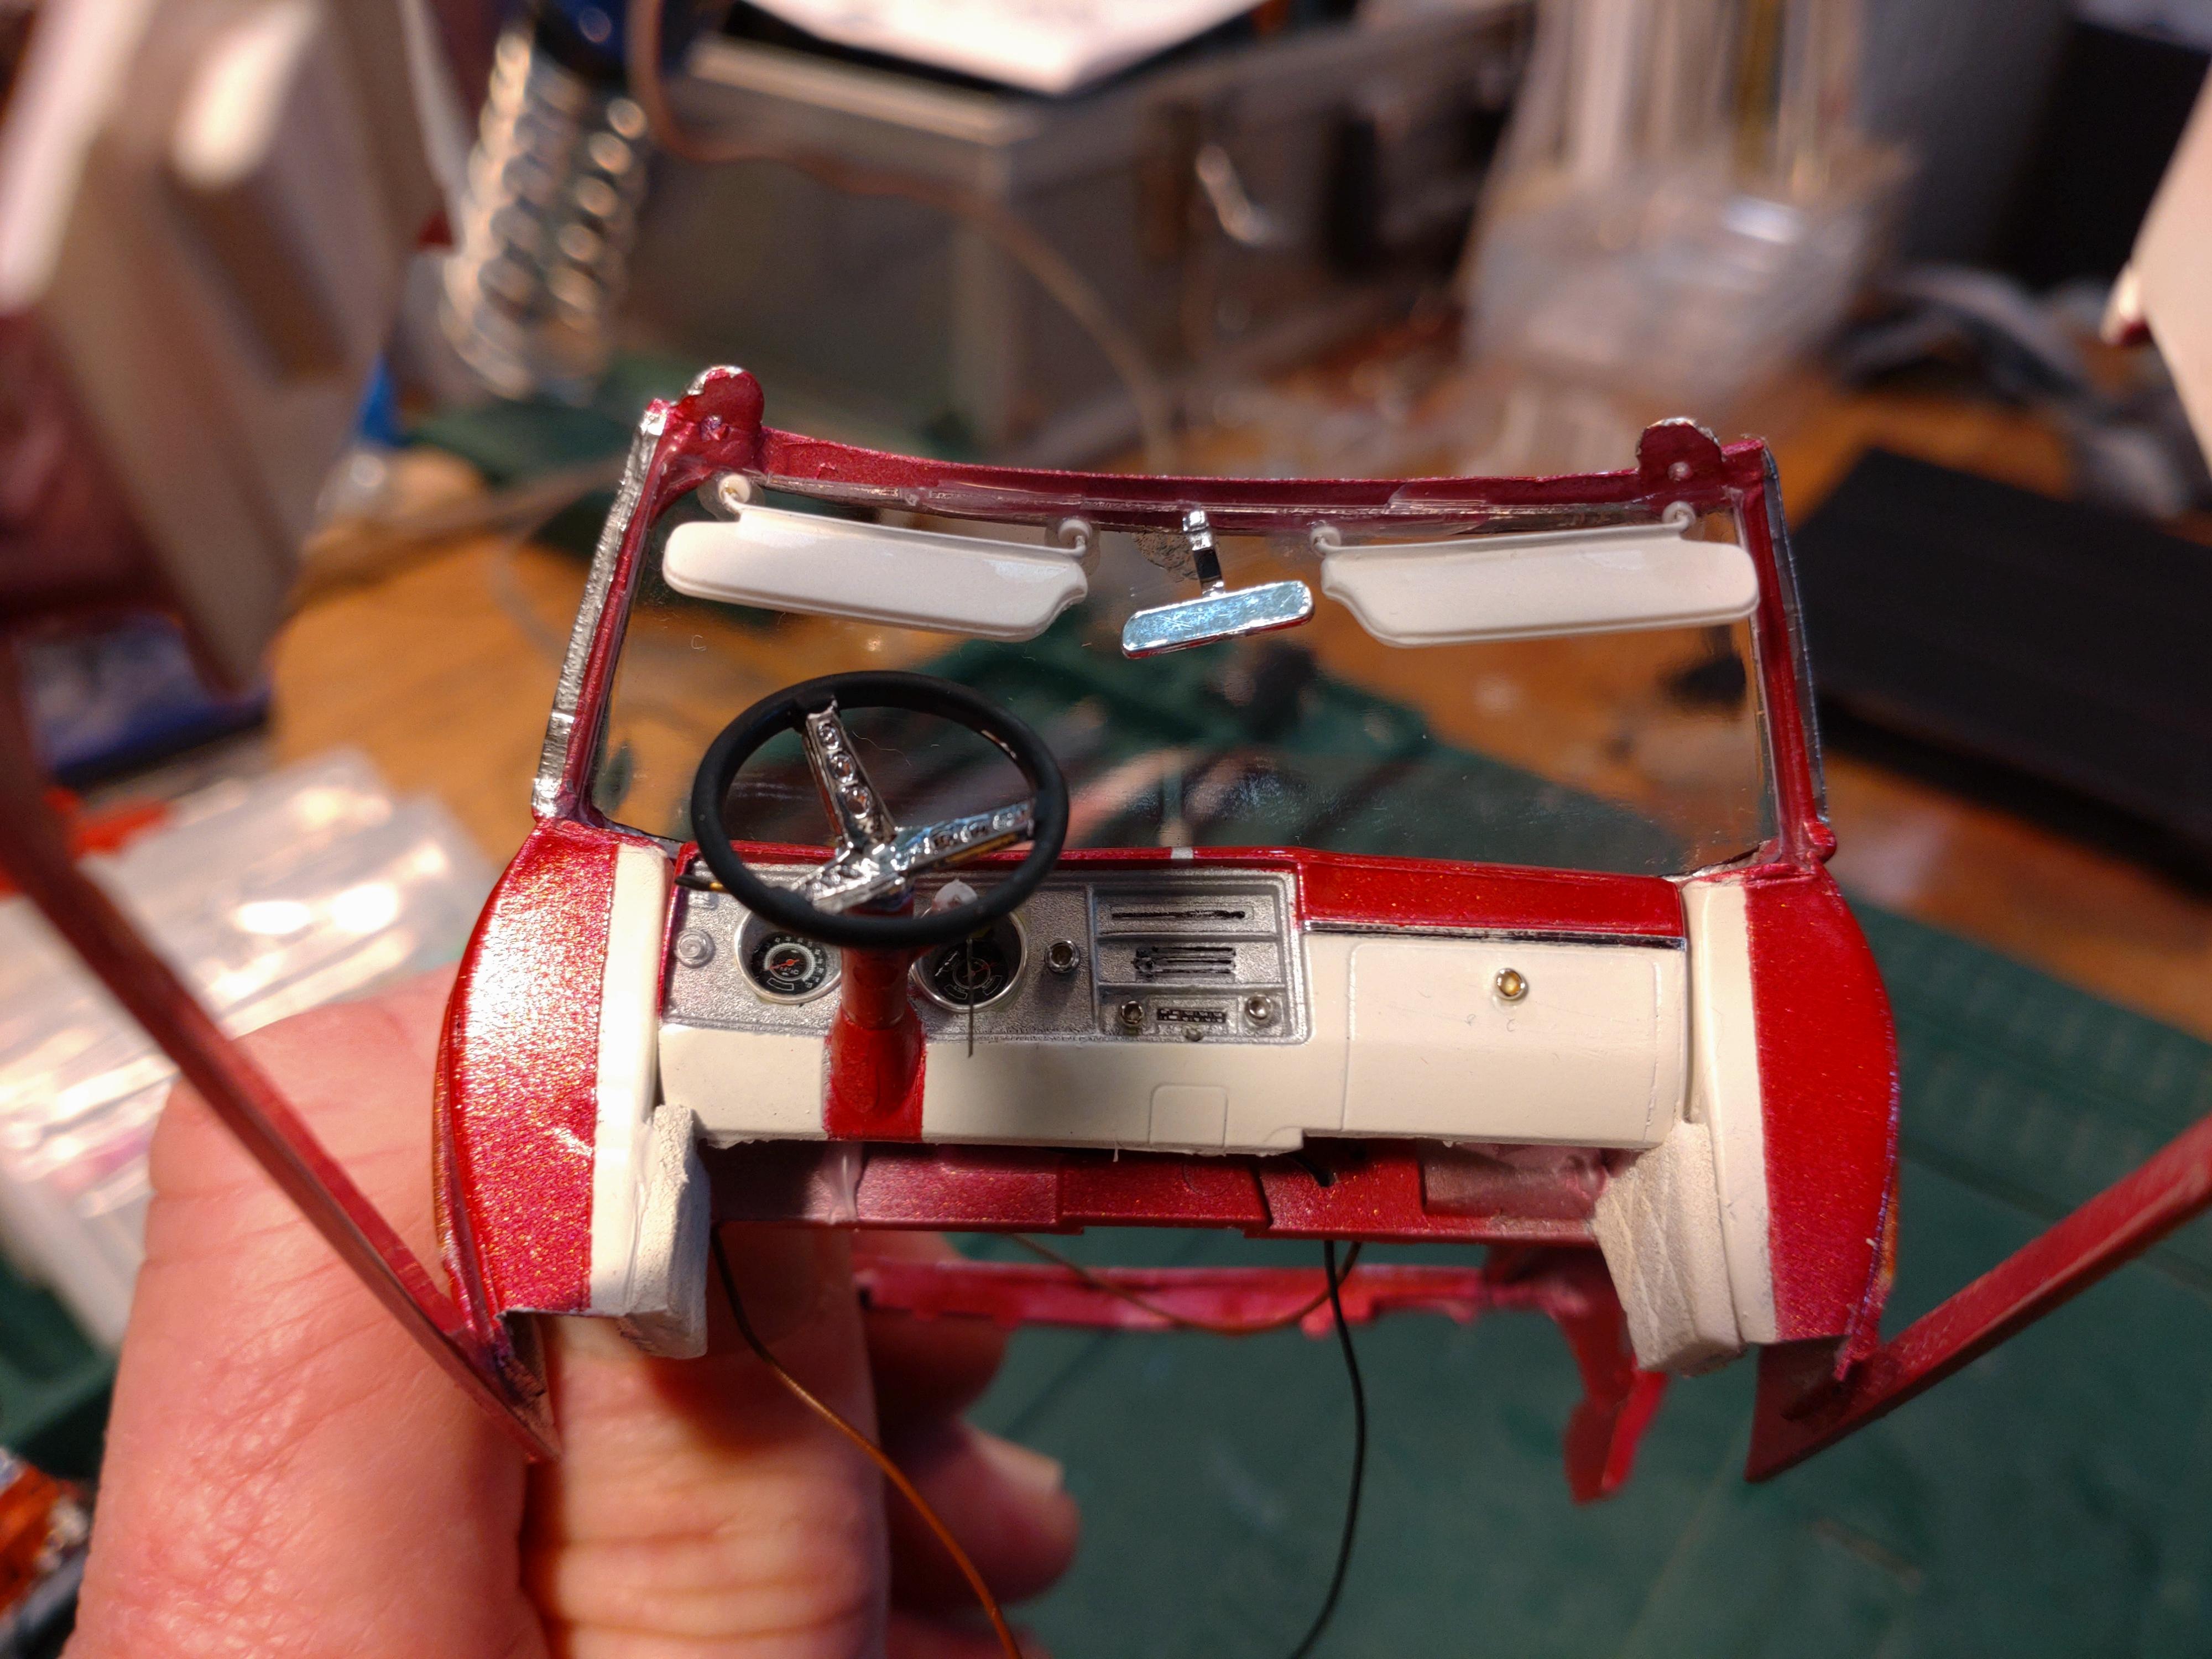
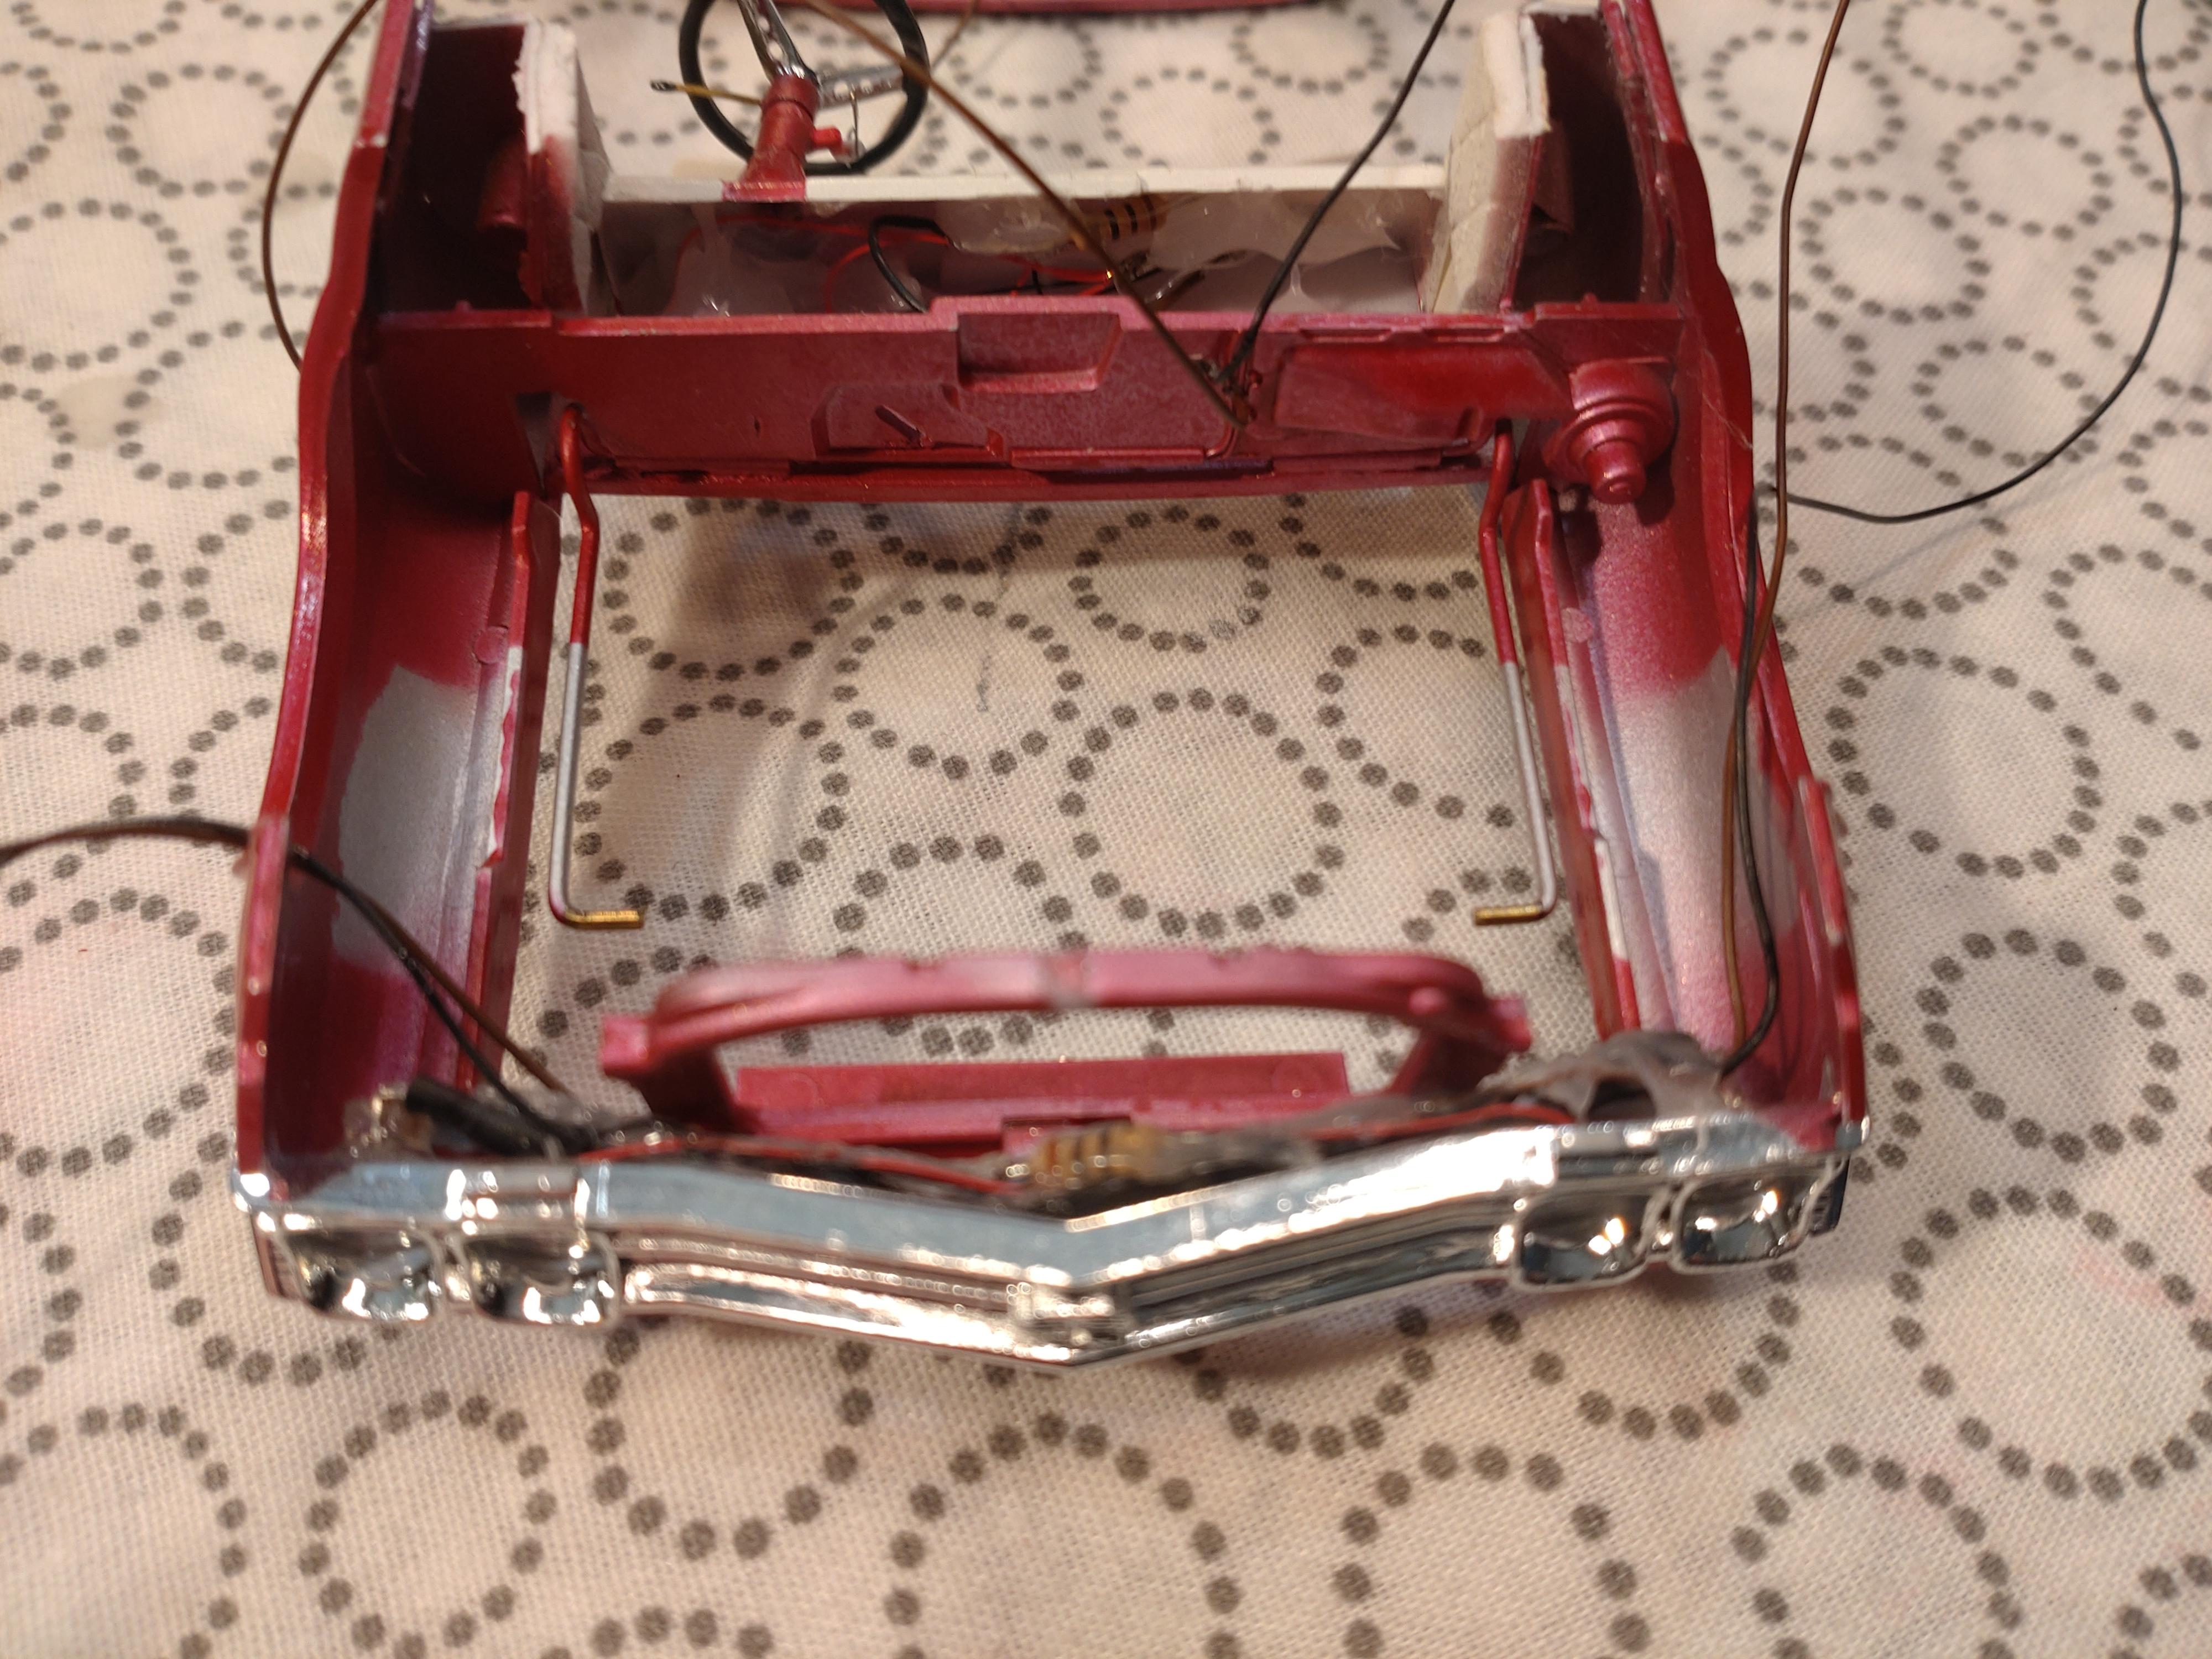
A wise model builder once wrote, that the essence of our hobby is solving problems we get ourselves into. I AGREE!!! Or let us say, looking for solutions, sounds more modern. Well, the paint job is done. After spraying a clear coat (AK clear varnish) and a fine sanding to remove the masking edges, I do my BMF work and apply the decals. These are now safe under a second layer of clear varnish and cannot accidentally rub off. I always warm the rattle can before spraying and the shine looks perfect. I guess I don´t need a polish. The windows are glued in place. Now I have to take care not to mess the body with dirty fingers🫣. I have to work on all major parts at the same time due to the wiring for the lights. Sometime I fell like doing everything in a backward order. Thinking ahead about where to lay the wires and how to get them hidden. The armrest console has an ambient light, so the wires have to lead on the underside. If this model had a tub interior it would be a bit easier. But the effect is cool. The floor is flocked with a self mixed red to match the paint. The door panels are finished and boast a fine BOSE sound system. The dashboard and the sun visors are attached and the dash fits smug between the door stops. The rear suspension is finished and attached. I dropped the chassis by about 1 cm so the stance is really hot. The shocks are hand made and the springs are wrapped with 0.6mm wire. You can see some wires in the drive tunnel but i guess they wont show much after the drive is attached. On the side I have started work on the engine. The block color matches the body paint work. The distributor is hand made, the carburetor is second market printed from Scale Production. Now a small impression of the hairy mess of the wiring😂. Yes, I still know which wire is which. And I am sure it will all fit and work fine in the end. Fortunately solutions pop up by themselves so now I know how to hide the headlight wires to the trunk. thanks for watching and best wishes from Europe! Andy

-
Wow, so many fast replies! Thanks guys! Wish you well!
-
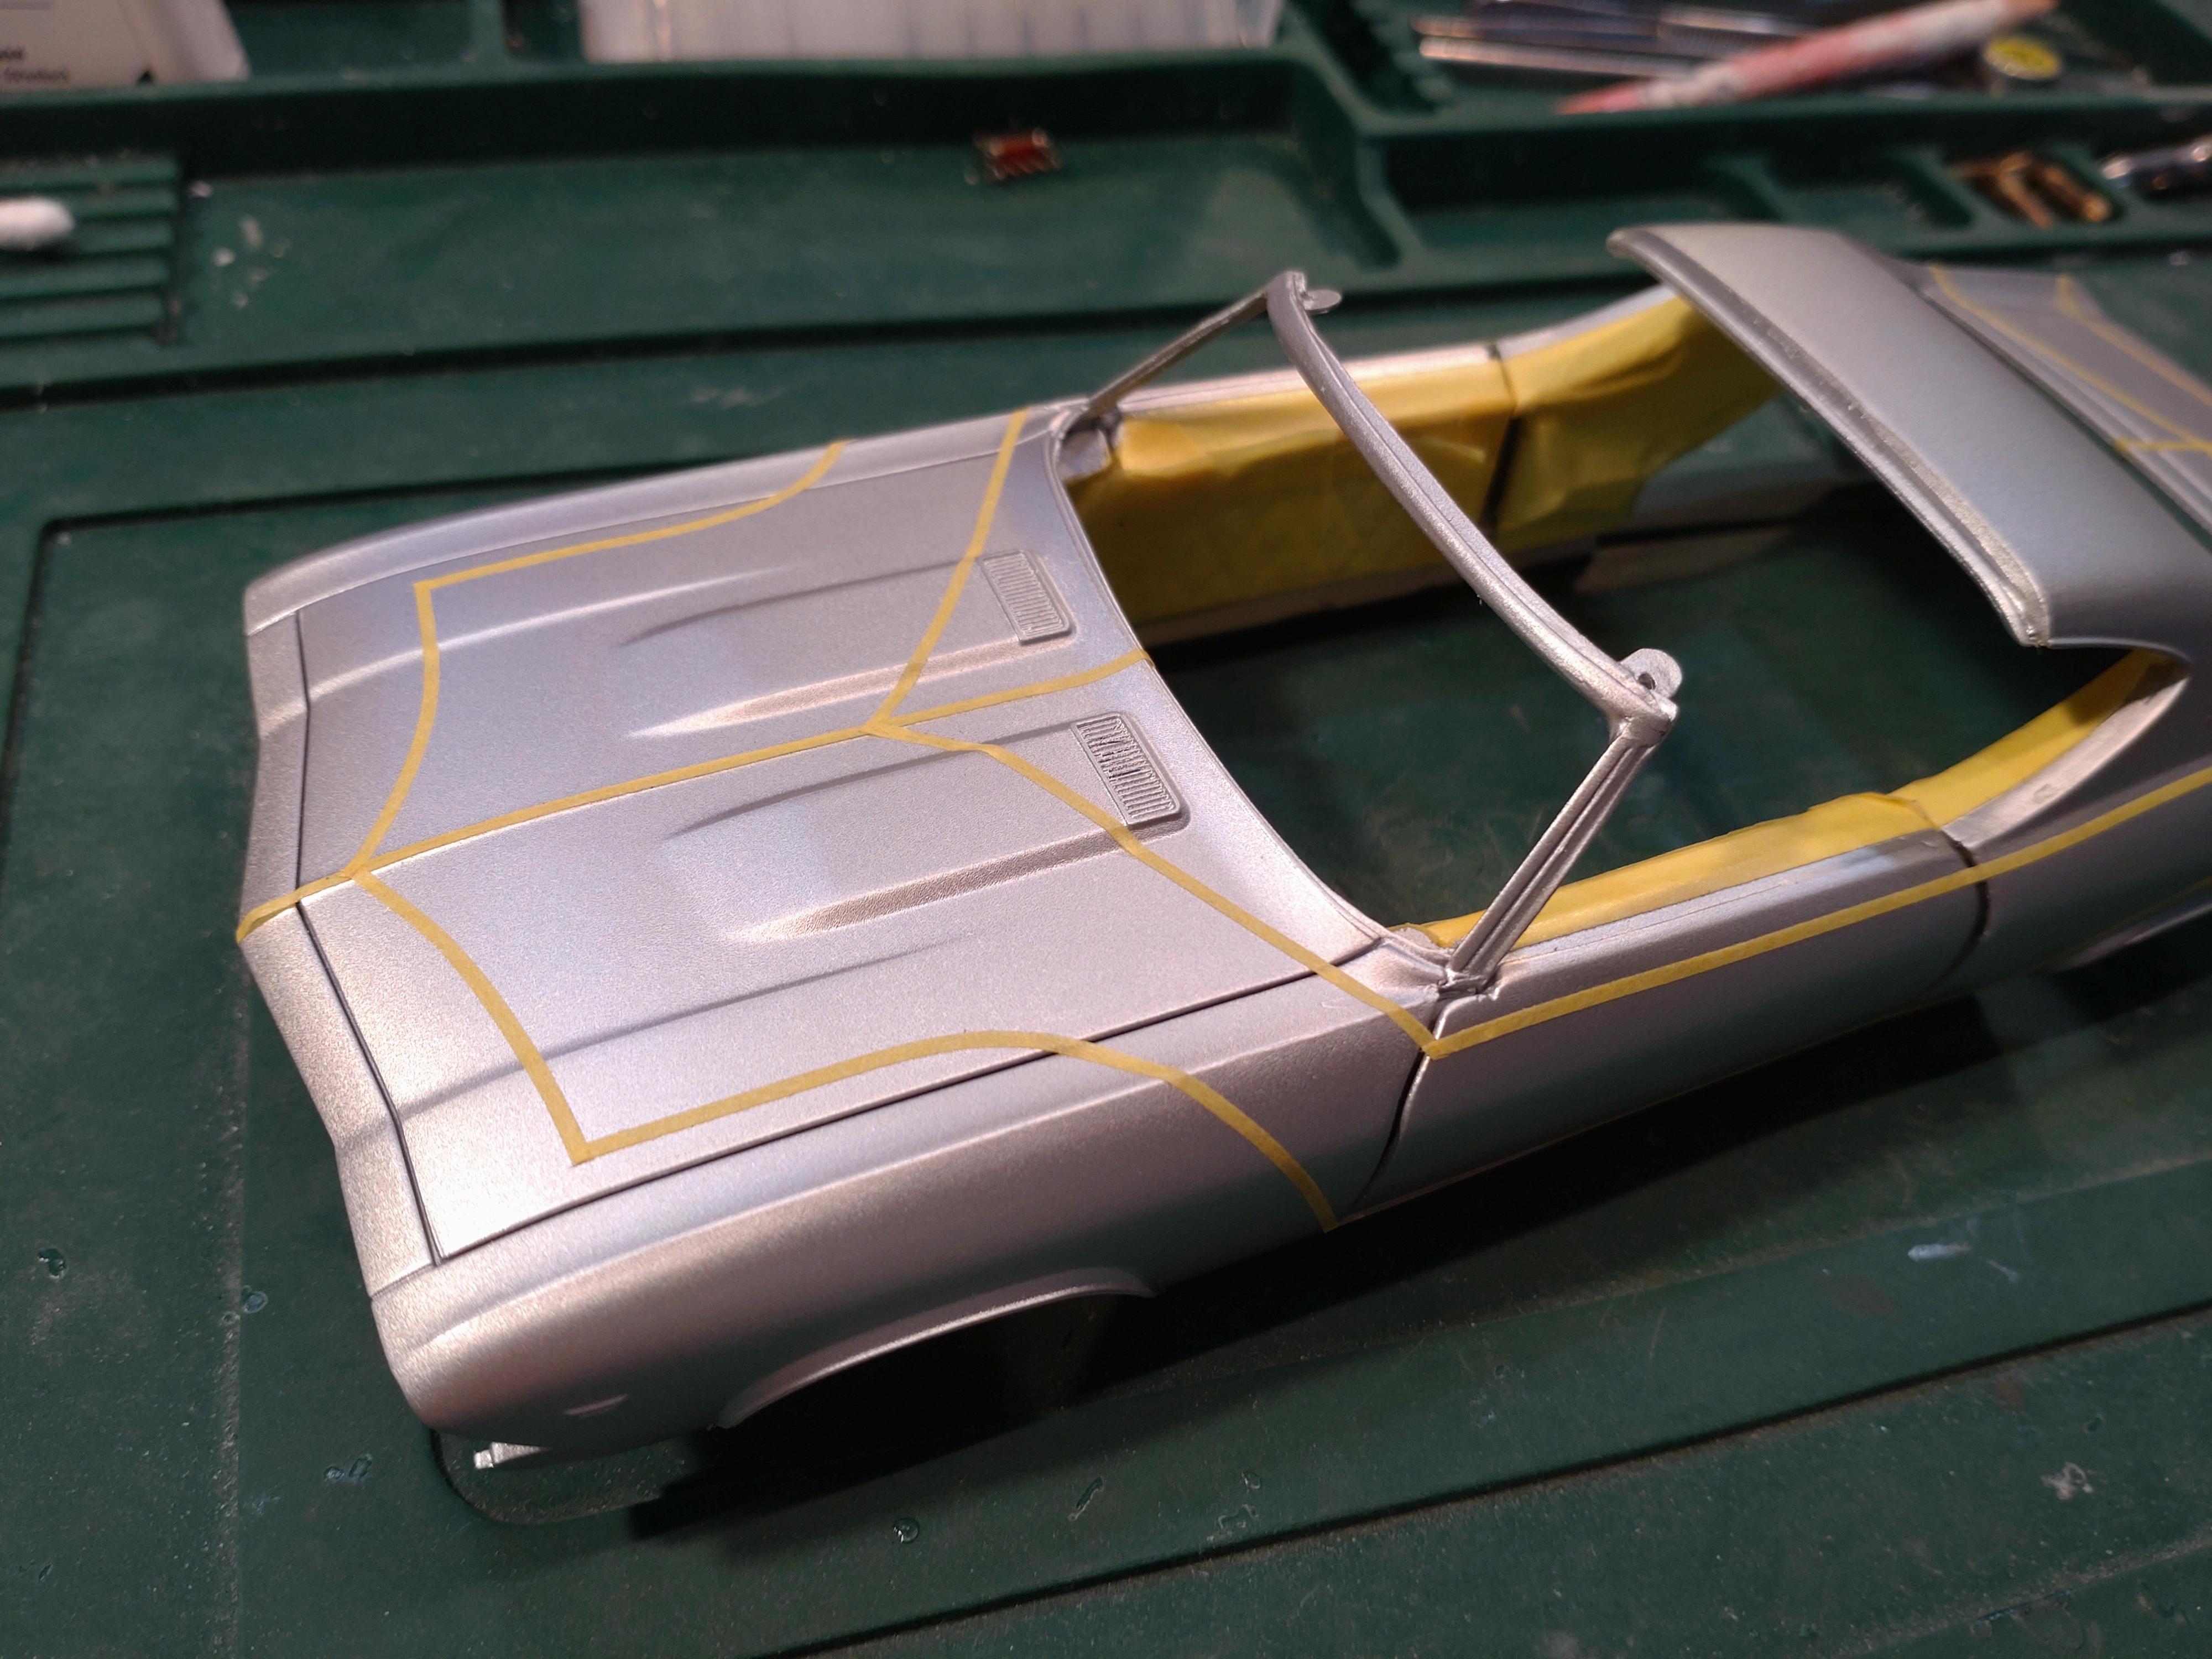
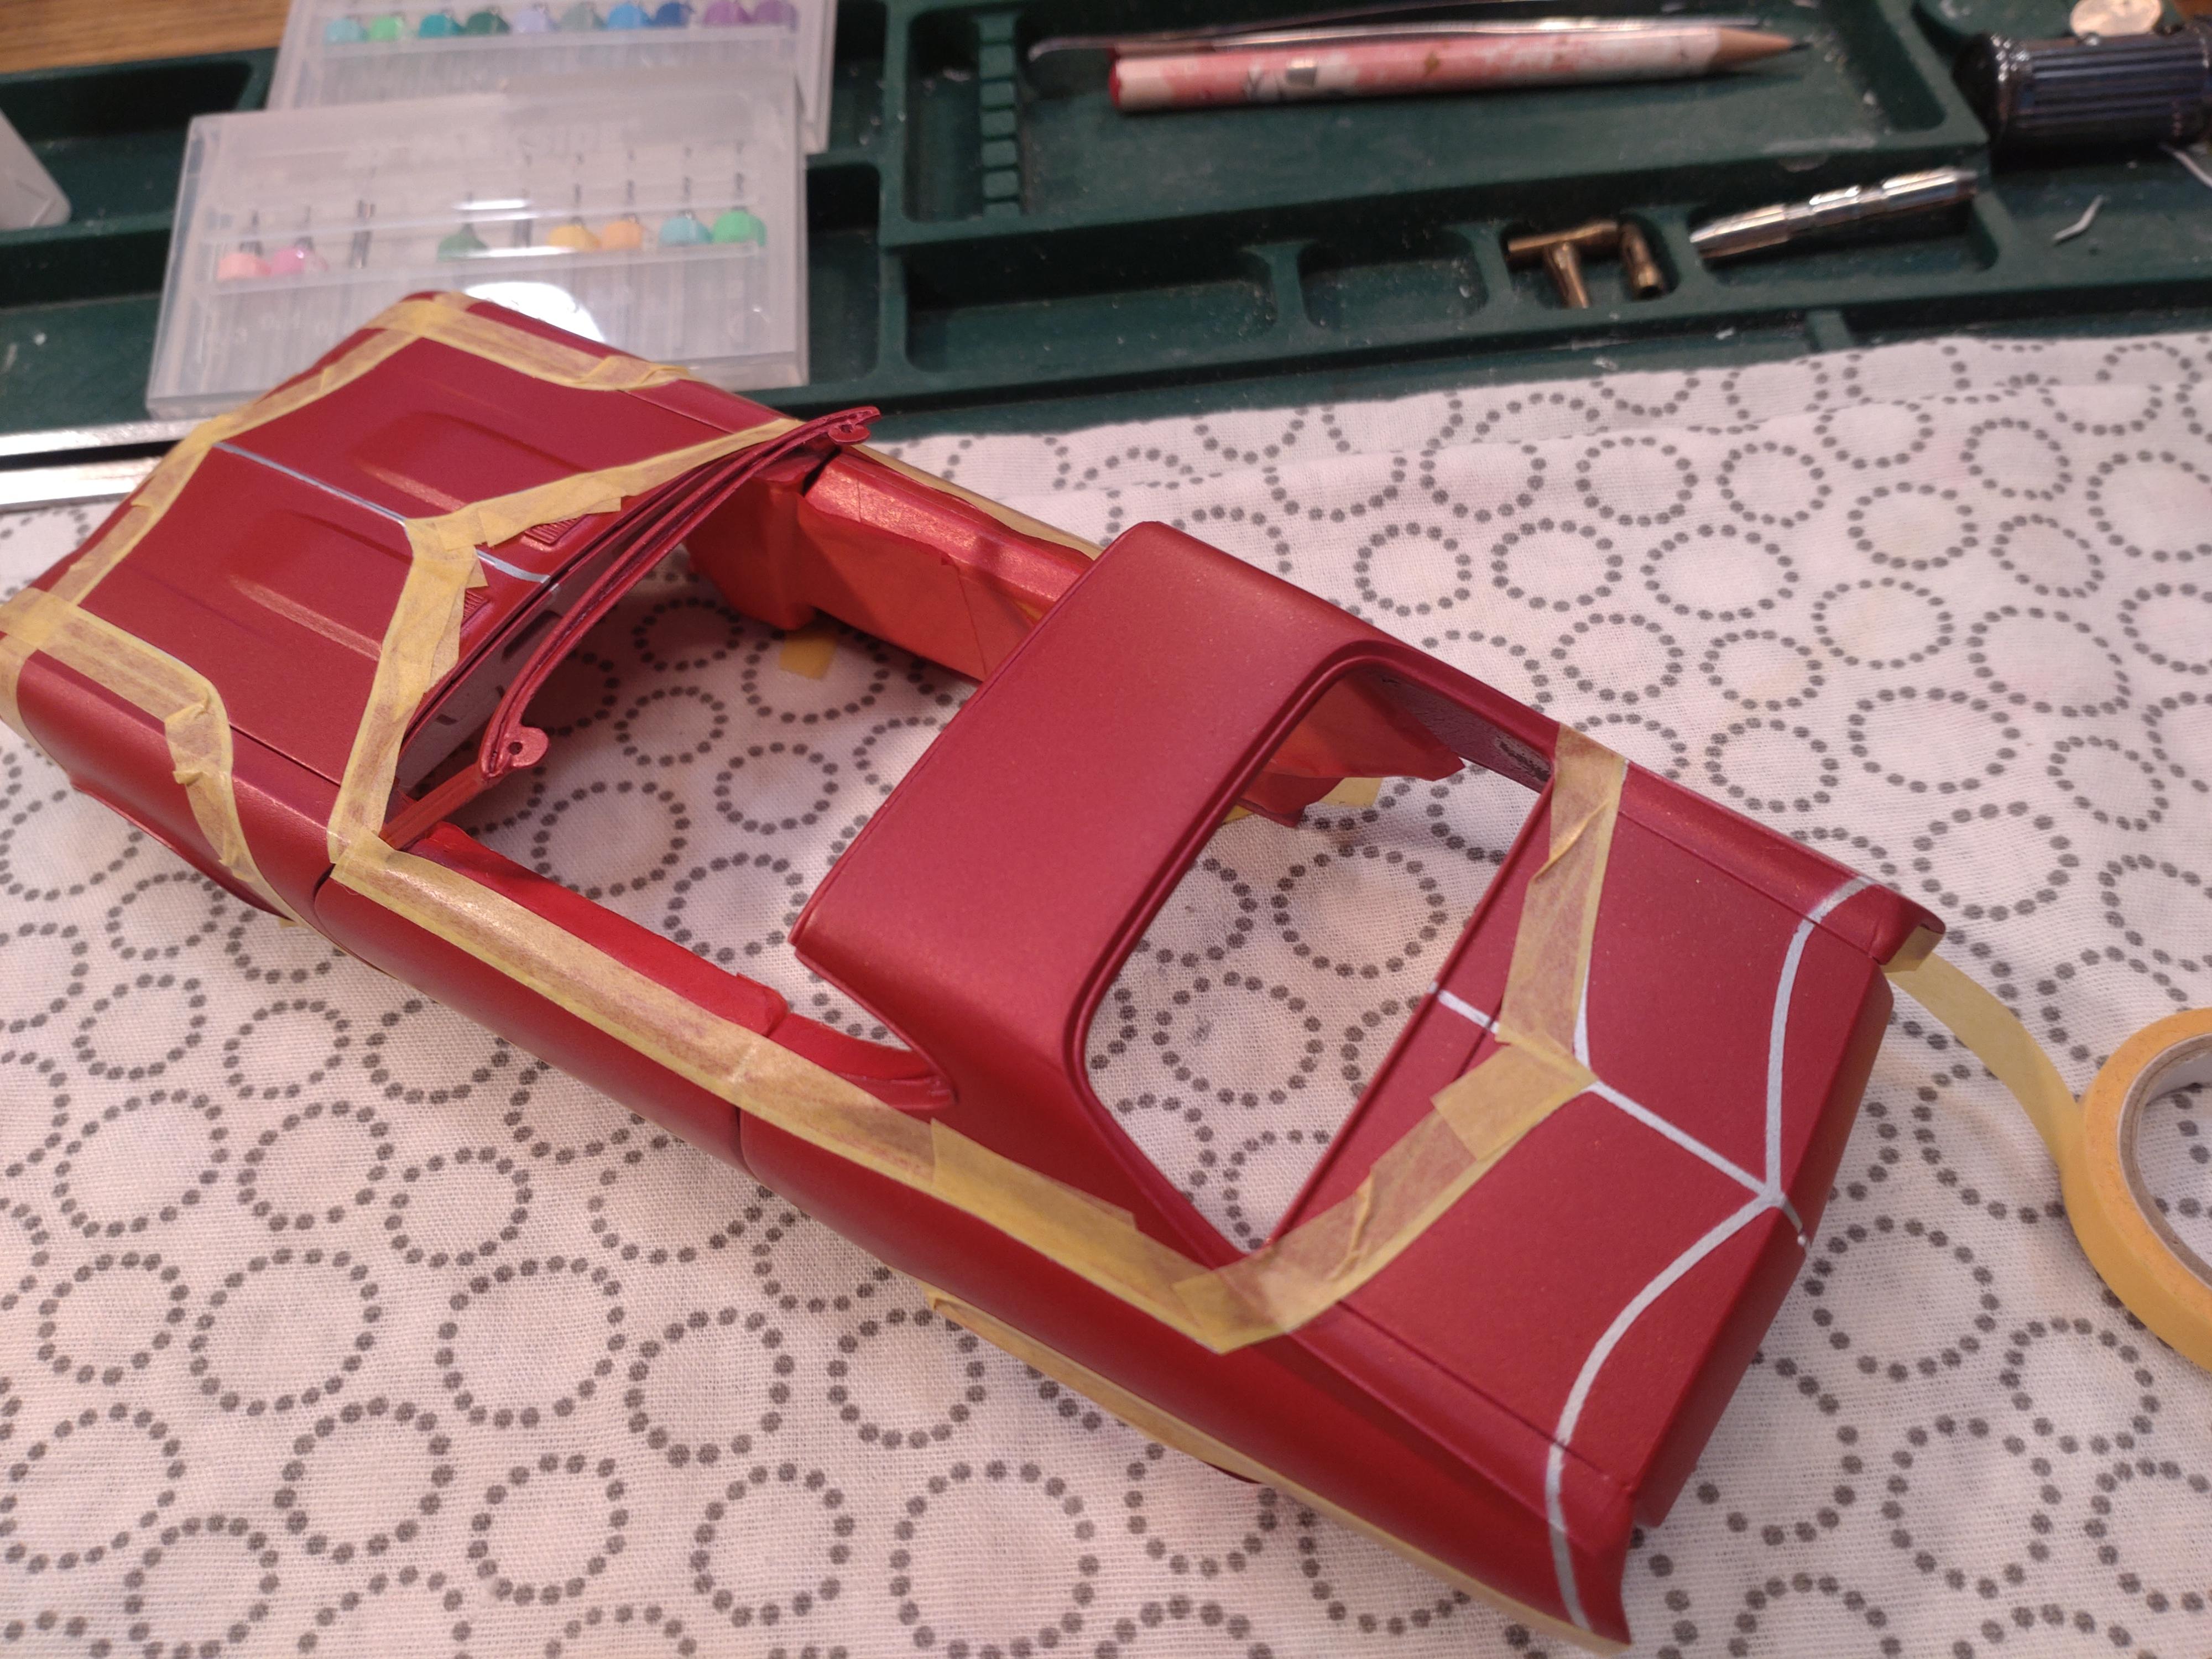
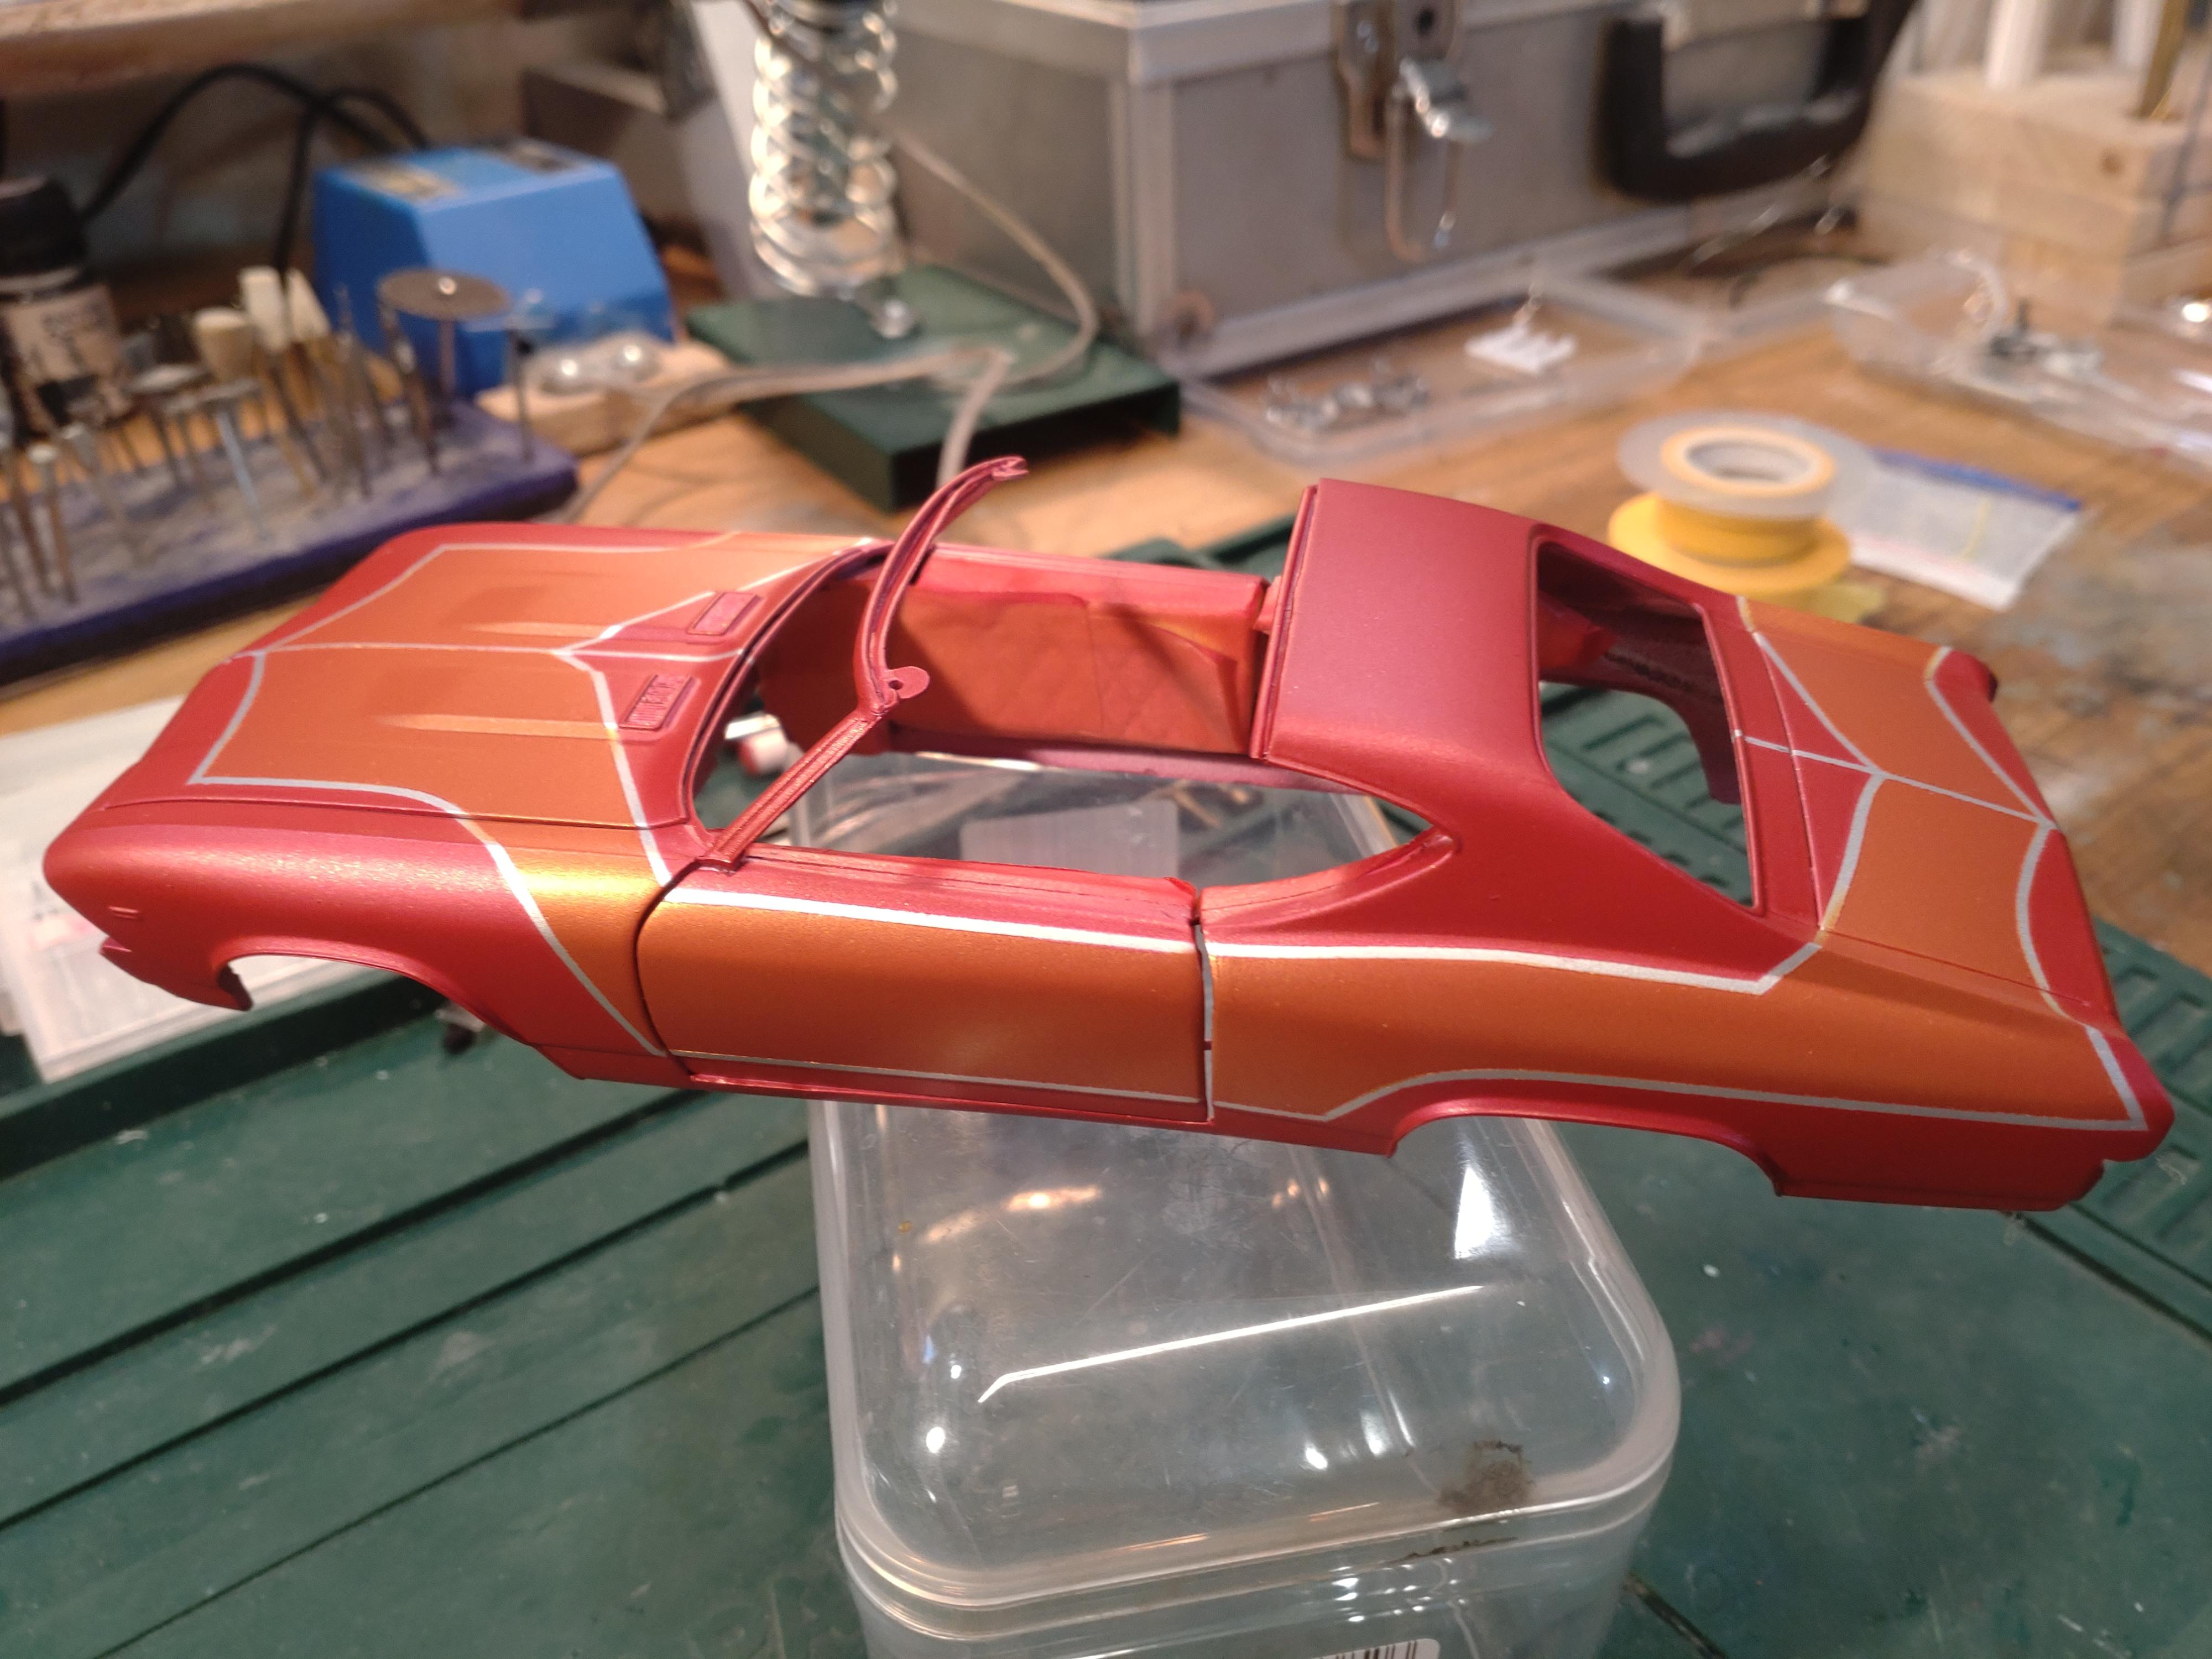
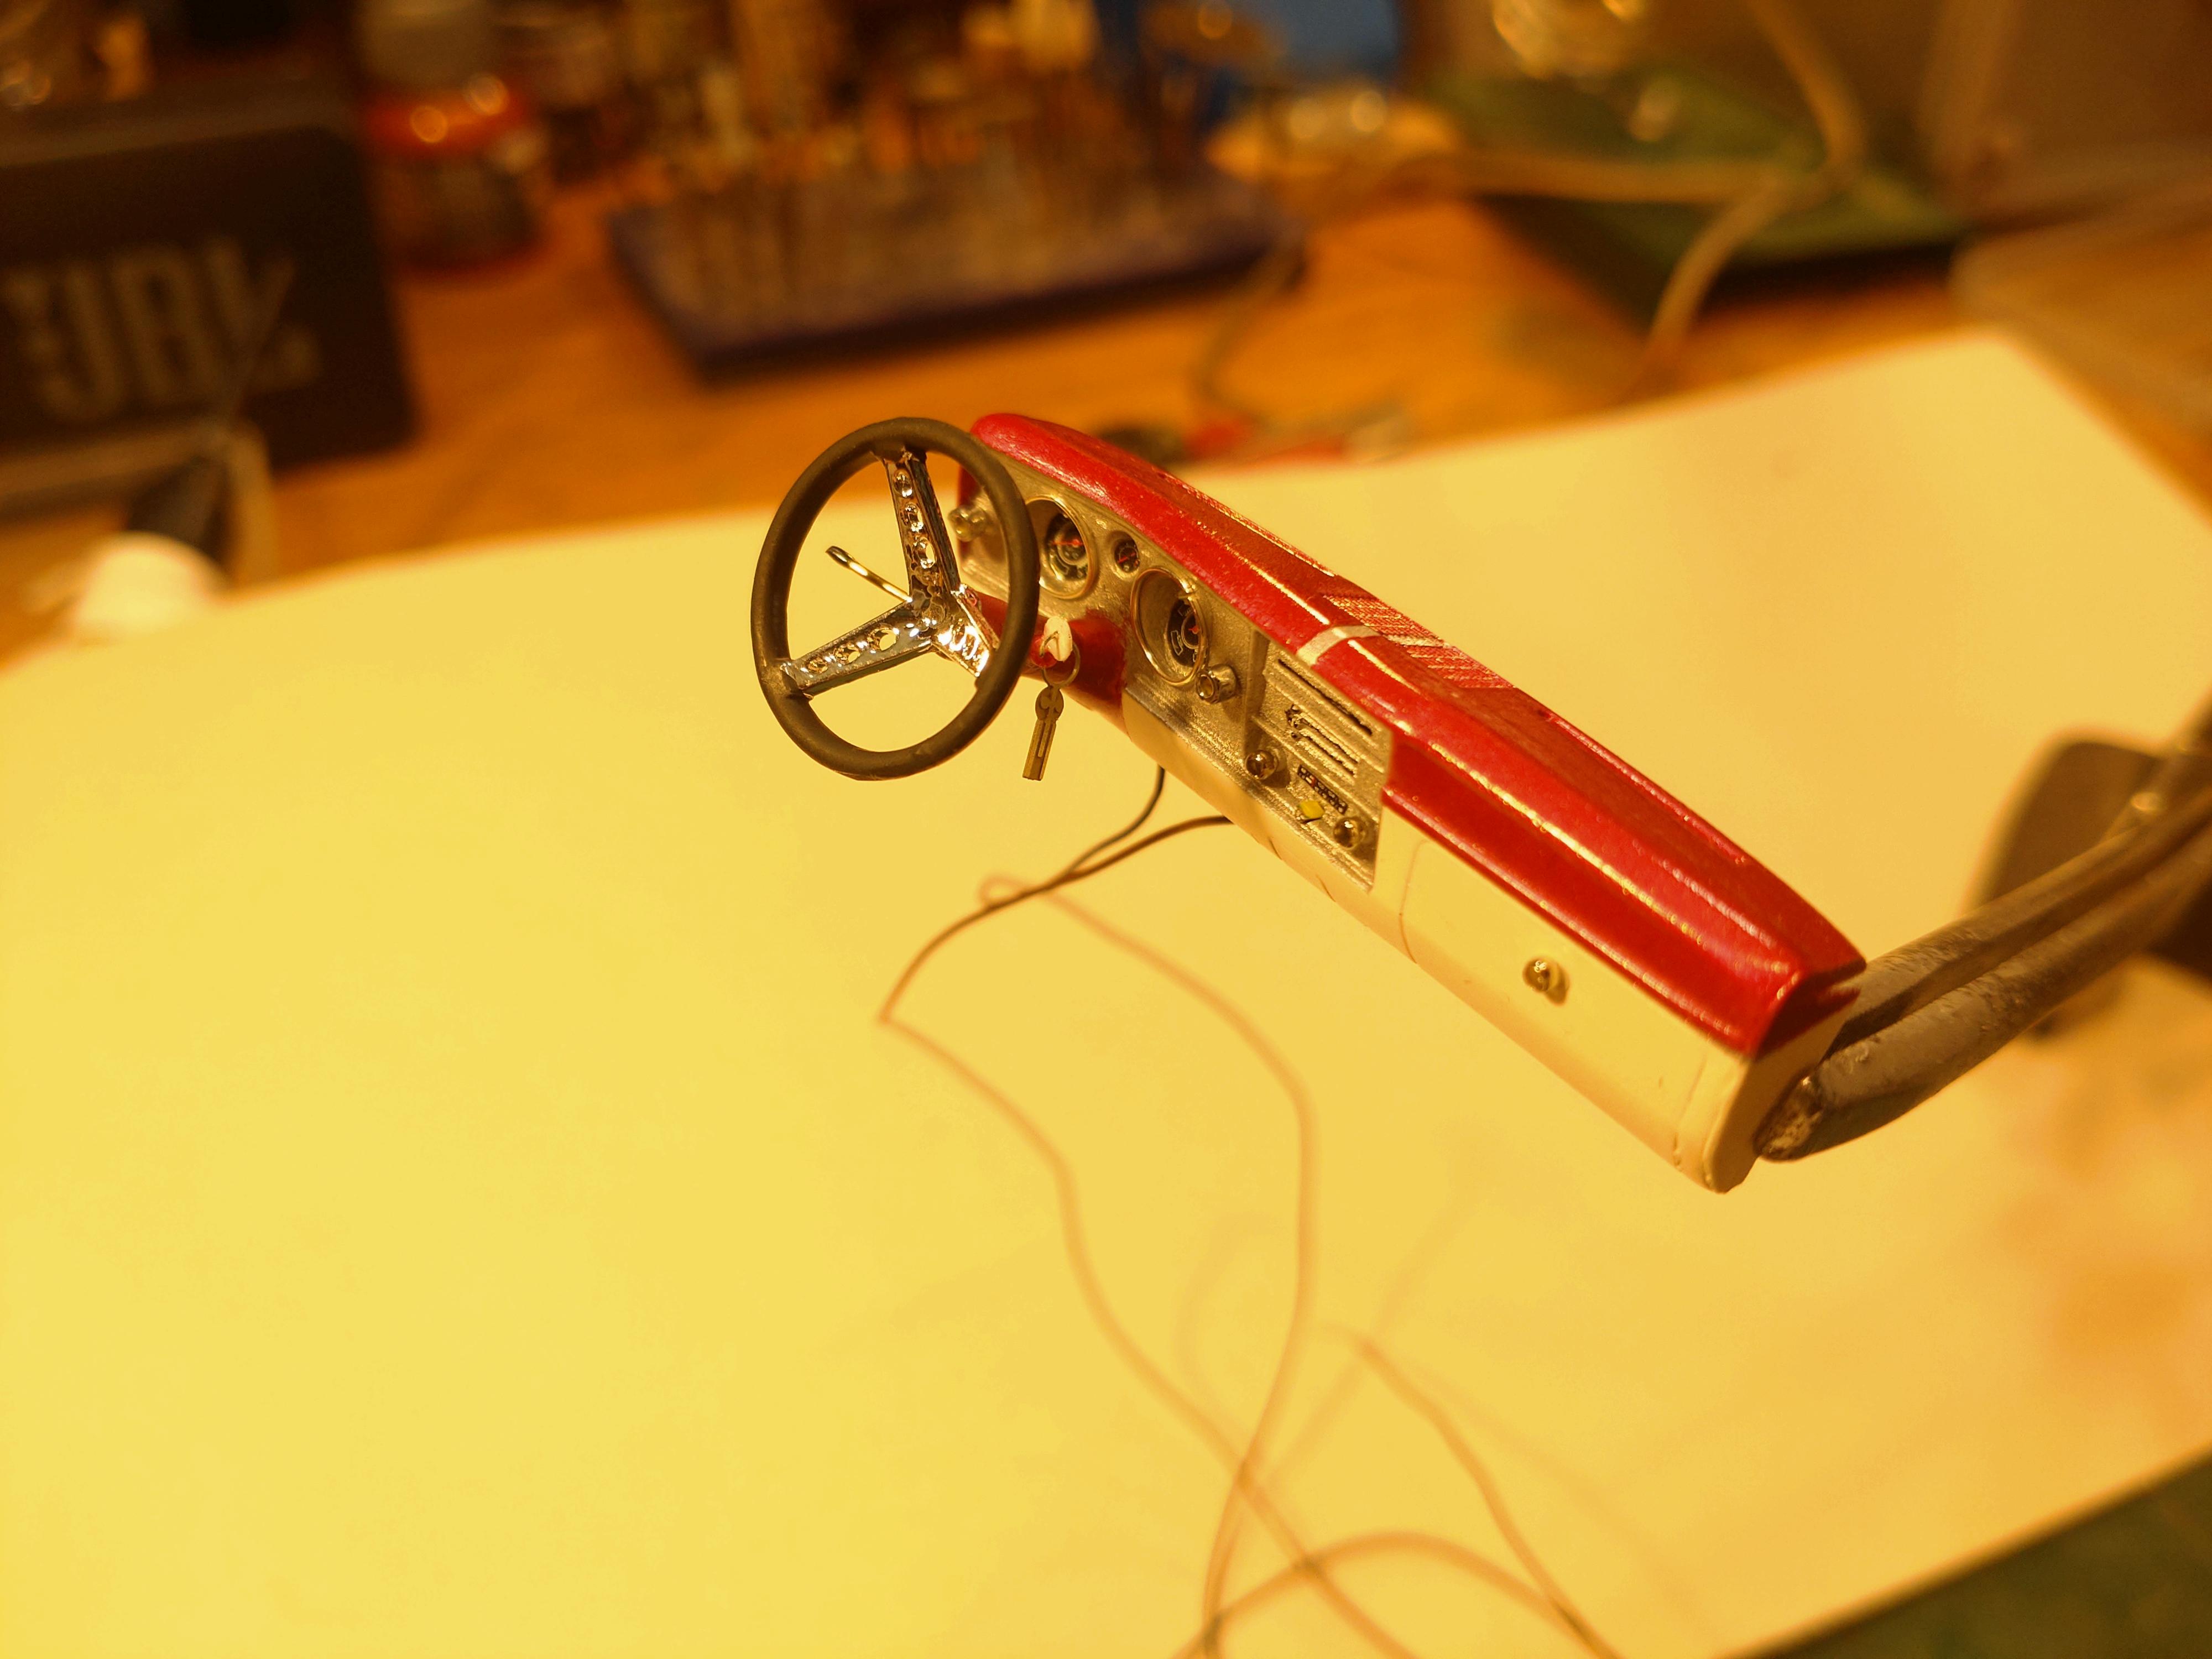
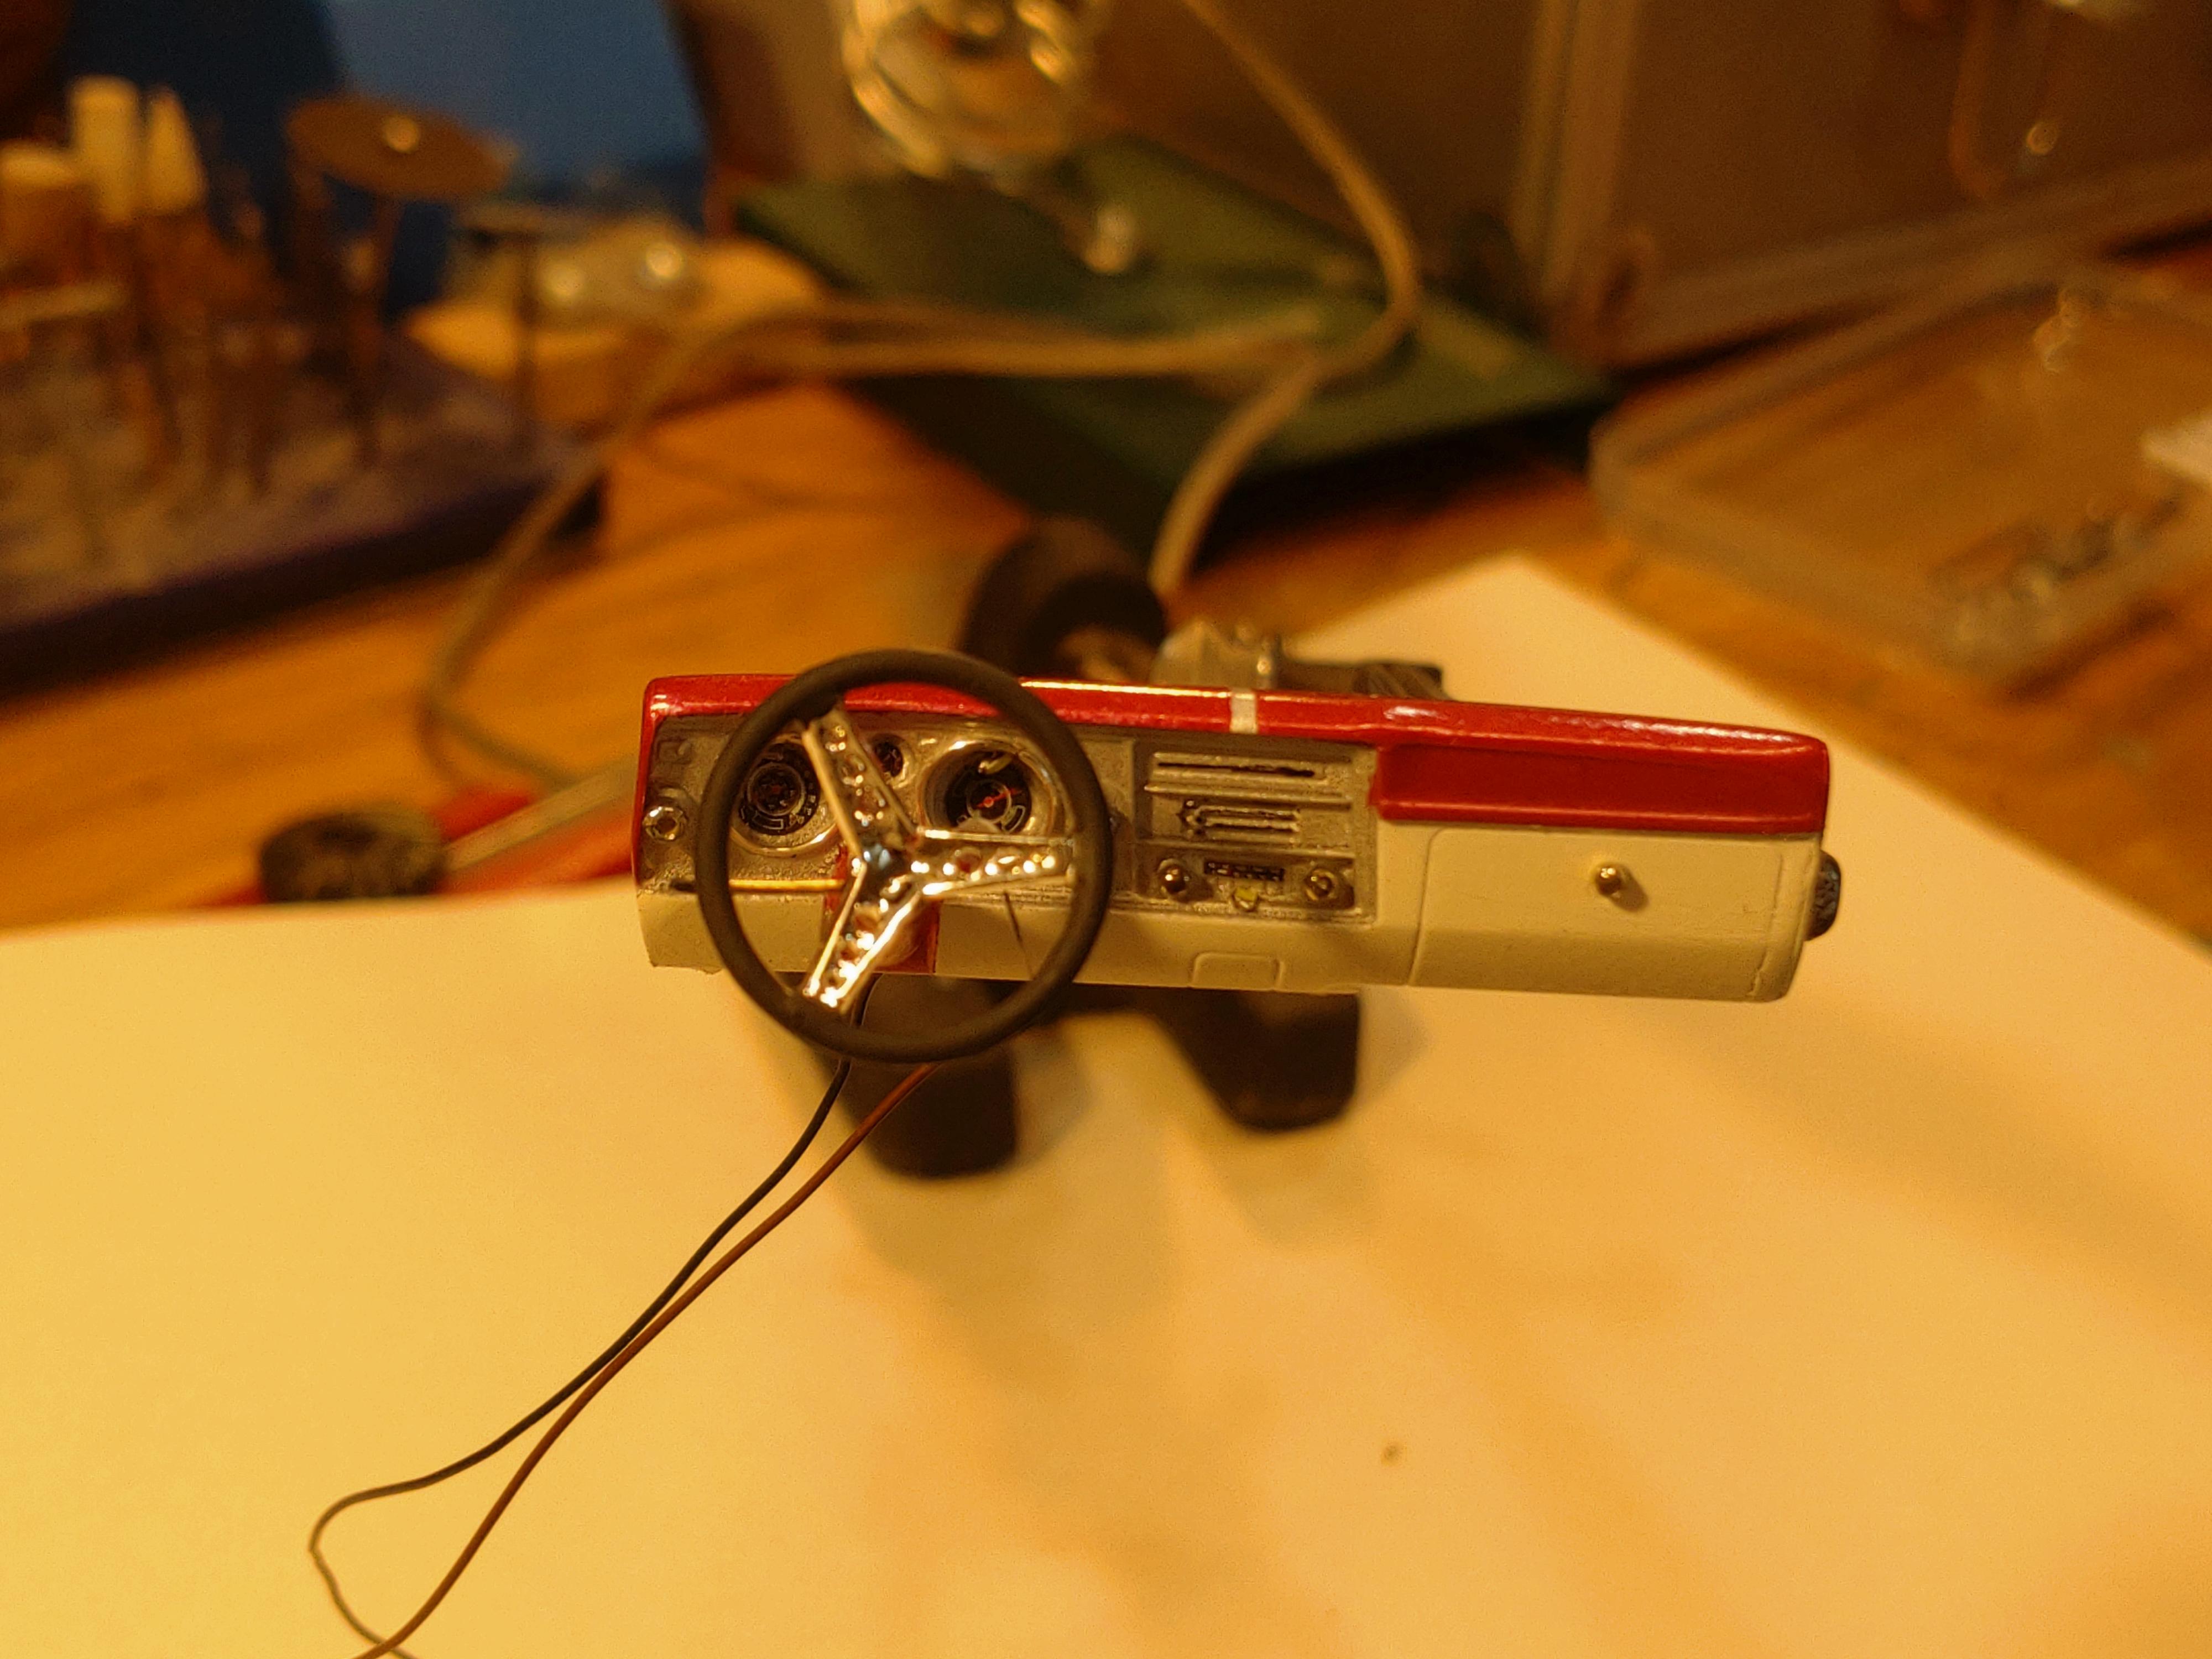
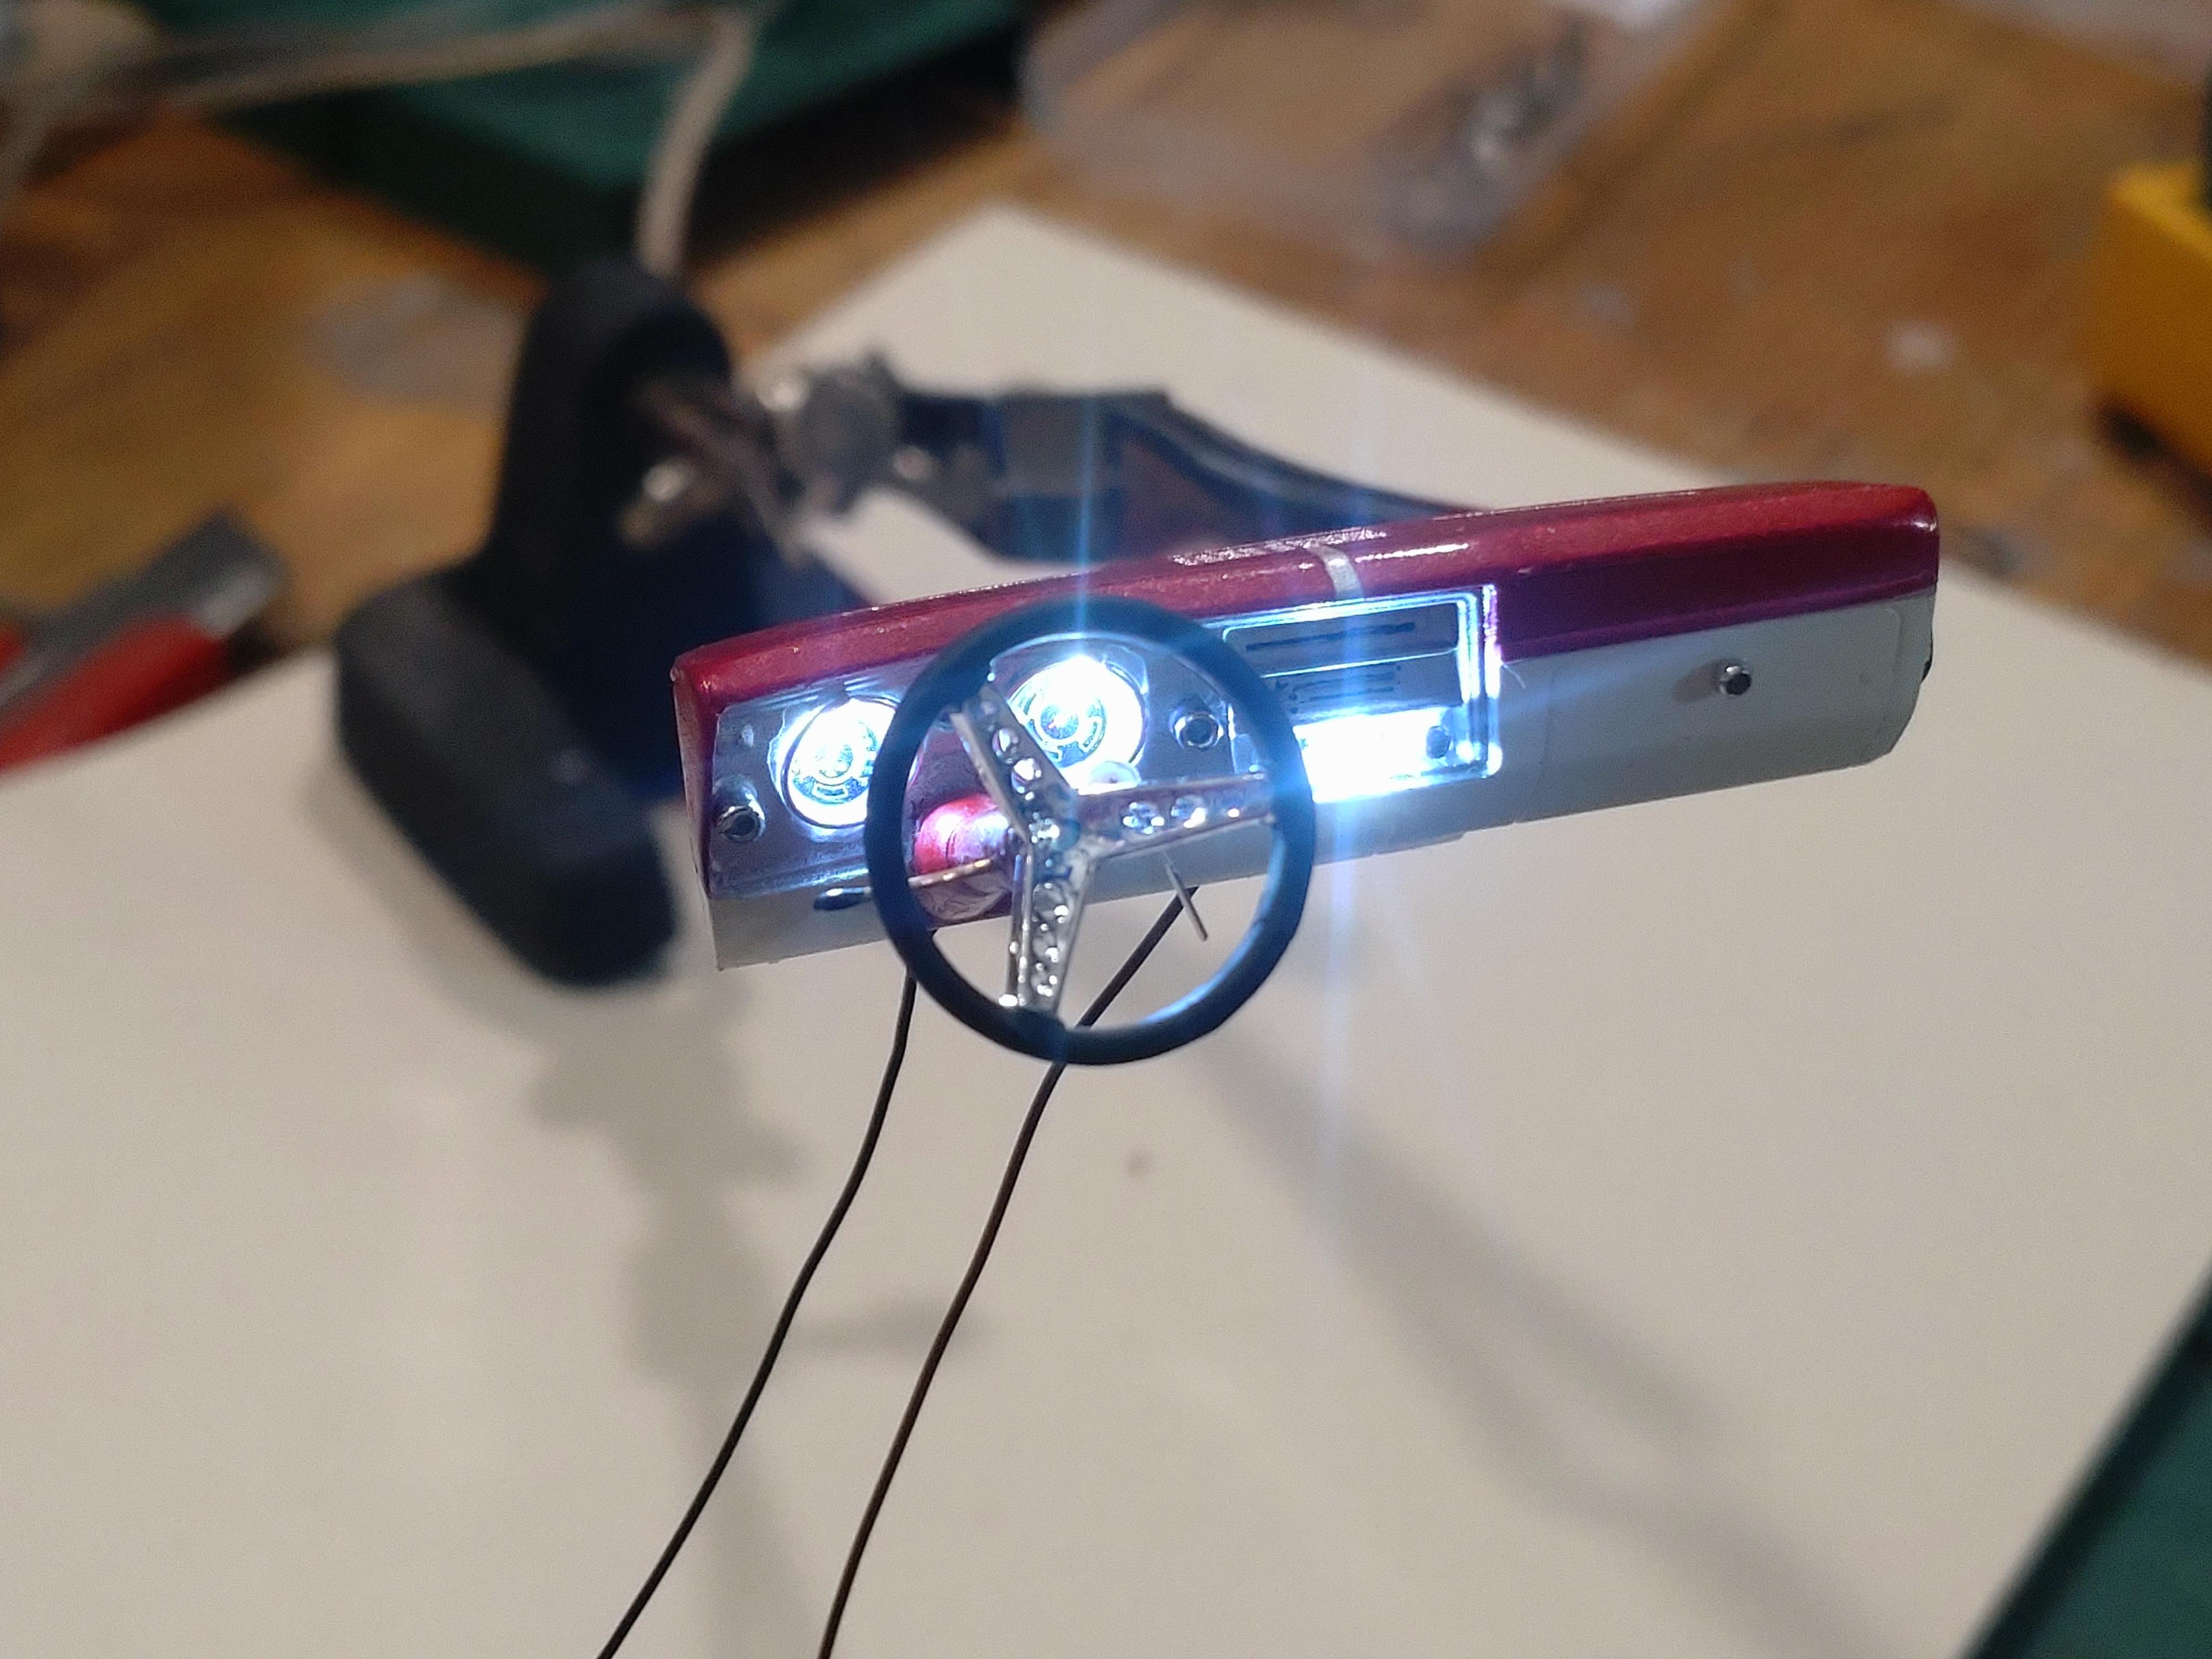
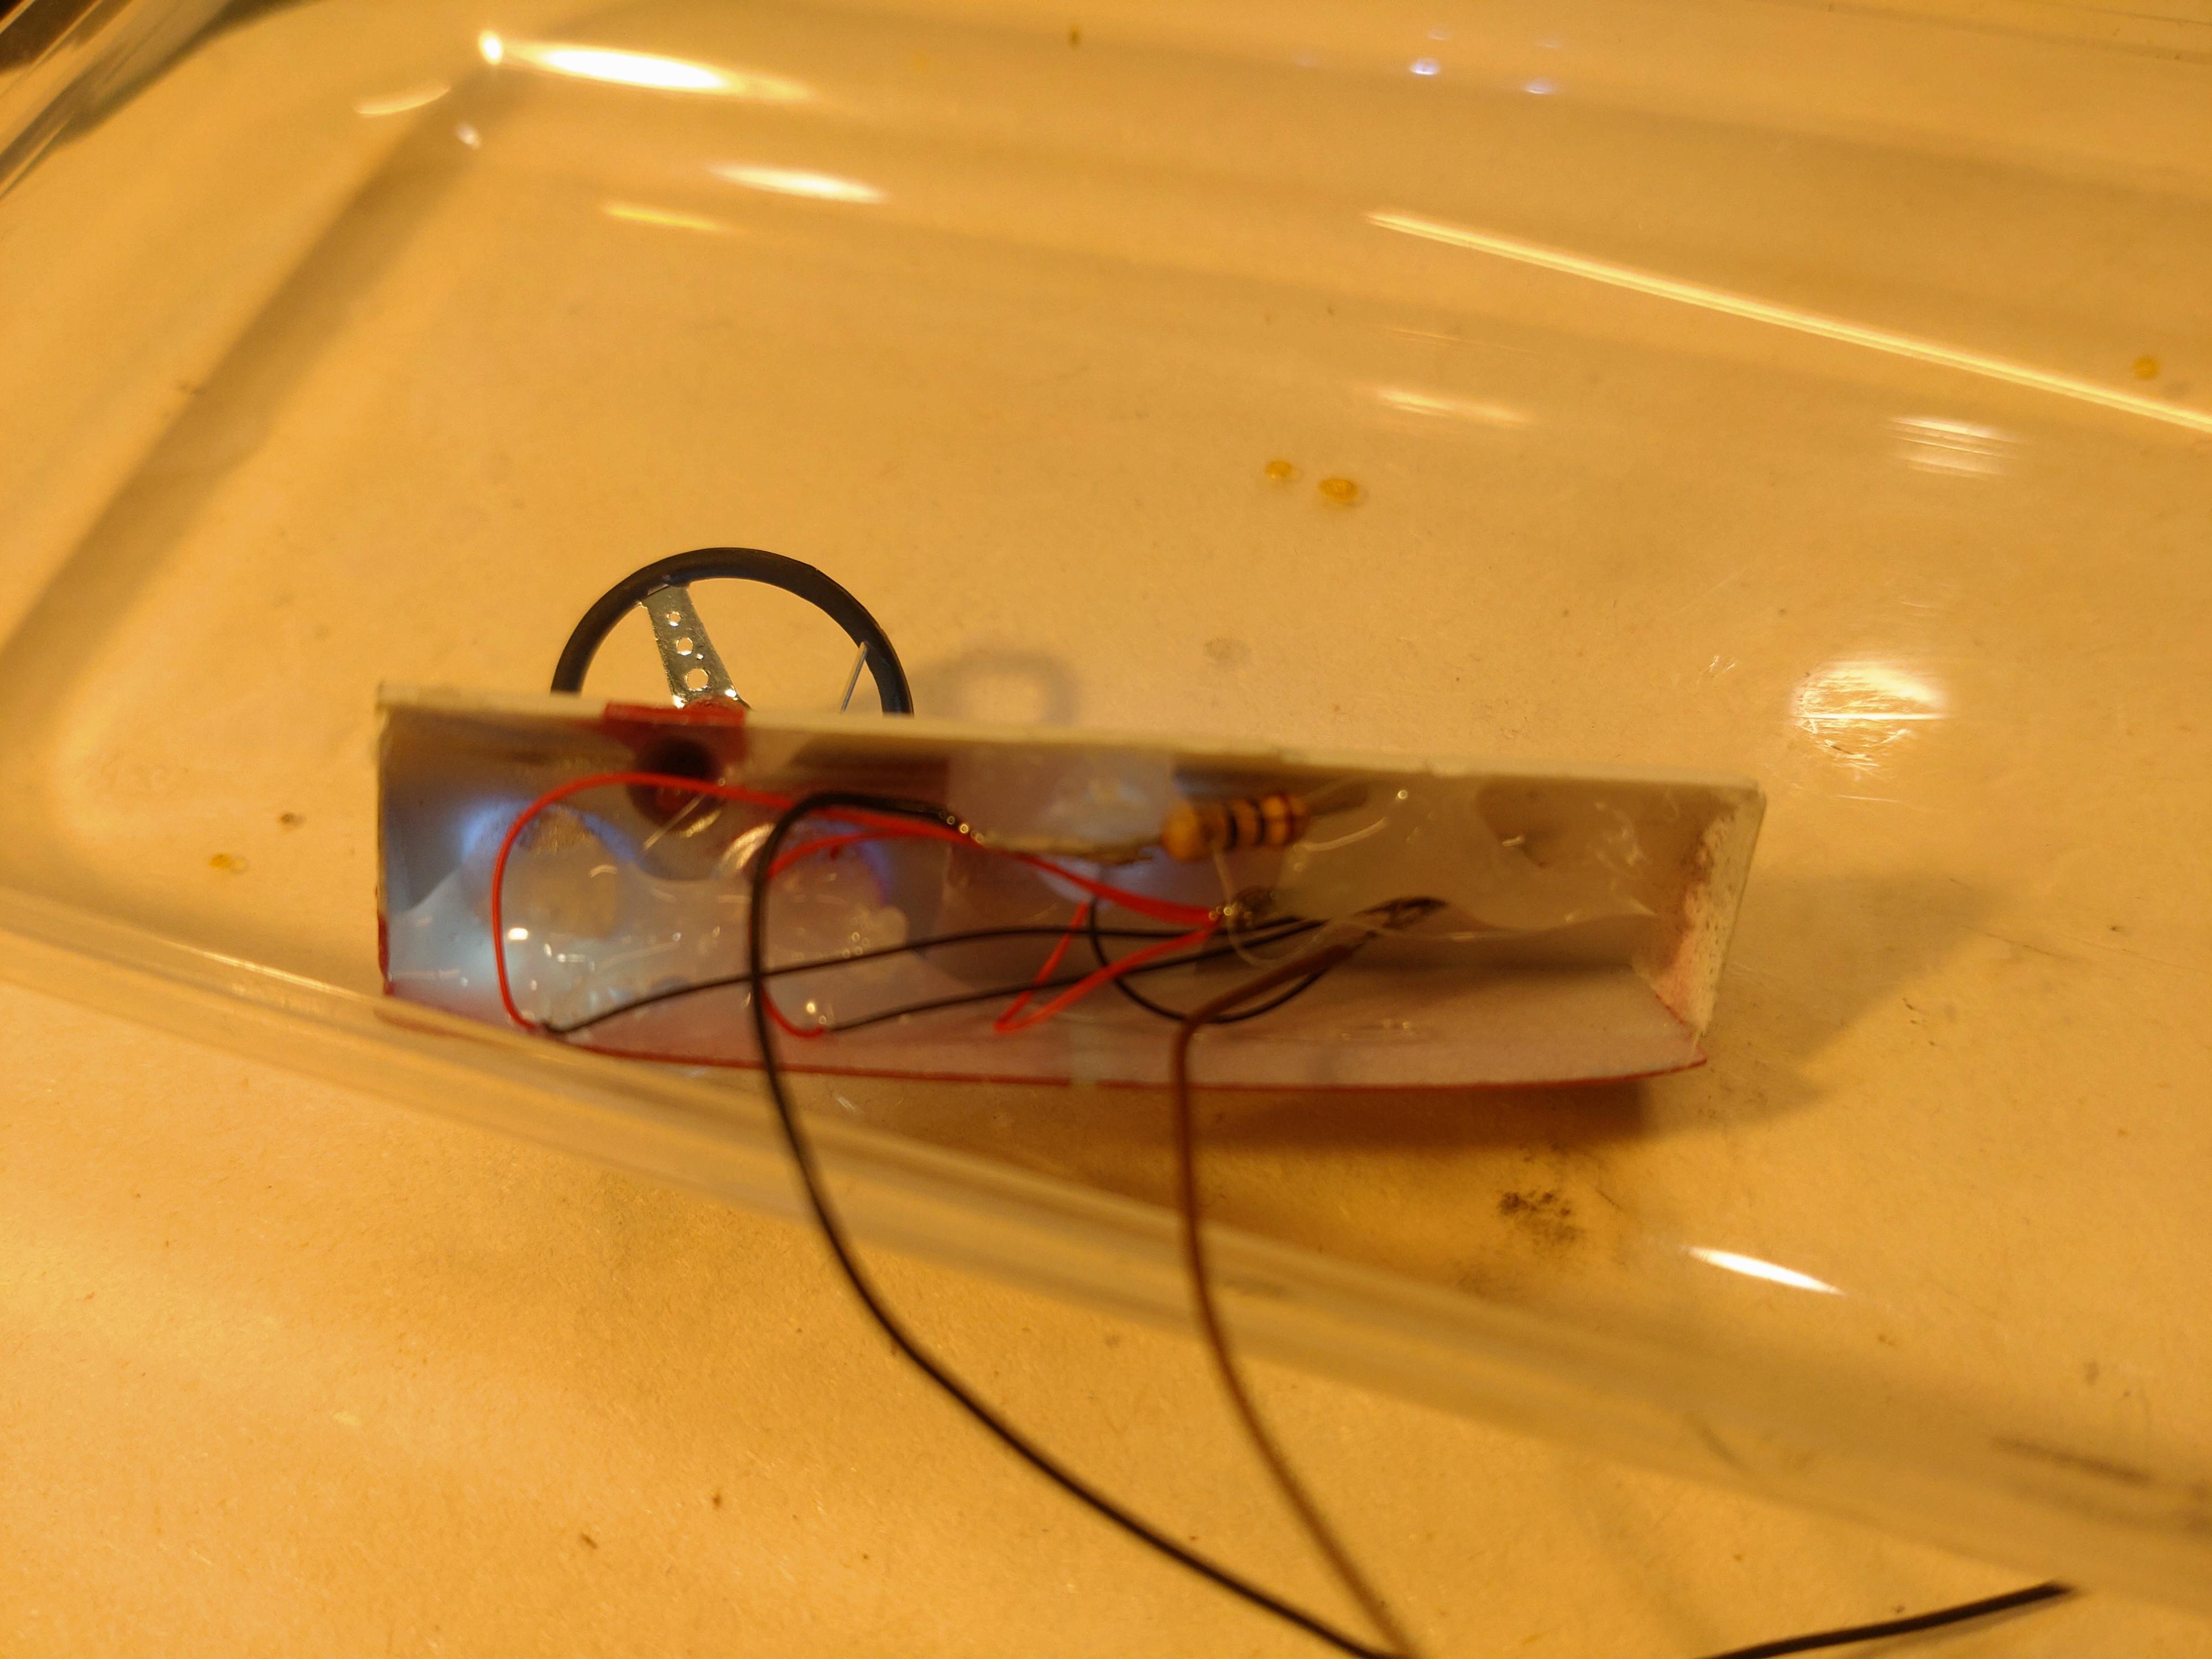
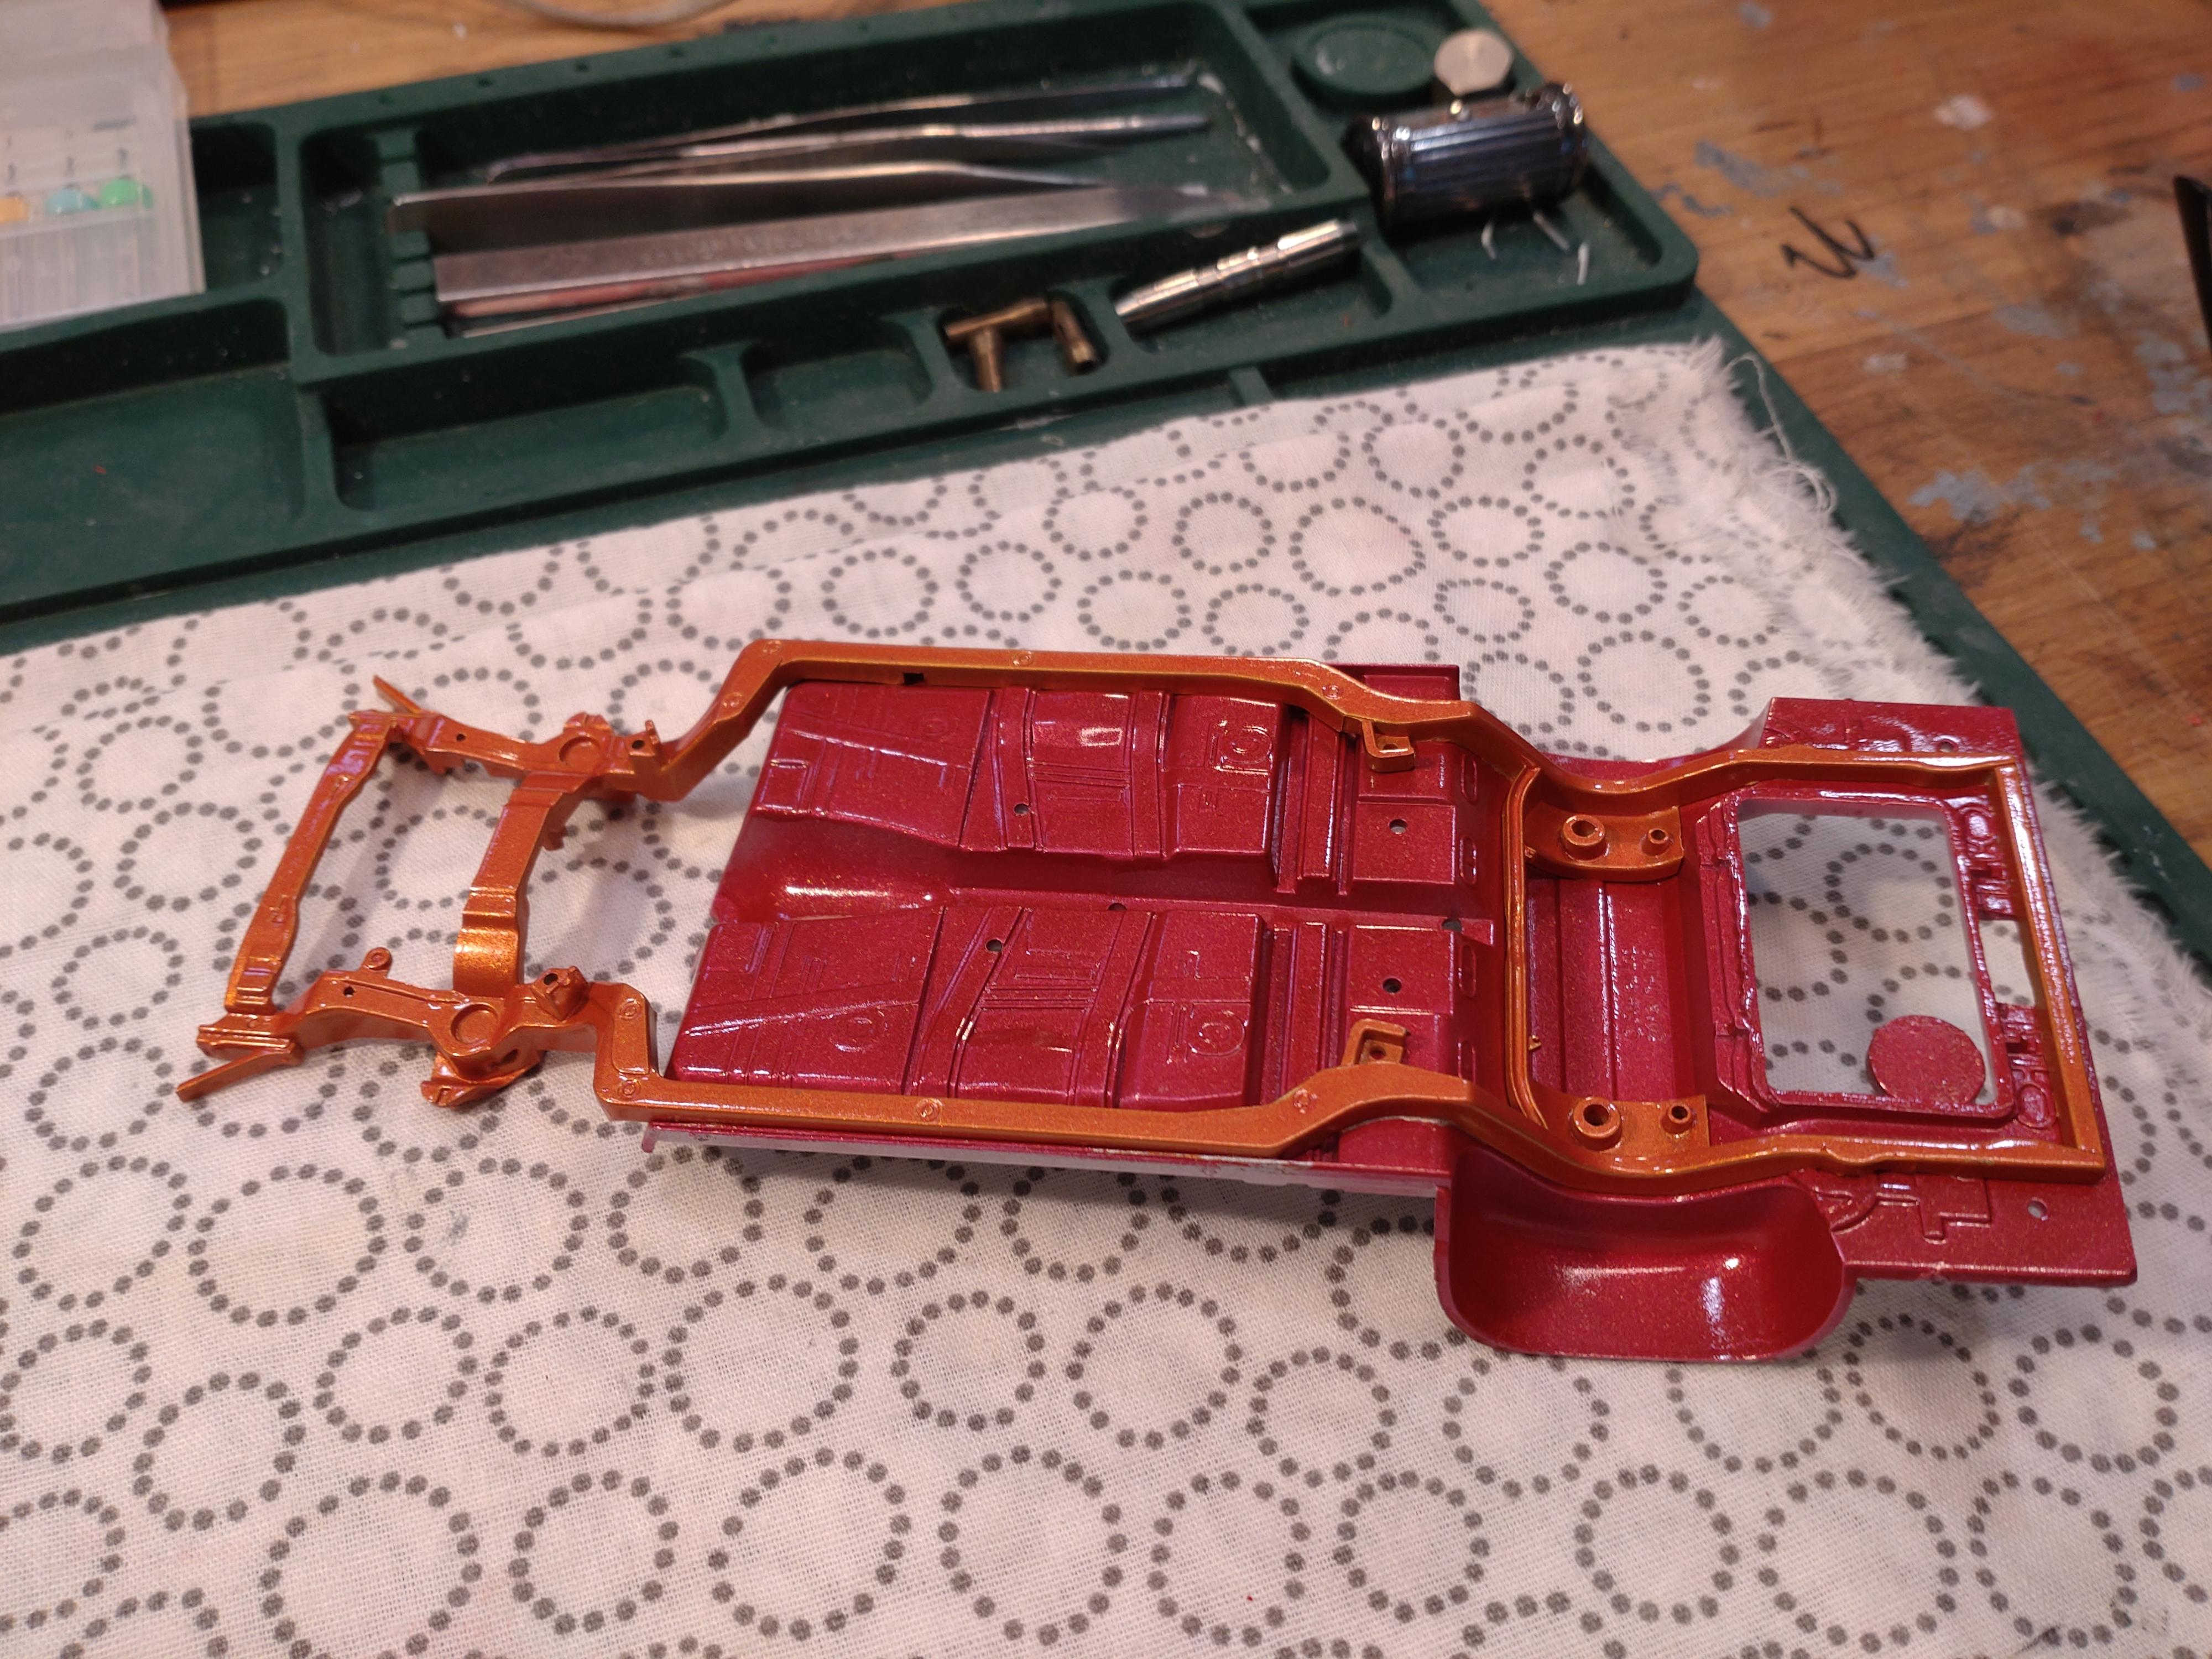
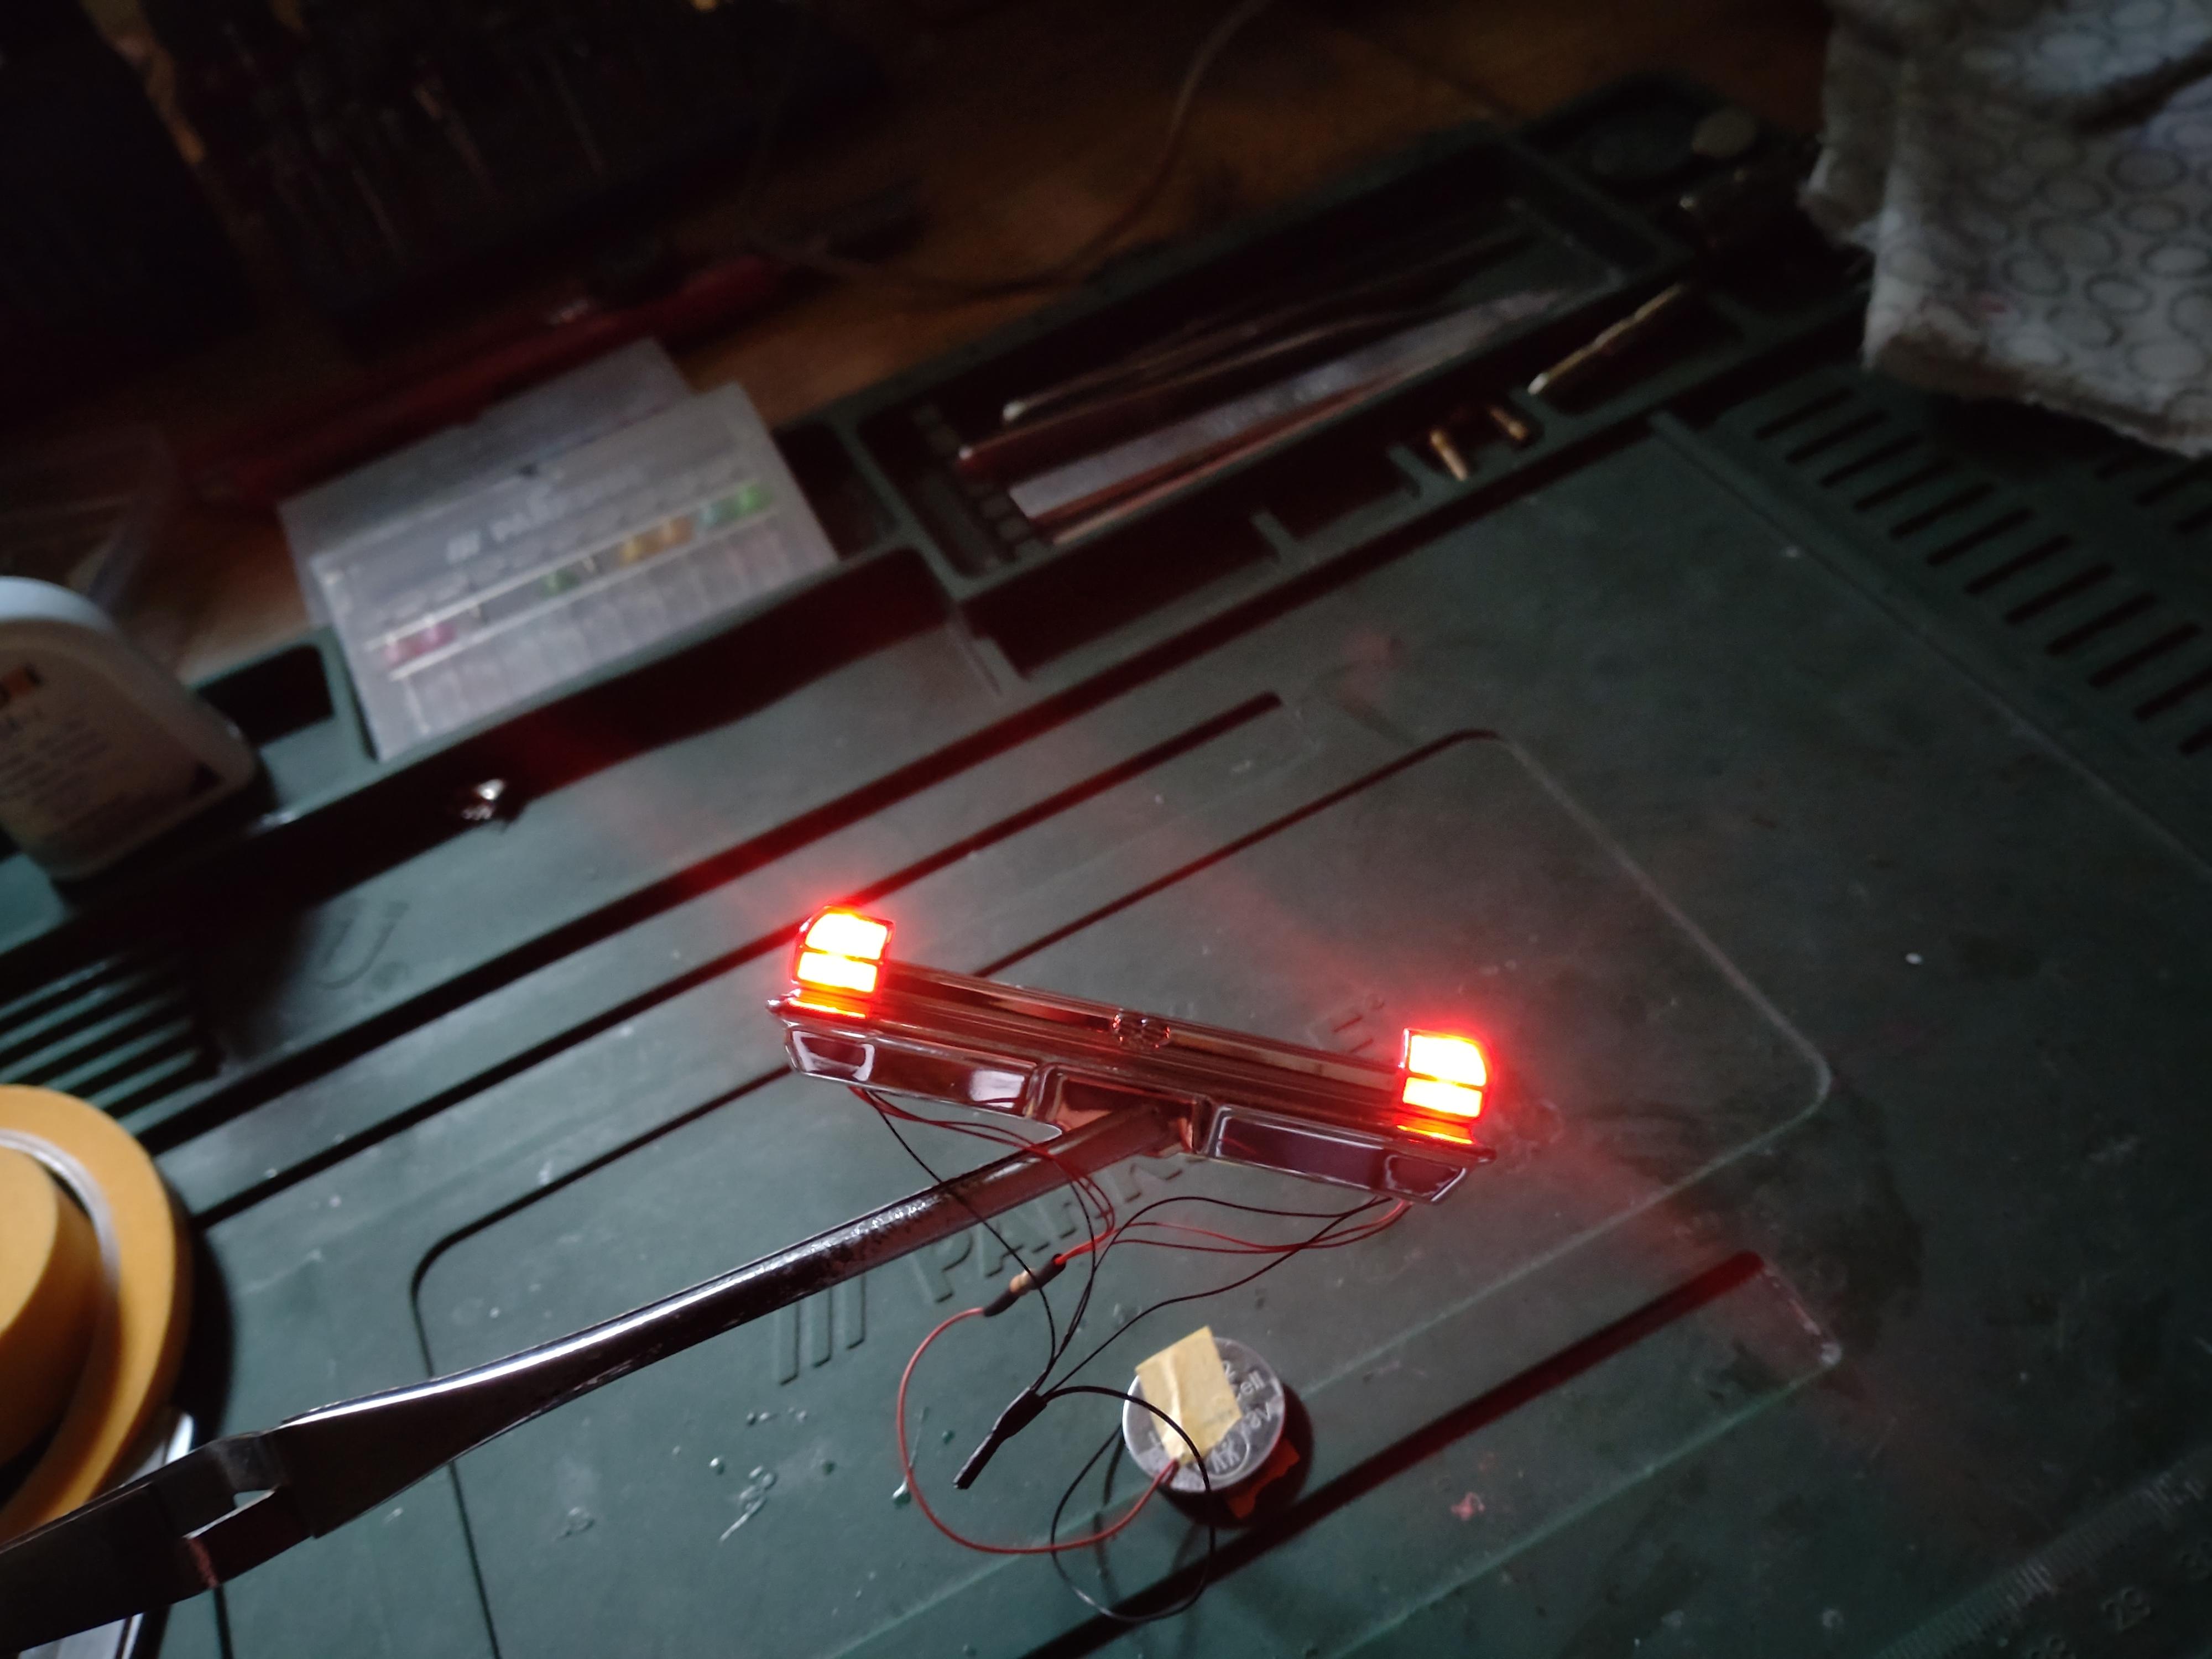
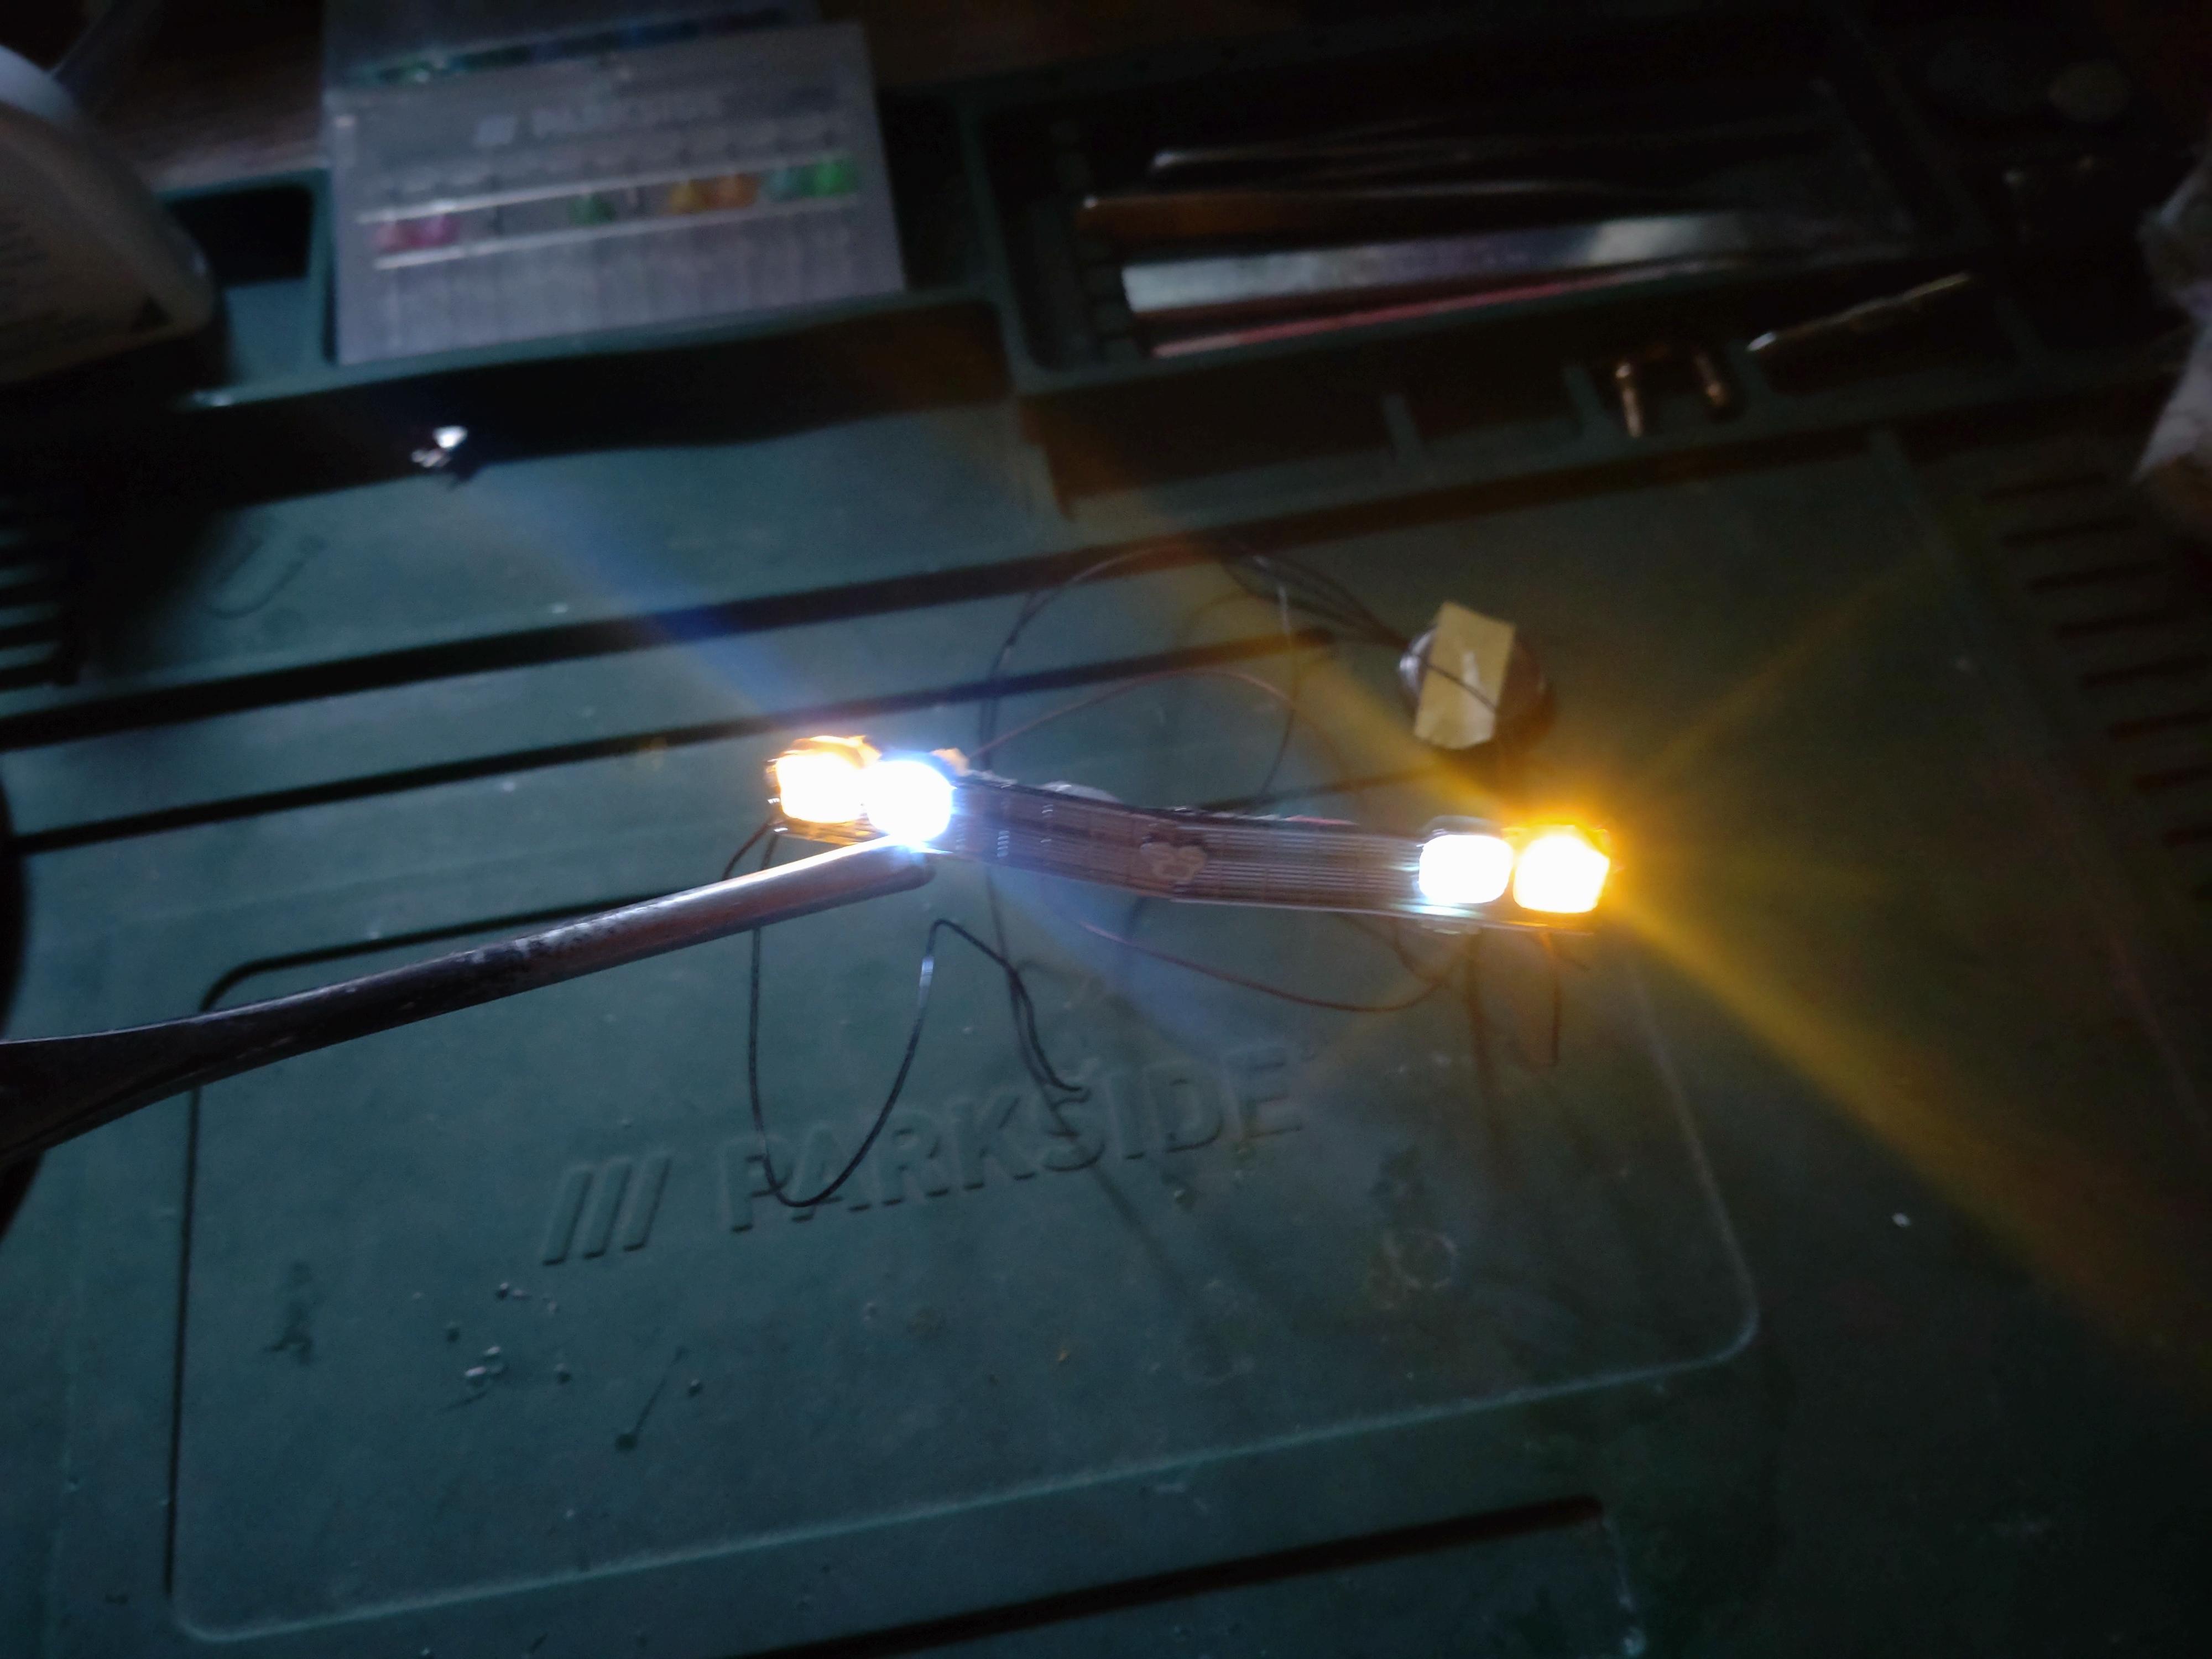
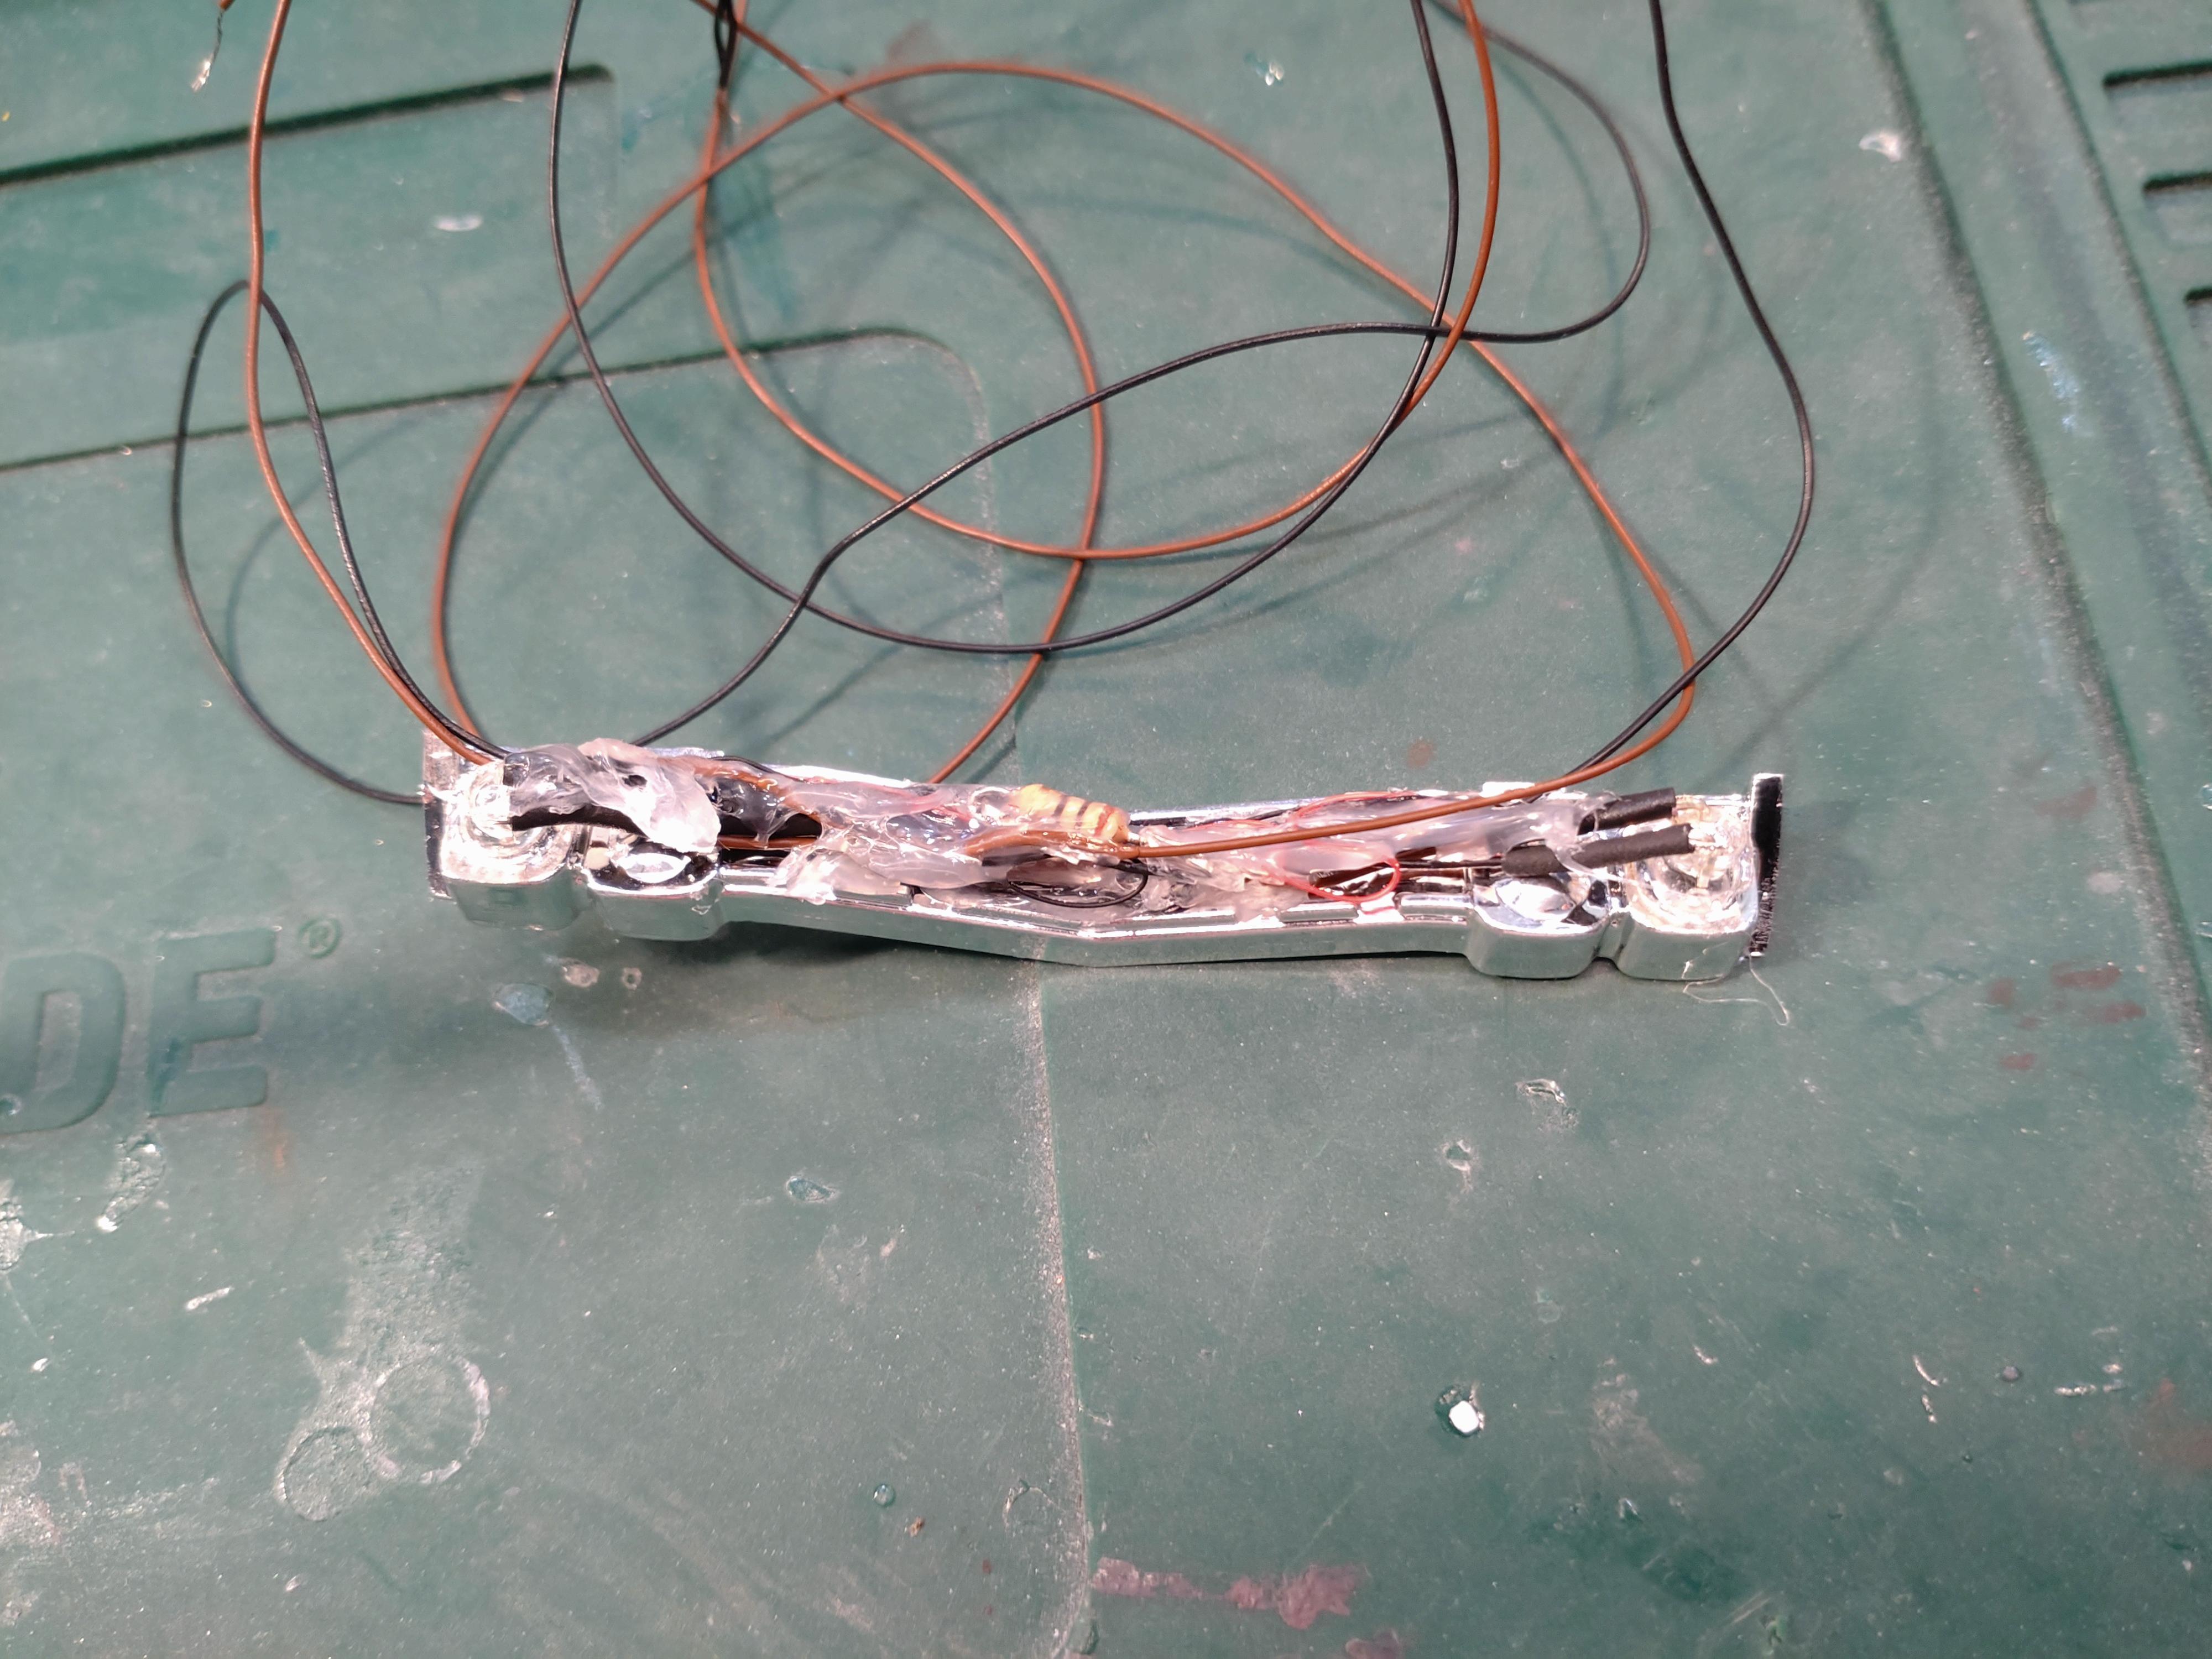
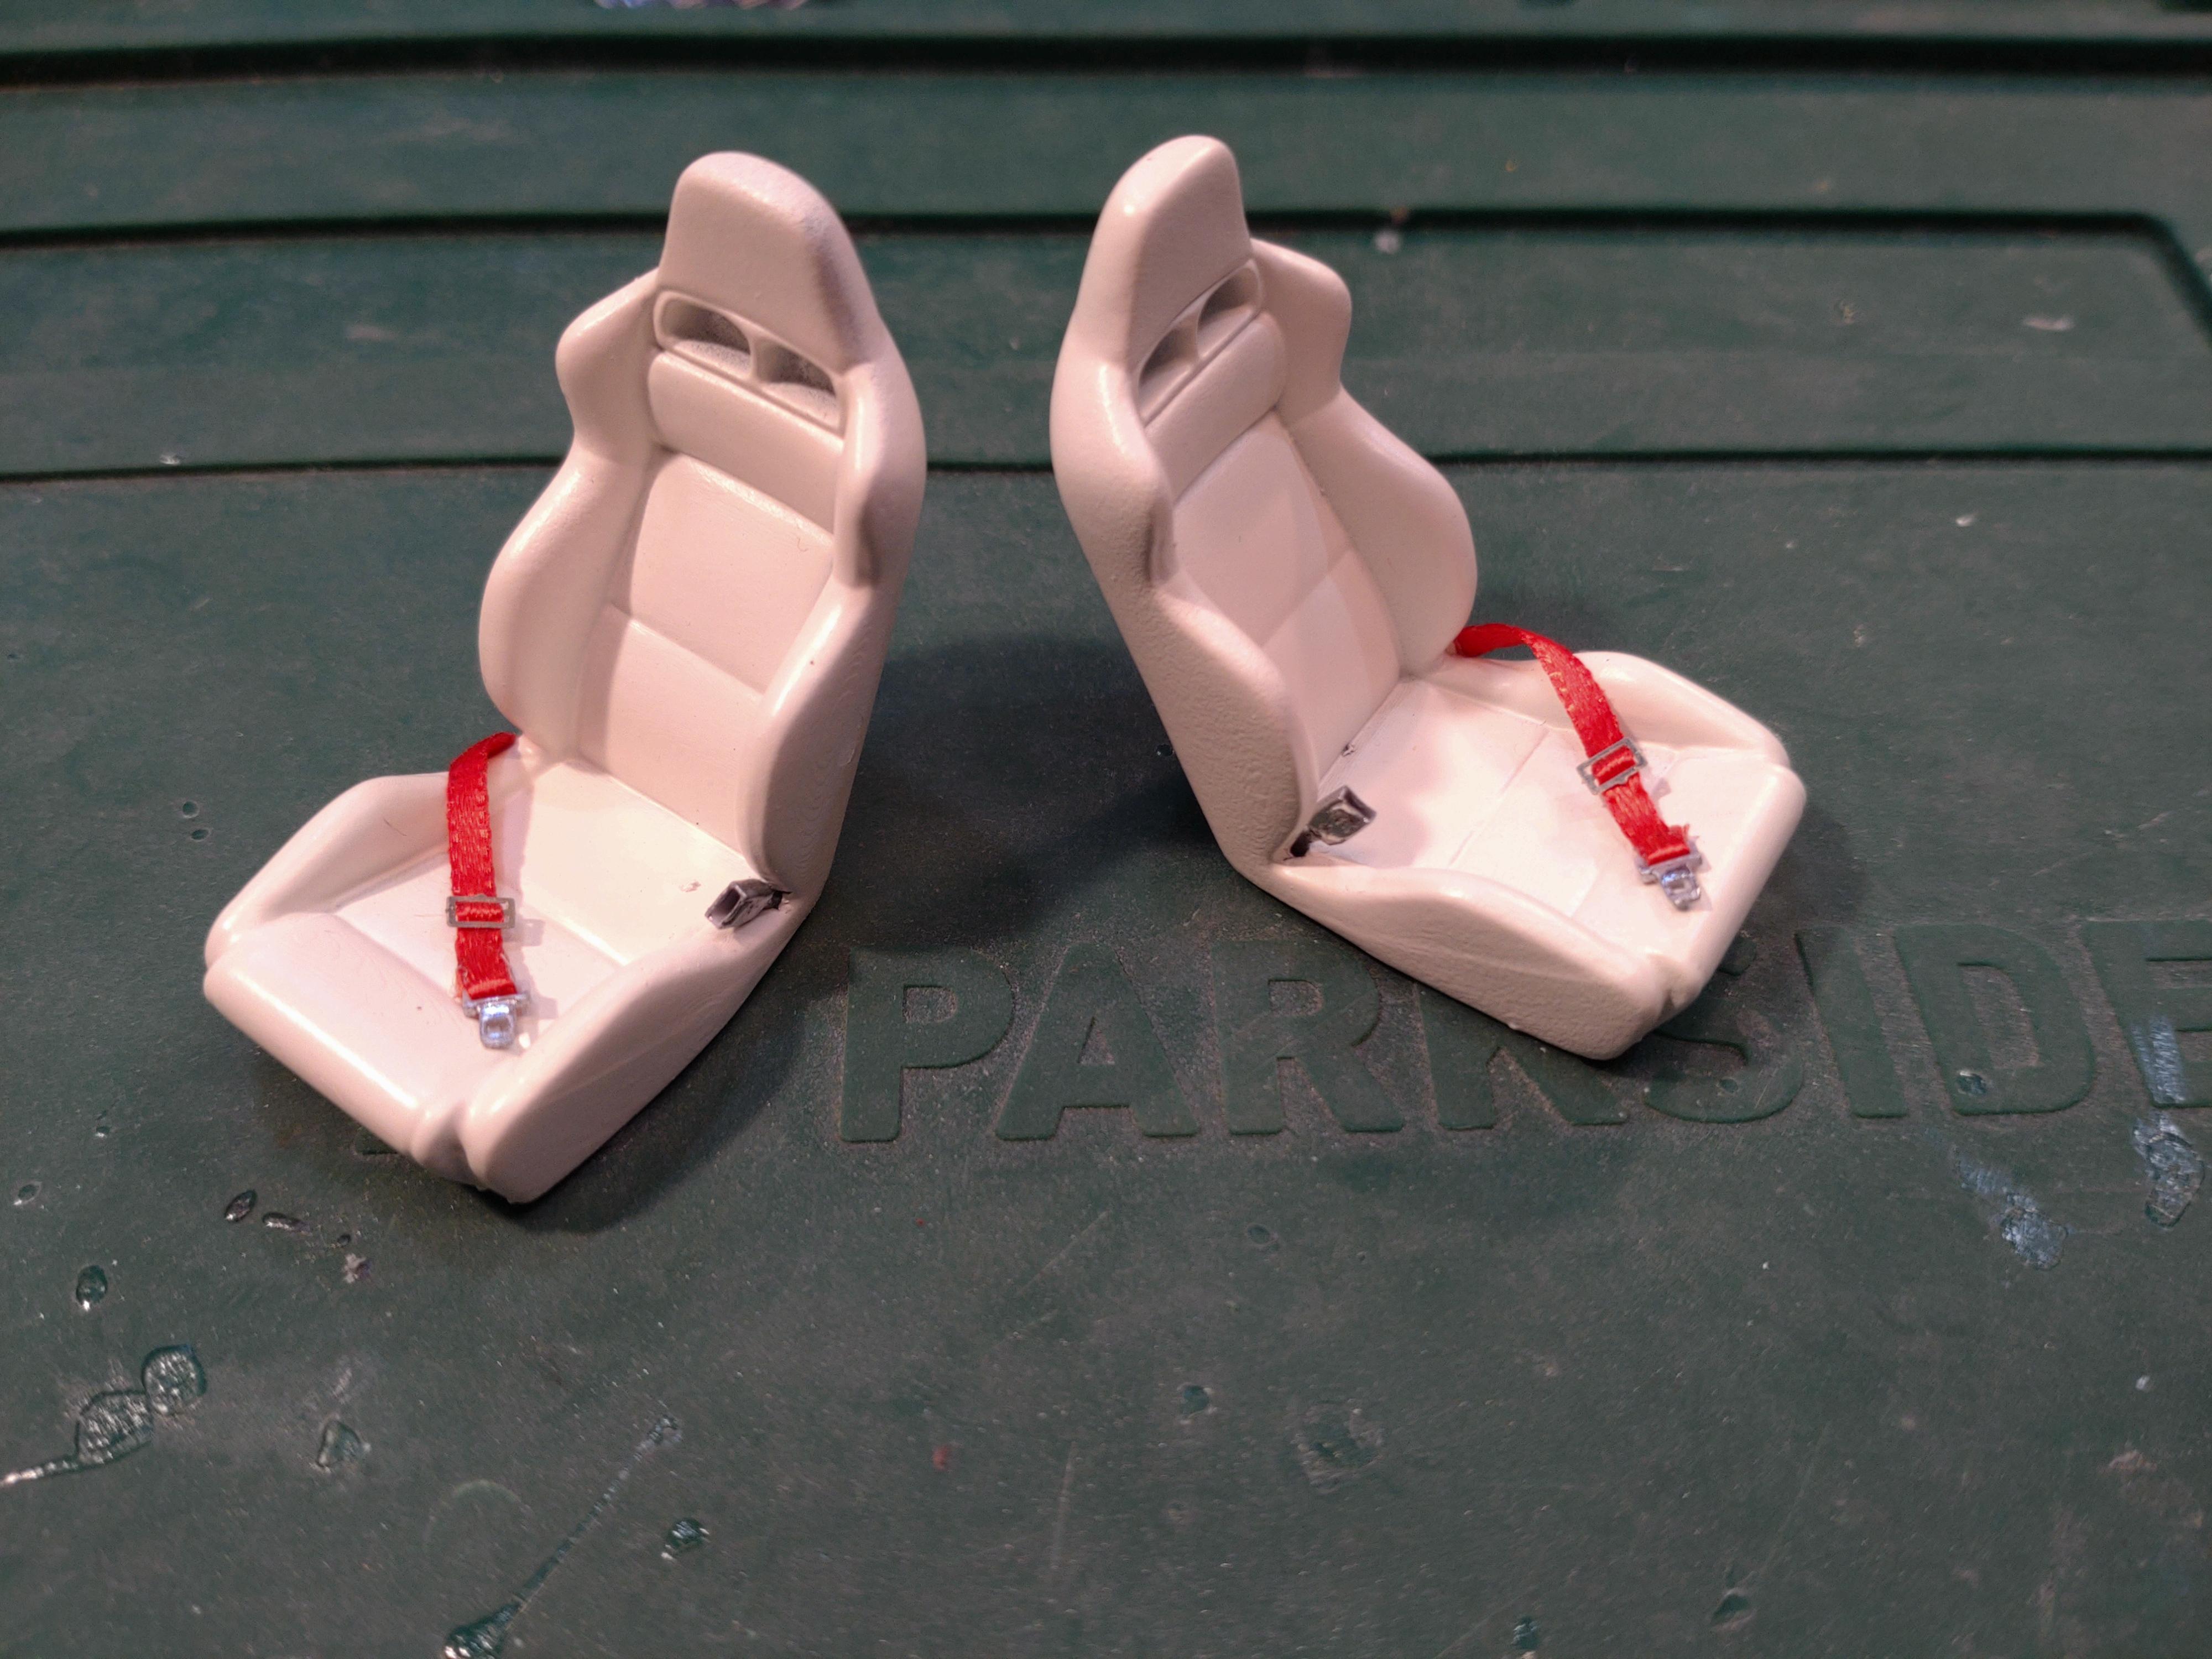
I´m moving on with this build! I had to wait a while with the paint job, because I am switching over to Createx Wicked Pearl. My collection of airbrush pistols don´t have a nozzle big enough to handle the metallic and the new pistol I ordered took a few weeks to arrive. None the less I was busy working on the interior, the undercarriage and setting up the lighting. The masking went down quite easy. I was very exited so experience how the Createx would atomize and cover. I am an impatient painter and I regularly speed up the drying process between the applications carefully with a heat gun. I haven´t found masking tape thinner then 1 mm yet though. Looks like I will have to cut my own like I saw on YouTube. Next job on the body will be a first clear coat and fine sanding. The dashboard is finished. I added few details like rings around the gauges and an ignition key. At a model fair in February I found micro LEDs and immediately had the idea of using them for lighting up the interior of a future build. The tricky part was getting the wiring tucked behind the dash. Those wires are super thin and delicate and my soldering skills are not the best. Bit by bit I laid down the wires and resistor and secured everything with a hot glue pistol. Like the dash, the front and rear grill and bumper are enhanced with lighting. The tail lights are all micro LEDs in red, behind the red plastic. For the headlights I used 3mm LEDs for the main lights and micros for the high beam. The grill ended up quite crammed because I had to hide 8 wires and 2 resistors. I will paint the heat glue matte anthracite before final assembly and hope that it won´t show much. The tail wires will be inside the trunk so I didn´t have to invest so much effort. You will notice that the chassis is missing the front fenders. Because of the massive door stops the body has become very rigid and will not flex at all. No way of prying the body over the chassis. So the front third is disconnected and split. The fender, engine and front suspension must be connected to the body in a "single" step. Knock on wood🫣🙏😂 You can see the open area of the gas tank. That round disc is a magnet that holds the tank. Under the tank all the cables will connect to the battery and I have easy access for the final soldering. The seats are printed second market from Scale Production, "original Viper". The wheels too are second market with added disc brakes. I sliced the front wheels to make them look more real and plan on tipping the wheels in a steering position. The rear bench now has its Bose speakers. The door speakers will be attached after the last clear body coat. I´m have a blast with this build, even though sometimes I get into a sweat. Now i´m back to my shop!😁 Thanks for watching and best wishes, Andy!
-
Hello to Jon, Zackary, Devon, Greg, Paul, Jack, david, Mark, Eric, Michael and Michael, thanks for your friendly response! Motivates me to take good care of this build and not fumble it 👍😉😂
-
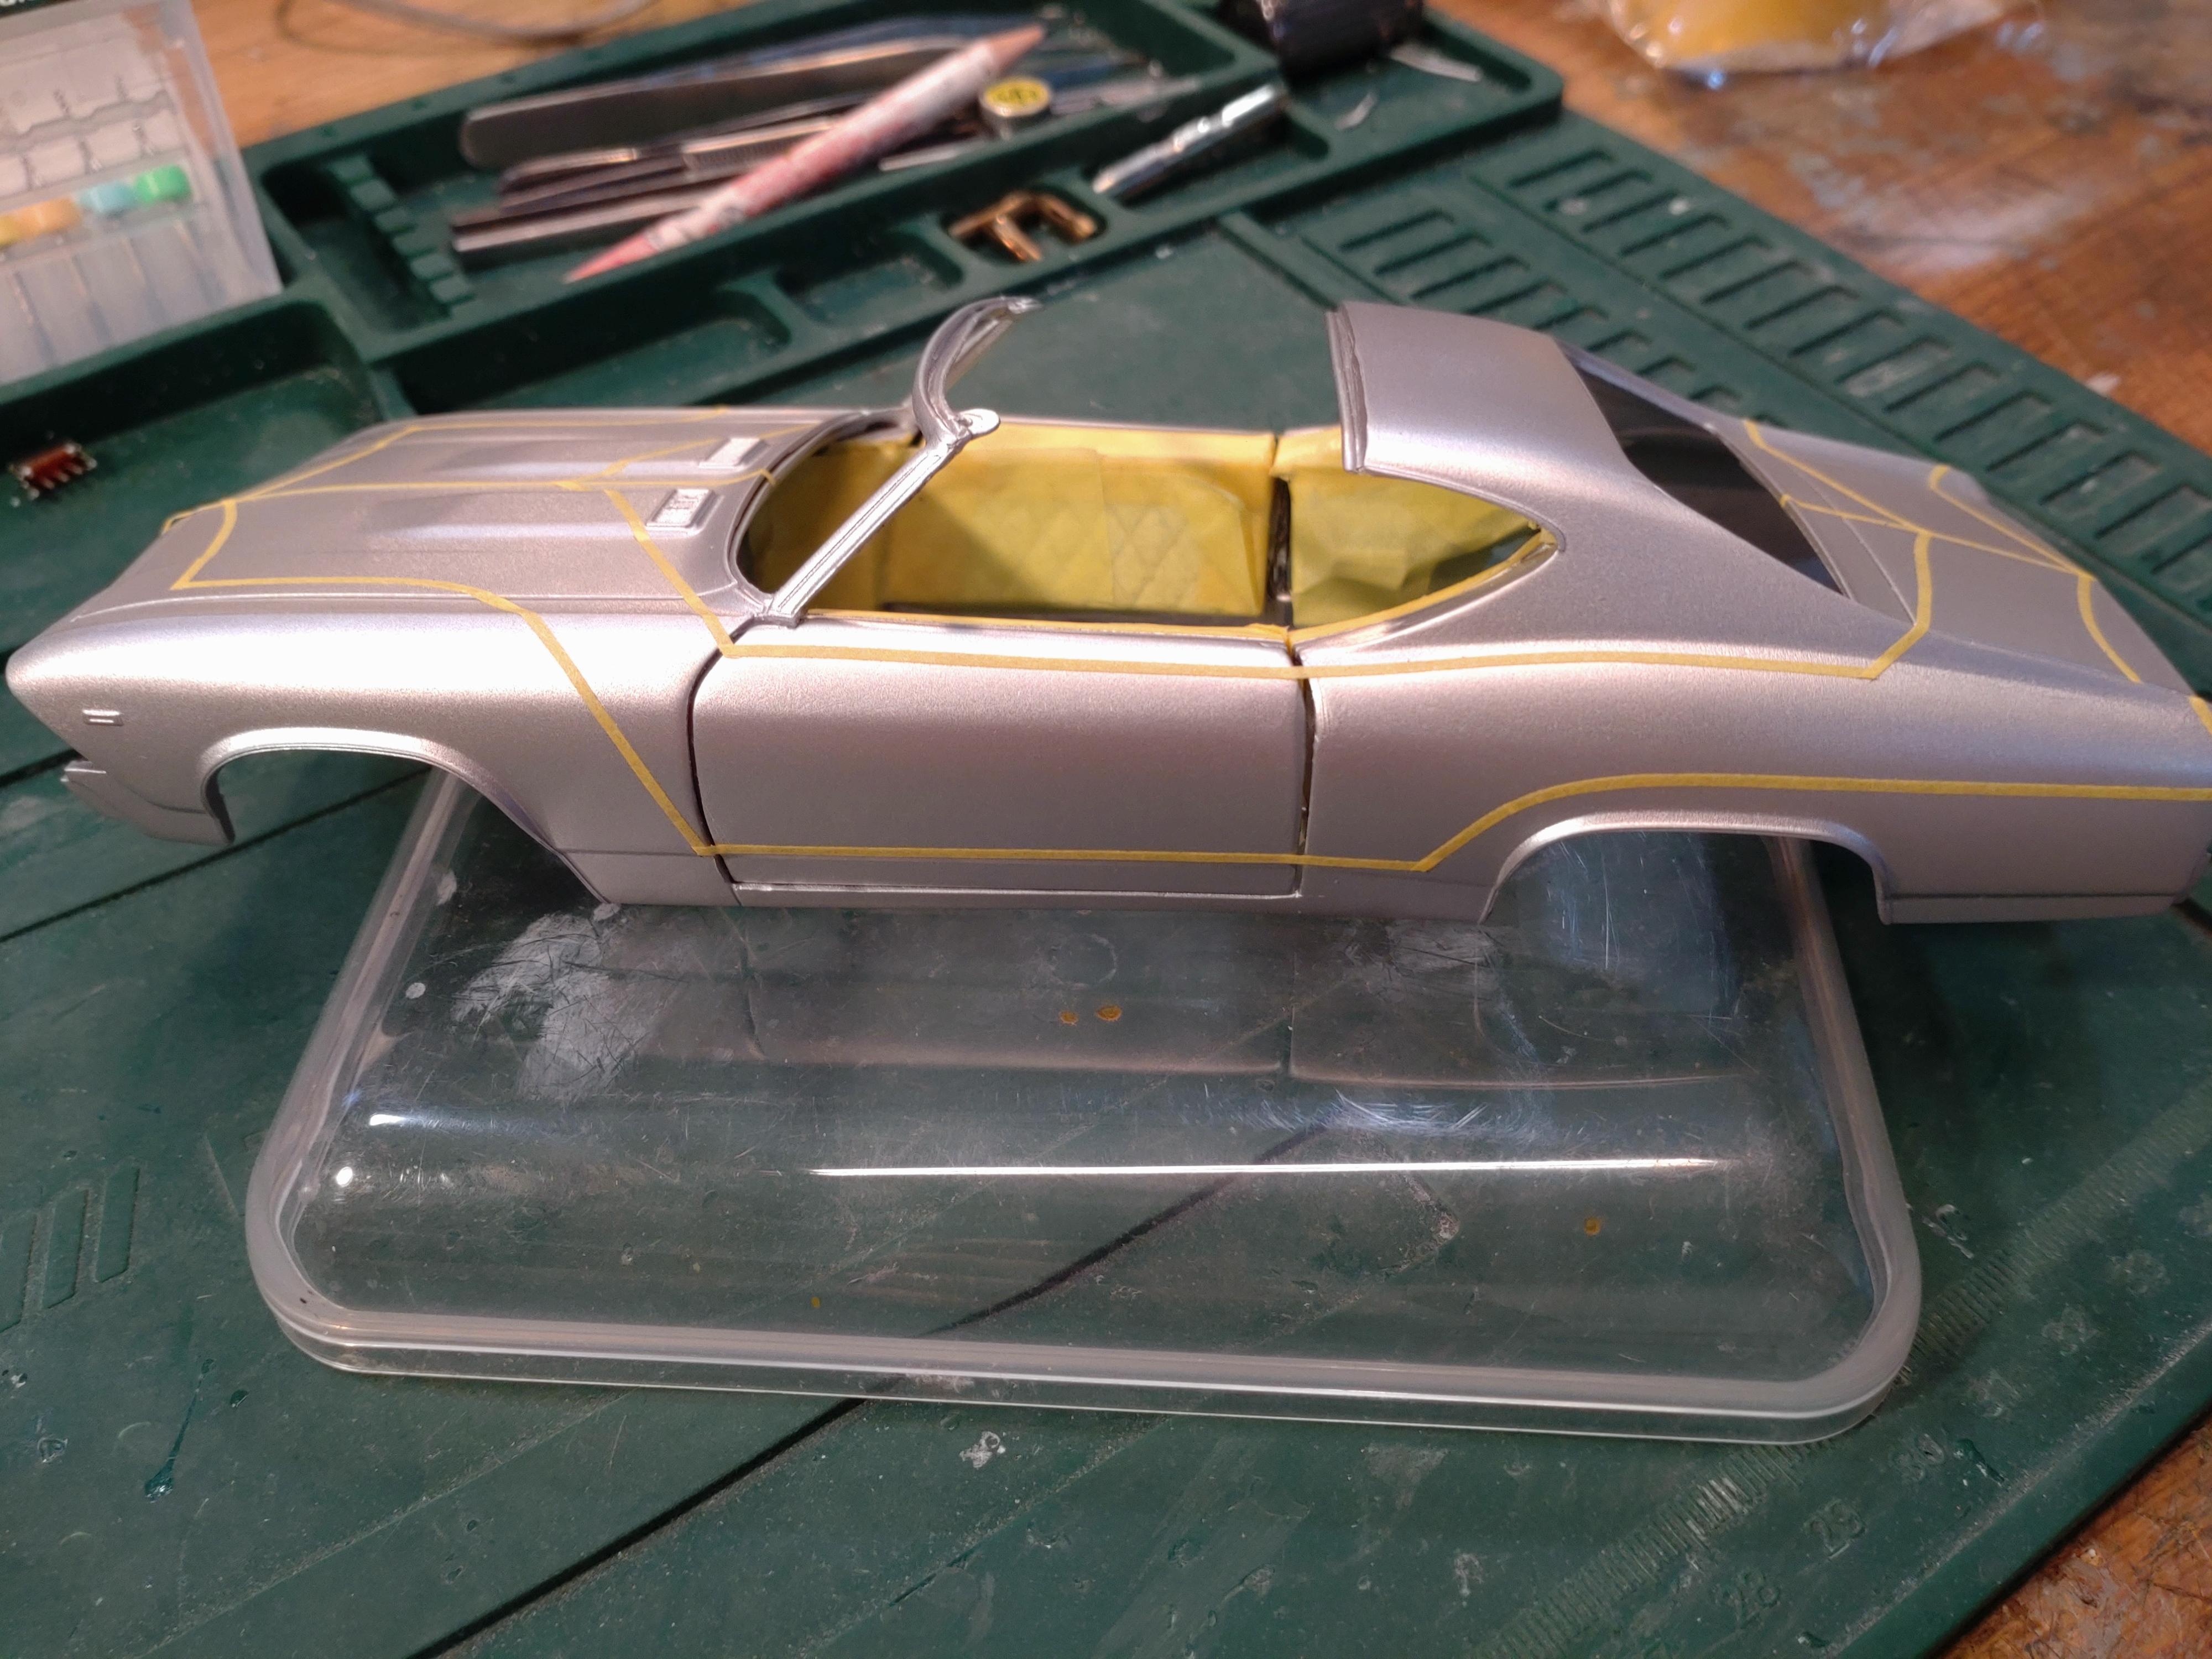
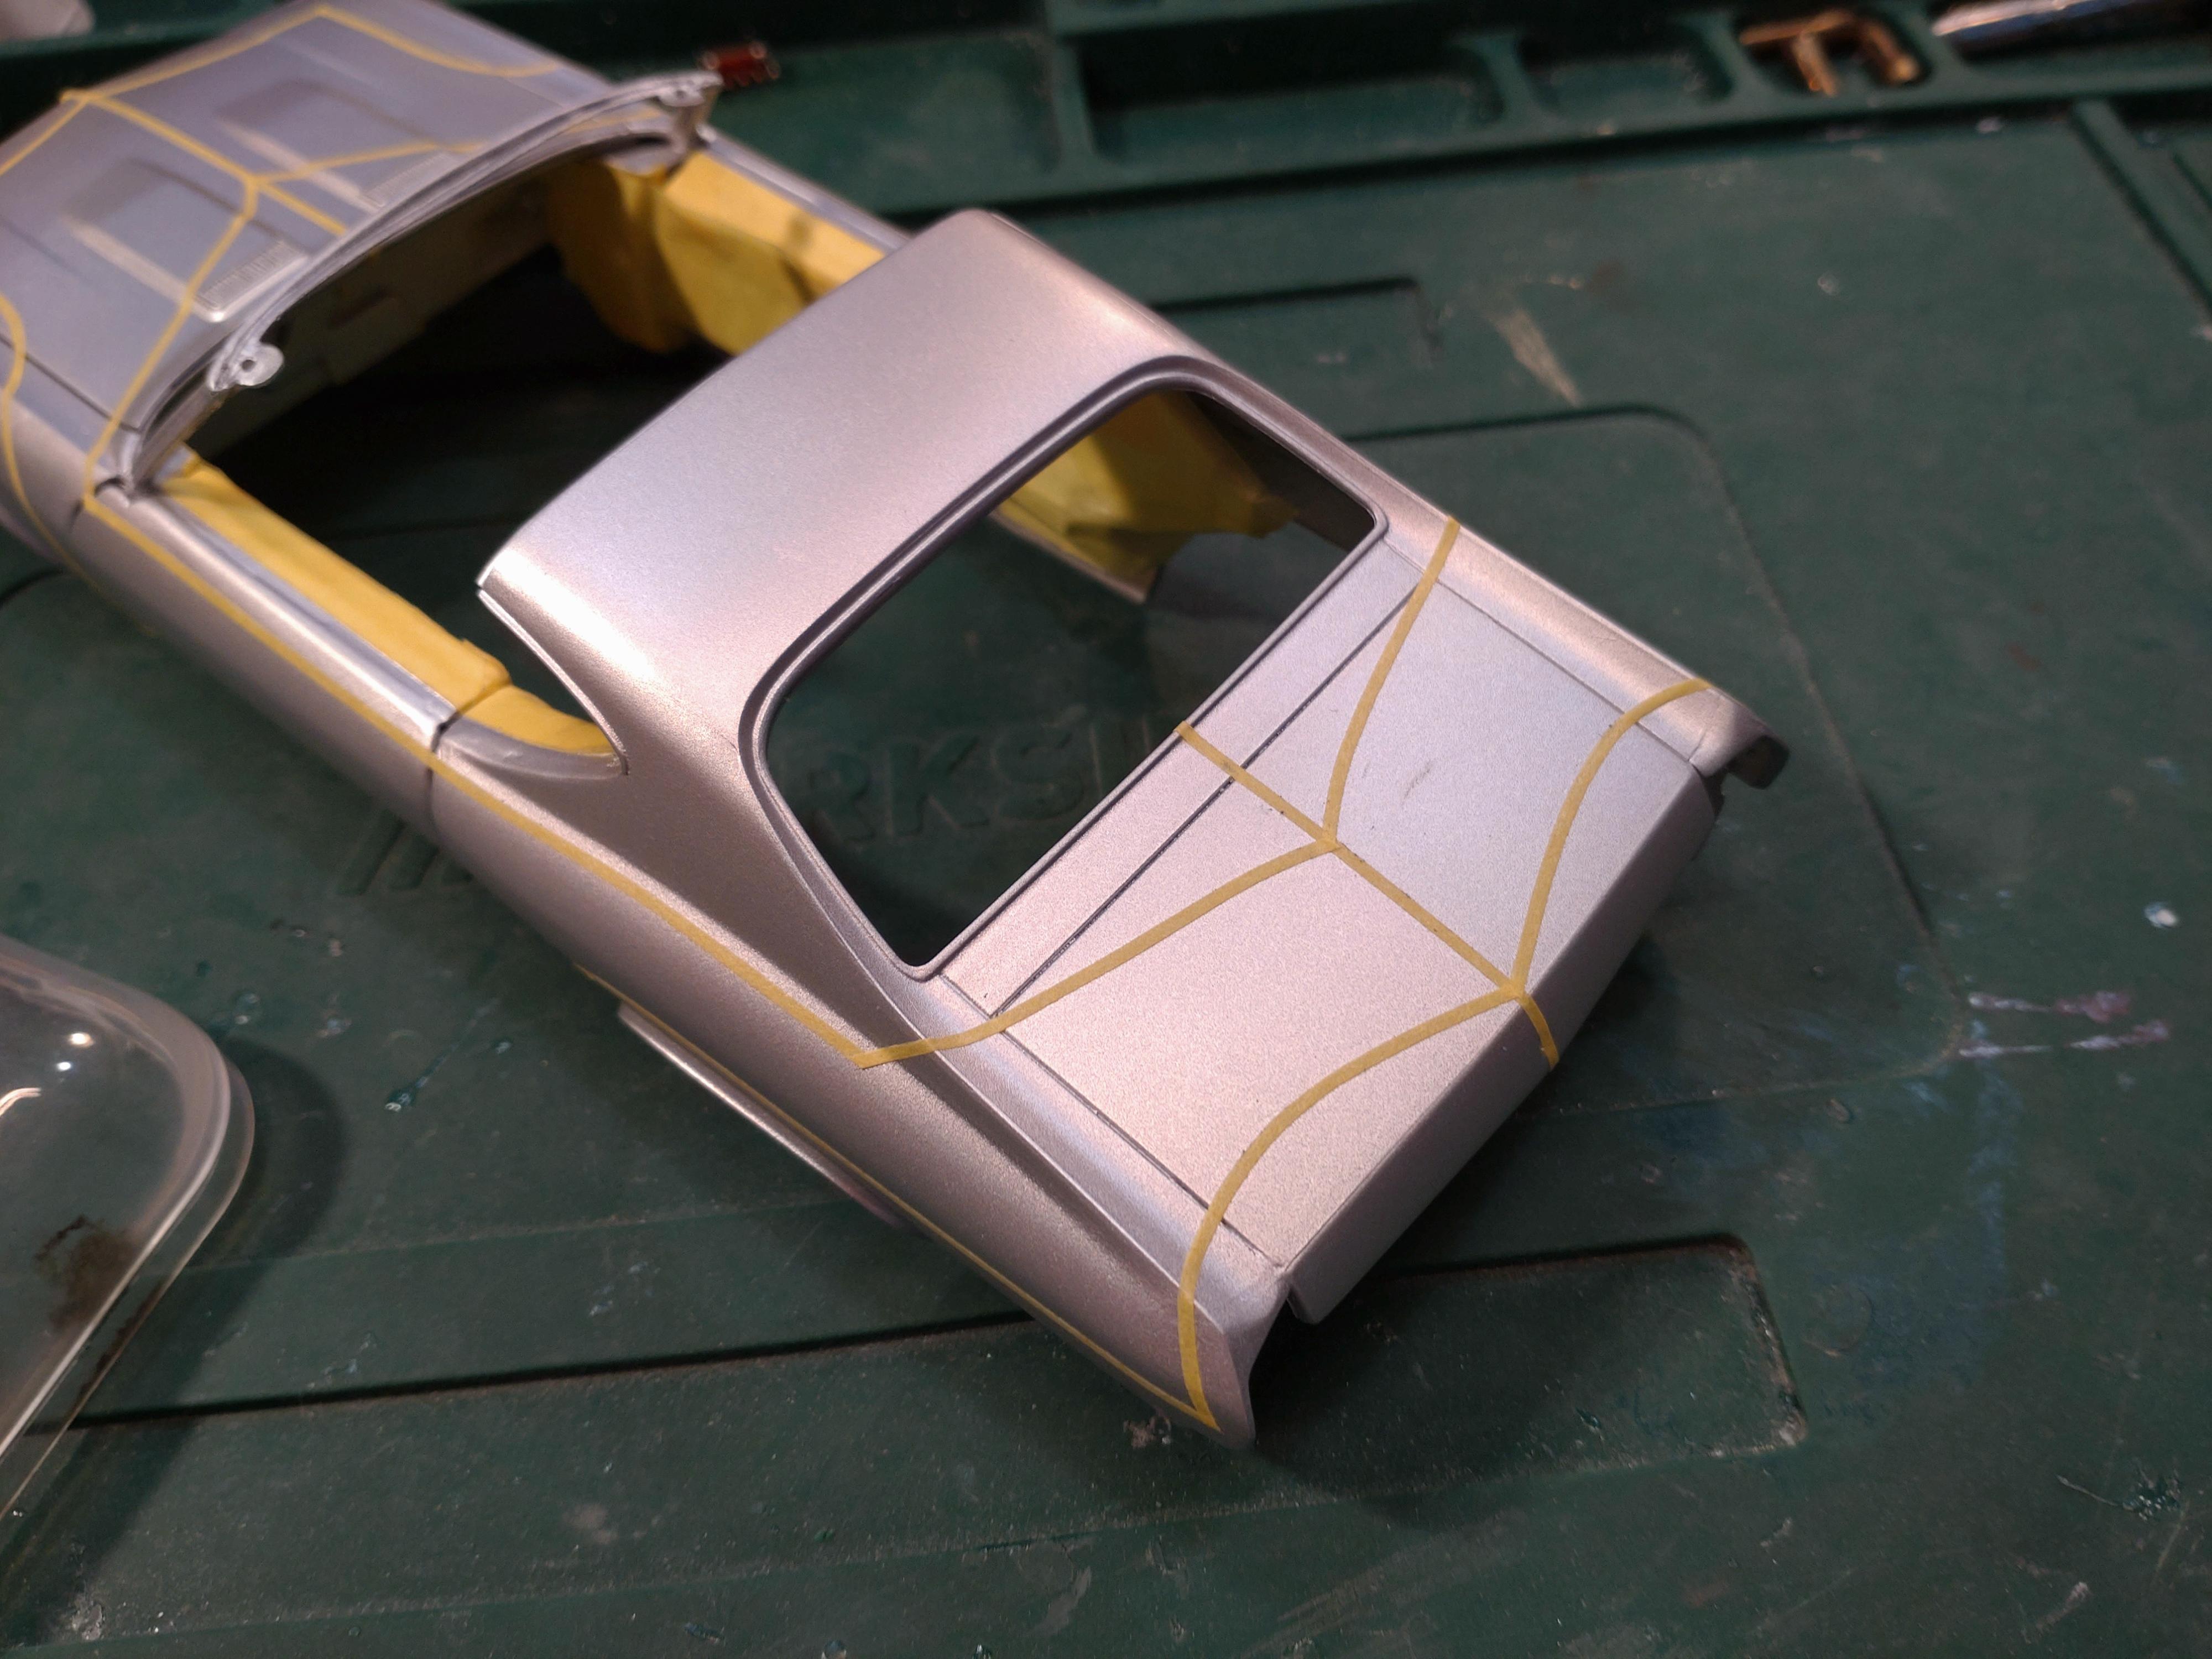
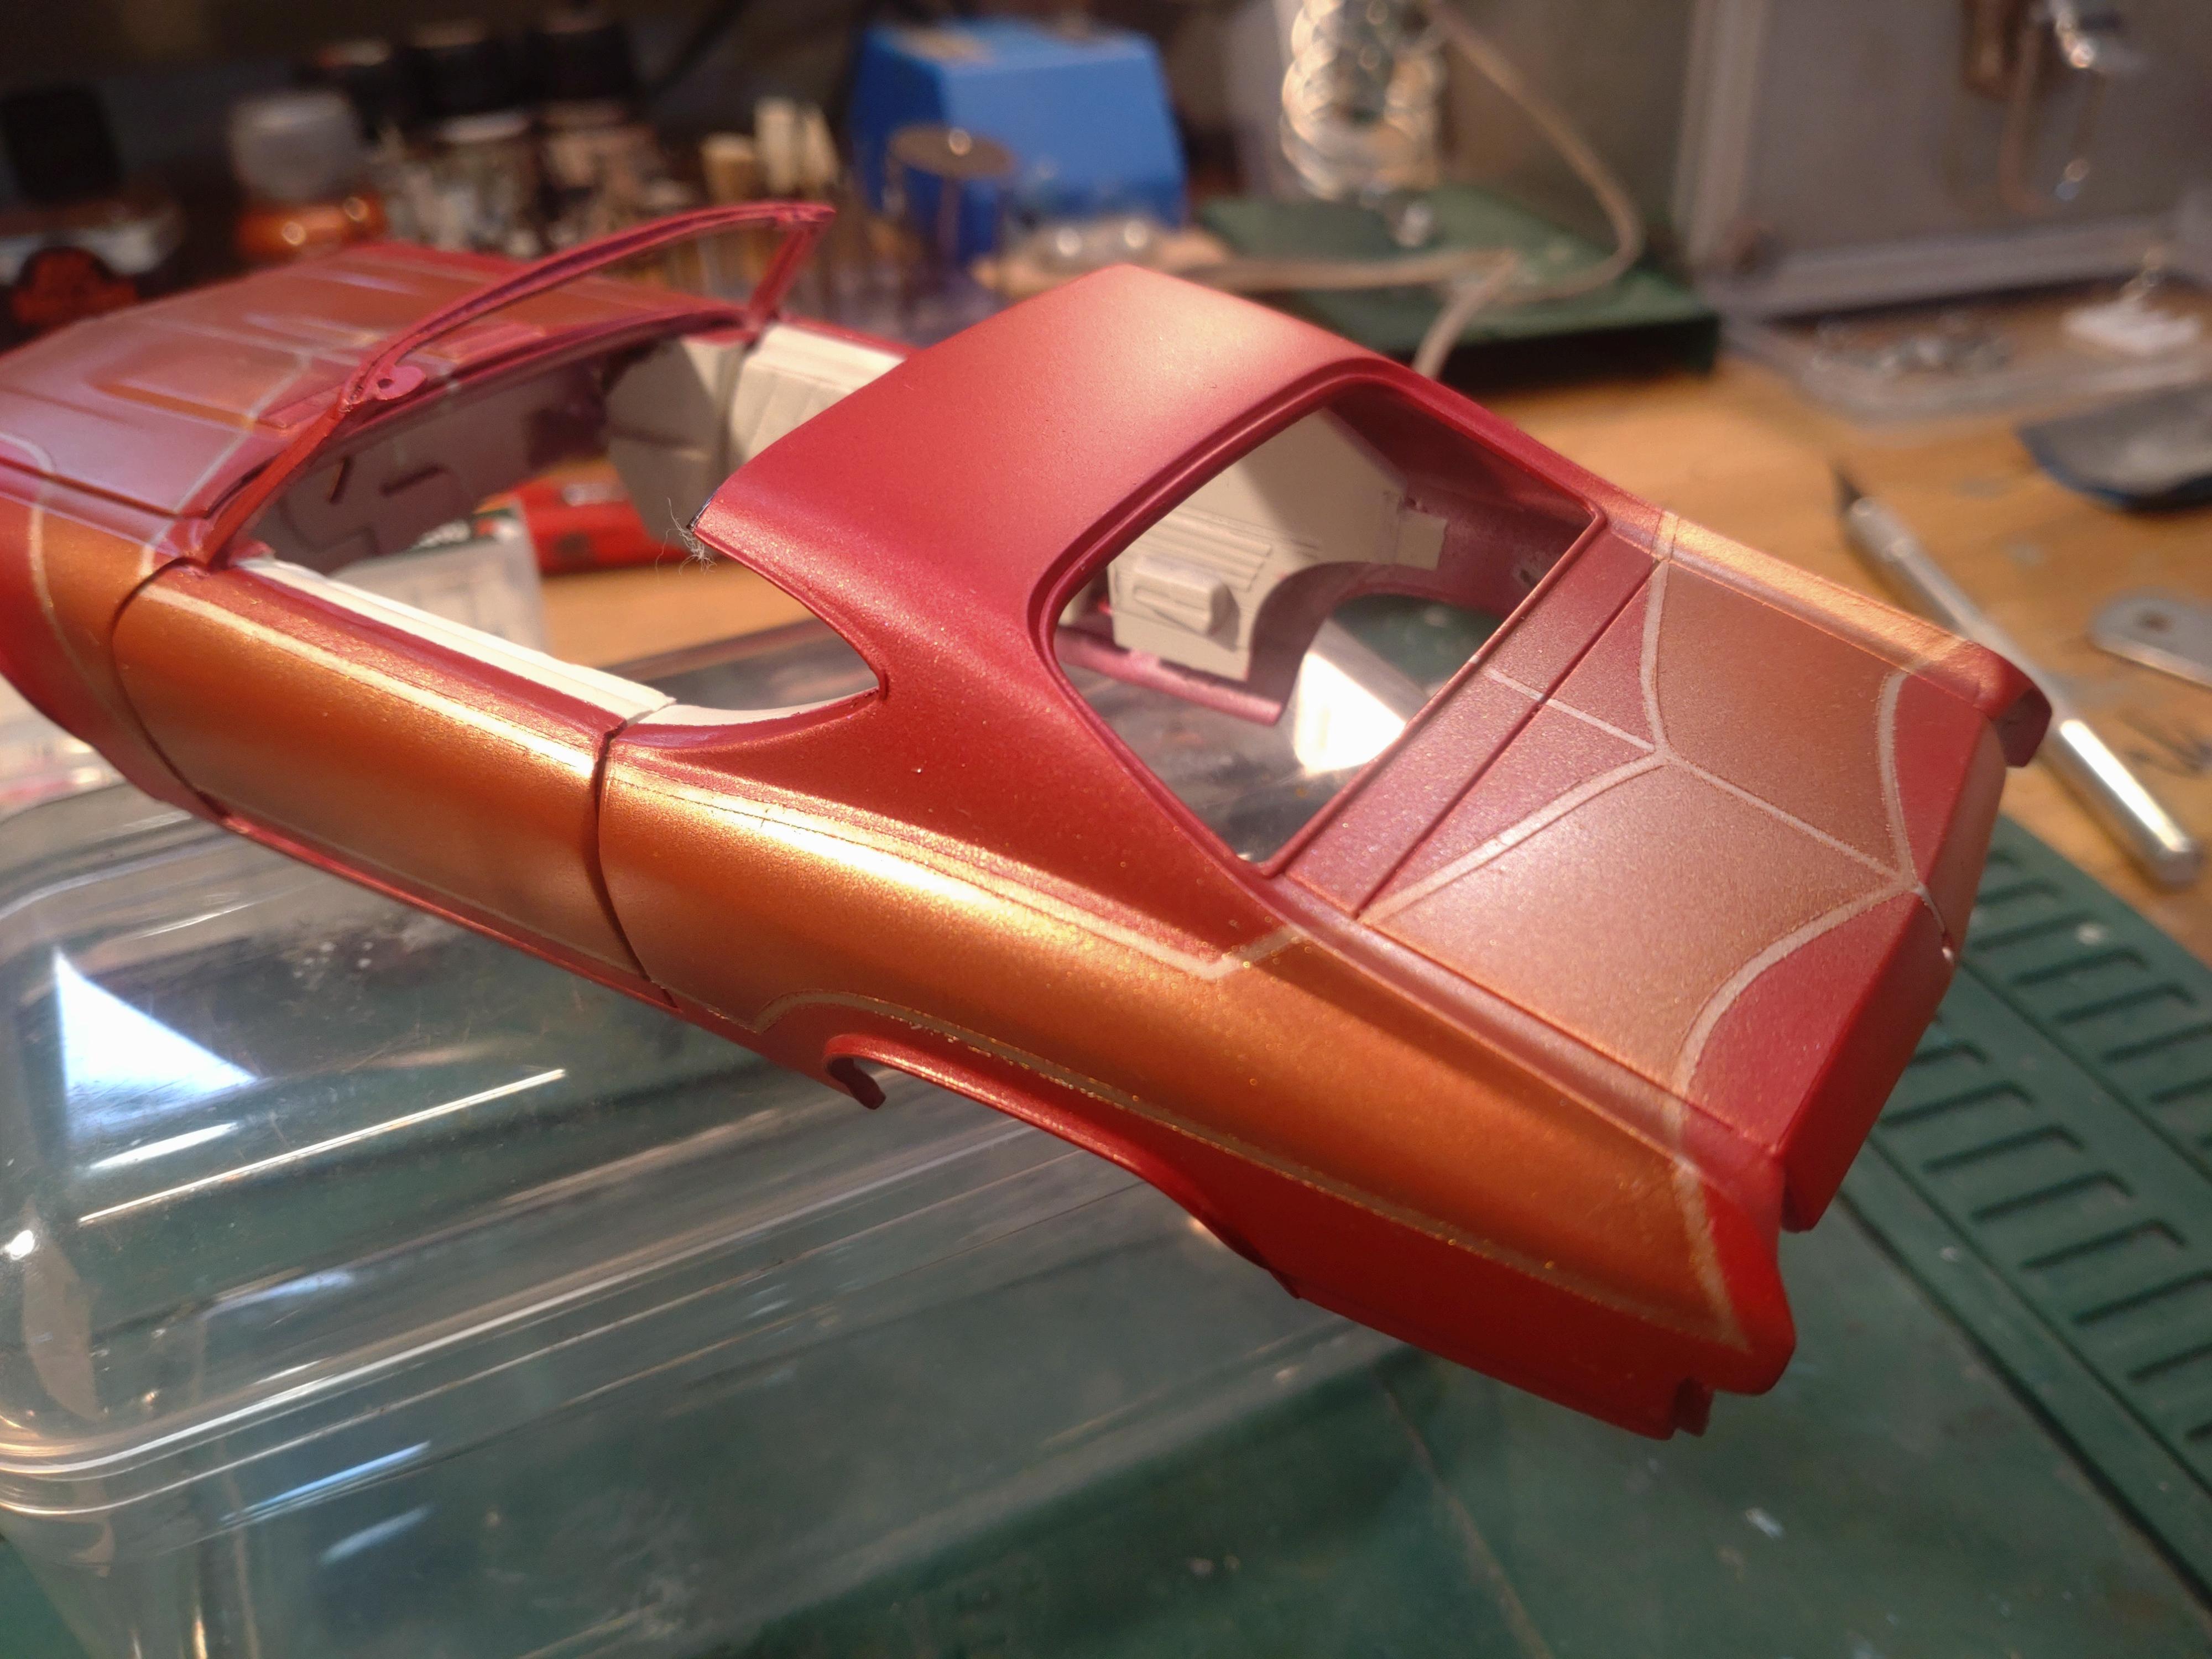
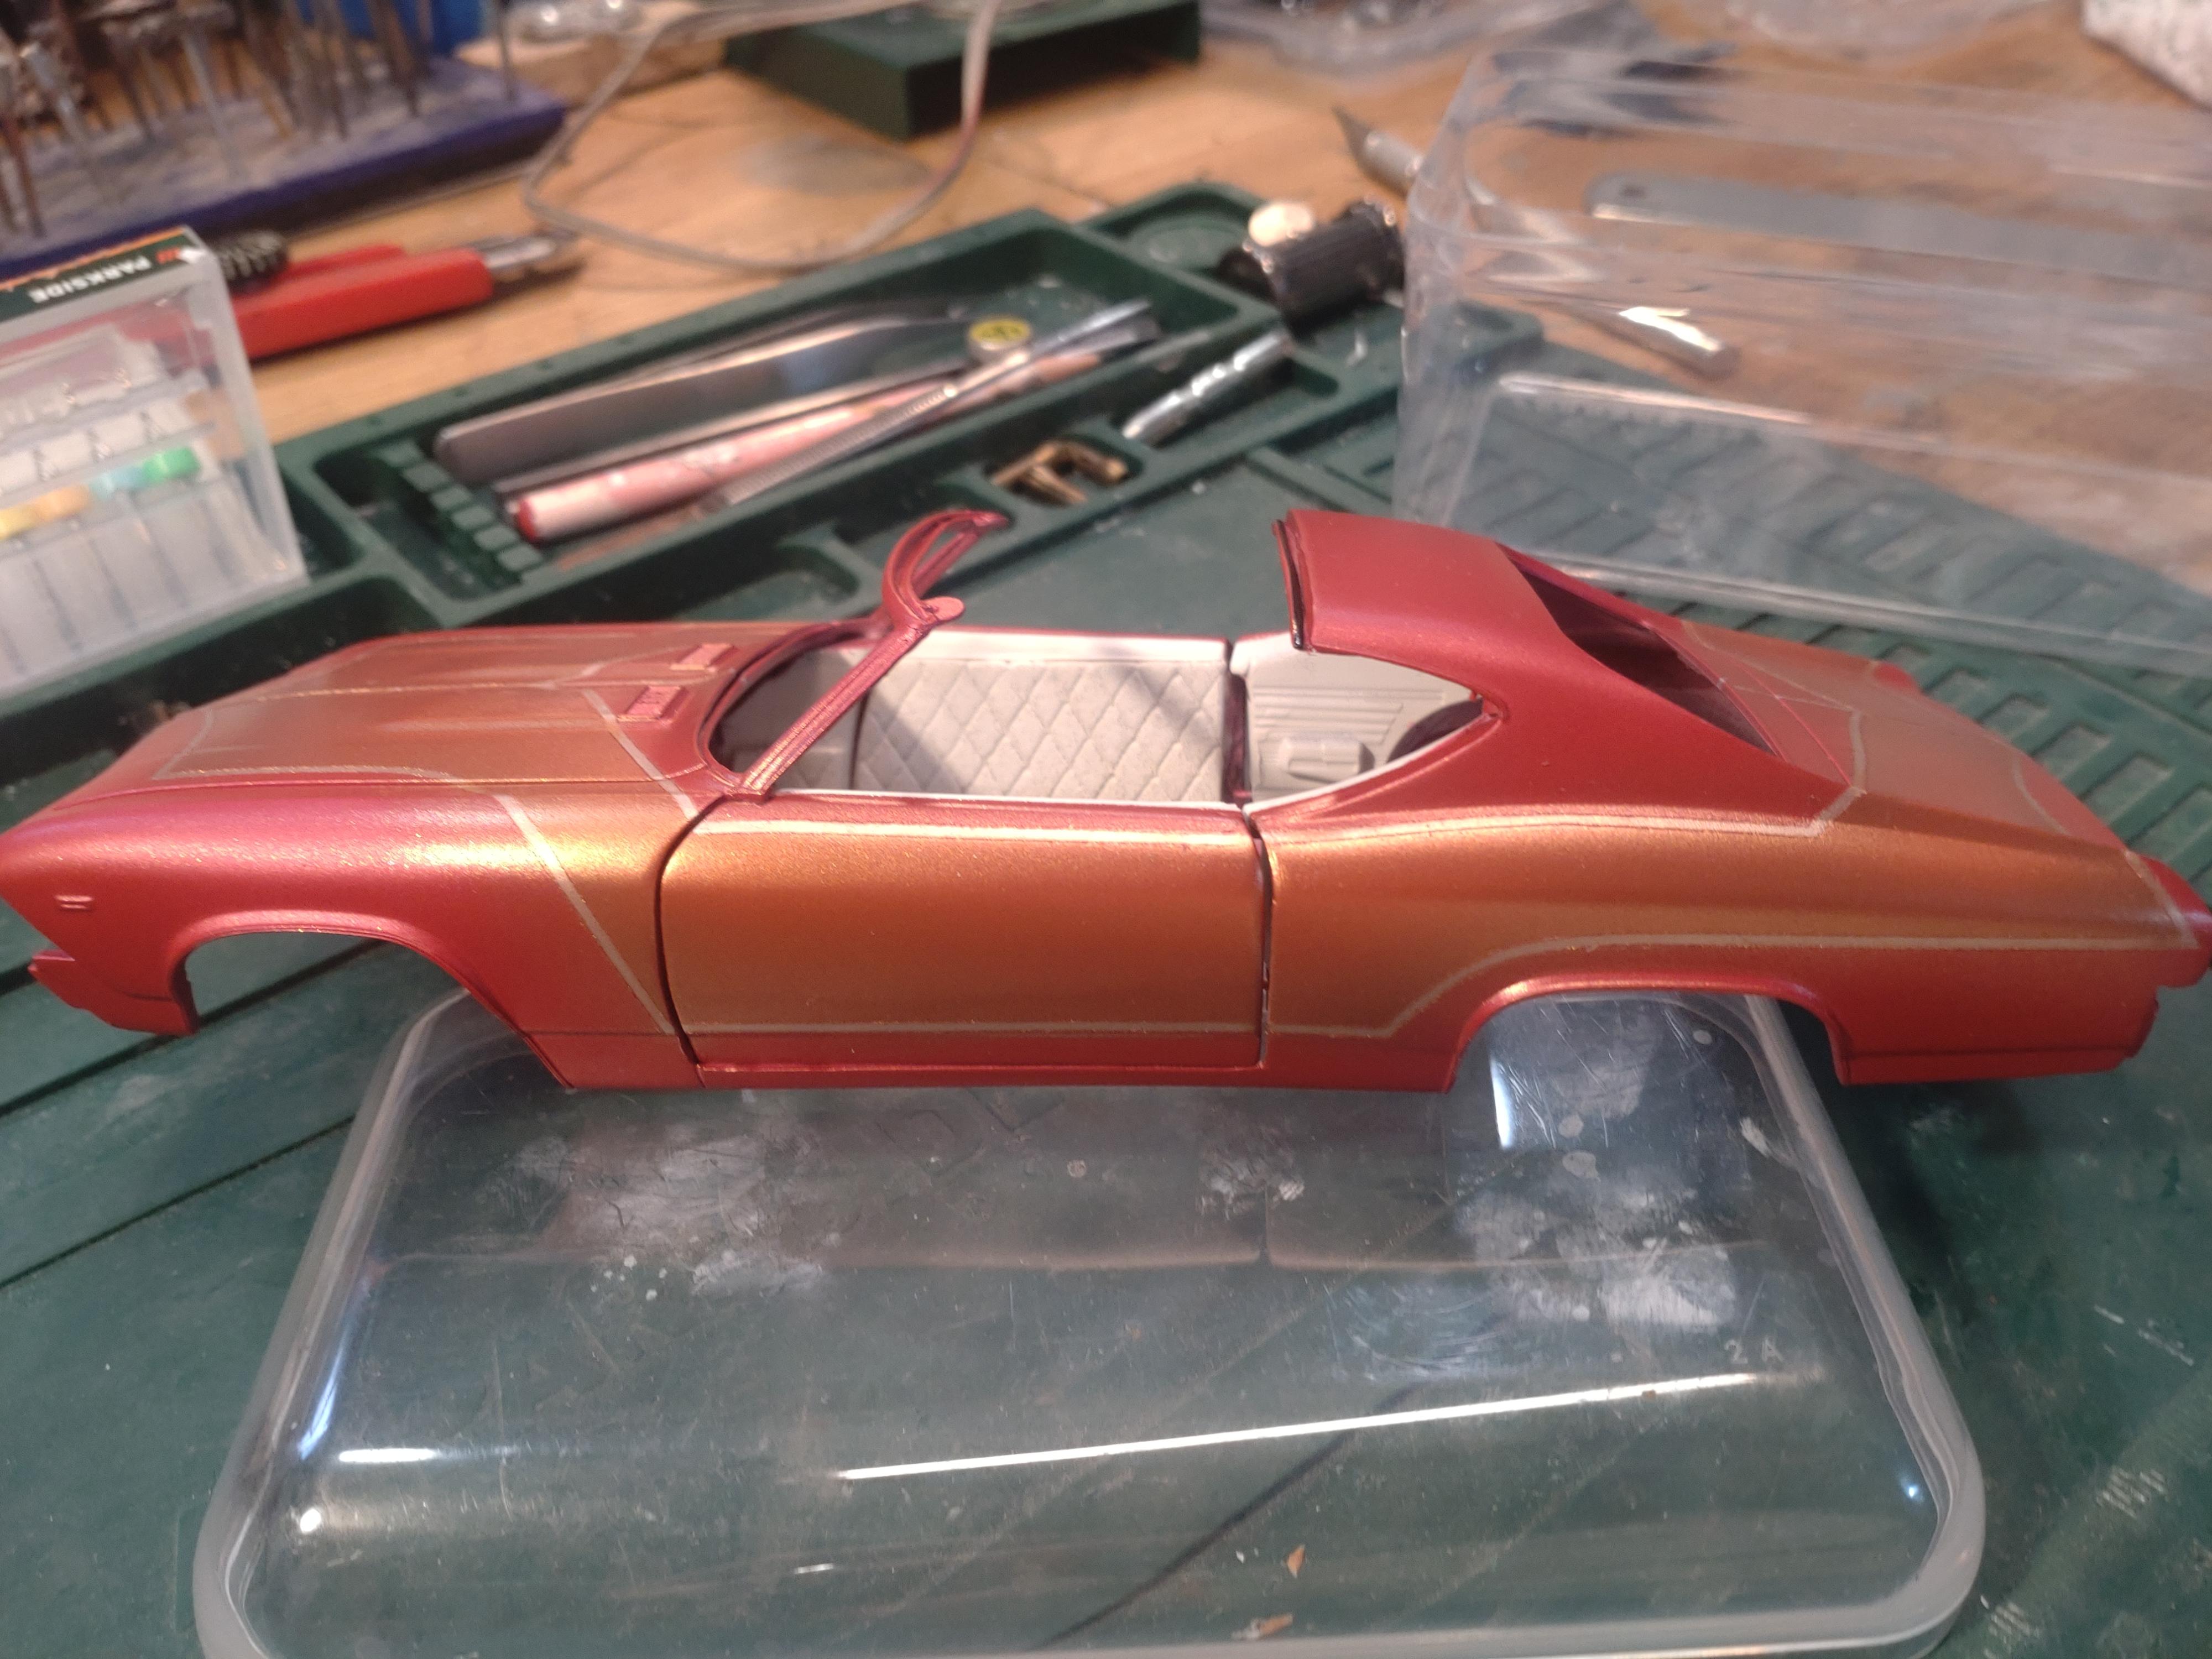
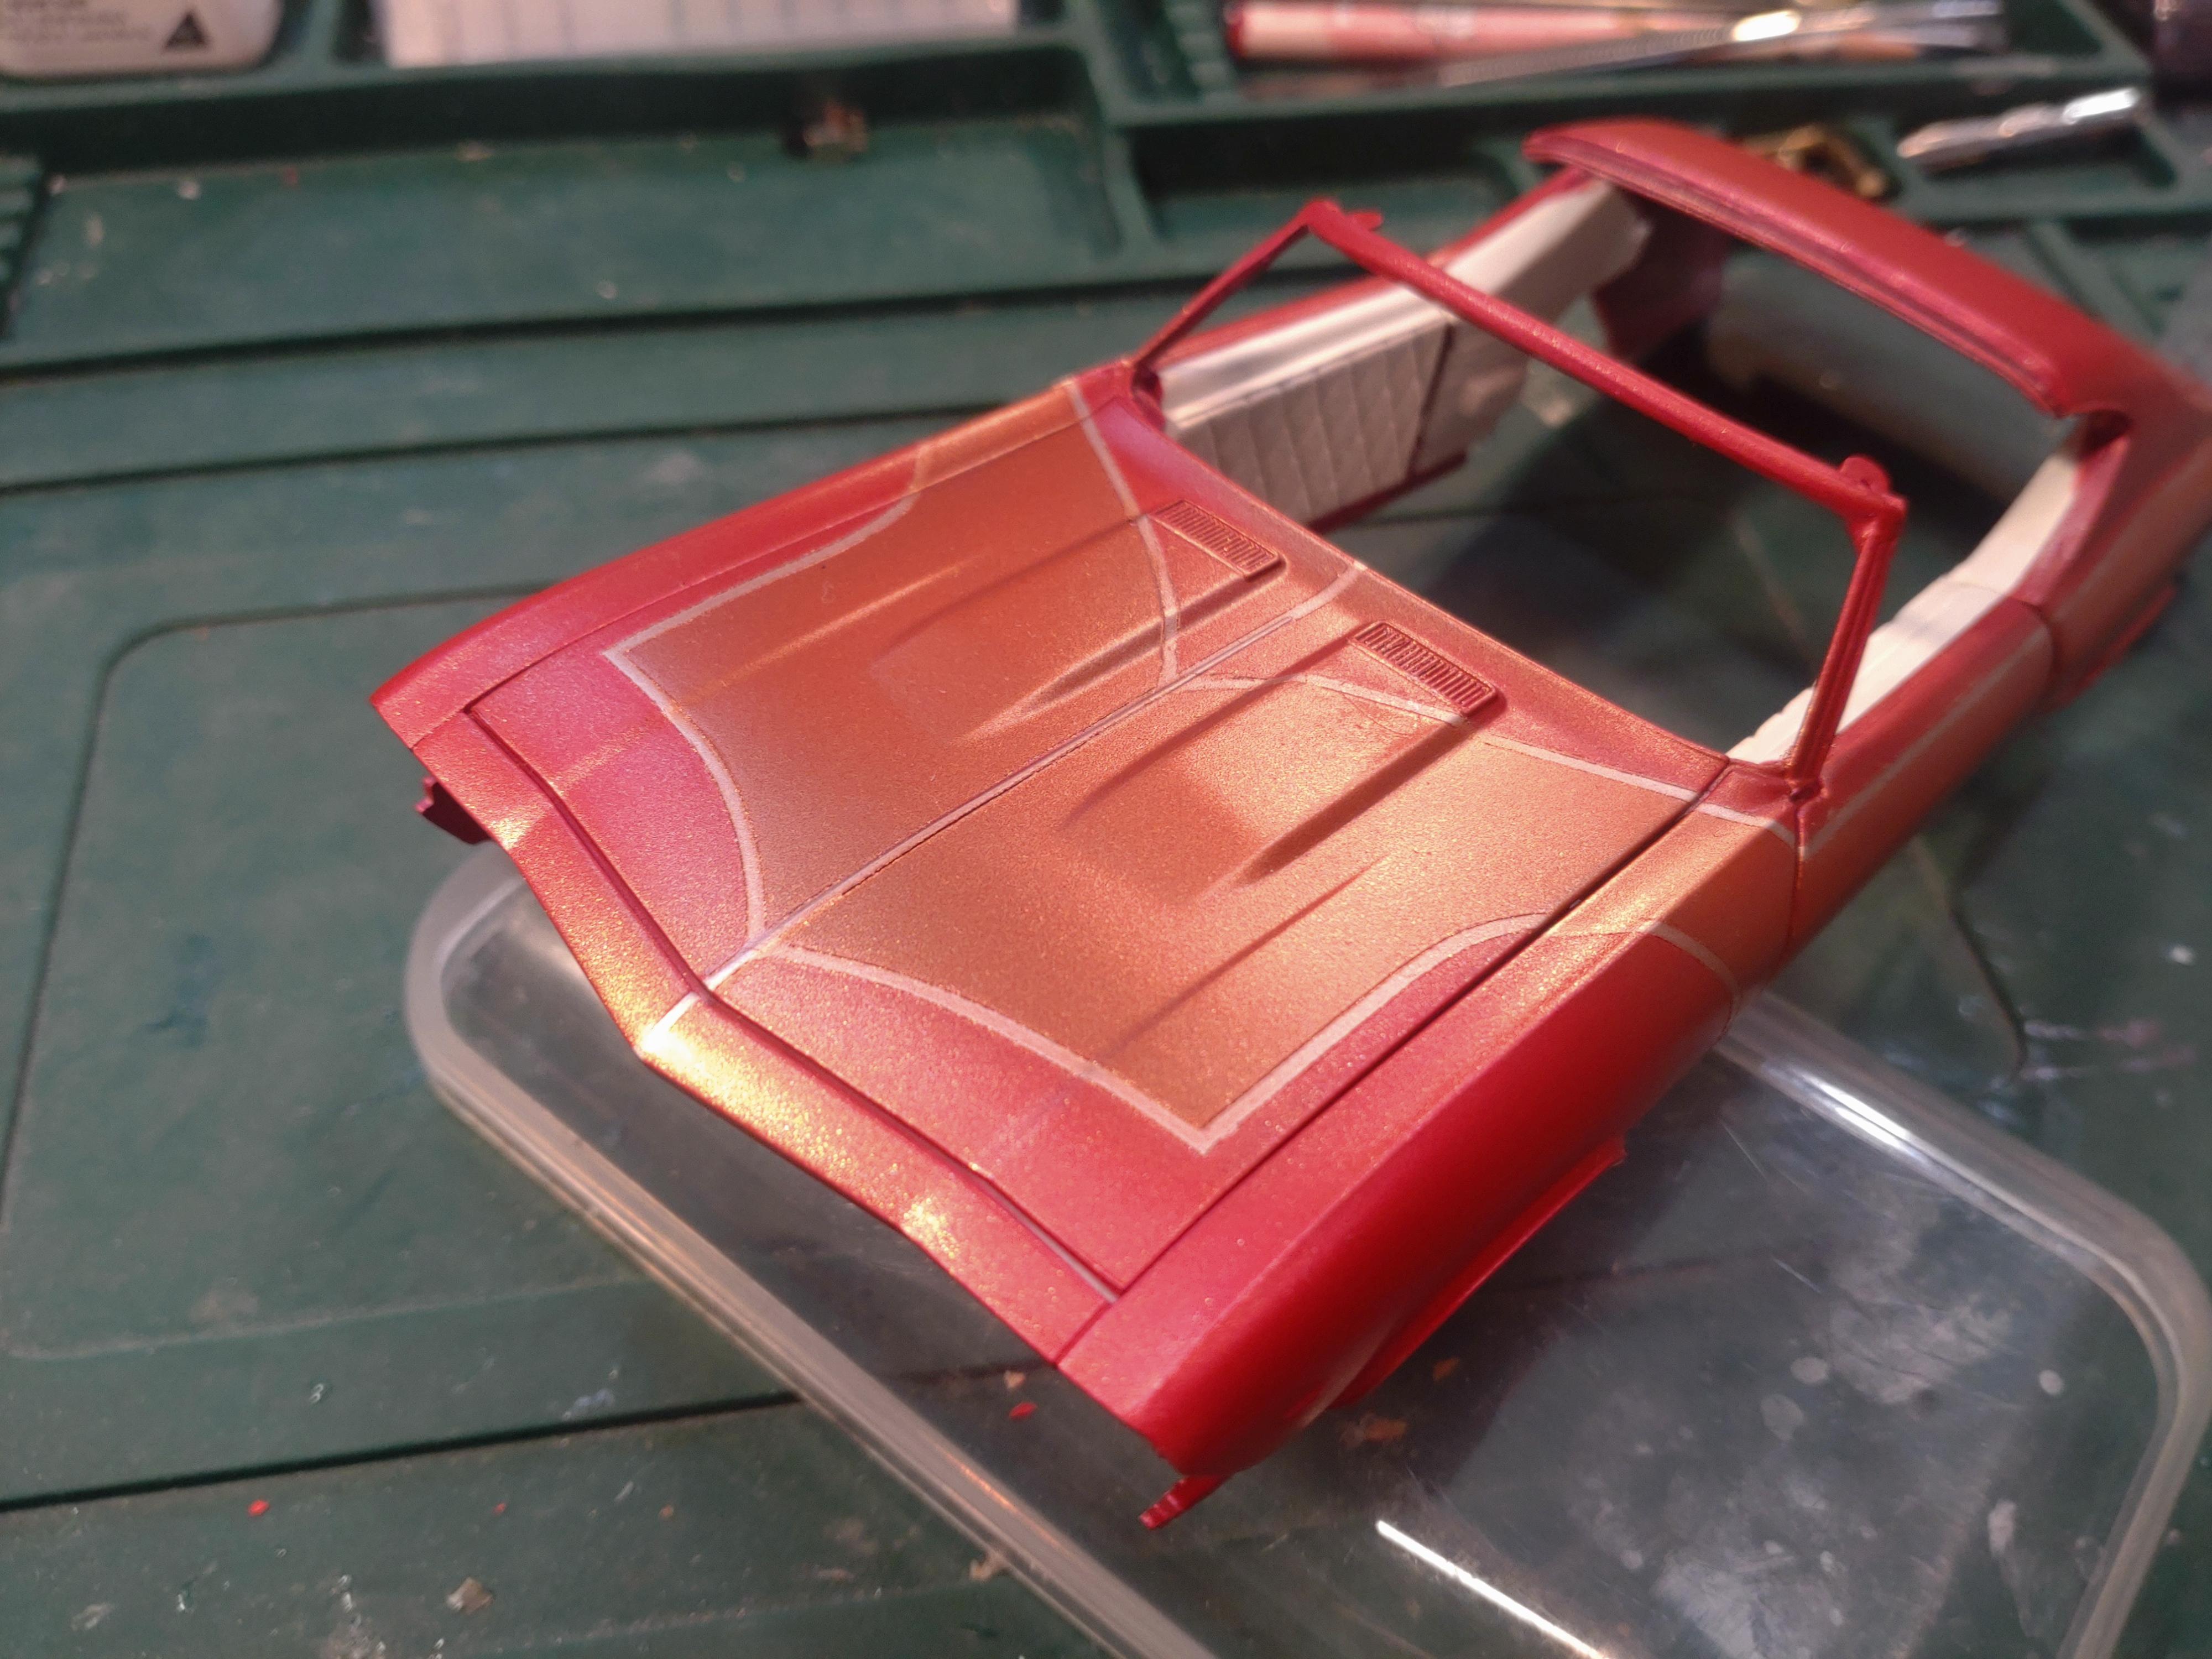
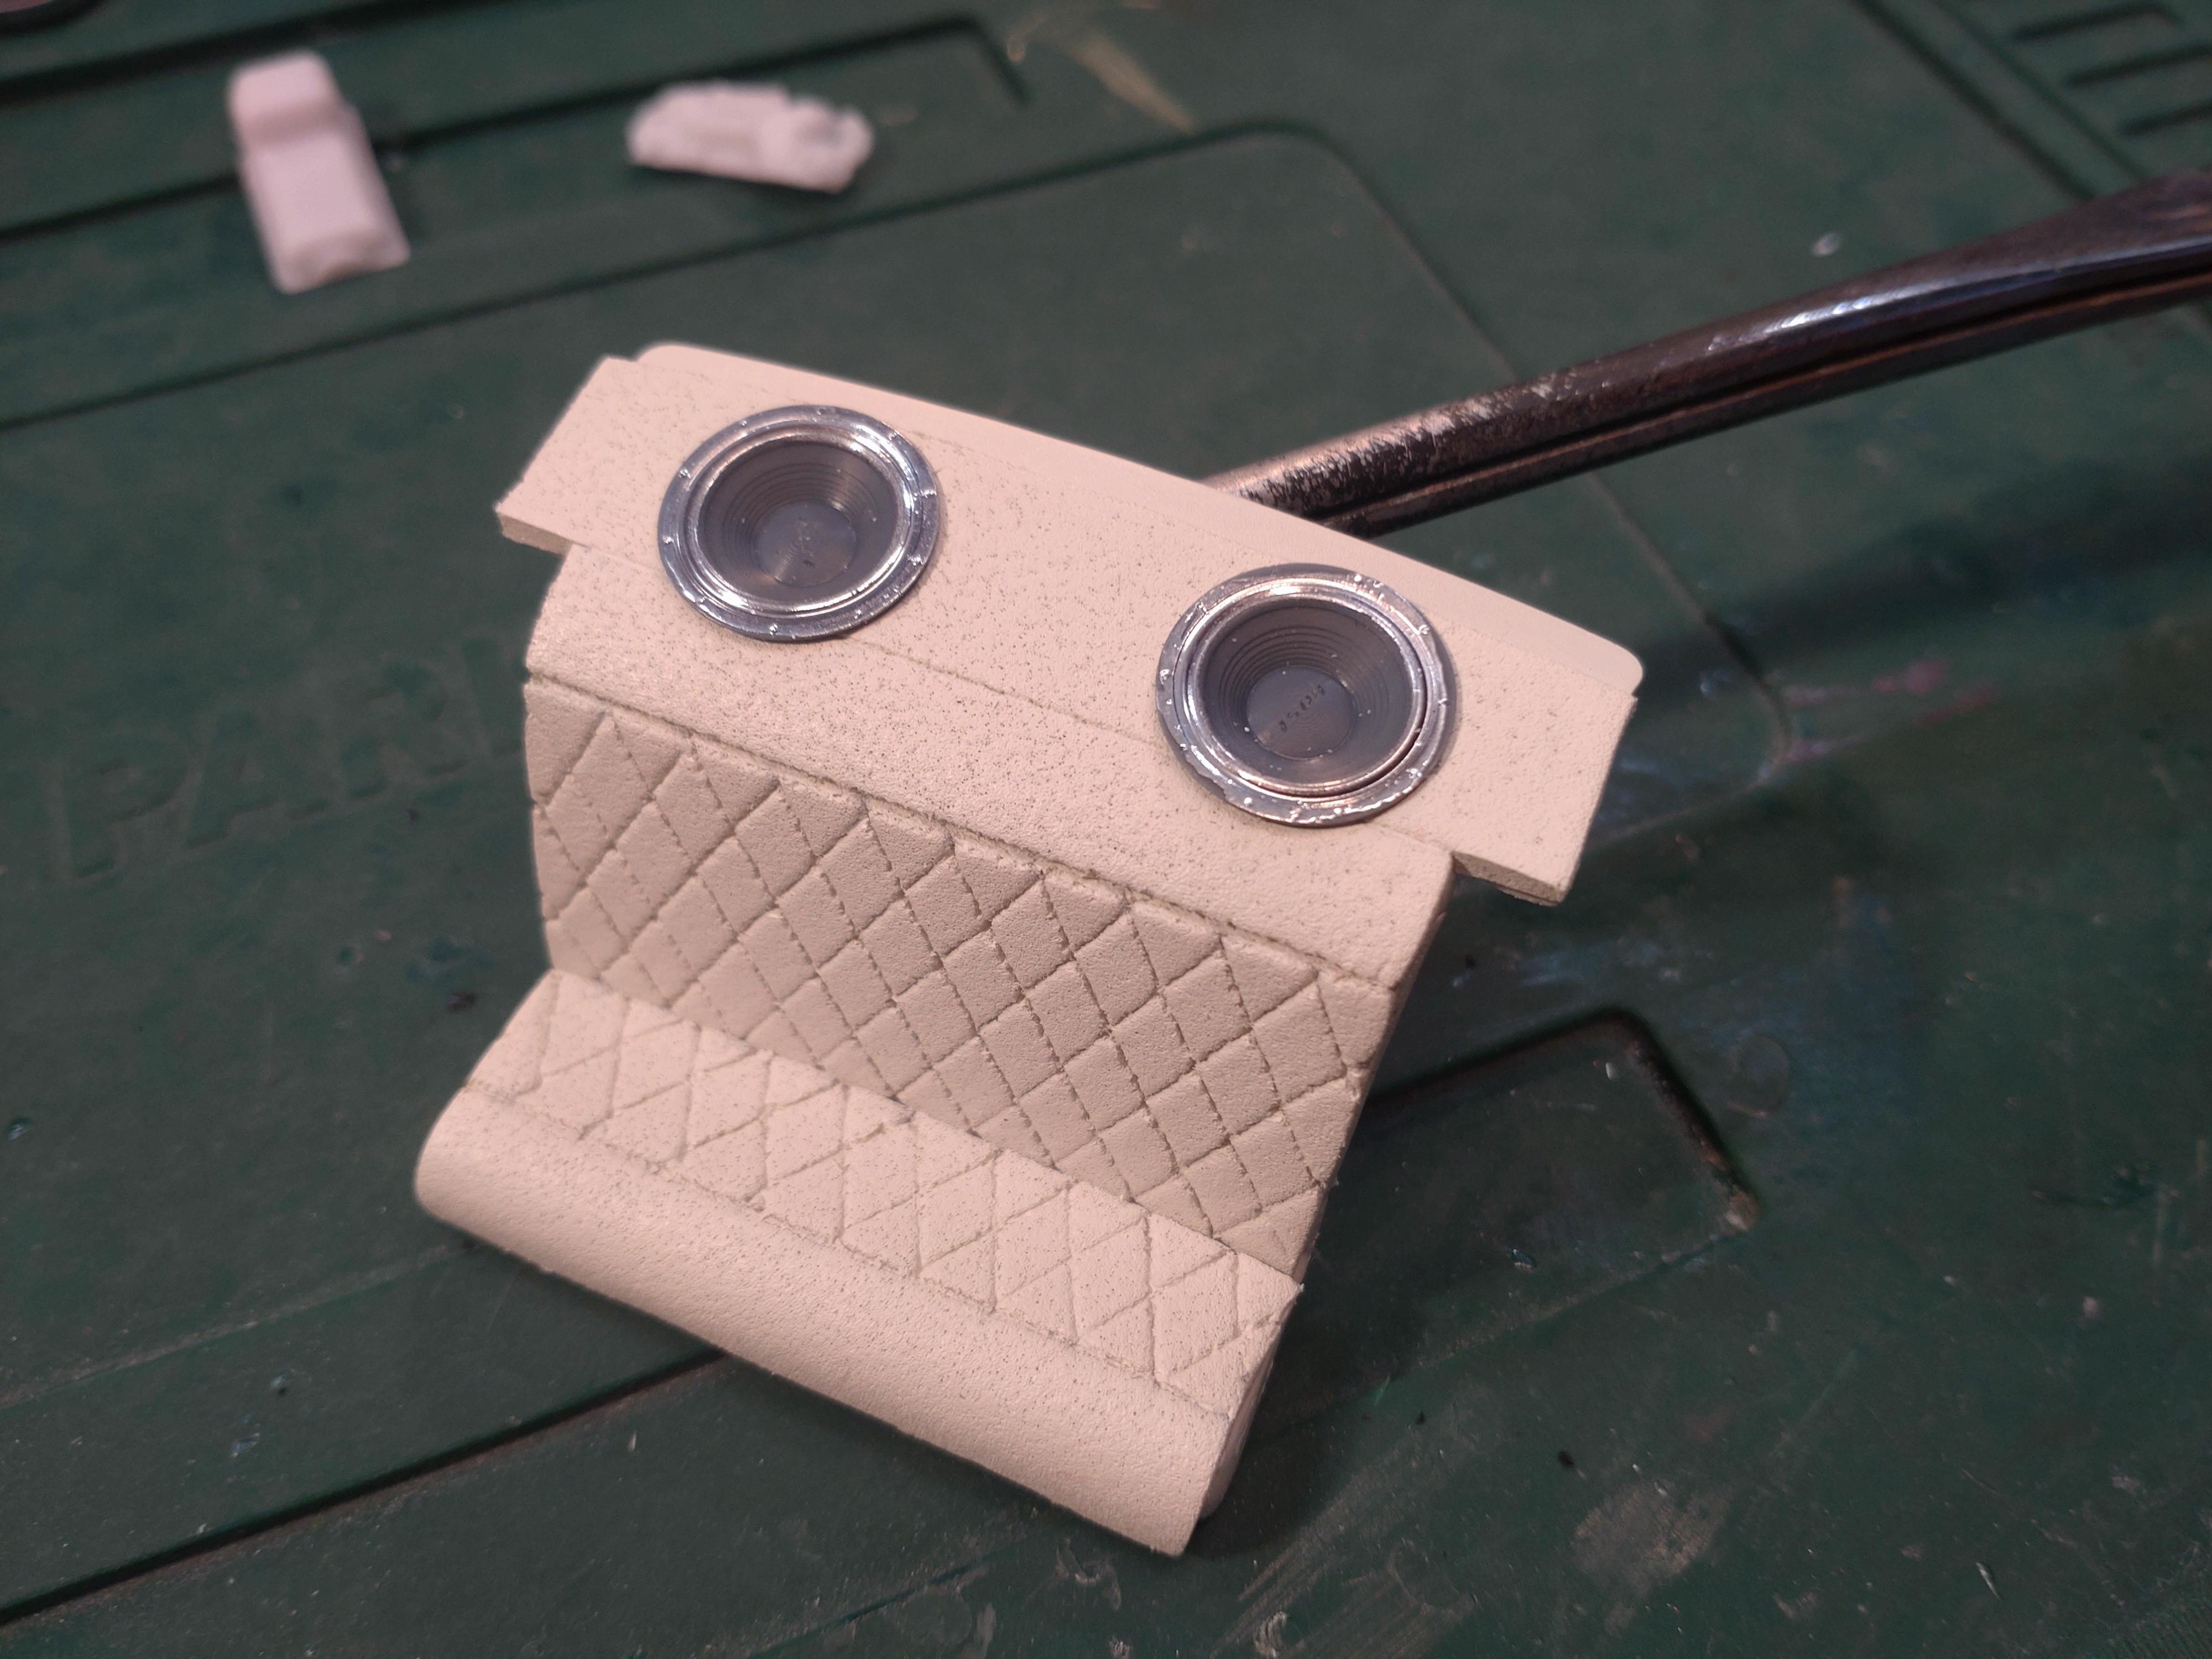
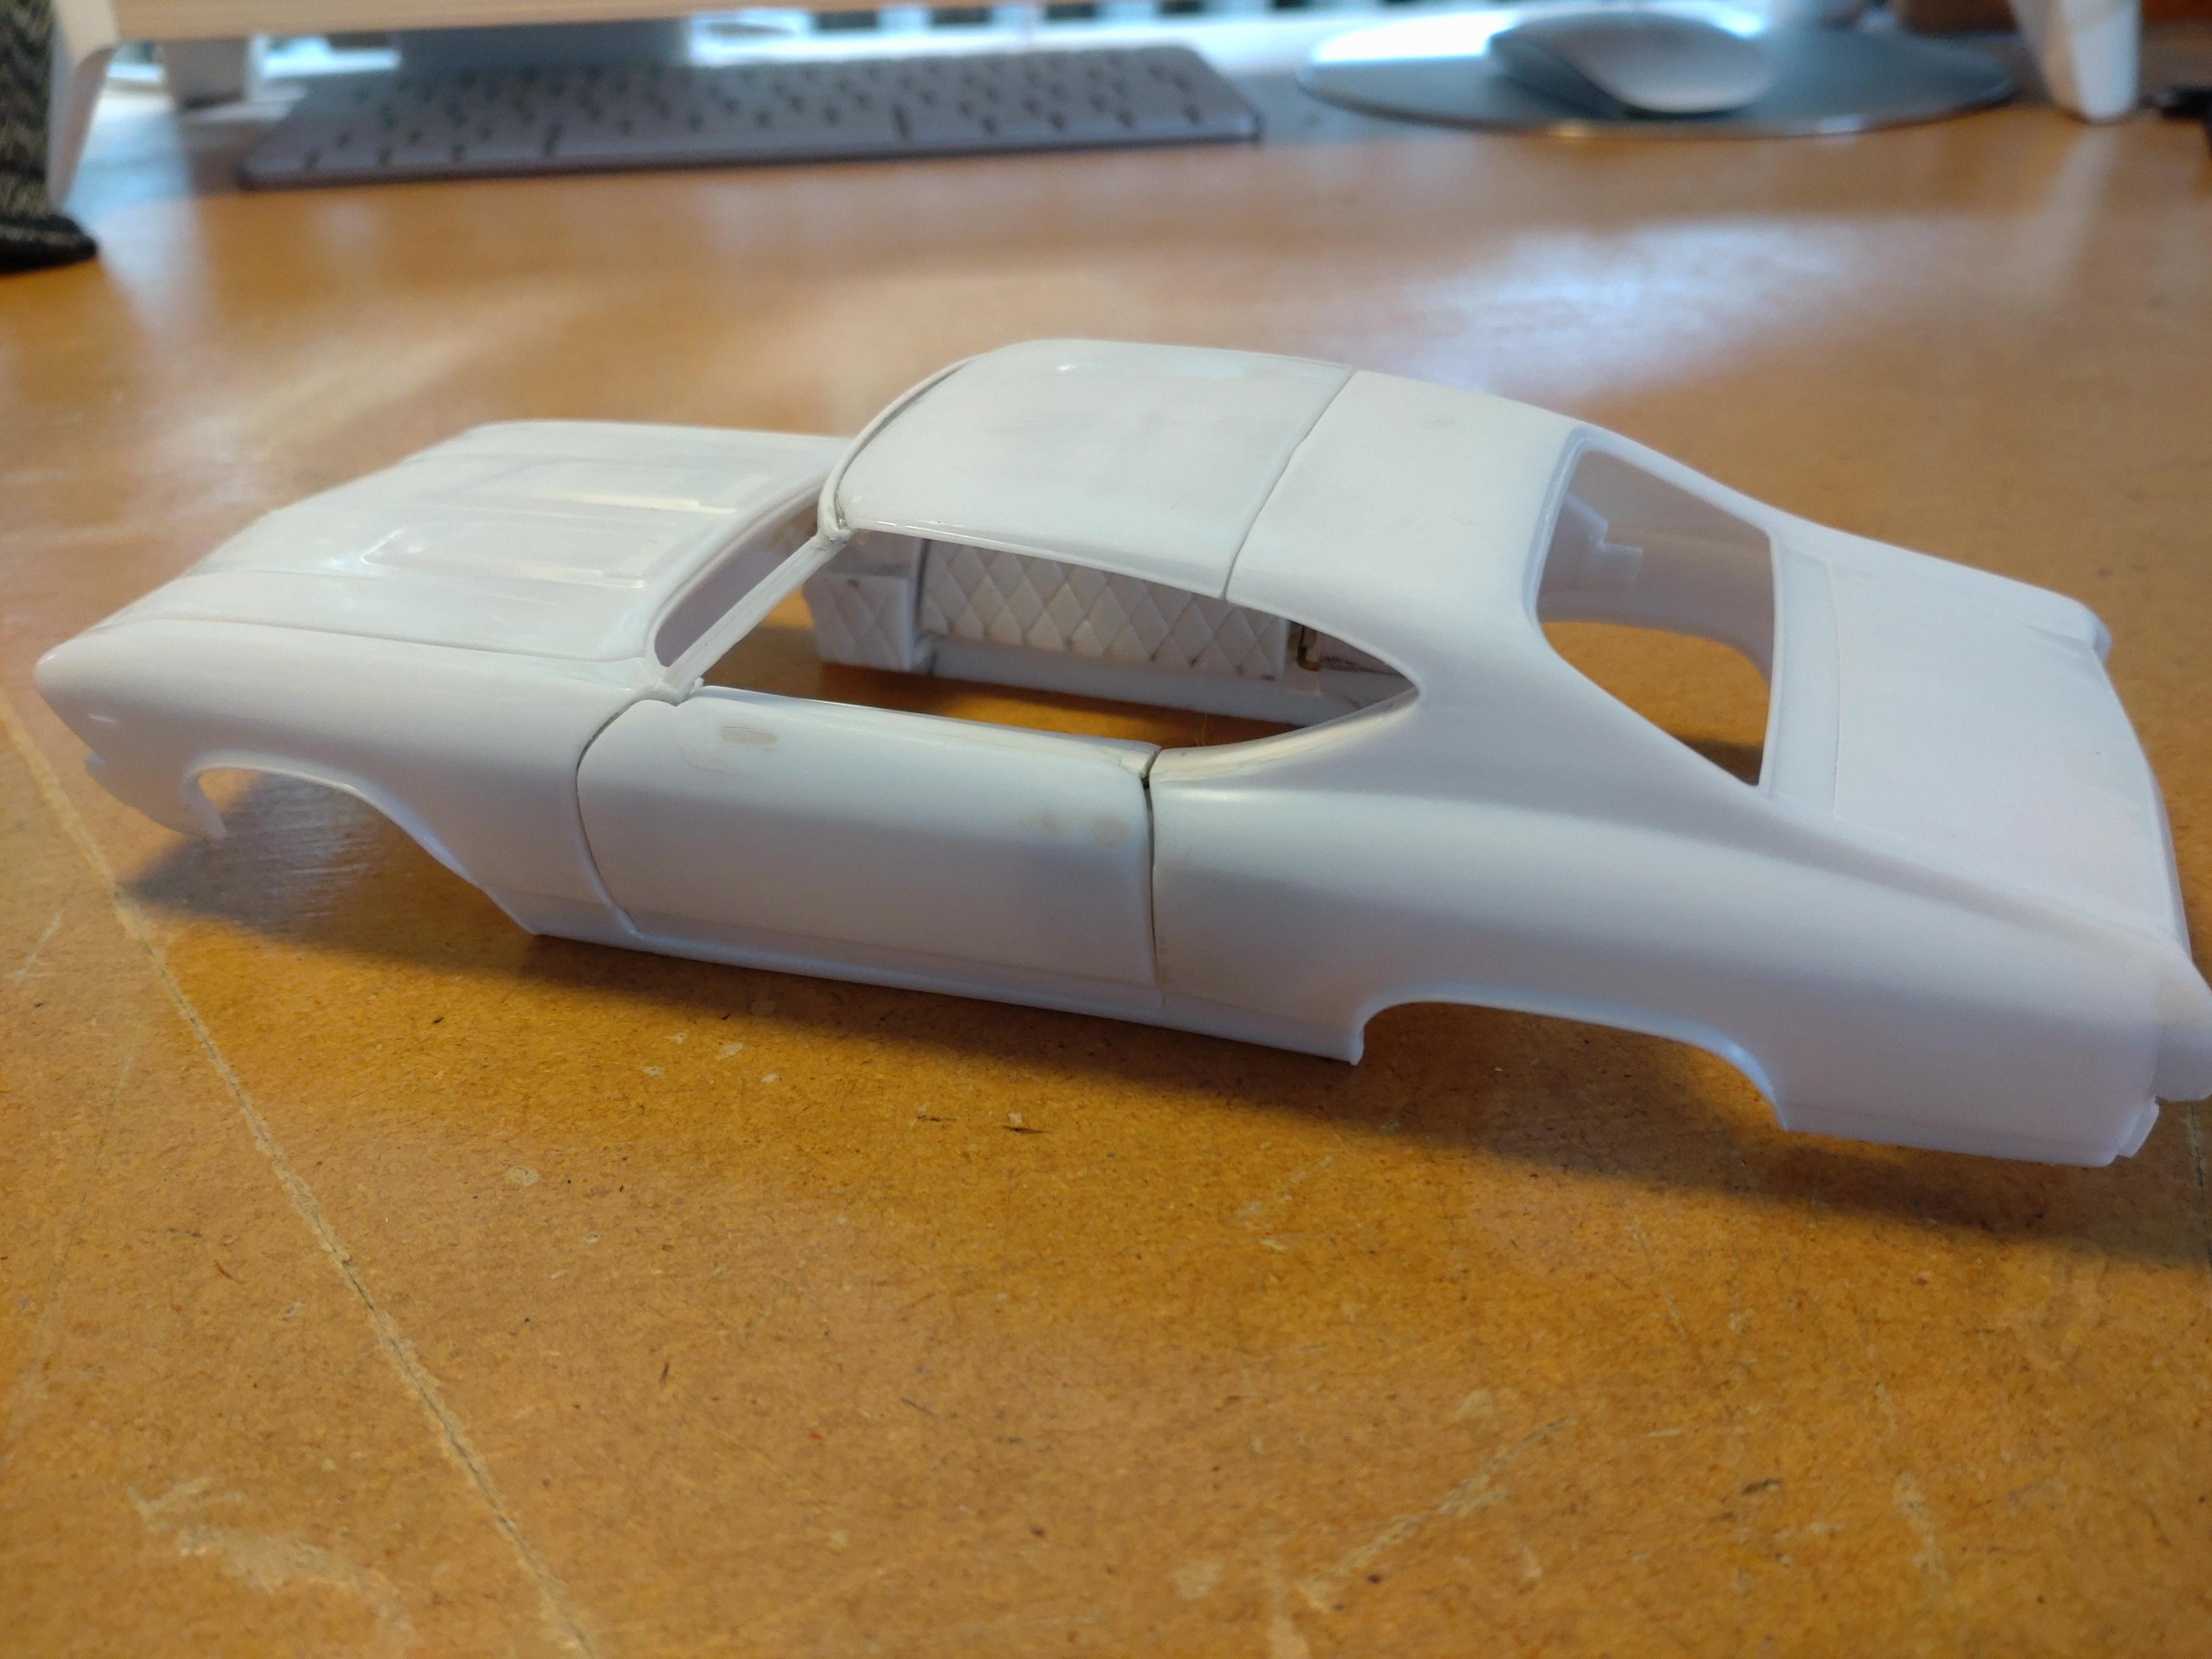
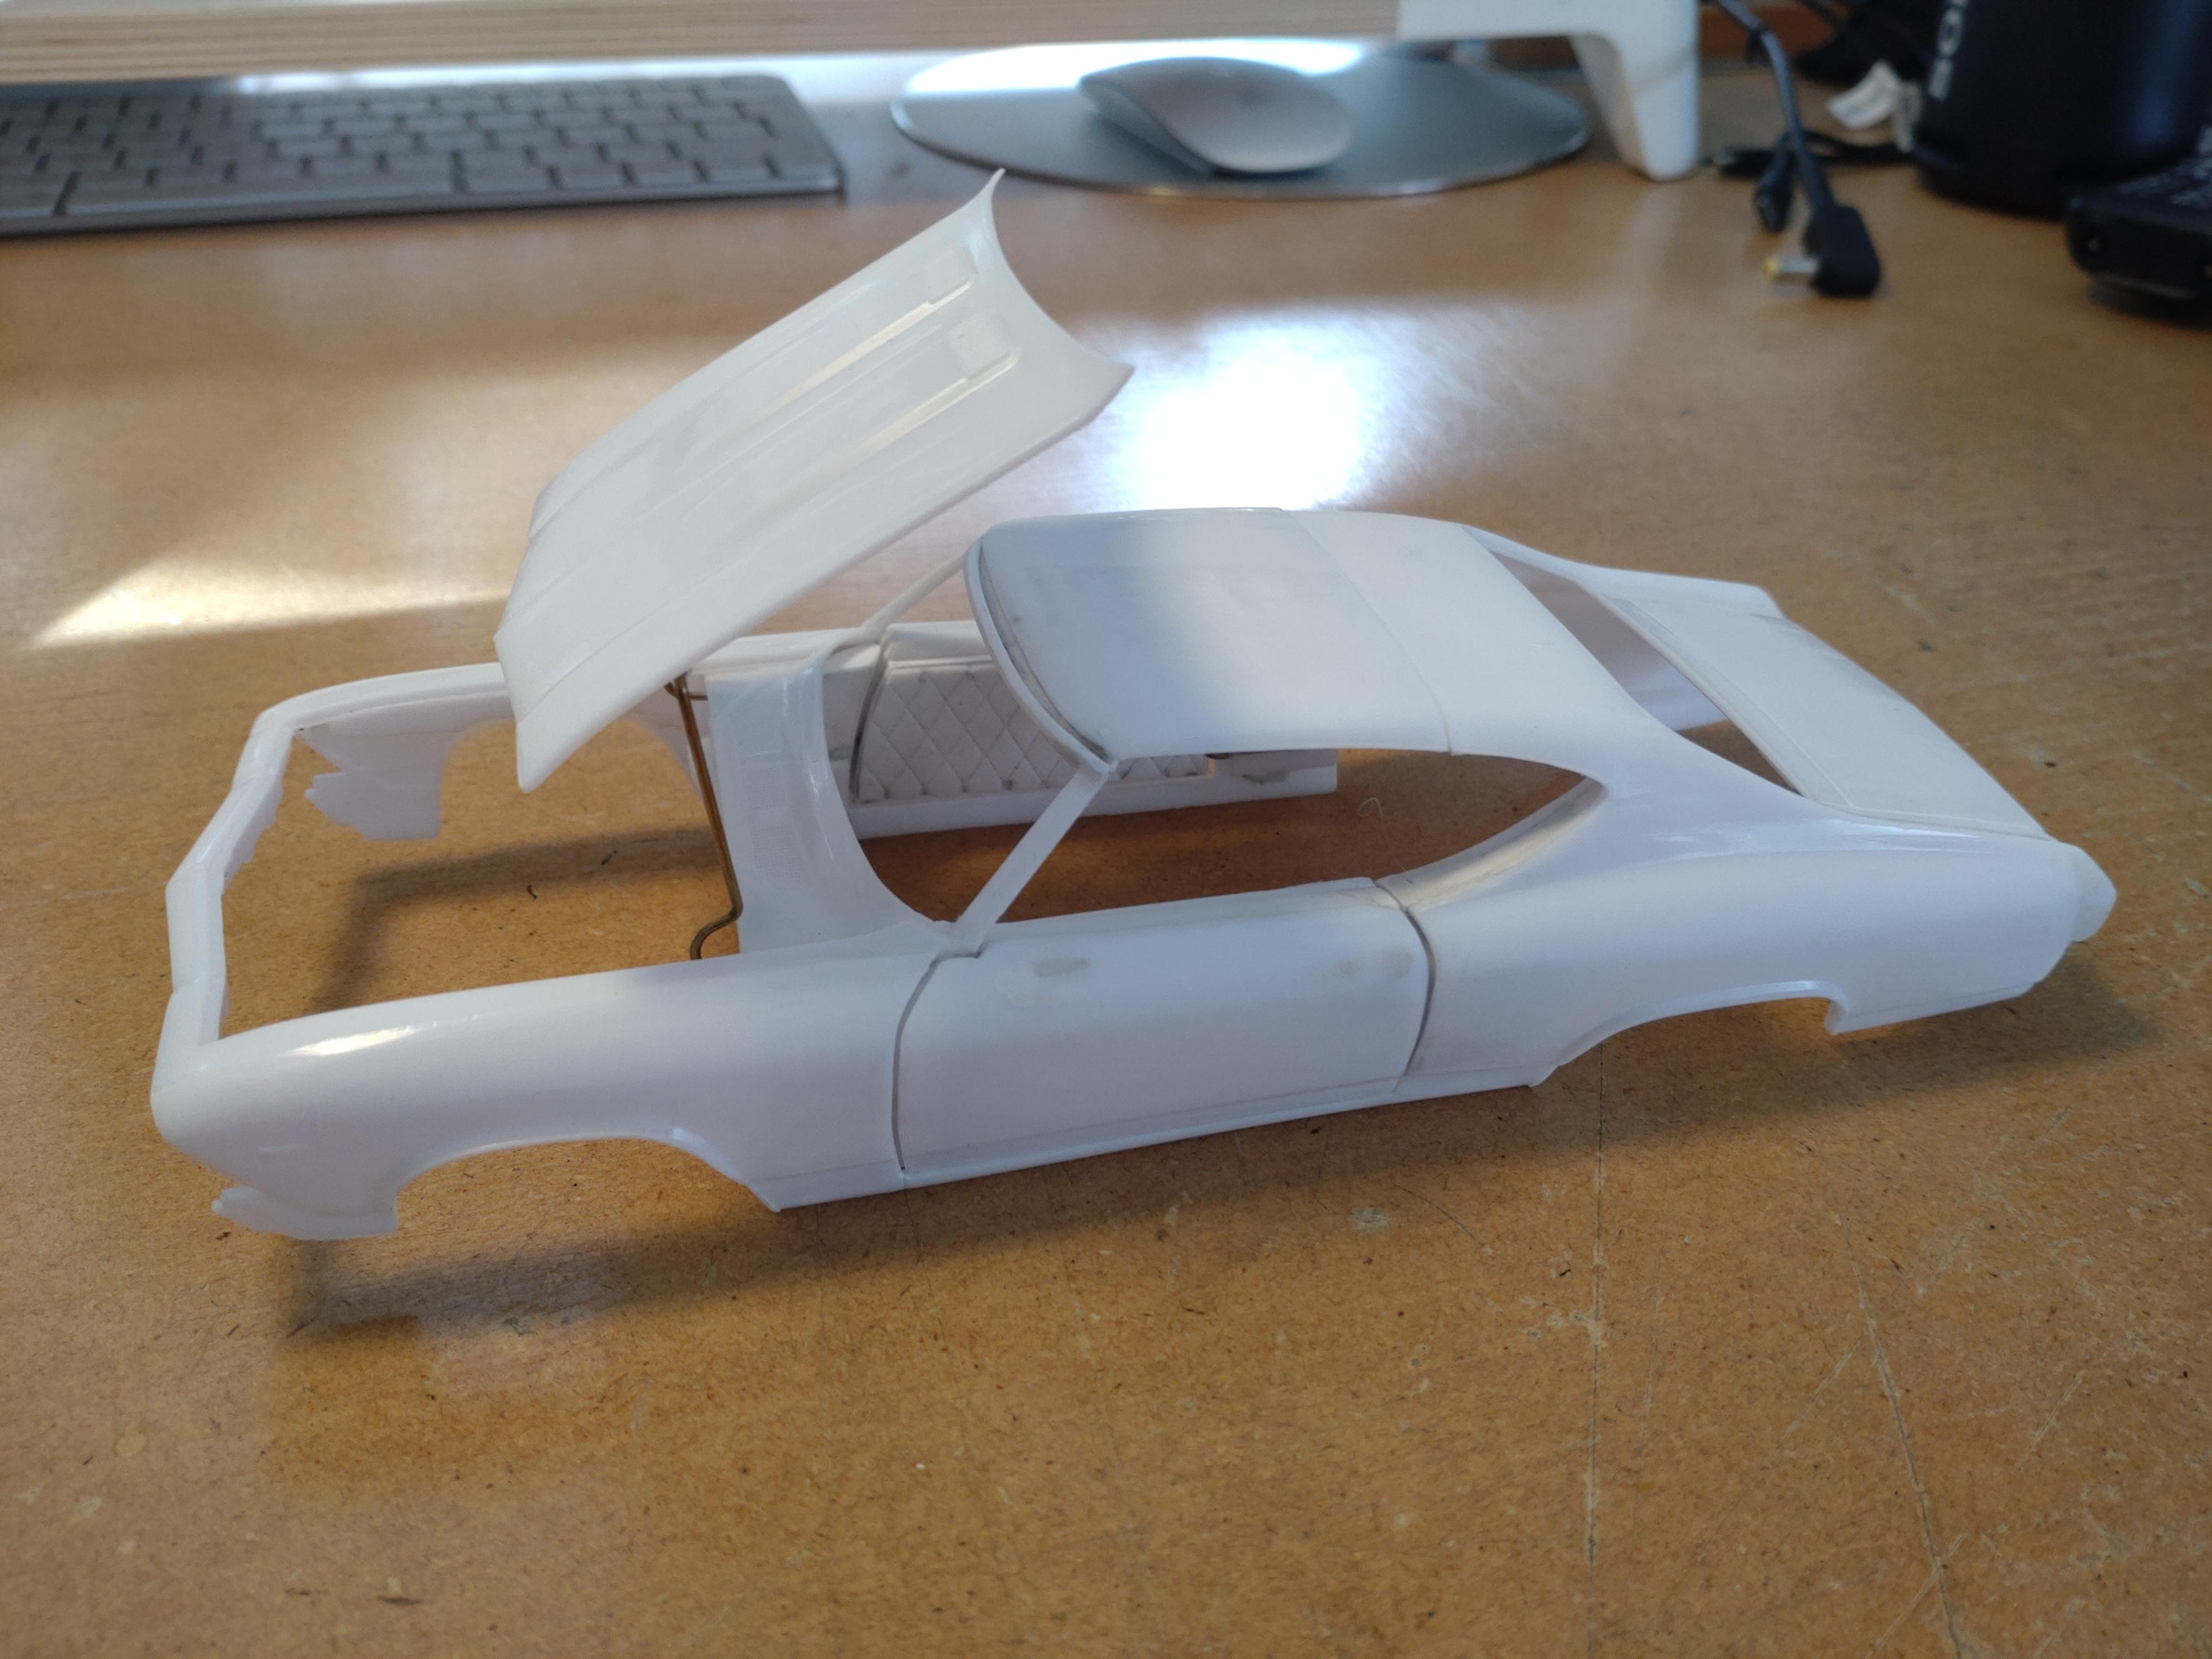
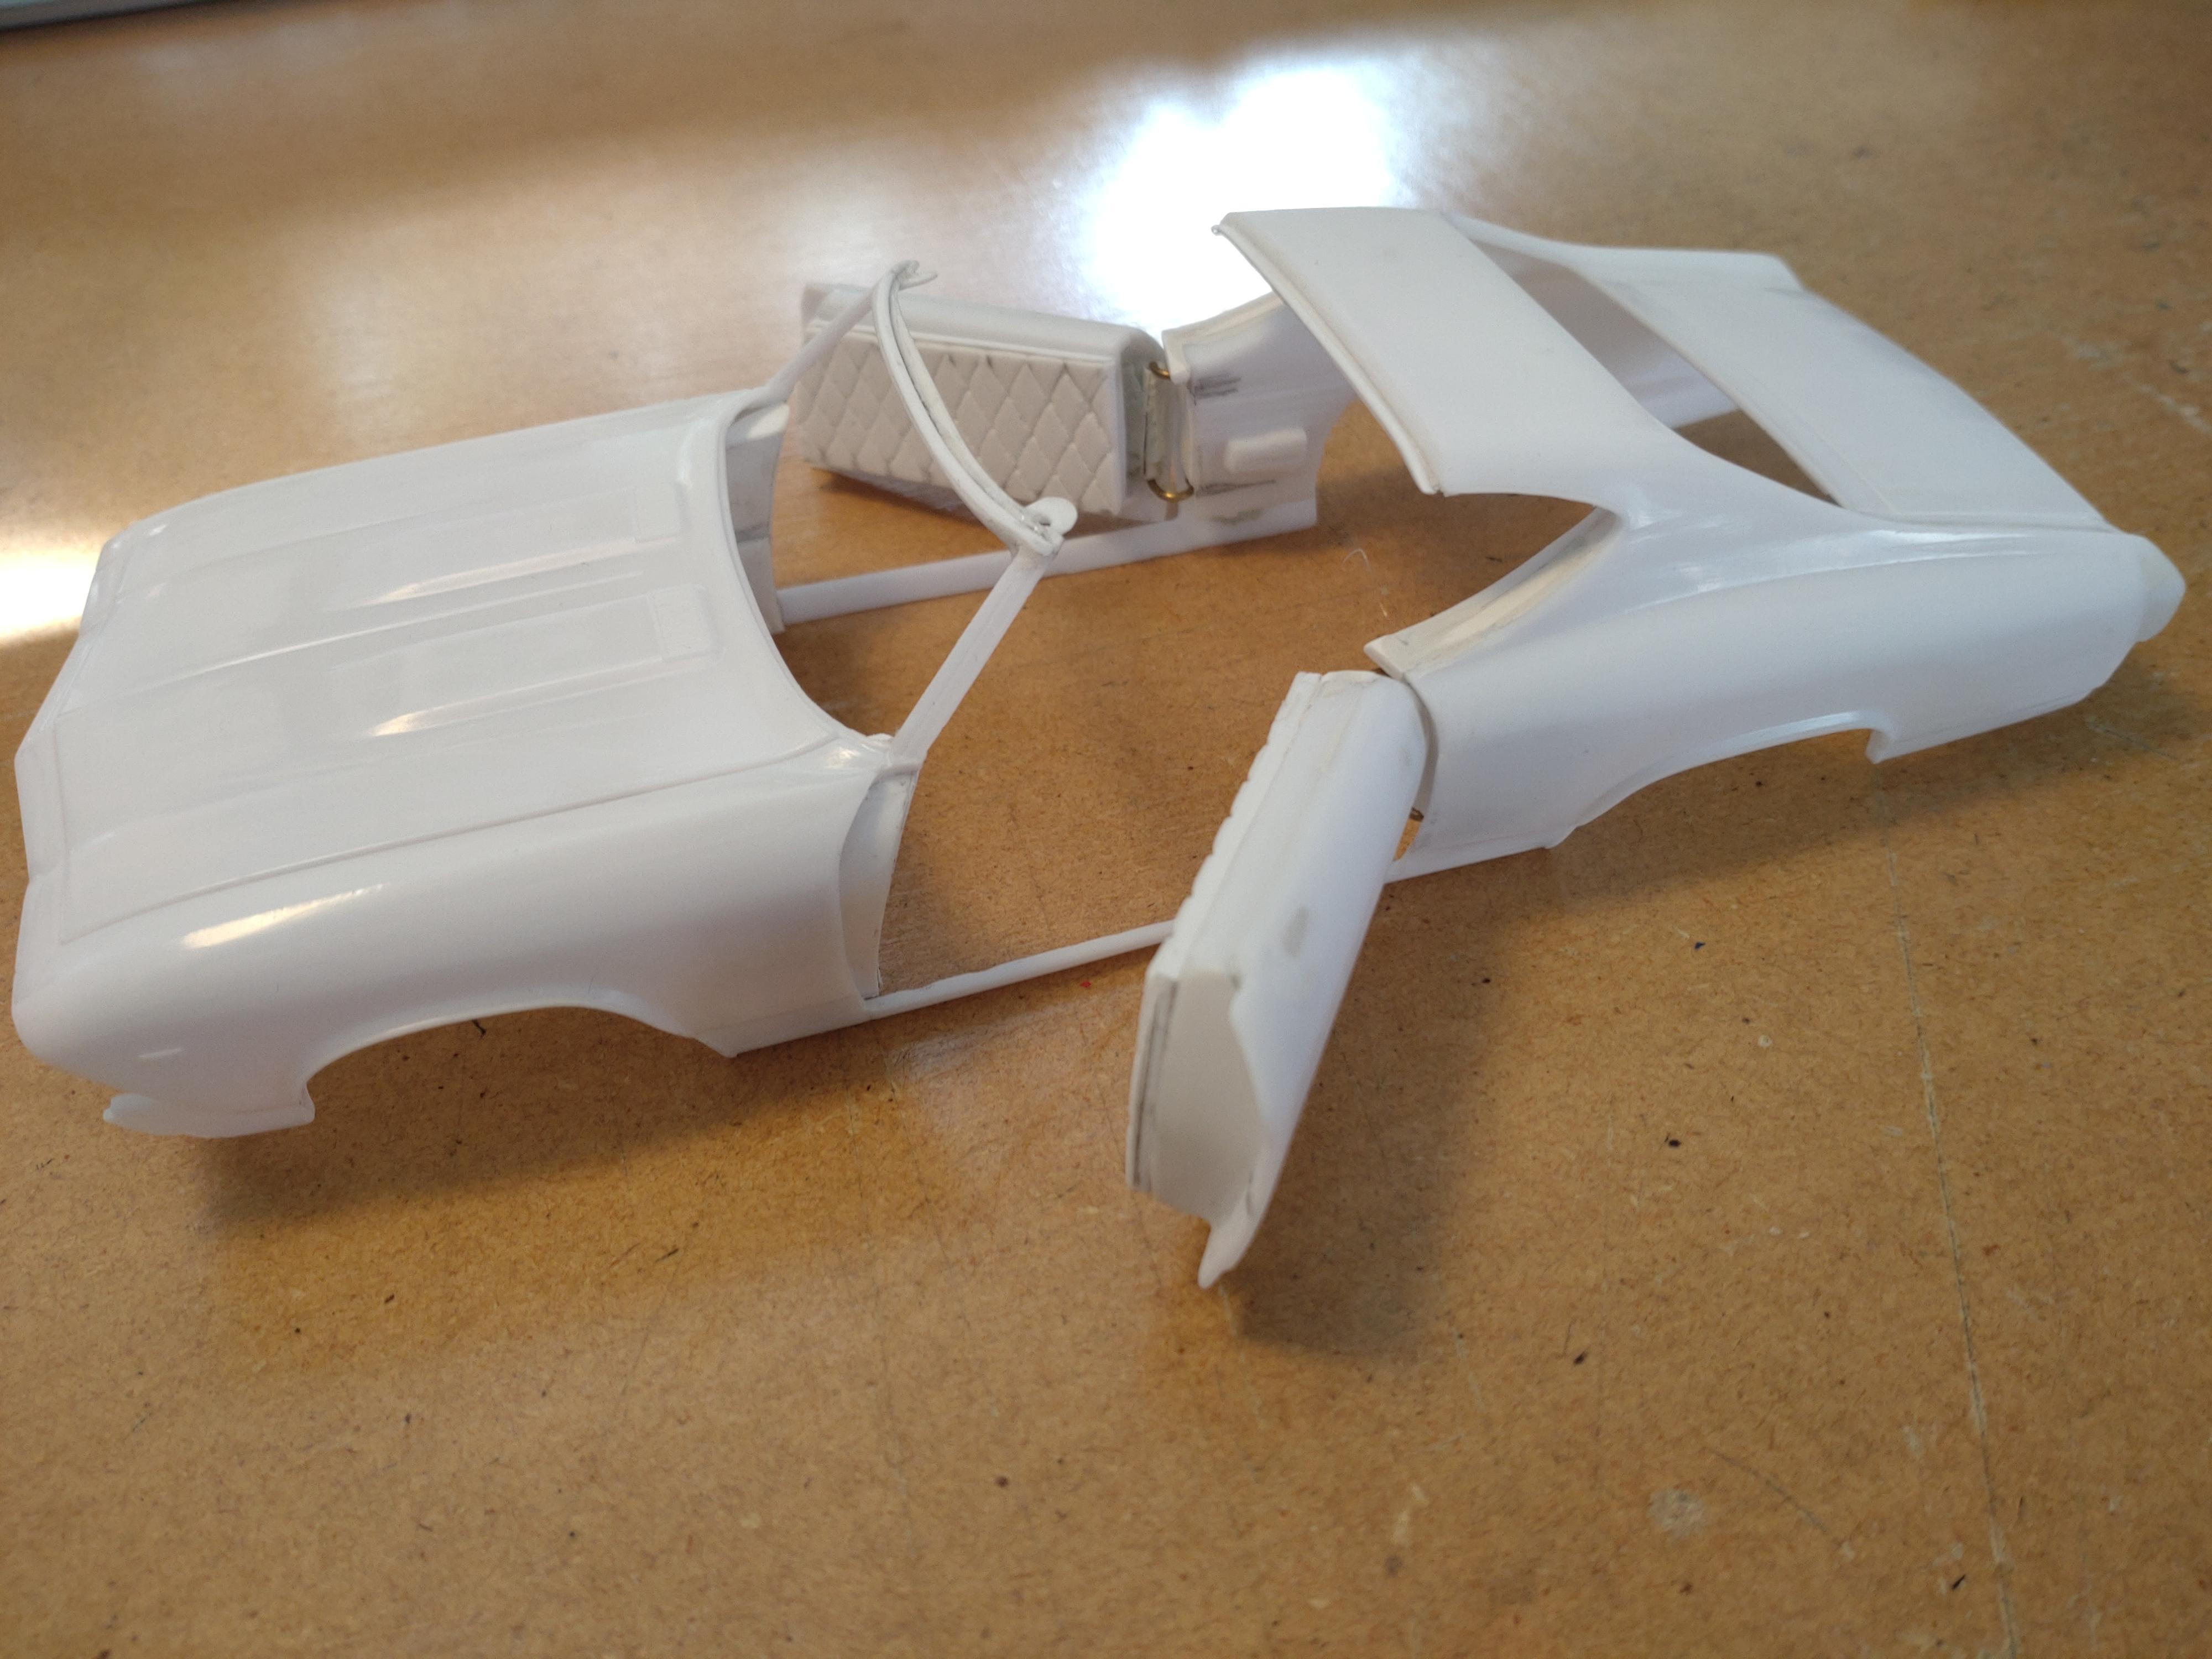
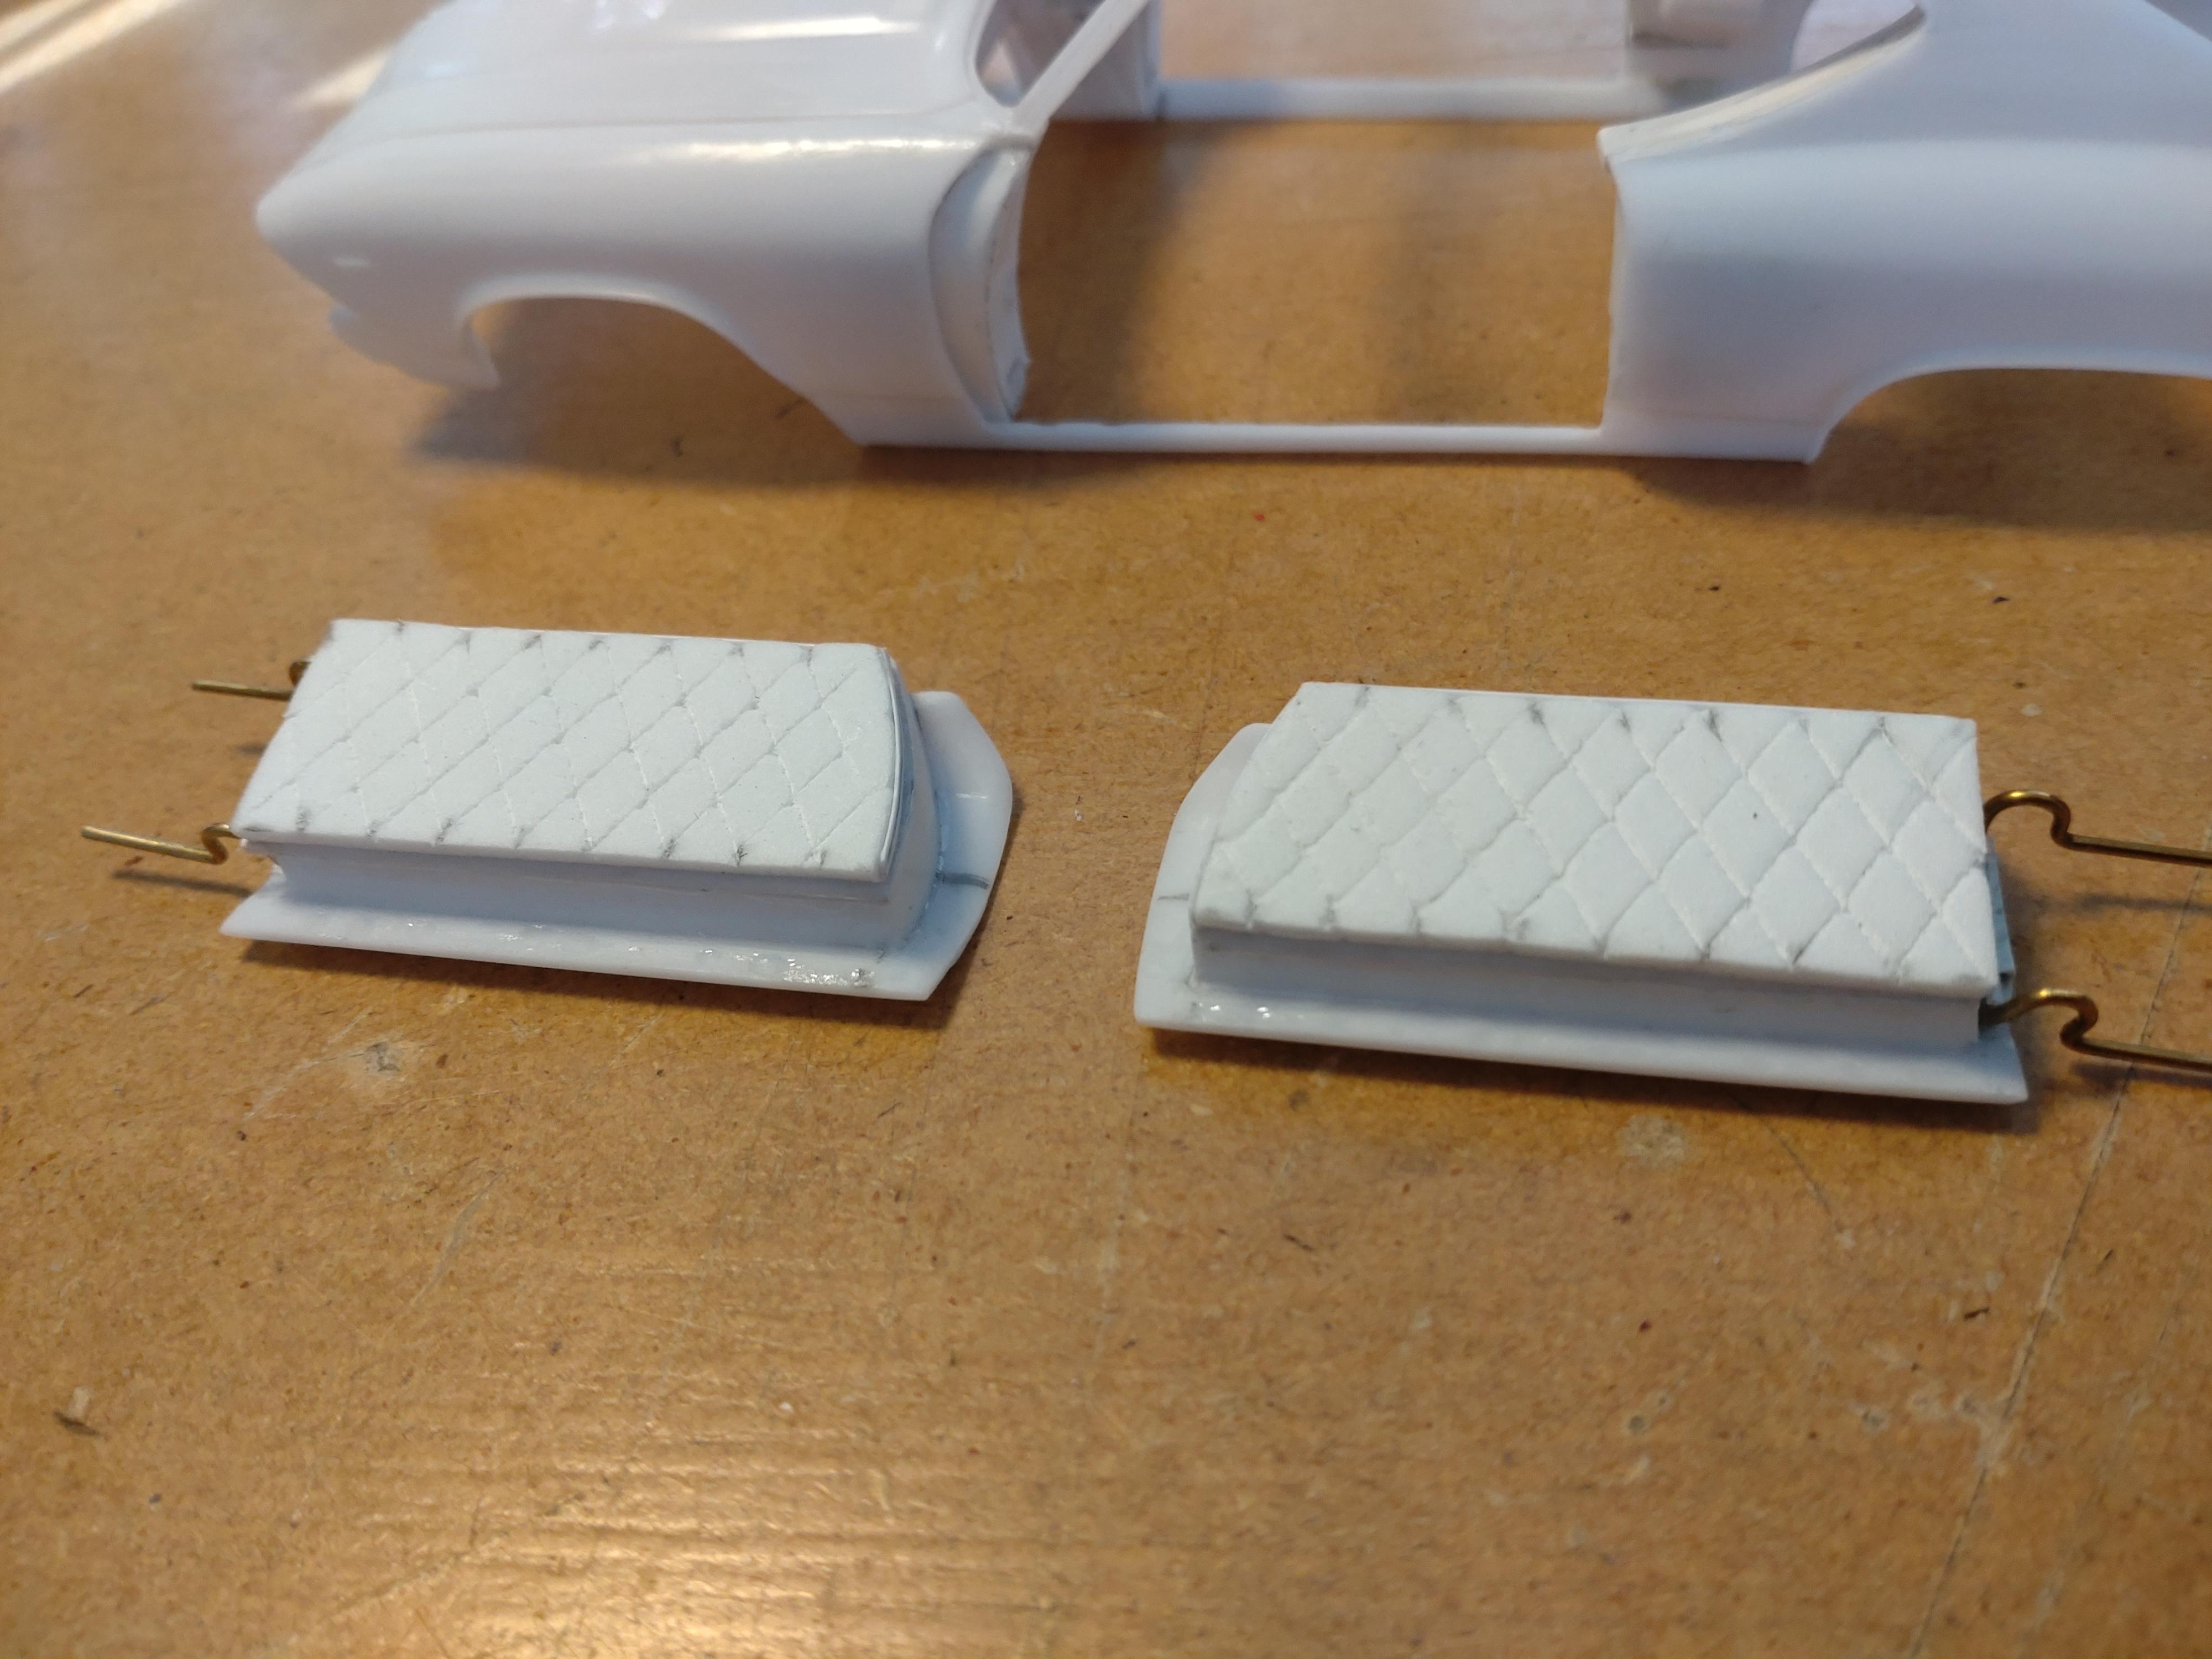
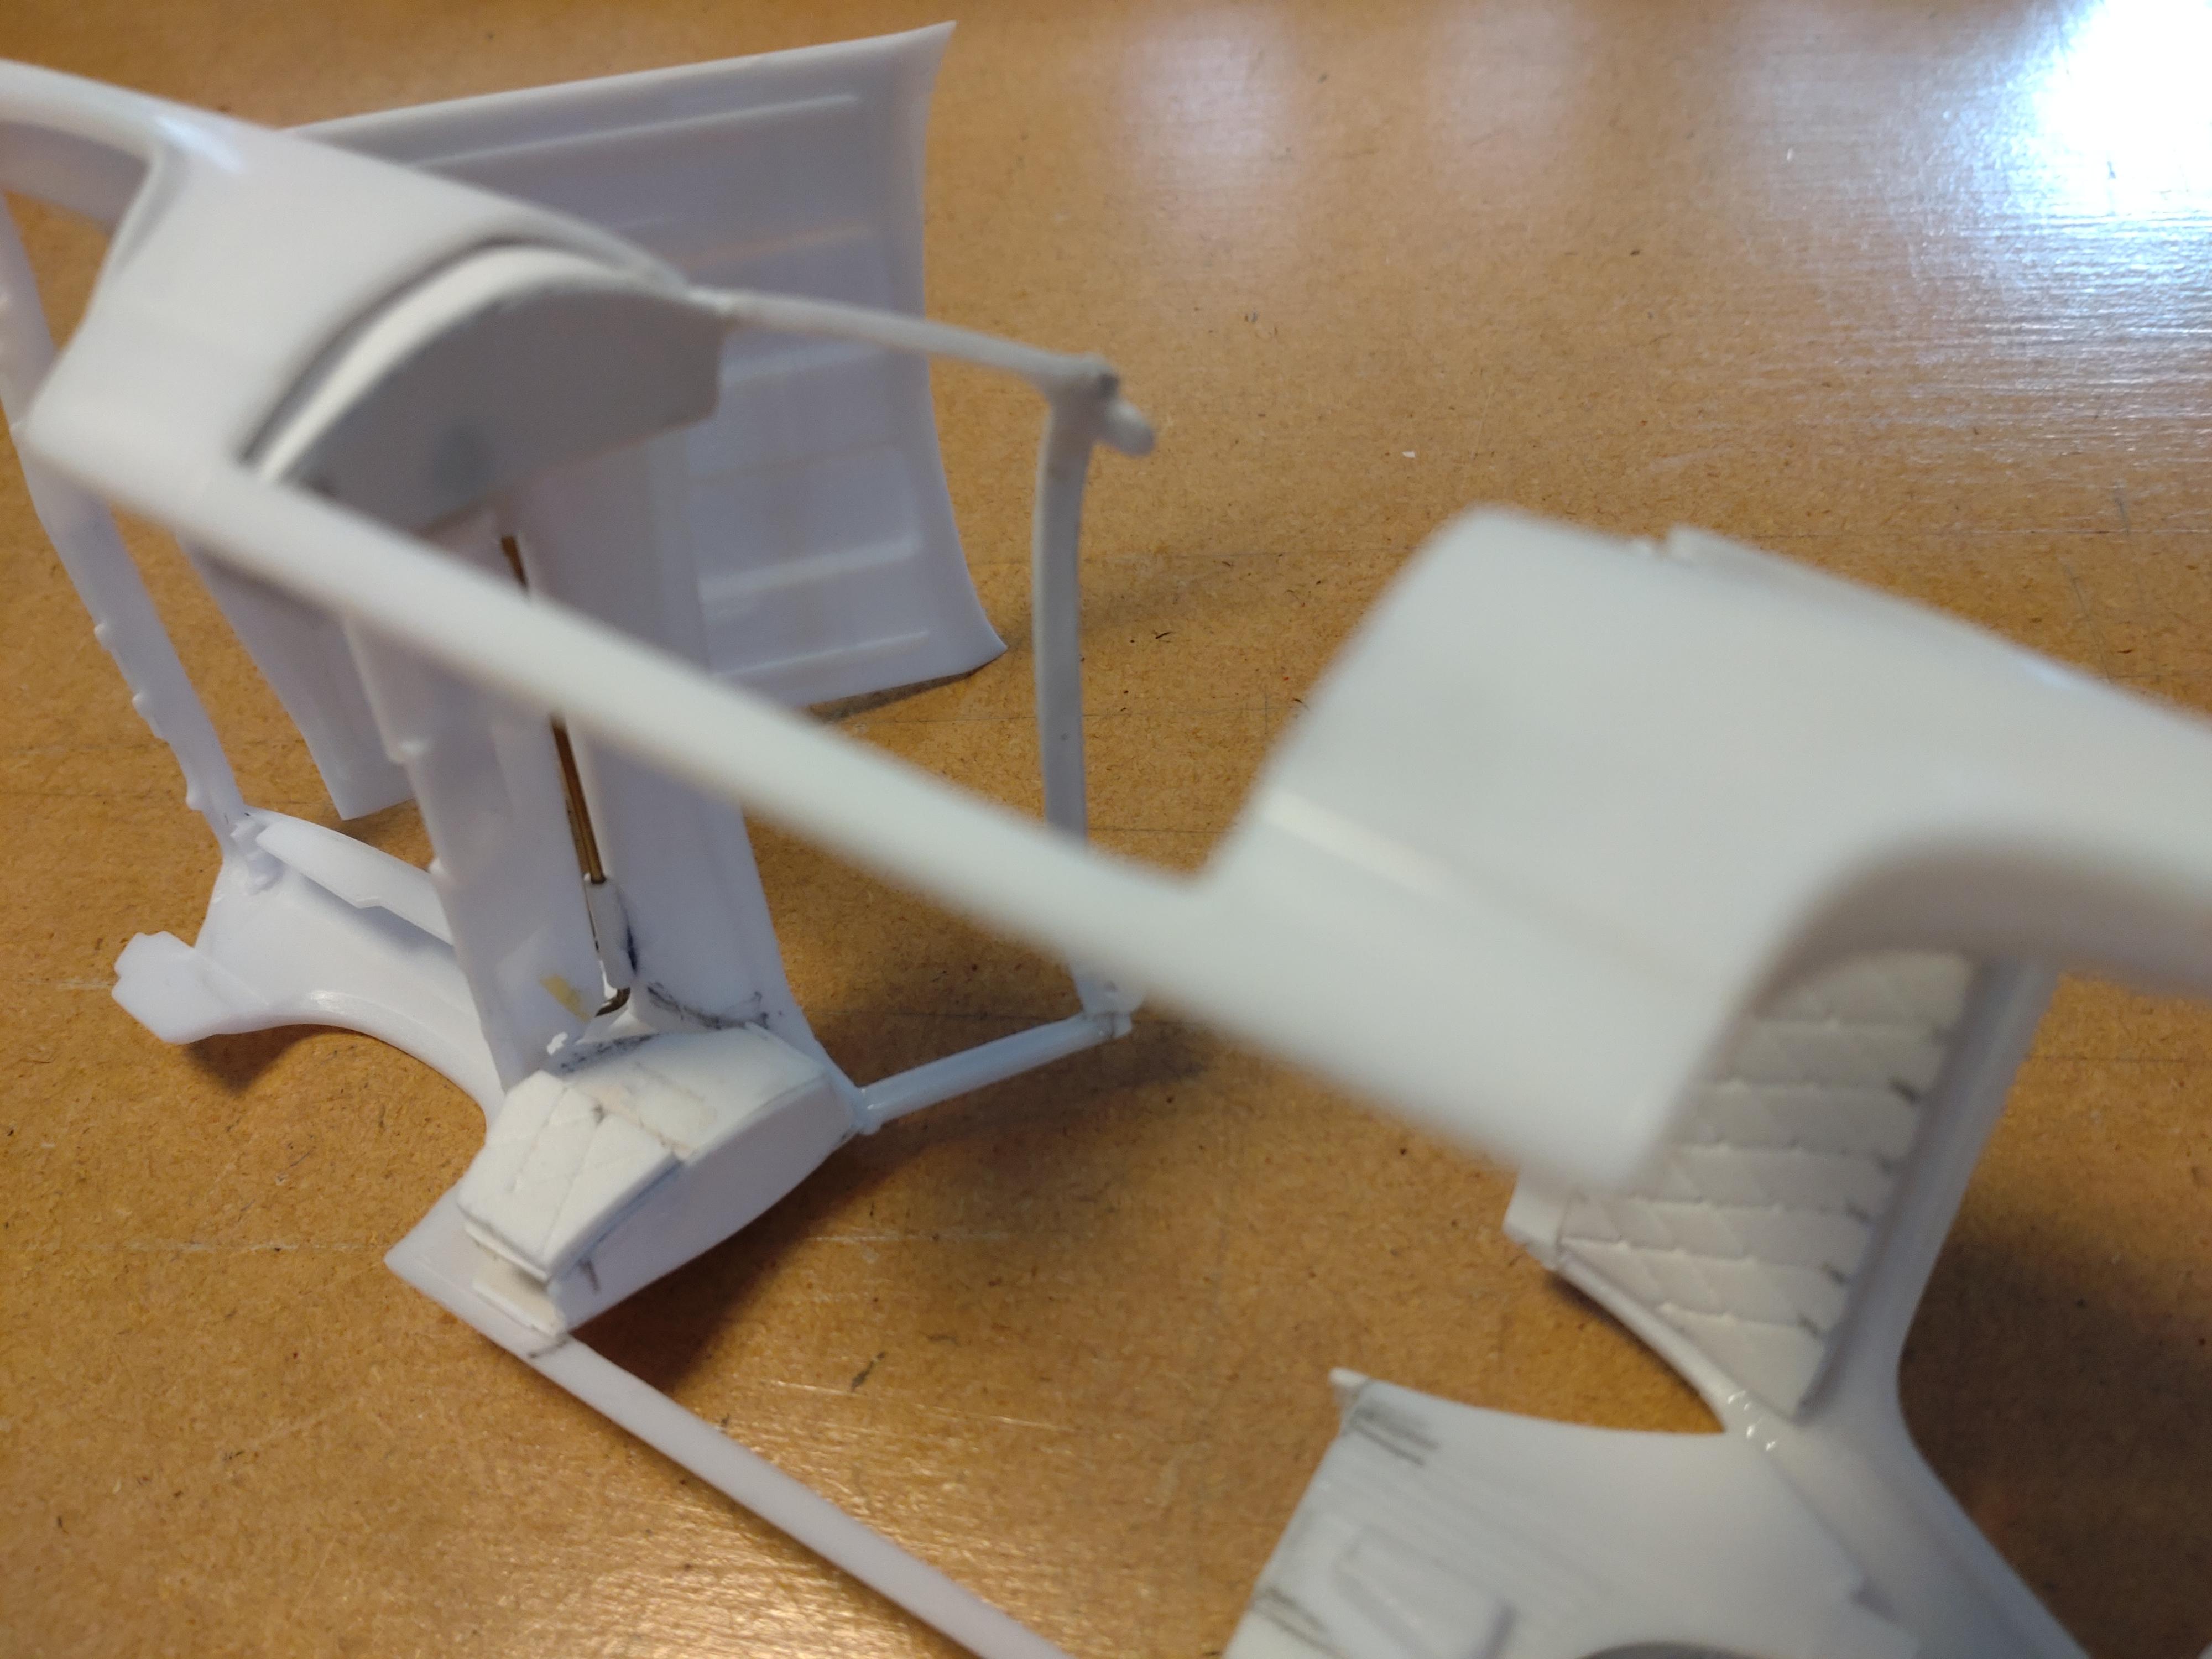
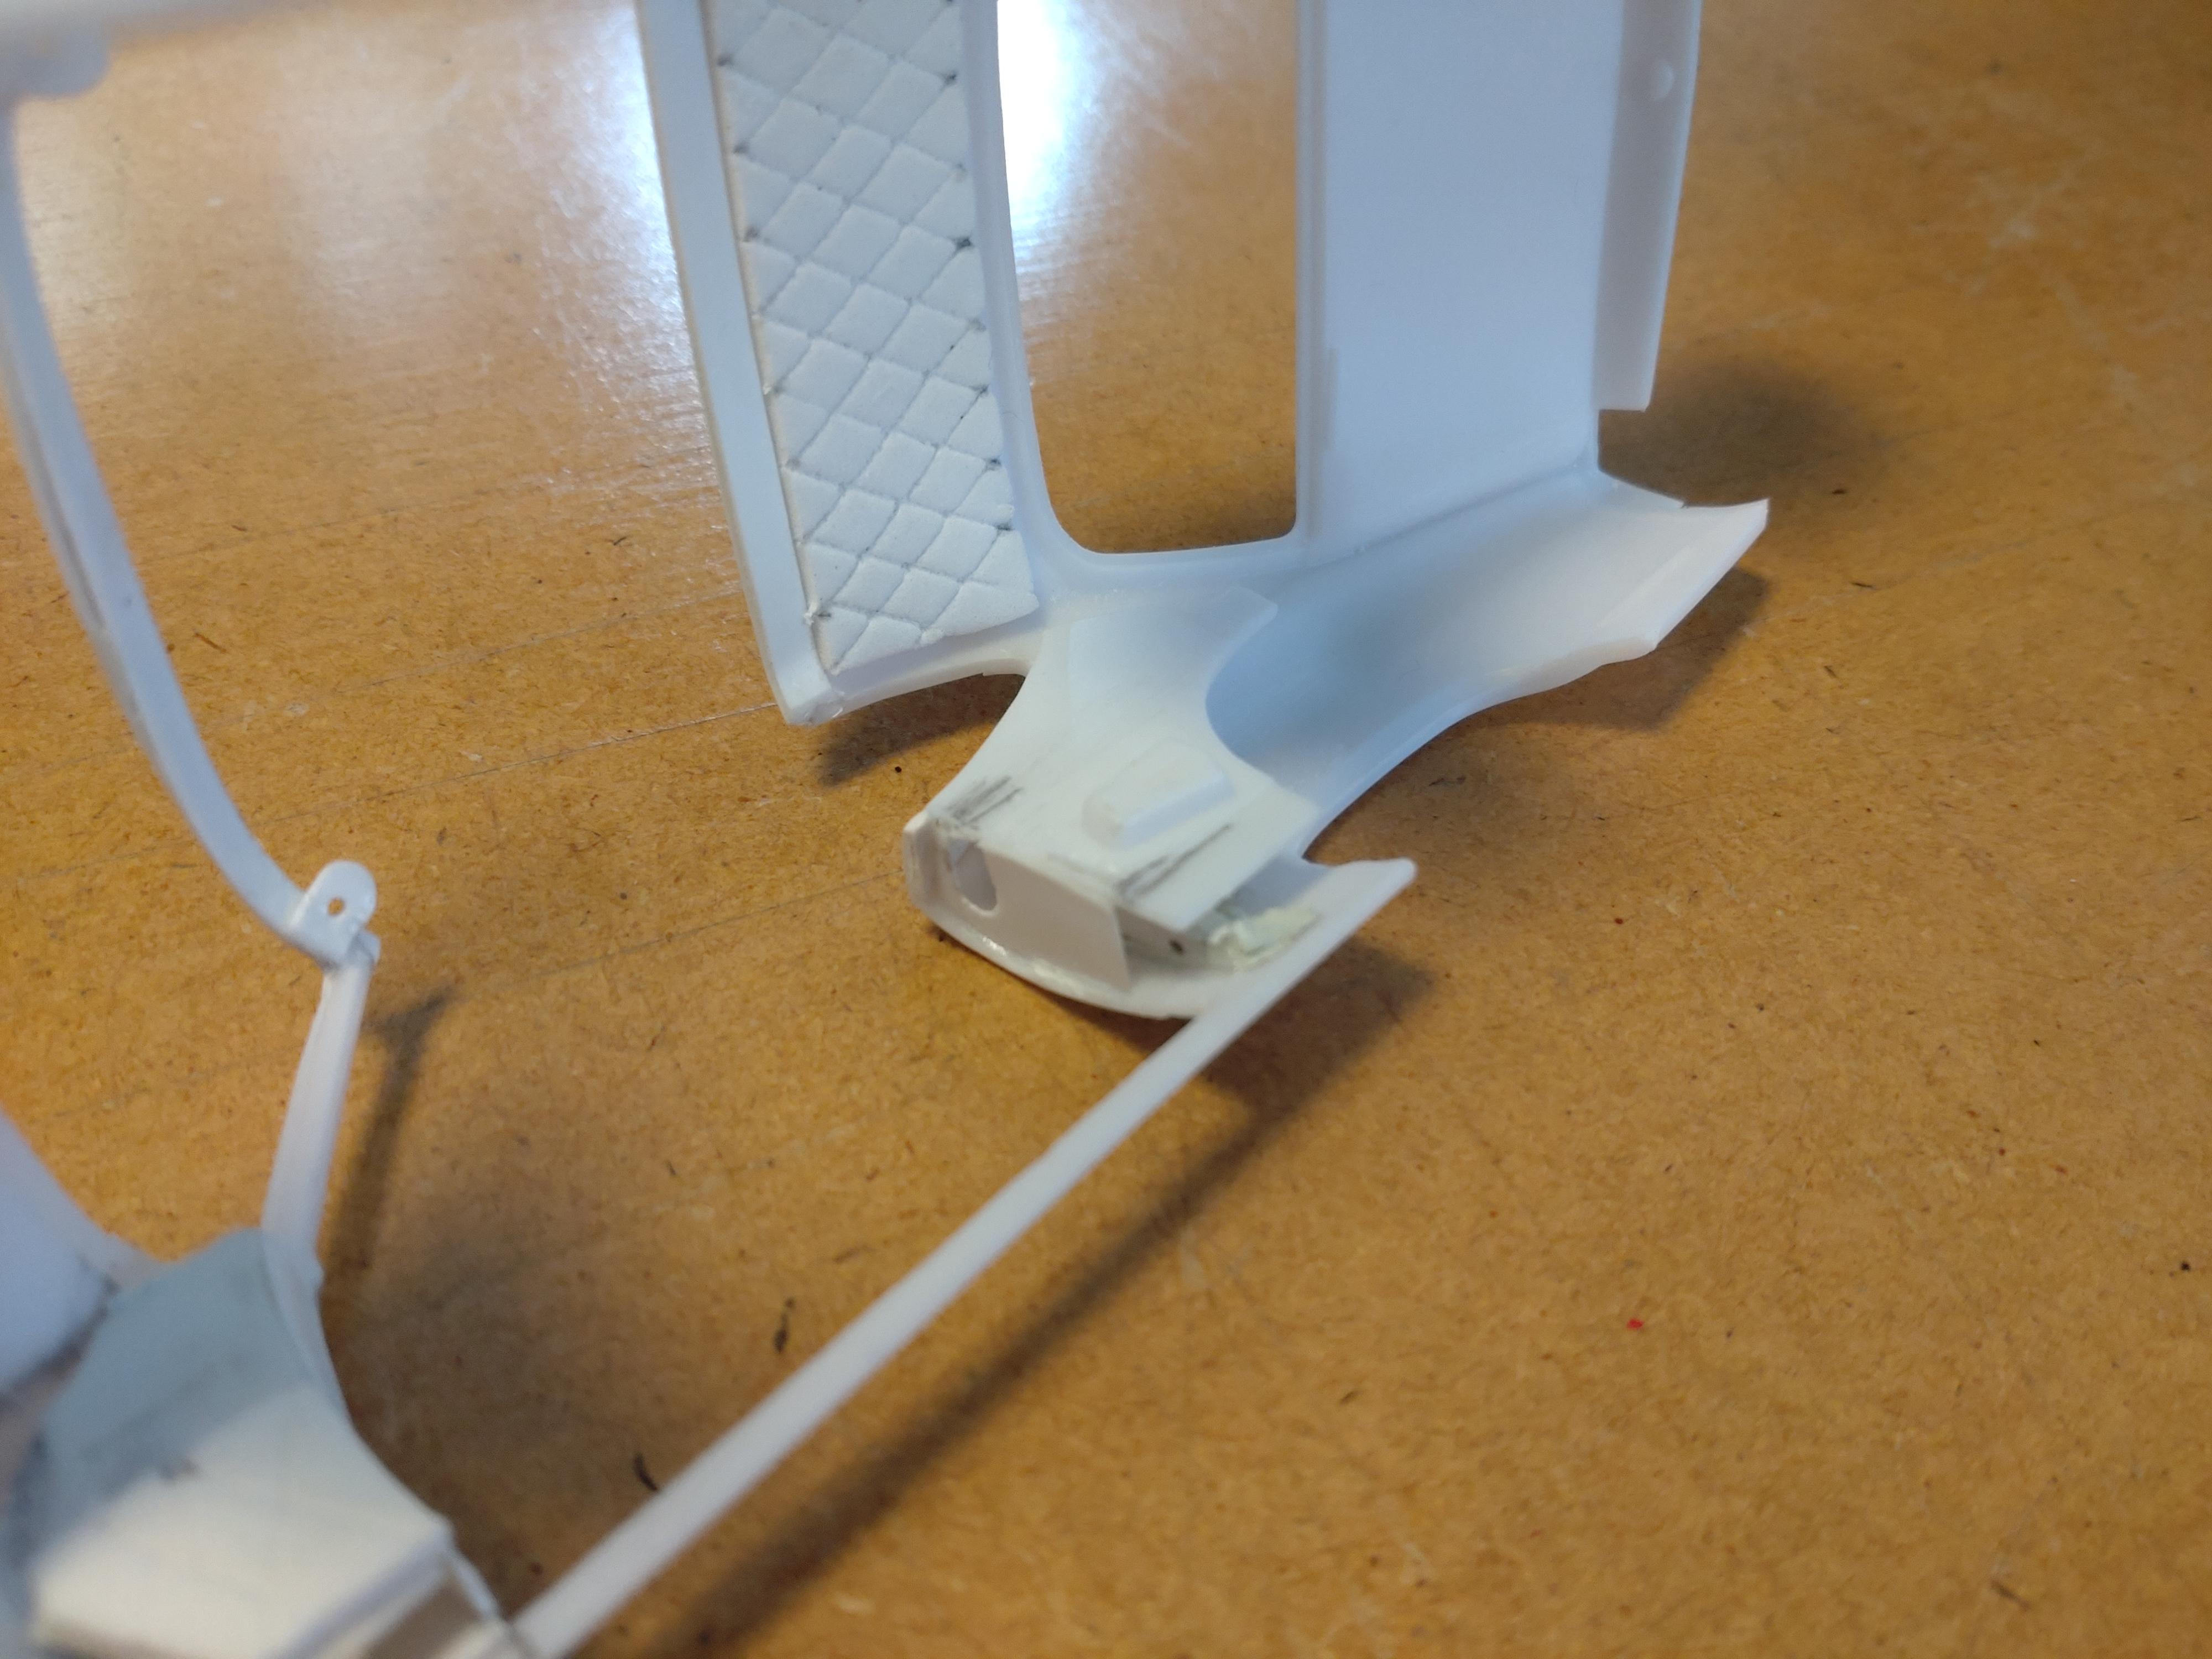
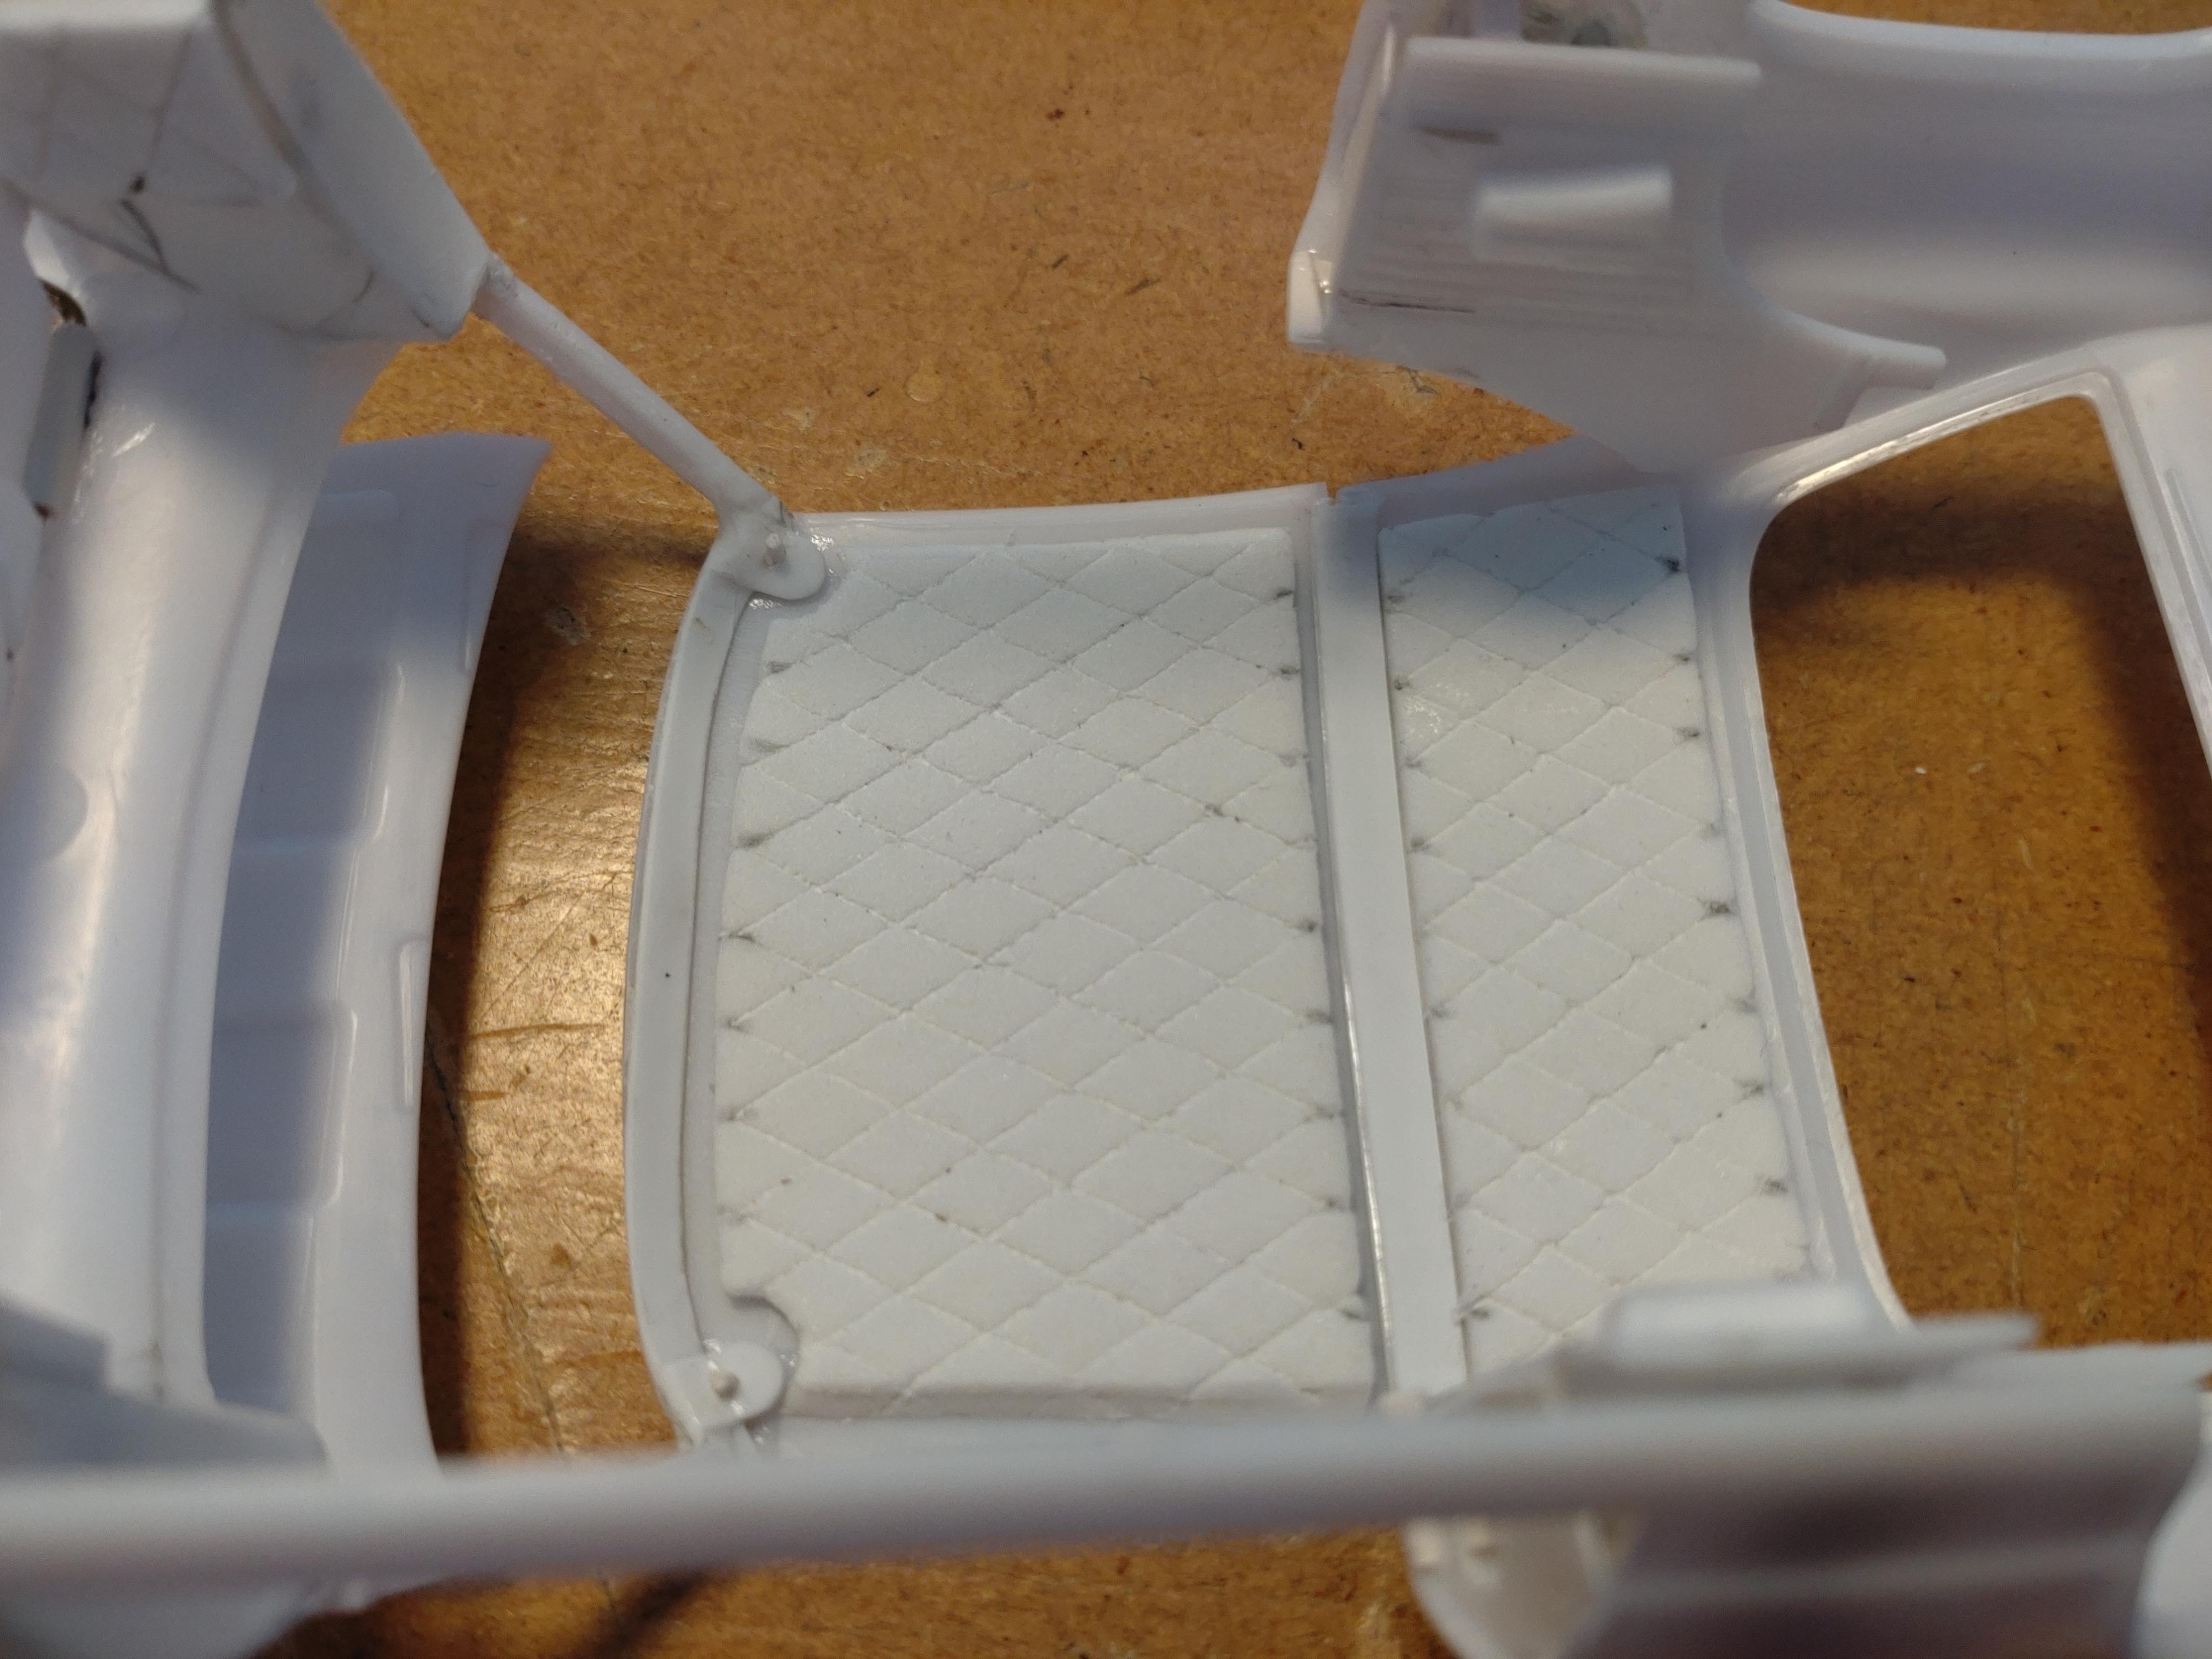
Hi everyone, after finishing my rust bucket pickup I am going into the complete different direction with this build. The ´69 Chevelle was a very popular muscle car, much power for a good price. The design was quite nice for those days. I was looking for a different approach and not go the stock build road. Willing to invest some time to get my very personal version of the Chevelle SS 396. I opened the roof and the doors and was very keen to keep the gaps as thin as possible. The roof made me sweat, because there was only about 2mm window frame left. So I had to reinforce that to keep it from breaking during the building process. The rockers on the other hand were much easier because the body is quite thick on the lower side. To keep the roof in place I added as slim rest on the remaining roof. The windshield has rests on the corners with holes for the pegs on the underside of the "targa-roof". Somewhat like those older Porsche sports cars. The doors go suicide way. They are held in place with super magnets to the panels under the dashboard. It was some effort building these to make them match the door panels. And of course getting the magnets in the right place (and direction...). Now the door stop has a nice curve with the A-pillar. The panels for the back bench had to accommodate the base for the door hinges and ended up fatter than usual. So, the rear bench needed some cutting to fit. Same as the dashboard, which is already prepared. The doors, the headliner and the bench are covered with 2mm foam rubber. For the doors I added thin frames to make the edges cleaner. To make the fabric structure look like soft padding I pressed the lines with the back side of a cutter blade. Now I can finally start with the paint work. Building a model this way means working on different levels and parts at the same time. Always thinking 3 steps ahead. PLUS: I´m thinking about adding lighting to this baby. It´s going to be SHOWTIME! But (humbly...) still a long way to go😉😄 Thanks for watching!
- 25 replies
-
- 17
-

-

-

71 Mercury Comet GT Boss 351 Prototype
Andy Oldenburg replied to satterwhite78's topic in Model Cars
Hi Chuck, well done, how you got the "naked" resin body completed with salvaged parts. Looks hot! -
Hi Scott, cool and creative idea! I know how one feels after a build with chopping involved turns out fine. Engine bay looks great!
-
Hi Kevin, what a surprise! Great idea and a fine execution!
-
Hi Eran, very well done! Clean build! Would have loved to see more details, your steering wheel suggests that you invested some time on the interior.
-
‘96 Impala SS Pro Street, Bostic Tribute
Andy Oldenburg replied to Mattilacken's topic in Model Cars
Hi Anton, great build! I love your detailing on the interior and of course the engine. Nice to hear that you finally got this Impala finished. Must feel great! -
Hello Toni, David, James, Jon and Michael, and the everyone that sent me likes, thank you so much for your kind response! I really appreciate that🙏. Yes, this build did take it´s hours, but I loved every minute of them.
-
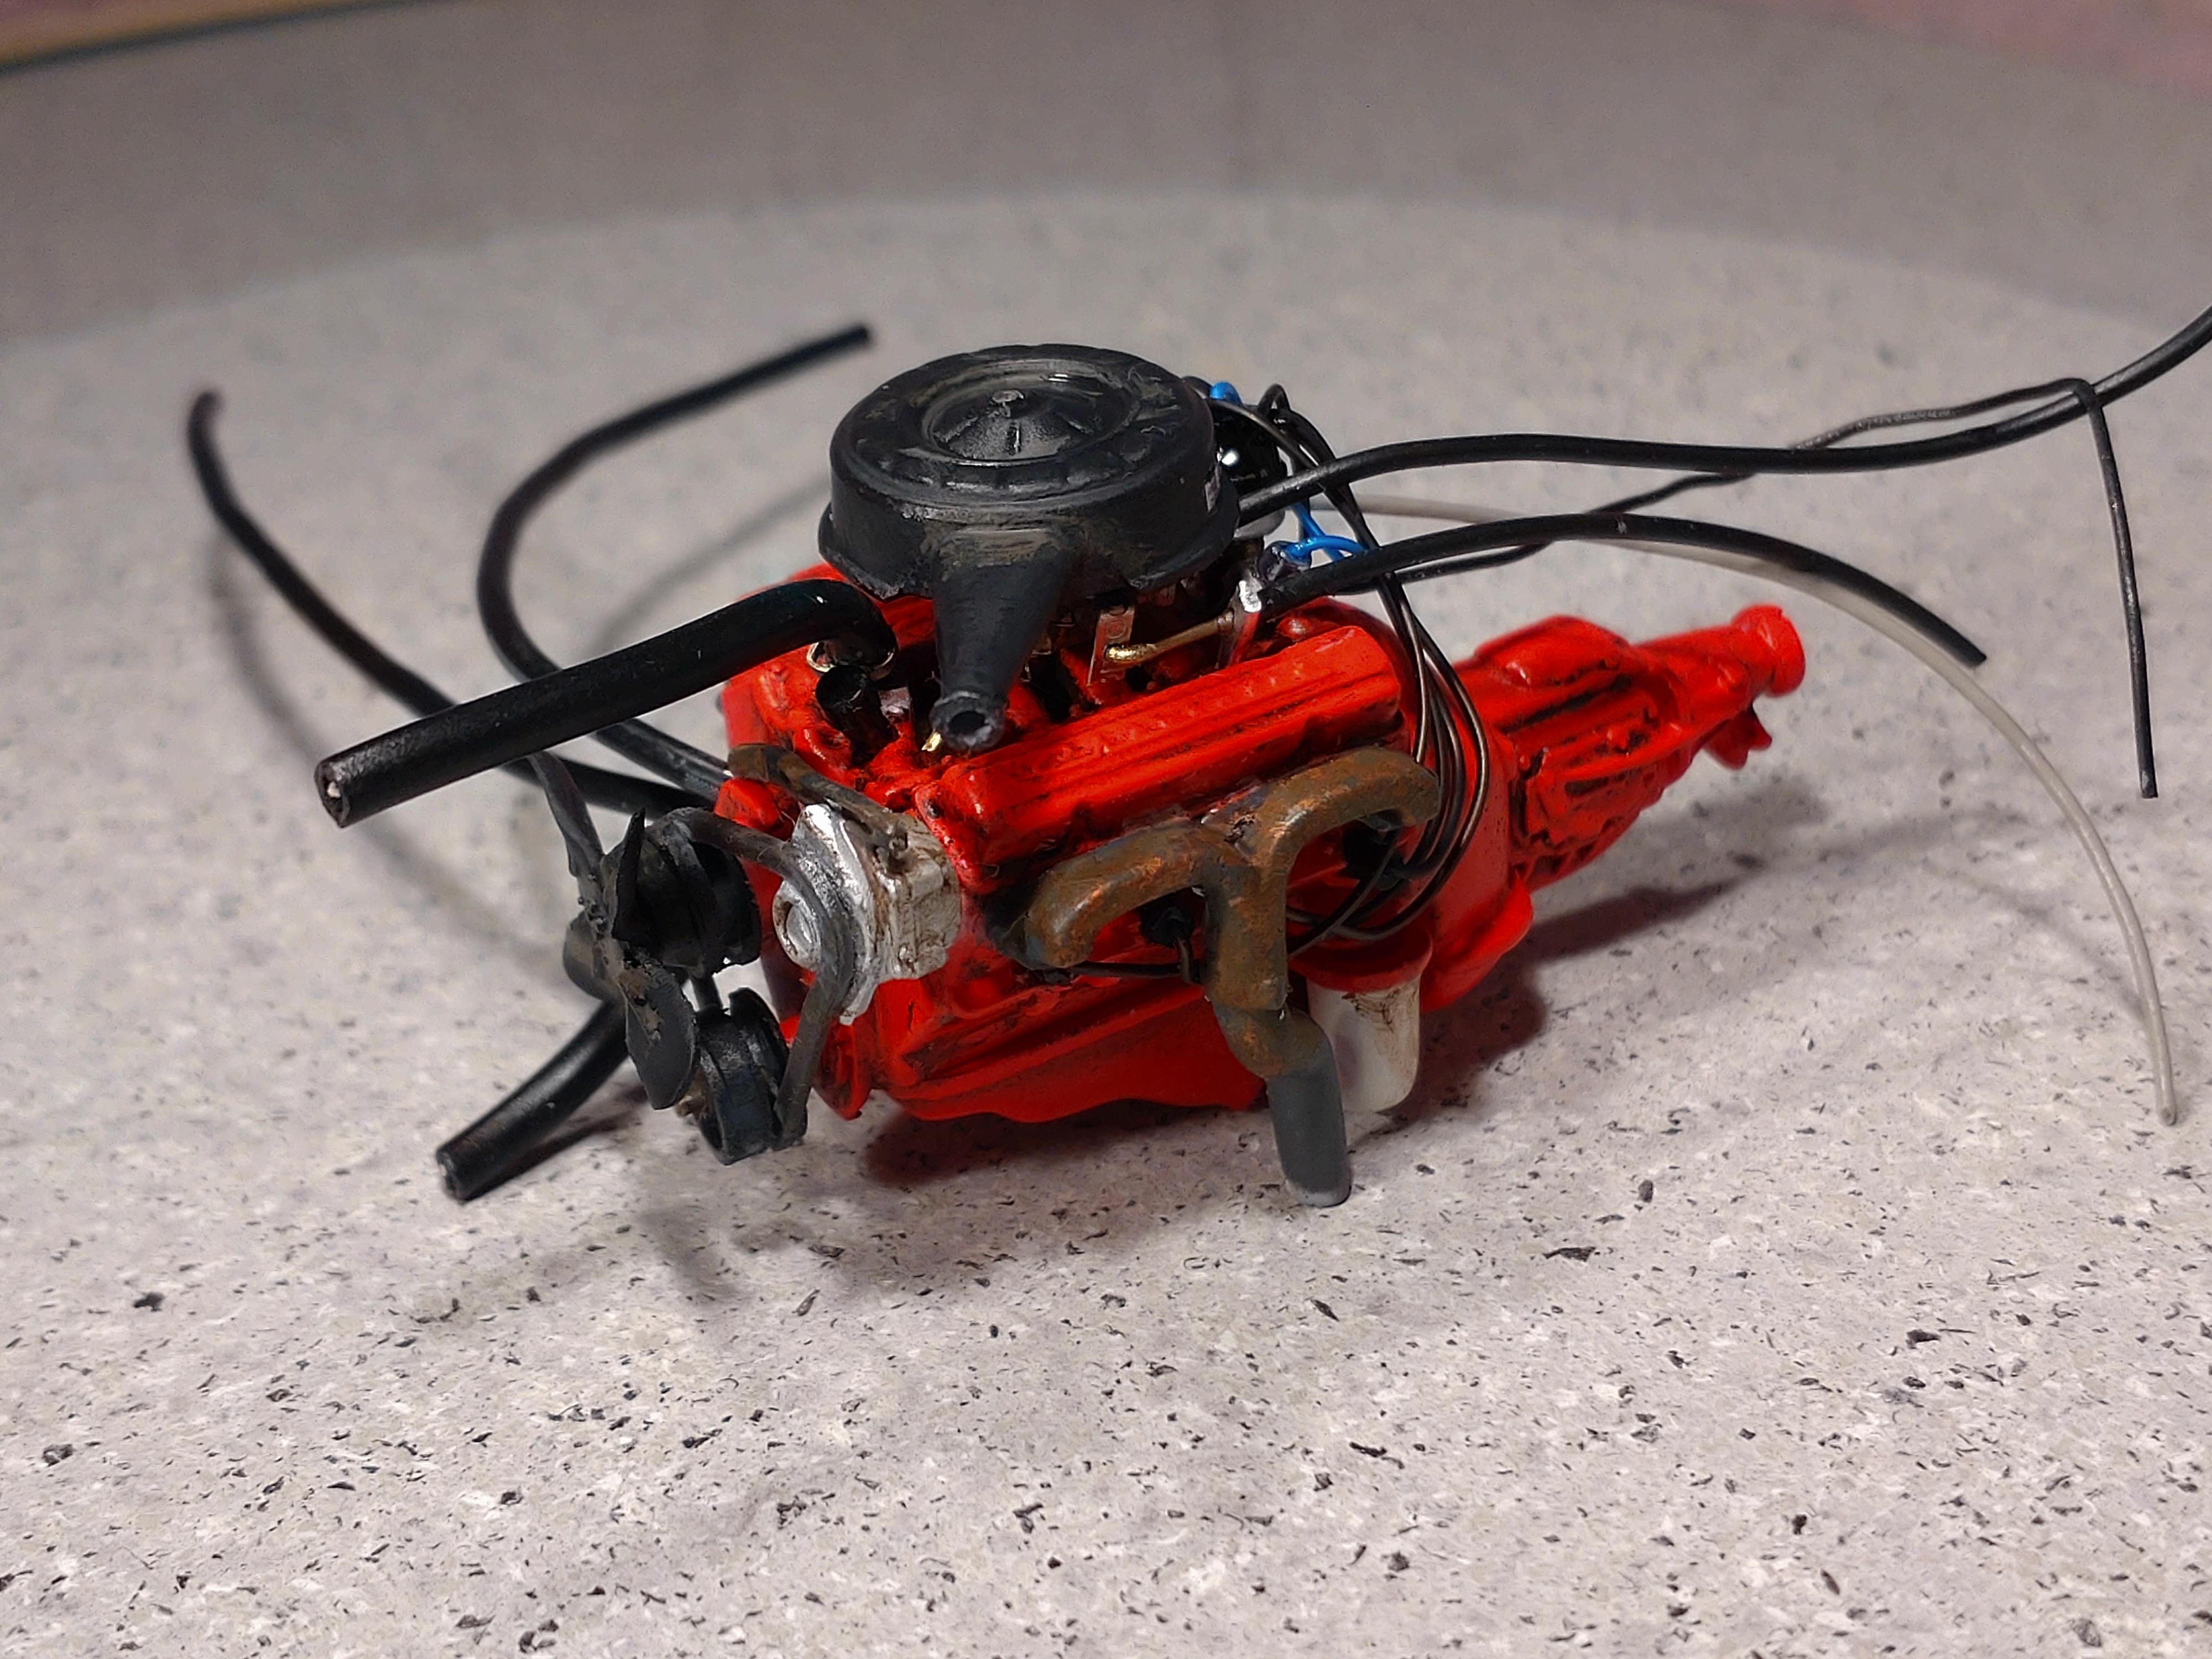
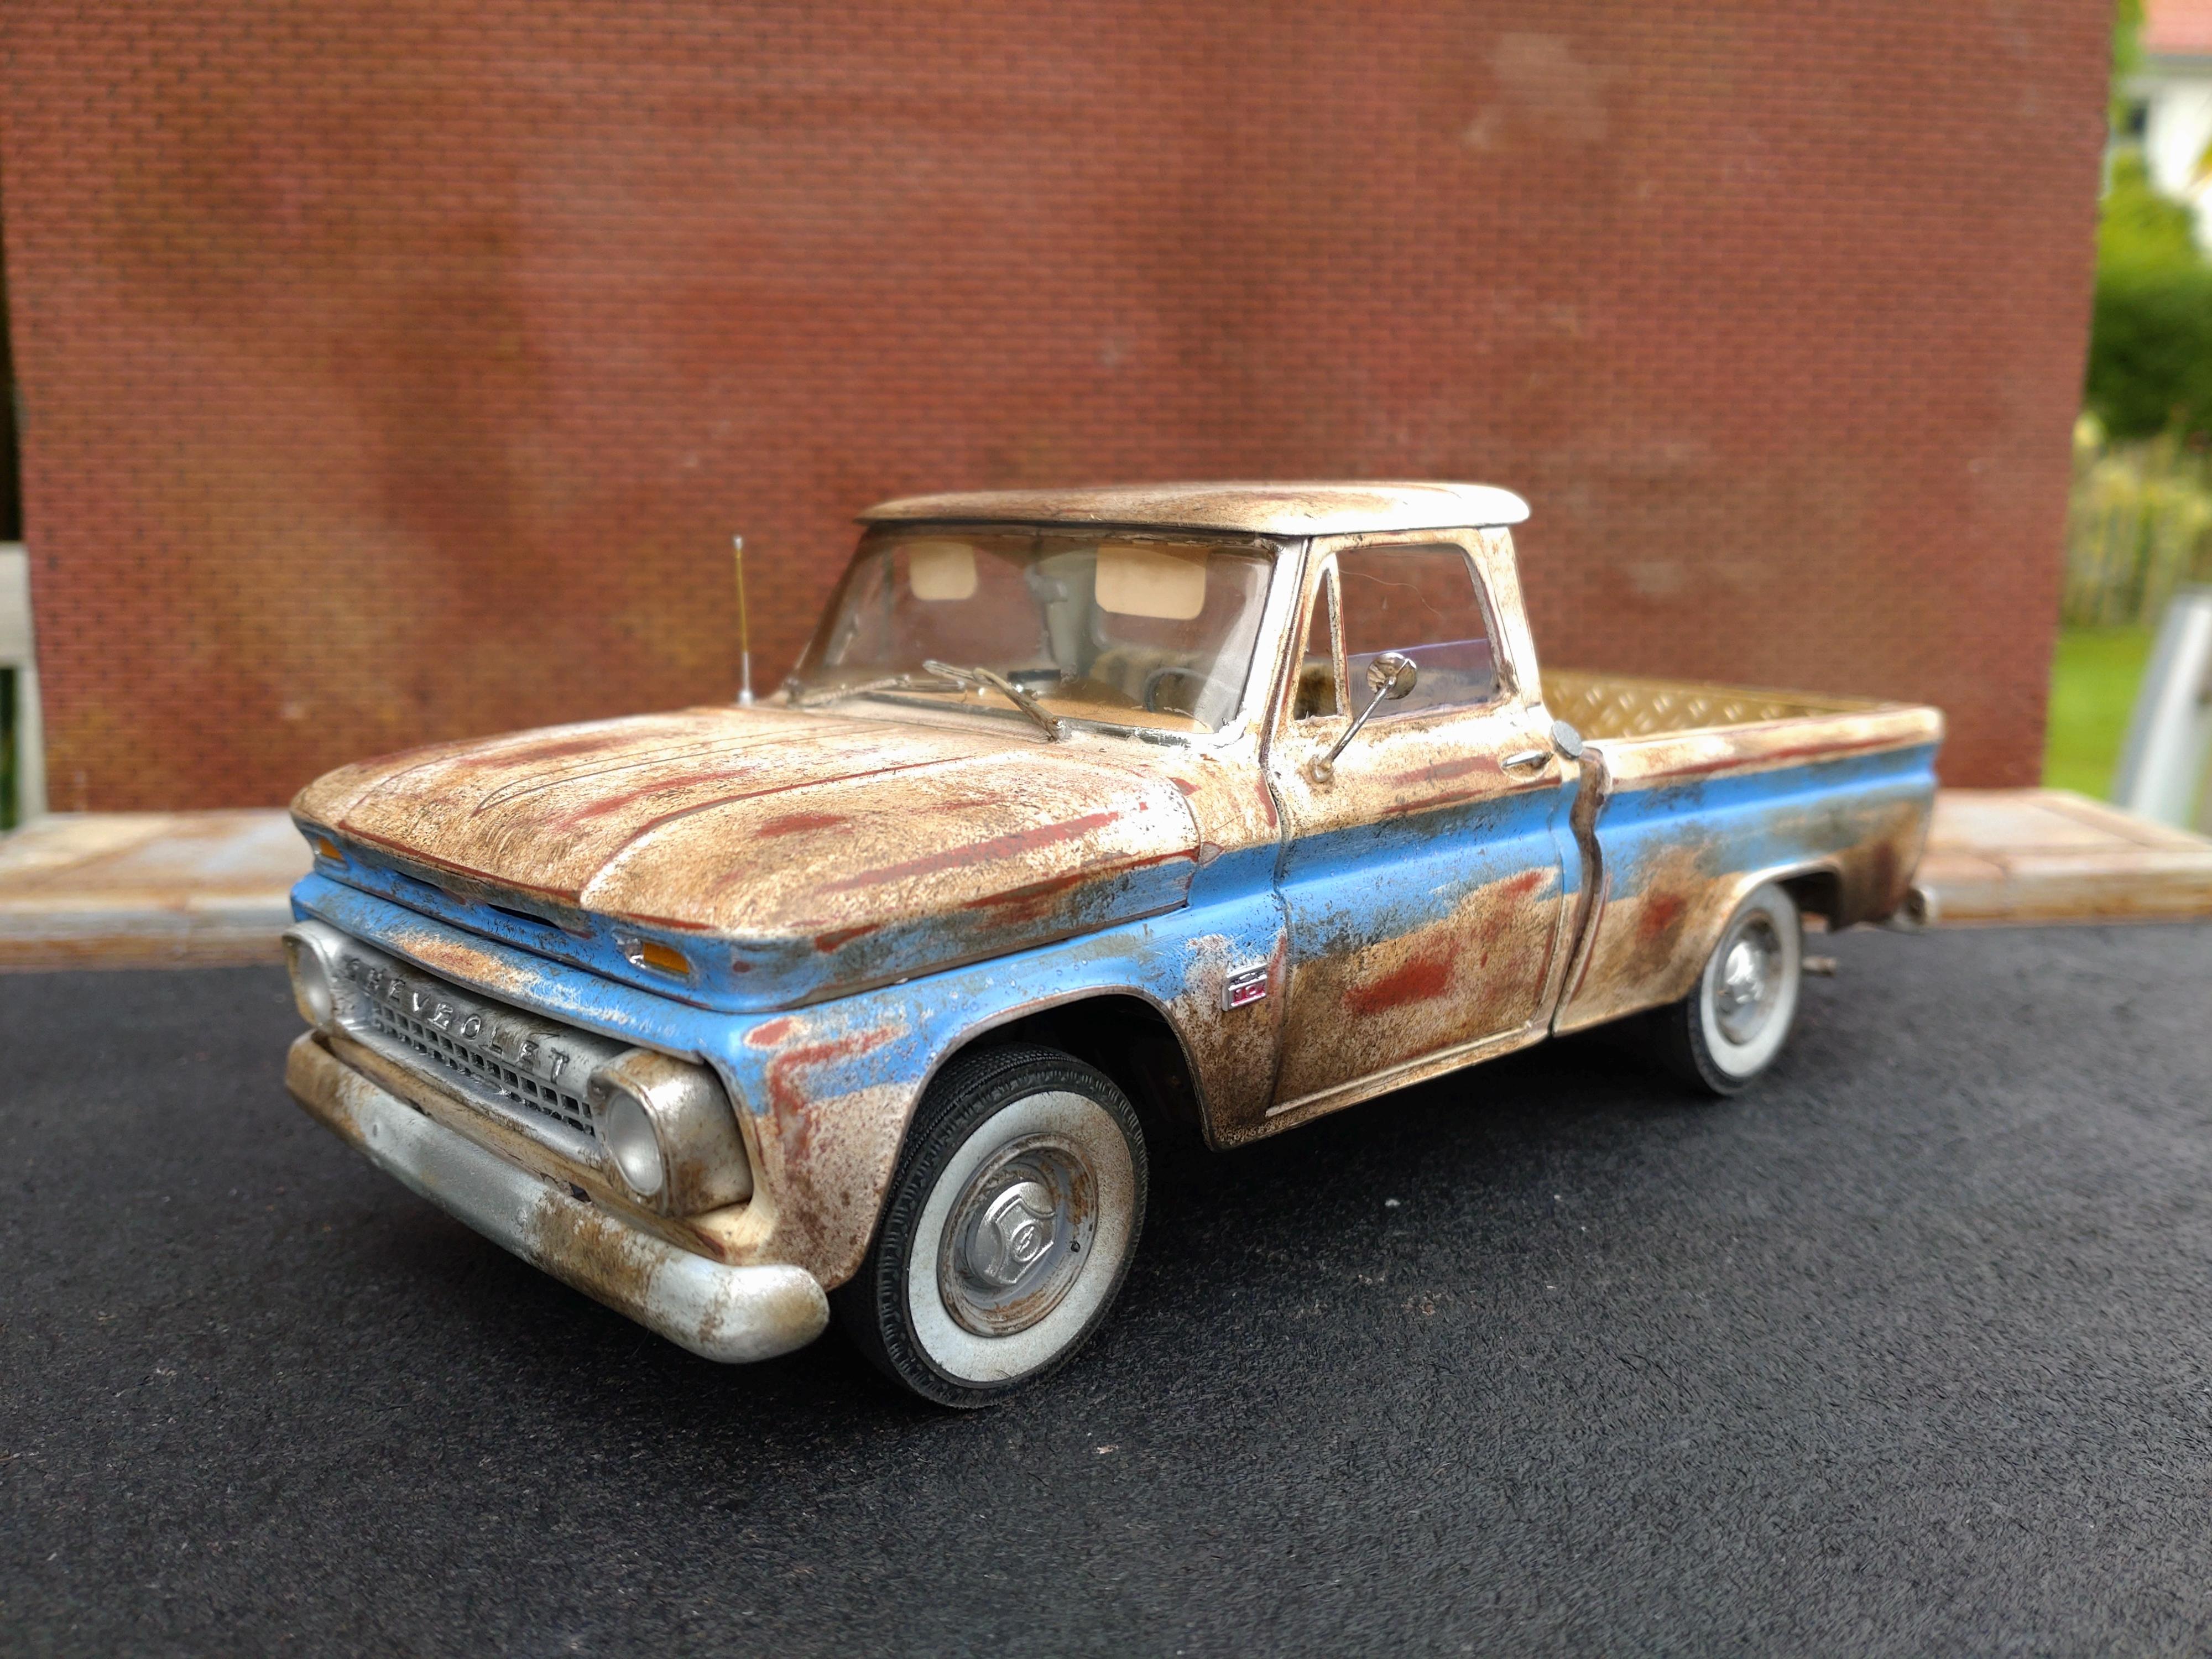
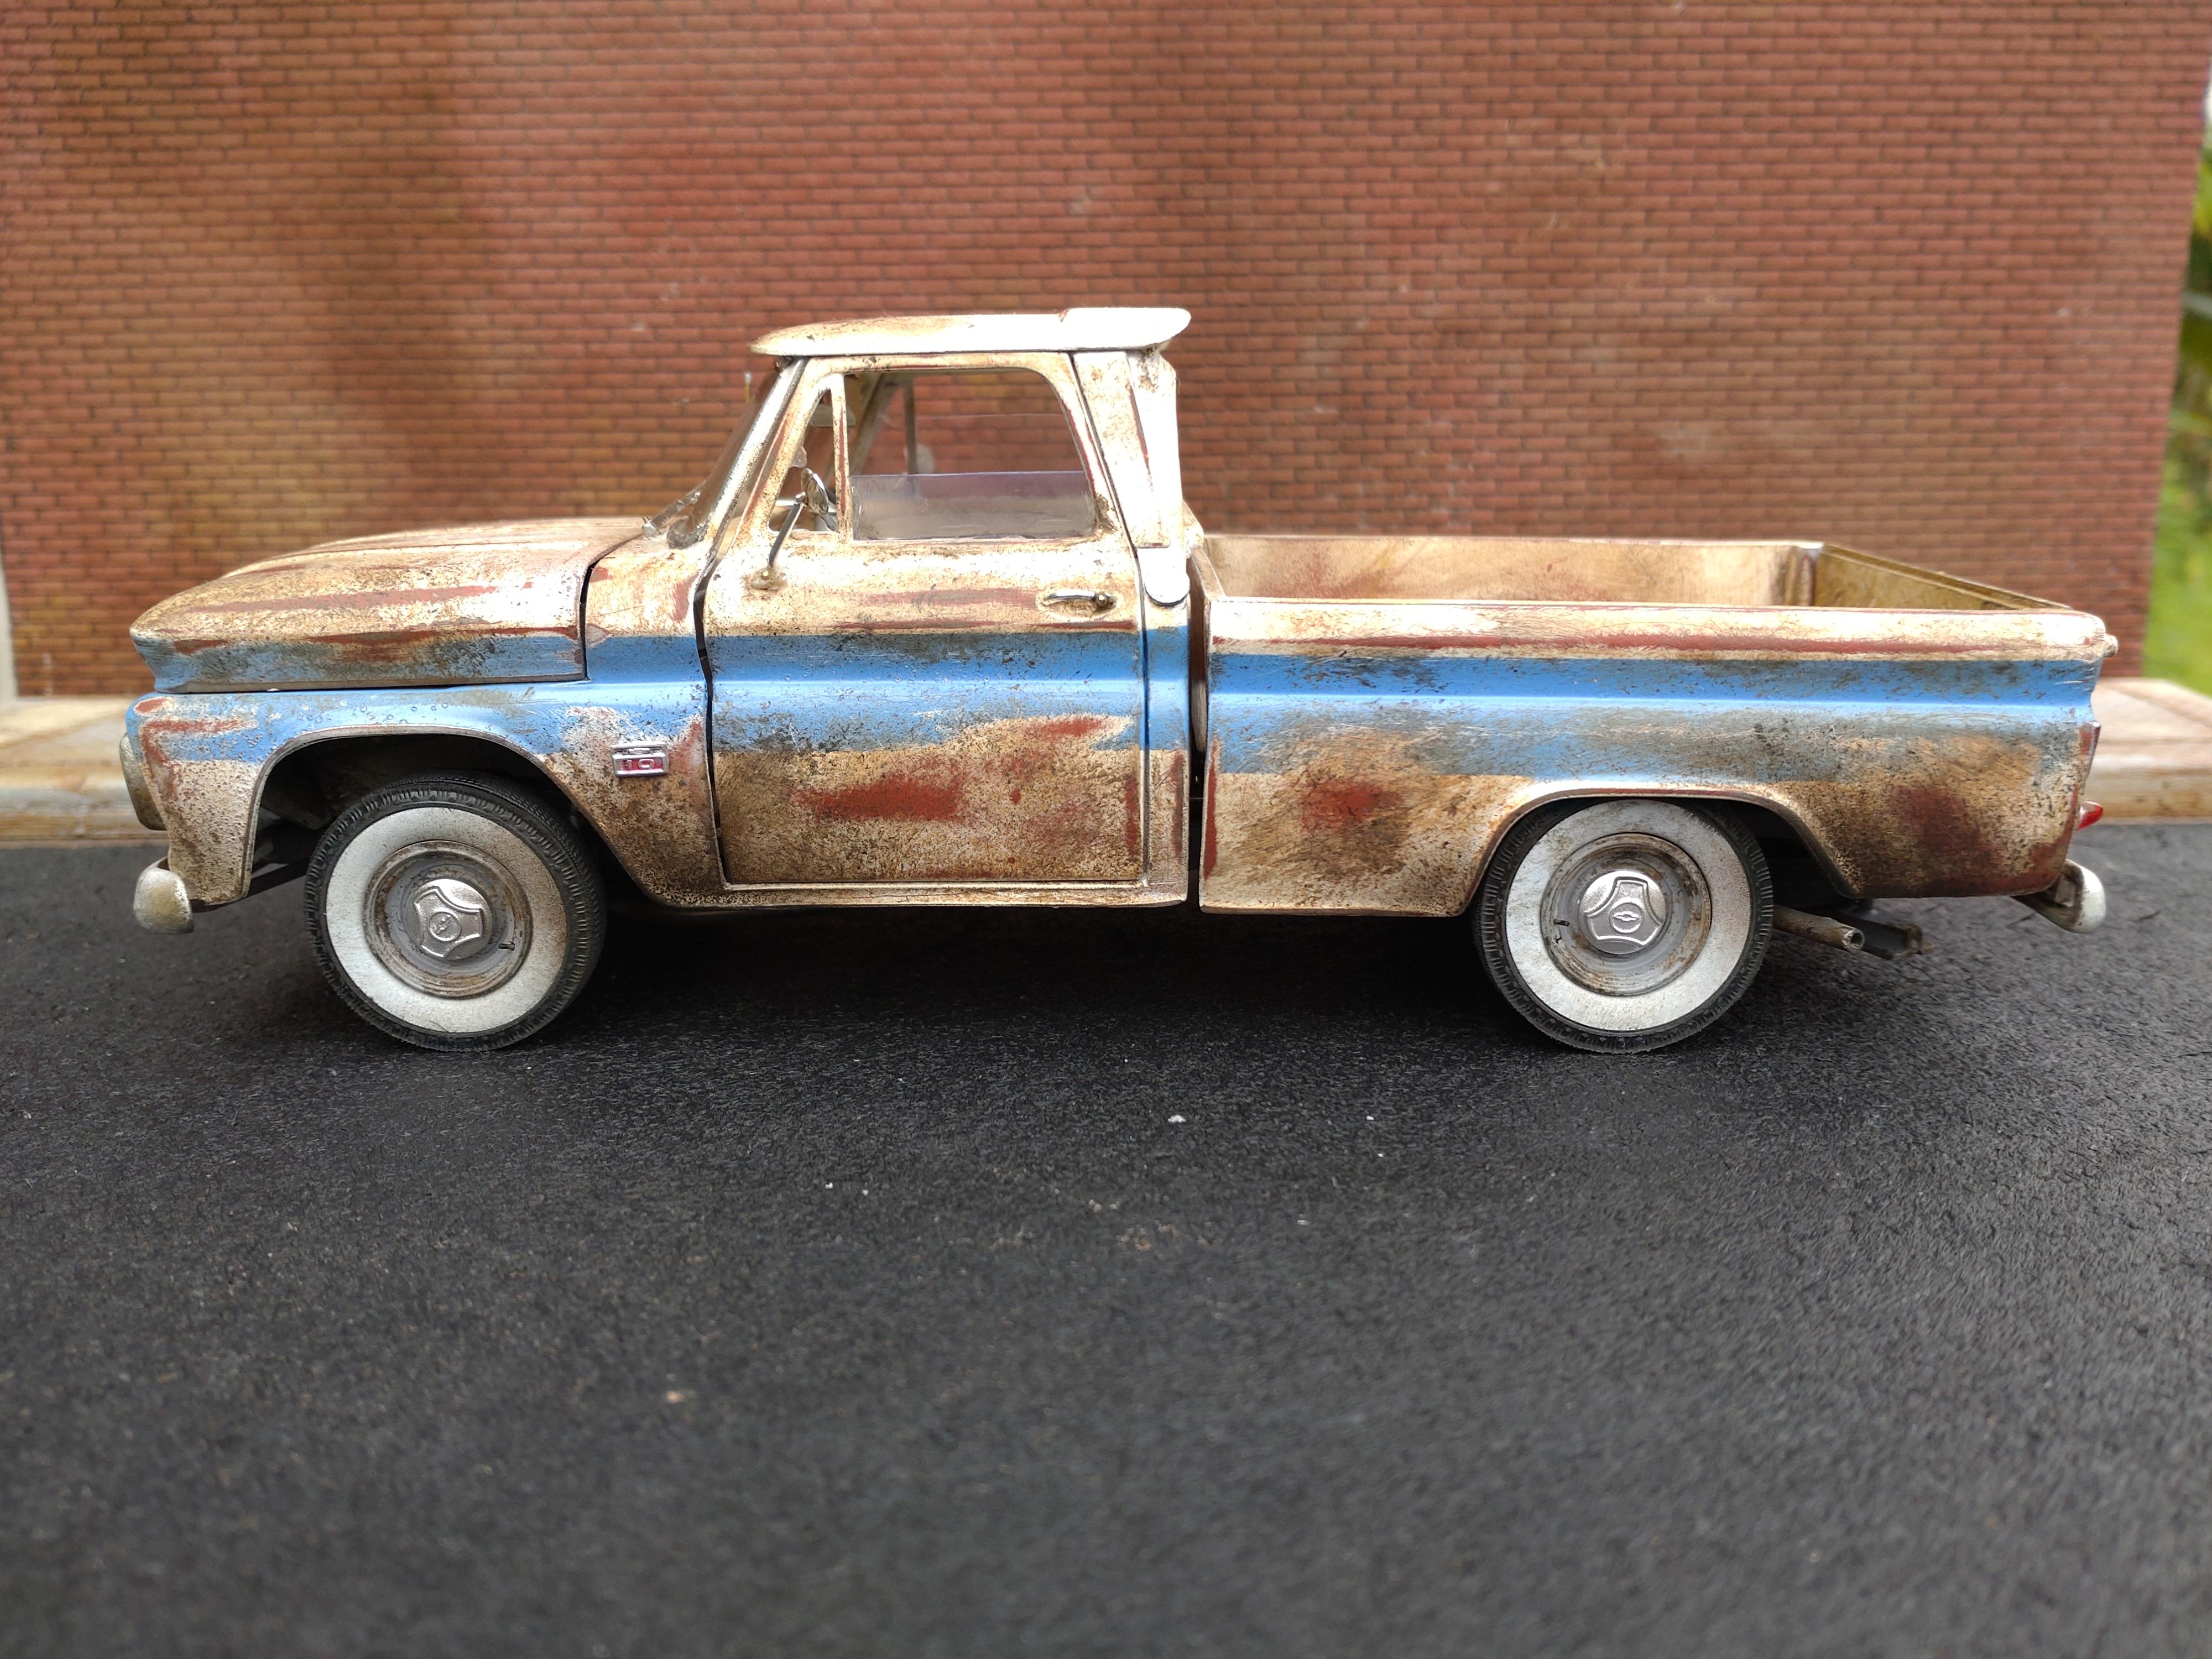
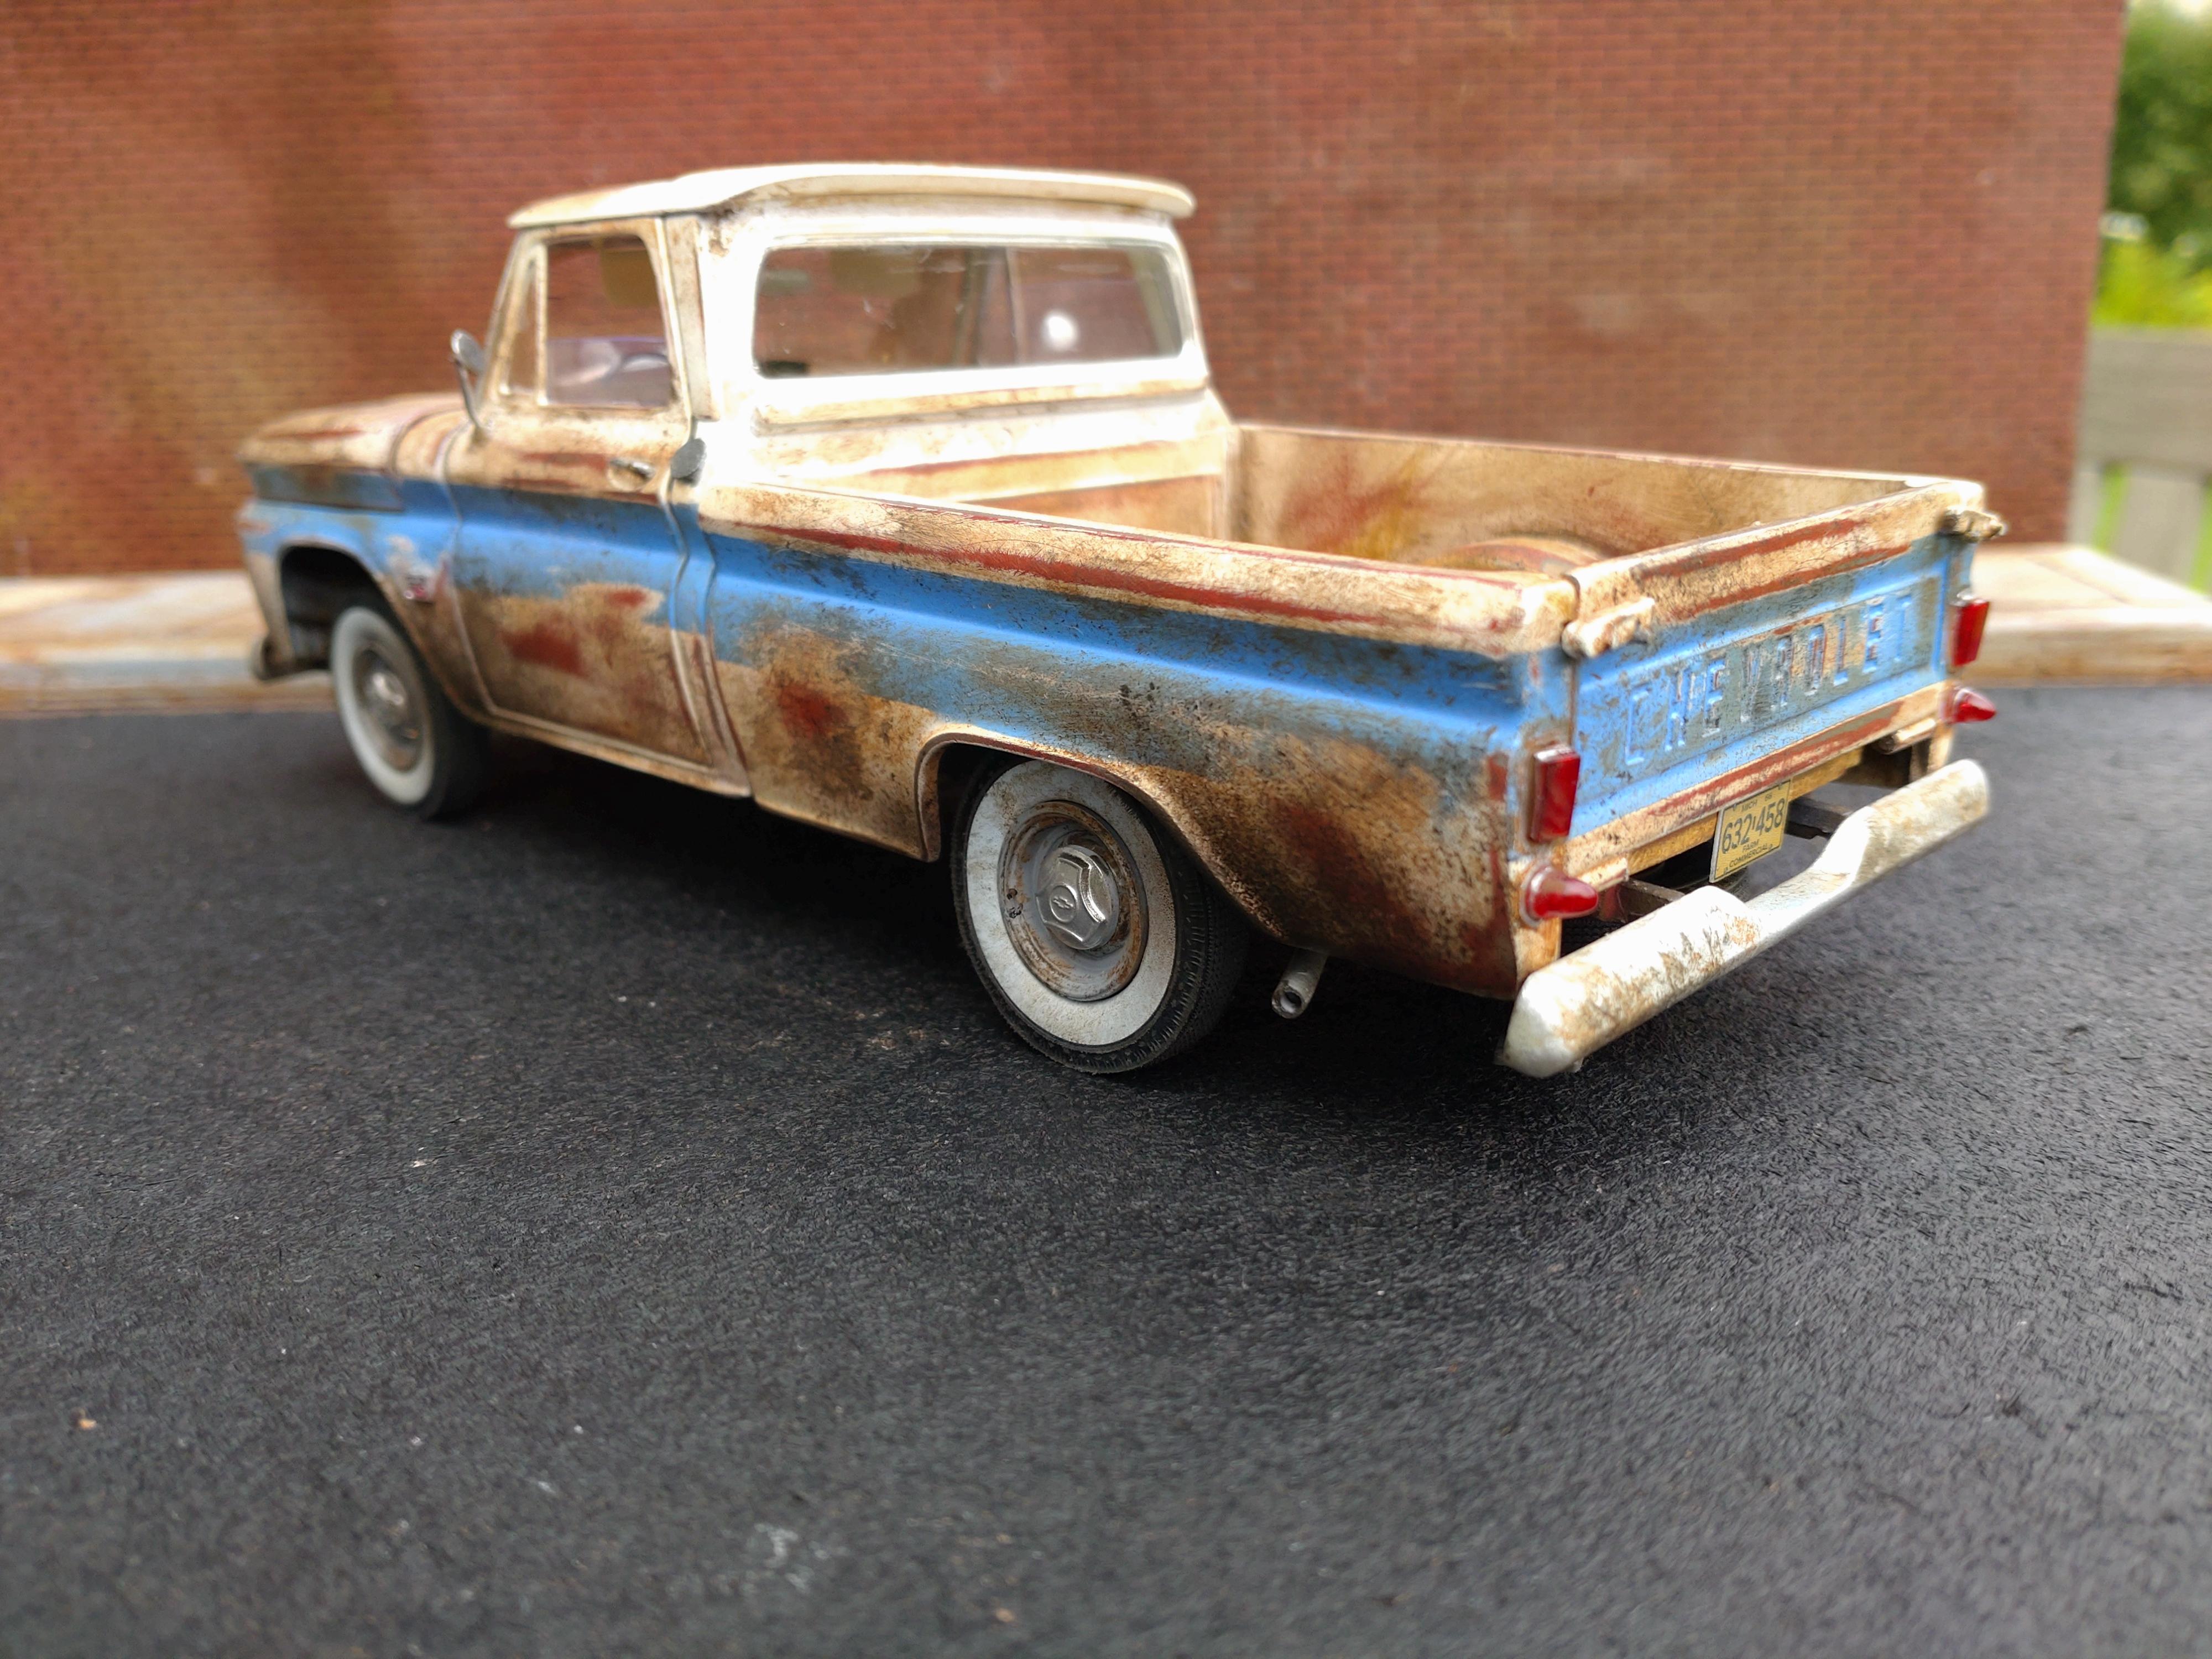
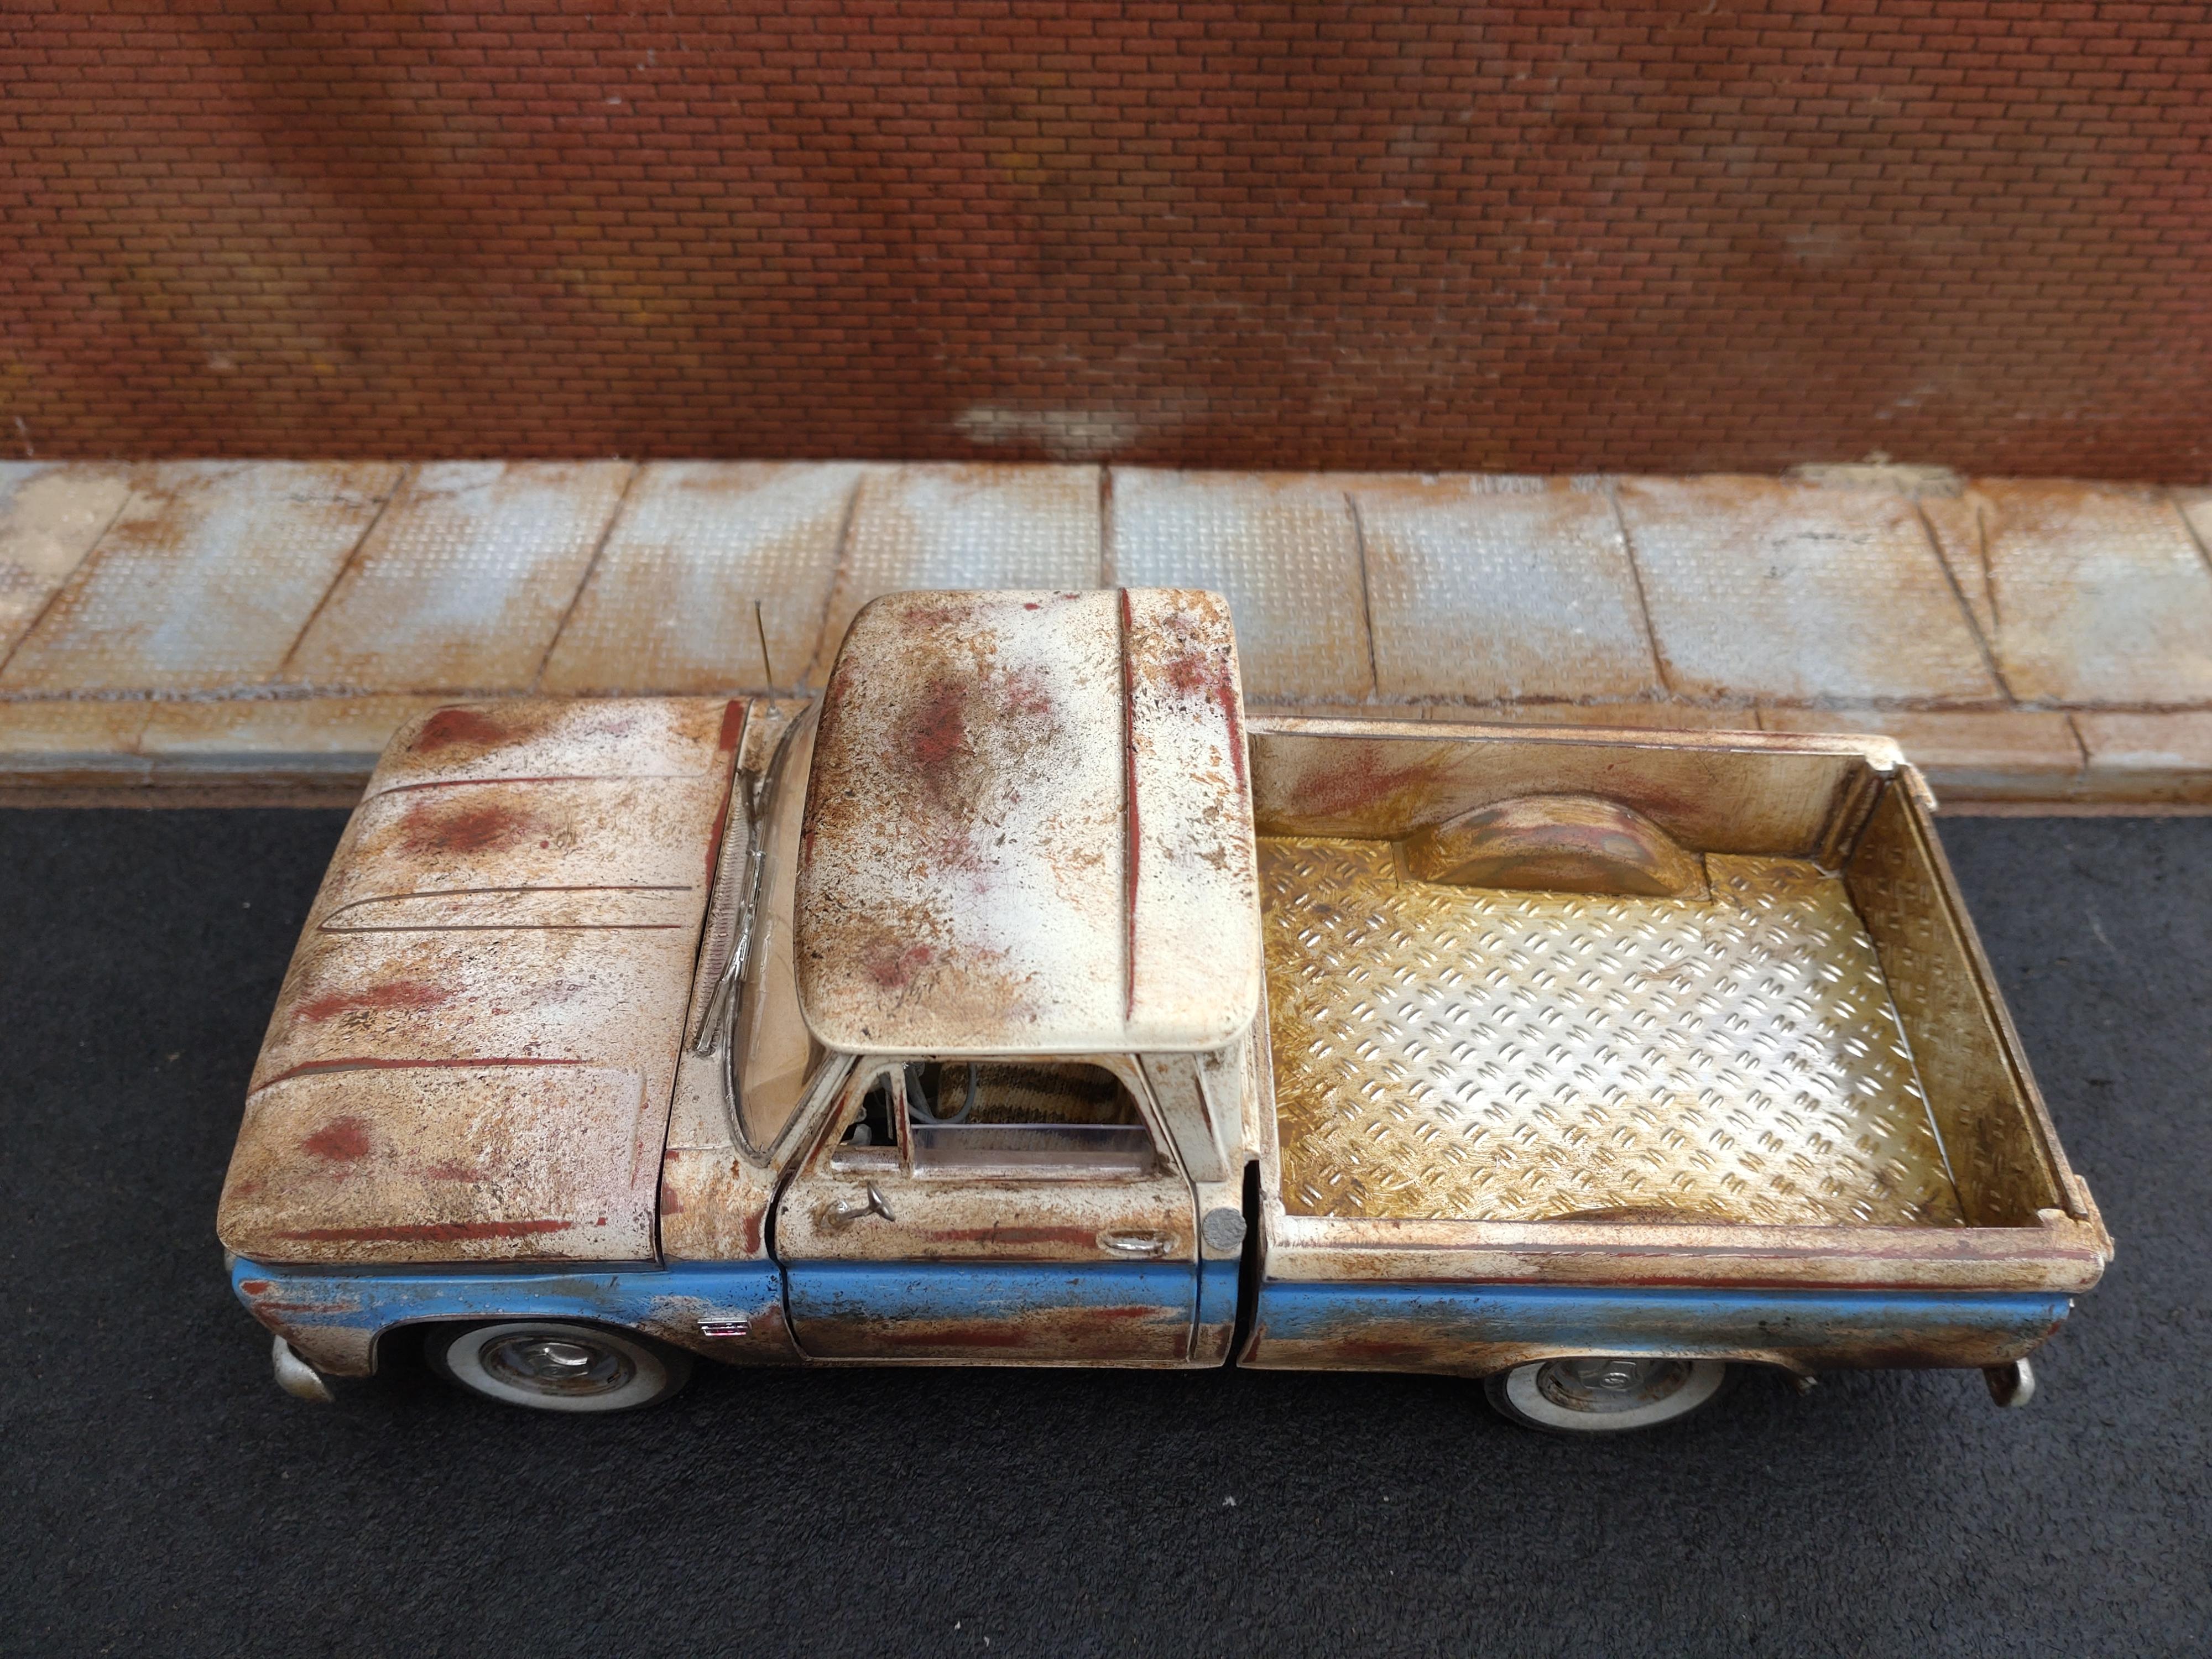
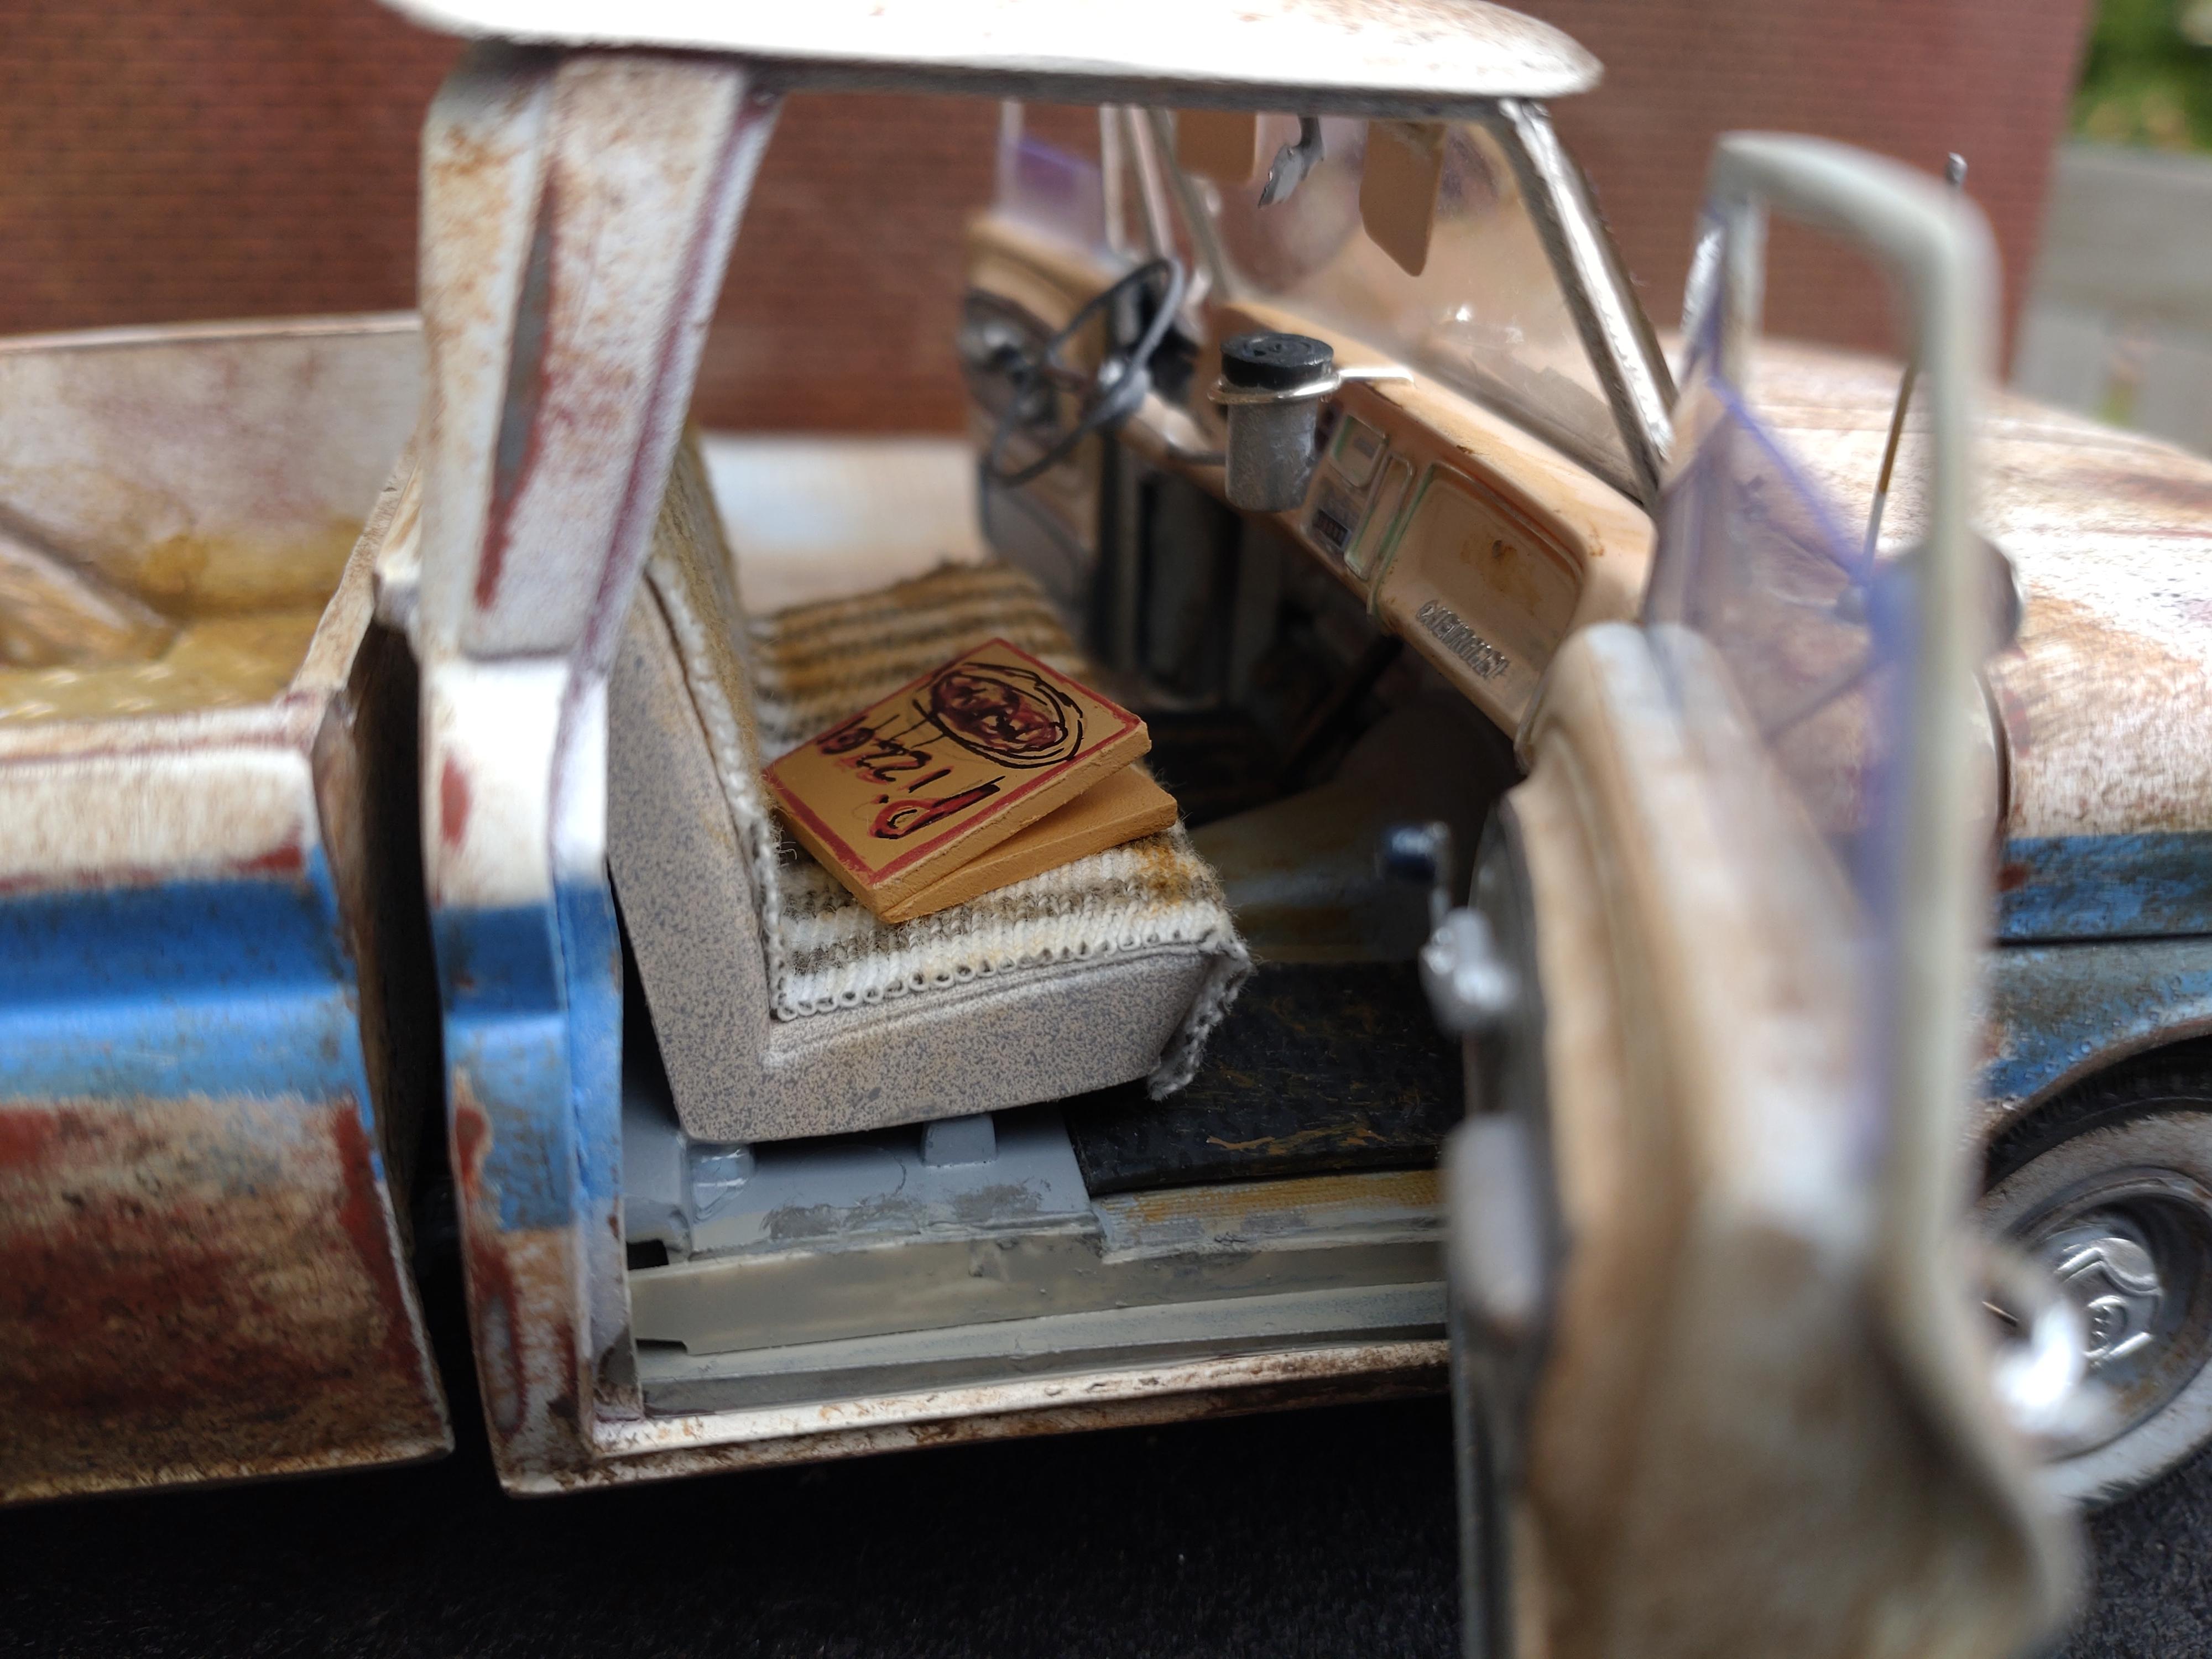
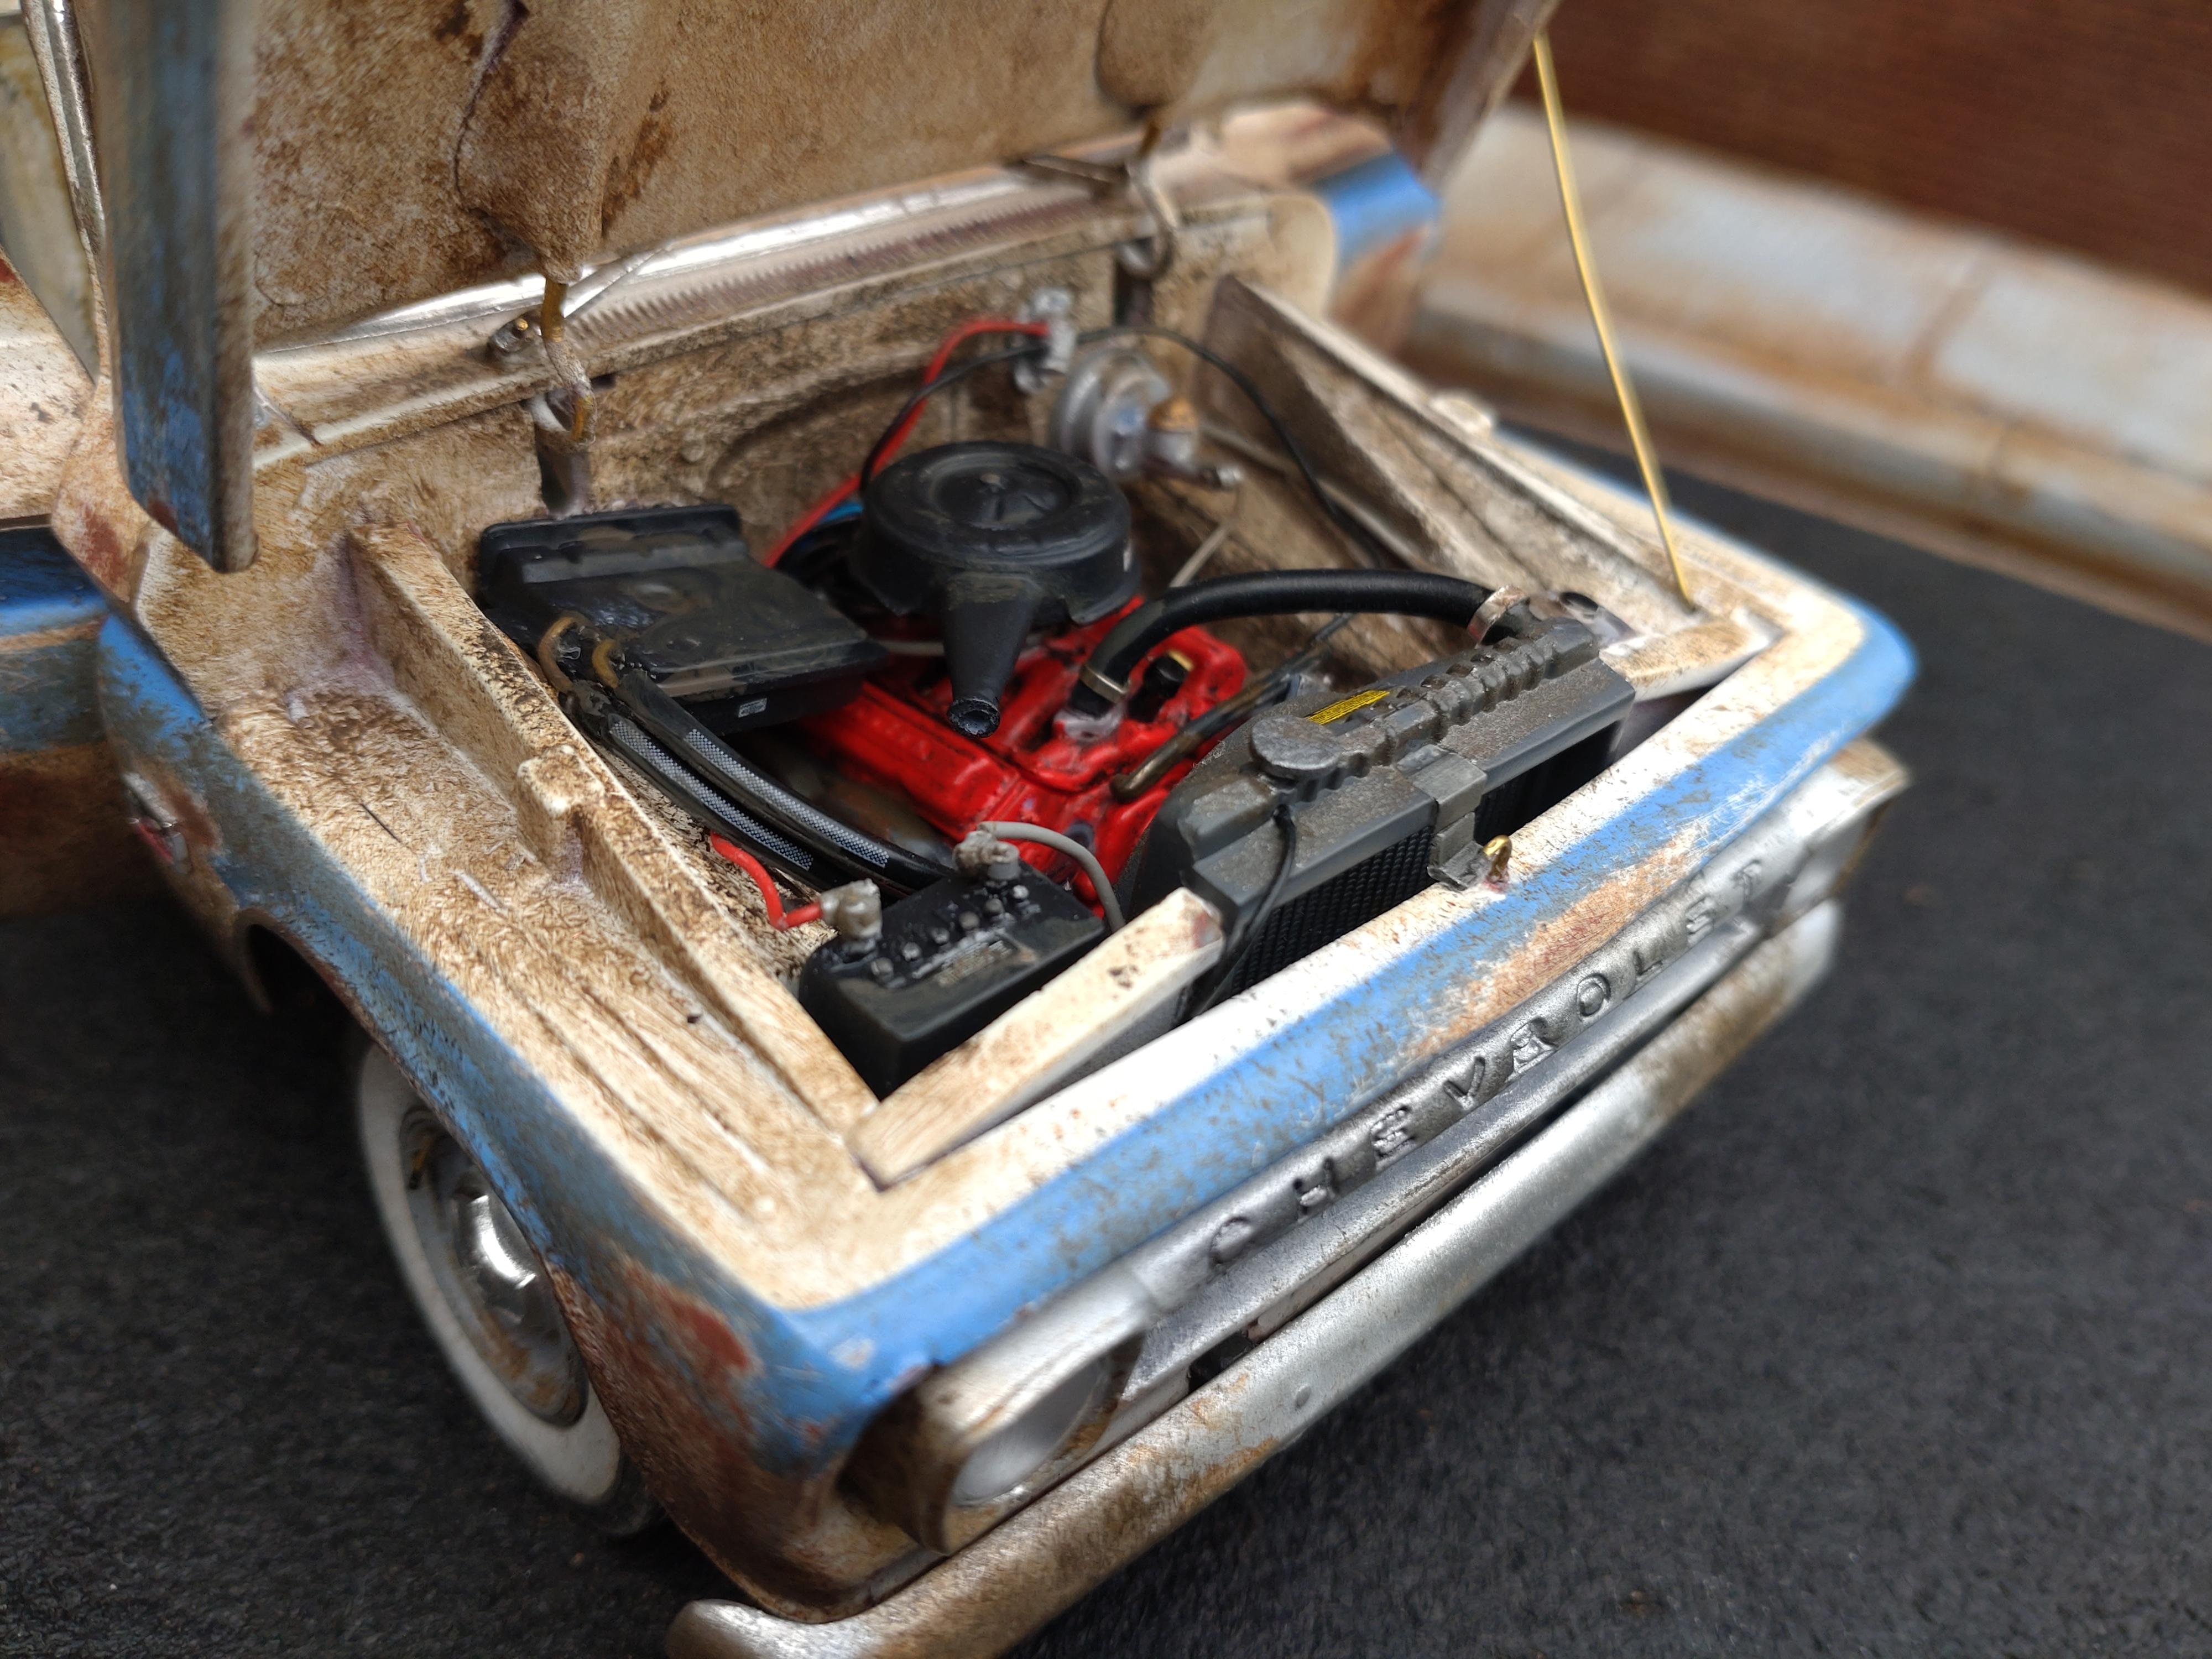
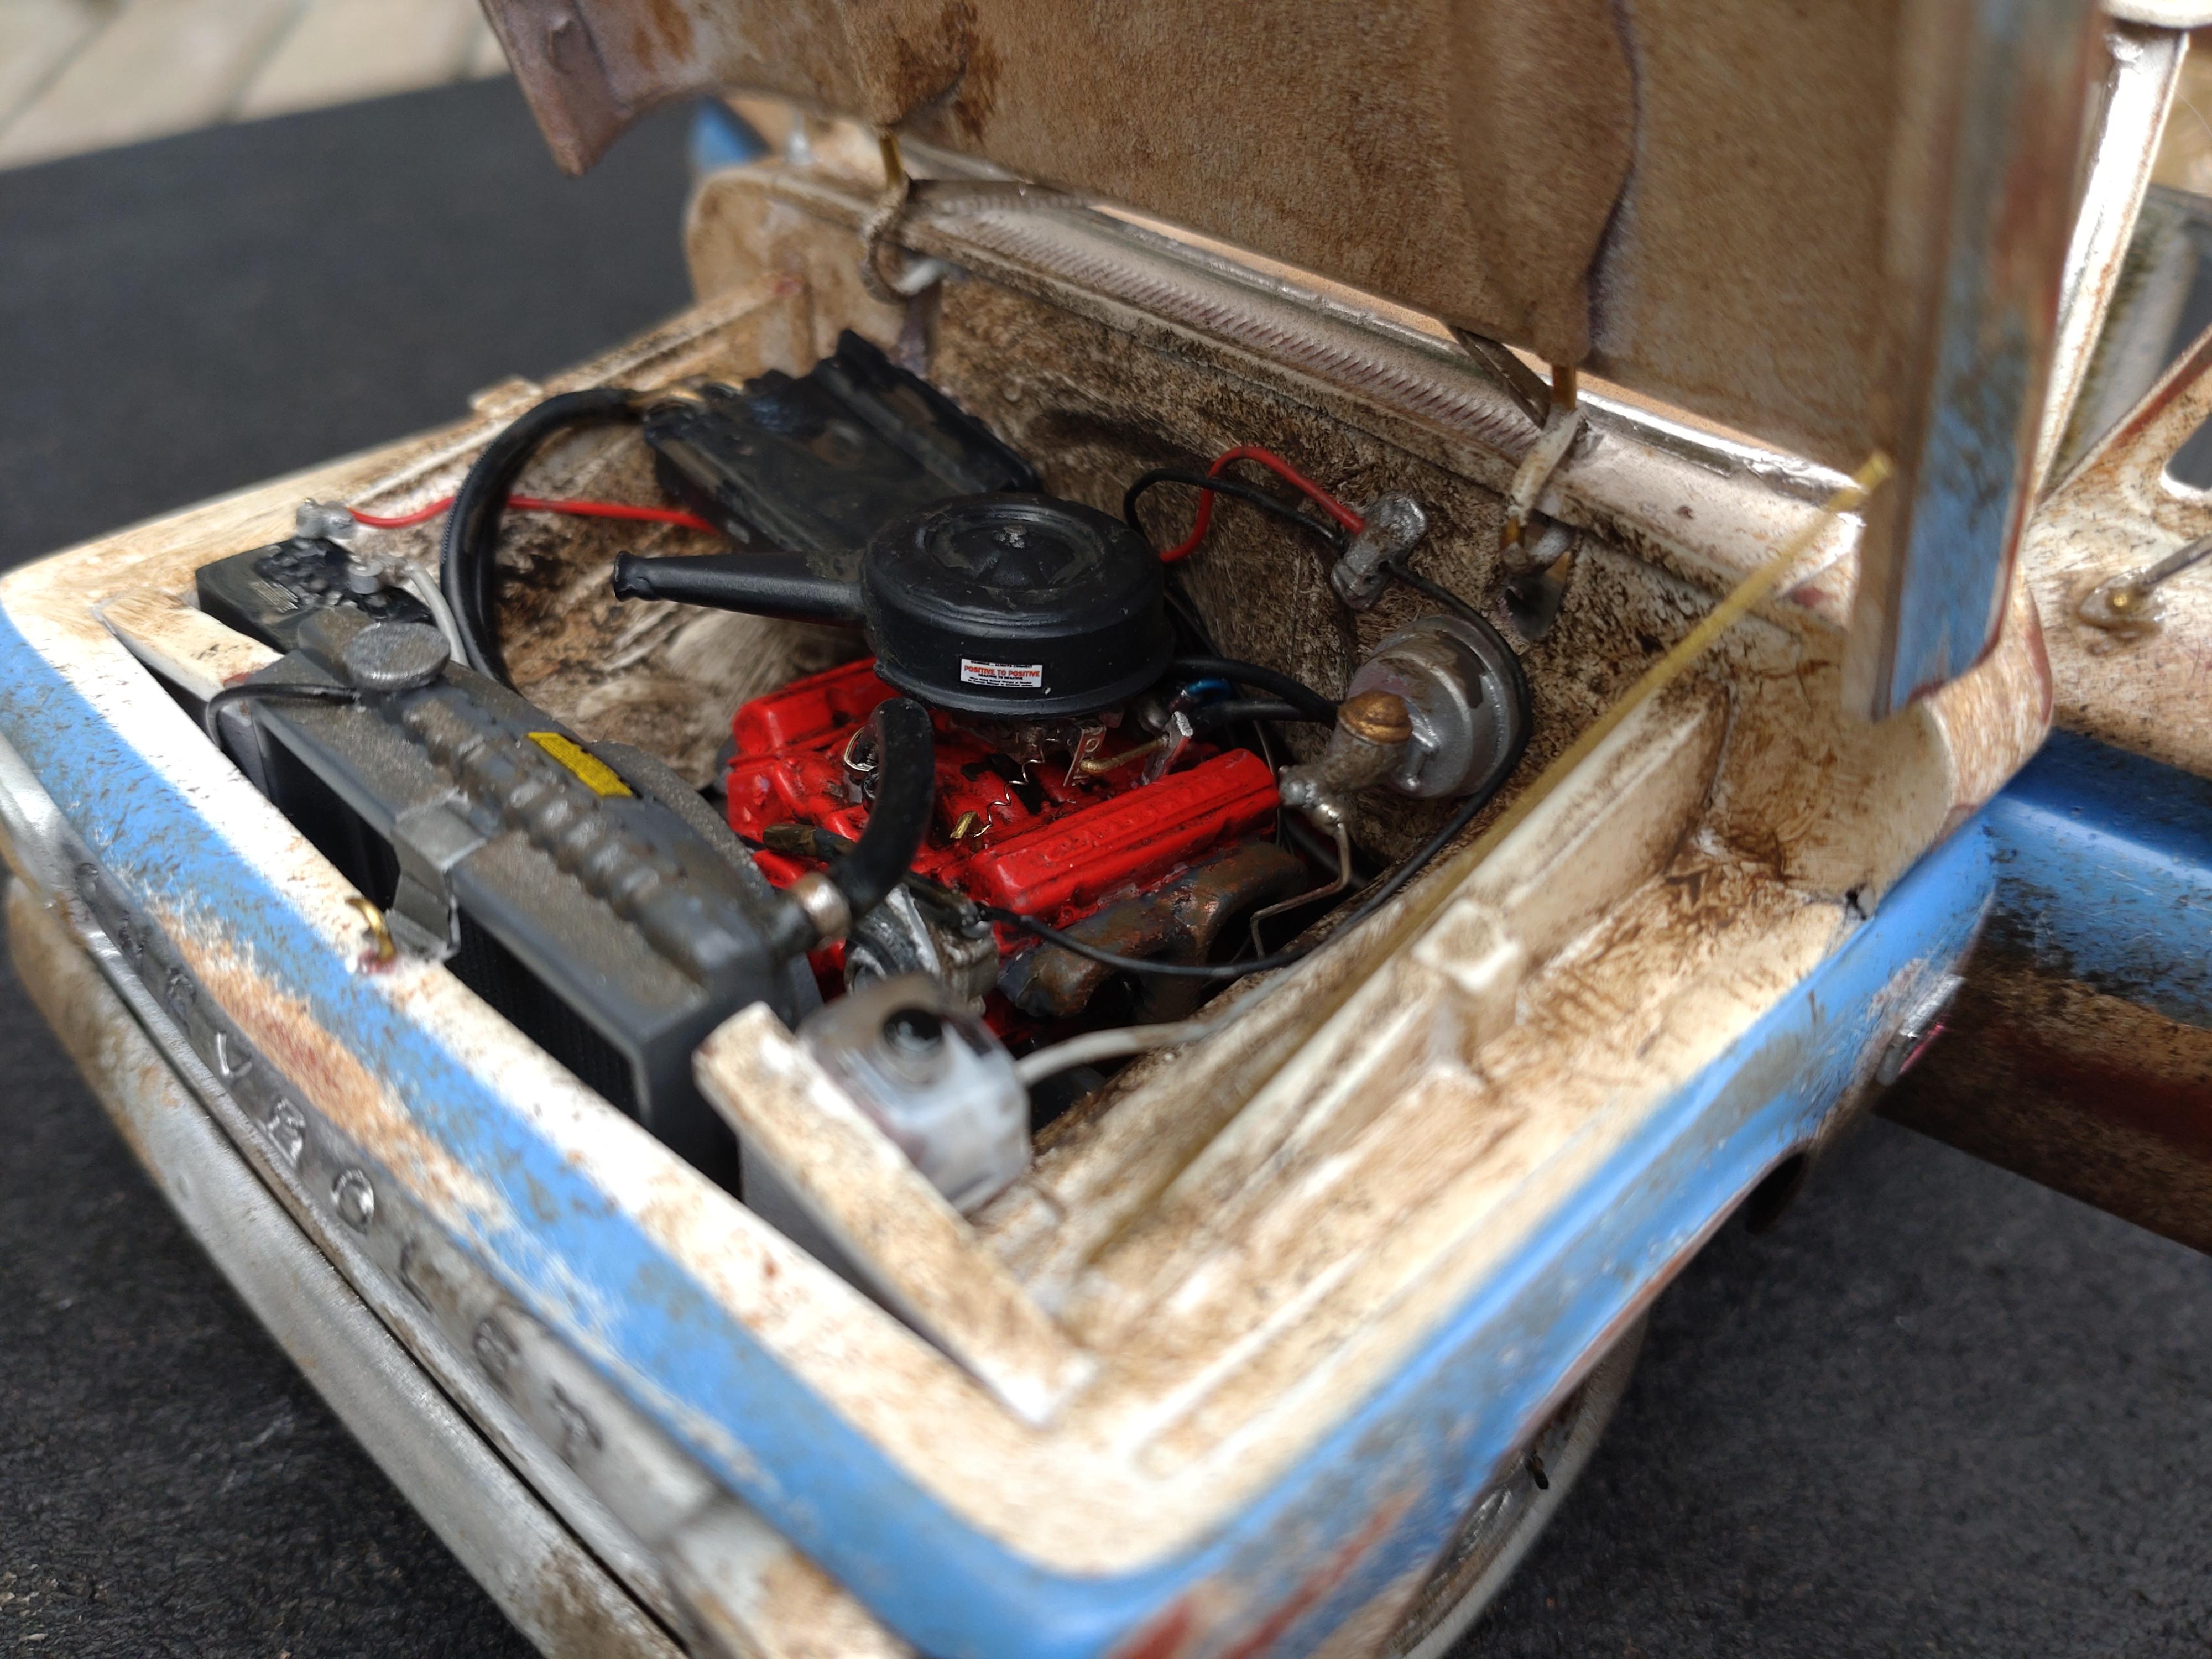
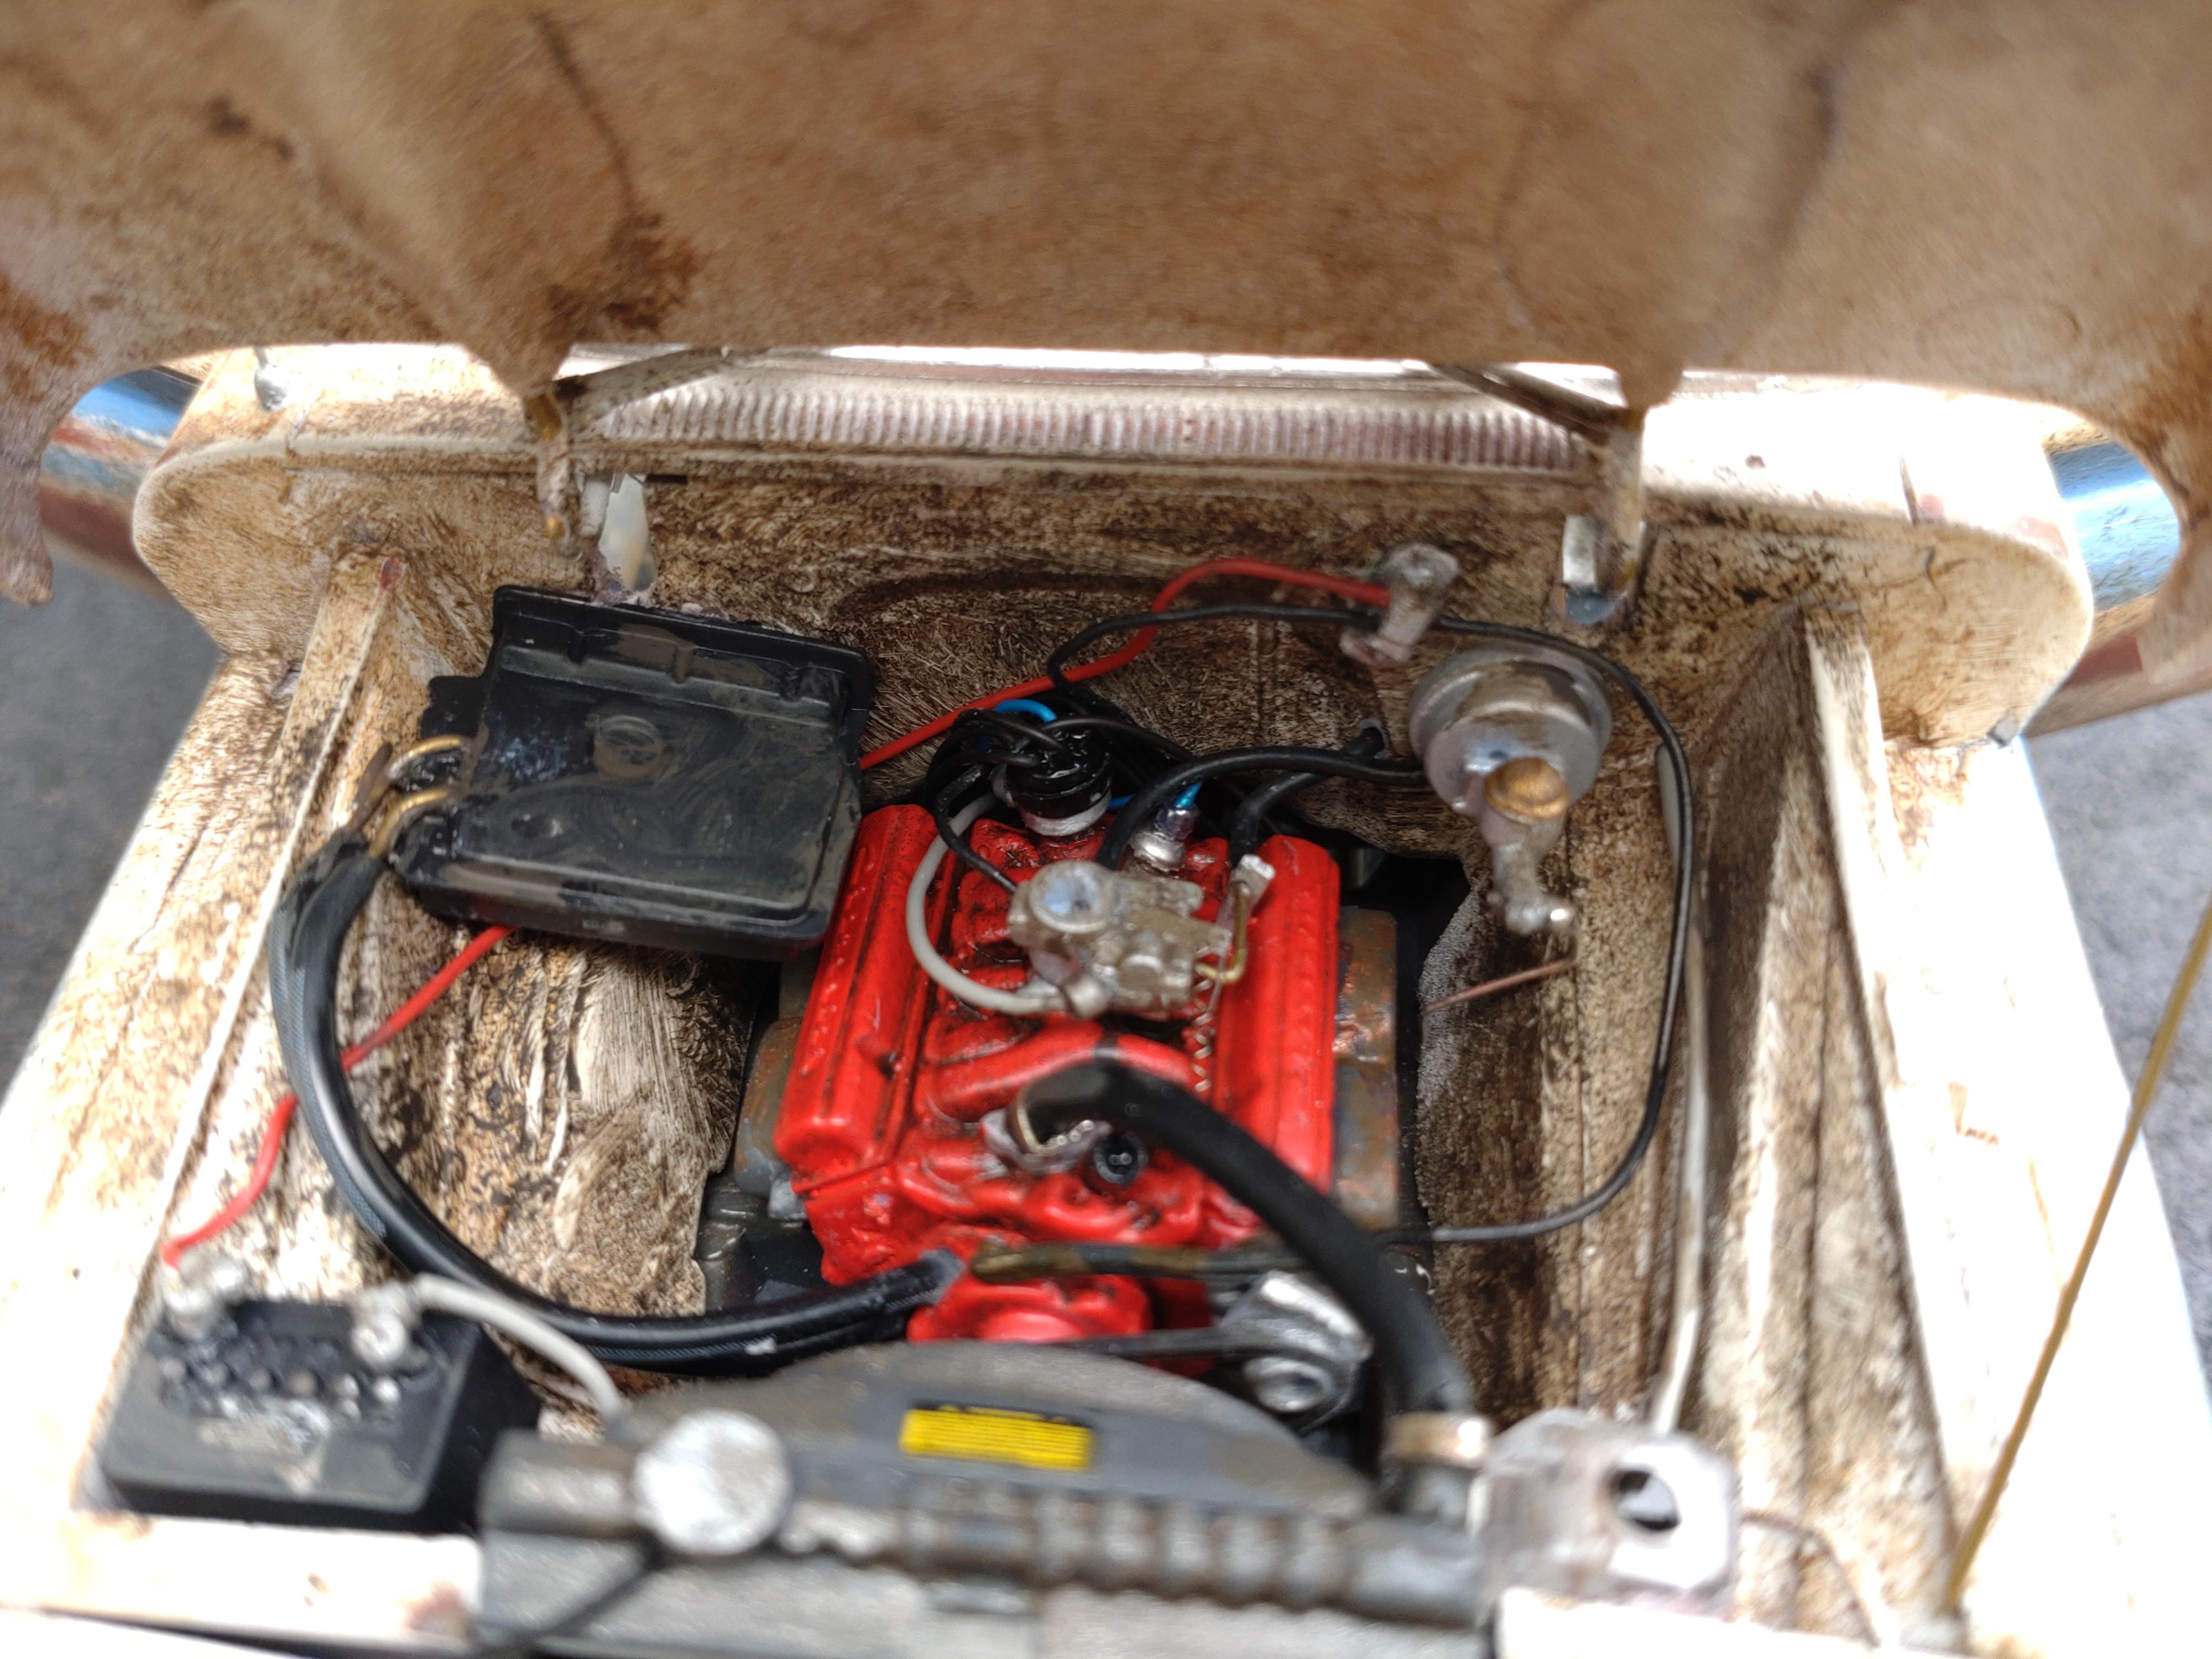
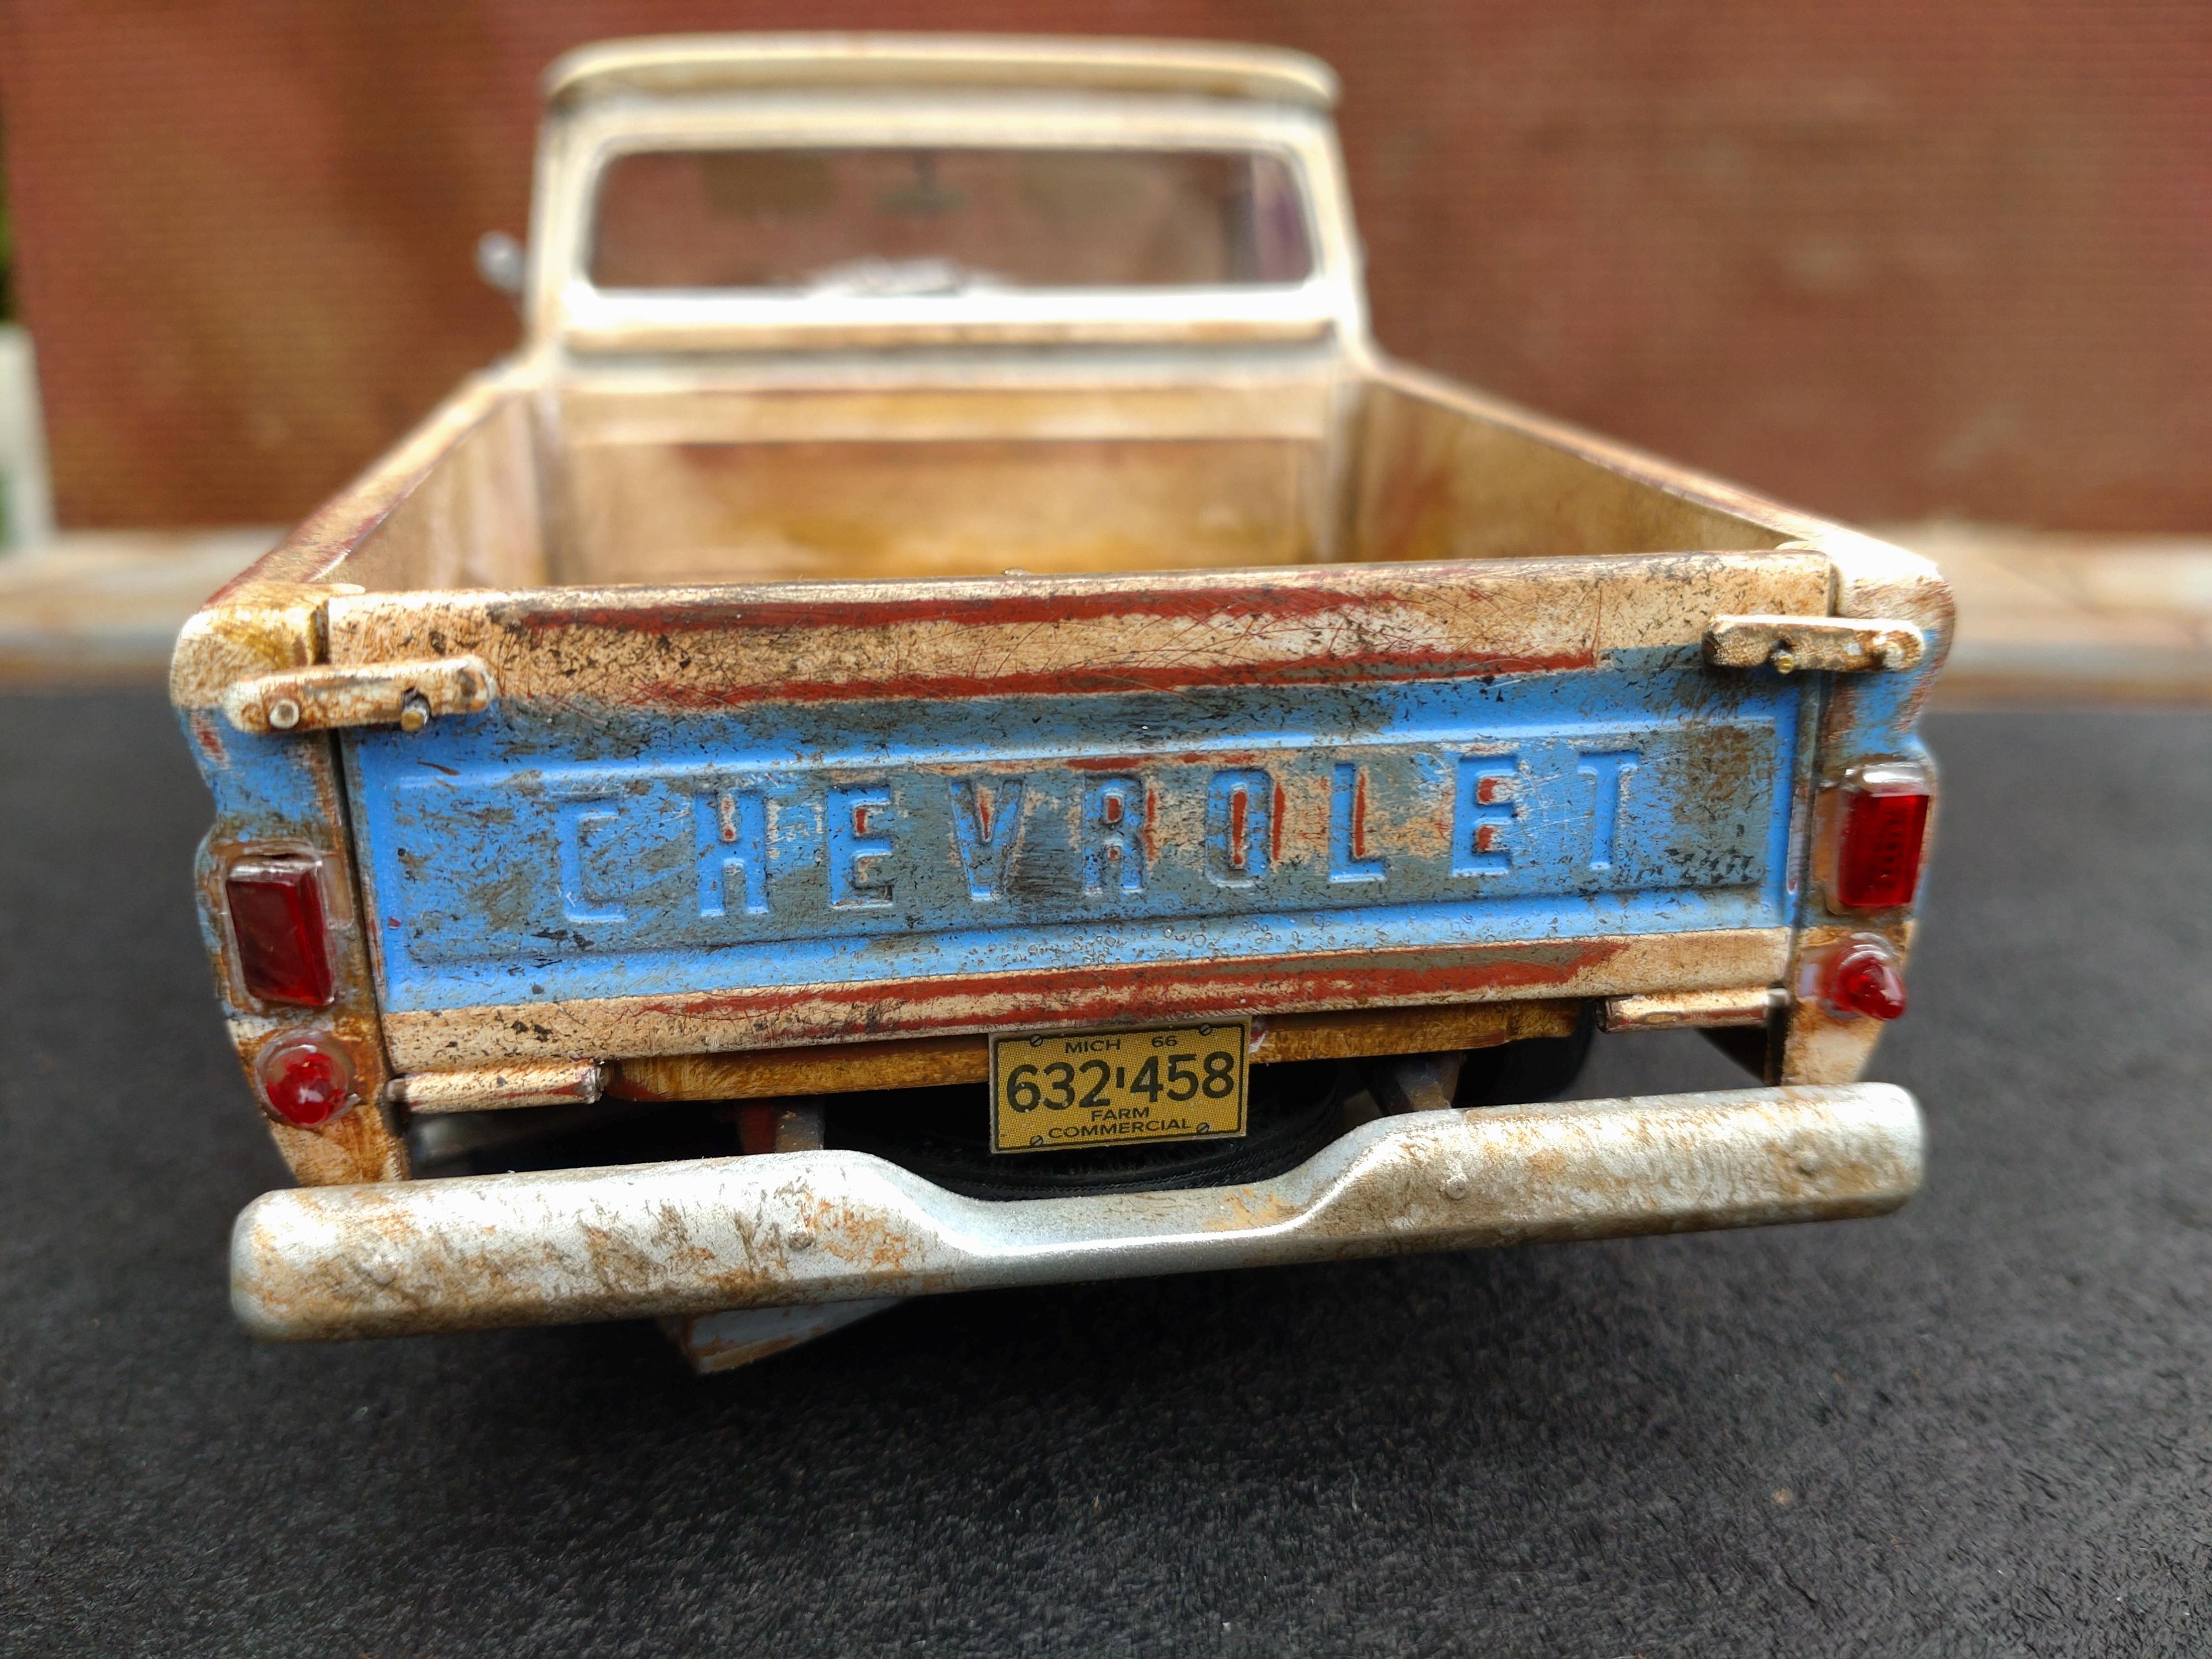
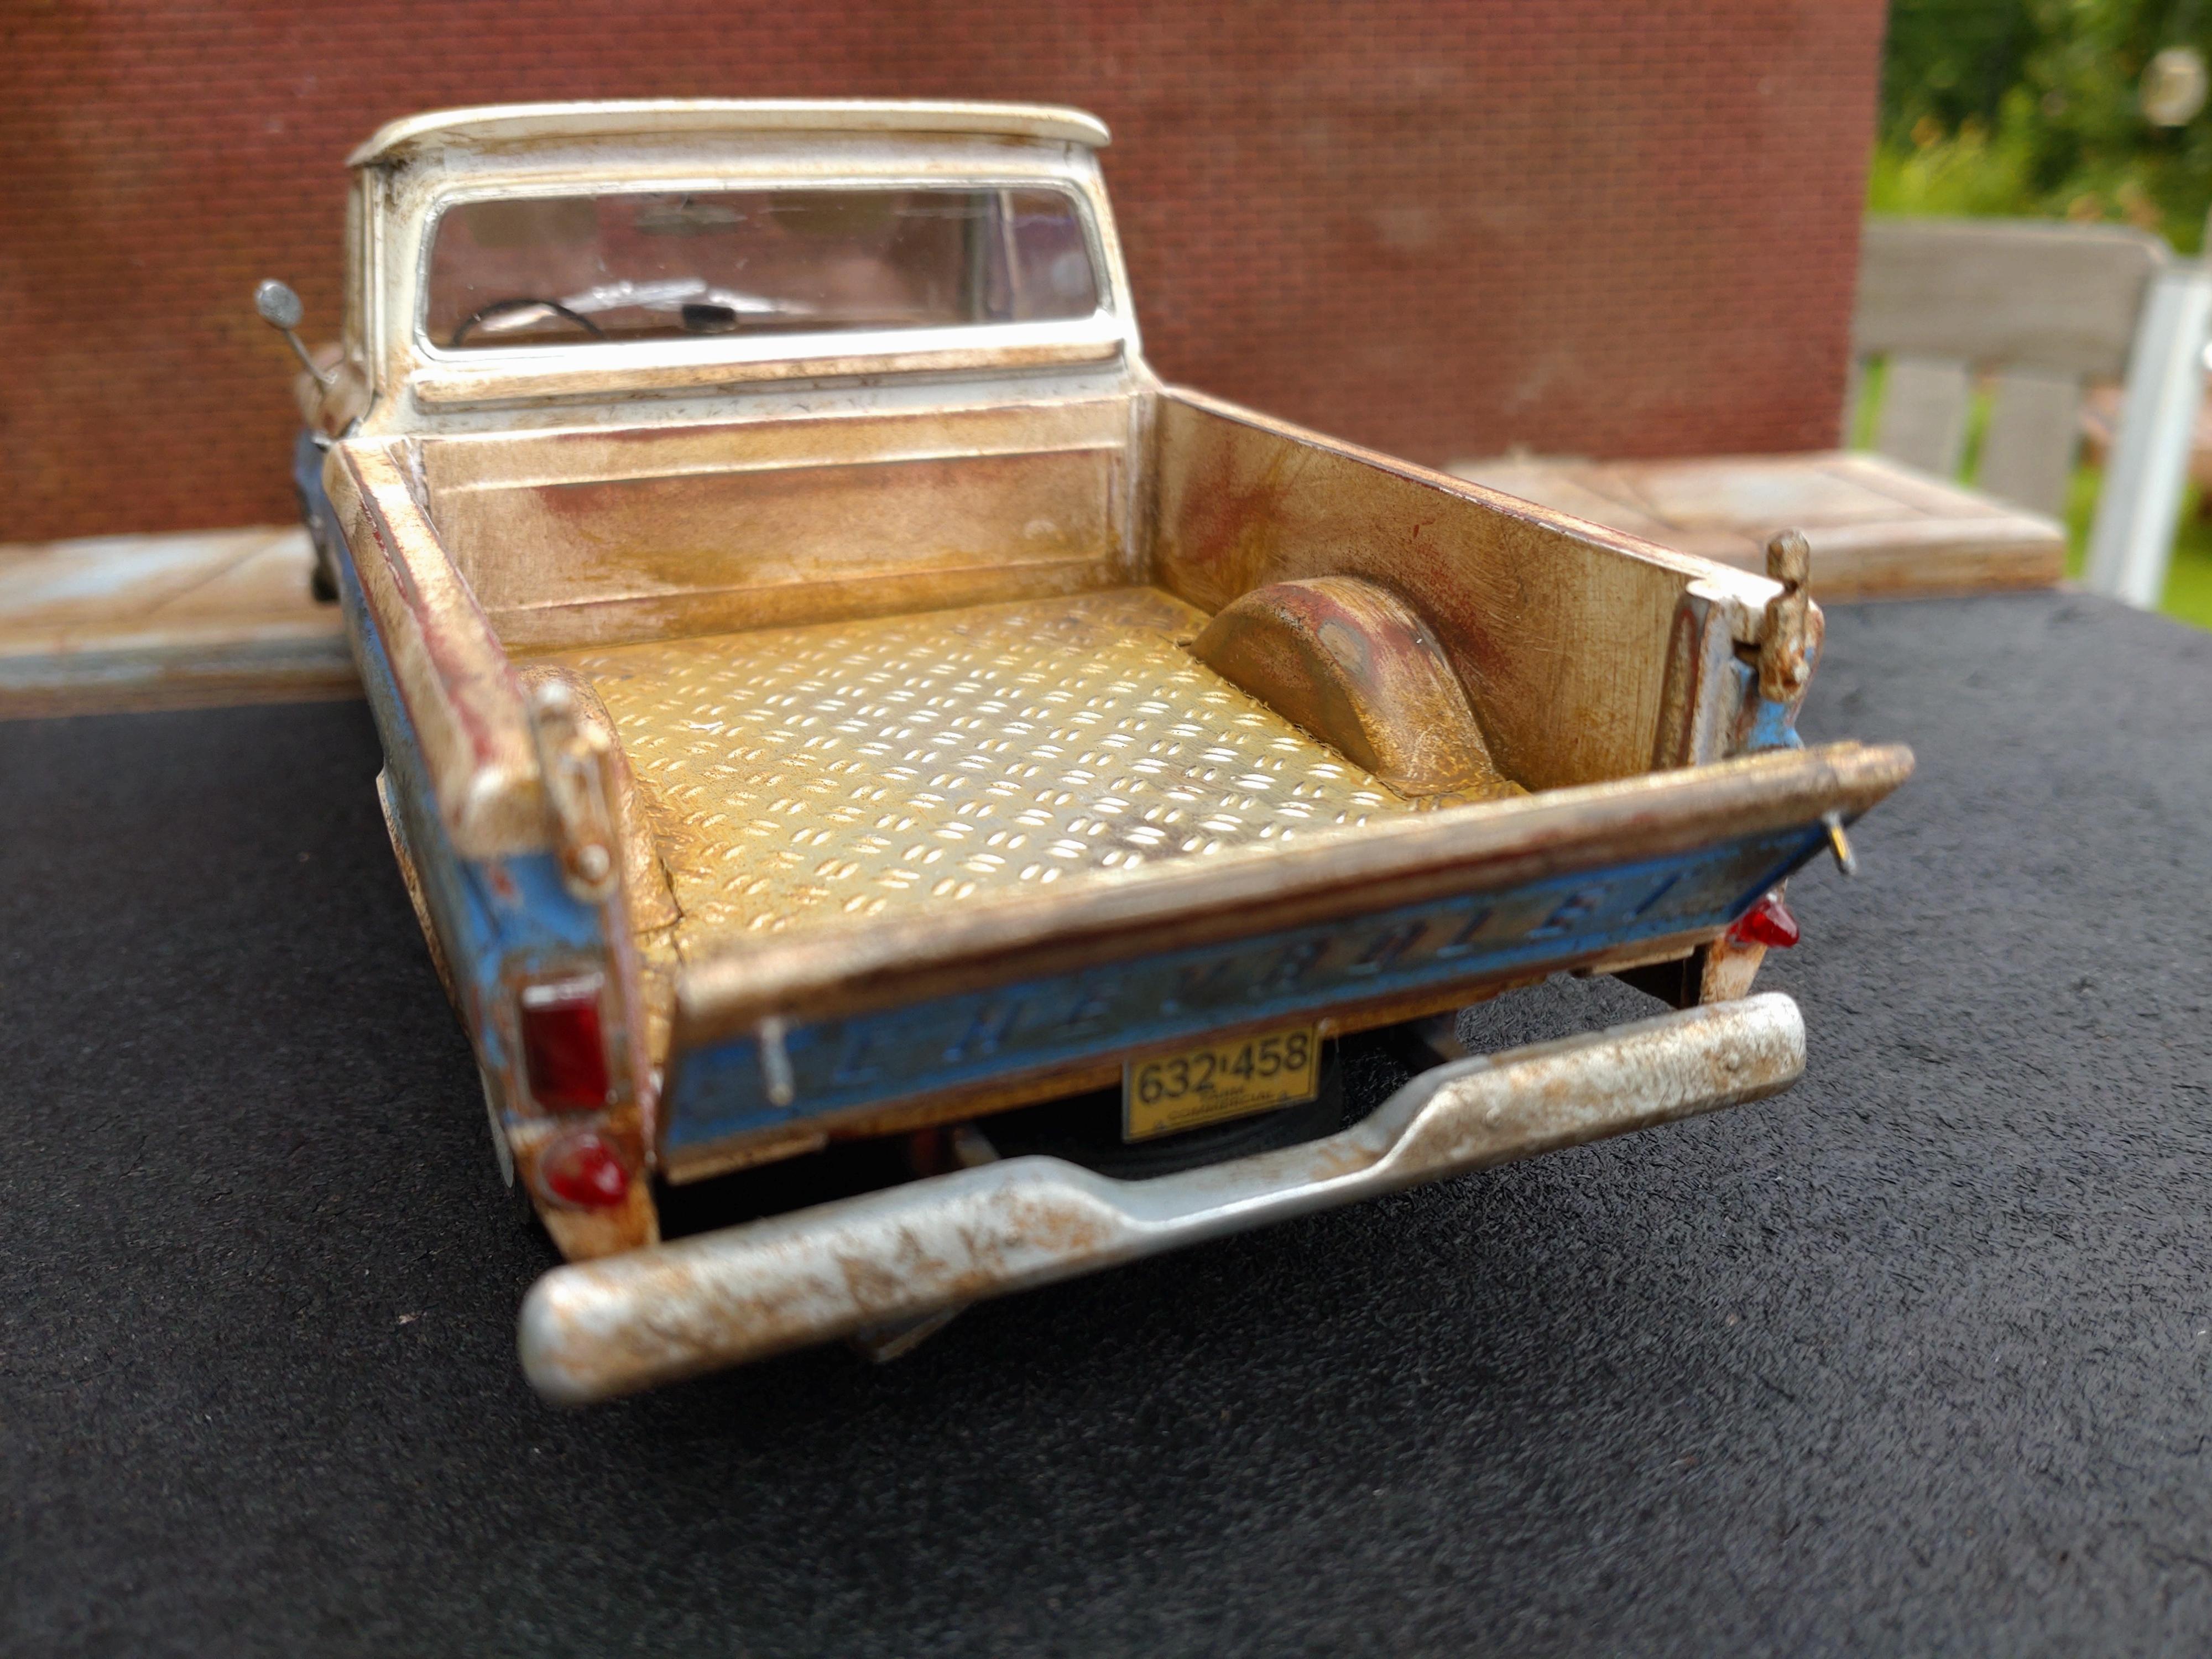
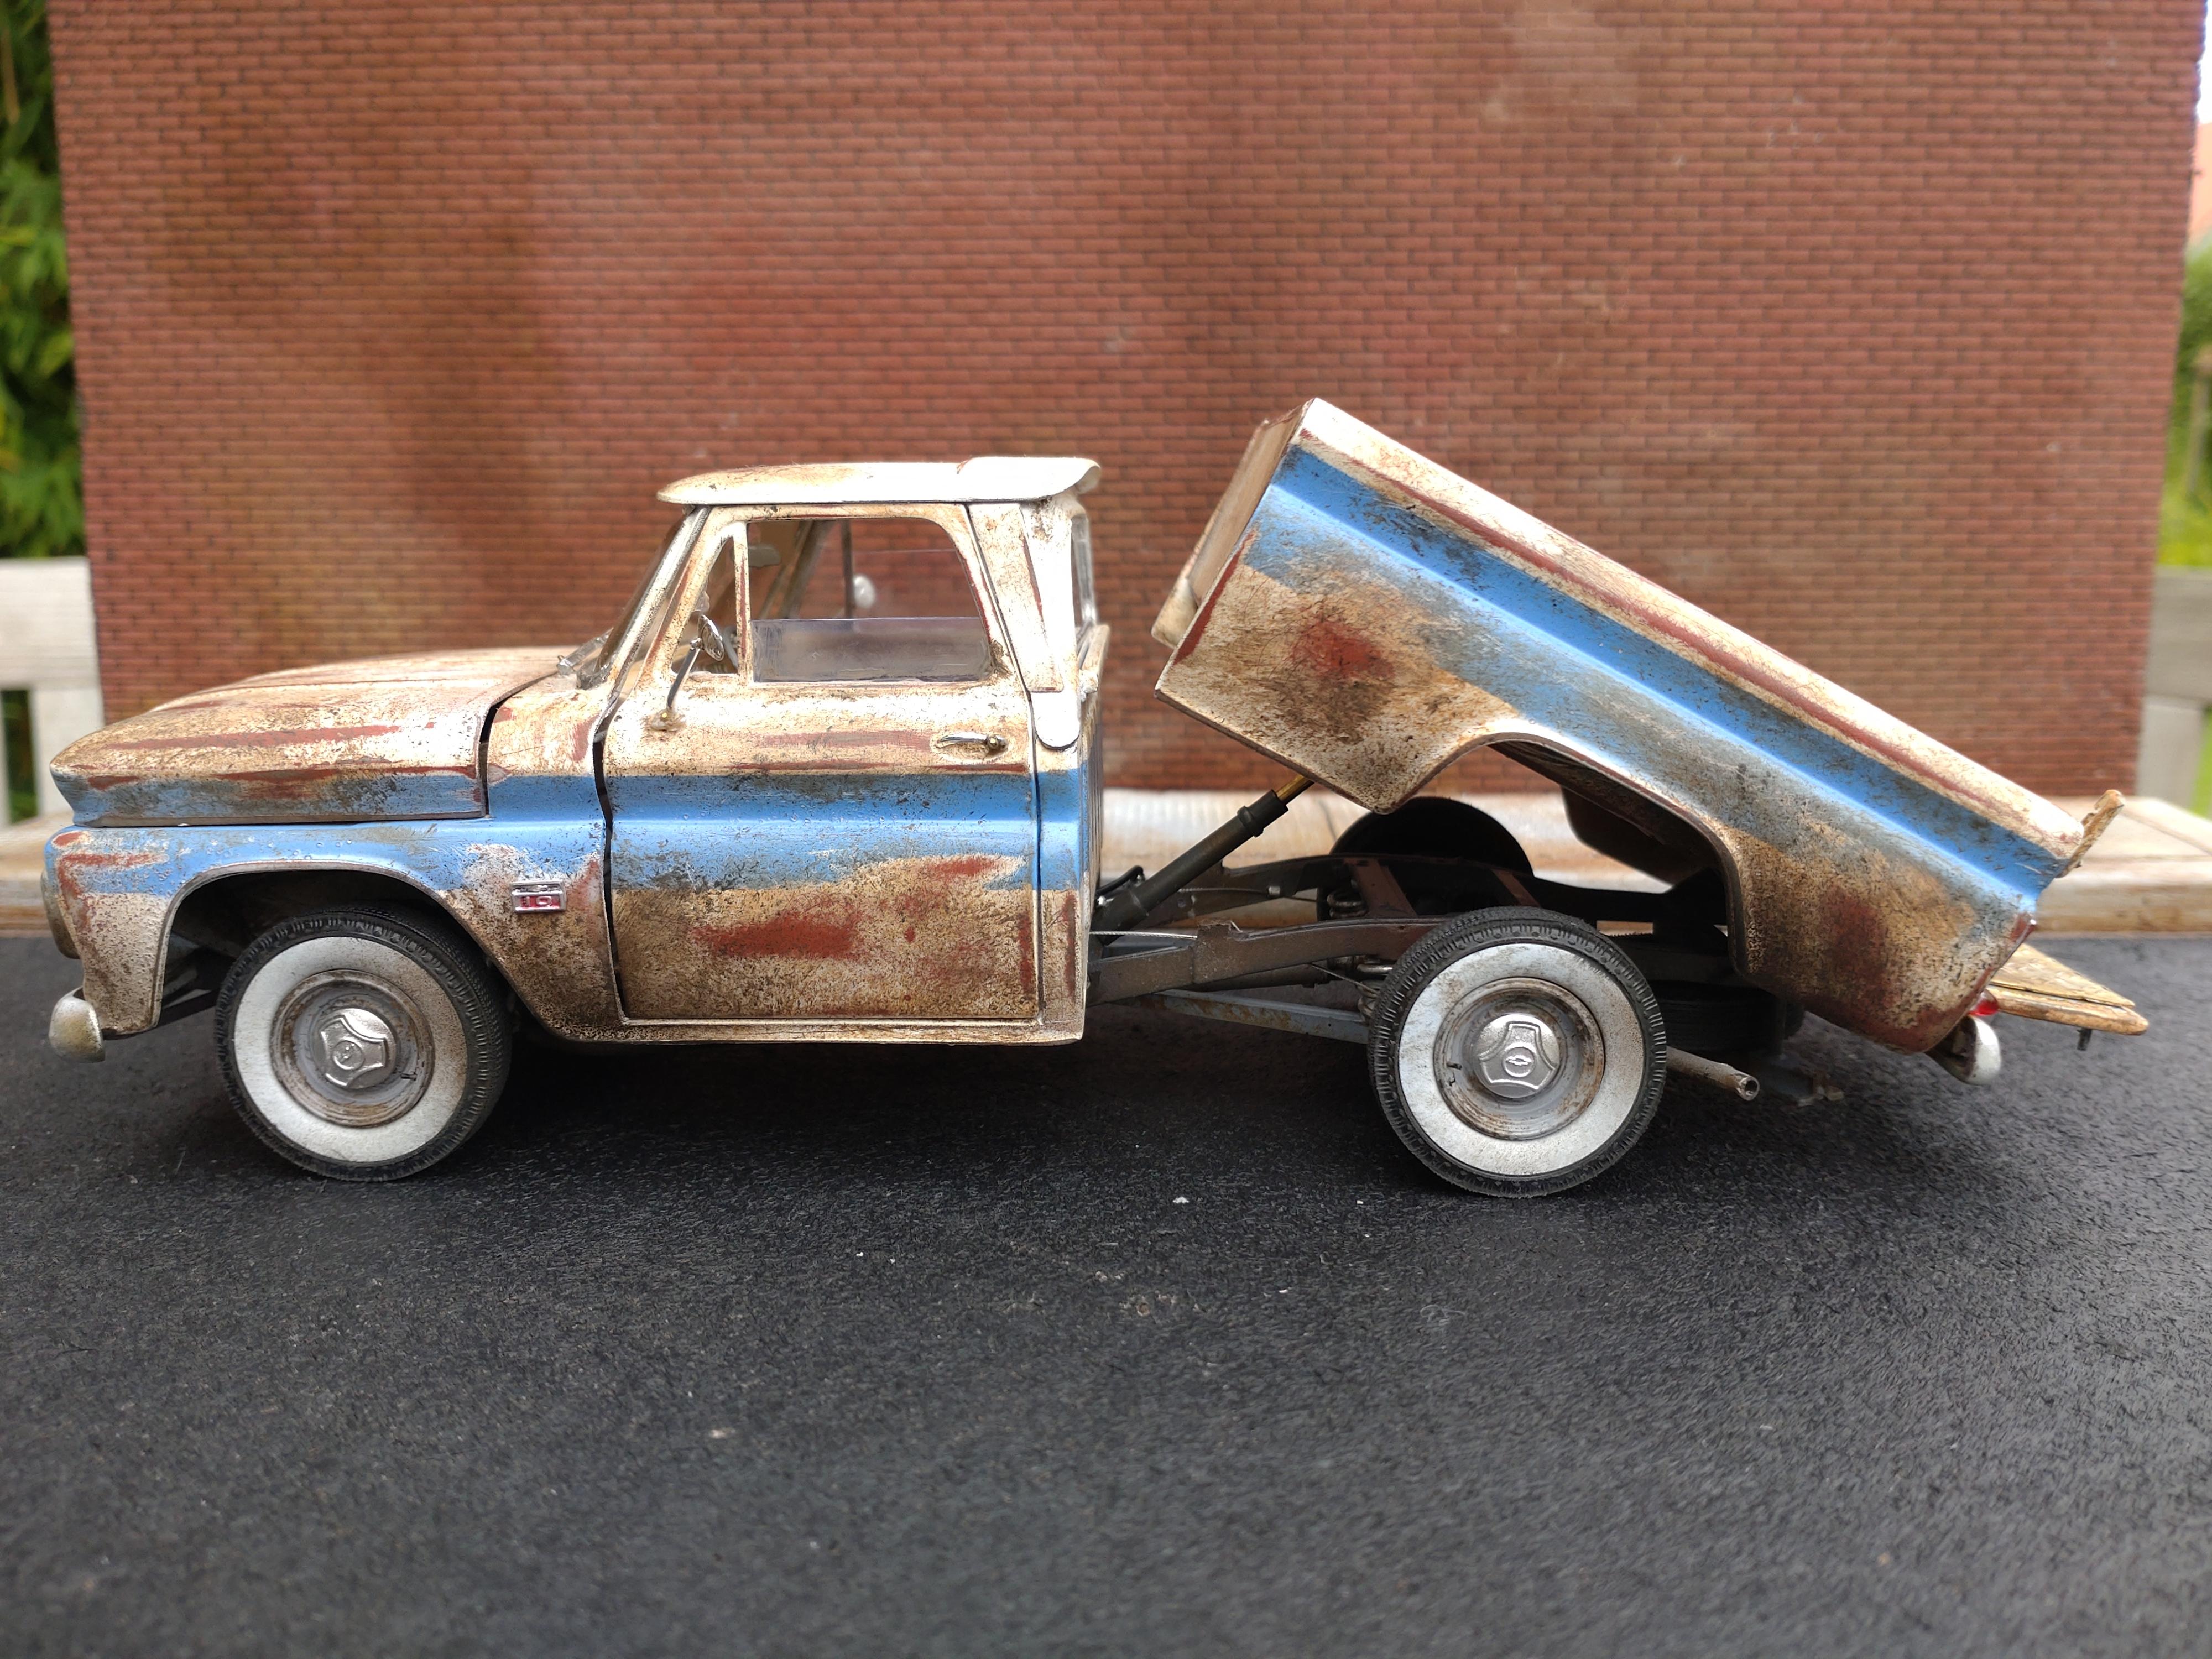
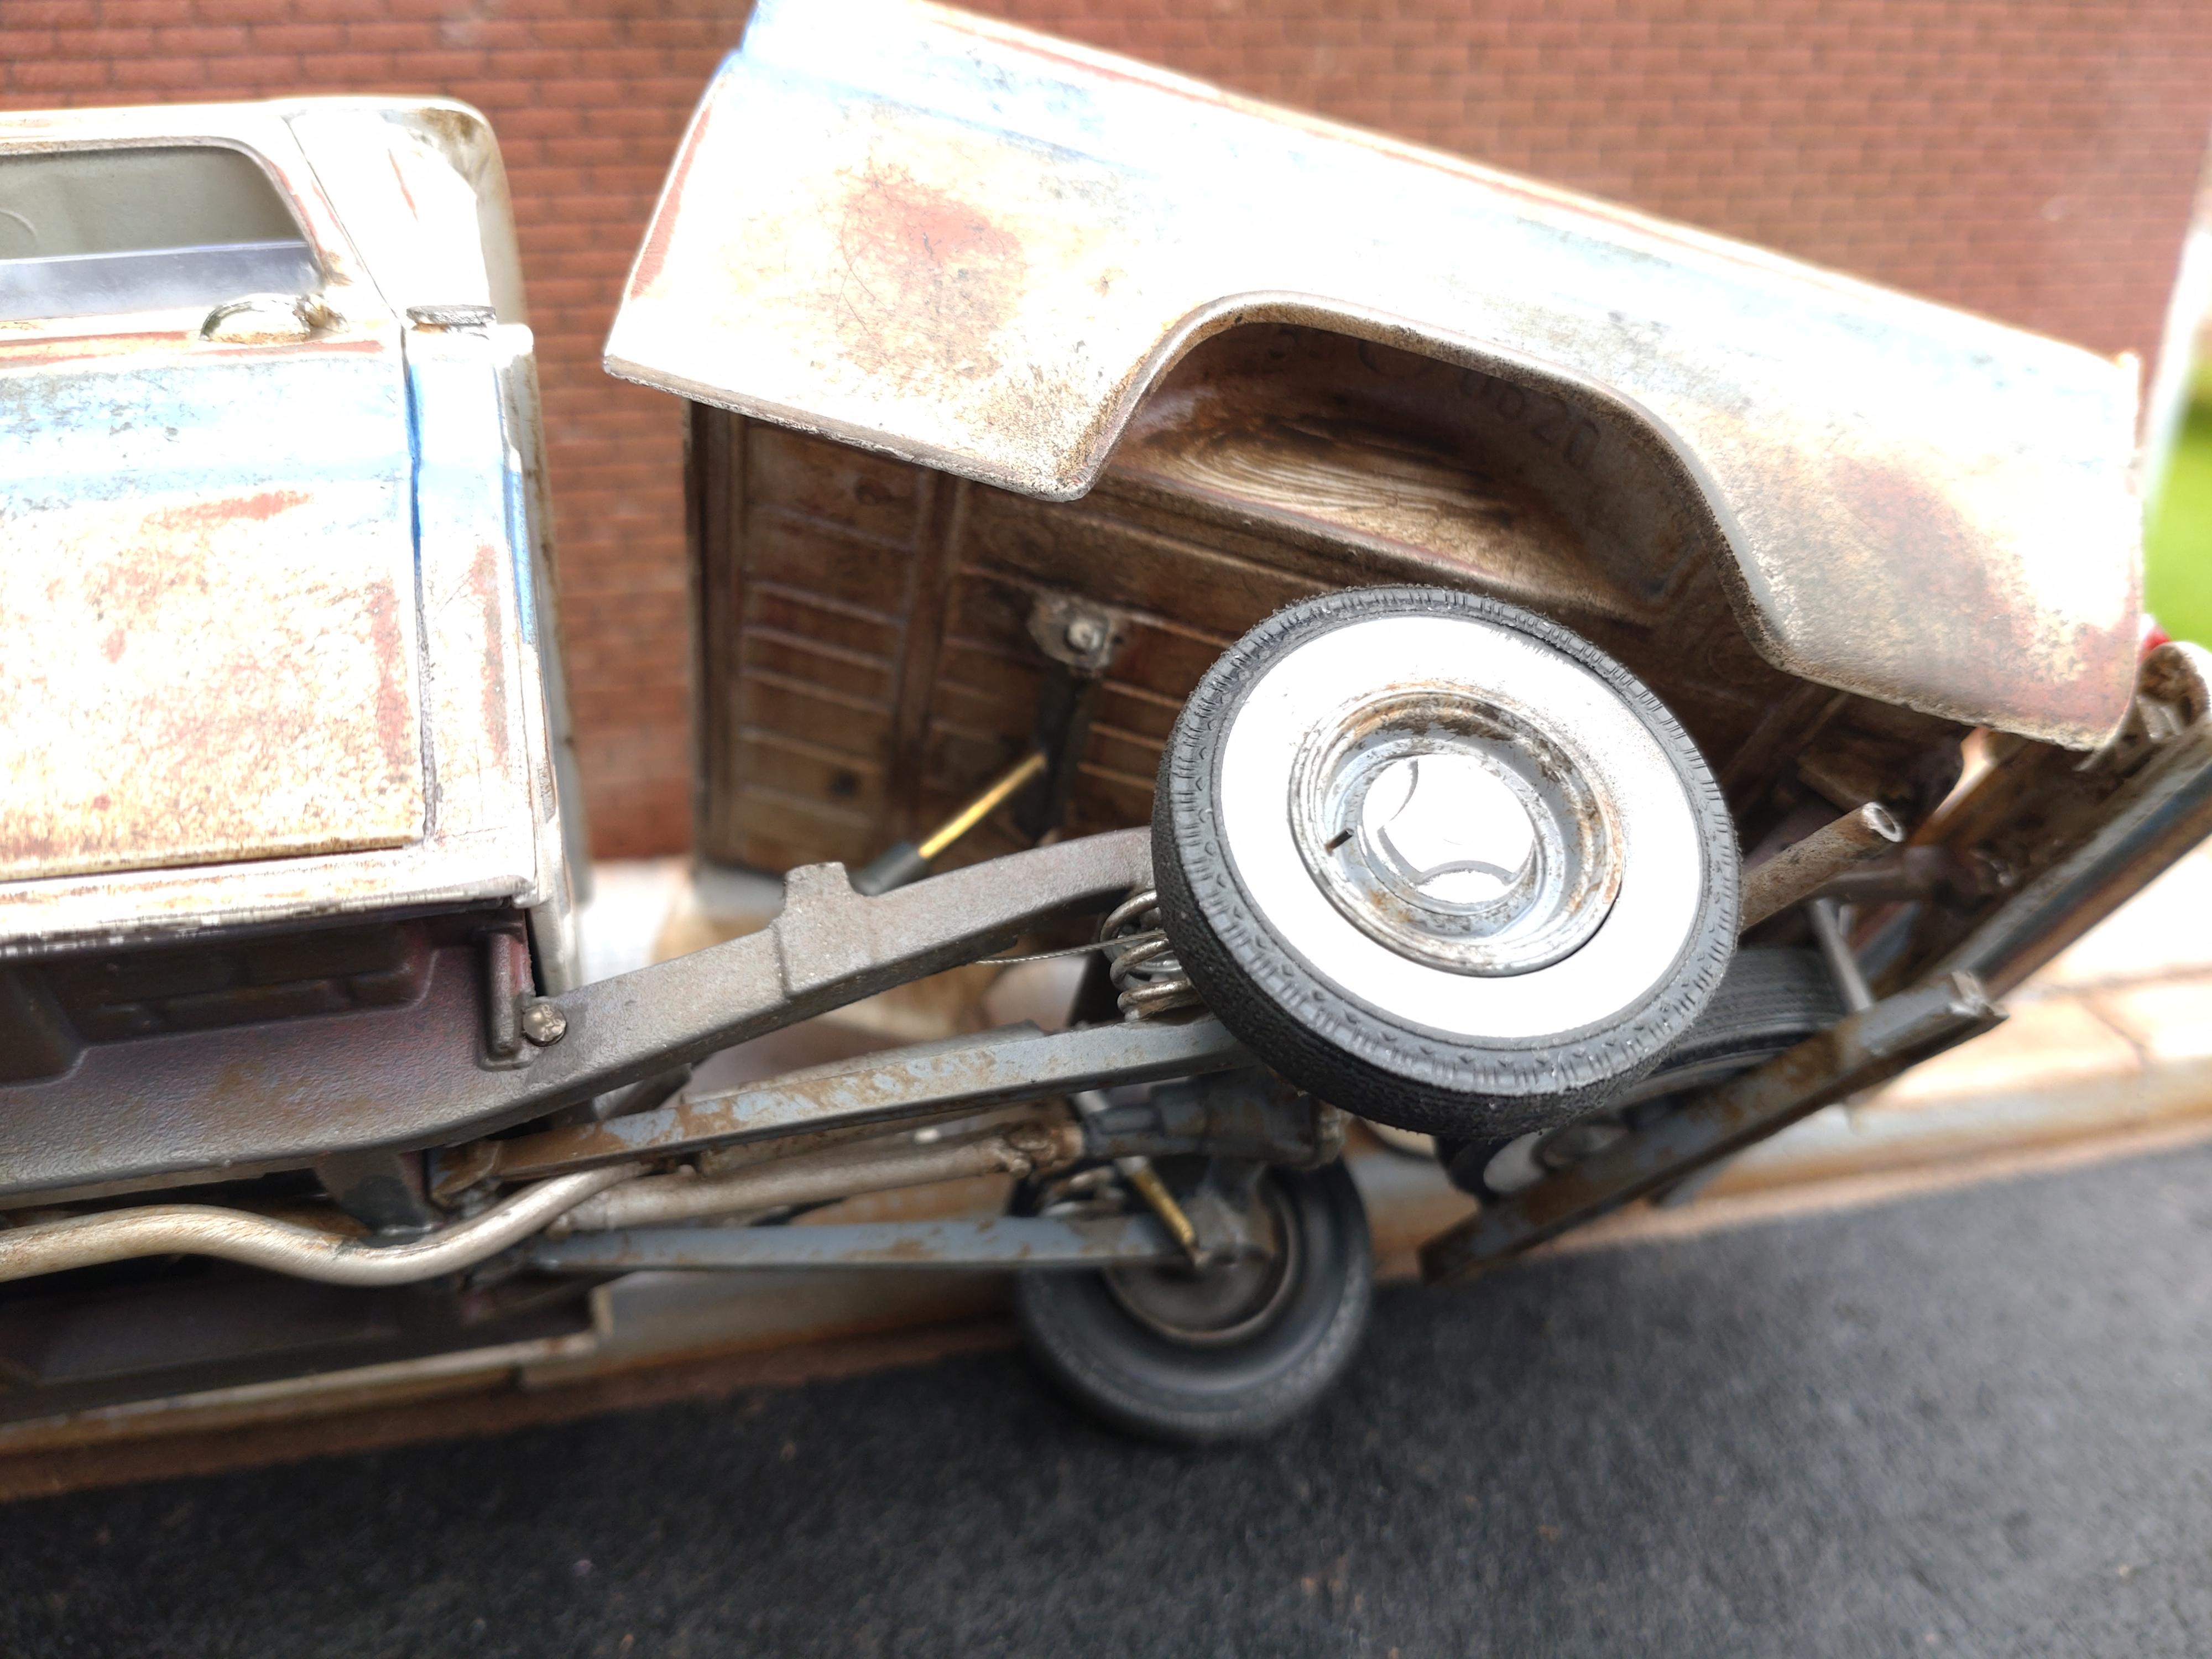
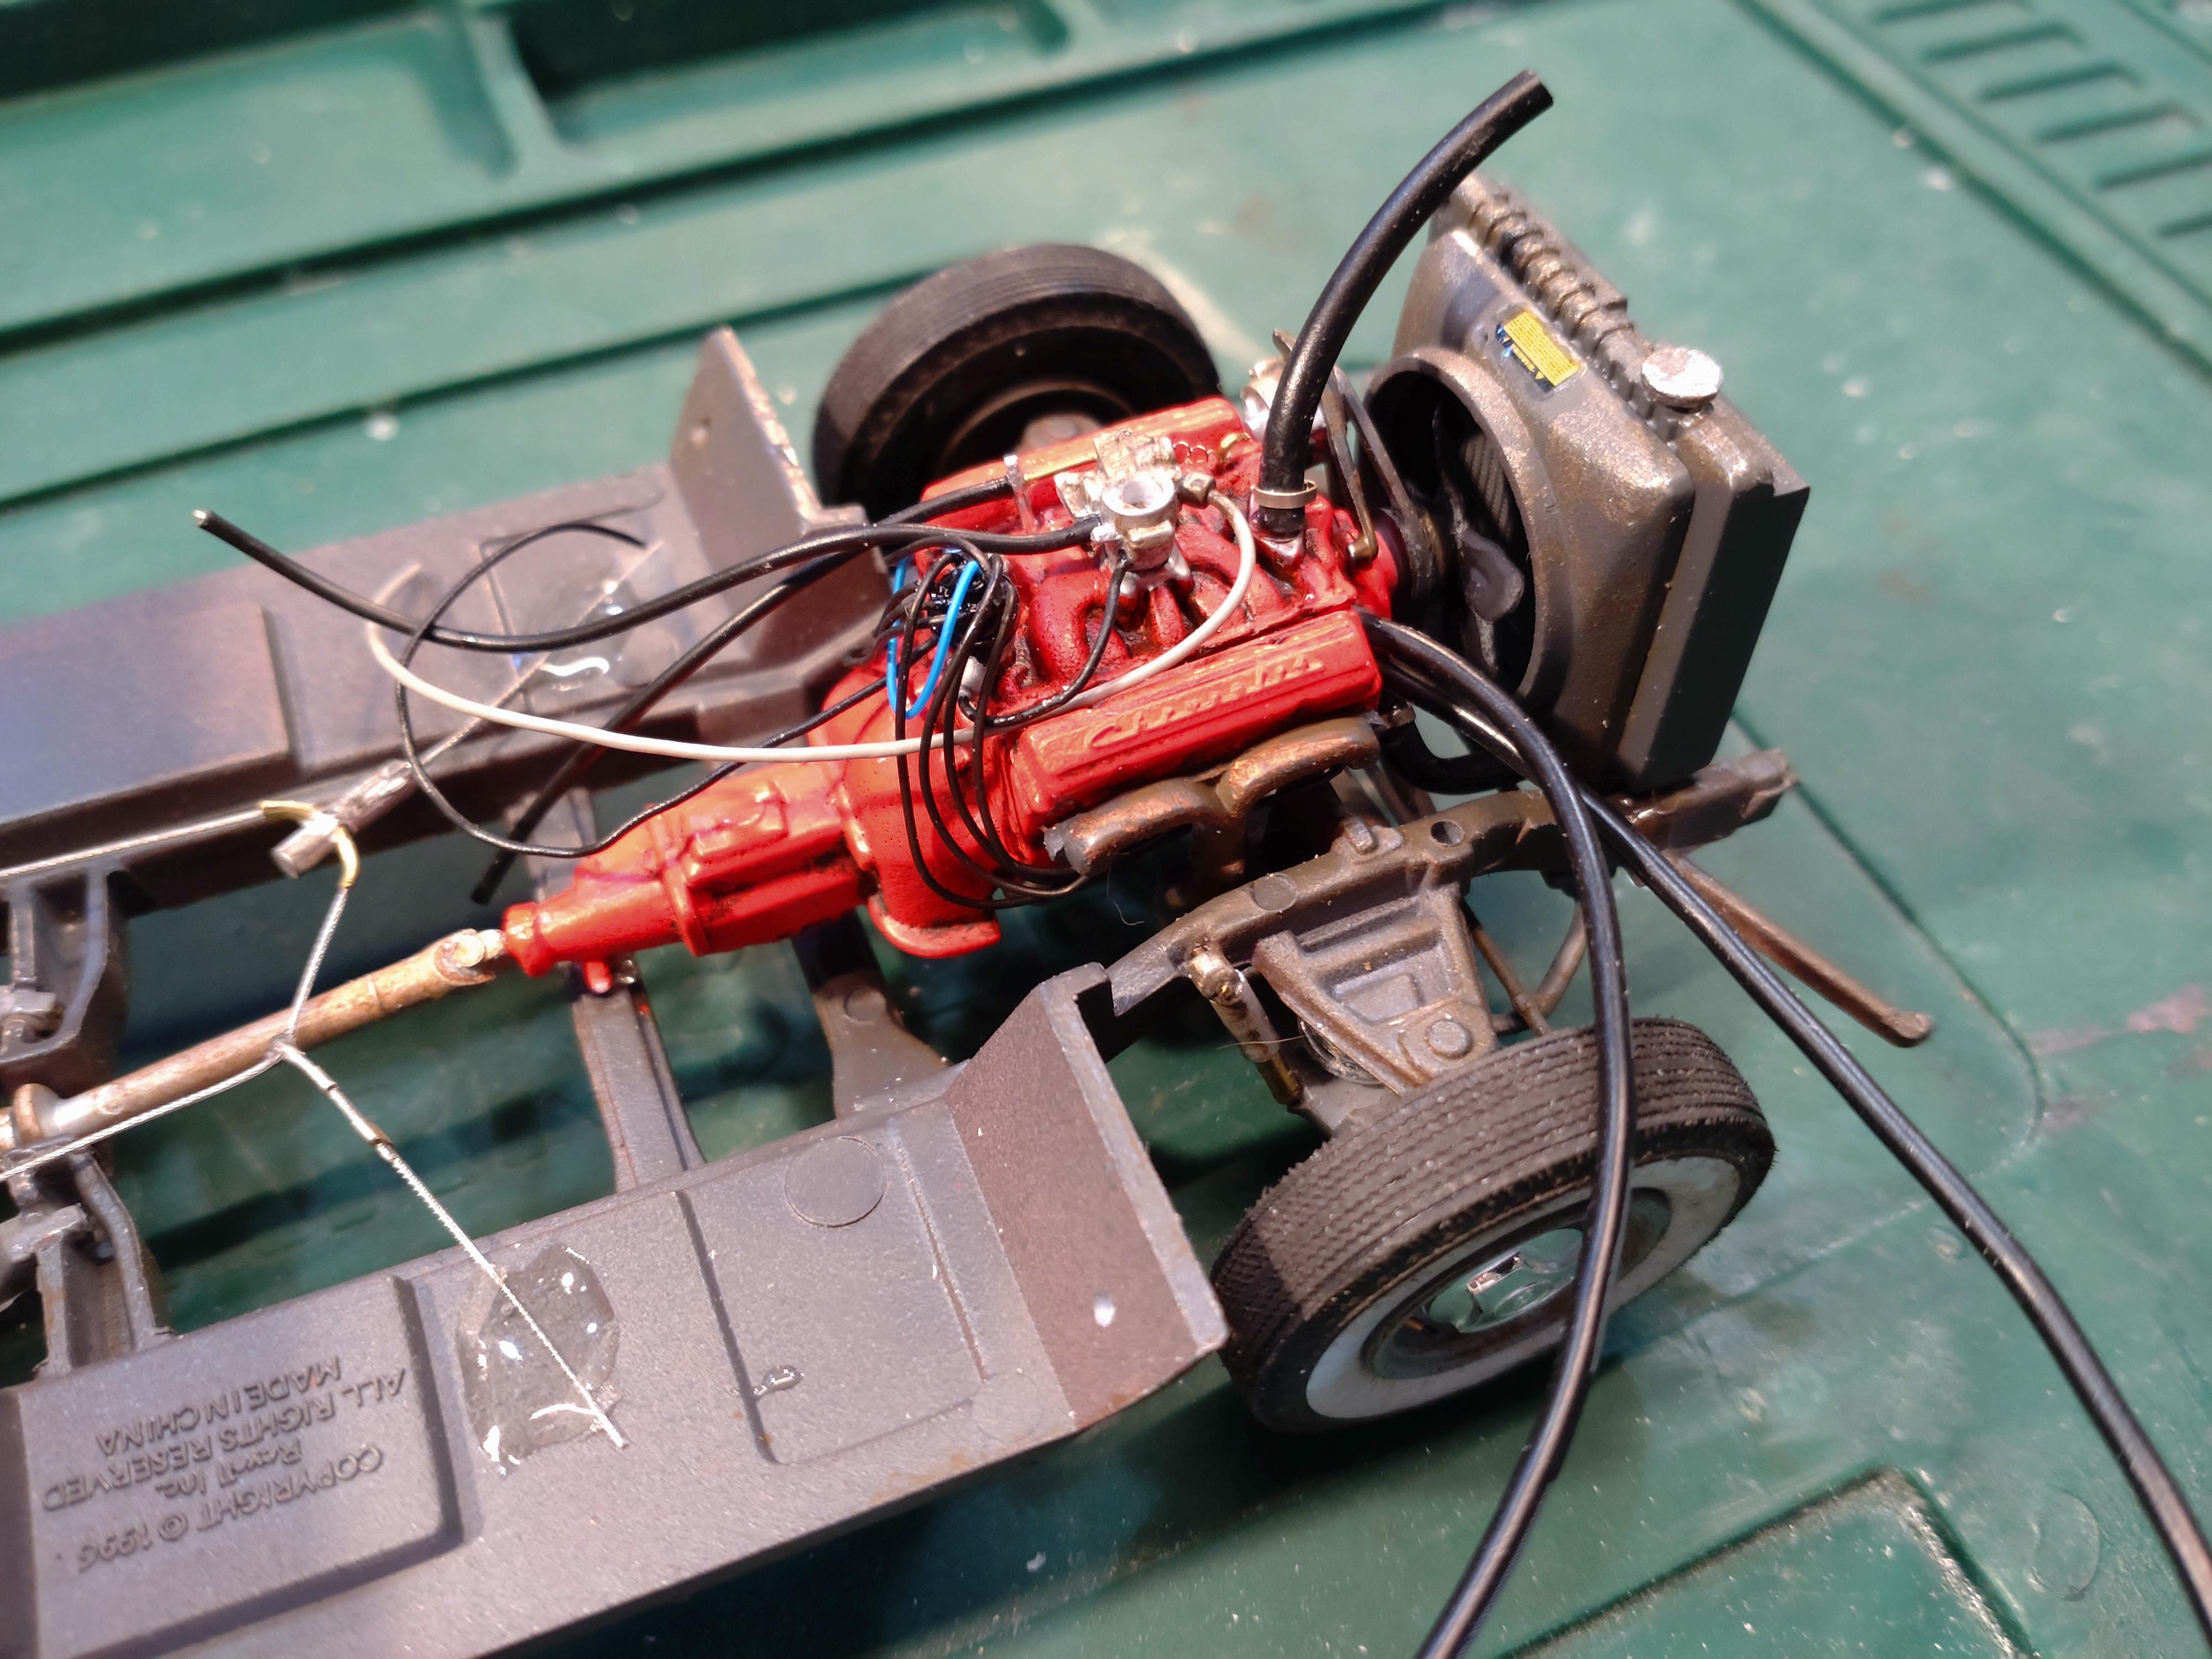
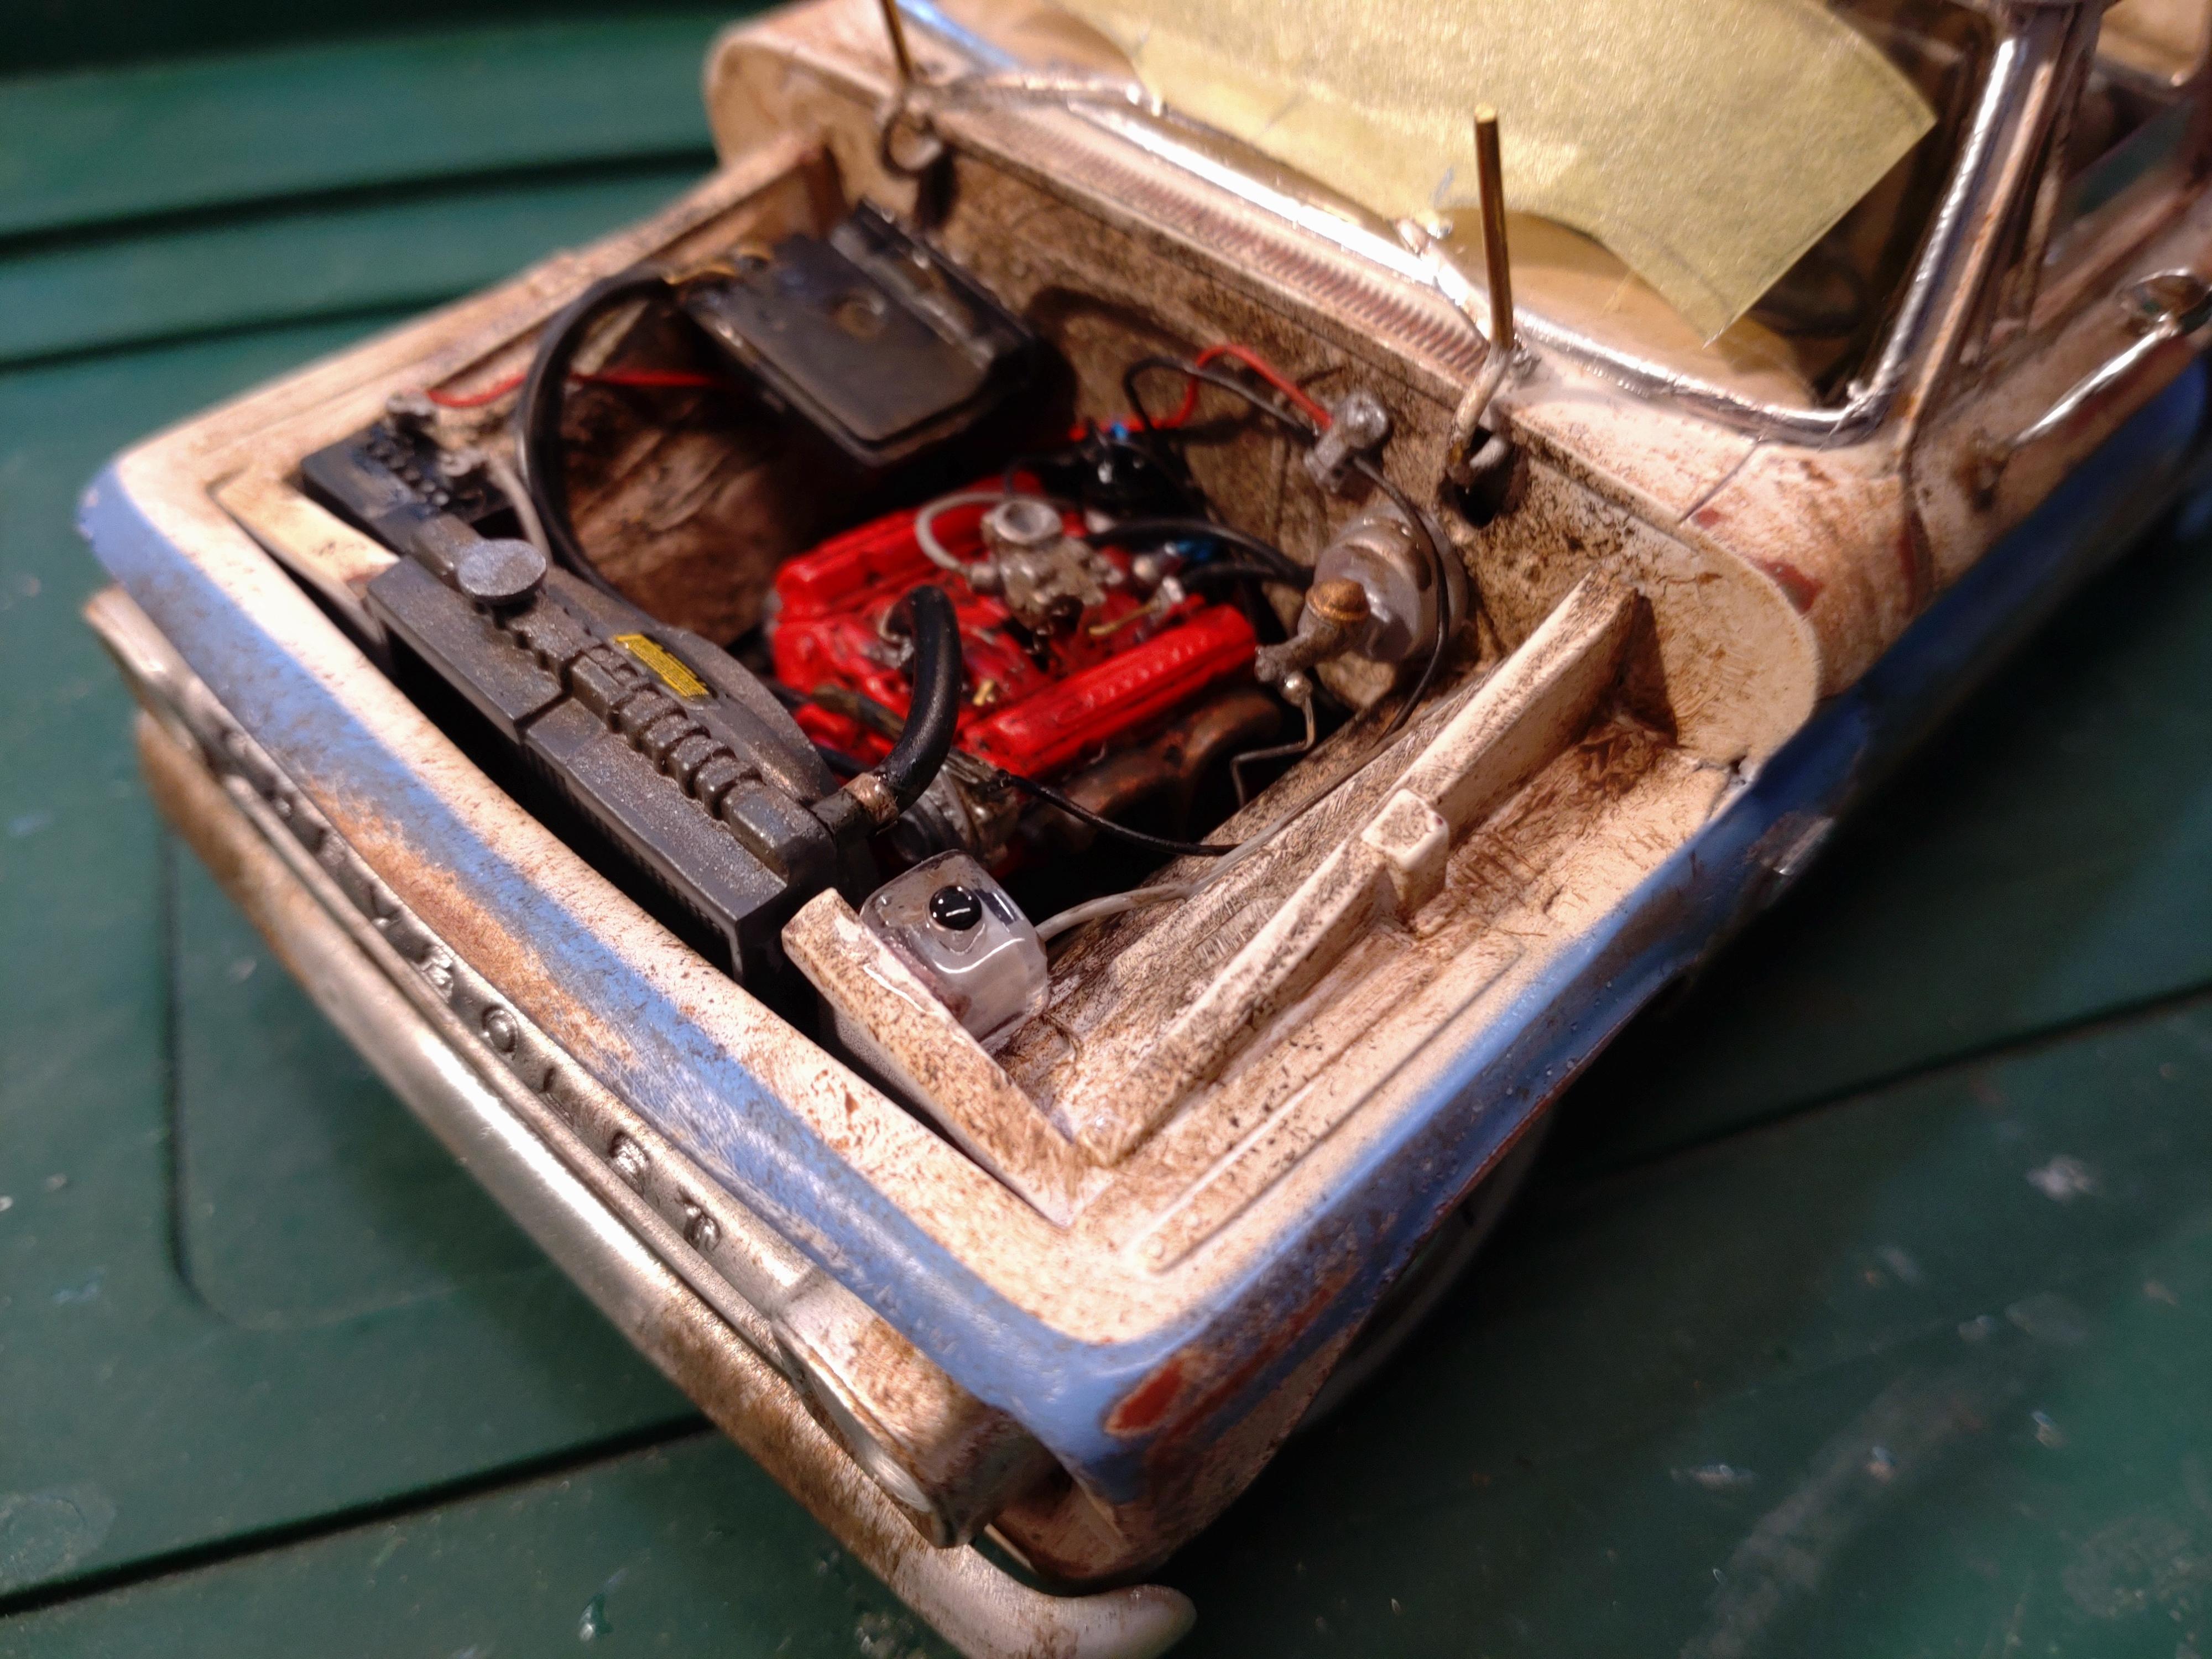
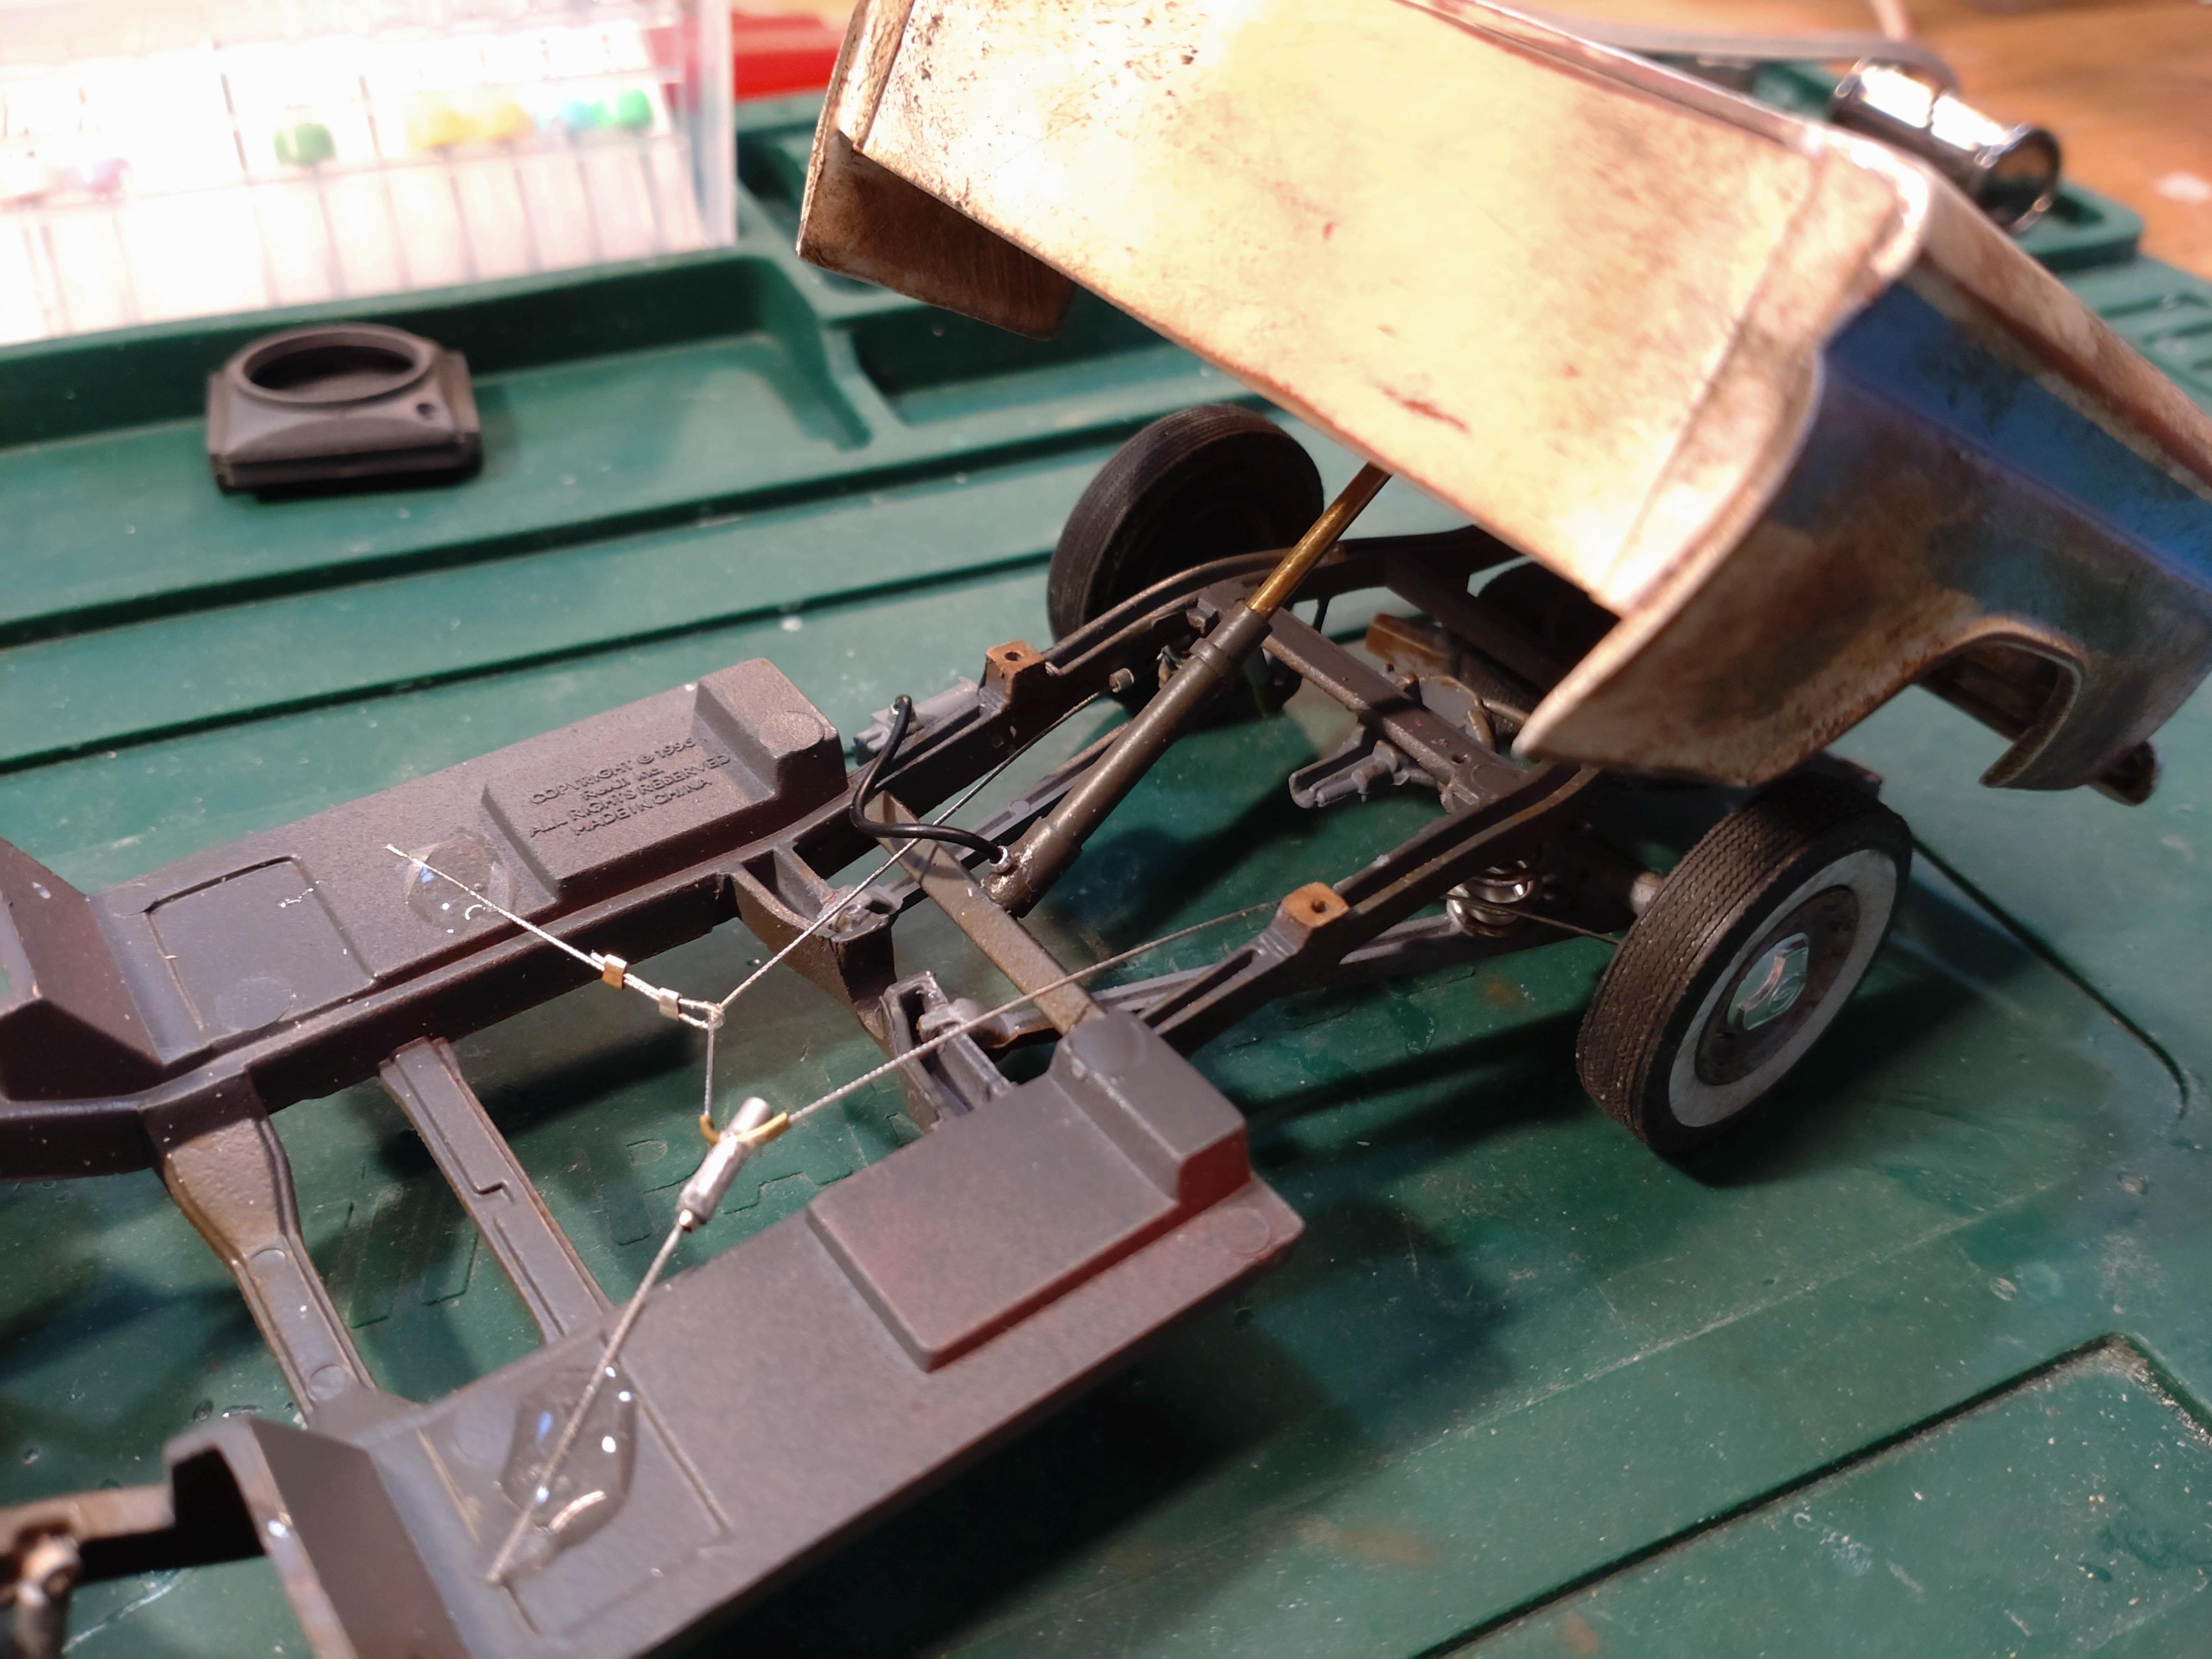
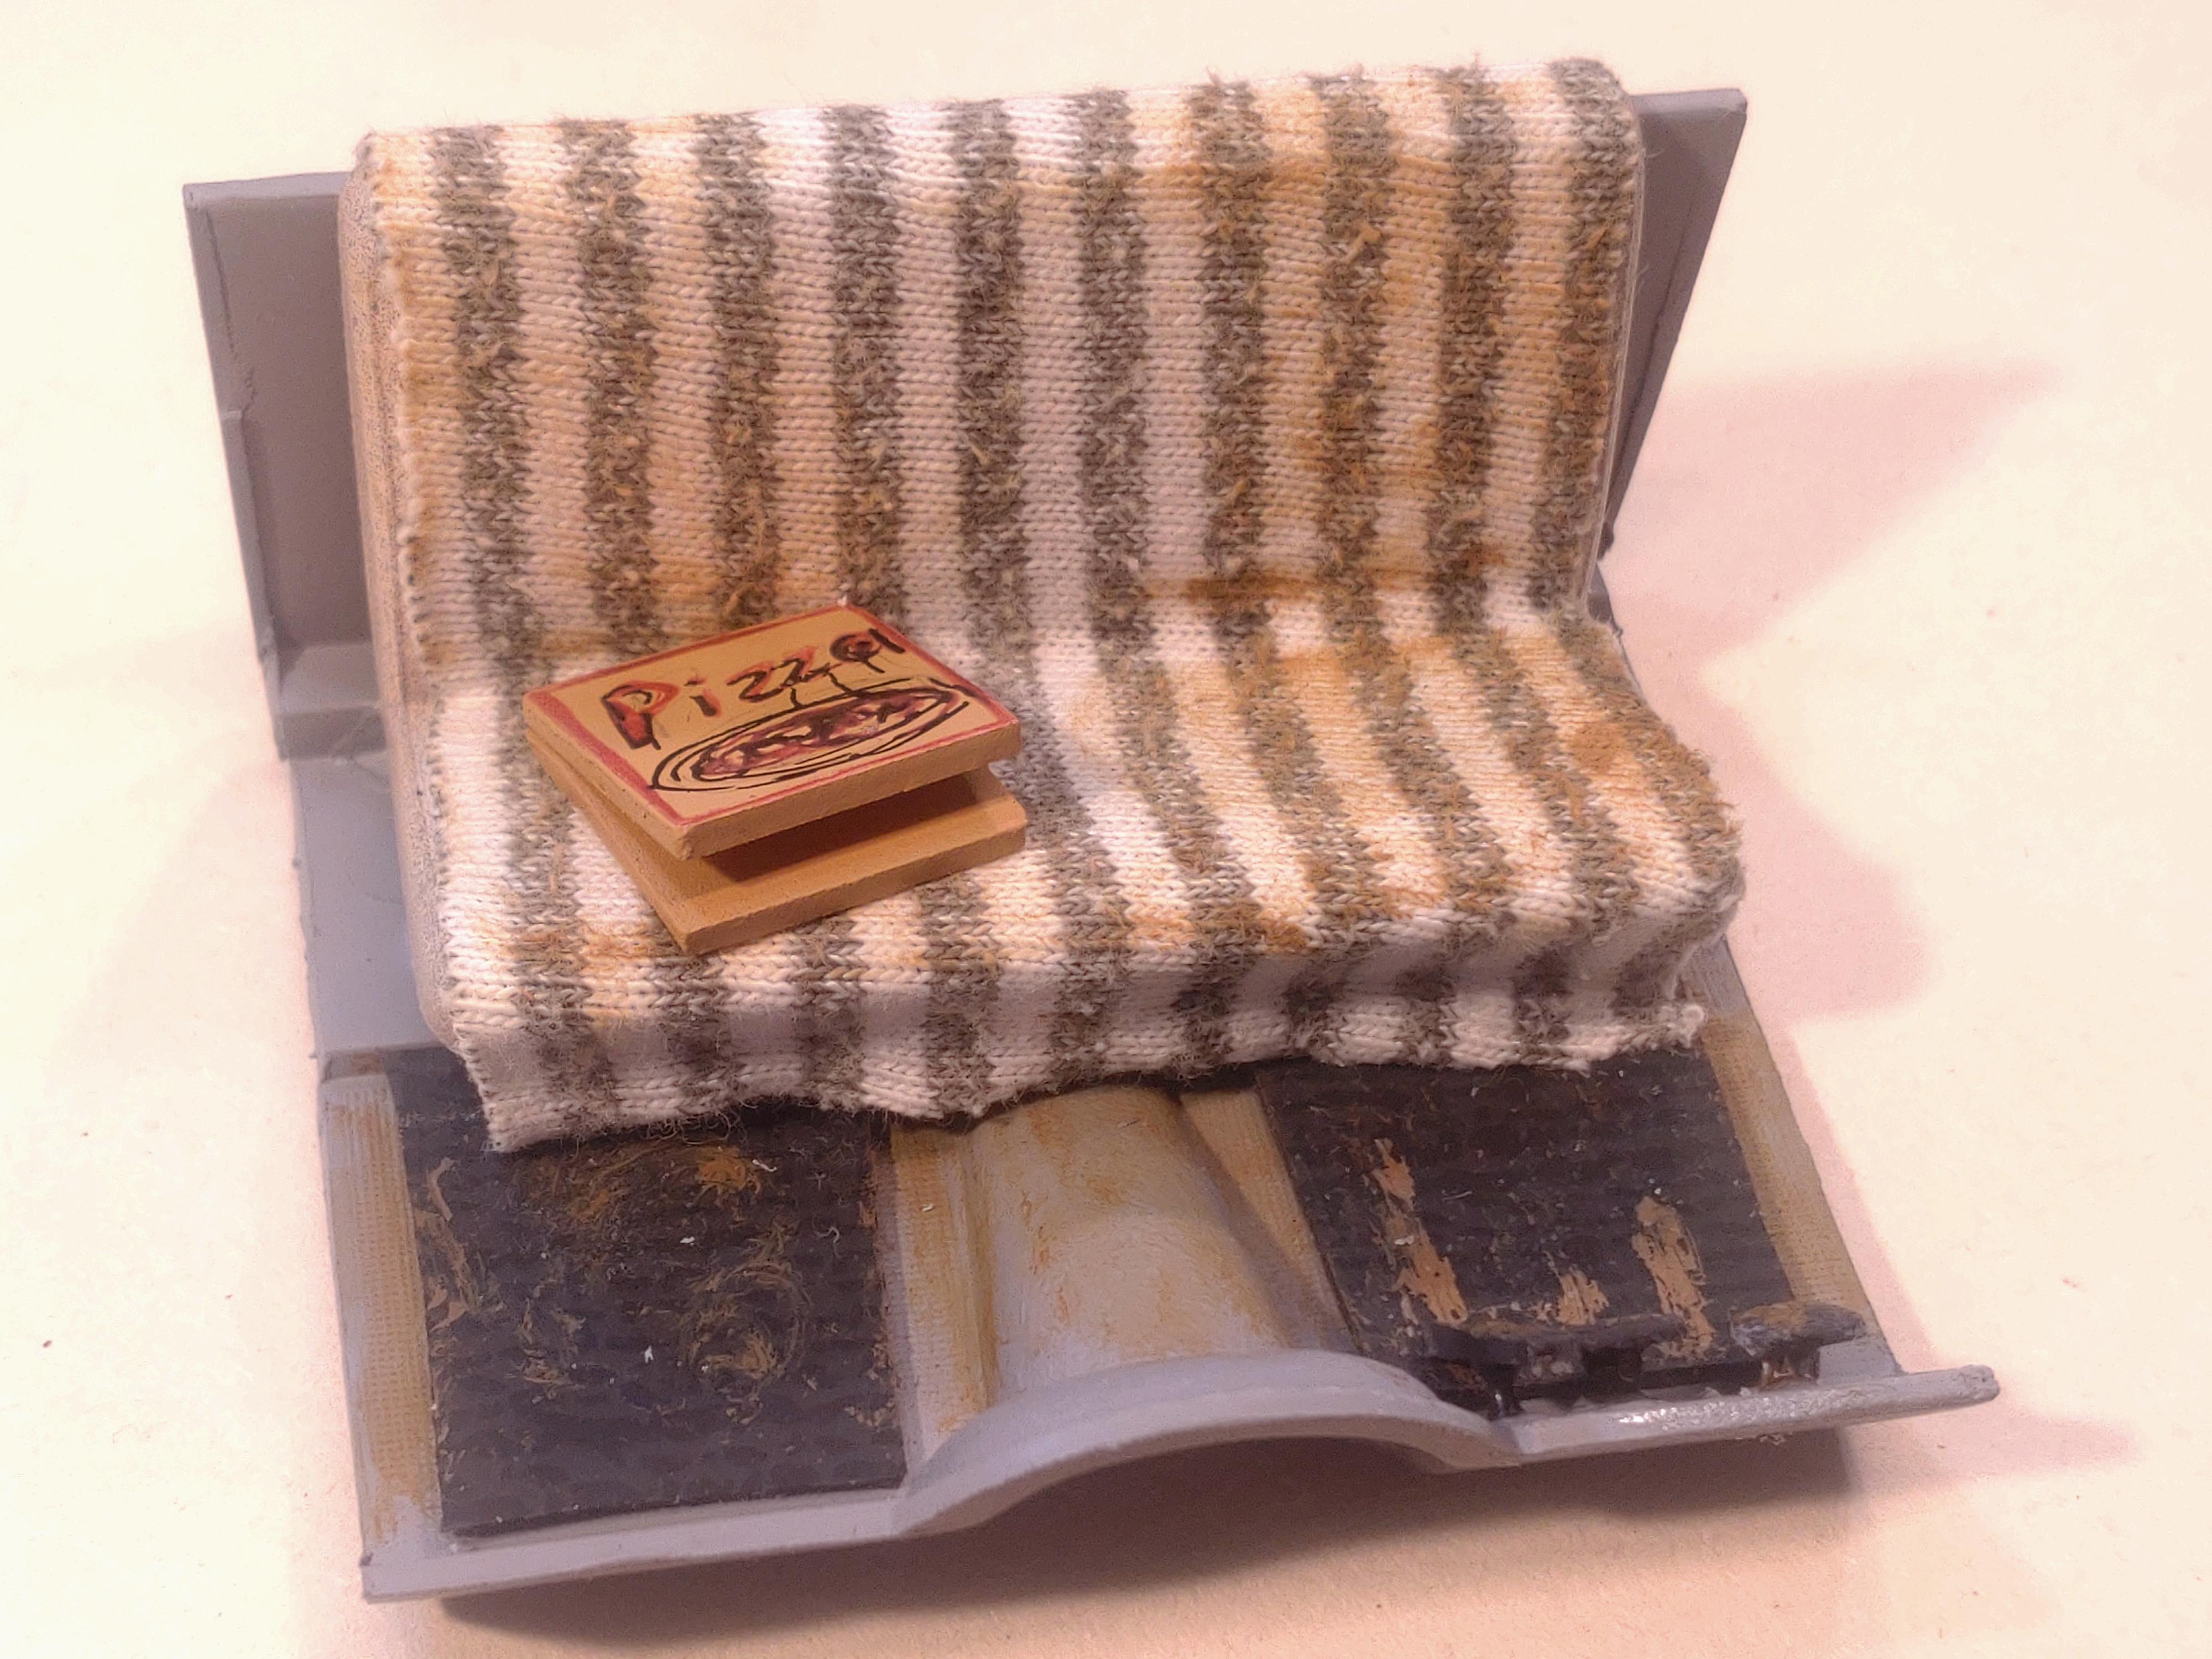
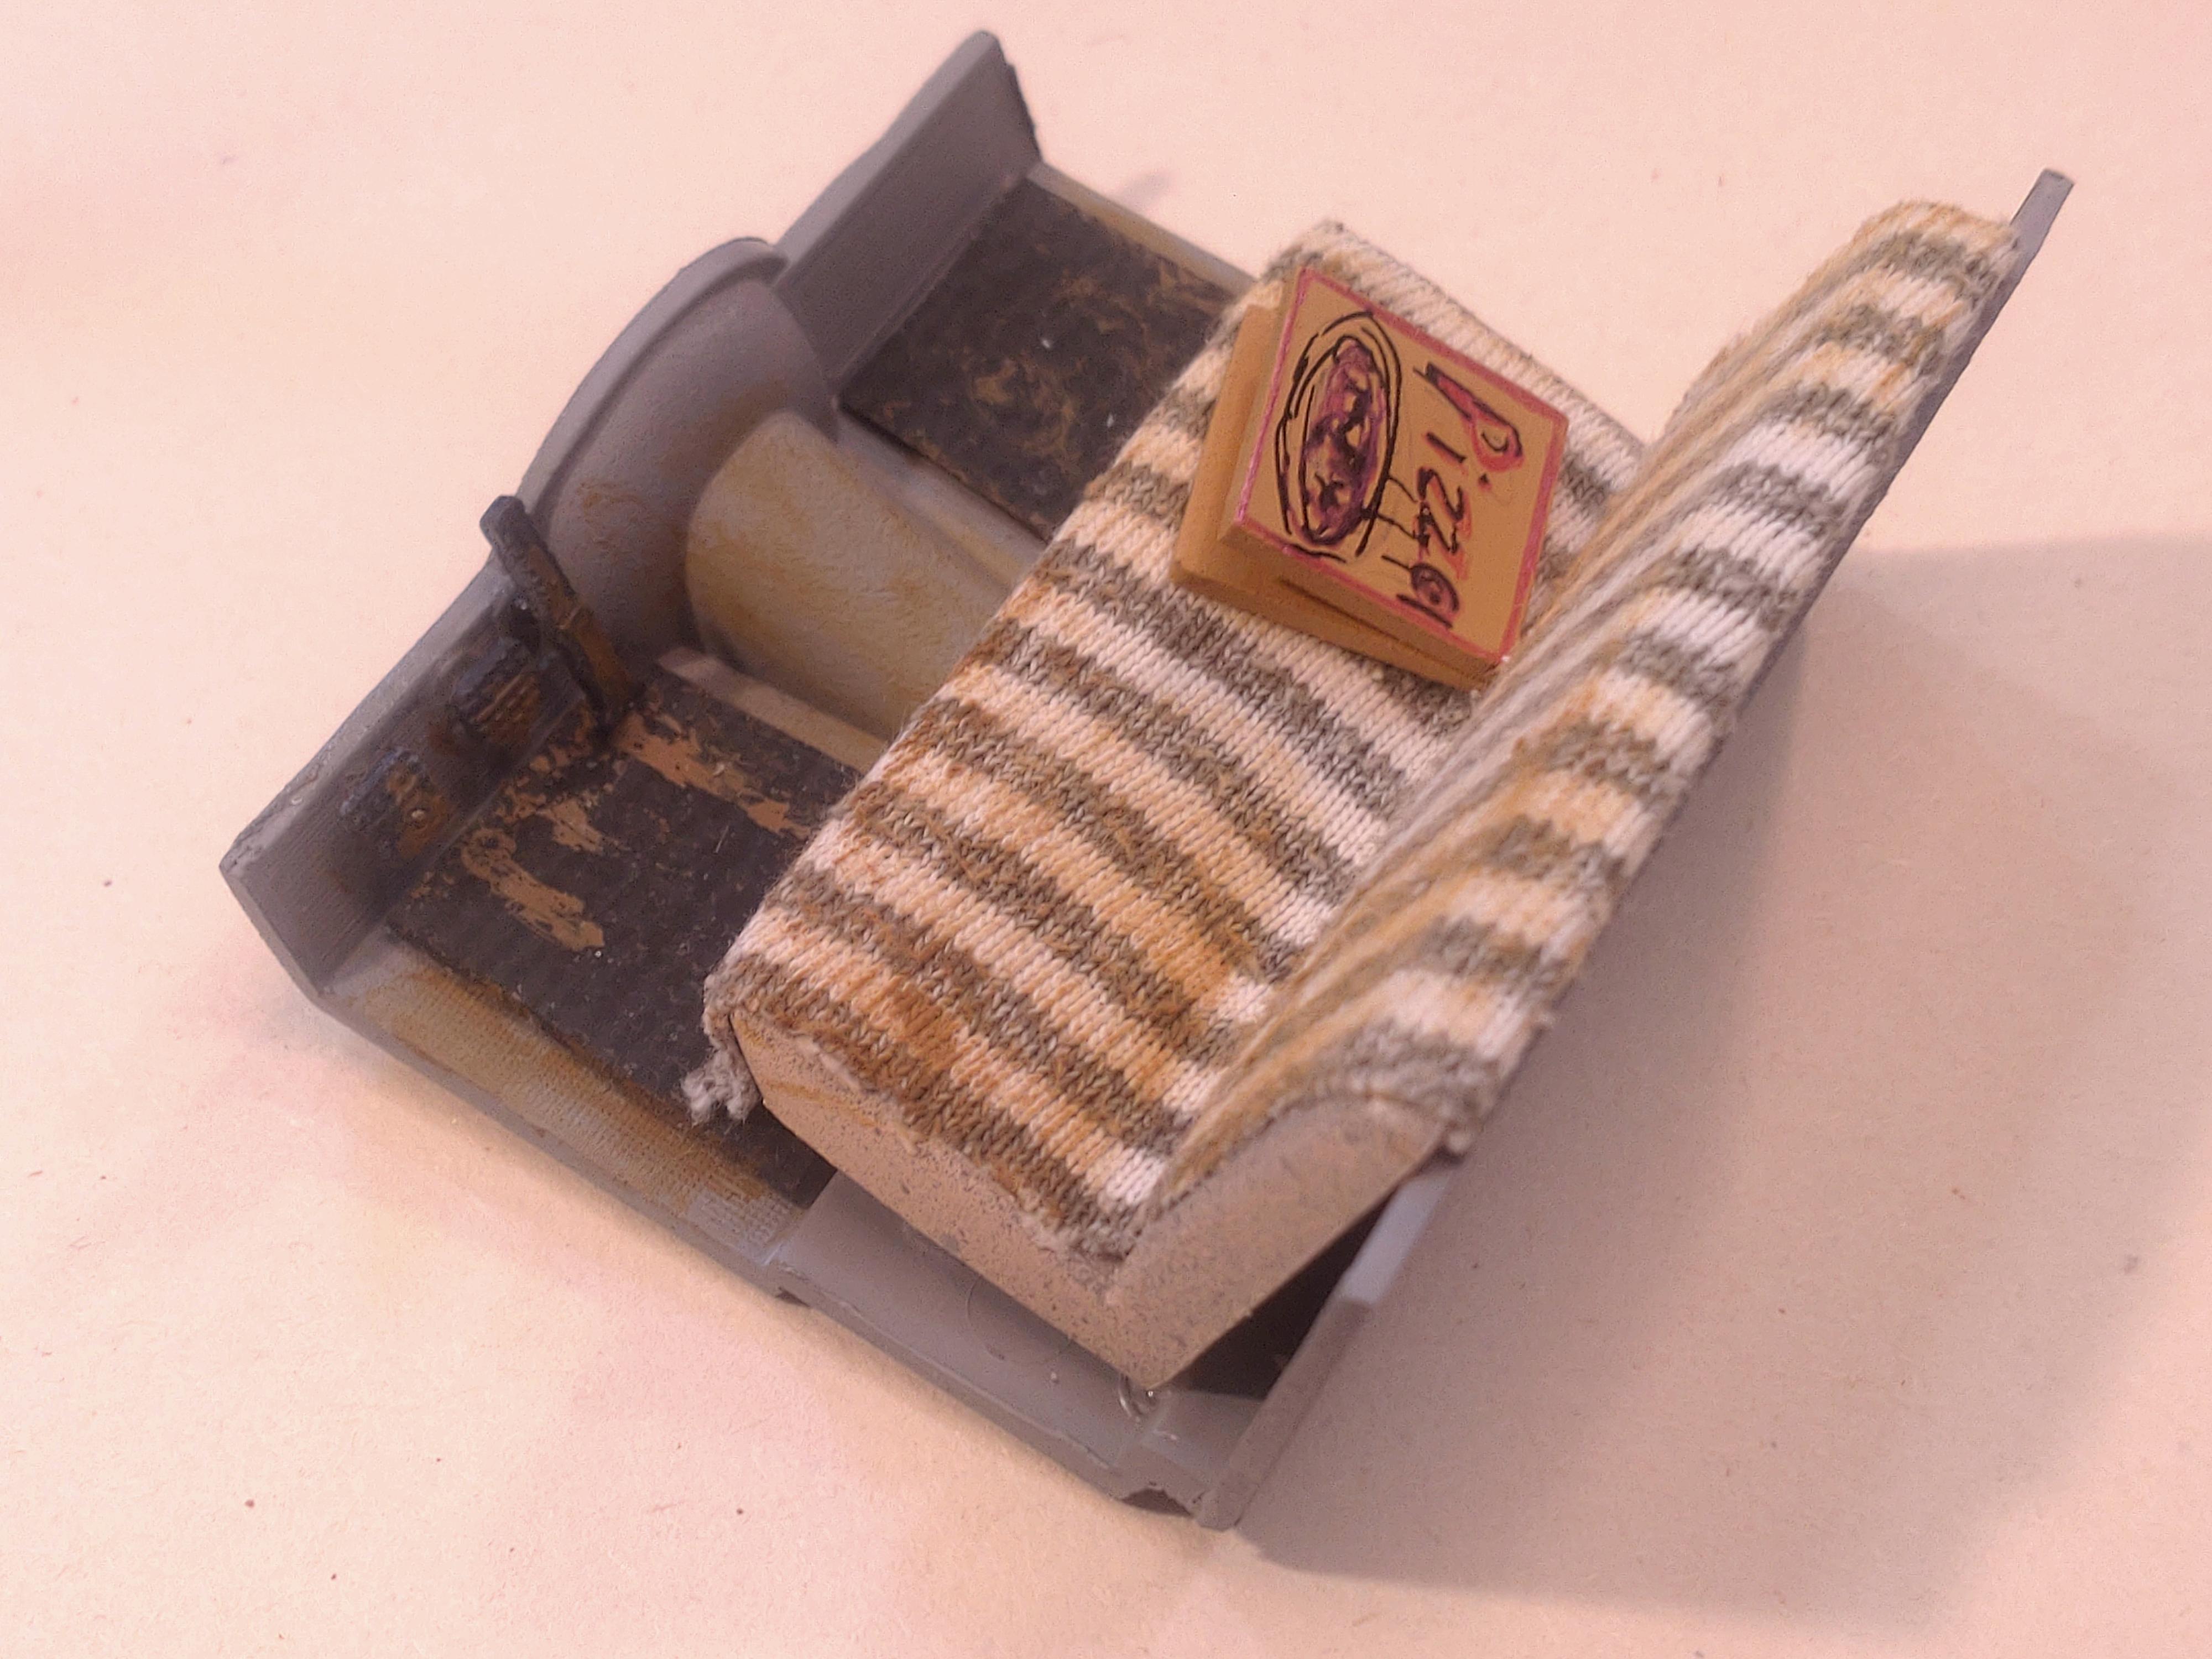
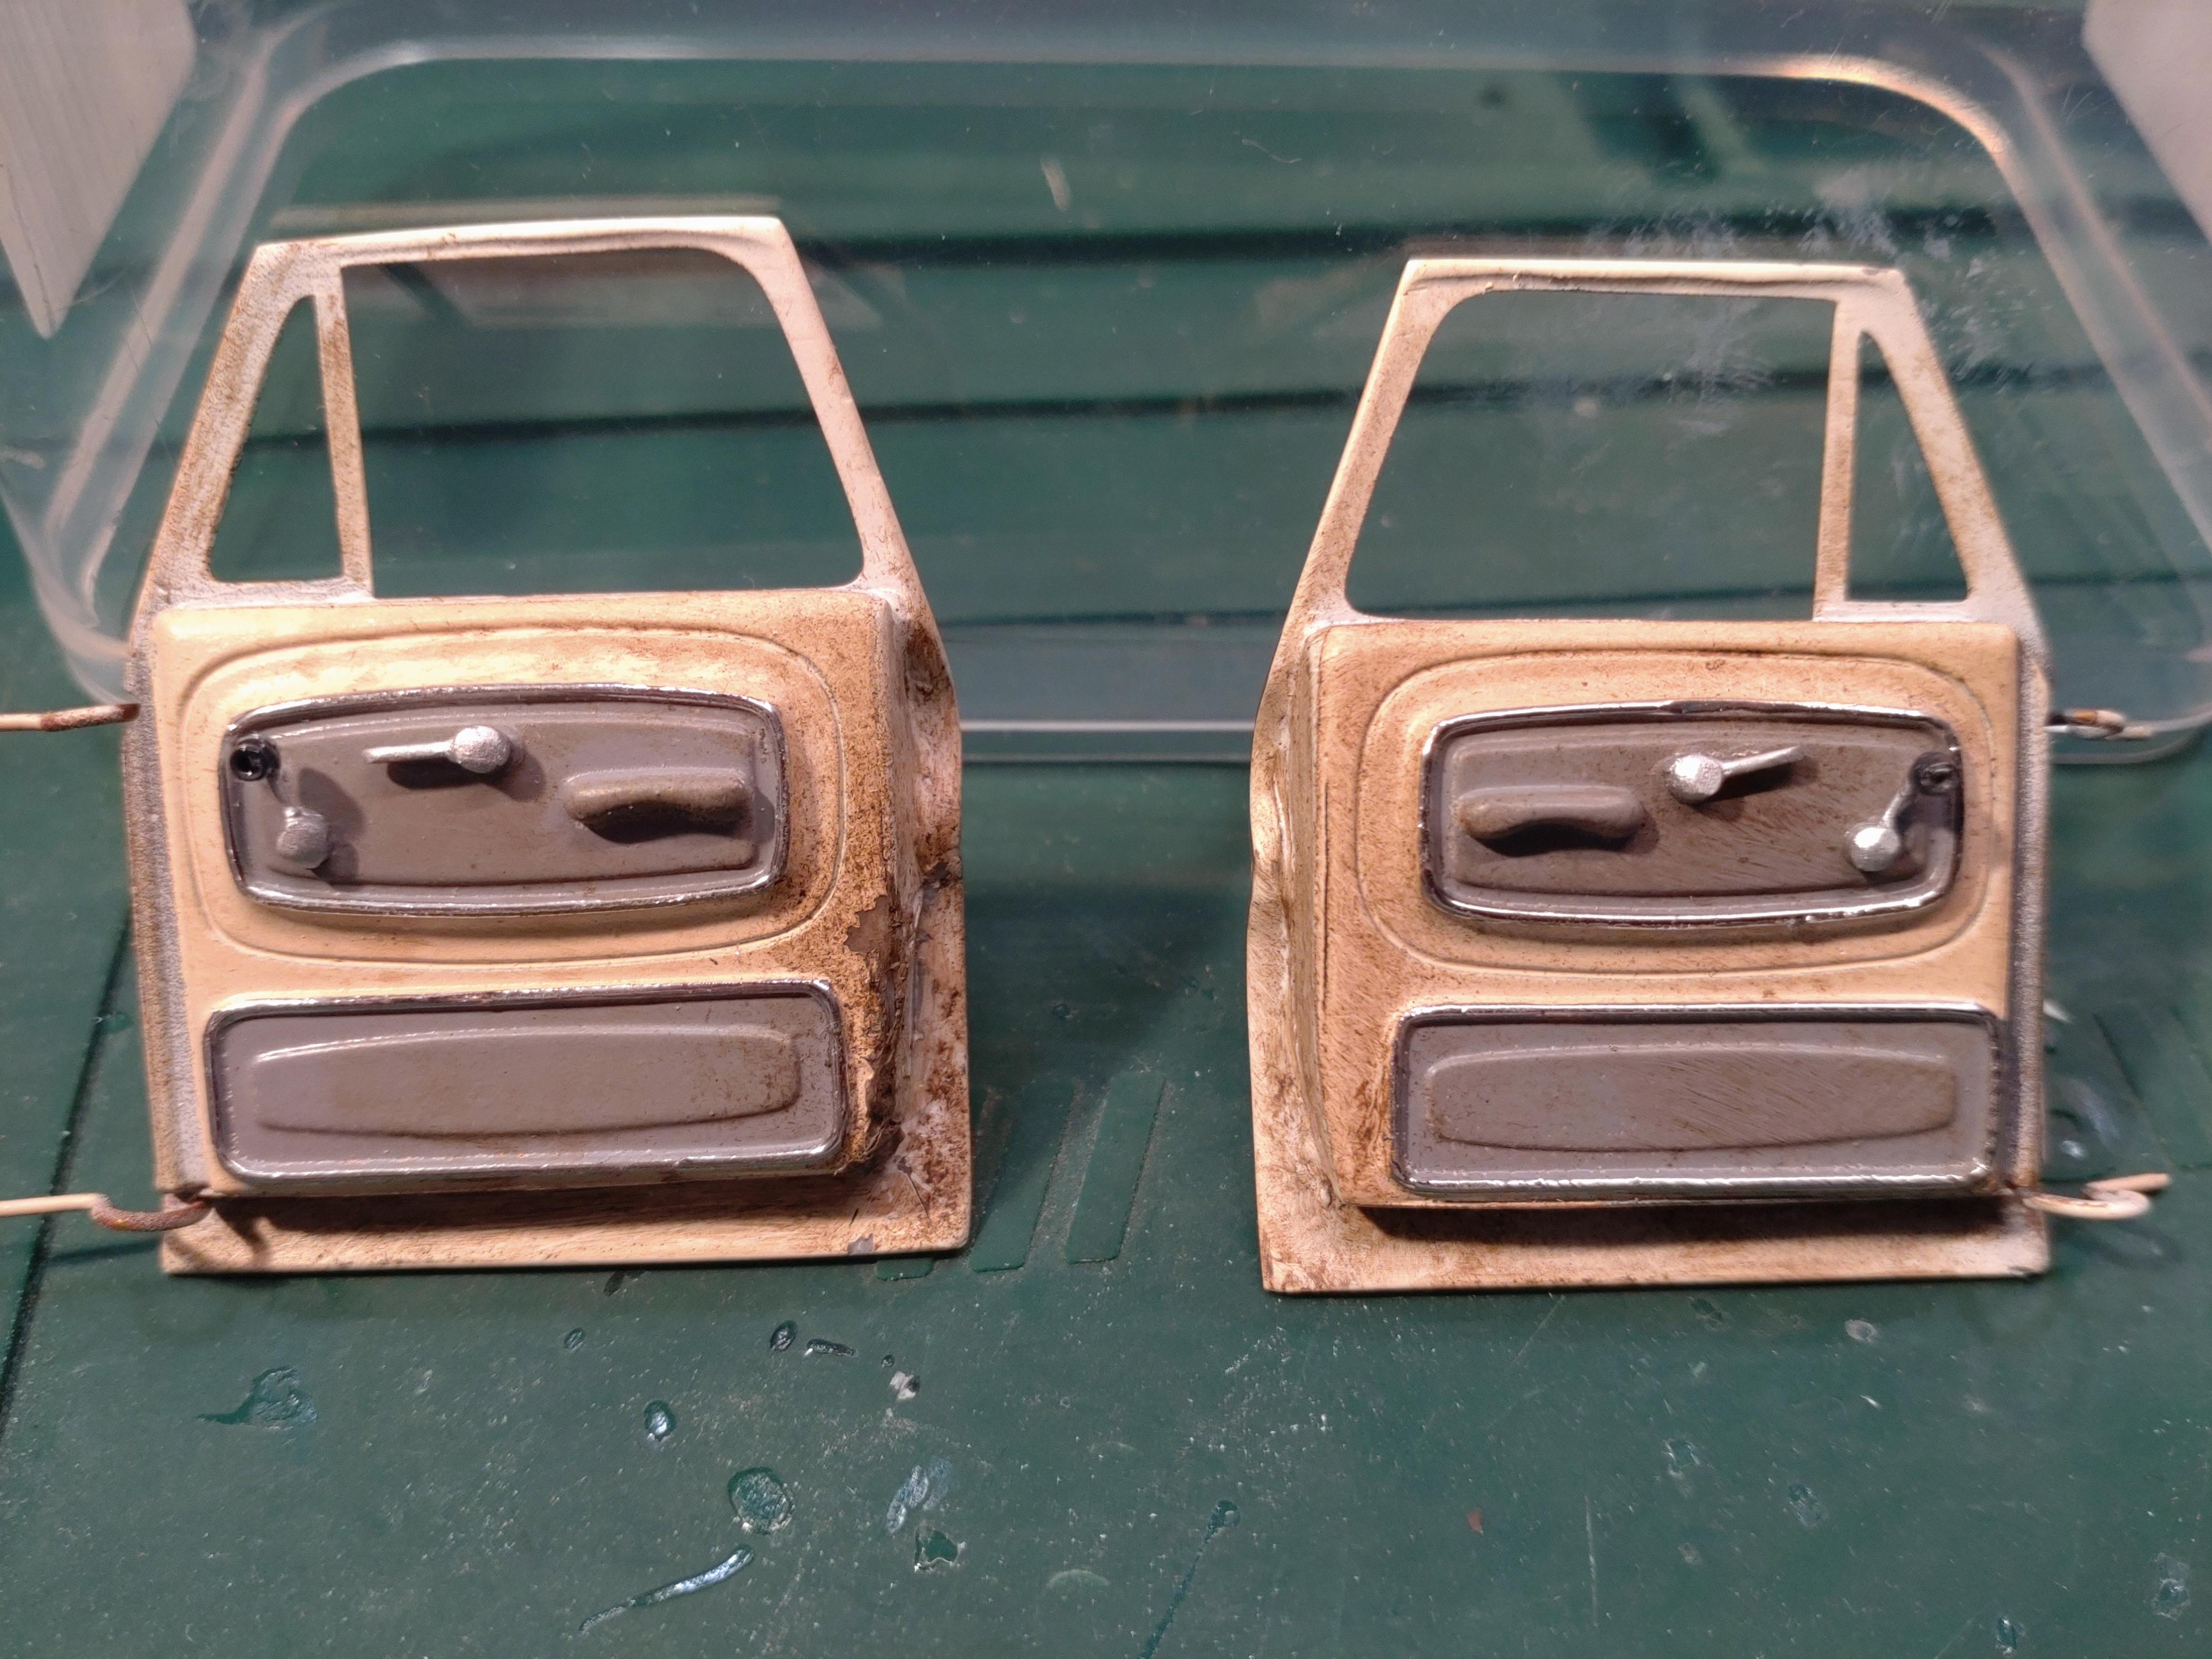
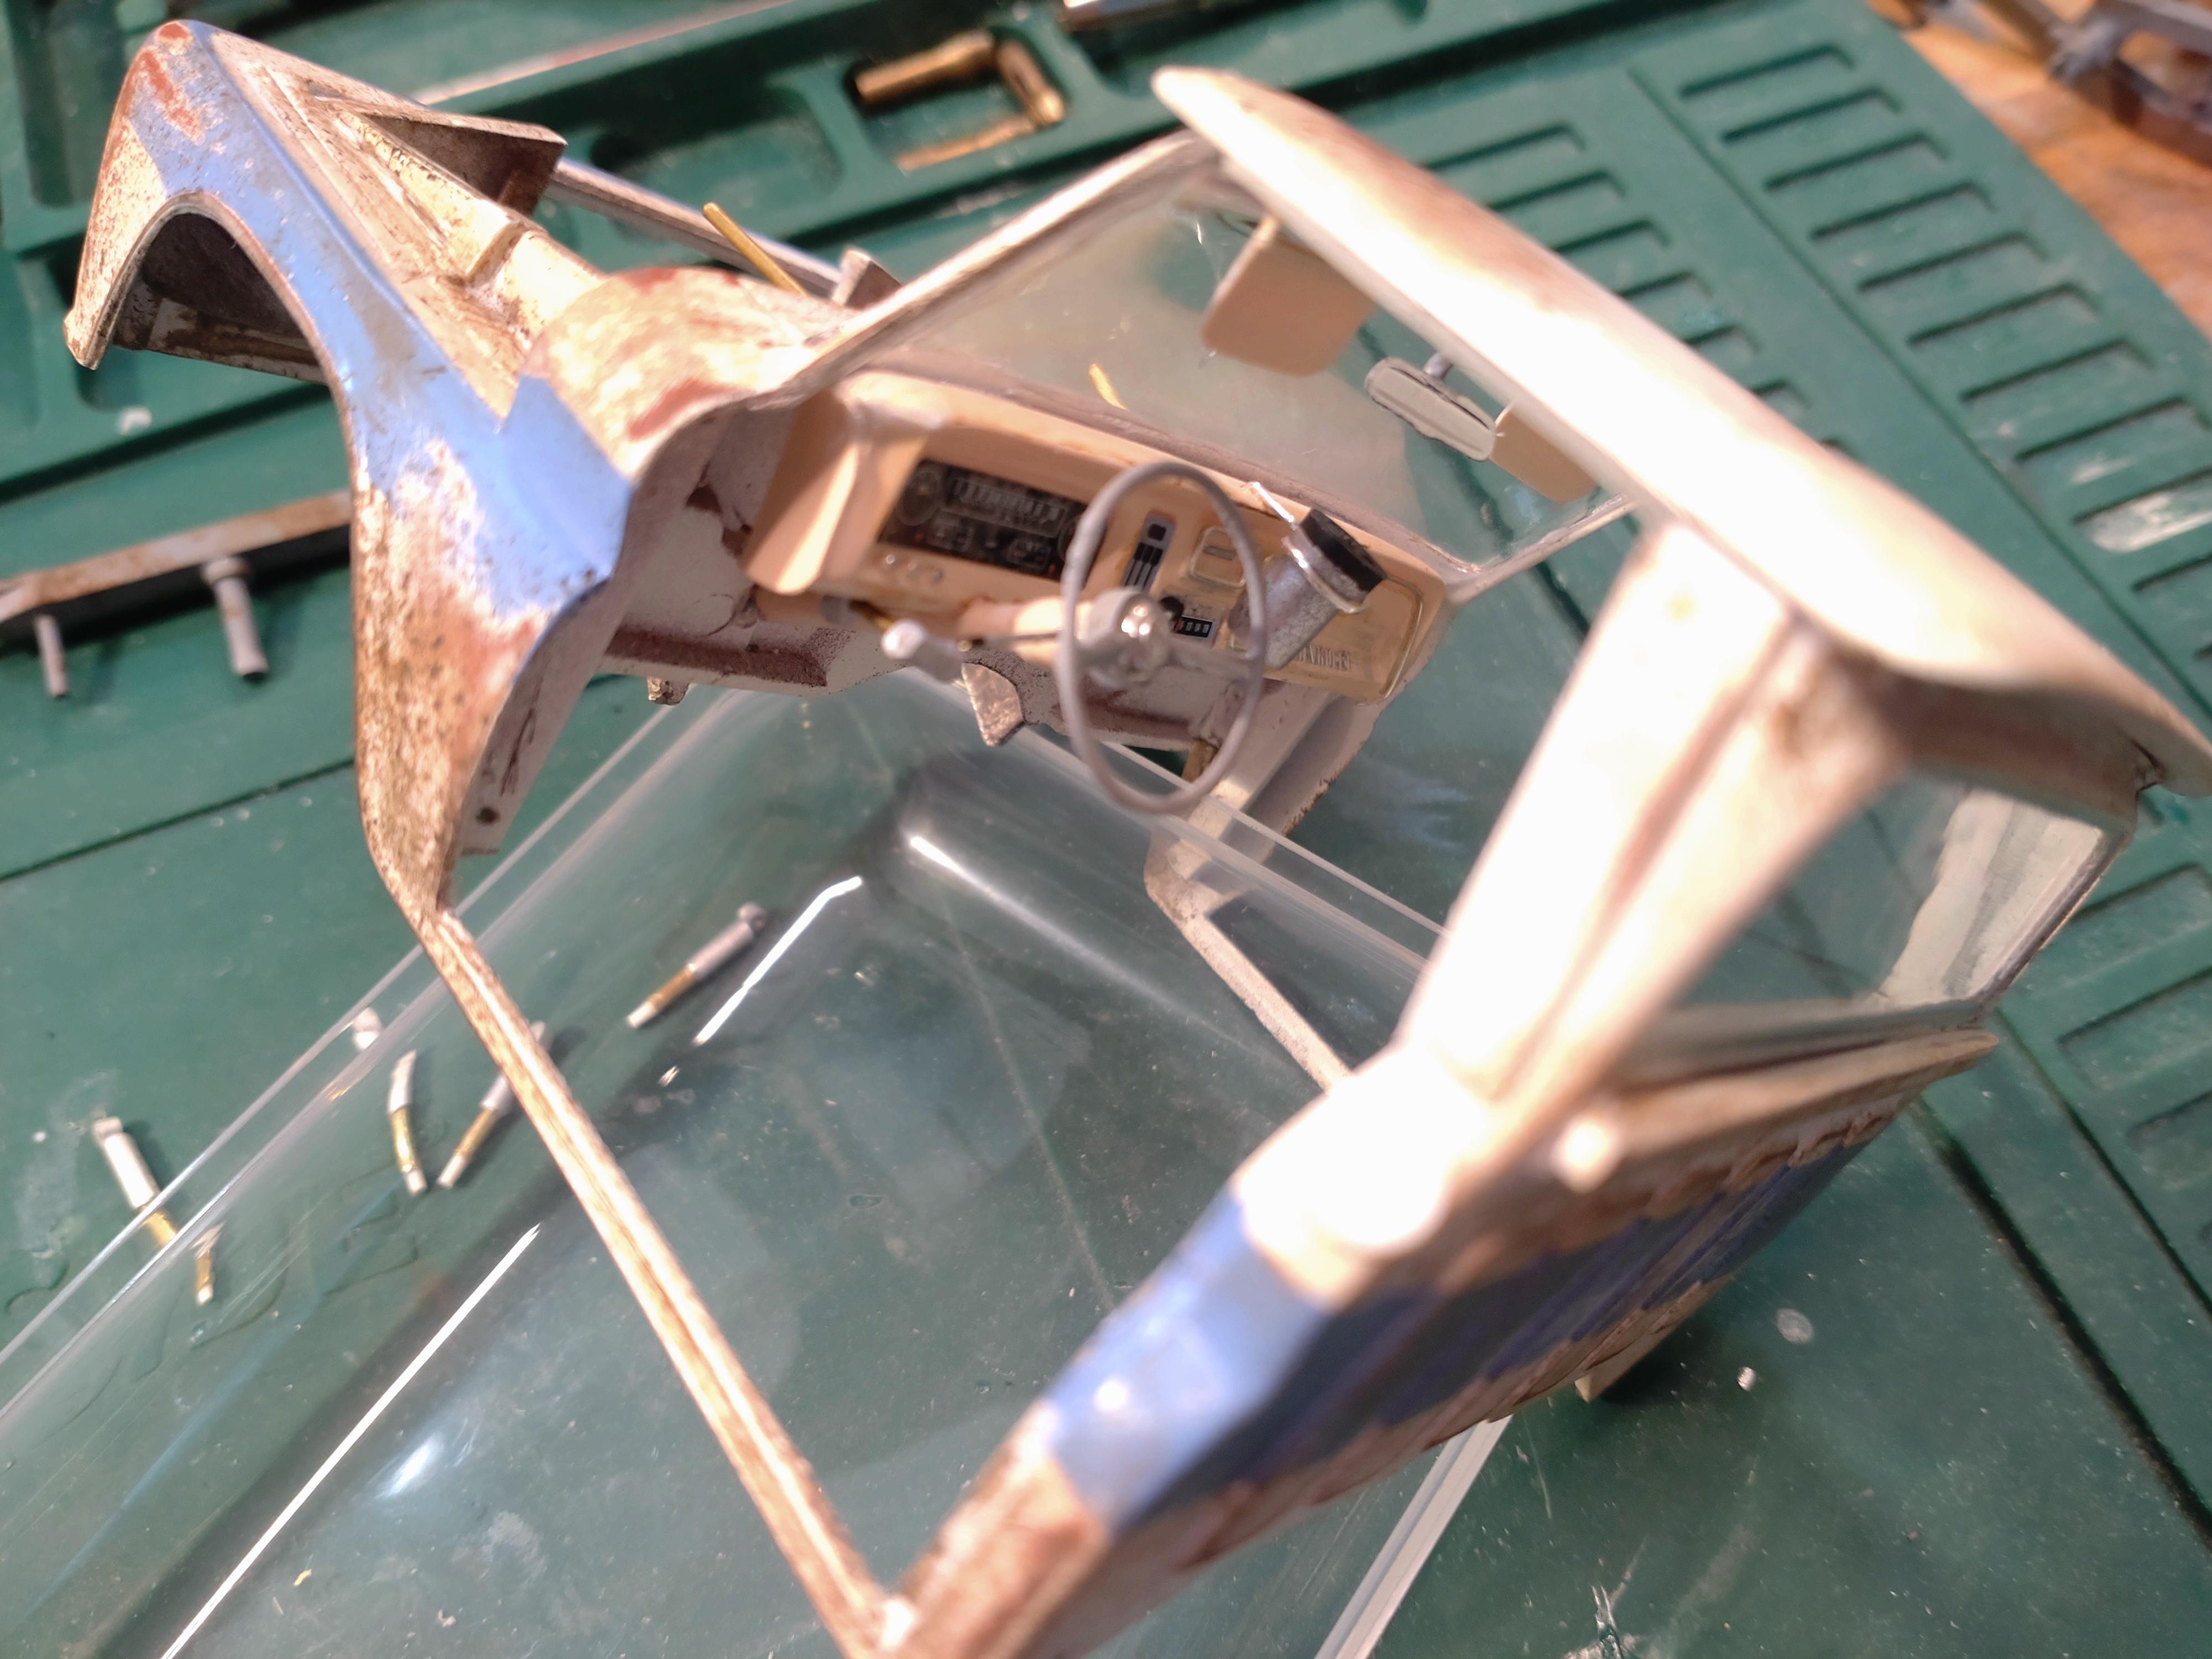
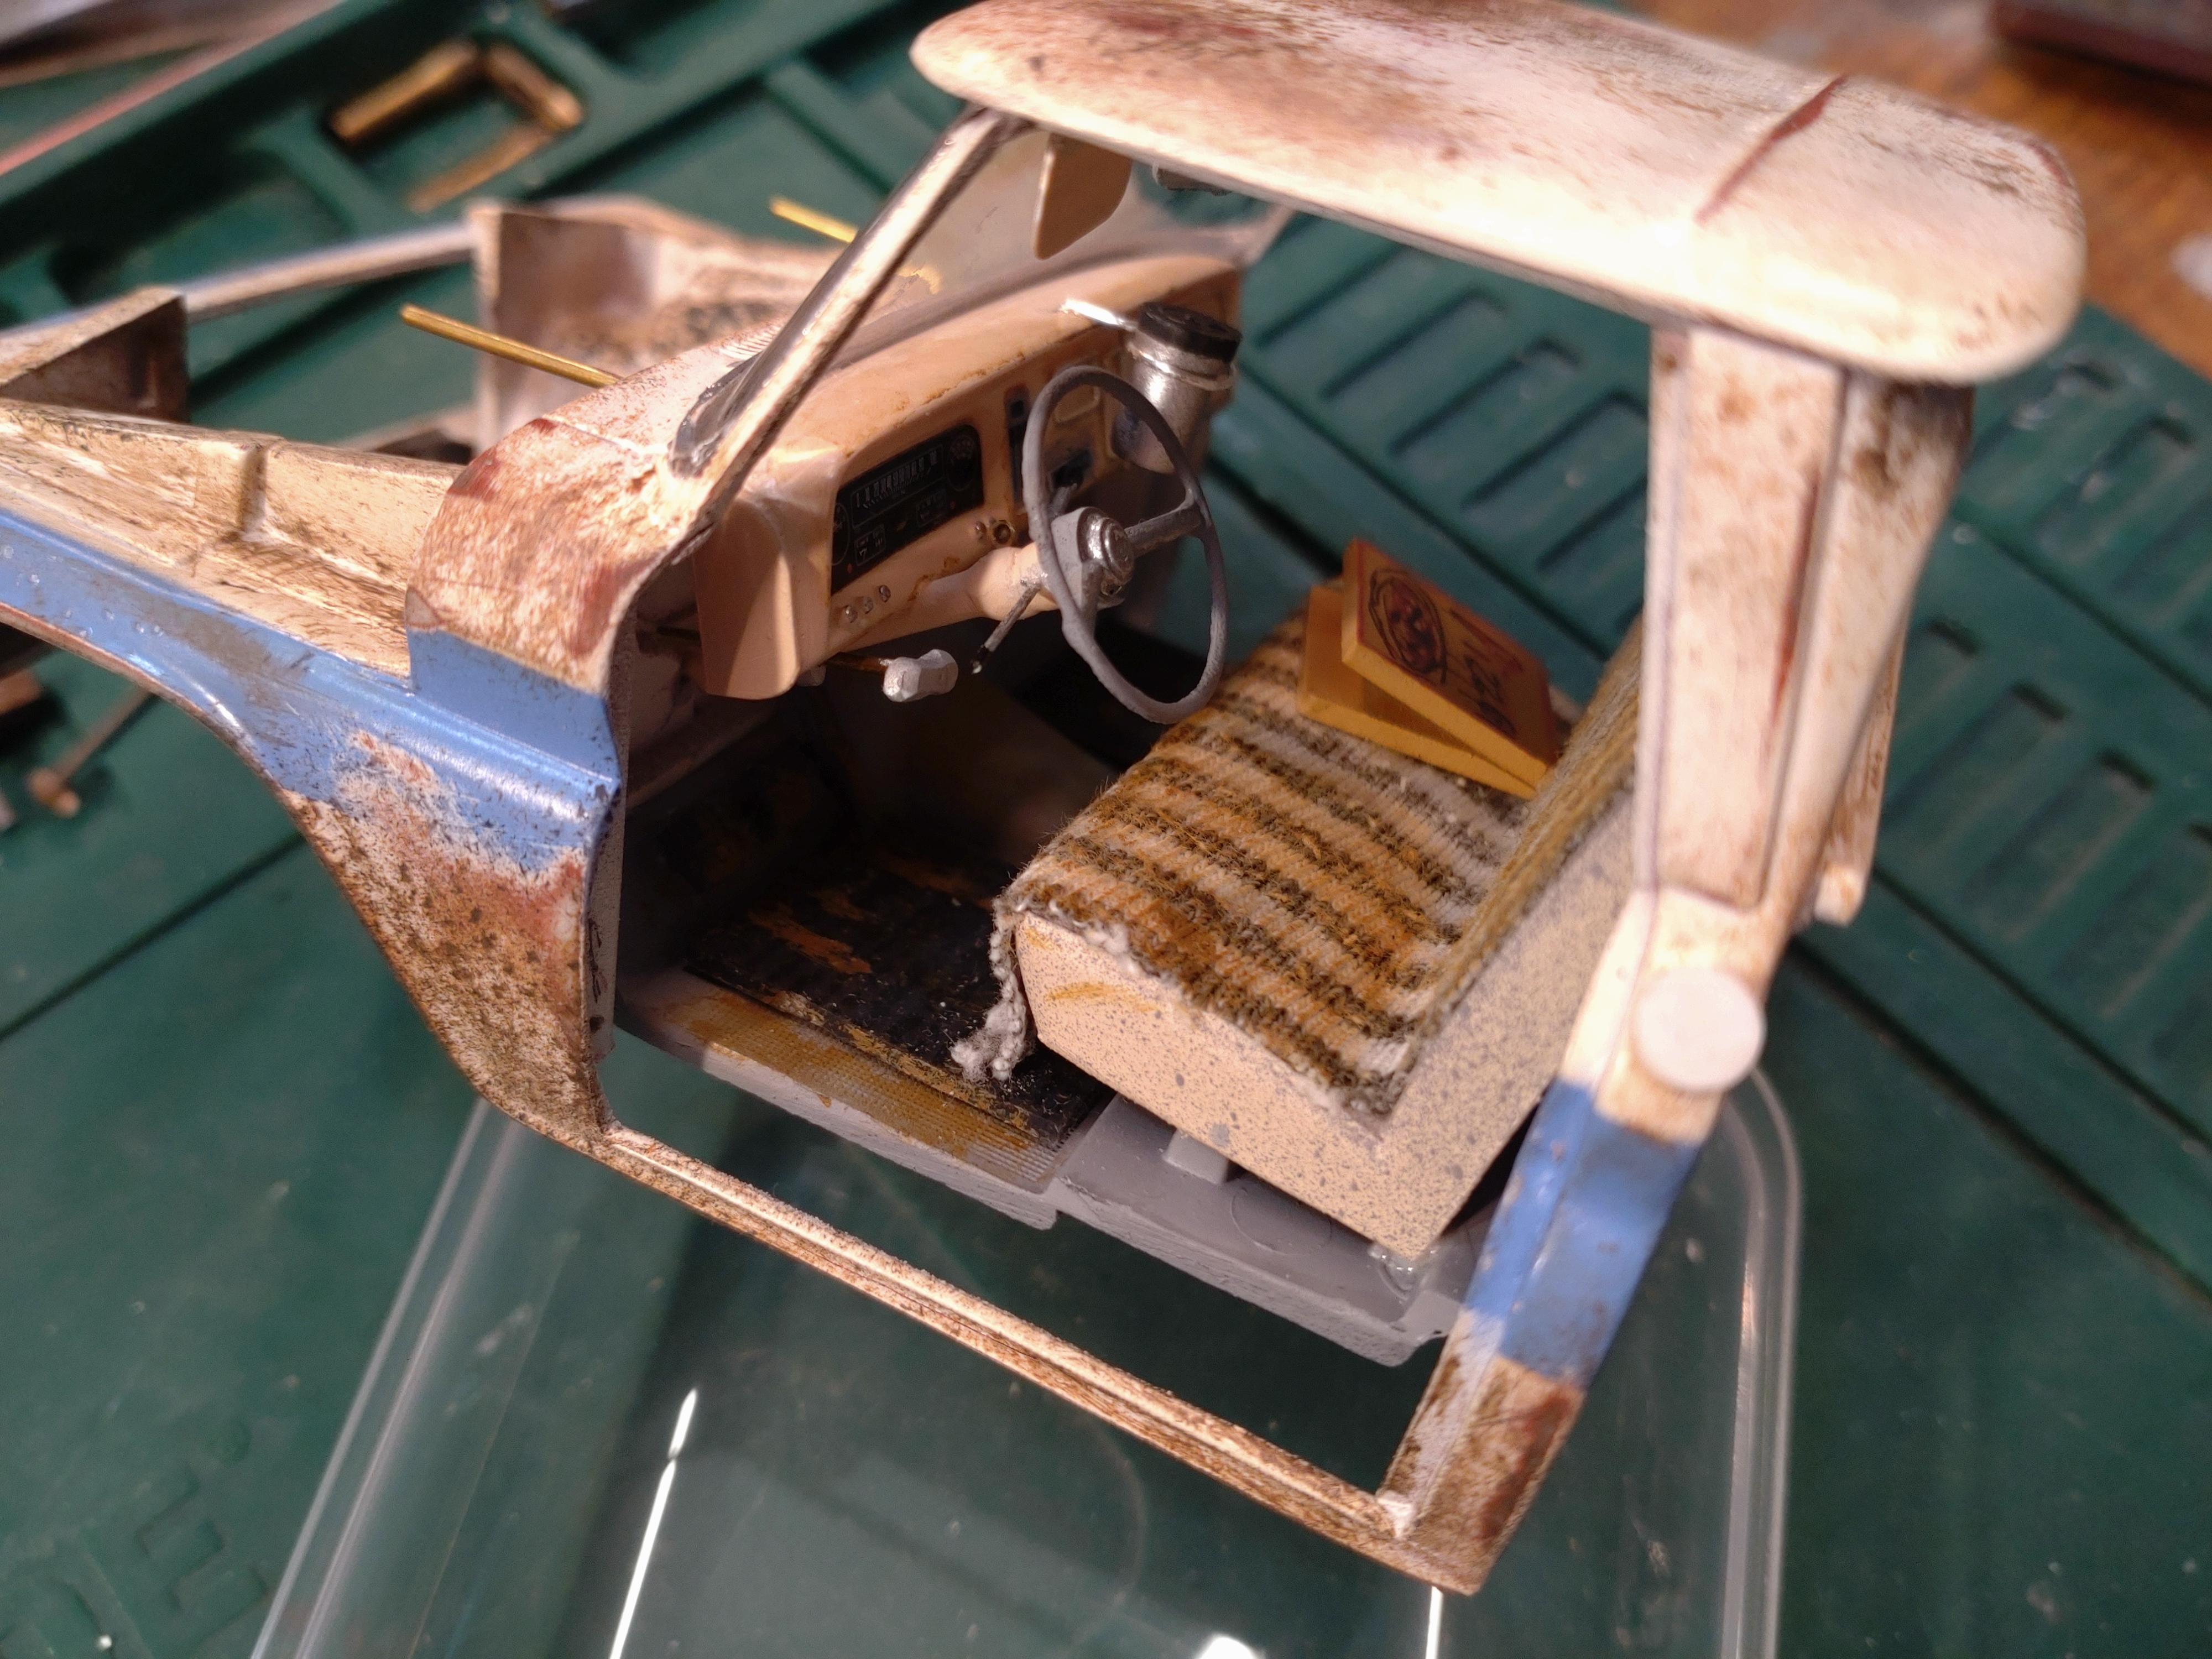
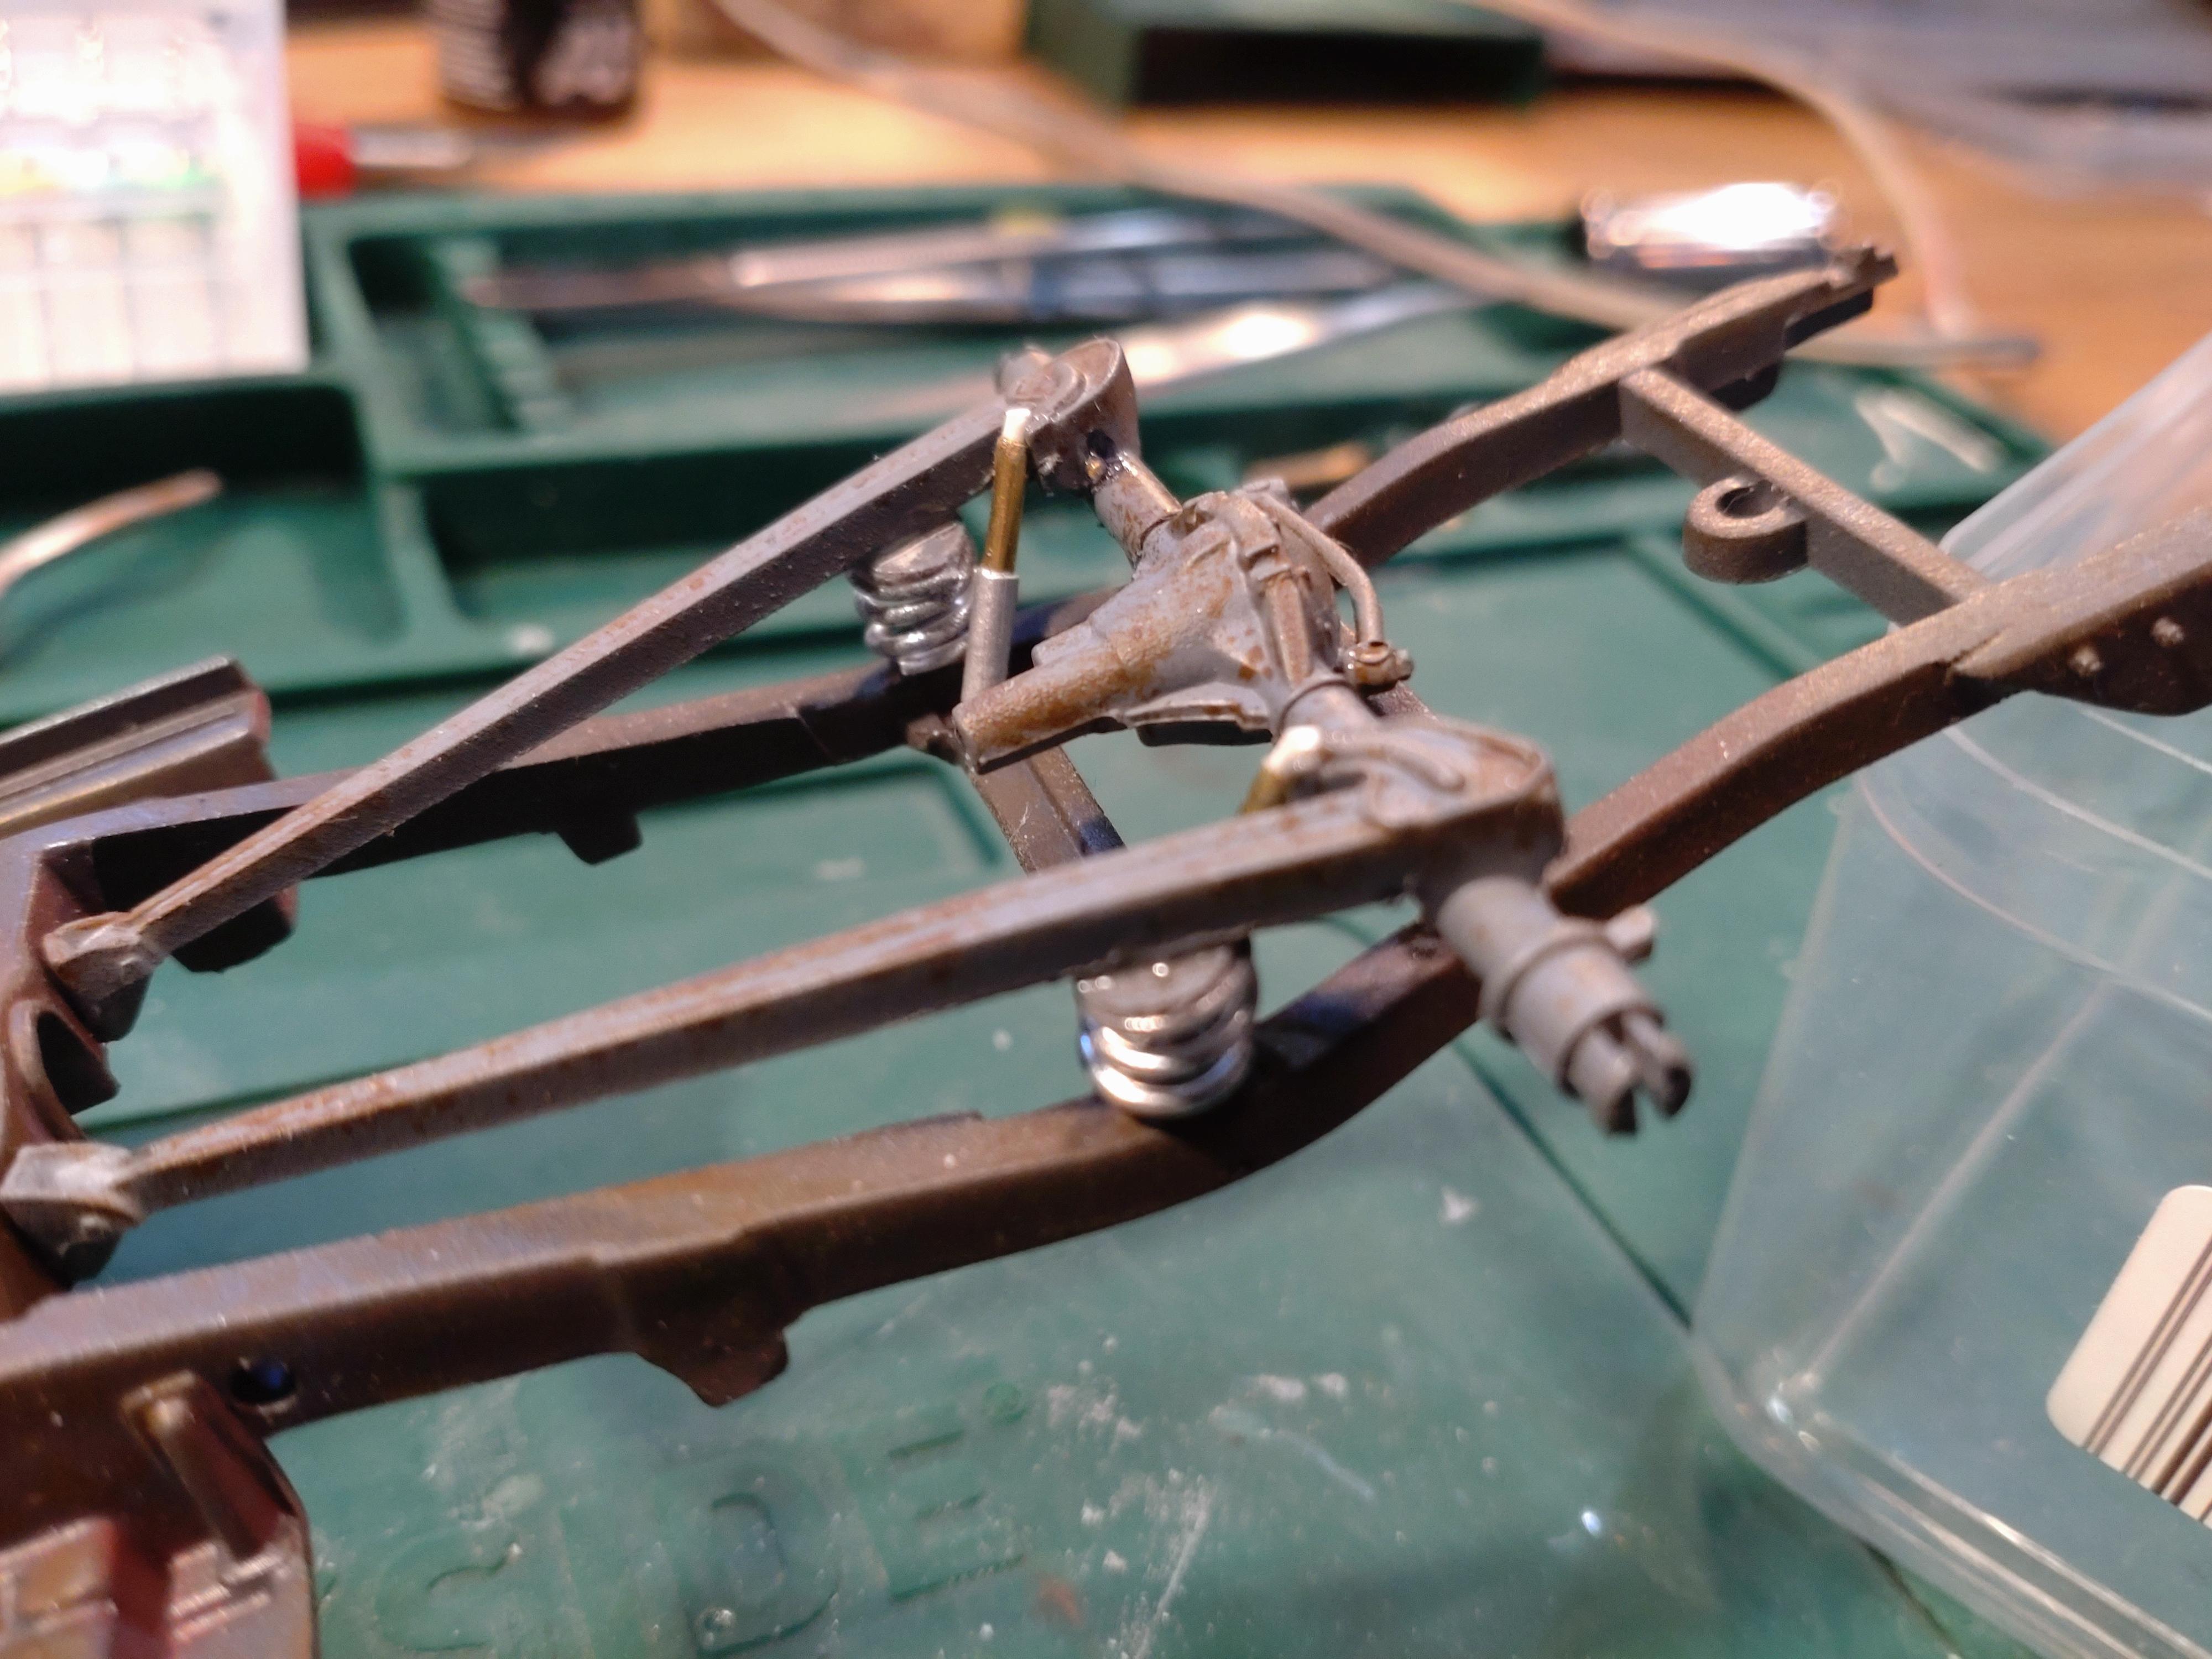
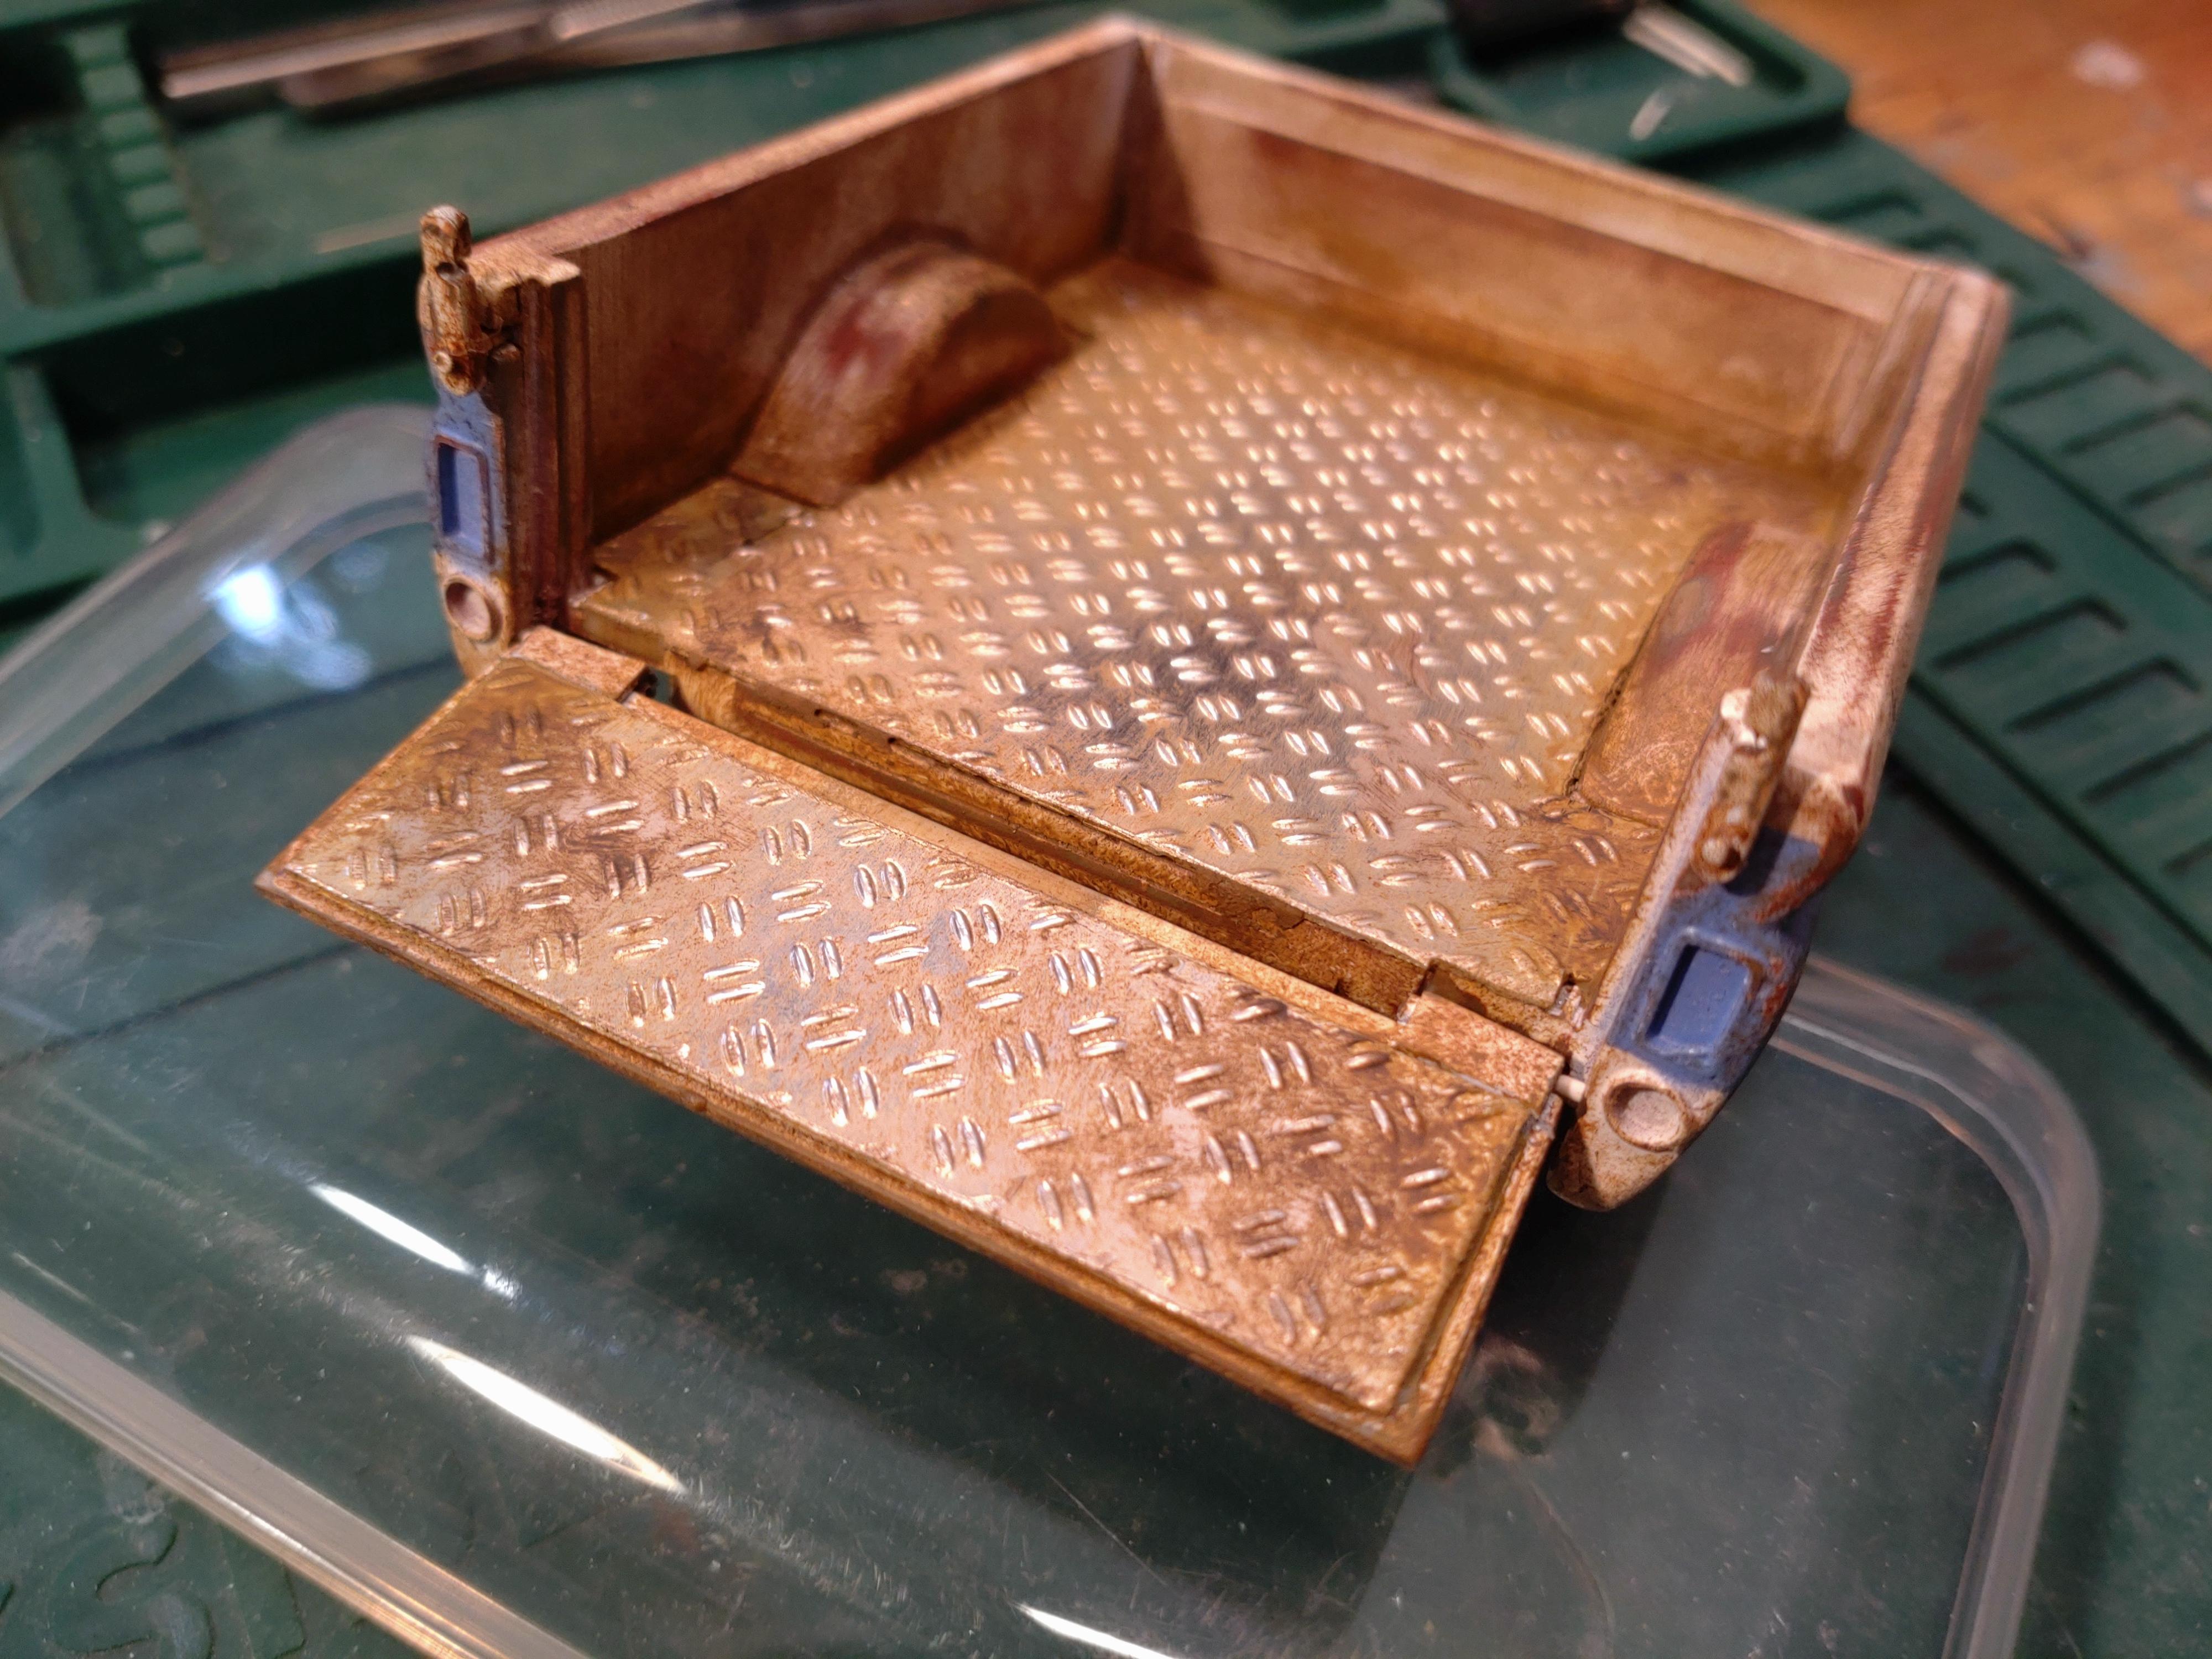
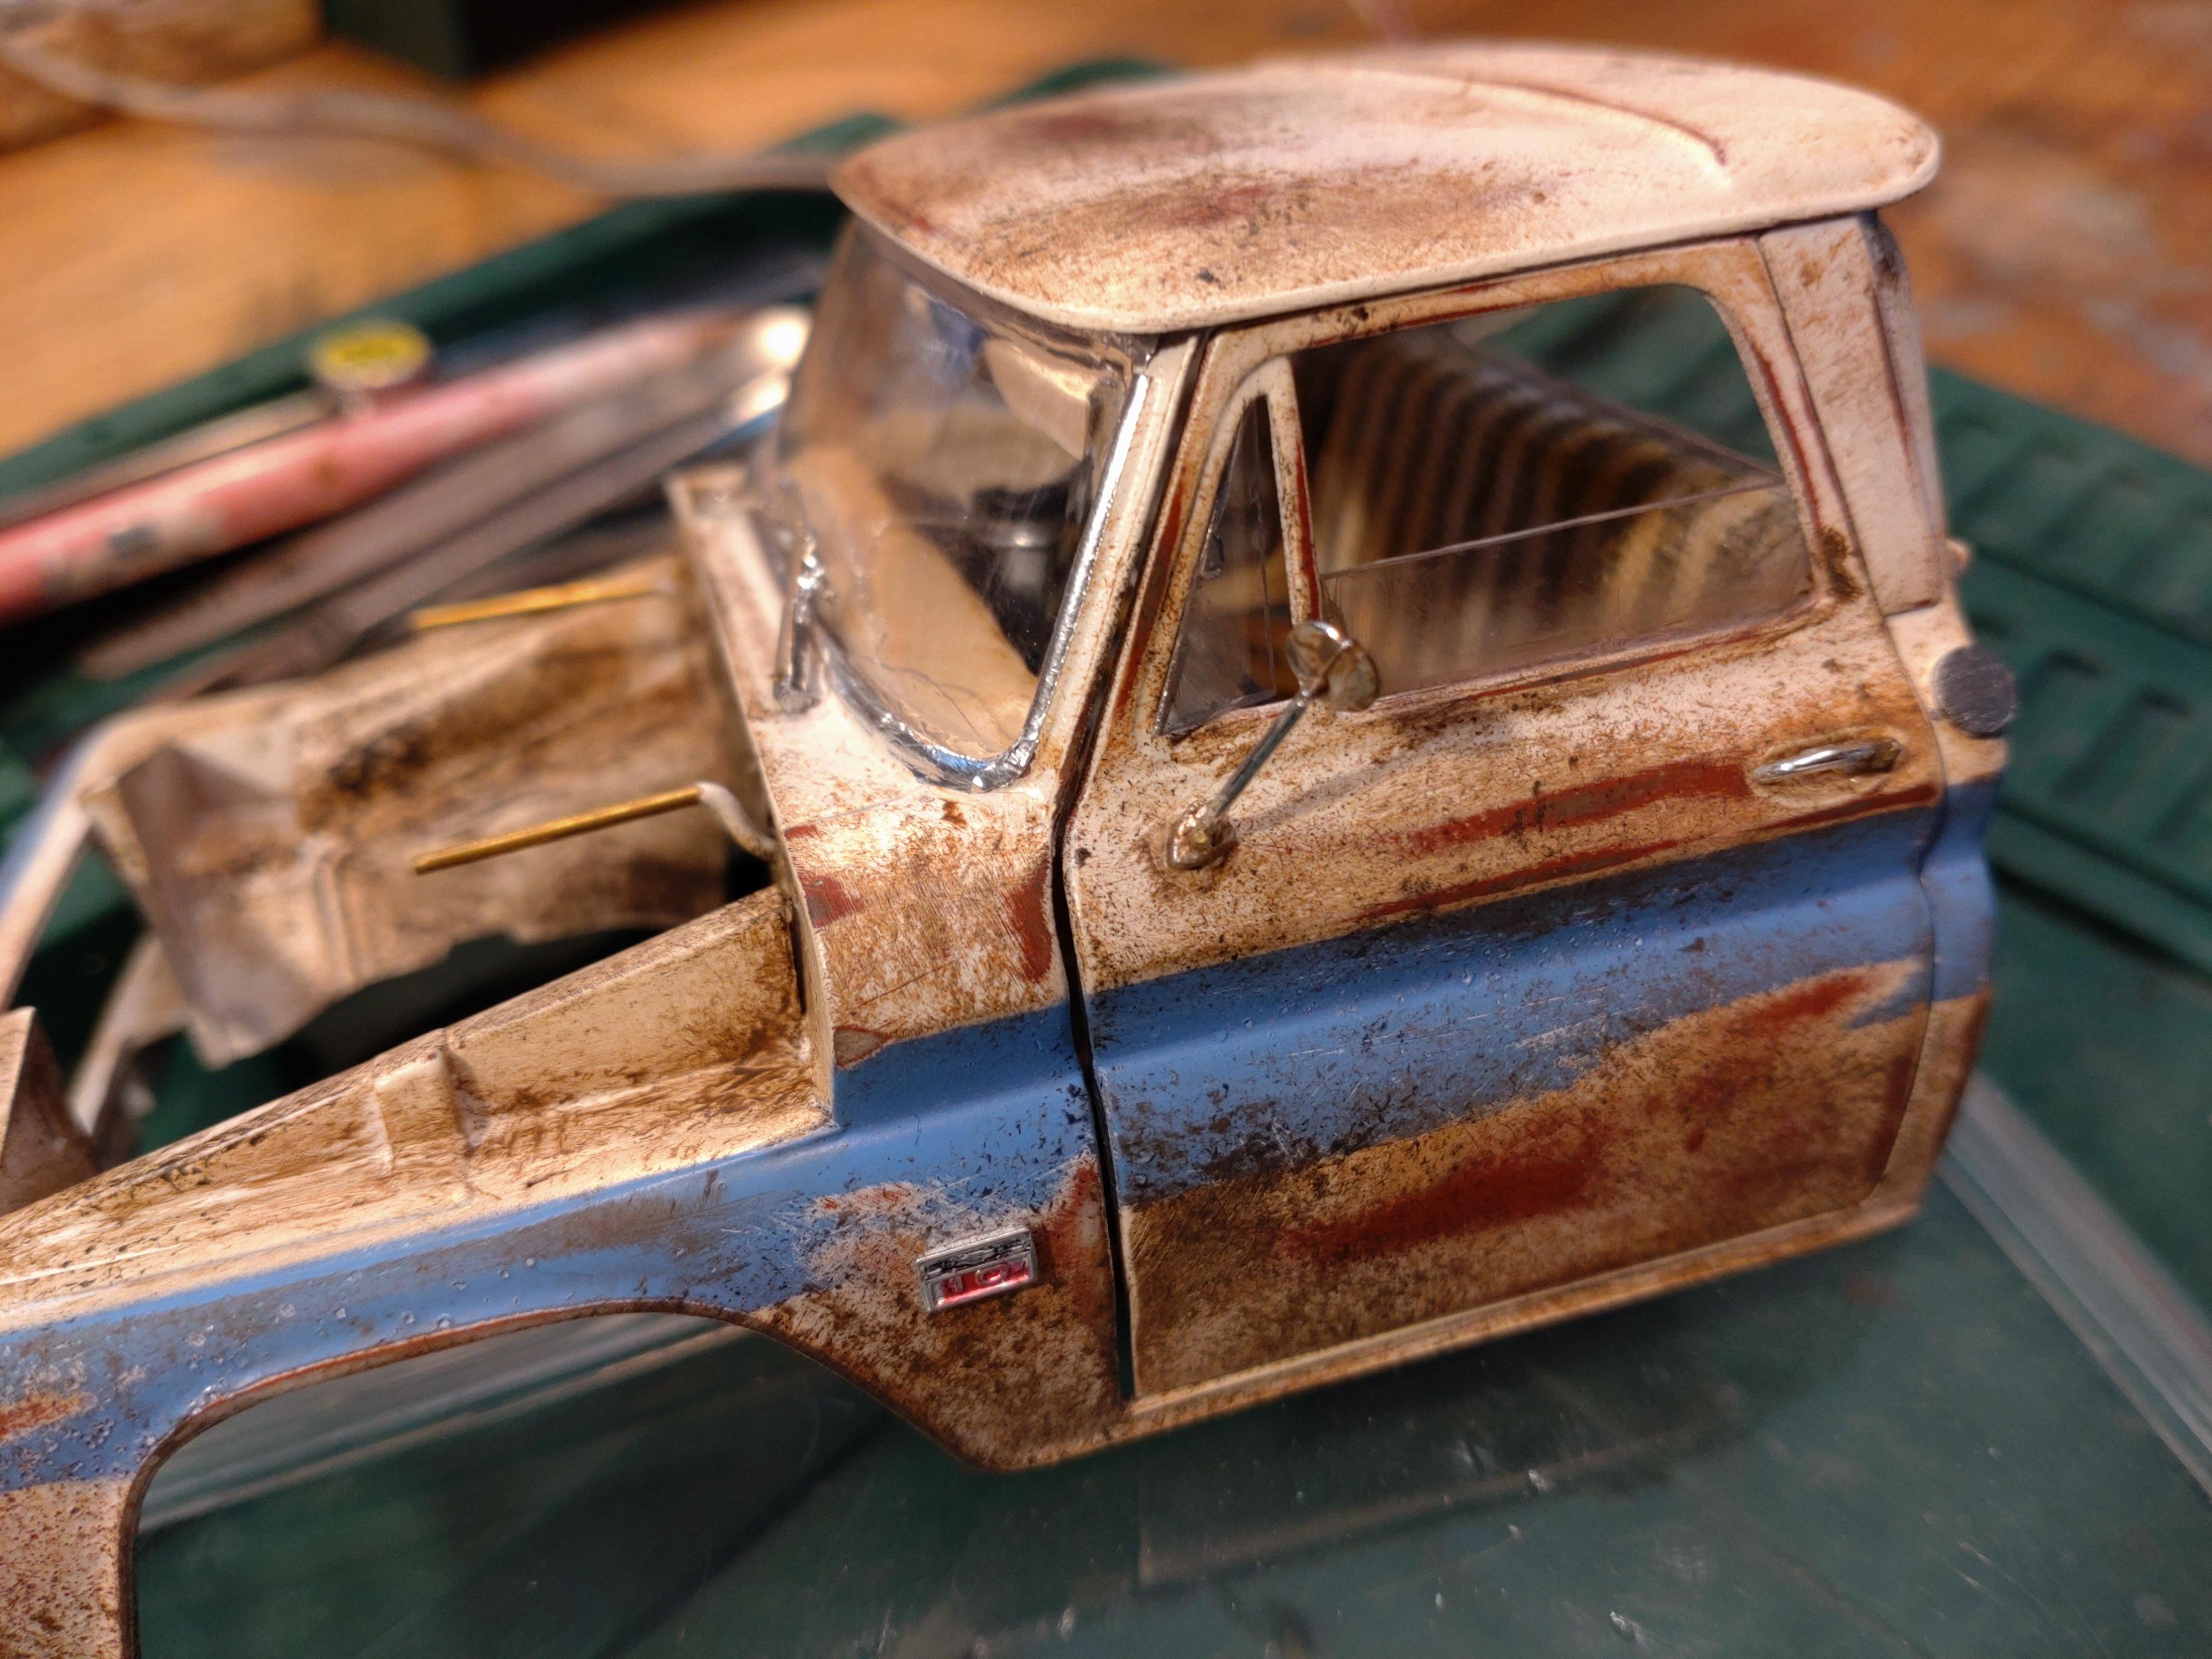
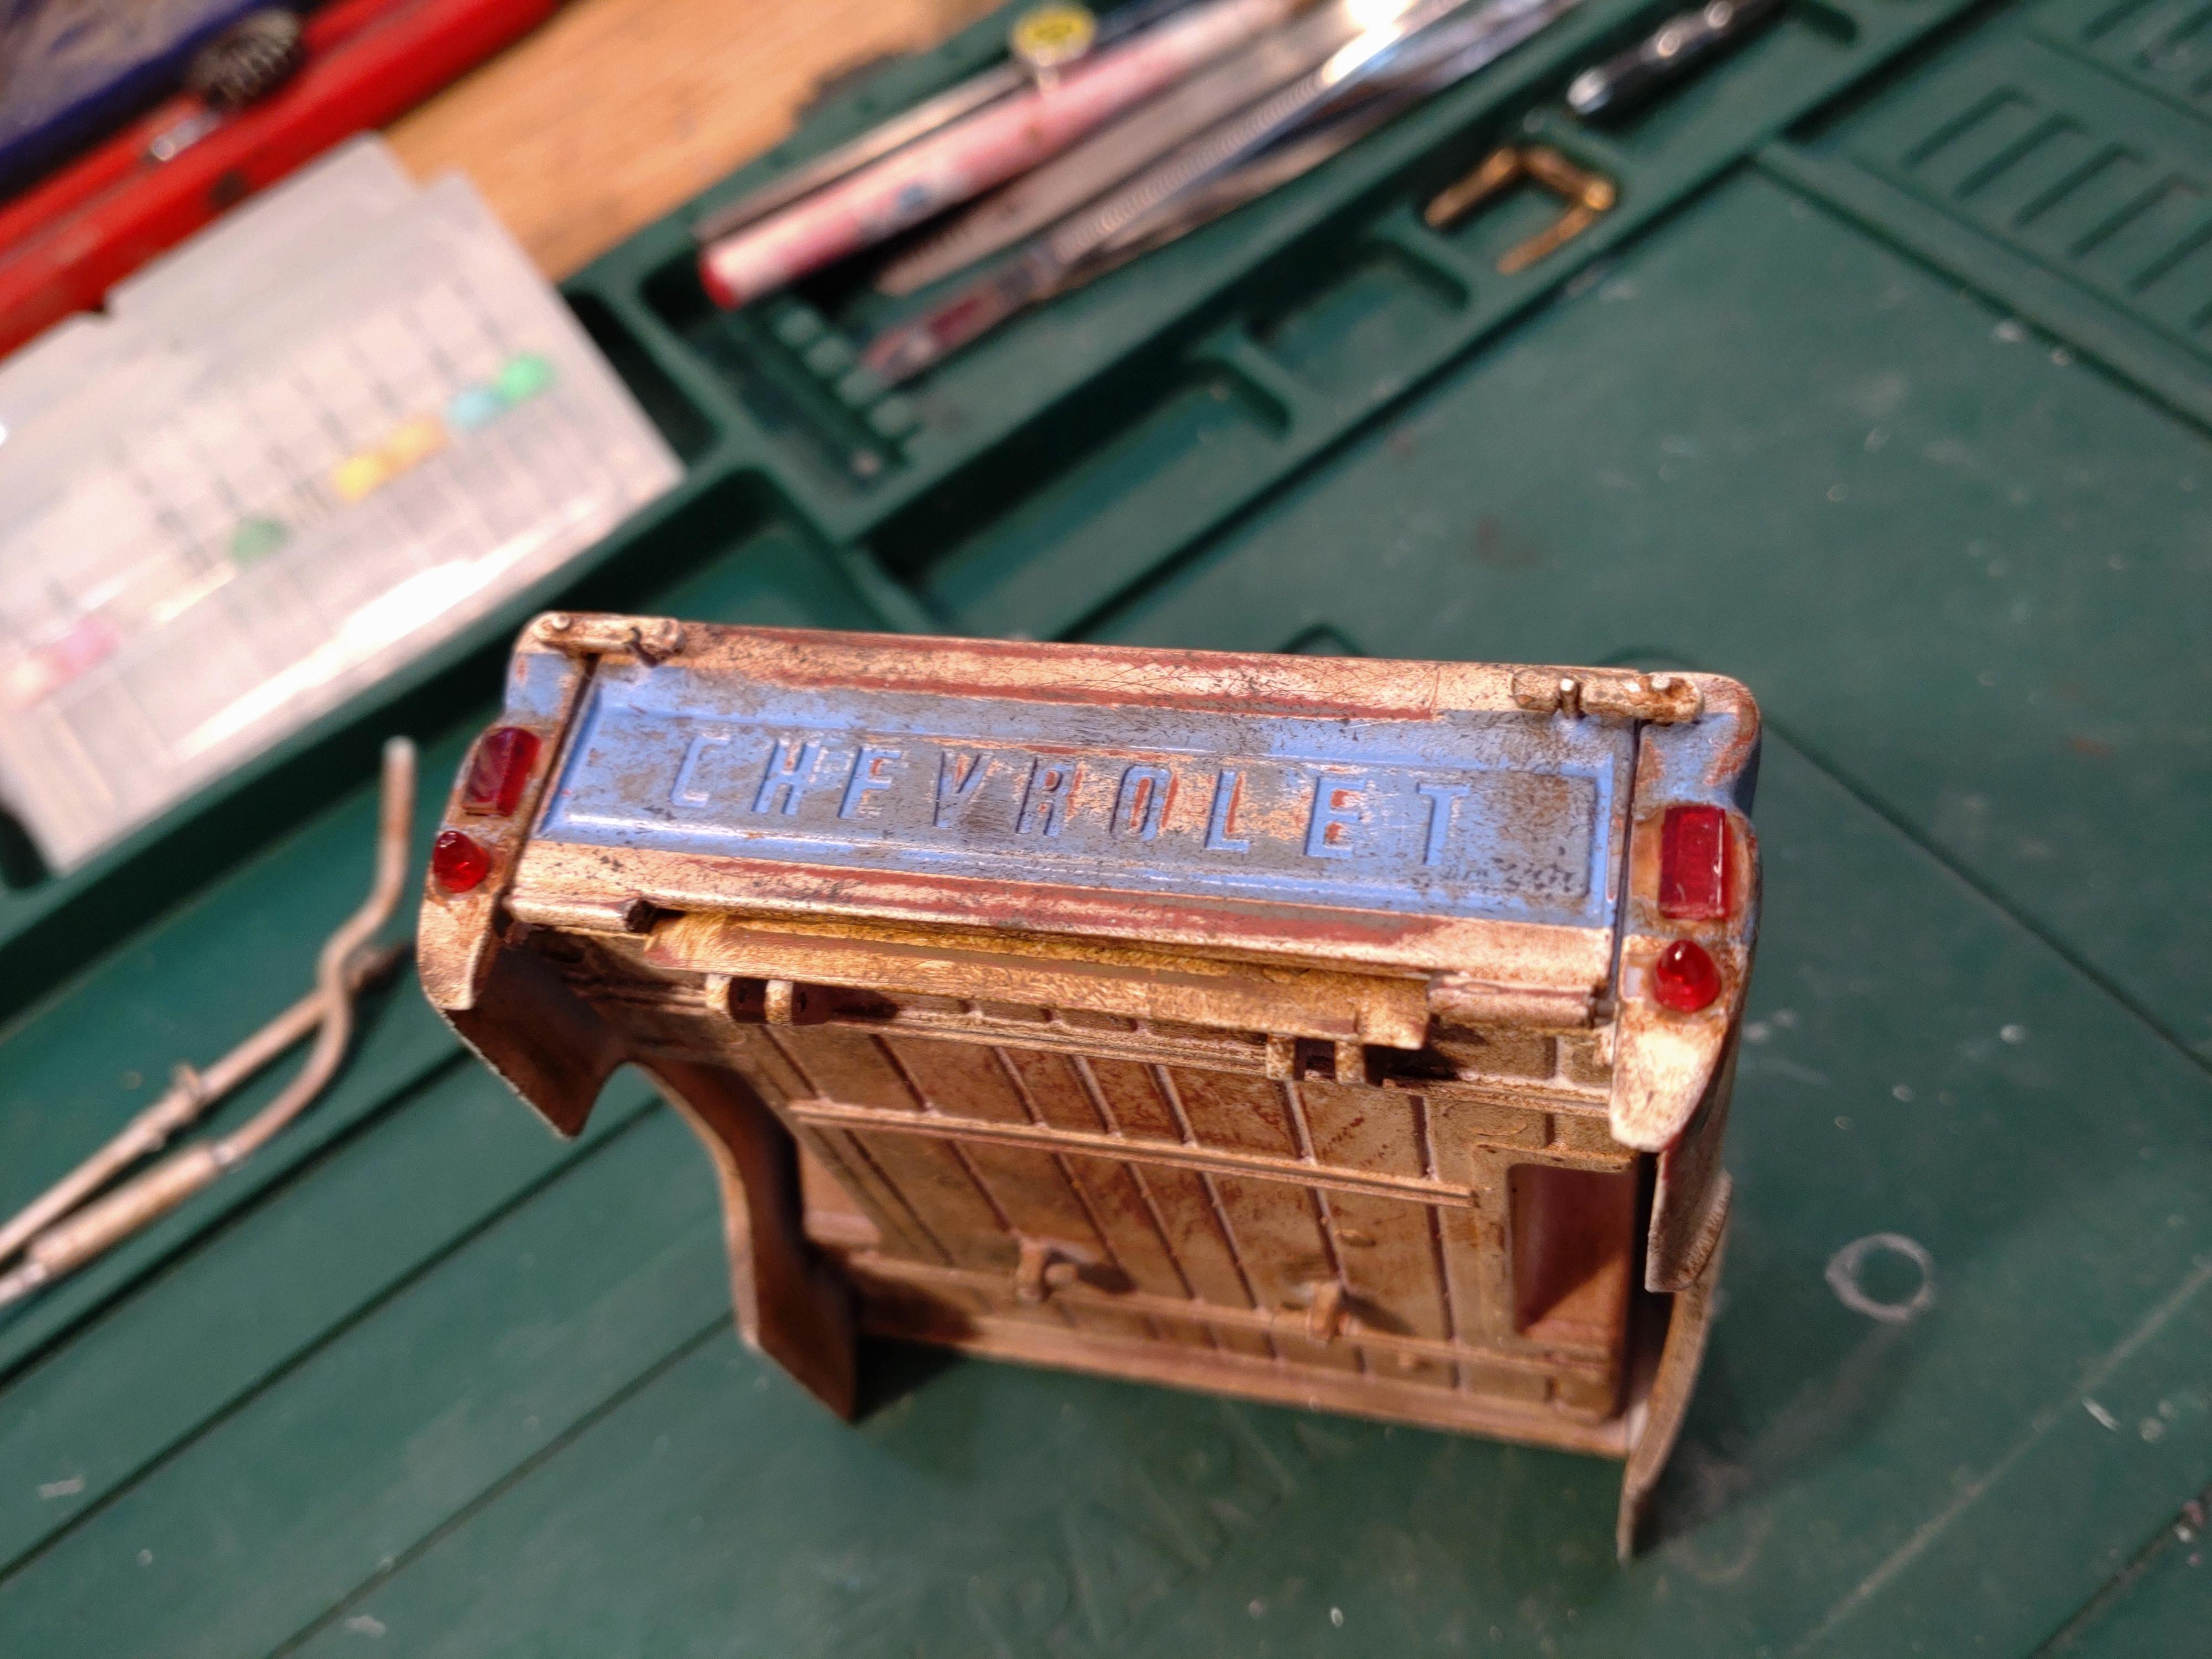
After building a few shiny stock and custom cars, I was longing to try something real dirty again. So, car wise 😂. This Revell pickup was at hand and I am not the first to build one with a rough patina body. Thinking about how to give it my own spin I came up with a dump bed. I knew this would not be a simple chore, but I had ideas about the engineering and in the end it all worked out fine. For some details you might want to check the WIP thread I had during the building process. The paint job was a lot of fun. Not having to worry about dust or messy spots. But the work does add up. On this body I started with a grey primer, then a rust colored layer, the top coat in off-white plus the blue stripe (all Molotow rattle cans). After several stages of sanding and salt treatment, I then built up the detailed rust effects with different AK rust, smudge and weathering colors, applied with a rough sponge. Makes about 12 steps. Just about everything on this build is box kit. I did add many details though on the interior and engine and bay. The lifting mechanics of the bed and carved and cut from styrene rods and sheet, plus a few brass rods of different diameter. I opened the doors and the bed door and made the hinges from 1mm brass rods. The closed cabin doors are held in place with super magnets hidden in the door panel and the bench. For the bed I was happy to find a scale matching checker plate in aluminum. Building the interior was fun too. I had this idea of the imagined owner, probably a gardener, still driving dad´s or grandpa´s old truck. Still running, but over the top due to hard work and nobody caring about the looks. The bench is wrecked, the holes covered with an old blanket. Extra details all over the dash, including a big coffee thermos mug. of course, the interior is a mess too, including an old pizza box. The engine received a decent amount of detailing. Lines, cables, hoses, and the pulley wheels are all connected with a rubber belt. Everything adequately smudged and rusted. The undercarriage has some extra detailing with the lifting mechanics and the cables for the parking brakes. The kit shocks for the front and back were replaced with home made absorbers (styrene tubes and brass rods), and I wrapped real looking springs from 1mm aluminum wire. I hope you like the finished build. Thanks for all the cool reactions during the WIP process and thanks for giving this post your attention! If you would like to see the pickup in "action", I would be pleased if you watched the video: https://youtu.be/40tImz2U_do
-
Hello Espo, Zippi, Meechum and all the others (no offense for not mentioning😊), thanks for your kind replies! I wanted to take pics of the finished build yesterday for the "under glass" post, but the light was crappy. It´s gotten autumn and dark so fast😕😒😖. Had to delete everything and hope to get that done this weekend. Best model building wishes, Andy
-
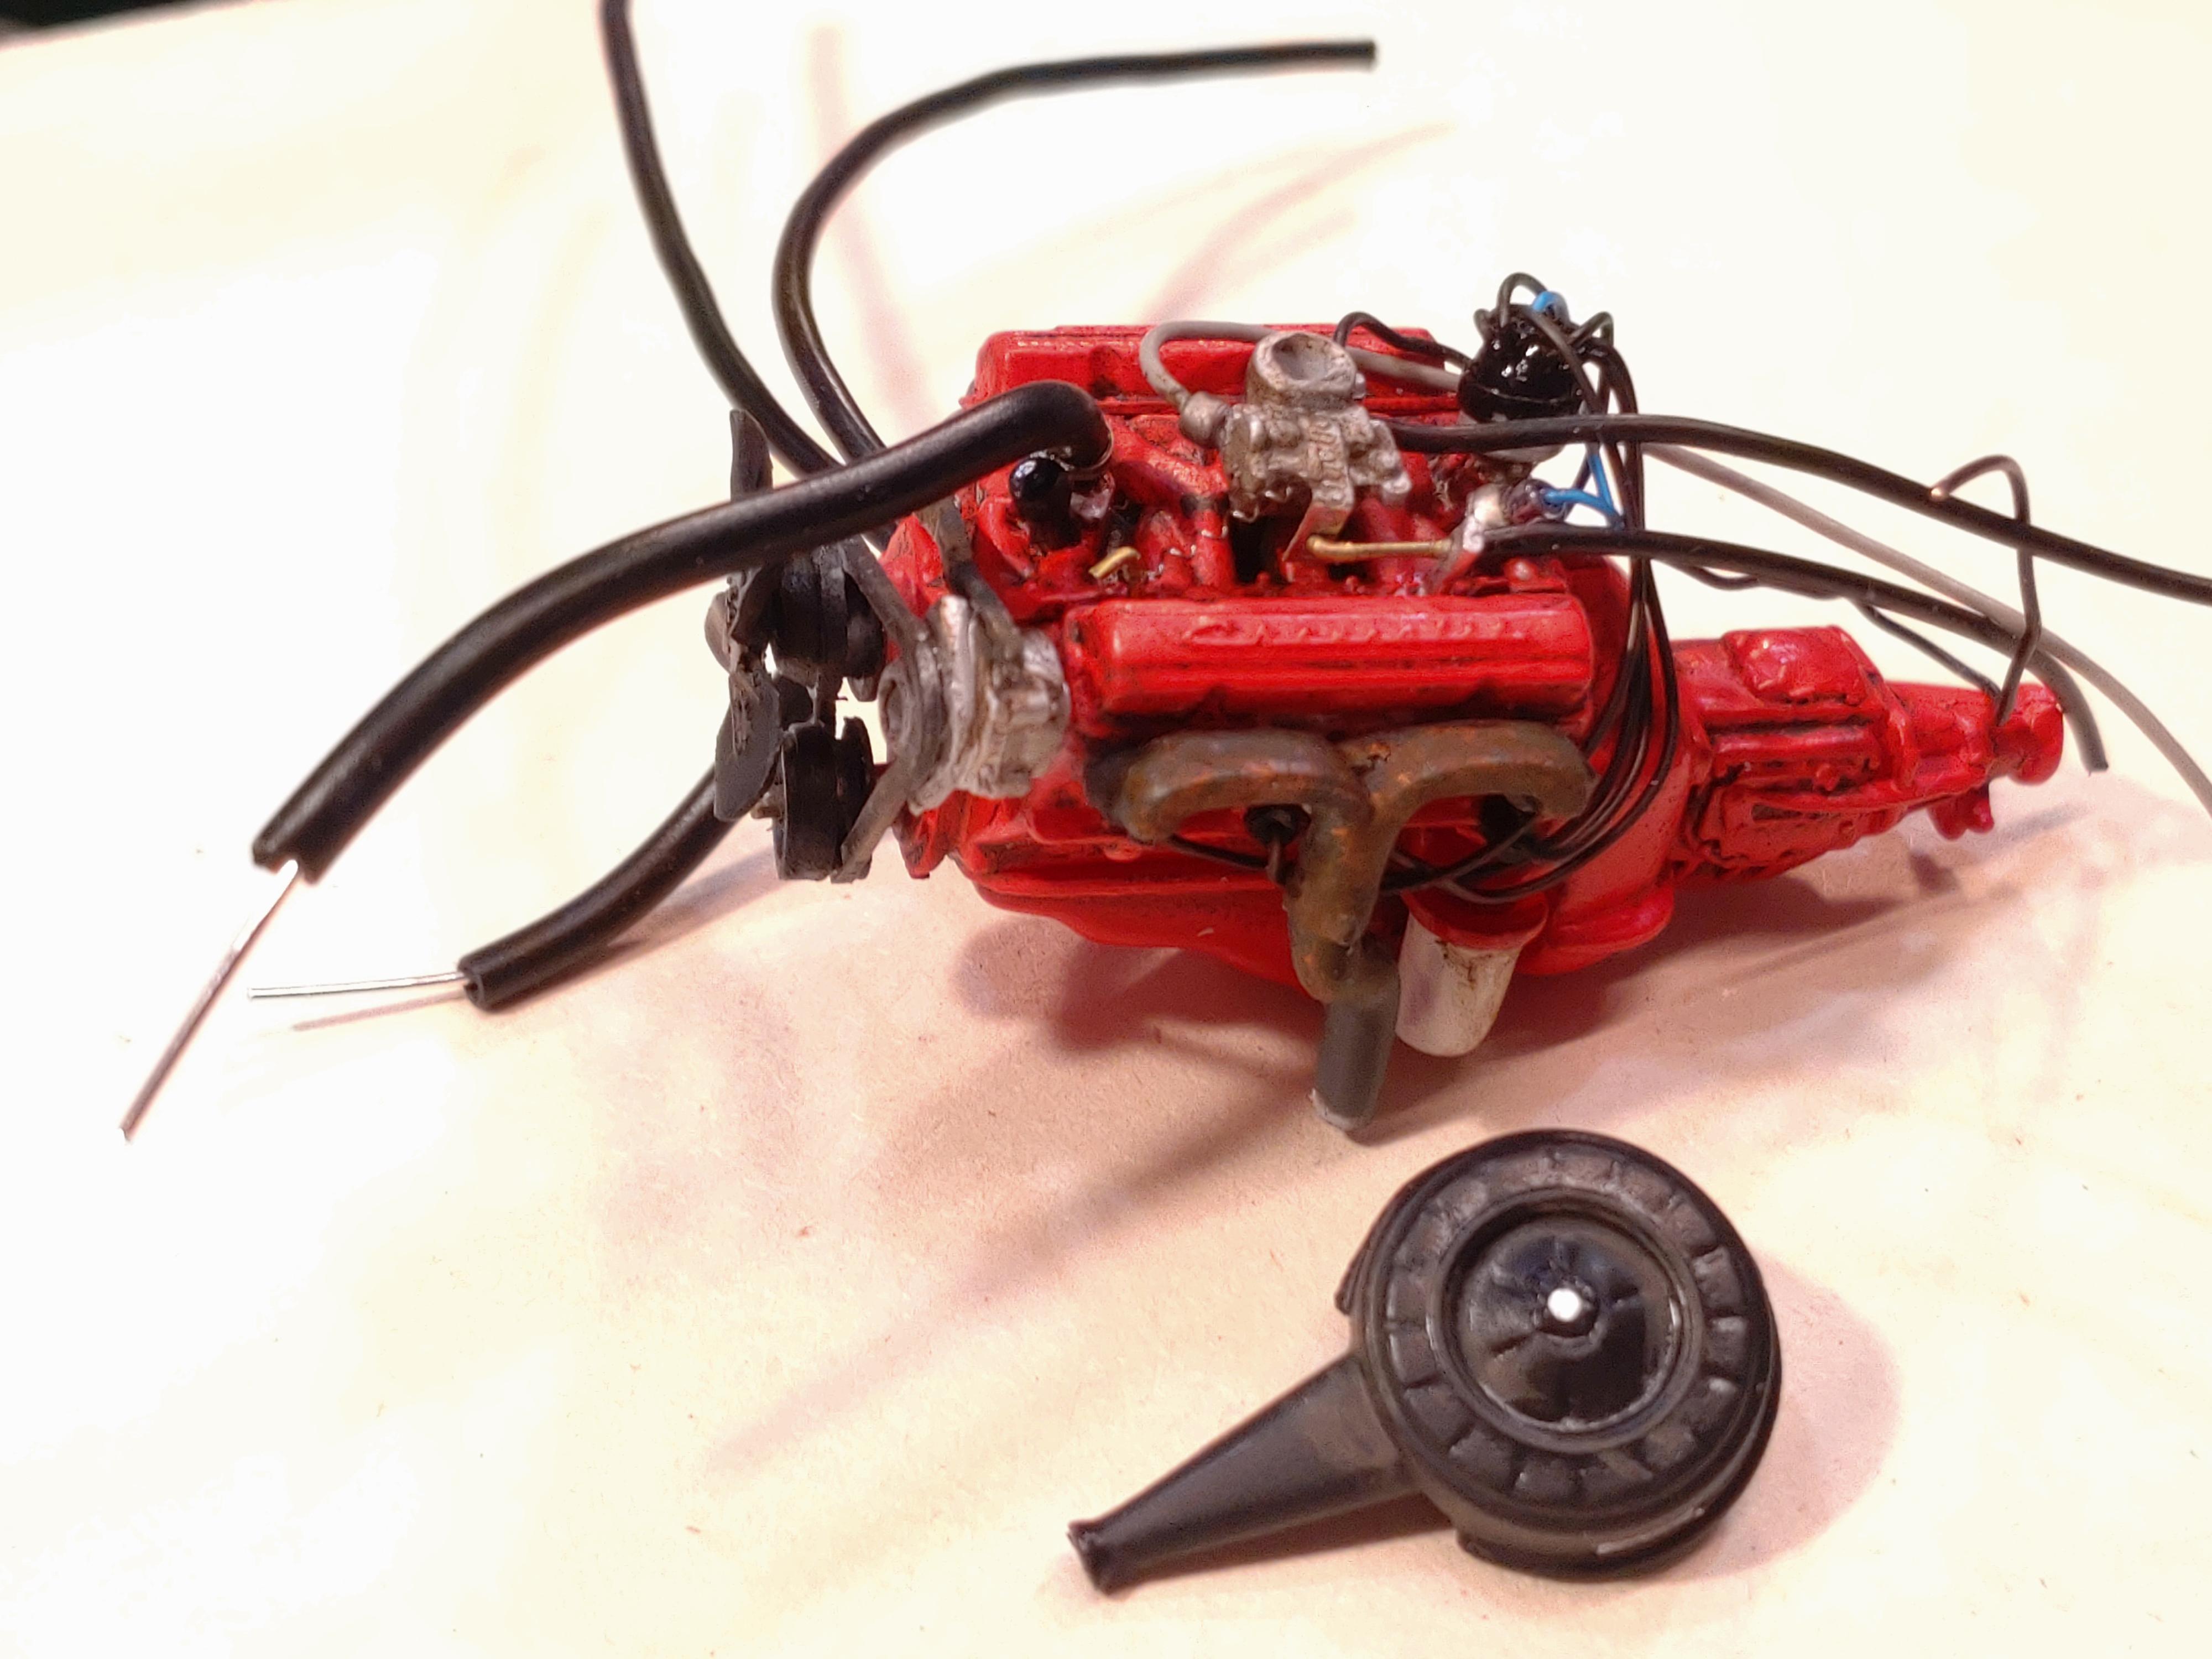
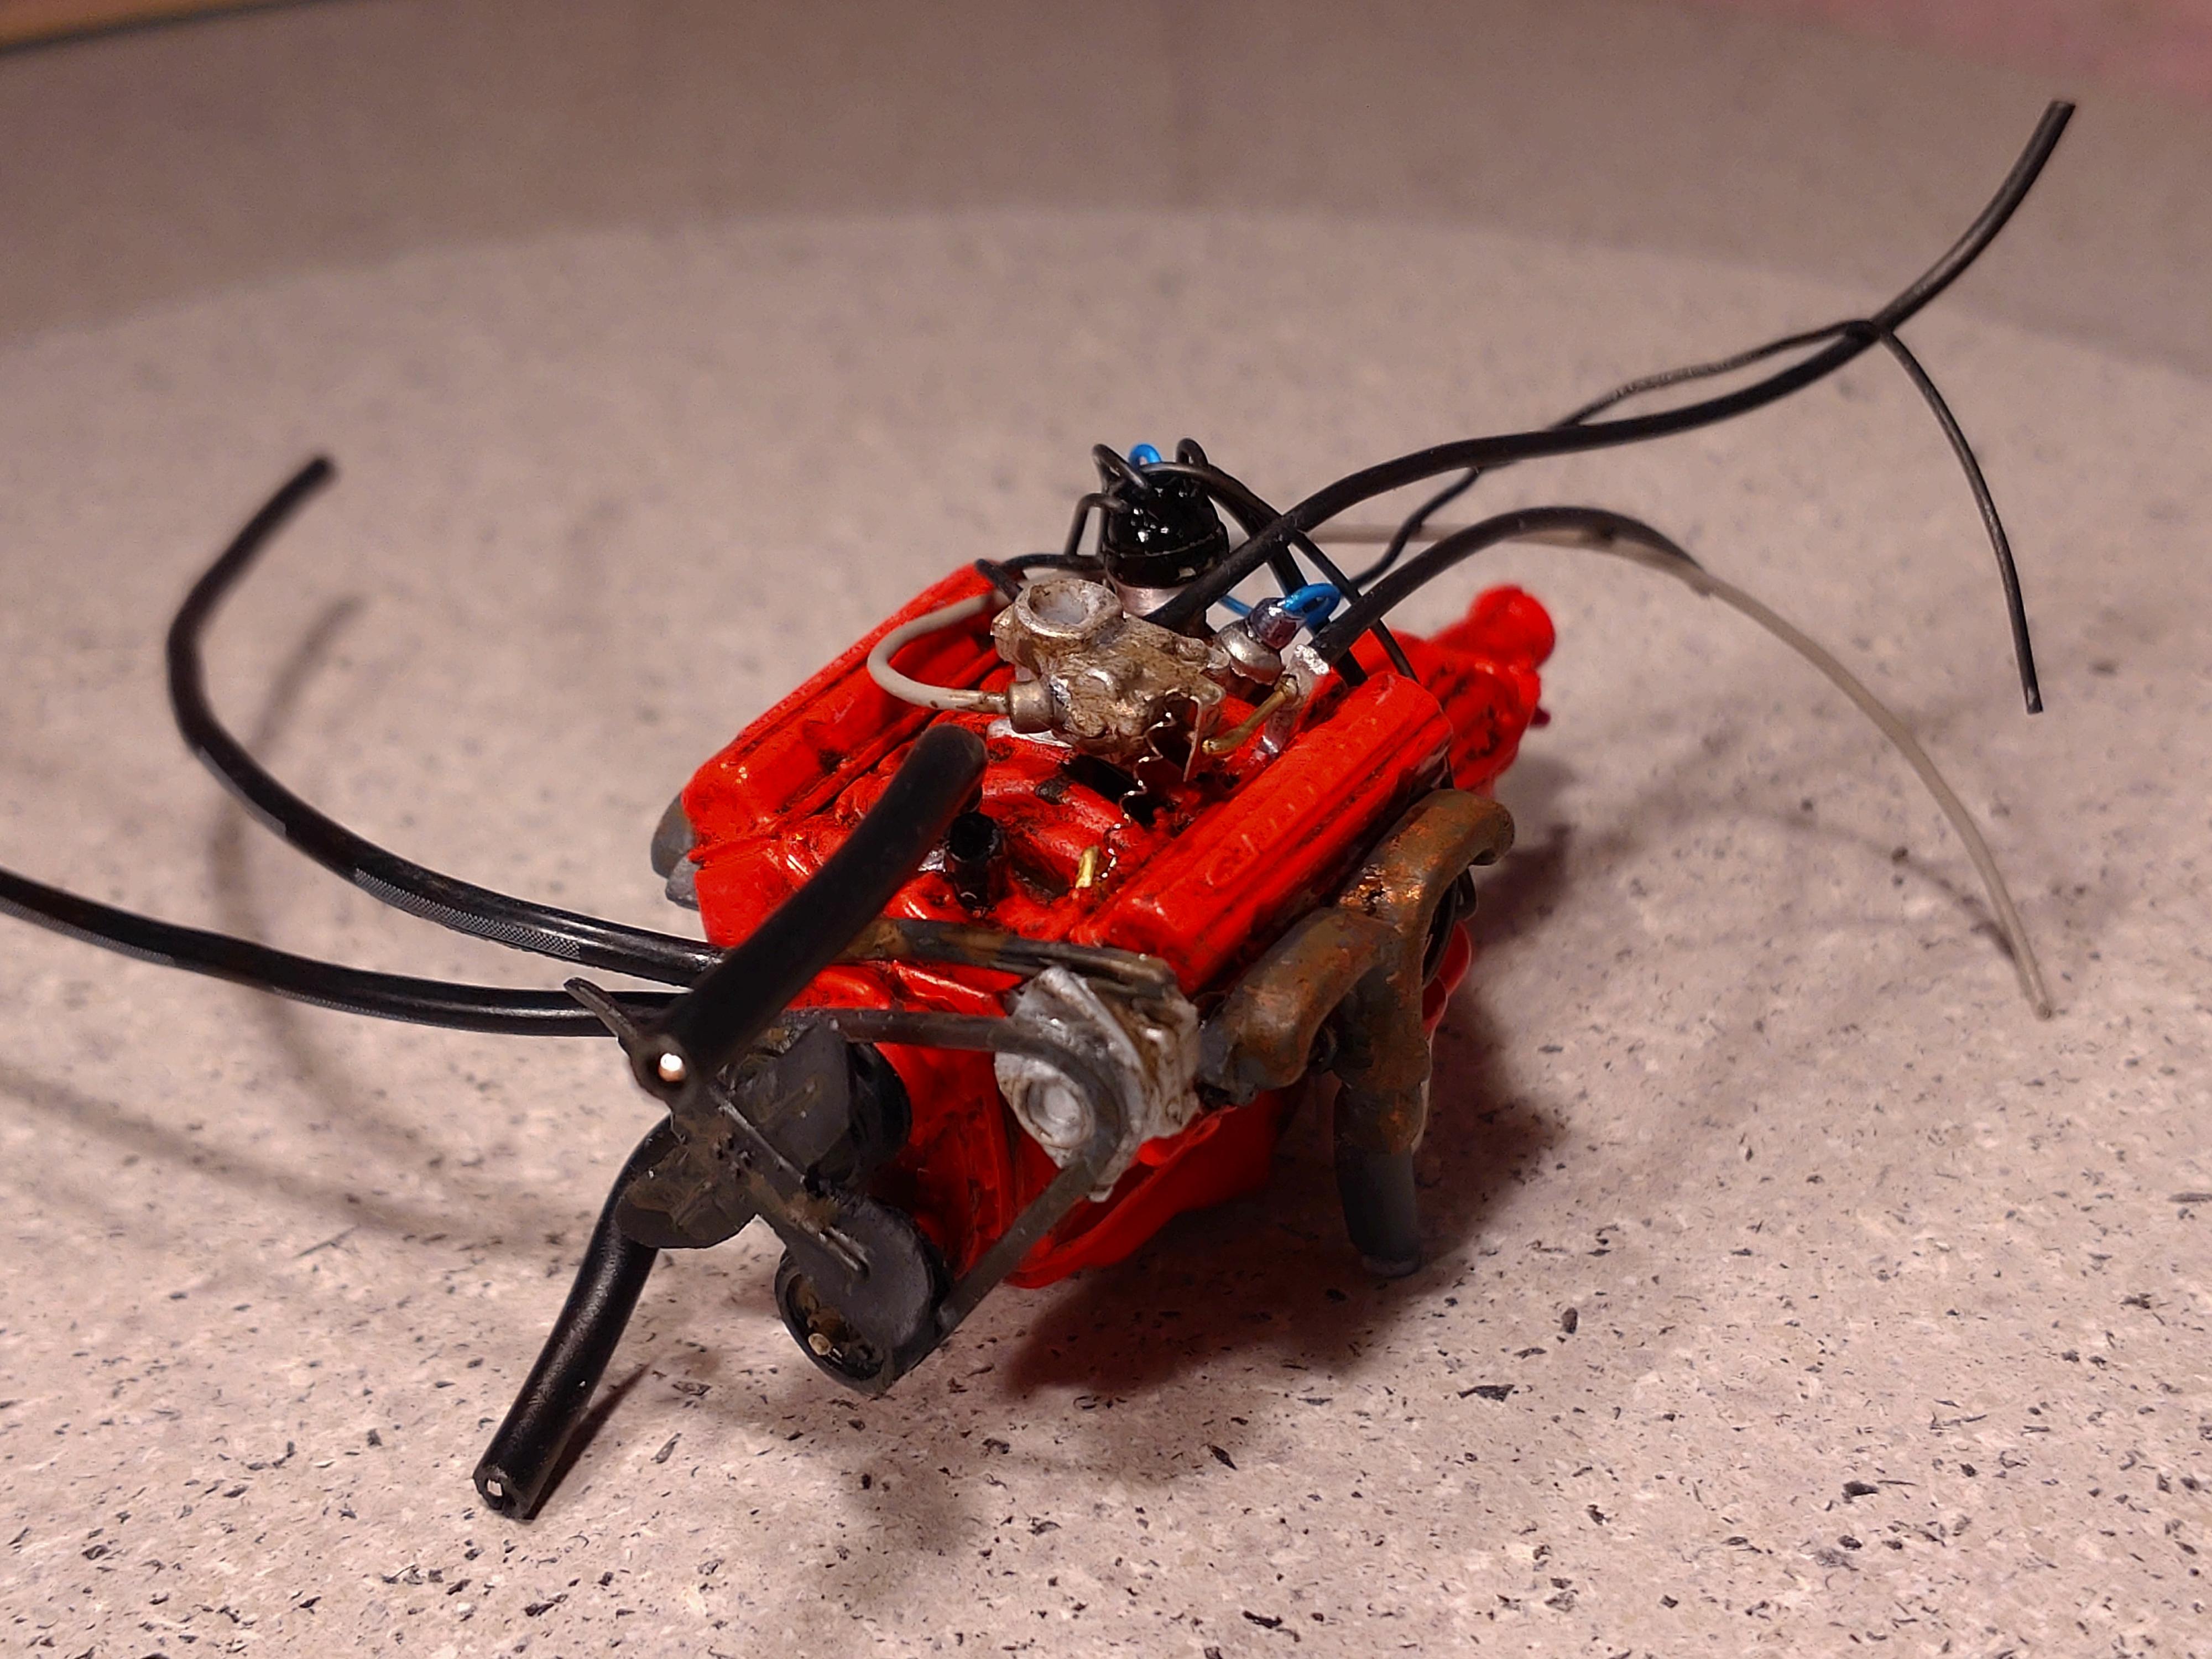
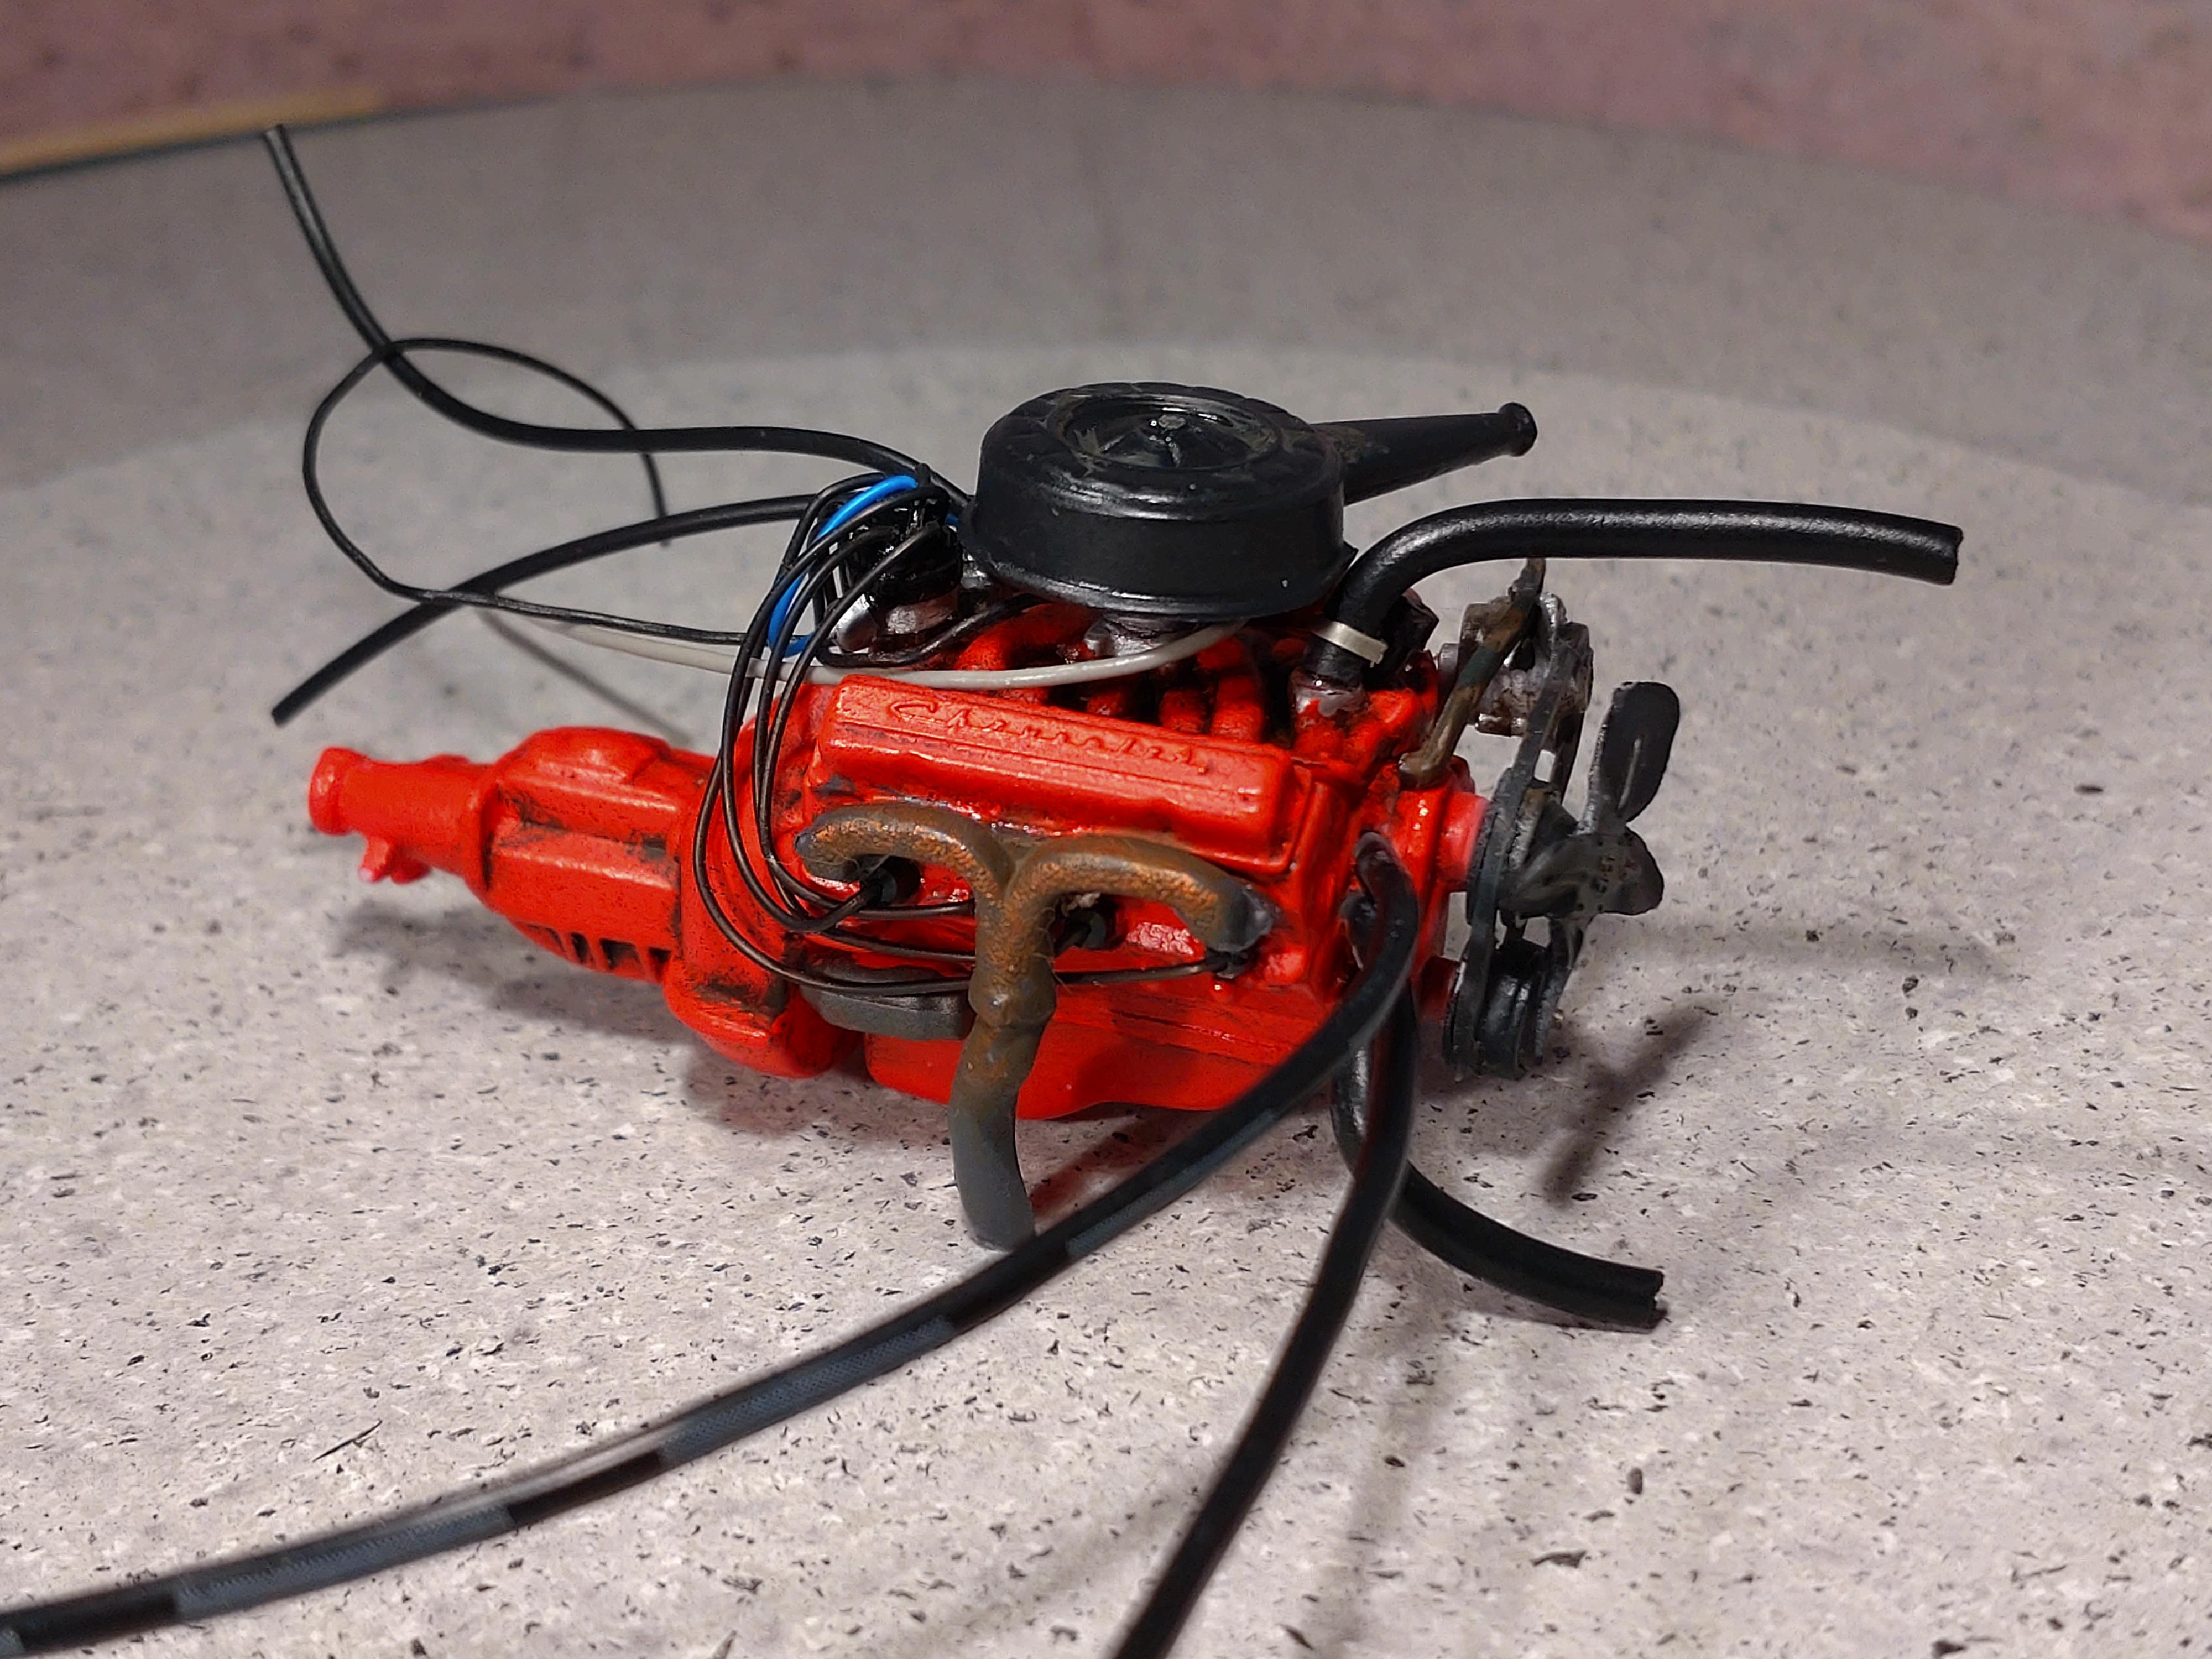
I´m turning into the finishing straight and have only a few things left to do! The engine has received a decent amount of grime to match the body. I added some details and am quite satisfied with the looks. After it´s dropped into the engine bay though, only half of the details will be visible...😕 The distributor is home made from aluminum tube and brass rod, the lines fit into the thin gap between them. Further added: throttle with spring, fuel line, pulley wheels with a rubber "v-belt". I deconstruct the kit part and remake the wheels to match the belt. Everything was treated with AK rust streaks and engine grime. I also added radiator hoses and hoses for the air conditioner. I strip the copper filament out of the vinyl and fill it with wire. The wire I can stick and glue into holes in the block, so I can bend them into any direction without fear of tearing them off again. . Attached to the chassis, all those lines and wires look a mess. The radiator is glued in place and will fit smug into the bay. This looks very neat now. The lines are all in place. I enhanced the bay with extra details: The brake booster received it´s brake line, the battery has better contacts with wires, a relay connects the main lines. The dump bed is working fine! There is only a little bit left to do now. Soon, I will show the finished build on an "under glass" thread. Thanks to everyone that took a look and for your friendly support!
-
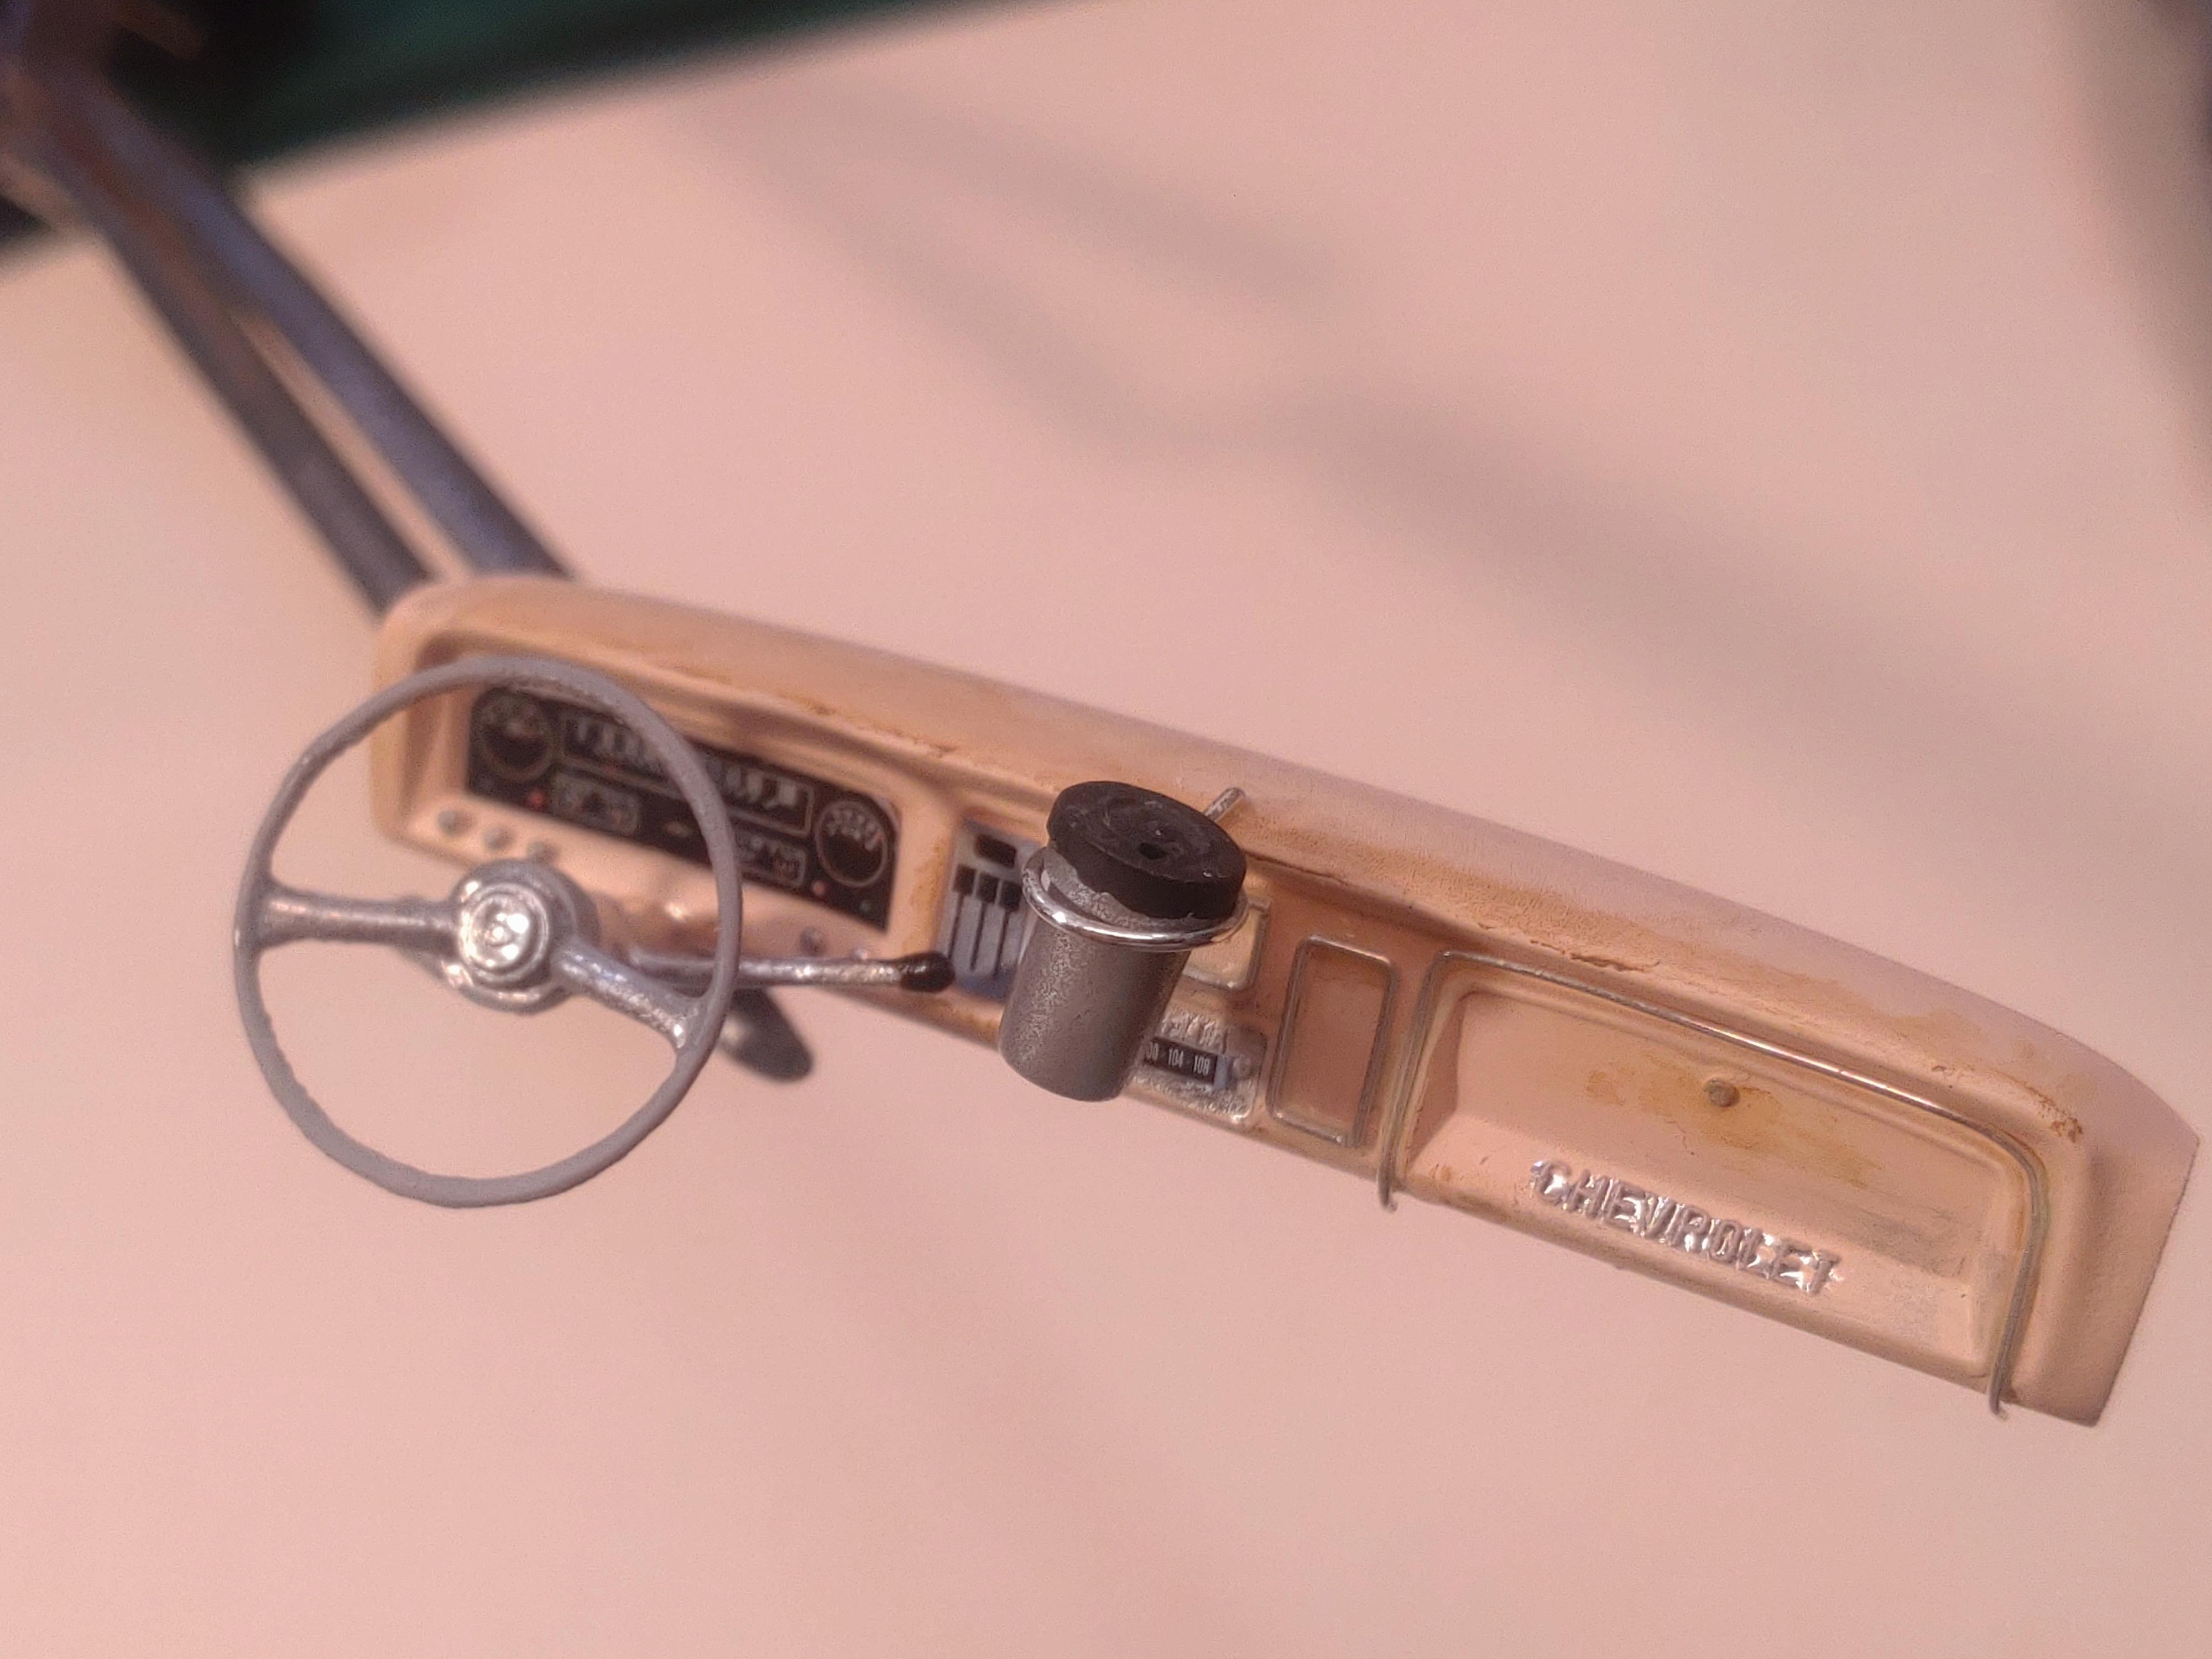
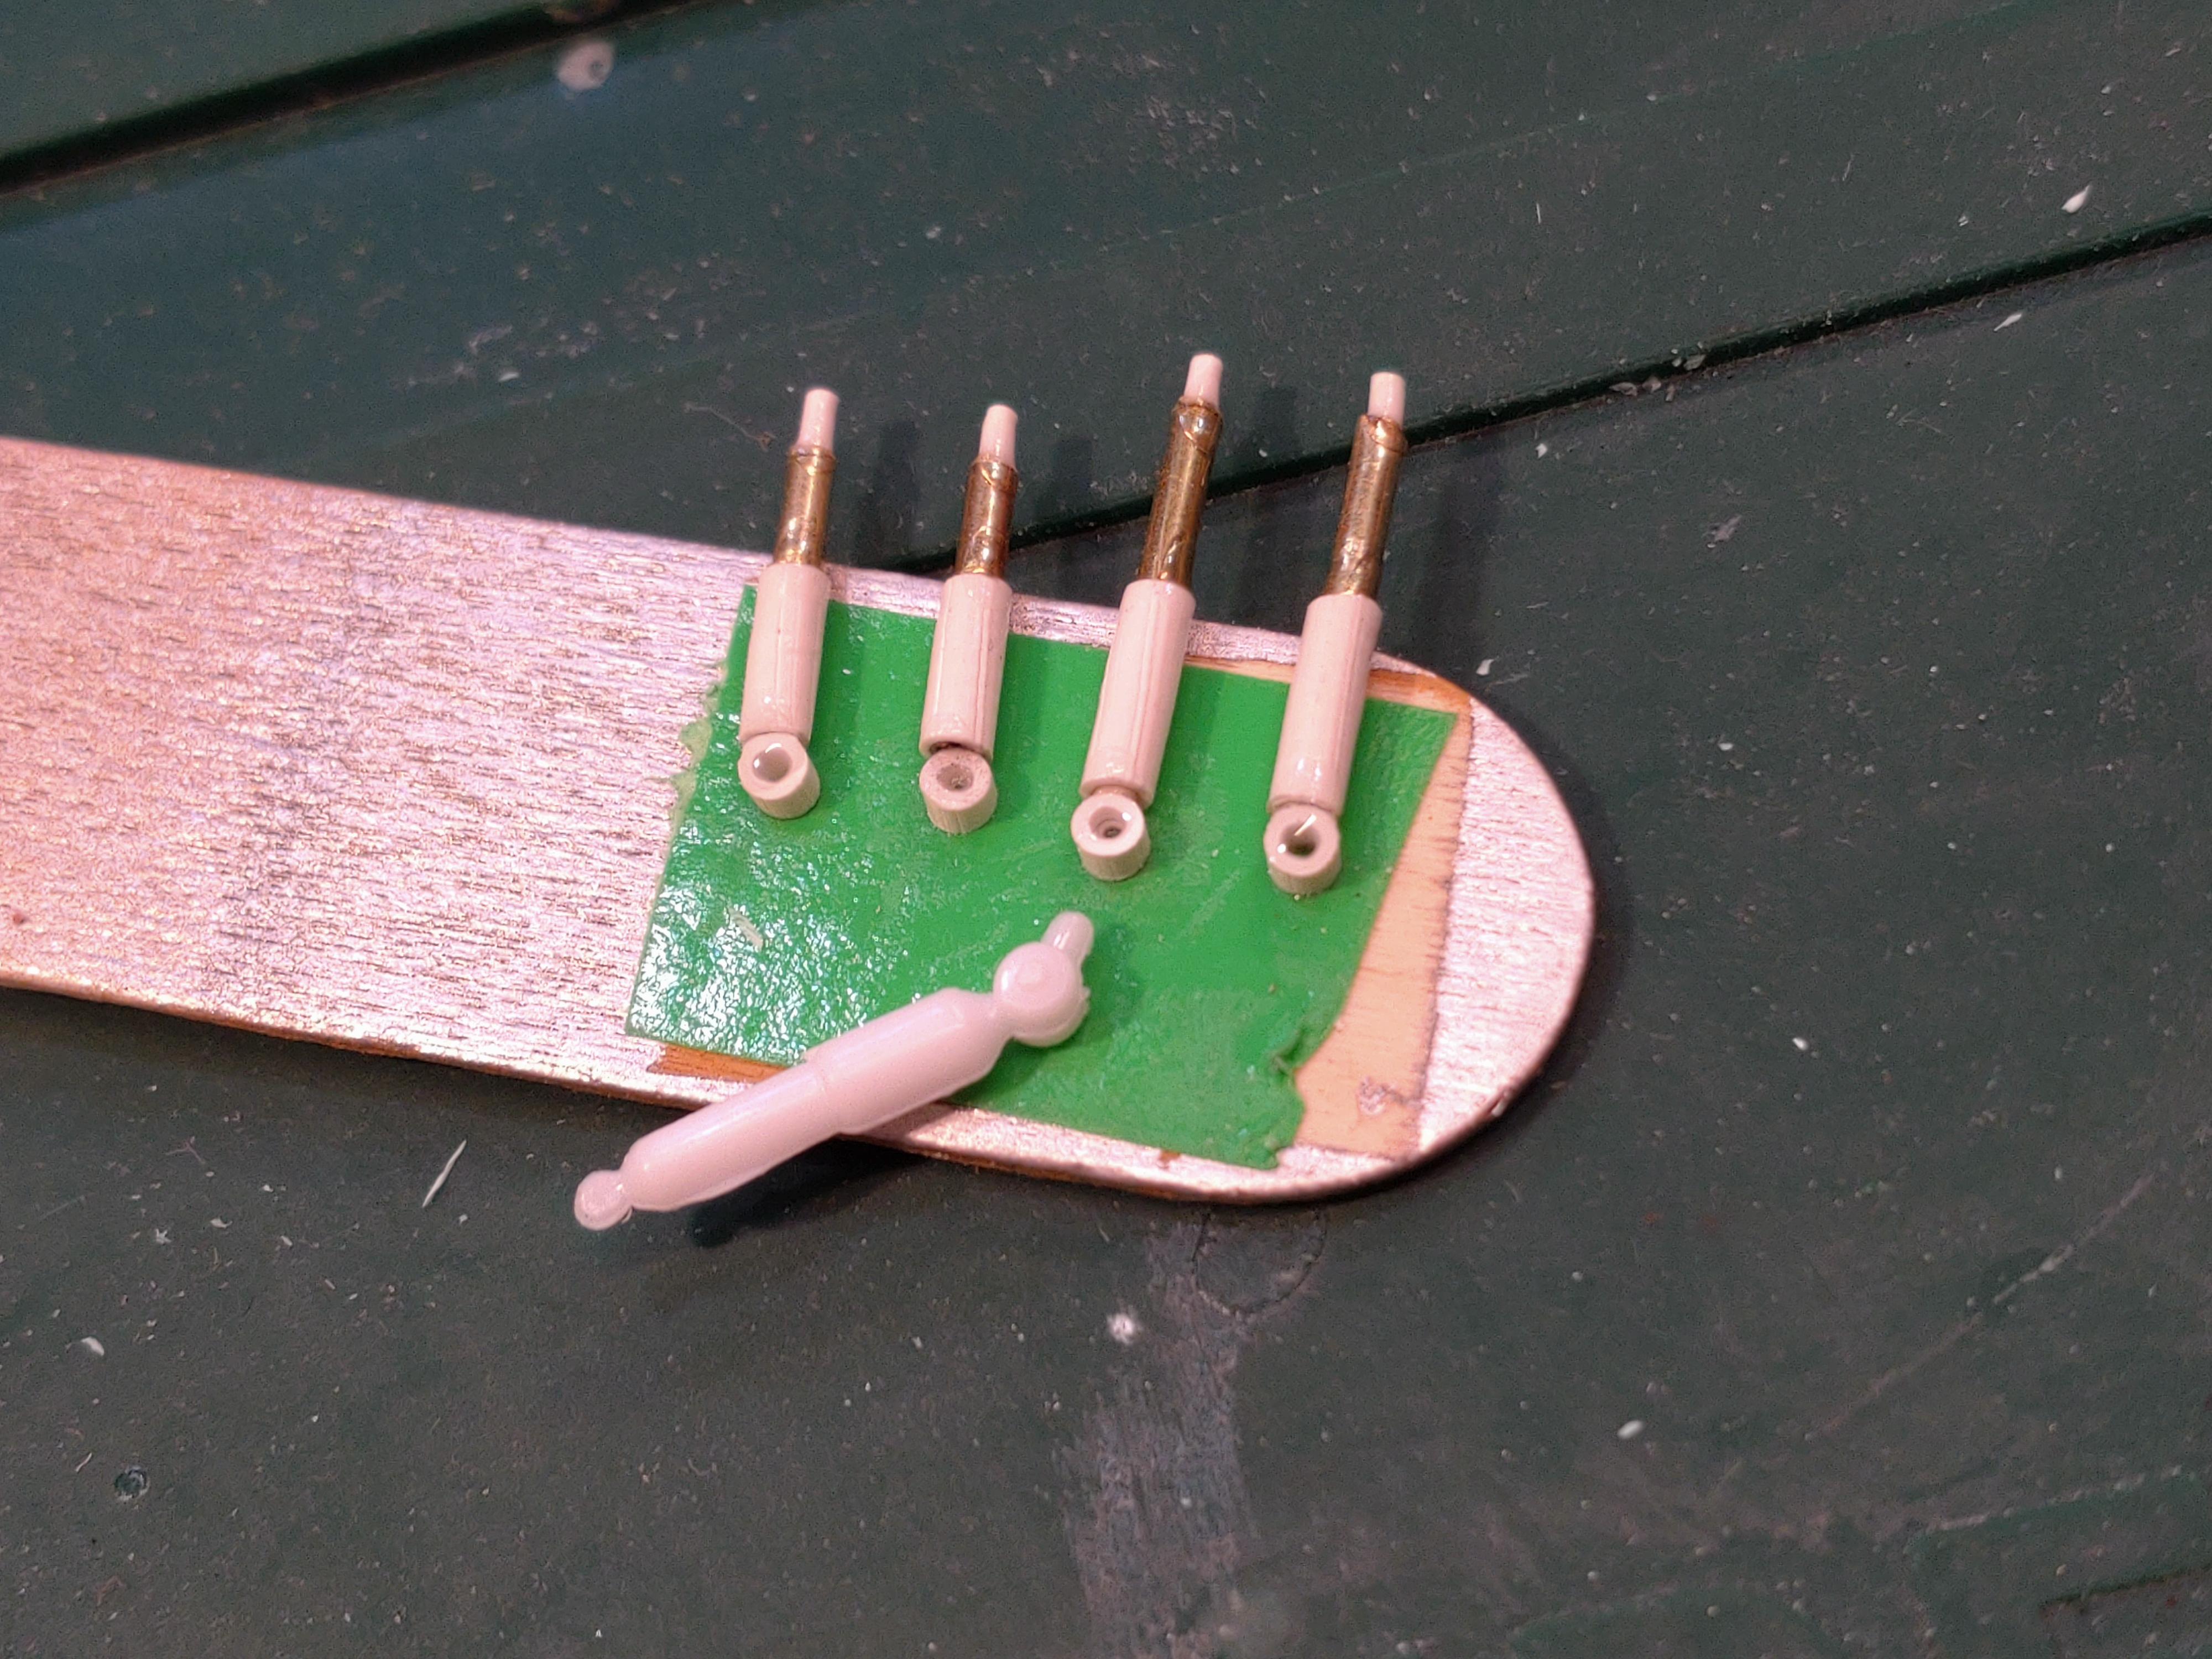
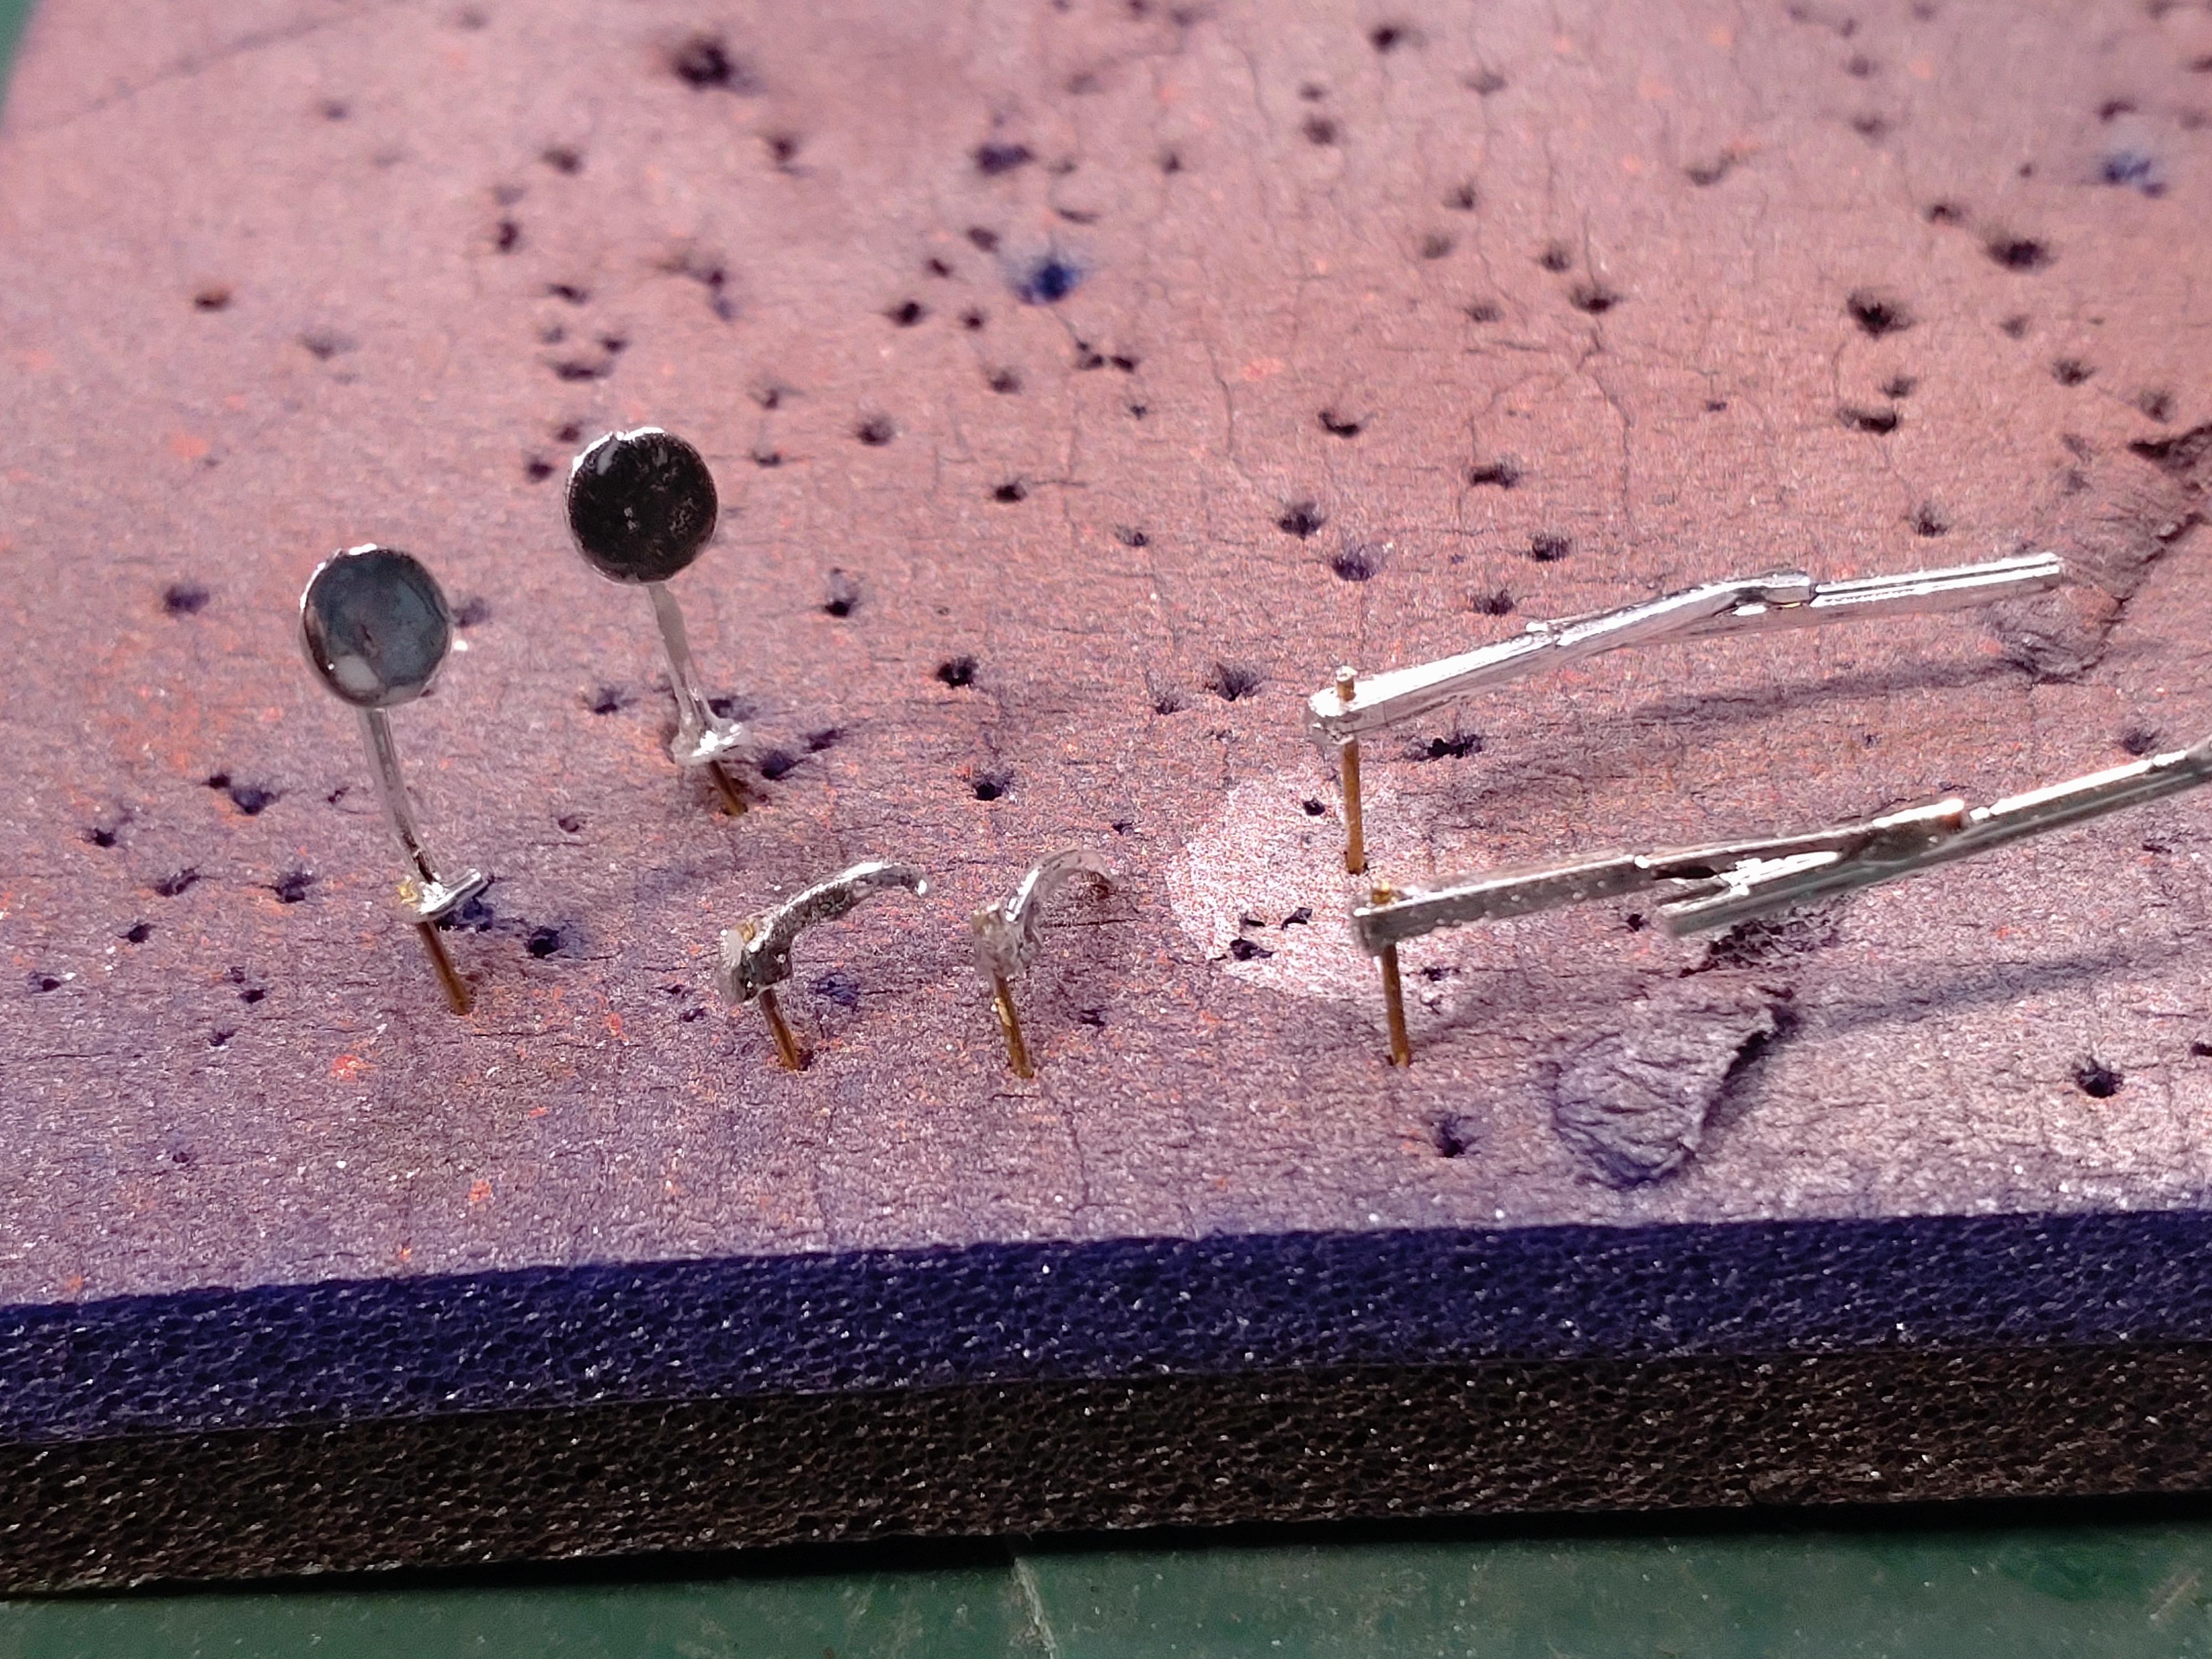
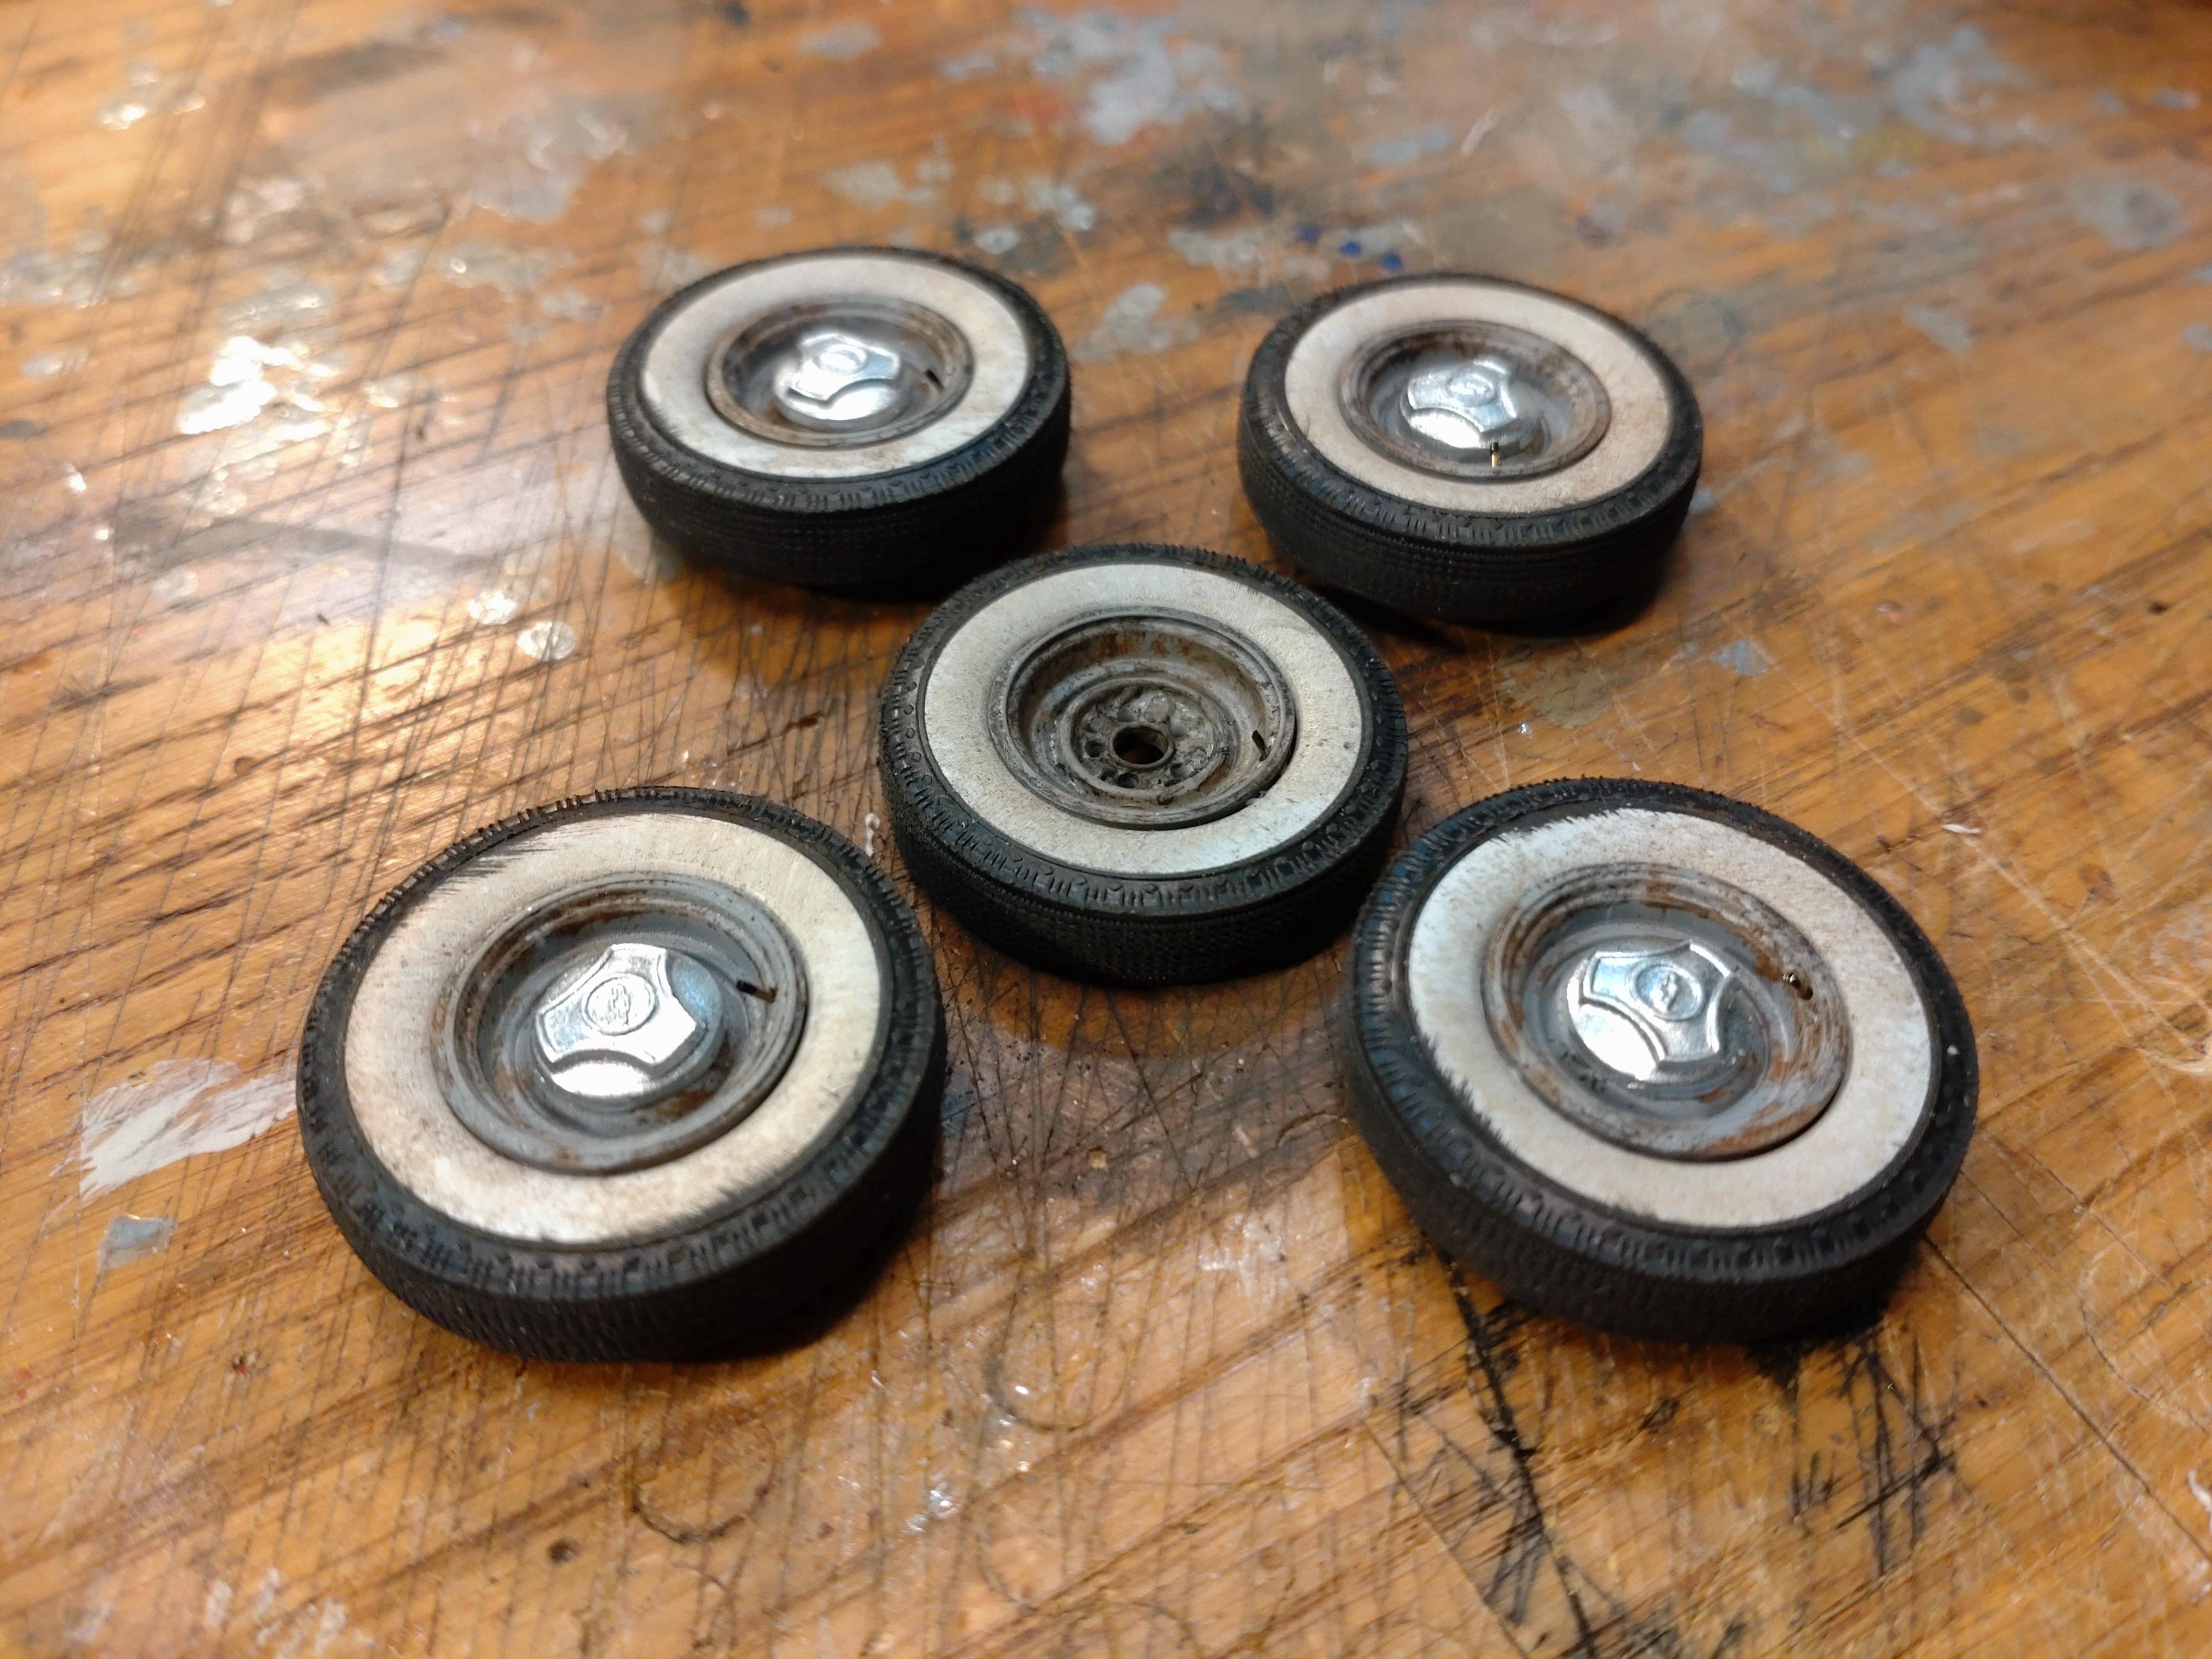
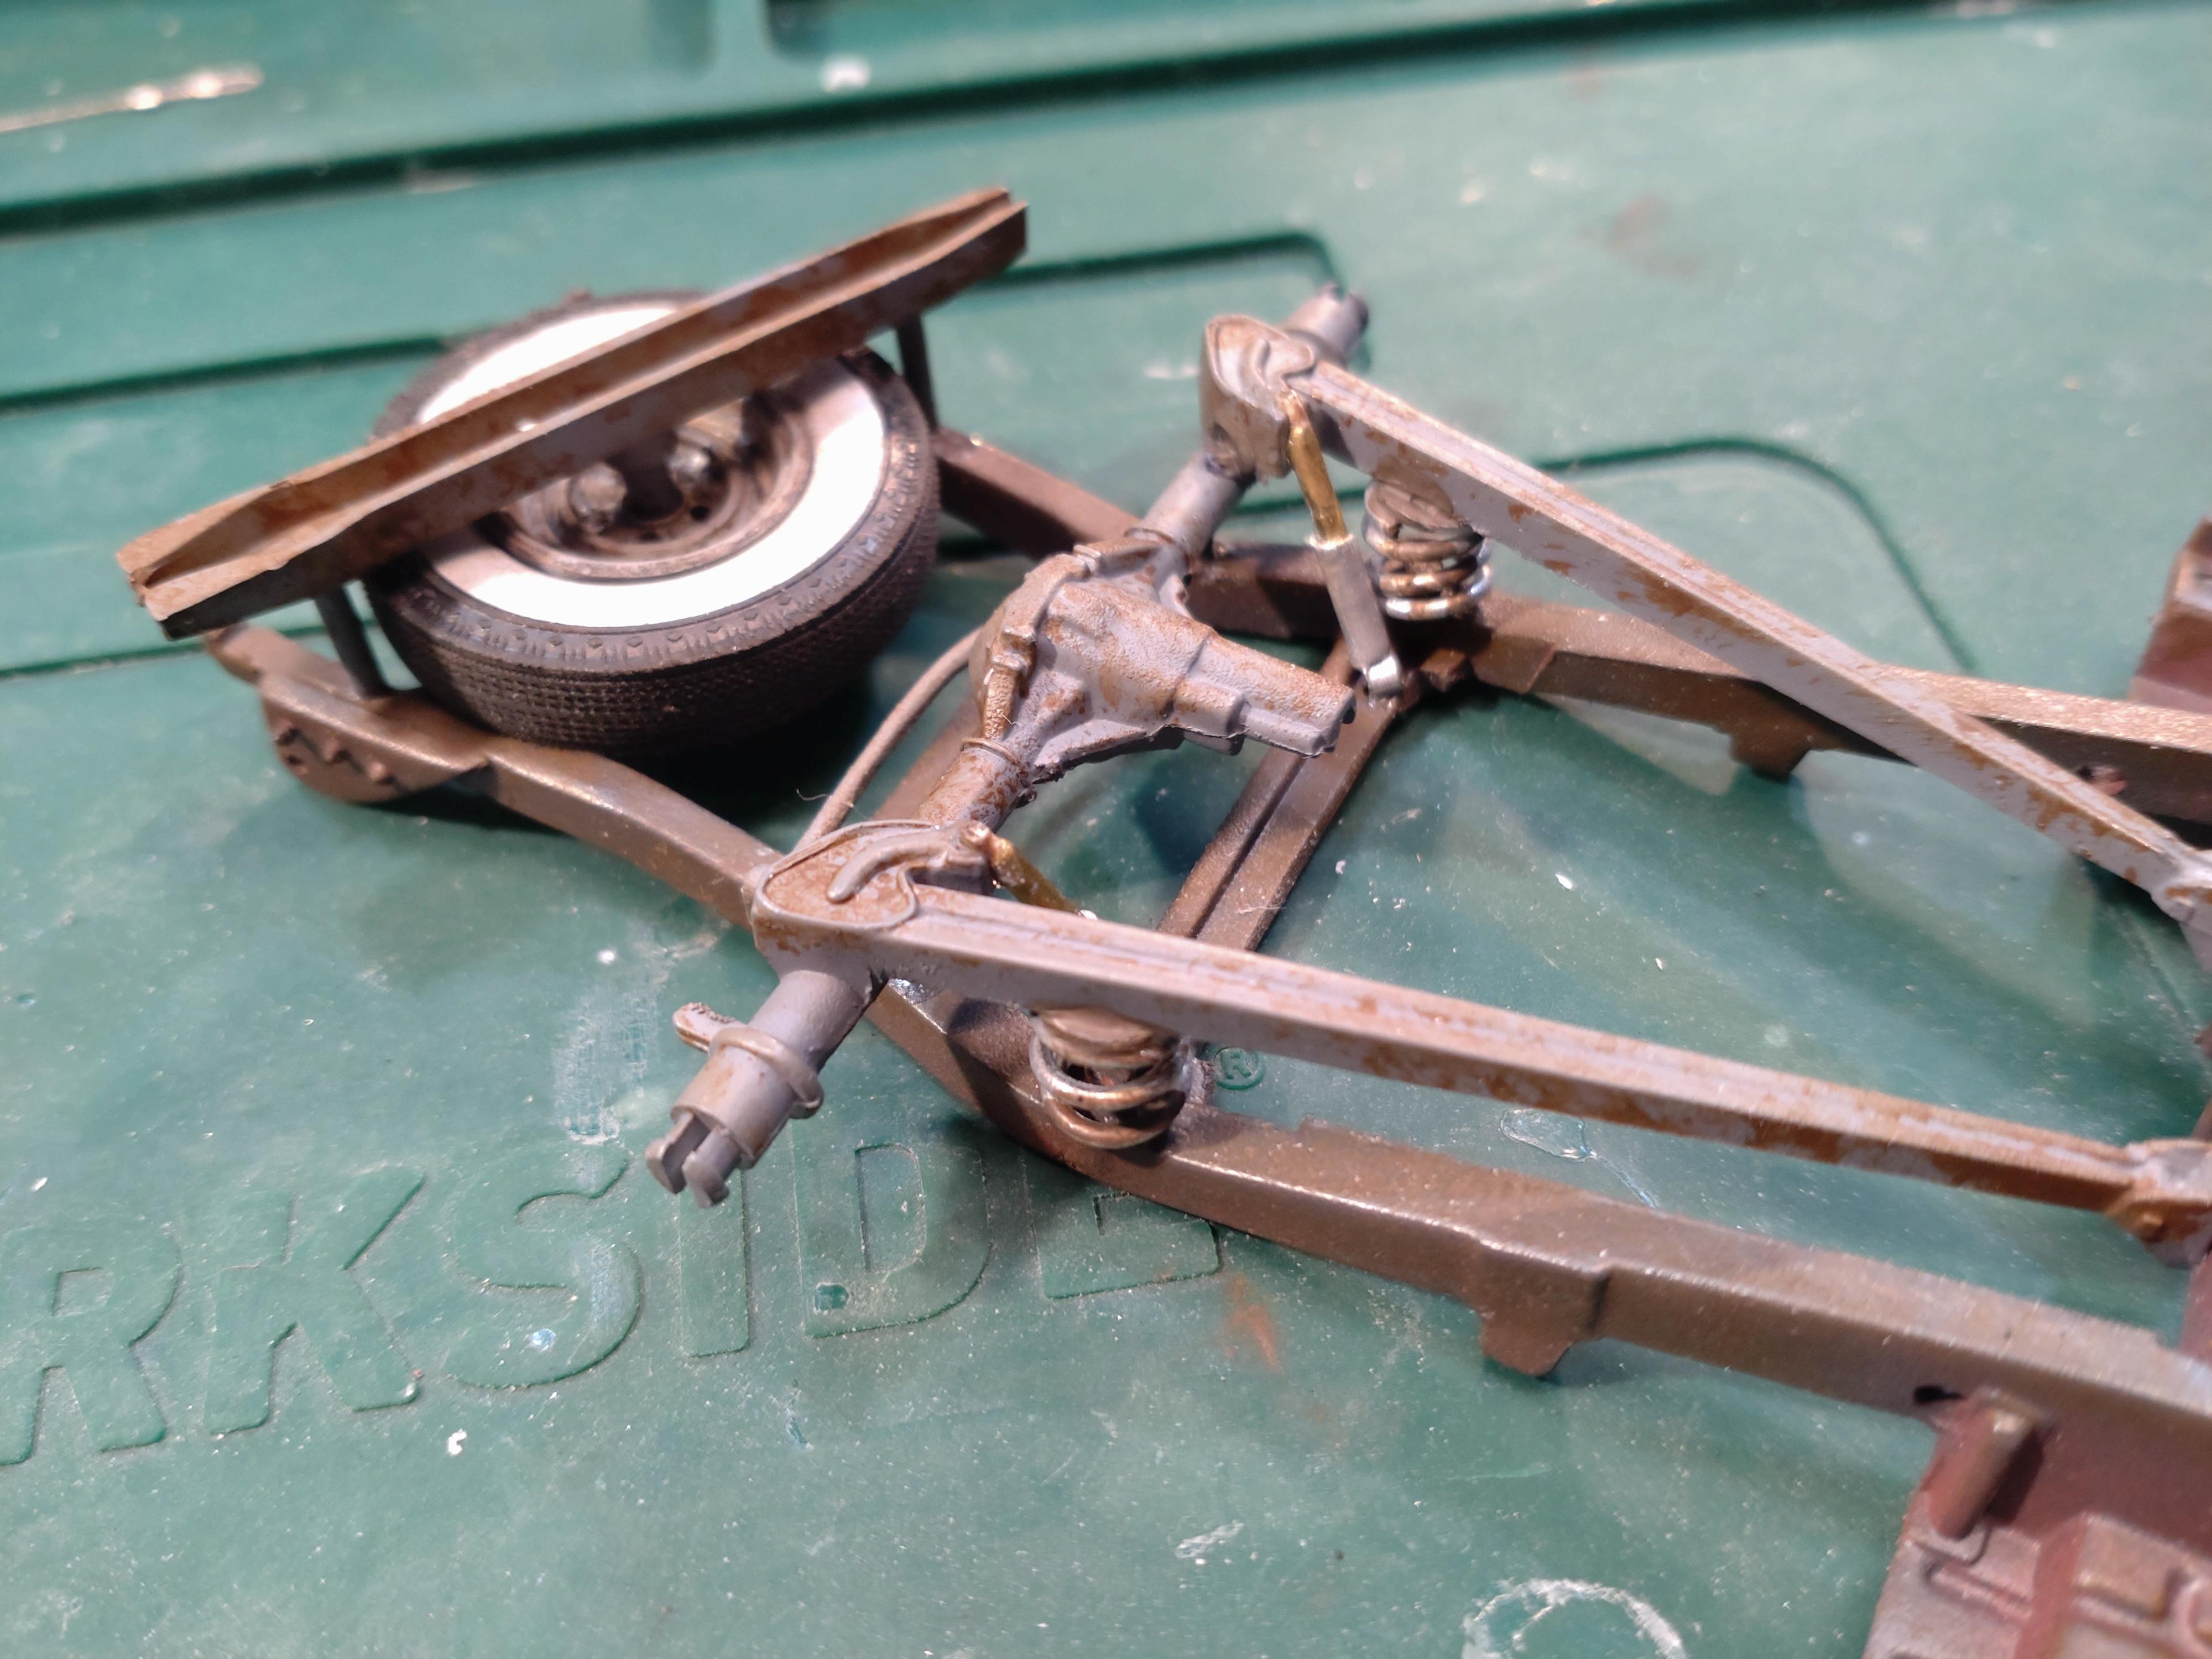
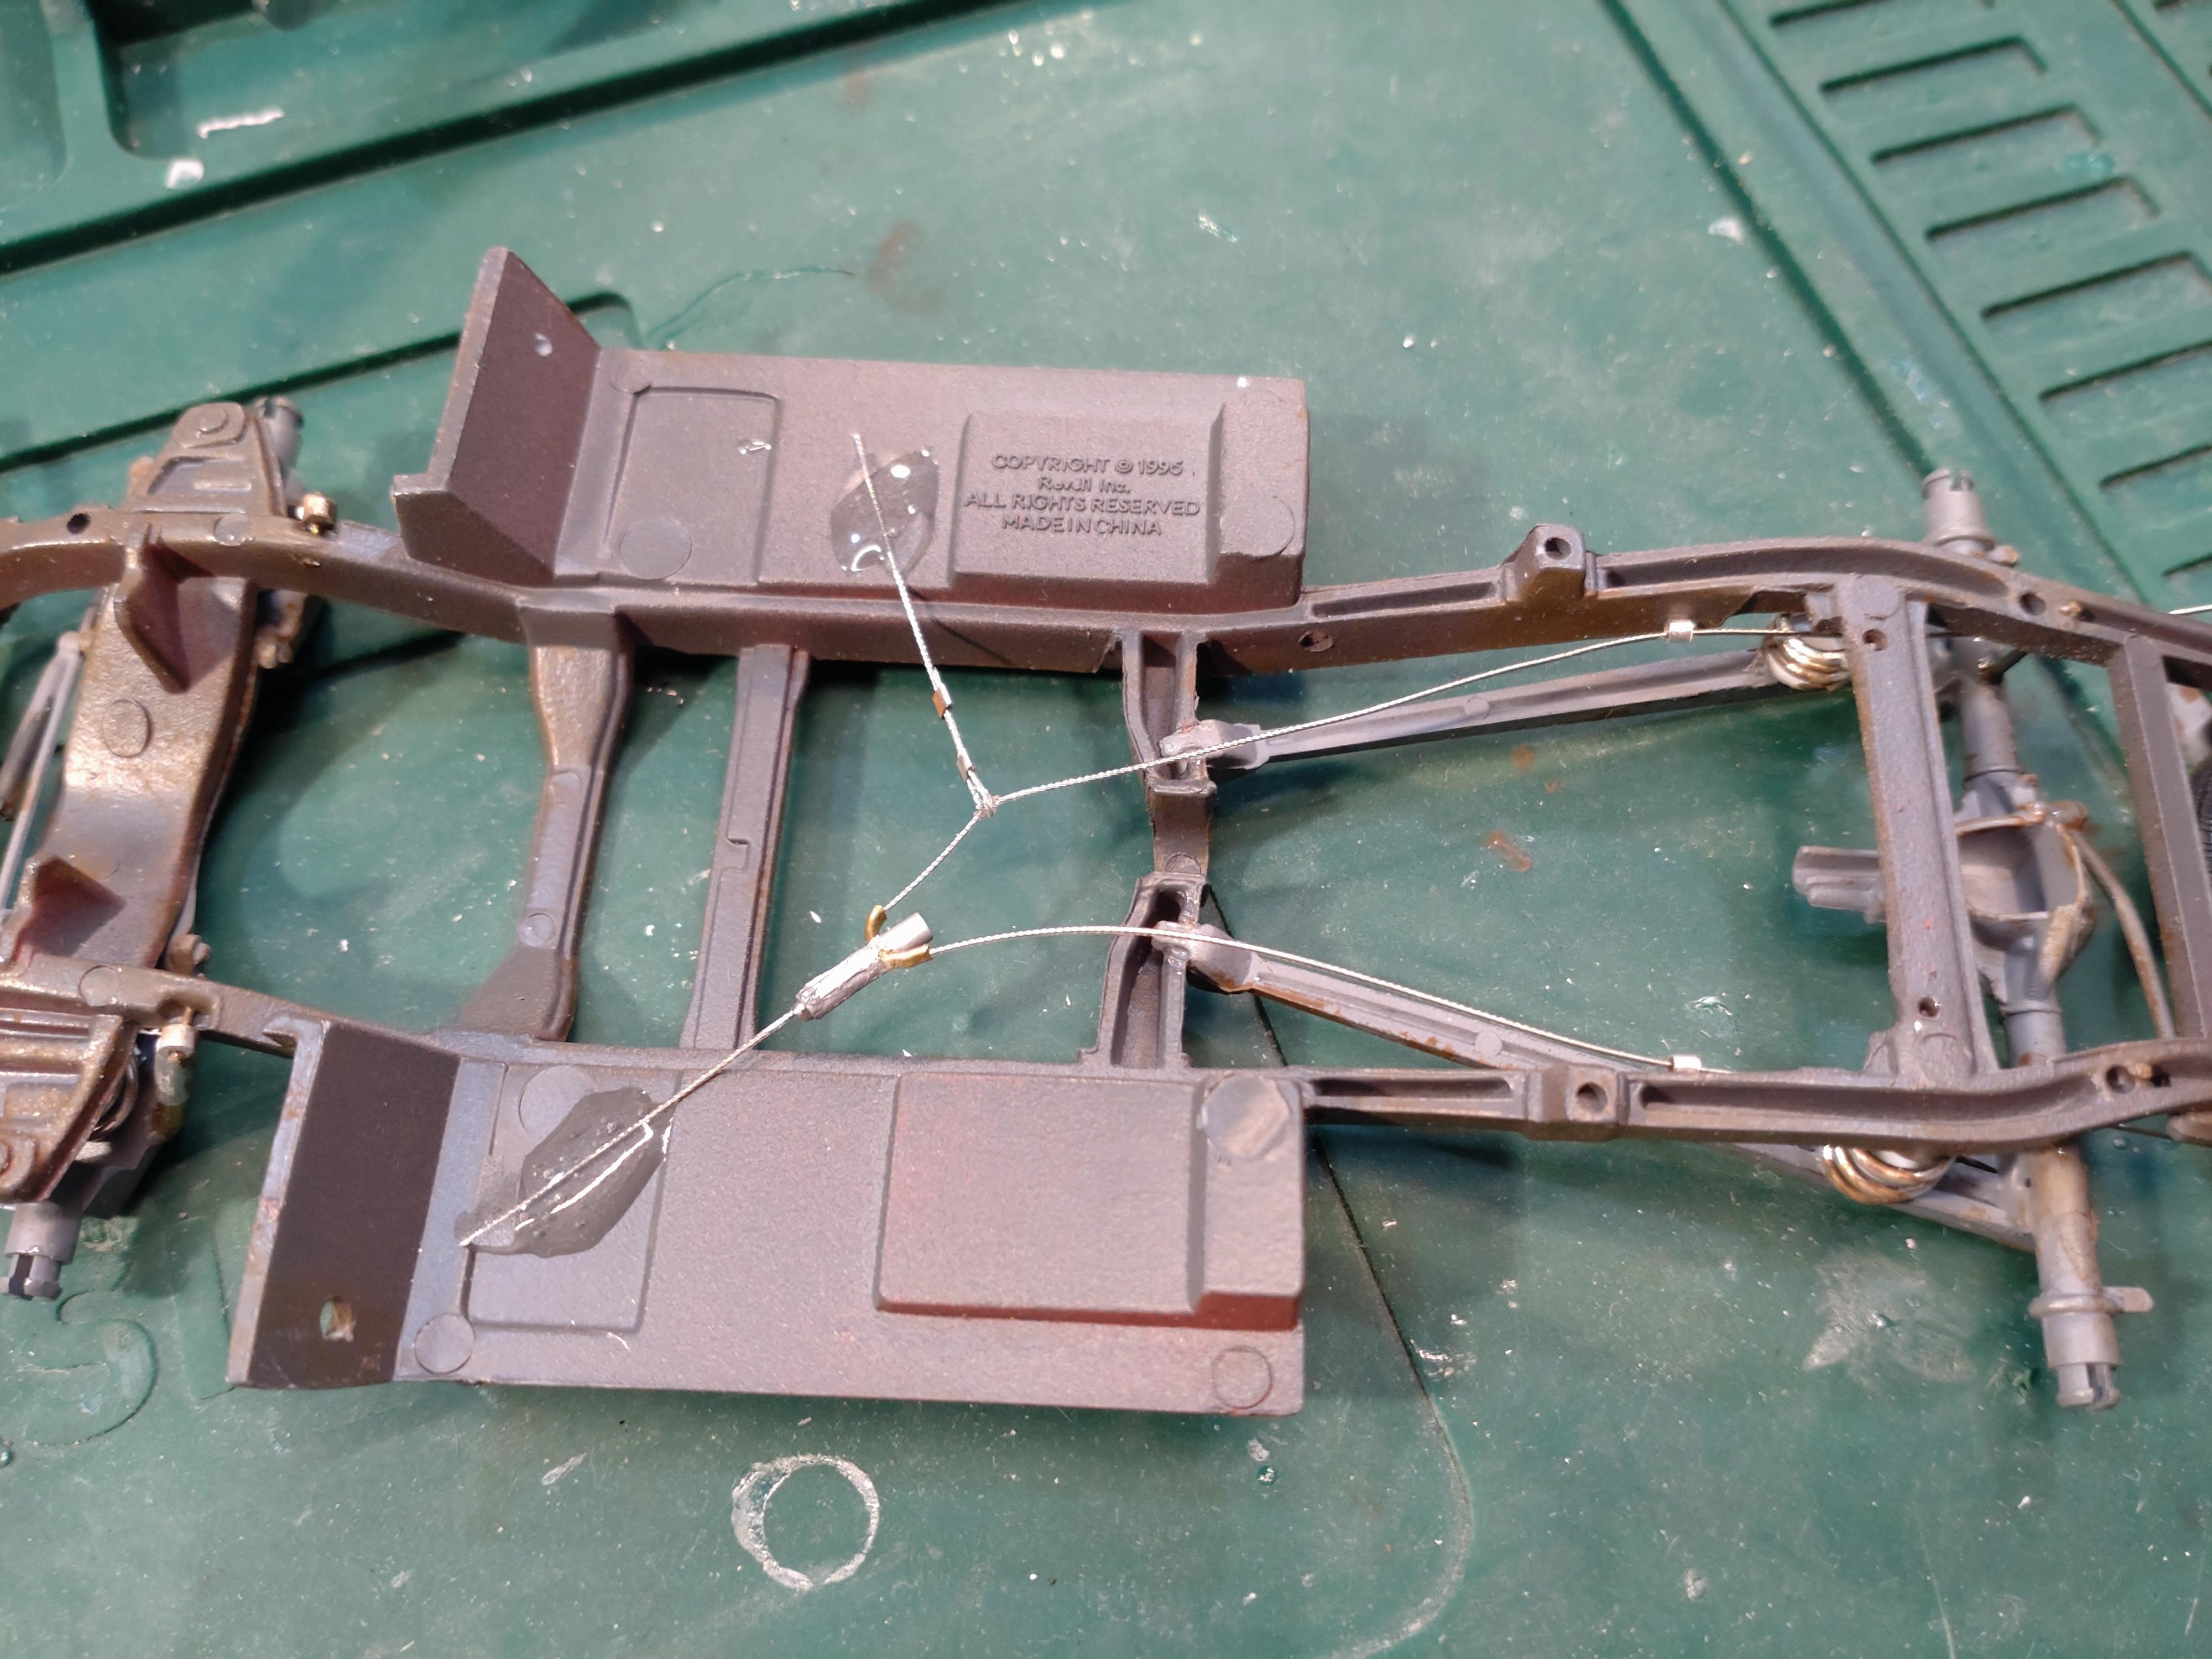
With some builds I like to imagine a story or setting to match my build in real life. Especially if the 1:1 car could have a "story". In this case the owner is a gardener or farmer. His old pick up was handed down by his father or ever grandpa. He keeps everything running and in good shape, but would not spend a dollar on the looks. Neither on the outside or the inside. Of course the interior is in a messy condition. On the dashboard I added some trim around the glove compartment and a parking brake lever. That gardener is a coffee addict so he needs a big thermos can close at hand. The bench is all run down. Covering the holes with an old blanket must do and that has gotten quite dirty itself. From his last lunch on the job a old pizza carton is still left. The floor is covered with rubber mats I cut from a thin place mat. The door panels are enhanced with fabricated handles. Everything has received its fair amount of patina. The dash and the floor with the bench are attached and the gap at the rocker will be filled in the end after connecting the body with the chassis. I´m not so happy with the detailing of the suspension with this kit. The springs are non existent and the shock absorbers look too crummy. I made my own shocks with styrene tubing and brass rods. The springs are wrapped from 1mm aluminum wire, easy to bend and move into the right shape. The rear drive axle is connected to the chassis with brass rods. Painted flat black, they hardly show afterwards, but keep the axle in the correct place and will hold the weight well. The shocks have received some patina and the spare wheel is mounted. The parking brake lines are made of thin jewelry cable I found at a crafts store. The pulling part is crafted from 1mm brass tube and styrene rod. I connect certain small parts with wire pins. I was one day tired of messing my models while gluing the door handles and mirrors. Things go wrong so easily. Now I drill the parts 0.5mm and stick them on brass wires. I can now determine the exact point to which I want to attach them and then glue with white glue. No more slipping or running. Here are those parts attached. You can also see the half open windows on the door. The wheels have their share of patina and rust. And valves also made of 0.5mm brass rod. The bed door is connected and working well. I´m working on the engine now and hope to get done completely during the next 2 weeks. I will show up again! Best wishes, Andy