Search the Community
Showing results for tags '454'.
-
Hi all,,its labor day already,,wow summer went pretty quick as always. Hope you all are having a good one,, up for review is the AMT 68' Camaro,,this kit has been around for quite awhile,,great features come with this kit,,mine had some general tooling/molding issues,,but the wonderful folks at Round 2 were very helpful at fixing the issues. Hats off to them. I wont bother going into it all,,no need to really. At any rate,,things I added that didnt come in kit: larger back tires,,scratch built carb scoop from a ww2 airplane drop tank, leaf spring riser lift pads to allow larger rear tires,,additional engine bay details. Sprayed w/testers quikdry turquoise using white primer,,it turned out more of a mint green,,which is cool. I was going to put the kit supplied stripes on it,,but after mocking it up w/body on chassis,,I liked it better without the stripes. Hand painted the rim detail, +,interior 2 tone work. Other than that,,its a real basic kit,,and looks great on the shelf! Thanks for looking and keep up the great works here! Skymnky over and out.. https://www.flickr.com/photos/153516536@N08/52333565774/ https://www.flickr.com/photos/153516536@N08/52333502848/ https://www.flickr.com/photos/153516536@N08/52333503828/ https://www.flickr.com/photos/153516536@N08/52333569264/ https://www.flickr.com/photos/153516536@N08/52333568639/ https://www.flickr.com/photos/153516536@N08/52333570459/ https://www.flickr.com/photos/153516536@N08/52333274121/ https://www.flickr.com/photos/153516536@N08/52333702610/ https://www.flickr.com/photos/153516536@N08/52333704475/ https://www.flickr.com/photos/153516536@N08/52333703575/
-
Hey folks,just finished this MPC Ramp Truck. had some minor issues with a few things,but nothing a dremmel couldnt take care of,,lol. I wont bother goin into it,,it turned out cool just the same. Ive always been a fan of the mid-late 60's and 70's Chevy trucks. So I kept the decals on cab to a minimun,,to enjoy the basic cab lines and design.Rattle can testors quik dry Firey orange,,Hardware store paint for chassis,,and hand painted details. The kit came with only 4 wire wheel rims,,so found 2 more in the leftovers parts bx. The Chevelle is an AMT pro street kit done a while back. All in all,,glad to have it on the shelf! Thanks for lookin,,build on!
-
Howdy folks,,just finished a swap meet 15$ MPC 1/16 84' Vette. S-built : Roll bar,,hood scoops,belts,rear wing, I added the rear tires from a MPC 1/16 Cobra kit. Rims came w/the kit. Used Testors Transparent Grape over dollar store F-Blk primer. Hardware store Autumn Red interior. Neat vintage kit. Thanks for looking,keep up the great works!
-
This was an open box purchase from a friend who wanted me to build a replica of the 1:1 car he is building. Unfortunately this kit was not appropriate for his build. So instead I built it for me. It is Testors Star Spangled Blue and has been top coated with Testors Wet look clear. I have only used rattle cans and this is the best paint job I have EVER done. The silver SS stripes are from Keith Marks. The rear window took some fine sanding and Future clear to remove the glue smears. The engine is a BBC mixed and matched with parts box pieces. The side emblems are photo etch and the wheels and tires are parts box pieces. (I wish I had more) Be advised the grille is NOT for ANY year Chevelle. It looks like is was adapted from a Monte Carlo. This is definitely one of my top 3 builds (so far).
-
G'morn,,hope your summer has been a good one. Ive been visiting Hobby Lobby these days,,every other week they a 40% off on kits. So,,for 13$ you can get quite a few cool kits,,maybe not the latest releases but still some fun kits to do. And here is the "Ol Pro" Nova everyone has seen for many years,,a cool kit,,aside from the separate front fenders that have to attached before painting{really?} But the motor and the rest of the features that come in the kit are great,,the decal sheet has many product brands to choose from,,very nice. I did the 70's version,,"jacked,,Stacked,,shackled up rear" Some basic wiring ect,,pretty much what I do to all my builds,,not a contest car,,just a nice one for the shelf! Rattle can sprayed hardware store paint,,testors bottle paint for everything else. Enjoy whatever you may have on the build bench! Cheers! SS
-
Started some months ago,got it painted today and just letting it breathe before clear goes on. Not sure who casted this but they did a sloppy job. The tub was garbage and so was the chassis,i bought it off Ebay a year ago. Maby some left overs who went wrong? Anyway,did my best with getting the body decent,and i used the Monogram Impala Convertible chassis,firewall and tub. The tub had to be modified a bit,also got to replace the area behind the rear seats. I know the doorpanels and rear seat will not be correct,but i had no option,will use bench and correct dash. The idea is to fill in the rear seat,and the use seat pattern decals for front and rear,this will hide the inserted chrome "thing" in the rear seat. Have not decided but i guess it will end up with steelies in body color,hopefully anyone makes nice dogdish caps for this era chevy. The engine will be an 454 or 427 and maby an mystery motor air cleaner from Scenes Unlimited. Ok,here are some pictures of paint. Dash and low cowl hood. Thanks for looking and comments/critique are welcome.
-
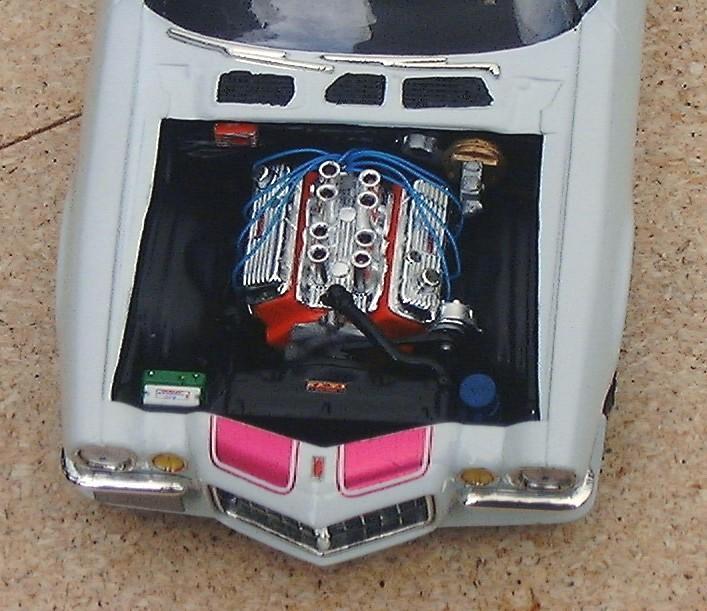
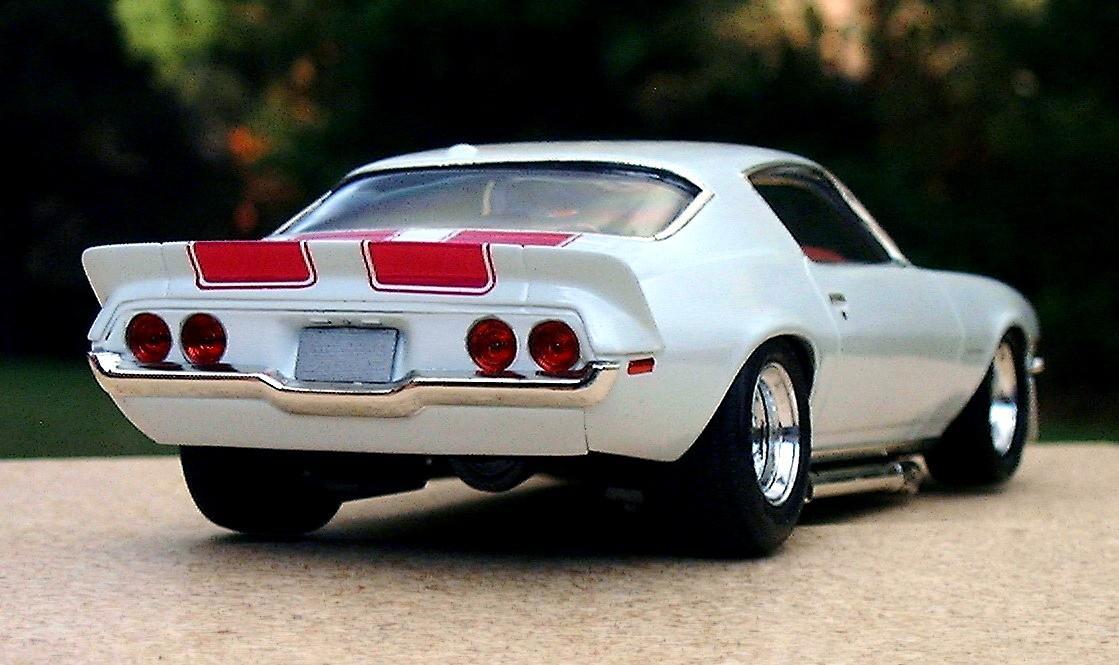
This is a model of a car I thought a lot about of years ago. It was what I dreamt of giving my daughter if I had one. (I didn’t. I have 3 boys) Anyway, The kit was AMT’s 70 ½ Baldwin-Motion Camaro. I loved the L-88 style hood and spoilers but didn’t like the graphics. To replace them, I had Keith Marks make me up a set of metallic magenta SS stripes. A few of them got rubbed through in the mail so he kindly made me two more sets (for free no less!) As it turned out I’m glad I had all the spares. I had a hell of a time laying them on the curvaceous hood bulge. I ended up using 8-10 pieces to get it fairly decent. The rear stripes were just as bad. It took 5 stripes to get two right. I am really pleased how all the lights turned out especially the front turn signals. I BMF’d the buckets, then yellow Sharpie’d the clear lenses. I knew they would be too yellow, so I orange markered the BMF inside the buckets. That gave me that amber color I was shooting for. I then silver dotted the nipples. The headlight buckets were also BMF’d then, I blue dotted the lenses before gluing them in with Testor’s clear window maker. The interior was a challenge. Most all of my model’s interiors, are basic black. This time I wanted to try something different. I thought gray would be good but by itself it was too plain. I started painting the inserts with metallic burgundy but it wasn’t covering very well. I stopped and painted a silver base coat then applied the burgundy. I used a red Ultra-fine point Sharpie to draw the piping. The dash and package tray in gray still did not look right, so I changed them to semi gloss black. I also did the console and the armrests to tie it all together. As much as I dread doing interiors, at least it turned out halfway decent. I was going to put gauge water slide decals on, but after the 3 hour ordeal with the hood, I just wasn’t up for it. At least the glove box got a “Camaro” script.
-
This Monte Carlo was built as a vague recreation of the copper Monte Carlo my dad had when I was a teenager. (Oh the stories that back seat could tell, LOL!) Anyway, this was an open, pre-painted kit I got on ebay. I didn’t like the purple, so I repainted it metallic copper. I usually build my models with the factory “High Performance” option which usually includes a special hood. Unfortunately, Monte Carlos were never offered from the factory with any hood other than flat. However, I learned that PSF Hobbies offers a custom 70 Chevelle Cowl Induction hood for this kit, so I got it. During the build, I had progressed about a third of the way through before discovering that the suspension pieces were missing. Fortunately, members of the DMPCC came through and gave me the missing parts I needed. The kit is surprisingly detailed for an AMT offering. It has details such as separate control arms for the 4-link rear and a complete multi-piece A/C system in the engine compartment. I also added chrome valve covers and air cleaner from my parts box. The gage faces have been decaled from a Keith Marks decal set.
- 12 replies
-
- 1970
- monte carlo
-
(and 2 more)
Tagged with:
-
This is a ProShop pre-painted kit with mixing and matching of parts from my other Chevelles. Overall it turned out pretty well. I picked the Cragar S/S wheels because they look good on Chevys. I went with a red interior just to spice it up. The engine is a 454 Big Block with ignition wires added. Except for the side marker lights, no BMF was used. Just a touch of Molotow chrome here and there.
-
-
I am looking to build a replica of my 1984 Chevy 1 ton 4x4 service truck (ex Fire Truck). I plan to scratch built the bed and I am using the AMT Wrecker and the 1984 Chevy(Fall Guy truck) to get the parts needed to look right. However, I need a 454. I have looked at Hobbylinc and I can find several with a 409, and tons with a Small block(ie 350 or 327) but no 454(or 366) Big Blocks. Can anyone suggest a kit that would have a good 454? I don't care if it has a blower, but as close to stock as possible would be nice, however I will work with what I can get. I just don't want a tiny small block in my truck.
-
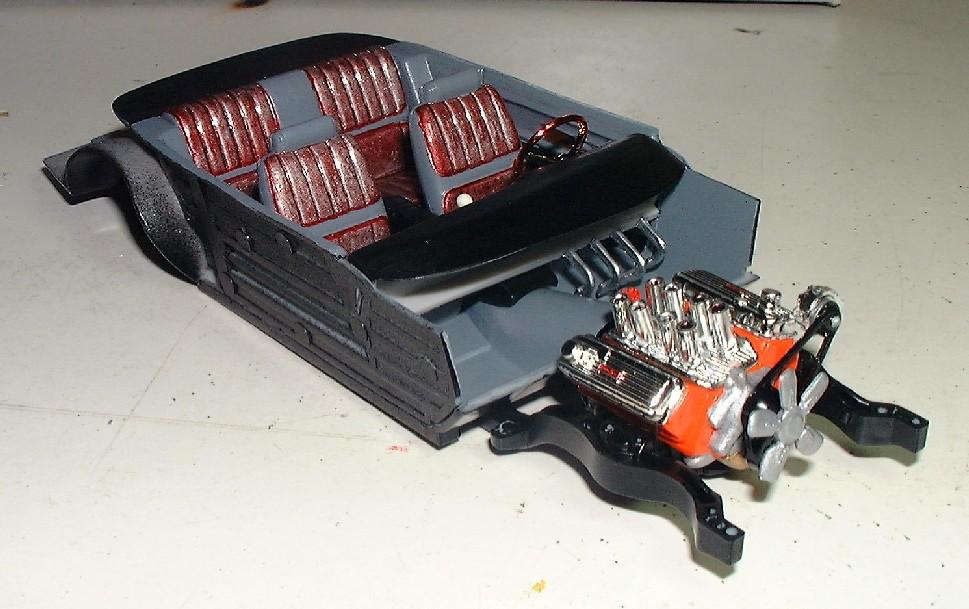
Hello. Long time since there have been a wip for my part,more or less been watching all the great builds on here,and a little sourcing parts and future retoration objects,so very little building. The other day i thought i`d pull out one of my favorite cars,the 62 bubble top Bel Air. Some say it has an incorrect grille,but i`m not bothering going into it,it`s still a very nice kit,and as usual i could not go stock,well the person who sold it to me did not include the original wheels anyway,only the 5spoke who follow the kit. I have more or less sorted out the stance,then used some hours trying to adapt the cowl hood,also instead of the 409 this will get a massaged 454 with twin carburators on a high rise sorta manifoil. This might change as for when i see if there is room for the set-up or not under the cowl. I sometimes change along the way. I do have some resin steelies with more modern Chevy hubcaps from Missing Link i might be using. Idea for colors are as for now between these: 1. White body and wheels with champagne roof and interior. 2. Champagne body and wheels with black roof and Interior. 3. Black body,wheels and red interior. 4. Light blue body,wheels and white roof and interior. Feel free to suggest what you think will look the best. Anyway,here are some pictures of the mock up.
- 21 replies
-
- bubble top
- 454
-
(and 1 more)
Tagged with:
