
.jpg.3869ec82859c49d19c221cb1e38dc132.jpg)
Tcoat
-
Posts
528 -
Joined
-
Last visited
Content Type
Profiles
Forums
Events
Gallery
Everything posted by Tcoat
-
.thumb.jpg.5fb3080b3082c0b7e11de74dbfff8c69.jpg) Some quick shots of some of the Bandai kits I did for a commission.
Some quick shots of some of the Bandai kits I did for a commission.
-
Thanks. The stowage is just the standard Tamiya packs and kit that came in the kit. The whole exercise was to make the old kits look good through paint and weathering instead of adding parts. It hepled a lot that even for their age they had great detail. I would be afraid to post it on an armour modeling site because you would inevitably have that one guy going "I see you marked it as 243 so it is totally inaccurate. That vehicle was built on May 24, 1944 and Hermann the riveter was hung over that morning so the 3rd rivet from the left on the plate below the mantlet should be a 1/2 scale inch out of line with the rest and the 3rd bogie wheel from the front on the right should be painted 2.76% darker than the rest because it was replaced by Fritz the gunner after being damaged on July 12, 1944. If you are going to model a specific vehicle then get your facts straight or just call yourself a builder not a modeler"
-
I have used printed pictures for posters, signs, and even water to good effect but the thought of using them as a whole shelf backdrop never even crossed my mind. Just clear coated picture of the ocean. Even the "wave" texture is an optical illusion.
-
Out of the box quick builds to wind down between a couple of big projects I was doing late last year. Older but updated Tamiya kit of the M2A2 Bradly supposedly as it appeared in Desert Storm. In reality it is a much later version but since I wasn't doing anything specific with it I really don't care what version it actually is.All in all a very well detailed kit for it's age and looks good out of the box even if the stowage (included) appears to be held on the sides by magic or fridge magnets or something. Normally I would at least add attachment points and straps but that would defeat the purpose of a 100% out of the box build so hovering Alice packs it is. Annnnnd here is the second down and dirty out of the box.It is a very old kit from 1975 when they were motorized and considered as much toys as anything. The new boxings do not come with the motor or other parts though.That said it is still beautifully detailed even by today's standard and the molds have held up really well. The commander figure is about the same vintage and was originally from a kit I built in the early '70s. He just got a new coat of paint.
-
That is incredibly effective!
-
Wall decals can be just printed paper from pics on the internet and then coated with clear to firm them up. Need to define "cheap" for shop kits. I have searched many times and they are all rather costly in my opinion. Expect to pay at least $30 for most. The Fujimi sets are probably your best bang for the buck and have some really cool stuff. Invest in a good selection of rod, tube, angles, sheets and such to scratch build your own equipment such as shelves, tire racks, etc. Model railroad shops usually have really good selections of Evergreen styrene in just about any shape you would desire.
-
Revell Thermopylae
Tcoat replied to Lucius Molchany's topic in All The Rest: Motorcycles, Aviation, Military, Sci-Fi, Figures
Sweet! Didn't expect to see that here! A few decades ago I built the Cuddy Sark, C.S.S. Alabama and U.S.S. Constitution from this series but never the Themoplylae. Have the most recent reissue of the Constitution in the stash to tackle someday. -
It is nice too. Pretty much the Titanium silver but in a spray can.
-
Yep, automotive "silvers" do not work for bare finish aircraft. Bare Metal foil is the best but can be tricky on complex curves. It is nice because you can mix up the different tones available for different panels. For painted bare metal aircraft I use: Tamiya acrylic Titanium silver X32 for a duller shine Or Modelmaster Chrome Silver FS17178 for a glossy finish
-
Modeling TV sit-com cars from '50s-60s; any out there?
Tcoat replied to W Humble's topic in WIP: Dioramas
There are 4 figures (and even the seated "babe") that would be perfect for these guys in the set I linked in your other thread. Even one of the ones in a suit would do an excellent Eddie! https://www.amazon.ca/P2501B-24pcs-Model-Trains-Architectural/dp/B07DWFRQB5 -
To seal...or not to seal?
Tcoat replied to Pierre Rivard's topic in Model Building Questions and Answers
I always seal with Future. Even flat coats get a full application of it and then are sprayed for the final finish. It not only seals the decals but evens out the overall finish if they are a little thick. -
Yep. The "Dangerous Curves Series" may have something although they may be a bit ummm...developed for teenagers. https://www.mbltd.info/figures/1-24-scale.html These are very nice figures actually. The only issue is they are made in the Ukraine so supplies may be limited right now. G Scale model railroad figures are also available in many different poses and makes. Not as detailed at the MB stuff but probably suitable. https://www.amazon.ca/P2501B-24pcs-Model-Trains-Architectural/dp/B07DWFRQB5
-
1975 Datsun Pickup MPC
Tcoat replied to Tcoat's topic in Model Trucks: Pickups, Vans, SUVs, Light Commercial
I have been an Environmental Health and Safety manager for over 30 years so know exactly what it has done! -
Hello from Italy, nice to unite with you here
Tcoat replied to Pasquale Galotta's topic in Welcome! Introduce Yourself
Hit rock bottom when I was arrested for modeling and driving. -
Hello from Italy, nice to unite with you here
Tcoat replied to Pasquale Galotta's topic in Welcome! Introduce Yourself
Sounds like the opening of an AA meeting! -
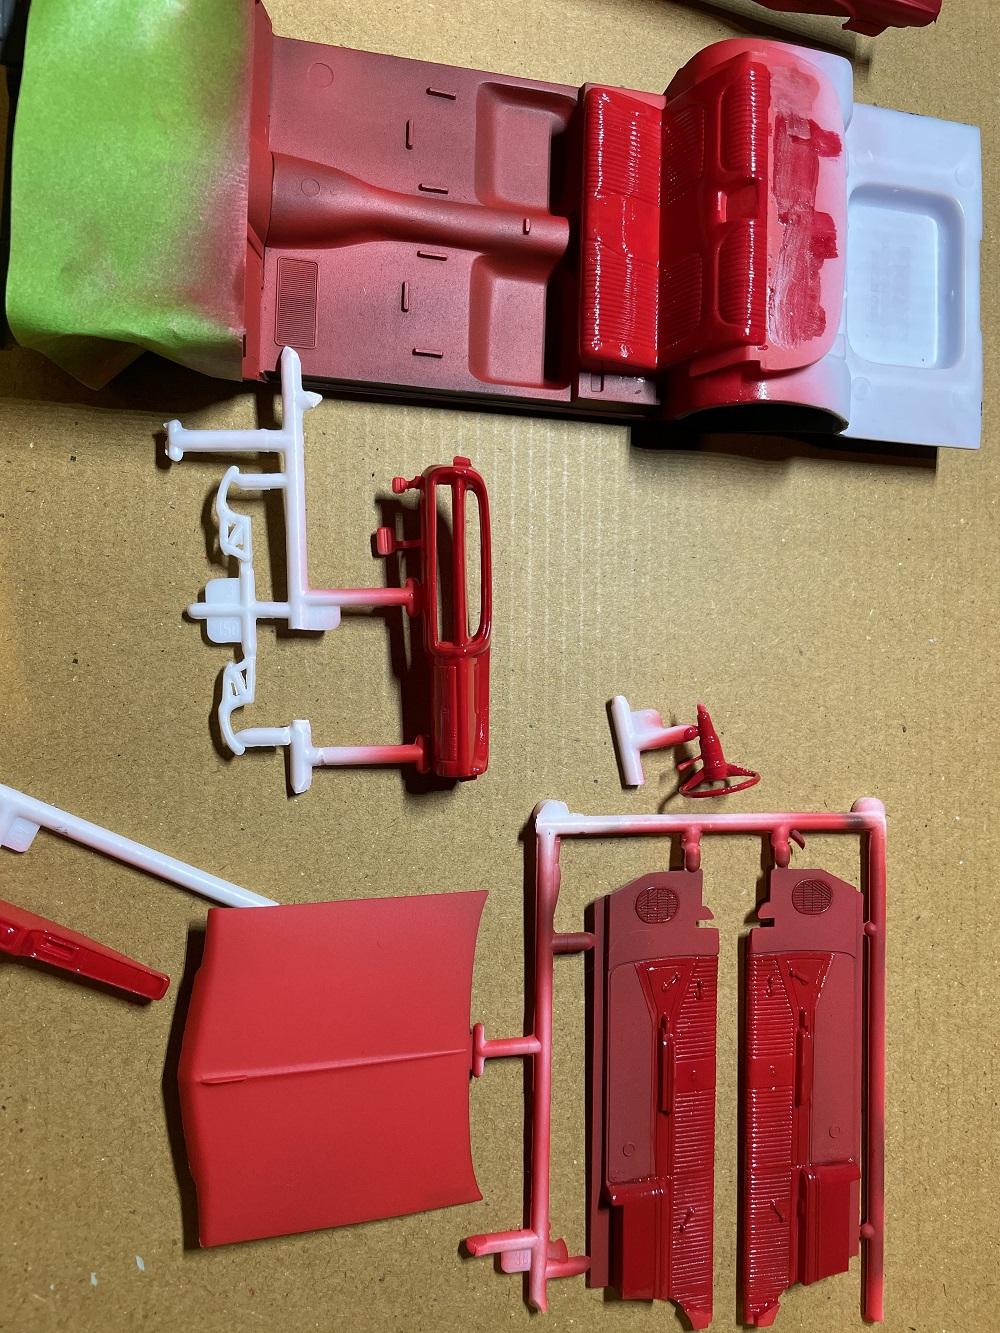
Body painted. It is a different shade of red from the interior but you will have to take my word for it. The adventure in BMF is successful. So far. The elusive to replicate SS reflective patterned side trim white base is done. Will need to figure out how to the a very thing silver was over it to get the right effect.
-
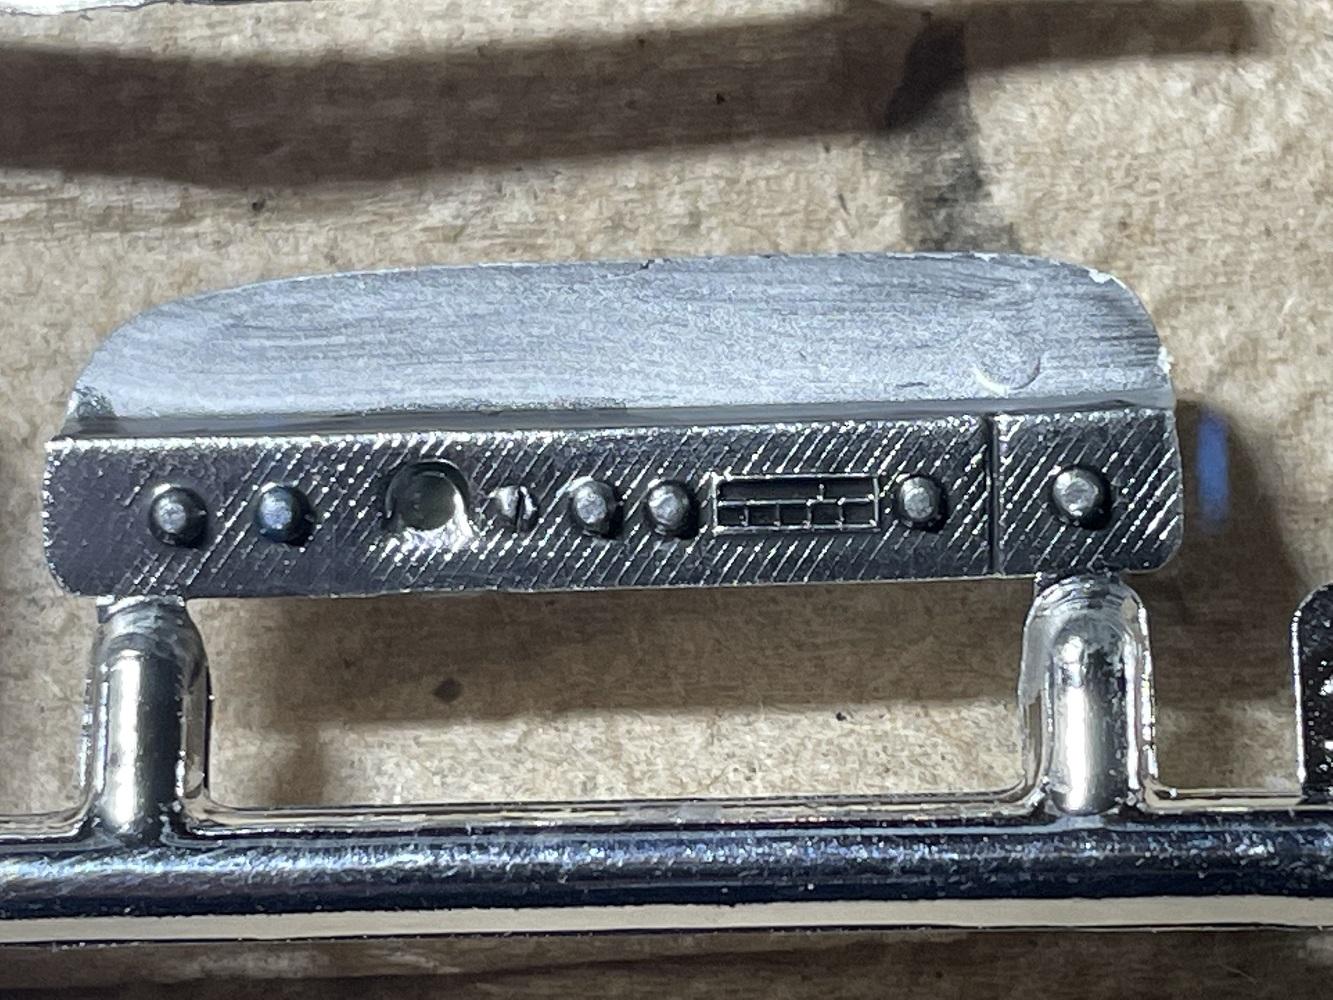
Chrome prep. Never was a huge fan of model kit chrome. It just looks wrong for most things (to me) since in scale it is far to bright and every single part has the exact same look. Only the most expensive of cars, after market re-plate or massively polished parts would ever have the shine of model chrome. There is a time and place for it (hot rods, showroom fresh cars, etc) but since I am modeling a 12 year old vehicle the chrome had to be knocked down to real world and scale shine. All identical and much detail is lost in the glare. Coated with...ah you know by now. This makes them even brighter but also fills the voids with black and highlights details. The black in the grill was from simply brushing the Future on. No wiping or other clean up needed. Then a light overspray of Dullcoat. Much more appropriate for a 12 year old daily driver street car in Canada. The shine can be varied by applying more future to selected areas. In this case the outer edge and center of the caps should be glossy but the middle a matt finish. Again there is the benefit of putting black in the areas it needs to be because the self leveling properties draw it down. Only outer ring done on left. Center and ring done on right. Dash should be a very low gloss not bright chrome. Toned down but knobs and radio highlighted. Even the smallest chrome part can benefit. The Future gives a nice gradual demarcation line between the edge and center.
-
OK time for some base coat. There are a lot of different reds on this thing but all started out as a base of flat Testers red. The black coated parts will come into play later. And here is why the black was there. The lower door panels and floor were a very low pile red carpet with sort of black threads through them. The black undercoat simulates this effect very well. It also nicely fills in the "open" spaces of the side vents giving a sense of depth. Next up is the actual colour coat for the Naugahyde (no Naugas were harmed in making this model). Then my standard tinted Pledge wash on all except the carpeted areas. (this goes on almost everything and you will get sick of hearing about it) Missing pics again but the whole interior was given a coat of Dullcoat and BMF was used for most chrome. The items too small or complicated for BMF were done with Testers chrome silver enamel. And this is the end product. The black shading on the seats and such is of course exaggerated by the photos. It is really much more subtle as the overall finish is more of a low semi gloss than it appears here.
-
Looking for cordless hobby drills
Tcoat replied to JerseeJerry55's topic in Model Building Questions and Answers
Nothing beats a base Dremel in my books. I tried a couple of cheaper ones but they just didn't do the same work. You can go pretty much as deluxe or basic as your needs require. I use the Lite with the basic kit. https://www.amazon.com/Dremel-7350-5-3-6v-Rotary-Tool/dp/B08YKH9JRH/ref=lp_5538998011_1_11 https://www.amazon.com/Dremel-730CS-All-Purpose-Accessory-130-Piece/dp/B01M1H1EH6/ref=sr_1_6?crid=T9CGDJGMU8EB&keywords=Dremel+kit&qid=1669991744&sprefix=dremel+kit%2Cspecialty-aps%2C139&sr=8-6&srs=5538998011 I forgot to mention that this is a single speed. I have a corded variable speed one as well. The variable speed is handy for some projects. -
Thanks guys. This one will be sort of a mixed bag of old and new since when I got it the body paint was still fresh but the rest was still untouched original.
-
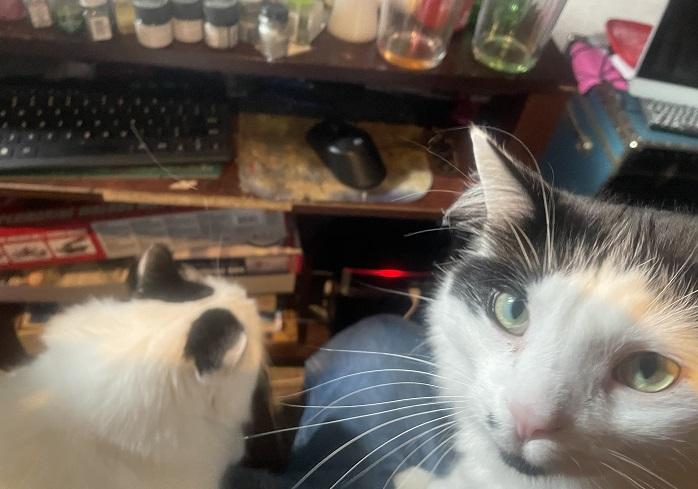
LOL My self inflicted fear of gloss paint is more hyperbole than a real concern and I have successfully painted gloss before. My biggest concern is my two long haired cats mean there is always a game of Find The Cat Hair in every paint job I do. Easy to hide on a muddy tank but stands out like a sore thumb on a nice shiny car. Find the cat hair hair round 1 (this one sort of works with the condition though) Nice paint job. Be a shame if we...got hair in it
-
OK I had no idea that this kit was so scarce until looking for a good box pic and stumbled across this thread on here. I picked it up at Michaels just before Christmas 2018 when my wife dragged me in to get some craft supplies. I always head over to the model section even though they usually only have about 12 or so of the same old kits. I spotted the box and grabbed it with shaking hands and tears in my eyes. To top it off there was a 70% off coupon so I paid around $12 for it! The reason I was so excited was that my very first legal car (safety inspected, with it's own plates and actual insurance) was a bright red '64 Impala SS convertible! Finding this kit by pure chance was what set me in motion to build all the cool cars I ever owned that have been kitted. By the looks of the other thread I see I don't need to go into detail about just how great this kit is. It is probably the best Revell kit I ever saw. This project has been on and off the bench about 10 times in the last couple of years and unfortunately I have somehow lost many of the pictures I took but there is still enough left t document much of the process. Step one was to cut that beautiful roof off and shape the windshield frame. If I had know that people would have wanted it (see old thread) I would have kept it. The inner fenders were then painted black and masked off. Next up came that little jewel of a 327. Unfortunately the build up pictures of that were some of the MIA but here it is in place. With coat of tinted Future (RIP) to bring out detail, add some grime and artificial shadows. And after a coated of Testers Dullcoat to have a more realistic shine and tone down the shading. No the plug wires do not look like rope on the real thing! Next up was doing the underside. Build pics gone but it looked like a bunch of white plastic glued together which I am sure most here have seen before anyway. Completely out of box with no modifications done. When I got my car it was 12 years old. That may mean nothing with todays cars or people down south but up here anything made much before the mid 90s had about a 4 year life expectancy for the body and floor. I bought the car after an almost complete floor replacement was done and it was well undercoated but still had some rust tones peeking through in places and things that had not been replaced such as the fuel tank and exhaust were quite rusty. I finished the underside to reflect that.
-
Yep. Acrylic is the final dried finish. What chemicals are used to get to that final dried finish can vary dramatically.
-
OH MY! The store near me has a bunch on the shelf still. I best go get some. Immediately. I use the stuff for everything.
-
It is still around. They changed the name but the product is the same. https://www.amazon.com/Pledge-Floor-Finish-Gloss-27/dp/B002YC438C
.jpg.697852f349f078a786e7e3bae9c4f2b5.jpg)
.jpg.e44d869ece7751e9ea06535f92dc3943.jpg)
.jpg.aded8a036d0a3478e8d09e9755195b82.jpg)
.jpg.3bfd00cafa85952e18c4087b285b4192.jpg)
.jpg.67adc7c1fd1728337e043da4843190b2.jpg)
.jpg.c6a16ce639bf9db34e7e8a93dfa729fb.jpg)
.jpg.34fbd427e1e207b9fdf42fc7c696b549.jpg)
.jpg.72f5fbfee6d6ba4ac9489692f96ecded.jpg)
.jpg.18fefd399d77fe4a043e9df28b4f72fb.jpg)
.jpg.833aee01ca0ba6d2b3bd8a4ff63a57ec.jpg)
.jpg.6e8acd0134a4460acd0e278cc2ffe1e5.jpg)
.jpg.de016bdacacfb94769fcc3067c18faa9.jpg)
.jpg.9de212a6fc2890edd128c6cb3c547239.jpg)

.jpg.d6acab0557cc8ab73d6335c27c4ffb6a.jpg)
.jpg.1f1cc14287c0113feeeca227f324766e.jpg)
.jpg.cb6b99a3b394ac56f7b855c7b736aa66.jpg)
.jpg.9b4c5d611c28a2871618b74cd6c6719f.jpg)
.jpg.8c292d93e14a79897e2ea00ce1c886c2.jpg)
.jpg.9b0536b8450361bcb0933e40e09e8a6b.jpg)
.jpg.14df0cd389116886e33ad38f651fb12e.jpg)
.jpg.fc3e462a881f50e4413ff874a0f5b982.jpg)
.jpg.dd3598b98e36bfe0caf06c55a3ad4940.jpg)
.jpg.4d786ab2ca8f0f005090e31a27d61937.jpg)
.jpg.4b686a98f1daf0e4b25b11273126fef9.jpg)
.jpg.806fcbdb99fc60458075420654c882b0.jpg)
.jpg.8b66cbe30e2236b51a5f983383195a3b.jpg)
.jpg.c580561df8695cbd7b3efb394218a4a4.jpg)
.jpg.c20a8a56912587e4d9b5a0409decbf7d.jpg)
.jpg.93cc2dc9f95d74b2c540bb5ab25570fa.jpg)
.jpg.214643010623e1297fa59354313bac9c.jpg)
.jpg.1c56f44598b4edada2062d19776426ea.jpg)
.jpg.dfb17d01c5f184059ef50b2f7e06c60b.jpg)
.jpg.573bf64d897b38f902420d118bce5734.jpg)
.jpg.5b6ba924322a9d8a049da30609b9fe74.jpg)
.jpg.6520917842814c114589d9c0a6527e6d.jpg)
.jpg.d505218a8c8e7b2488075c102d3d132f.jpg)
.jpg.ccd4c83e90361245f1d594f5f11a7111.jpg)
.jpg.6f8422a1f96ca3a4d29fd4826865601c.jpg)
.jpg.89e18a7a0c15884a69ddb5cfad1d4862.jpg)