
.jpg.3869ec82859c49d19c221cb1e38dc132.jpg)
Tcoat
-
Posts
528 -
Joined
-
Last visited
Content Type
Profiles
Forums
Events
Gallery
Everything posted by Tcoat
-
.thumb.jpg.5fb3080b3082c0b7e11de74dbfff8c69.jpg)
1960 Chevrolet AMT
Tcoat replied to Stingray wes's topic in WIP: Model Trucks: Pickups, Vans, SUVs, Light Commercial
I recently completed this kit and ran into a few issues. Not insurmountable but still noteworthy Couple of points that I ran into: The frame was badly twisted. I mean really bad! I straightened it as much as I could with hot water but had to clamp the body to get the remaining twist out. This may be just my kit though. The rear cab panel (part 70) assembles from inside the cab. The instructions are not clear and make it look like it is on the outside and it will go on nicely from the outside but there is no way you will ever get the box on as there is just no clearance. Maybe OK with the stock engine but there is not much space between the inner fender liners and you need working space to align the cab body pins so it is much easier to add the engine after the cab is in place. The mounting pins on the box are brutal to try and line up. Since the box fits right against the cab there is zero wiggle room and the box has to come straight, and I mean STRAIGHT down. I fought with it for an hour and finally ended up cutting two pins off to get it in place. If I had to do it again I would open up the holes in the frame a bit so there is a bit of leeway. Other than those it goes together like a breeze. The engine from the kit, which I am repurposing is a little gem! -
Almost there!

-
And so so SO much wood paneling.
-
LOL I was all happy to make a little cabinet and barstool for my van project but can't wait to see what you do to fill that monster up!
-
Looks great! And thanks for not making it black or silver like every single BMW I see on the street is.
-
Revell Land Rover Station Wagon
Tcoat replied to landman's topic in WIP: Model Trucks: Pickups, Vans, SUVs, Light Commercial
I love nostalgia projects! Nice to have actual pictures to work from though. The youngins' don't understand that pictures back then were rare since they actually involved forethought and cost money. -
1964 Econoline
Tcoat replied to Tcoat's topic in WIP: Model Trucks: Pickups, Vans, SUVs, Light Commercial
The more I think about it the more I am convinced the dash pad has to go. In my van the dash was a semi gloss black with the panel around the instruments, ash tray and flat steel glove box door in white. The pad at the top of the dash doesn't hurt anything but the padded glove box really will mess up the symmetry of the white parts no matter how a paint it. As I said I have never worked with resin parts before so just how hard would it be to grind/sand/scrape or otherwise remove that pad? I don't want to ruin the dash just to get the right colours in the right places! -
Two Reefer Trailers
Tcoat replied to Rockford's topic in WIP: Model Trucks: Big Rigs and Heavy Equipment
Pretty sure that wavy trailer showed up at work last week! Except you could see daylight between the floor and the walls on that one. -
1940 Ford larger truck
Tcoat replied to junkyardjeff's topic in WIP: Model Trucks: Big Rigs and Heavy Equipment
The sky is the limit when it comes to these farmyard builds. A dump box would be cool and can be as simple as modeling some rough welded steel plates for a home made box. My dad had a home made dump box on a late 40s GMC chassis and cab. I have no idea what model it was though. When I was a kid I used to do hay with a neighbour. He had a late 40s International pickup cab tacked onto and old 1950s school bus frame with a wooden deck on it. It was a beast! Looking forward to see what comes out of this. -
1964 Econoline
Tcoat replied to Tcoat's topic in WIP: Model Trucks: Pickups, Vans, SUVs, Light Commercial
Thanks that all makes sense to me now. I never saw a padded dash since they were used in the passenger version (badged Falcon) and all I ever saw in person or looked up was the panel Econoline. All I have ever seen (including mine) was the all steel flat dash. Another wrinkle that I haven't mentioned is that although I keep referring to the one I had as "Ford" it was actually a Canadian Mercury. Still named and badged as an Econoline though. Mine was completely debadged other than the Merc emblem on the steering wheel so I have always thought of it as a "Ford". The registration said Merc. -
1964 Econoline
Tcoat replied to Tcoat's topic in WIP: Model Trucks: Pickups, Vans, SUVs, Light Commercial
Never saw a padded dash ever but since they obviously existed I may just leave it alone. Never worked with resin before so do know how difficult it would be to remove and the rest of the cab is Dodge anyway so the padded dash is the least of the concerns I guess. -
Just finished my first diorama! Asbury, NJ streets!
Tcoat replied to GlueSniffer's topic in Dioramas
So realistic I feel like I have been there! -
1964 Econoline
Tcoat replied to Tcoat's topic in WIP: Model Trucks: Pickups, Vans, SUVs, Light Commercial
Well look at that! I never looked for pictures past '64. Makes sense since the '68 had a whole new dash that included the padding. Looks like a transitional "upgrade". Thanks I feel better about that weird bulge now even if it has gotta go for a '64. -
1964 Econoline
Tcoat replied to Tcoat's topic in WIP: Model Trucks: Pickups, Vans, SUVs, Light Commercial
Presume it is also built on the Lindberg Dodge platform. Funny how all three companies 60s vans were just slight variations of the same thing. -
1964 Econoline
Tcoat replied to Tcoat's topic in WIP: Model Trucks: Pickups, Vans, SUVs, Light Commercial
Be interesting to see once I can actually look at the real thing. By pictures it looks very crisp so if based on the diecast it was heavily reworked. would have been nice if they had done the side doors as separate pieces like the diecast since I will be opening them up and hinging them so you can actually see the interior. I will also have to open up the rear windows as mine had the swing open ones in the rear doors. Not sure what they molded the interior from because that big bulge on the right side of the dash has nothing whatsoever to do with a stock Econoline. The dash should be flat steel all the way across with just a basic glove box door. Makes me wonder if it was sculpted based upon somebody's modified van. -
1964 Econoline
Tcoat replied to Tcoat's topic in WIP: Model Trucks: Pickups, Vans, SUVs, Light Commercial
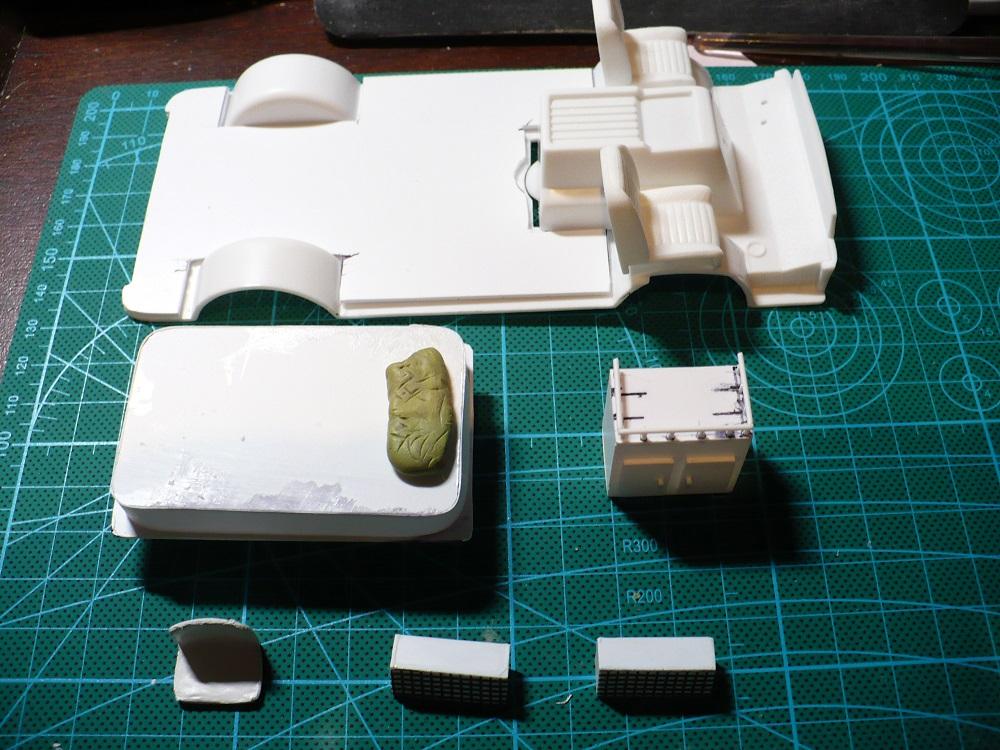
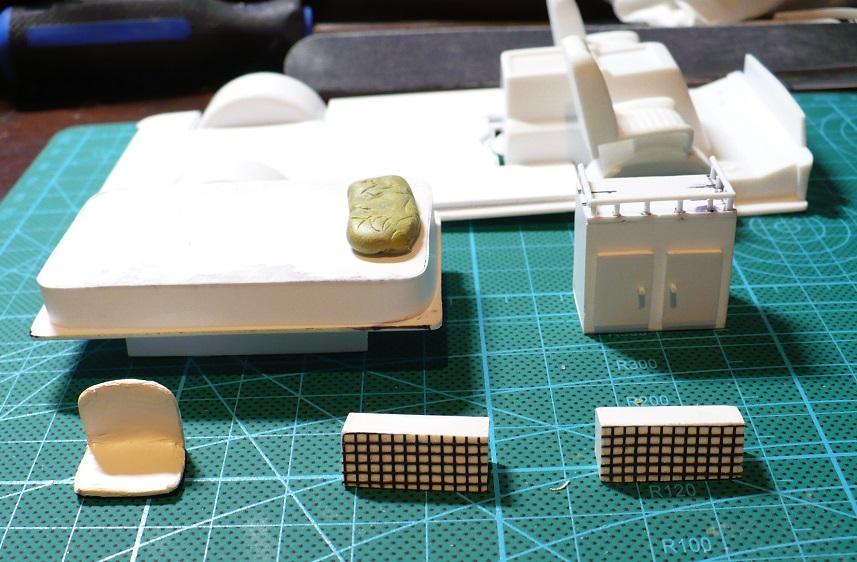
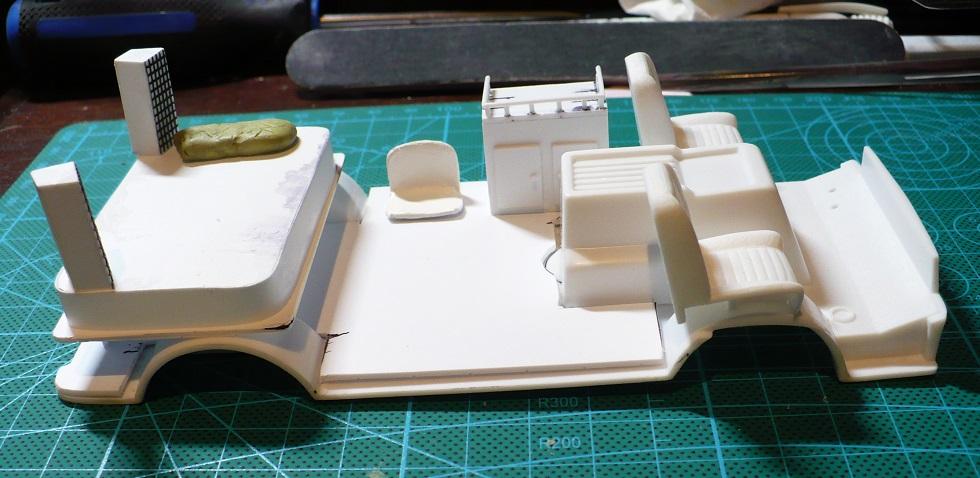
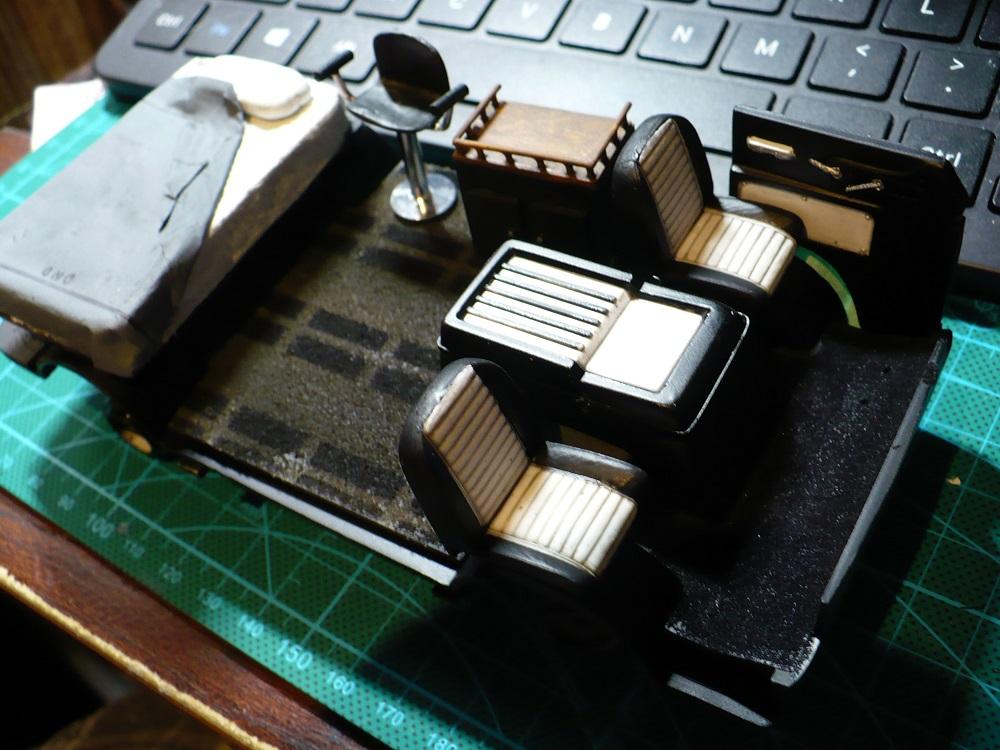
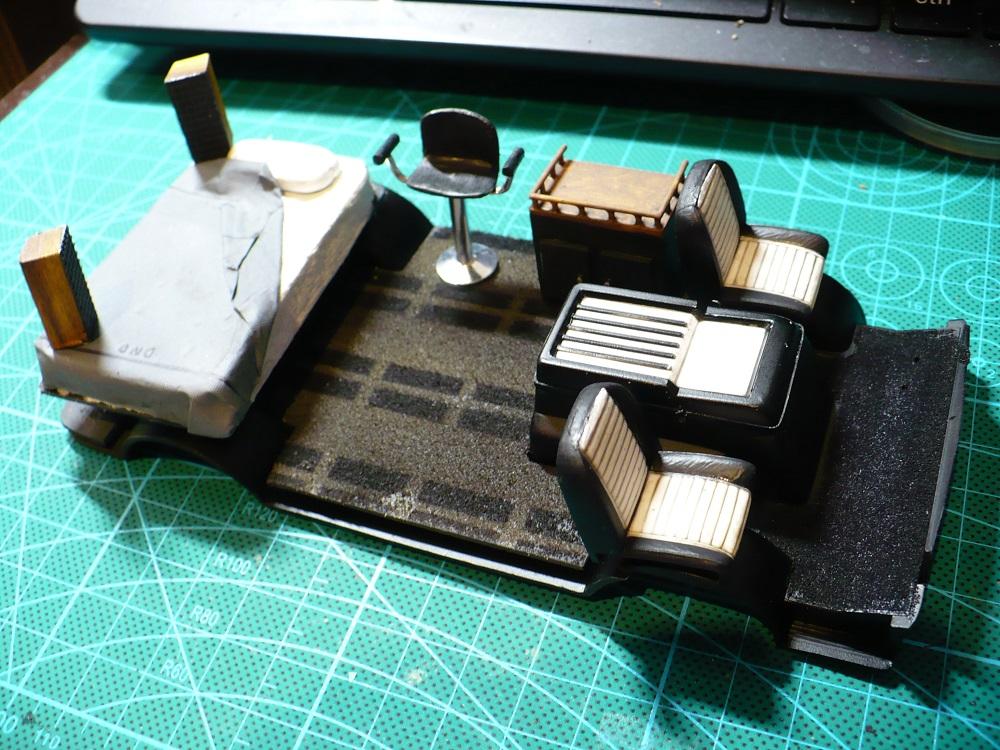
Quick mockup using the Dodge body. Looks like I am going to need to trim a hair off the barstool height but the cabinet is bang on. There is no way the front seats will fit in using the locators. They don't even clear the kit body so need to move closer together. I raised the rear about 3 scale inches when I built the suspension so the rake looks about right.
-
1964 Econoline
Tcoat replied to Tcoat's topic in WIP: Model Trucks: Pickups, Vans, SUVs, Light Commercial
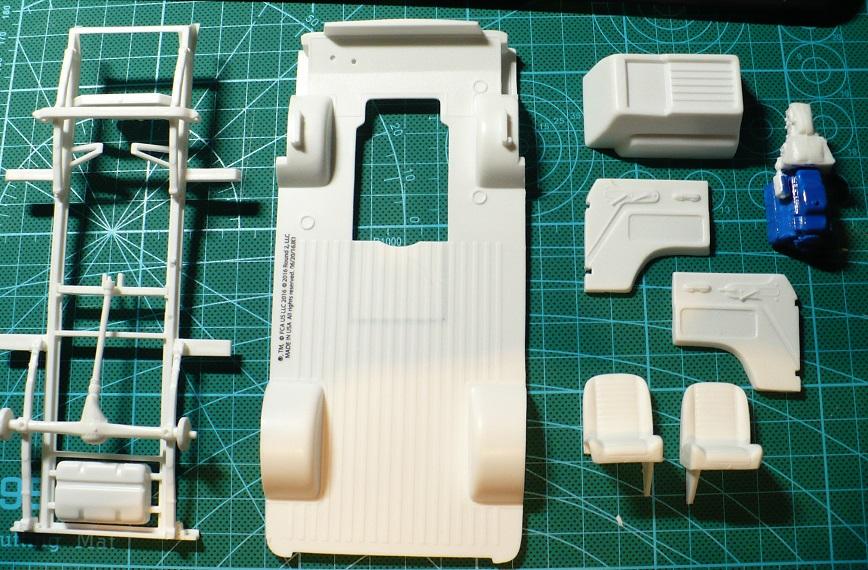
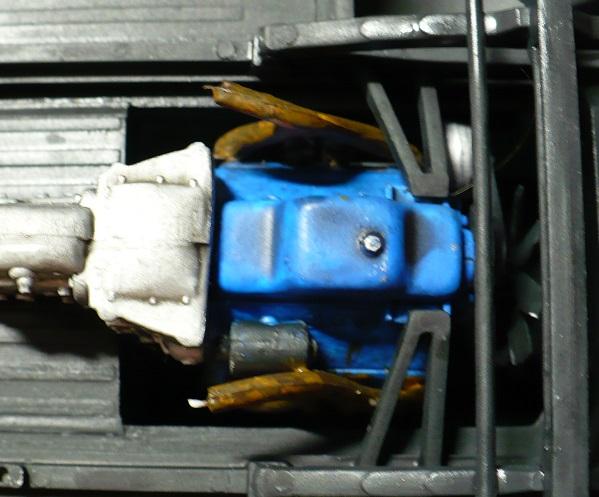
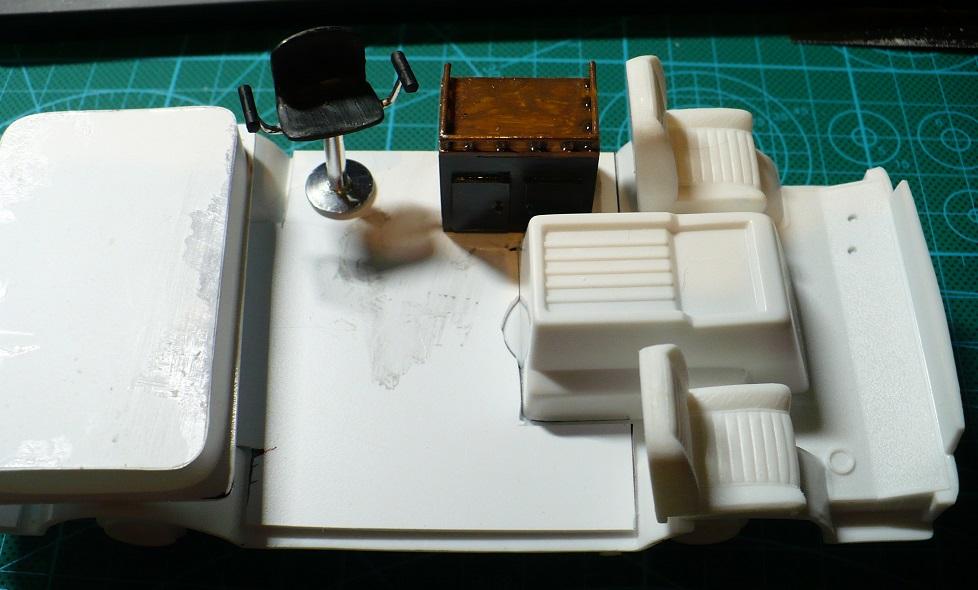
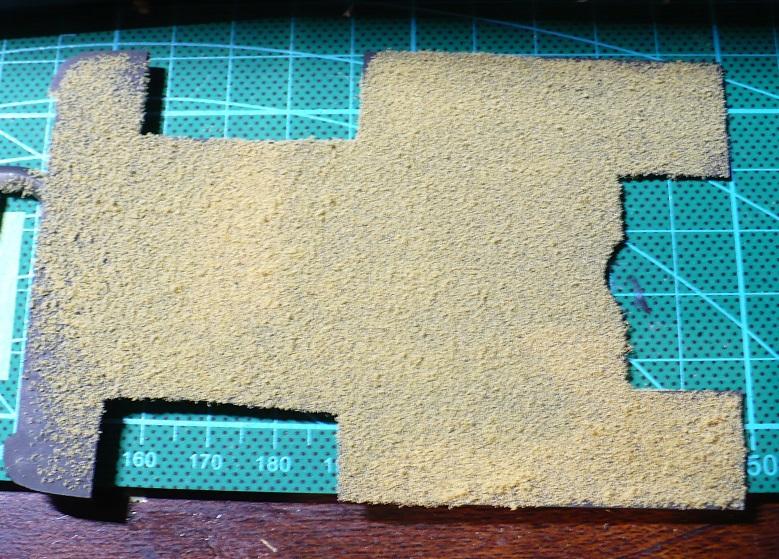
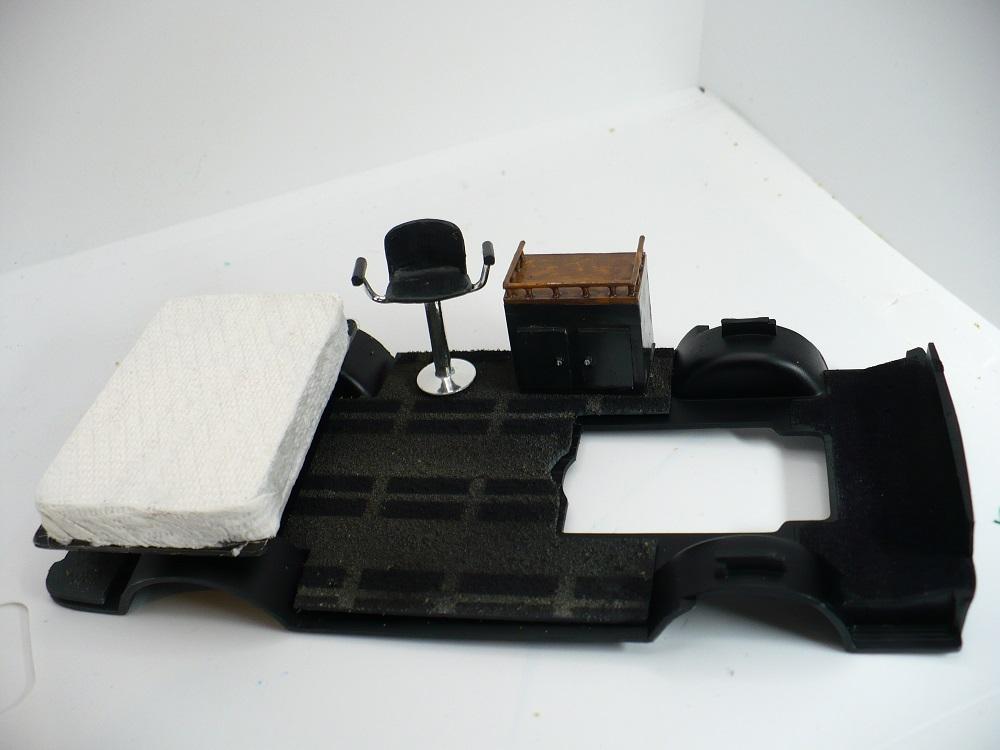
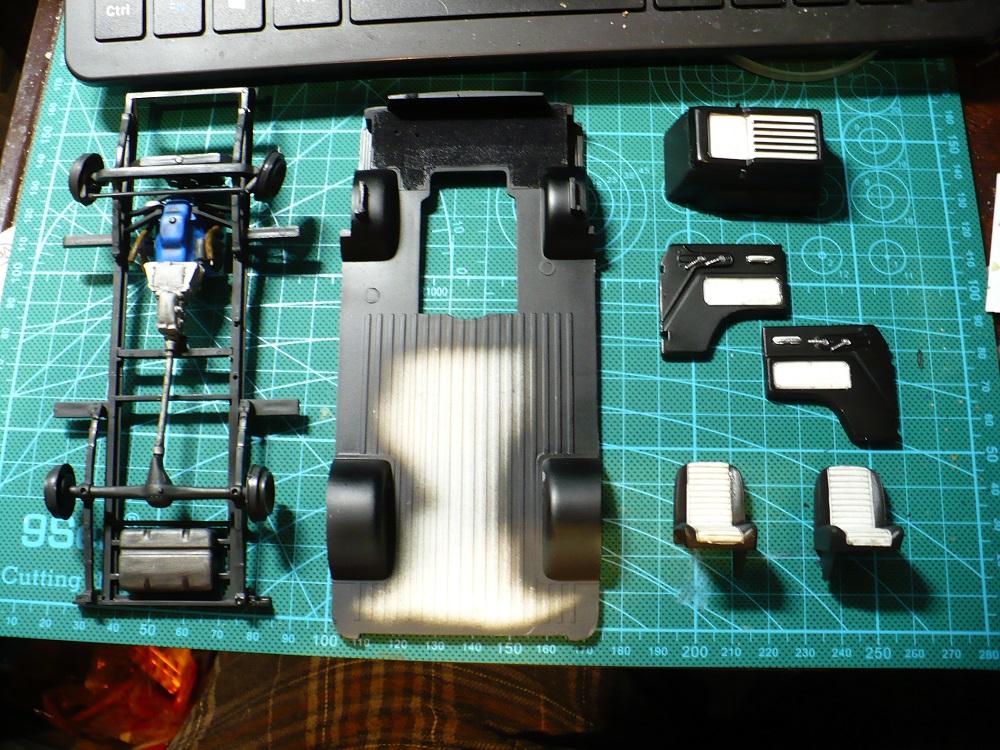
And now for the rest of the story... While shopping the Jimmie Flintstone site for a 58 Chevy body I stumbled across the '61-'65 Econoline panel body. I was over joyed to find it as it is a major vehicle in the Cars I used to Own series of builds. The Flintstone site does not ship to Canada and anybody that sells the body here charges WAY more I had a buddy in Vancouver Washington order it and he then shipped it to me. It is still in transit as of this writing. Since the first generation Econoline's have never been kitted the body is designed to go with he chassis and interior from the Lindberg Lil Red Wagon/Dodge fever Dodge A100 pickup kit. After a long search for one of these available for a price that did not require a second mortgage on the house I managed to score one from a reasonably close toy store/hobby shop. As these have not been released for several years I was beginning to think I would have to sell a kidney to complete this project! Although it is a Dodge interior the basics are close enough for anybody but the most diehard early sixties van fanatic. In fact Dodge it looks like didn't even try to hide that they were copying the Econoline. The knowledgeable amongst you are probably saying "But Tcoat the Econoline only came with a six cylinder engine and that is clearly a V8". Well that is actually convenient for me as my '64 had a 351W and C6 tranny from a 96 Fairlane crammed into that doghouse between the seats. So with some blue paint and a bit of squinting the kit318(?) now becomes a 351. It isn't like you are going to see much beyond the very bottom anyway. I bought the van already built in late 78 and it had already been done up in pretty much standard vantasic style. There was a bench in the rear that folded down to a bed, a cabinet from an early sixties RV with an 8 track player in it, an ugly (by todays standards) carpet and some early '70s house speakers mounted up in the rear corners The two pieces of foam for the bench/bed were hard to "sleep" on as they always pulled apart so I screwed the base down and threw a cheap RV sized mattress on it. I also wanted a chair so borrowed (forever) an old mid sixties bar stool from my parents and screwed it to the plywood floor. It of course would have meant instant death for anybody riding on it in the event of a crash by those were the invincible days. So I had to make a bunch of stuff up. Paint starts to bring things to life. The top of the cabinet was that sort of psychedelic woodgrain pattern that anybody over about 55 years of age will recognize. The carpet, although not shag was a heavier pile than you get using embossing powder so it is short turf fibers used in model railroads. I think I missed a narrow black line between the bigger sections of the carpet but once body is on won't see much of it anyway. And all painted up. The dash is coming with the Flintstone body and will have white panels like the doors, seats and doghouse have. The blanket will be familiar to pretty much anybody with military, police or firefighting experience anyplace in the world. You can probably feel the itching kicking in already. Still need to make an 8 track player for the cabinet but have to did up a chrome radio I know I have someplace for that. Nothing but the front seat are glued on yet since I need to have the body to ensure spacing is correct. As far as I know there are no existing pictures of the real thing but most of the details are etched in my brain even after al this time so it is very accurate at least in my head. That's it for now since... I ain't got no body
-
-
Here are some more views. The figures are not actually shiny that is just a trick of the camera lens!
-
Thanks! I use the liquid cement and an old brush too stipple the surface method but yours looks more even and less labour intensive.
-
Beautiful and a nice choice of colour. How did you do the vinyl roof? It is very effective.
-
Glad you are OK with it! I grew up with these early 50s cars as my playground through the early to late 60s. My father would buy some old beater for $20, drive it for a bit and when it completely died park it in the back field with the rest. The list of cars that rotted out behind the barn would make many here cry. At around 8 years old I would take a bunch of tools out and start pulling engines apart just to see if I could. Not many went back together again I am afraid. It did pay off in later years when I myself drove old cars though.
-
Exactly. The cork gaskets, very long panels with few bolts and light materials all conspired to leak. They did just keep chugging along though. It is easy to forget that cars back then were built to last 3 or 4 years and about 100,000 miles at best. The fact that any survive at all is truly amazing. Sorry for hijacking the thread there Andy!
-
The top of your engine isn't bad. The bottom was just so, so, SO clean that It kept me awake at night. My engine is for a very specific project that did indeed have a greasy old engine that stayed that way no matter how hard I tried to clean it up.
-
Great job on both but not sure why you modeled my son-in-law. It looks JUST like him!


.jpg.3bbb44df2168392fd14e8f96f4b9826a.jpg)

.jpg.5f0f876b594e4192edef7a85182cc0ba.jpg)
.jpg.4db4130a1fb5b536d8683e659184c8e3.jpg)

.jpg.c6beba02113e85636110b089d7e35845.jpg)
.jpg.443a9126402d4f842944dd2930512e50.jpg)
.jpg.0c3eb234a1f404ae7168f37e322a968b.jpg)

.jpg.d8fd4e62d5810c1a07ddd538b7a686f3.jpg)

.jpg.d7e5d410a0f9d6d0ead2ca8cc6e1d22c.jpg)


