T-Ray
-
Posts
123 -
Joined
-
Last visited
Content Type
Profiles
Forums
Events
Gallery
Everything posted by T-Ray
-
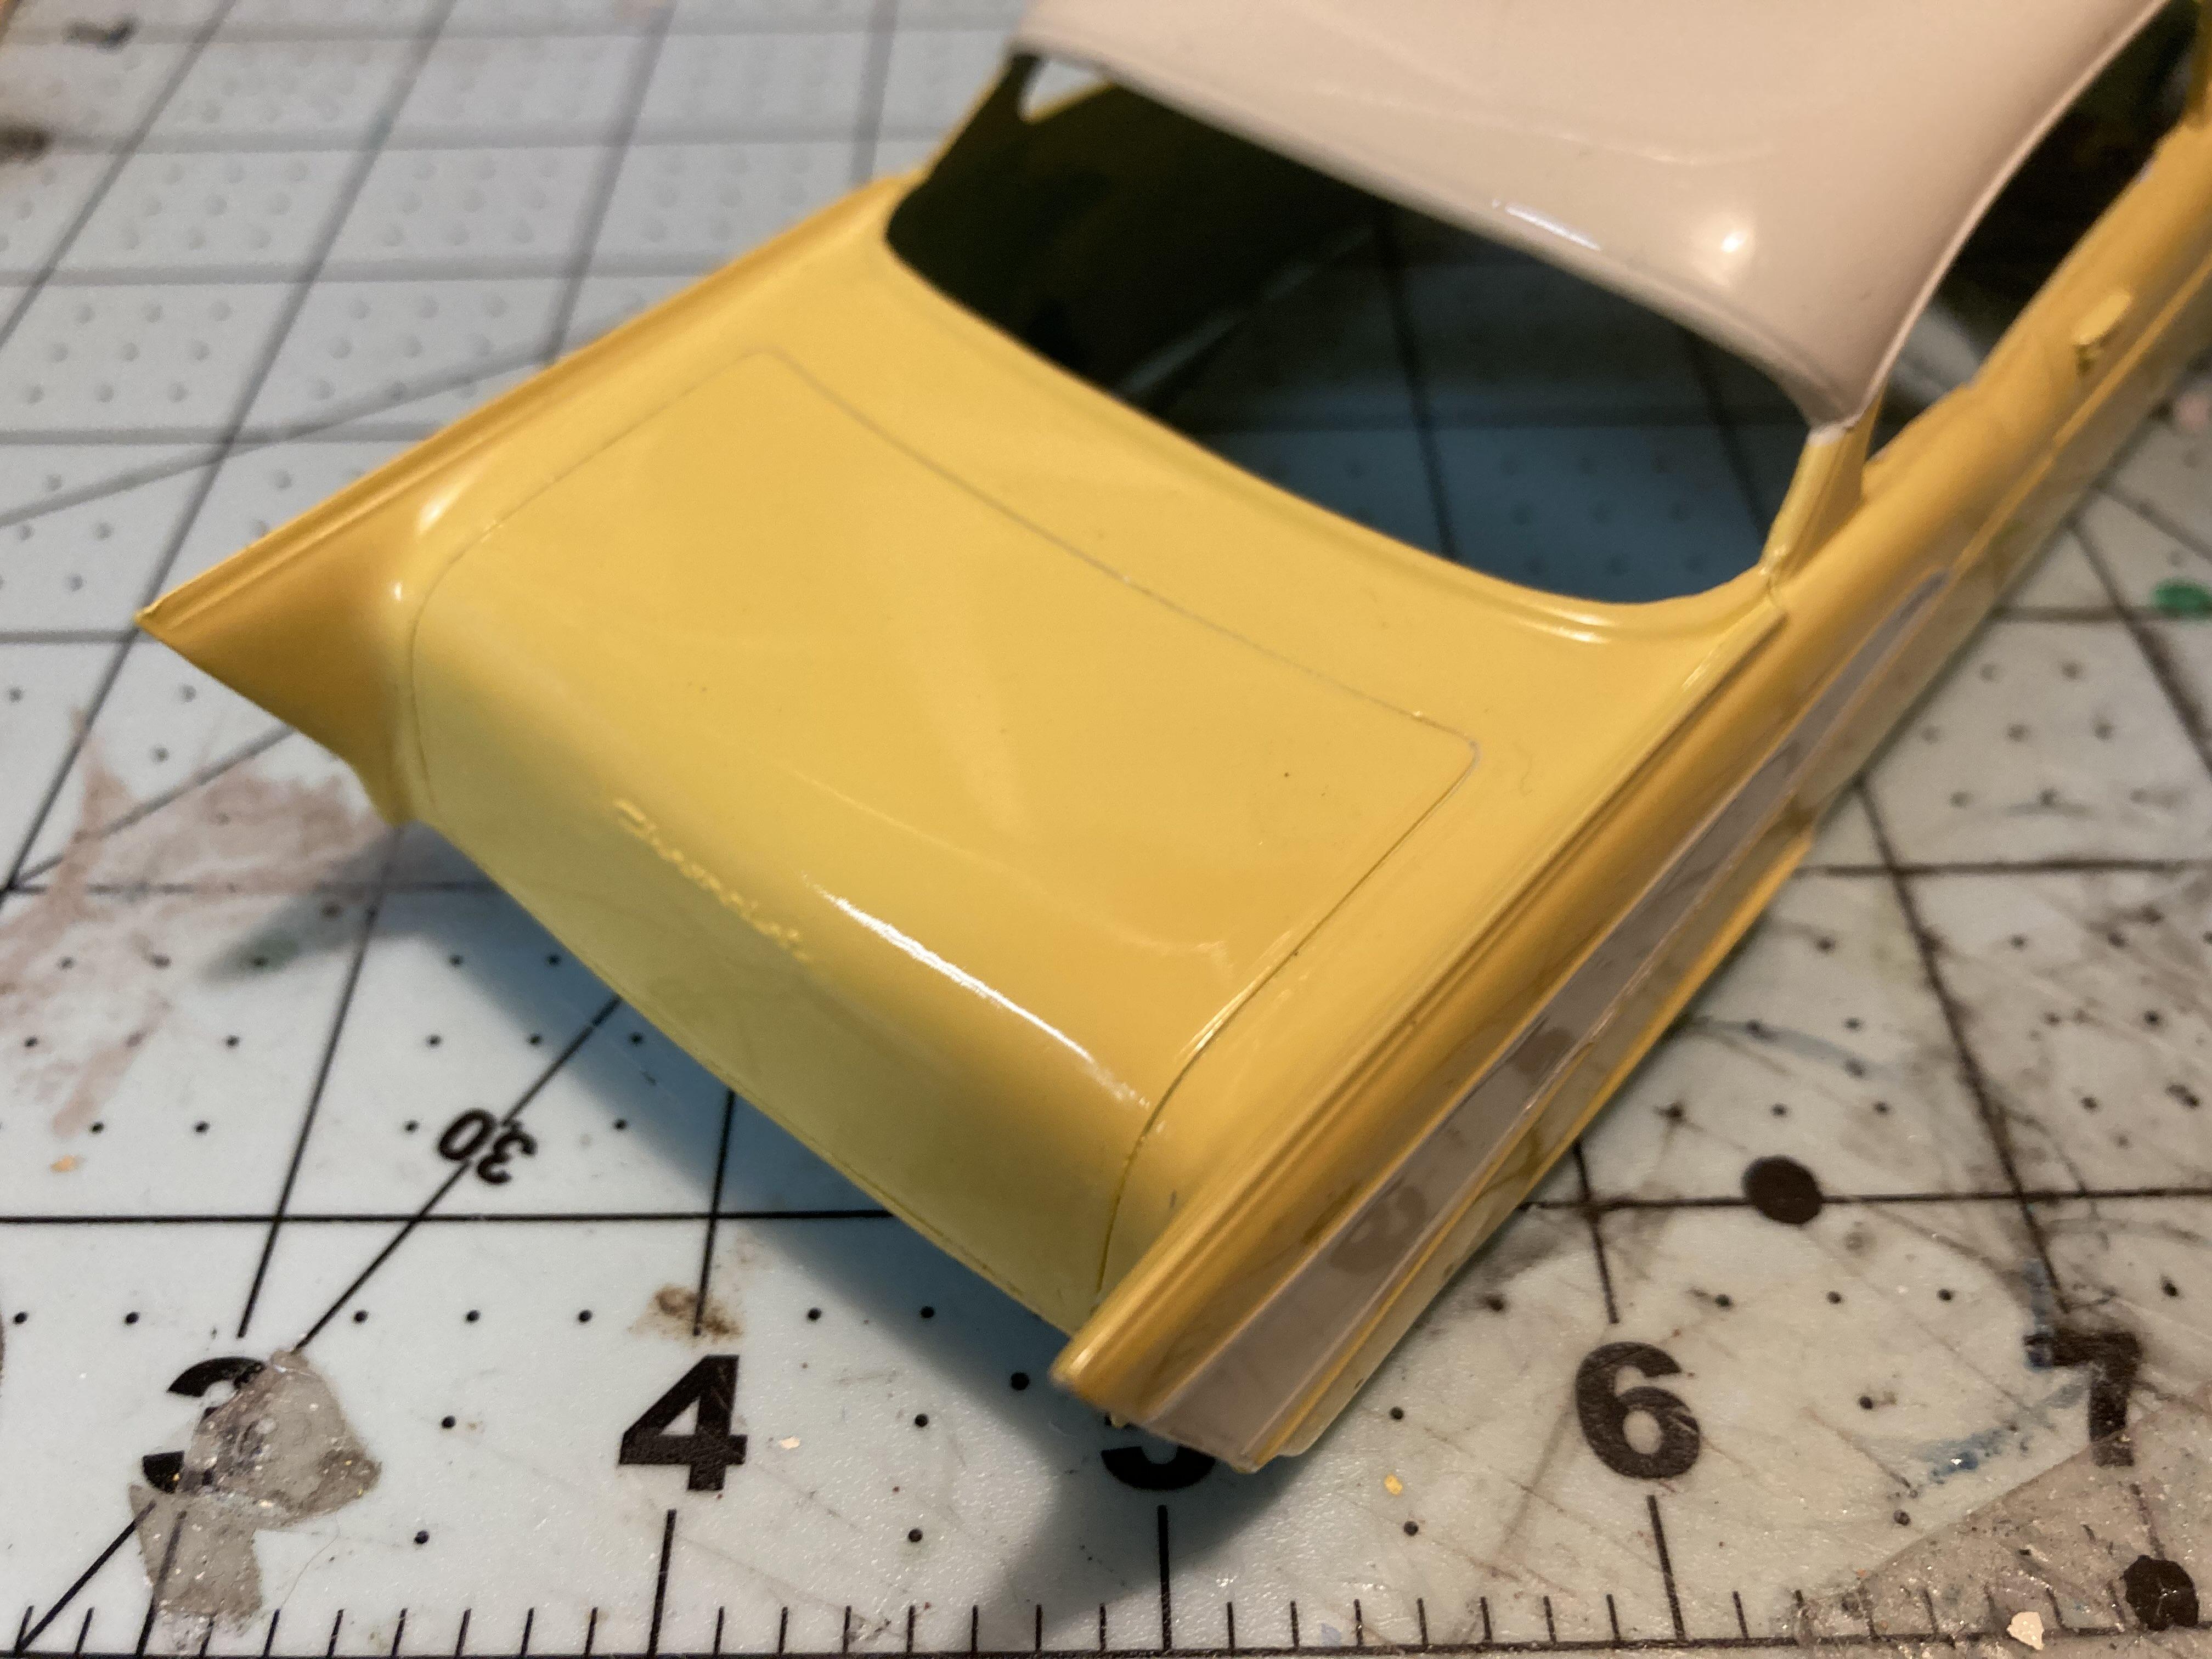
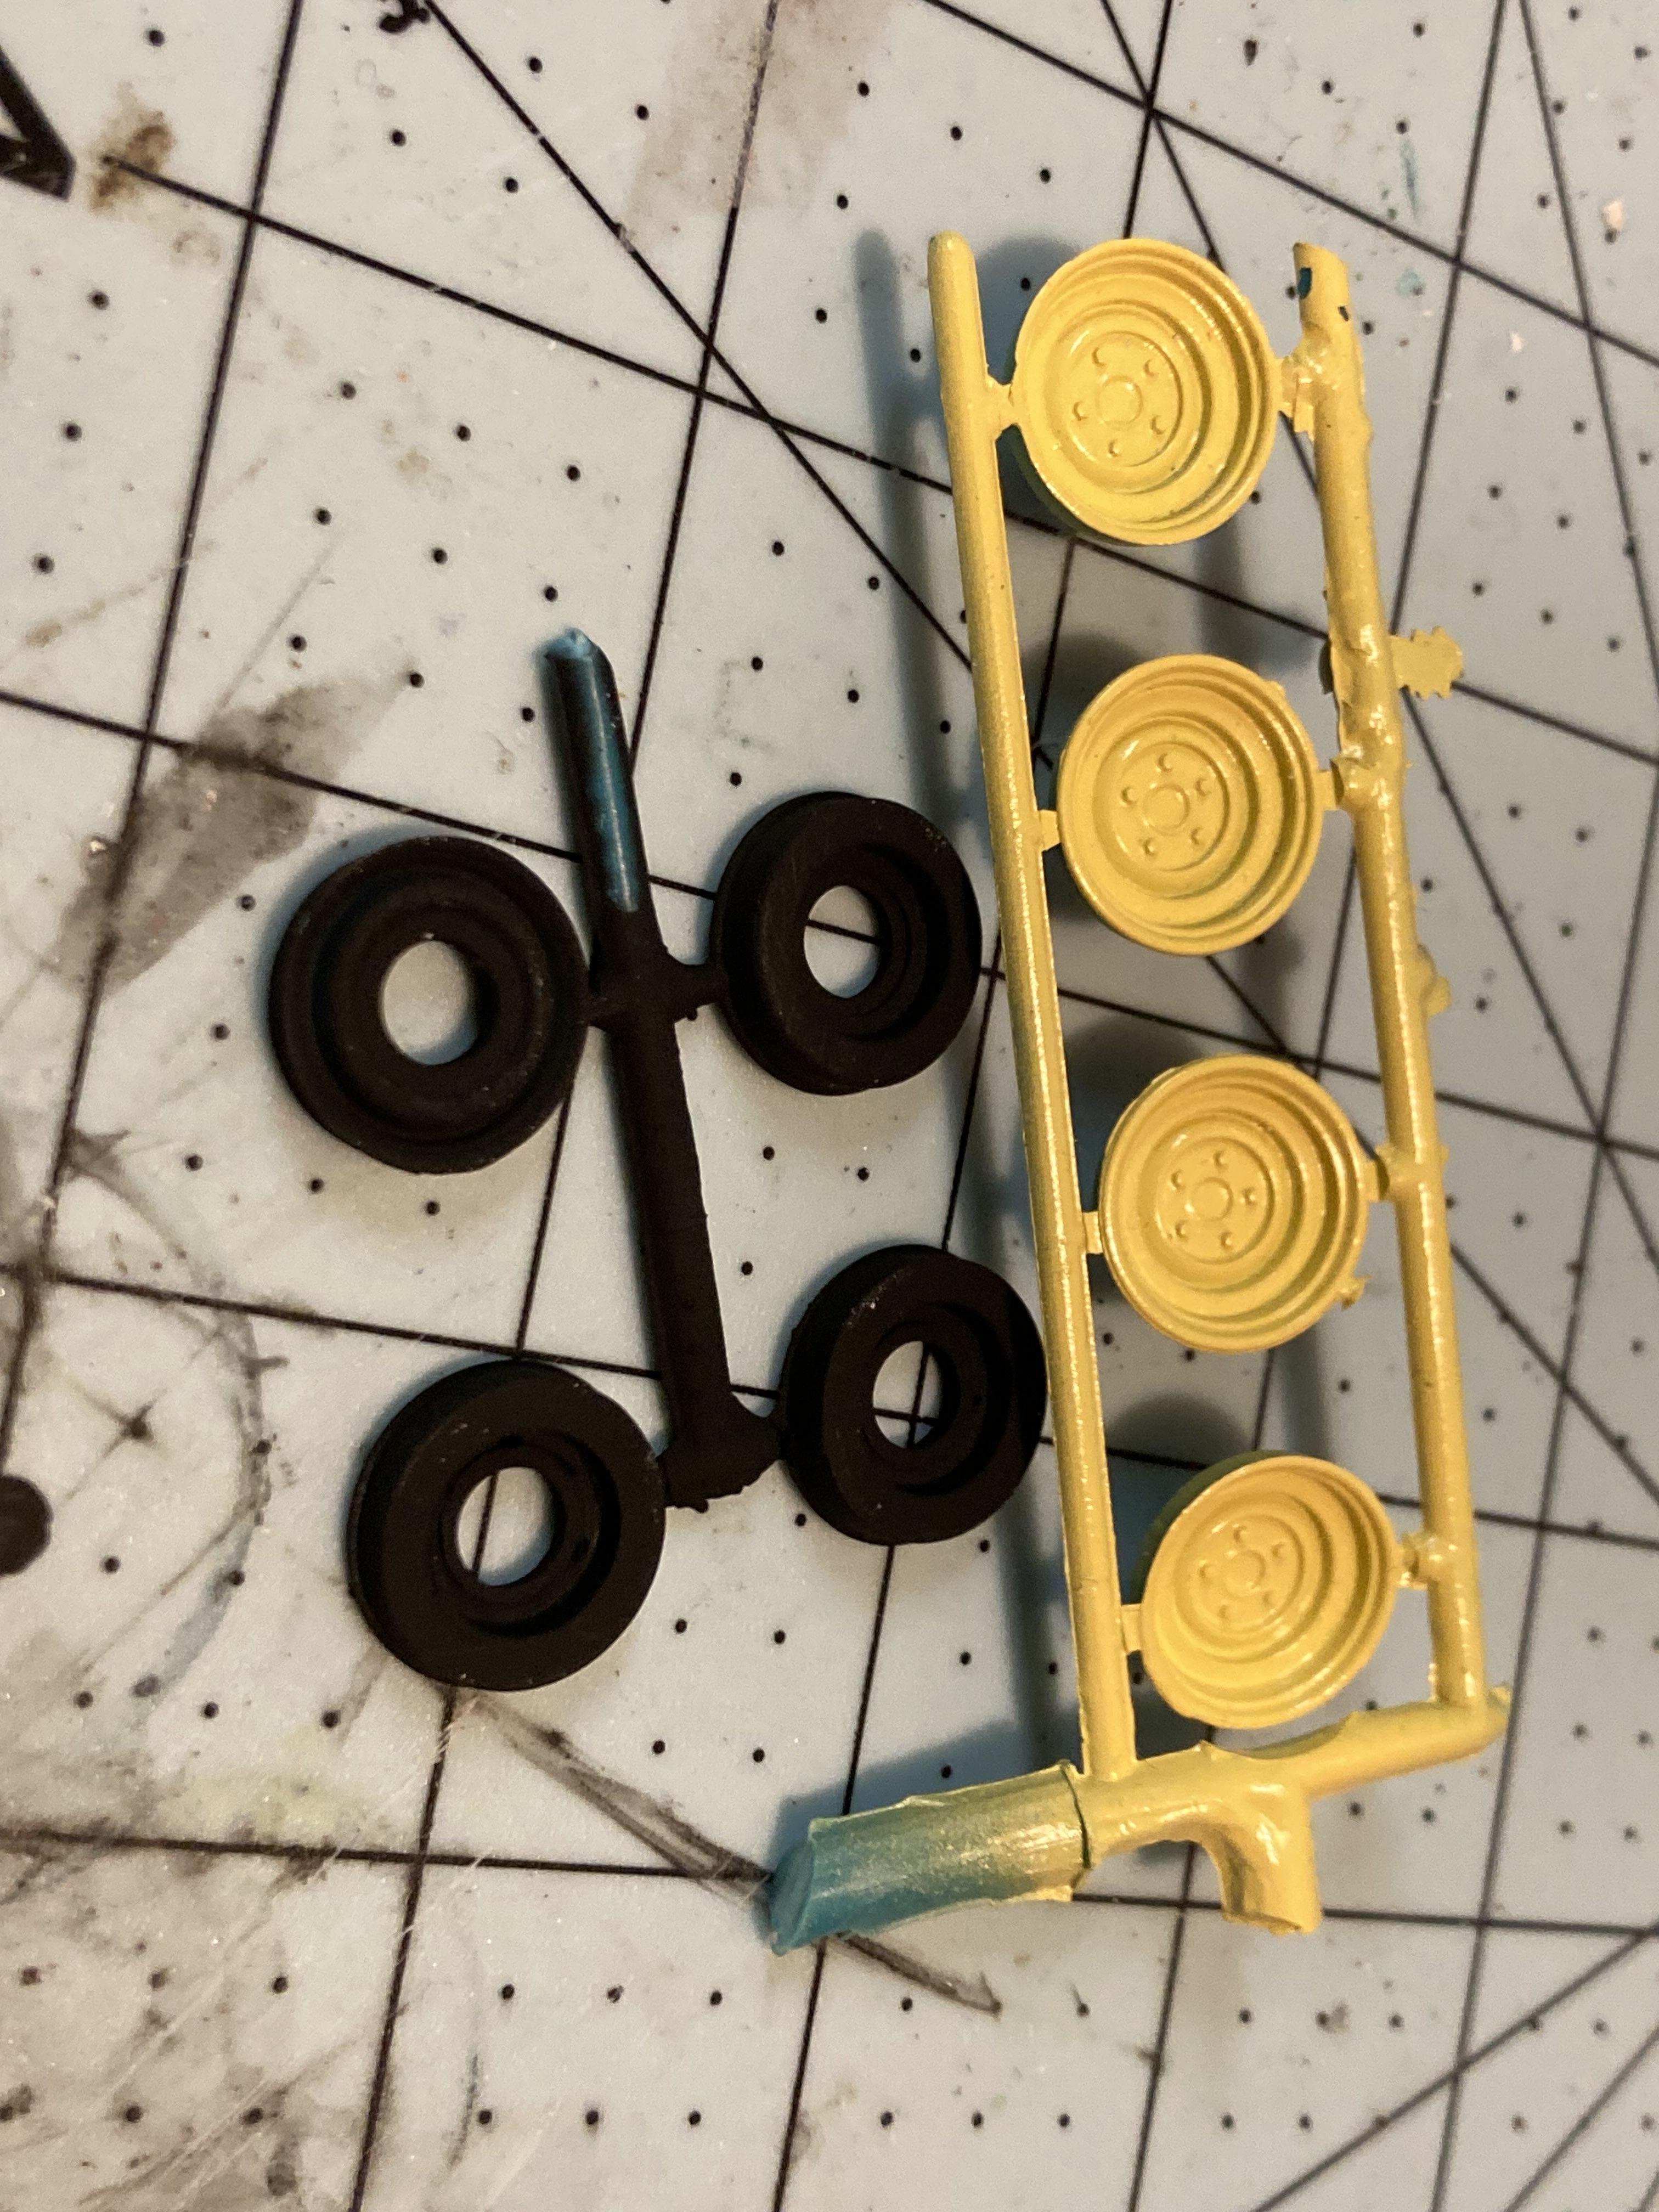
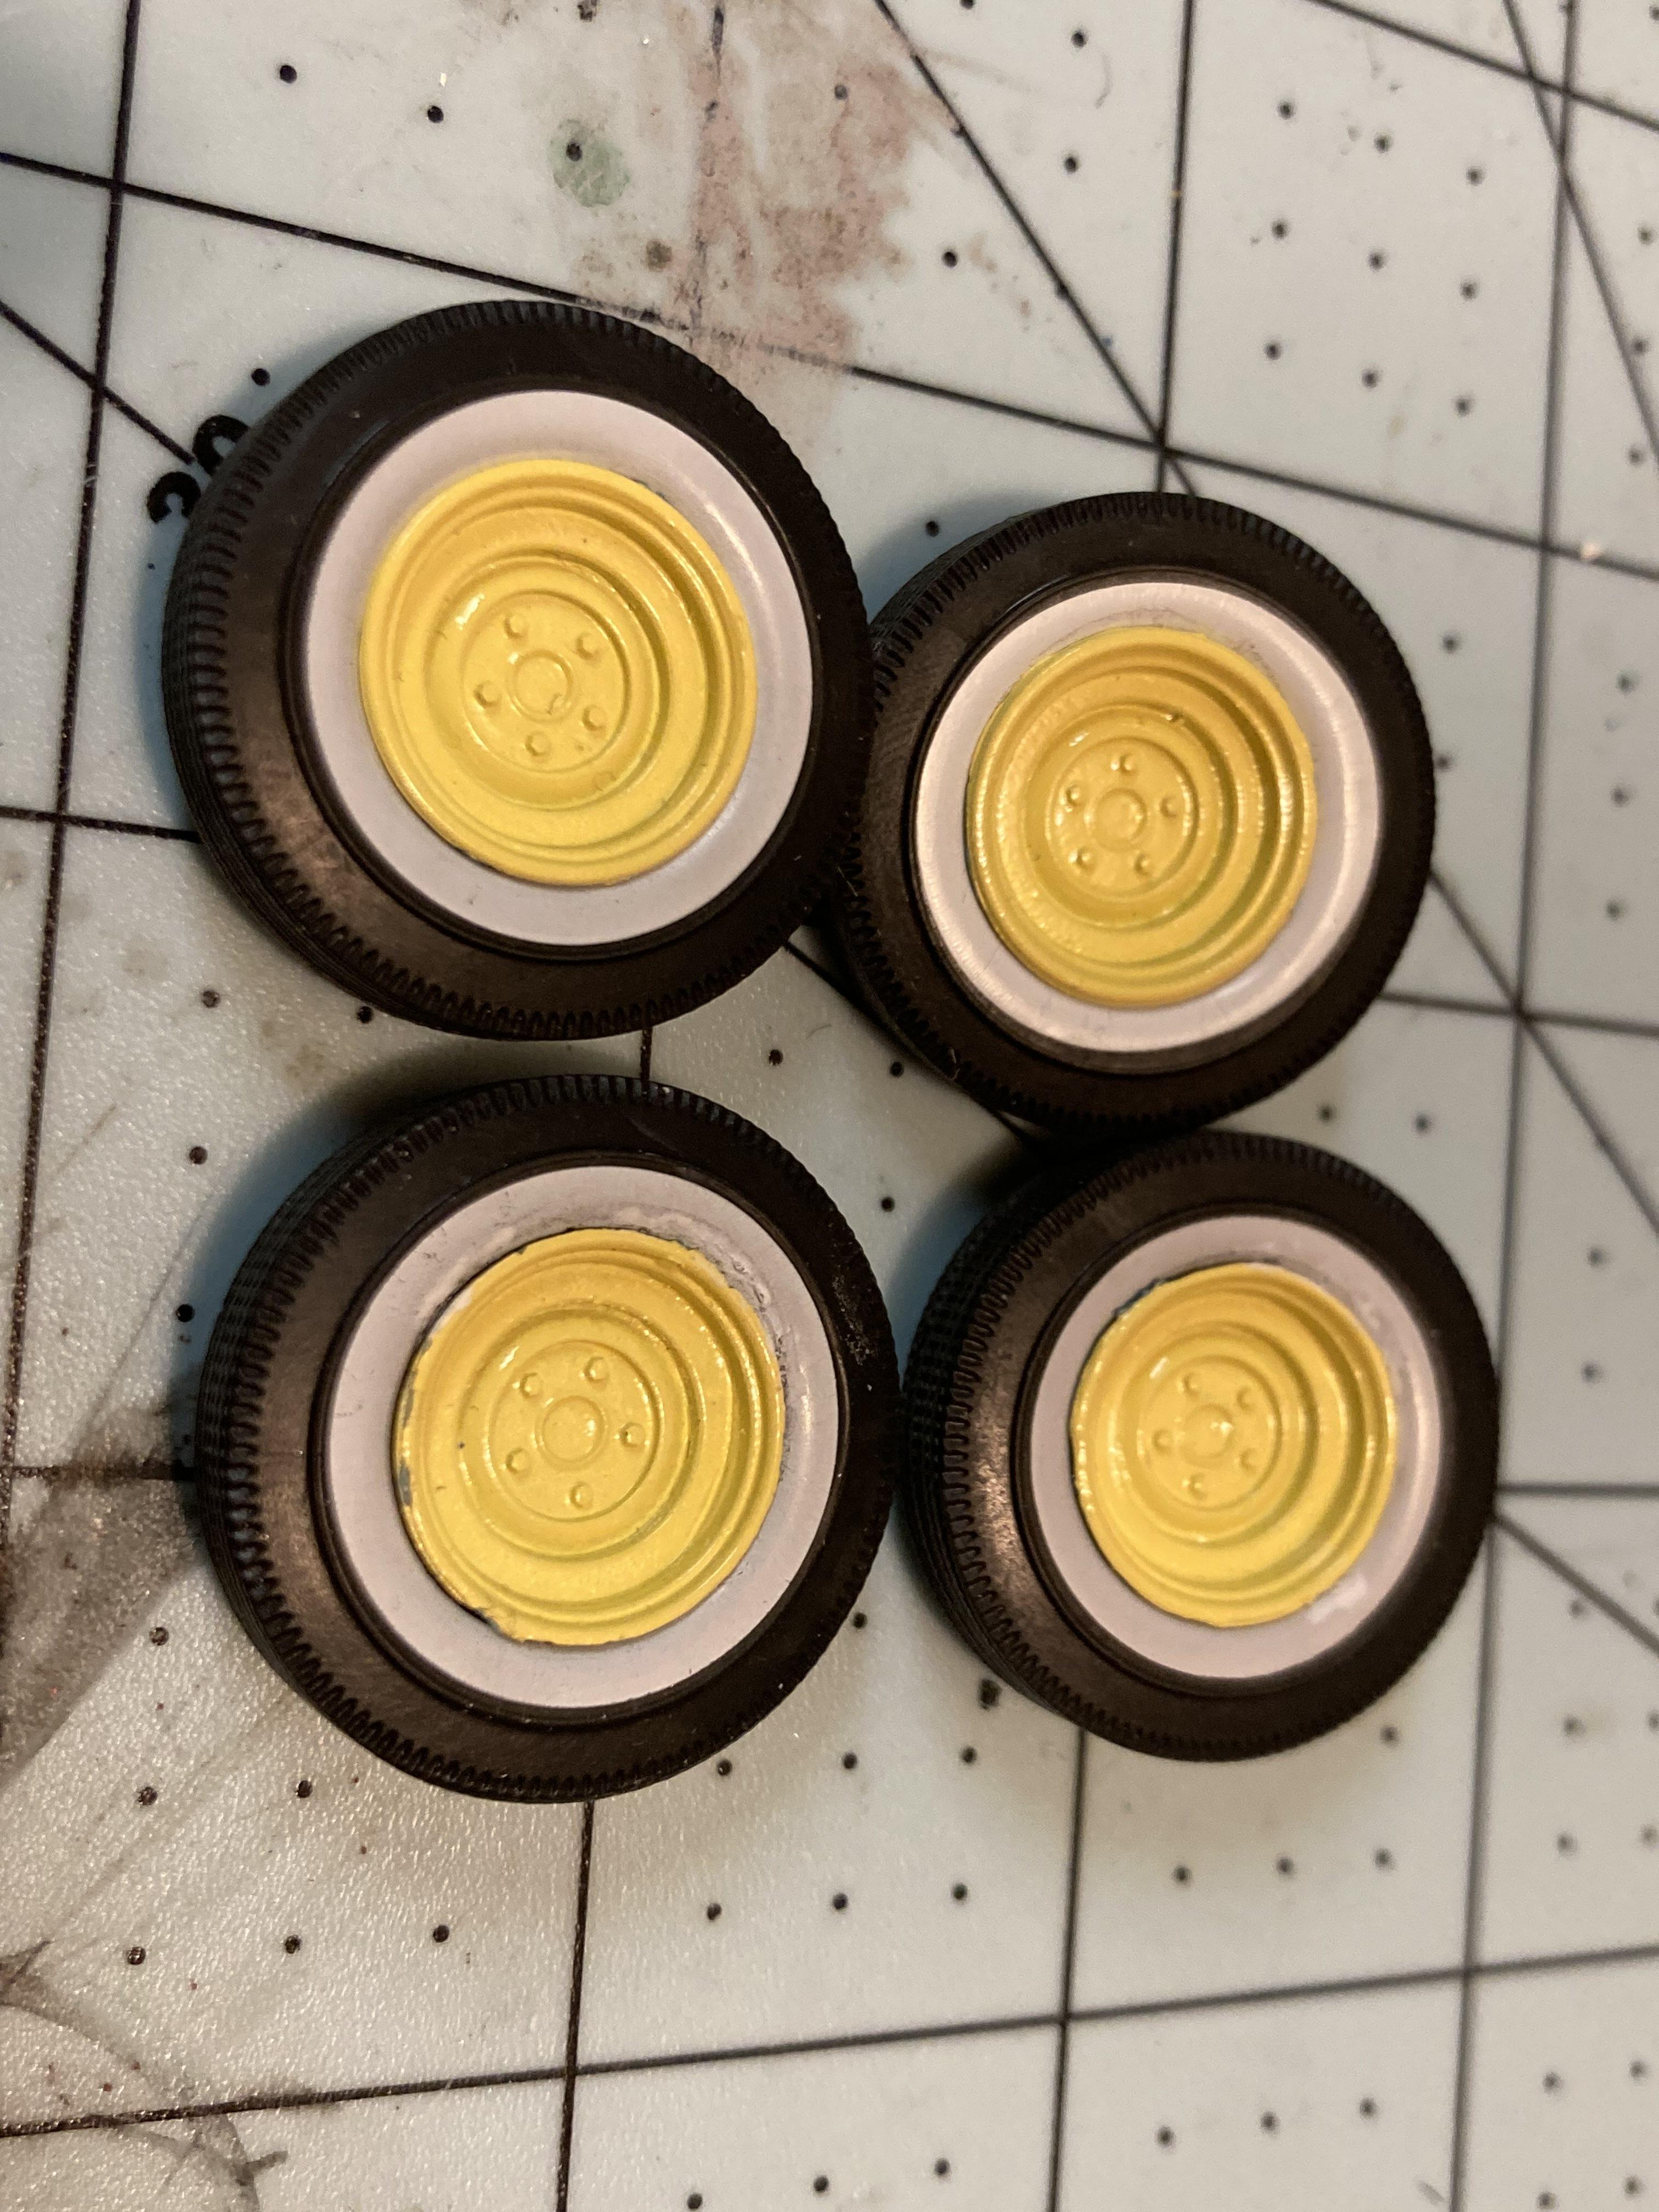
This project is not dead! The body was stripped, repainted, cleared and here it is getting ready to touch up some troubled spots in the clear. The engine has been partially assembled Rear has been installed in the chassis Wheels and backs painted Lastly, here are the wheels mounted in the tires from the AMT '50 Chevy truck

-
I hate to be a pain but I think Volkswagen's "Pearl White" name is really misleading. From what I can tell, Herbie is an off-white kinda like Wimbleton White, as opposed to white with pearl.
-
Ah, Vectors! I was thinking something like that. Thanks
-
If you don't mind that I ask, how did you do that window sticker? I figured that if I printed a graphic that small on waterslide paper, it would be unrecognizable. What did you do?
-
I didn't do much to this one, I seem to be focusing more on the stock car. All that I did was put some black paint on the mesh to make it stand out a little more.
-
A little more work... The seats are officially done! I put a coat of Tamiya's Semi-Gloss Clear on the flat paint to make it look more like vinyl upholstery. I also did the same to the interior tub but I foolishly masked the tub to paint the package shelf before I remembered to take any pictures. The dash is also pretty much done, just need to paint the gauges. I'm not entirely happy with how the silver was masked but I needed to use silly putty because I couldn't figure out any other way to do it. All things being said, it won't look too bad when installed. (Is it just me or does it seem odd that it appears that Chevy painted the dashboards in these cars with gloss paint?) I also painted the steering wheel to the best of my abilities. I really dislike the wheel that AMT includes in this thing, I think it looks more like a pool floatie than a Chevrolet steering wheel.
-
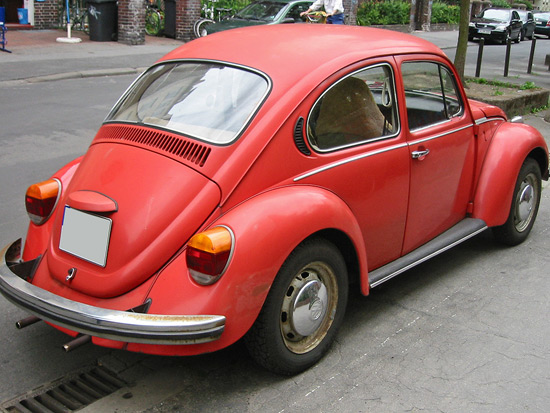
A minor thing, I do not believe that kit comes with "Elephant's Foot" taillights. Those came on the 73+ Super Beetles and Standard Beetles. They actually have a different fender to fit the lights. I think your kit came with the "Tombstone" lights Project looks cool! I just wanted to clarify that.
-
That's basically it!
-
Thanks!
-
I was busy for the past couple weekends but I managed to get some work done. I've painted the front seat and the interior tub. I will be honest, the interior is not accurate to a 210. It's still got the Bel Air side panels but I went through so much effort to sand down the gator skin on the seats that I could not bring myself to do the interior tub as well. So I painted the Bel Air ones in the same scheme as the 210 would have been. It's not accurate but I figure that you won't really see it or be looking for it anyway. Unrelated, a weird problem I had with the primer I was using (decanted Rustoleum 2X white primer) and it peeling off, I think that may have been what happened with the body. I had it happen on the interior tub but since it wasn't on anything you could really see and that only the white paint came off in a few small spots, leaving the white primer, I left it. Lastly, I put down a coat of silver for the dash and steering wheel. If you notice, I added a column shifter as well.
-
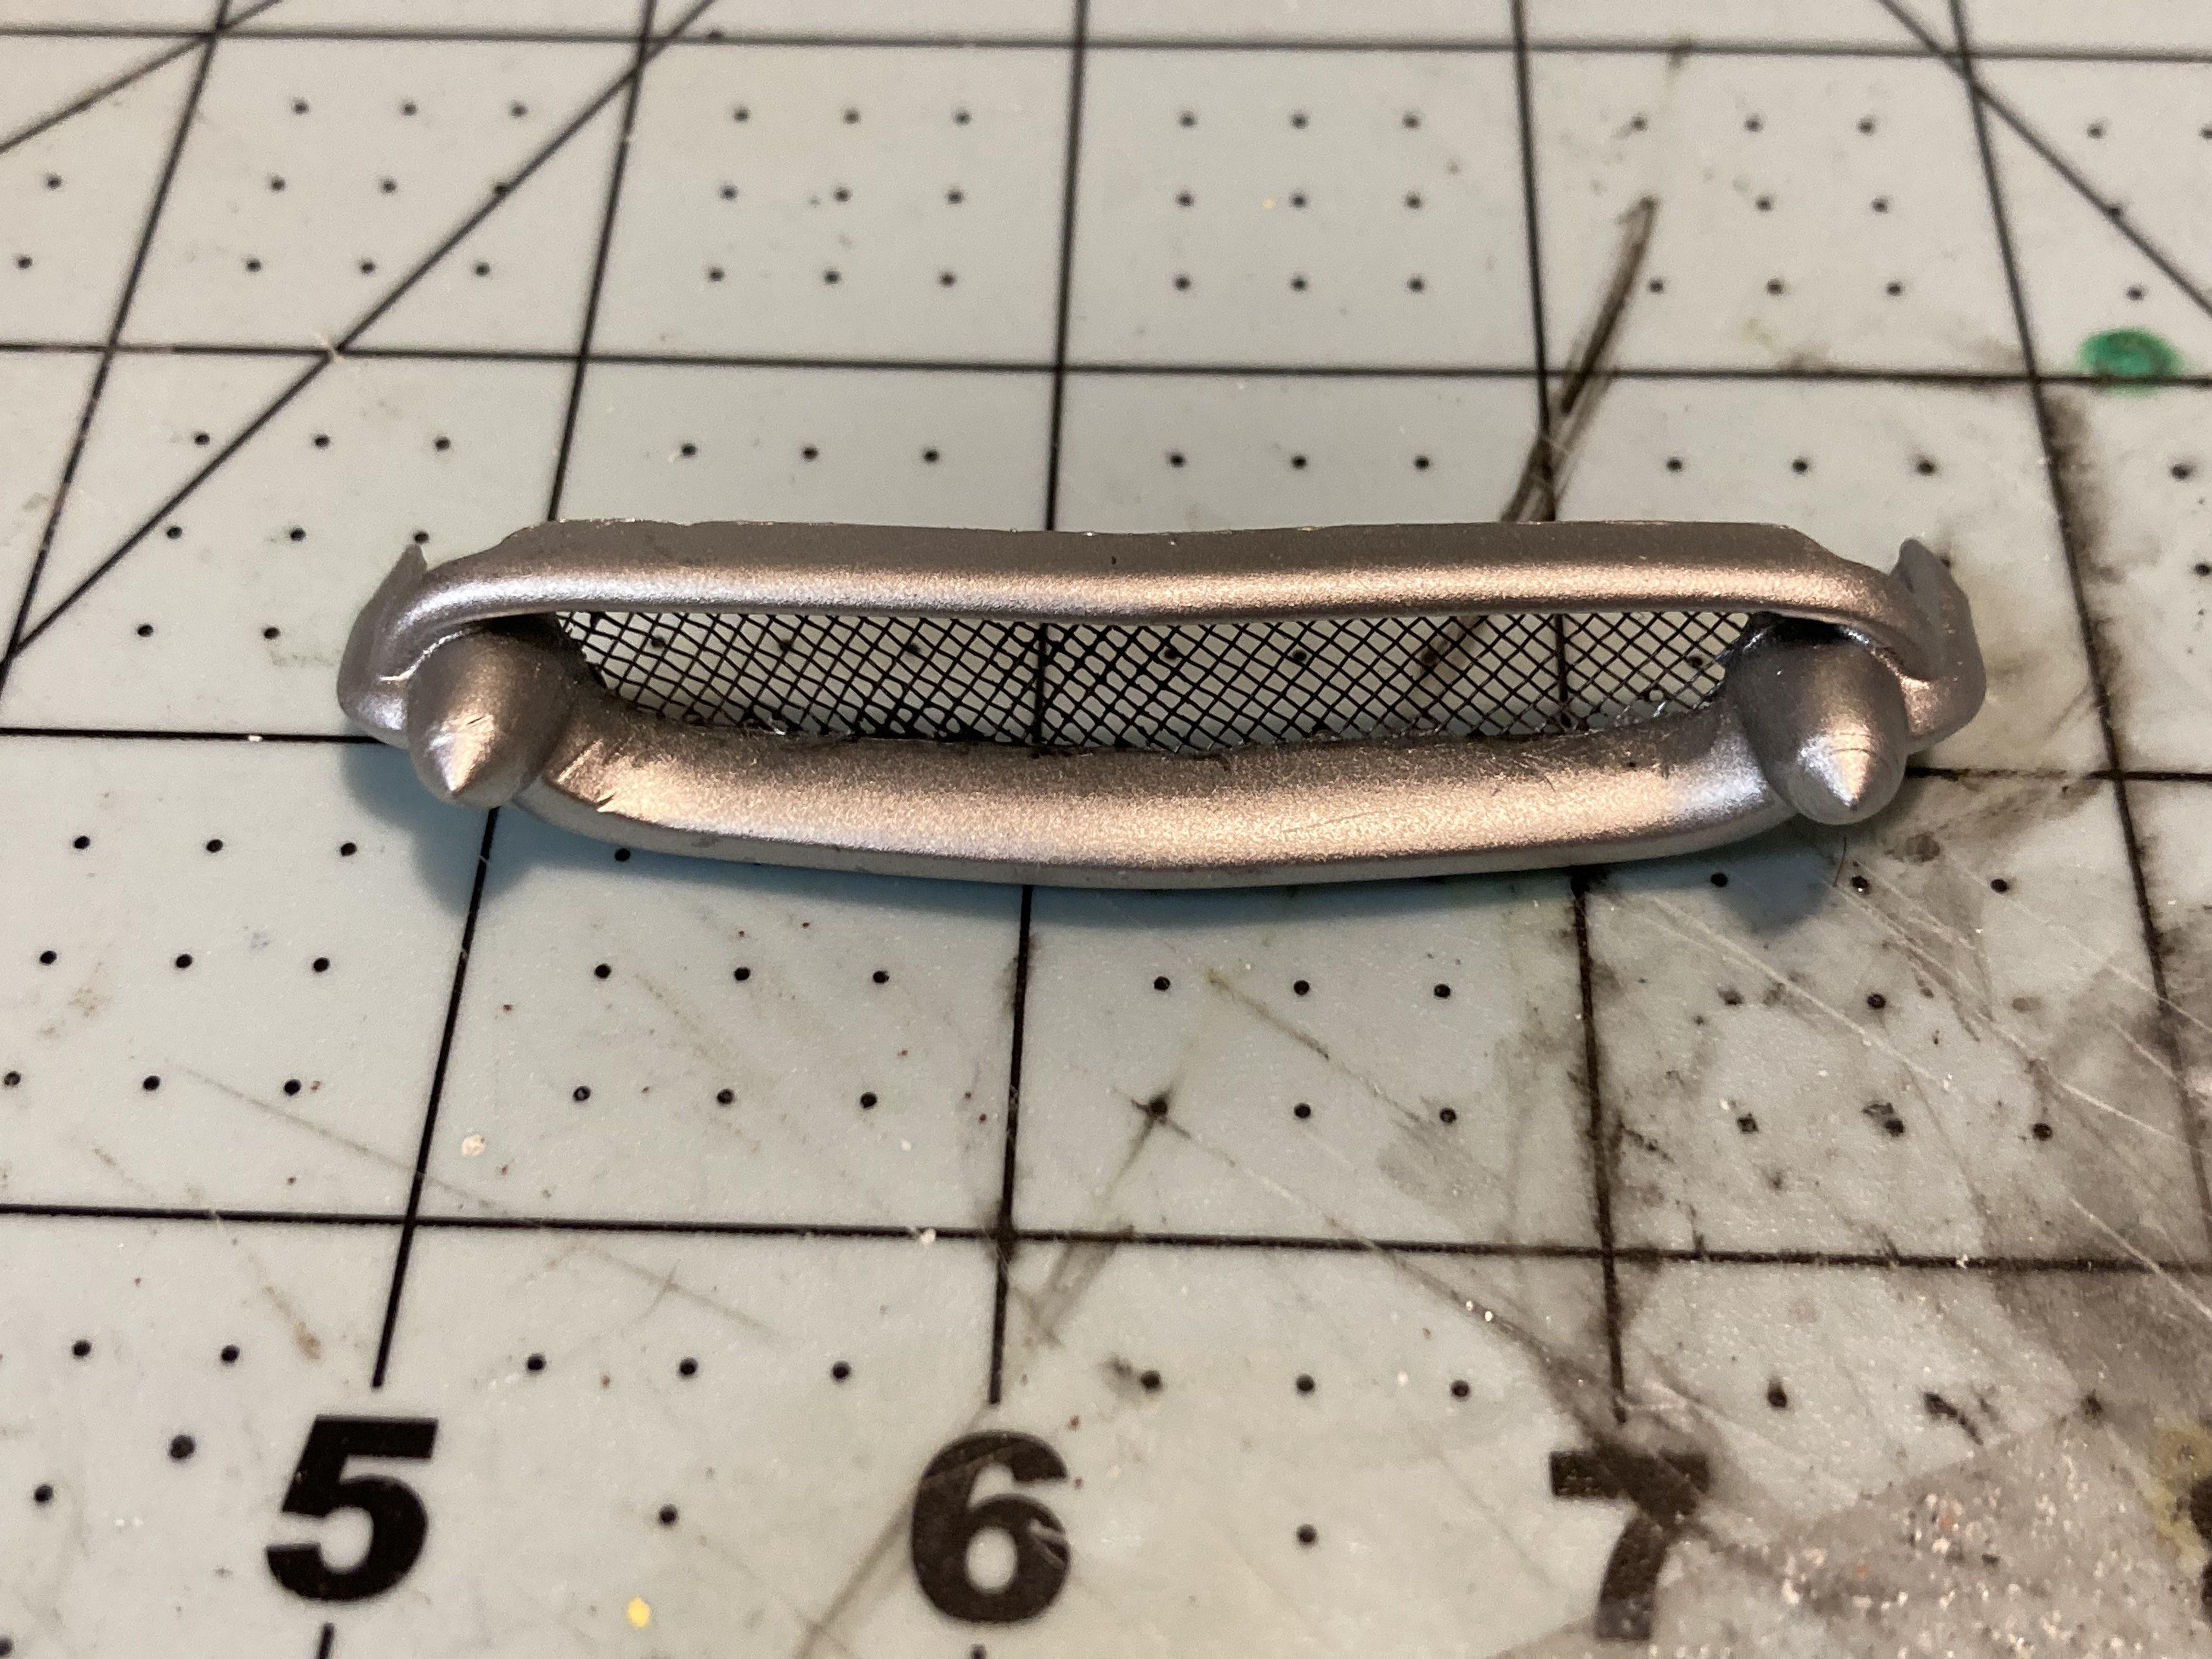
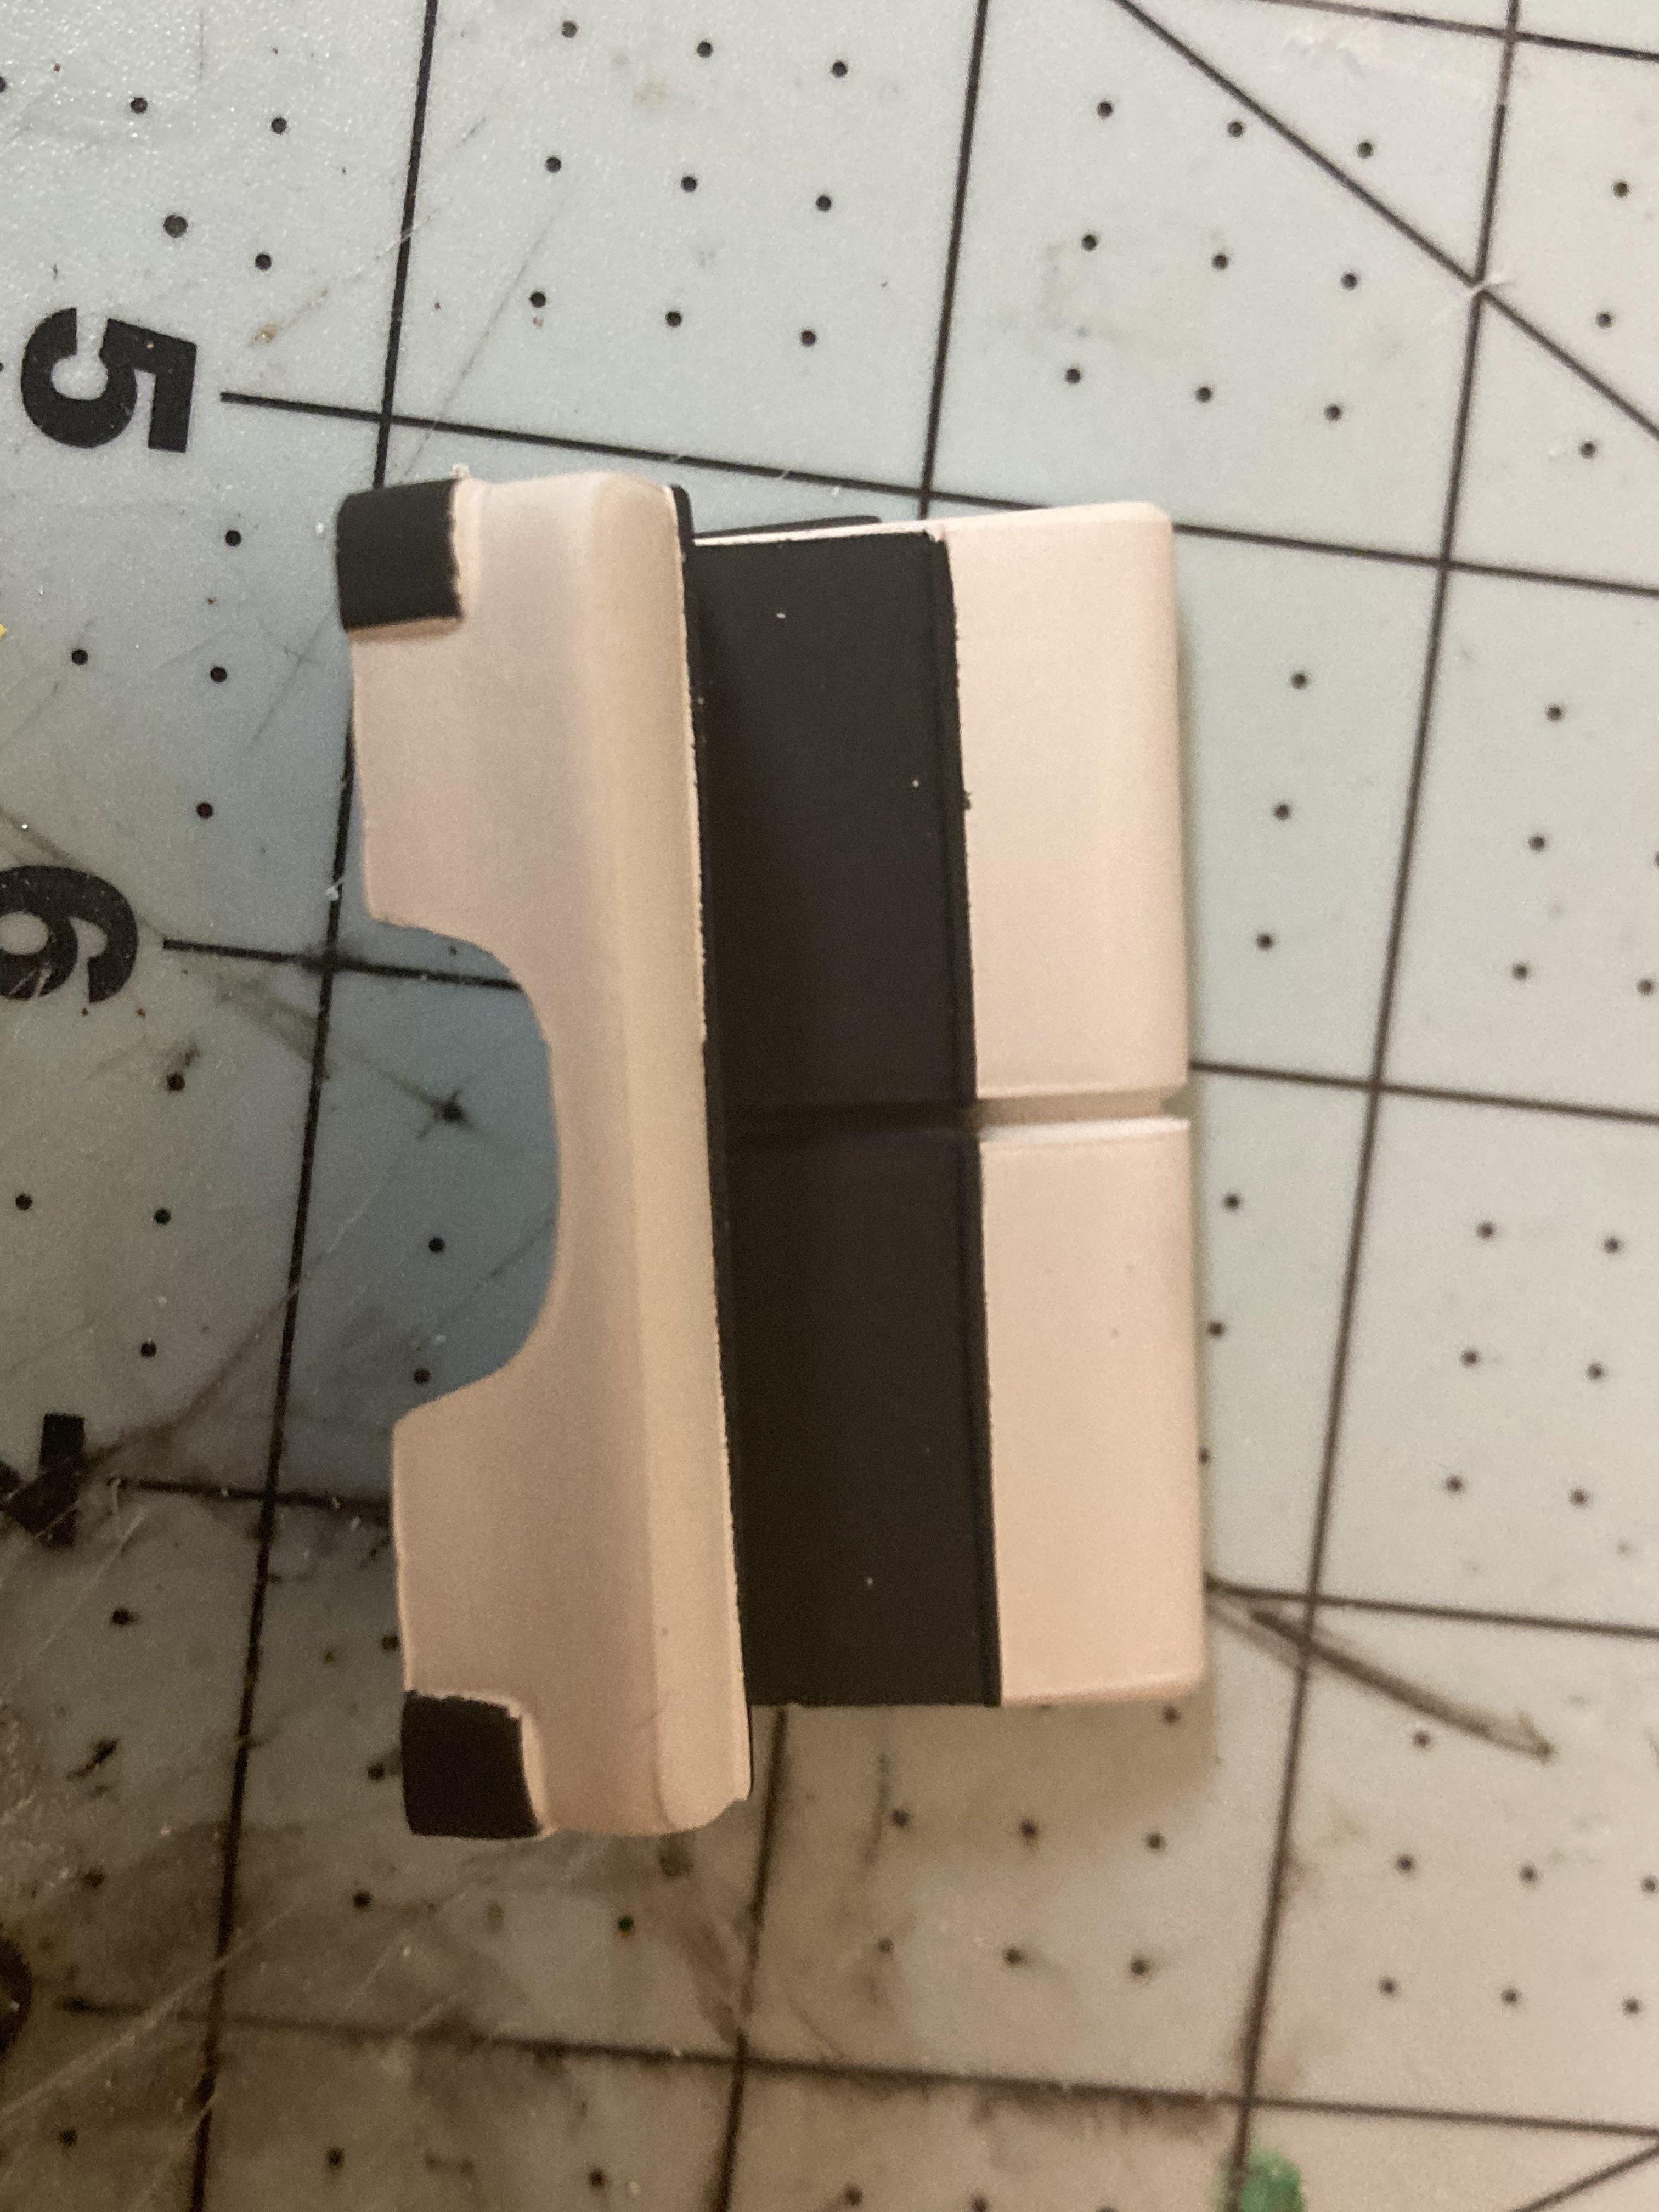
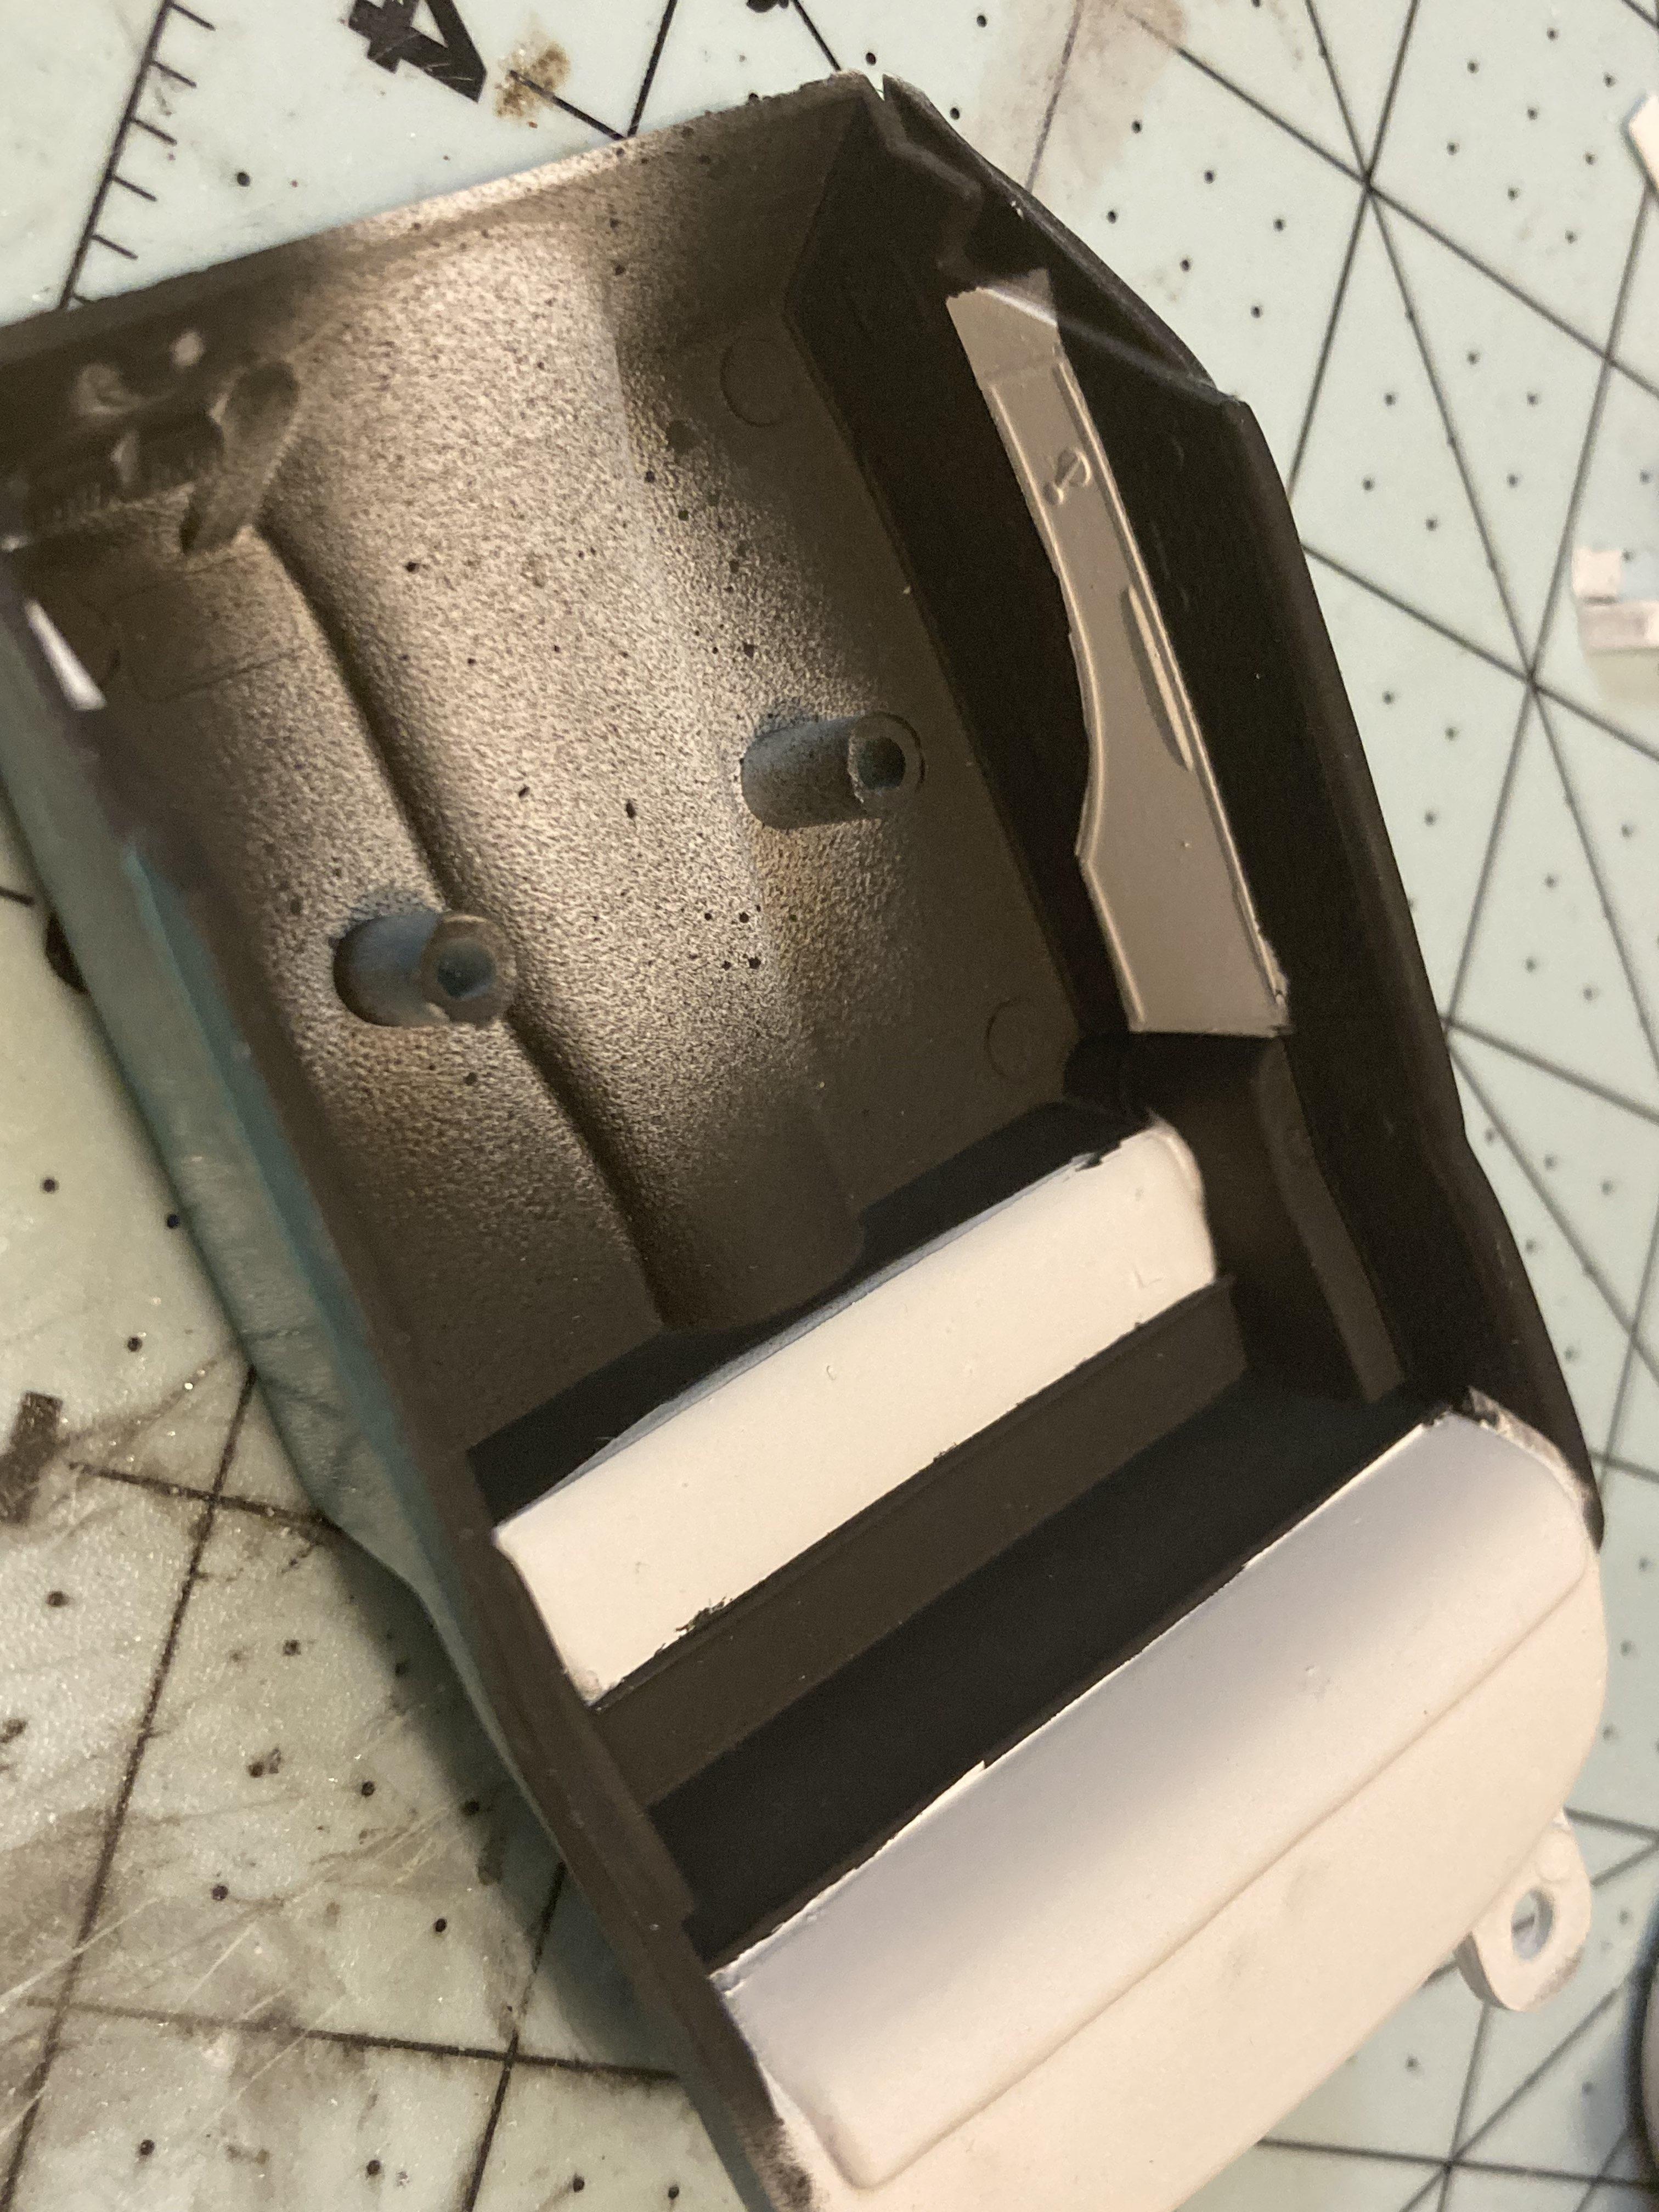
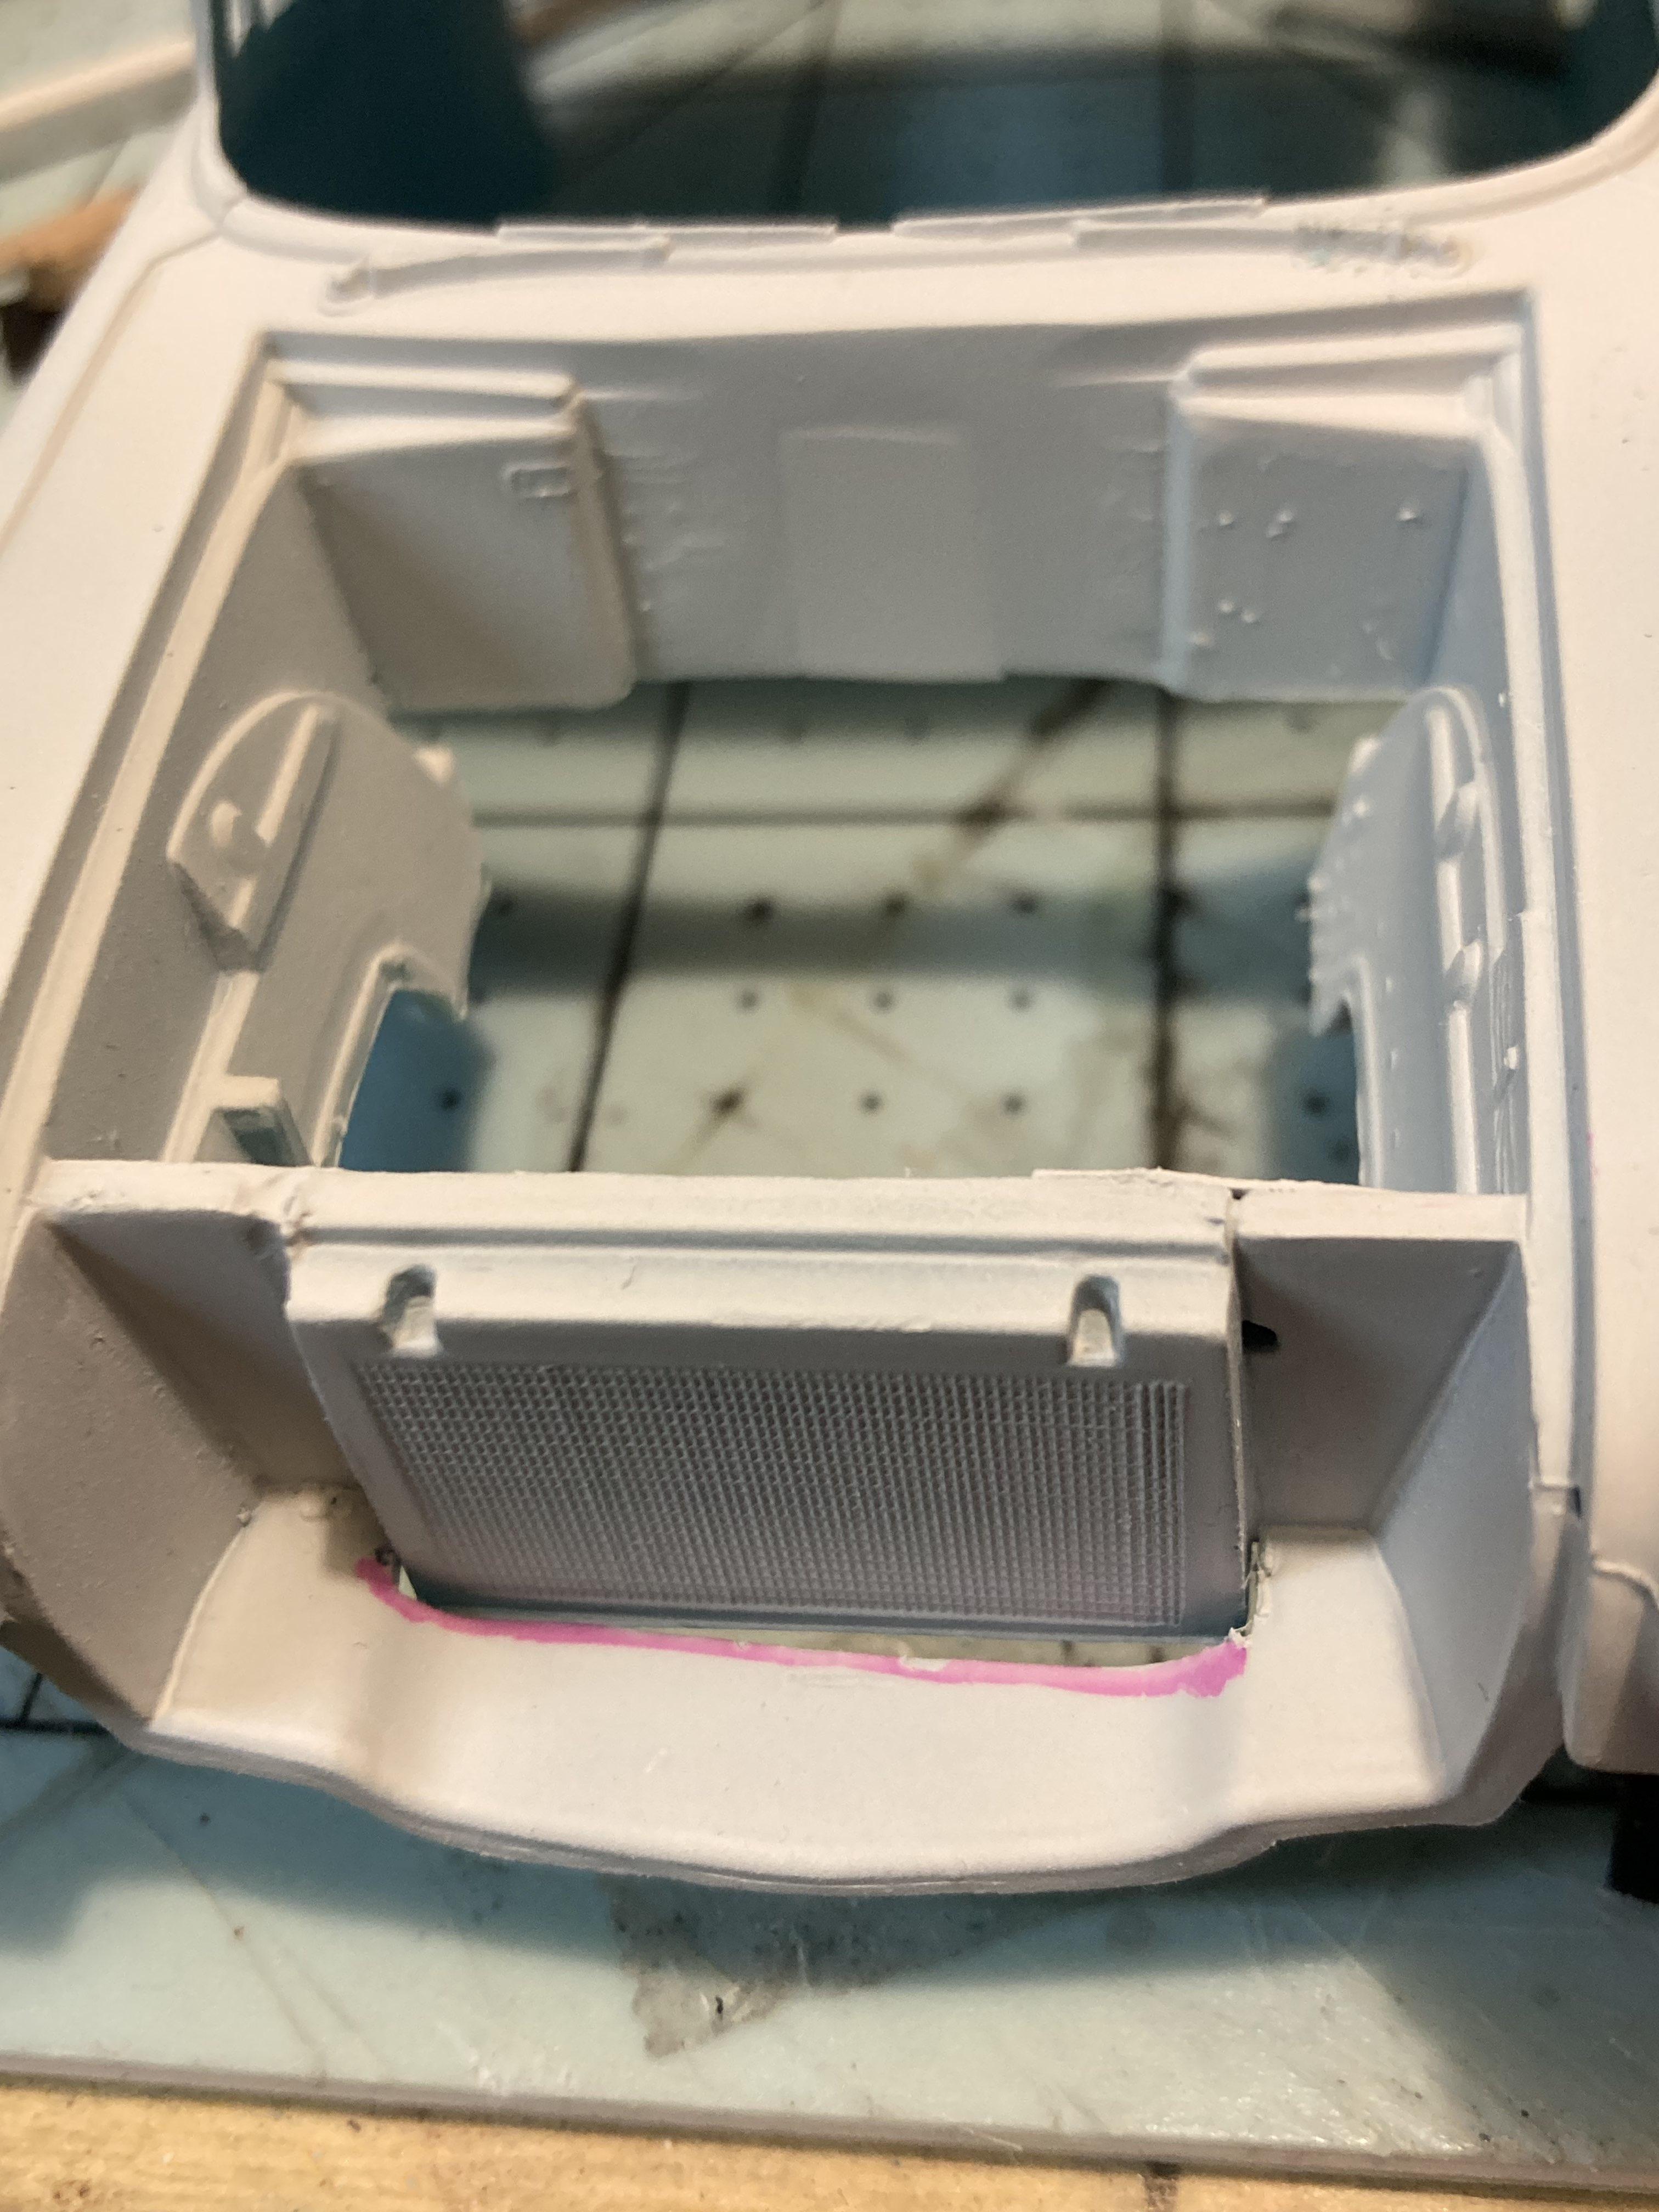
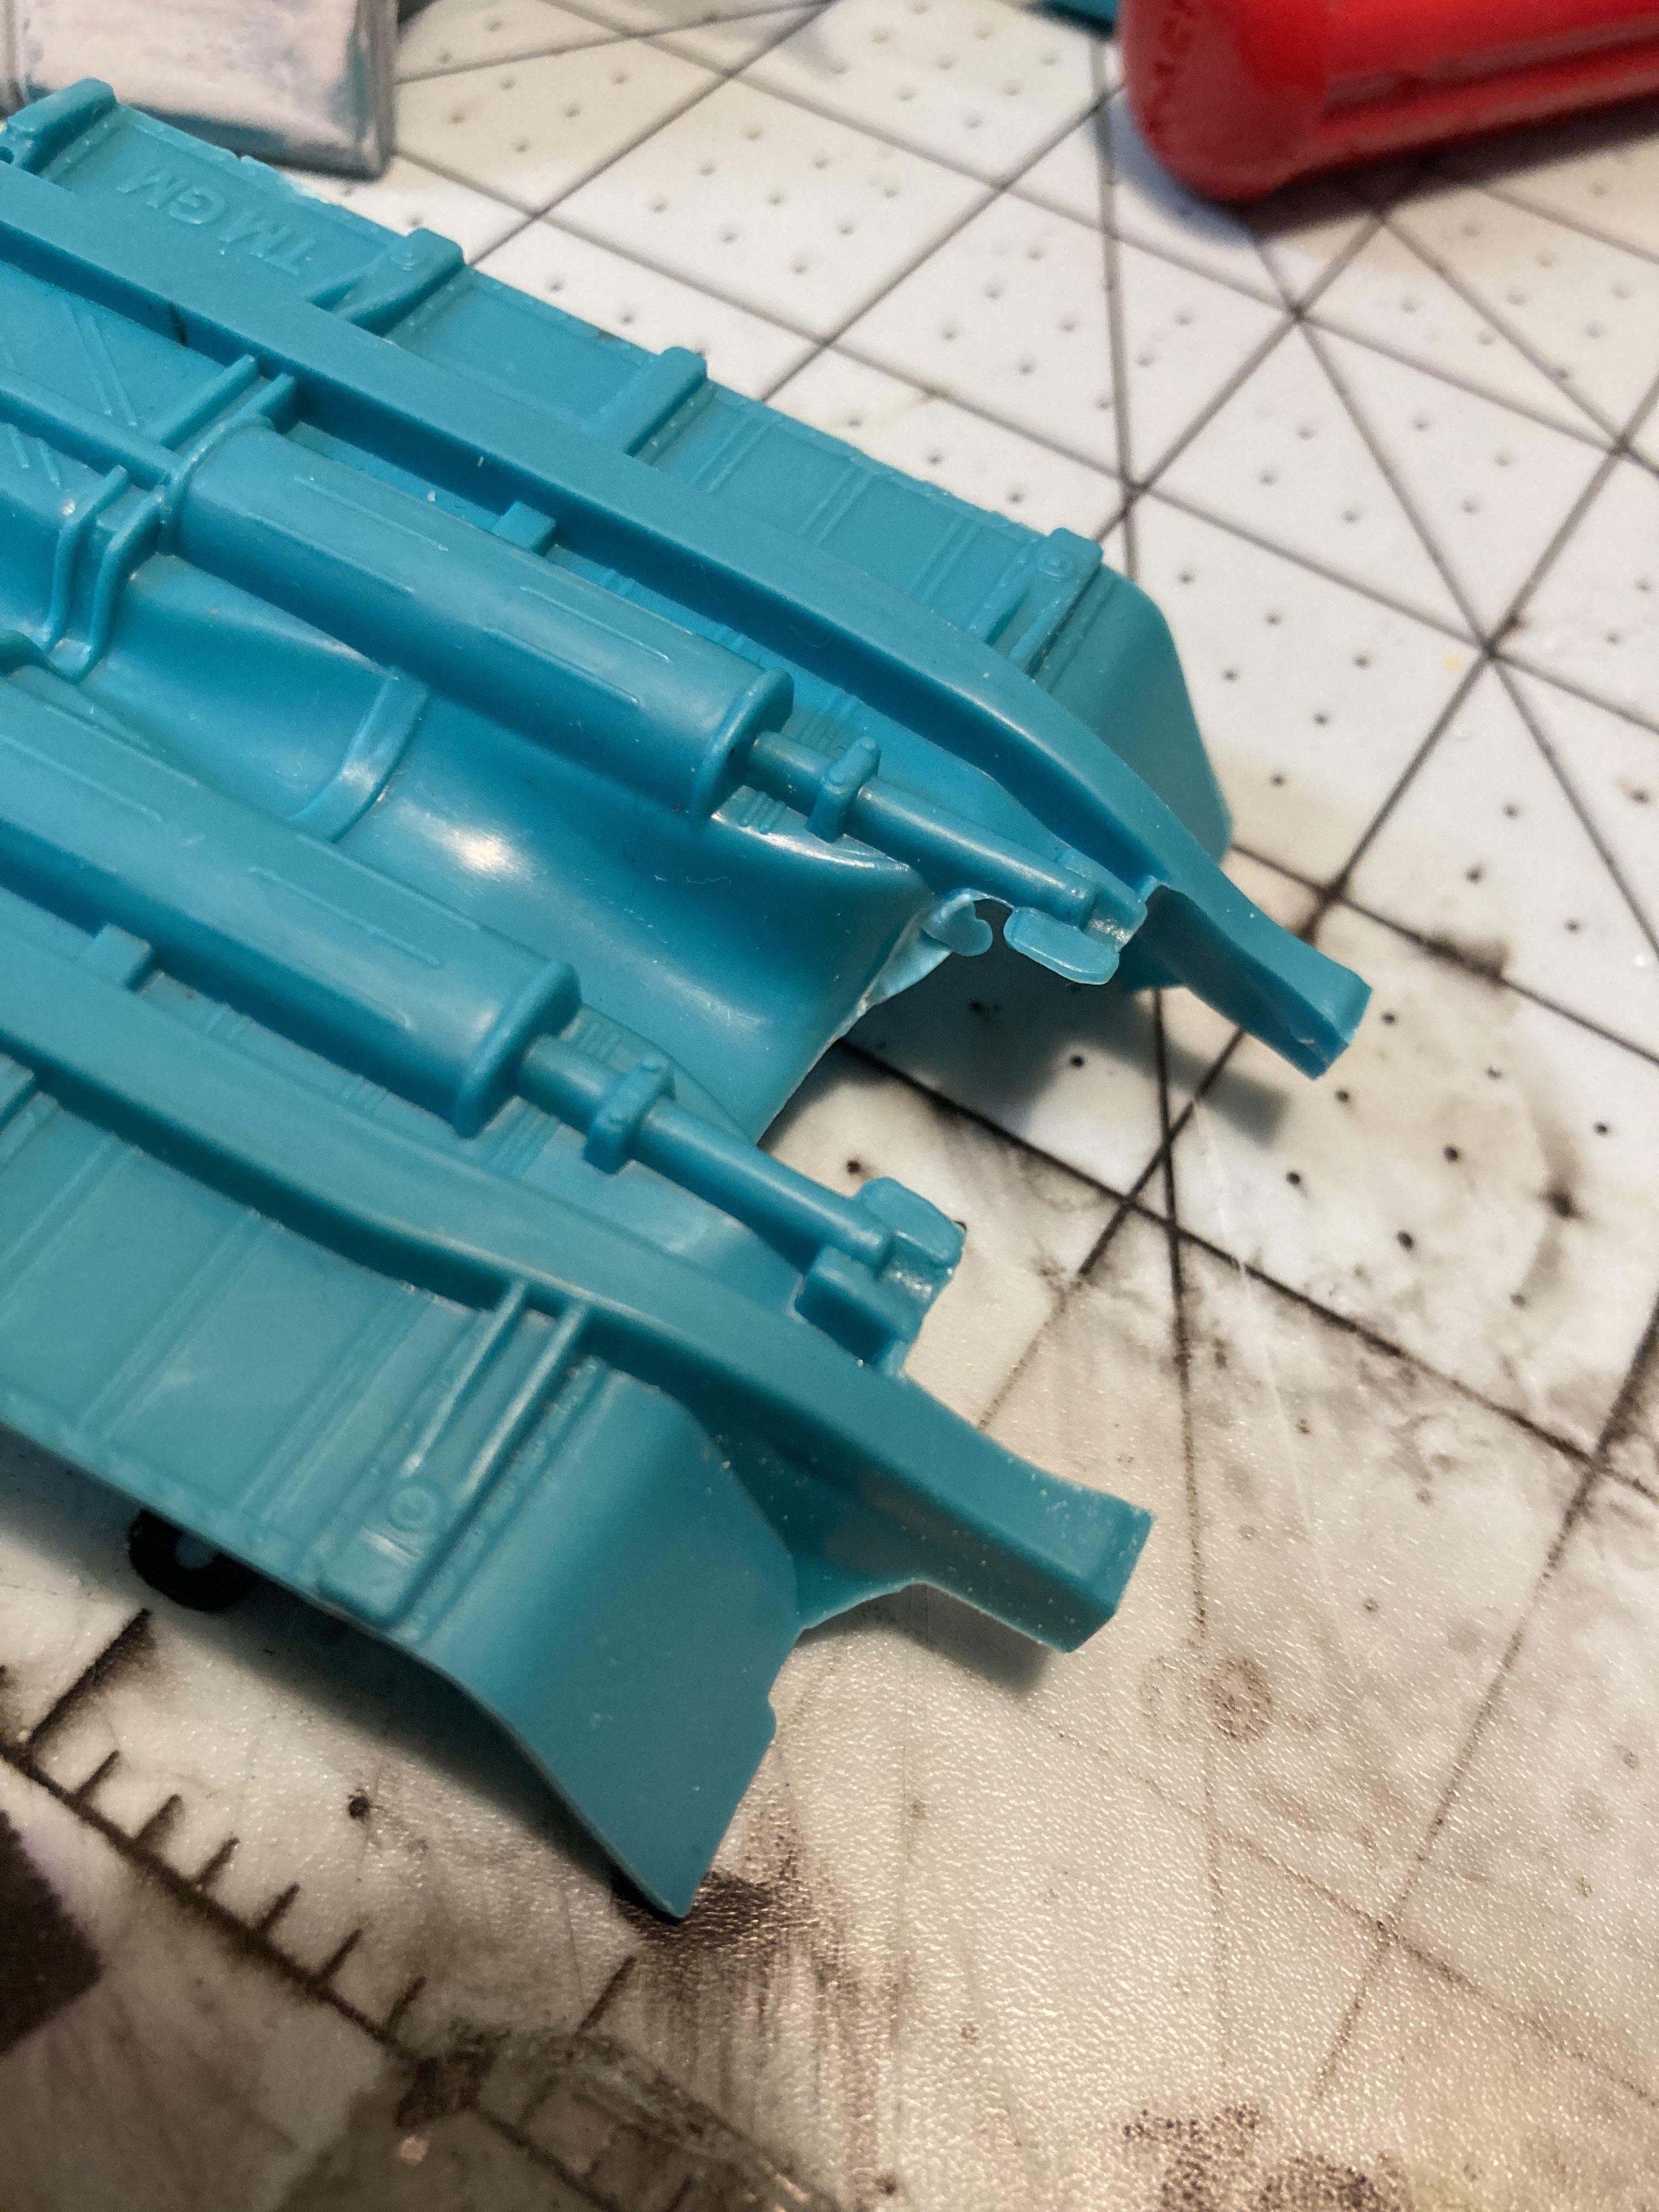
It's not much, but it's something A couple weeks ago, I stripped the instrument panel and bumper of its chrome. The idea was to cut up the bumper to make it lighter and make it look as if it was a fiberglass copy of a Chevy Bumper As you can see, I removed the bottom "lip" and cut out the middle. The mesh is from a dollar store splatter guard and will get painted black later, don't worry. I think it looks pretty good.
-
I believe that Pledge has been discontinued for at least a year now, I think Quick Shine is gonna be the closest thing you can get, or at least it's the most commonly available.
-
 What separates a Catalina from a Bonneville, besides the length of course? The taillights look to be different between the two but they otherwise seem to be the same.
 -
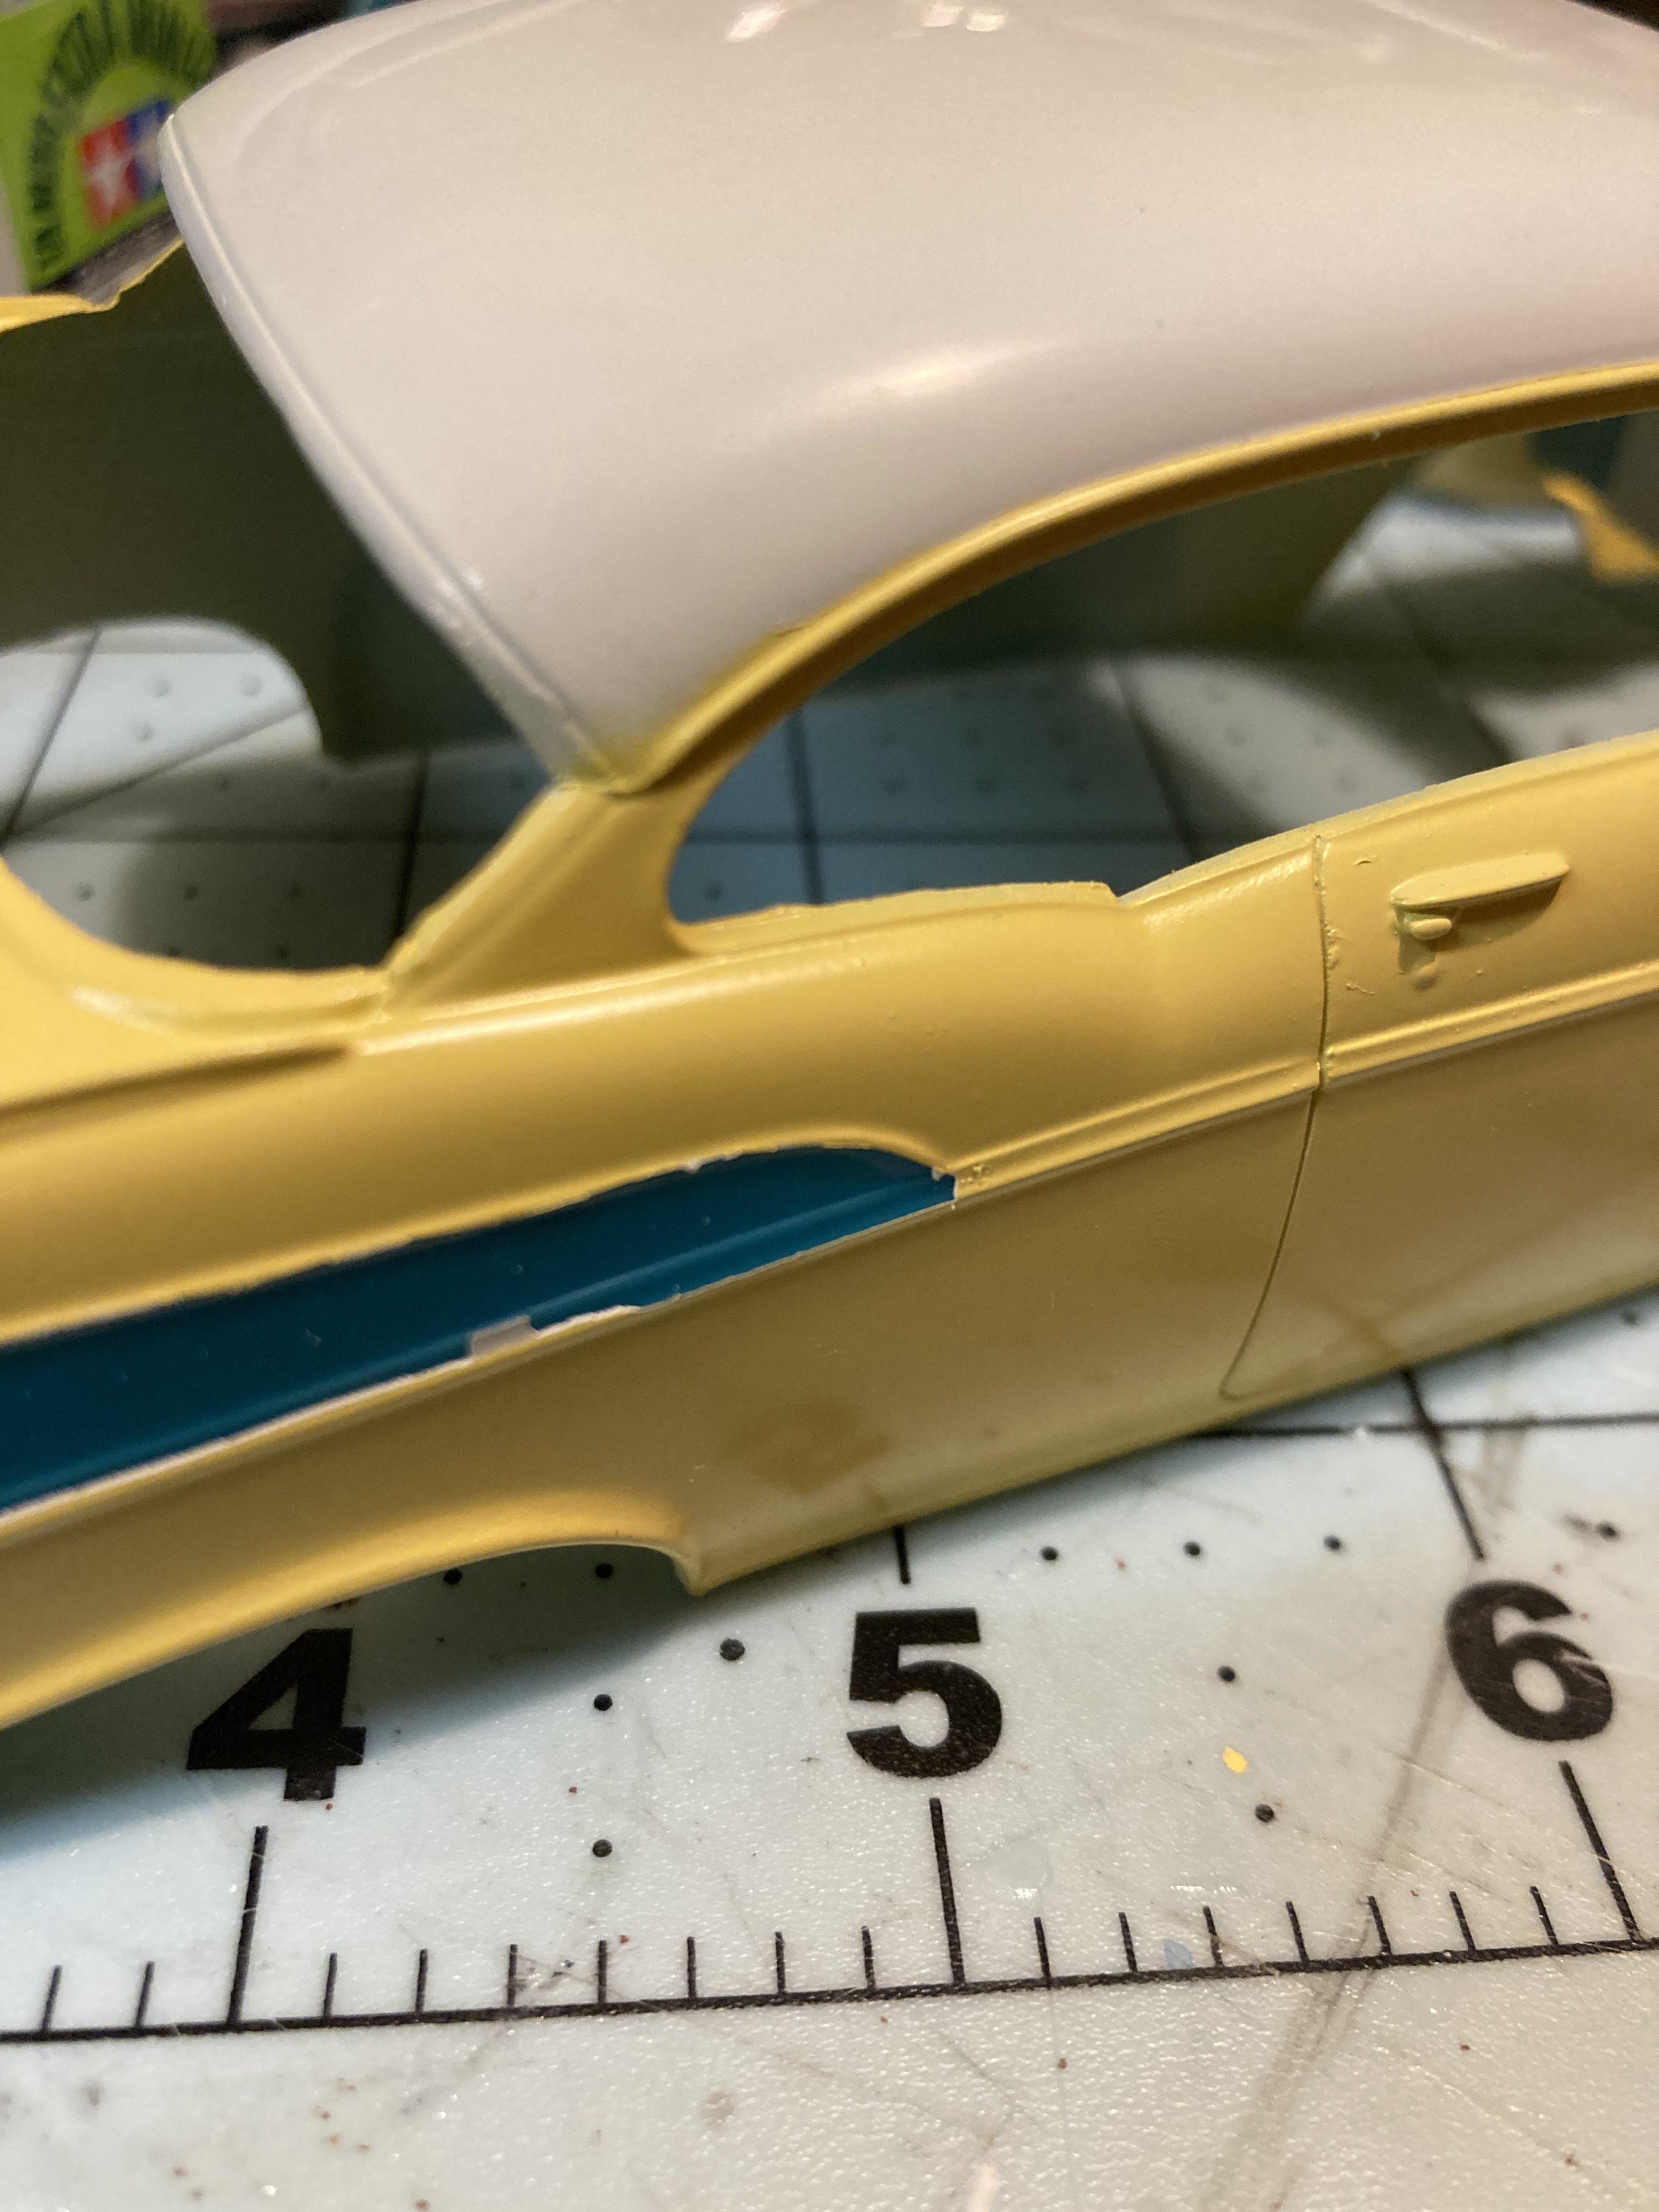
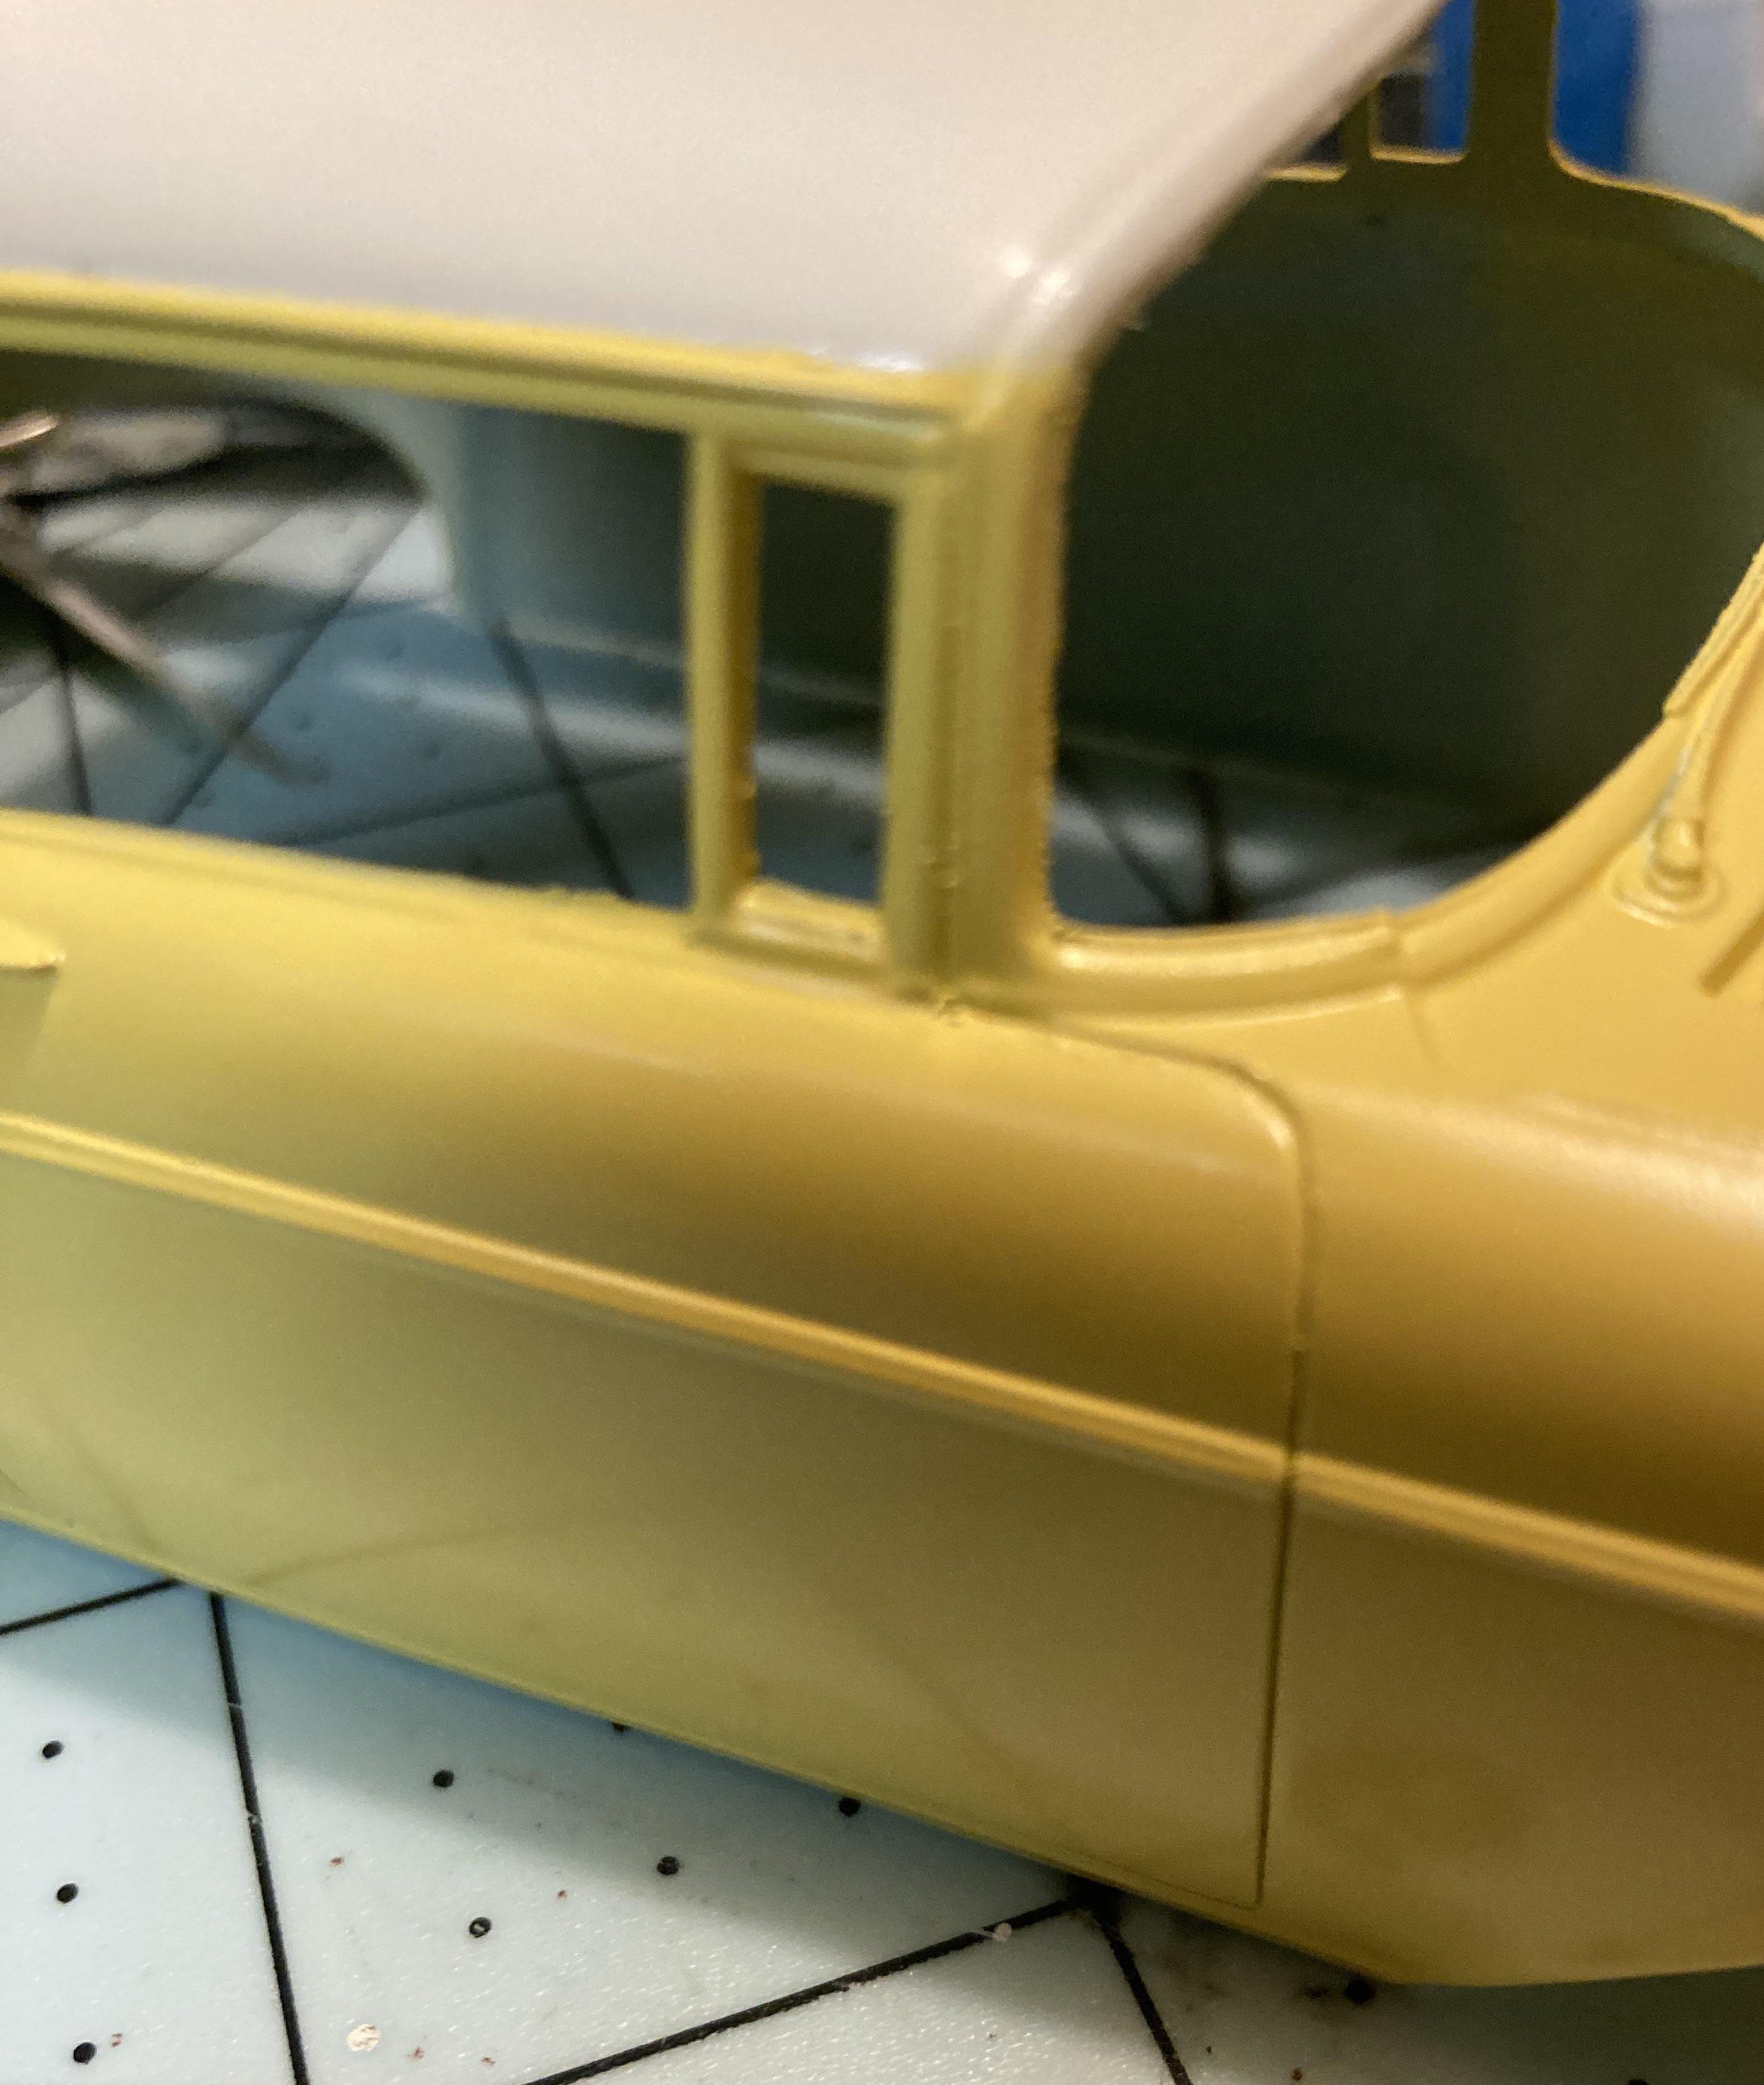
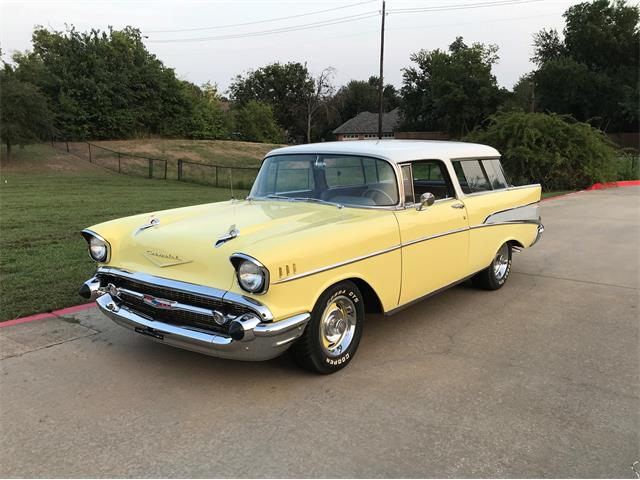
Well, it wouldn't be a good project without a setback. I had masked off the roof and quarters to leave them white and when I peeled the tape off, it peeled everything off down to bare plastic. I have no idea why that was but next time I'll try a different primer, probably Tamiya white. Here's a shot without the quarters in frame so you can better see the color scheme without the blue impacting anything For those curious, the color scheme is supposed to be like this Nomad, Colonial Cream base with India Ivory accents Nothing else to do besides strip it and start over
-
Believe me, I understand your point and I would ordinarily agree with it if I was going to make a model of a normal Pontiac. However, the thing that I want to do is make a replica of the El Catalina out of the '59 El Camino kit. I actually have a good majority of the pieces to the Pontiac that I found in a box of 60's model junk at a flea market but there was not a hood or a rear bumper. I figured that it would have been more economical to try and make a new hood and rear bumper as opposed to waiting for a reasonable promo/model to show up and hack up.
-
Thanks, for some reason, I didn't even think of Barrett Jackson
-
Thanks! I think the things I need primarily are things like the back bumper
-
Sorry to bother but one project I'd like to do... eventually... involves a '59 Pontiac and I would like to try to design and print some pieces but that brings up an issue, there really aren't that many great "dead-on" shots of these cars on the internet. So, if anyone has anything like that, that would be unimaginably helpful for me, when I get to that. Thanks
-
I dismissed this idea at first but after thinking about it, I think that a decent case could be made for a Japanese manufacturer to make a kit of a '32 Ford (Or any "old school" Hot Rod for that matter). Granted, I would not hold my breath for it. One thing in Japan, at least from what I can understand, is that they have a fondness for the "idea" of American culture. This fondness permeates things like Video Games, anime, etc. There is actually a greaser "movement" for lack of a better word, there. So, I can sorta see them making a kit of an iconic American car like a '32 Ford because let's face it, you can't get more 50/60's than a 32 Ford, except for maybe a 57 Chevy or something. The major problem would be that due to it being a foreign manufacturer, everything would be 1/24. https://www.messynessychic.com/2015/01/07/the-tokyo-subculture-of-1950s-rockabilly-gangs/ https://japanesefashionblog.wordpress.com/2013/01/31/greaser-fashion-in-japan/ dangerousminds.net/comments/retro_rockabilly_gangs_of_tokyo
-
I did some bodywork to allow the Big Block that I plan on using to fit more comfortably. Here, I have grafted in the tip of a plastic spoon to make a recessed firewall. I also grafted in a piece of plastic spoon on the interior tub to mate up with the recess in the firewall Don't worry, by the way, that is not the final bodywork
-
I had forgotten to post these yesterday, The body has been primed! Although this coat has been sanded down, reprimed and the body is actually in it's first coat of paint. I didn't take a picture of that though. Don't worry, the molding lines and what's left of the V have been sanded off.
-
Safety in the 50's
T-Ray replied to TarheelRick's topic in General Automotive Talk (Trucks and Cars)
See, I don't know. I feel like there's a fair amount of nuance in this situation. Like, I agree that dropping the skin of a '57 Chevy over a new Corvette is kinda stupid, why not just drive the Corvette at that point? But like, installing IFS in an Advanced Design pickup is something I can understand so that it will ride more like the cruiser you want instead of an old farm truck. However, that's entirely subjective. -
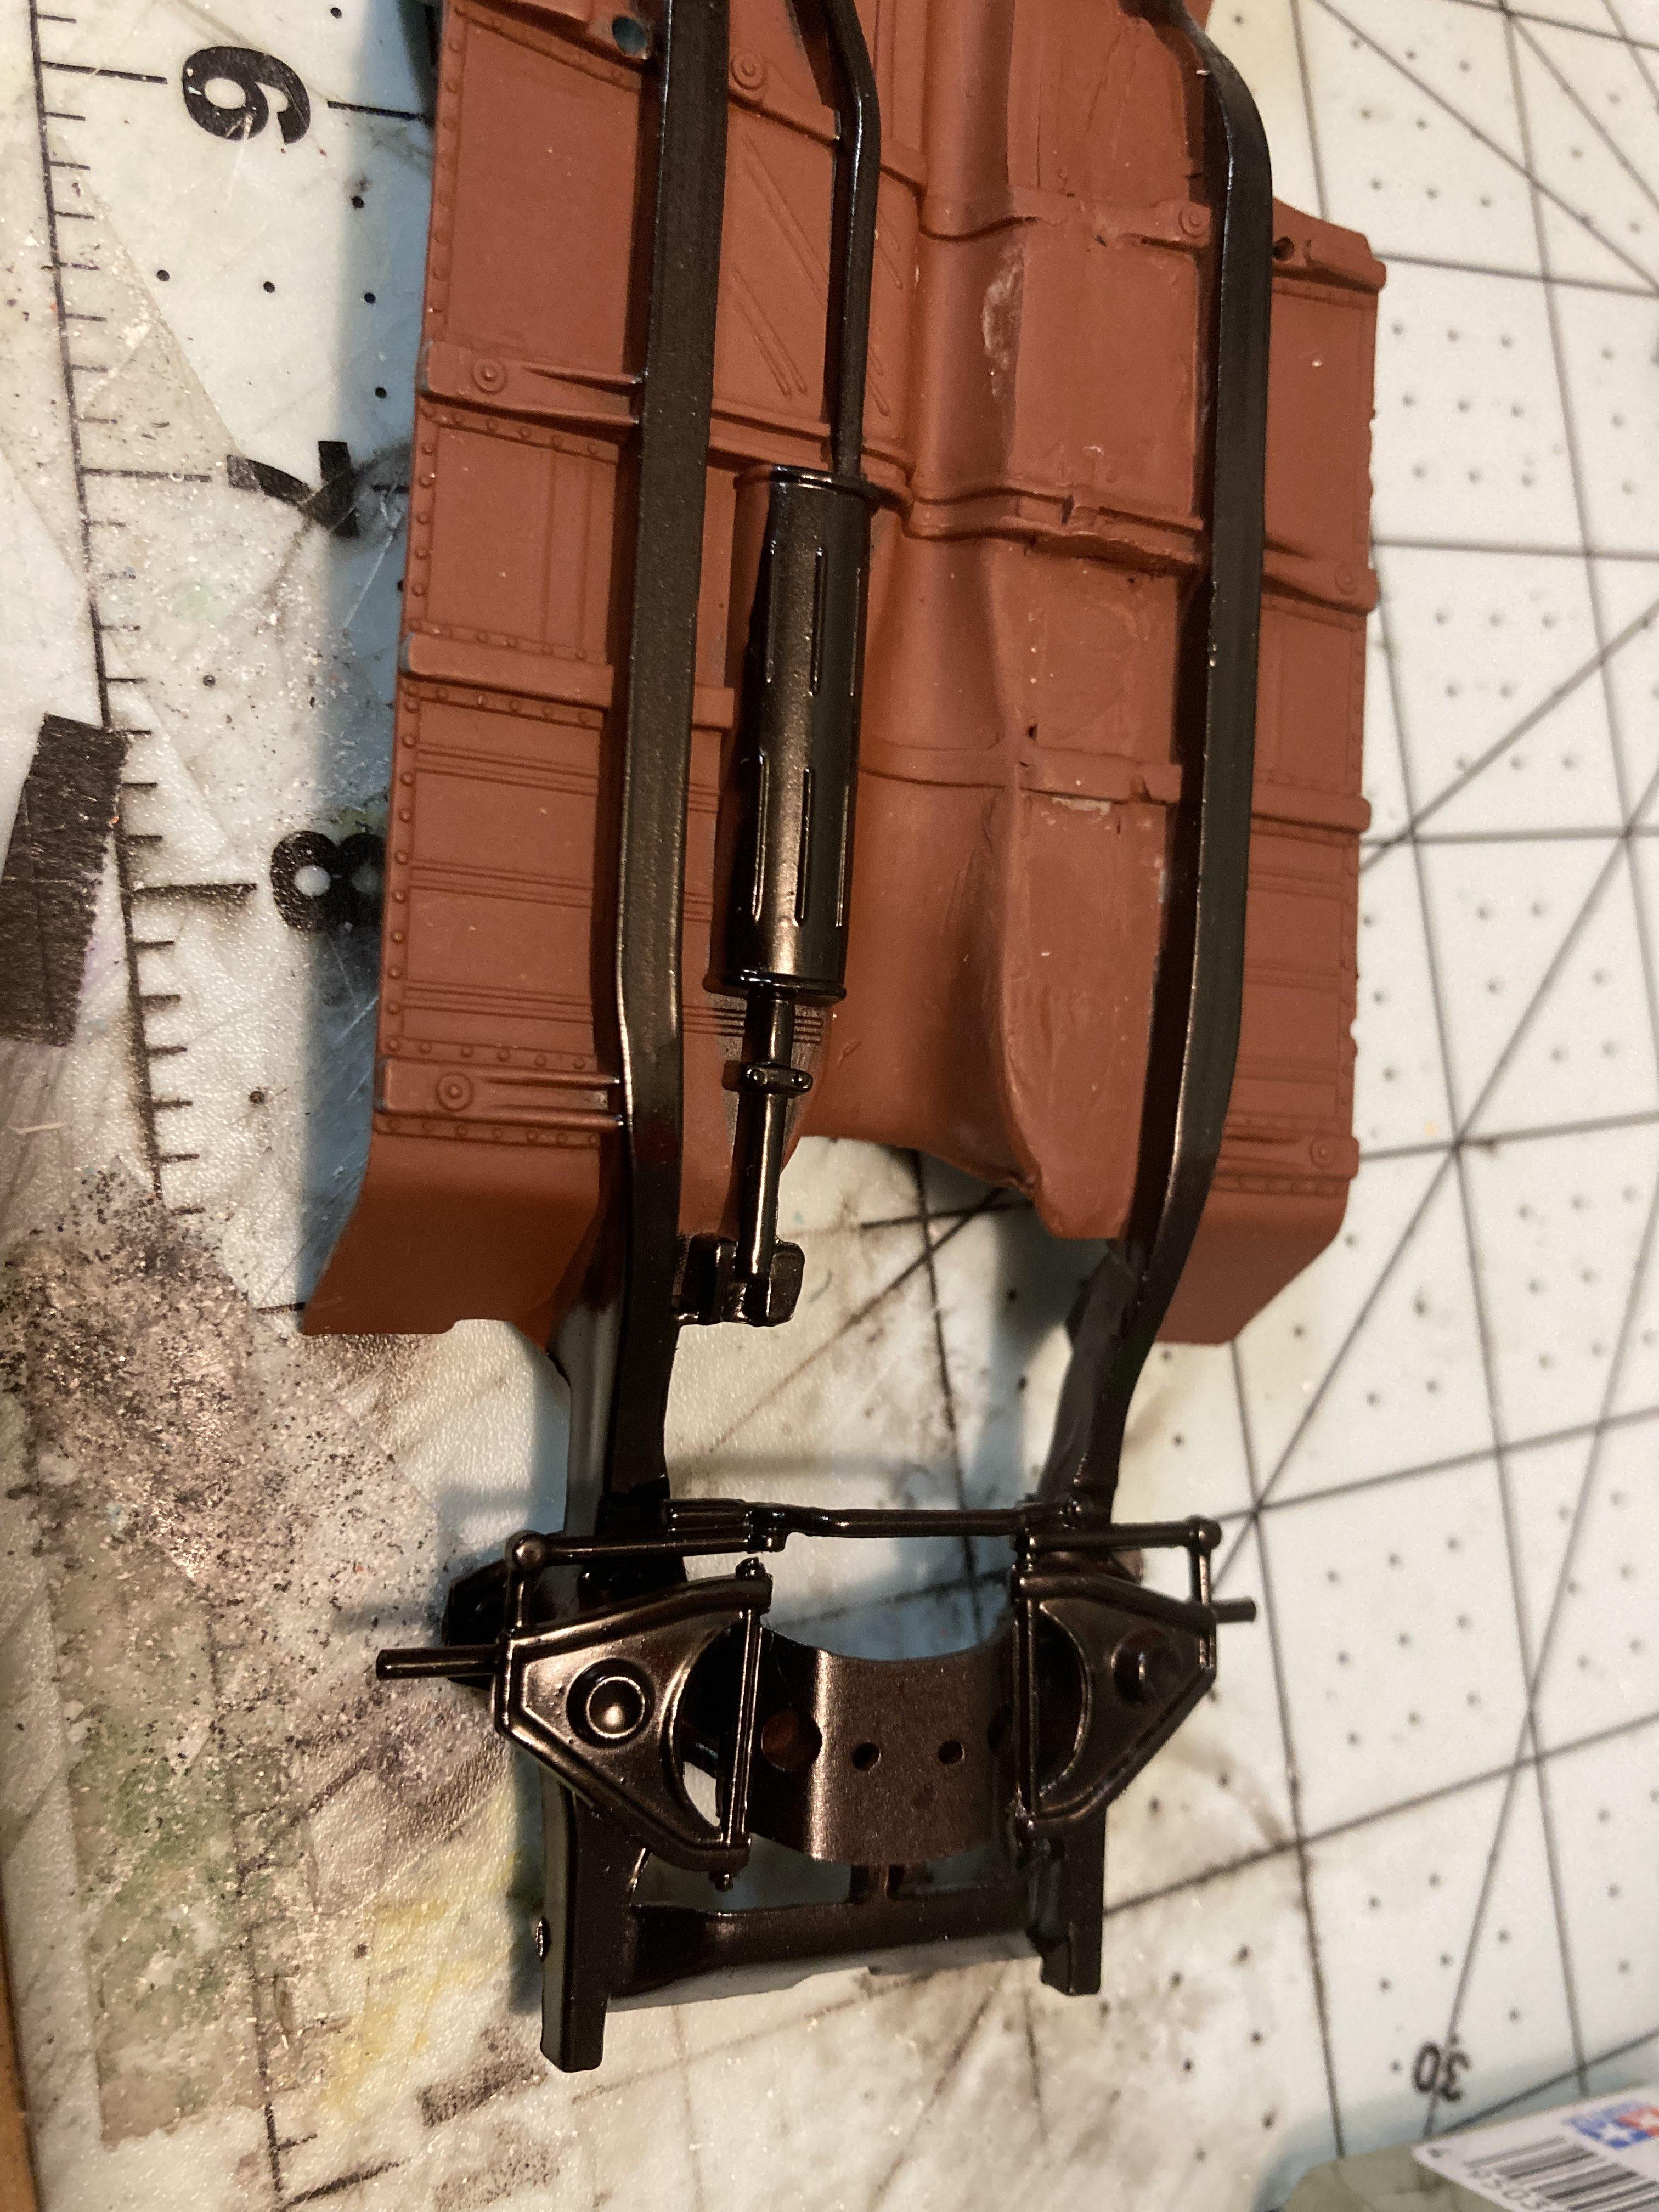
I have been working on this project, I've just forgotten to take pictures. What I did take a picture of was the frame after being painted, although I forgot to take a picture of the exhaust painted up. For the record, I have started a thread for the second car as well Thanks, I wanted the car to represent the average grocery-getter second car and I thought the V8 would have been too much for that.
-
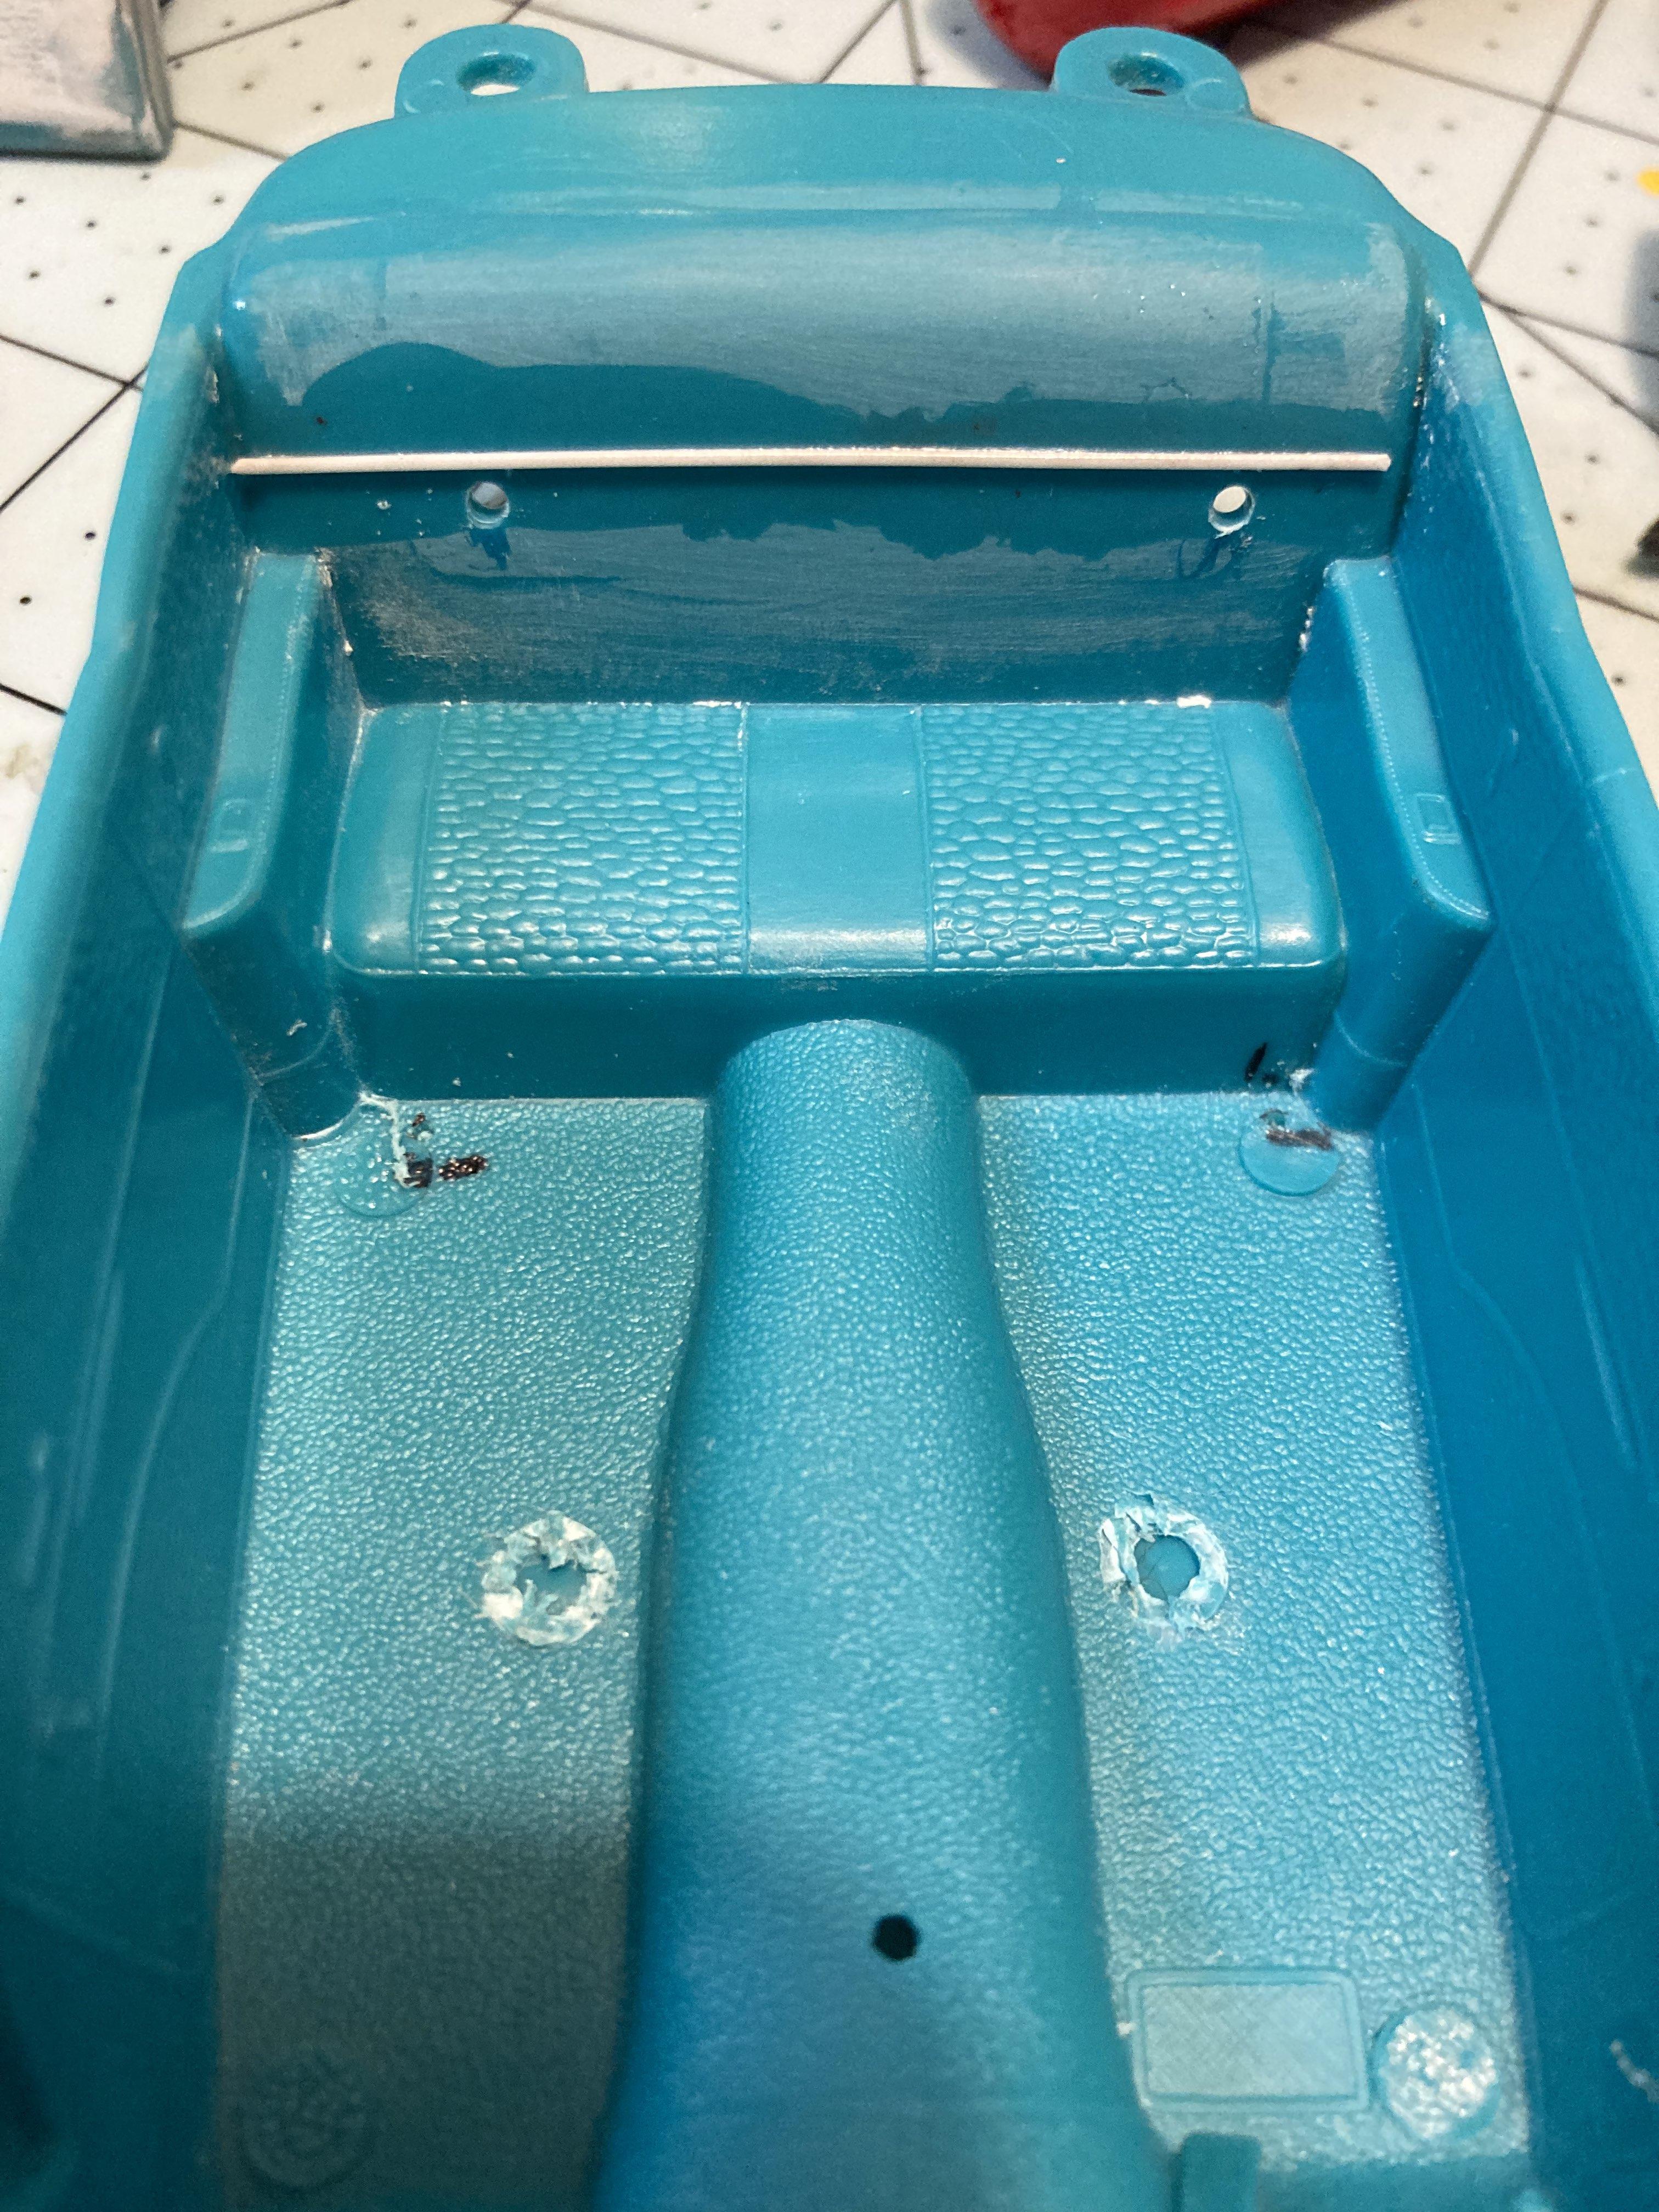
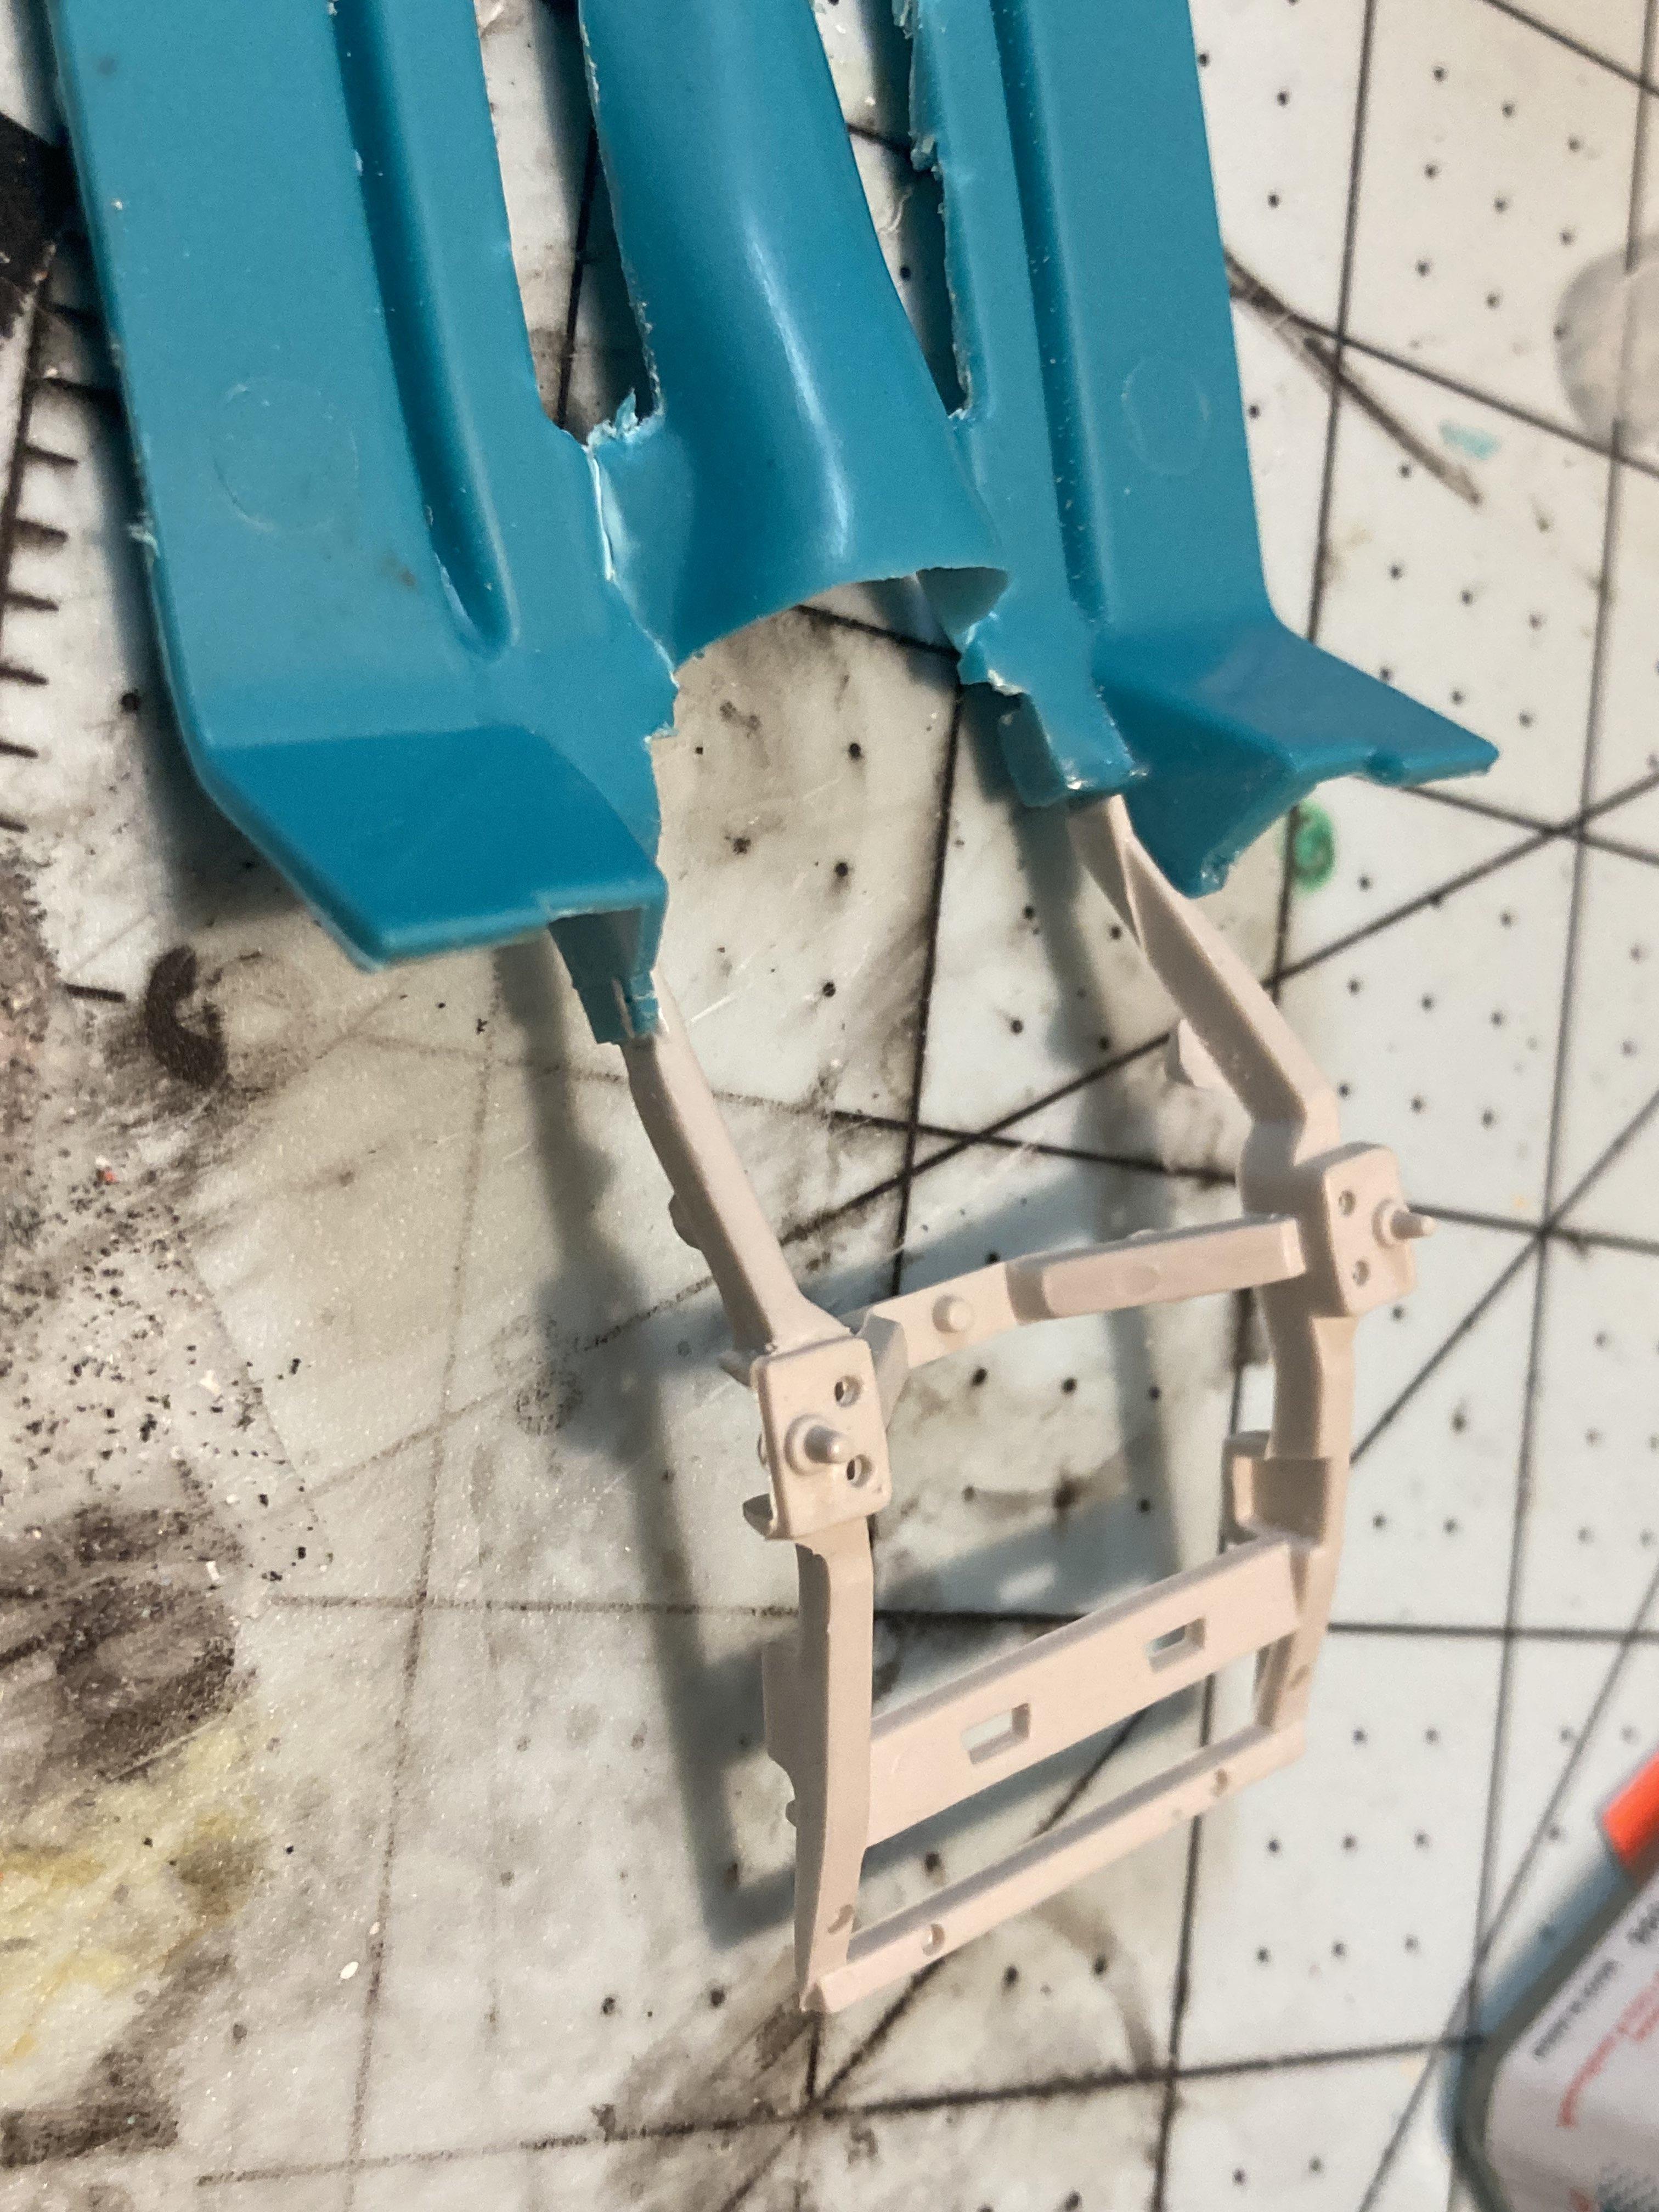
I also have started on the interior Here's the interior tub after I shaved the details off the upper half of the seat, installed the 210 trim and drilled holes for the roll bar to fit into. The bottom half stayed as a Bel Air because I didn't want to sand anymore but for the sake of the story, I'll just say that somewhere along the lines, the bottom half of the seat had gotten torn and ruined, and when the guy who made the car into a gasser got it, he just took the seat out of a junkyard Bel Air. I also removed the posts for the bench seat as I plan to install buckets. These are the seats I plan on using. They're from the 70 1/2 Z28 which I know isn't accurate for a car built in the mid to late '60's but that's what I had and I think they fit the bill. Lastly, I have modified the roll bar from the Old Pro Nova so that it fits better in the Chevy.
-
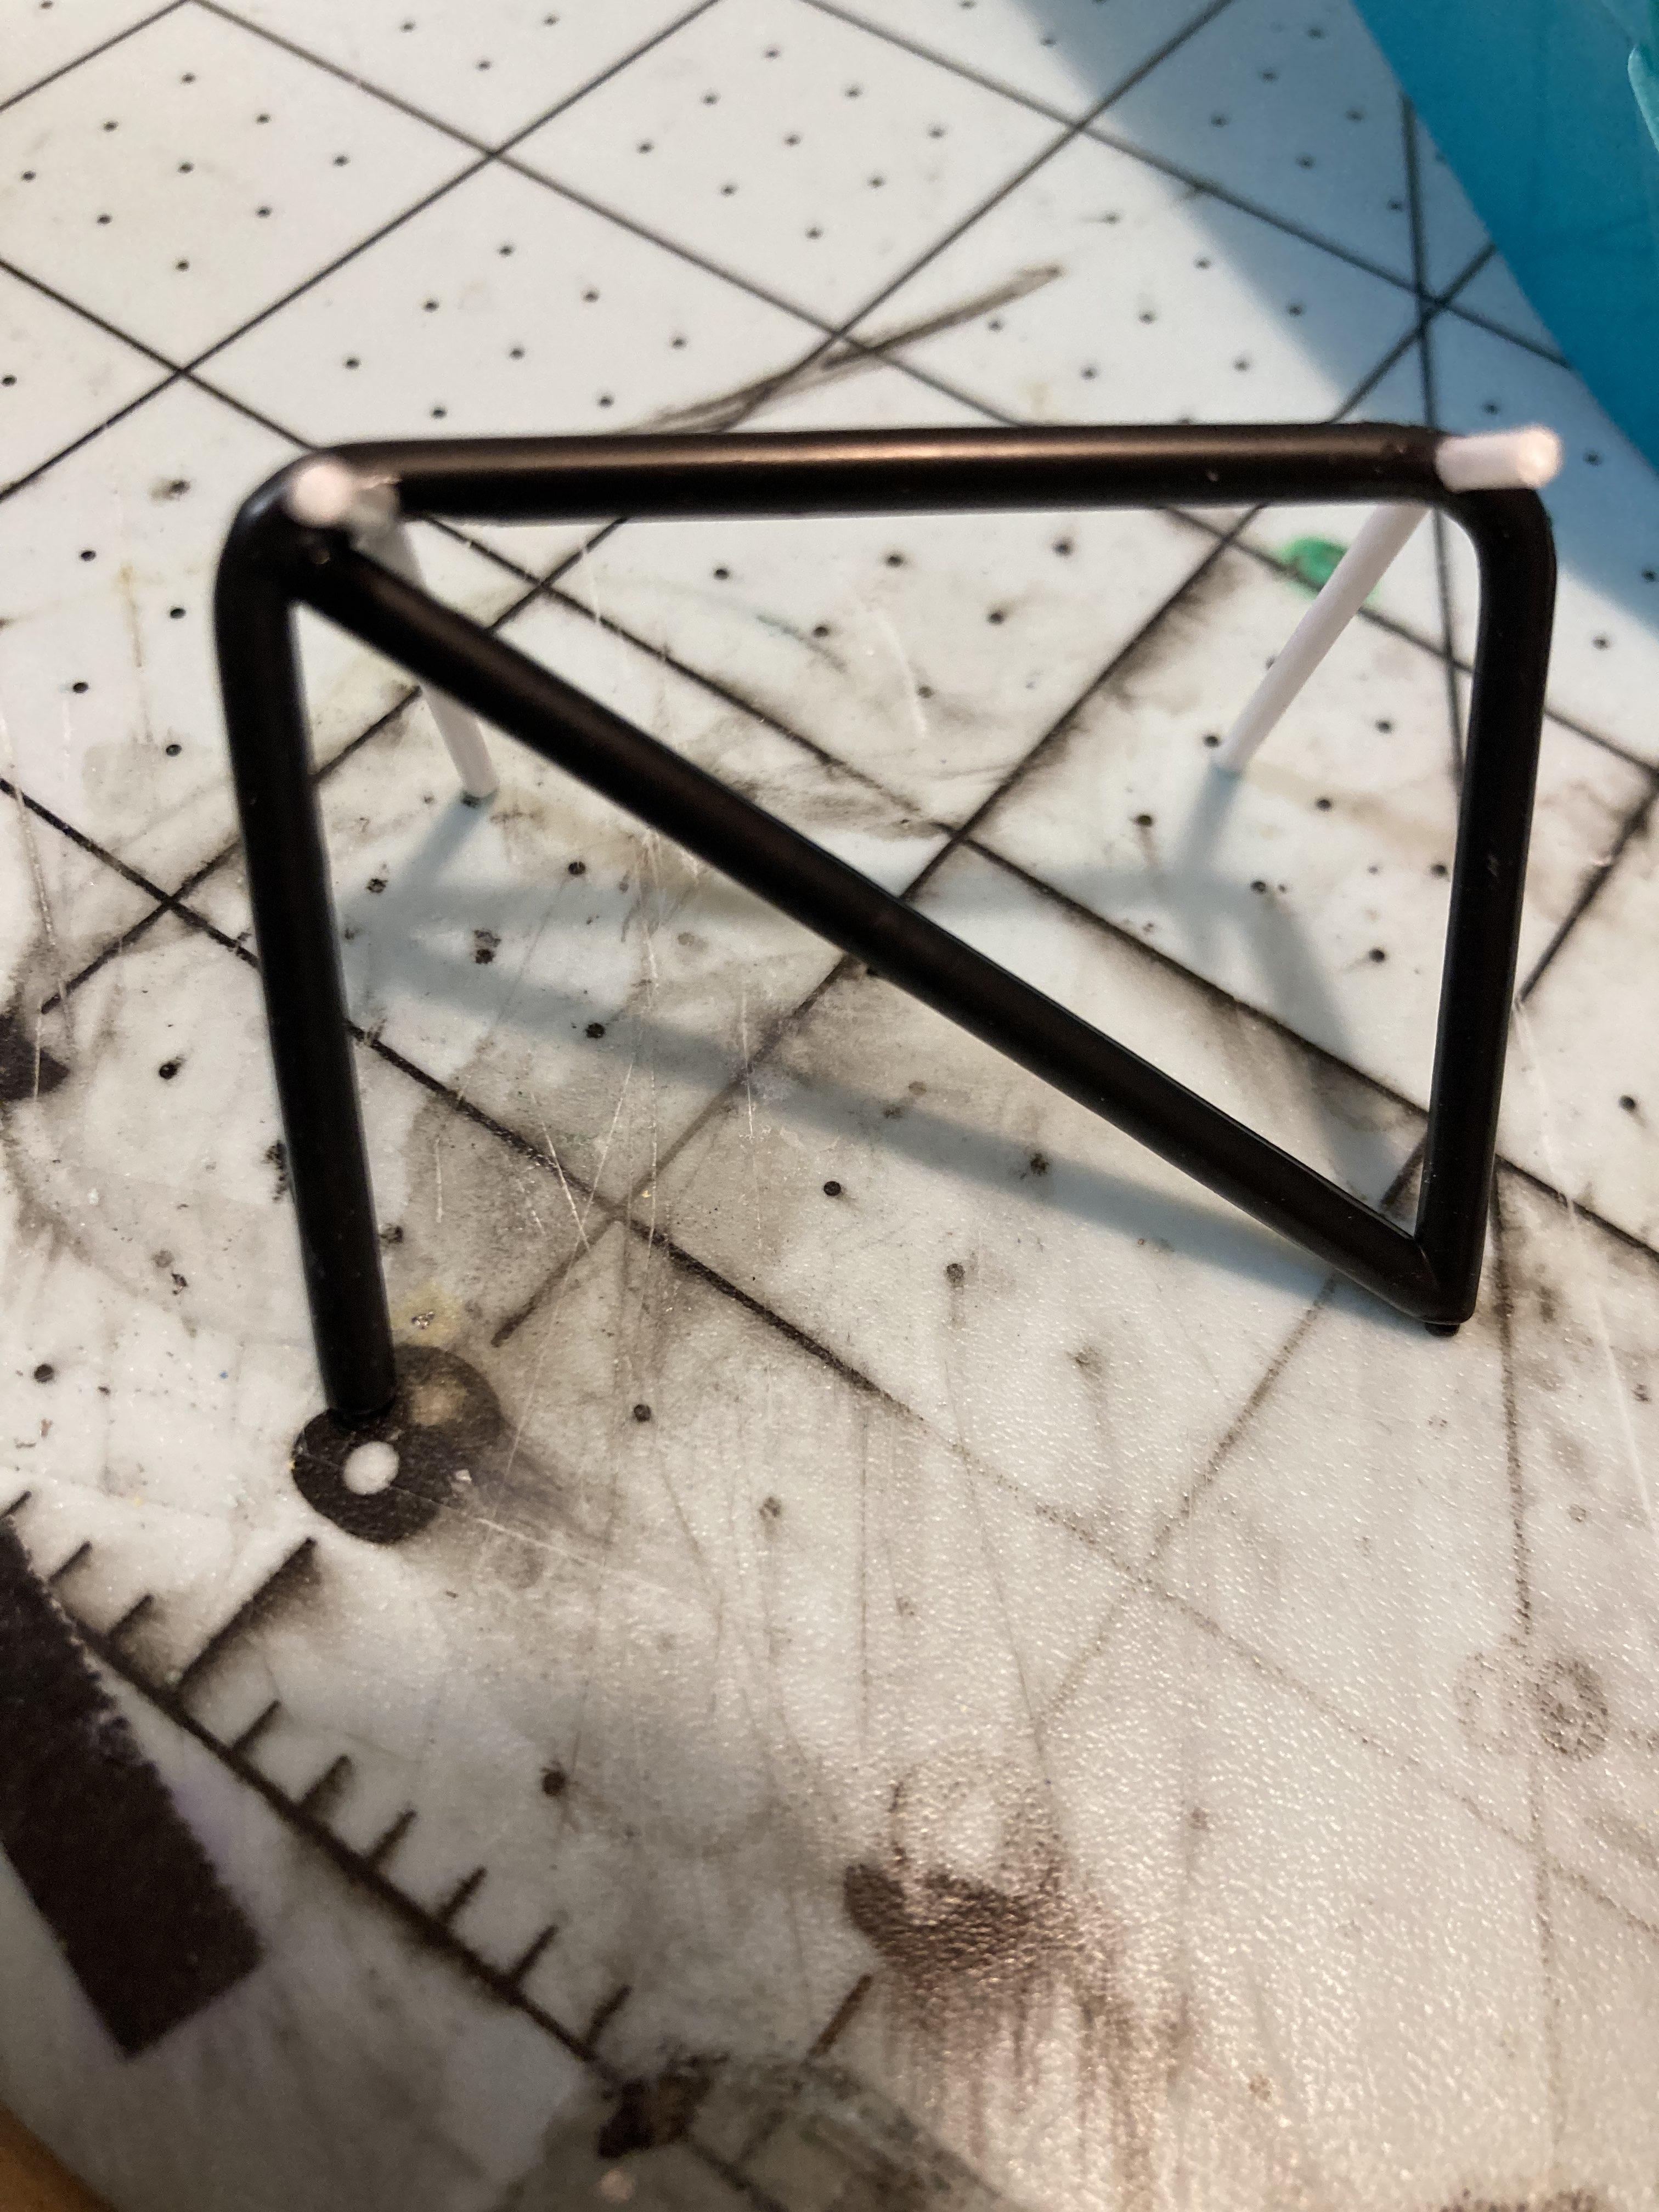
This is the sister build to the other '57 Chevy that I am working on. The first car is supposed to represent a '57 Chevy ordered by a man for his wife as it came from the dealer and the second, this car, is supposed to that same car after being made into a gasser in the 1960's. Anyway! The first thing that I had done was to cut the frame as I had planned to make a new front for it. This was a mistake on my part, I was not happy with the front that I had made for it and after viewing the Flintstone Flyer thread, I realized that I didn't have to do that So, I cut the front off a Nascar Lumina and grafted it onto the '57 Chevy frame. Here is the frame after removing the section that the Nascar Radiator mounted to. You can also see the steering wheel for the stock Chevy.