Andria H
-
Posts
279 -
Joined
-
Last visited
Content Type
Profiles
Forums
Events
Gallery
Everything posted by Andria H
-

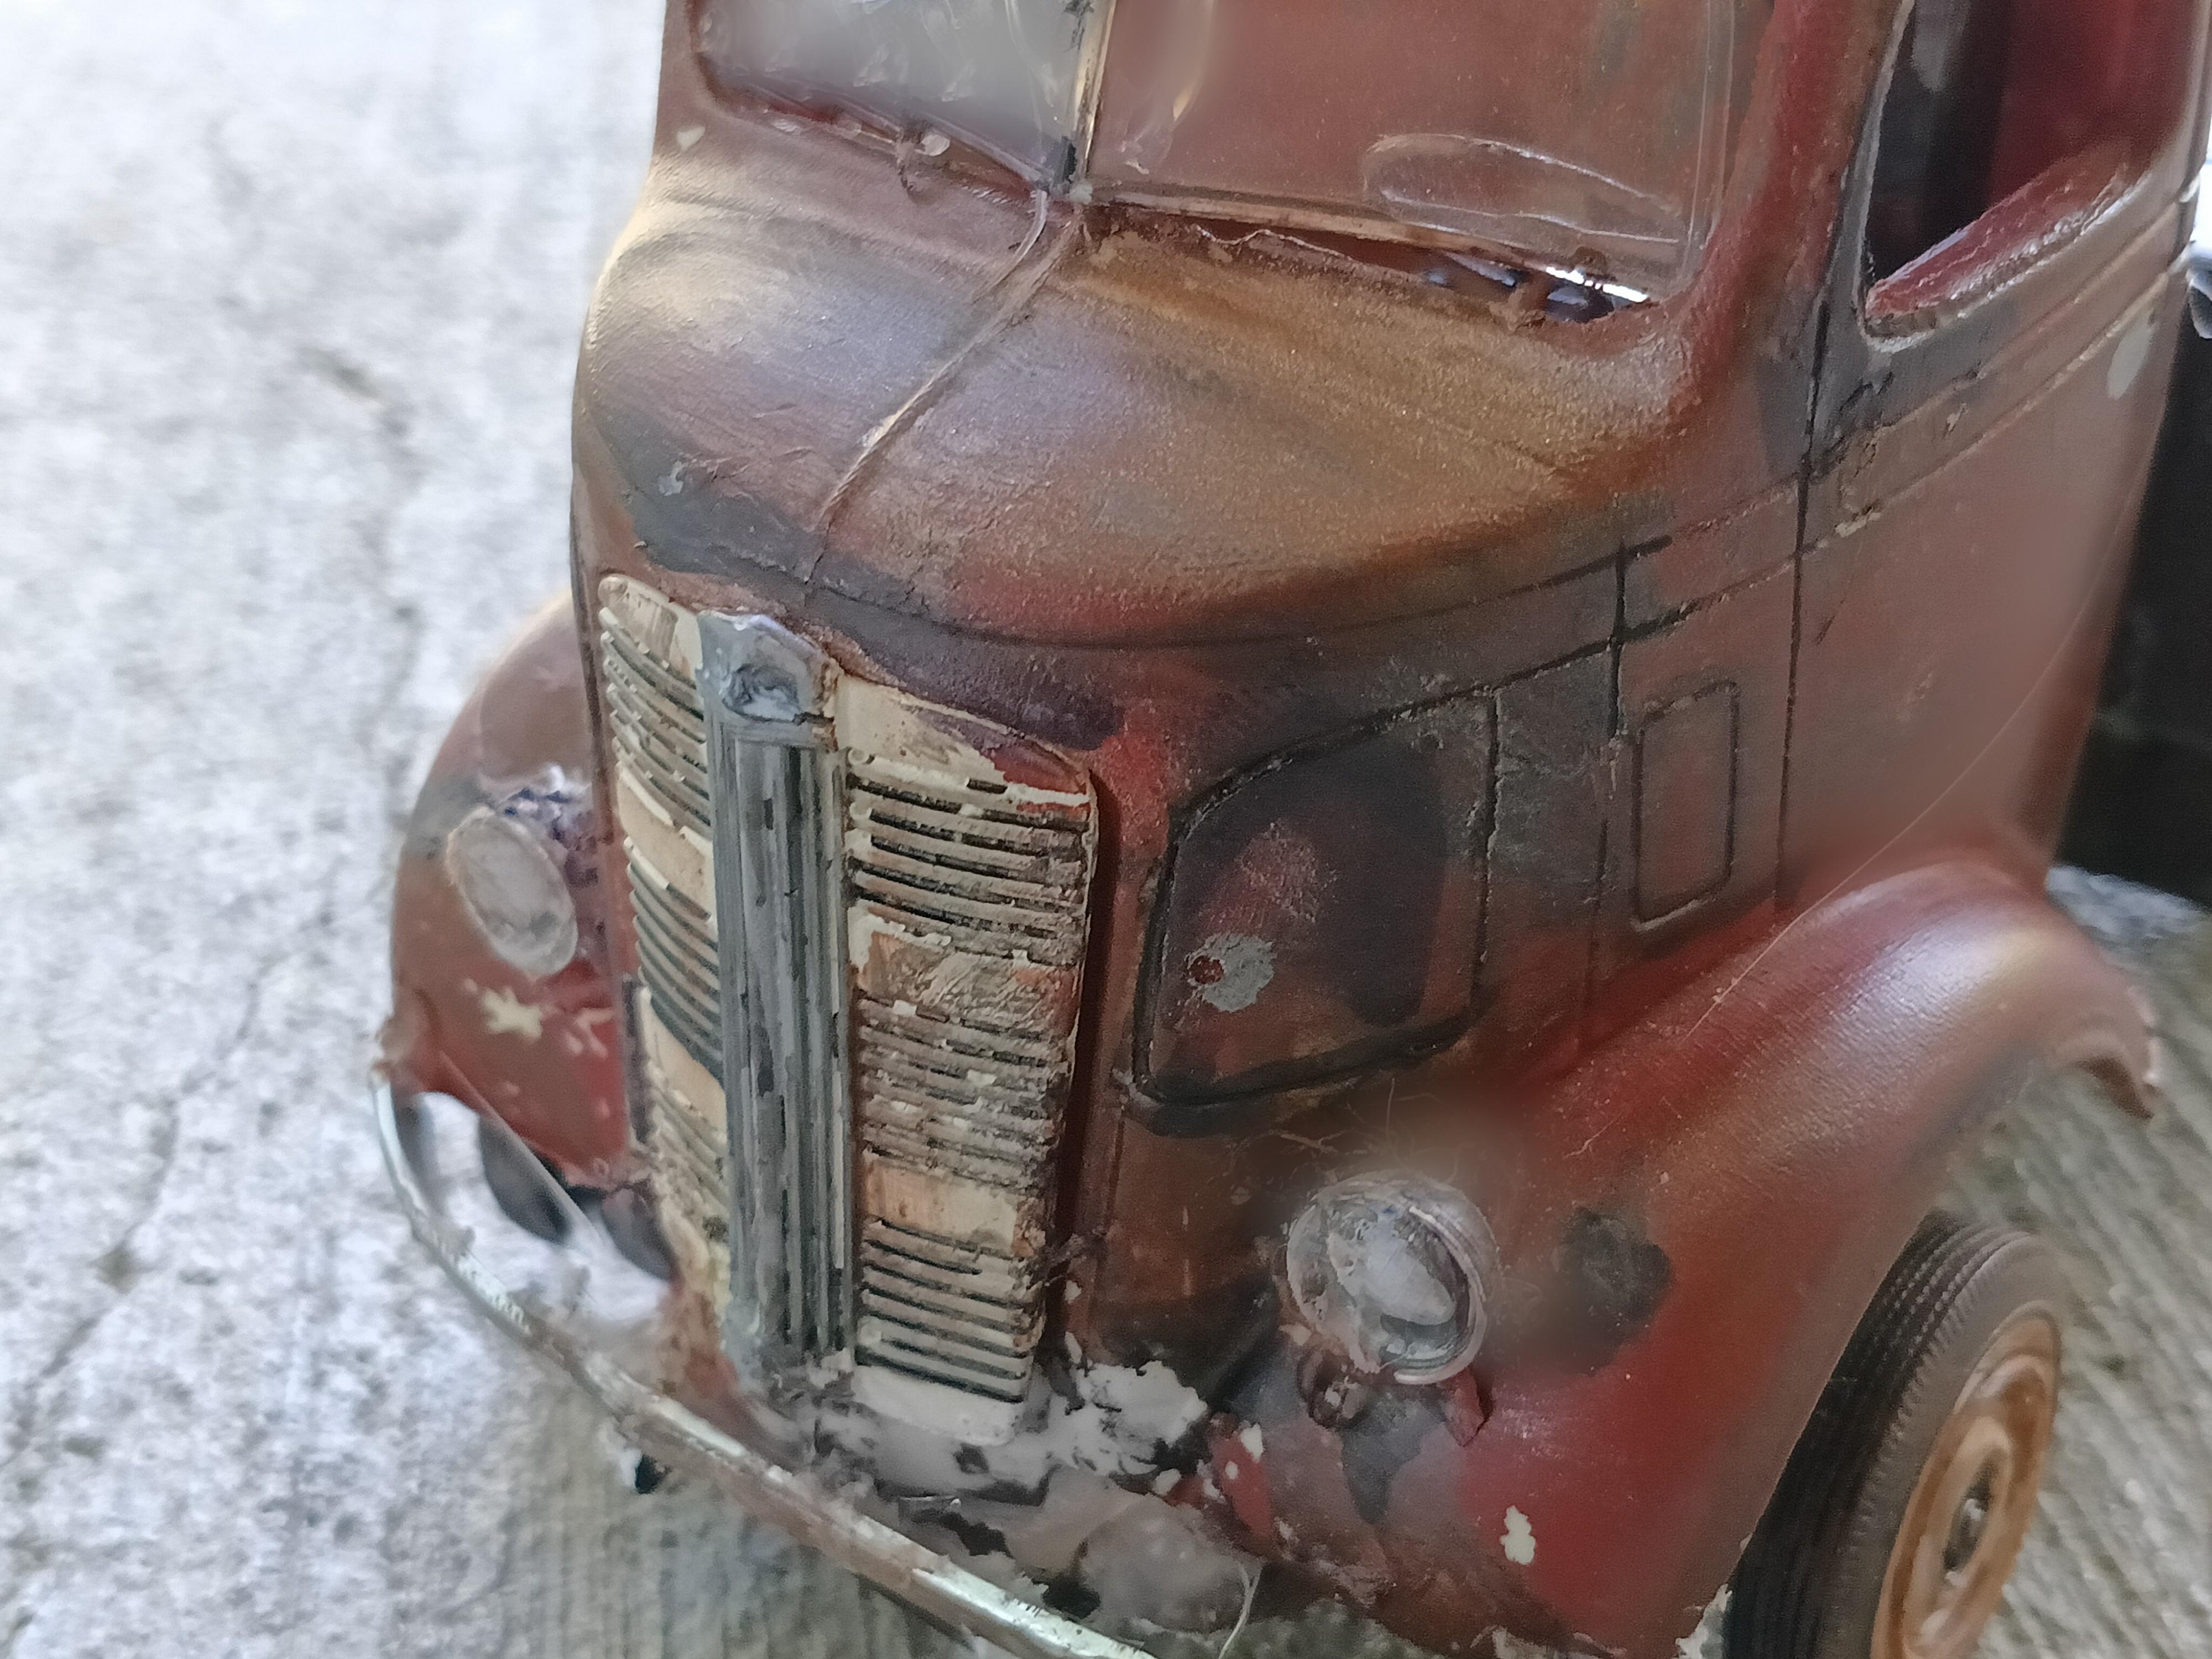
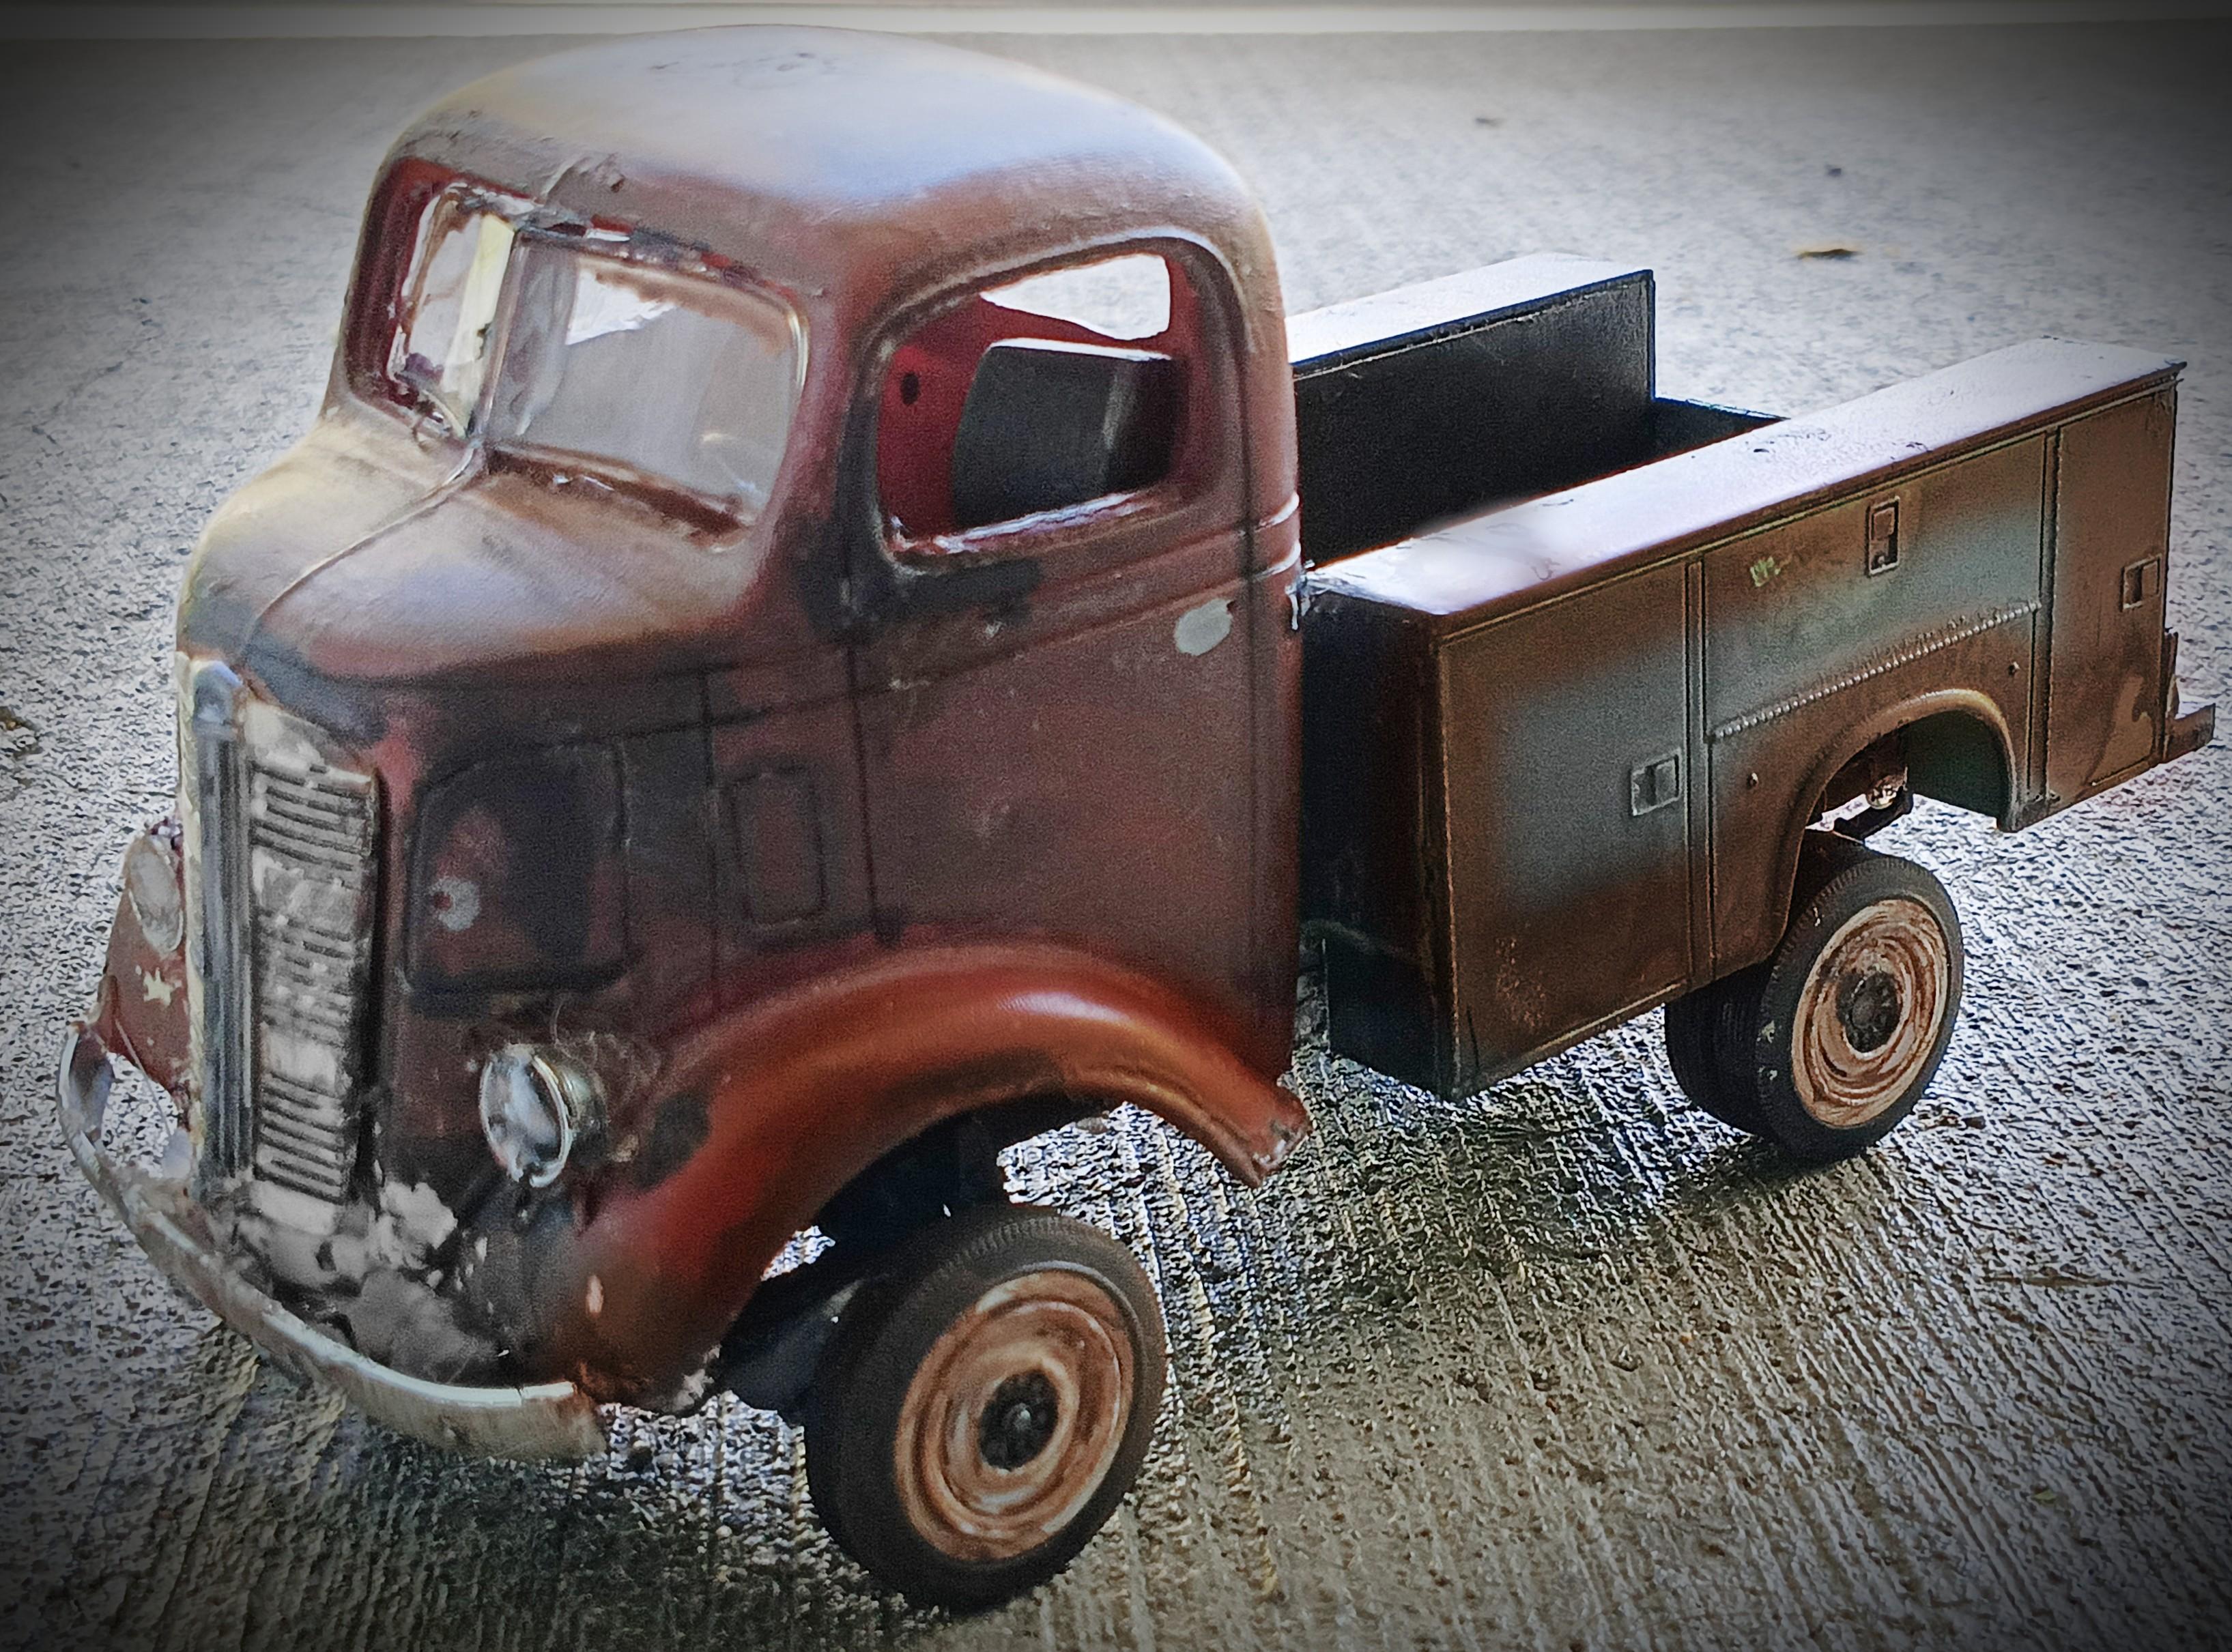
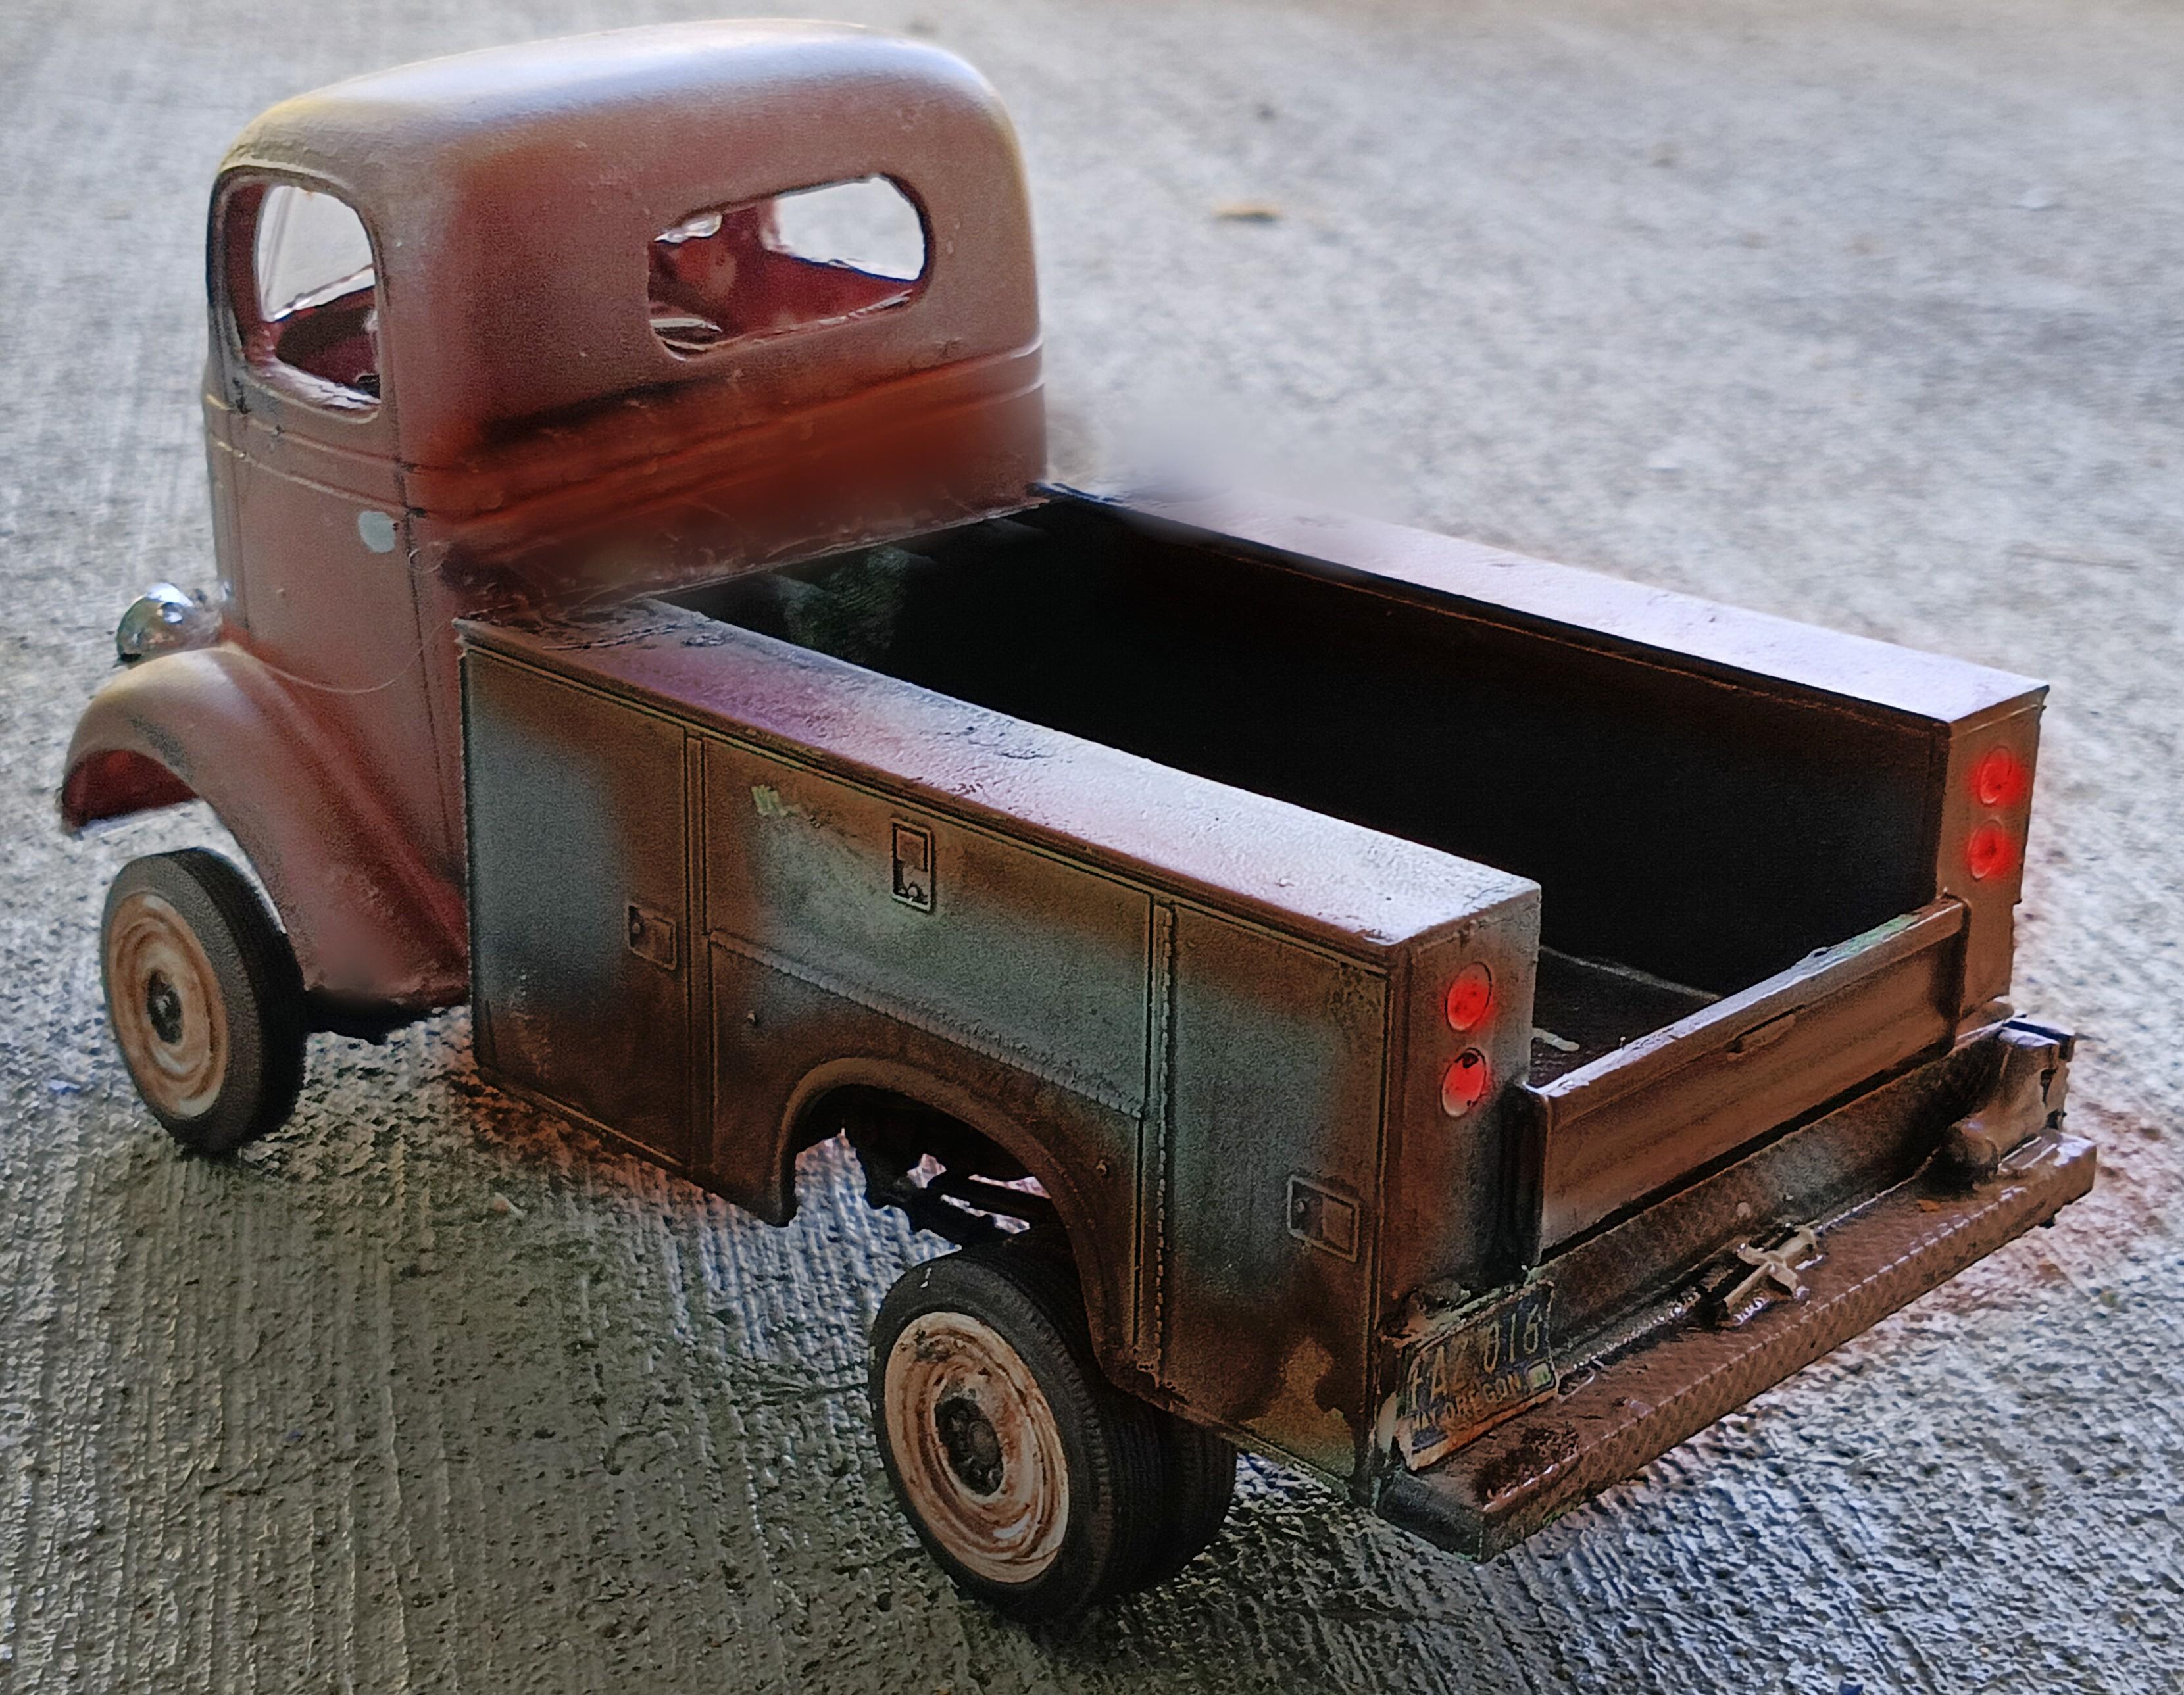
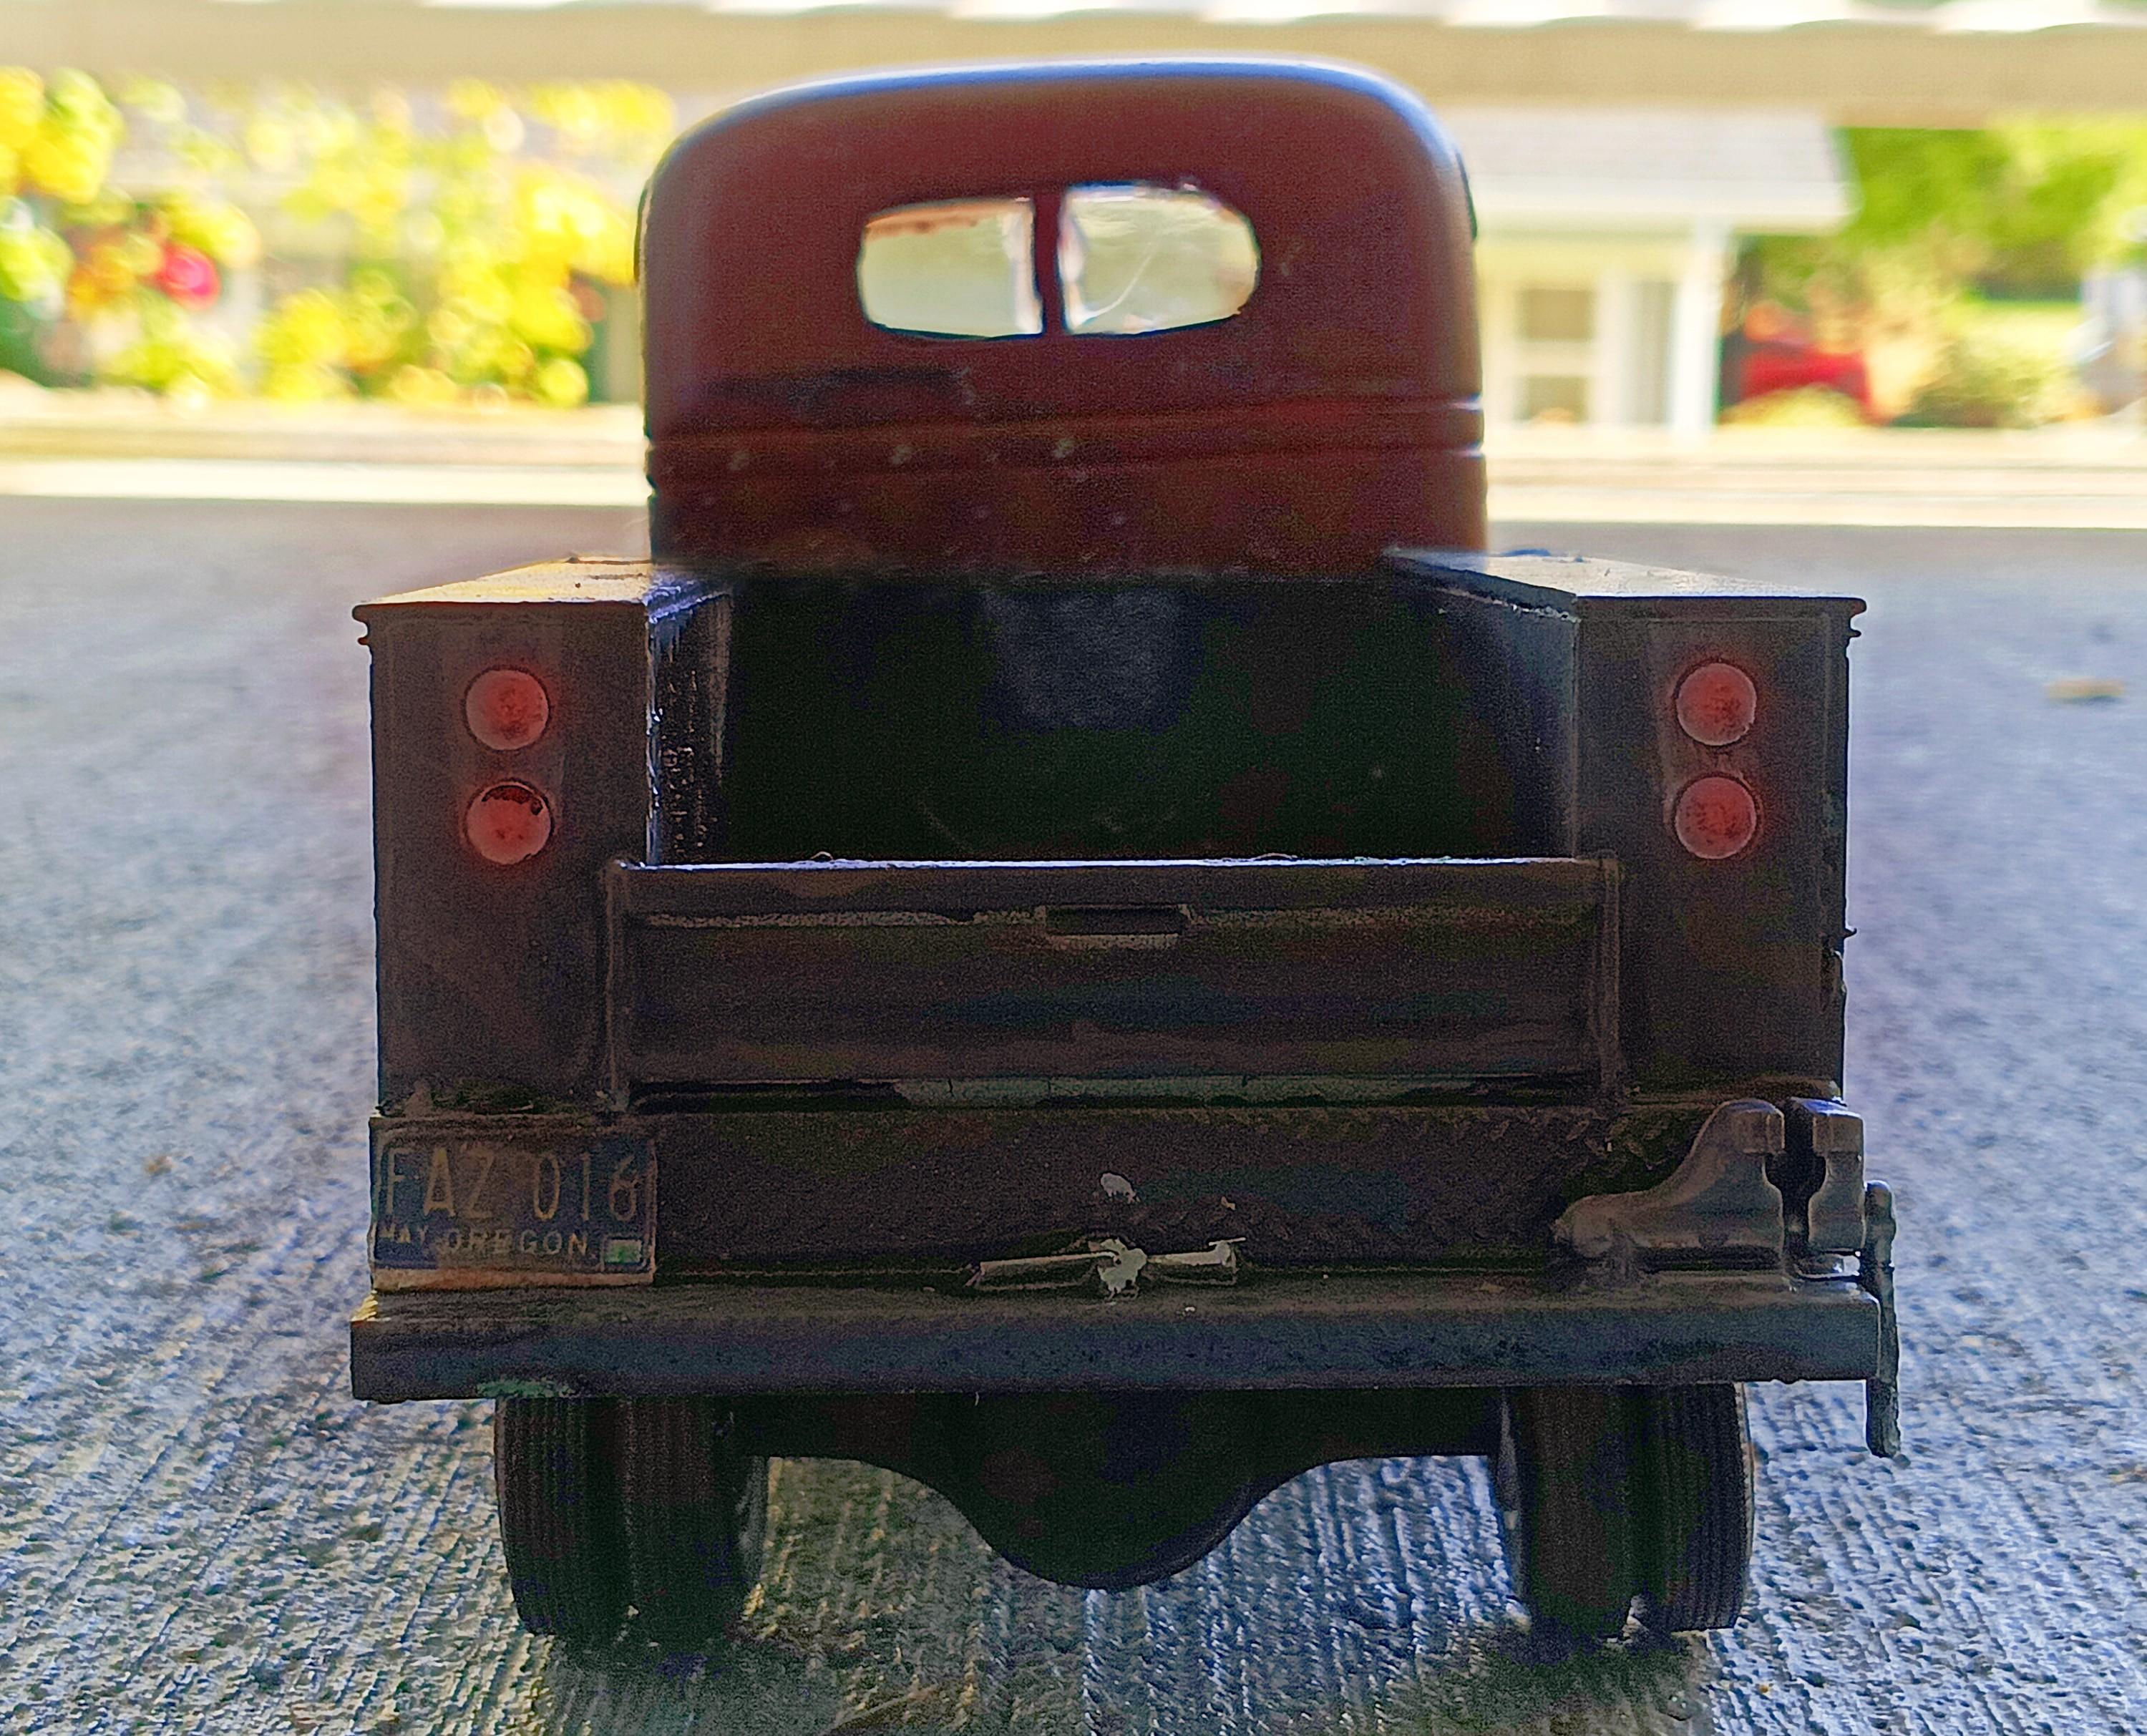
1937 GMC COE Service Truck
Andria H replied to Andria H's topic in Model Trucks: Pickups, Vans, SUVs, Light Commercial
thank you! -
1937 GMC COE Service Truck
Andria H replied to Andria H's topic in Model Trucks: Pickups, Vans, SUVs, Light Commercial
thank you Jon! -
1937 GMC COE Service Truck
Andria H replied to Andria H's topic in Model Trucks: Pickups, Vans, SUVs, Light Commercial
thanks Michael! -
1937 GMC COE Service Truck
Andria H replied to Andria H's topic in Model Trucks: Pickups, Vans, SUVs, Light Commercial
extra, from an MPC Racers Wedge -
appreciate it!
-
1937 GMC COE Service Truck
Andria H replied to Andria H's topic in Model Trucks: Pickups, Vans, SUVs, Light Commercial
thank you Donato -
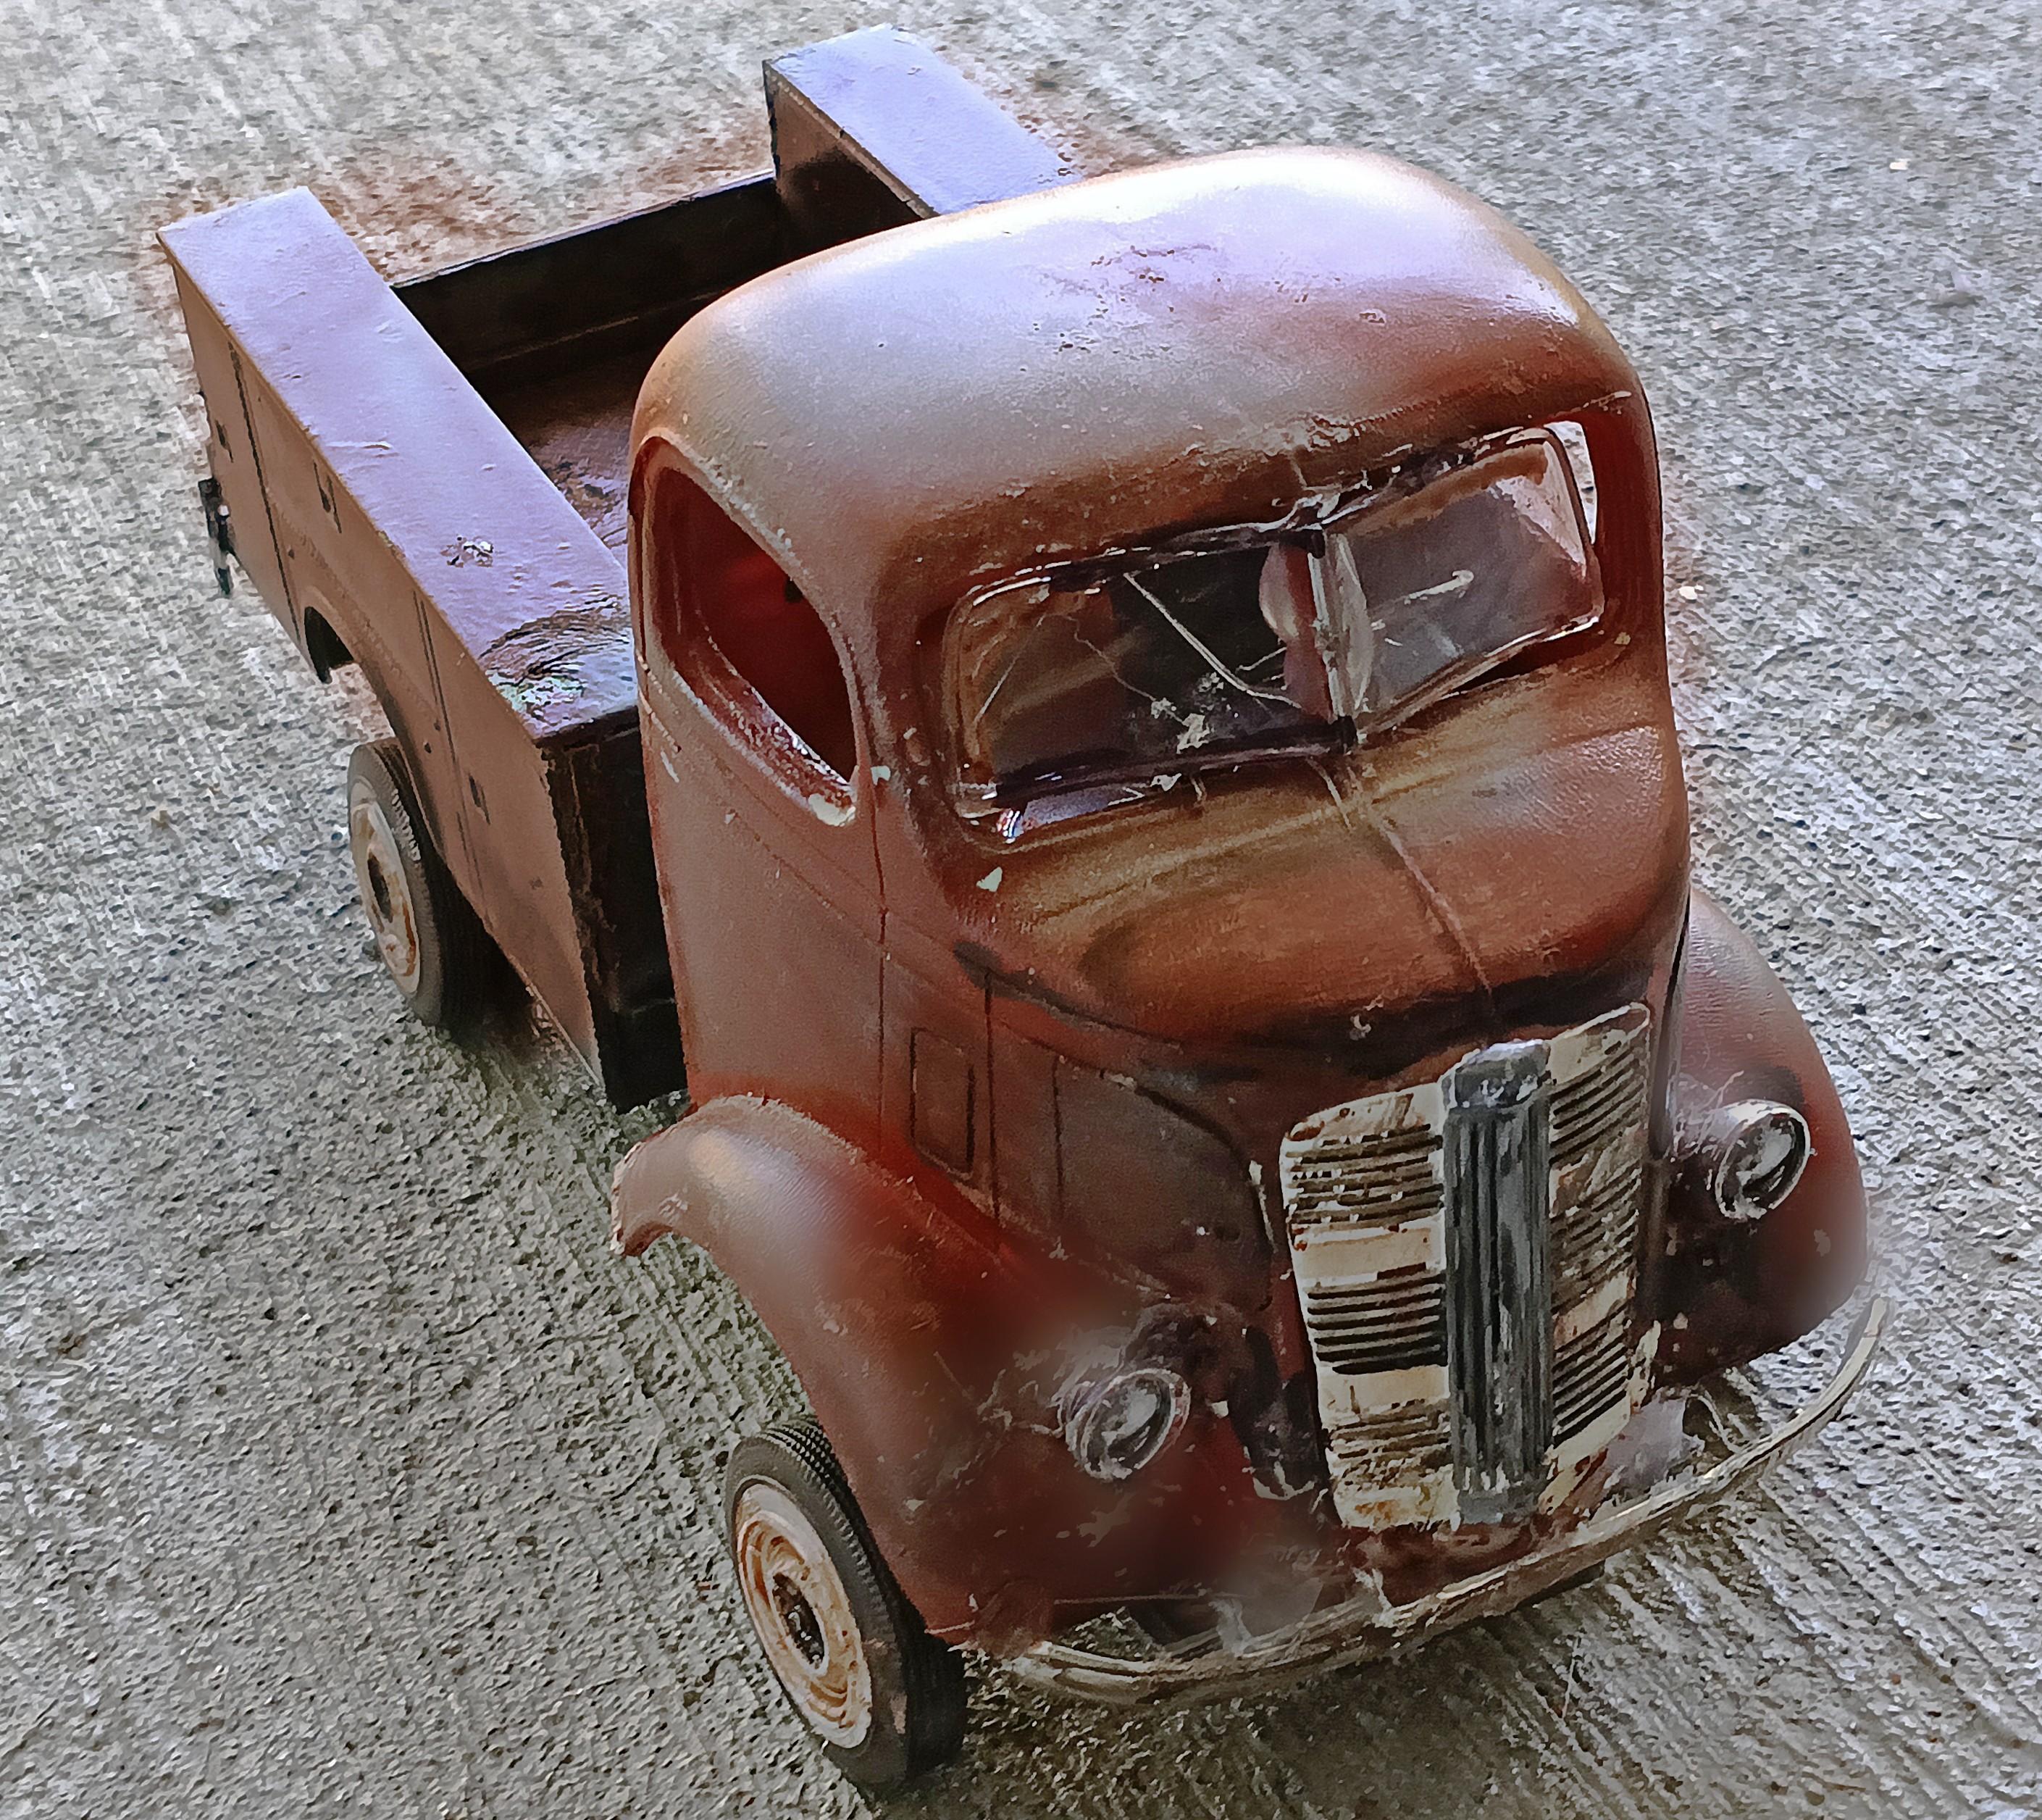
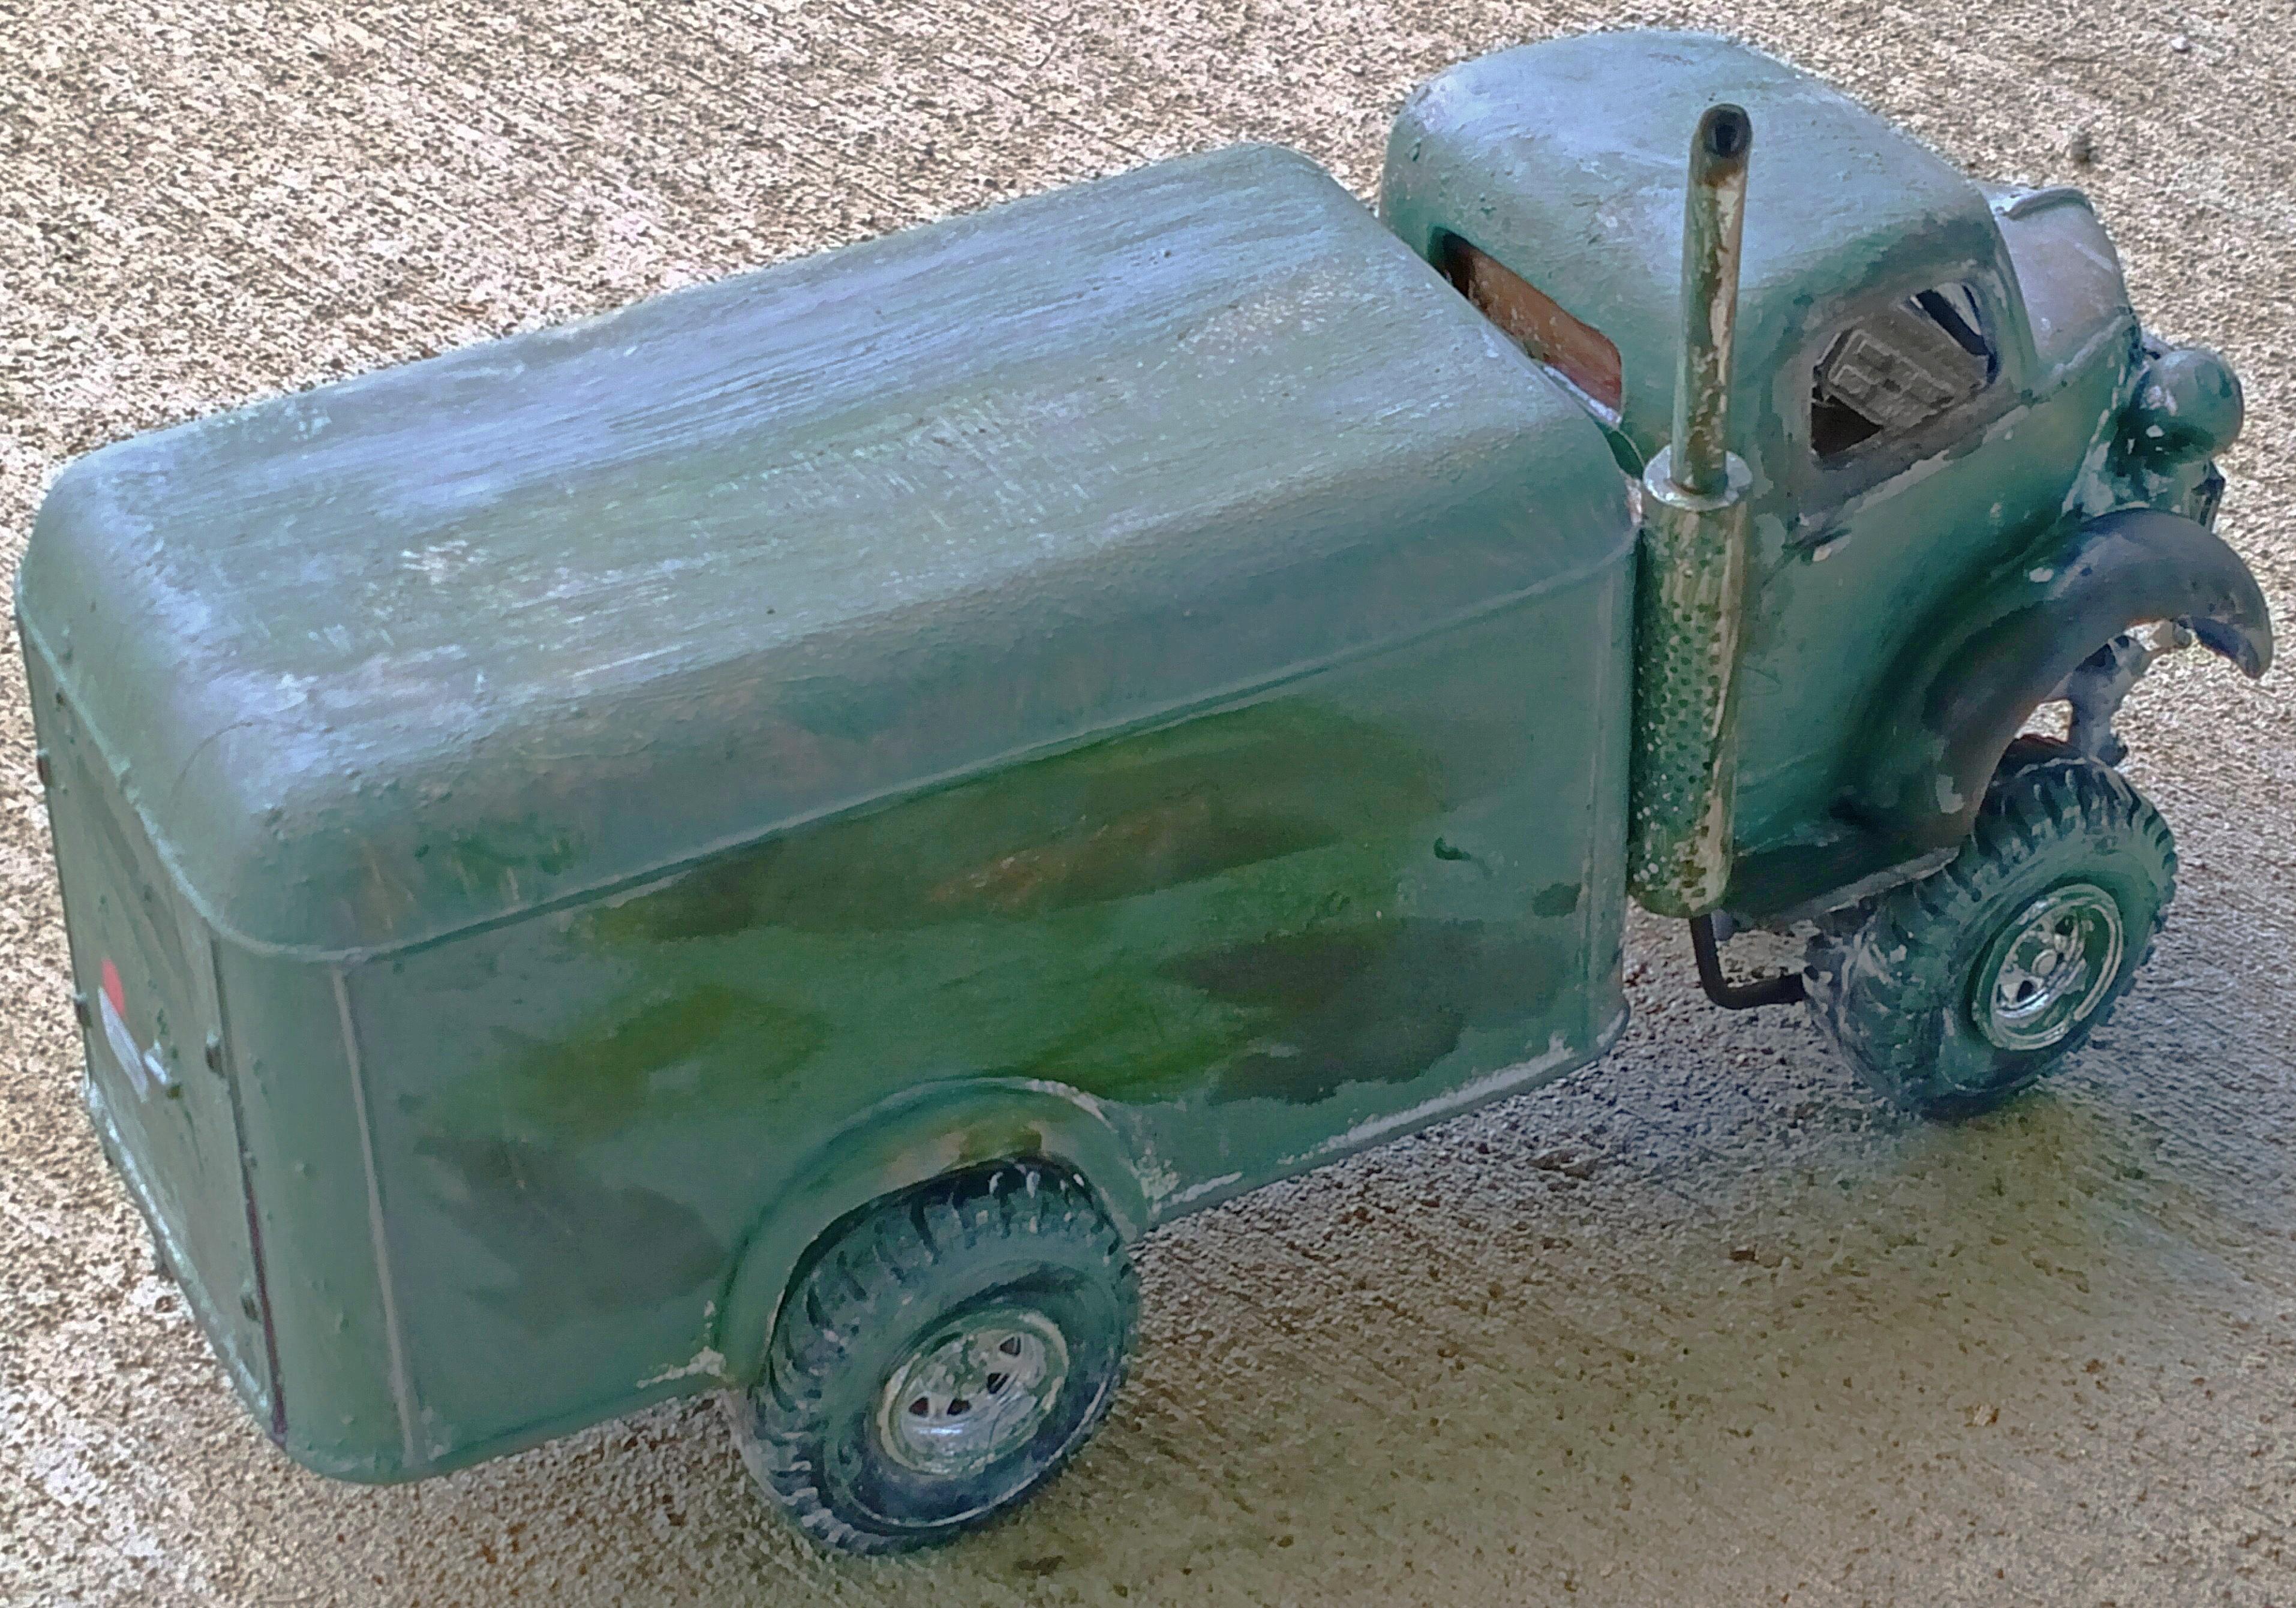
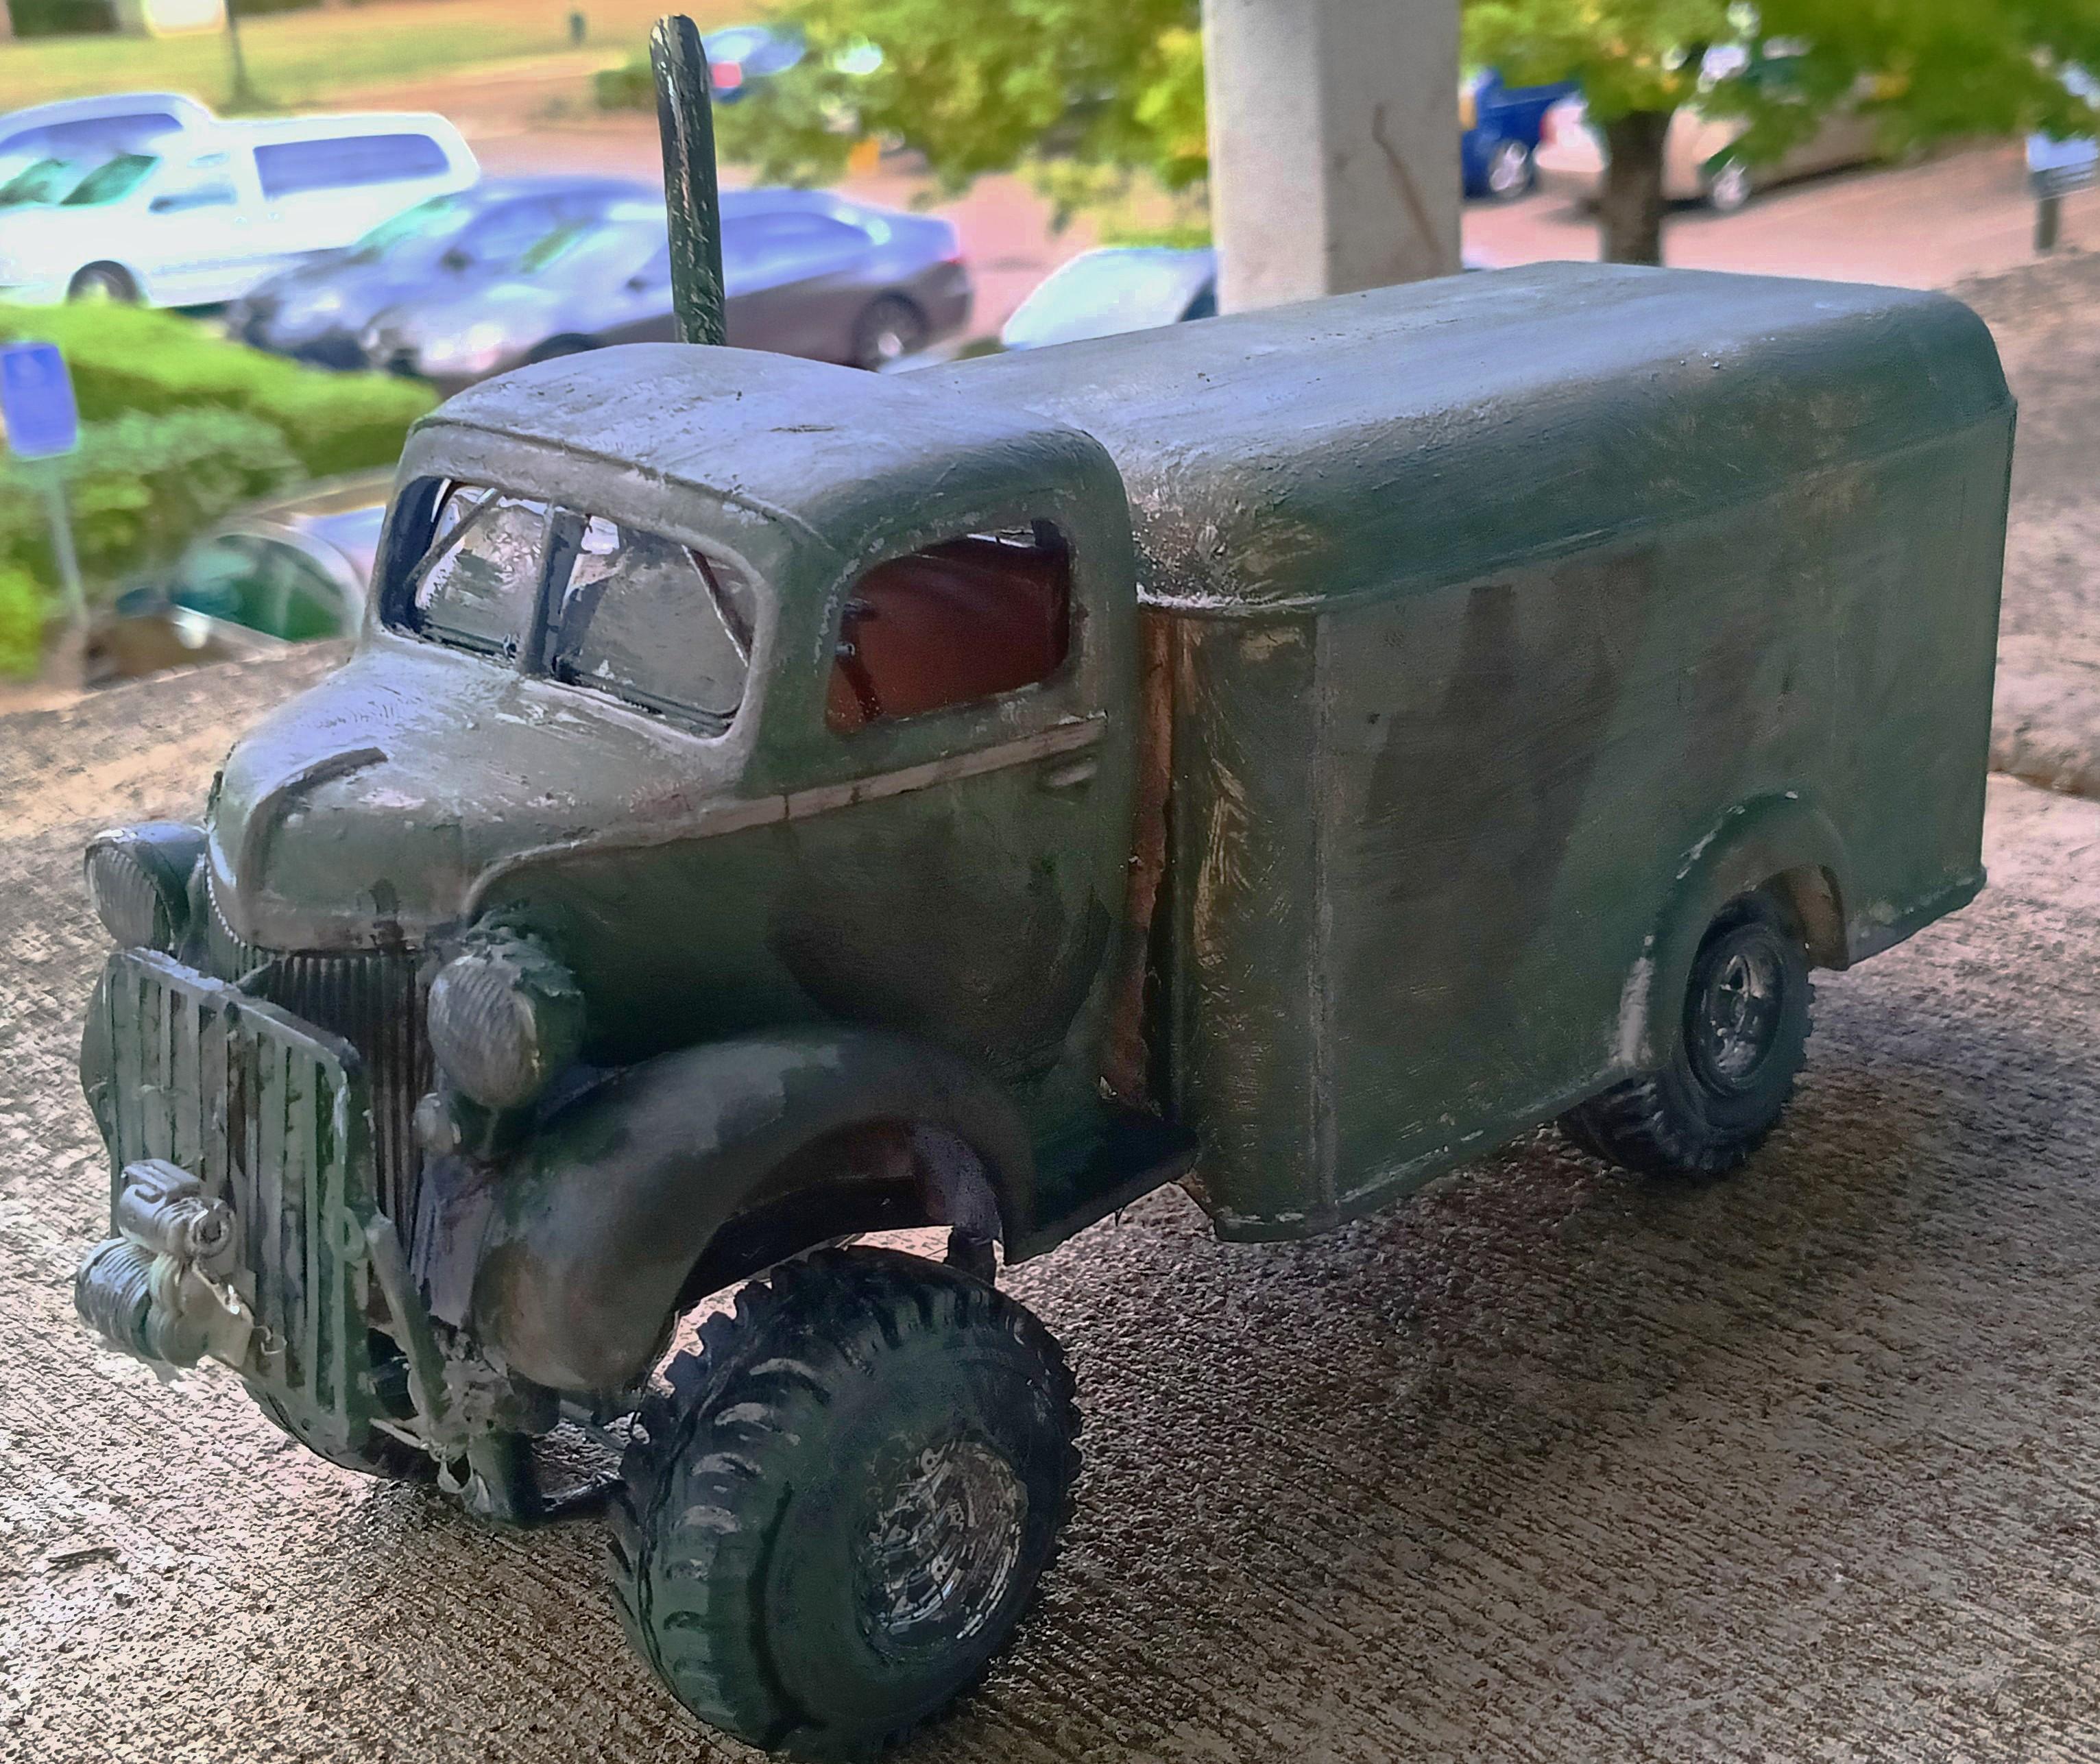
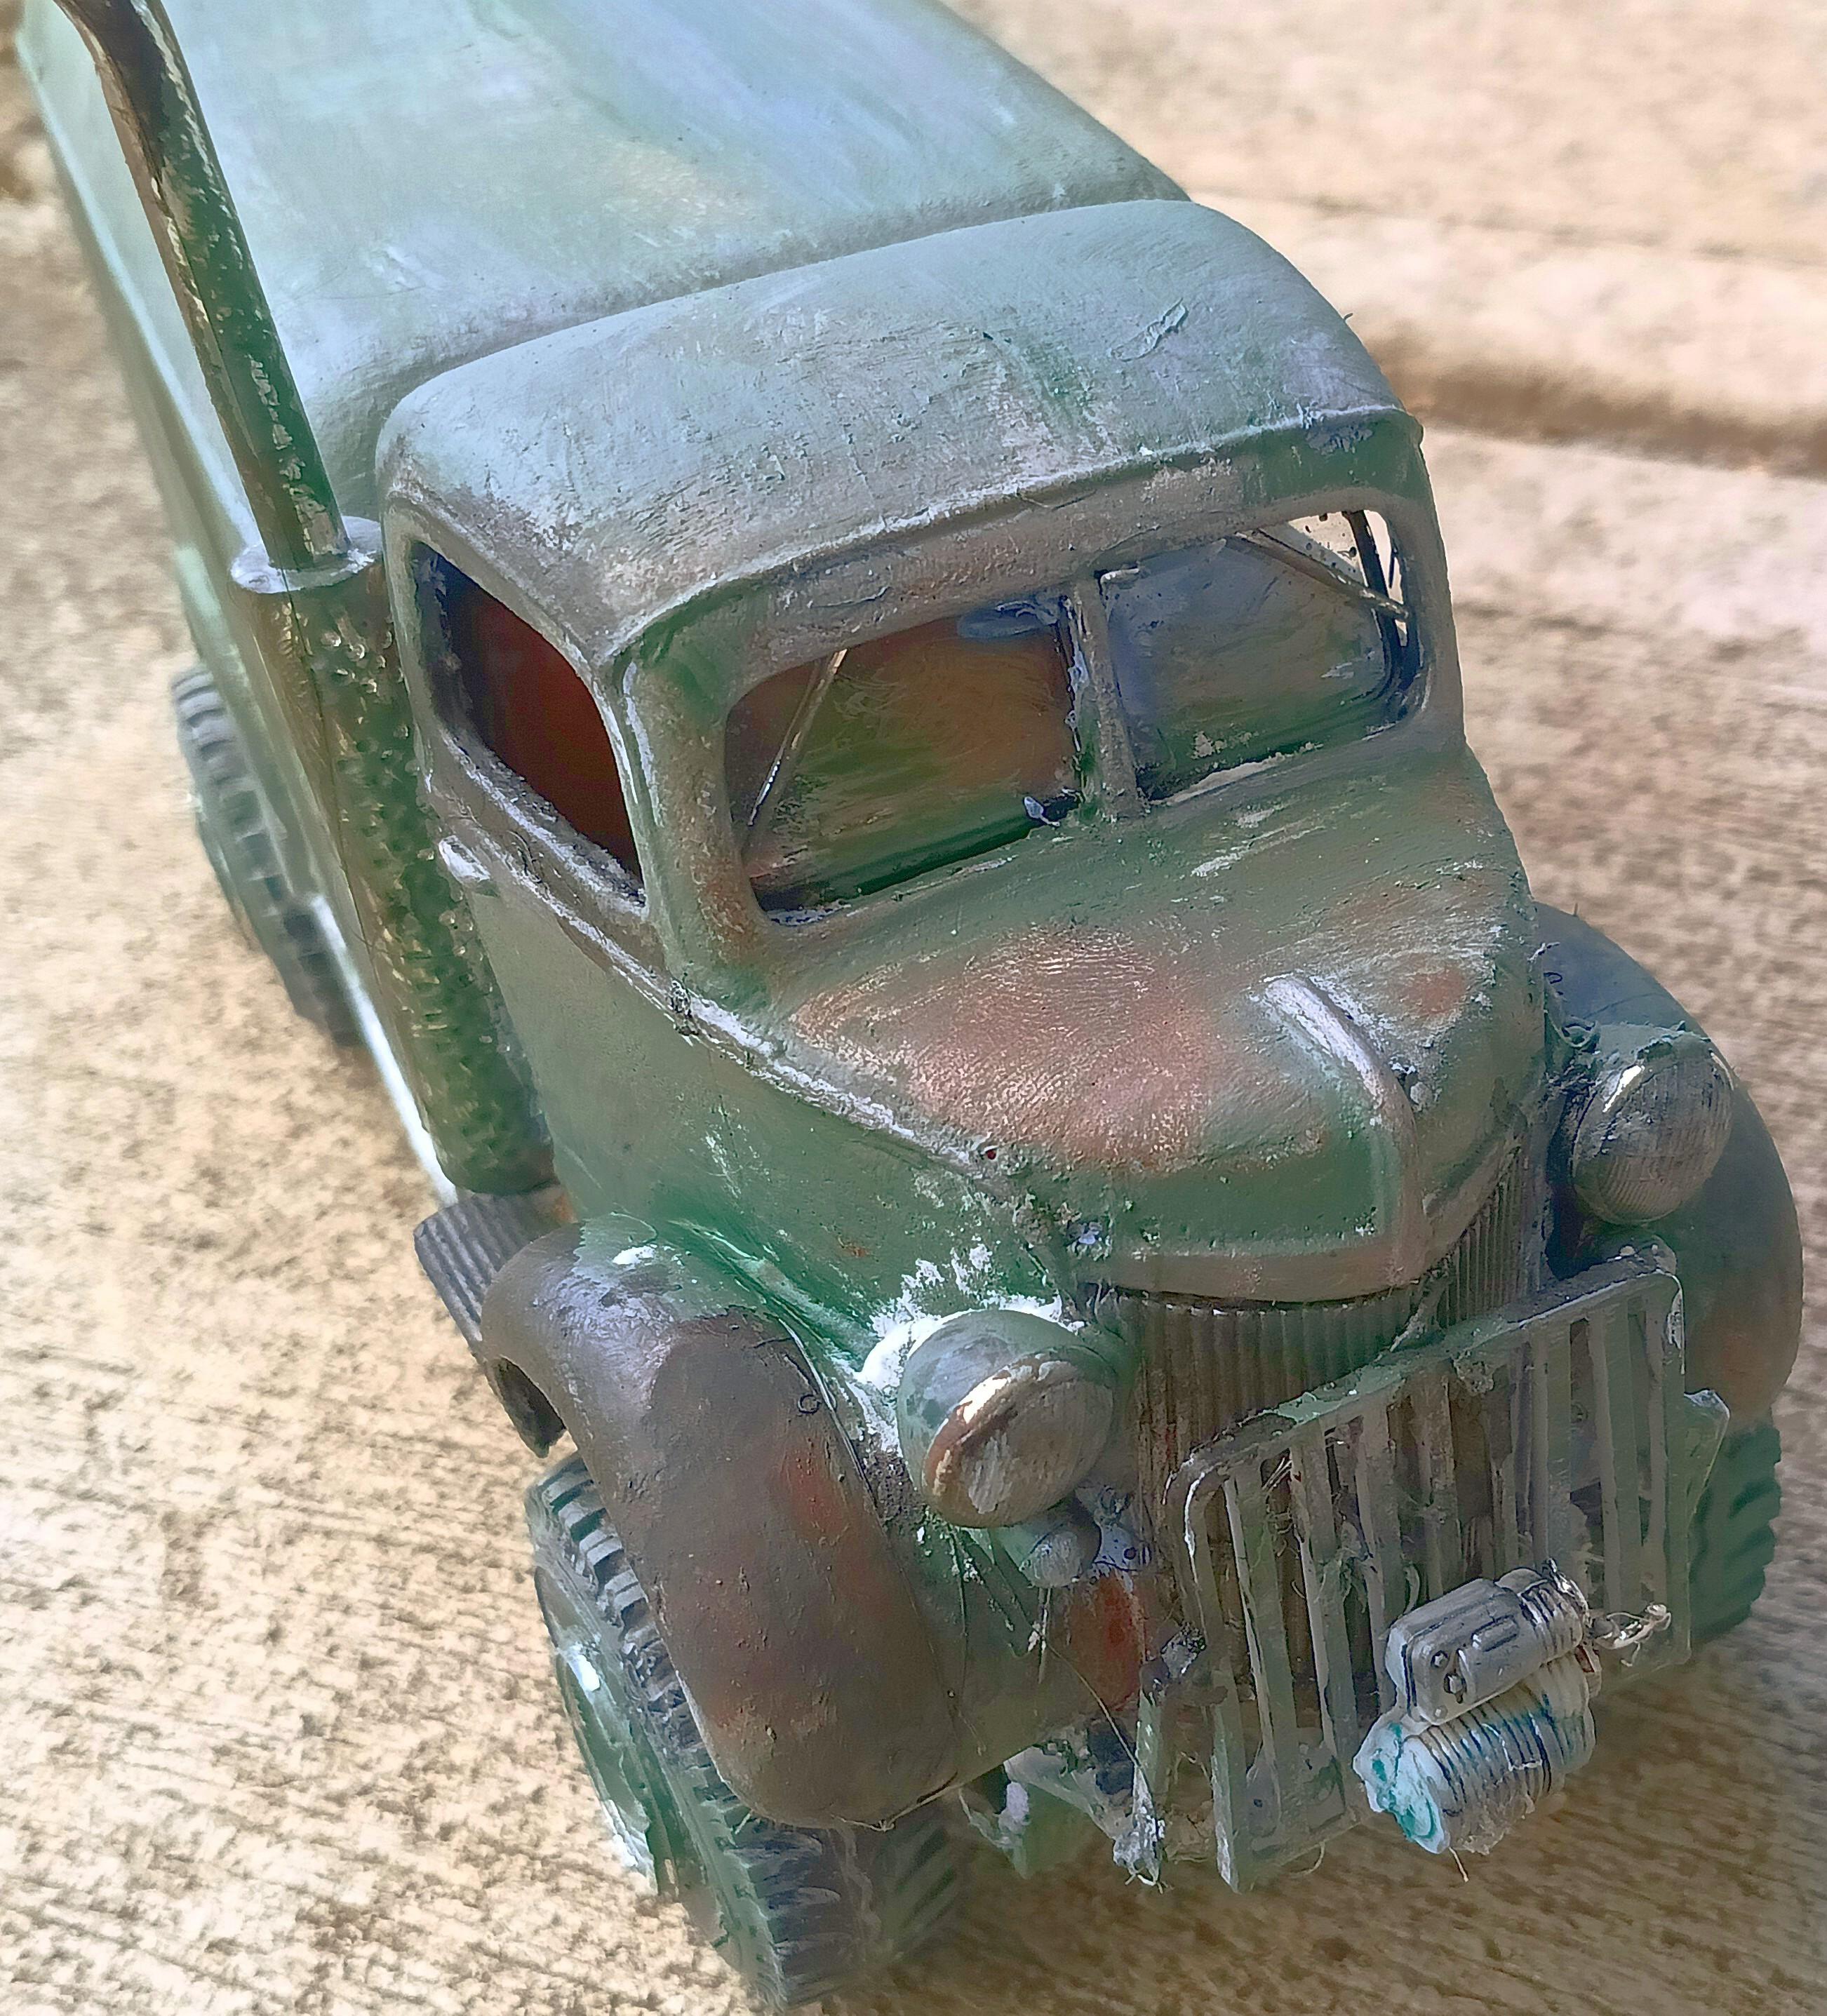
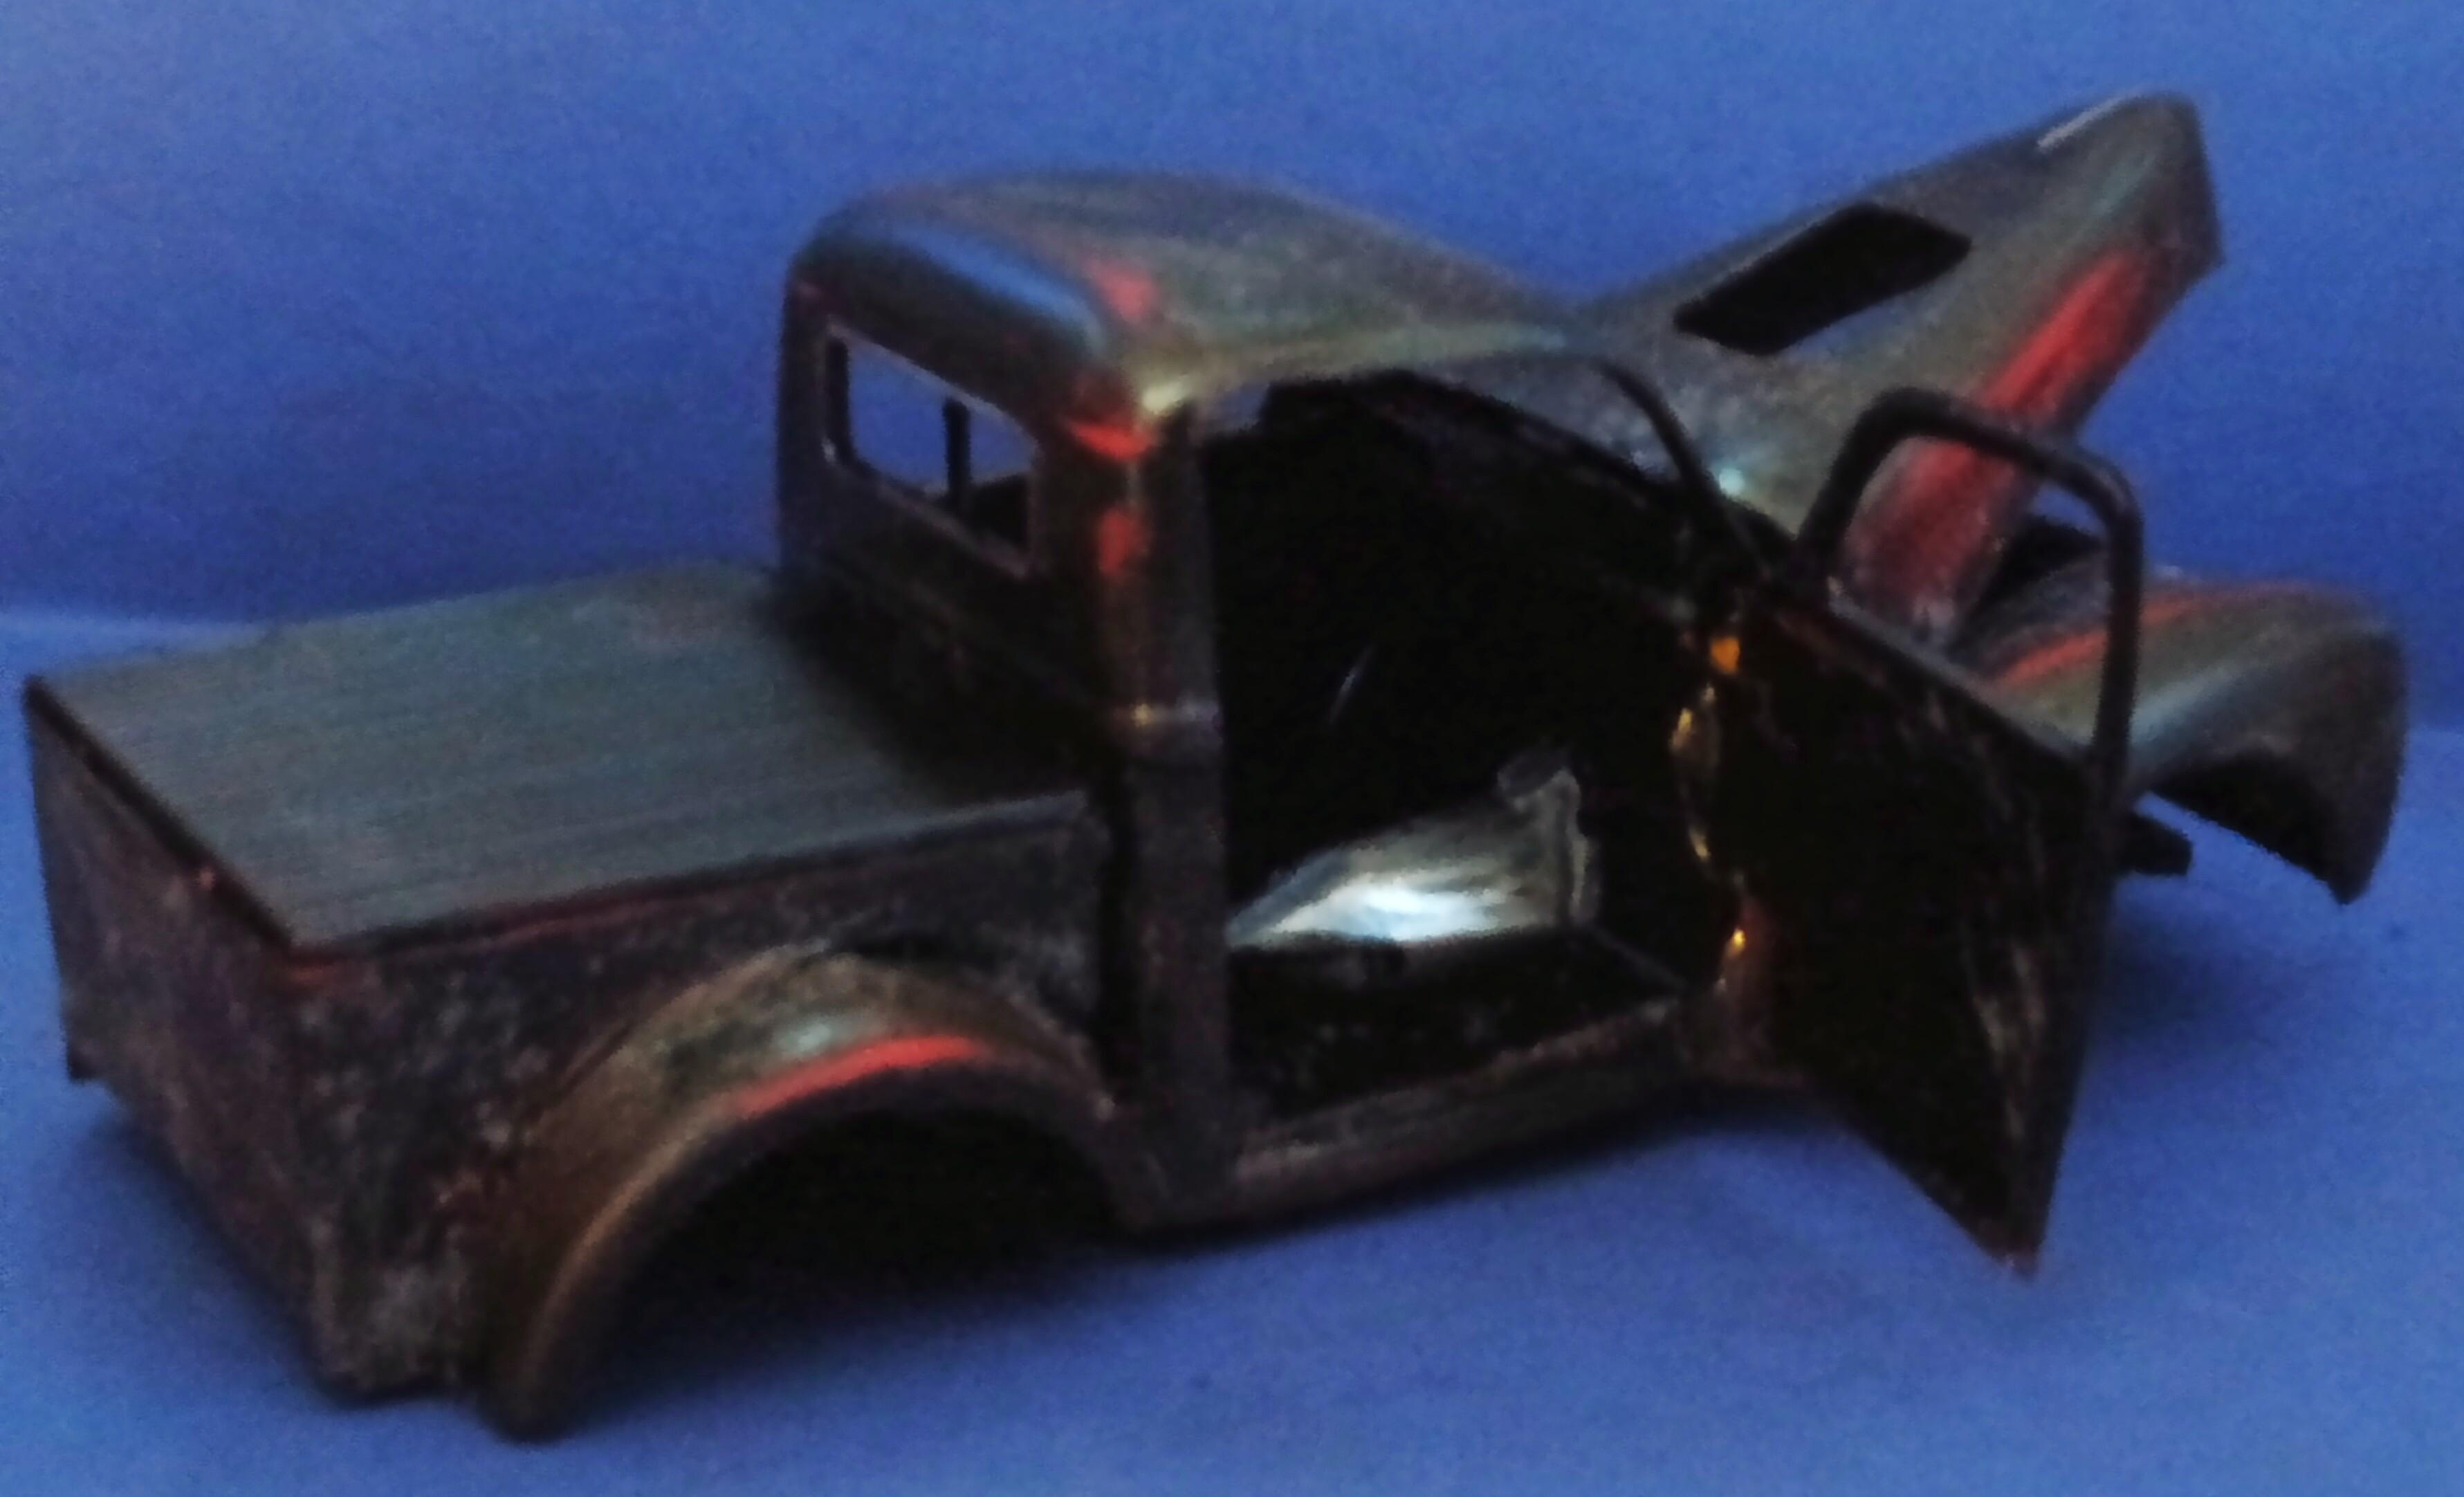
Freshened up an old build with junk parts and new patina. Cab is Jimmy Flintstone and appears to be a Danbury Mint copy.

-
Kitbashed with Flintstone resin cab/box, weathered and built from spare parts. While the 1/1 Jeepers Creepers truck was a GMC, I had this Ford cab so chose to build a tribute like some Halloween or horror fans might build in real life.
- 5 replies
-
- 4
-

-
- resins
- kitbashing
- (and 1 more)
-
Looks good. I'm wanting to build one as an unrestored Isetta. Sacrilege, I know
-
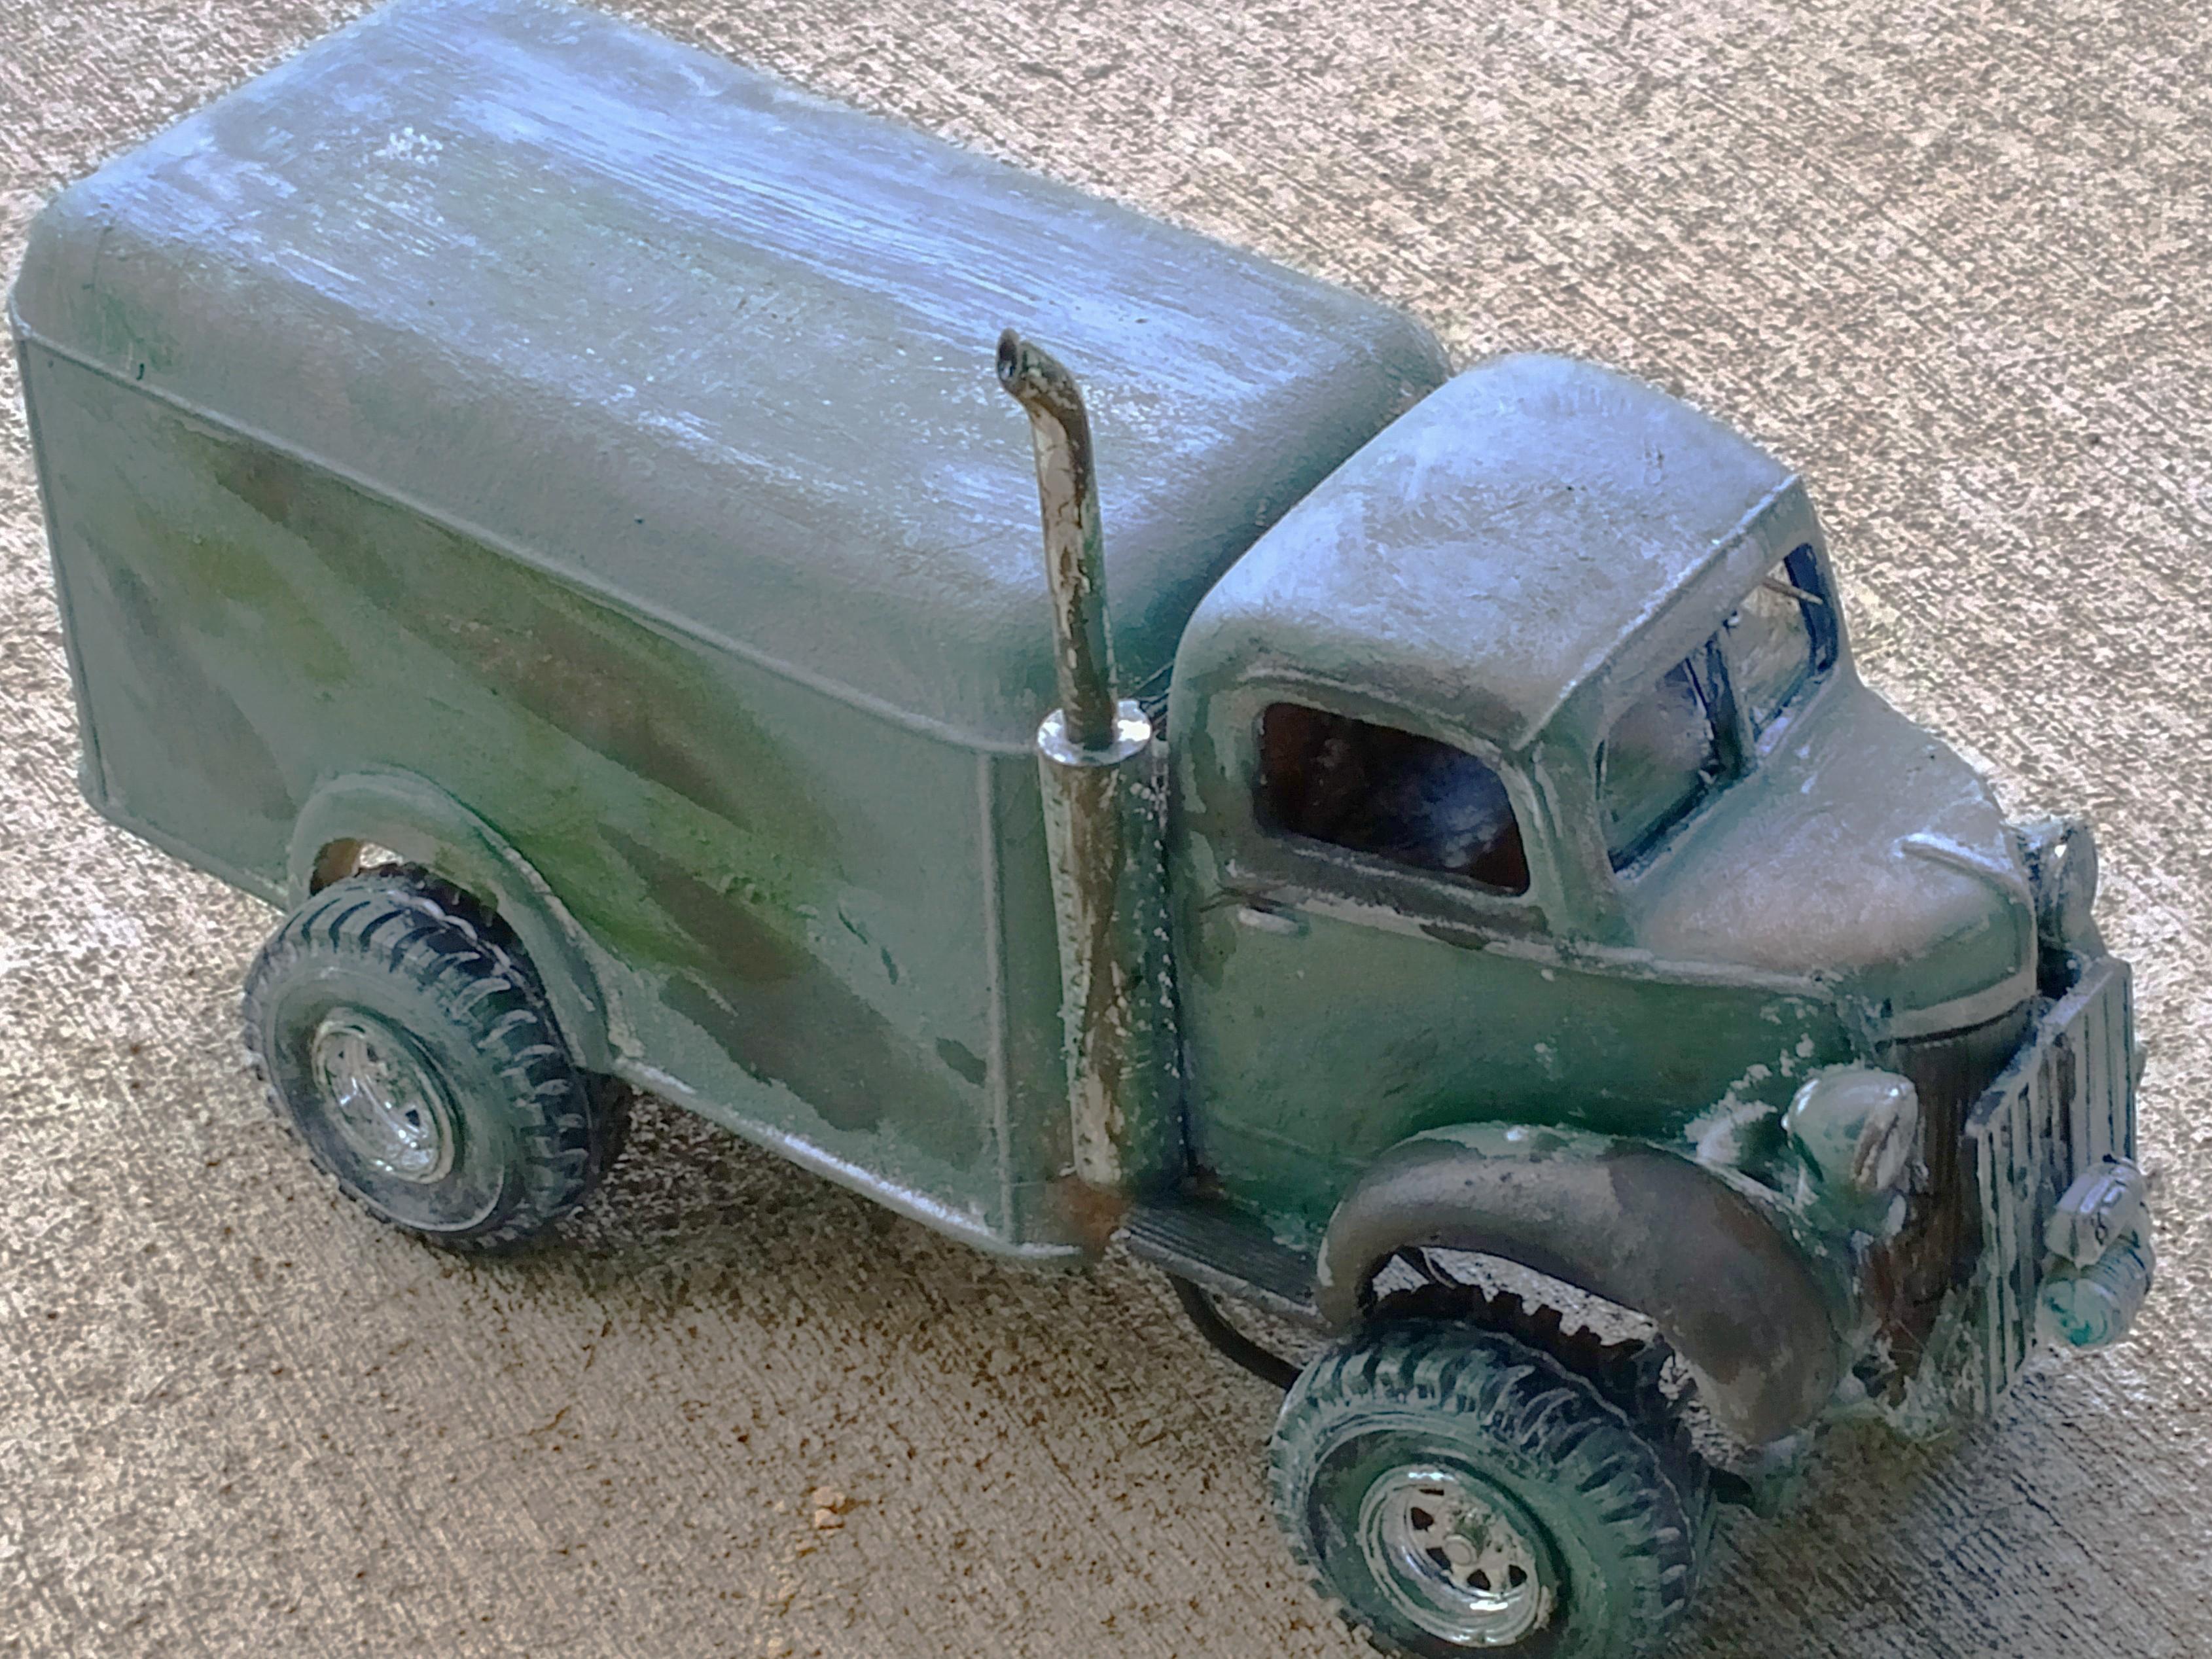
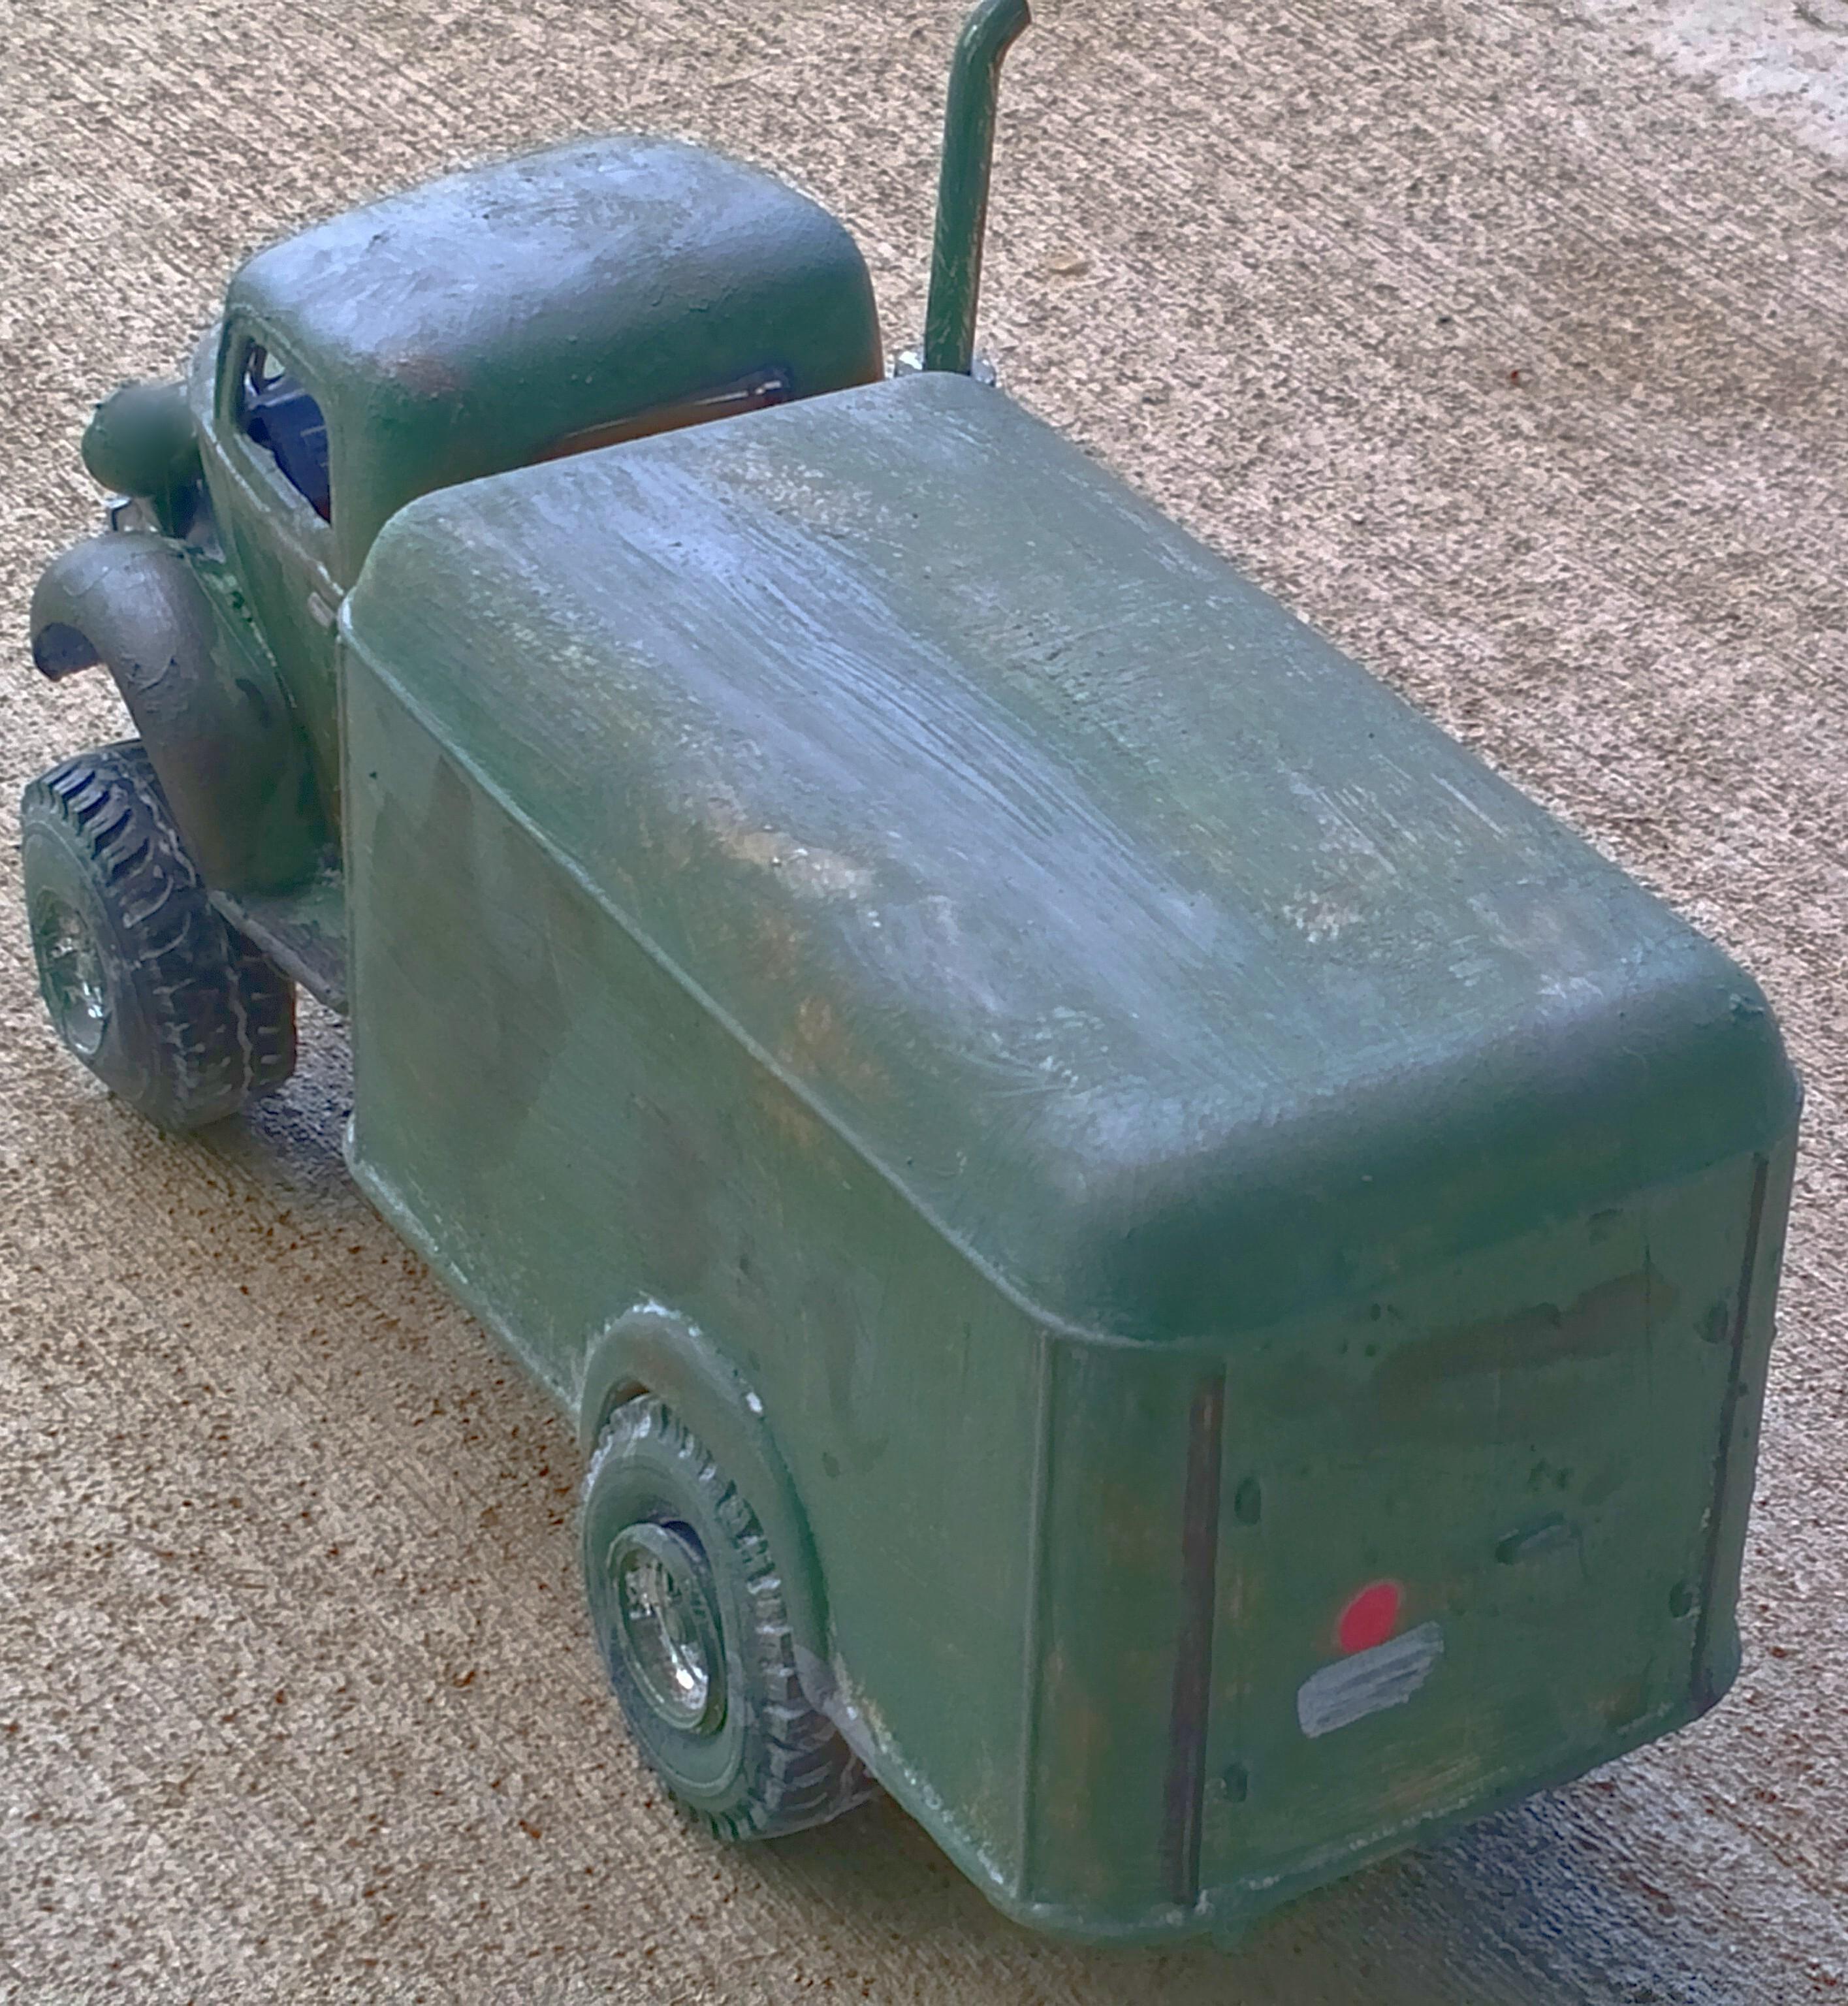
Hi all, Looking for a hood to complete my Jimmy Flintstone '50 Chevy COE. Any resin 1/25 scale COE chevy/GMC hood for a '50 cab will work for me.
-
thank you! As a fan of his renderings, I'm flattered
-
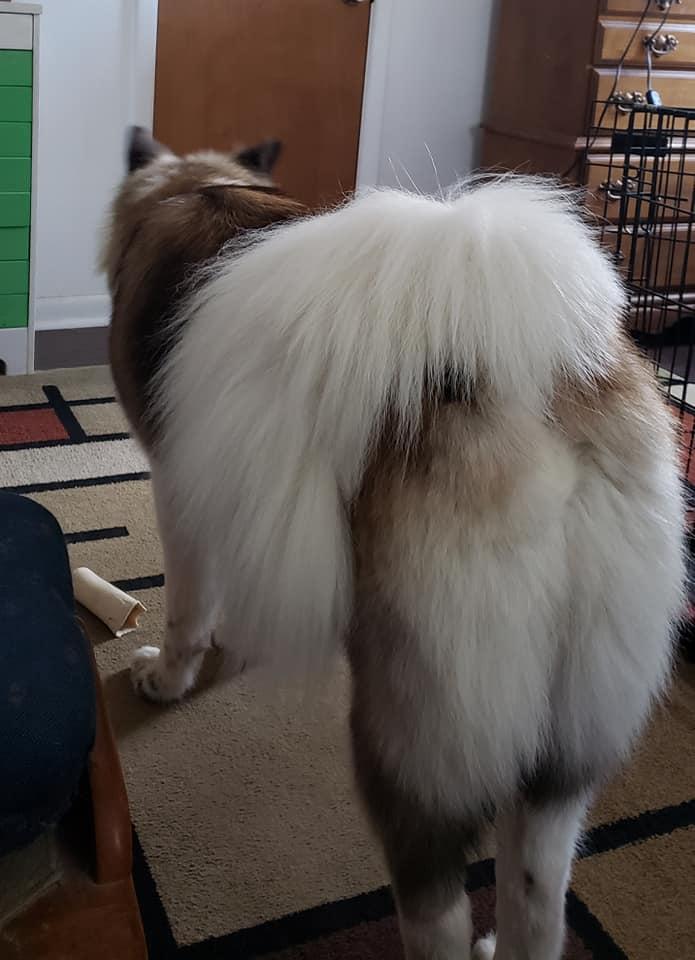
When Soraya's tail plume starts getting longer and fluffier and her pantaloons start getting long, you know fall/winter are around the corner around here.
-
thanks, Donato
-
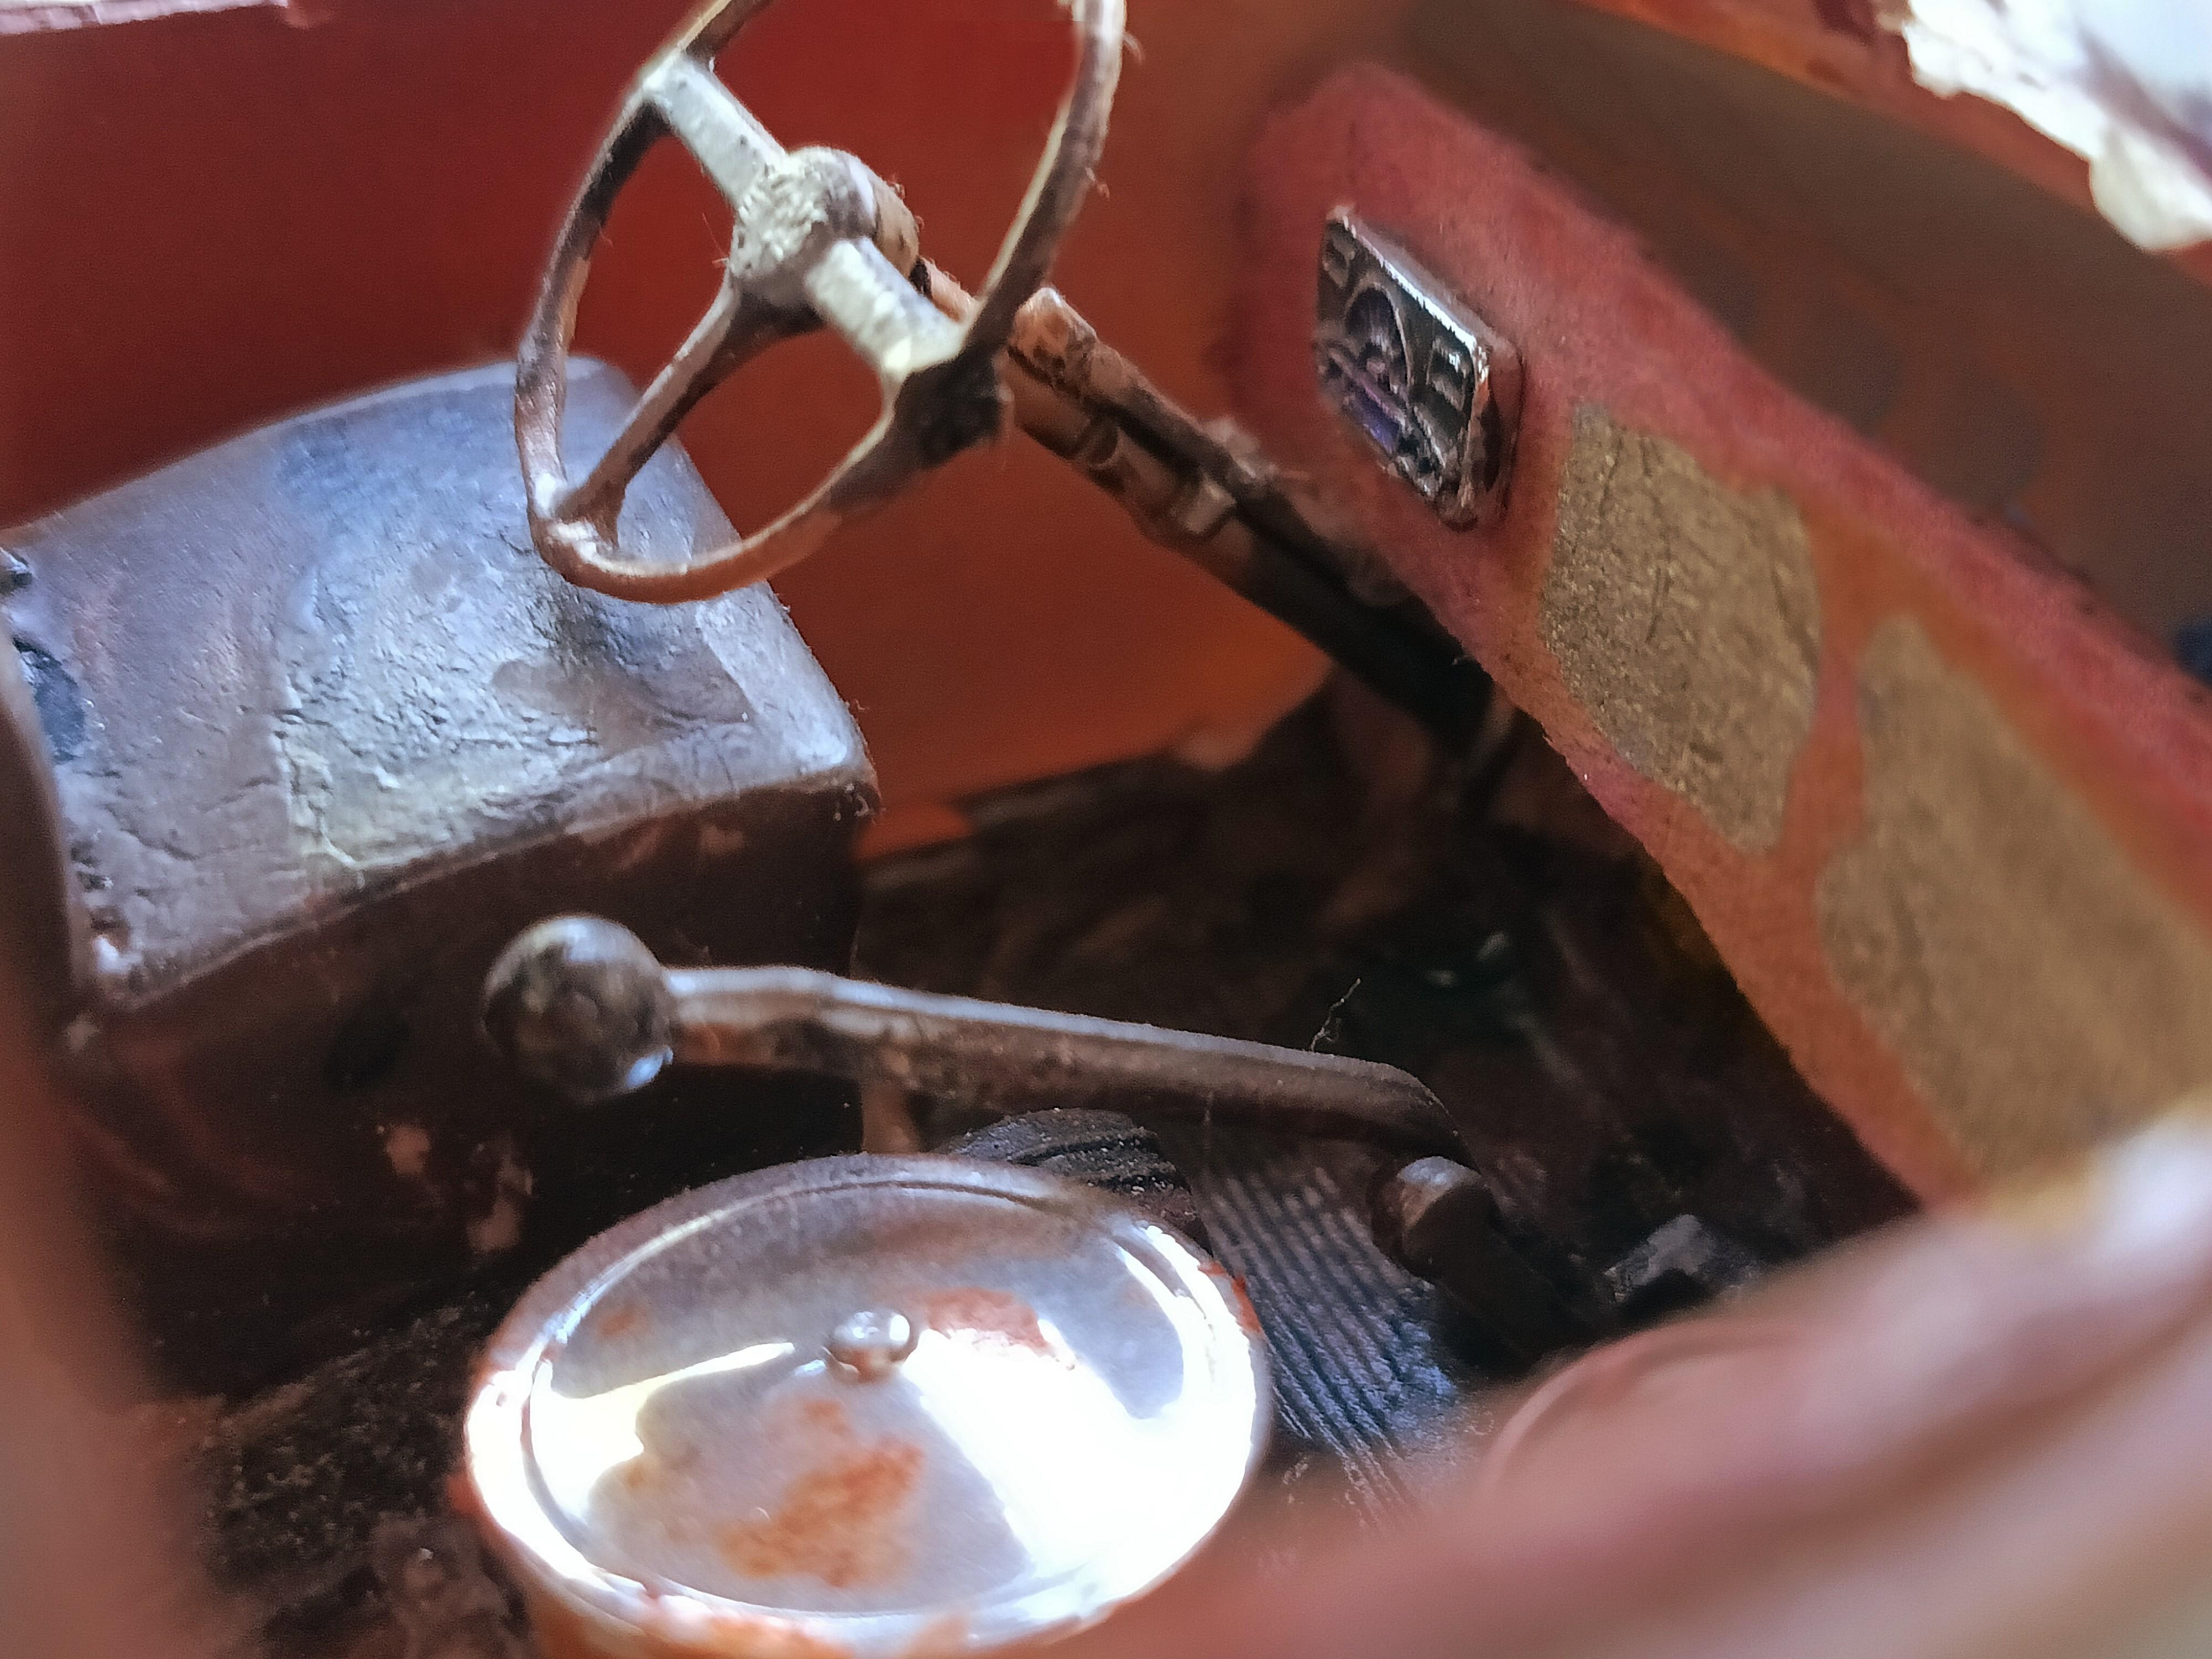
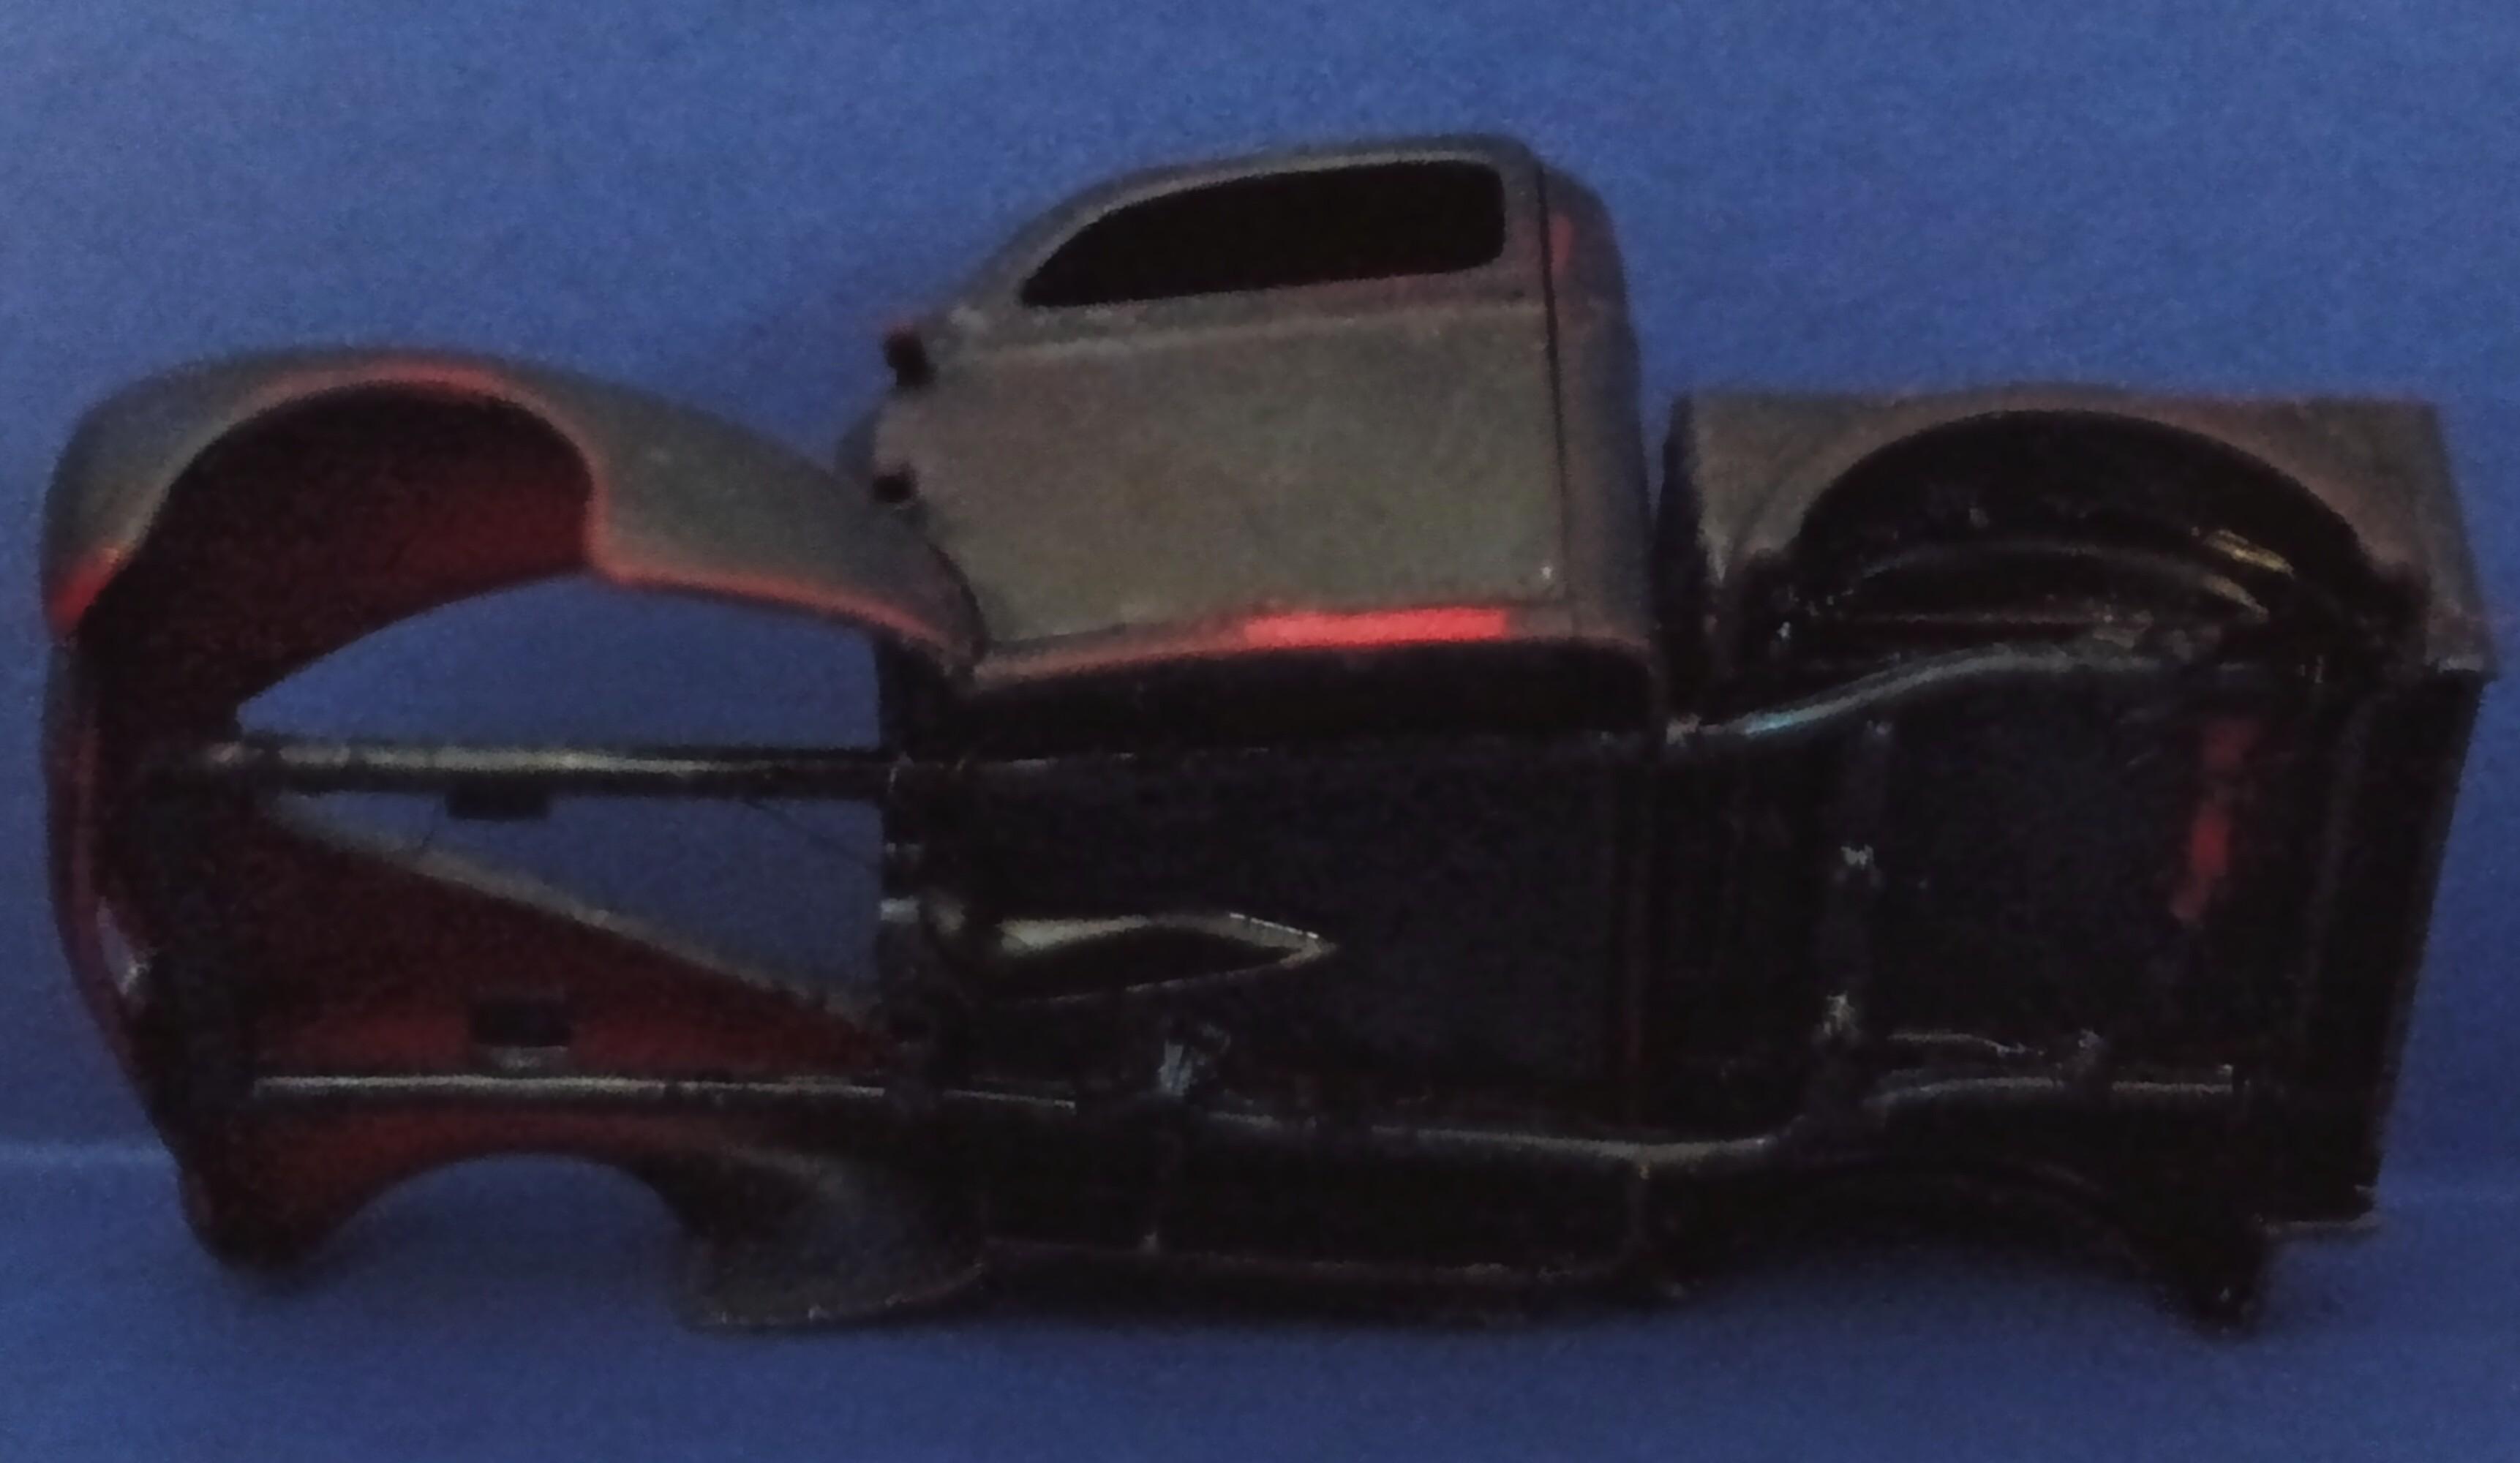
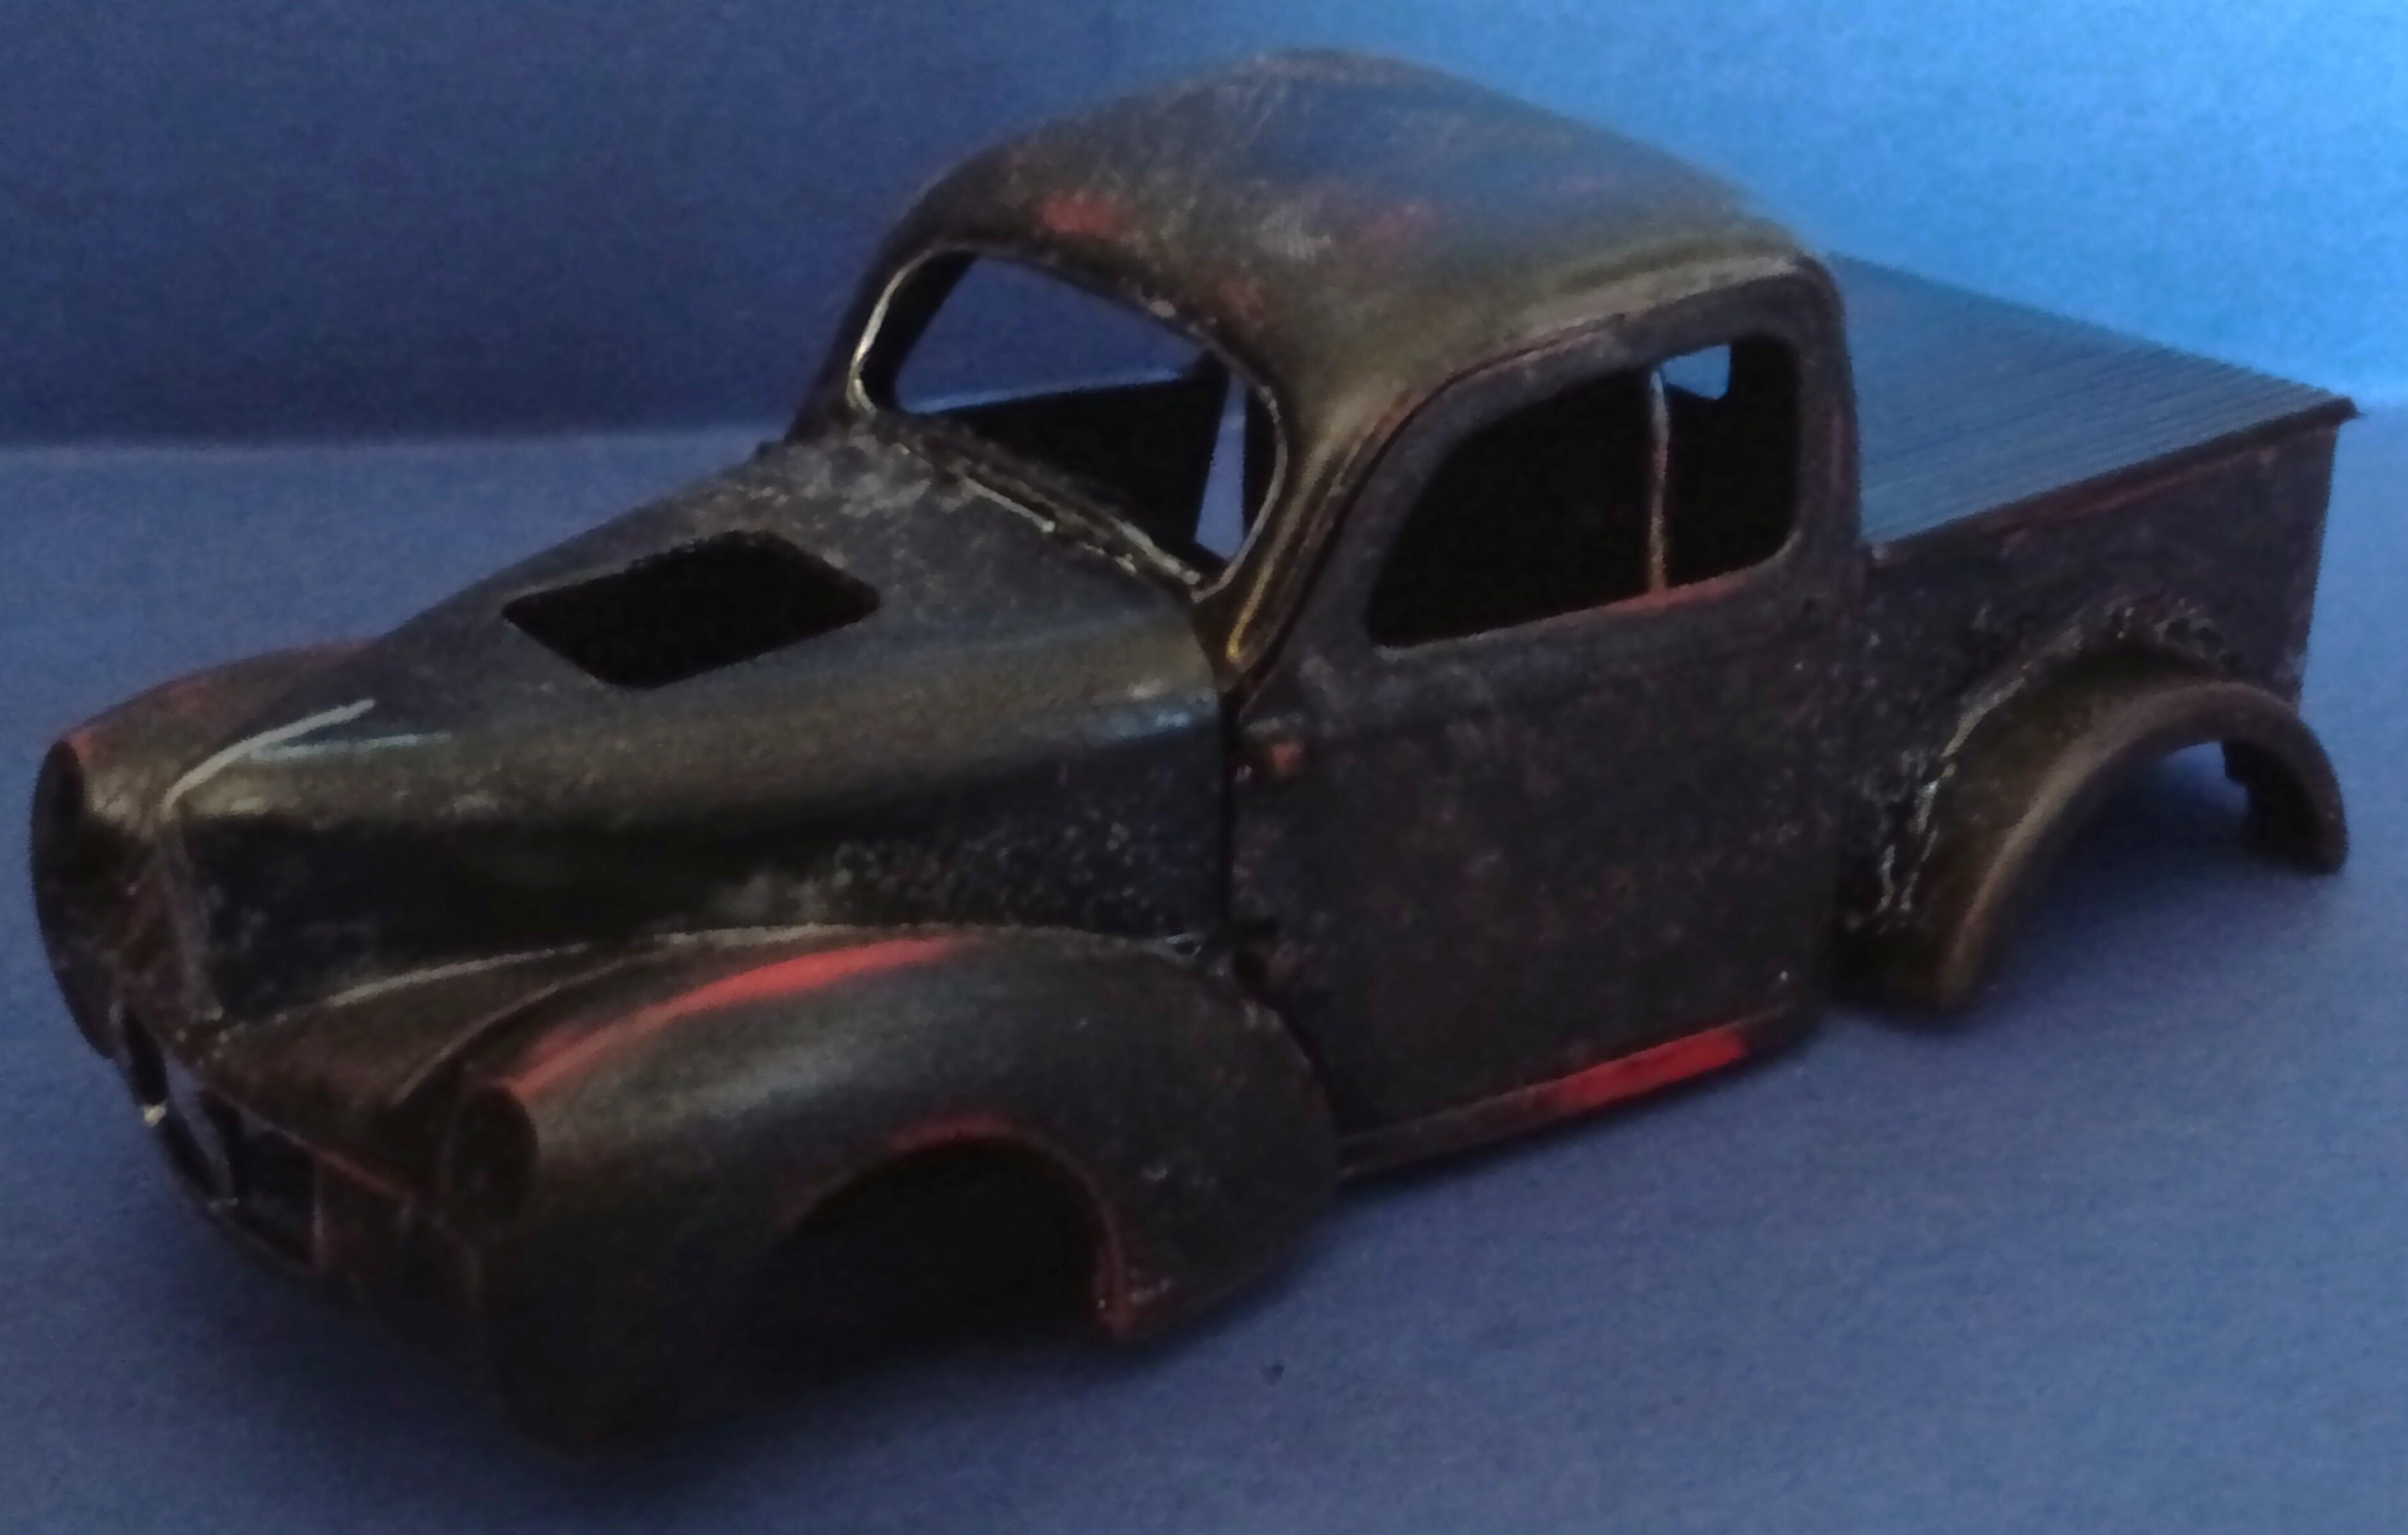
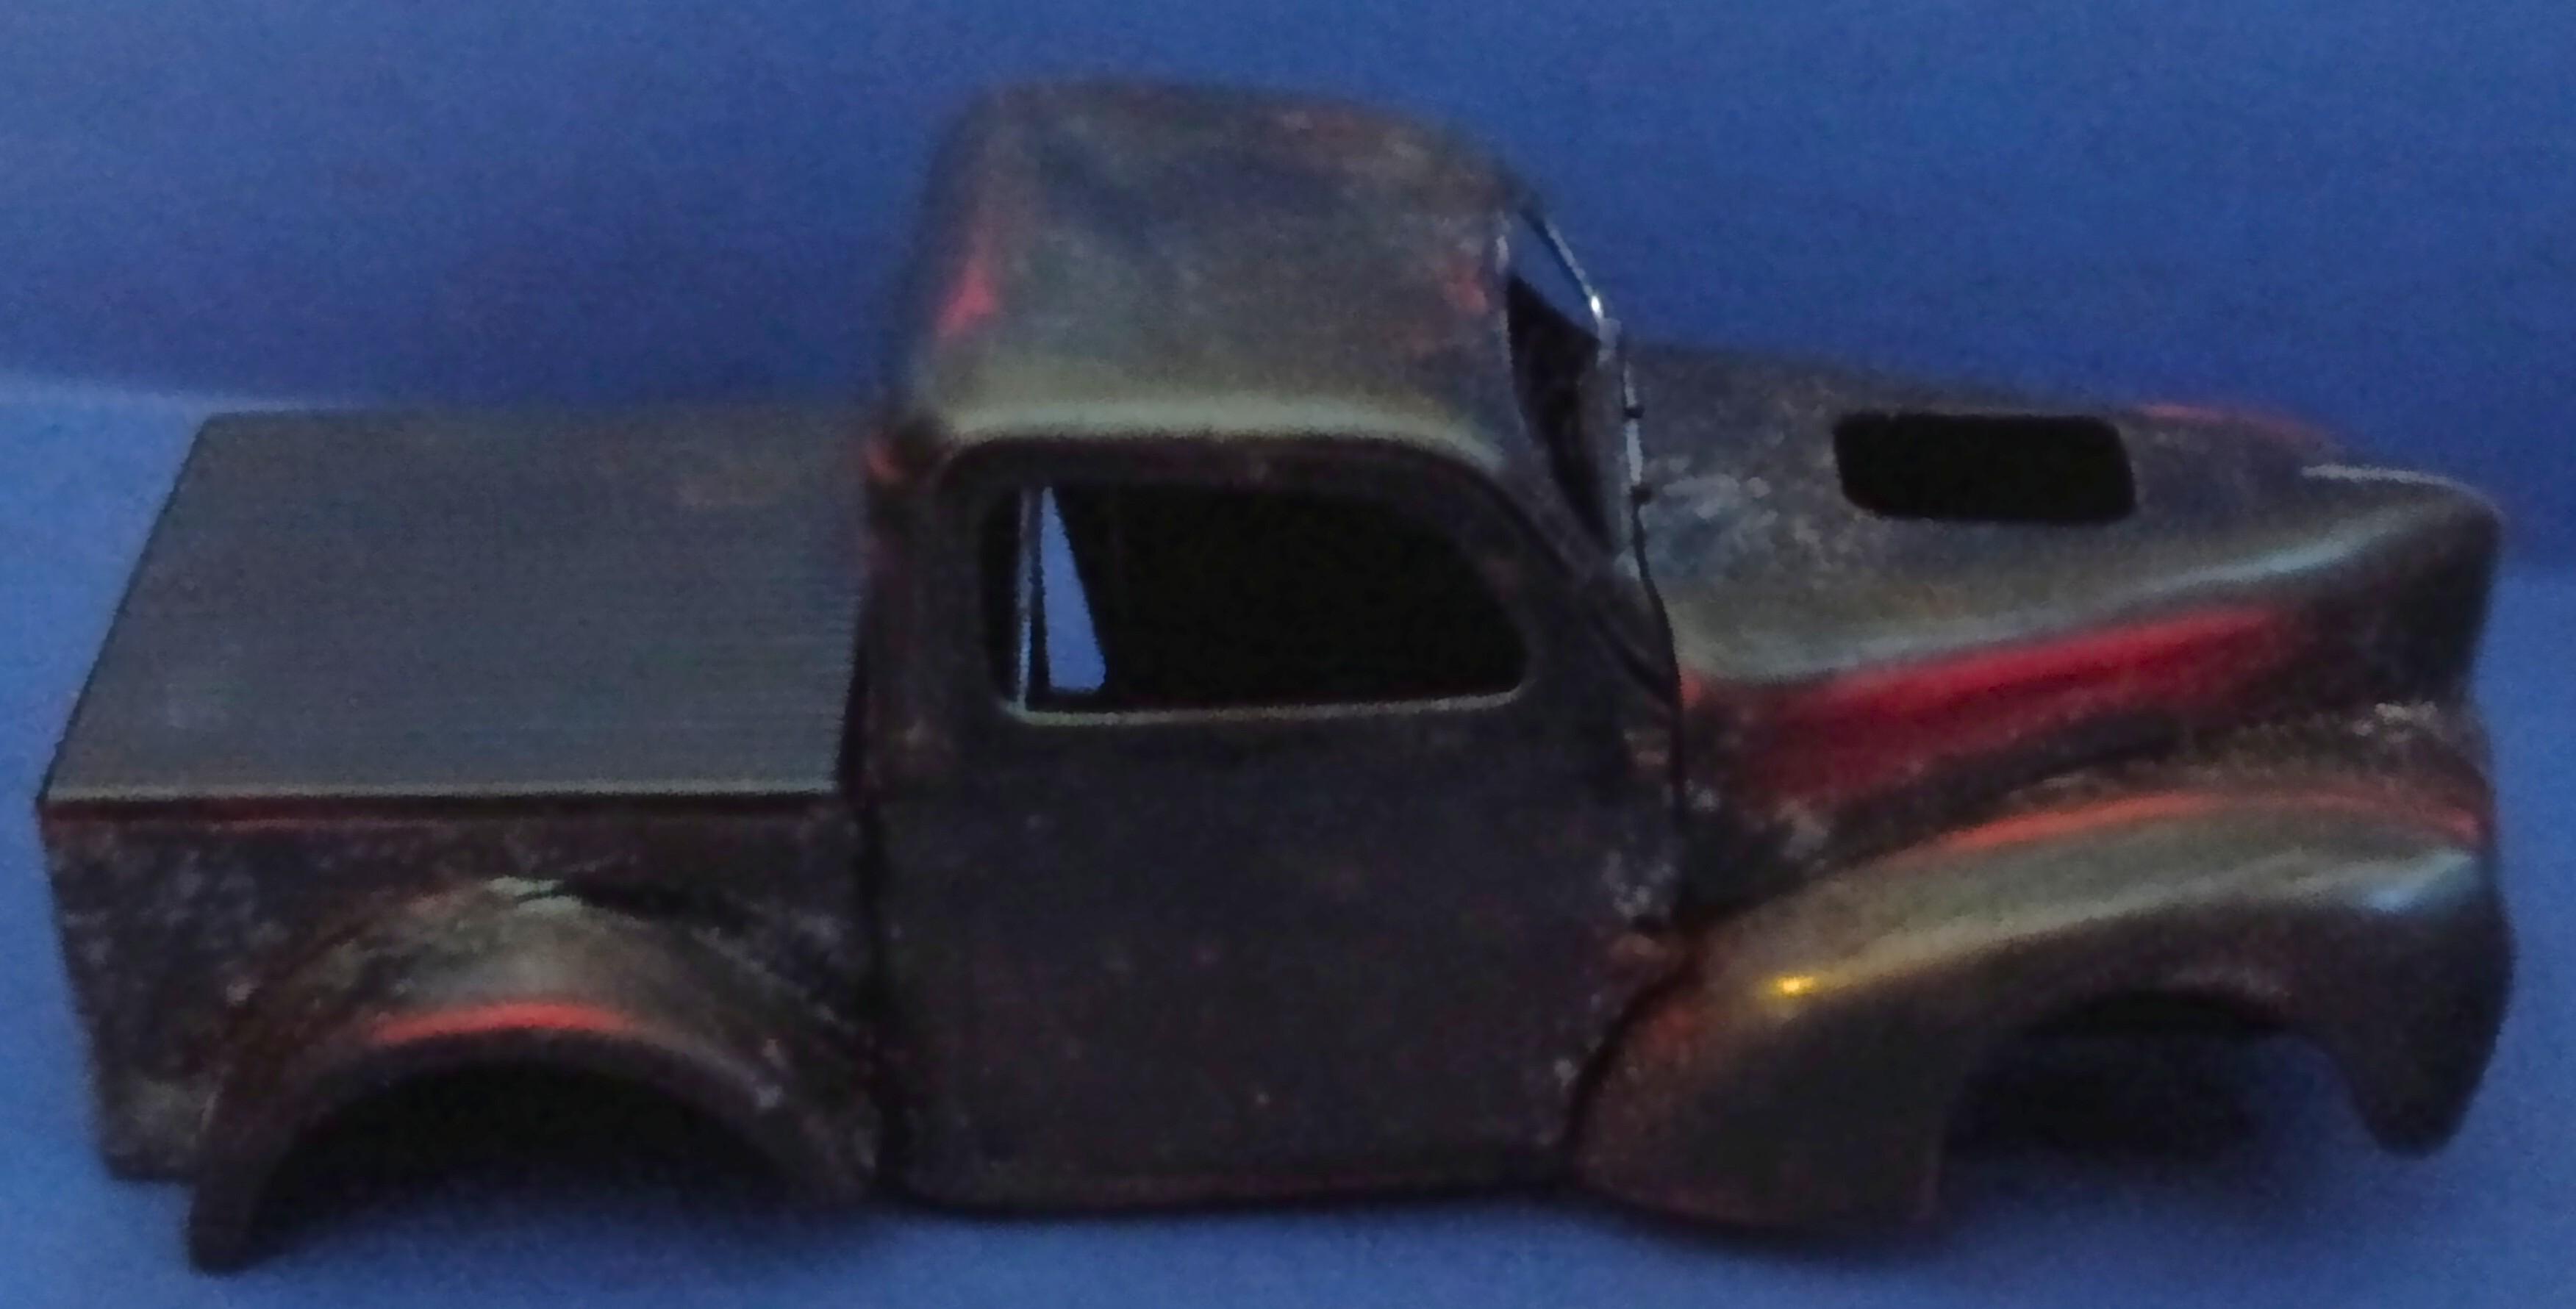
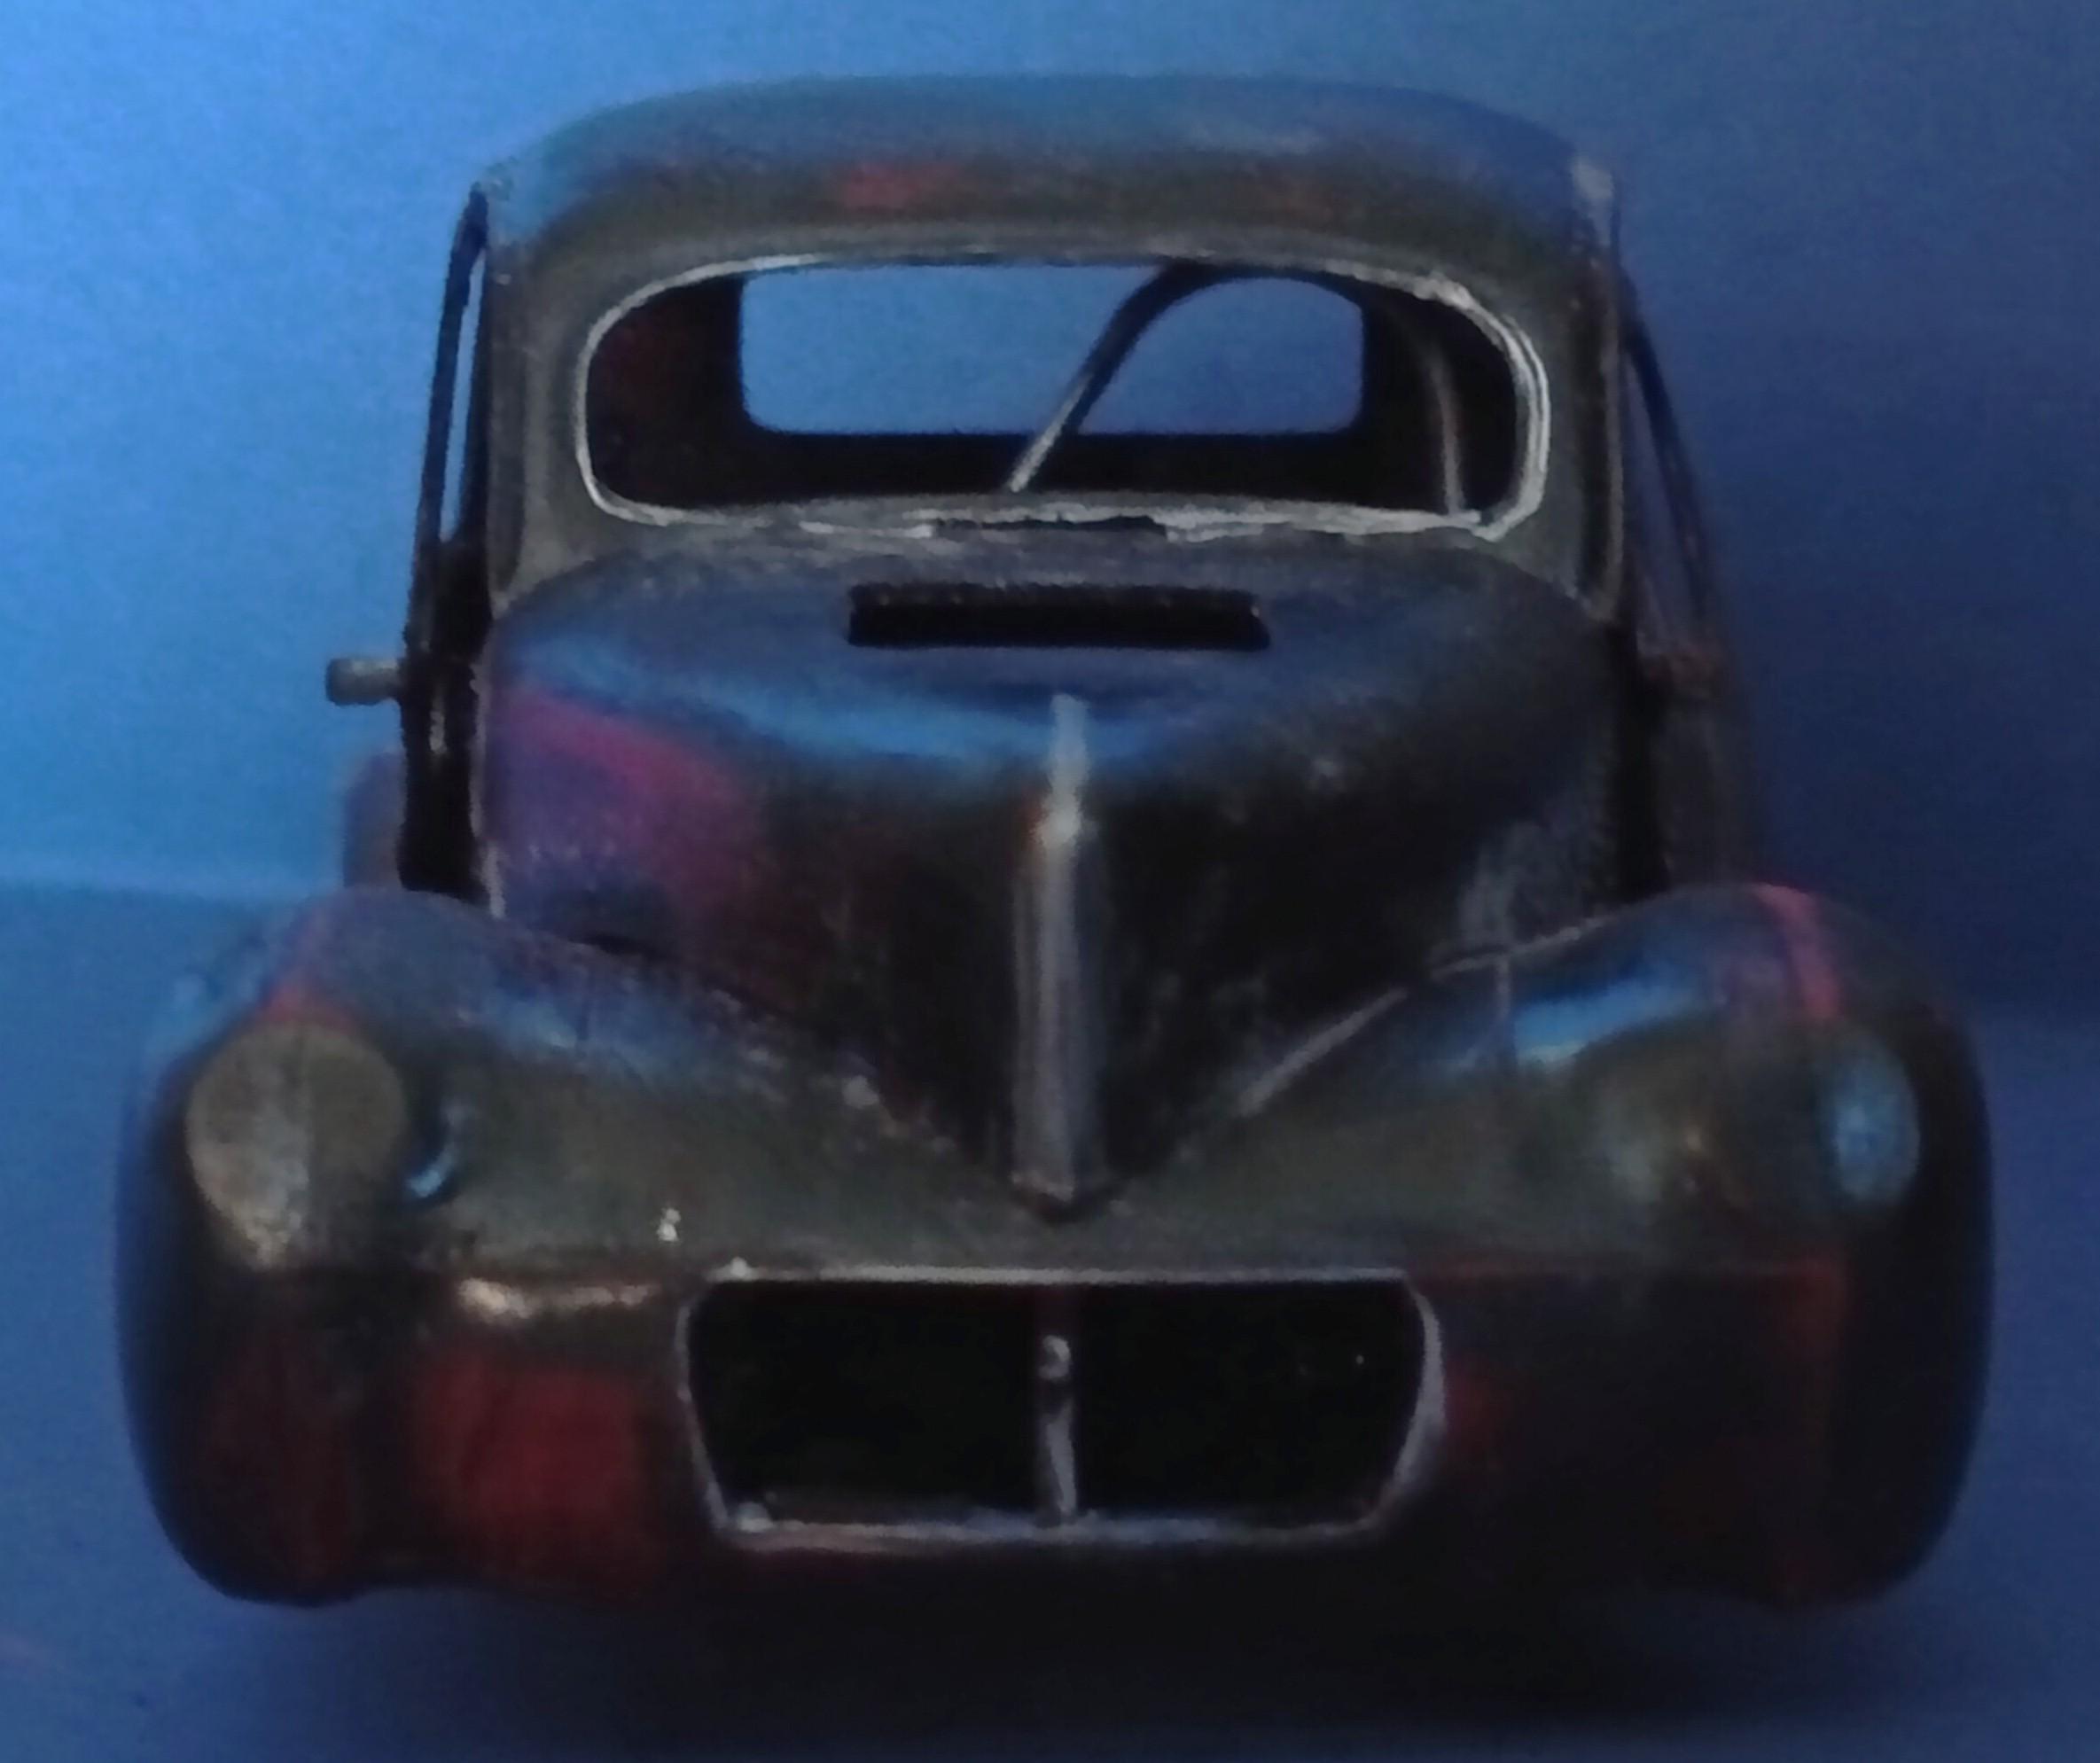
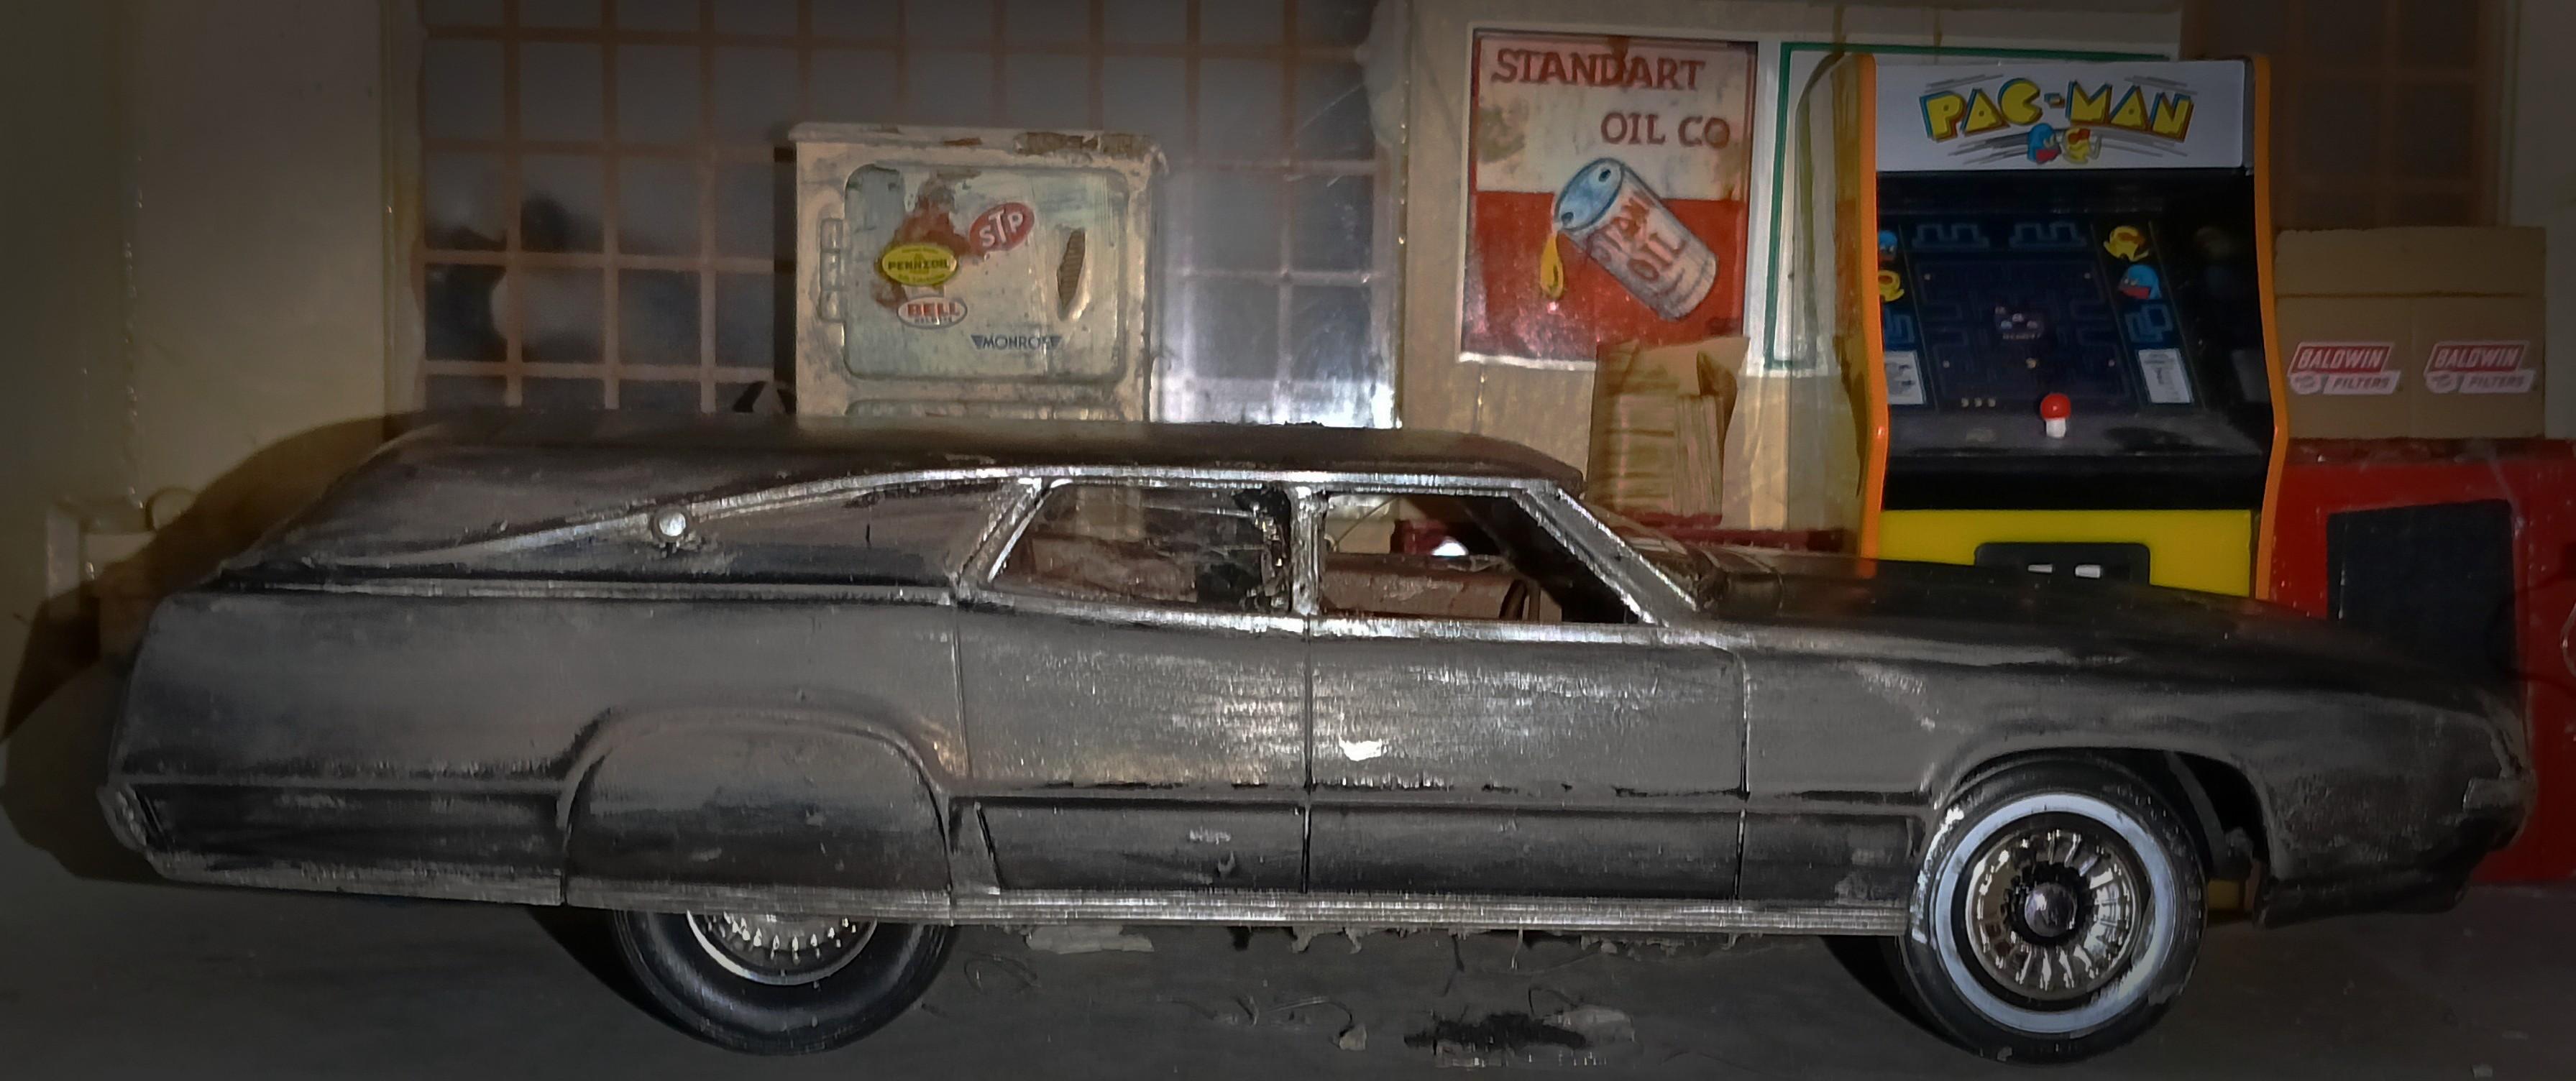
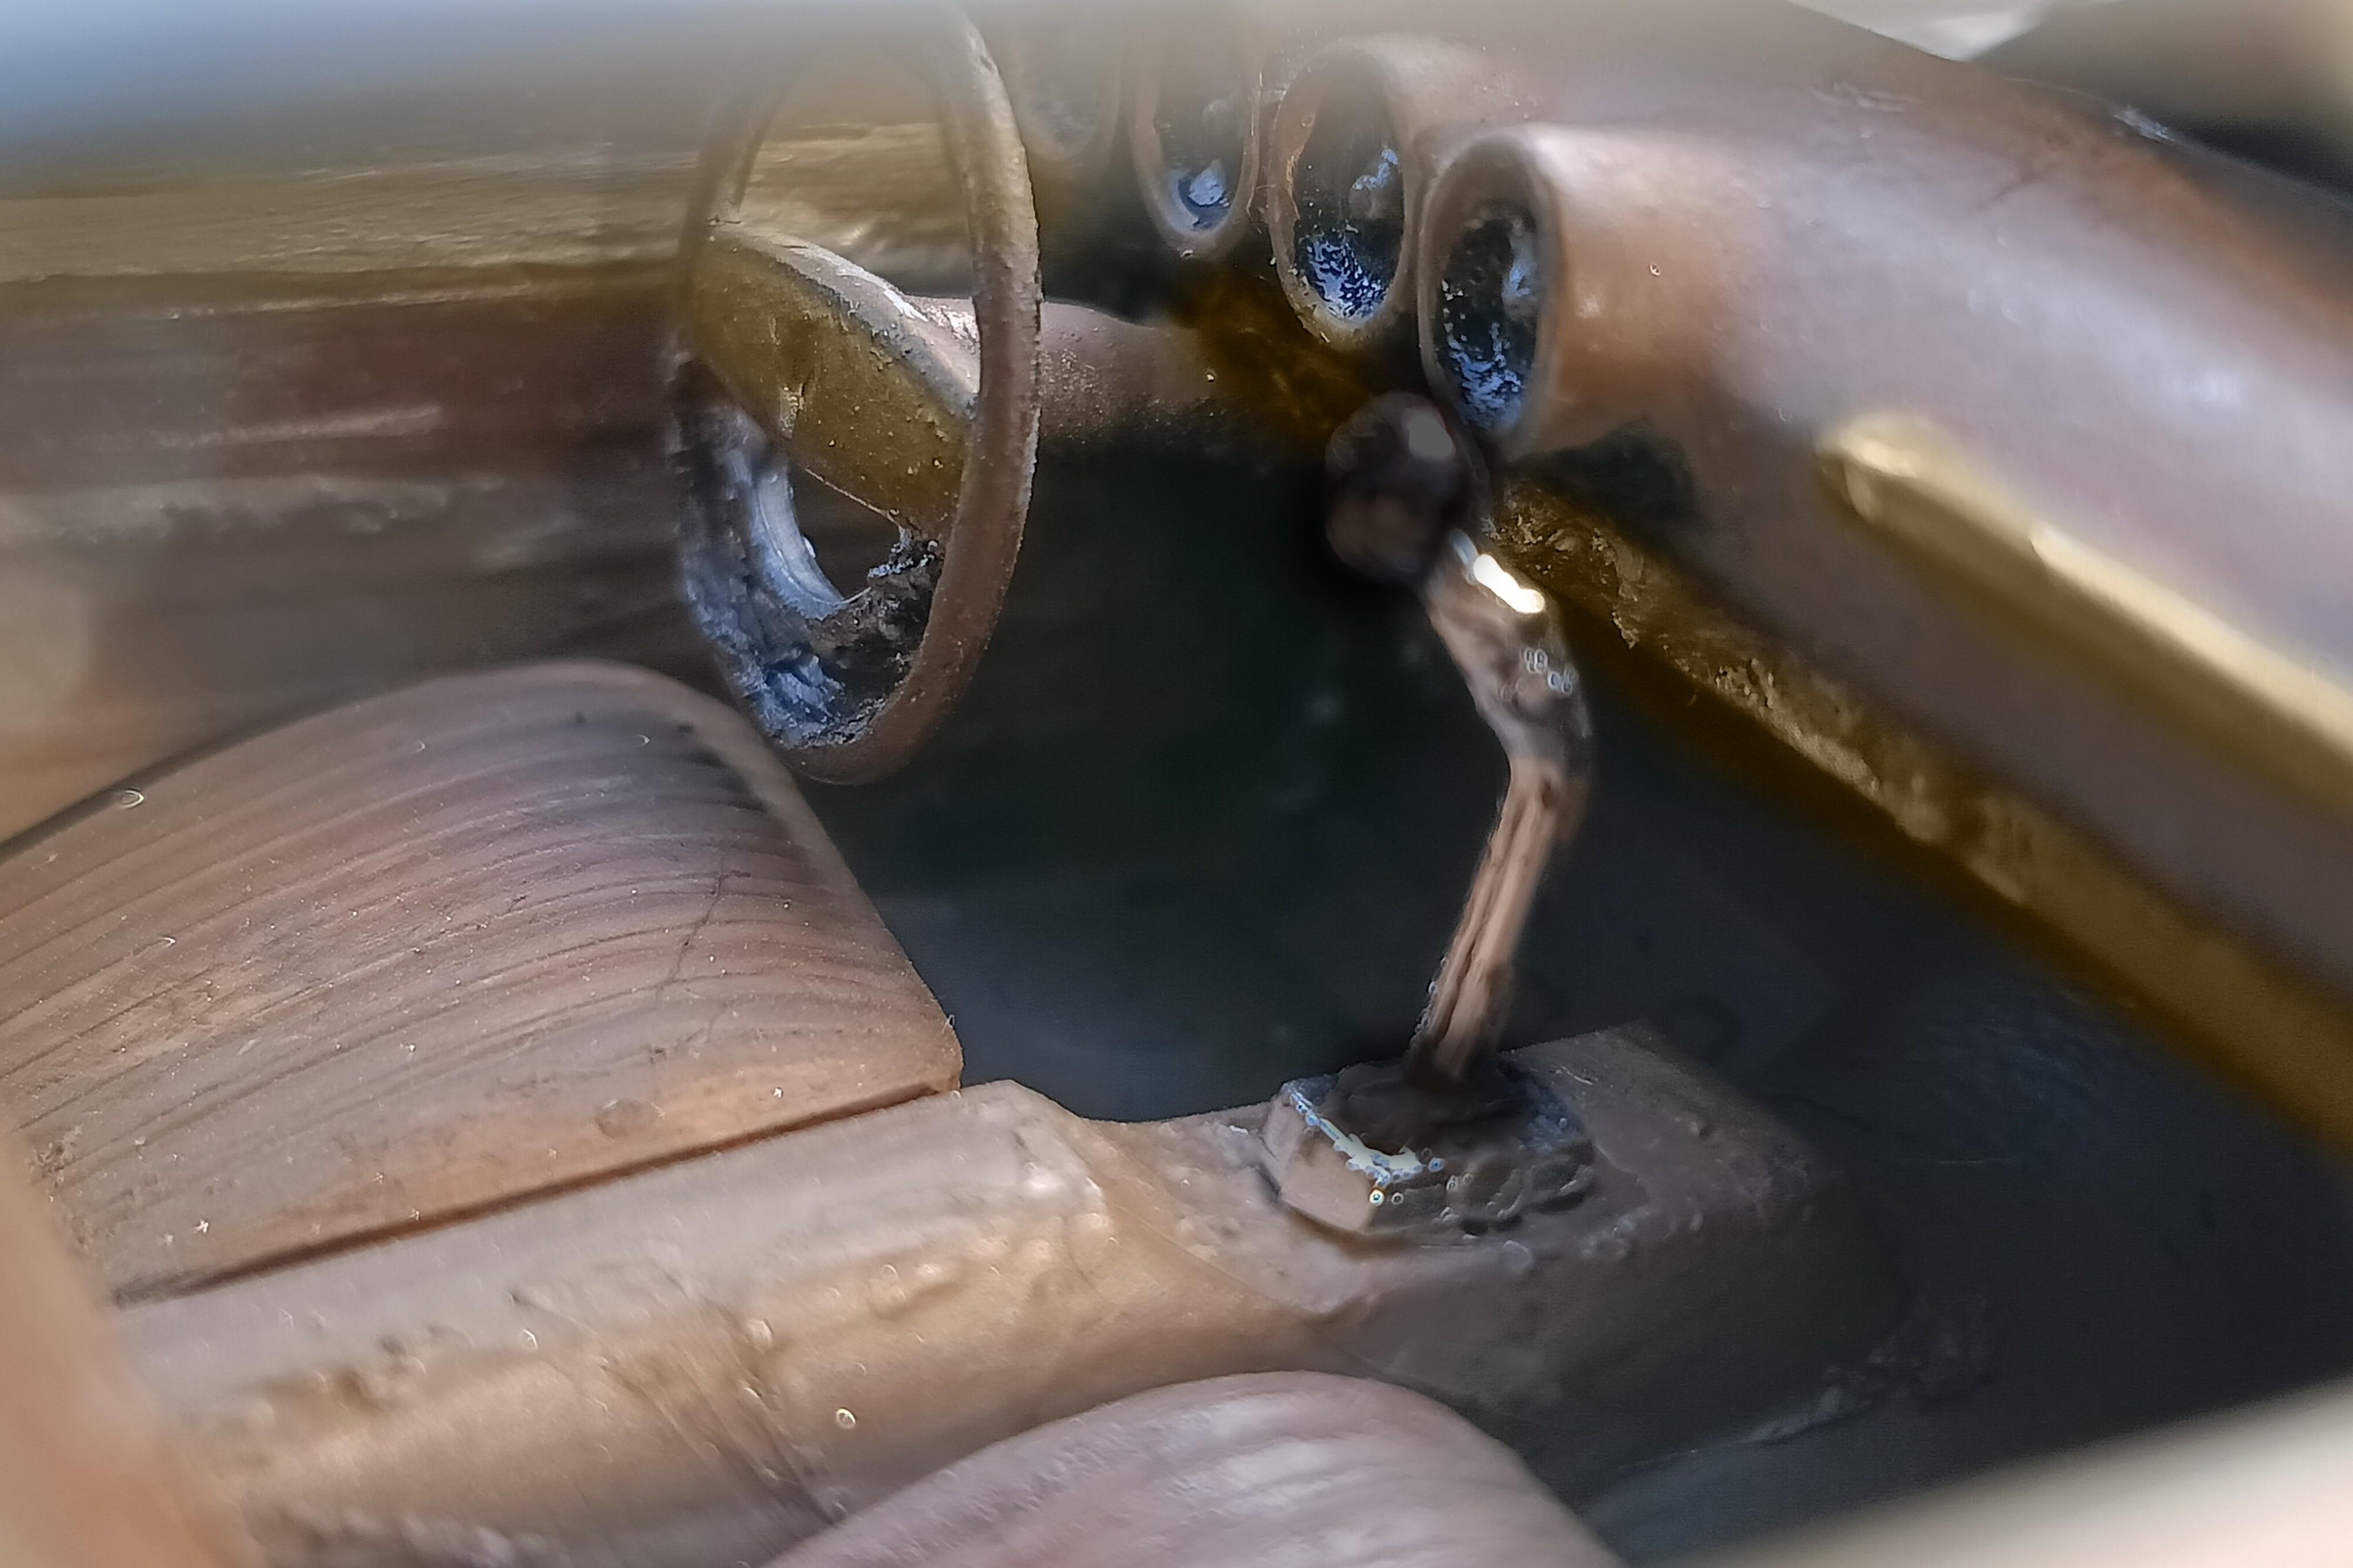
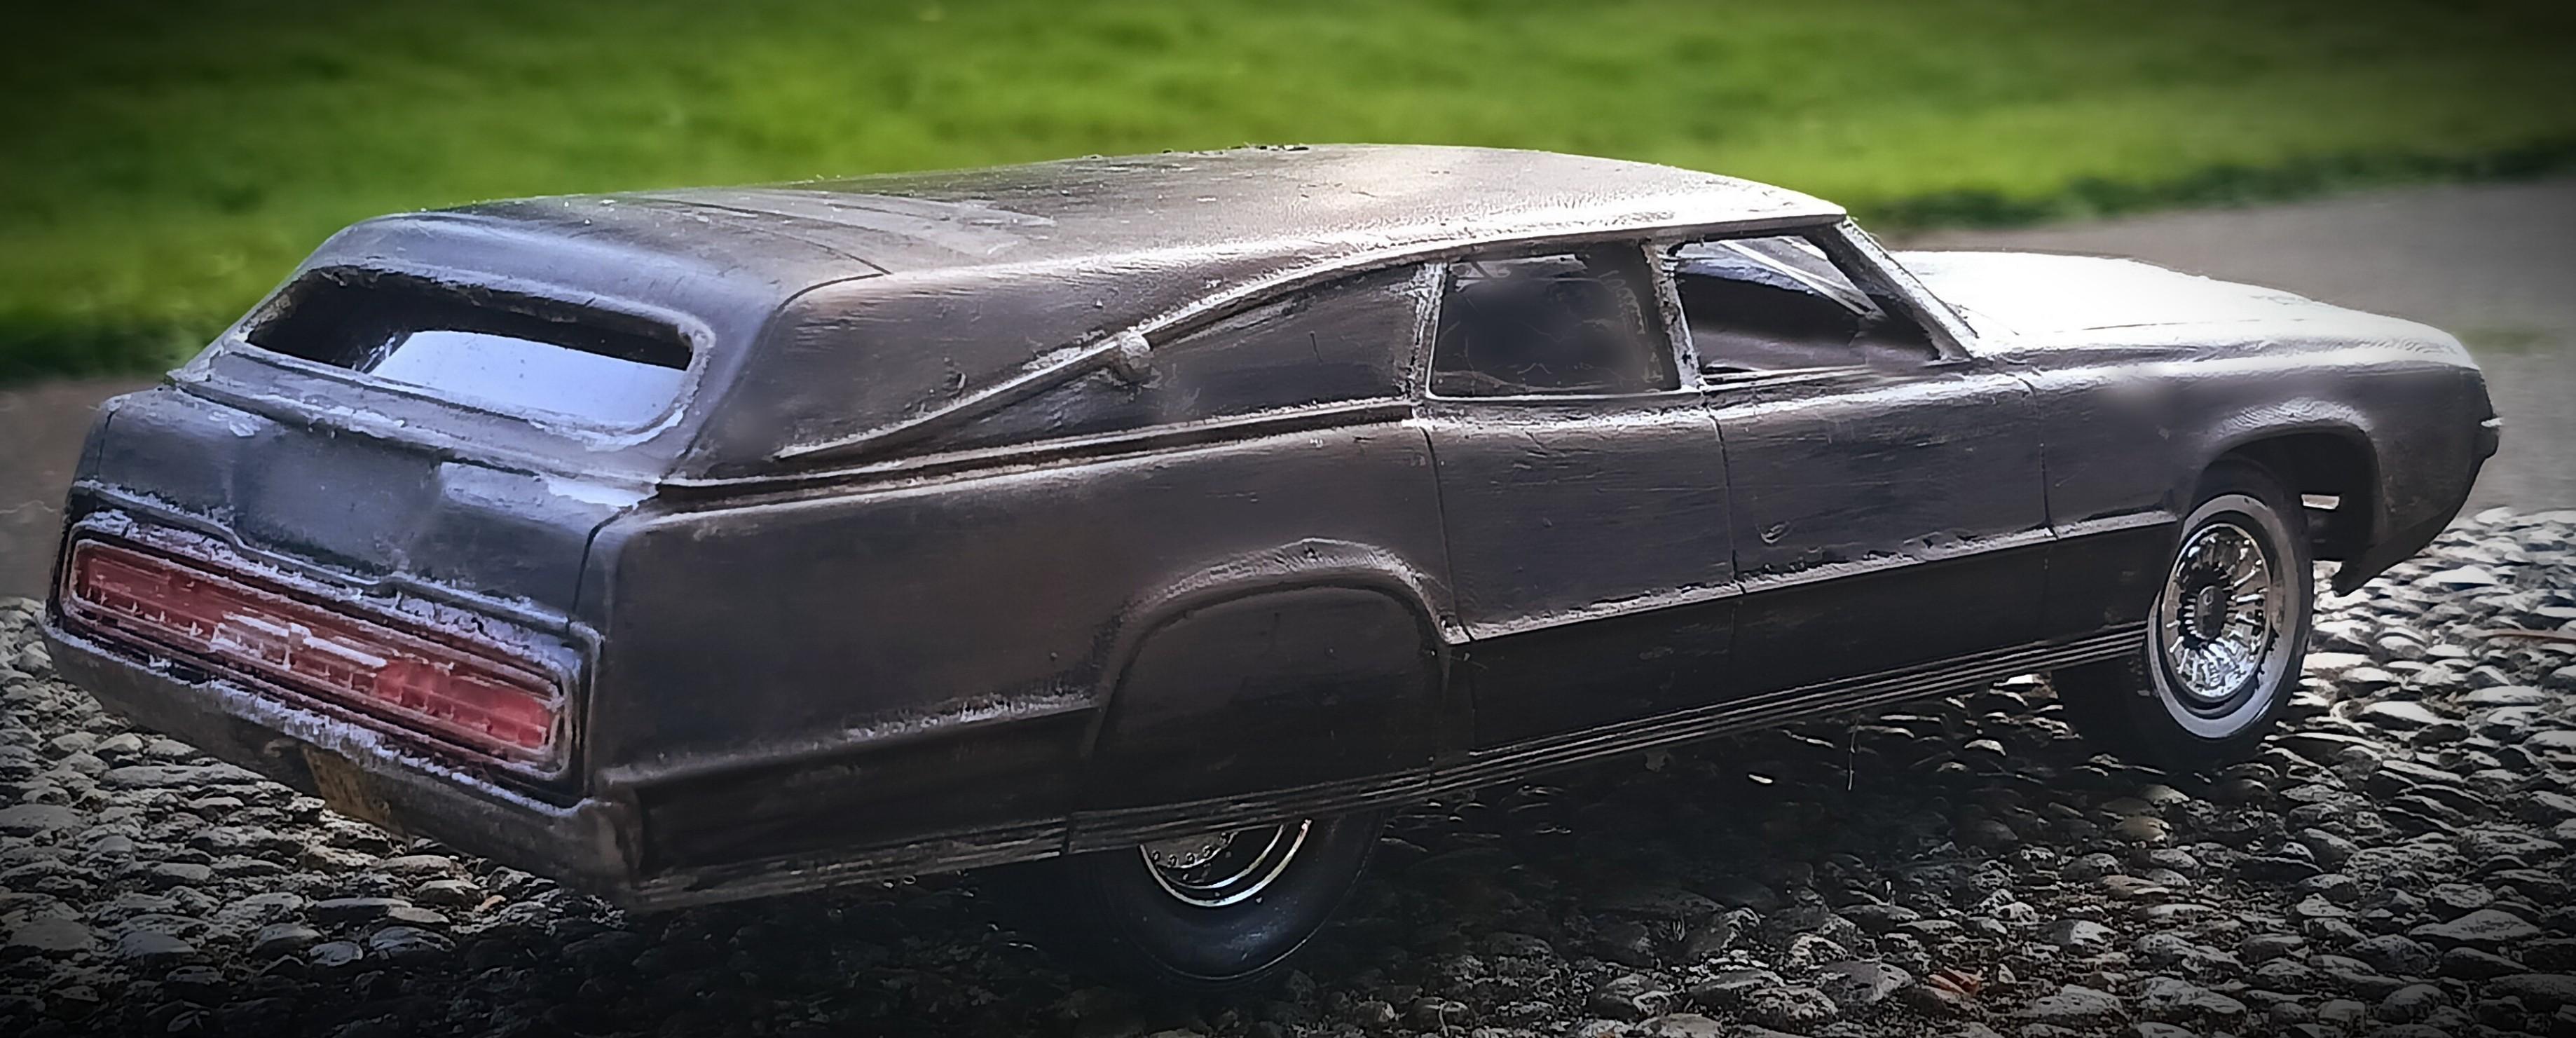
Start on a Jim Keeler tooling Revell '40 Willys Overland pickup gasser in "out of longterm storage" condition. The build is getting a DeSoto hemi V8 swap with custom headers and a chrome dropped axle, some areas of red will be replaced with corrosion, interior will be 2-tone buff & black with simulated age wear, a few parts/oil/gas logos will go on the firewall, hood sides and glass, and a scratchbuilt wood slat bed floor is installed with a battery to be placed in the front left corner. Wheels are kit supplied with AMT Racemaster slicks in back/MPC Goodyear Polyglas up front. Weathered finish is Krylon satin black sanded down, rubbed with Grumbacher oil pastels in burnt sienna/raw umber and dusted with talcum, with a homemade black/rust wash over certain areas. Droopy hinges are made with an old political sticker cut into strips and are to be concealed behind the dash and gauge panel/door cards.
-
Looking to see if anyone has an MPC "Space: 1999" Amphicat or MPC Wheel Horse garden tractor, Atlantis '57 Cadillac Eldorado Brougham, or the powersports goodies like karts, minibikes, wetbikes, 1/25 chopper bikes, garage diorama stuff, etc. that they do not need nor want. Thanks, Andria
-
thanks Larry
-
looks like a "Pyrador" or Pyr and Labrador or possibly Pyr with something like a cow dog/heeler.
-
1973 Chevy Luv
Andria H replied to Andria H's topic in Model Trucks: Pickups, Vans, SUVs, Light Commercial
thanks, Bob & Larry -
thank you!
-
thank you! Ertl Collectibles, Gearbox Collectibles & Spec-cast/Joseph Ertl Scale Models are the same way, but are usually undersized, generally toward 1/35 military scale.
-
Think I have the Henderson motorcycle now. Still looking for the midget racer
-
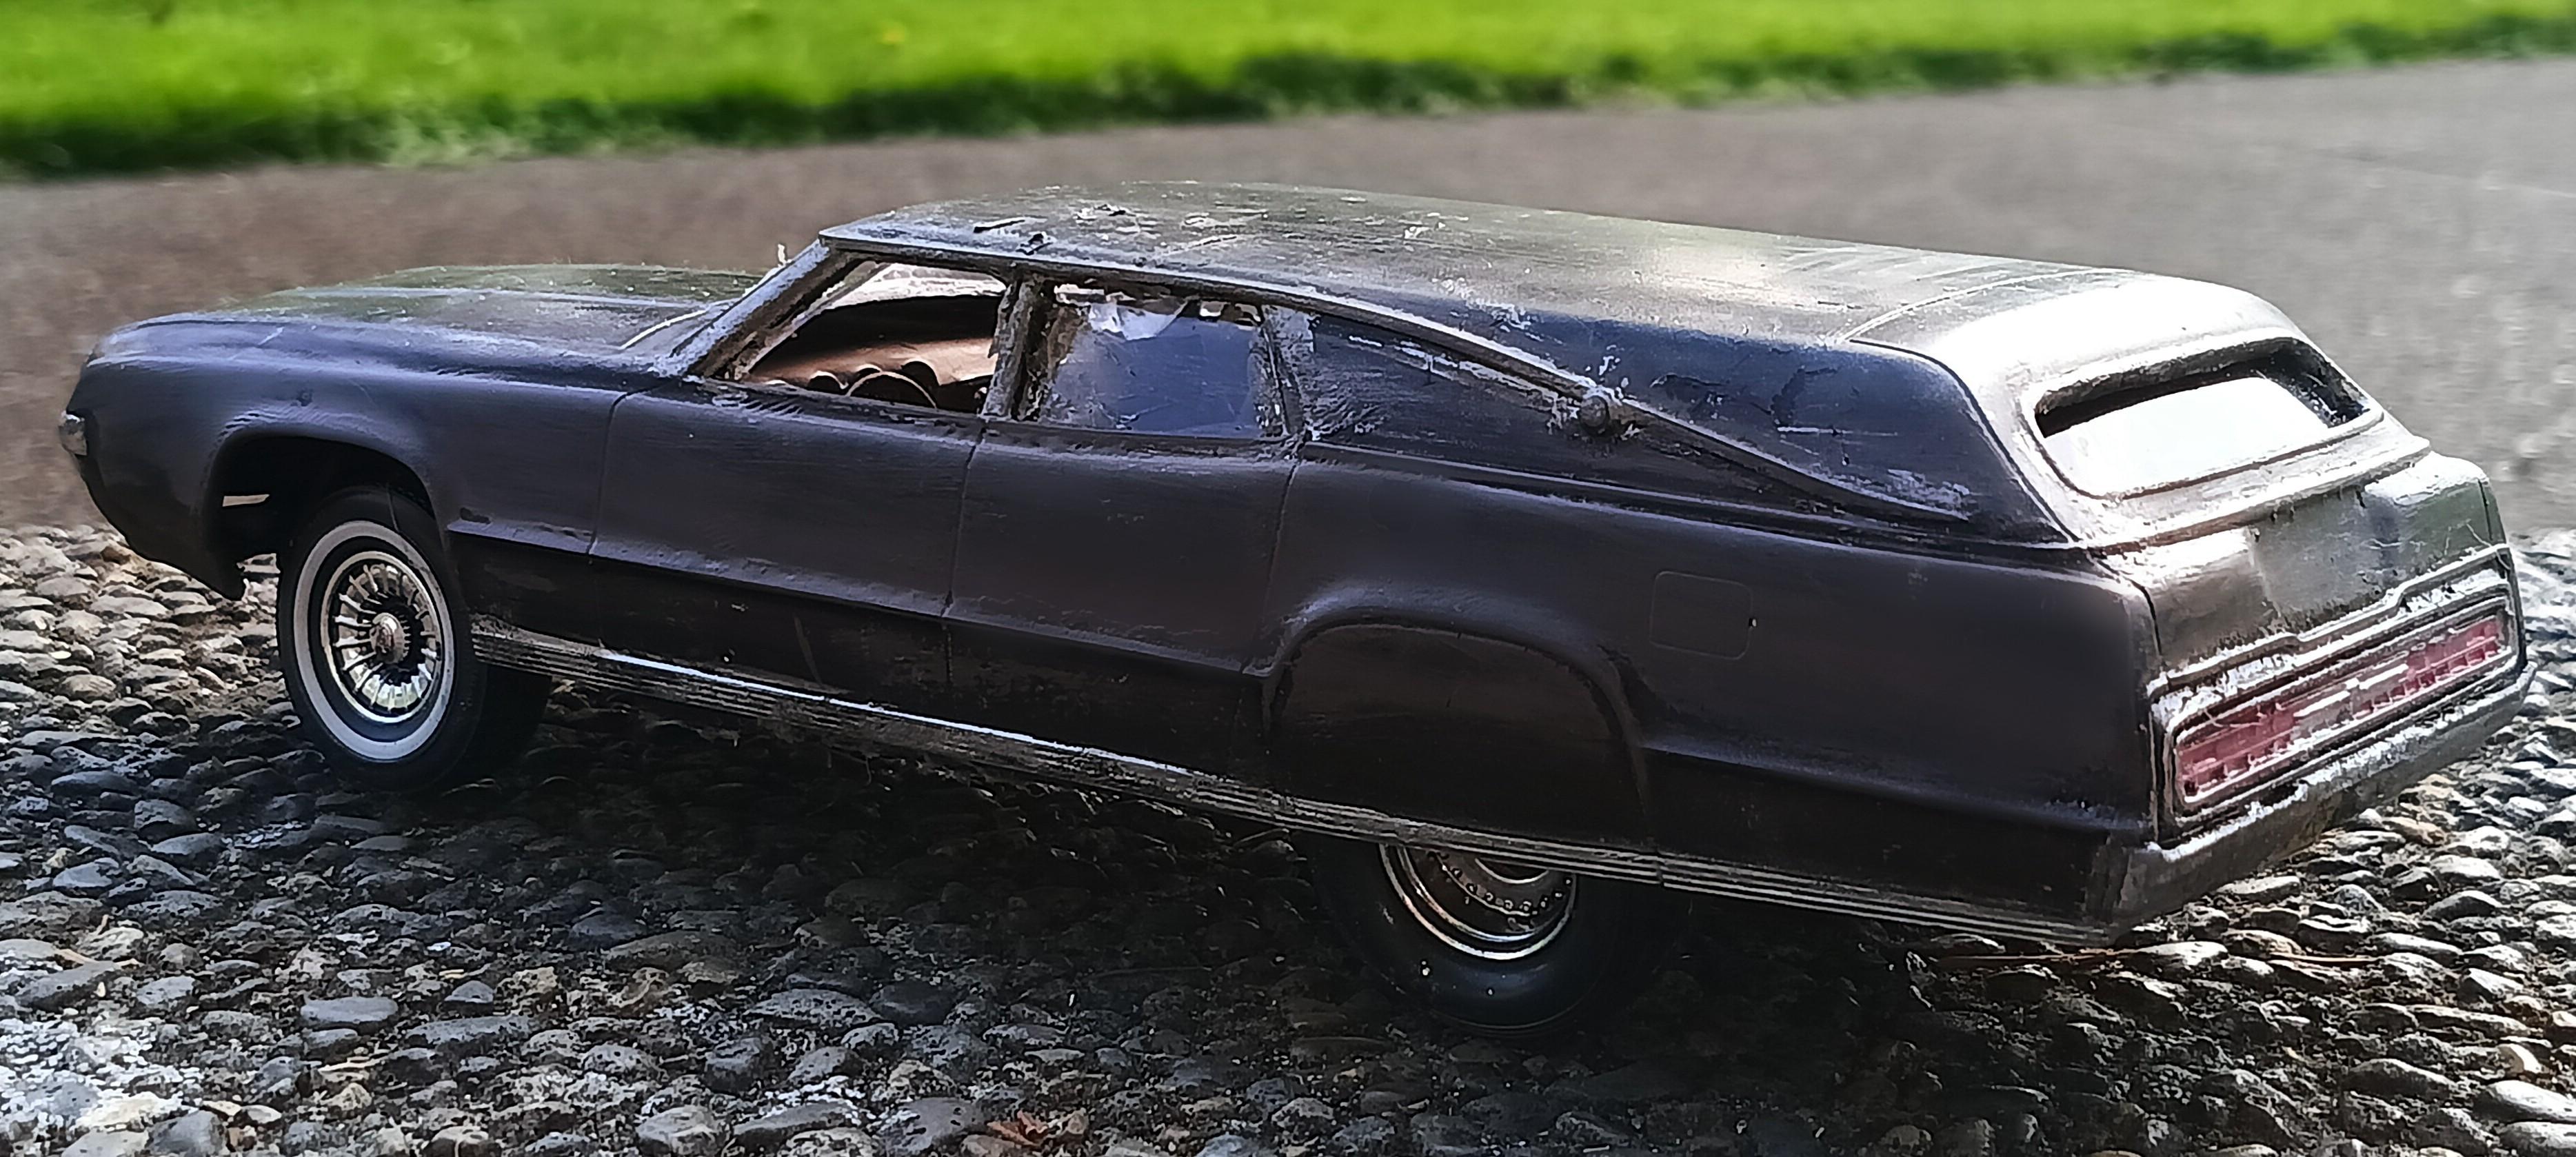
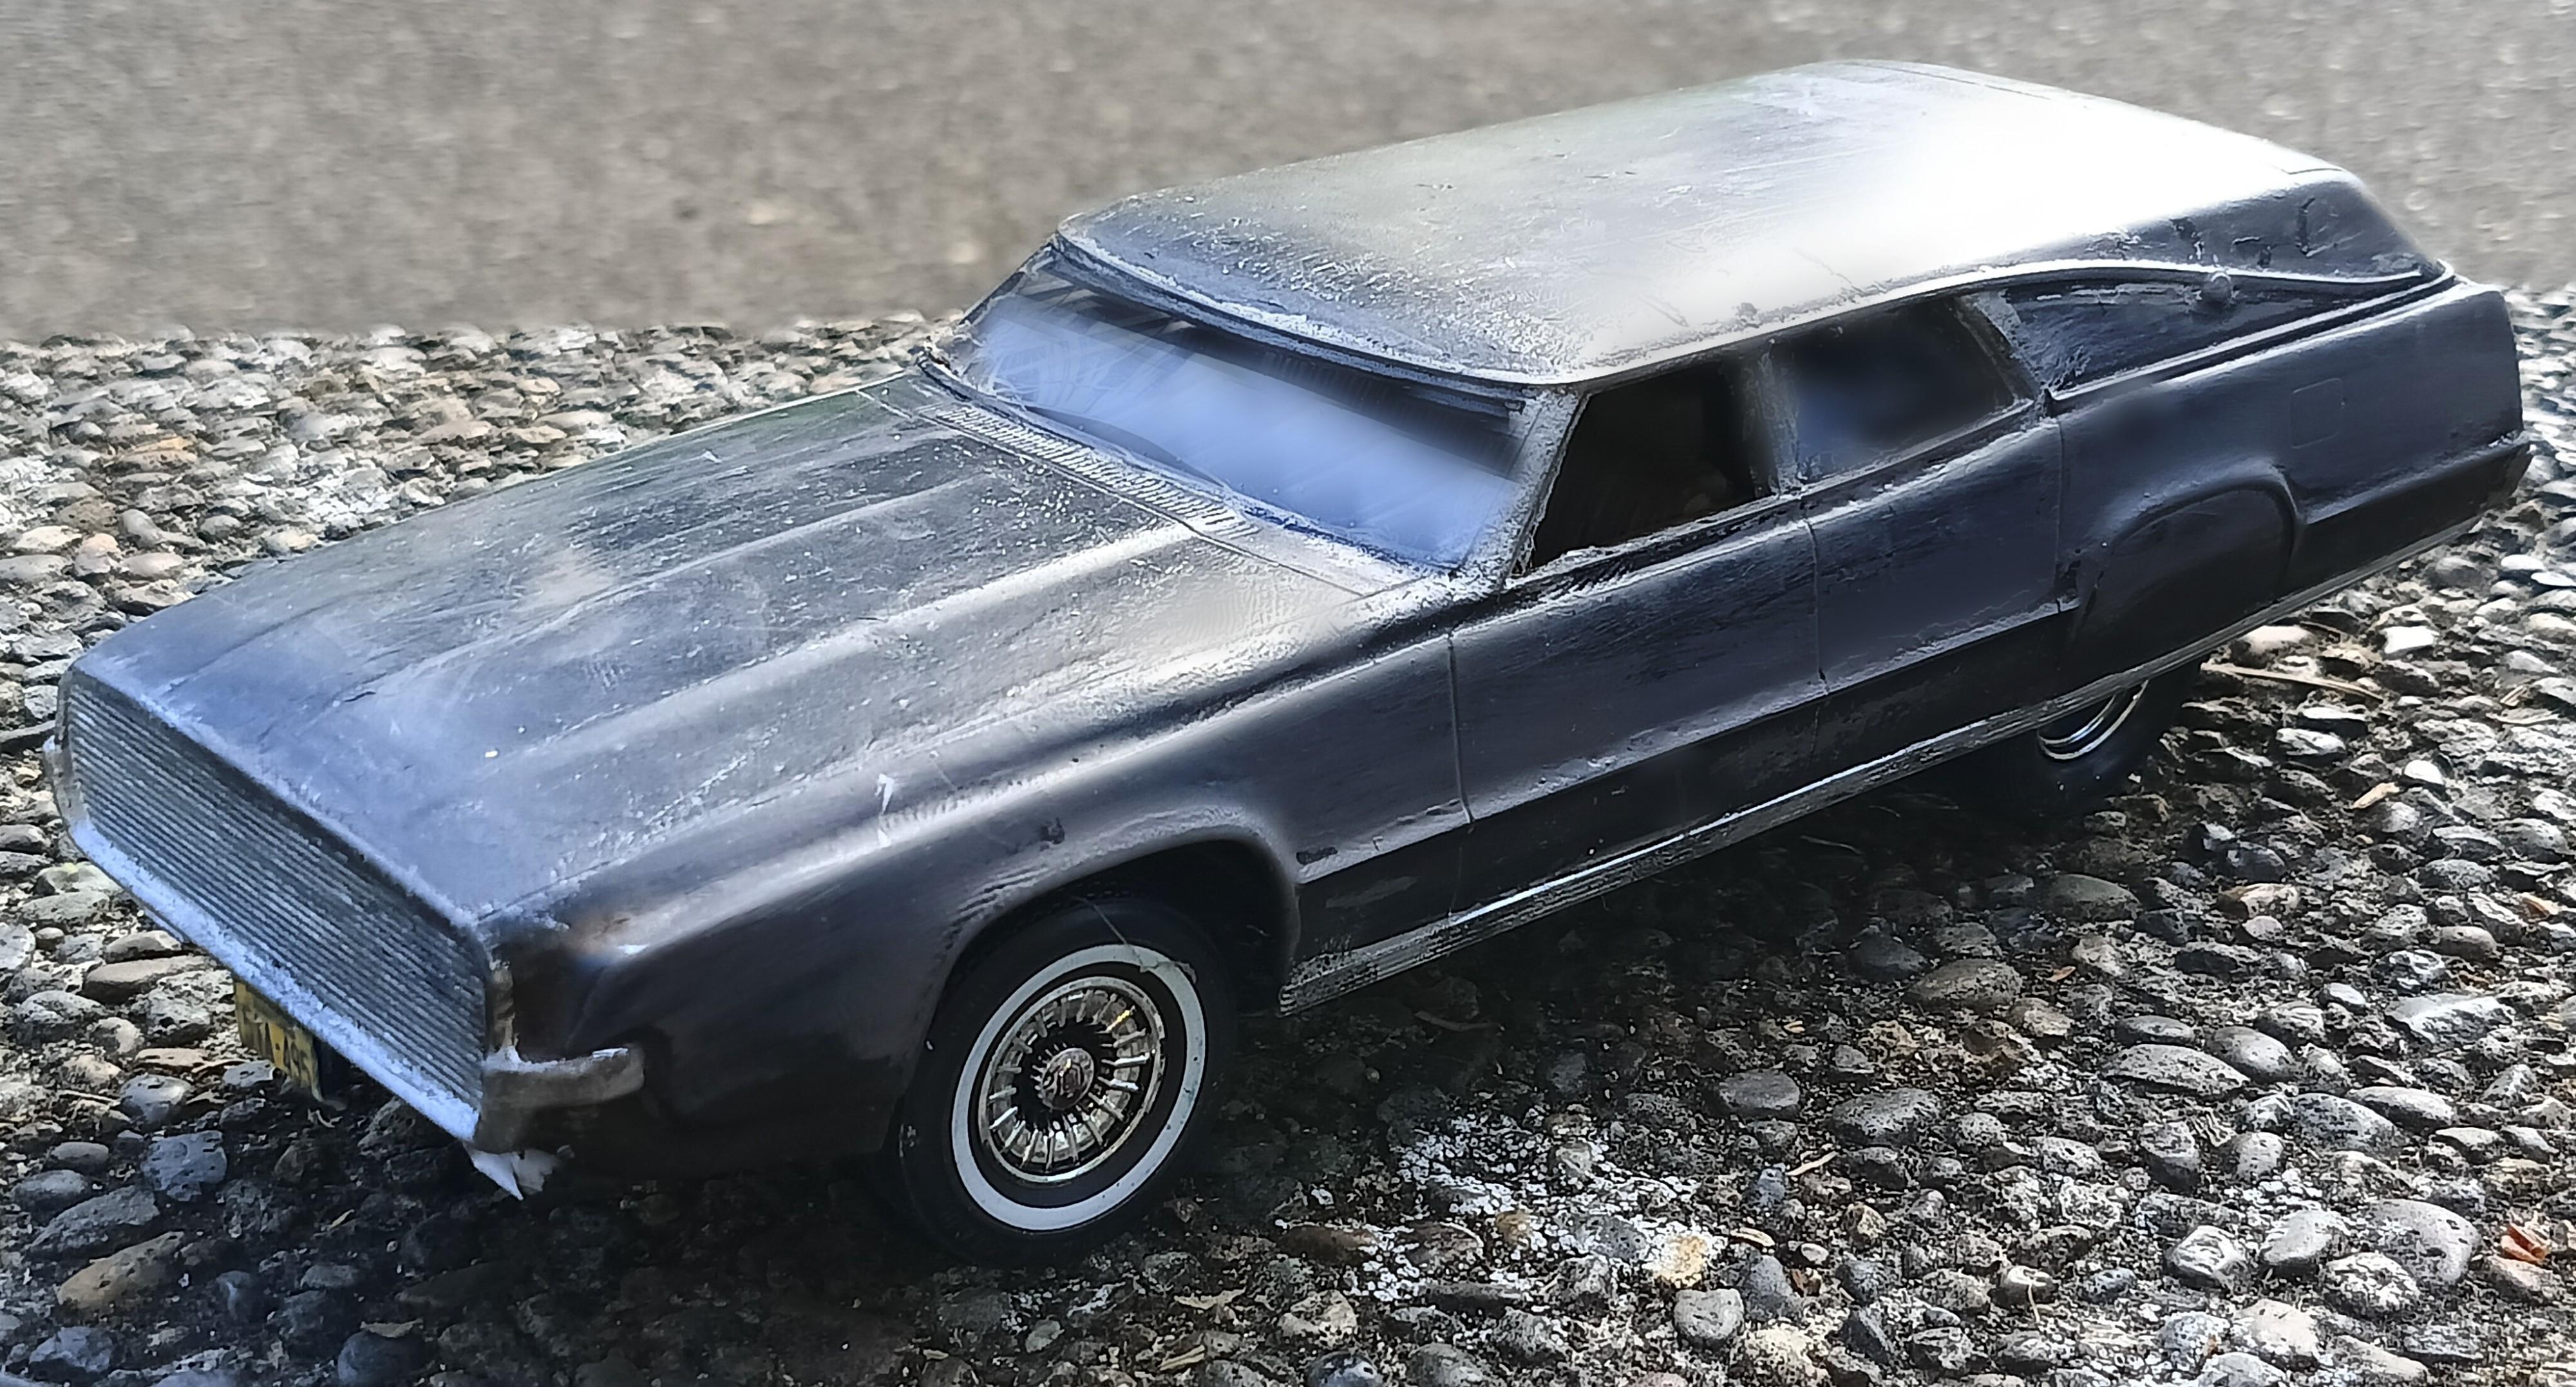
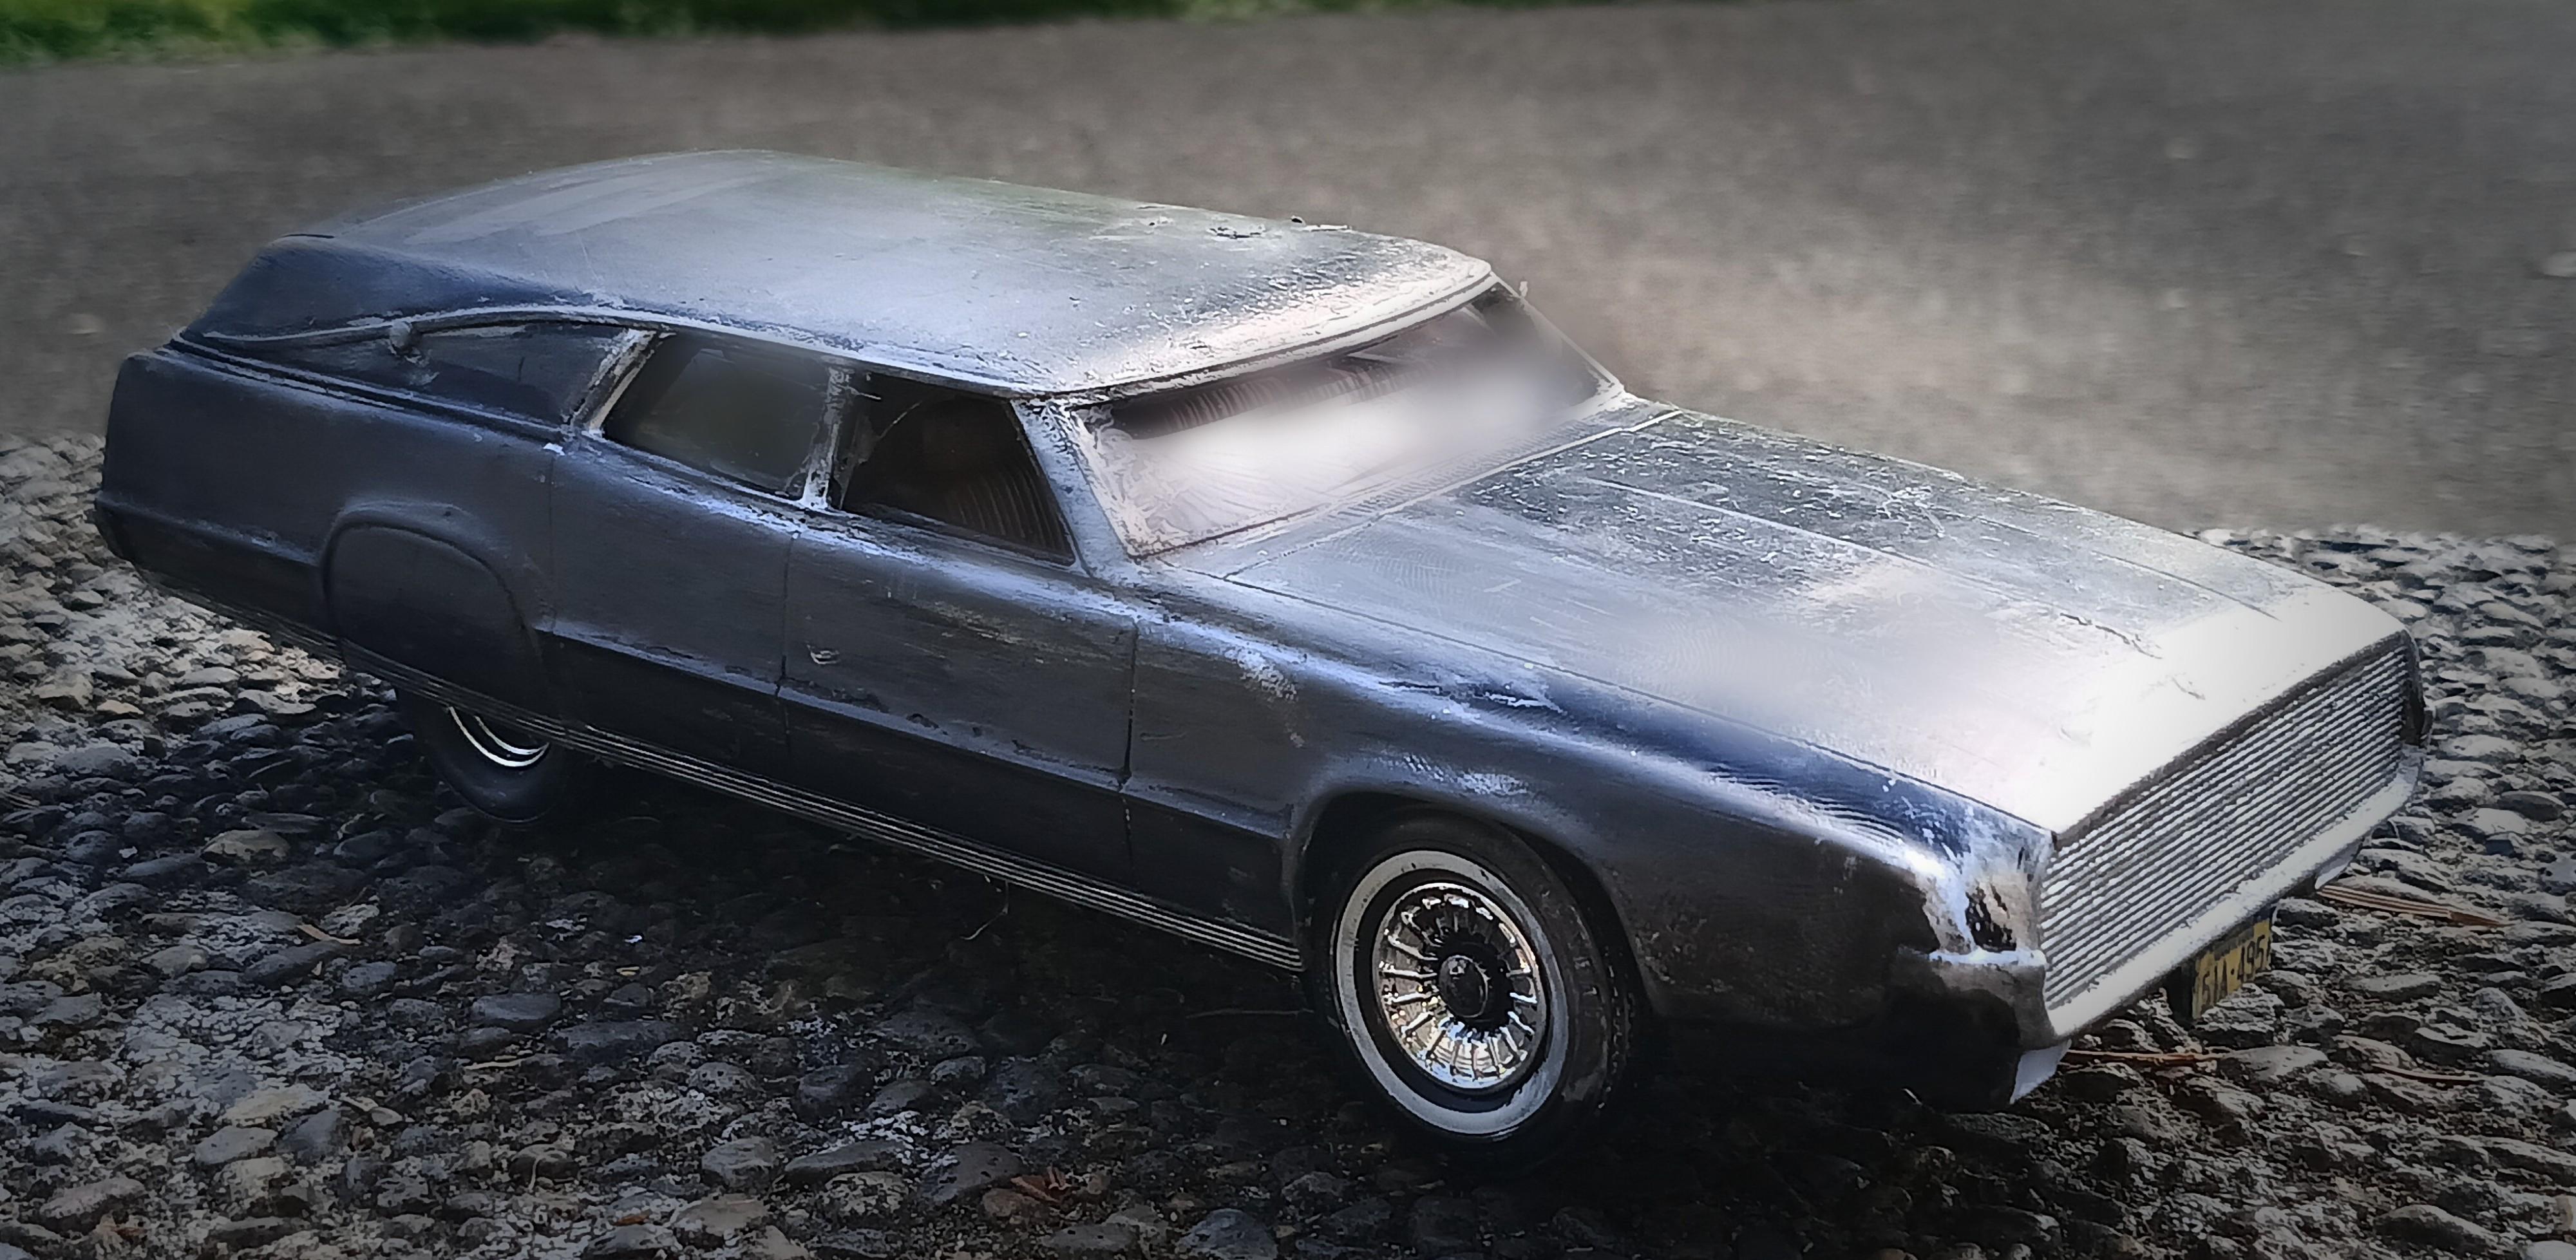
https://www.modelcarsmag.com/forums/topic/203374-1968-ford-thunderbird-custom-hearse/ Build thread (not much of one because I got too excited about the build to document much progress, but still) above. this is a Hooligan Scale Models chopped '68 Thunderbird hearse on a modified '65 Lincoln frame and reworked '69 Torino interior. Wheels/tires are from parts bin, aged finish is the aftermath of aging flat black Krylon with artist's oil paint and pastel powder.
-
thank you! Under glass thread is ready.
-
Bump. Still looking for the Henderson bike and possibly other Gangbuster bits from the Chrysler Imperial reissue and an Atlantis or Monogram midget racer.