
Scott Colmer
-
Posts
1,665 -
Joined
-
Last visited
Content Type
Profiles
Forums
Events
Gallery
Everything posted by Scott Colmer
-
 I am guessing either S&S or Detail Master. I can't find S7S on the net. So I hope it not them. Any help would be appreciated. I ran out of the Philips screw heads in the middle of parts assembly. (5th row form the bottom) Thanks Scott Hosted on Fotki
 -
Banjos scare me. Good idea on the fab then paint. On my latest, I have been trying to complete sub assemblies then store them in small bags so keep them safe and clean. I try to be extra careful when handling them for test fitting. It's hard to resist the temptation to do mock ups for fun. Keep going, James - yours is a winner. Scott
-
Amazing how that flows together. VERY kool!
-
Why do you guys model cars?
Scott Colmer replied to ericmaxman's topic in General Automotive Talk (Trucks and Cars)
I aplogize for the long reply, but I wrote it about two weeks ago after I read this thread. Why waste it. Here goes...... Scott Why I do it. No one told me about it. I found one in the bottom of a wooden toy box at my great grandma’s house. The box seemed to be endlessly deep as one day I dug through generations of left behind toys and found the parts of a Monogram Black Widow. I played with the parts all day until I figured out how they went back together. My parents came to pick me up and my father recognized what I had found so we got a tube of glue on the way home. The real stuff, this was 1966 so Notox was not available. By myself, over a covering of newspaper, I put the plastic, black truck back together using most of the glue in the tube. I was 4. The next model may have been a T’rantula or a Beer Wagon. I barely remember most of them now. By the time I was ten, I had built over one hundred. Every penny of allowance, and every Christmas, and every birthday brought more. I built them all as fast as I could. I only tried to stop once - while I was in college. I ended up making a chassis from straws and modeling a body from clay purchased at the book store. The passion could not die. The only thing that has changed is the amount of work into each one. They went from glue direct from tube to parts and entire decal sheets in water, to brush painted parts, to spray painted bodies. Then came the kit bashing. My OWN creations. I was a designer. A tiny stash of kits began its rapid expansion as soon as I had a real job and contact with other modelers. E-bay only added to the hoards. Every one is still meant to be built. Kit bashing gave away to scratchbuilding as my imagination required new parts to feed and perfect my dreams. This in turn pushed my materials, parts resources, tool accumulation, and eventually fabrication skills. My small work area became a time machine lit by a magnifying lamp. Hours slipped away without the slightest pause or notice. Like a manic Richard Dryfus making an alien inspired mountain from mashed potatoes, I had a vision that needed to get out. Set aside finish quality and piece count, the end result has is the same as with that sticky, black truck resurrected from the toy box – It has always been fun. -
Hey James, Good to see some progress on this one! Very clean work. I can't wait to see the grill finished. If you want to mount the axle for fab work but remove it later for paint, there are few options. White glue or a tiny bit of CA glue works. I like to use liquid tape, but it takes some clean up with alcohol after. Keep going. It's a great build. Scott
-
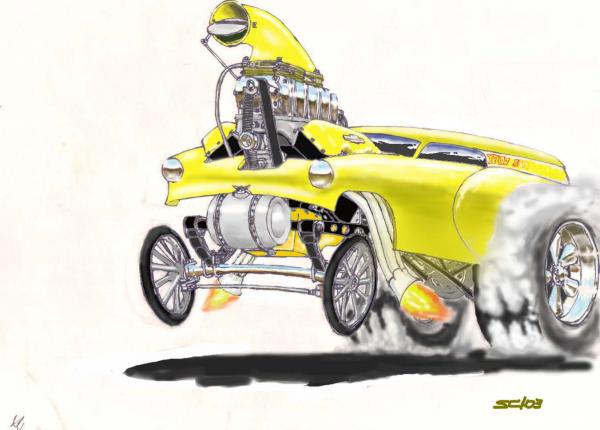
Kinda like this? Built this a few years ago. Great thread. Love the old stuff! I'll be watching. Scott Hosted on Fotki
-
Still working through the details. Thanks for all the encouragement. To those who went through the whole album...DANG! Floorboard. The first set of fasteners were too big, so pryed them up and replaced them with the smallest I have. I love this stuff...no really, I do....really. Hosted on Fotki Adding counter sunk screws to the interior panels. This way yellow plastic dude won't snag his pants, since these ride inside the cage. Simple process - drill, color hole black, dab of clear, place screw head. Hosted on Fotki Screw and bolts also have shanks. All those tabs have shanks made from bits of fine wire rolled under a file to make sort of threads. Hosted on Fotki Tomorrow, I'm packing up for Salt Lake. Back later. Scott
-
Tons of scratchbuilding - Unique design....I'm in! Very cool.
-
Tons of scratchbuilding - Unique design....I'm in! Very cool.
-
What's on Your Backburner?
Scott Colmer replied to FujimiLover's topic in General Automotive Talk (Trucks and Cars)
This is a thread I can relate to.. Flip Flop 55 started in 95. Stalled because I started something else. Hosted on Fotki Model A delivery. First started in 76, then made major progress in 85. Stalled because of front suspension questions and other projects. The engine recently exploded on the garage floor. Hosted on Fotki Replica of my real Sprite in dream configuration. Hosted on Fotki See how close I got. I gave this one away when Pop told me to get it out of his shop. I have another body. Hosted on Fotki Prostreet mini truck. Hosted on Fotki Nova Funny. Stalled because of inability to make the custom small block chevy hemi valve covers from 1963. Soon as I learn to photo etch, I can finish this. Hosted on Fotki Nike bus. The custom mixed paint lifted off the other side. There are two allisons underneath. Hosted on Fotki This is scheduled to be finished next. It's a 40 ford. Hosted on Fotki Scott -
What the???.....
Scott Colmer replied to Harry P.'s topic in General Automotive Talk (Trucks and Cars)
Seems like leaning back to far could cause the rider to get steamrolled. -
Well I got my decals woes sorted out with some good advice from HiZoot and the board. Had to let the good part of the sheet dry longer and then using the urethene to clear did the trick. Seems heat from a light bulb also helped. Once the dash was in carbon fiber I could put in the gauge cans and switch backs. The hold downs are photo etch scraps. I think I got all the parts in there that should be. And yes, it will be visible. I had to look up a wiring diagram in the internet, so that will be the next step. Scott Hosted on Fotki
-
I just spent the better part of a day trying to get some Scale Motor Sports decals to stick to some panels I made. I have no idea how old the sheet is. First they were falling apart in the water. Then I found a spot on the sheet that was OK, but they are just so fragile and they do not want to stick to the styrene. I have been using microsol to get them to lay down. Then I airbrushed them with future, but it seems that the decals just lift off. I was doing one side at a time, complete with the Future over top. When I laid the decal on the other side, the water would seep through and ruin my previous work. Next, I am going to lay the decals on both side and then clear both sides at one with two part urethene. Am I missing something? Scott
-
Well, the frame is red - really red. All the tabs are shaped to the right size and the joints are tight. This took and incredible amount sanding and filing. If I were to do this again.... Hosted on Fotki These aftermarket carbon fiber decals were a bear to work with. Some parts of the sheet were OK, and some just flaked away. Once I finally go two panels done, I foolishly sprayed one with clear lacquer. I did test a scrap first, which turned to the same black mush right after the one in the photo did. Hosted on Fotki So it was on to gauge backs. Since the back of the dash is open, might as well detail the back side. The is the can for the tach. I still need a source for the custom faces and some other small decals. Hosted on Fotki One thing is for sure....This will not be done for GSL this year. But it will get done. Scott
-
That is an amazing model of a stunning car. Don't forget Breedlove's Spirit of America - the lake version. I think that one is even bigger that the Golden Arrow. Land speed is probably the last arena for straightline creativity. At a recent day trip to El Mirage, I saw a Pinto with a 6/71 blown flat head. Cool - but it had blown up. I was hoping to take a LSR car to GSL too. I figured out that I will not make it. Oh well, it will be my first time, so there will be lots to see and learn. Good luck. Scott
-
Thanks Anthony, I did get a hold of Bob. What a great guy to do business with! I placed a pretty good order with him and will be placing another soon. Scott
-
Man, that's a stunner! Wonderful detail work. The headers are beautiful. Glad you took pics. Scott
-
Wow. I really like how the major element work on this. What great sense of motion the body has. The intricate door panels also give it a feel of depth and fulness and weight. Very good stuff! Scott
-
Hey Anthony, Do you know if they are still in business? I tried to call the number from the fotki site and it's a disconnect. I might have the hijack the number that Bob posted. Hope it's ok. I really need some rod ends. Scott
-
How did I miss this one?! All the fab work is great! This will make a cool ride. The Caddy fins are killer. Keeeeeeep building, Keeeeeep building. Scott
-
Great stuff here. A very entertaining piece! That paint is is awesome! Scott
-
I am taking advantage of a work furlough to make as much progress as possible. Here are the basic front suspension elements readly for final finishing. This is pretty much all scratchbuilt. Hosted on Fotki Instaling the scractchbuilt brakeline fittings. These are a pain to make. I thought my eyes would pop. Hosted on Fotki Almost there. We have the spindles and rotors. Plumbed fron axle with carbon fiber leaf spring. Hydraulic laver action shocks. And the calipers. Looks like a couple of the allen head mounting bolts came off the calipers. Easy fix. Hosted on Fotki The frame is next. Till next time. Scott
-
How do YOU assemble your project?
Scott Colmer replied to beefheart22's topic in General Automotive Talk (Trucks and Cars)
I tend to do a lot of scratchbuilding, so parts must be mocked up somehow before they are ready for paint and preassembly. I learned the hard way by having to grind painted pieces when they would not fit or line up correctly. Now I try to pin as much as posssible so there are no vague mounting points. I also use a lot of liquid tape. The trick is trying to figue out how all the parts with ineract with each other. Just like the guys on the bike building show, I try to get the muck up done as far as possible, then I break it down for paint. Working in subassemblies also helps keep things organized. I may have to fire up the air brush more then once for the same metalizer, but it works for me. My most recent project has some pretty tight chassis to body tolerences, so I have decided to assemble and paint the chassis first and components, then do a final body fit around it - considering room for paint -before laying on the body color. It's actually fun doing mental assemblies to figure this stuff out. Scott -
Dang. Thems parts are putry! Can't wait to see what comes out of that little machine shop. Where are you going to get your raw materials? Scott
-
Kit bashing vs. Scratch building
Scott Colmer replied to Jairus's topic in General Automotive Talk (Trucks and Cars)
Seems like we all pretty much agree here - at this site anyways. Scratchbuilding is taking raw materials and creating what you need. (By the way - a great source of fun!) Kit bashing is taking molded pieces from one kit and using them in another kit. Even if you modify them - such as drilling lightening holes, or trimming them up, or even using them for another purpose - it's still kit bashing. (Also fun.) I am always impressed by guys who take some household material or item and turn it into a cool part. Not so sure about the slotcar working of the definition of scratchbuilding, but OK, that's their show I guess. Scott