
Jason Foster
-
Posts
93 -
Joined
-
Last visited
Content Type
Profiles
Forums
Events
Gallery
Everything posted by Jason Foster
-
Re-chopping the Revell 48 Ford Update 4-13-16
Jason Foster replied to Jason Foster's topic in WIP: Model Cars
Now with the back window out. We can chop the top off. First we make a horizontal cut from the rear window opening to the side of the car. Then from the rear of the side window to the cut that is already made. Should end up with something like this. The front window pillars get cut on either side of the tape used to mark the chop. This now frees the top from the rest of the car. Quick test fit, looks pretty good so far. More to come. -
Looking great so far! Like the tail lights.
-
Well, with the 48 Chevy project coming together. I started a new chop tonight. I seem to be becoming addicted to chopping cars lately. Yes, this time I took plenty of pictures of the process. Let me know what you think. First up is marking what to remove. Next I removed the door pillars. Followed by the rear window. More to come!
-
That rear panel looks awesome!
-
Galaxie Limited 47 Chevy Custom Update 03/31/16
Jason Foster replied to Jason Foster's topic in WIP: Model Cars
Well, finally got the body buffed out and foiled. Started working on the engine and interior. Thanks for looking.....more to come. -
Another one of my ongoing projects. Just shot some gold paint on it last week. Let me know what you think. I really need to get this thing done!
-
Galaxie Limited 47 Chevy Custom Update 03/31/16
Jason Foster replied to Jason Foster's topic in WIP: Model Cars
Still need to add the exhaust and gas tank. I don't think they will cause to many problems. Did have to cheat a little and cut he tops of the tires. The hub caps are from the AMT 36 Ford kit Its as low as it will go! Next up interior and engine. Thanks for looking and commenting guys. -
Galaxie Limited 47 Chevy Custom Update 03/31/16
Jason Foster replied to Jason Foster's topic in WIP: Model Cars
I am still able to use the kit engine after the chassis mods. More to come. -
Galaxie Limited 47 Chevy Custom Update 03/31/16
Jason Foster replied to Jason Foster's topic in WIP: Model Cars
Here are some photos of the modified chassis. I had to modify quite a bit to get this thing as low as possible. I cut the front cross member off and raised it up as much as I could. Made a new transmission mount. Modified the rear leaf springs. Cut the mounting blocks on the floor pan More pics of this to come. -
Galaxie Limited 47 Chevy Custom Update 03/31/16
Jason Foster replied to Jason Foster's topic in WIP: Model Cars
Sorry for taking so long to reply guys. Unfortunately I did not take any pics of the chop while in the process. The window trim is made from .040" styrene sheet. I first made a paper template, so that I could transfer it onto the sheet plastic and cut it out. I then drum sanded the inner opening. After that I used small sanding sticks to radius the inside and outside edge. -
Galaxie Limited 47 Chevy Custom Update 03/31/16
Jason Foster replied to Jason Foster's topic in WIP: Model Cars
Small update this evening. Got the chassis modified to be as low as possible. Think it looks pretty good. I can live with it. -
Galaxie Limited 47 Chevy Custom Update 03/31/16
Jason Foster replied to Jason Foster's topic in WIP: Model Cars
Here is the window trim in place. -
Galaxie Limited 47 Chevy Custom Update 03/31/16
Jason Foster replied to Jason Foster's topic in WIP: Model Cars
Thanks for all the comments. Small update to the paint. Add Pearl-ex Duo Blue-Green to the clear. Shot two coats of this, followed by one coat straight clear. Looks much better I think. Take a look. Thanks for looking. -
AMT 37 Chevy Coupe Gasser Update 2/29/16
Jason Foster replied to Jason Foster's topic in WIP: Drag Racing Models
Thanks for the comments guys. Small update tonight. Got all the foiling done. Interior is in. Glued the supercharger pulleys on. Now I need to wire up the engine. Stay tuned. -
Another project on the bench right now. Painted with Revlon 495 Sultry nail polish, over a silver base. Then it was masked and sprayed with Testors One Coat Purple-licious for the starburst paneling. Main decals are from the Model King 50 Austin Gasser kit. Wheels are from the Revell/Monogram 36 Ford Coupe Street Rod. Tires are from the Revell Willys Gasser. Made the front wheels pose able. Added extra trim ring to back wheel to give a deeper offset. Ring was painted with Dupi-Color Gloss Black and then Alclad II Chrome. Lots more to do. Thanks for looking.
-
1959 Chevy Brookwood Wagon - Updated 2/27
Jason Foster replied to IceMan Collections's topic in WIP: Model Cars
You can never have too many flames! Like it! -
Here is my latest project. Chopped the top 3.5". Made my own fender skirts. Sinful Colors Cinderella nail polish paint (no clear yet). Custom made window trim. This is my first time chopping a curvy car like this. I think it turned out well. Thanks for looking.
-
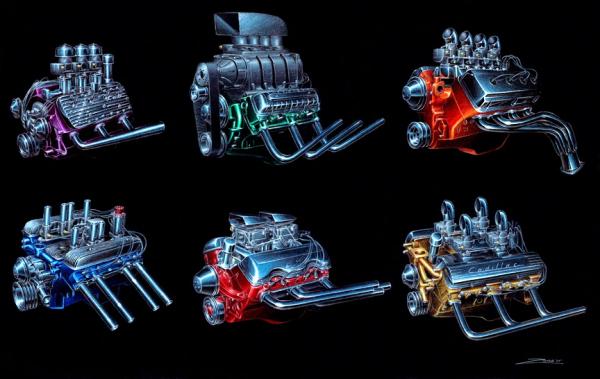
Thanks for all the positive feedback. Here is a couple of up close pics of the engine.
-
Here is my latest project that I completed. A lot of things have been changed and added to this. The biggest mods were, lower rear axle supports and shortening the firewall so the body would close all the way. I'm very happy with the stance this thing has. Here are the pics enjoy.
-
Recently moved and wonder if there were any model car clubs in findlay ohio?
-
Chris, the orange did crack. I've had issue with slixx decal cracking.
-
That thing is bright! Looks like it is ready to start up. Nice!
-
Here is the new reissue from round2. Basicly box stock. Added plug wires. The front wheels are from the piranha funny car. Testors one coat White lightning for paint. Thanks for looking. 20150206_133418 by Jason Foster, on Flickr 20150206_133506 by Jason Foster, on Flickr 20150206_133613 by Jason Foster, on Flickr 20150206_133637 by Jason Foster, on Flickr
-
Here is the new reissue from round2/mpc. Paint is Testors one coat Root beer and Testors Phoenician yellow. Added a roll cage. Modified the hood scoop to fit the high rise manifold. Thanks for looking. 20150206_134343 by Jason Foster, on Flickr 20150206_134405 by Jason Foster, on Flickr 20150206_134439 by Jason Foster, on Flickr
-
Here is my willys pickup from the new reissue. Decided to shorten the bed. Used the lace decals from the new reissue of the Revell Willys pickup. 20150206_134658 by Jason Foster, on Flickr 20150206_134805 by Jason Foster, on Flickr 20150206_134734 by Jason Foster, on Flickr 20150206_134930 by Jason Foster, on Flickr
