
my66s55
-
Posts
1,355 -
Joined
-
Last visited
Content Type
Profiles
Forums
Events
Gallery
Posts posted by my66s55
-
-
Just now, my66s55 said:
Thank you very much. Any help is graciously appreciated. There isn't enough pics on the internet to fully cover this subject.
17 hours ago, sbk said:Nice work! My apologies if you already mentioned it, but what program are you using for design?
Thanks,
SteveI have only said "Blender" without any clarification. Blender is an open source program created by people who use it. I'm a Linux user and not a big fan of Windows. Blender has been mentioned on the Shapeways website as a good source for checking your files for 3d print ability. I started learning Blender in 2013 when I built my first 3d printer.
-
 1
1
-
-
On 6/23/2021 at 2:37 PM, bill-e-boy said:
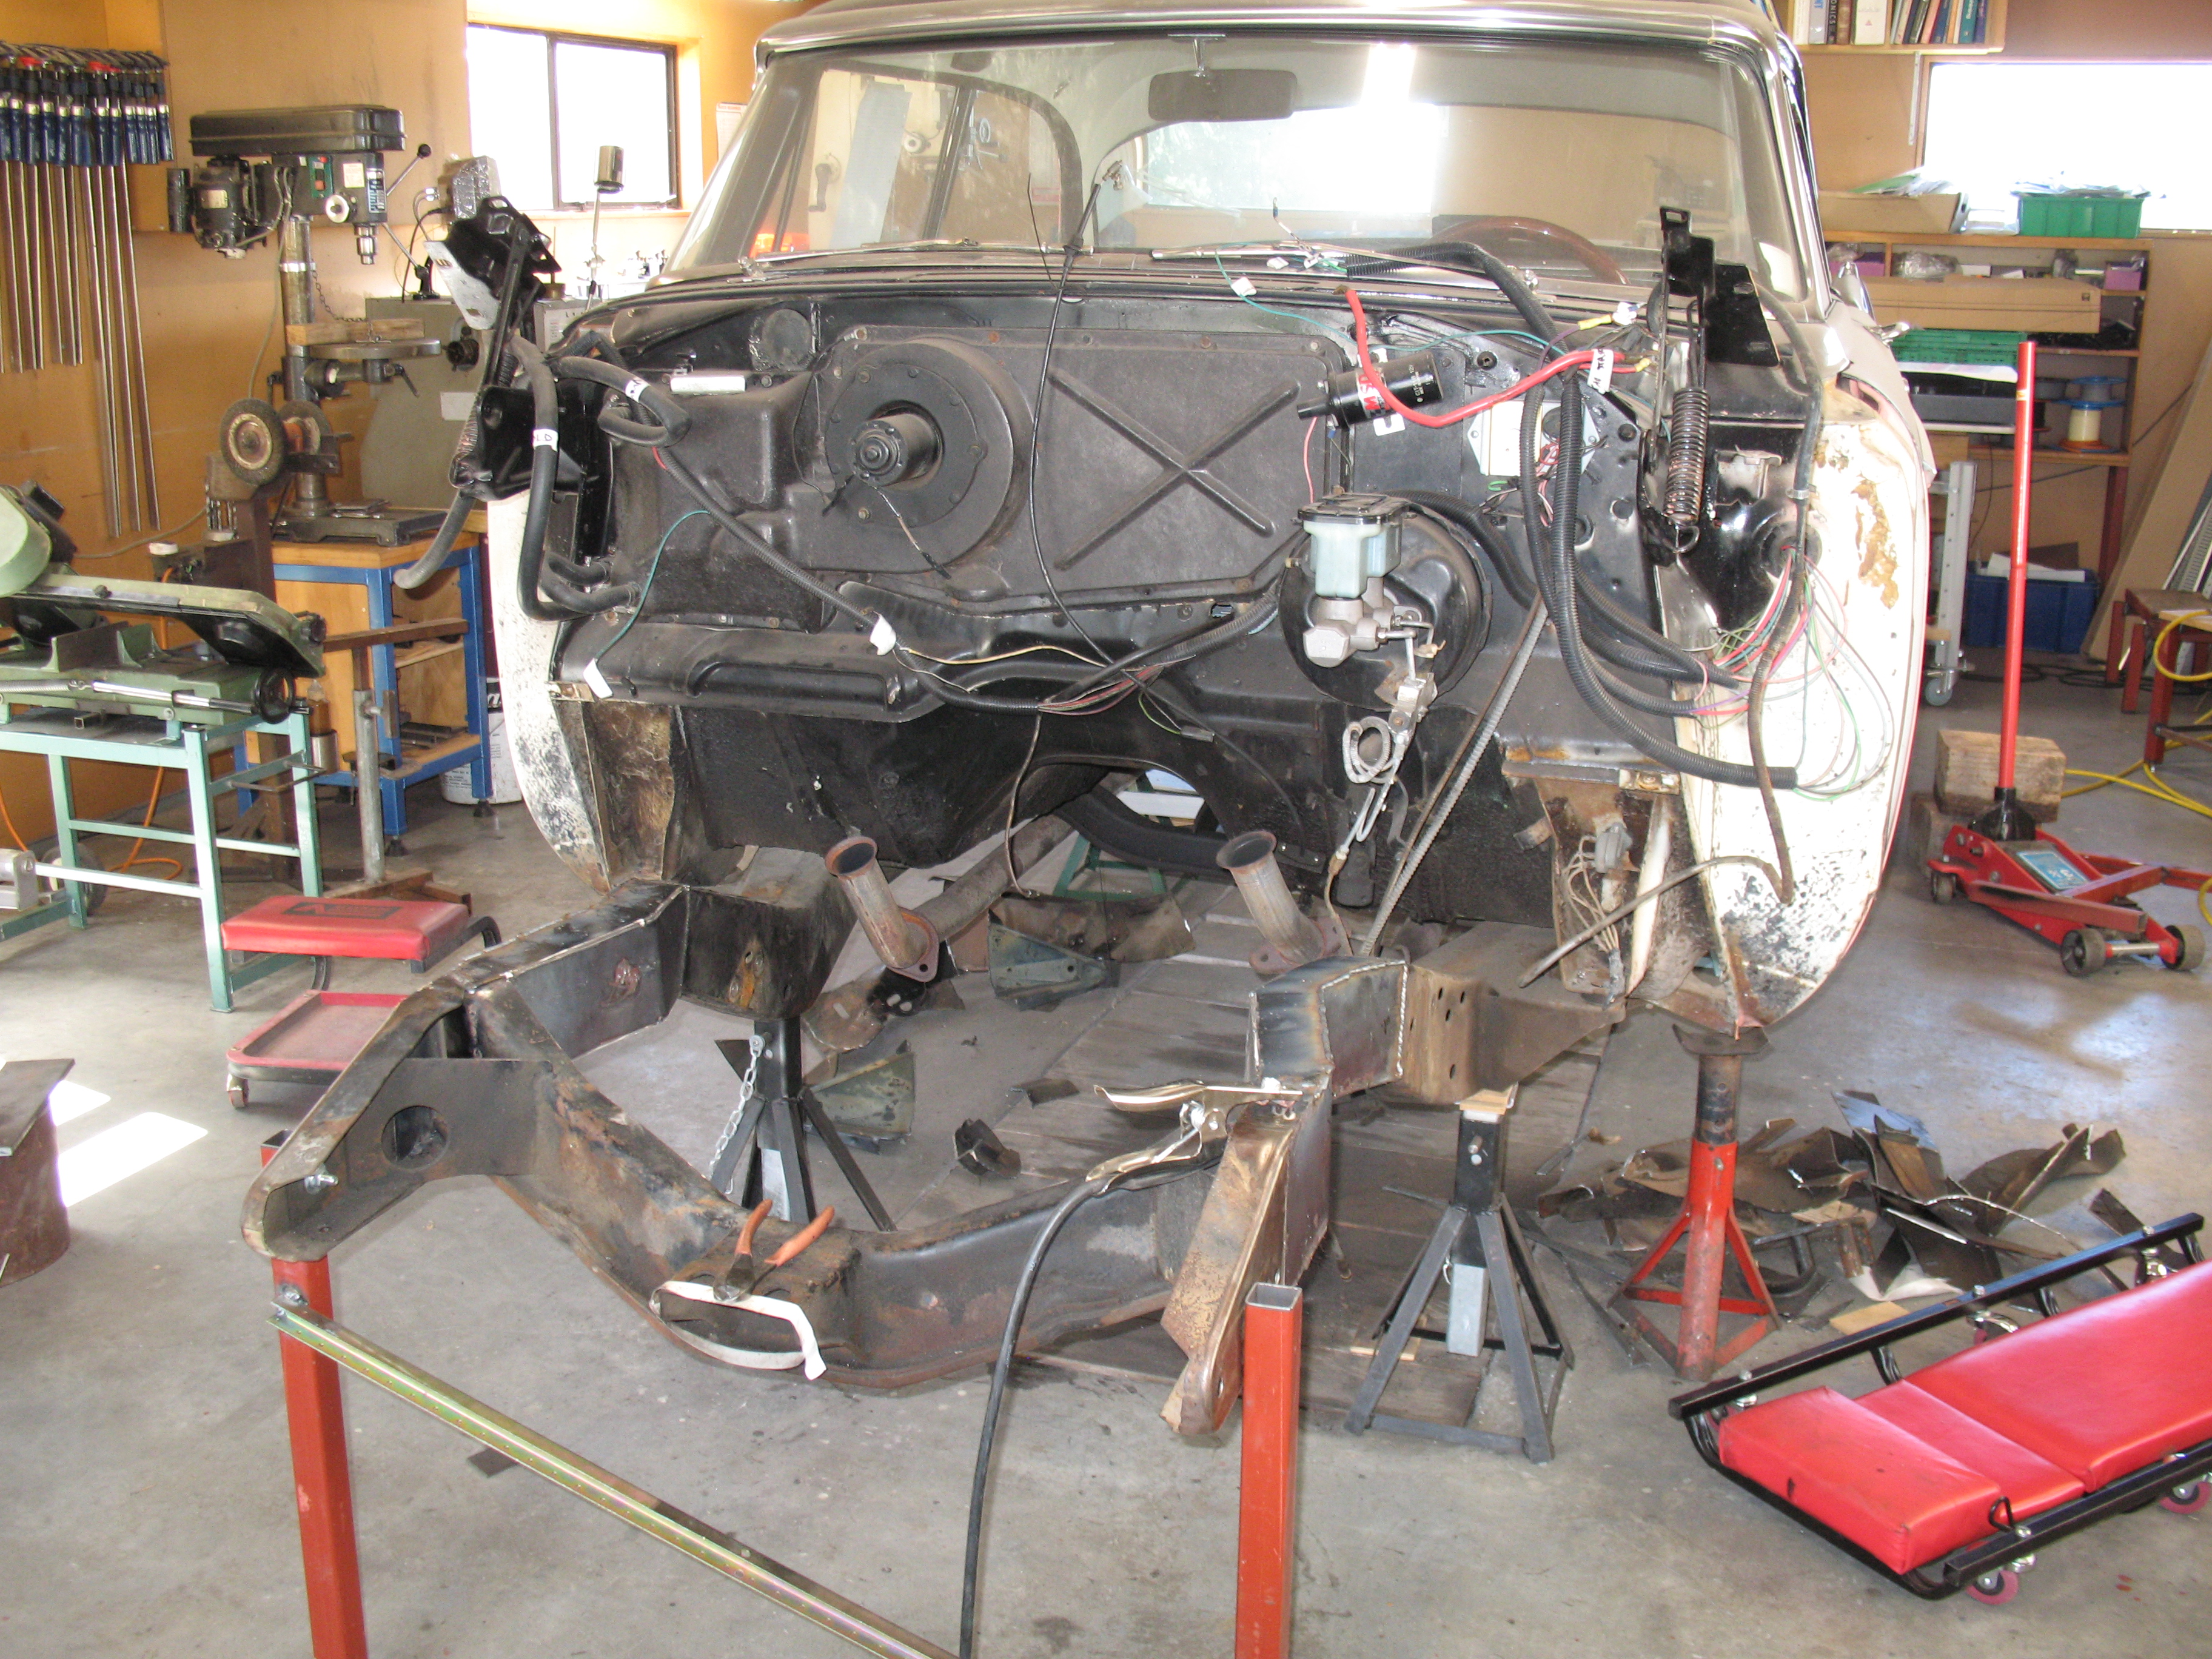
Here is a shot of the firewall. The brake booster is a Chebby item and the chassis at this point has been modified for the Jag XJ6 front end

And a shot of drivers side chassis with motor in place - not original 315 Poly but an LA360
Thank you very much. Any help is graciously appreciated. There isn't enough pics on the internet to fully cover this subject.
-
1 hour ago, Jhedir6 said:
Thanks Doug. Great tip.....where were you when I was trying to figure this out....just kidding.
Should I have any questions could I toss you a message Doug?
Been right here. Are you following my "3d printed" posts?
Message me any time. I'm here to help.
-
9 hours ago, Jhedir6 said:
Otherwise it shouldn't be too difficult to merge the halves back together.
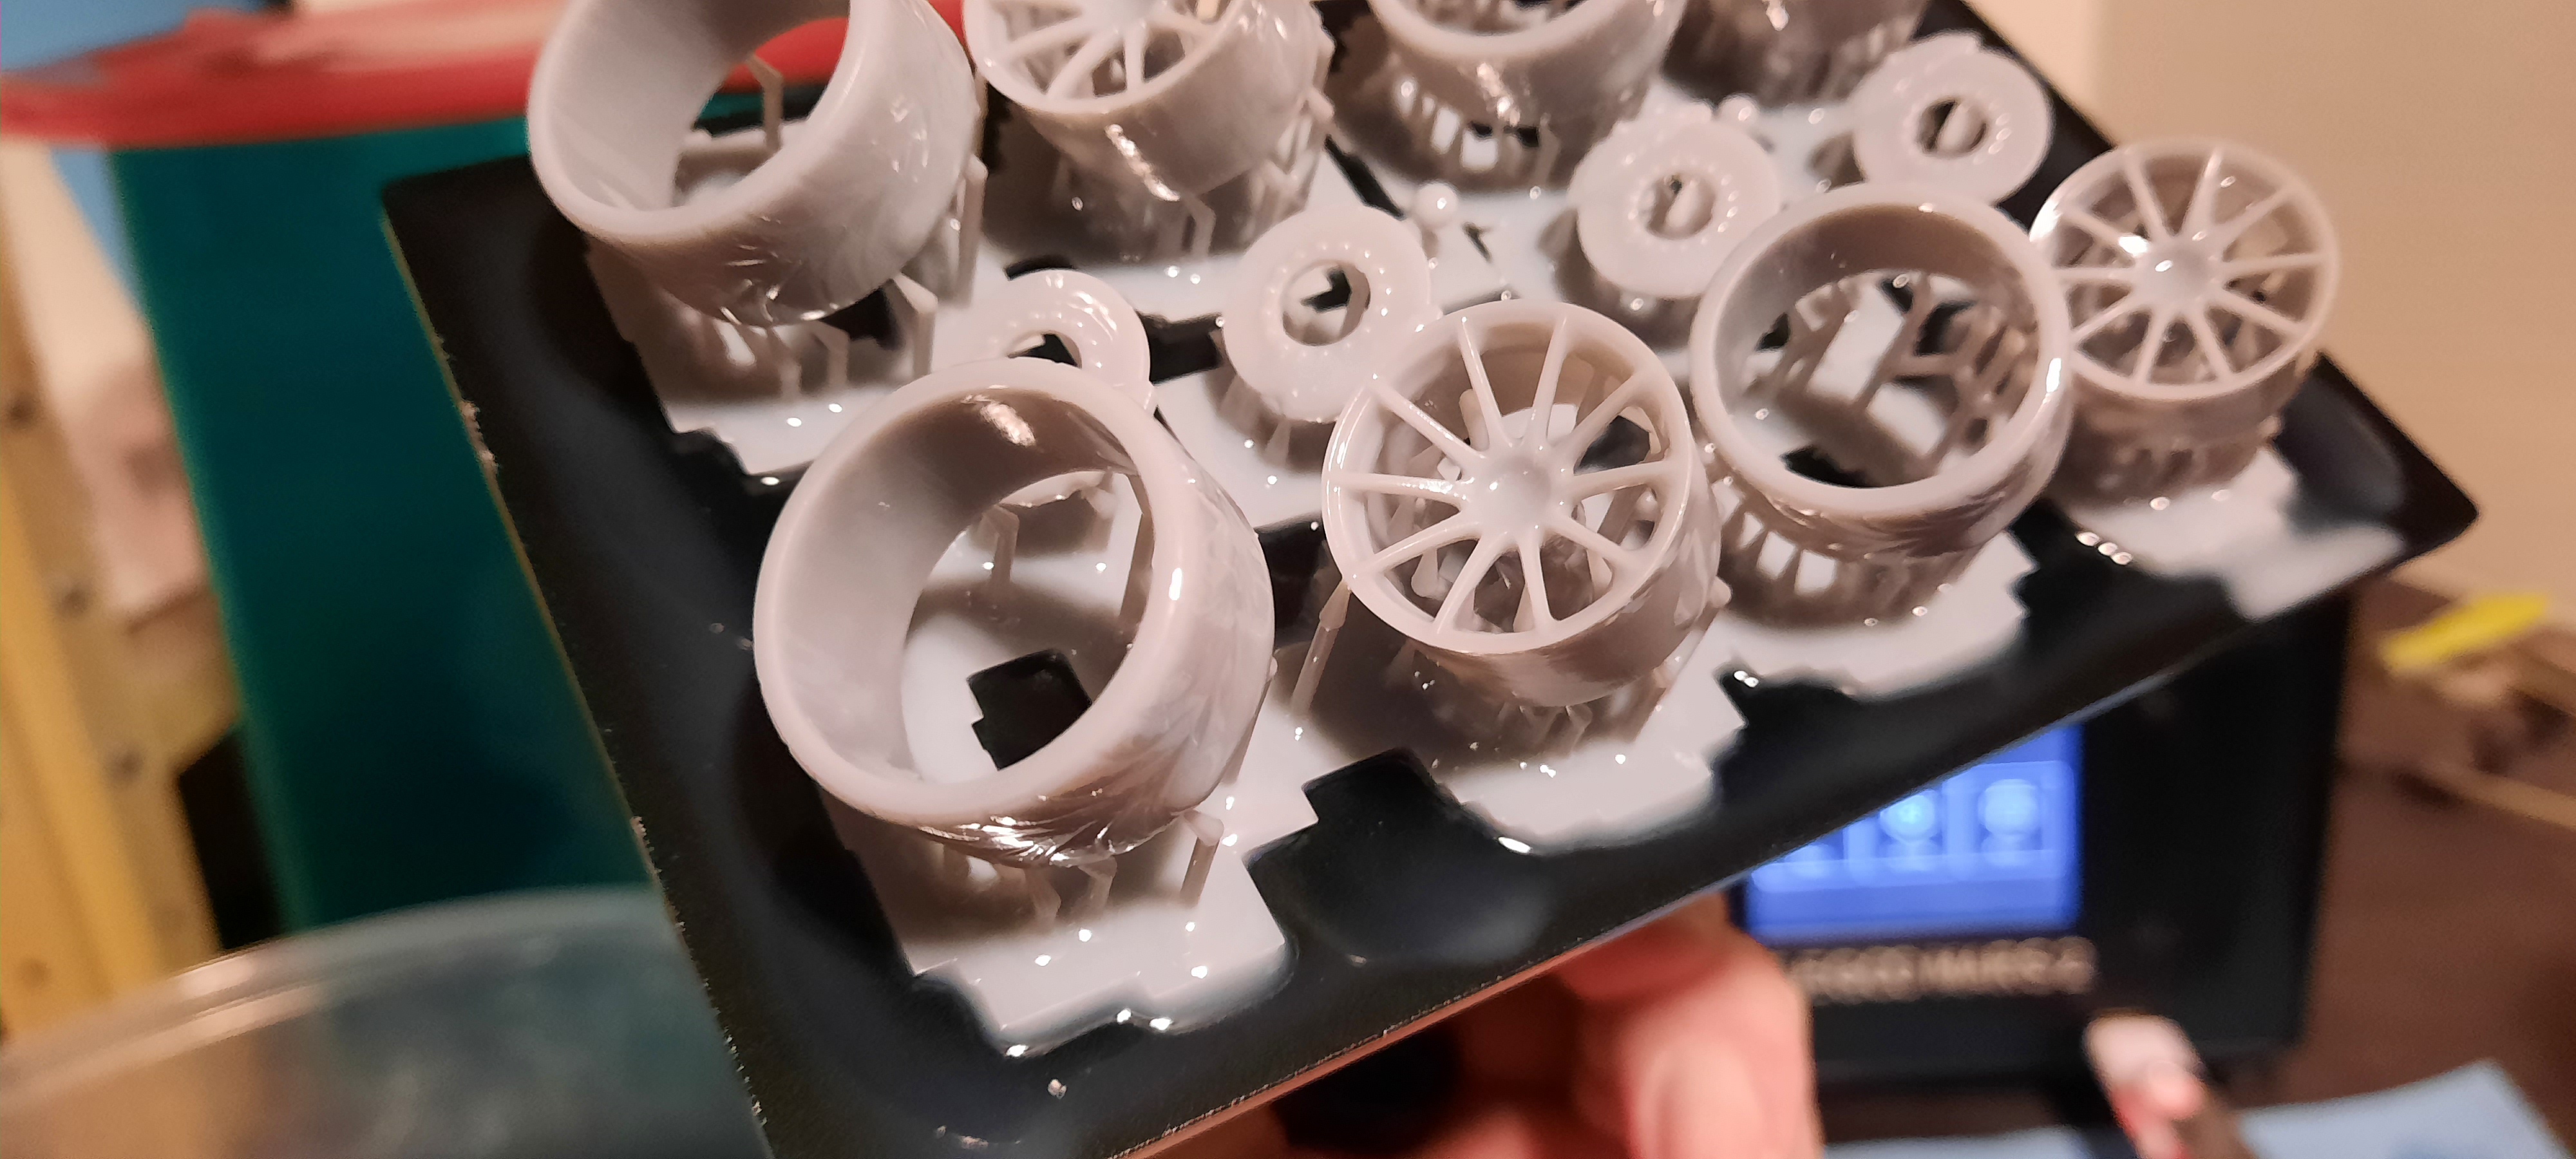
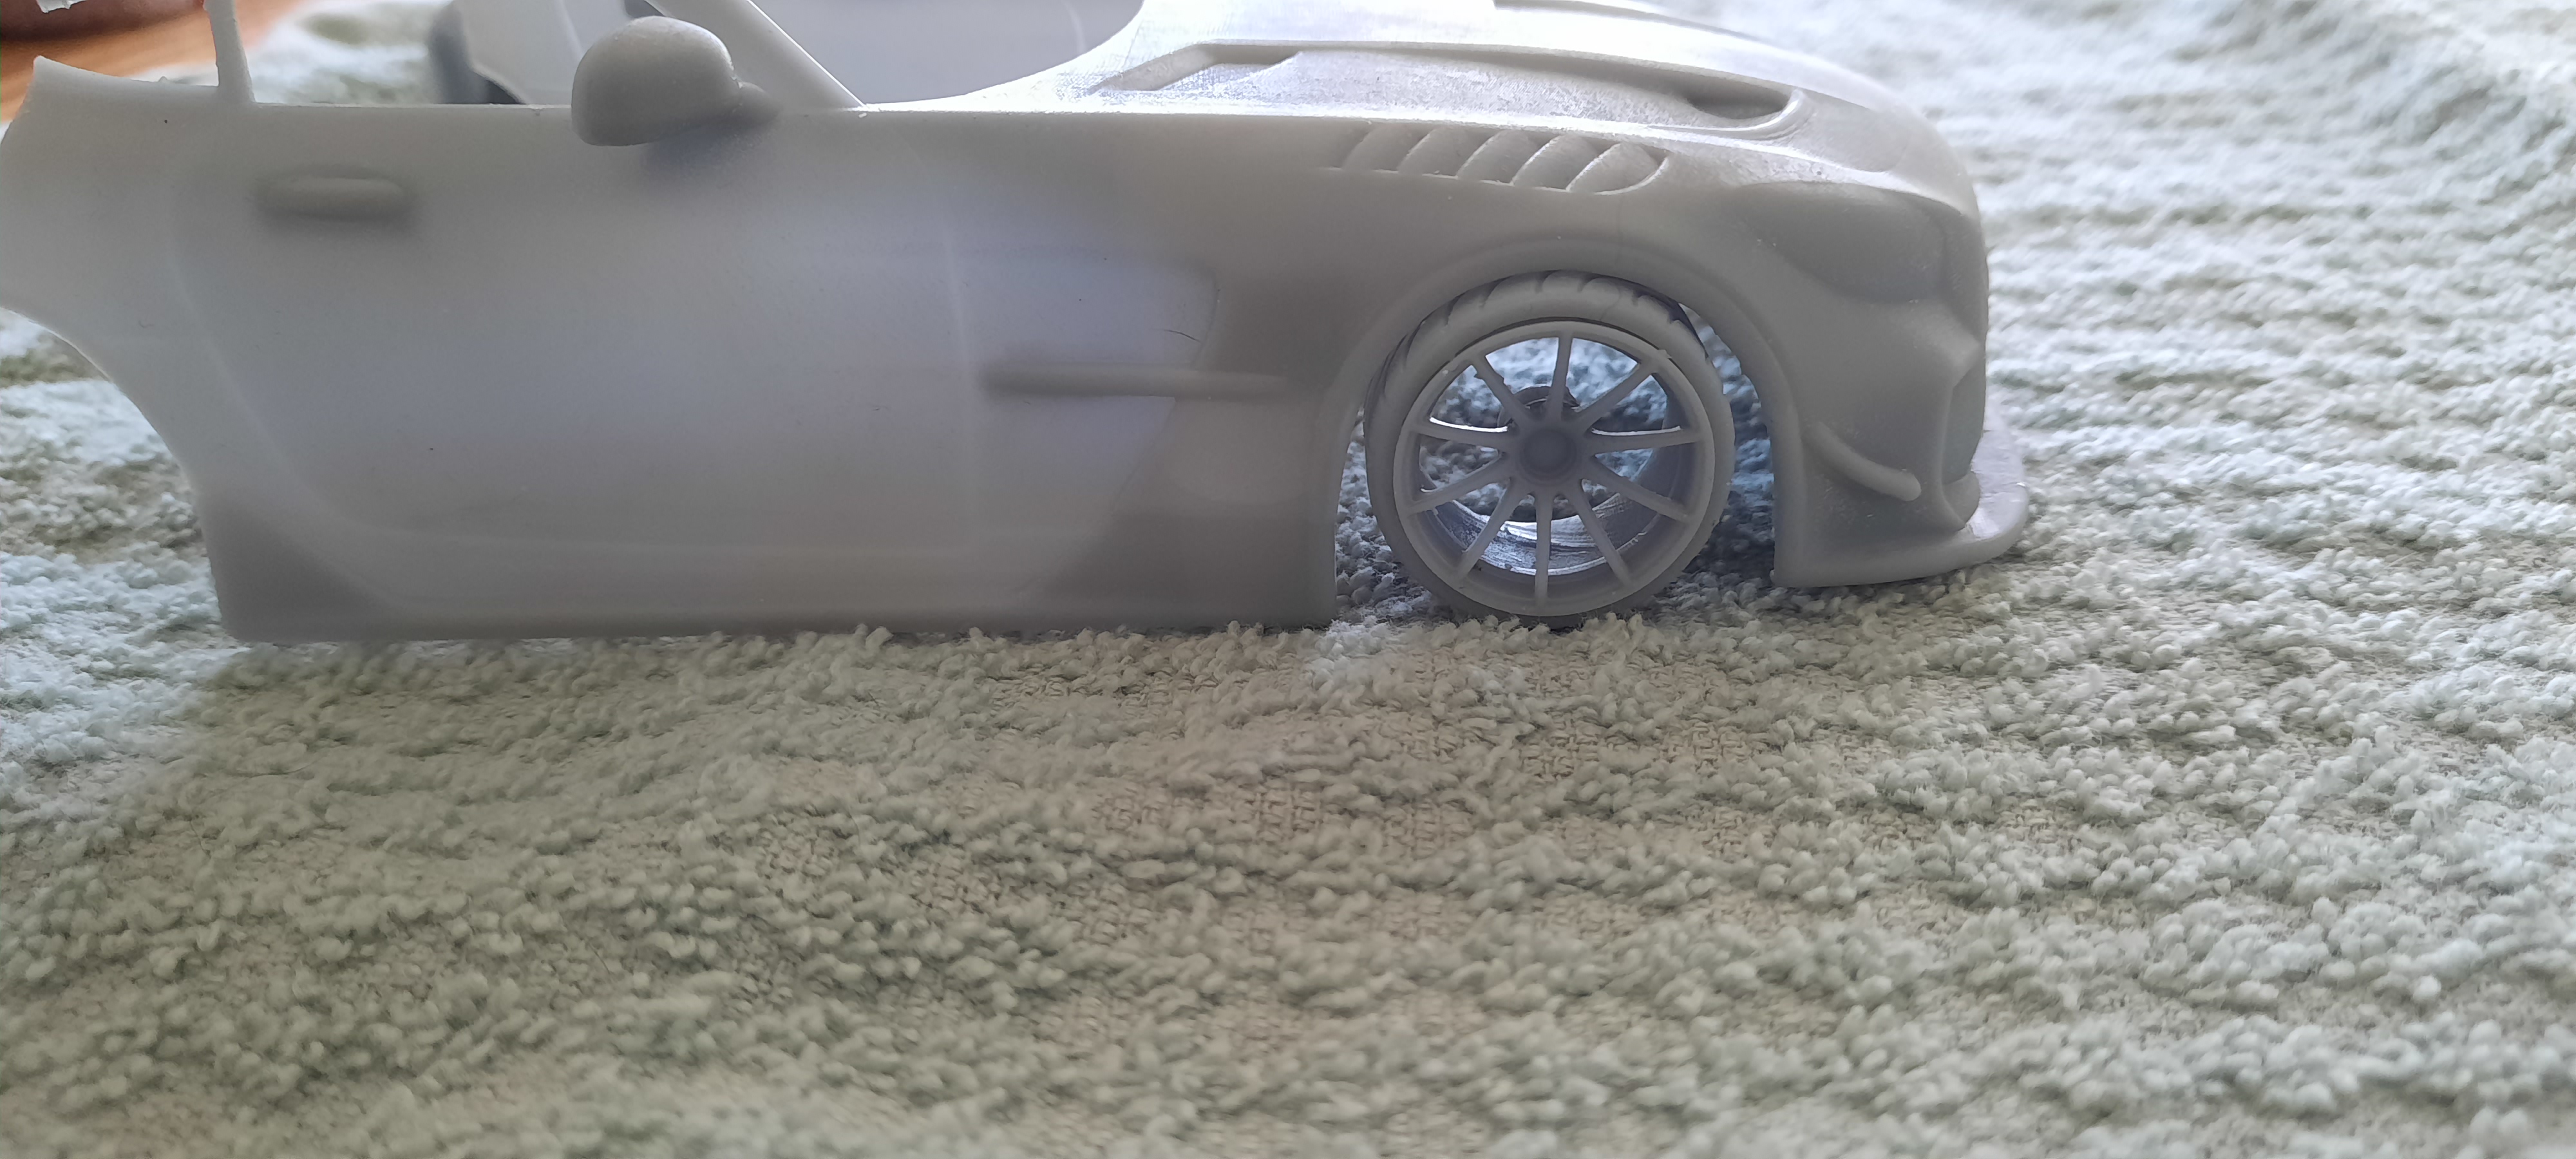
And now for the ugly..... well it's not really ugly, the print was perfect, just way to small. I printed the wheels at 1/24 scale based off the actual wheel sizes for this car, fronts are 19x10 and rears are 20x12. I scaled them down put the measurements in the software and got a perfect print.....at around 1/28 scale for some reason. They look great but I'm going to have to reprint them unfortunately.
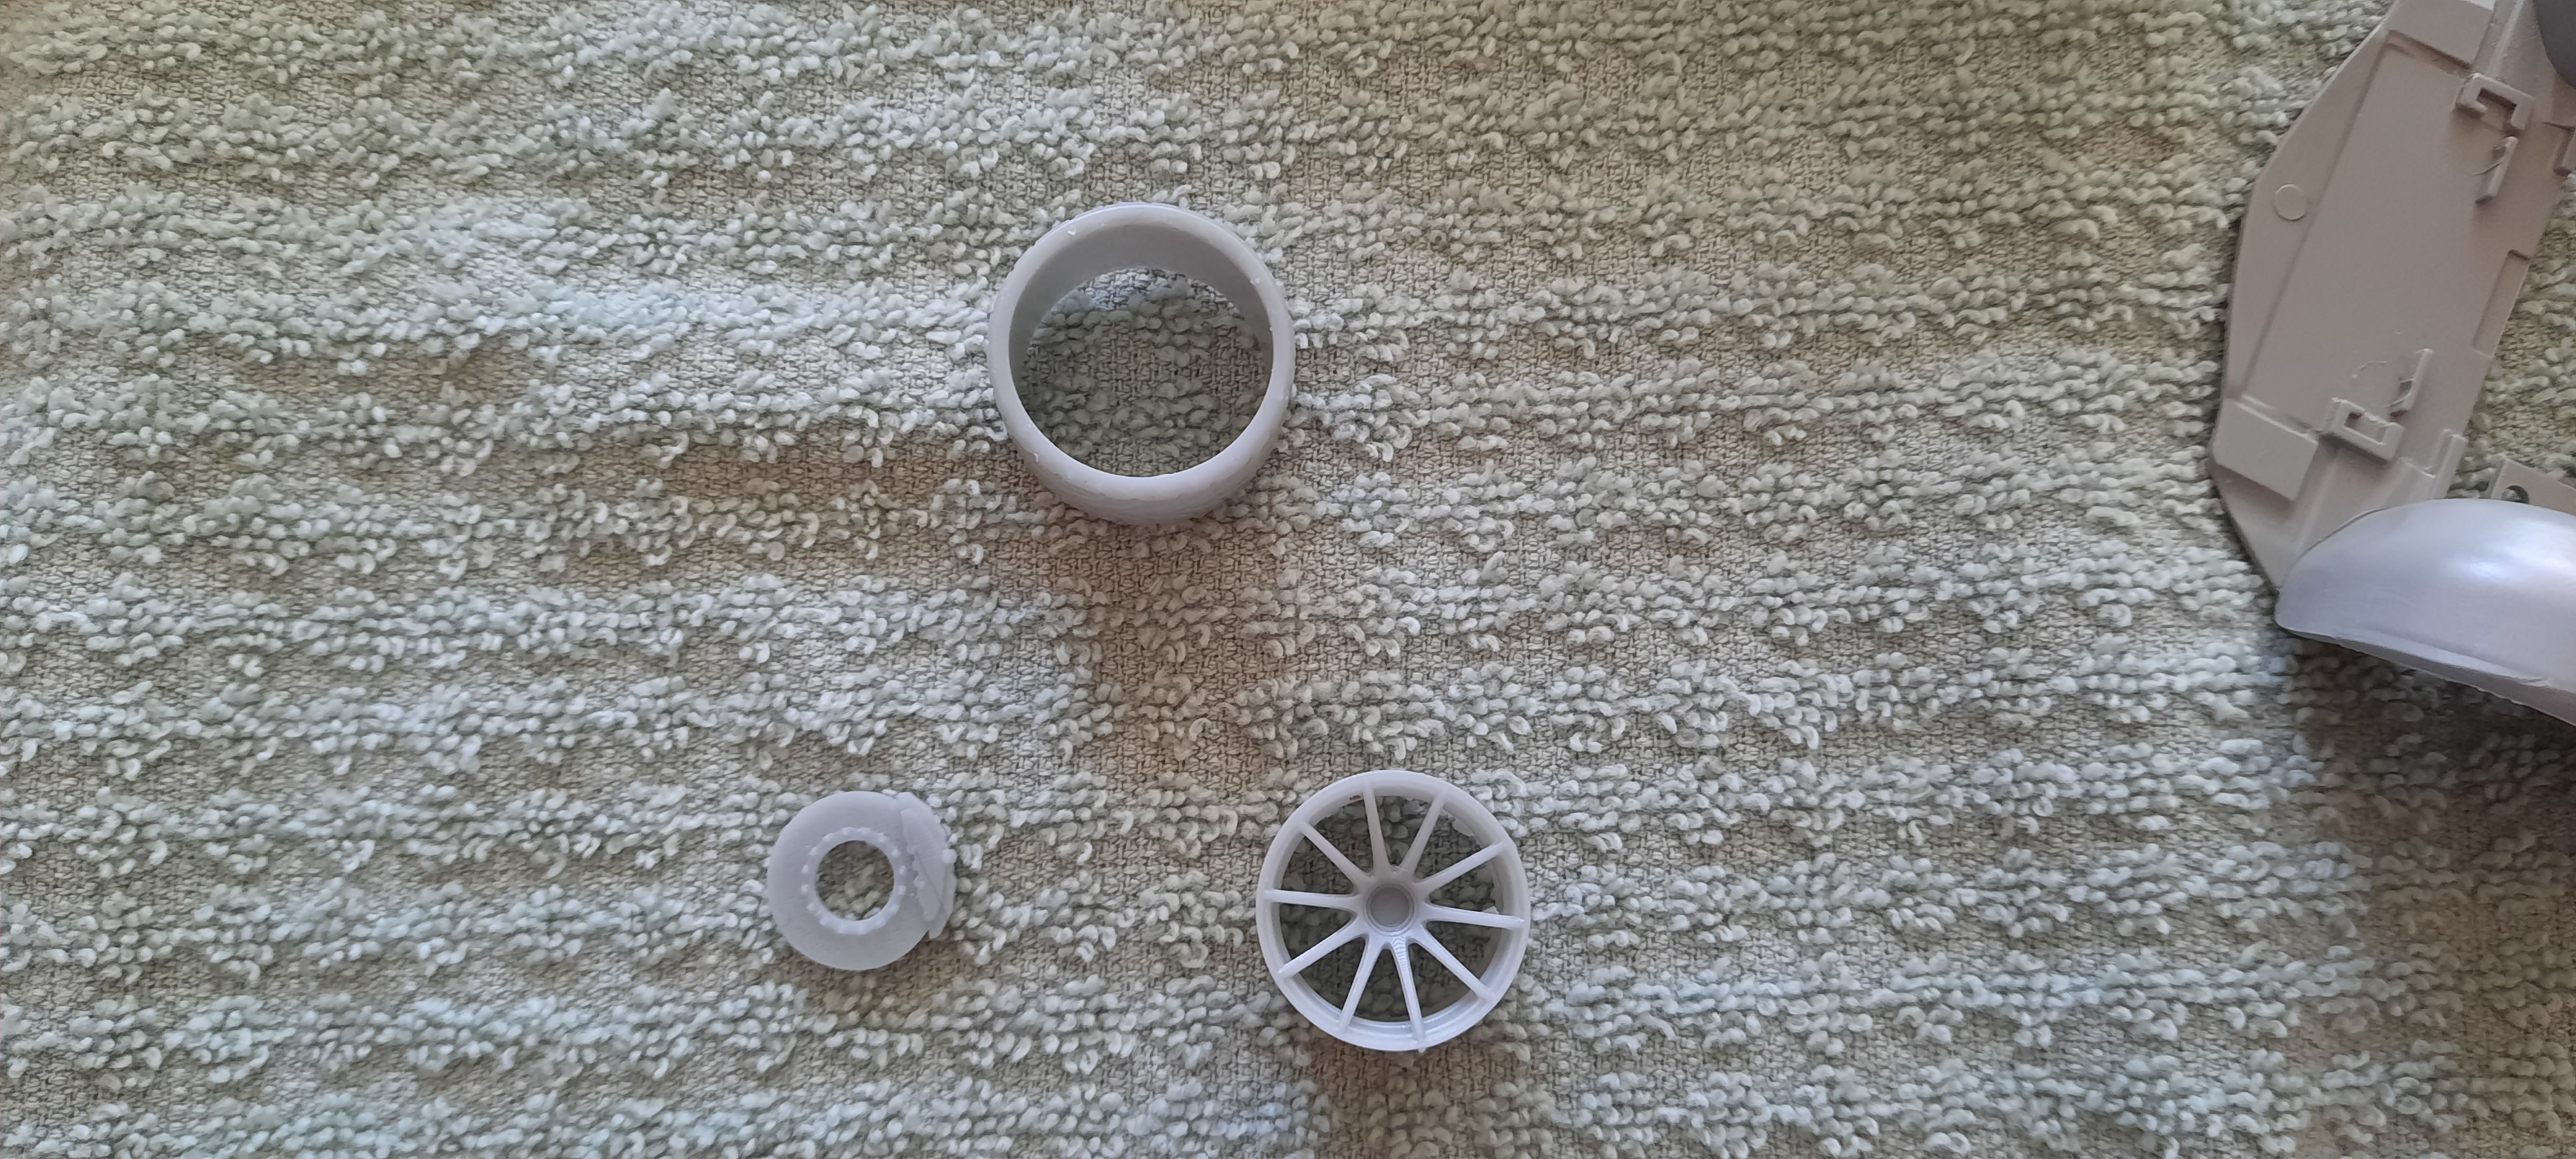
As you can see in this pic, I put the rear wheel inside the front wheel well and it's way too small. It might just be the low profile tires but either way I'm going to have to resize them. Not a huge deal, but I hate that I wasted the resin. Another lesson learned.
It's a simple fix. Load the car into your cad software. Then load your wheel, tire and brake into the software. Position them into the general location of the wheel well and scale them to fit. Things like this you learn with time and experience. Check the width of the tire to make sure it's not too wide. Your doing fine so far.
-
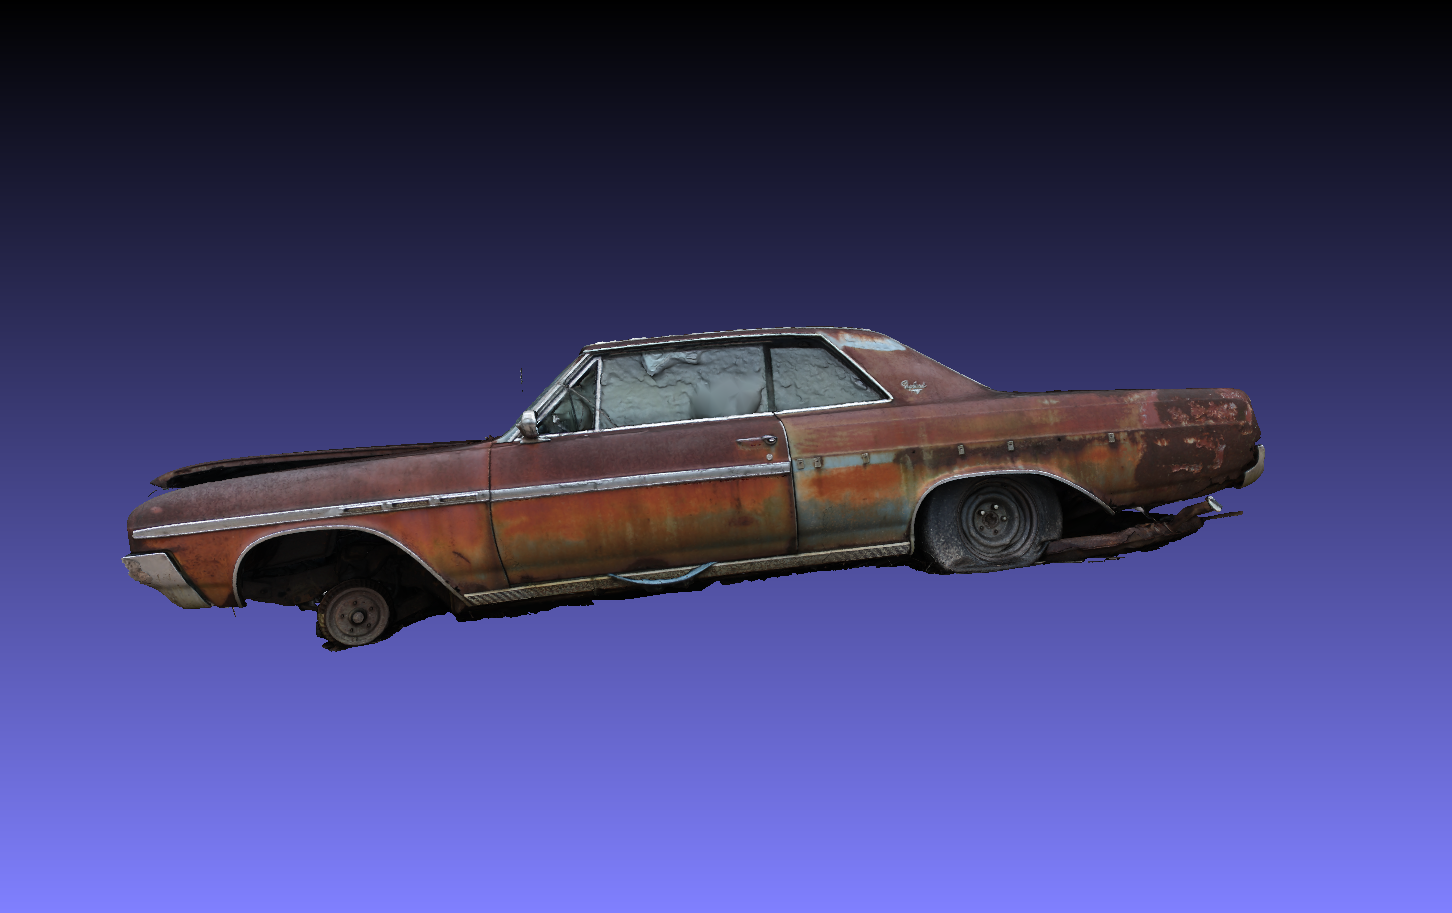
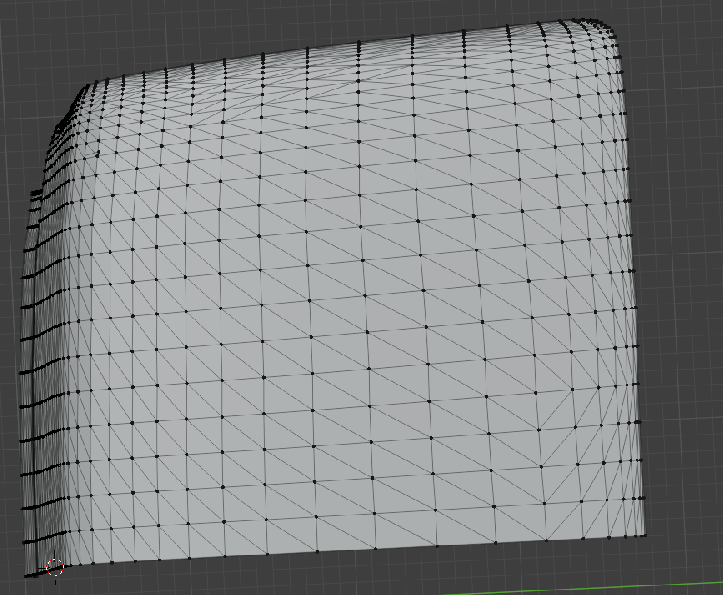
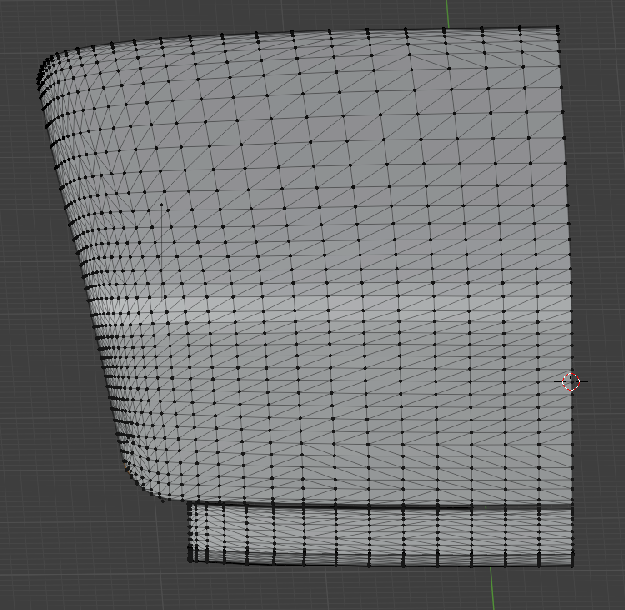
Of all the cars I have files for, I don't have one for a 55 Plymouth. I did find a raw scan for a 56 4 dr that I'm using that to create some parts for the 55. This is what I did over the last few days.
Take the scan.
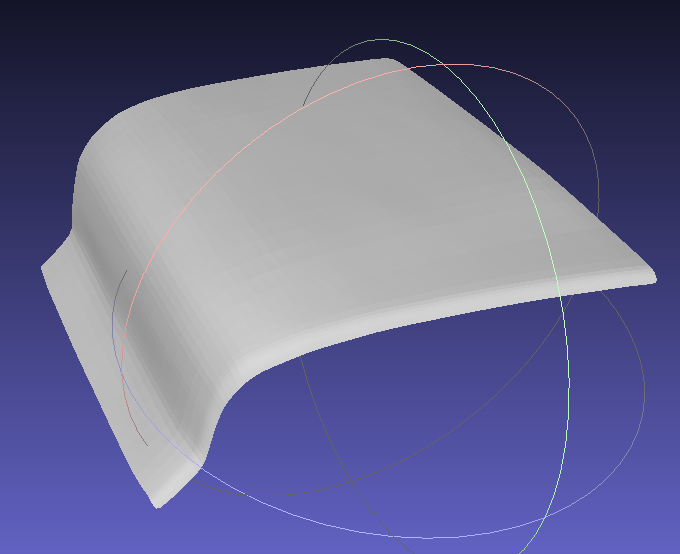
Cut out that area to make the trunk lid.
Trace the needed part.
Subdivide it, smooth it and you get this. It's only half,but that's all I need.
Thus, you can see how I'll create the above Skylark.
-
1 hour ago, gui_tarzan said:
I think what you're doing is a fantastic thing, but that '64 Buick Skylark convertible is a barrel of errors. I have that one too and I'm just starting to try to figure out how to correct it. There isn't a panel or edge on it that's correct.
I won't be using that 64 Skylark for my project. I have a raw scan I got off Sketchfab.
-
1
-
-
I found a site with a 56 Dodge that was being built for Trans Am racing. There are pics of the sheet metal for under the hood that gave me great insight on how to create the needed parts.
This one worked well to make the horse collar.
-
On 6/18/2021 at 4:25 PM, bill-e-boy said:
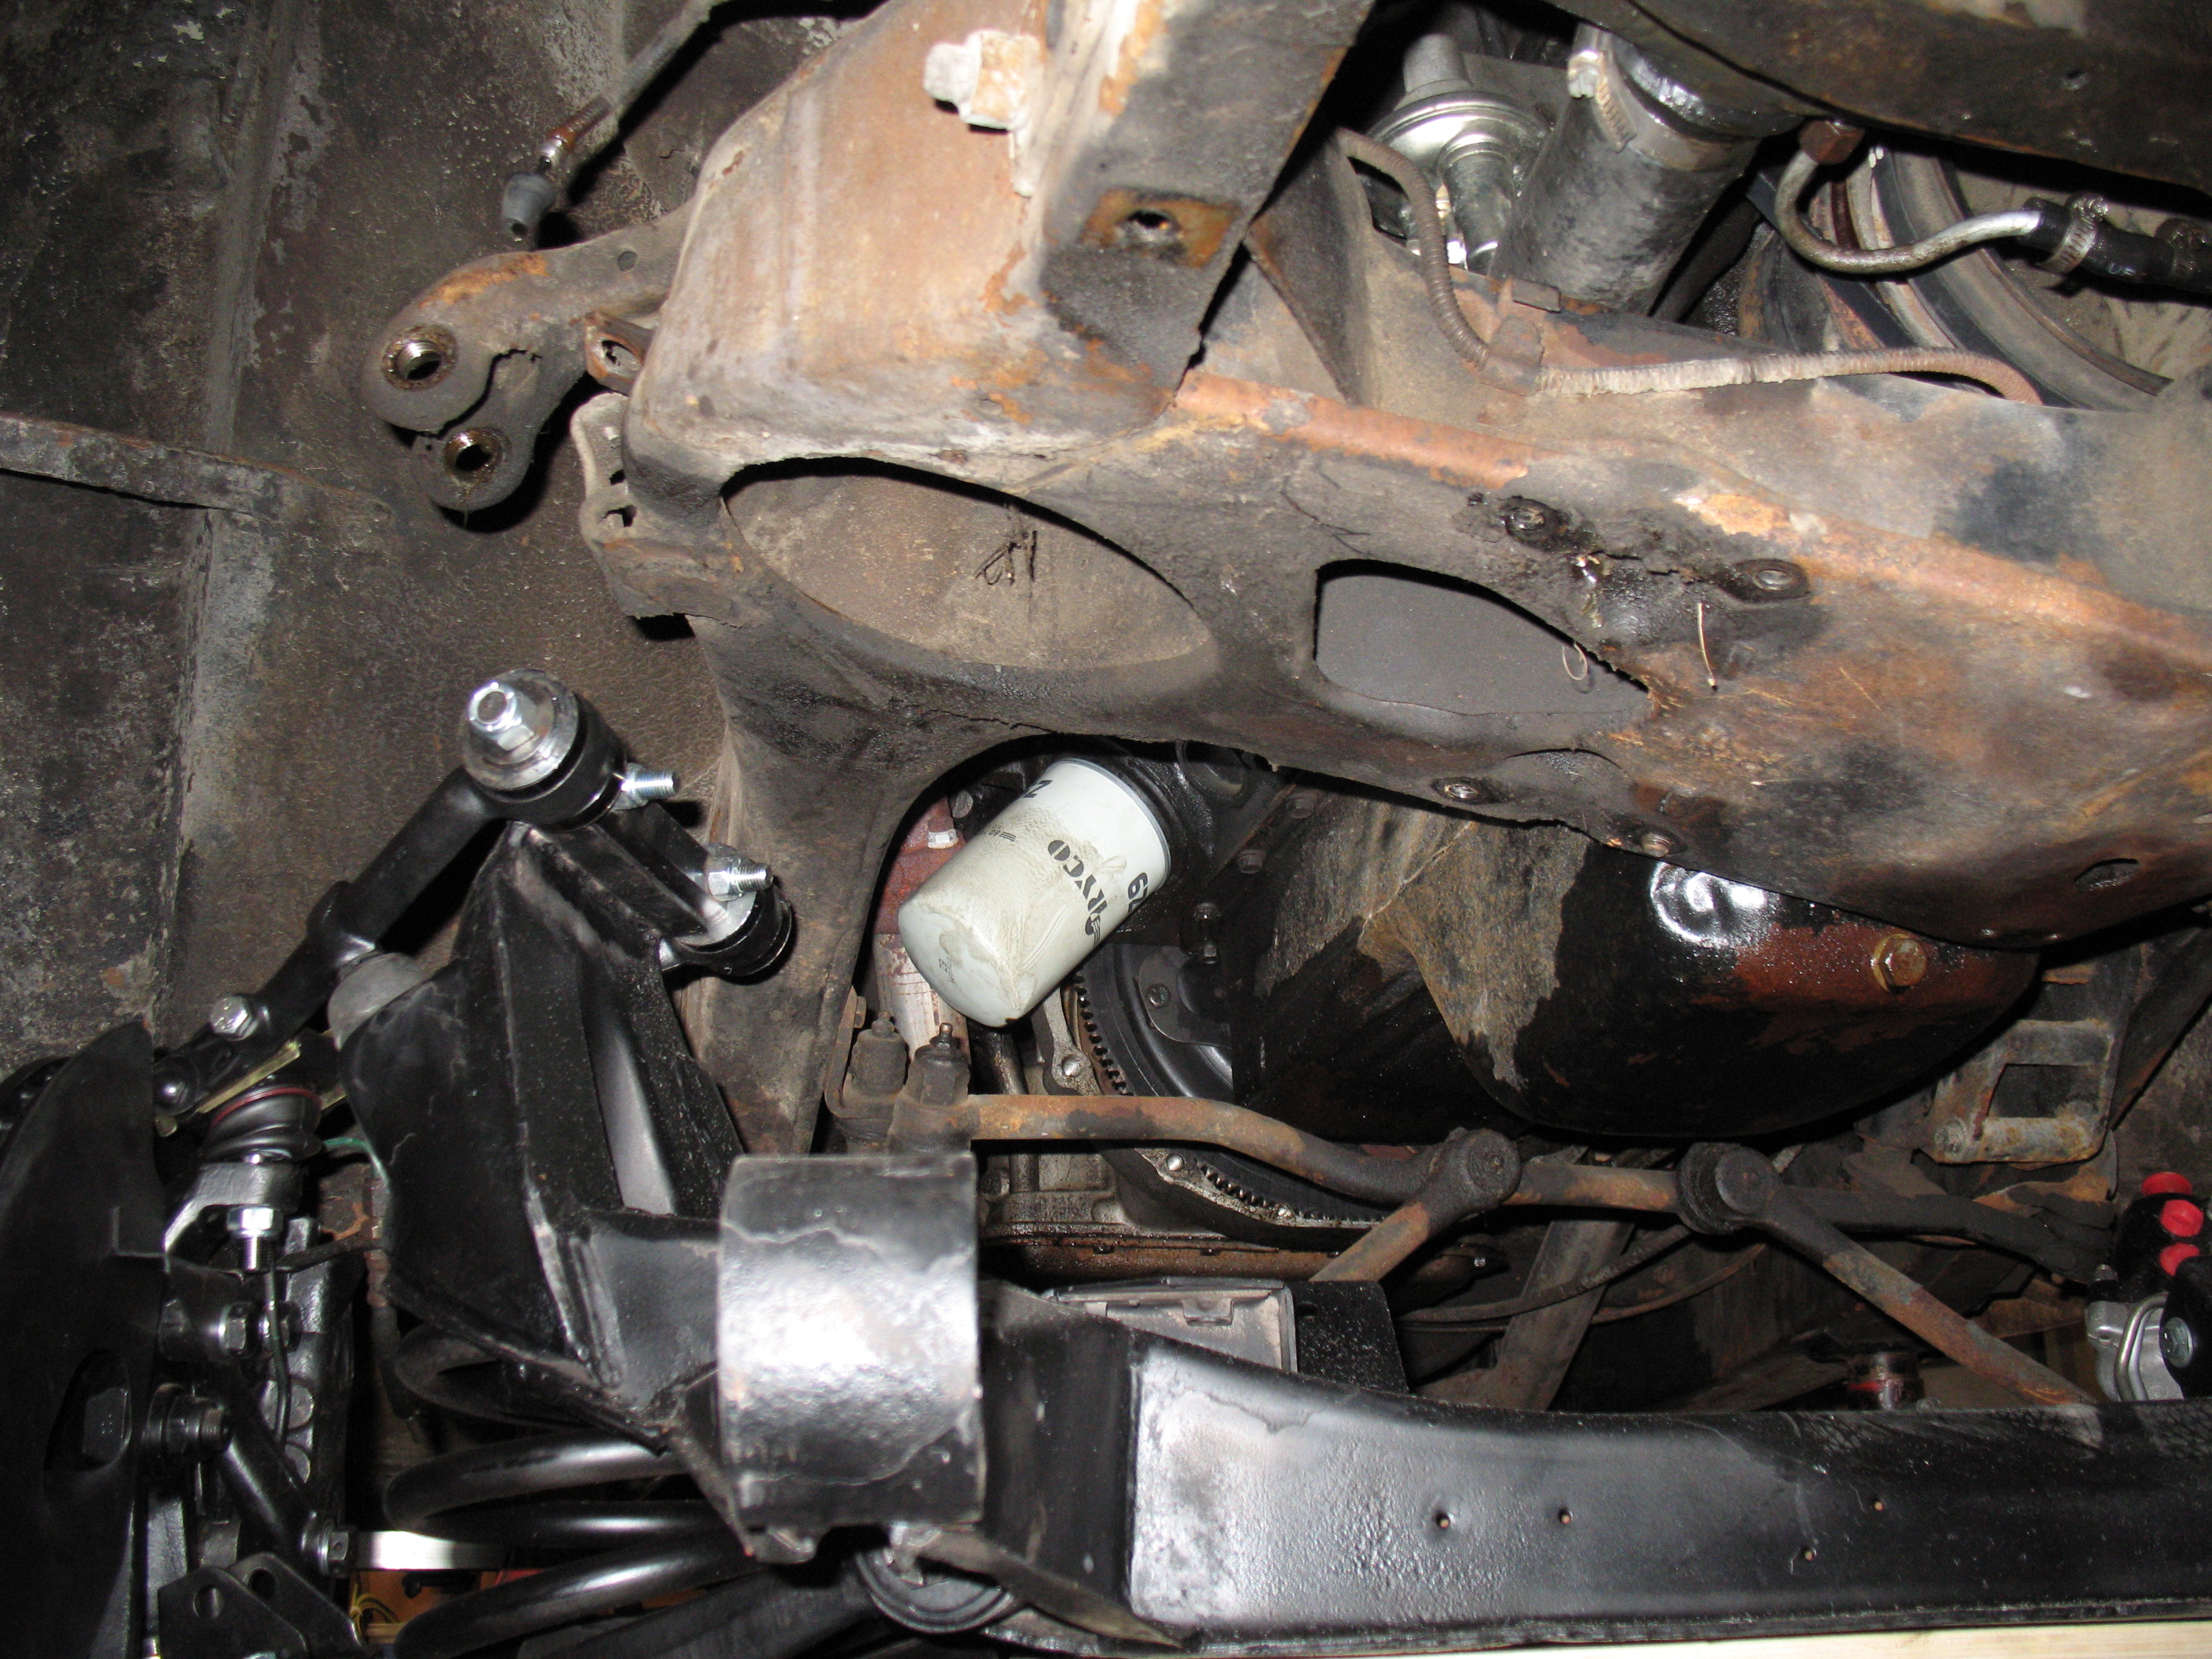
As an owner of a real deal 56 Dodge CRL coupe you have got the details very accurate. The 55 and 56 chassis were the same but the convertible has an X member for additional strength
The front body mount is a U shaped piece welded to the front cross member and does not have a wedge shaped tunnel that carries on to the back of the cross member that is depicted in one of you renderings
I have attached an image of that area and of the spring pocket area of the front cross member
The front end shown under the Dodge chassis is a Jag XJ6 that I installed in place of the original - a long story that came about but it is on the road now and it is awesome
Thanks for the heads up.The bottom pic will help me a lot.
-
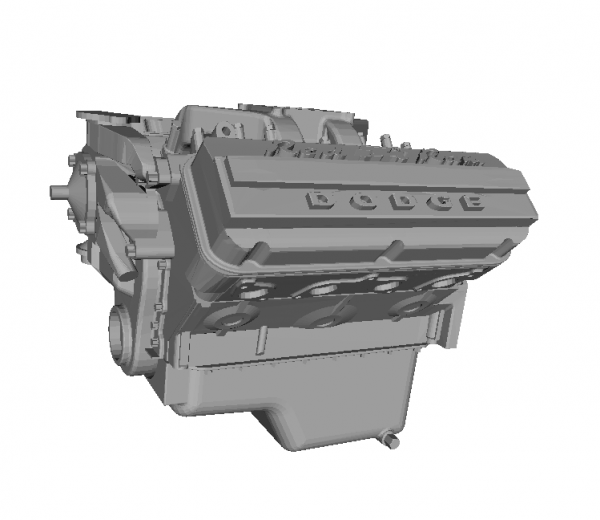
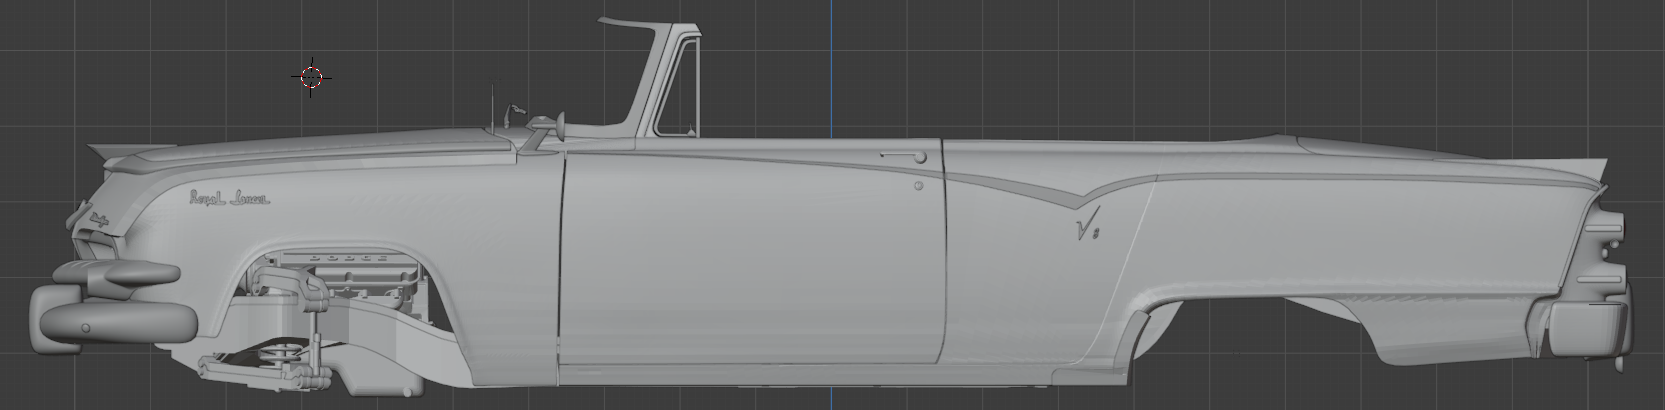
So now the body has been corrected. The frame and suspension have been done. I put my 55 Dodge 270 hemi in to help for positioning the next step. Up coming next is under the hood files
-
1
-
-
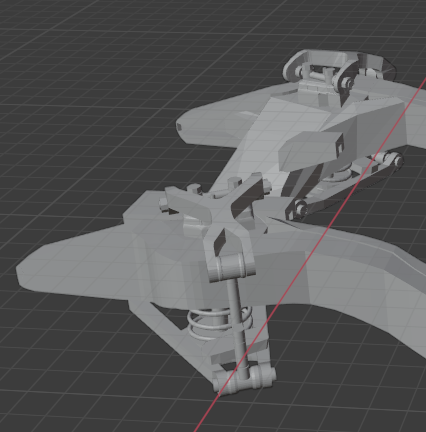
Adding a steering knuckle, shock and coil spring makes the front suspension.
-
I used the service manual to find pics to make the upper and lower control arms. Here are 2 of them.
Here's the finished parts.
-
Frames done. Next comes the front suspension.
-
33 minutes ago, MeatMan said:
Good stuff Doug!
What printer are you using?
I will only use Phrozen printers. It's a Taiwan company run by 3 Taiwanese engineers. The printer in this case is the 2018 XL I upgraded it from a 2k rgb lcd to a 4k mono lcd last June. Mono lcds let more light through and cure the resin faster. This speed the print time up by i/3 rd or more. The 57 DeSoto took 15 hrs at 2k and 11 hrs 4k.
-
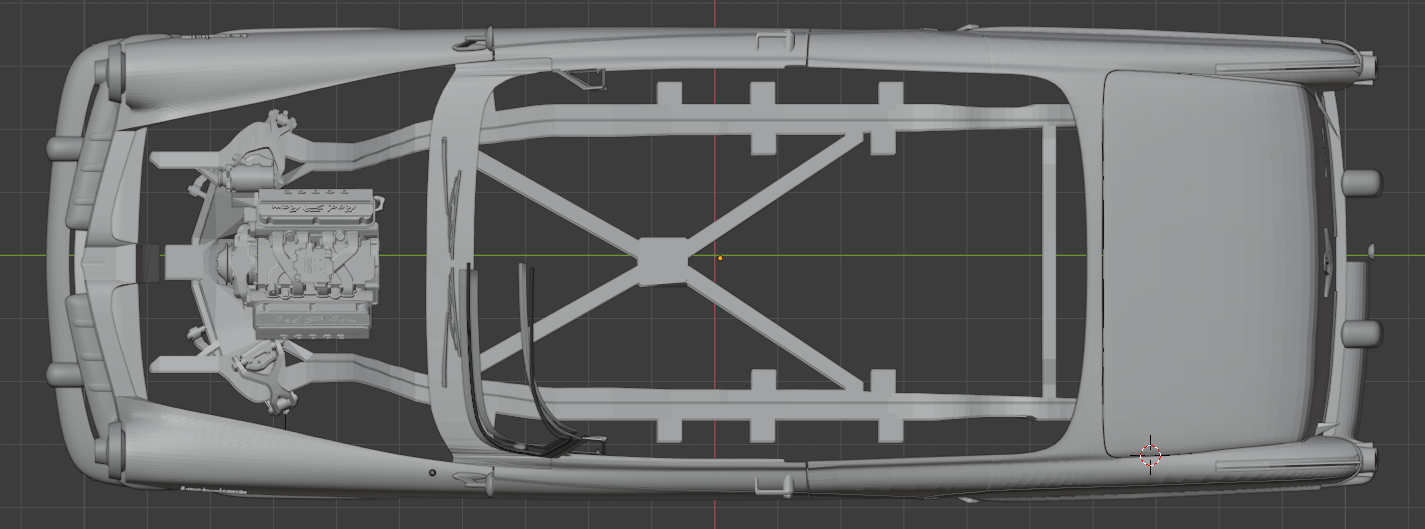
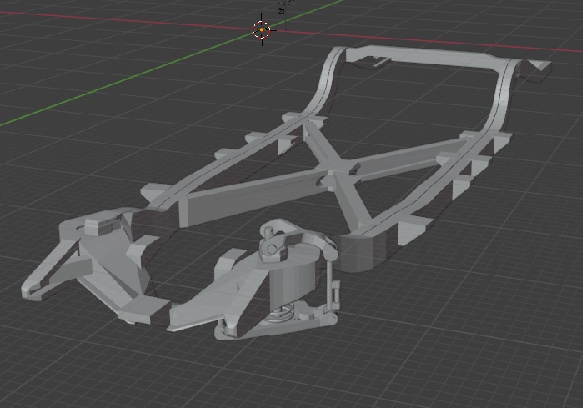
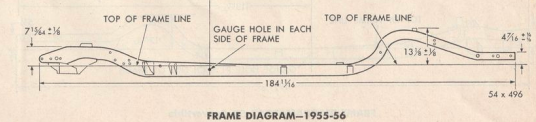
My next creation is the frame. First I find a frame chart for the convertible and take screen shots of the top and side. These I import into a new Blender file. The top goes into the top view and the side into the appropriate side view. Then they are lined up and the drawing begins. I always start with the top view.
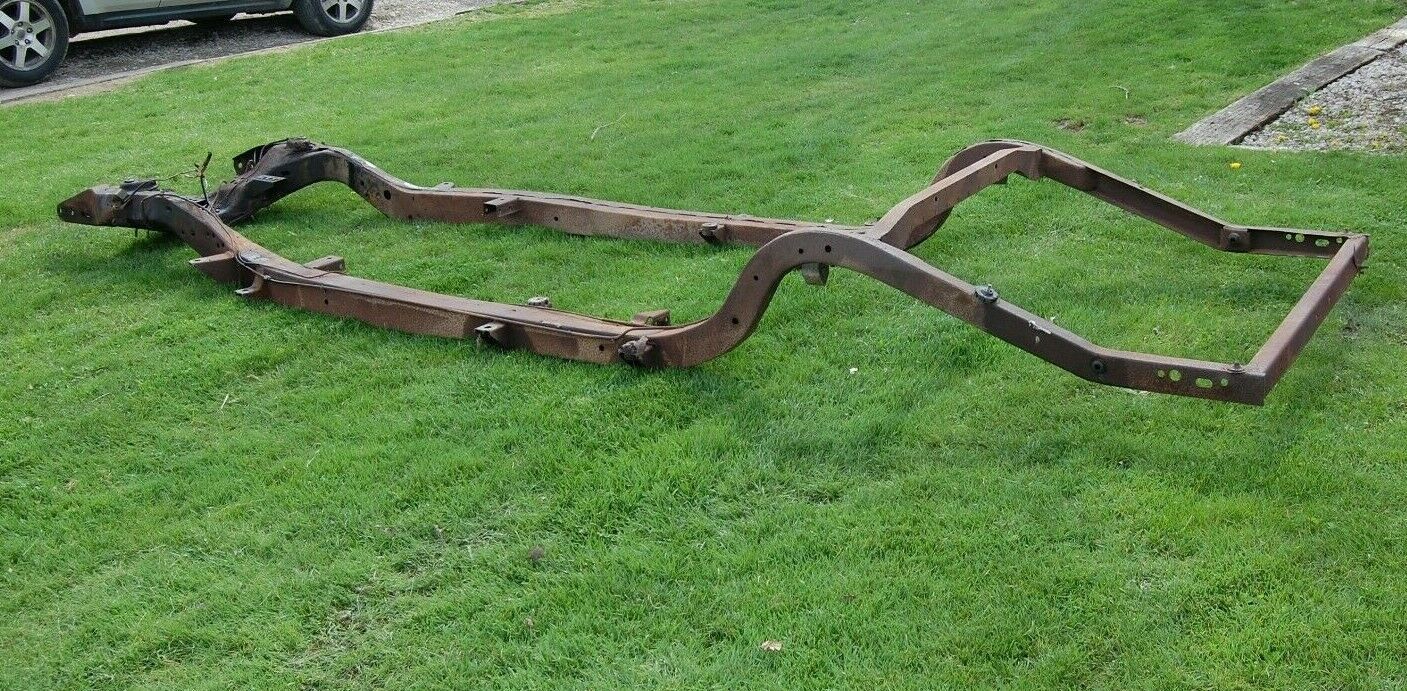
It's always important to search for reference pic's. In this case, I found a 55 Plymouth frame for sale that had 13 different views. Plymouth, Dodge same basic frame.
-
1
-
-
5 hours ago, charlie8575 said:
If you'd like, give me your e-Mail, and we can discuss. Also, I tried to order through Facebook one of your Polyhead A-blocks. If you can e-Mail me the details on how to order, I'd appreciate it. I can use at least two or three of them.
Charlie Larkin
crai2773@bellsouth,net.
-
Let's take a look to see what we've accomplished. Then do a quick test print.
-
1
-
-
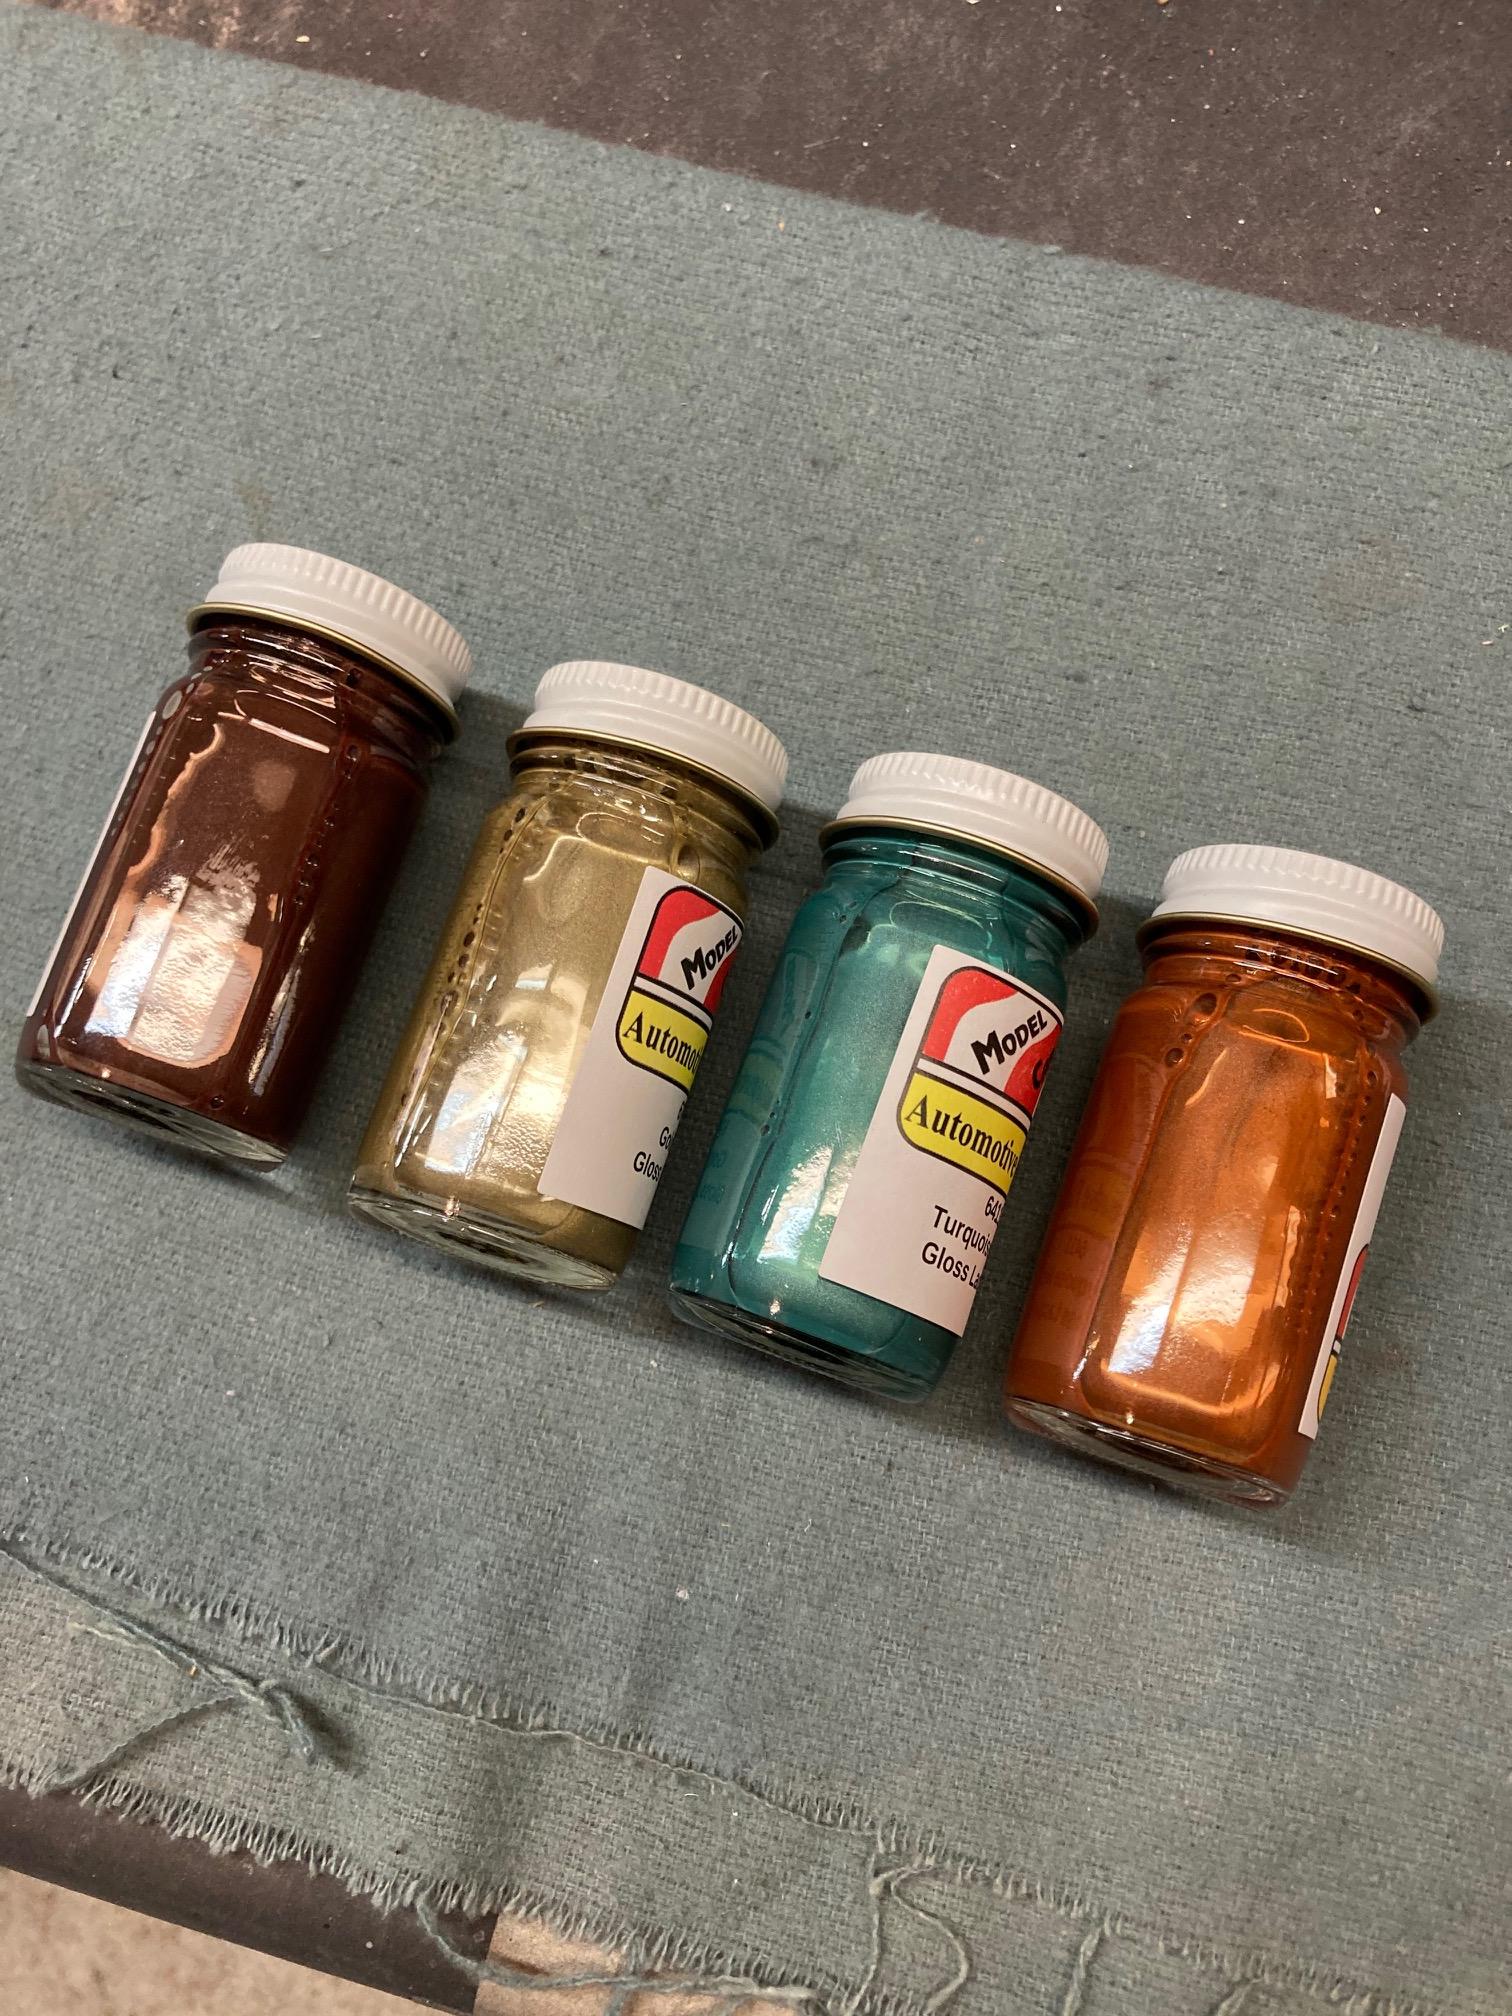
11 minutes ago, StevenGuthmiller said:
Another bunch of MCW paint.
1957 Chevy "Sierra Gold".
1964 Plymouth "Chestnut".
1964 Pontiac "Turquoise".
And 1967 Mopar "Gold", which I'll be using for my '68 Coronet project.
Also bought a jar of vinyl top texture paint to try out.
Steve
What are you using the 1957 Sierra Gold on exactly Steve? As I remember from my youth, it was used with a particular off white.
-
The original file was a Coronet. I want to create a Custom Royal Lancer. To do that, I need to make files of the Tail fins, the Custom Royal Lancer name on the front fenders and two chrome strips that go on the rear panel below the trunk lid.Notice the file I used to create the name.
-
1
-
-
The front clip is next. This first pic is the original. Note the lip around the edge of the part. This lip has to be deleted in order to thicken the part for printing. The middle pic is the part after fixing and eliminating the lip. The third print has the walls thickened and is ready for printing. I have found that 1.7 millilitres is the best thickness for body parts.The reason I use individual parts is that it is the best and easiest way to thicken the car.
-
After:
-
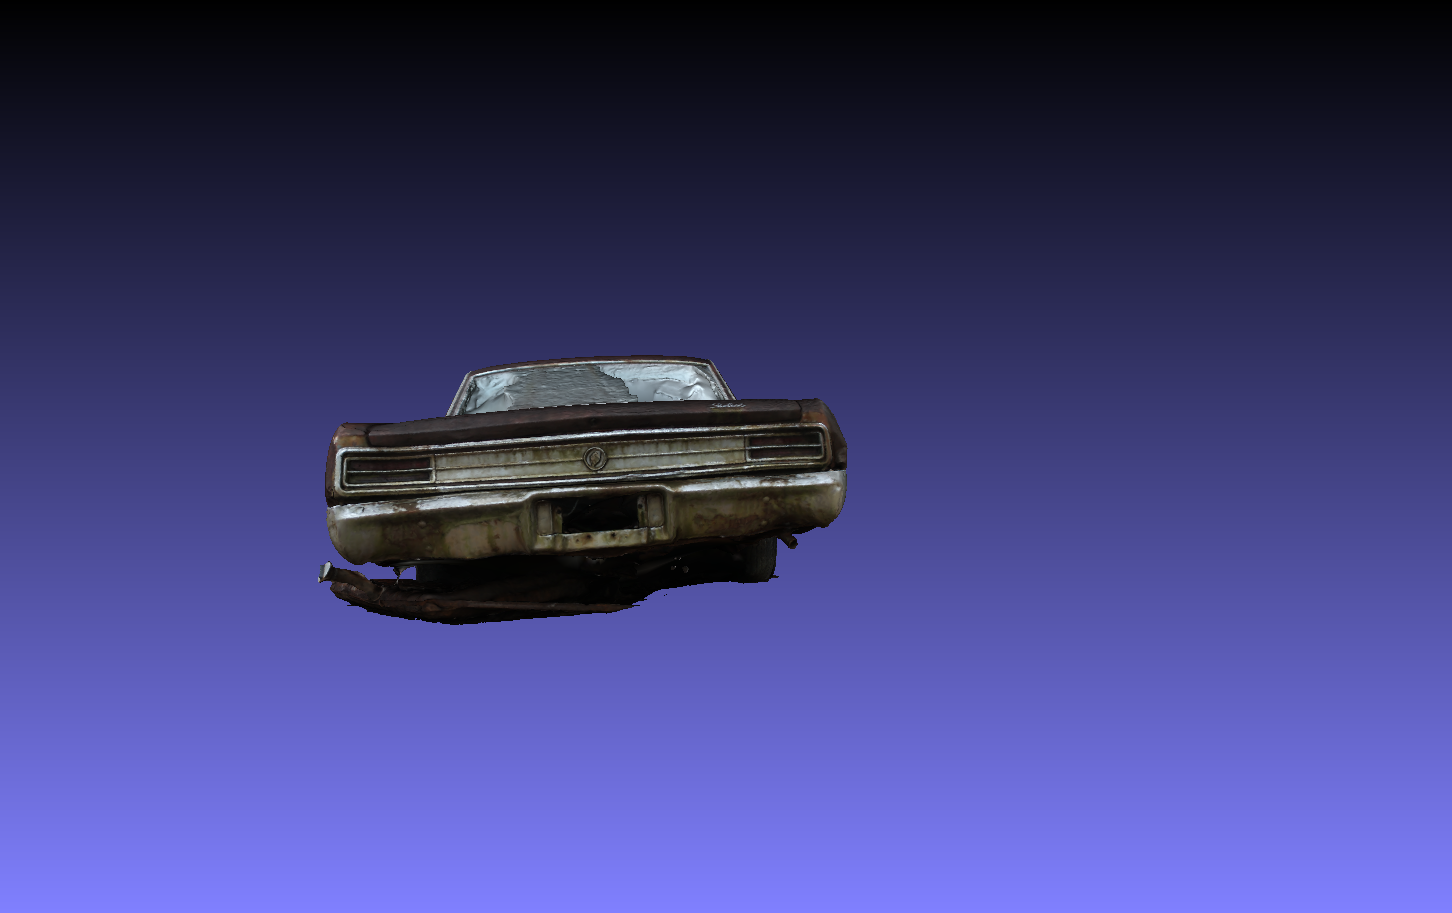
Next is the trunk. Before top
:
and back
-
15 hours ago, bisc63 said:
Beautiful work; you are really approaching this professionally, and it should make a fine model! I'll be following...
Thank you for the kind words Rusty.
-
15 hours ago, Michael jones said:
Just wondering, almost all files i see on the net don't have windows. Is it possible to 3d print windows in clear resin for example, or are they too thin to be possible? Thanks and great work.
Micheal it's possible, but not ideal. The best way to do window is clear plastic. If I take the windshield glass file out of the cad file, I can create a file to 3d print a buck to form it with clear plastic and heat gun. The end results are much more realistic and to scale.
-
2
-
-
On 6/5/2021 at 7:32 AM, charlie8575 said:
I own a 1955 Coronet 4-door. I'd love to see a corrected 3-D model of that so I can build my car. Closest I could get was one of MCW's Custom Royal Lancers.
Doug, I'm working a couple of possible ways to start doing some low-medium volume kit production that might be a little more economical long-term than 3D, and some of your subjects might be a good match. Let me know if you'd like to team up.
Charlie Larkin
Sounds like an interesting proposition Charlie. Please keep me posted as to the details.
-
1
-


 :
:
my 3d printed projects
in WIP: Model Cars
Posted
So here's what I worked on today. I have a free file of a 53 Cadillac Eldorado convertible that is one of the best files I have ever found. There is a body and a beautifully detailed interior, but no engine. There for, I'm creating a 1953 Cadillac 331 engine. I'm currently working on the heads.