
my66s55
-
Posts
1,352 -
Joined
-
Last visited
Content Type
Profiles
Forums
Events
Gallery
Posts posted by my66s55
-
-
I've had that Safari for at least a couple years. It's just not a good file. These files are done by Dan Palatnik. There $150 each. Go to his Facebook page and check it out. There"s 56 Buick Roadmaster 2dr hardtop. He's doing the 55 Plymouth for the same $150. His files are all high poly count.
-
 1
1
-
-
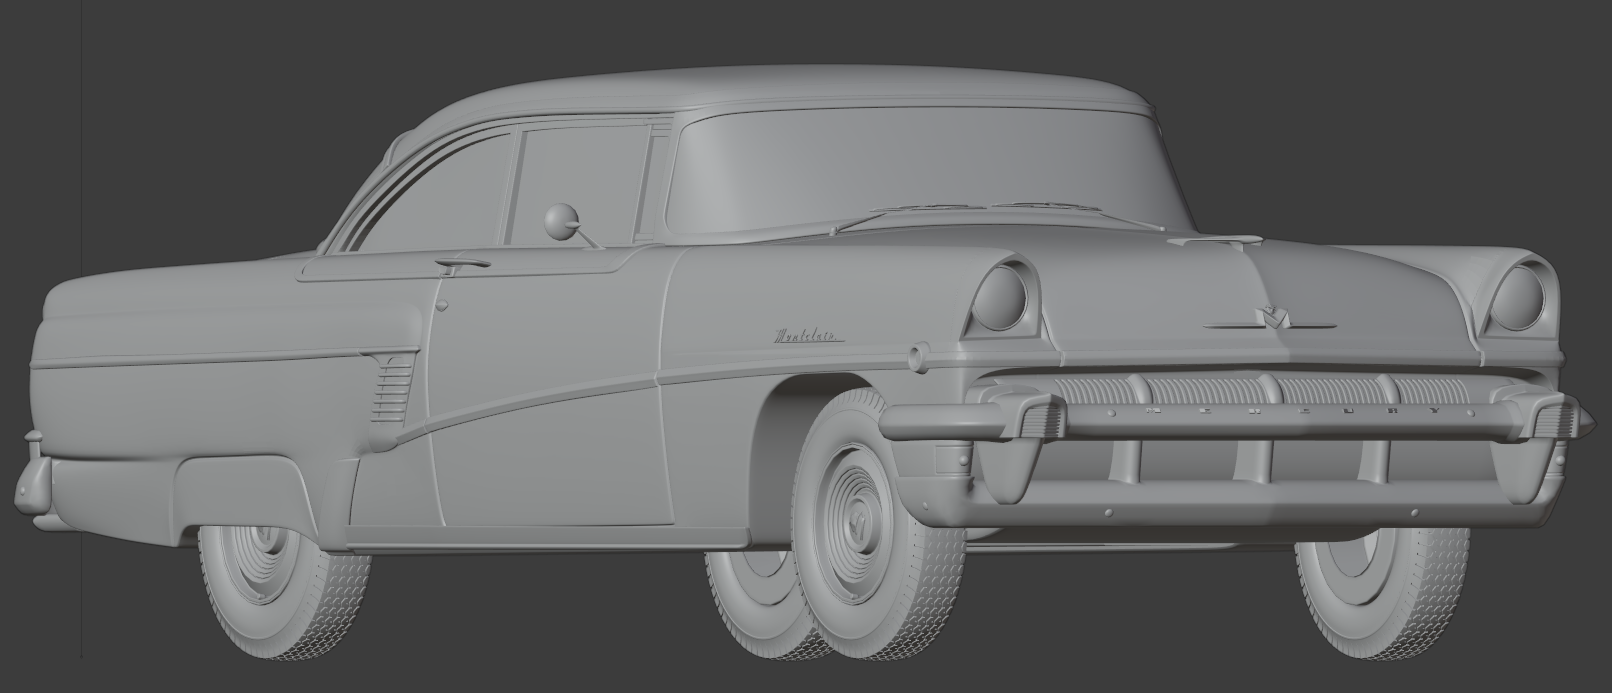
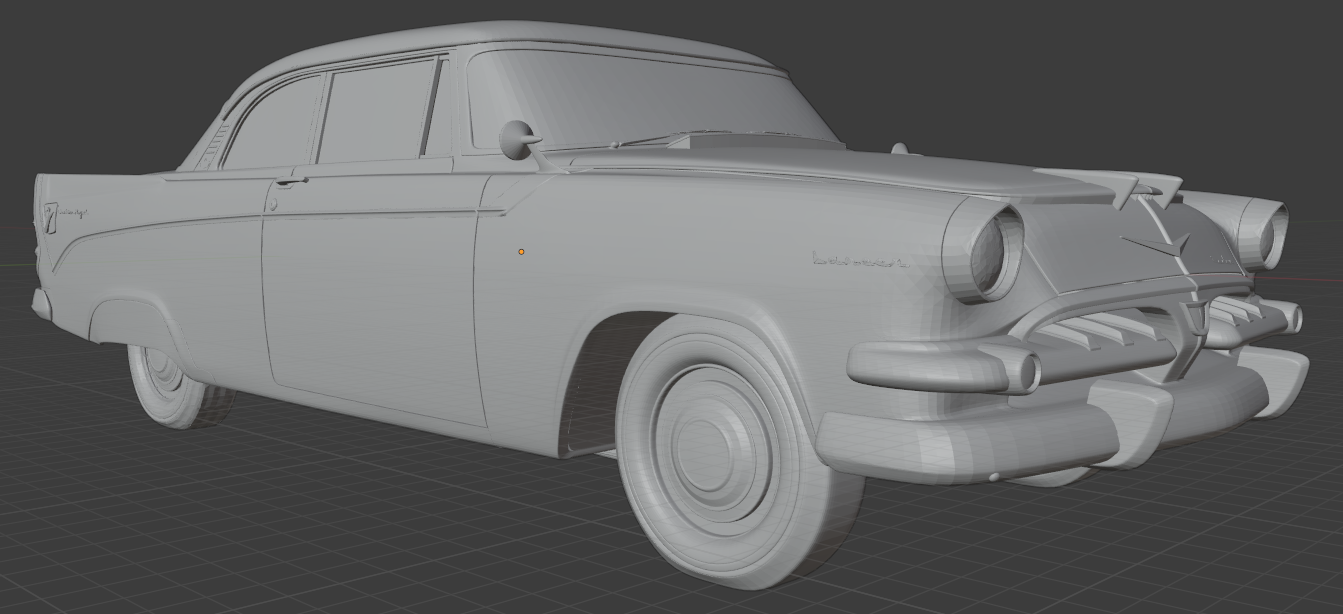
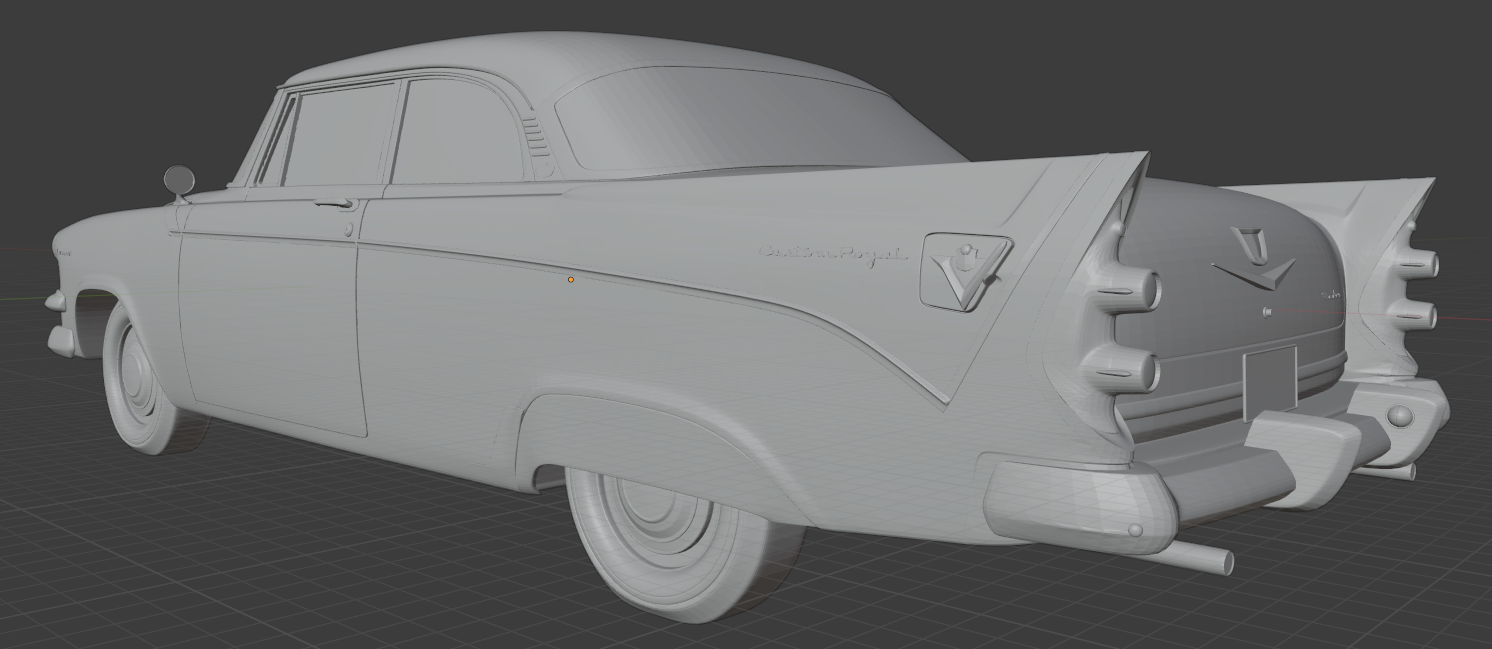
I found three 56 car files that I've purchased and modified for 3d printing. There just isn't any files available for these, but I got lucky and found a gaming file producer that had them. Their pricey and need some modification. He's also creating a 55 Plymouth Belvedere convertible for me. The Caddy 331 engine and thans are almost finished. The 56 Continental is ready for print and the 58 Ford Sunliner convertible is almost printable. The new printer should be here by the end of August. Here's the three 56"s.
Pontiac Star Chief Catalina Sports Coupe -the front bumpers need scaling down.

Mercury Montclair. - I had to flatten the small grill.
Dodge Custom Royal Lancer-can't find anything wrong. I will probably combine this front end onto the rear of the 55 and make the few changes..
-
1
-
-
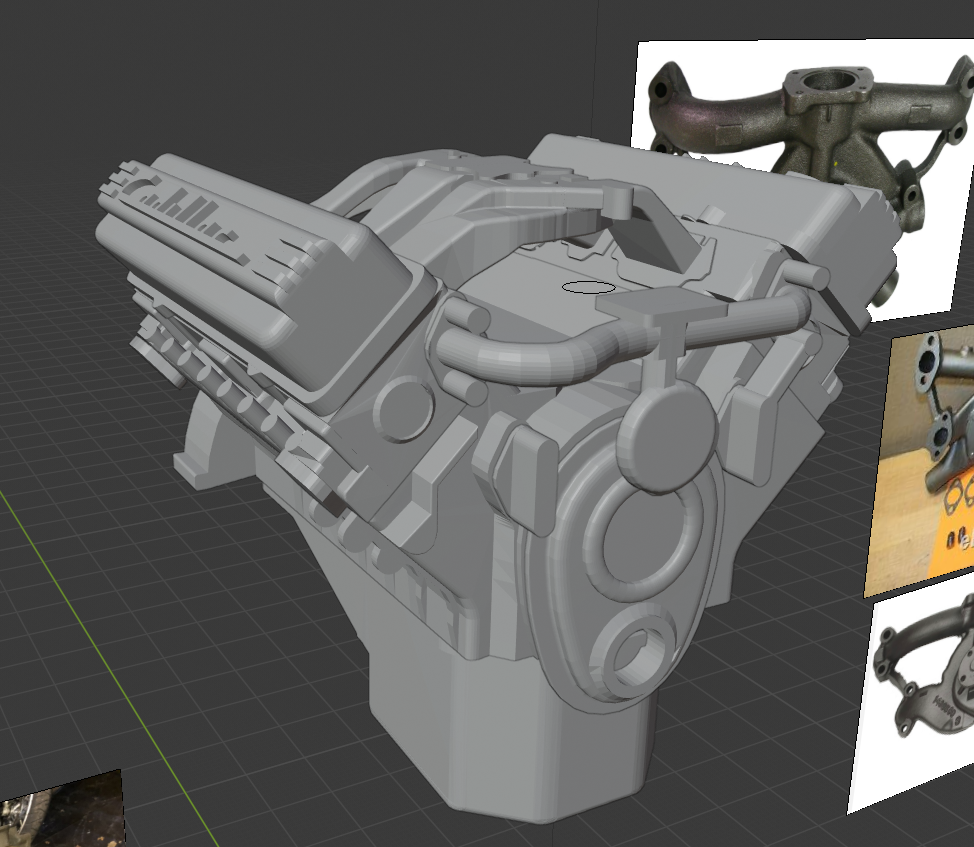
Progress on the Caddy engine. Water pump housing is done. Center exhaust pots for heads is done. The correct Hydra-Matic Trans is well underway. The oil pan needs to be corrected.
-
2
-
-
Is this what your looking for Micheal? This is a newer release with better plastic.
There is no warping. I bought it a few years ago for the body. I made a resin casting of it for my convertible project. There is no interior but, everything is in good shape. Message me if interested.
-
9 hours ago, CabDriver said:
Has anyone seen a decent print file for a 66 Cadillac Coupe De Ville anywhere? Seems like something @MrObsessive might have come across at some point…
I’m building a Johan ‘66 now…
…and the kit comes with a bunch of custom parts (like a lot of the AMT kits did too). I’d really like to find a body that I can attach them all to without spending $150 on another rare old Johan kit…
Go on Squir.com for the 65. It's $99. Squir is top notch. TurboSquid doubles the price.
-
2
-
-
The other thing you need to watch for with purchased files is the accuracy. I covered this in my "My 3d printed projects" posts with a Hum3D 55 Dodge file that was major messed up. I downloaded the free 56 Pontiac Safari file and new something major was amiss. I'll turn it into a convertible at some later date. I put the file on top of a good side view because the front wheel well was off. I'll use this setup to correct it.
-
1
-
-
You did a fantastically beauty-full job on this classic. My hats off to you.
-
The system that the guy used in that first video were he brushed it on and then buffed it won't last. I checked out the chrome nail application not using the gel and it doesn't last long. As a couple of other things I'll add is that one some techs use iso alcohol on the gel before applying the powder. It helps it adhere better. Also. If your attempt doesn't come out perfect or you missed some spots you have two options. Leave it in 91 % iso alcohol for a few hours and most will come off. The rest has to be lightly sanded off. If you missed a few spots, just apply another coat. The addition led cured of a gel top coat will protect it and won't dull the shine.
-
1
-
-
1 hour ago, Oldmopars said:
The big issue I had is with print thickness, it was way too thin. However that is how I got it and while my skills in Fusion are good, my skill with Blender is none. I need to learn Blender so I can fix issues like this.
I also printed it at a lower angle, 15 degrees, however that is the body that failed. The 2 I did steeper were successful, but the details were lost.
In the future I will only print thicker bodies.
Also, please don't insult my printer, I did a ton of research and it is the highest rated 4K printer in its size class. I looked at all brands, I am very happy with the one I have.
I didn't insult your printer. My Shuffle 2018 is a step up from the printers you considered. A company like Phrozen also makes a better quality line as well as the hobby printers. I've had my Shuffle XL since September 2018. It's electronics aren't cheap Chinese and the software isn't Chitubox garbage. A Raspberry Pi 3b ( you know-not made in Mainland China) powers a main mother board, a much better designed led array, the lcd and 3 fans. The software is NanoDLP which runs circles around Chitubox. The z axis is secured at the top and not hanging in mid air. The dual z axis has 2 slides and very high quality glides. There is a solid metal build plate with a solid metal fixture that holds it to the glides.. I started 3d printing in August 2013 when I built me first printer. It was a diy fdm machine. That's when I started learning to use Blender. I build my second 3d printer in the fall of 2014. It was a DLP resin printer. Back then there was a program called Creation Workshop that ran the machine. There was no auto support generator so I had to learn how to place supports. Since I've built my own printers, I know what it takes to make a good printer and how the printer actually works. As far as printing goes, I know what works and what doesn't. As a side note, the working basics of these resin printers your using weren't developed by some company. The open source community back in 2014 started experimenting with resin DLP printers and Kickstarters were used to fun small startups This is where Formlabs came from. Circa early 2016, the open source community started developing a resin printer using one powerful led for curing. That only allowed a small surface for curing so someone started using an led array. I know all this because I was there and was a member of a couple of diy forums. In November 2016, a couple of built printers came out of China. One was the Wanhoo Duplicator 7. It was roughly constructed and Wanhoo relied on the open source community to help them fix it. Circa 2017, a group of 3d printer enthusiasts from Taiwan formed and made a printer called the Make and started a kickstarter to fund it. It was a success so they improve it and made a printer called Shuffle. That company is Phrozen. They gained a reputation for building good, affordable printers that still exists today. Both the printers and the reputation. The Shuffle XL followed and that's when I bought mine. Check it out.
-
So what, prey tell, has this to do with the topic at hand?
-
 1
1
-
-
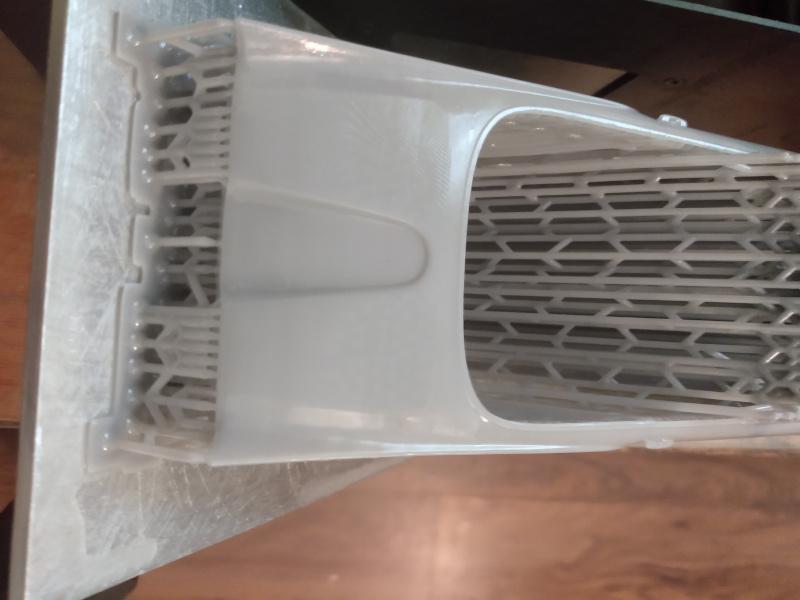
I don't know guys. Most of your problems come from the lack of experience. People say Robert Burns body's are thick. I have stated and I will restate now. He has a reason and that is that a thicker body will be, the less inclined for failure. These print ready files you purchase on line are, for the most part, too thin. Hence the rips in one of Oldmopar's build. I have never had a failure when printing car bodies, or anything for that matter, on my Phrozen Shuffle 2018 that I converted to 4k two years ago. But then, the printer is a step up from what you are using. As to thickness, I make my car bodies at 1.6 to 1.7 mm thickness. I checked the thickness on a couple of printable bodies and the max thickness was 1.4 mm. Also leave the bodies in the build plate for post curing. If you insist in using the too thin bodies, leave the supports on after post curing. The resin continues to cure afterwards. Thus, the warping. I totally avoid making anything real thin. It will eventually warp over time. When you encounter a body such as the one Oldsmopars is having trouble with remember that 3d printing is an additive process. Lowering the angle will increase the quality of the build. a 15 to 20 degree printed with the front down should do wonders. There should be no reason not to be able to print Oldmopars body correctly.
What's missing is experience.
-
2
-
-
Your way
Apply adhesive layer, brush the powder on a tacky base coat of paint , buff. Enjoy chrome finish.
My way
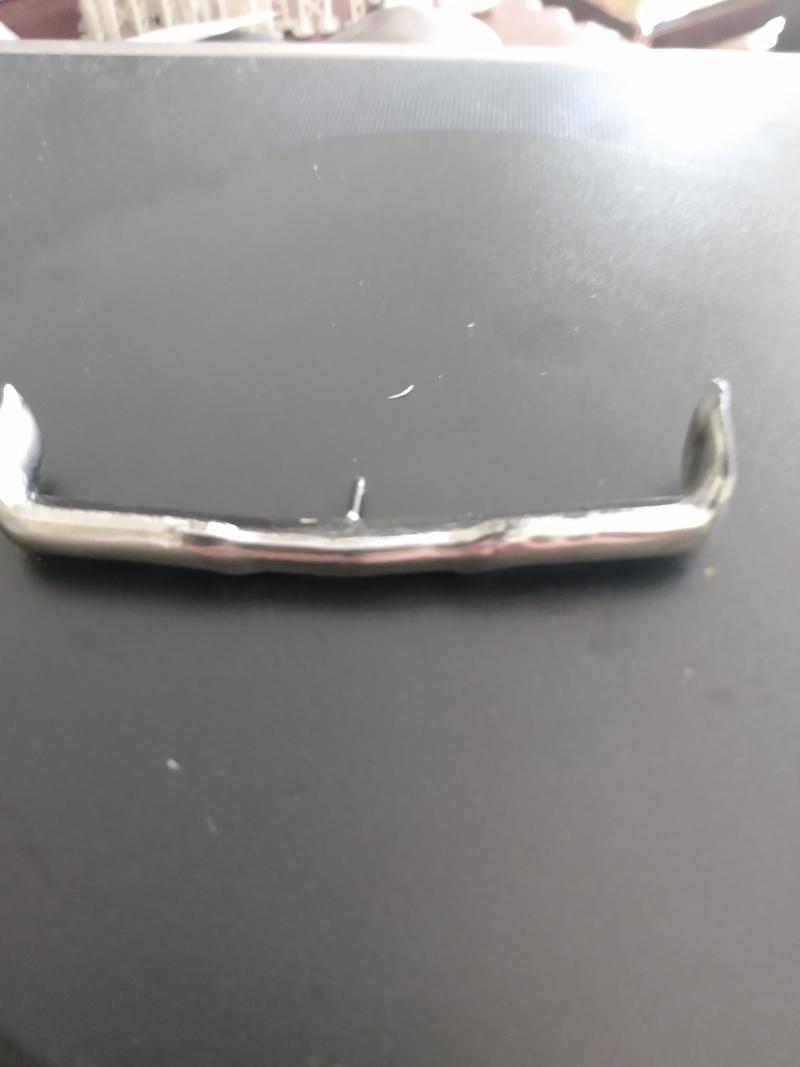
apply gel layer, uv cure (uv curing hardens the layer so you can touch it. It's not sticky.) rub the powder on with a sponge applicator , brush off unused powder. No sticky surface or buffing. My bumper looks a whole lot better than that spoon. My powder even looks more metallic. The non gel way takes a lot more work to get it to shine and in my eyes view, doesn't appear to be as shinny.
-
Here's a nail tech putting it on nails. It works the same way on plastic and resin parts.
-
3 hours ago, Sandboarder said:
Look like the same powder/techniques to me just used a different base/adhesion method and optional clear coat as Barbatos Rex will tests every type of chrome with a clear coat to see the results. Part of his testing to show real world results.
Maybe you could copy and paste some links to make it easier for people to see your references.
My reference has been posted and the result is on my desk. This stuff doesn't need a clear coat. You seem to be set on your guy. I'm sure of what I have and don't need any more proof.
-
1 hour ago, NOBLNG said:
Here is the video. It looks like fantastic stuff. The nail powder part starts at 6:10.
https://www.youtube.com/watch?v=ninpBuzNSxQ
I wonder if that “glass finish gel” could be airbrushed on for a smoother finish? And then what to clean the airbrush with?
It's too thick. but is self leveling. The cured finish is smooth as glass.
-
1 hour ago, SfanGoch said:
What's the product name? That would make it much easier searching for it with Google. A general search comes up with dozens of products, not necessarily the one you used.
They were purchased from Amazon. Search "chrome nail powder" and you'll see many different ones. A lot of them come in a package with many colors.
I found one for $6.99 that was just chrome. Here's the Glass Finish Gel.
-
 1
1
-
-
1 hour ago, Dpate said:
Have you tried it with a gloss black base? or you have to use the glass finish gel? I watched that video but wasn't really thrilled with the results. I also can't really tell from your pictures either.
The glass base gel although cured hard, is what adheres it. I used Duplicolor standard black for the base. It's difficult to photo as the light reflection blurs it.
Here's a couple more with the blinds closed. There's still some reflection, but there are some areas that can be seen well.The whole part looks like these areas. That's me in the background of the second picture. I was not totally sold by the video either. My main question was how would it would take handling. I did't just handle it, I repeatedly rubbed it with my fingers and gave it a real test. It didn't even phase it.
-
1
-
-
20 hours ago, iBorg said:
More info please.
See my post above as the posted video ISN'T it.
-
Nice video, but that's not it. This chrome is even shinier and doesn't need a clear coat. This is it. The YouTube video "Chrome Finish on Plastic- Did I Find the Answer?"
You paint your part black. next, apply a coat of Glass Finish Gel. Cure that with a uv light and then rub on the powder. There is some powder residue that you just brush away. I just used a cheap brand of powder, but I watched a video yesterday were a nail tech use a mirror chrome. Totally unbelievable.
-
3
-
-
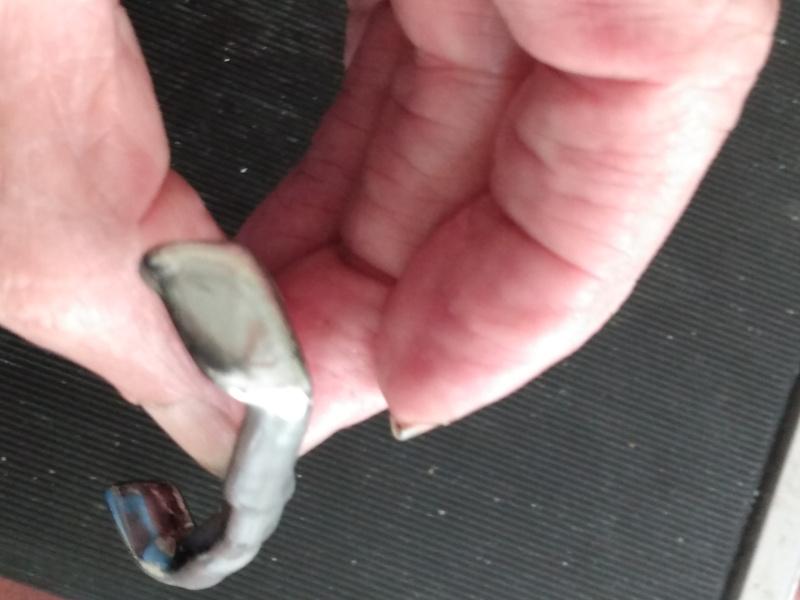
I decided to try the chrome nail powder. It works exactly as shown in the video that was on here a short while back. It does take practice to get it right. Here's a front bumper for my 59 Plymouth that I did. It's so shiny that my cell phone camera can't get past the glare. I've rubbed my fingers all over it and done everything to see if it held it's quality. Nothing phased it. It'still like it was when I applied it.
-
3
-
-
Good points Bill.
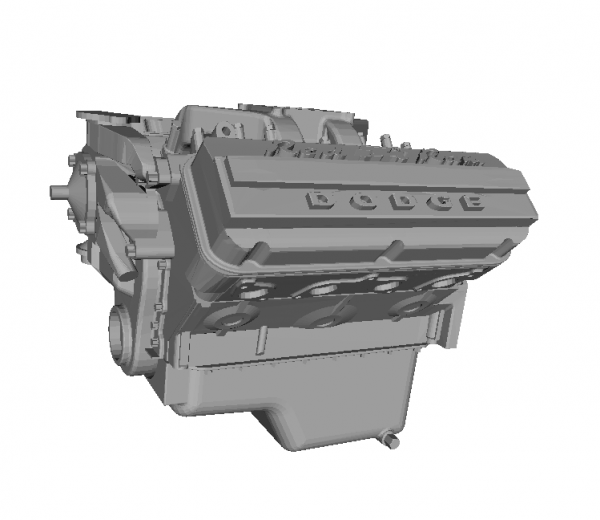
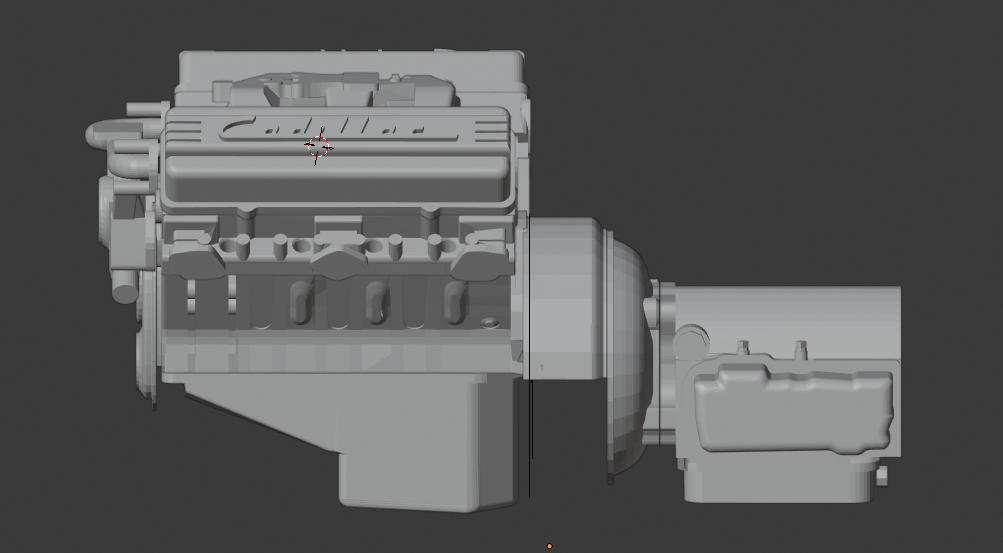
Caddy 331 engine with intake manifold and oil pan.
-
3
-
-
Very nicely done. Your prints look clean and have good, sharp detail.
-
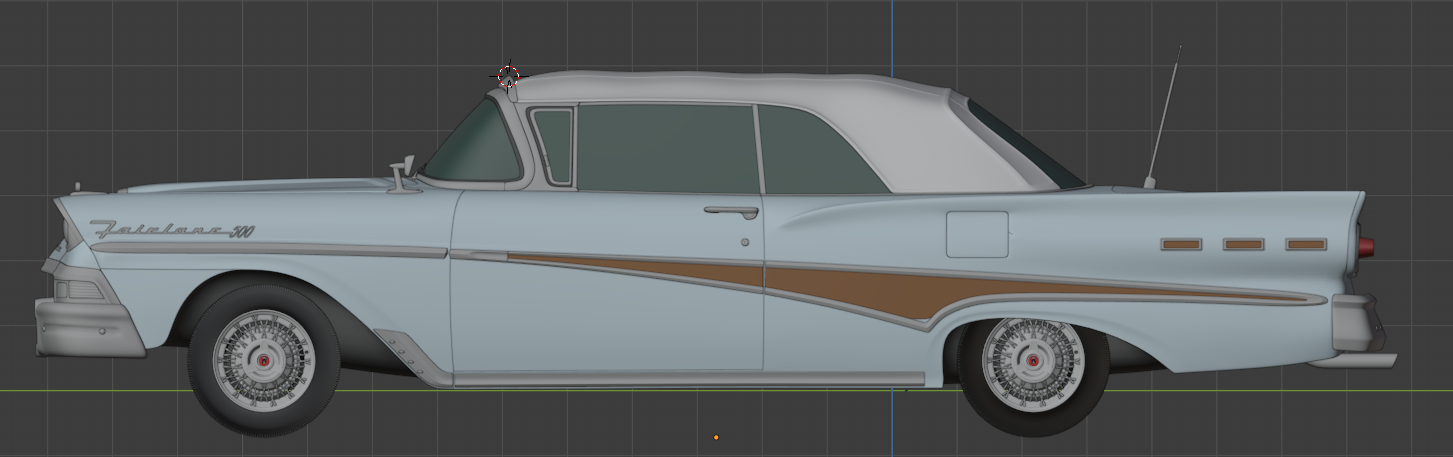
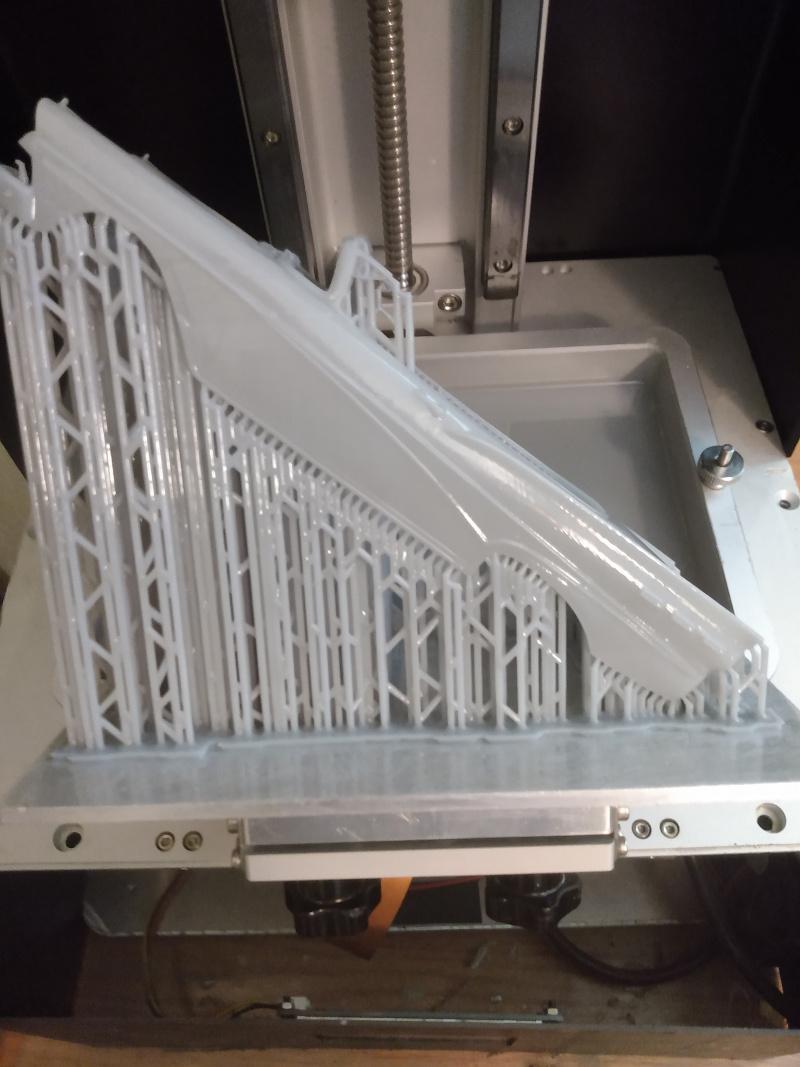
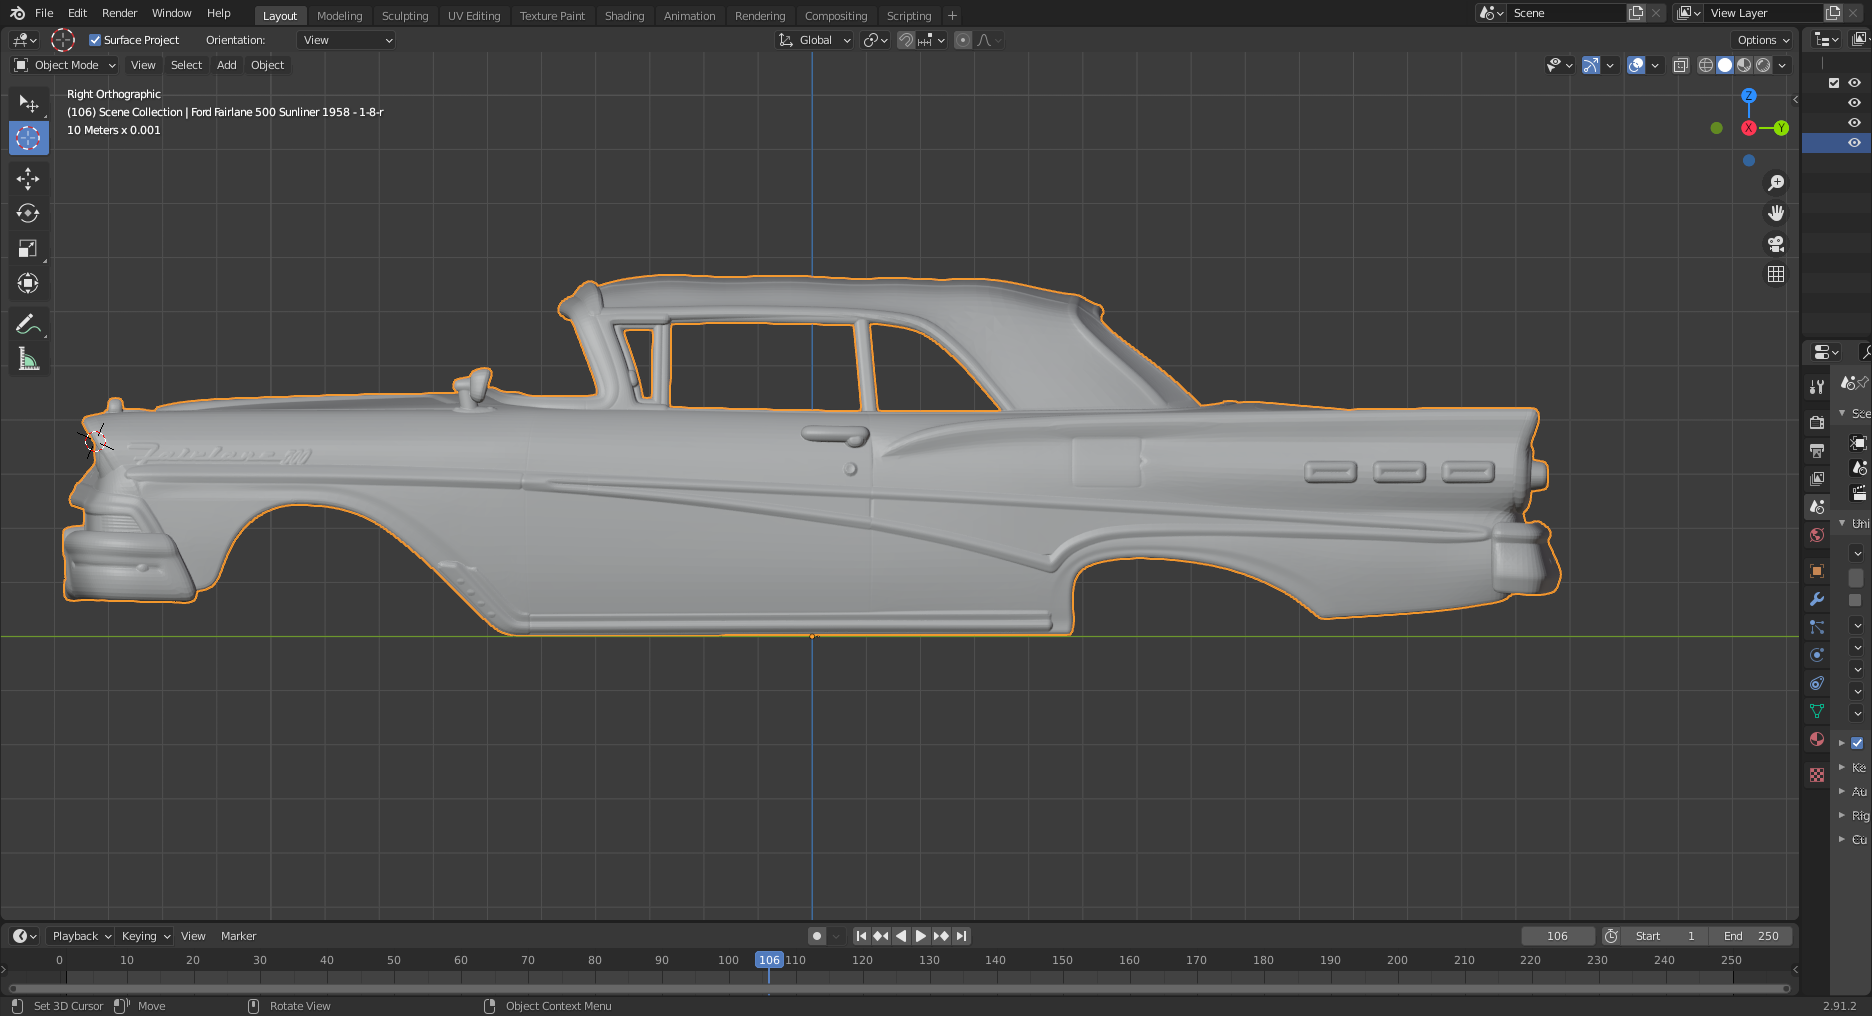
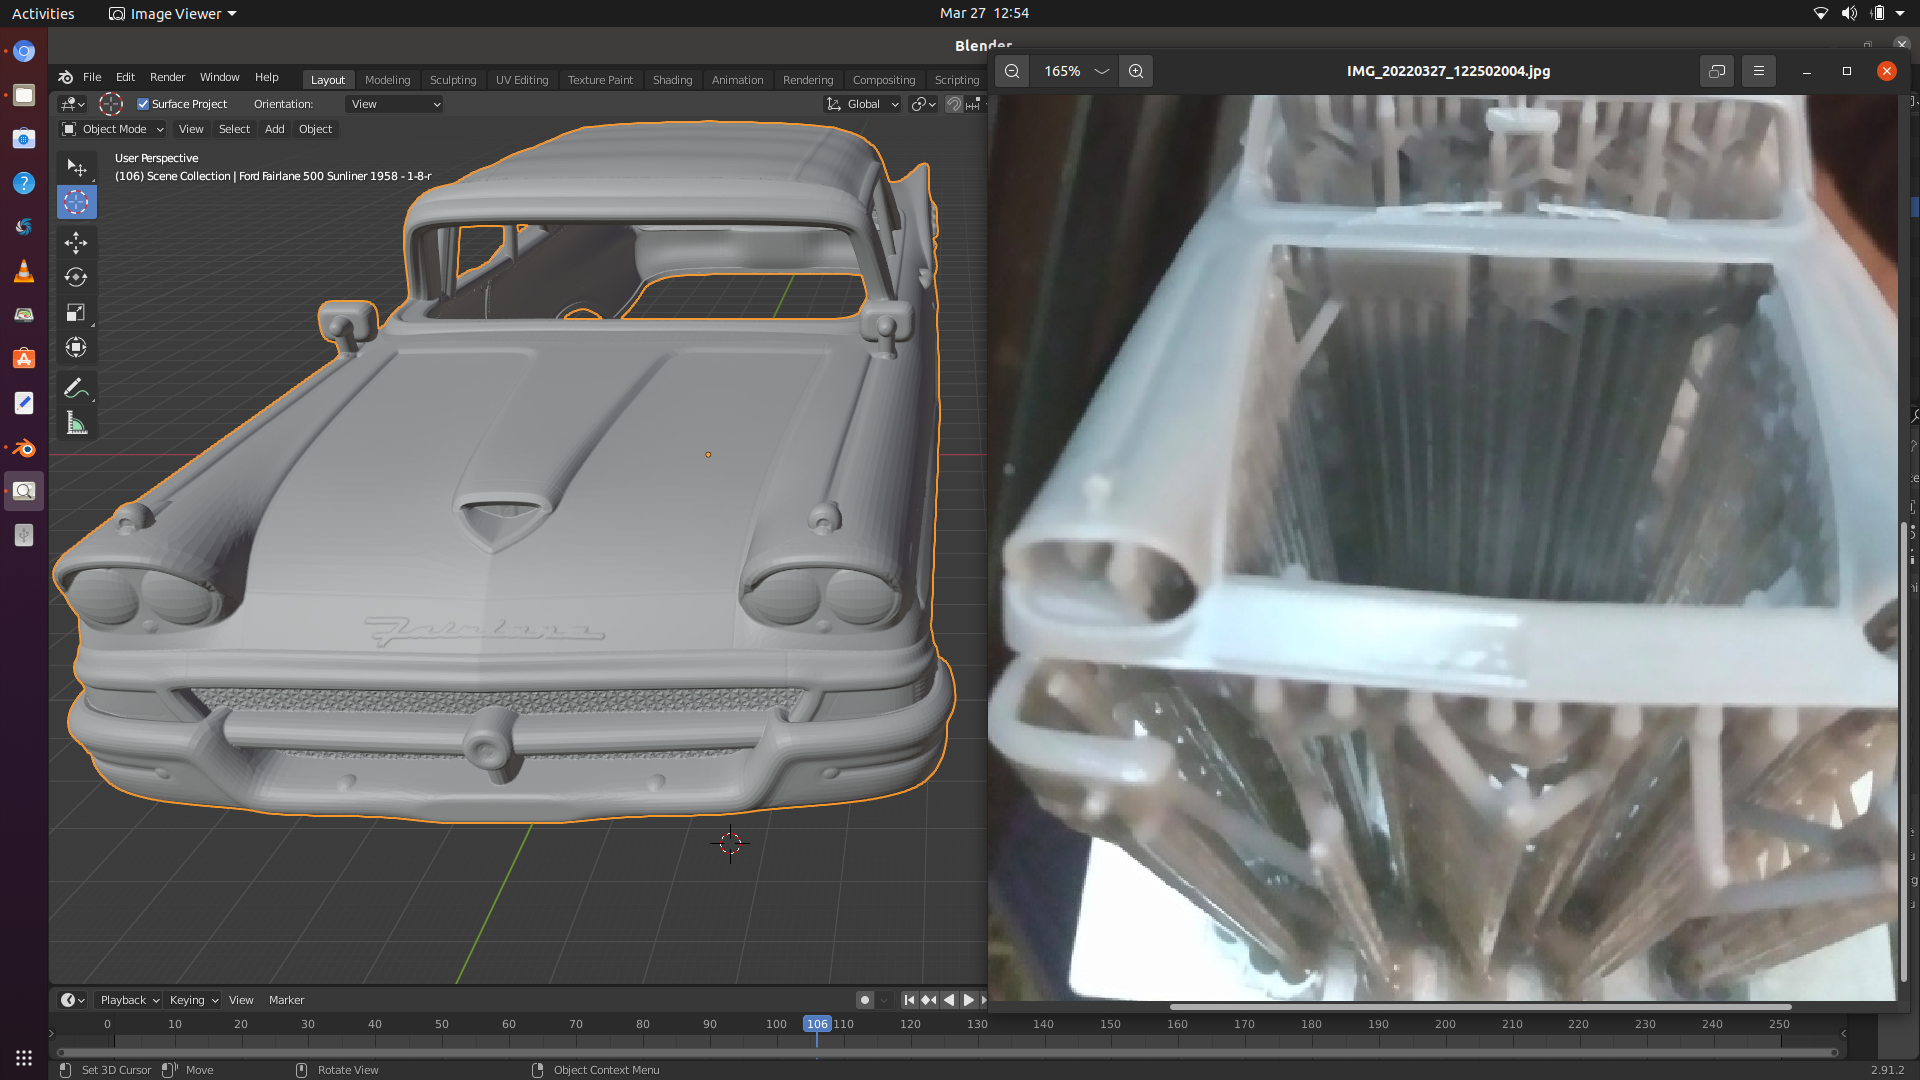
Things are progressing nicely. I'currently working on the intake manifold for the 53 Eldorado. The 35 LaSalle is coming along nicely and should be done sometime this month. I did print out the body of the 58 Ford Sunliner convertible. The length fits perfect with the AMT 57 Fairlane 500 body. This leads me ti believe That I could make a trans kit for it. I'm going to show you what it looks like as well as a Cults printable body which is one of the reasons you need to be careful about Cults files. Here is the Hum3D file printed out. Note how it prints in fine detail.
And then the Cults file which is a poor rendition of a printable file. Some pics are comparisons to my printed car.
I purchased the new Phrozen 8k printer which I should have in late August. To give you an example' the xy um for the 4k printer I currently use is 50. the xy um for the new 8k printer is 28 um. That's almost a 50 % improvement. Take a look at these prints off a new Phrozen 8k I just purchased. Simply amazing. No more lines in the print.
-
1
-
-
I printed 10 because sometimes a few don't come out right. Surprisingly, 9 came out decent. I see your in Canada. That means more for shipping. Let me check on the cost.


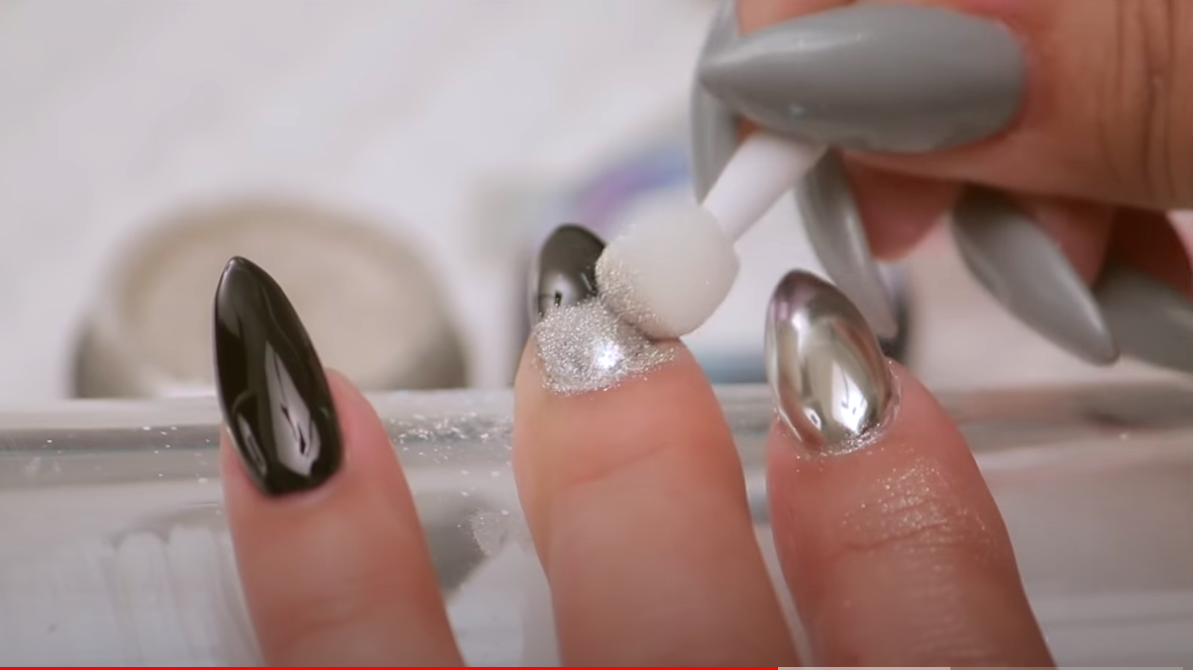 Here's a nail tech putting it on nails. It works the same way on plastic and resin parts.


my 3d printed projects
in WIP: Model Cars
Posted
Yes, they come in obj format. But, as I previously sated above, they are gaming files and very difficult to take apart. There is no separation of parts like your used to. It's totally different and takes me days to do. The 56 Mercury took 6 days at 3-5 or more hours a day to do. Then you have to know how to properly fill holes that you create in the process. The parts that are made separately don't always line up. You have to alter them to work. On and on. There a lot of work.