empinut
-
Posts
168 -
Joined
-
Last visited
Content Type
Profiles
Forums
Events
Gallery
Everything posted by empinut
-
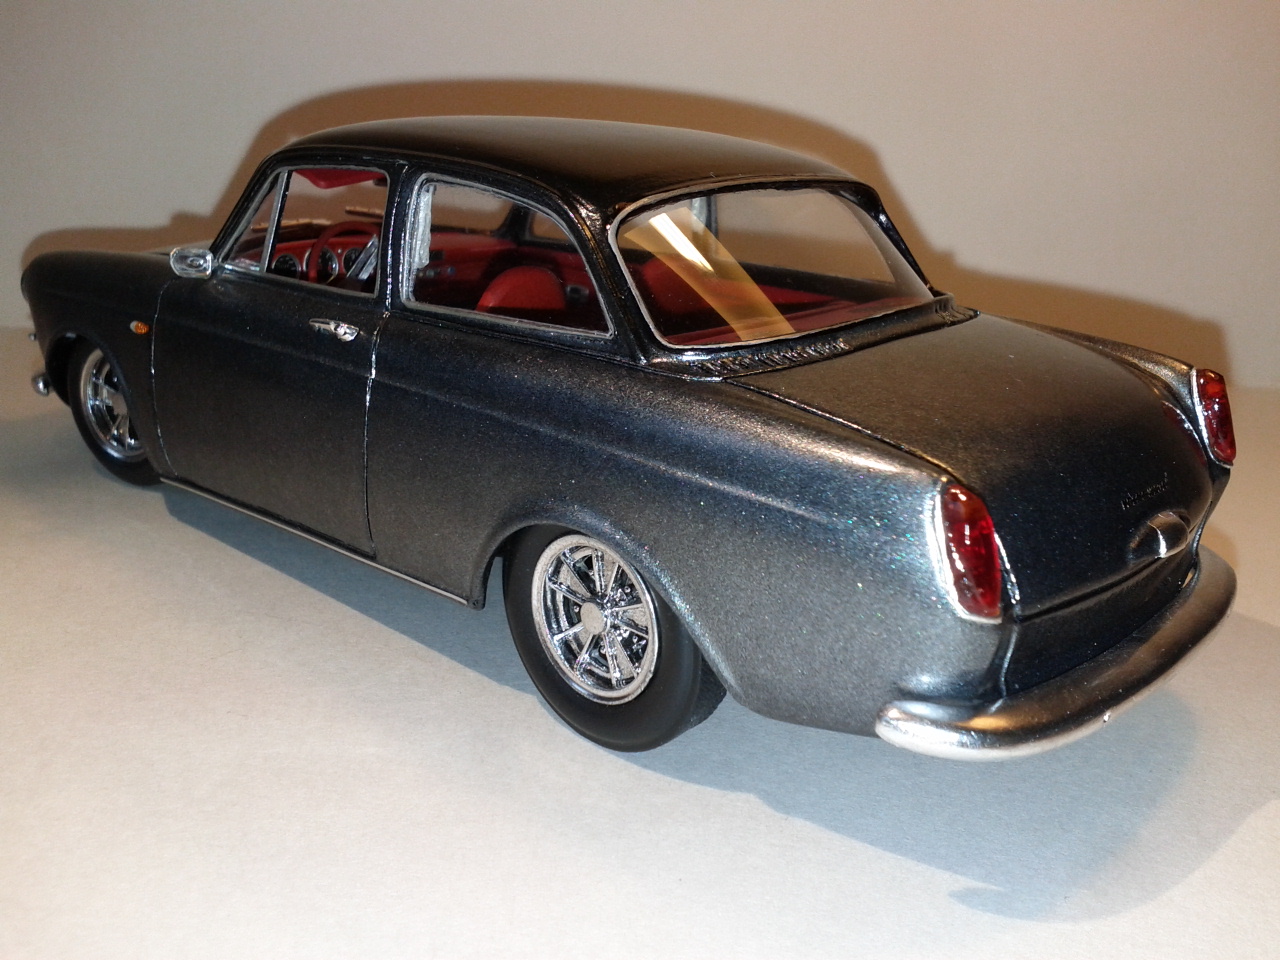
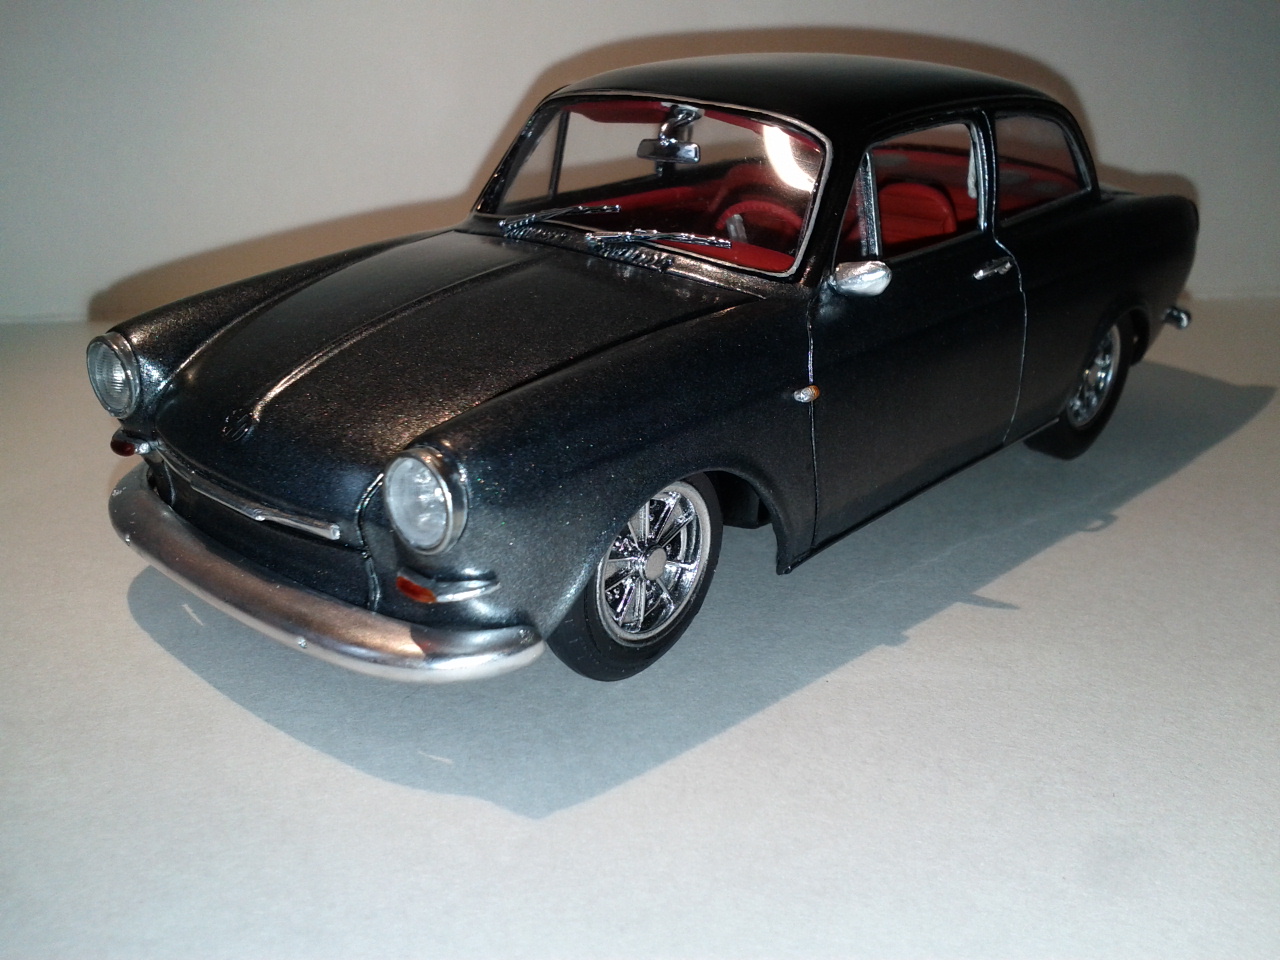
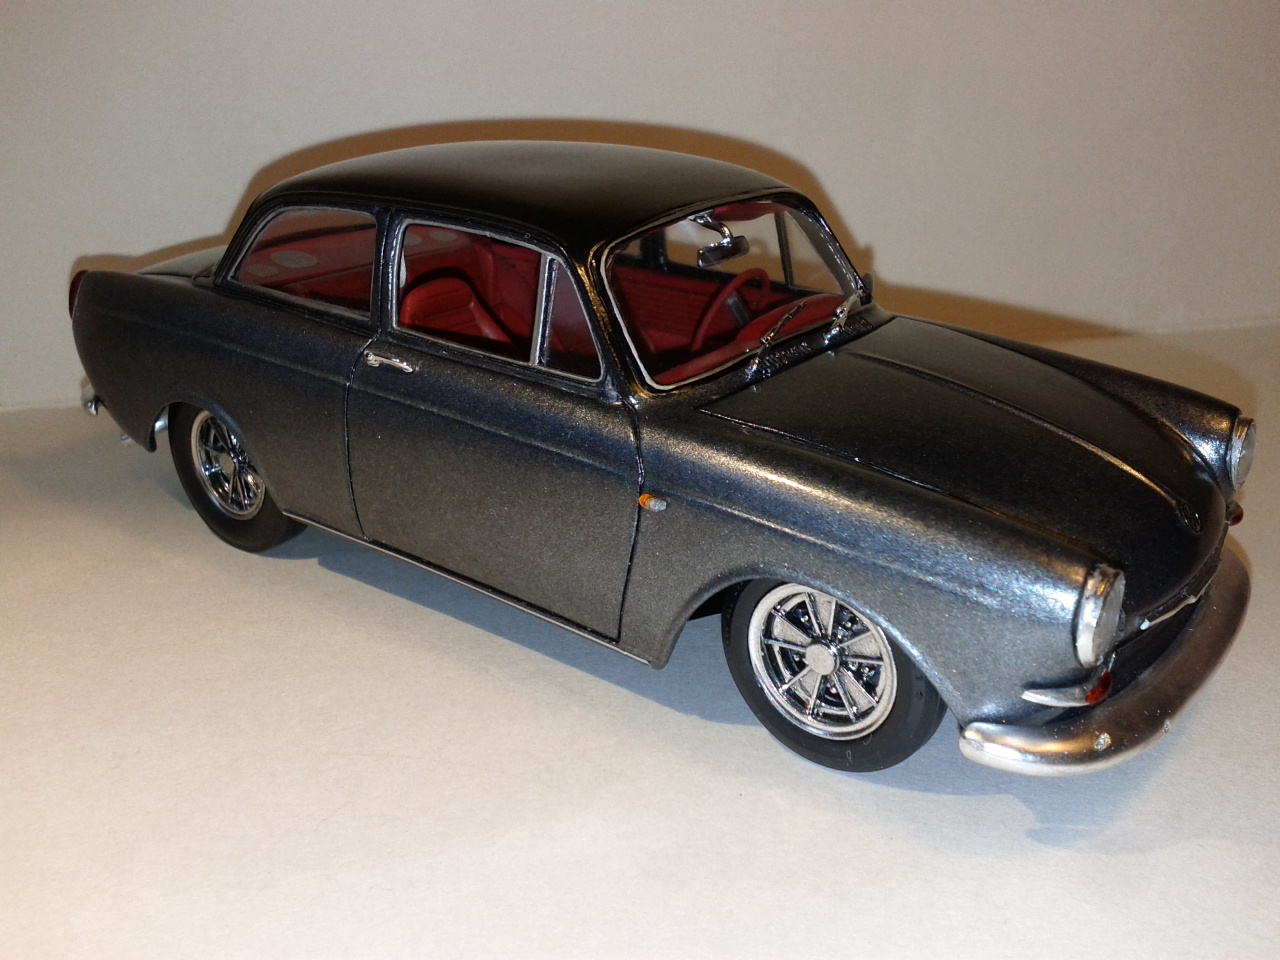
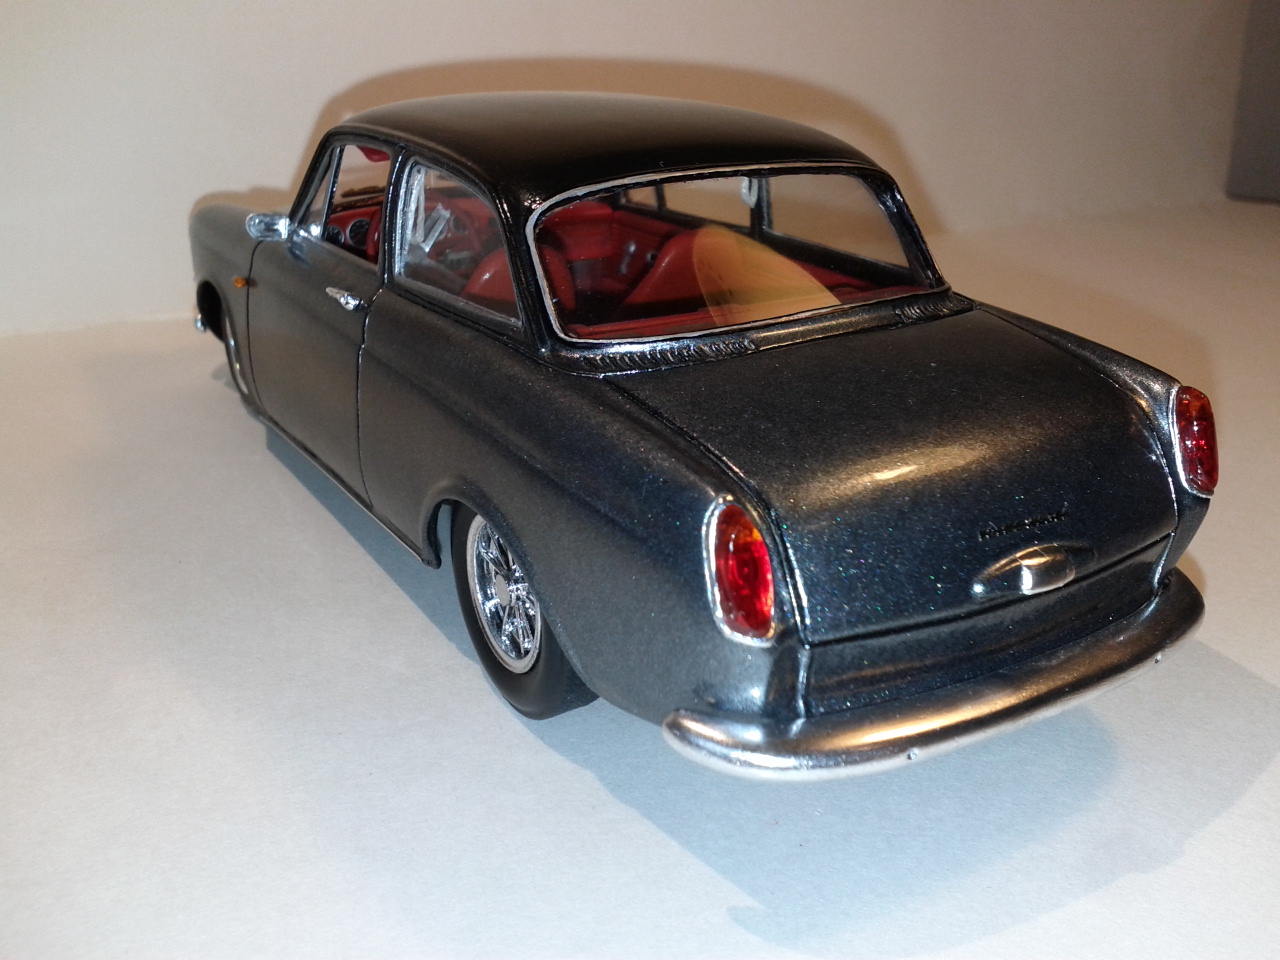
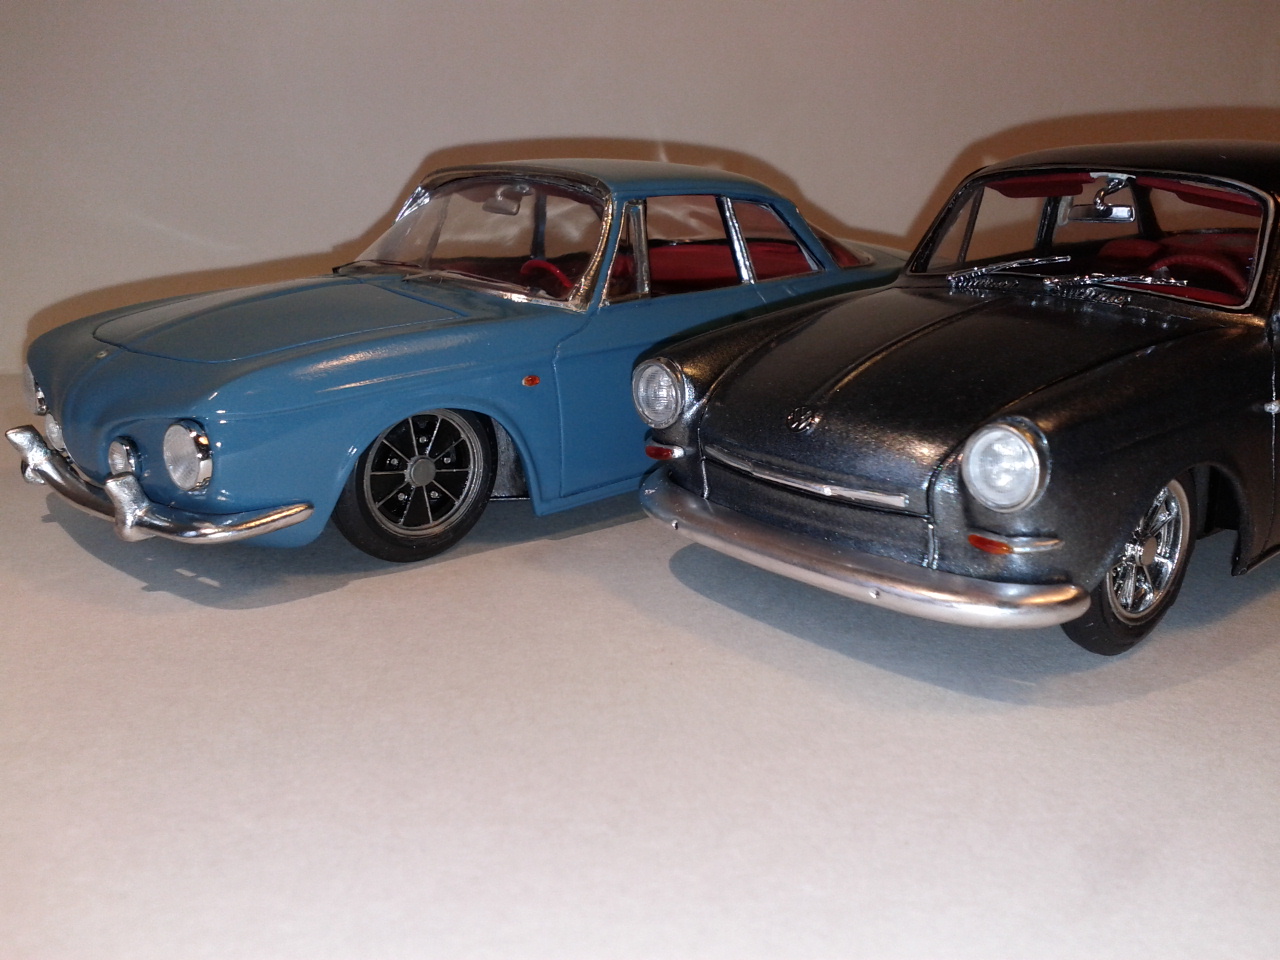
Airtrax Resin Body used as base with many modifications and details added. Chassis is from a Fujimi Porsche 911 with a Turbo engine added for motivation. Engine and chassis details are all there, you can only see from the bottom. BRM rims are my own creation. Added interior details like pull handles for getting in the back seat on the B pillars made from cut down seat belt material and sun visors and Photoetch dash and pedal details. All windows are flush fit made from 015 clear sheet. Front hood trim, "cat eye" mirror, headlights, turn signals and rear lights are scratchbuilt. Boy that was fun. PE emblems added. Last 2 pics show the T3 Notch next to Airtrax T3 Razor Ghia.

-
Seats painted and decaled with houndstooth pattern. Sub floor added to hide front mounting points. Carpet is replicated from a really nice stick on fuzzy material. Easy to cut and very sticky. Scatch built Barndoor foot bar. Added heater and turn signal handle from Fujimi parts, plus photoetch foot pedals. Shifter modified with longer stalk. Re-primed body after fixing 1st paint job mess ups. Added a new body color and about to install the Safari Window photoetch Brackets. Also adding a pop in fabric headliner and some other goodies to the Barndoor dash pod. More to come. Thanks for looking, commenting.
-
Dale, You are correct and I feel your pain. I love building vw models and like to super detail the few kits that i build each year. I only have 25 kits left in my stash and i want to focus on quality not quantity. Many kits have tried to copy the vw aircooled engine but none is perfect. The kit that I find has the best representation of a type 1 cylinder head in 1/25 scale is the MPC Kyote. The best in 1/24 is the Tamiya 66 beetle. Because this is such a small part in 1/25 scale, I have been making my own...it's really not that hard. The other issue is that so little of the cylindar head is actually seen after the engine tin, exhaust manifold and valve cover is attached. Even the 1/16 vw engine from revell of germany has a lack of detail. Since there has been some interest in vw engine parts, I have accumulated a bunch of the best engine parts from every vw kit made (Tamiya, AMT, MPC and Monogram) and am sending them to a resin caster that is very interested in repopping them. You can see some of these parts and my vw builds on my fotki...empinut. Since I have accumulated multiple parts from every VW model made for over 25 years, let me know what you are interested in seeing repopped and I will include these in my shipment to the resin caster. I was deeply disappointed with the toylike moldings of the new VW's by revell of Germany. I get why they did it, but find it interesting that model builders today of european cars would accept having half of the fan belt assembly not molded just because you can't redily see it. Some of the engine parts are grossly out of scale and look bad. Just gives me more motivation to do it right and push my skills.
-
Thanks Ray, check out my fotki, empinut for more vw stuff. Thanks Jason. On THE SAMBA message board, much discussion has been posted, but no pics? Dale, after building vw engines for 30 years, here is my "best of" parts list that for the best vw engine in my opinion..... Complete Engine Pre '53, (25 horse)....Hasegawa Kubelwagen. Early 36 horse single port.....AMT Meyers Manx. Late dual port.....Tamiya 66 beetle or Ghia. None are perfect but are a very good starting point. Excellent parts to mix and match..... AMT Meyers Manx dog house fan shroud, blue coil. Monogram Lil Van valve covers, Bosch 009 distributor. MPC Kyote cylinder barrels, heads, custom carbs. Revell orange or pink or yellow US 68 beetle/convert for empi intake manifolds ( cut off the close, but no cigar weber 48ida carbs) After market.... Replica Miniature Maryland 48IDA upright carbs (perfect!). Parts by parks aluminum pulleys. Check my fotki labeled empinut for pics of these parts and models where I have used them.
-
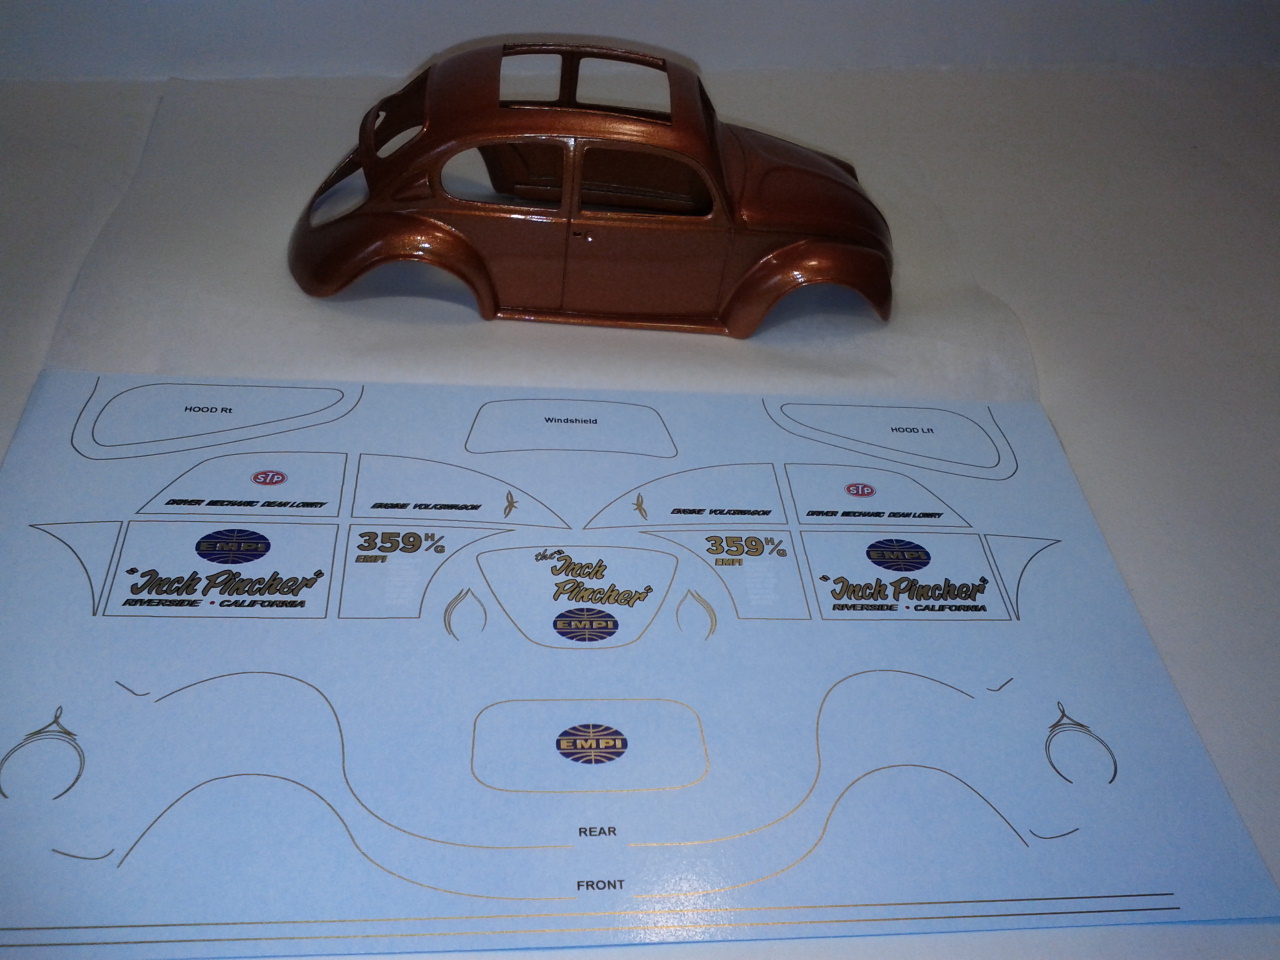
Airtrax Type 3 Notchback in final assembly. New decals available for the Empi Inch Pincher Gasser had me adjust a Revell VW DKP project. Extended single cab T2 Pick up to become the iconic Inch Pincher hauler. Utilizing Tamiya engine block for a super detailed gasser engine. Starting a couple of original Revell Porsche speedsters for quick builds?
-
Thank you for all of the kind words and nice comments! I'm the final stages of finishing the AirTrax T3 Notchback. Pics up soon. Thanks again.
-
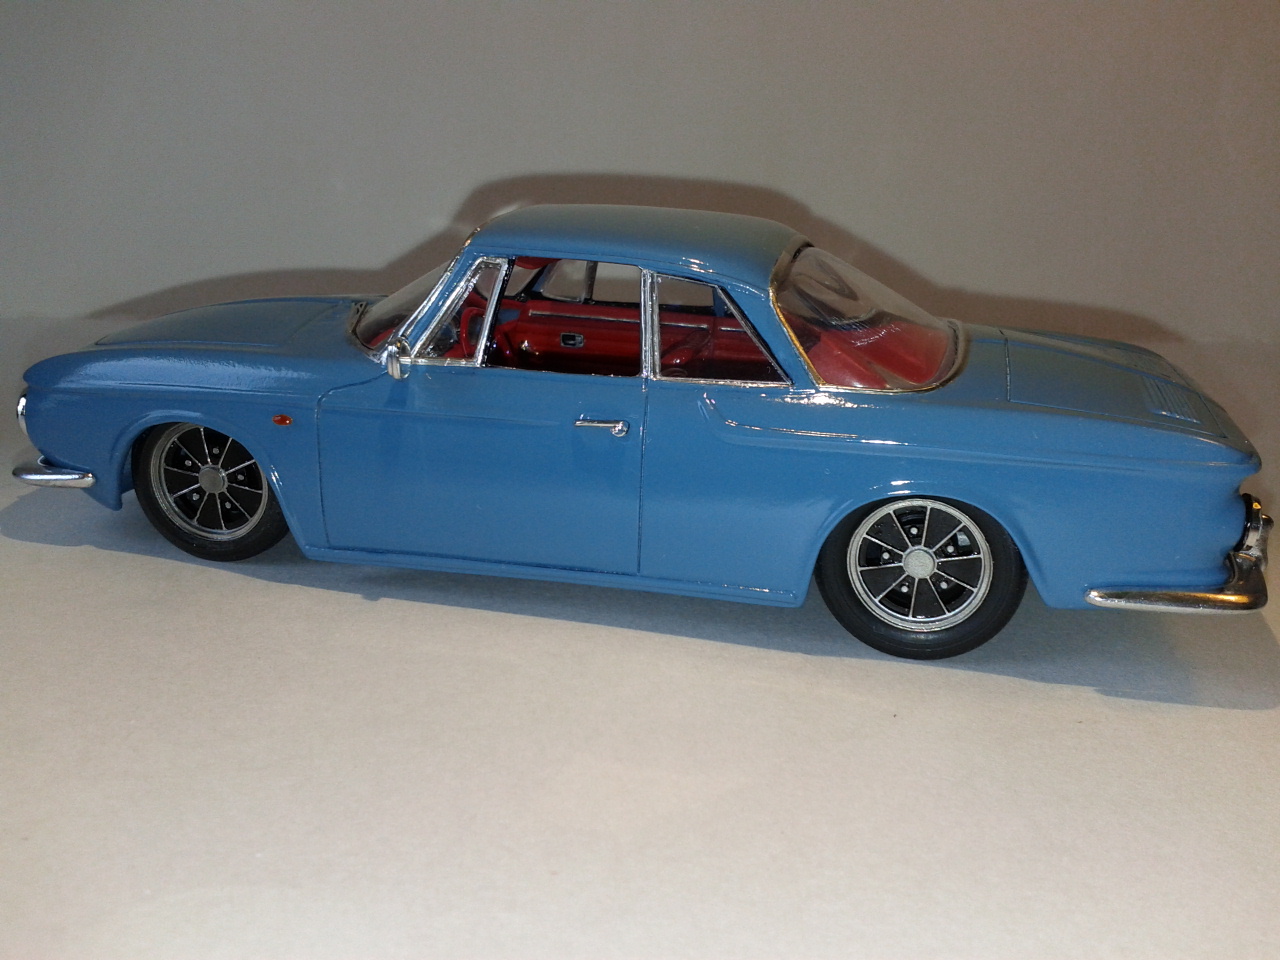
Airtrax Resin Body, bumpers and door panels. BRM white metal wheels from Dennis Chung ( no longer available). Engine tin and sheet metal scratchbuilt. Back seat rear area scratchbuilt. Engine from Hasegawa, chassis and front suspension from Tamiya Ghia. Trans and rear suspension scratchbuilt from early Pyro Bug. Blue is a Tamiya AS medium blue clear coated. Photoetch wipers, nose emblem and rear lid button. Many hours prepping the resin body and bumpers as pinholes would pop up at every turn. Thanks for looking, comments.
-
VW Phantom Crewcab update 1
empinut replied to empinut's topic in WIP: Model Trucks: Pickups, Vans, SUVs, Light Commercial
I tried to attach these new photoetch pics to the other post but it would not let me for whatever reason? -
New photoetch sets are available from Eero Kumanto. Contact info: eero.kumanto@riemudesign.com His blog: www.riemudesign.com Postal charges are very reasonable. He accepts PayPal. I had a perfect transaction and will be ordering more. If you use Facebook, you could click: https://www.facebook.com/pages/The-Art-of-Scale-Modeling-by-Eero-Kumanto/434259049977788 You can see all the PE sets he can provide at the moment.
-
VW Phantom Crewcab update 1
empinut replied to empinut's topic in WIP: Model Trucks: Pickups, Vans, SUVs, Light Commercial
Thanks for the kind comments! Been working on a couple of different projects. On the crewcab I readjusted the roof piece to look more like a barn door top in the front. Removed the late model mirrors from the upper door hinges and attached to the body. Added the window trim for the sliding door windows. Also created a barn door style dash. Here is a pic of the new photoetch from Eero Kumanto....SAFARI WINDOWS!!!!!! YEA! I'll give his info in new products section. -
Thanks Glenn. These BRM wheels are not from Hideo. They are a white metal casting from Dennis Chung (Think Small) from Waaay Back. Hideo's are nicer, but also reflect newer technology in their development and execution.
-
Thanks Austin, Kevin, Ray. Thanks for the jump Bill. When are you going to apply your magic to one of these?
-
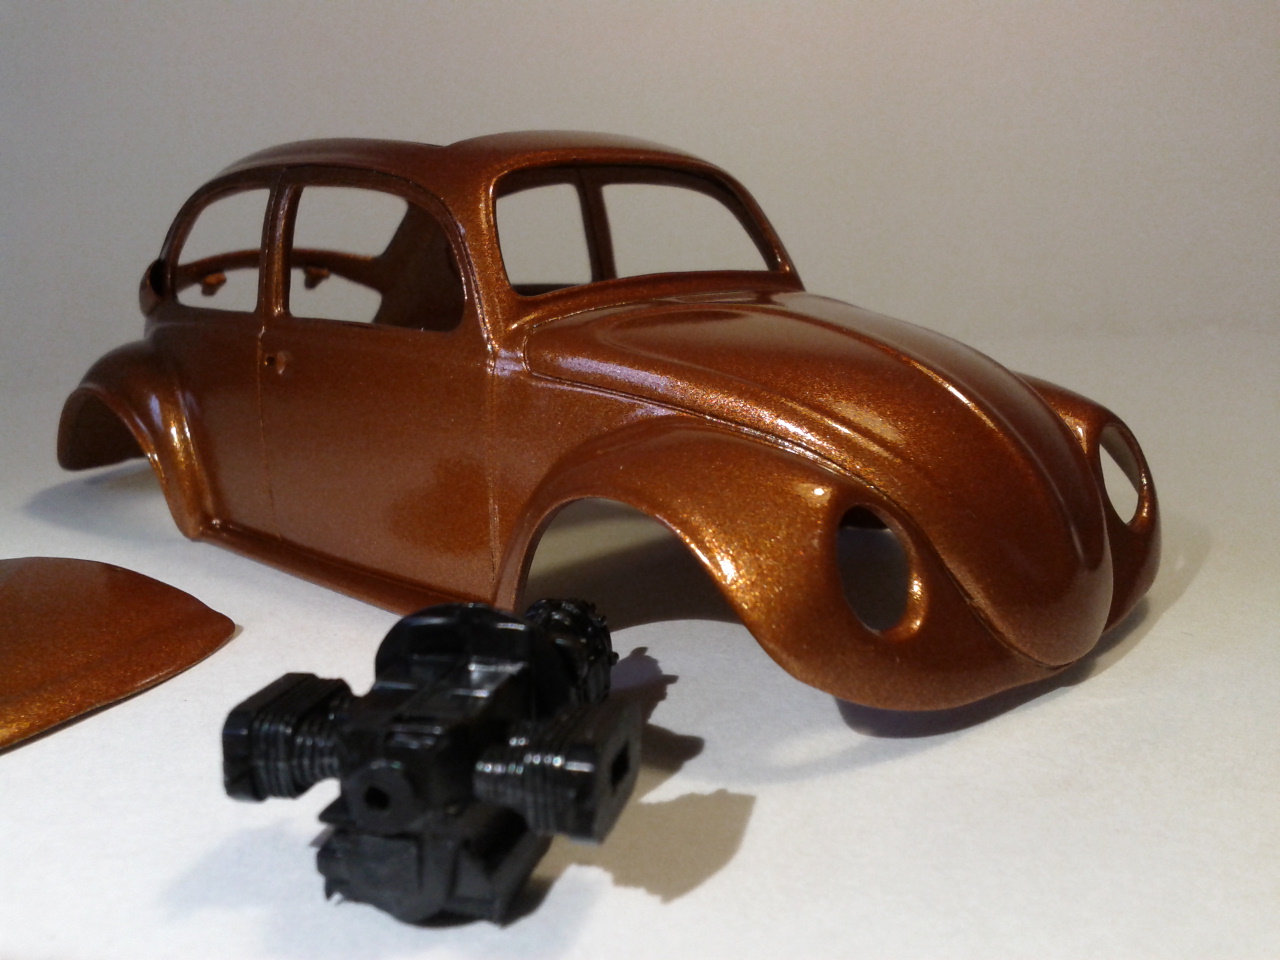
Added sun visors, inside mirror, iconic side marker lights, front and rear lights. Rear Lights are 4 pieces. tried 3 different sets to get them close. Body mounted to chassis pan. Shot of scratch built type 3 pancake engine I made with front mount fan shroud. Engine lid does not open, but I know its there. Priming bumpers for black for alclad and found a bunch of pinholes to fill that I missed during sanding, shaping prep. Once bumpers are painted and mounted and the mirrors, door handles and photoetch details are attached, I will post in finished section.
-
VW Phantom Crewcab update 1
empinut replied to empinut's topic in WIP: Model Trucks: Pickups, Vans, SUVs, Light Commercial
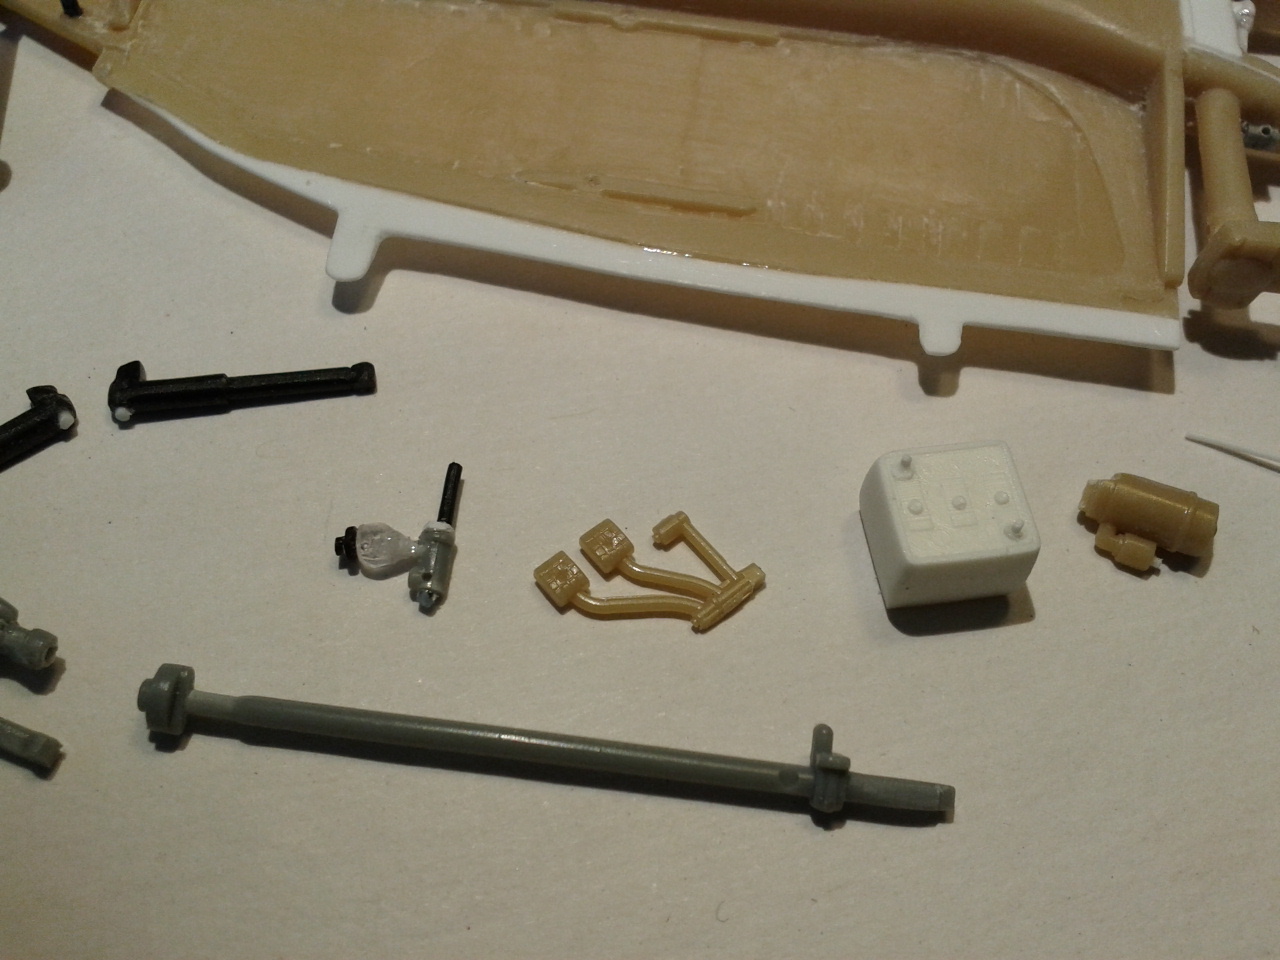
Thanks Carl, Ray and Oscar! Here is a pic of the engine and trans unit that I modified to have a top side as it comes in the curbside kit with only a bottom side. You wont be able to see this work as I decided against opening the engine compartment in order to keep this a semi quick build. But I know its there. -
From my earlier post a while back when i started the project, a helper posted this: All the AirTrax stuff is very low volume. You can get one of their kits by contacting a chap called Tapani Rauramo on raurata@yahoo.com They are based in Finland, but Tapani's English is very good. You can see some of the kits here. http://www.hapico.com/00_C/02_24.htm And here... http://public.fotki....0686.html#media
-
Thanks Carl & Tom. AirTrax offers this resin.
-
Chassis finished. Front suspension from early Revell bus with extra detail and rear suspension a detailed Hasegawa unit. Wheels are custom made one off wide 5 bolt style. Body will be repainted. I found out I could not polish out a problem on the passenger side, going down to primer. May go with a very light grey or eggshell white. Walk through interior next. I plan to add door panels that have a matching pattern to the seats. Stay tuned for a review of a very cool new PE fret that is now available for you VW Bus builders.
-
Body painted, BMF, headliner painted, glass installed. 1st polish
-
Thanks Darryl. Thanks Jason, this might go with the Scalekraft Hebmuller.
-
started with Hasegawa Kubelwagon chassis.
-
thanks guys. single throat dual carbs are fujimi with mesh air cleaner elements. dual carb body is from an IMC dune buggy. all linkage is from photoetch.
-
Thanks Clay (Der Bugmeister!) and Kevin (fishnets,tats and volks rods, yes please!)
-
Some engine work finished over the weekend. Couldn't sleep so decided to work on the linkage. Okrasa style 25/30/36(?) horse will go in the Hebmuller or Split window. Not sure yet.
-
Thanks IRA, your VW panel is one of my all time favorite articles/vw's. some Split window inspiration.... I used to shop at AutoHaus in the late 70's.
-
This was just seen at SEMA 2013, just in case you missed. I was thinking you may be able to adapt the fender flares from the new Revell Jeep issue? I built one of the original Chees Cast resin Bronco kits way back and found that one side was not the same height as the other and the wheel wells did not match up. Maybe this was fixed in subsequent copies? I made mine a custom street version, slightly lowered, with rear wheel drive and used the complete drive train from the IMC Mustang including engine (289?) and most suspension. Everything just fell in place! I sold this kit and cannot find the pics from way back. I love early Broncos. Good building!