Skip
-
Posts
1,049 -
Joined
-
Last visited
1 Follower

Recent Profile Visitors
11,281 profile views


(1).thumb.jpg.e371d4579f83ee021ff22f9ad4b79bbc.jpg)

Skip's Achievements
MCM Ohana (6/6)
-
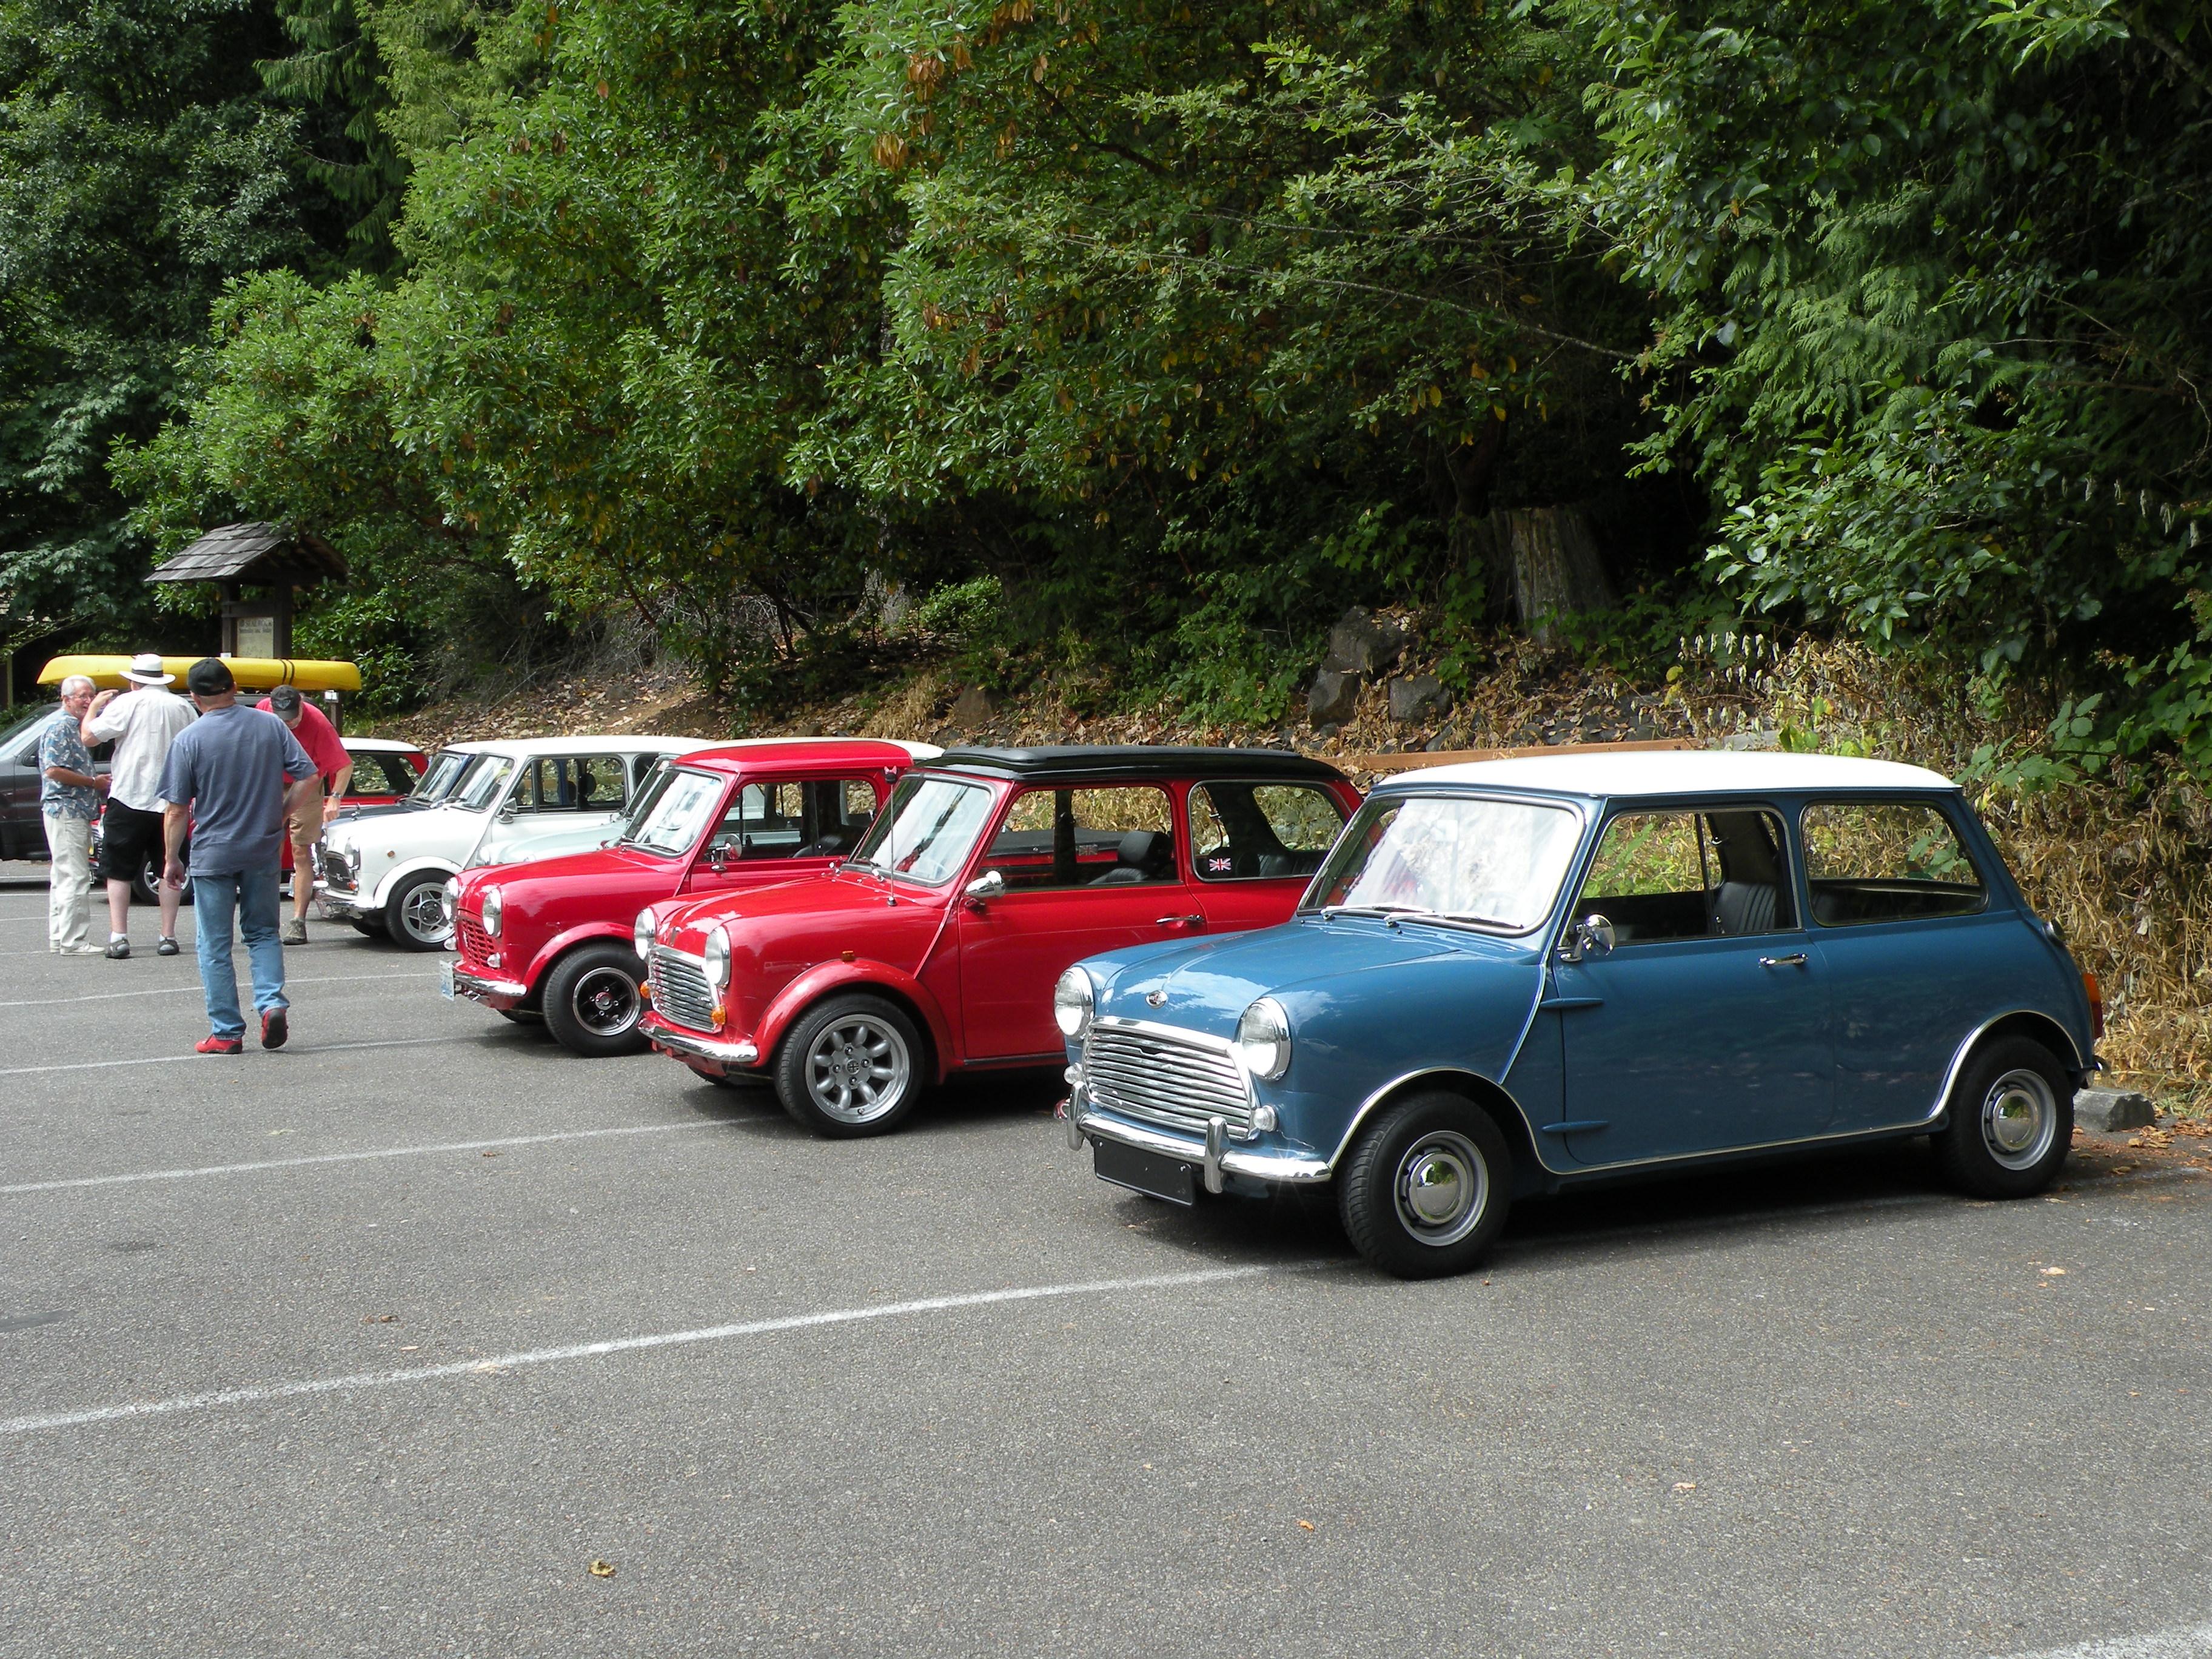
Sunroof is a Webasto electric Vs. manual sliding sunroof it's the same dimensions as the original sunroofs used by Austin/Morris/BMC over the years the original sunroofs were manual wind-ups. The Webasto sunroof on mine will open and close at 70 MPH where the manual sunroofs were a bit difficult to get closed at highway speed. The 13 X 7-1/2 wheels on our Mini (#2) are a rare Mini-Lite wheel made by Two-Gates Wheel in UK, I have never seen another pair here in the USA, in the UK, I have seen them in 10 and 13" diameters, but they are somewhat rare there as well.
-
Second Red/Black top Mini from the Right is ours; it started with a Mark II Mini then added 1275 cc fuel injected engine (from a 1995 John Cooper Works); the "Sport Pack" wheel arches (flairs) are from late Mini Cooper / John Cooper Works Mini. Runs on a 13" wheel most of the time, I have the smaller disc brake setup to run 10" wheels which for handling I think works better than the 13" wheel and tire, the bigger brakes are somewhat of a trade off with the larger wheel which runs a slightly stretched tire that is quite similar in height to the 10" wheel/tire combination. The nice thing about the Mini's 1959 to 2000 production run is that if you want to mix and match some of the best parts to make it handle or go faster they are there for you to build the Mini you want. We even converted ours back to the Right-Hand Drive that it was originally born with, so we have got to drive the same car from both sides of the dash! Below are the blue Mark I, my red Mark II, Red Mark I Mini-pickup, White Italian Innocenti Mark II or III

-
We have a “Full Sized” ‘71 Morris Mini Mk II, sitting in our garage for the last 25 years or so, it’s all hot rodded up with a furl injected John Cooper Works engine as well as the Sport Pack wheel arches from a JCW Cooper S and much wider Minlite Wheels. Fun little “Hot Rod” that we’ve put a ton of fun trouble free miles on, gives you that permanent, goofy grin! So, I sort of know my way around the first generation 1959 - 2000 Mini’s, and can hopefully answer your questions with some degree of accuracy. There should be no problem stretching a Mini, bear in mind the front is wider than the rear, so depending on length of stretch you may have some minor fit up issues. The Mini rides on front and rear subframes which bolt to the unibody which has most of its structural rigidity through the rocker panel and the roof sections. The Mini used the same long block as the Austin Healey Sprite and MG Midget, it’s just turned sideways on a transaxle versus an oil pan and transmission to the rear of the block. A common variation on the stretched Mini theme is to weld the donor Mini back together after harvesting the center body section for a really short Mini! I’ve seen one or two at West Coast Mini Meets, I’m told they handle horribly!
-
The best and smallest drill bits for a Pin vice
Skip replied to Rattlecan Dan's topic in Model Building Questions and Answers
Harbor Freight and even some of the eBay drill bits that I have purchased do not seem to cut plastic very well. Even when used in a pin vise or by hand. Many of these bits have micro-burrs on the cutting edge. My cure there is run the bit lightly across a good fine grit sharpening stone (water or oil stones, I like water stones from experience). It gets the very fine micro-burr that many of drill bits have on them, even from some high-end drill manufacturers. When cutting metal, as most of the drill bits are intended for, the micro-burr is taken off almost immediately by friction so it's not an issue. I've also found burrs on McMaster Carr drill bits before, normally they will replace them no questions asked. While working in Aerospace machine shops, I learned about dressing the cutting edges of drill bits, something a lot of machinists do even on larger bits to make them cut the material better. Just be careful that you get the same cutting angle on the drill bit that was ground on it in the first place, use the finest sharpening stone you have available to you and work slowly, testing on a piece of scrap as you go. Normally, all it takes is a couple short, quick strokes across the sharpening stone, that's it, so don't overdo it! Do the examination and re-cutting under magnification, like through your magnifying glasses or loupe lenses so you can see what's going on. Look at it this way, if you cut the angle wrong and it doesn't work, what are you out? The drill wasn't working for you in the first place! Working in machine shops where tool and die work was performed, I got to inspect many specialty drill bits under an optical comparator under magnification the burrs and differences from one bit type to another is sometimes pretty significant. The carbide Circuit Board drills are meant to be spun at a higher speed, although they will and do cut styrene/plastics quite well as many have found. When I use a Circuit Board drill bit, normally it's out of an appropriate sized machinist's pin vise. I have a set of Starrett Machinist Pin Vises. There are cheaper Chinese versions on eBay as well, it's been my experience with them that the threads on the thimble are coarser than on the Starrett and tend to be slightly stickier most won't even notice it. That said, the Chinese Machinist's Pin Vises work OK with for me, and I'd recommend them with those reservations. Using the Pin Vise with the Circuit Board drill bits will also cut down on snapping these brittle bits off as easily, you'll still snap a few but held in a Pin Vise there is more control over the side forces of the bit that tend to snap them off. Examining these bits, even the cheapest Chinese bits, I have never found a burr, that's one reason they cut quickly right out of the box every time until they break. You'll probably never wear one out on plastic! That said, be extra careful with those Carbide Circuit Board bits, they are super brittle and are meant to be turned in a collette in a machine spindle where there is zero side play. When one of those bits do snap, it's easy to either cut across styrene or skin as they skitter across the surface scarring and cutting anything they come across! Ouch! Don't ask me how I know! I just know!! -
Cleaning Resin car body & parts before priming
Skip replied to Chevy II's topic in Model Building Questions and Answers
Yes, agree with the soaking of Resin Cast Parts, my original comment was meant, to use the isopropyl alcohol as a surface cleaner, like the Windex. Which is what I have done for as long as I can remember, I also use this method to wash styrene/plastic kit bodies prior to painting as well. I am getting the sheeting action with water on the surface. This was/is an old painter's test for cleaned surface, free of oil and contaminants, I've got the same sheeting action using dish washing detergent as well. -
The "Overspray" that you mention is the overlap from the touched-up section that gets blended into the existing surrounding paint. If you have done your feathering of the existing paint into the touchup section, then the blending either with a good "Cleaner Wax" or a Light Compound can take place. It's far easier to blend in scale with a "Cleaner Wax" than it is to use even a Light Compound to blend. Things happen really quickly on a small-scale touchup, it's really easy to burn through the touched-up paint to the blended areas. Work Carefuly, Work Slowly, Back Up your polishing cloth with a foam pad to spread the pressure evenly across the surface. If you do that alone, you should be able to come up with a good blend.
-
Cleaning Resin car body & parts before priming
Skip replied to Chevy II's topic in Model Building Questions and Answers
Second the 70 - 90% isopropyl alcohol, normally followed by a spritz of Windex. The “Proof” of clean surface is just like on your freshly washed car, the water should sheet right off of a clean surface, where a contaminated surface will gather droplets won its surface where it’s incompletely cleaned. -
Vote for thinner, turn upside down and wait until you can unscrew by hand.
-
Very Cheap Airbrushes. A Recipe For Frustration?
Skip replied to Bugatti Fan's topic in Model Building Questions and Answers
That’s exactly right. Too many get pushed or guided into a double action airbrush before they’re actually ready. I would much rather see someone get a single-action airbrush and get the processes figured out, before they are trying to put the paint on the model and control the flow through the trigger to boot! As we all know, the whole painting processes are like a recipe that has to be followed or the bread don’t rise, flat bread’s OK, but not as good as bread that rises. Neither is dull, orange peel paint when it’s supposed to be bright and shining, it just gets better with the polishing. I know of a few guys who can lay down paint with a rattle can that looks like it’s through a paint gun they got talked into a double-action airbrush and took about ten steps backwards! The learning curve wasn’t anticipated or factored into the switchover. Some get frustrated and never come back. When you’re tying to pick up any new learned skill you have to find a mentor who is willing to take you under his wing and bring you along someone who will tell you the truth when criticing your work; they’ll tell you hen it looks good and be honest when it doesn’t quite look so good either. The other harder path would be reading a whole lot of books and watching a ton of videos then get out and practice, wear out an airbrush or two until you get good! Study people like Steve VanDaemon, Rhino, the late Mike Lavale, David Monig, Craig Fraiser…. Heck study anyone that’s good until you get good yourself. Right now, a young guy can pick-up the skill set by just watching the right YouTube channels. When I started, you had to find someone willing to teach you the skill sets needed to practice a craft. I apprenticed for four hard years under some crusty old Sign Painters to pick up the skills needed to do production work. Along the line adding frills like pinstriping, airbrushing starting with Hi-Liting, murals, touch up - for a while in the eighties dealerships were advertising airbrush touch ups and guys were making good money with a little hand sanding, prime, paint and polish. If a guy was fast and good at it, he could do 10 - 15 touch ups a day walking away with some good money doing so! You are going to have to work hard if you want to get good. Just having the tool won’t make anyone a custom painter; It’s the experience and artistic skills behind that tool, that separate the somebody’s from the crowd of nobody’s… -
Brand? Single or Double Action? Air Pressure initially and after adjustment? Air pressure adjustments typically solve siphon feed pick up issues, crank it up a couple of pounds at a time until the paint is sucked up the siphon tube. Might help to stop, reread the directions and tips and troubleshooting section, regroup, reclean everything, mix to recommend ratios, try it again. Keep at it you’ll figure it out! Back when I first started you could get five jars of Tester’s enamels for a buck, toss in another $1.50 for a half gallon of lacquer thinner. Go home and spay away until you were either too goofy to spray any more or your mom yelled at you to quit because it was stinking up the house! So it was easy to get lots off practice on the cheap. We used to practice on old models, tin cans, or small jars card board, News print to learn to control the paint out of the airbrush. Key word is… Practice until you get good, then practice some more! Fish Eye - Is your paint surface squeaky clean? Did you wash the hood or did it come riiight out of the box? The only other source of contamination then would be - Compressor - Air Line - Airbrush. Do you have an inline filter between airbrush and compressor? Water tap? Solvent cleaned airbrush? Is there moisture in the air where you’re spraying?
-
Very Cheap Airbrushes. A Recipe For Frustration?
Skip replied to Bugatti Fan's topic in Model Building Questions and Answers
As long as you polish the needle and tip with any airbrush you should be good. I recently wore out my last Harbor Freight De Luxe which they discontinued like almost five years ago, tip finally split out. I used that one for tons of sign painting work spraying anything from enamels thinned with lacquer to acrylics even urethanes. For model work it sprayed lots of MCW paints, enamels thinned with lacquer thinner, lacquers, acrylics and any other stuff on hand. I also own several of each Miller single action, Paasche, Harder & Steenbeck, Iwata, Badger, and toss in another handful of no-name brands collected since I started airbrushing back in Jr-Hi in the early 70’s. So, with a cursory clean and adjustment I can probably grab any single or double action out of the toolbox and spray away for either production or model work. The oldest airbrush in the roll-a- way is a pre- WW II Paassche double action given to me by an old sign painting buddy, who is now long gone both his Paasche sprays on occasionally, just to remember how heavy had those old airbrushes were! For production stuff, those El-Cheap-O specials work great right out of the box and sort of go down hill from that point. They will however teach you all about the minor adjustments or will end to work on their more expensive brothers. Stuff like air pressure +/-, distance to the painted surface, trigger control on the double actions.. most of if you can learn to break down and clean cheap airbrushes and develop good maintenance habits; you’ll do just fine when you graduate up to the more expensive name brand brushes… My recommendation for years to anyone wanting to begin airbrushing is to start cheap and work your way up to a name brand airbrush. First, not everyone likes using an airbrush. Second, not everyone likes airbrush maintenance and cleaning with every use. Third, not everyone is mechanically inclined enough to tear down their airbrush and reassemble it again. I can’t begin to count the times some guy has brought a pile of parts that should assemble into an airbrush, crying for help to put their expensive baby back together! I’ve got some pretty good deals along the way and flipped quite a few of them for a buck, especially when they lost a part or two. I don’t take advantage of them and make a low ball offer either, if I buy one it’s always offered for sale to me. Friendship is always worth more than a killer deal! Bottom line - Don’t go whole hog and get the Iwata right off the bat! Buy the cheaper airbrush. Learn how t spray with it. Learn to clean, maintain and adjust it. Decide whether you like airbrushing or not, then go from there! -
Is anybody familiar with F&F Resin?
Skip replied to Riser70's topic in General Automotive Talk (Trucks and Cars)
I would see about buying it, if I could convince Ed to repop it. Seeing as how Ed Sr.'s stuff is getting pretty rare these days. Ed jr. is awful funny about repoping other people's work because he's had some of his own work stolen and repoped then sold on Ebay. So I can see it, plus Ed is a businessman of tip top integrity! He's also a pretty good friend so I can say that because I know it about him, we've talked about such stuff. Let me see if I can get ahold of him and we can see what we can do, it would be all dependent on if Ed would be willing to redo this kit. I'd love to have one and love for other people to have one too! Be a great way to memorialize his dad too. -
In one of the short lived Rod & Custom & Model Cars magazines they did an article on the Strombecker Midgets 1/32 scale (I think I remember that was the scale). Pretty much a go faster and more detail article. The magazine shows up every once and a while on eBay, so do the Strombecker Midgets which are normally just north of unobtainium in price. For what they go for and what I’m willing to pay, I’ll probably never see one, unless some crazy person shows up with one and I actually get to hold it and look at it! LoL! Does anyone 3D print a Midget Body and details to build up a slot car? 1/32 would be a great size, for me at least as that’s the scale we run around my place. The parts Box (Australia) used had a Midget Racer that was supposedly the Strombecker Midget, but I have never seen one in person, so I’m not certain what the scale is or if it really came from the Strombecker Midget Racer.
-
'53 F-100 Kit Interior Resin Parts
Skip replied to 1972coronet's topic in Model Building Questions and Answers
They do show up on eVilbay every once in a while. I found a Drag City Castings '50 Olds Tuck & Roll interior kit for reasonable price. It was right around the price Ed was selling them for, so don't count out eBay. -
Testor's Nassau Blue Metallic 28129 Equivilant
Skip replied to cholmes1's topic in Model Building Questions and Answers
You might check Exact Match Car Paint Made Easy | AutomotiveTouchup I've used them before for full size projects, a 12 oz. spray can is $28.95, they also have compatible primer and clear coat. If I were spending that kind of money, for a single can of paint, I would go with all of the same product line, just to be on the safe side. You might be able to get pints mixed locally for less than Automotive Touchup wants for their pints then spray it through an airbrush. For models, I have got away with using the brush in bottle touch up kits sold in most good Auto Parts stores. Just drain out of the container and thin as needed. Nassau Blue and Daytona Blue are popular enough for muscle cars that you might find one or both in the Duplicolor line, or something for a late model with a different name but a close shade.