
KJ790
-
Posts
811 -
Joined
-
Last visited
Content Type
Profiles
Forums
Events
Gallery
Everything posted by KJ790
-
Thanks guys! I am planning on leaving this one as a curbside. It will have an engine, but the hood won't open.
-
I managed to get a little color on the chassis this week.
-
The front axle is the driven on.
-
Scratch frame rails
KJ790 replied to Mattix2016's topic in General Automotive Talk (Trucks and Cars)
I use 7/16" I-beam and shave off the flanges on one side. This gives you nice 11" channel that looks like frame rails. I use Meng nut and bolt heads to add detail. -
Freightliner Cascadia
KJ790 replied to KJ790's topic in WIP: Model Trucks: Big Rigs and Heavy Equipment
I am probably not going to put too much detail under the hood. This is going to be a display model in a case for a trucking company's head office. Theoretically it should have a DD15, but I probably won't bother scratch building one of those for a truck that will never have the hood opened. -
Freightliner Cascadia
KJ790 replied to KJ790's topic in WIP: Model Trucks: Big Rigs and Heavy Equipment
I scratch built some side steps and DEF tank, as well as some fuel tanks. I used PVC pipe for the fuel tanks. -
Added brake detail, most of the plumbing, and started working on the wheels.
-
Freightliner Cascadia
KJ790 replied to KJ790's topic in WIP: Model Trucks: Big Rigs and Heavy Equipment
I got a black base sprayed on the cab and hood. White will be painted over it in a couple days once this has cured. -
What Donor for a Brockway Build?
KJ790 replied to Dodge Driver's topic in Truck Aftermarket / Resin / 3D Printed
Yup, the other guys pretty much covered it. 12V71 Detroits were pretty common in Brockways, but only with the longer hood models. Depending on the way the AITM interior is cast, you may need to modify the firewall to make the engine fit. I had to do that on the one I am building, as the real truck had a cut-out in the firewall to allow for the engine to fit, and the resin interior did not have this detail (since it was not made with the intent of having the hood open). The cab I got from Dave is still a very nice piece. For the exhaust, you can easily use pipes from any kit, as exhaust stacks are pretty universal. I tend to make my own using plastic tubing though, as I don't care for most kit exhaust pipes due to seams and mold lines. 7/16 diameter tubing makes for great mufflers, and 3/16 tubing makes great exhaust pipe. I use perforated brass sheet painted with chrome paint as heat shields over mufflers. -
What Donor for a Brockway Build?
KJ790 replied to Dodge Driver's topic in Truck Aftermarket / Resin / 3D Printed
That should be a nice build for sure! If you want some Dayton spoke steer wheels, I sell these. I have two different float tire to fit the rims. -
What Donor for a Brockway Build?
KJ790 replied to Dodge Driver's topic in Truck Aftermarket / Resin / 3D Printed
I am building one right now using an AMT Diamond Reo kit and it seems to work nicely. I replaced the tanks with some square step tanks from AITM, but the chassis cross-members, suspension, battery boxes, and air tanks all look very similar to what was used on a Brockway. -
Nice! Is the trailer going together alright for you? You are the first I have seen work on one.
-
While waiting for paint to dry on the Cascadia, I decided to start on a Brockway 758. I got the cab conversion from AITM. I am using a Diamond Reo kit for the chassis and an engine from the Freightliner DD cabover kit. So far I have added a recess to the firewall to fit the cummins engine, shortened the frame, and used a piece of tubing to replicate a tag axle. I am using a metal steerable front axle from KFS.
-
Freightliner Cascadia
KJ790 replied to KJ790's topic in WIP: Model Trucks: Big Rigs and Heavy Equipment
I drew the cab in 3D CAD and then had it 3D printed. This was by far the hardest shaped cab and hood I have ever drawn. It took me around 40 hours of drawing to get it to look right, and it is still not exactly right. I had a few known dimensions (length, width, height, etc) and I scaled everything else from pictures. Some of the complex curves on the cab are still a little off, but I am hoping that the rest of the build will mask some of the flaws. -
Freightliner Cascadia
KJ790 replied to KJ790's topic in WIP: Model Trucks: Big Rigs and Heavy Equipment
Thanks Dave! Unfortunately nobody has made a Cascadia kit, so I made the cab and hood myself. I had plans of building this 2 years ago when I made the cab, but it got put on the back-burning at the time. -
I started building a cab and hood for a Freightliner Cascadia about 2 years ago. This weekend I finally decided to do something with it. I started with scratch-built frame rails using 7/16" I-beam with the flanges shaved off of one side. I used the suspension from a Moebius Lonestar kit and added nuts and bolts from Meng. I used Moebius rims, but sprayed them with Spaz Styx to dull down the kit chrome shine a little bit. I drilled out the centers and added some resin drive hubs. Next I painted the chassis black and added some scratch-built quarter fenders and rear mudflaps.
-
I use a little vaseline mixed with Naphtha as a mold release. This works great and is about the cheapest thing you can get. Personally, I like to use industrial silicone for my molds rather than ones that are marketed towards model builders and hobbyists. I find the industrial silicones are incredibly strong and will hold up through many pulls.
-
I am finally calling the build (close enough) to done.
-
1974 Kenworth W900
KJ790 replied to KJ790's topic in WIP: Model Trucks: Big Rigs and Heavy Equipment
Almost done with the trailer. -
1974 Kenworth W900
KJ790 replied to KJ790's topic in WIP: Model Trucks: Big Rigs and Heavy Equipment
I managed to get the trailer painted and made some decals for it. Just been working a little each night. -
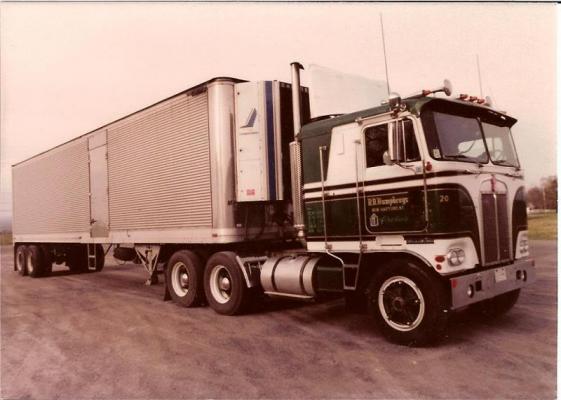
I believe that is an old White.
-
Glue Bomb Great Dane **Finished**
KJ790 replied to KJ790's topic in WIP: Model Trucks: Big Rigs and Heavy Equipment
It is from Evergreen. It is the sheet with 0.080" ribs. -
Glue Bomb Great Dane **Finished**
KJ790 replied to KJ790's topic in WIP: Model Trucks: Big Rigs and Heavy Equipment
Thanks guys! Pat, for the exhaust soot on the corners I just lightly airbrush some black paint on the corners and down each corner of the roof a bit. I have found that it is really easy to over-do it though. It seems like less is more for that technique. -
Glue Bomb Great Dane **Finished**
KJ790 replied to KJ790's topic in WIP: Model Trucks: Big Rigs and Heavy Equipment
And the finished product. It has a few flaws, but compared to where it started I am happy. -
Glue Bomb Great Dane **Finished**
KJ790 replied to KJ790's topic in WIP: Model Trucks: Big Rigs and Heavy Equipment
Been making some progress. I have the sides done and worked on detailing the front today. I still need to make a roof for it.