KJ790
-
Posts
811 -
Joined
-
Last visited
Content Type
Profiles
Forums
Events
Gallery
Everything posted by KJ790
-
45' Stainless Steel Great Dane Reefer
KJ790 replied to KJ790's topic in WIP: Model Trucks: Big Rigs and Heavy Equipment
I'm not sure when 48' trailers officially started being used, but I know that my family's company ran 40 footers through the 60's and 45 footers through the 70's and into the 80's. We didn't start buying any 48 footers until the mid 80's, though I am sure they existed before then. There definitely were many good looking rigs back then, but even the good looking ones could often be found with a layer of road grime on them, especially in the north during the winter time. It seems like roads back then had a lot more dirt on them. Here are some examples of the look I am after with this build. -
As if I don't already have enough projects going on, I decided to start yet another. This has been a project that I have been thinking about for a long time. My plan is to build a 45' Great Dane stainless steel reefer that would be typical of what was common in the early 1970's. I will be mostly scratchbuilding it with a few kit pieces here and there. Looking through old pictures it did not seem uncommon for trucks to be dirty in this time era, so it seems like a good project to practice some weathering techniques and push my limits. I have been preparing for this build for a long time. First I made a Thermo King reefer unit and cast it in resin. Next I made some trailer spoke wheels with split-ring rims. I figured it would be easier to paint everything if they were all separate pieces. Then I made a variety of tires that would be typical in that time period. Since I want this trailer to be well used, I am using a mixture of tires and making each rim have its own degree of rust and dirt. This way it will appear as though some wheels were changed more recently than others. I put the rustiest rims on the set of old school drive tires, since wheels like that would have likely already spent some time as drive tires on a truck before being retired to trailer duty. Here I have put the wheels completely together and mocked them up on a junkyard tandem that I had. For the weathering I used a combination of brushing on water color paints and airbrushing a light coat of gray over everything.
-
BRBO Kenworth K125 **Finished**
KJ790 replied to KJ790's topic in WIP: Model Trucks: Big Rigs and Heavy Equipment
Thanks guys! I just finished up the fuel tanks and the quarter fenders. I think I am going to call it a day for now. -
BRBO Kenworth K125 **Finished**
KJ790 replied to KJ790's topic in WIP: Model Trucks: Big Rigs and Heavy Equipment
Slowly making progress. -
BRBO Kenworth K125 **Finished**
KJ790 replied to KJ790's topic in WIP: Model Trucks: Big Rigs and Heavy Equipment
Got the frame painted. -
BRBO Kenworth K125 **Finished**
KJ790 replied to KJ790's topic in WIP: Model Trucks: Big Rigs and Heavy Equipment
I worked on some front rims for this build. I modified some snap kit rims and sprayed them with Spaz Styx to get a more realistic shine to them. -
BRBO Kenworth K125 **Finished**
KJ790 replied to KJ790's topic in WIP: Model Trucks: Big Rigs and Heavy Equipment
Finally finished the rest of the suspension and started fitting the engine to the chassis. -
BRBO Kenworth K125 **Finished**
KJ790 replied to KJ790's topic in WIP: Model Trucks: Big Rigs and Heavy Equipment
Alright, I haven't had much time to work on this, but I finally got to work on the engine a little bit. -
I know there are a ton of topics on engine colors, but what about radiators? I know most are painted black these days (just like most frames now), but what about in years past? Were most painted the color of the chassis? I am building a late 60's Kenworth W925 and I want to make it as accurate as possible. Anyone know what color the radiator would have been?
-
Sorry, I am not offering the W900L at this time.
-
BRBO Kenworth K125 **Finished**
KJ790 replied to KJ790's topic in WIP: Model Trucks: Big Rigs and Heavy Equipment
This is my 3rd time using a torsion bar suspension. They are a pain to put together, but my last 2 attempts turned out alright in the end. I am hoping that I can repeat my success this time! -
BRBO Kenworth K125 **Finished**
KJ790 replied to KJ790's topic in WIP: Model Trucks: Big Rigs and Heavy Equipment
It's been a long time since I have touched this build, but last night I started putting the frame together. I am using a metal steerable front axle from KFS and a resin torsion bar suspension. -
A gluebomb is a term used for a poorly built model. Typically they have excessive amounts of glue everywhere, but commonly have poor paint, missing or broken part's, etc. This truck was the first model I ever built and I did not have very good modelling skills at the time. Since then it had handled a lot and started falling apart. So I broke all of the glued pieces apart, stripped the paint with oven cleaner, and started over. Thanks!
-
Calling this one close enough to done. This is my first glue-bomb rebuild ever. This was the first model that I ever built, and I was never quite happy with it. So a couple weeks ago I tore it down, repainted everything, added new wheels, tires, scratch-built exhaust and intake, and a 3D printed grille.I'm still not happy with a few things, but it will do for now.
-
After almost 9 months, I am calling this one done. This is a replica of a real truck that I have built for the owner. The real truck is a 1977 Pete 359 that was cut up and scaled down slightly, then placed on a Dodge 3500 chassis with a cummins diesel engine. The box was custom made with wood decking inside, gorgeous truck. For my replica, I used a Revell snap kit cab and hood with scratch built fenders, scratch built box, bumpers, fuel tanks, air cleaners, exhaust, rims, tires, and lots more.
-
Help with 'BJ and The Bear' project
KJ790 replied to Mark B's topic in General Automotive Talk (Trucks and Cars)
Not to hijack too much, but I find Brown's history interesting. Way back in the day, some of the largest trucking companies thought it would be a good idea to build their own trucks instead of buying them from an independent manufacturer. Consolidated Freightways built Freightliners, and Associated Transport built Browns. Brown built both trucks (based off of a Corbitt) and trailers. By the mid 50's they decided it was better just to buy trucks from a manufacturer, so Brown stopped making trucks, however their trailers were pretty decent, so they continued to make them, but began selling them to the public to avoid legal issues. I only know all of this because my Grandfather's first truck was a Brown that he bought used (retired Associated Transport truck). The trucks are very rare today, but there are still a bunch of trailers floating around since they were made for many more years. -
If you want to see how the aerocab sleeper looks without stacks, maybe this will help. I know it isn't the W900L, but the T800 uses the same cab and sleeper, just a different hood. The front corners of the sleeper slope in to the cab, the roof of the cab slopes up and fits into the rounded top front edge of the sleeper.
-
Truckers, What's in those boxes?
KJ790 replied to 10thumbs's topic in General Automotive Talk (Trucks and Cars)
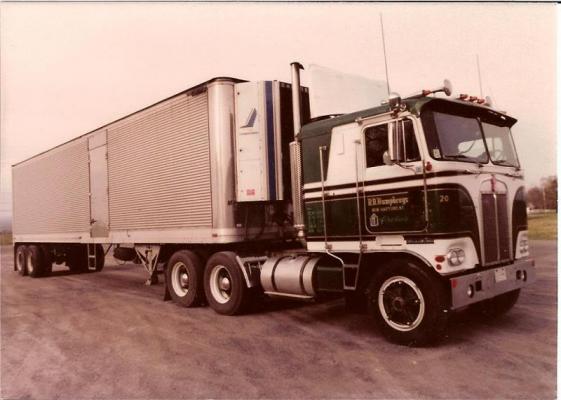
We also did it for weight savings. We ran one fuel tank that was extra long. One long 240 gal tank is lighter than two 120 gallon tanks (saves the weight of 2 end caps, fuel caps, fuel tank brackets and straps, etc. All in all you save maybe 150 lbs, but if that means one less overweight ticket then it is worth it. There are still quite a few scales on major highways around the US. -
Truckers, What's in those boxes?
KJ790 replied to 10thumbs's topic in General Automotive Talk (Trucks and Cars)
I would rather change truck tires than car tires, I find them easier (though a lot heavier). You can easily change a truck tire with two long tire-irons. Just let the air out, break the bead down, push the bead into the drop enter of the rim (the hump in the middle of the rim) and pry the tire off. Some tire guys change the tires while the wheel is still bolted onto the truck. Many trucks have a small bottle jack in their storage box, and a lot of guys have a spare tire already mounted on a rim hanging under the trailer in a carrier. This eliminates the need to swap the tire on the rim on the side of the road. Back in the day it was pretty common for drivers to at least change the whole rim/tire on the side of the road themselves, but that is less and less common now. Most people call a roadside service company to come out and change tires on the road now. -
Truckers, What's in those boxes?
KJ790 replied to 10thumbs's topic in General Automotive Talk (Trucks and Cars)
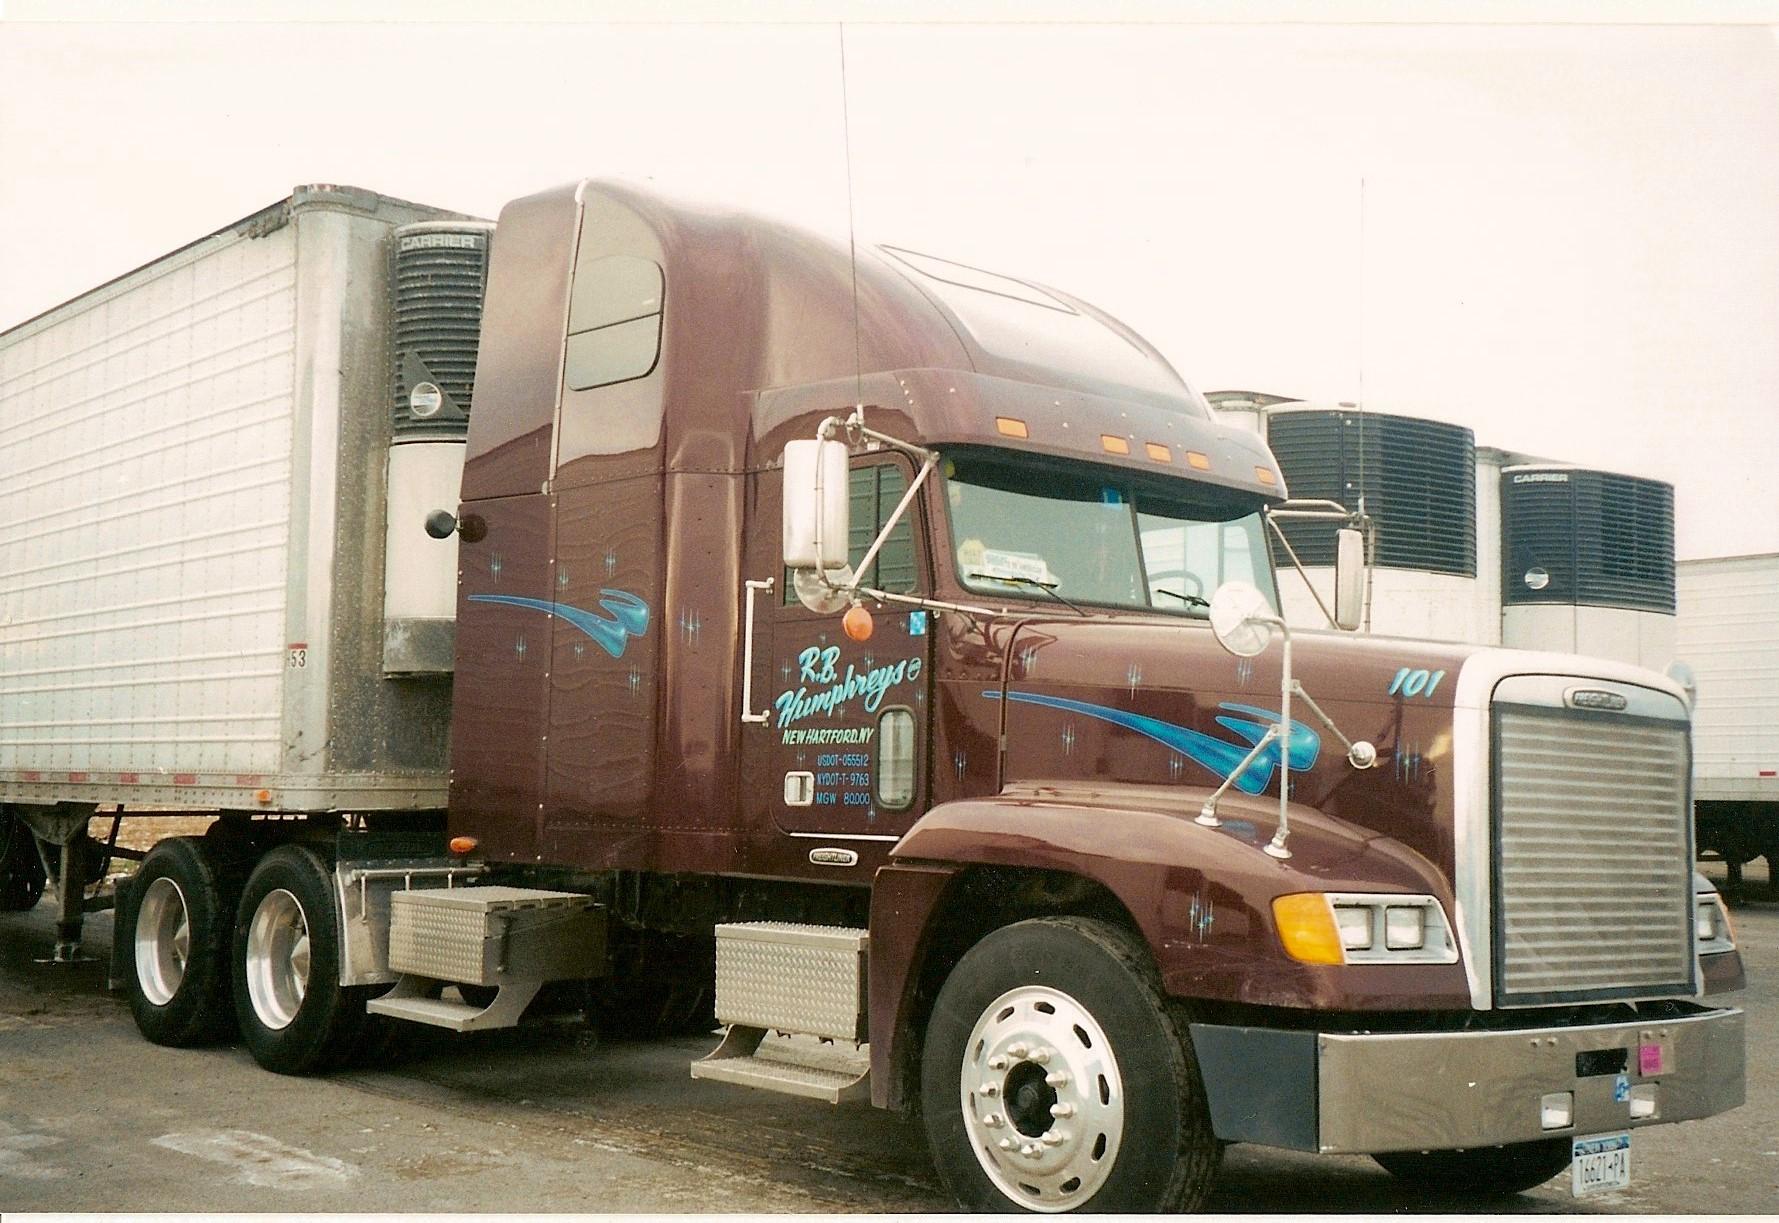
Here was one of our old trucks with the fuel tank on the driver's side only. The front box in the picture is the battery box, the rear box is just a storage box.
-
Truckers, What's in those boxes?
KJ790 replied to 10thumbs's topic in General Automotive Talk (Trucks and Cars)
Sometimes the boxes are actually the battery box (where the truck's batteries are located). sometimes they are just a cover hiding part of the exhaust system (especially on new trucks with the fancy new emissions systems), sometimes they are APU's as mentioned, and sometimes they are just storage boxes. All of the storage boxes I have seen are just aluminum inside, some guys put cardboard or wood on the bottom, but some don't. Every driver is different, some keep a gallon or two of oil in there, some keep work gloves, chains or straps, a small toolbox, etc. Our company used to order a lot of our trucks with only one fuel tank, always on the driver side for us. That seems to be the most convenient. -
Current truck aftermarket?
KJ790 replied to Petetrucker07's topic in Truck Aftermarket / Resin / 3D Printed
I actually sent Dave an email last night and got a response this morning. I just used the email address from his website. -
BRBO Kenworth K125 **Finished**
KJ790 replied to KJ790's topic in WIP: Model Trucks: Big Rigs and Heavy Equipment
Alright, Sam (guitarsam326) was nice enough to trade me a V8 detroit engine for some parts that I had. This week I finished the masters for my correct 8V92 valve covers, it always bothered me that the kit valve covers were wrong. Here is how the new ones look. -
BJ & The Bear KW
KJ790 replied to Old Buckaroo's topic in Model Trucks: Big Rigs and Heavy Equipment
Wow, you finished that one up quick! That looks great! -
Melbourne Model Truck Accessories
KJ790 replied to DRIPTROIT 71's topic in Truck Aftermarket / Resin / 3D Printed
I'm pretty sure the K100 aerodyne is labelled as an 8V92 on the box. I could be wrong, but I believe the 8V71 and the 8V92 were the same physical size, but the valve covers were different beyond the very early years of the 8V92.