khier
-
Posts
457 -
Joined
-
Last visited
Content Type
Profiles
Forums
Events
Gallery
Everything posted by khier
-
62nd All Japan Model & Hobby Show (2025)
khier replied to niteowl7710's topic in Car Kit News & Reviews
Well, the 240ZG is around since 2021, the custom came in 2024. Don't you think 3 years are more than enough to release the standard version? Hasegawa releases 2 versions of the same car per year (RX-7, Celica, BMW 2002....). -
62nd All Japan Model & Hobby Show (2025)
khier replied to niteowl7710's topic in Car Kit News & Reviews
That is a wonderful tip. Thanks. Sadly, the only Hasegawa 240Z in my stash is a G version. Back in the days only Fujimi made decent 1/24 240Z. Therefore, the majority of 240Z that I have are Fujimi. I have also the Doyusha version, but that was a terrible mistake..... -
62nd All Japan Model & Hobby Show (2025)
khier replied to niteowl7710's topic in Car Kit News & Reviews
Luckily the Hachette/IXO/Leo die cast models are still around. They filled a huge gap with their French, Italian and German series, especially Opel. I can send you a couple of online shops who sell the remaining stock at very reasonable prices, besides ebay, you are interested of course. The models are VERY accurate and really nice from the outside, but do not expect detailed interior or underside. These are mostly magazine models, not Franklin Mint cars. -
62nd All Japan Model & Hobby Show (2025)
khier replied to niteowl7710's topic in Car Kit News & Reviews
Hasegawa is probably the only Japanese kit maker who finally has seen the light. They have been releasing iconic Japanese cars over the latest five years or so with a great attention to details. I cannot imagine it took kit makers nearly 50 years to make first generation Honda Civic, while there has been tons of Fairlady and Skyline kits, none of the former is an accurate representation until Tamiya finally released there 240Z, but, sadly, as G version only (I do not care for the custom versions). The same can be said about the Mitsubishi Lancer, First generation Mazda RX-7, Celica LB. Not only Japanese cars, but Hasegawa did the move that should have been made a long, long time ago and made a BMW 2002. Hopefully Hasegawa will do a 610 Bluebird. A 810 would be great also. And if it has to be European light, I hope it will be a Mercedes-Benz 230/280 SL, a Facell Vega, a Jaguar MK-X, a XK-120, Iso Rivolta Grifo, or..... Rolls-Royce Silver Shadow... These would be much more interesting than Gordon Murray's nonsense..... -
I can only speak about myself. I neither sell my files nor printed parts because I am using the CAD software freely. It would be immoral to charge anyone anything in any form for things I did not pay for the tools used to produce them. I do not mind if someone sells prints of my design as printing service provided that my name is declared as a designer.
-
Excellent color choice.
-
Mad Max's E-type.
-
Beautiful model of a beautiful car.
-
These were the days when cars and ladies looked decent and did not have plastic in them. Great model.
-
"I can't imagine what "mess" you're talking about......." I had enough of the simple sticks, especially the fun when I try to re-activate older paints adding thinner. My life became much better after I bought a vortex mixer. I hated, however, the need to hold vibrating bottles with fingers (it is dangerous by the way for those who do it four hours in labs). I wanted a mixer that sits firmly on the table and holds the bottles by itself. The above design outperformed my vortex mixer by light years. It is running at 500 RPM, something like 10 times stirring. I am working currently on a second variant with less moving parts and simpler design.
-
Haven't shaken a paint bottle fer many years, been using a paint mixer. Works perfectly, no mess, no fuss. 1- Does not fit in small containers. 2- MUST be thoroughly cleaned after each mix. In short: The worst device ever, unless we are talking about Cappuccino.
-
Why bother shaking paint bottles? Seems to me that it’s a LOT easier to stir. Because stirring IS a mess I want to avoid.
-
WIP

-
I am not sure if this is the right section for this topic. I leave it to the moderator to decide, Do you like to shake paint bottles? I don't.... therefore, I bought a vortex paint shaker that worked well, but I hat holding the bottles and vibrating my finger. I read also somewhere it is not a healthy practice. I needed a shaker that I can fix on the table. Besides.... My almost new Anycubic Chiron sat there collecting dust for years since I was busy with resin printing. So I was looking for a project to make it warm again. I am not done yet with motor speed control and display. There will be a 10 segment led to display the motor voltage/display and a driver board to handle the current. No adapters are needed for different paint types. you will need the following hardware parts in addition to the print parts included here: 1- JGA25-370 Geared motor-I picked up the 500 rpm/12V variant 2- 12V power supply - of 2A rating or higher 3- M4 threaded rods. 3 to hold the paint bottles and 3 to join the shaker body parts. 4- 6xM4 flat head hexagon socket sleeve nuts 5- 6xM4 butterfly or sleeve nuts 6- 3mm steel rod to be cut in 10-12 mm rods. 7- 3x3x8x4zz bearings 8- LM3914 10 Segment 12V Battery Capacity Indicator 9- 12V DC Motor Speed Controller Module 10- 40PIN 20CM Dupont Line Male to Female wires. 11- Female DC Power Supply Jack Socket. 12- C-Type Clamp to hold the shaker. The 10 Segment display has to be separated from the board socket and connected via the male/female connectors. The potentiometer in the driver board must also be disouldered and connected via wires. Here is short video link of the mechanical test using a 23 ml Tamiya acrylic paint glass:
-
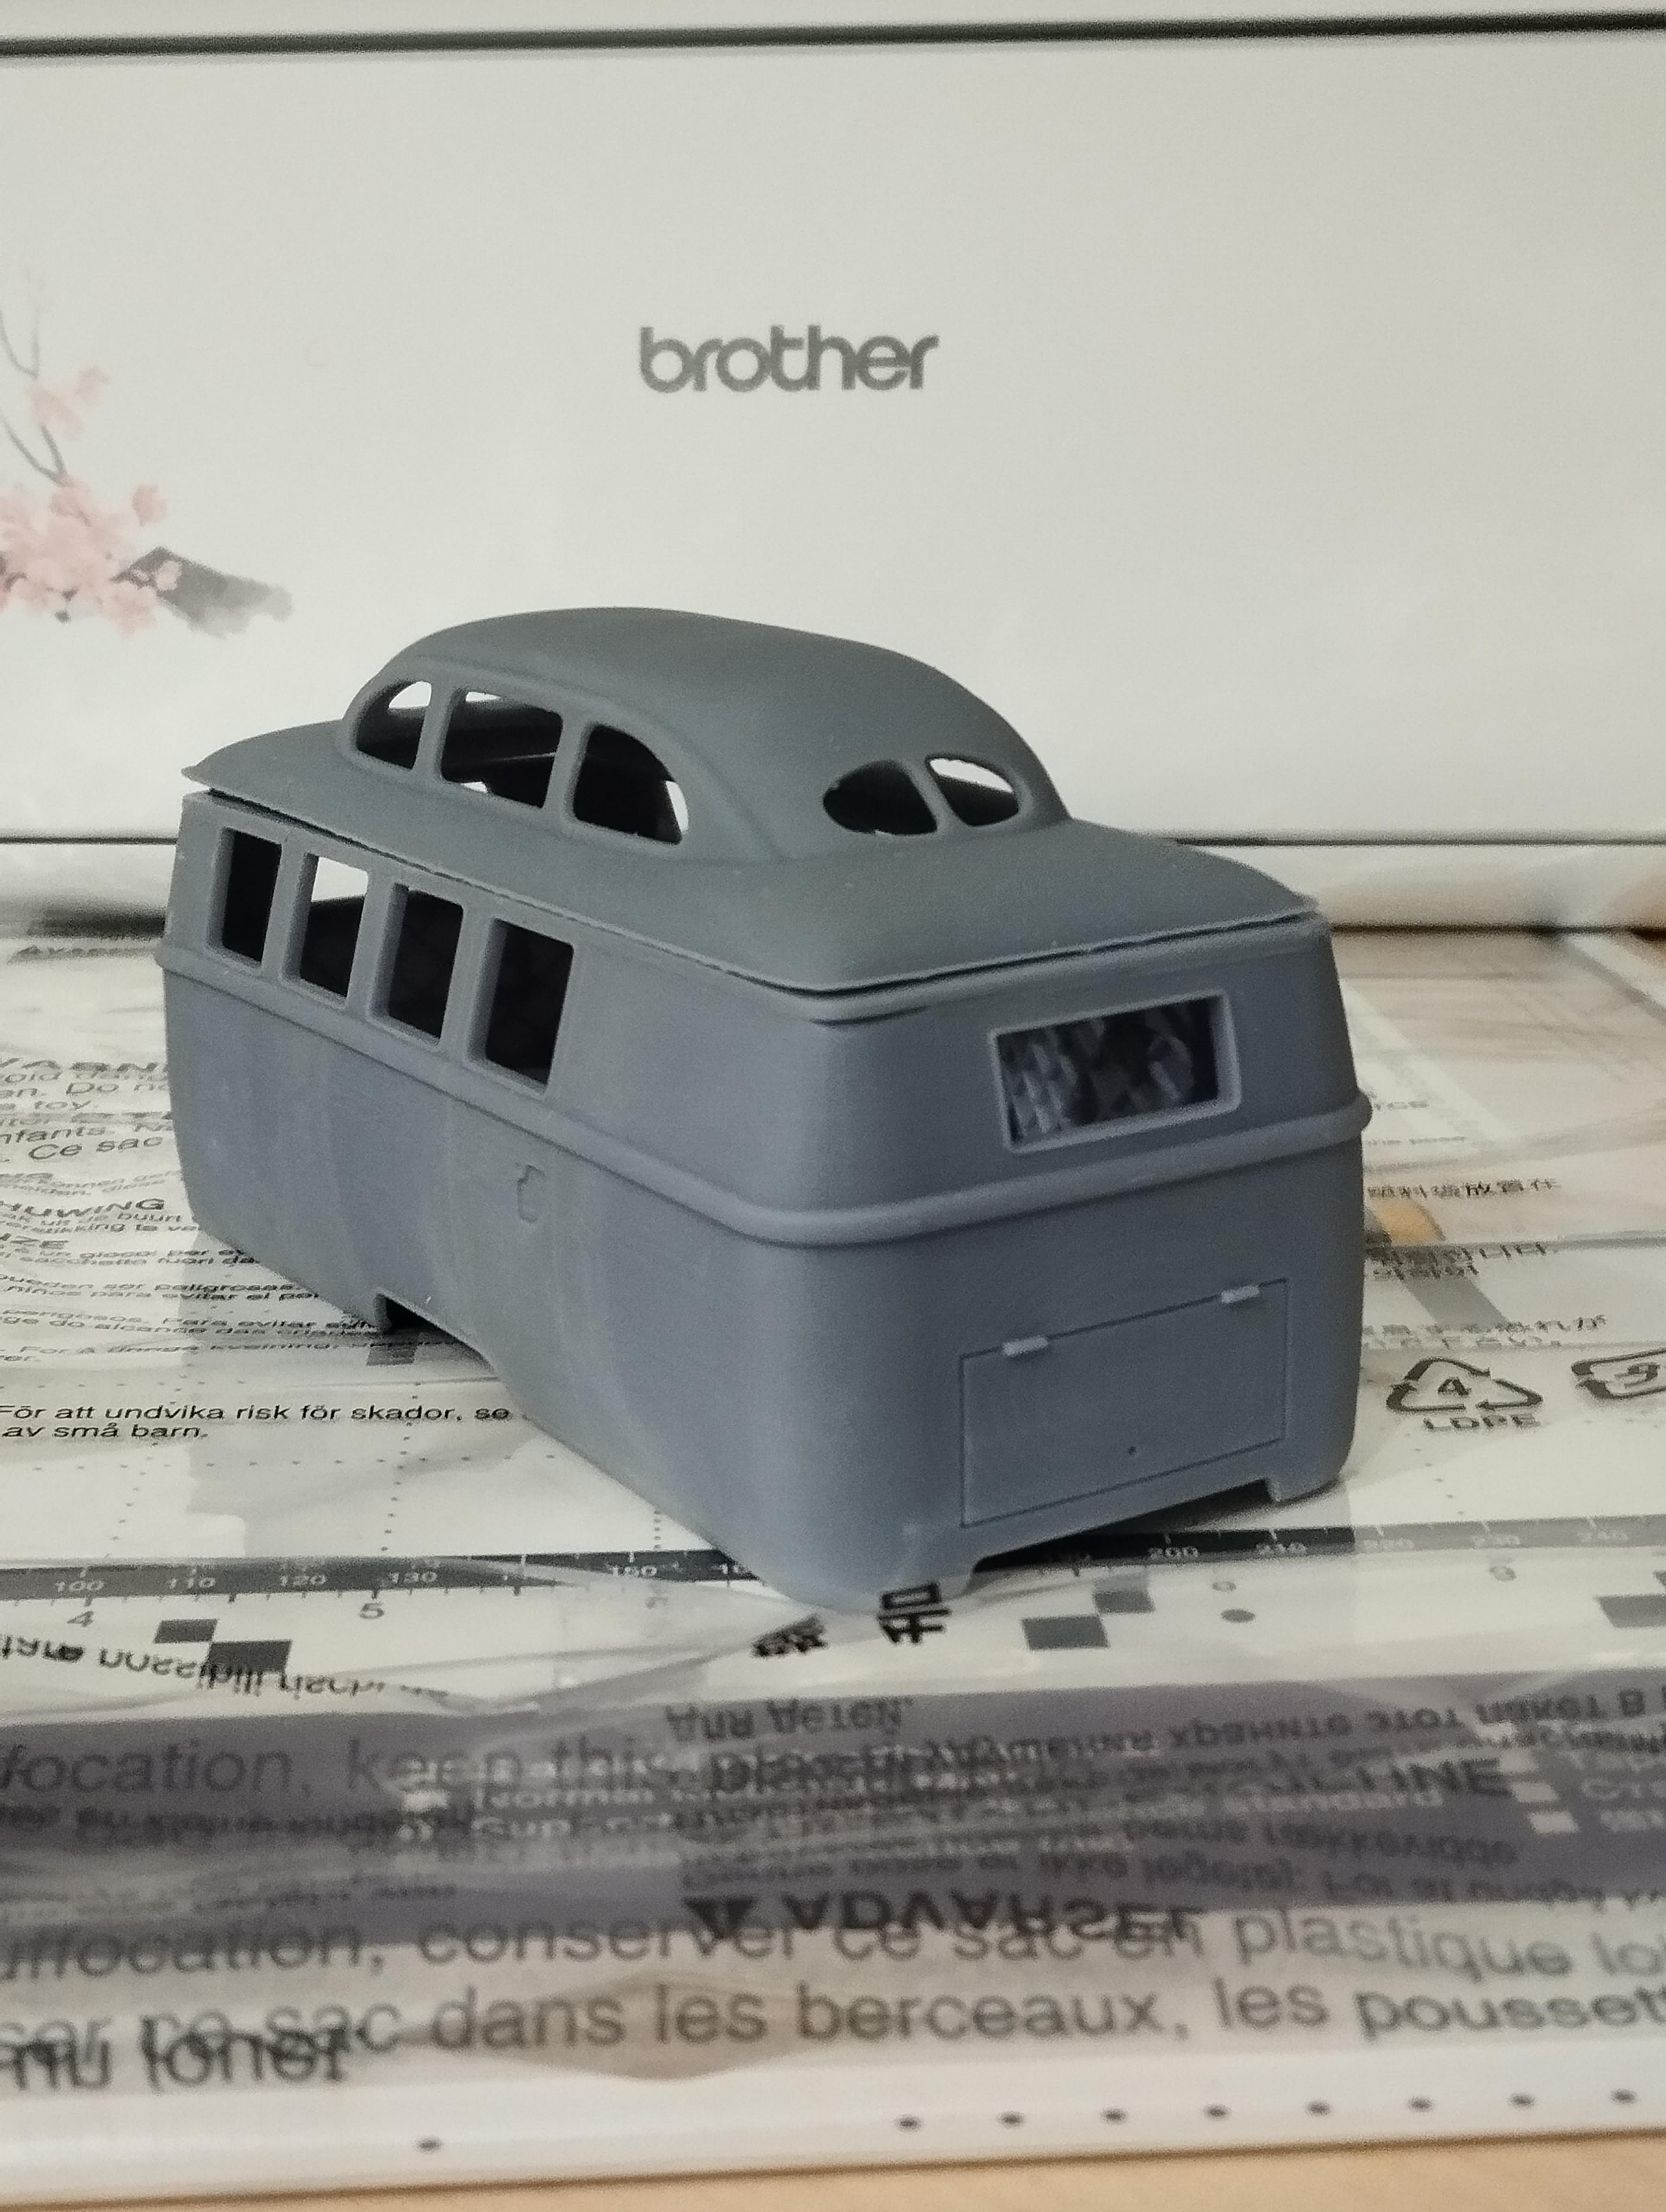
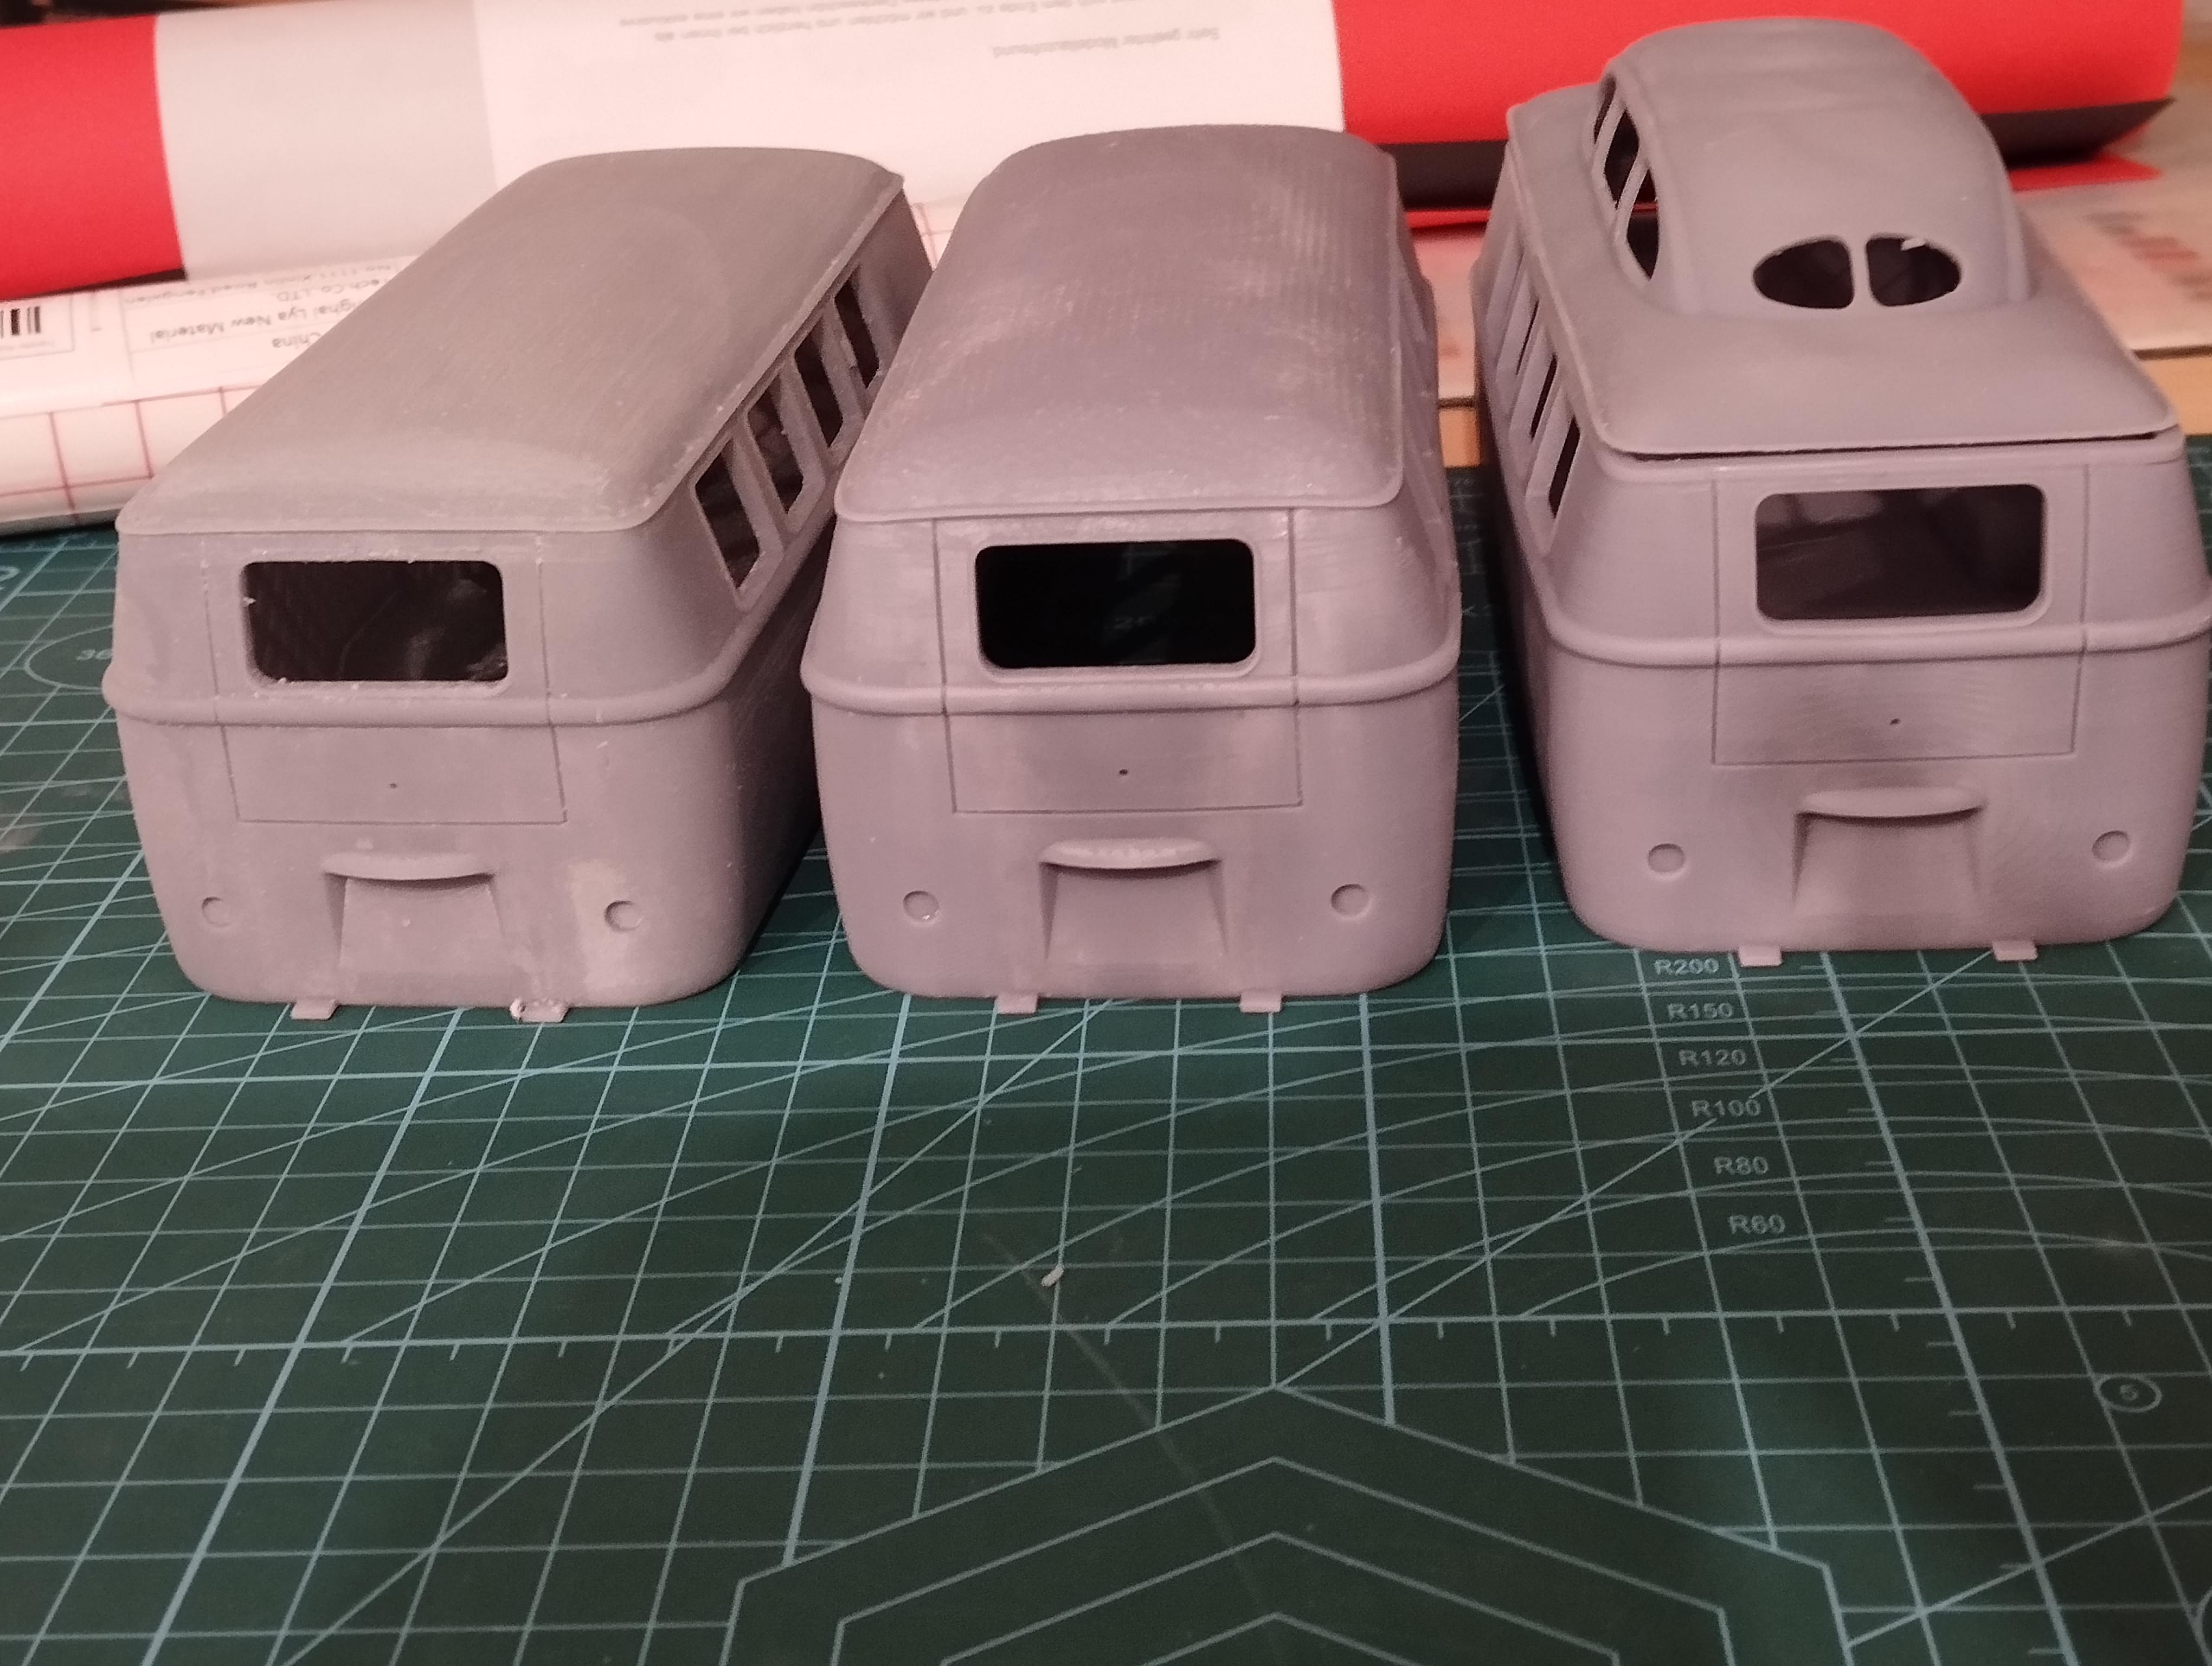
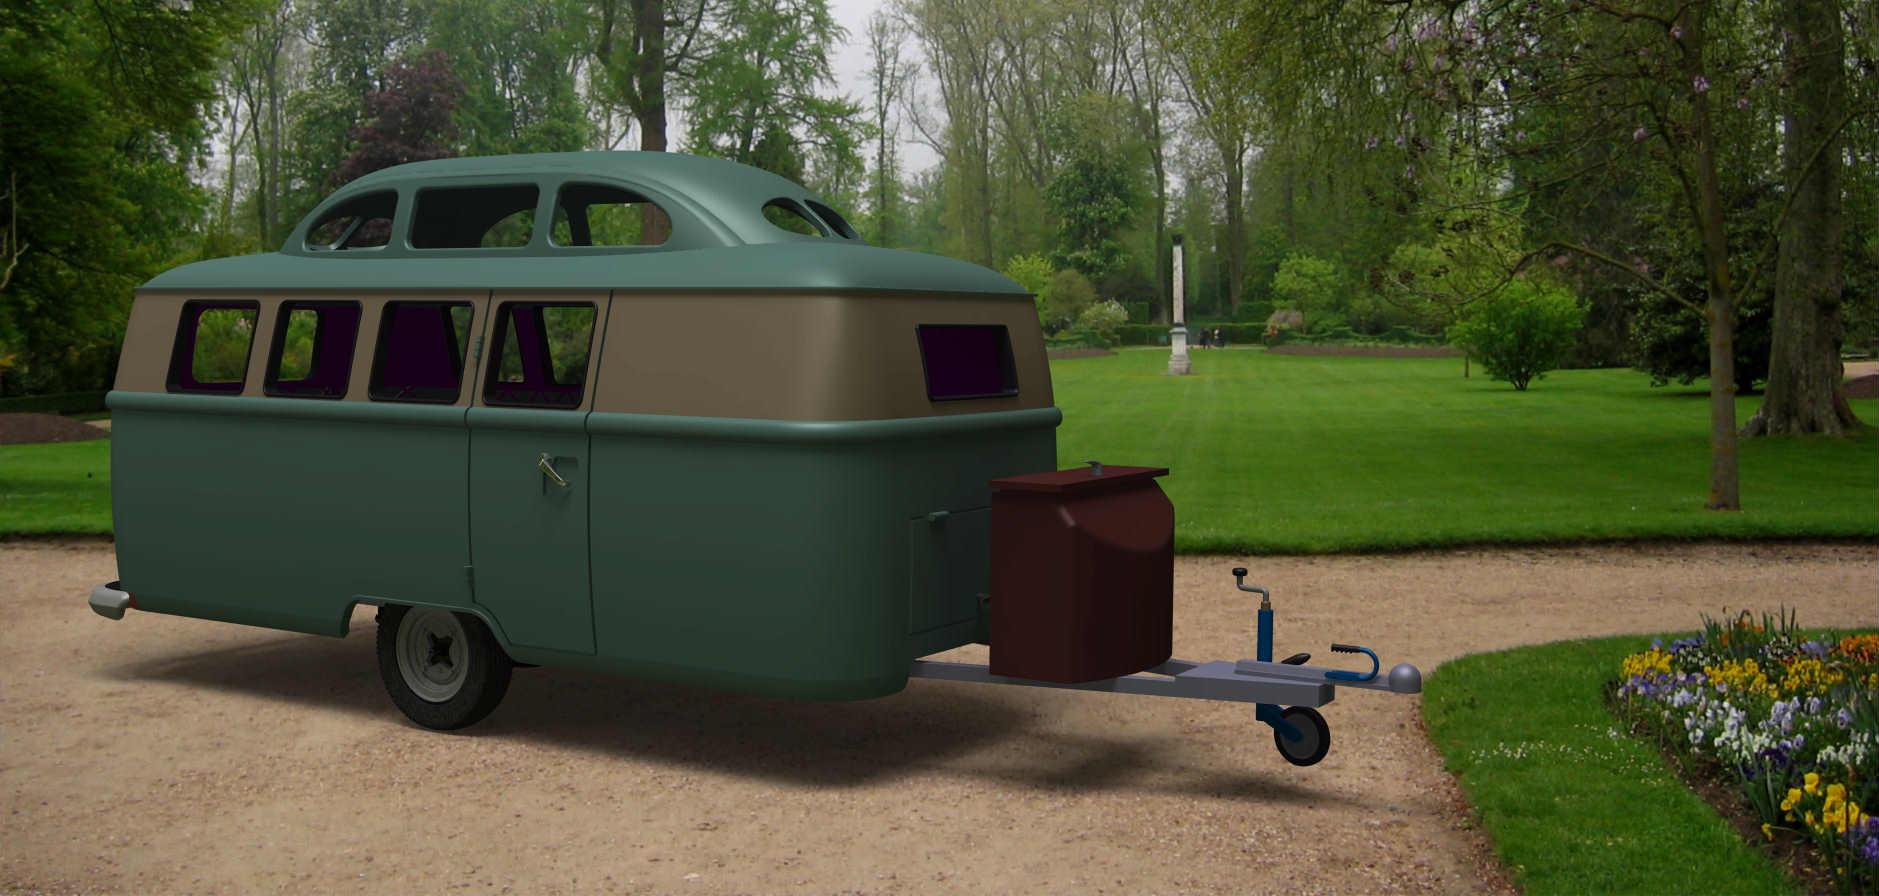
I made a roof with skylight for my trailer. Shorter versions will follow. Feel free to download and print.
-
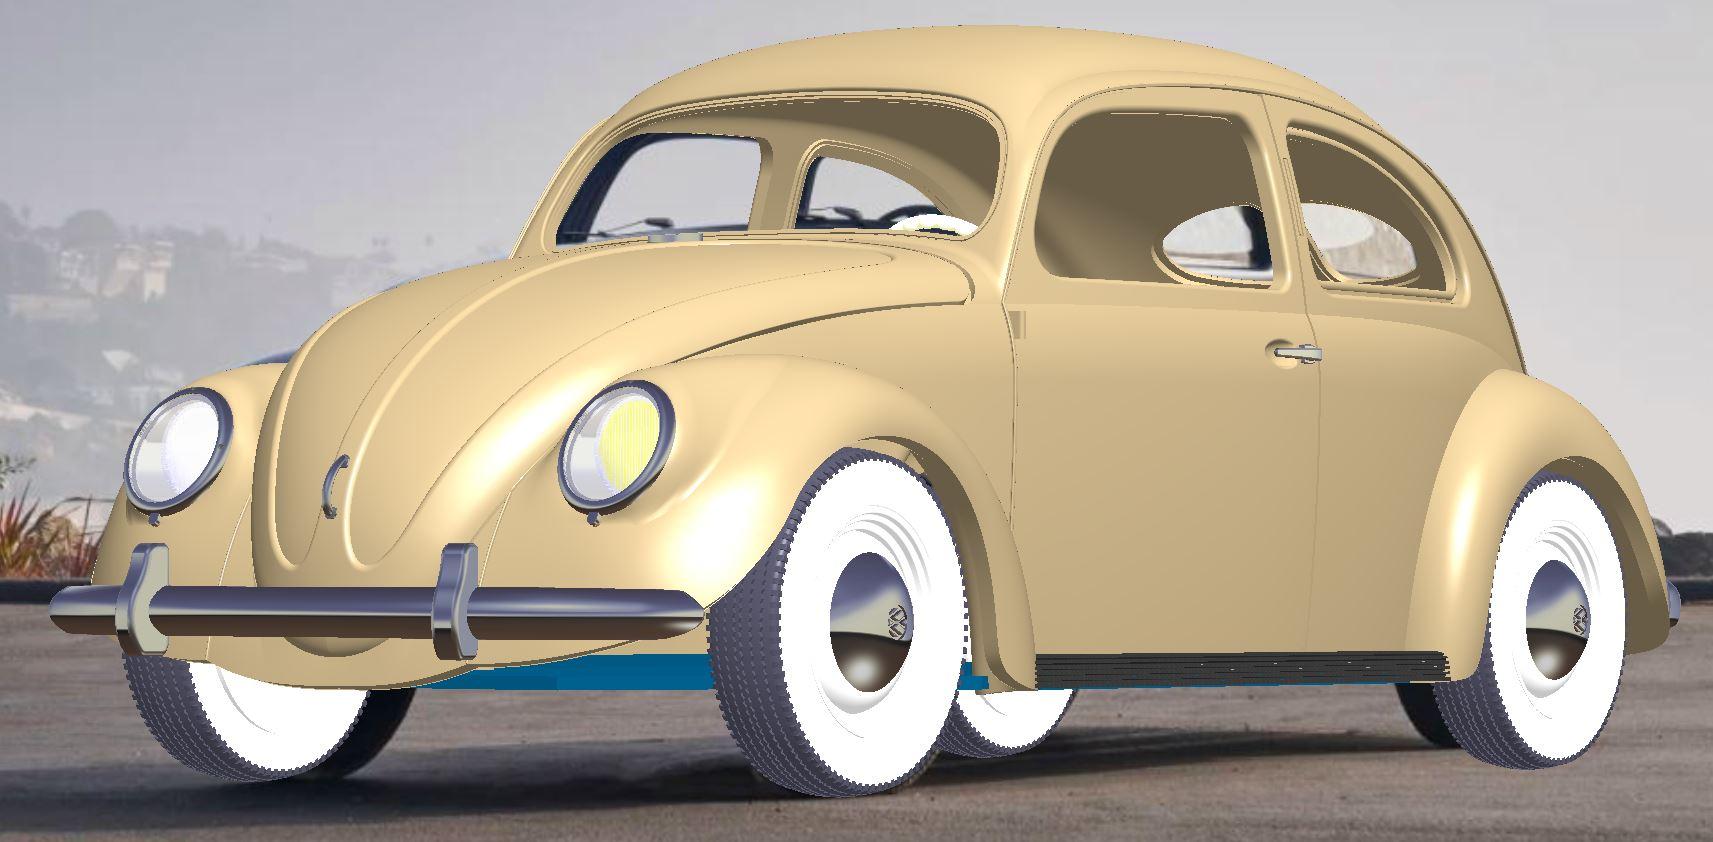
As far as I know, there is not a single kit of a split window beetle in 1/24th scale. Therefore, I decided to make a conversion kit to exsisting VW beetle kits. I did not go crazy with accuracy and details and limited the parts to the exterior, like body, bumpers, lights,... etc,. As far as the interior is concerned, only the dashboard and steering wheel. I will create one day decals for the gauges. Seats, door panels have to be taken from a donor kit, or scratch built if an accurate model is desired. Clear parts have to be fabricated also. Available for download in STL format at major CAD exchange platforms, free of charge as usual. I hope you like it.
-
Let me know if you experience difficulties. I shall be glad to assist. Here is a link to a YouTube video showing them (not my video). Look at 10:24 for the wheels:
-
Can you name him/her, or post the link to the copy of your decals? I mean as a warning for others.
-
I am not surprised because someone stole my work. I am surprised because he offered it at the very same platform where he stole it, and did not even try to rename file.
-
I wouldn't mind if he acknowledged me as a designer and didn't sell it.
-
Yes. The site administrator removed it upon my report.
-
Today while I was browsing parts suitable for my upcoming Revell E-type convertible build, I came across a page selling the wire wheel I made three years ago for the same kit. The seller is so clever that he/she is selling my file on the same platform I offer mine. Furthermore, using the exact file name as mine. I allowed a couple of person to sell printed parts based on this file, but not the file itself, and on the condition of referring to me as a designer. Here are the links so everyone can can judge himself: 1- The stolen file: https://cults3d.com/en/3d-model/various/jaguar-e-type-rims 2- Mine, the original file: https://cults3d.com/en/3d-model/tool/1-24-jaguar-wire-wheel-for-revell-s-kit
-
I will, provided you supply the complete list of VINs to choose from.
-
Revell's suggested prices are 36.99 and 39.99 EUR for the C8 and GT500, respectively. Not 5 EUR, but yes, more expensive than the Corvette despite being an old, depreciated kit.
-
Hi all, Would it be enough to drop the hood decals and chin spoiler to convert the kit to a '69 car? Thanks