

SpreadAxle
-
Posts
2,198 -
Joined
-
Last visited
Content Type
Profiles
Forums
Events
Gallery
Everything posted by SpreadAxle
-
1970 L-1000 Dodge cabover
SpreadAxle replied to bitner's topic in WIP: Model Trucks: Big Rigs and Heavy Equipment
You have every reason to be proud of this one. Nice work. -
Mack R & doubles--Overnite colors
SpreadAxle replied to phoneguy's topic in WIP: Model Trucks: Big Rigs and Heavy Equipment
It's cg together really nicely Jerry. -
1976 GMC Astro/95 Done
SpreadAxle replied to Jim B's topic in WIP: Model Trucks: Big Rigs and Heavy Equipment
Looks like you're going right out of the brochure. Looks goos so far. -
Very nice for a 1st try.
-
YES!!!! Matt's back, and casting some stuff I want. I'll be looking for that 70" sleeper for sure.
-
GMC Astro wrecker
SpreadAxle replied to bitner's topic in WIP: Model Trucks: Big Rigs and Heavy Equipment
You did a fantastic job on this wrecker. VERY NICE!!!!!!!! -
1972 Gmc Astro
SpreadAxle replied to SpreadAxle's topic in WIP: Model Trucks: Big Rigs and Heavy Equipment
The mirrors came from an original issue Chevy Titan kit. They were dechromed, and Bare Metal Foil was used for the "glass" on the mirror. This kit was the most recent issue of the Astro. the color is DupliColor GM#302 Light Metallic Blue. It was the closest match to the pic on the box. -
1972 Gmc Astro
SpreadAxle replied to SpreadAxle's topic in WIP: Model Trucks: Big Rigs and Heavy Equipment
Thanks Chris -
Big White 379
SpreadAxle replied to mackinac359's topic in WIP: Model Trucks: Big Rigs and Heavy Equipment
Looking good Pretty darn good Tim. Once again, you've done outstanding work. -
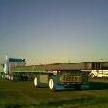
I thought I would share my latest one with you. After cutting it down to a daycab, I added hydraulic lift cylinders, working steering, air brake lines, shortened the frame, and some minor weathering. Here is one of the last in progress shots with the Luberfiner lines added. Thanks for looking.
-
Coil Chained Down
SpreadAxle replied to Semi Trailer Mechanic's topic in WIP: Model Trucks: Big Rigs and Heavy Equipment
Thanks Scott, I will try that. I hadn't read this thread in awhile, so I didn't seee your reply, but I will email you with my question. -
GMC Astro Daycab
SpreadAxle replied to SpreadAxle's topic in WIP: Model Trucks: Big Rigs and Heavy Equipment
Thanks for the compliments everyone. The 8V-71 from the kit will be used. As to a working rear suspension, I haven't been brave enough to try one yet, but I will soon, as I think it's a cool feature. -
Arrow Peterbilt 386 and 378
SpreadAxle replied to mackinac359's topic in WIP: Model Trucks: Big Rigs and Heavy Equipment
I saw these on another forum, but I have to say again, these look really nice. -
GMC Astro Daycab
SpreadAxle replied to SpreadAxle's topic in WIP: Model Trucks: Big Rigs and Heavy Equipment
These pix aren't the greatest, but since my camera quit all I have is my cell phone to use. I added some air line details to the rear of the frame. -
GMC Astro Daycab
SpreadAxle replied to SpreadAxle's topic in WIP: Model Trucks: Big Rigs and Heavy Equipment
Yes, it's K and S aluminum and brass round tube for the hydraulic cylinder, and square tube for the safety tube. -
It's been forever since I posted any of my builds or progress here. I'm going to share with you a truck that I'm finishing for a CBP on another forum. It's actually way overdue, but I had so much going on I couldn't finish it in time. It's almost done, and what I'm working on as I type this. Modifications include conversion to a daycab, operating steering, and the operating hydraulic cab lifting cylinders. The interior upholstery that you see on the back wall of the cab is the piece that is for the rear wall of the sleeper. I drilled the windows, then cut them out of this piece. I made corner sections out of the leftovers. The cab is done, it just needs the accessories like mirrors, lights, etc. I'm still working the frame, and I want to do some engine detailing.
-
Another 359 On The Work Bench
SpreadAxle replied to studioman3's topic in WIP: Model Trucks: Big Rigs and Heavy Equipment
Thanks for the info. I thought the 88 Big Cam was the Big Cam IV. -
Mack R Model Boom Truck WIP
SpreadAxle replied to docf225's topic in WIP: Model Trucks: Big Rigs and Heavy Equipment
Looks good so far. Hopefully, you have better luck with it. -
Another 359 On The Work Bench
SpreadAxle replied to studioman3's topic in WIP: Model Trucks: Big Rigs and Heavy Equipment
Dave, the NTC designation was used on all Big Cams from what I've seen. The next thing after the Big Cam IV is the N14. The N14 is basically the evolution of the Big Cam. Main difference is air-to-air instead of liquid aftercooling. And of course, more electronics. There are others, but those would be the basic differences between the N14 and Big Cam. From what my instructor in the diesel tech school explained 2 me, the Big Cam 1st appeared in the mid 1970s. The old "smallcams' had a 2 inch cam. I just can't remember if the Big Cam has a 2-1/2 or 3 inch cam. -
Autocar Wreck
SpreadAxle replied to 41CHEVY's topic in WIP: Model Trucks: Big Rigs and Heavy Equipment
Paul, what caught my attention was the engine. Having seen a Cummins in this stage of disassembly, you did a phenominal job accurately showing it. Well done, cool idea. -
Another 359 On The Work Bench
SpreadAxle replied to studioman3's topic in WIP: Model Trucks: Big Rigs and Heavy Equipment
The N stands for 4 valve head, also. -
Kenworth T600 Wip
SpreadAxle replied to Semi Trailer Mechanic's topic in WIP: Model Trucks: Big Rigs and Heavy Equipment
I thought that's what you did. I could tell by the doors on the sleeper that you used the kit sleeper, I just wasn't sure which roof you used. I'm guessing that's where the rear of the frame came from, too. -
Another 359 On The Work Bench
SpreadAxle replied to studioman3's topic in WIP: Model Trucks: Big Rigs and Heavy Equipment
Looks like you're off 2 a good start. -
Kenworth T600 Wip
SpreadAxle replied to Semi Trailer Mechanic's topic in WIP: Model Trucks: Big Rigs and Heavy Equipment
Nice job Scott. Could you please explain how you made the sleeper a flattop? Looks like the Revell AG Pete 359 sleeper roof. Is it? Thanks in advance. -
70's Ice Road Truck
SpreadAxle replied to 41CHEVY's topic in WIP: Model Trucks: Big Rigs and Heavy Equipment
Well done!