
Scale-Master
-
Posts
5,297 -
Joined
-
Last visited

.thumb.png.e64ca4fead948adbdf6a111229b6cf2f.png)


Recent Profile Visitors
25,286 profile views


Scale-Master's Achievements
MCM Ohana (6/6)
-
Not a bad kit, but it is time consuming. WIP Thread:
-
 Original Hasegawa 1/32 scale kit from 1973. First I built the Walter HWK 509 rocket engine.
 -
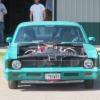
One of the tires melted one of the pieces of side trim. I fixed the bad spot and replated that section of it. I'm not sure if I'll use the stock air cleaner or maybe machine some velocity stacks, but the rest of the engine is done.
-
Finally got most of the chrome parts attached to the exterior. I made a decal for the badge on the hood.
-
The foil has been applied to the molded in trim. That took some time…
-
The interior is pretty basic. I used the same Gunmetal for the top of the dash and under the rear window as I did on the body. I swapped the factory steering wheel for one from a 1/24th 240Z; the larger scale works pretty well here.
-
The primary color is a mix of Testors 1112 Light Yellow and 1116 Cream enamel. Both bottles of paint are from the last century, (80's era, maybe 70's for the Cream).
- 18 replies
-
- 10
-

-
The secondary color for the two-tone is Tamiya LP-19 Gun Metal.
-
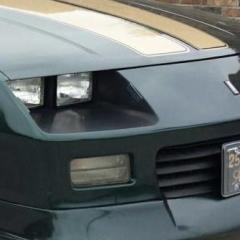
The second color will be a gray. Not a fan of the continental kit either. It's distracting from the best part of the car. The side in the below photo had the broken pillar; I'm happy with the repair. I decided to lower the front by about 0.060 of an inch by removing the spring bosses in the lower control arms. Then I raised the rear by about the same amount by making new coil springs. Not a lot of difference, but enough to see and the rocker is no longer parallel to the ground. The tailpipes interfered with the larger rear wheels so I cut them off and made them exit in front of the wheel wells. I also filled the mounting indentations in the frame for the tailpipe hangars. The exhaust system was intentionally distressed.
-
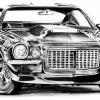
I've always liked this year of Impala, especially the rear end and the horizontal fins. I've had a few of the kits since they came out, time to build one. First I tossed the wheels and tires in favor of something meatier and added brakes. The wheels are from a Ferrari 360 with some minor changes to make them fit in the wheel wells and the tires are from the parts box. The brakes are from a Nissan Skyline. I kept the same ride height, at least for the time being… It will be a two-tone with the main color something between Lemon and Butternut Yellow. There is a lot of prep needed to clean up this body for painting, plus it had a broken roof pillar that had to be repaired.
-
WIP Thread:
-
Ferrari FXX K
Scale-Master replied to Scale-Master's topic in WIP: Other Racing: Road Racing, Land Speed Racers
The decals fit well, but the silver graphics/stripes are very fragile. Several of them broke while still on the paper even though they release rather quickly. The kit provides sections of silver decal for touch-up/repair and while they work well, from some angles the repairs are evident. -
Ferrari FXX K
Scale-Master replied to Scale-Master's topic in WIP: Other Racing: Road Racing, Land Speed Racers
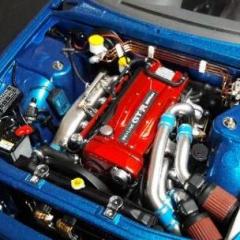
The interior, engine and chassis. Ready to start accepting body panels. So far everything fits very well. -
Ferrari FXX K
Scale-Master replied to Scale-Master's topic in WIP: Other Racing: Road Racing, Land Speed Racers
The brakes were done using the same technique as I used on the Aston Martin DBS. -
Ferrari FXX K
Scale-Master replied to Scale-Master's topic in WIP: Other Racing: Road Racing, Land Speed Racers
The engine builds up easily; not sure how much will be visible when the car is done.