
kennb
-
Posts
1,056 -
Joined
-
Last visited
Content Type
Profiles
Forums
Events
Gallery
Everything posted by kennb
-
The light I got with the optic cable had a 3 colour light that flashes. I am going to try to bypass that but for now we are just learning how to control more than one colour. Red, Blue and Green but those might not be the final colours. We are just learning at this point. There is also an off on switch with this and I am using 9 volts but it is what I had,,,it only requires 4.5 volts for the circut that was in the light. The first thing we need to do is isolate each colour so we can make them do different tasks. Eventually this will all be paints black inside but at this point it will be sufficent. Now lets see how it works. the fibers a just set in the hole with the blue light. no glue, Nothing holding it , later we will glue them. moving the fbers to the red light ,of course will change the final colour we see.... Now that we know this works we can add this to full LEDs that we experimented with for the interior and make our car look like a christmas tree.
-
The fiber optics materials have arrived today. now on to playing with them.....just a real crude test for an Audi type of head light...................The holes are pin holes,, Last one is too blurry but you get the concept. Now to some practical applications for lights and dash........................and seperating colours.................. Thanks for watching.
-
worked on the ford tonight a little...................
-
Tony....thank you for the suggestion,,,,,,,,,,,,,,,,,done................. Frank,,,I will put that on my build list,,,,,,,,,,,,,,,,,,,,,,,,,,,,,,,just have to figure out how to do it so it looks right. Thanks to all my followers,,,,I should now have a link to the K3 challenge as a signature
-
Tony.....I started it in here and admin moved it over there...I think you are right that it would get more attention here but have to work within the confines of how they split it up......I would like it in the workbench part too,,, Thanks for the comment and suggestion. Kenn
-
John,,,,,,thanks for the dates,,,,I have me head in 1932 and plans for a 1930 Bad me,,,,,,,,,,,,,,,,,,,,,,,,,,,,,,,,,,,,,,,,,,, ..I will continue with the 30...in the mean time I ordered a bunch of Revel 1932's, Me ordering kits,,,,,,,,,,,,,,,,,,,,,,,,,,,,,,,,,,,,,,,,,,,,,,,,,,,,,,,,,,,the sky has fallen,,,,,,,,,,,,,,,,,,,they are more for reference to see how they put the kits together and to get a good 32 4 door body for casting,,,,,,,,,,,,,, ...The question being now can the cast it so that it has opening doors built in or is that something that has to be done after the fact.....????????????????????? a caster can let me know. I also ordered and am waiting for the fiber optics to arrive so I can get back to the Bentley.........since I am only 2 weeks into the build I feel the time off wont hurt the 2 month time line..... I have also posted Section 5 to the K3 challenge...........................................I have not been getting a lot of comments so I dont know if what I am doing is appreciated by many but will keep plugging along,,,,comments are a way of knowing it what I do helps anyone in their kits. I know I have posted this in the Chevy build but wanted to have a nice piccy in the post..................................... I allso have the revisions to the methods of making wire wheels that are more fool proof that I will be poasting later this week. Thanks for watching,,,commenting and using any ideas I have put out there..If you see anyway I can improve on anything let me know............... Kenn
-
Did not accomplish much this weekend,,,had snow duty...................... Did the wires for the ford and started the rear fenders, and chassis stuff, then took a little time for a study of a motor cycle shown in the background.........wont post much about it other than it is preliminary study. Charlie,,,,,,thanks for the idea Kenn
-
Section 6 Frame assmebly Will post more later Kenn
-
Section 5 Front axel and springs. The front axel can be made in a jig like above. The .80 is heated at one end and formed to one end and then repeated for the other, it is a little tricky and may take a few trys. The other way is to bend the .80 with a pair of needle nose pliars to get the shaoe, either way will get the accommplihed effect. The rear axel is just 2 pieces of a 5/16 tube and a short piece of 716 tube. you can use what you have on hand. The leaf springs are no more than a series of short pieces .20 cut to size derived from the drawings and glued together and bent a little to get the curve. The last picture shows them in place on the Bentley. Next we will assemble the chassis and wheels. If you have any questions let me know so I can clearify any point. Kenn
-
-
I was a little concerned about how to hing the doors but with the self adjusting automatic hinge from the bentley modified some they work. even with the operating windows... If you look close in the picture above you can see the hinge, two straight pins.......................they are harder to do when the body is assembled this way... The window has to be remade since it is too small for the opening and there for does not operate properly like the front windows do. The rear windows will only go down so far though because of the shape of the door. Thanks for all the kind comments. I do hope that some things I do will be of value to others, even if they dont build a care the way I do. Kenn
-
this weeks work..... Kenn
-
revisions to the operator mechinisum.......i made it hidden. If you look close to the jamb you can see the red mark. It slides in a slot to open and close them window....much simpler and easier to make than the previous. Might have more revisions later i am not sure.Trying to find a motor to operate it................................. . Kenn
-
lets get some windows that open and close..... I will incorperate this into the Bentley............. simple prototye,,already have some other ideas to hide the opener,,,,,,,,,,,,,,,,,,,, Thanks to all those comments and offeringencouragement and watching. Kenn
-
The back is roughed out now...... Thanks for the comments and feed back. Kenn
-
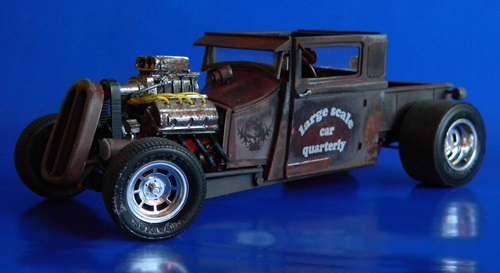
I am waiting for parts for the elctrical to come so I thought I might try some thing quick here per Richards suggestion...This is a 1932 Ford 4 door. will see how far this goes. It is 1/25th scale. Thanks for following Kenn
-
test for going under glass later this week....... Kenn
-
Richard,,,how about a cool 1930 roadster,,,,,,,,,,,,,,,,,,,,,,,,,,,,,,, Kenn
-
Thank you for the comments,,,,the engine has been assembled and the frame went to the paint shop......might have things assembled later today or tomorrow on this. Kenn
-
Simple practical application in dash.................................................excuse the fuzzy piccy but you still can get the concept. Kenn
-
Fiber optics is a simple concept, moving light along a clear channel in and shape to a designated location. The light source can be miles from the location but in the case here it can be 8 to 10 inches. The colour of the light depends only on the source light. We will be using red, green, and yellow for this section. The light sources are shown in the previous post using s 3 volt battery. I am using clear plastic window sprues for this section. They are heated to a thick consistency and slowed pulled out to become thinner along the run so they can be truned, bent, and run along inside the body of the vehicle or in place of brake lines or fuel lines to get them to where you want the light. I left the ends larger so they can be used as the actual light. we will get into controlling this later. The ends are then exposed to the candle to make them smooth and polished. Be very careful and take your time pulling and polishing the ends, the plastic can catch fire and burn your piddies in a hurry. Now you can test the finish light and channel. Note the "hole" in the light. That comes from the fact that the sprues are actually hollow and even when you pull them out they are still a tube. If you use "genuine" fiber optic material this will not be there. Thanks for watching and comments are very welcome.... Kenn
-
Introducing electric lights to your car using LCD's and fiber optics. This next week we are going to use these items to make working lights on a 3 volt system that runs all your lighting. Dash lights, interior lights, trunk lights, head lights and marker lights. Towards the end of the week we will go SOLAR!!!!!!!!!!!!!!!!!!!!!!!!!!!!! Getting materials. I have a handfull of light(LCD's) that I got out of baby monitors, old phone bases,,,computers,,,,and floppy drives. I checked them all and they work without the need for resistors. Some are small enuff to be used as they are while others will be the mother light for the fiber optics...... Note the micro switch on the red LCD circut board,,,,,,that is an on/off swtich that we willl be using............. Kenn More as we go........................
-
Thank you Eric for the comments and kind words ...I find great enjoyment of sharing my builds and how I do things. I hope that everyone can find something usefull in my posts. Kenn
-
Dome light inside the passenger compartment....................will show how later................... I was looking for a nice warrm glow and I think I have the right one right on the first try.................. Kenn
-
Thank you charlie for the kind comments. Maybe I should do some roll down windows in the furure............. .Power ones of course.............. I will be starting the fiber optics next week and since I have never covered them in my builds I will be going through that aspect with great detail including all the ways I mess it up until I get it right. Kenn
