
kennb
-
Posts
1,056 -
Joined
-
Last visited
Content Type
Profiles
Forums
Events
Gallery
Everything posted by kennb
-
section 4,,,frame rails coming in on Sunday.................. Kenn
-
I went shopping today in the big city and got a new cutting board and a cheap plastic "T" square. Now I can cut straight lines and accurate 90* angles..... The "T" square inches line up with the cutting mat but on the half inch but still a nice feature that was a surprize now maybe I can make some nice looking models Kenn
-
This very similar to what real frame shops use and you can make the fixtures that slide as you need them. It is made from simple I beams with sliding fixtures that match the I beam cross section. The fixtures then can slide into position and changed or made differently according to your application. Here it is in action making the frame for the Hudson Italia. Notice the different fixtures and guides used to make the straight true frame. You should use small clamps or a better pinning system than I show here, I hope this helps you out some in determining if it is how you want to proceed. Kenn
-
I made up a framing jig a few years ago,,,,still have the piccys someplace,,,,I will check the tutorials or set one up if you want. Kenn
-
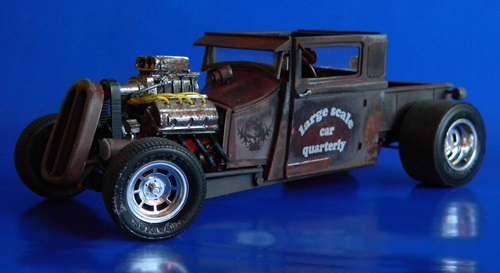
Finally I have the wheels set on the coupe'..................nice old school mags with wires on the front,,,,,,,,,,,,,,,,,,and the monster hemi Fun times at the drag strip this week end,,,,,,,,,,,,,,,,,,,,,,,,,,,,,,,,,,,,varooooooooooooooooom............. will use a crate for a seat for now. now off to the uphostry shop for a cool interior..................................... Thanks for following this build................. Kenn
-
Thanks for the comments,,,I have a photo to show size of the front wires to give you an idea of the actual size. It gives a good look at what can be done. I do have to make a different a different board for this wheel tho. I need to have fewer pegs for lacing and closer to the center. I have to conserve on the wire I use . Kenn
-
Hey all I am near Duluth and would like to find someone near there that goes to some shows in Minn and Wisc that I could tag along with. I would like to go and have a table that I could have some tutorials on scratch building. I do not have a car but could help with expenses,gas eats,,,,,these can be day trips or overnights. I would be taking my builds to show and put in compititions. Kenn
-
rear wheel concept is ready for construction I think........................... Thank you for watching................... Kenn
-
I am lacing some wires special for this coupe on the front,,,,,,,,,,,,,,,,,,,,,,they are a little different but I think will add a ton to the overall appearence of the car... Thanks to all those that are following and commenting....you are so nice about my builds,,,, Kenn
-
Thanks for all the comments,,they are truely appreciated. Kenn
-
I did a 53 Chevy with Packard taillignts and made them out of a clear red lighter case. a little cutting and wet sanding with 600 the polished out nicely...You could go that way to get the size and fell you are looking for. In any case this build screams Packard tail lights and they are a must have, how ever you do them..The front is awesome........................ Kenn
-
I have been thinking of the colour to paint this buggy.I have seen them in black,,British racing green, bright blue, deep red, and polished aluminium. The bodies are aluminium and reproductions are available,hence more of the Q series today than were ever built. The origionals are very rare but reprops are common, so finding information on the real ones is not easy. Anyway,,,,,,I am torm between deeper red and polished aluminium like in the picture below. The only problem with this is it takes 2 to 3 weeks to set up properly after painting. The deep red would be like on the 32 Chebby coupe' that I am working on. Thanks for the comments and following along with me on this adventure, which is turning out to take longer than I origionally figured....whats new. Kenn
-
body in first primer................. Kenn
-
Thanks to all those commenting and looking..........it has been a slow day for me but will post a few more piccys tonight, Cato. I show how to build the tires and the lacing of the wires here. http://www.modelcarsmag.com/forums/index.php?showtopic=71724 I am going through an entire build and challenge there on the 1933 MG K3. The tires were the first section. If you have any further questions or need clearification pllease let me know and I will post more information on them..I have over 100 photos of the tire and wire build to work with. Thanks for the question,,, Kenn
-
the main body is now almost roughed out and I have the brake drums and backer plates assembled but no details on them yet. I have one more wire to lace but it seems krazy glue does not work like super glue.....the krazy glue has a long set up time and I ruined one laced wire by not thinking about that. It felt dry and reacted right but any pressure made it let loose. Wire glue, and plastic mess........................... Kenn
-
Now a rolling chassis plus a bit more you see whats coming on this now???????????????????? Thanks to all my followers..... Kenn
-
Pretend it is a Forderler engine,,,,,,,,,,,,,,,,,,,,,, Do you have a different type of intake that might look better,,,I am always open to suggestions,,,,,,,,,,thank you Kenn
-
Setting up the chassis,,,,note the pattern taped to the desktop with top and front veiw to set up front axel. I will be posting only information different from the K3 build since they are very similar until you get to the body.. Note that I detailed engine (previous post) a lot differently with a lot more of the actual details and shape. Most will probaly not be seen unless you get inside the engine compartment... I use the patterns that I have down to set the engine up and other parts of the chassis as you can see....cross members and the chassis is ready to roll. thanks for looking and hope you follow this build too. Kenn
-
By all means bookmark the thread......If you dont have time now you might later.....Thank you for following..........................I am lacing s set of wires right now for the TA-Q I am starting......................... Kenn
-
Nice and creative,,,,,,,,,,,,,,,,love the bug eyes very interesting take............... Kenn
-
Glad you asked about the hub. I use 3/16" tube since it fits over the .80 axel shfts nicely. You will also need a tbe that slips over the 3/16" tube. The one I have is a little large so I insert some .20 shim inside. you will cut thin waffer of the larger tube to slip over the 3/16" The finished hub is about 3/8" long. Notice the recesses cut into each end of the tube with a small rat tail file, and the waffer in the center. Note that I do this all before the hub is cut off the long tube since it is easier to work. with some fileing on the center waffer with a flat file you will have a hub. Take your time and let the glue set sufficently and work the fileing slowly so you dont over do it. Read this. One more note...I inserted a small finish nail in the center of the lacing board since it is more stable than a plastic shaft. It is from the back side with the point coming through to make it easier for the hub to slip over. build up the nail with bits of masking tape it the nail is too small for the hub..This is a simplified hub from shown previously. If you have more questions or I missed the mark on the answer please let me know I will walk you through the entire hub process slower.... Kenn
-
Just needed to make a hemi................it is a little overscale for the coupe body but it has a nice mass to it. Tires need to be found for this,,,,a sample is shown here...............please comment to let me know what you think,,,good or bad. Thank you for following my builds. Kenn
-
Thanks to all those that made such nice comments............ Kenn
-
For those that have not followed the origional build, here is a picture of what we will end up with on this challenge, So follow along and take each step and you will have a similar finished model. Kenn
-
You used a word i don't know,,,,,sleep,,,,what is that.
