mecklm
-
Posts
174 -
Joined
-
Last visited
Content Type
Profiles
Forums
Events
Gallery
Everything posted by mecklm
-
Peterbilt fire truck DD powered
mecklm replied to truckabilly's topic in WIP: Model Trucks: Big Rigs and Heavy Equipment
Very nice build. If I may ask, what material did you use to represent the rope holding the canvas in place? The color and diameter look spot on. Mike -
Loadstar Brush Truck
mecklm replied to Chariots of Fire's topic in WIP: Model Trucks: Big Rigs and Heavy Equipment
Charles, I really enjoy watching your builds come together. It takes some real visualization skills to be able to envision those finished hinges and then figure out how to break them down to the least common denominator. Very nicely done, as usual. Mike -
Thanks for all of your replies! I'm especially fond of the extra credit tips like "super clean" and heating the solution. I'm assuming the heating only applies to short term soaks as opposed to weeks long durations. Follow up question; I do have a small, heated ultrasonic cleaner with a 30 minute timer. Has anyone used the cleaners in combination with ultrasonic? Any pitfalls to be wary of? Thanks again for all the thorough replies! Mike
-
For you folks that remove paint in the purple pond, does the paint merely lose its adhesion to the base surface and come off in sheets and pieces or does it actually dissolve/disintegrate or does it depend on what type of paint was used? Thanks in advance for your info! Mike
-
1/160 1920 Macdonald 5 ton low bed truck
mecklm replied to mecklm's topic in WIP: Model Trucks: Big Rigs and Heavy Equipment
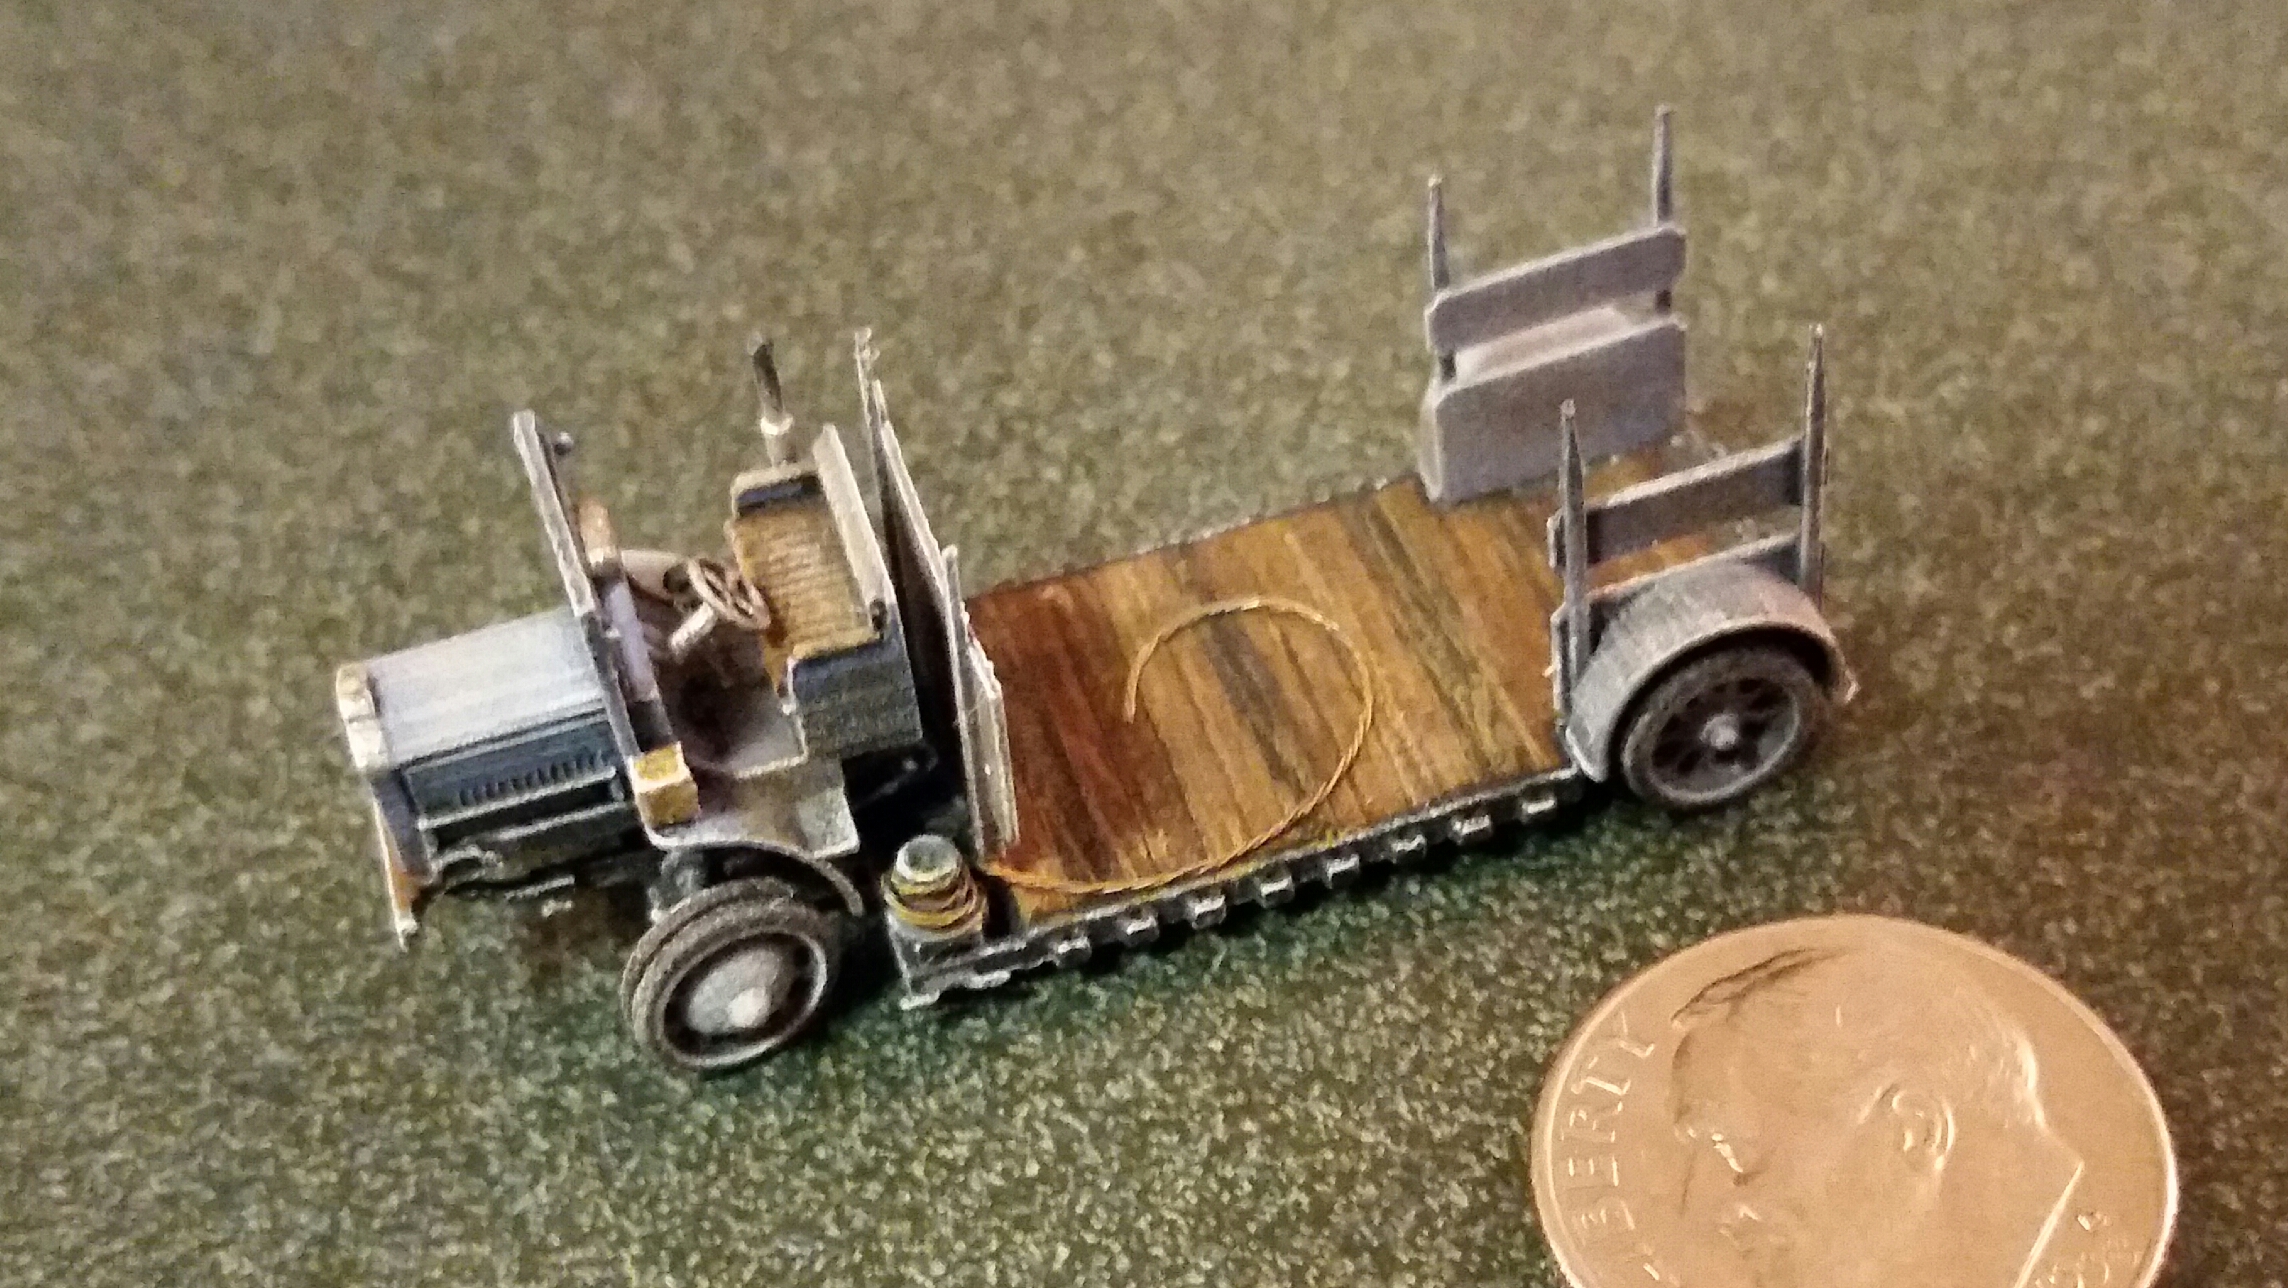
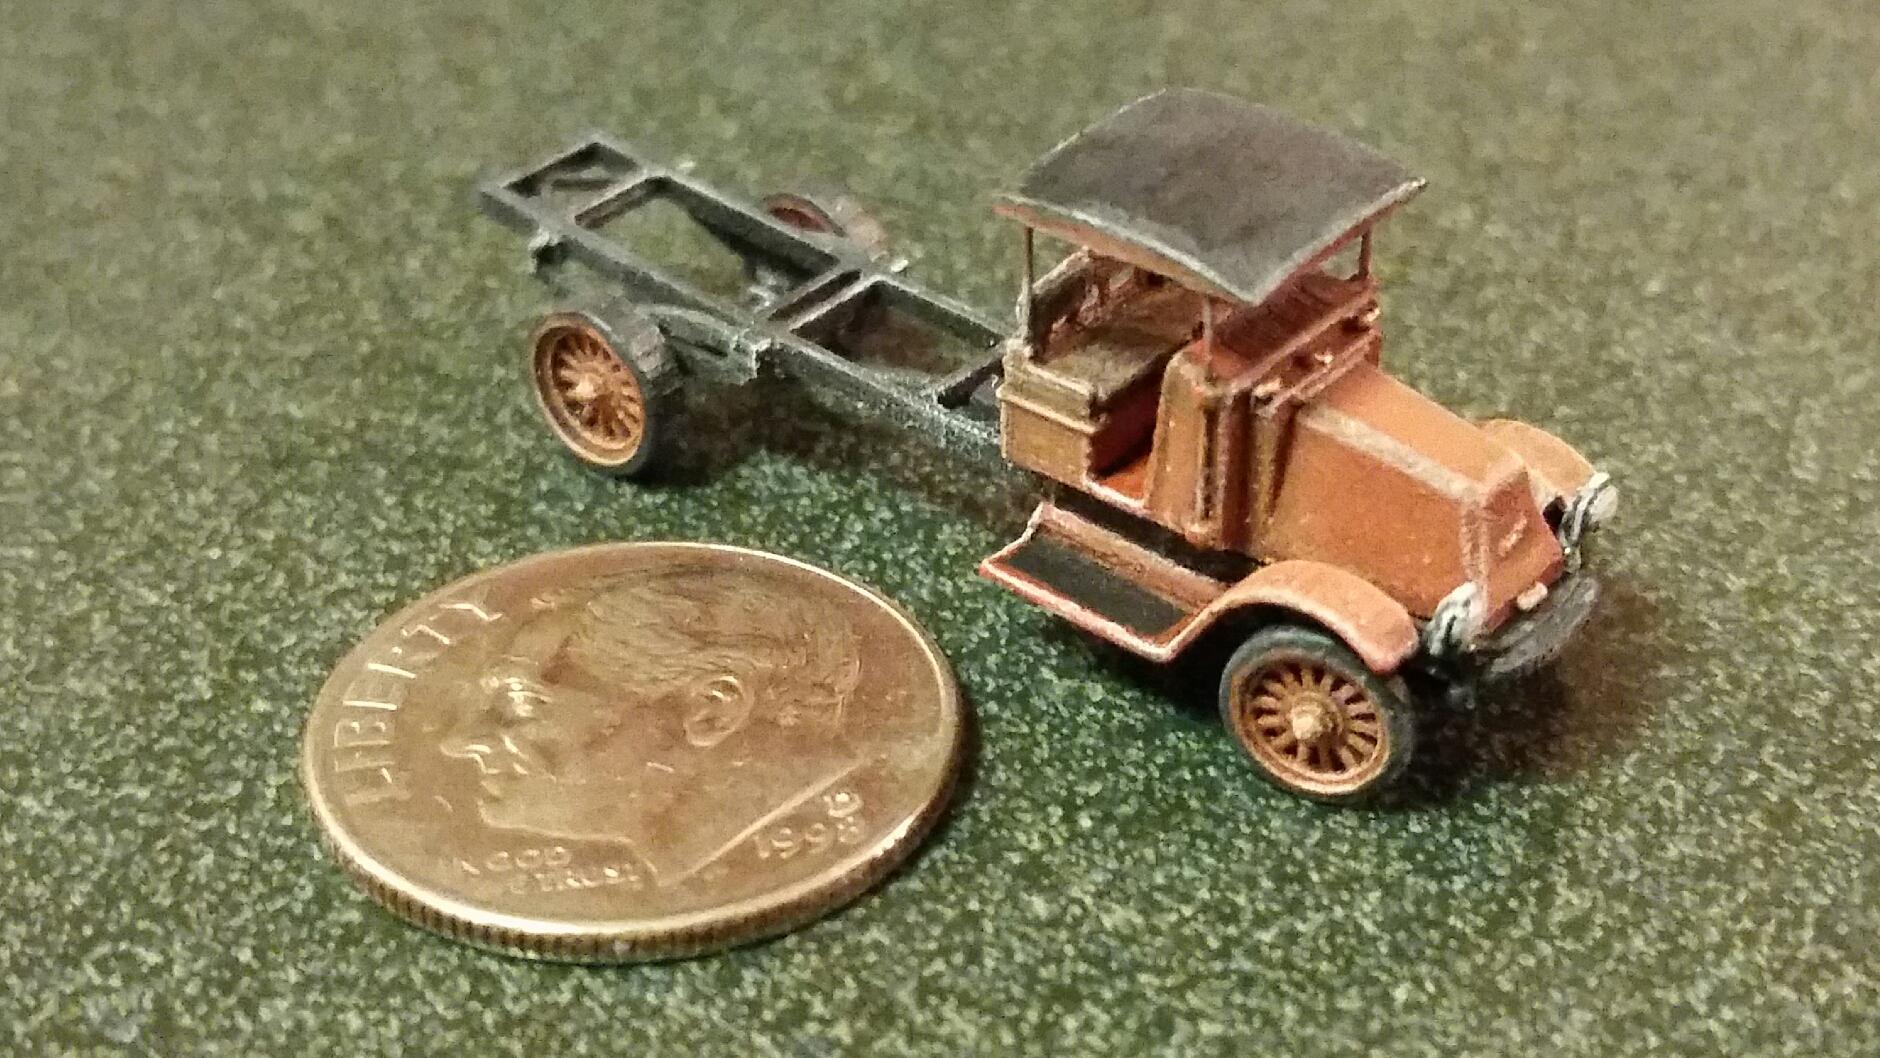
Hey Charles, thanks for posting the photo of your friend's rendition of this truck. I couldn't help but join these two photos together for a comparison shot, given the general size, position, perspective and even the angle that the front wheels are steered to are remarkably similar between the two. The cool thing is the top one is roughly 11-1/2" long while the bottom one is just under 1-3/4" long. Mike
-
1/160 1920 Macdonald 5 ton low bed truck
mecklm replied to mecklm's topic in WIP: Model Trucks: Big Rigs and Heavy Equipment
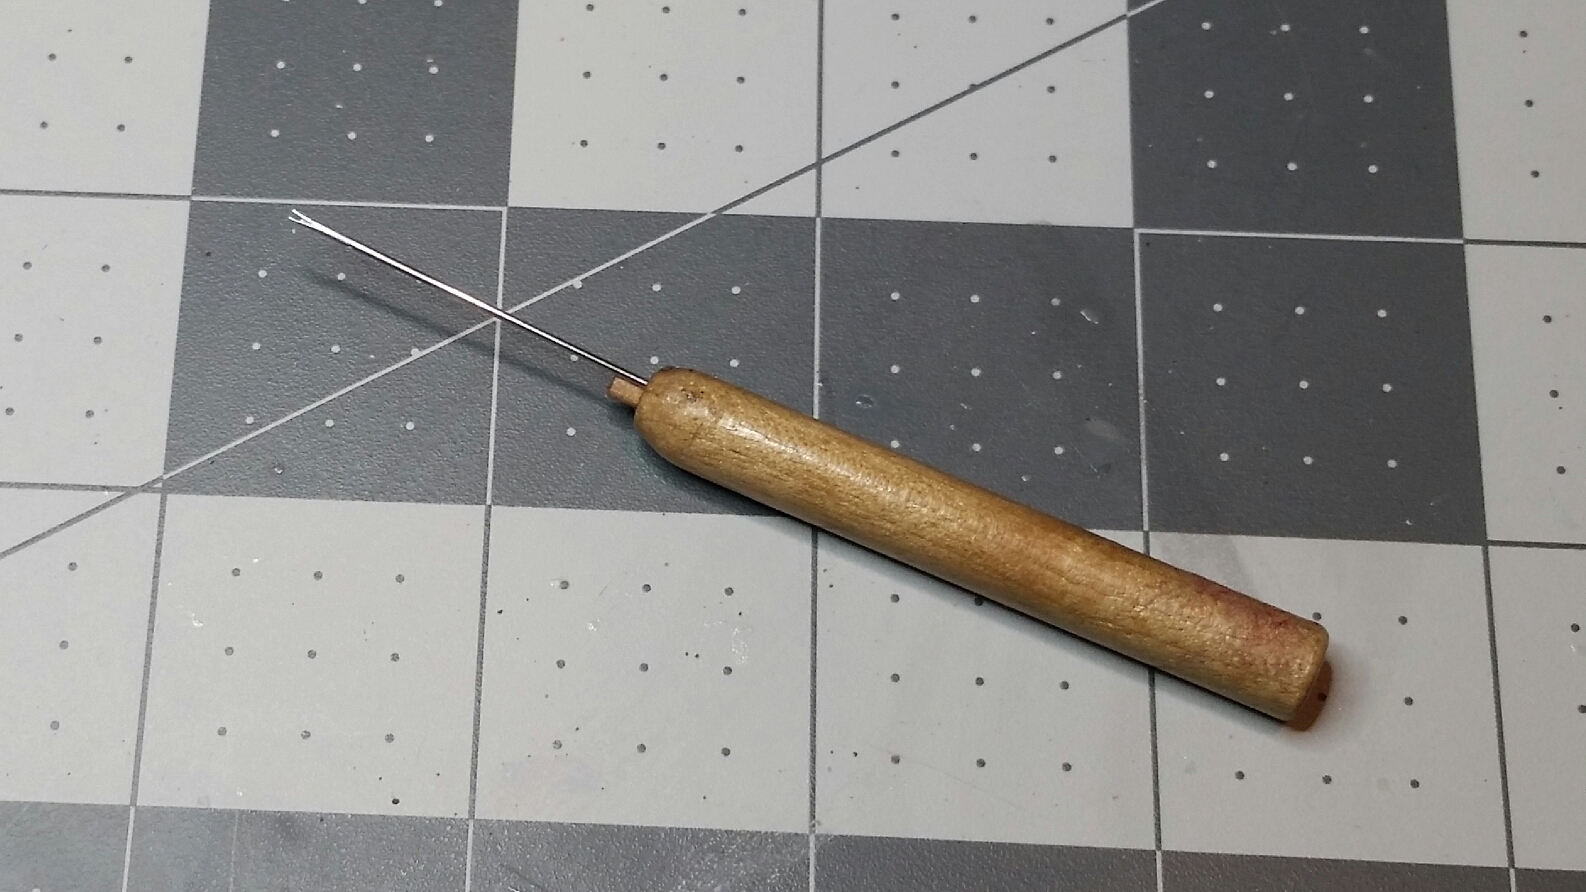
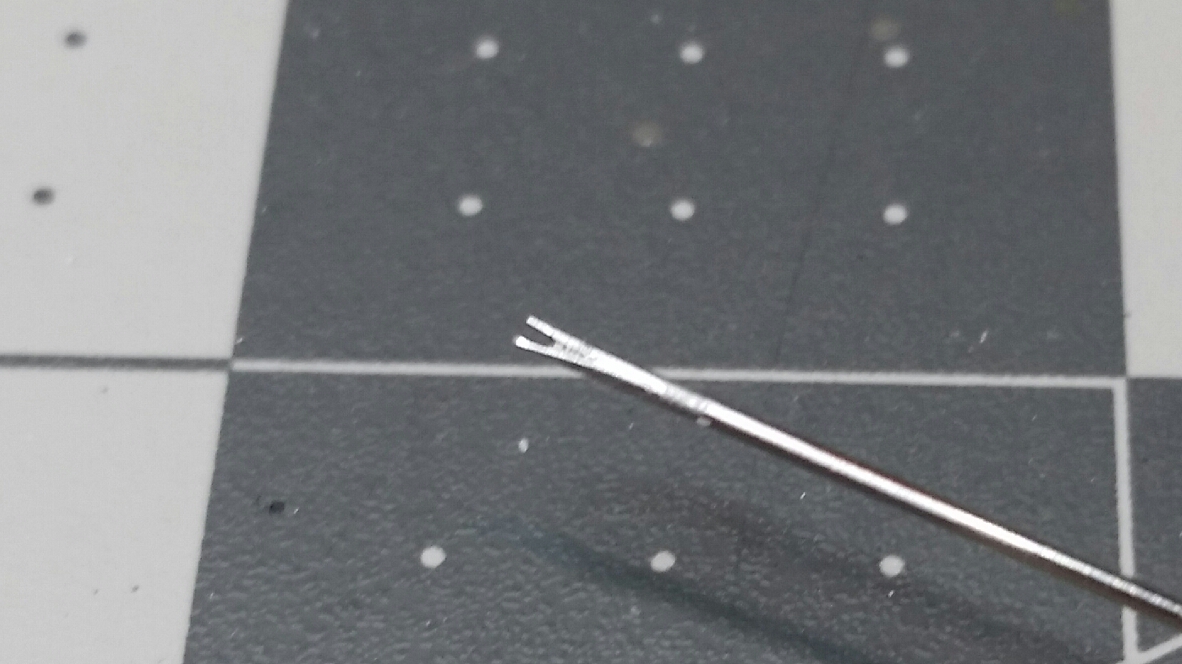
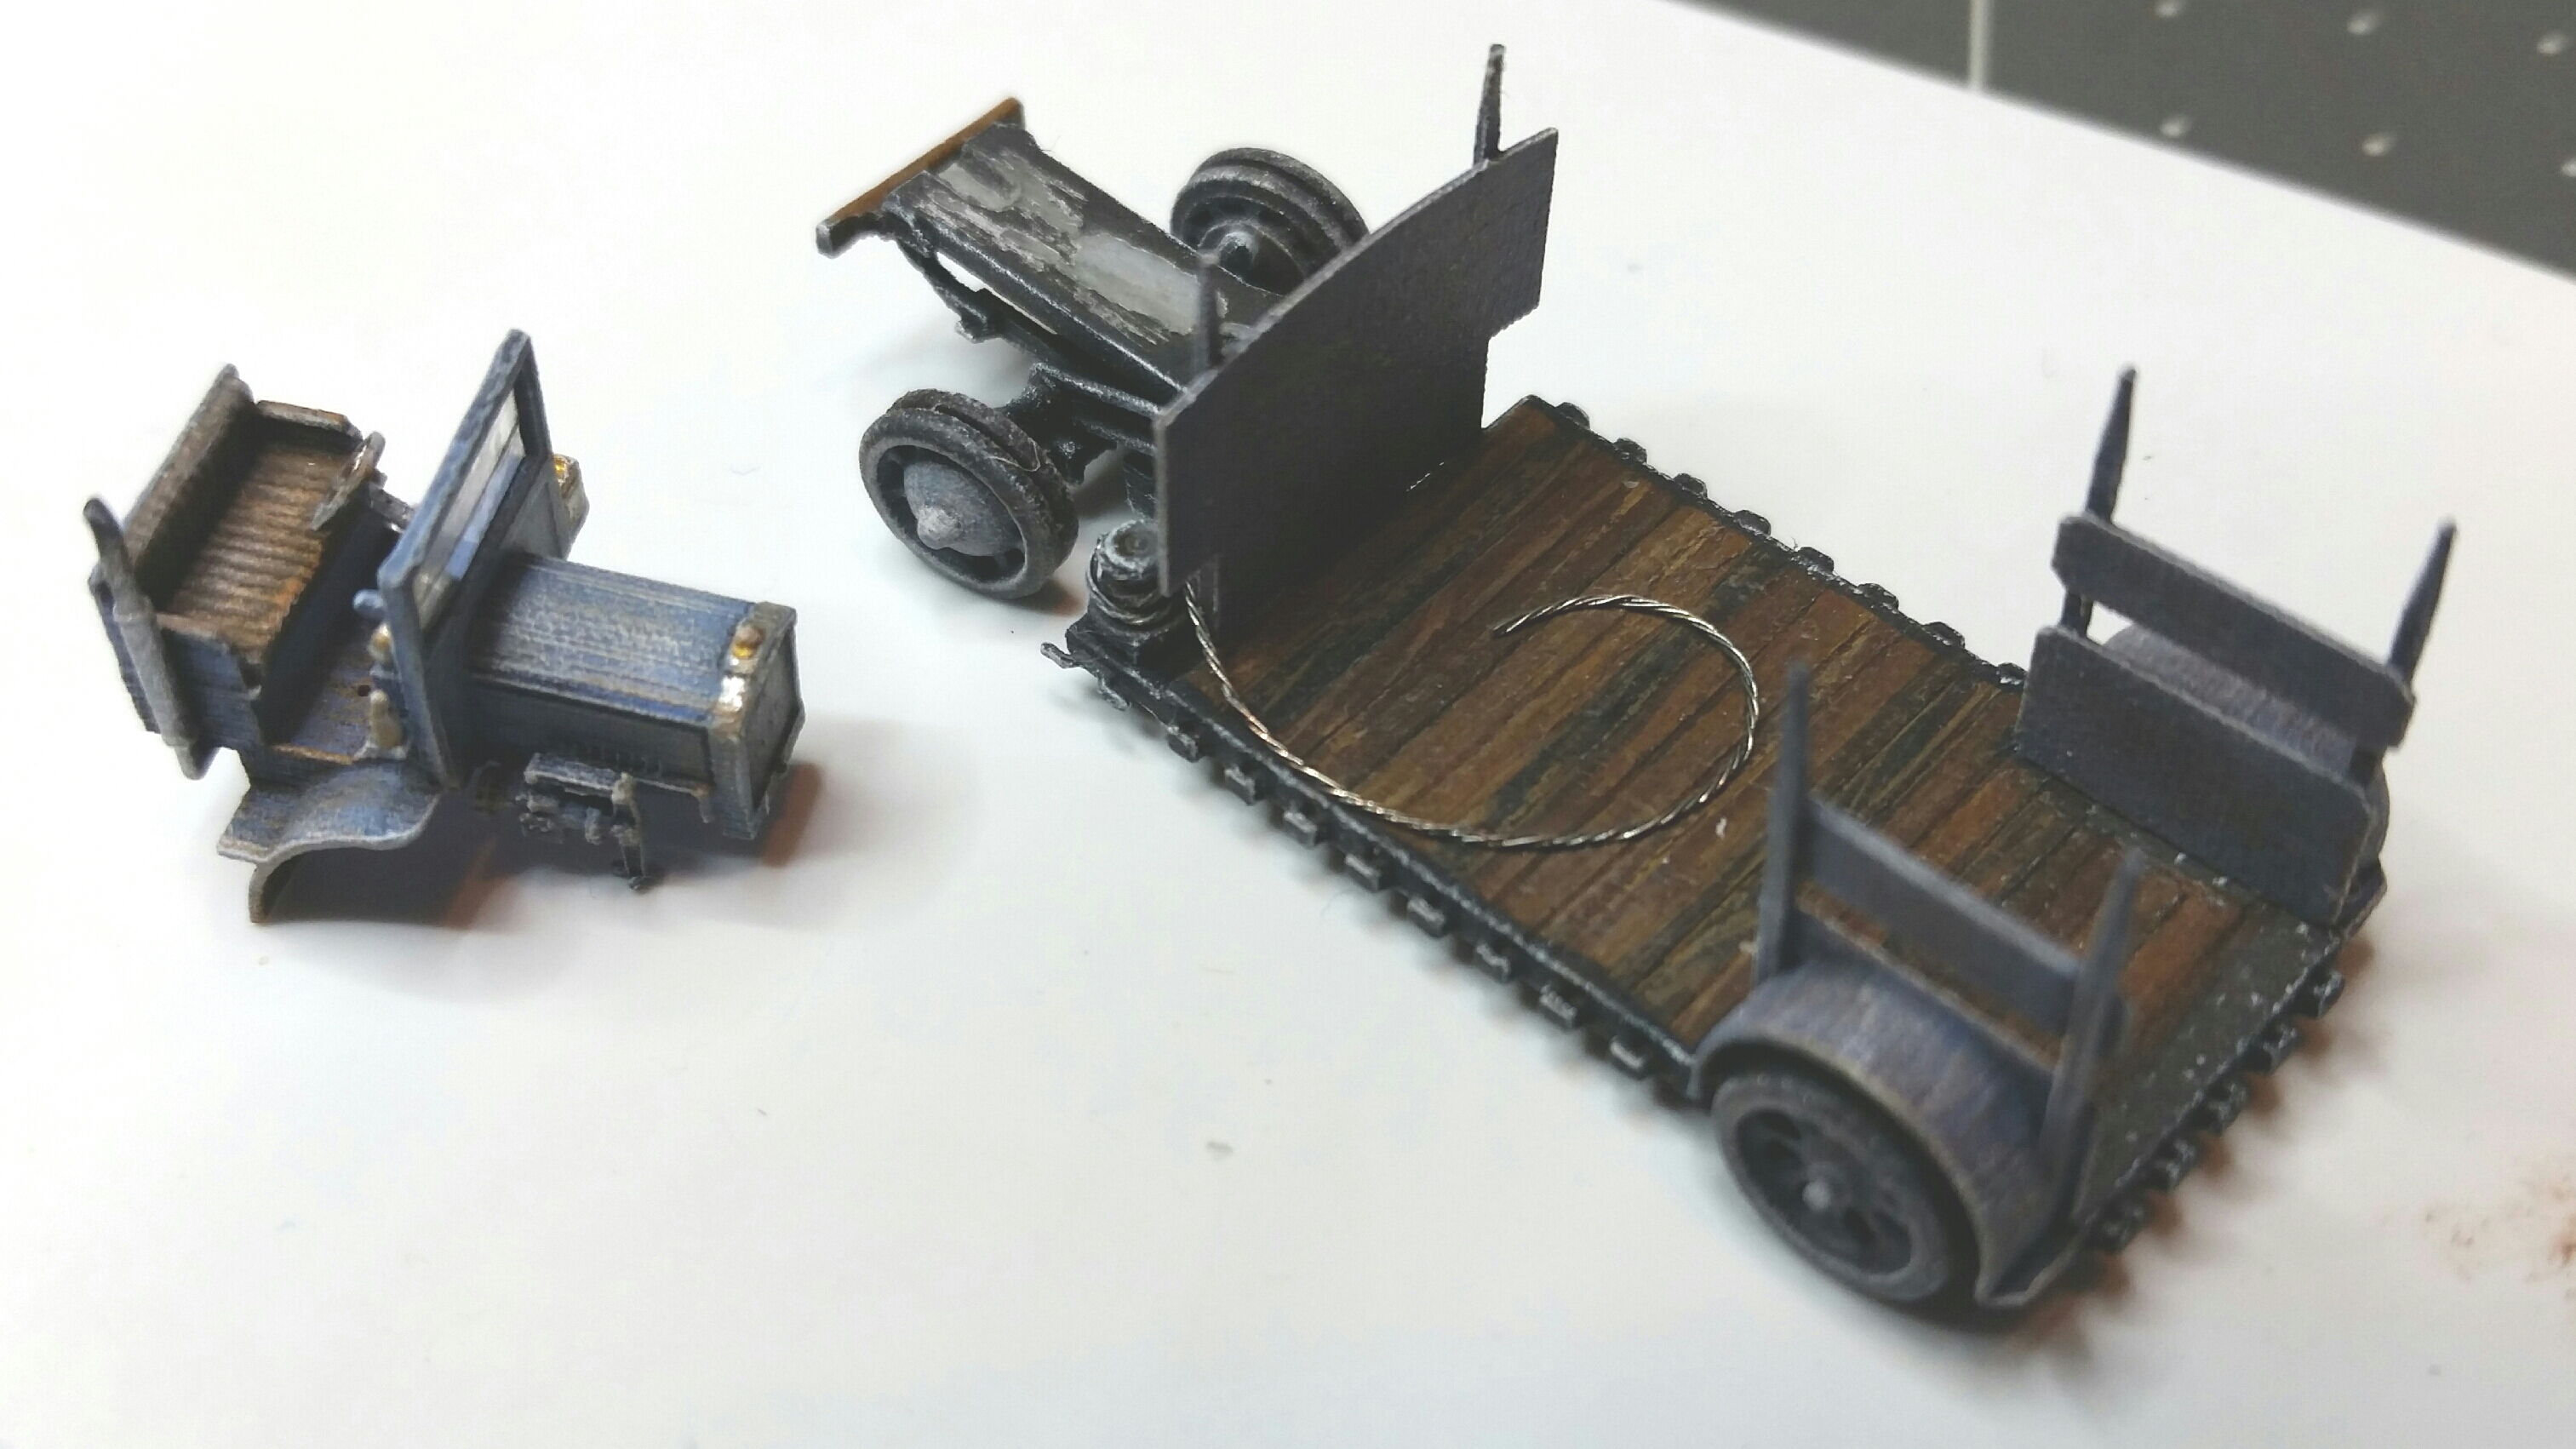
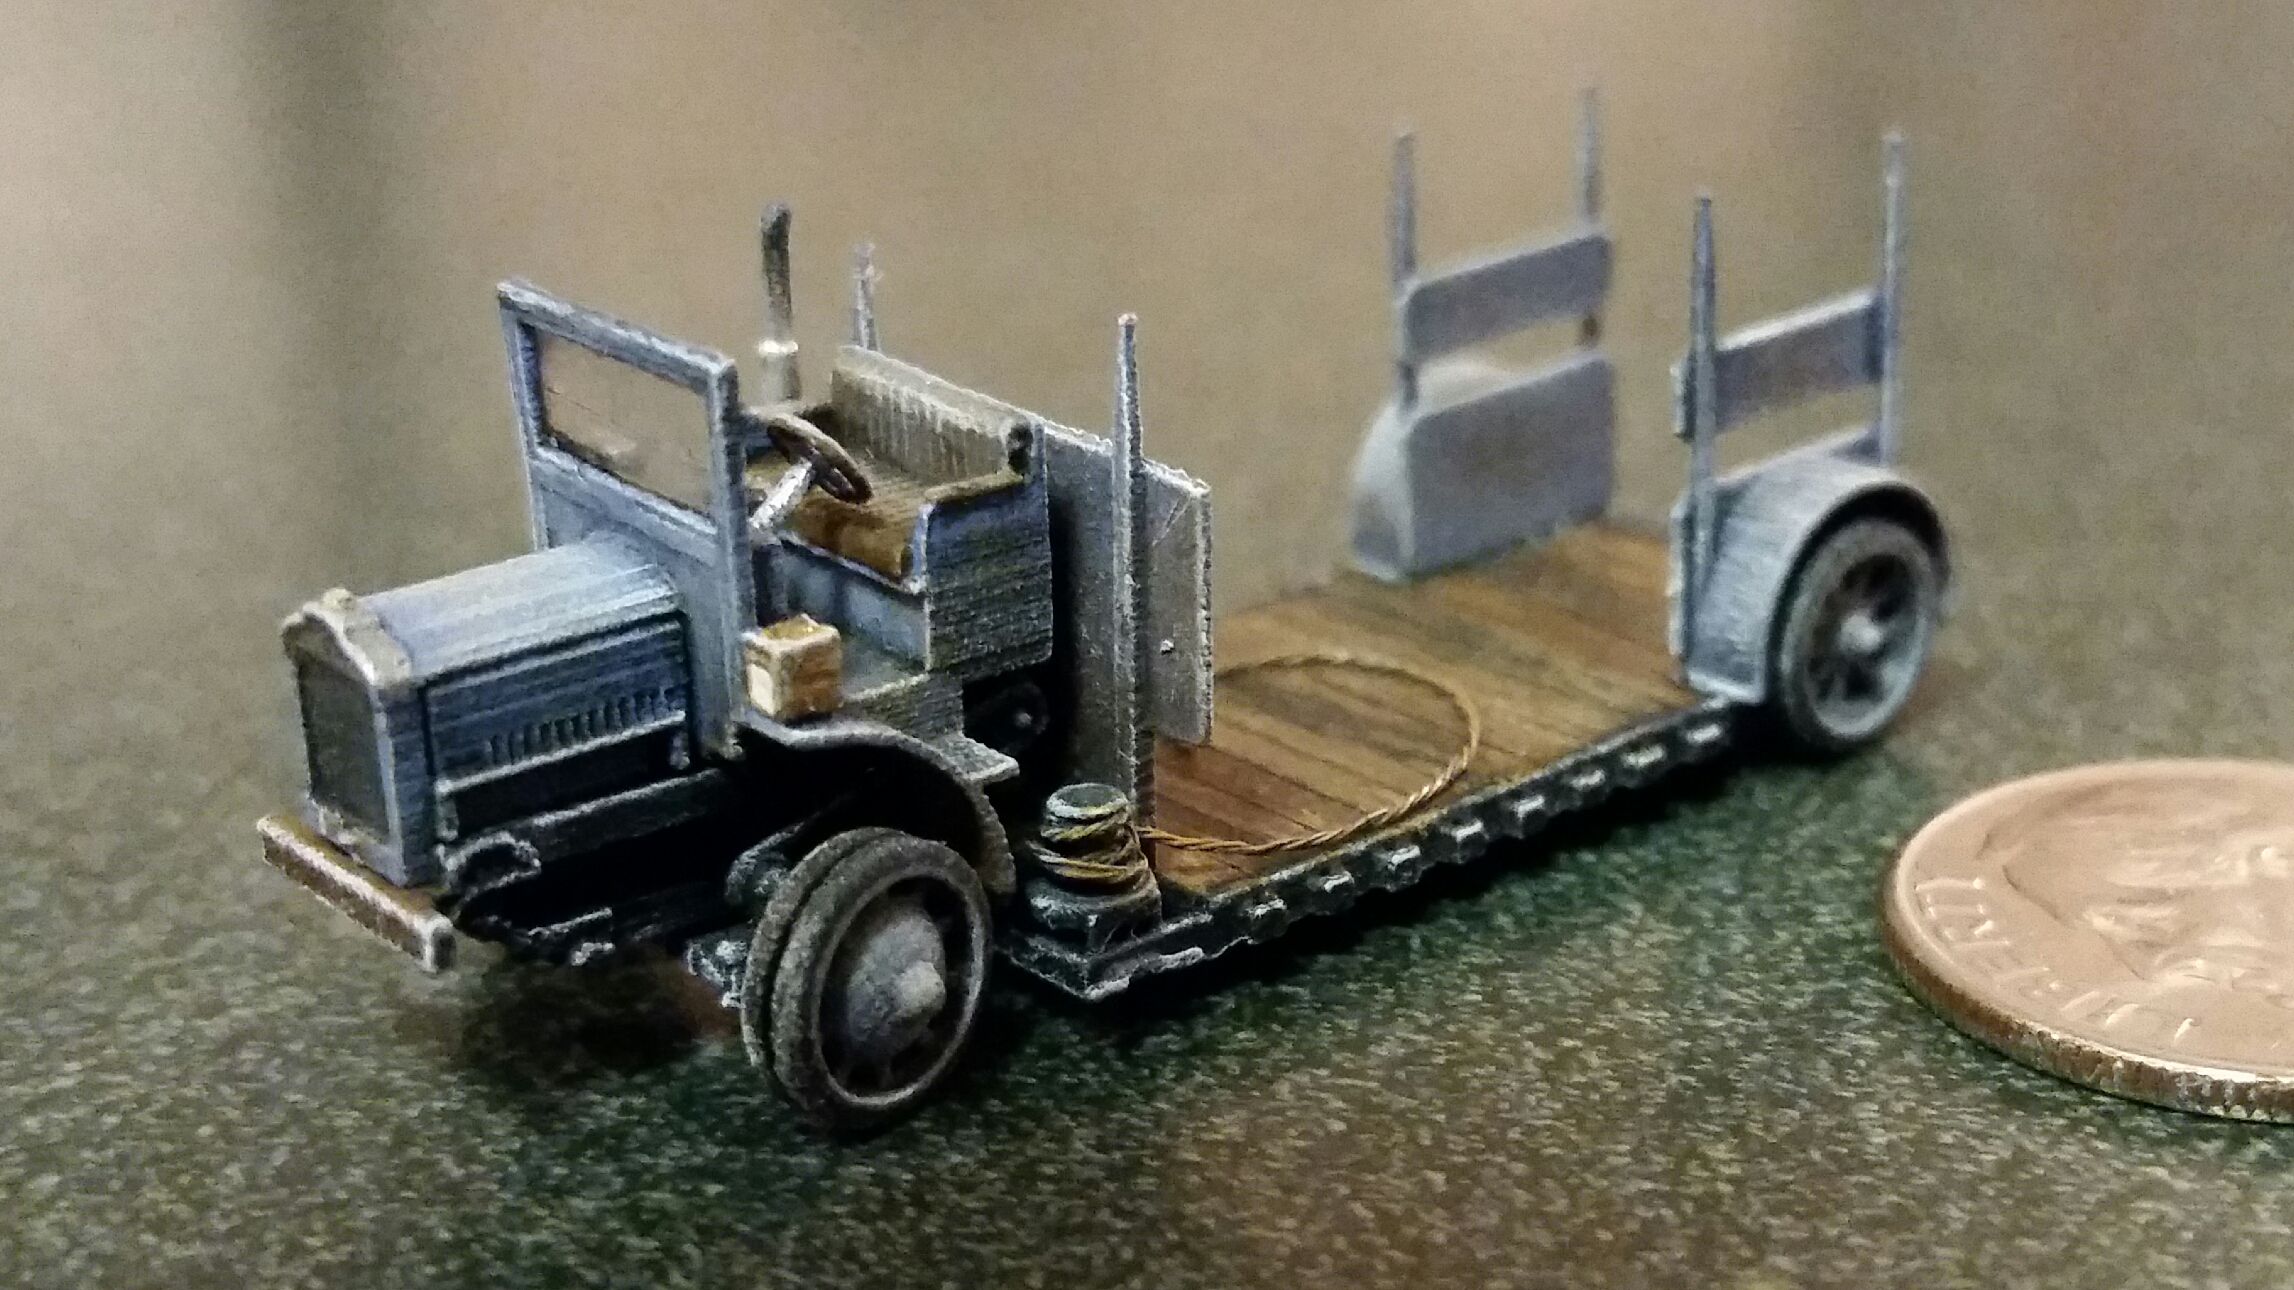
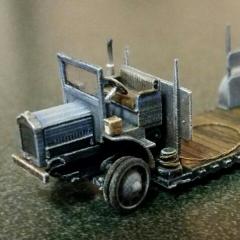
I only have these photos of the final assembly stage, basically everything attached to the main frame except the cab. I use super glue at all the joints to hold the truck together. My preference is to dry fit each part and then apply super glue to the joint to finish it off. I'm sure lots of folks here use the same applicator that I do - a small sewing needle that has exactly half of the eye cut or ground away. This leaves a miniature two pronged fork that holds a very precise and repeatable amount of super glue. I stick the pointy end of the needle into a small scrap of wood to serve as a handle. And here are a few final shots, at least until I get my photo booth set up again for "under glass" pictures. Mike
-
1/160 1920 Macdonald 5 ton low bed truck
mecklm replied to mecklm's topic in WIP: Model Trucks: Big Rigs and Heavy Equipment
The plans I worked from indicated three separate shift levers. I wasn't able to discern if one of them was actually a parking brake so I just made all three the same. I used 0.006" brass rod with a tiny ball of white glue on ends to simulate the knobs. Here they are stuck in a bit of silly putty to facilitate painting. I just used plain silver for the rods and dark gray for the knobs. There are three holes formed in the cab floor that measure roughly 0.010" in diameter. Next, and last, is the final assembly of all the parts. I should also mention that I didn't acknowledge the baking soda blasting in my post above. The blasting comes after the 24hr soak and prior to the application of the gray primer. Mike
-
1/160 1920 Macdonald 5 ton low bed truck
mecklm replied to mecklm's topic in WIP: Model Trucks: Big Rigs and Heavy Equipment
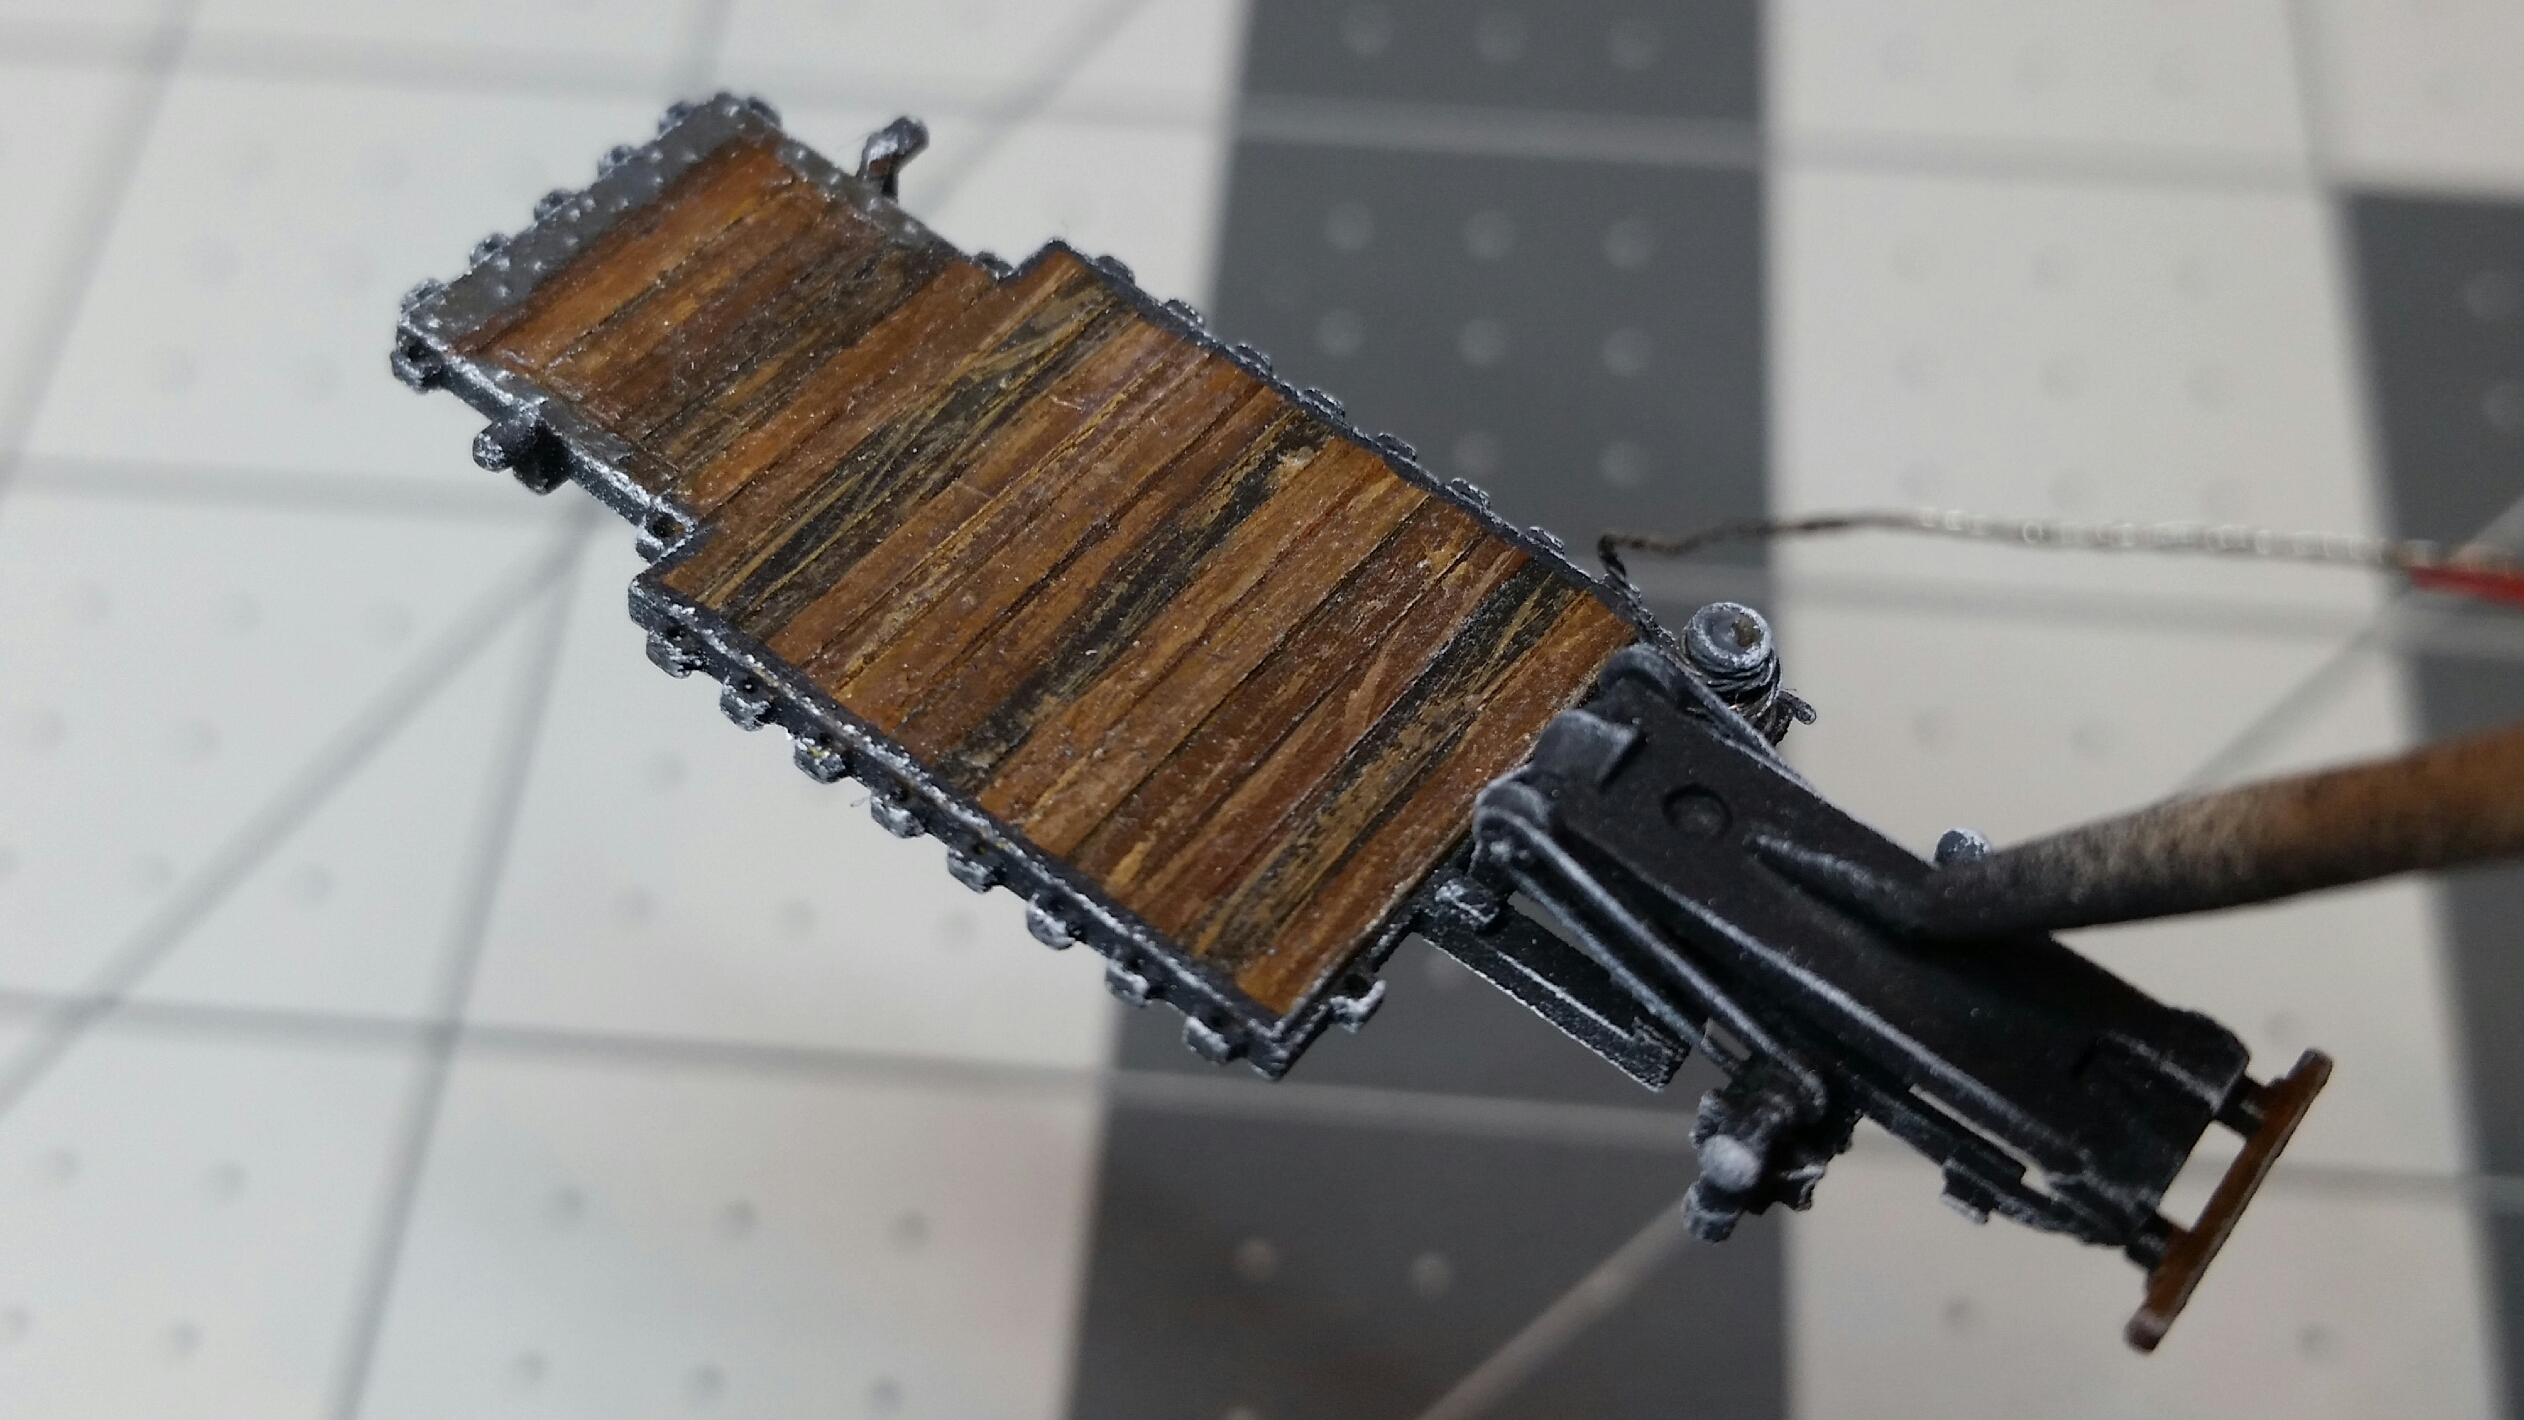
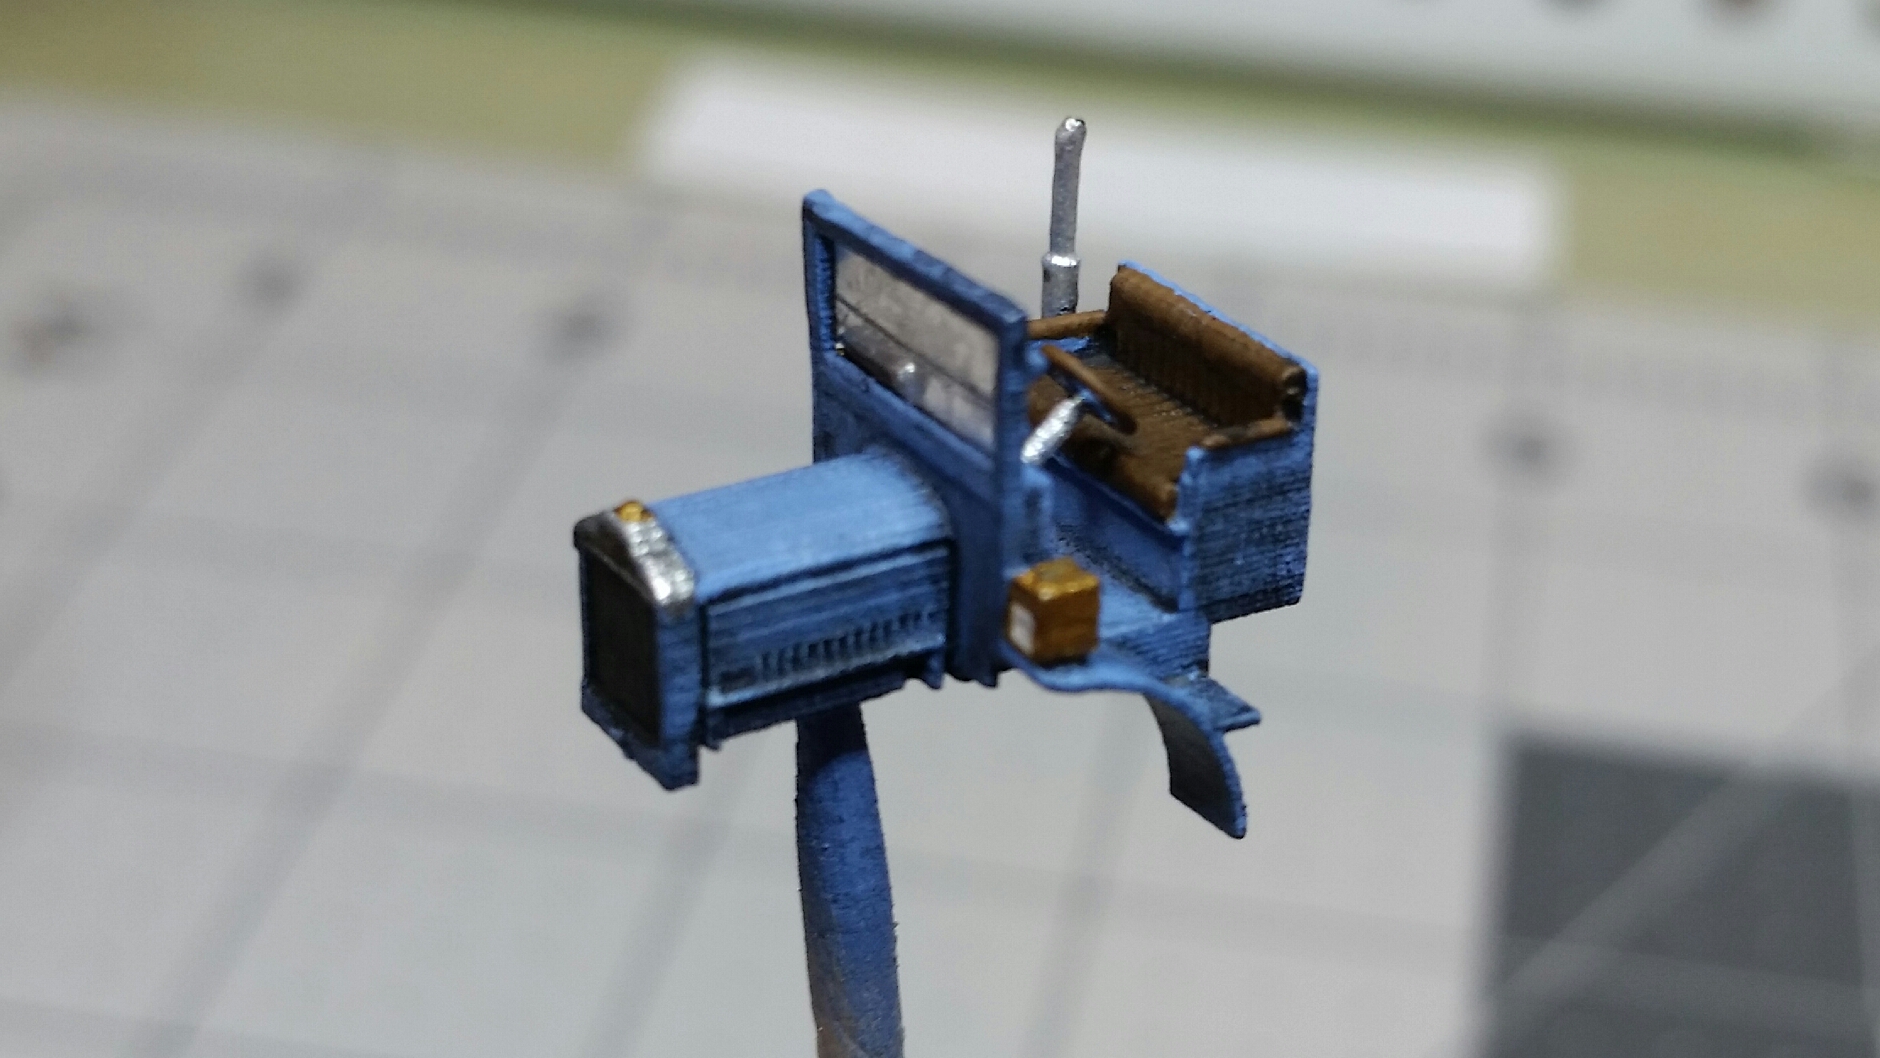
Here is the first step in creating a natural wood finish on the top side of the main frame timbers. I use the Vallejo wood and leather paint set which includes easy to follow instructions to create a pretty realistic finish. Unfortunately I only have photos of the first step of the painting process and ultimately the final finish. Here's a close up of the winch area of the main frame giving an indication of the coarse nature of the wood painting techniques. The winch and cable have been detailed with plain silver paint and a black wash. The underside of the main frame timbers got a sepia wash, which gives a nice indication of greasy, oily stains. To finish off the main frame, I brush painted the outer edges dark gray and picked out some steel reinforcing strips near the rear of the frame with a silver paint darkened with some black. The front bumper got the simulated wood finish also and the overall frame was dry brushed with pure white, again with the focus being on the edges and corners. Next up is a minor detail followed by the final assembly. Mike
-
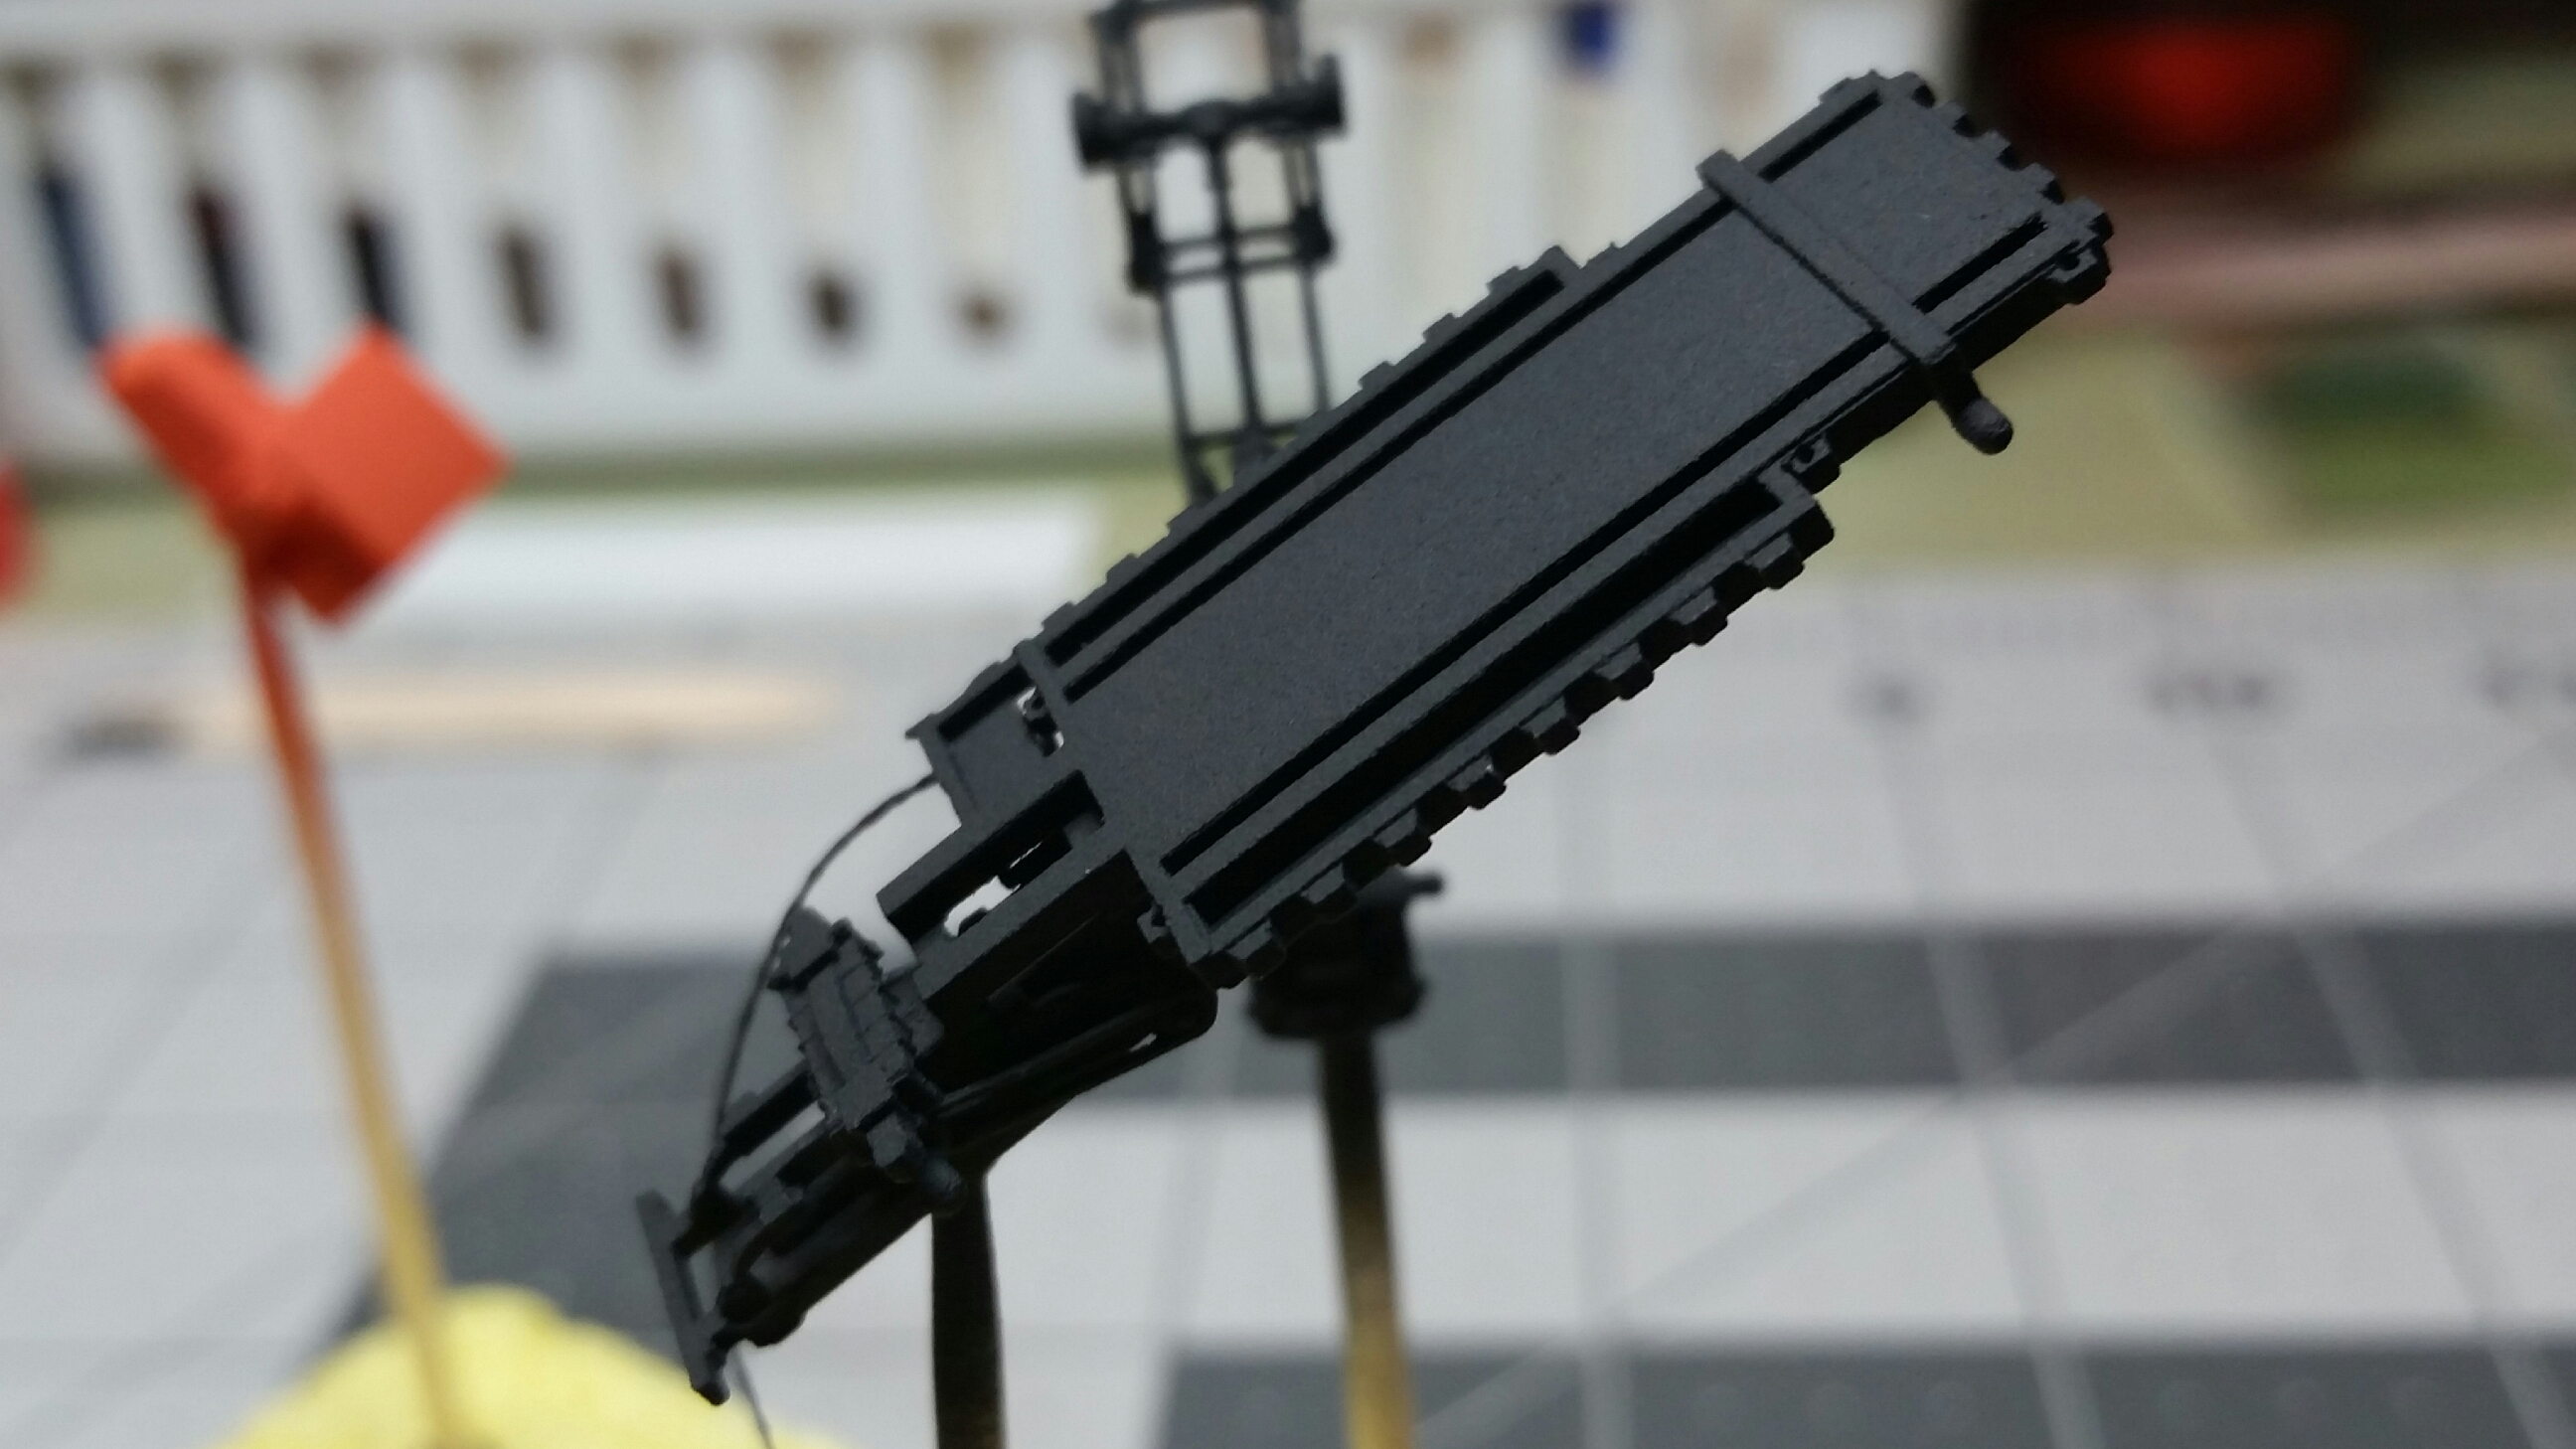
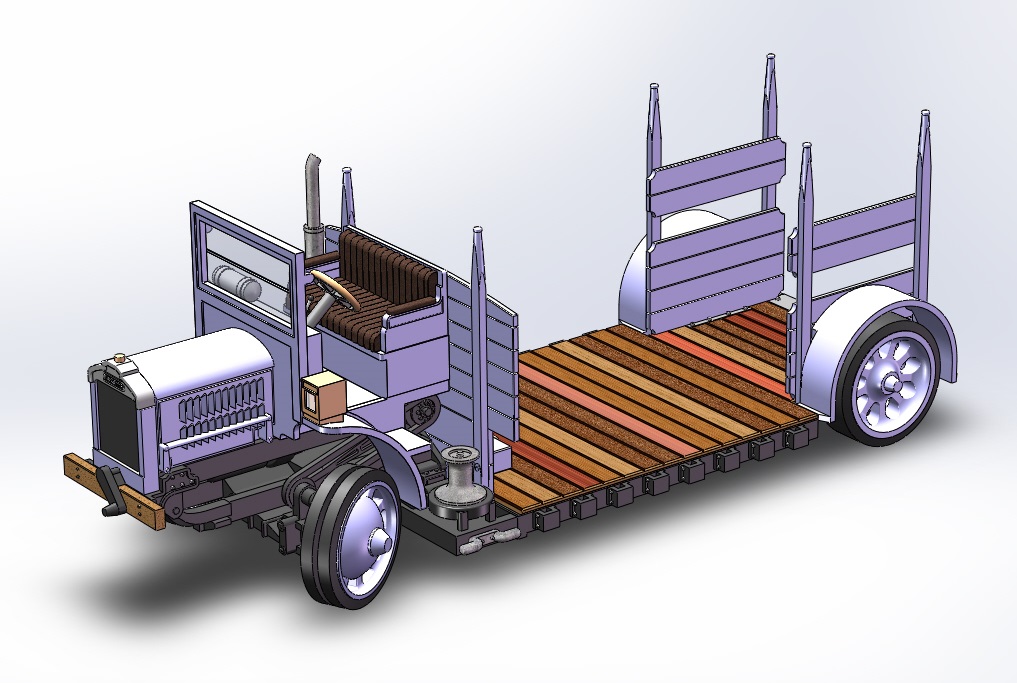
Here are images of the CAD file for the "reefer" body. It's easier to see the intended details this way, at least until I get the real parts painted and detailed. Mike
-
1/160 1920 Macdonald 5 ton low bed truck
mecklm replied to mecklm's topic in WIP: Model Trucks: Big Rigs and Heavy Equipment
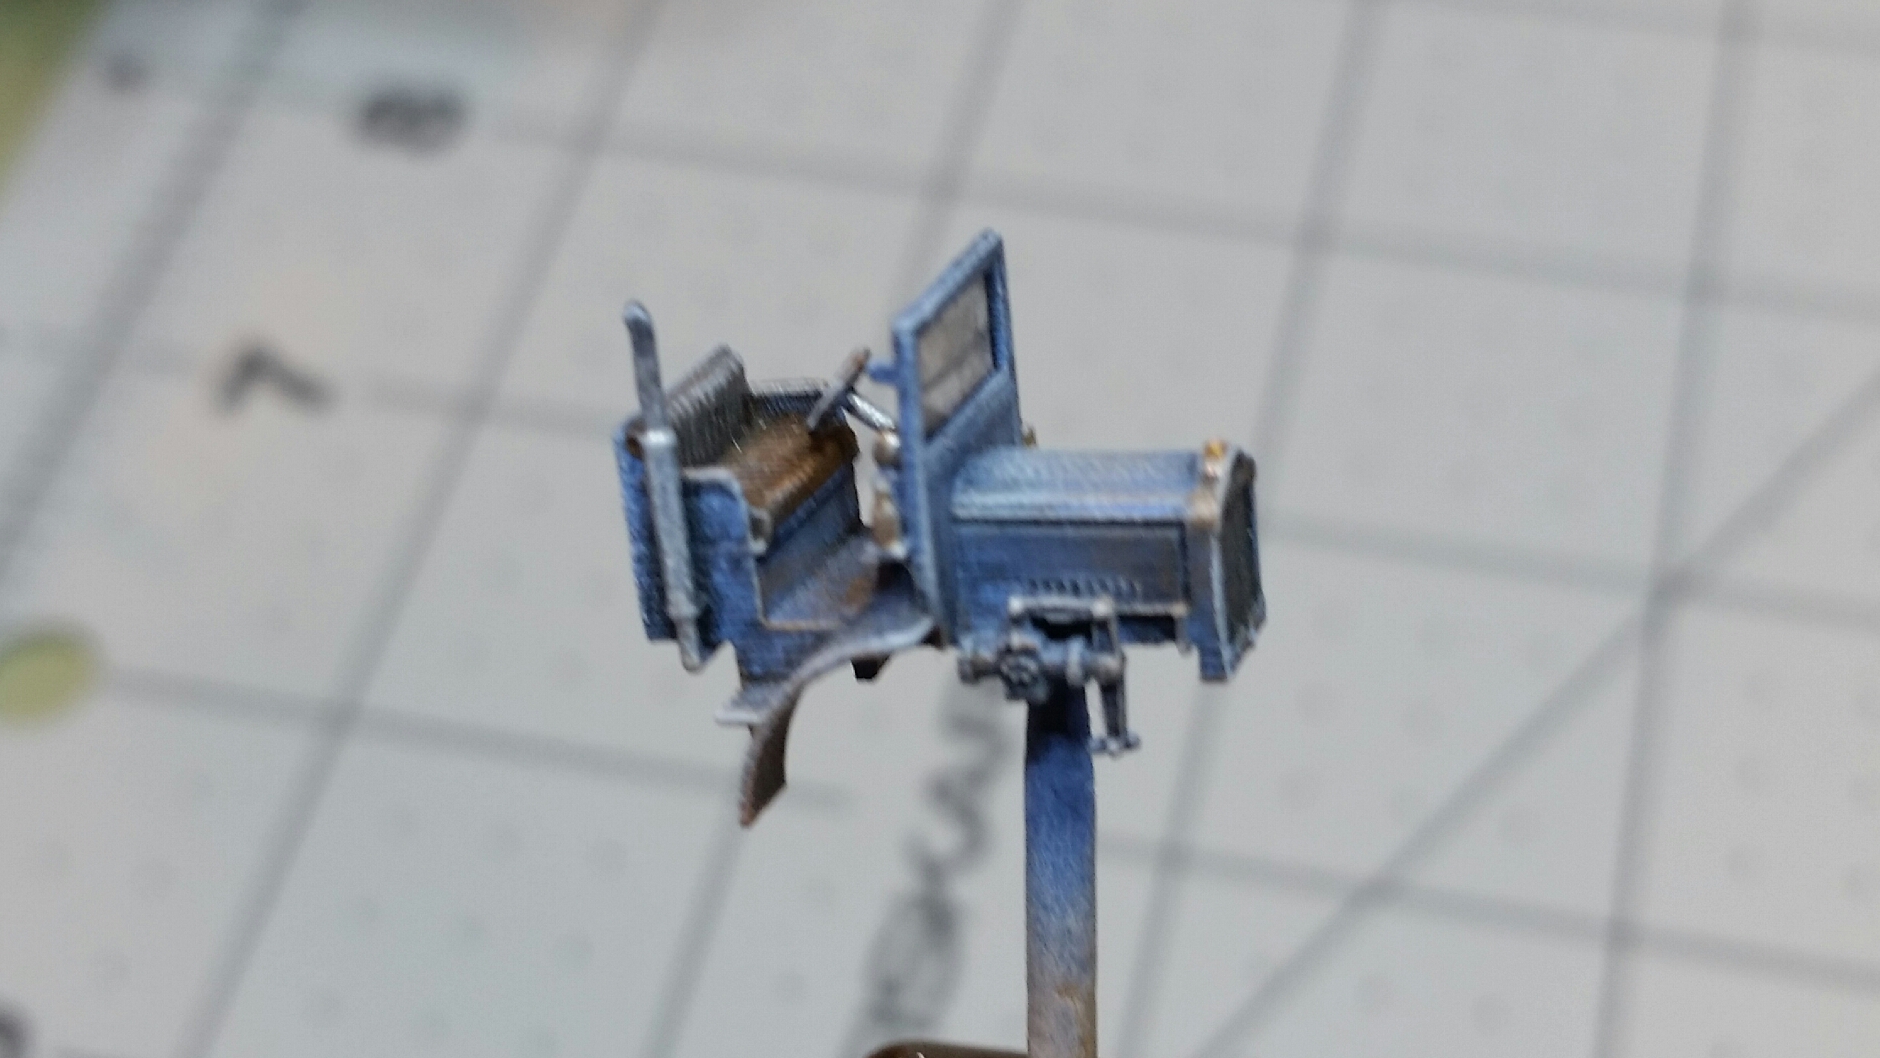
Here two different washes were applied, since I wanted to portray a heavily used but well maintained truck. The first was an overall wash of a medium/light gray. The second was a black wash focused on the cracks, crevices and corners. I did include the windshield with the gray wash. The washes were followed by two dry brushing sessions, the first hitting the main panels with a lightened shade of the base blue color. The second session involved pure white applied to the high points and all outside corners. A light dry brushing of flat earth added a bit of a dirty tone to the truck. These techniques were then applied to the rest of the blue parts. Next installment I'll detail the main frame, including putting a wood finish on the top side of the planks. Mike
-
Mark, I appreciate the time you took to explain your clearing process. I think I understand it now and it has to do with the different heights (or layer thicknesses) since some coats are side by side, so to speak, and others are stacked one on top of the other. You therefore end up with an uneven surface which this intra-clear attempts to bring to one even level, by way of paint coats and sanding. Way beyond my pay grade but it's nice to learn about these details as you never know when they might come in useful. Thanks again, Mike
-
1/160 1920 Macdonald 5 ton low bed truck
mecklm replied to mecklm's topic in WIP: Model Trucks: Big Rigs and Heavy Equipment
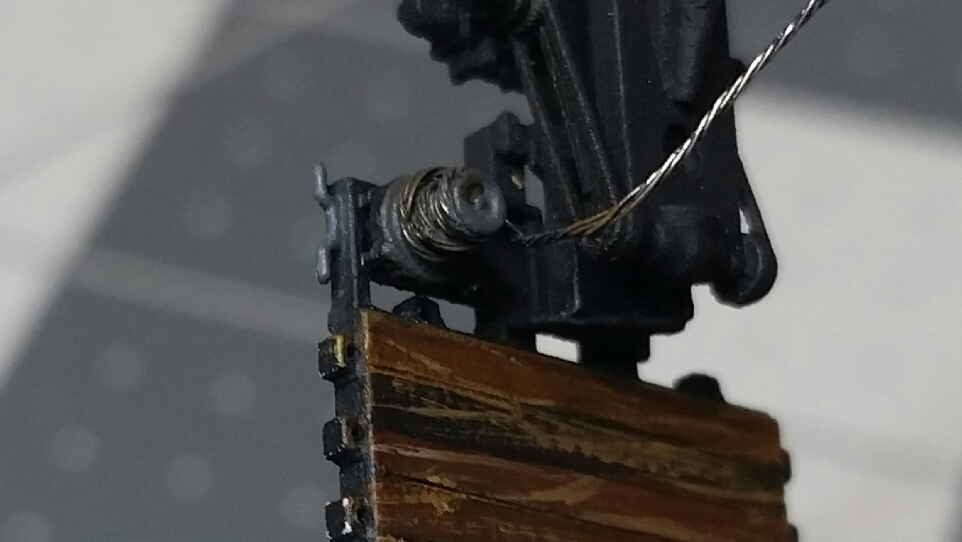
So, clean up was the same as the International, starting with a 24hr soak in diluted Dawn dish detergent. This was followed with gray primer. Next, I sprayed everything but the main frame in what Vallejo calls Azure - just a nice light blue in my semi-color blind eye. This happened to be the same day my Molotow pen showed up so I chromed the radiator cap, steering wheel spokes and the acetylene tank on top of the dashboard. Here the grill is detailed with dark gray. I also sprayed the main frame the same shade of gray. The wire dangling from the main frame is three strands of wire that I pulled from some super small gauge wire I have laying around. I drilled a hole in the side of the winch drum, inserted these three strands, twisted them and then wrapped a few turns around the drum just to add a little character to that area of the truck. Here the detail painting of the cab is complete. Next installment covers the washes and dry brushing. Mike
-
1/160 1920 Macdonald 5 ton low bed truck
mecklm replied to mecklm's topic in WIP: Model Trucks: Big Rigs and Heavy Equipment
Yes, same truck. I came across another scratch built one in white. I think that one was 1:12 or 1:16 scale. I'll have more pics up soon. I did not, however, model all of the individual stakes, just so you know. Just doing the two behind the cab and the four that hold the rear fenders was enough. Mike -
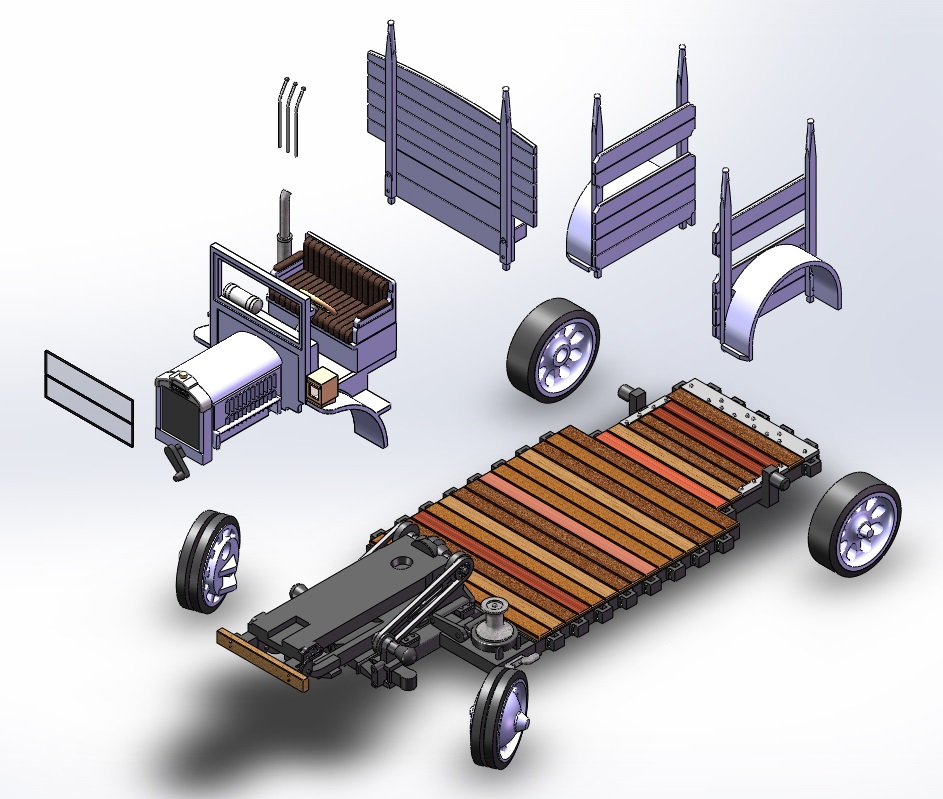
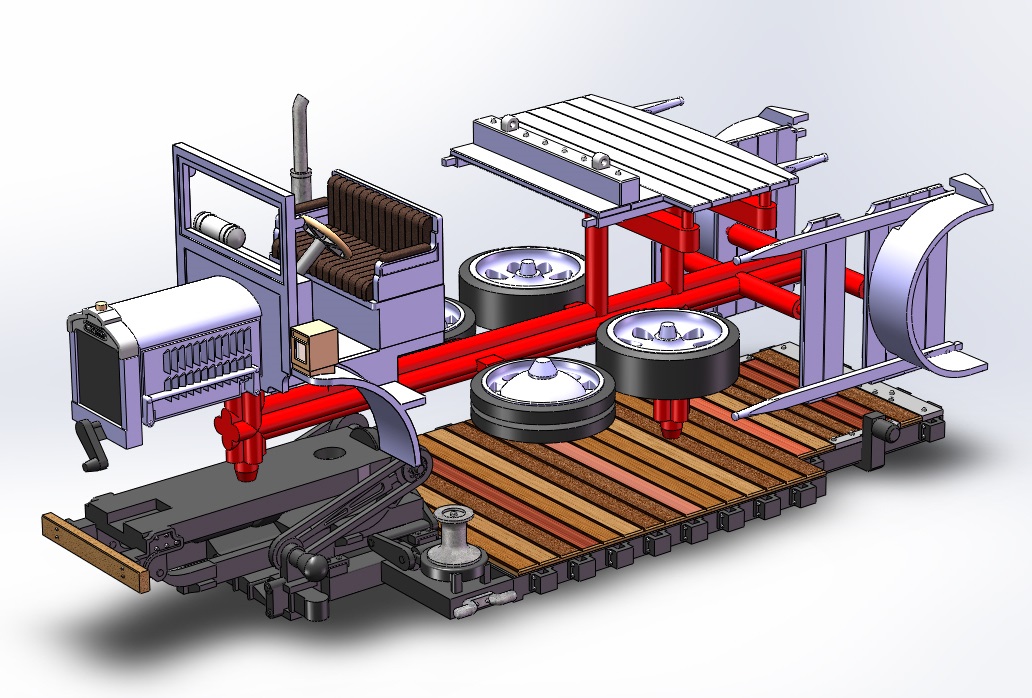
Here is truck #2 in my project of creating 1910's - 1930's vintage trucks in 1/160 (N scale). There is a distinct lack of era correct trucks for those early years. This truck, the 1920 Macdonald low bed, ranks right up there as one of my favorite trucks of all time. It is a purpose built vehicle designed to carry heavy loads and provide an extremely low bed height. The way this was accomplished was by eliminating the drive train to the rear wheels and instead, powering the front wheels. As such, the main frame consists of heavy timbers laid side by side that ride mere inches off the ground. There is a complete lack of rear suspension, replaced with stub axles on short timber uprights to fasten the wheels. As simple as the rear is, that's how complex the front is, which gives this truck the character I love. Two of the main timbers extend forward under the cab and serve as the mount for a secondary frame that supports the engine/cab unit. This secondary frame is suspended from quarter elliptic leaf springs, affording the driver at least some sort of suspension. The front of the cab is fairly conventional with radiator followed by engine then firewall and driver's cab. Where it deviates from the norm is the "rear" axle, which is the type used on chain drive trucks but, in this case, is located right under the driver's seat. The cool part is the chains run forward to the front wheels. This is accomplished by using a planetary hub at the wheel. Dead center is the normal kingpin for steering but since the hub is planetary, the stub shaft of the front sprocket is mounted eccentrically, directly above the kingpin. A u-joint in line with the kingpin allows the front wheels to steer without introducing any weird motion to the chain. From what I understand, these trucks saw duty on west coast harbors, no doubt handling the heaviest loads coming off the ships. In order to create my model in 1/160 scale, I once again designed a 3d CAD file in Solidworks. Given the small size, many features had to be made oversized in order to just barely exceed the minimum print capabilities that Shapeways can provide. Here is the finished assembly file, an exploded view showing the part breakdown and the STL configuration where the parts are joined together with a sprue. Nine of the parts are printed with the remainder being the shift levers, parking brake handle and the front window glazing. Next update will present the printed file and the prep work leading up to detail painting. Mike
-
Once again, an outstanding build that I'm really enjoying following. I like to think I've understood your explanations and techniques throughout the build but the following sentence has me completely baffled. For the life of me, I just can't figure out what this "intra-clear" is, where it goes sequence wise and what it serves to accomplish. Can you help a guy out and maybe rephrase it so a mere mortal might understand? Thanks! Mike
-
For crying out loud, send me your address already! I have plenty, can spare at least one and won't miss it a bit.
-
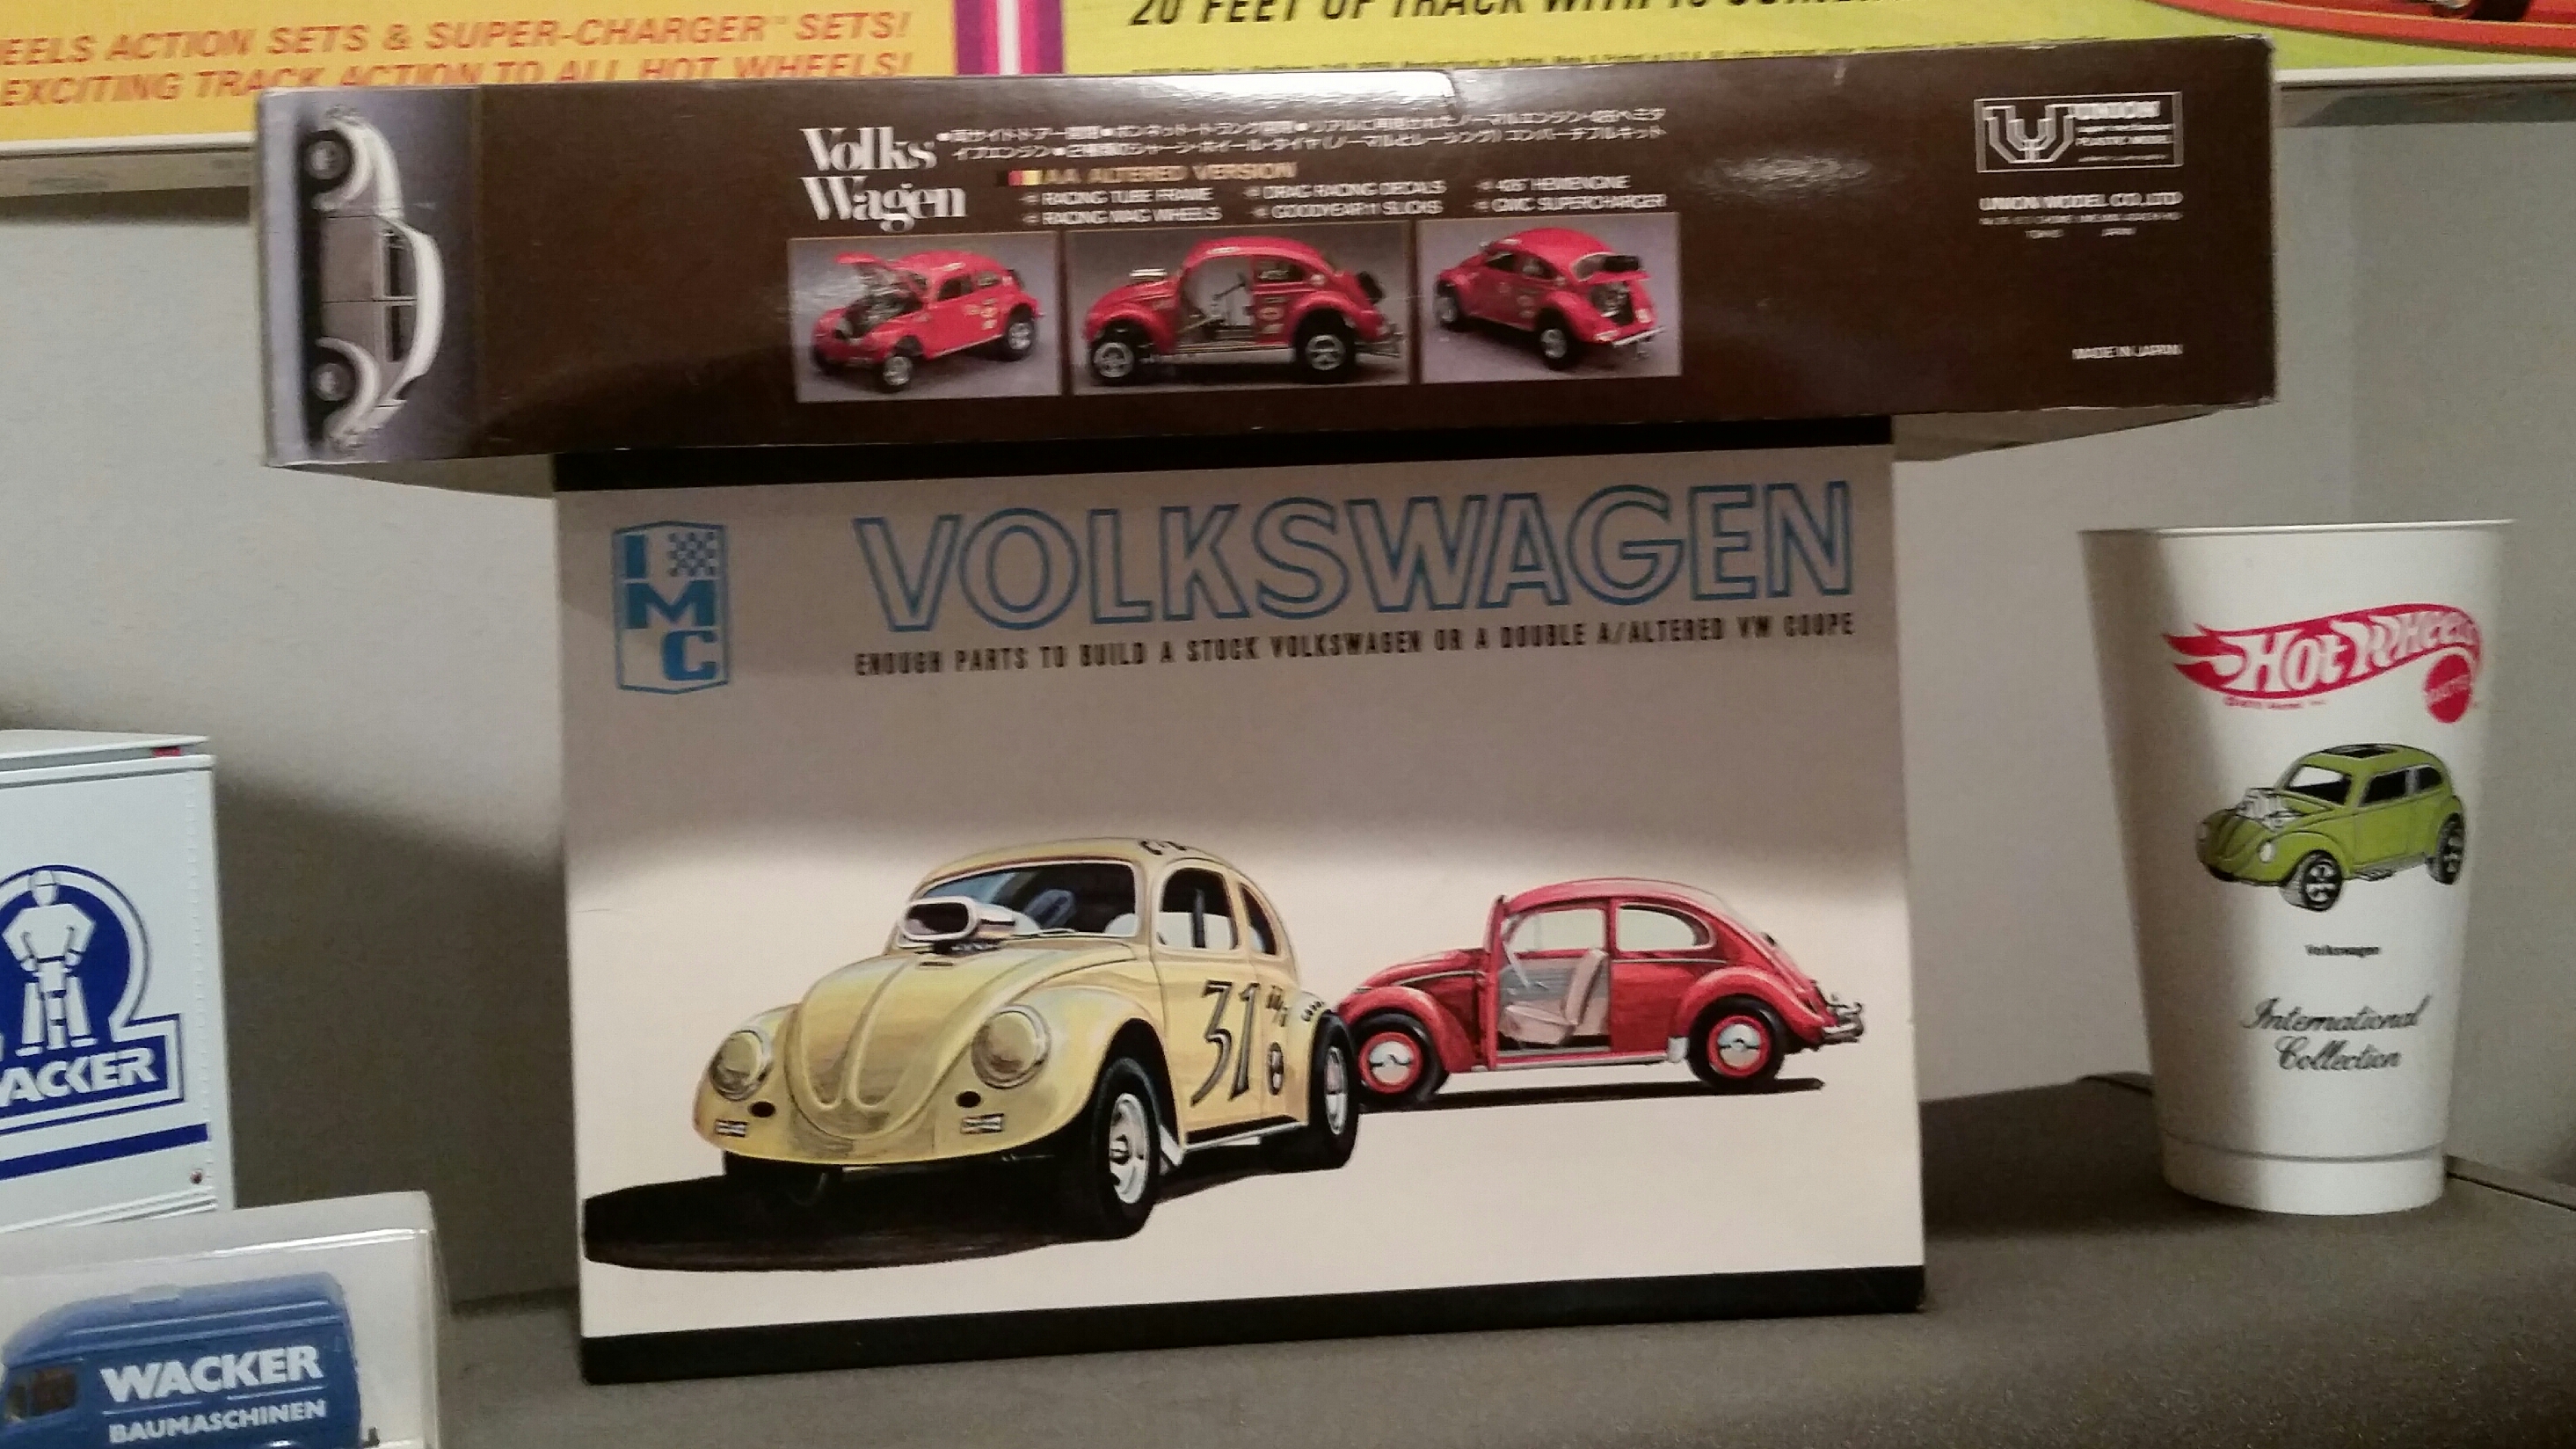
Hey, I have both the IMC and the later Union kits, both unbuilt. If there's any info or pics you need of anything involved with those kits, just let me know and I'll see what I can do. I also have an extensive collection of the VW from Hot Wheels, including some duplicates that are in storage. If you need a clean example of one, just pm me your address and I'll shoot one over to you. Mike
-
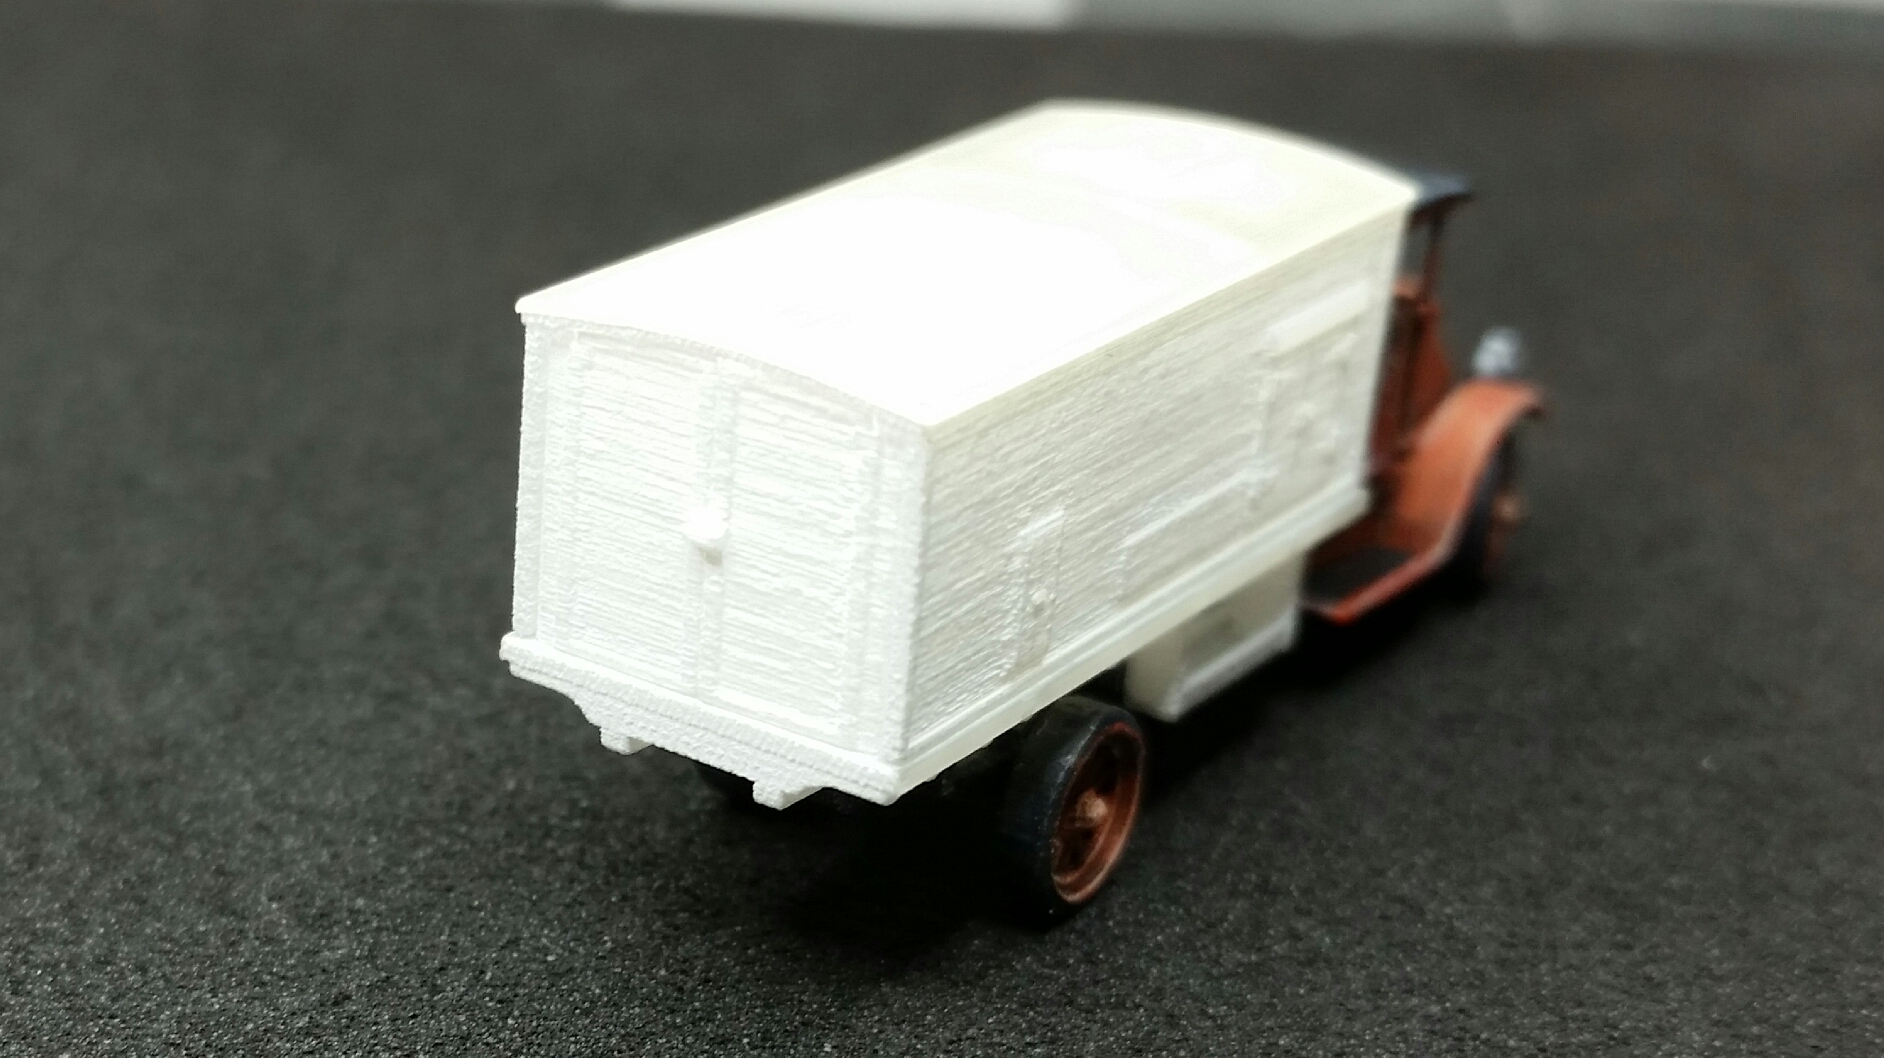
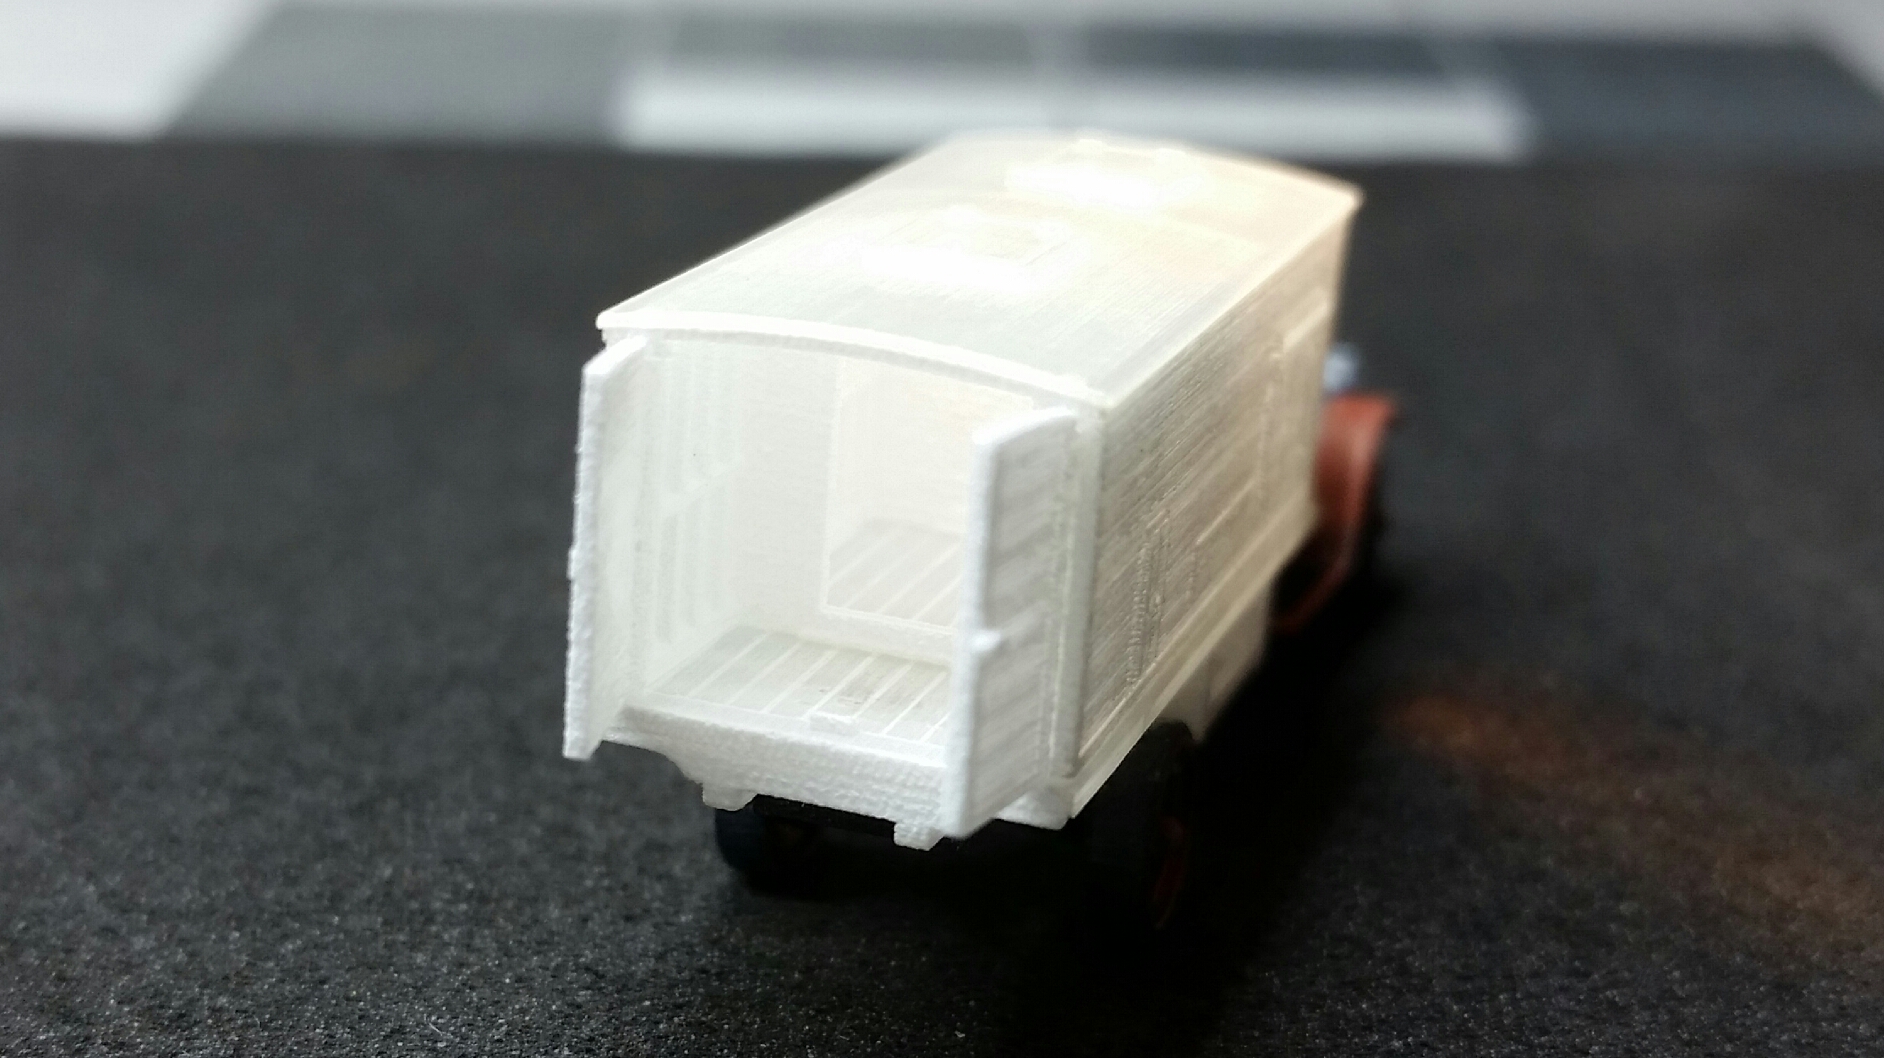
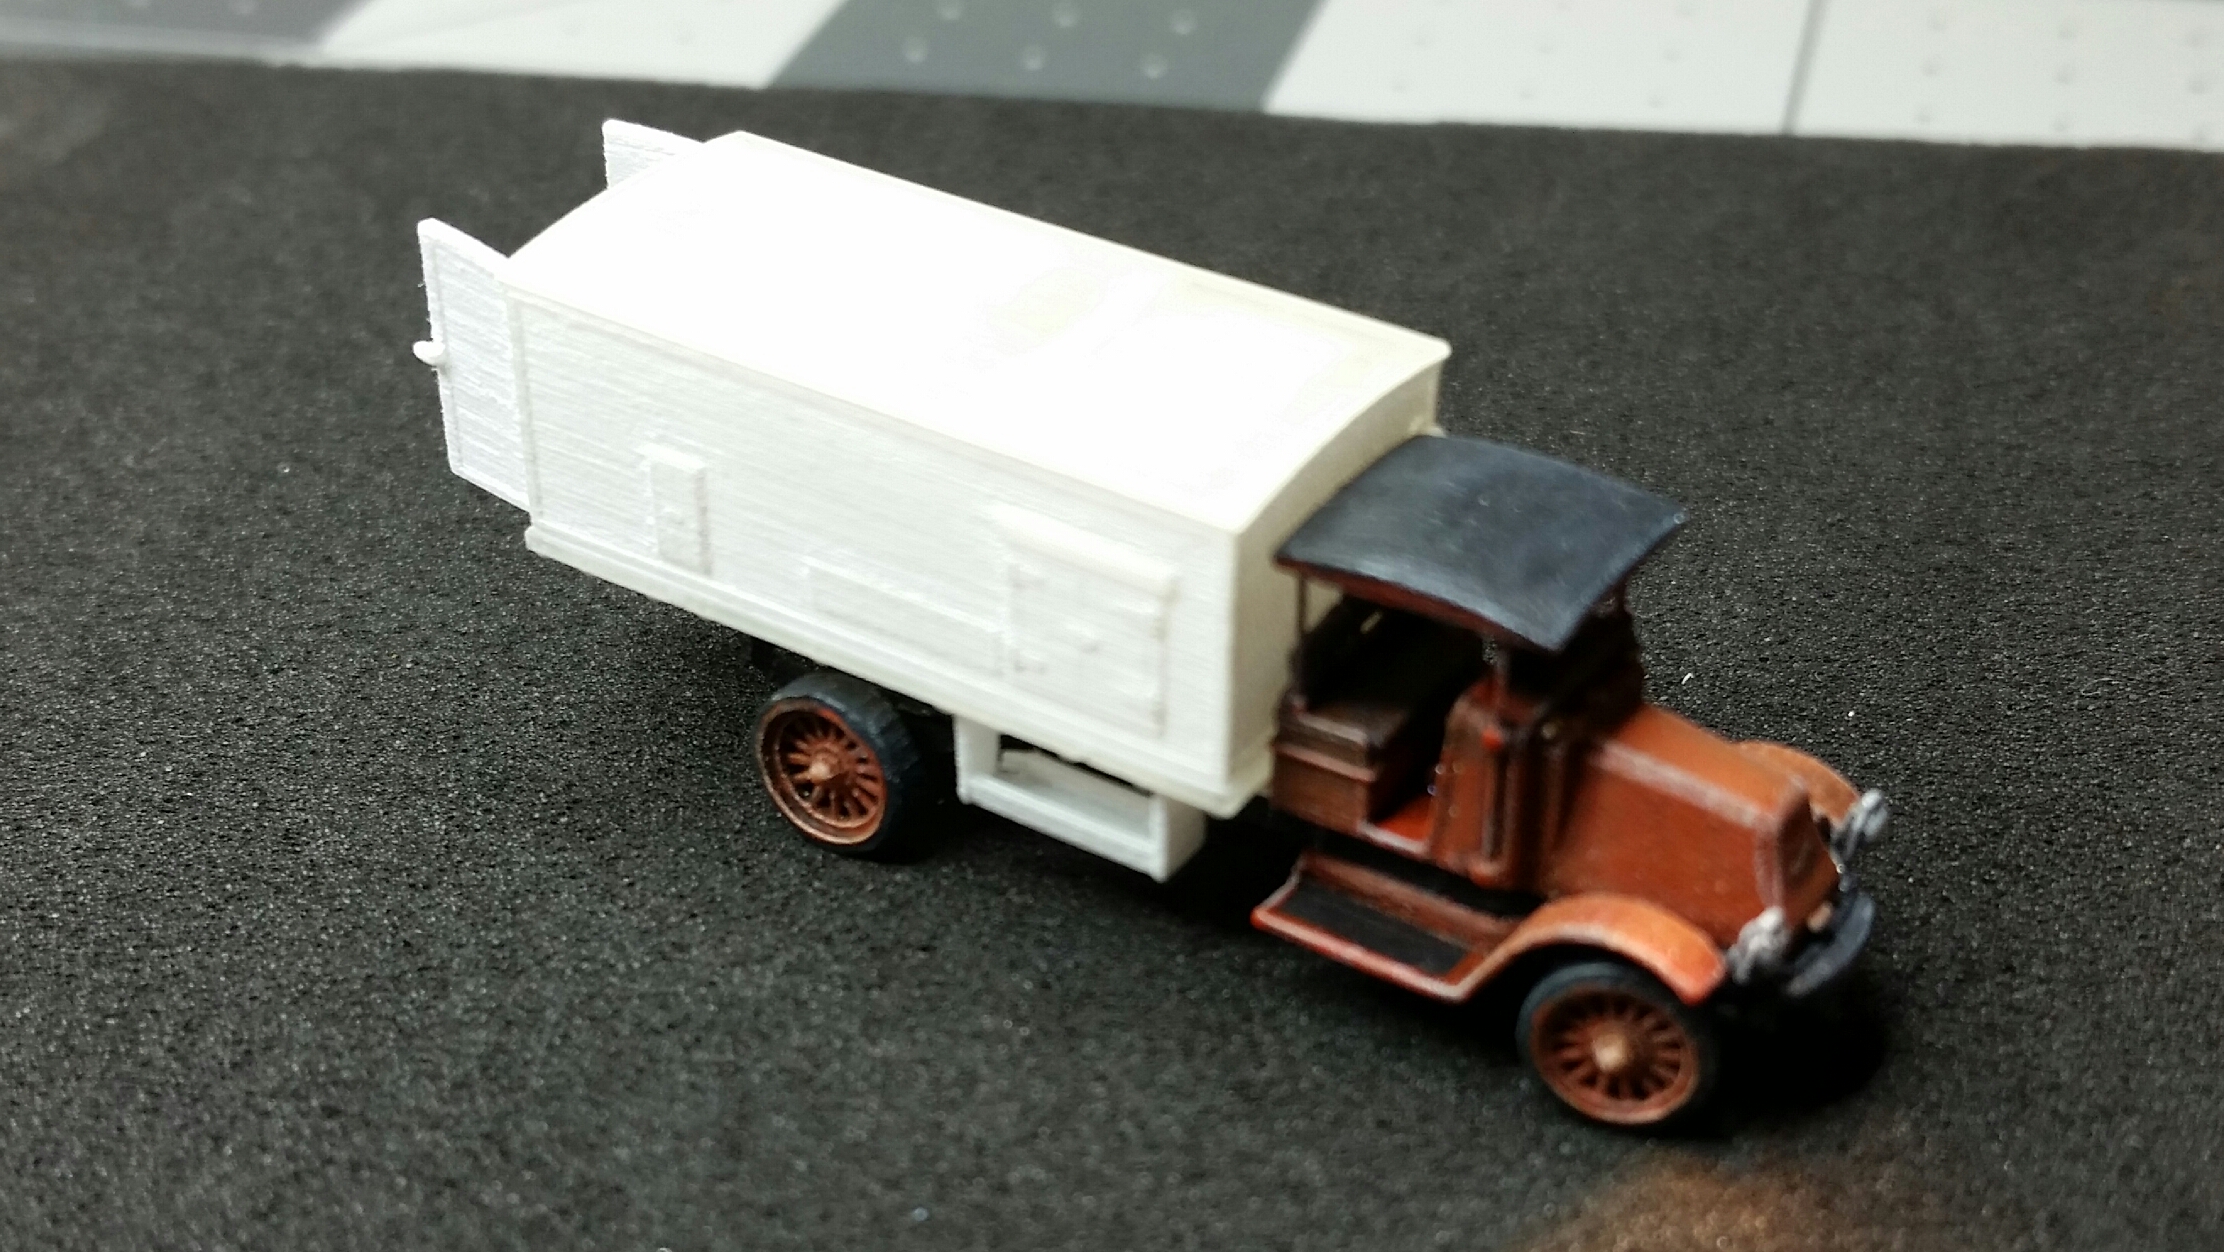
I knew I wasn't going to leave this truck bare and I had some free time this past week so I drew up this refrigerated box based on several photos I downloaded. Back in this era, these truck boxes were cooled the same as the "reefer" railroad cars - using big blocks of ice. Hard to see in these photos but there are hatches on the roof for loading the ice. There's also various side doors for access. Right next to the cab is a drain pipe to get rid of the water as the ice melted. I couldn't get any good images of the inside so I did some generic studs and partition - basically what I imagine the inside could have looked. I already did the 24hr Dawn soak so next up I'll blast with some baking soda, prime and then match the orange paint of the truck. This one will remain rather clean when it's finished. Thanks for looking. Mike
-
Nice build. I especially like how crisp and sharp the chrome window trim is. BMF or Molotow? Mike
-
As a collector of original Custom Volkswagens, I can't wait to see your take on it as part of your "sweet sixteen" builds. Based on how gorgeous this Cougar is, the VW is going to be awesome. Will you be using the IMC VW, since there's speculation that Hot Wheels got their details from that very kit? Thanks for sharing - looking forward to the rest of the builds also. Mike
-
As I'm scrolling down I'm thinking to myself "this car is screaming for some BMF". You must have heard me, lol. Personally, I think it looks great with the addition of chrome around the windows. Now, any thoughts of just a tad more chrome on the front end, perhaps in the way of a chrome spoiler or splitter? Either way this is an excellent marriage of old and new. Love the paint color too. Mike
-
It was a little awkward taking photos during the assembly stage so I went straight from the final painted parts to the completed build. I need to empty out my photo booth so I can get some decent photos of the truck. Once I do that I'll create a new post in "under glass". If anyone really wants to see photos as each part is attached, please let me know and I'll see what I can do on the next build. Thanks for humoring me and checking out this build. Mike
-
Finally, here are all the parts after getting a black wash. You'll note the frame also received a black wash. This is the very reason you never paint black parts with black paint, at least in the model railroading world. Floquil used to have a "black" paint that they referred to as "grimy black" and that was the go-to color to represent black parts. In reality it was a dark gray. But using this lighter shade allows you to add shadows with a black wash, which really adds to the depth of the part. Somehow I failed to snap a photo of the next step which is a dry brush of a lightened mix of the orange paint. Likewise, the frame received a similar treatment with a lightened mix of the dark gray. Lastly, all the parts got the dry brush treatment with pure white. This was concentrated on all edges as a highlight. Only thing left is assemble all the parts together. Mike
-
Here the rest of the detail painting is complete... Next up will be a black wash followed by a lightened mix of orange for the interior portion of the major body panels. Last will be a pure white dry brush along all the panel edges. Once that's wrapped up the final assembly should go really quick. Mike
-
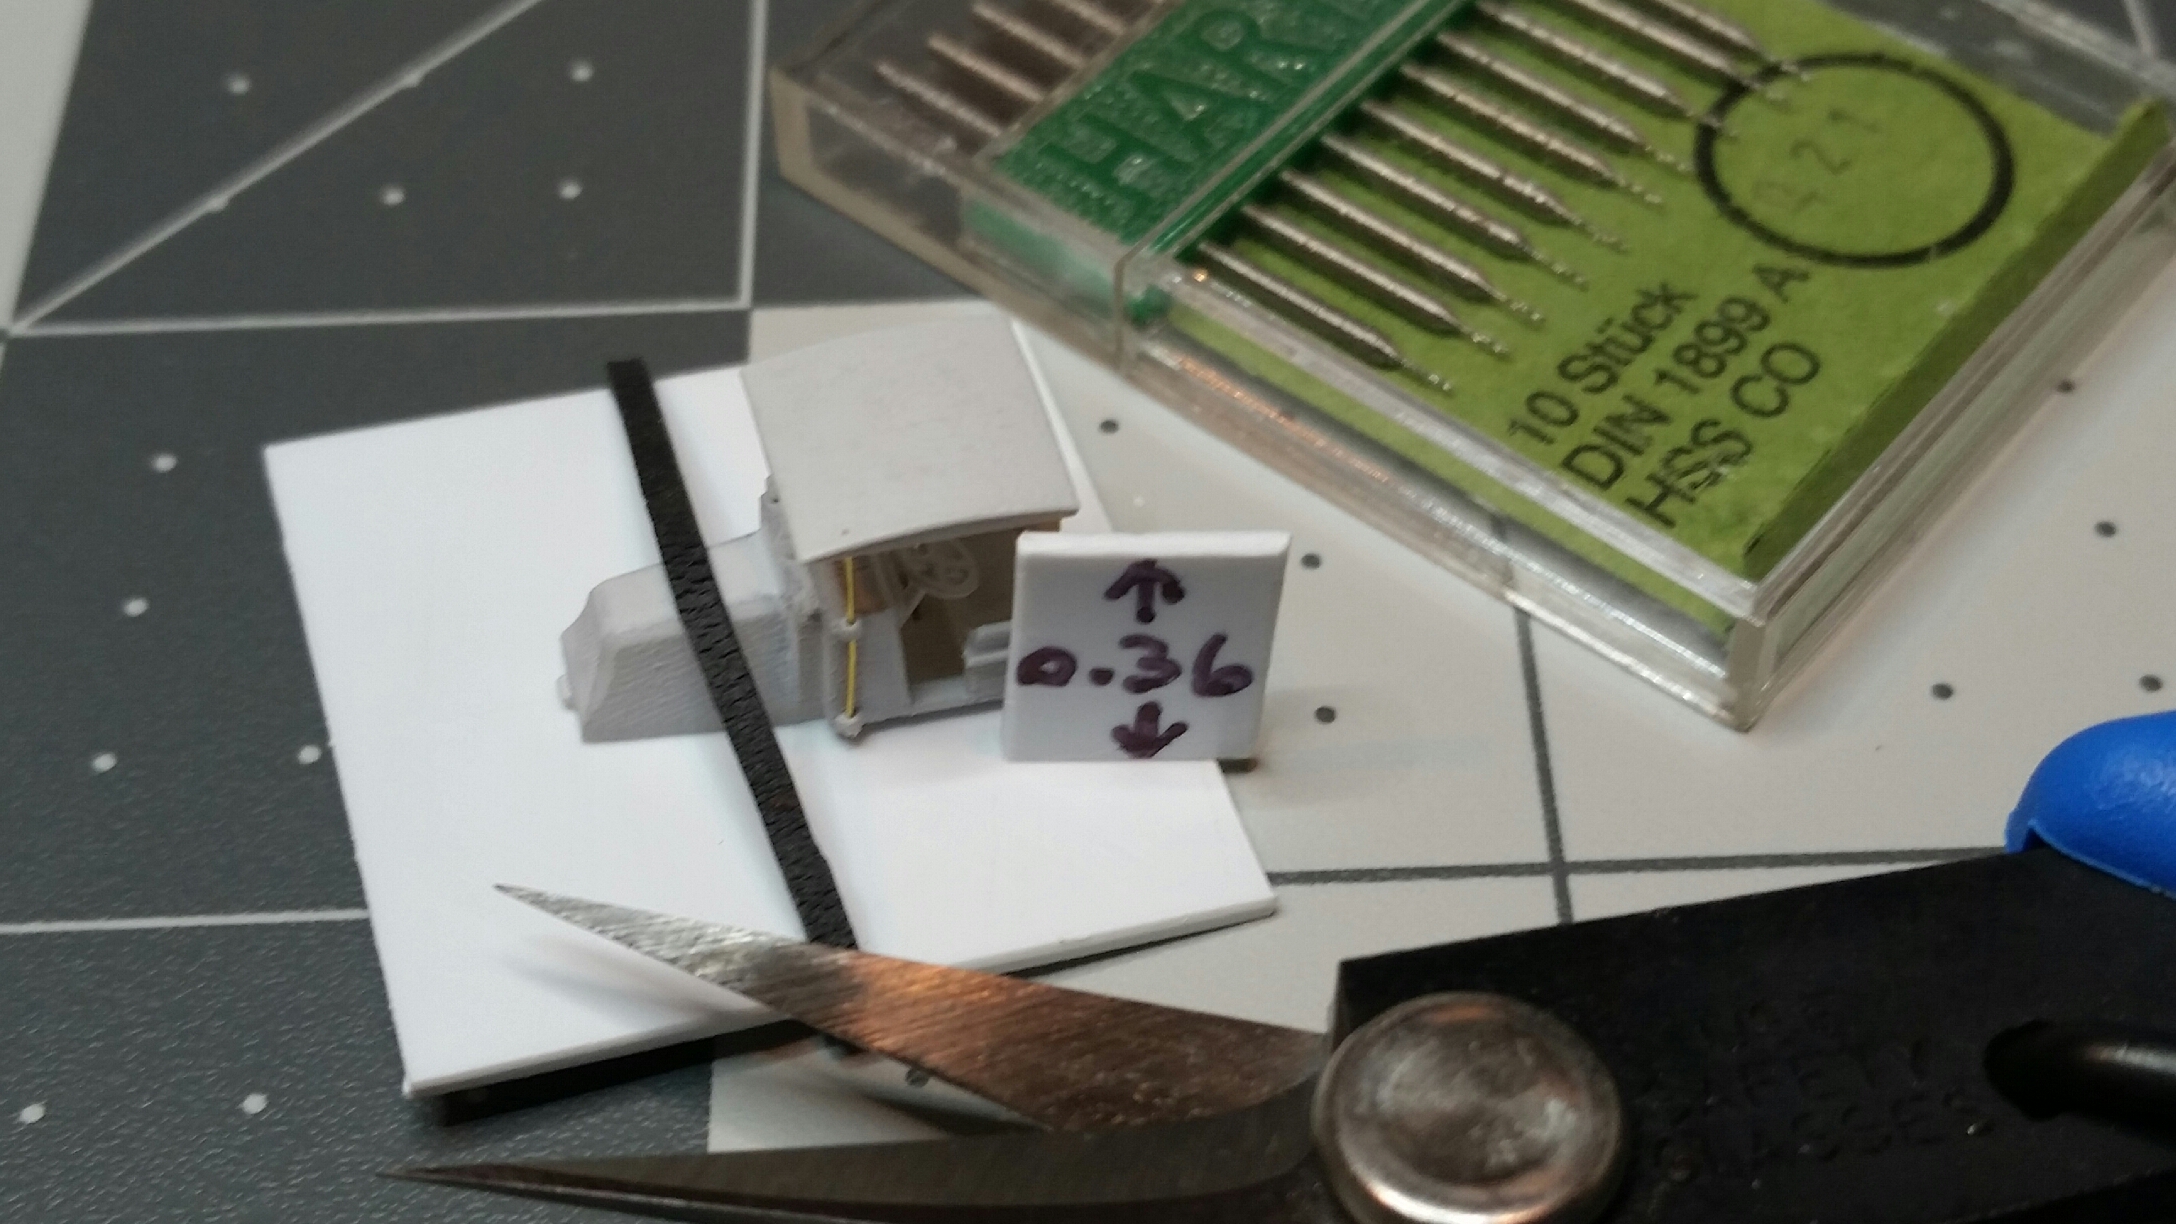
As mentioned, I cut the roof posts long to be able to get them all the same height. I cut a plate of styrene that matched the theoretical distance from the bottom of the cab to the top of the posts. I also had to create a styrene plate that fit against the bottom of the cab and form the surface on which the other plate would rest. I needed this plate because the bottom face of the cab has two protrusions that mate with two holes in the top of the frame for locating purposes. Here the roof has been permanently attached to the posts and all parts have been sprayed Clear Orange (70.956). You can see the fenders in the background have received the first detail paint by way of the black portion of the running boards.