
Scottnkat
-
Posts
563 -
Joined
-
Last visited
Content Type
Profiles
Forums
Events
Gallery
Everything posted by Scottnkat
-
Glenn, I appreciate it. I'm glad I am able to anything to help anyone else, and I am glad Tommy has enjoyed my build. Thank you
-
Thank you, Bart. I am planning on doing a couple of Chargers, actually. Not sure what I will do next, though - still have to make that decision.
-
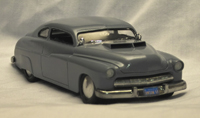
Thank you for the comments, guys - I appreciate it. Here's the car in it's case on the shelf - this was done with no flash as the light just reflected off the case wall.
-
Wow, thank you very much for the compliments, gentlemen. Here's a couple of pics of all four cars so far:
-
Thanks for the comments, everyone. The finished build is now in the Under Glass section
-
Here is my 1968 Roadrunner. This was made from the AMT Roadrunner kit. It is based on the paint scheme used at the Firecracker 400 that year. This is not box-stock and includes the following modifications: Belly pan covering most of the underside Brass tubing for exhausts Resin cast wheels and tires Handmade rear end cooler Working hood pins Handmade rollcage Handmade seat with 5 point racing harness Handmade headrest and fire extinguisher Handmade front suspension Handmade intake manifold and air cleaner Added "B" billars to the body
-
Thanks for the comments, guys. I appreciate it. And the Roadrunner body is on the chassis! Here's a shot of the engine compartment. Yes, I've already got the hood pins all in place and ready to go. Finally, just to show what the bottom looks like, here's a shot that is somewhat similar to that pic posted earlier in this thread. It's not too far off, I think.
-
And the Roadrunner is getting there... I've done the BMF around the windows, installed the windows, put on the hood pins on the trunk and the cover over the front of the engine compartment. Tomorrow are the hood's hood pins and maybe we can finally get around to mounting the body (fingers crossed). I still have to do the door handles, but the body is almost there...
-
Thanks, Tommy! I'll look forward to seeing your cars! Thanks, Bart! I appreciate it.
-
sure thing, Dave!!
-
Thanks, Liam. most of the smaller parts are painted with Testors brand enamels. For the industrial blue (such as on the wheels and suspension components), I was using Krylon's dark blue. For the Petty blue, I used Rustoleum light blue with a bit of white added to it. Funds are tight and I'm on a budget, so I've been having to make due with Walmart paints. I know they are not exact and there are better paints out there, but this fits with my budget.
-
Dave, here's a pic that shows the back of the chassis pretty darn well Regarding the rest of it, I have this from page 2 of this build:
-
Thank you for the comment. Not much to post today - doing the BMF today - I am slow at this, so I haven't gotten much done.
-
I enjoyed this kit when I built it - it comes out really nice and I'm enjoying watching yours. So how will you paint the body?
-
Finally, the running gear is about all done - yes, the chassis is sitting on it's tires now. Does anyone else get excited when you finally put the wheels on and find that all four tires actually touch the ground? I love that feeling!!
-
And here's an update on the body - I repainted the space between the trunk and the rear window in the blue that it was supposed to be. It's drying now...
-
Well, the interior on the Roadrunner is just about done. Still a few things to do, but not alot now.
-
By the way, it was pointed out to me that the space between the trunk and the rear window is blue as well - I missed this and painted the rear in the way shown above. Well, I made a mistake, so I had to repaint the back of the car just now to correct that - I'll post updated pics after it dries.
-
He he - thanks, Bart.
-
Also, I have decided which version of the car I will make this one. Can you guess? Come on... guess... Still have some touch up to do on the body, but overall I am happy with it so far.
-
And I got some more done in the engine compartment. I made the air cleaner earlier this evening. That covers up almost all of the firewall's factory stock detail. I know my intake manifold is not as detailed as a real one would be, but after a few tries I just decided to stick with something plain and simple, but with the basic shape. After all, the air cleaner covers most of it up. I do need to put another coat on the air cleaner to sorta smooth out the looks of it, but you get the idea.
-
Well, I have an update now. The engine is sitting in the engine compartment - woo hoo! I still have a few things to do in there, but it is slowly starting to come together. Also, I am done with the suspension and undercarriage. It's nice when everything fits.
-
We need to take the four remaining small tubes and drill a small hole through the side. It should look like this: I went looking for paperclips, but I just can't find any. So, I decided to raid my wife's sewing pins. Cut off the tapered pointed end so you are left with a straight shaft. If this were a paperclip, then we wouldn't have to worry about this step. We then push the pin (or paperclip) through the hole in the small tube as shown below and glue it into place: We then measure and cut the top of the pin off. In this case, I made the pins 10mm long. Simply slide the pin (or paperclip) into the sleeve that you made in the last step and voila!! We've got shock absorbers that are adjustable and will fit anywhere you need them to. As you can see, the pins are a little skinny, so a paper clip would work better. But feel free to experiment on your own... Of course, they need paint and a little bit of clean up, but you get the idea.
-
One thing that this Roadrunner model is missing is shock absorbers. It has two for the rear differential, but that's it. So, we need to make some. Let's start with some small plastic tubing. We will need to make four shocks, so we are going to cut eight pieces of this 1mm wide as so: We then cut four lengths 8mm long. Once we have those, we glue four of the small tubes on top of the four longer tubes. It should look like this: We've now made what will be the tops of the shocks. Now we need to get started on the other half...
-
I am planning on building that, too. I'd be interested in watching your build of it when you do get started.
