Dodge Driver Posted January 28, 2017 Posted January 28, 2017 Thanks for the input guys. I appreciate it.Let us know how you make out. It's so frustrating to be set back by unexpected problems. Hope it all works out for you.
Ron Hamilton Posted January 29, 2017 Posted January 29, 2017 I started work on one of those myself. I have yet to put paint or primer on it, as I spent a lot of time sanding, cutting, and filing on the body to get it to look better in my eyes.
FordRodnKustom Posted January 29, 2017 Posted January 29, 2017 I agree with the others on the BIN sealer. I experimented here on a Orange Hauler body. A coat of the BIN then a heavy coat of HOK white base, No bleed through. I've also heard that a final coat of Future (or whatever it's called now) before paint makes a great sealer too but I haven't tried that. I have had some lower quality primers crack like that and I agree stripping the body (with the process of your choice) and starting over is the best way to go, Just my 2 cents.
Jonathan Posted January 30, 2017 Posted January 30, 2017 BIN is nice, but it can go on thick. I've had great success preventing bleed-through of red plastic using silver or gold hobby paint. Strip the model (Purple Power or equivalent), wash and dry. Use LIGHT coats of silver and let it build up - two or three light coats and you're in business. I'd use all Testor's or all Tamiya paint - just don't cross brands and you'll be in business. As to comments - it seems in today's world, being somewhat anonymous behind a keyboard or screen seems to cause folk to forget their manners - don't sweat it. Keep trying and keep posting your progress. Worst case on this body - if it's toast, but it appears you might be able to still work with it - see if someone will be willing to trade, or if Revell will help you out. But don't give up, it's a great hobby.
Dave Van Posted January 30, 2017 Posted January 30, 2017 BIN is nice, but it can go on thick. I've had great success preventing bleed-through of red plastic using silver or gold hobby paint. Strip the model (Purple Power or equivalent), wash and dry. Use LIGHT coats of silver and let it build up - two or three light coats and you're in business. I'd use all Testor's or all Tamiya paint - just don't cross brands and you'll be in business. As to comments - it seems in today's world, being somewhat anonymous behind a keyboard or screen seems to cause folk to forget their manners - don't sweat it. Keep trying and keep posting your progress. Worst case on this body - if it's toast, but it appears you might be able to still work with it - see if someone will be willing to trade, or if Revell will help you out. But don't give up, it's a great hobby.Agreed.....never had a bleed through issue using silver base. I must be the luckiest man in the world.....
charlie8575 Posted January 30, 2017 Posted January 30, 2017 I stripped the primer from the hood with an acetone solution and it was just a pink mess. After stripping it, there was an oily residue on the hood. I then attempted to flame treat the hood by passing over it lightly with a torch to extract any other solvents from the plastic, but was unsuccessful as the hood is too thin and warped badly. Dunk it in the purple pond and start over. Attempts to fix or patch it are not going to work out well in my experience.Second on Super Clean. Acetone will melt your plastic, and the use of heat? Very, very bad idea for a number of reasons. I agree with the others, cut out the UPC and send it off. For Revell's faults, they do generally have very good customer service, and will handle your needs quickly. Charlie Larkin
Sledsel Posted February 3, 2017 Posted February 3, 2017 I started work on one of those myself. I have yet to put paint or primer on it, as I spent a lot of time sanding, cutting, and filing on the body to get it to look better in my eyes.Have a link to your work on it? Would like to see what you are addressing. I have recently started fighting this kit also.
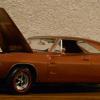
Ron Hamilton Posted February 4, 2017 Posted February 4, 2017 Have a link to your work on it? Would like to see what you are addressing. I have recently started fighting this kit also. Andy, I have not taken many good pictures of my work on the project. I am not sure of the direction I want to take with it yet. I originally purchased one of these kits to do a replica of the Starsky and Hutch car, but as the kit stands, I am not happy with certain aspects of the kit engine, as it is not a standard issue Ford 351 engine, and I do not care for the speed parts and the "soft" detailing of the kit engine. My sister had a '75 Mercury Cougar, with the standard 351 2 bbl V8, which was slow as owl poop, but I digress, I want to do a "factory stock" looking mid '70's Ford Windsor V8 for my build, so I have to do some "creative picking" from my parts box, and some scratch-building to get a reasonable 351 V8. I may go as far as a transplanting 460 from a Revell F250 pickup, as I understand that the engine and accessory package is pretty accurate, and the 460 was a factory option for the one-to-one, and I understand that Ford provided a Torino to the studio with one in it. But anyway "Zebra 3" is not the only option I have. I did some "massaging of the body, per some of your comments and your photos. Thank You!!!! I removed the flash, and did a little re-contouring" here and there, and I did some leveling of the body. It can barely be seen, I even re-contoured the side window profile ad upper doors. In my parts stash, I have a complete "nascar" fastback body, which is 98% a factory stock fastback body. Yesterday, I was looking at one of my "collectable Automobile" magazines, which had a good photograph of a triple-black '73 Gran Torino Sport Sportsroof with the chrome side mouldings on it like the body I have. I already did a test fit, and I have concluded that I can make such a car happen within my skill set, the "Nascar" body, the S&H kit, a deep dig in the parts box, and some creative scratch-building. I saw Tom Elfritt's fantastic project, and it got my juices flowing to do this one in the future. As you can see, the two bodies are fairly close, and some "Frankenstein" work can be done to combine the two into a reasonable copy of a '73 Gran Torino Sport. My third project from this kit, is of a '74 Gran Torino Sport 2 Door Hardtop, which was my favorite version of this car. The red car in the upper photo may be that particular car. I want to add a Vinyl Roof to it, so I have to install the proper mouldings, as well as some other trim unique to the model, as well as a complete interior transformation form the base Gran Torino, to "Gran Torino Sport" trim with Bucket seats, console, and revised door and dash trim. Model Car Garage does a photo etch set for the kit, so I have to get it, and a couple more kits to continue the project. Again, thanks for your thorough critique of this kit. It will make my build that much better.
Tom Geiger Posted February 4, 2017 Posted February 4, 2017 I contacted Revell regarding the issue and they are requiring me to remove the UPC symbol from the box and mail it to them, which seems like more trouble than it's worth. Lets see.... YOU screwed up the body by using paint that isn't recommended for model cars. Revell is willing to replace the body for you and all they ask is a UPC tag from the box? And that's too much trouble for you? Maybe you don't understand how many people try to scam Revell out of kits and extra parts? They used to ask for the UPC and the store receipt. There was an outcry from people who bought kits at shows, so they relaxed it just to the UPC. Give them a break!
Sledsel Posted February 4, 2017 Posted February 4, 2017 (edited) Andy, I have not taken many good pictures of my work on the project. I am not sure of the direction I want to take with it yet. I originally purchased one of these kits to do a replica of the Starsky and Hutch car, but as the kit stands, I am not happy with certain aspects of the kit engine, as it is not a standard issue Ford 351 engine, and I do not care for the speed parts and the "soft" detailing of the kit engine. My sister had a '75 Mercury Cougar, with the standard 351 2 bbl V8, which was slow as owl poop, but I digress, I want to do a "factory stock" looking mid '70's Ford Windsor V8 for my build, so I have to do some "creative picking" from my parts box, and some scratch-building to get a reasonable 351 V8. I may go as far as a transplanting 460 from a Revell F250 pickup, as I understand that the engine and accessory package is pretty accurate, and the 460 was a factory option for the one-to-one, and I understand that Ford provided a Torino to the studio with one in it. But anyway "Zebra 3" is not the only option I have. I did some "massaging of the body, per some of your comments and your photos. Thank You!!!! I removed the flash, and did a little re-contouring" here and there, and I did some leveling of the body. It can barely be seen, I even re-contoured the side window profile ad upper doors. In my parts stash, I have a complete "nascar" fastback body, which is 98% a factory stock fastback body. Not sure I would try a 73 Sport as the fronts are different between the 73 and 74-76's. Another issue I found once the S&H car was in my hands is the upper body line on the door is too soft and needs careful sanding. The tail light bezel is a poor fit and need to be more flush all around. If you use the S&H engine block and Monogram Nascar 351 cylinder heads, intake and valve covers it makes a convincing Cleveland or 351M/400. If going stock, a modified intake from an AMT Ford FE. The Fire Fighter Mustang has stock style 351 Cleveland valve covers Edited February 4, 2017 by Sledsel
Ron Hamilton Posted February 4, 2017 Posted February 4, 2017 Not sure I would try a 73 Sport as the fronts are different between the 73 and 74-76's. The only difference I notice is the Grille Texture, which I can do with some photoetch. The Headlamp bezels , Bumper, Hood and grille surround look to be the same between the '73 and '76, and can be blended into the JoHan sportsroof body.. Another issue I found once the S&H car was in my hands is the upper body line on the door is too soft and needs careful sanding. The tail light bezel is a poor fit and need to be more flush all around. I agree with you , and I have worked on those points on my body. If you use the S&H engine block and Monogram Nascar 351 cylinder heads, intake and valve covers it makes a convincing Cleveland or 351M/400. If going stock, a modified intake from an AMT Ford FE. The Fire Fighter Mustang has stock style 351 Cleveland valve covers I am not a big Nascar modeler, so I do not have those parts. I do have an engine from the Firefighter, as well as several FE engine parts. I have seen a few of these built in person, and it looks like all of them were built directly from the box. I plan to do some more modifications to mine to make it look closer to the one to one. I have a lot of work ahead of me with this kit.
Sledsel Posted February 5, 2017 Posted February 5, 2017 Not sure I would try a 73 Sport as the fronts are different between the 73 and 74-76's.The only difference I notice is the Grille Texture, which I can do with some photoetch. The Headlamp bezels , Bumper, Hood and grille surround look to be the same between the '73 and '76, and can be blended into the JoHan sportsroof body..The grill on a 73 is shorter top to bottom, Wider at the bottom than the top, and the front bumper is totally different. Not saying it could not be doneAnother issue I found once the S&H car was in my hands is the upper body line on the door is too soft and needs careful sanding. The tail light bezel is a poor fit and need to be more flush all around.I agree with you , and I have worked on those points on my body.If you use the S&H engine block and Monogram Nascar 351 cylinder heads, intake and valve covers it makes a convincing Cleveland or 351M/400. If going stock, a modified intake from an AMT Ford FE. The Fire Fighter Mustang has stock style 351 Cleveland valve coversI am not a big Nascar modeler, so I do not have those parts. I do have an engine from the Firefighter, as well as several FE engine parts. I may be able to help ya with a complete engine, I have quite a few
Ron Hamilton Posted February 6, 2017 Posted February 6, 2017 The only difference I notice is the Grille Texture, which I can do with some photoetch. The Headlamp bezels , Bumper, Hood and grille surround look to be the same between the '73 and '76, and can be blended into the JoHan sportsroof body..The grill on a 73 is shorter top to bottom, Wider at the bottom than the top, and the front bumper is totally different. Not saying it could not be doneYou're right, but in 1/25 scale, a little putty and file work, the difference will be nil.
Recommended Posts
Create an account or sign in to comment
You need to be a member in order to leave a comment
Create an account
Sign up for a new account in our community. It's easy!
Register a new accountSign in
Already have an account? Sign in here.
Sign In Now