65slotcar Posted December 12, 2021 Author Posted December 12, 2021 thanks Kenneth, nice work on your r-model . you might want to start over with the Monogram/ Revell r-model kit. it will comes with correct back window, but i would use the resin cast front apron. way better then kit apron . 1 hour ago, 250 Testa Rossa said: I still need to find a set of those taillights. I still need to add the license plate bump on the bottom as well before I paint it. I totally spaced on that. I actually built up the rear on mine to make sure I had the right look. the good tail lamps with seperate red lense come in the 1/25 amt mustang kit. a little work on engine compartment and a look at future decals.
250 Testa Rossa Posted December 13, 2021 Posted December 13, 2021 Nice to see that you're doing 5R106. I'm gonna do that one as well.
65slotcar Posted December 21, 2021 Author Posted December 21, 2021 progress has been slow , still painting multiple parts. a little work on r-model dash with pad,radio and glove box door removed. 1
65slotcar Posted September 4, 2022 Author Posted September 4, 2022 ok ,this project is back. anyone who has built a Monogram r-model shelby knows the front apron is garbage. did a little modification. cut off top section on body and glued to apron. finished with a little body filler. 2
250 Testa Rossa Posted September 6, 2022 Posted September 6, 2022 On 9/4/2022 at 8:28 AM, 65slotcar said: ok ,this project is back. anyone who has built a Monogram r-model shelby knows the front apron is garbage. did a little modification. cut off top section on body and glued to apron. finished with a little body filler. How did you get the front valence to fit so flush?! I may need to do this with my build!
65slotcar Posted September 7, 2022 Author Posted September 7, 2022 Maxx, i used a hobby saw to cut off top section and then i glued to apron. i used a flat file and a sanding block to make flush. a little body filler was used to get it flat on top . Hope this helps out. Bill
Pierre Rivard Posted September 7, 2022 Posted September 7, 2022 Amazing work. I am attempting to build 2 cars together and getting stuck at times, can't imagine trying to handle 9 ! 1
250 Testa Rossa Posted September 7, 2022 Posted September 7, 2022 14 hours ago, 65slotcar said: Maxx, i used a hobby saw to cut off top section and then i glued to apron. i used a flat file and a sanding block to make flush. a little body filler was used to get it flat on top . Hope this helps out. Bill It looks great! 1
65slotcar Posted September 8, 2022 Author Posted September 8, 2022 13 hours ago, Pierre Rivard said: Amazing work. I am attempting to build 2 cars together and getting stuck at times, can't imagine trying to handle 9 ! thanks Pierre. i started 9 but really getting burnt out on working on the same parts over and over. also ran out of the nice wheels i wanted to use , So i will be happy if i get 6 finished. too many other projects that i have started and really want to finish. 2
65slotcar Posted September 17 Author Posted September 17 this one is from 4 years ago, revived project. trying to get maybe a couple ready for NNL Hollister model show this Saturday. still have 8 in the works with some giving me paint problems. Orange Blossom Special is ready for clear coat and may make it to the show. i hope. Bill 4
250 Testa Rossa Posted September 17 Posted September 17 Looking awesome. I can't wait to finish my build of 5R101 1
vamach1 Posted September 18 Posted September 18 I won’t be able to make this show in Hollister CA but please post pictures.
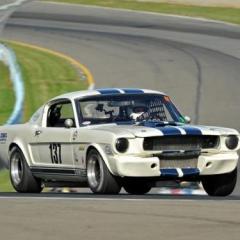
Brudda Posted September 20 Posted September 20 I really like your builds. Cannot go wrong with a GT 350. Used to vintage race mine at laguna Seca and the Ferrari hill climb . Fun cars. Although not fast by today’s standards, it’s a very fun car to drive. Jay Leno loves his. Here is mine. I have a few models but never built them. I’m watching this to learn. This is great. 3
65slotcar Posted September 28 Author Posted September 28 a couple ready for clear and a couple ready for assembly 2
Smilesperhour Posted October 10 Posted October 10 Lovely selection so far and more variety than the usual white and blue
Recommended Posts
Create an account or sign in to comment
You need to be a member in order to leave a comment
Create an account
Sign up for a new account in our community. It's easy!
Register a new accountSign in
Already have an account? Sign in here.
Sign In Now