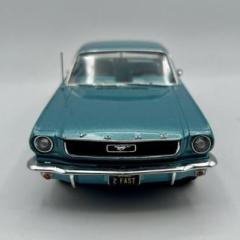
radiohd10 Posted June 10, 2022 Share Posted June 10, 2022 (edited) Hey guys - I never did a WIP thread before, so I figured I’d do a quickie on my current project. I found this kit on eBay for like 10 bucks and decided it would be good practice for the new ‘67 I just just picked up. This kit was comically under-detailed and has quite a few inaccuracies, some of which I addressed and others I just rolled with (ie. there were no decals, body scripts, wipers, chrome bumpers etc, and I’m pretty sure the door panels are from a ‘67). That said, I love a ‘65 vette and wanted to see what I could do with this one. Oh, and the dude on the cover is amazing… The main purpose of this build was to test out a paint technique I hope to use down the road on other builds…specifically an E-type I want to convert to the custom Eagle version at some point (will explain down below). I’m fairly far along in this build, and should have started the thread earlier…consider this a Netflix binge version of a WIP lol. I do still have quite a bit to do though, so if there are any glaring errors/omissions which are not too late to address, I’m all ears. Have a great weekend 🤙🏽 Interior: First I had to fiddle with the interior. I sanded off the door panel “details” and added some armrests. Also added an armrest to the center console. I tried making the sound bar I’ve seen in a bunch of the 1:1 cars but didn’t realize there are supposed to be three speakers on each side of the bar until after I put it together. I probably wouldn’t have been able to fit them all anyway so I just tweaked it and stuck to 4. I used styrene, aluminum tubing and pipe screens for the speaker covers. I also added some styrene strips to the seats for trim. I foiled the dash after priming and removed the paint around the dials after painting them matte black. The rest got hit with semigloss black and clear coat. For the gauge hands, I used some stretched styrene, sprayed red, and cut to size. Then used some uv resin over the gauge faces. I wanted to try out some detail master push knobs for the center console, but only had room for two, as the scaling was off. Not ideal, but I liked the look of them (and I’d already drilled the holes 🤦🏻♂️) so I decided to just keep them in place. After painting it, I used some 28 gauge wire as trim around the dash on each side of the console. I ended up buying a PE set for the body scripts, but also used it for the steering wheel. For the center emblem, I cut and polished some aluminum tubing and placed it around the Chevy emblem after spraying it black and rubbing out the high points. It took a bit of sanding to get it to fit inside the tubing but we got there. Then I added some resin on top. The stick shift was a tailoring pin dipped in bob smith glue a few times followed by some Molotow paint. The center console is foil under paint as well. I used 28 gauge wire for the trim around the door panels and made the window cranks and door knobs out of some aluminum rods and bent tailoring pins. Then added some pedals (which are tough to see) and carpeting. Still needs a clean up but it’s coming along. Edited June 10, 2022 by radiohd10 Quote Link to comment Share on other sites More sharing options...
radiohd10 Posted June 10, 2022 Author Share Posted June 10, 2022 For the body color, I wanted to replicate a dark metallic red/black I saw on an Eagle etype speedster. Took some trial and error but think I got pretty close. I did a test run on an old hood…started with metallic black, then clear red, then smoke (all tamiya cans). It came out looking a little too maroon/brown and the metallics weren’t really doing their thing... Next I tried a gloss black base under clear pearl. I did one half of the hood with clear blue to see if I’d like it and the other with clear red. Then hit the whole thing in smoke and clear coated. The hood is a mess, but this is basically just a spoon test. I liked this method much better. Will probably do a car in blue down the road, but it’s gonna be red for this vette. Quote Link to comment Share on other sites More sharing options...
radiohd10 Posted June 10, 2022 Author Share Posted June 10, 2022 The body needed a lot of work. Tons of flash and brutal mold lines, especially around the windows. I opened the side vents, removed the door handles, then sanded the whole thing out. I also dechromed the side panels and attached them to the body. Going to foil them later on. prime time… primer + gloss black primer + gloss black + pearl clear primer + gloss black + pearl clear + clear red primer + gloss black + pearl clear + pearl red + tamiya smoke Quote Link to comment Share on other sites More sharing options...
espo Posted June 10, 2022 Share Posted June 10, 2022 Interesting paint layering. I like how you show the different effects. I'll have to keep that in mind. The interior looks very nice. Quote Link to comment Share on other sites More sharing options...
mrmike Posted June 10, 2022 Share Posted June 10, 2022 I built mine as the Stingray Corvette since I like to build TV and Movie Cars. I'm liking the interior mods you are making and the exterior paint is definitely different. Quote Link to comment Share on other sites More sharing options...
radiohd10 Posted June 10, 2022 Author Share Posted June 10, 2022 26 minutes ago, espo said: Interesting paint layering. I like how you show the different effects. I'll have to keep that in mind. The interior looks very nice. Thanks - the interior is still a bit of a mess but I’ll get it looking sharp (I hope haha) 20 minutes ago, mrmike said: I built mine as the Stingray Corvette since I like to build TV and Movie Cars. I'm liking the interior mods you are making and the exterior paint is definitely different. That’s a beaut. I actually had no idea this was a tv car - was wondering who the heck that guy on the box was 😂 I usually do factory colors only, but felt like getting weird. Figured a $10 kit would be a good one to do it on. This is the paint job I’m going for…I like how it looks black until the light hits it a certain way Quote Link to comment Share on other sites More sharing options...
slusher Posted June 11, 2022 Share Posted June 11, 2022 Real nice work!, I really like your interior very realistic! 1 Quote Link to comment Share on other sites More sharing options...
radiohd10 Posted June 11, 2022 Author Share Posted June 11, 2022 Added some photo etch emblems and painted them before hitting the whole thing with ts-13 clear. Here are some shots under LED lights so you can see the pearl. It’s not 100% what I was going for but it’s pretty darn close. Next up is some foil and a polish… FullSizeRender.MOV 2 Quote Link to comment Share on other sites More sharing options...
Pierre Rivard Posted June 11, 2022 Share Posted June 11, 2022 That color is totally awesome. Great demonstration of creativity. Quote Link to comment Share on other sites More sharing options...
ewetwo Posted June 11, 2022 Share Posted June 11, 2022 Beautiful color! Quote Link to comment Share on other sites More sharing options...
radiohd10 Posted June 11, 2022 Author Share Posted June 11, 2022 7 hours ago, Pierre Rivard said: That color is totally awesome. Great demonstration of creativity. 1 hour ago, ewetwo said: Beautiful color! 17 hours ago, slusher said: Real nice work!, I really like your interior very realistic! Thanks fellas…got a lot more done today. Will update soon Quote Link to comment Share on other sites More sharing options...
gautreau Posted June 11, 2022 Share Posted June 11, 2022 Paint looks AMAZING!! Thanks for sharing the formula you used! 1 Quote Link to comment Share on other sites More sharing options...
slusher Posted June 12, 2022 Share Posted June 12, 2022 Gorgeous paint color and finish! 1 Quote Link to comment Share on other sites More sharing options...
radiohd10 Posted June 12, 2022 Author Share Posted June 12, 2022 (edited) Got the engine sorted…didn’t go too crazy on it, but got it wired and grimed up. I thought the tail lights that came with the kit were a little too big and toyish looking so I made some replacements. I had to sand out the holes on the body a little for fitment, then cut some aluminum tubing to size, sanded them and then polished them with some wenol. Then I stuck the red tail lights to some evergreen rods and wiggled them into place. Once I install them, I’ll set them in some epoxy and snip the excess plastic rod so the chassis can fit. It’s my favorite part of the car so I want it looking good. Gonna do essentially the same thing for the rear exhaust pipes. Edited June 12, 2022 by radiohd10 Quote Link to comment Share on other sites More sharing options...
radiohd10 Posted June 14, 2022 Author Share Posted June 14, 2022 Foiled, fitted, and covered in fingerprints 🤦🏻♂️ This one needs a polish, some finishing touches and she’s a wrap. Will post finished product in under glass. Next time I’ll do a proper WIP - got a 356 on deck oh boyyy FullSizeRender.MOV Quote Link to comment Share on other sites More sharing options...
espo Posted June 14, 2022 Share Posted June 14, 2022 Great looking paint finish and color. I like how your taillights and exhaust turned out. The taillight issue seems to be with every Corvette kit. Quote Link to comment Share on other sites More sharing options...
Recommended Posts
Join the conversation
You can post now and register later. If you have an account, sign in now to post with your account.
Note: Your post will require moderator approval before it will be visible.