64SS350 Posted January 21, 2023 Author Posted January 21, 2023 Thank you all, starting on new suspension. Going 4WD with a few inches of lift. 1
64SS350 Posted March 2, 2023 Author Posted March 2, 2023 Update... actually did some frame and body tweaking. The frame was too short and the body was out of square. Got those remedied and started on an engine I chose from Texas 3D. Now I can locate and make mounts for the engine, trans, and transfer case. The valve covers are a color preview.... 4
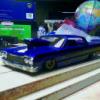
64SS350 Posted May 29, 2023 Author Posted May 29, 2023 (edited) Frame is painted, springs added, motor installed. I used masking tape for the serpentine belt. Edited May 29, 2023 by 64SS350 3
redscampi Posted June 1, 2023 Posted June 1, 2023 Avidly watching this build as I will be attempting something similar at some point.
64SS350 Posted June 1, 2023 Author Posted June 1, 2023 (edited) At the time I started, there weren't many options, now several people are 3D printing the bodies. I ordered tubing for the axels today, and I need to get busy on casting the engine bay. Edited June 1, 2023 by 64SS350
'70 Grande Posted June 2, 2023 Posted June 2, 2023 (edited) What method did you use to make your cut/joint-lines in that pieced-together body disappear like they have? Edited June 2, 2023 by '70 Grande
64SS350 Posted June 2, 2023 Author Posted June 2, 2023 I start with a solid glue joint, then use the super thin CA to reinforce after glue sets. Fill with body glazing and sand, seal with the CA again...sand and primer until flush, more CA if necessary. Thicker CA can be used if larger gaps or holes need filled.
64SS350 Posted June 18, 2023 Author Posted June 18, 2023 Got the exhaust finished (for the second time) and installed. I forgot that after bending the styrene(from eBay) it doesn't play well with Model Master Metalizer, breaks very easily after sprayed. Also started axels... 4
64SS350 Posted June 26, 2023 Author Posted June 26, 2023 (edited) So I never was satisfied with the original frame, it came together alot for the engine. This made the LS have an extreme angle back, I used the current headers to help, but not enough. I could make a custom set to exit straight out then back in under the frame, but... just opted not to this time. Sooo....instead I'm opting to customize the frame to accommodate... after all it is a 4wd. I tried spreading it first, but that wasn't enough. Edited June 26, 2023 by 64SS350 4
64SS350 Posted July 4, 2023 Author Posted July 4, 2023 Whew.... rebuilt! All back together, repaired a few parts, reengineered some, and added drive shafts. Painted bottom of interior tub, and the brakes are close! 3
64SS350 Posted July 10, 2023 Author Posted July 10, 2023 Brakes and rotors installed, steering started. 6
Bainford Posted July 10, 2023 Posted July 10, 2023 That's looking great. Very nice work. Tough looking drivetrain.
64SS350 Posted July 17, 2023 Author Posted July 17, 2023 While making suspension parts, I have been prepping the interior. These seat bottoms bothered me, so I cut them from the backs to try and clean up the lines, to no avail. So I opted to sand down the seat lines and replace with styrene. More pics soon, interior is painted, just needs carpet installed. 2
64SS350 Posted July 18, 2023 Author Posted July 18, 2023 Interior painted, carpet installed, ready for detailing and assembly. 4
64SS350 Posted July 25, 2023 Author Posted July 25, 2023 Small update on the interior. I had both bench seats installed, then had an incident with the back one, so it's getting stripped for a repaint. Here's the dash from original to finished. I think it turned out decent. 4
NOBLNG Posted July 27, 2023 Posted July 27, 2023 The dash looks great Karl. Were the instrument decals included in one of the kits or are they generic ones?
64SS350 Posted July 27, 2023 Author Posted July 27, 2023 There not actual decals, there are printings from the guy on eBay. A side note...I , for whatever reason, I decided to use a small dab of super glue for placement. Works great, but have it exactly where you want it.... there's no moving it after! Lol Hence my speedo is the tiniest bit tilted. I'll stick with Elmer's or clear coat from now on! Thanks for everyone following along!
64SS350 Posted August 2, 2023 Author Posted August 2, 2023 So... interior is done, unless I come up with a few extras to place in there... I'm not proud of my window cranks, but they'll do. 5
64SS350 Posted August 14, 2023 Author Posted August 14, 2023 This isn't much of an update, but sure feels like it! Playing with ideas and materials to get the u-bolts as right as I could, styrene, piano wire, straight pin shanks... Finally got the styrene to work for me. 2
Recommended Posts
Create an account or sign in to comment
You need to be a member in order to leave a comment
Create an account
Sign up for a new account in our community. It's easy!
Register a new accountSign in
Already have an account? Sign in here.
Sign In Now